Charles Oduk: Fab Academy 2K19 Webpage
Week 4: Computer-controlled cutting
This week we learnt the basic idea behind design of files on software,coverting them to machine languge;after which cutting of the designed parts was to be done using laser and vinyl cutter.
Assignment:
- Group
Characterize your lasercutter, making test part(s) that vary cutting settings and dimensions.
Individual.
- Cut something on the vinylcutter design, lasercut, and document a parametric press-fit construction kit, accounting for the lasercutter kerf, which can be assembled in multiple ways.
Solution:
Group:
Unfortunately we encountered a problem with our fablab machines; the vinyl cutter and the lasercutters were all not working well. We thus had to outsource this week's tasks. We then majorly emphasized on the individual assignment.
Individual:
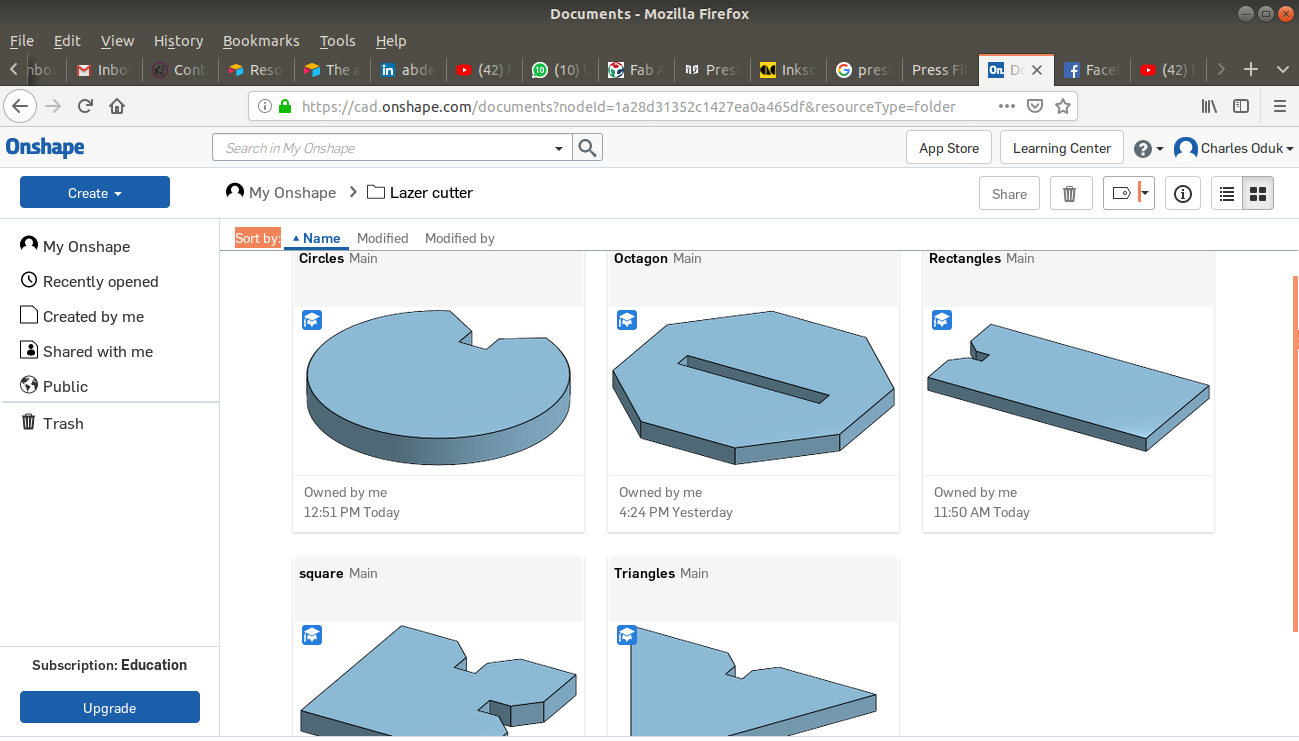
I designed my fit press files using the online ONSHAPE platform after which I converted the files into dfx files and dowbloaded to my local machine. From here I would easily open them in other relevant softwares such as Adobe illustrator,inskcape etc. Among this I settled on inkscape. I designed the following press fit patterns:
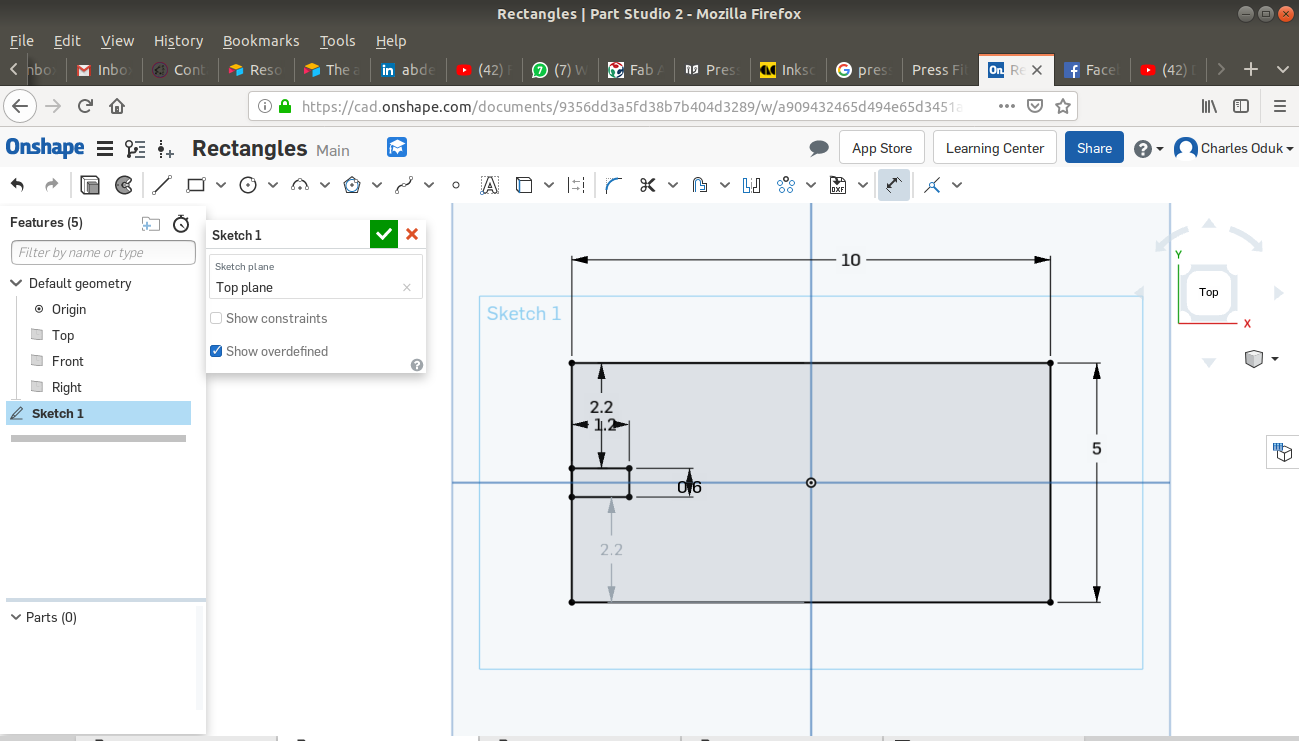
- Rectangles: 4 designs of 5 pieces each.
- Squares: 4 designs of 5 pieces each.
- Octagons: 2 designs of 5 pieces each.
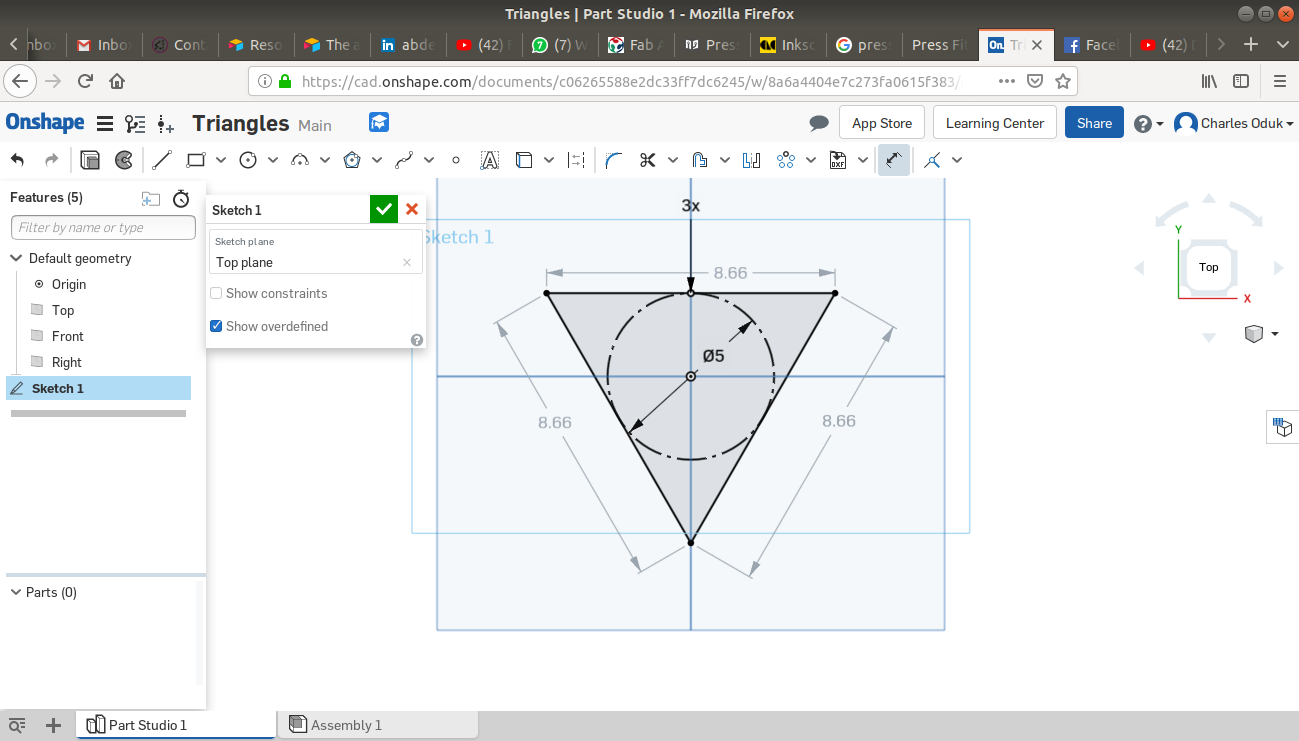
- Triangles: 3 designs of 5 pieces each.
- Circles: 5 designs of 5 pieces each.
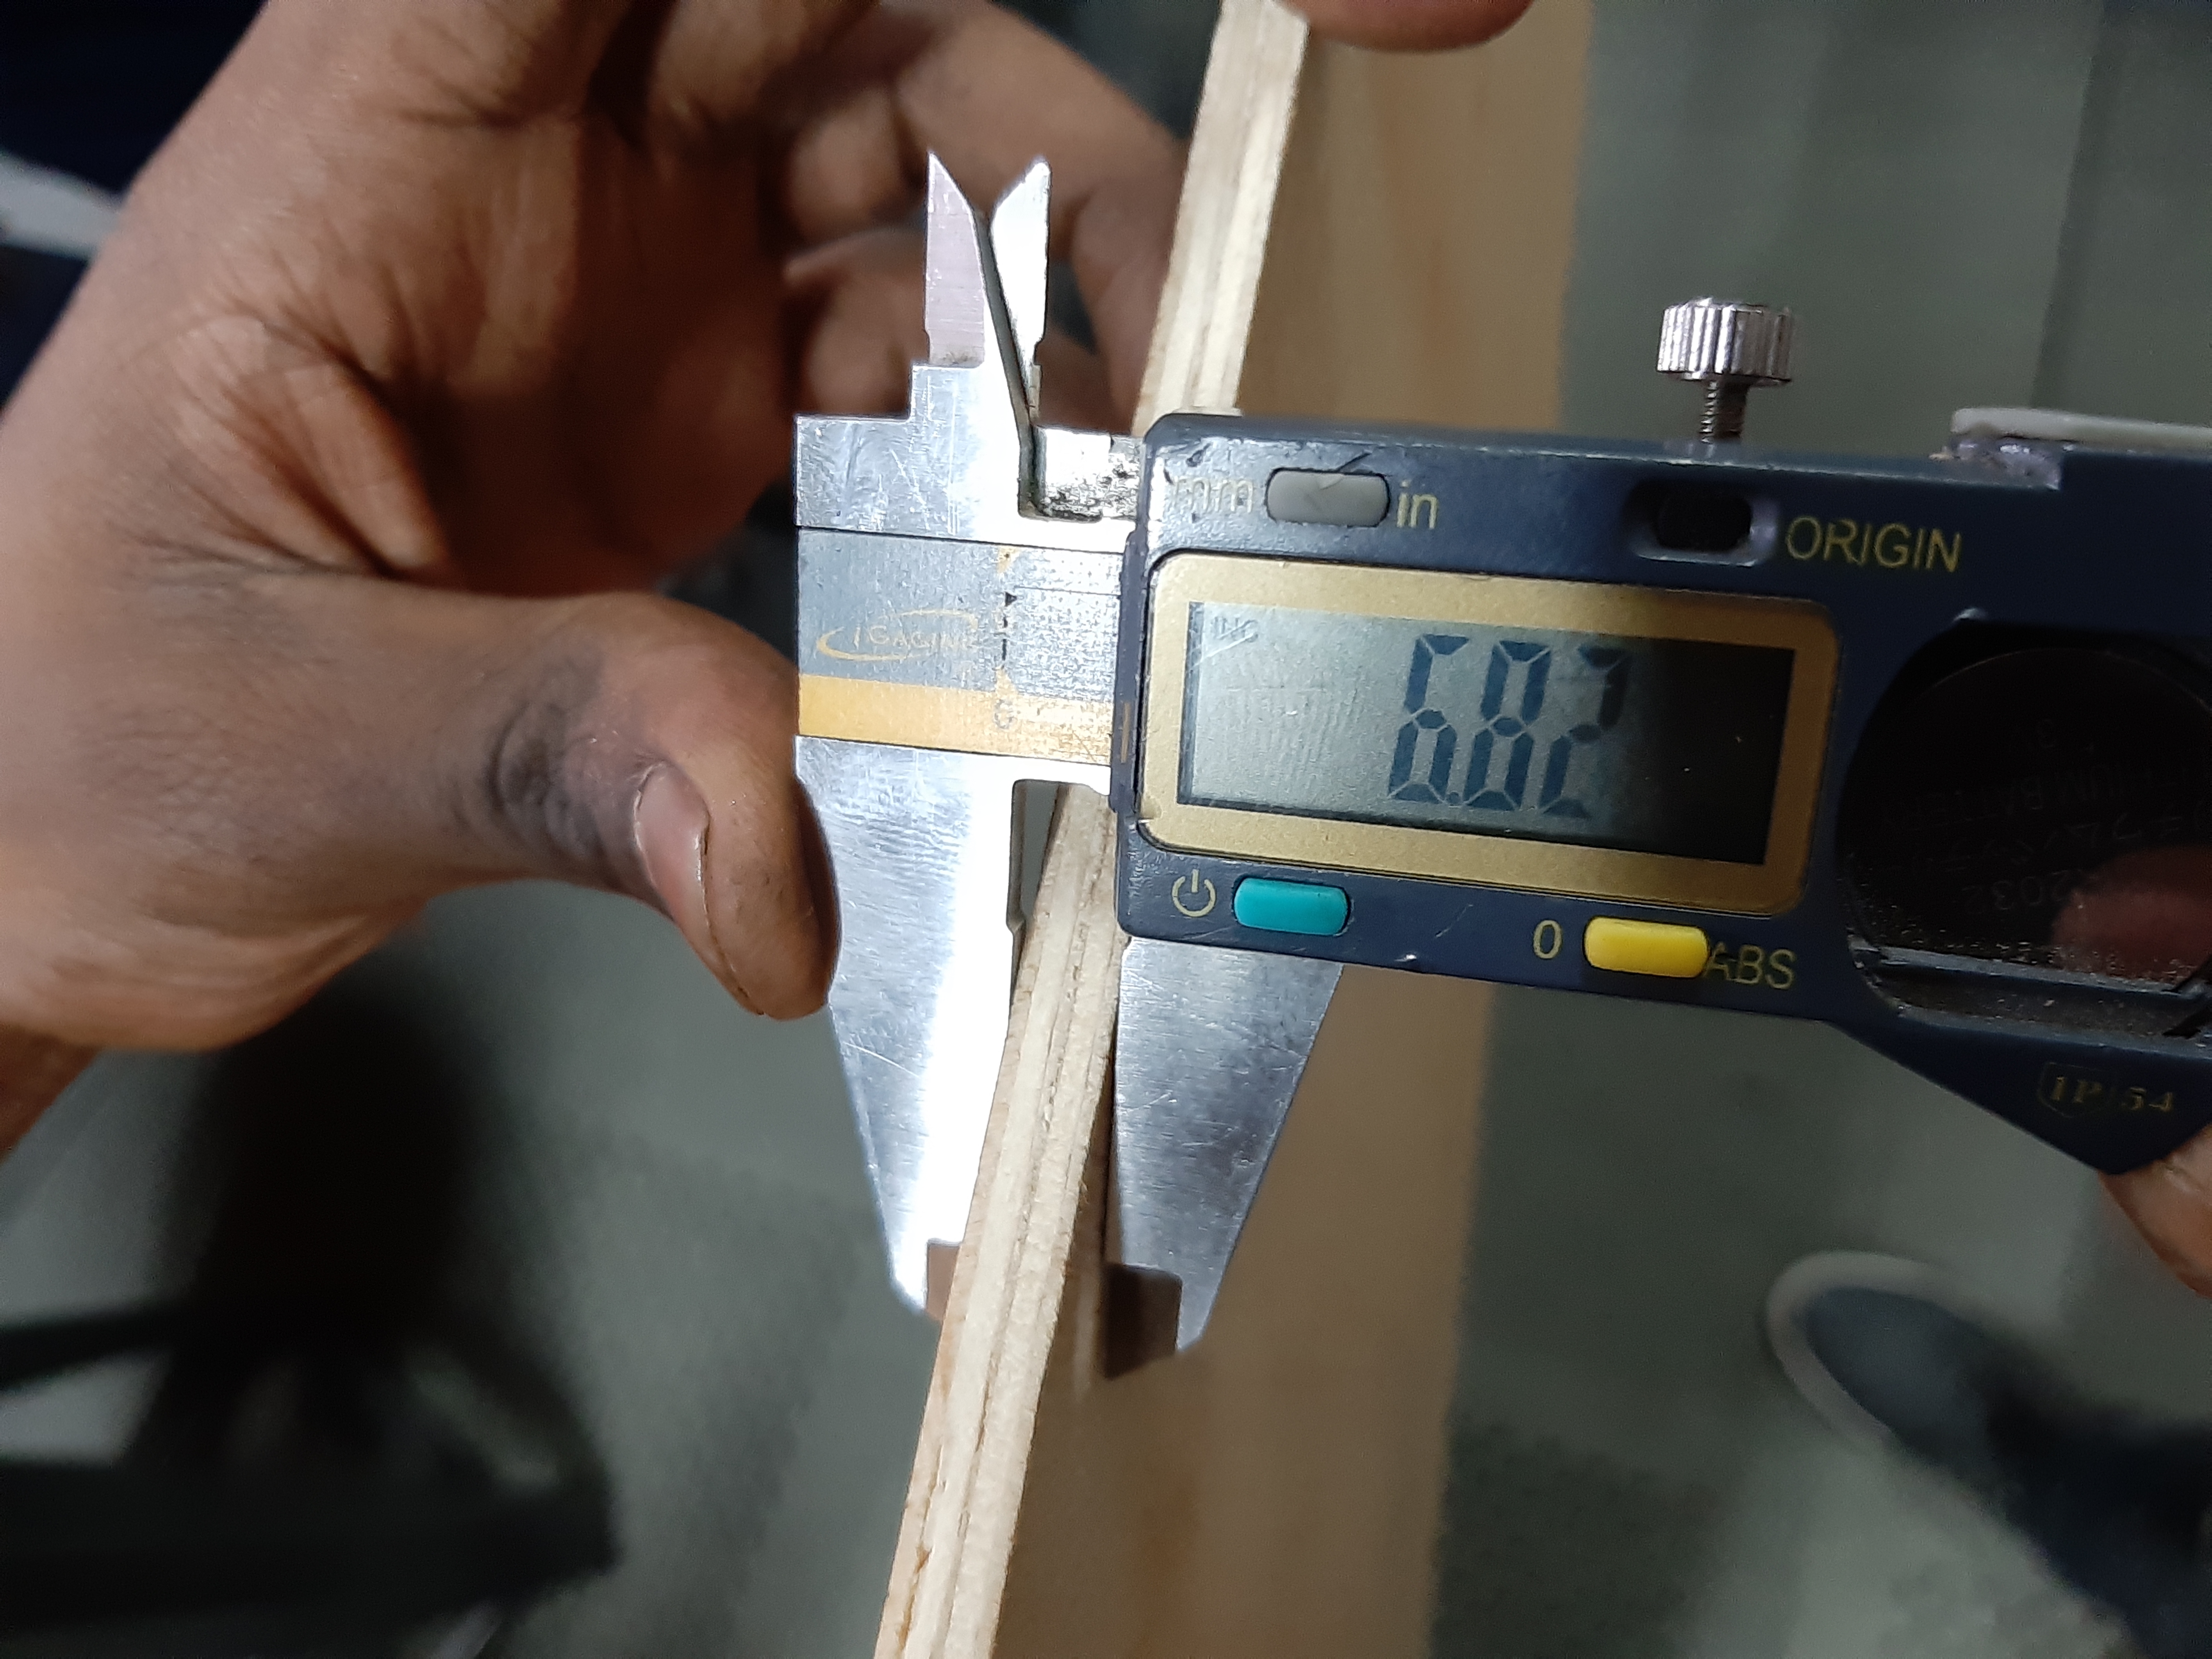
I thus will have a total of 90 fit press pieces. All the designs had a grove of 6mm to compensate for the material thickness.
Onshape online design:
Laser cutter designs:
I made use of the free onshape 2D design platform to draw and dimension my files:
Attached pictures shows the steps I used with the onshape online platform and functions.
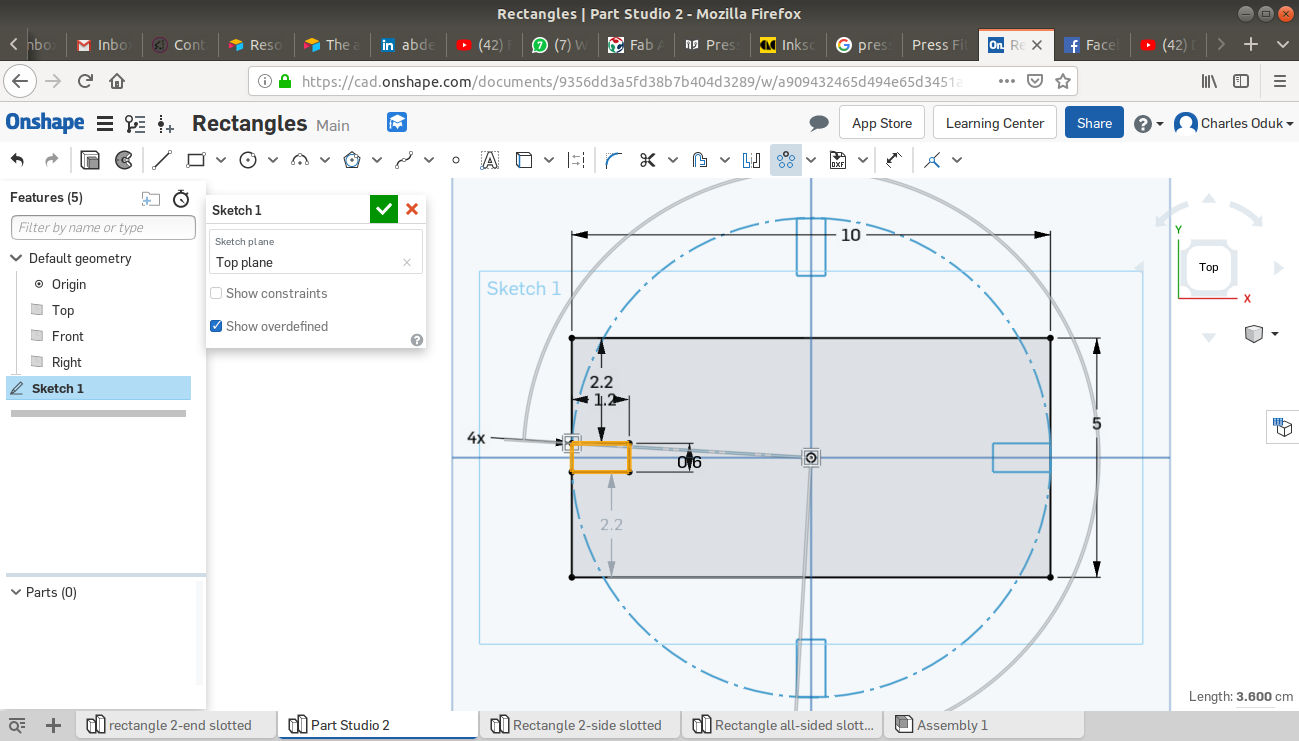
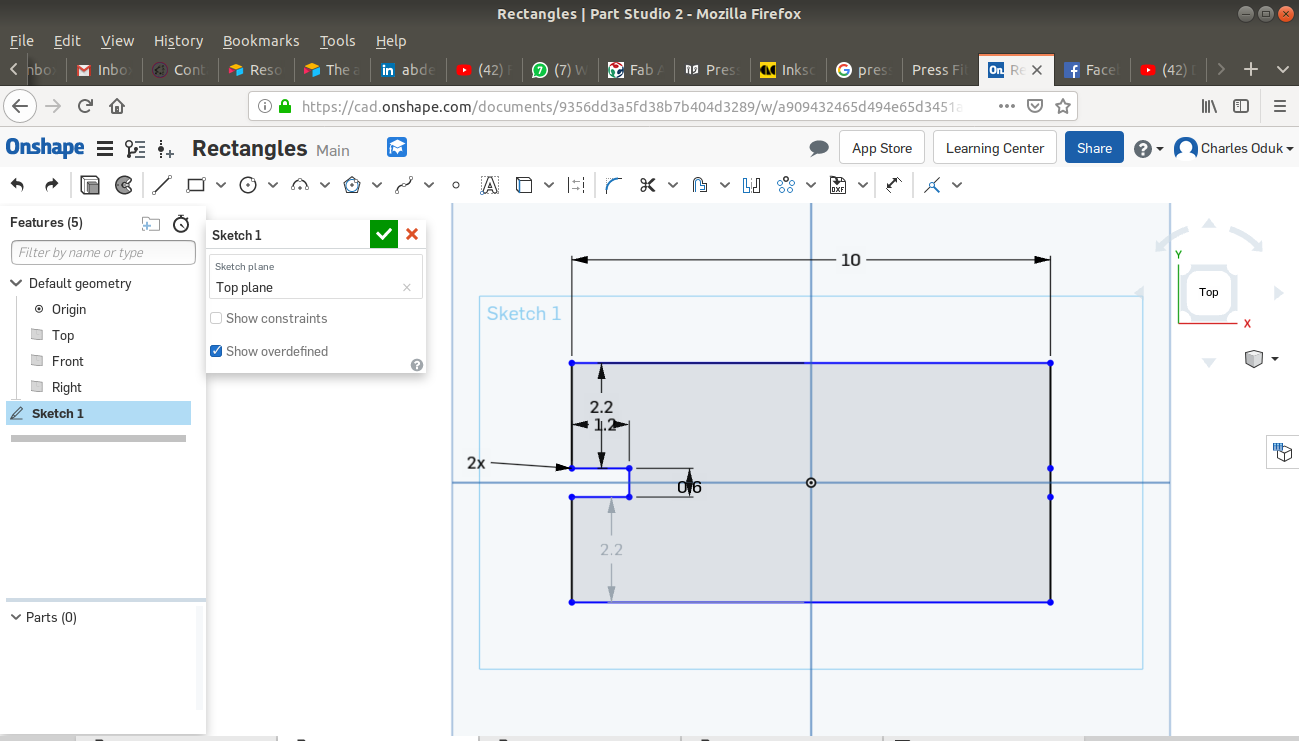
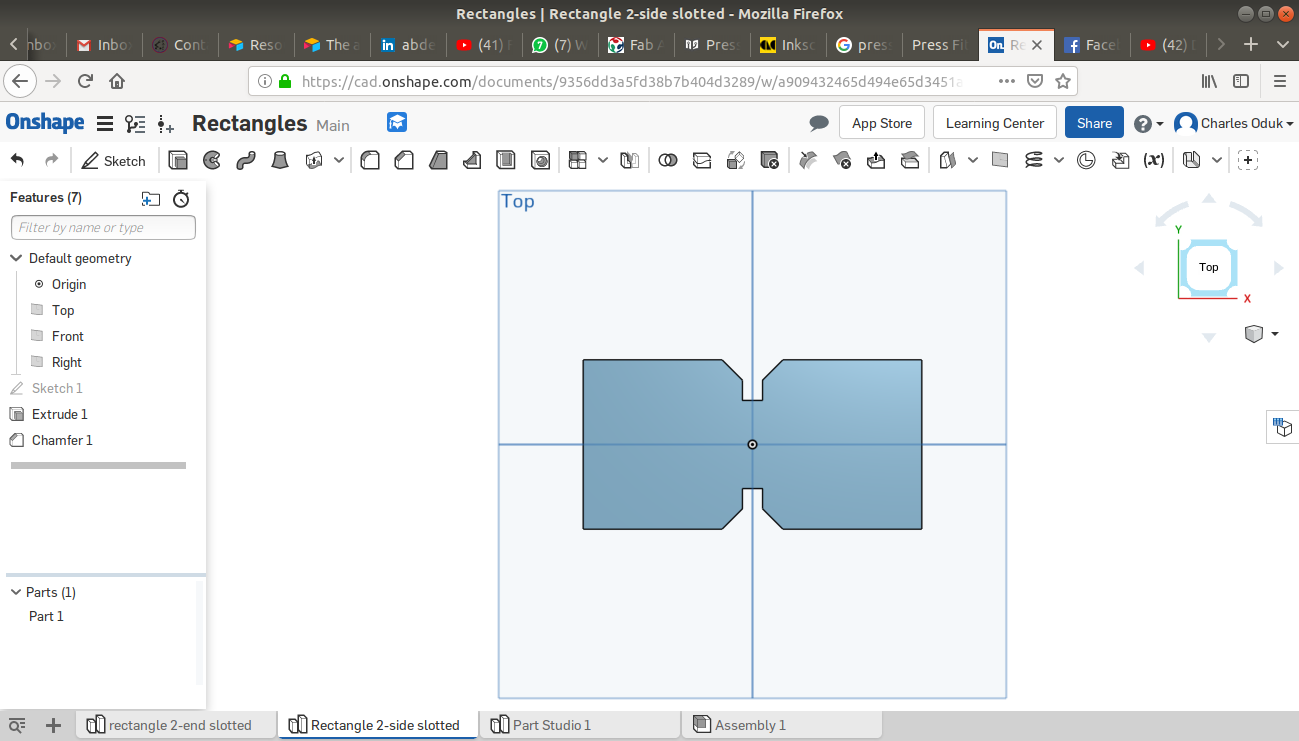
- Creating 2D dimensioned sketches:
The ONSHAPE online CAD platform allows the user to both design 2D sketches and transform them to 3D objects. Below are steps I used to create my 2D sketches. Dimensions are in centimeters.
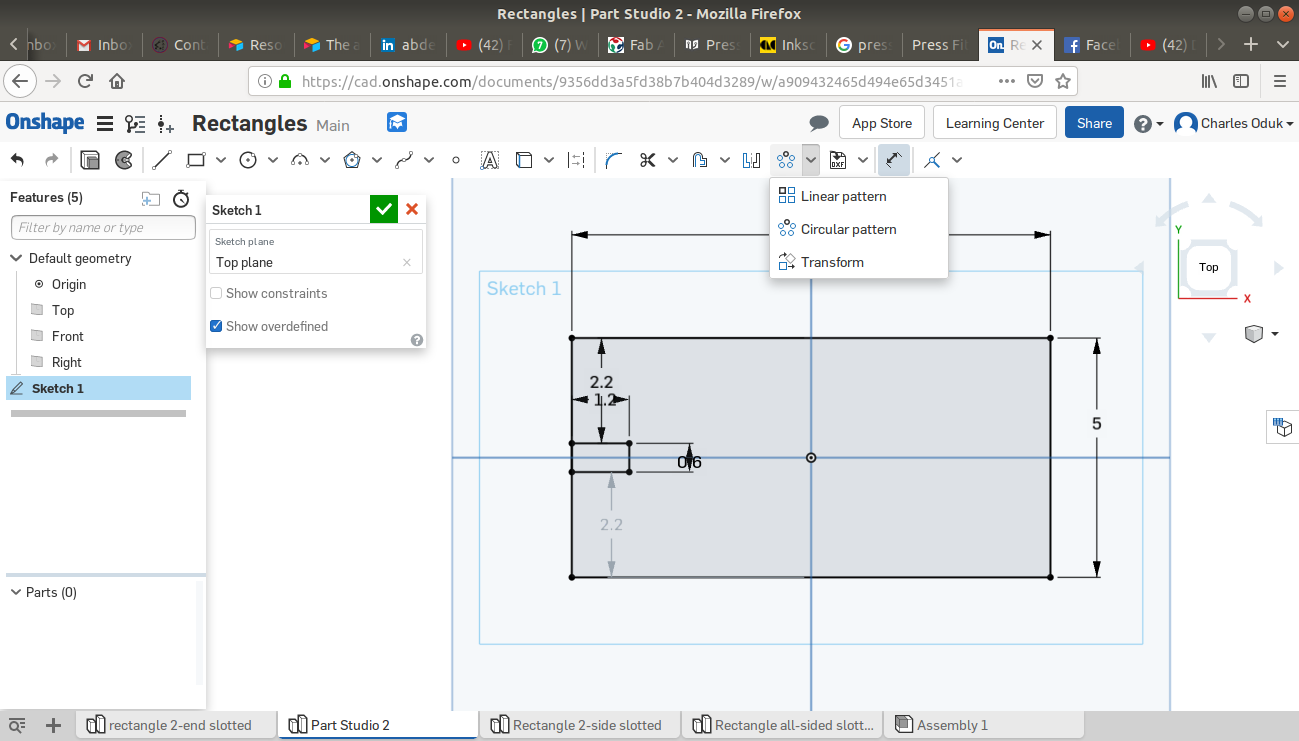
- Creating patterns on the 2D sketches:
The patterns I cretaed here helped me to make groves through which the press fit kits would hold together.

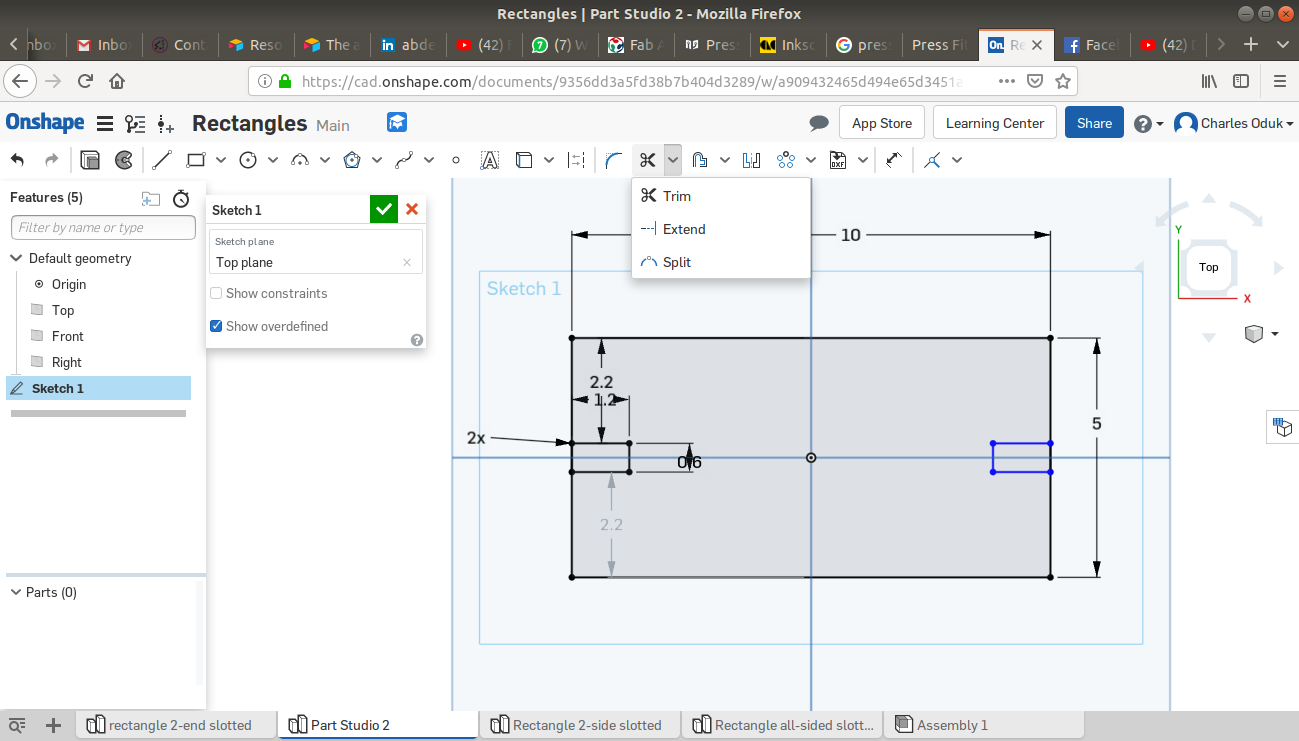
- Trimming out unwanted patterns,lines and shapes.
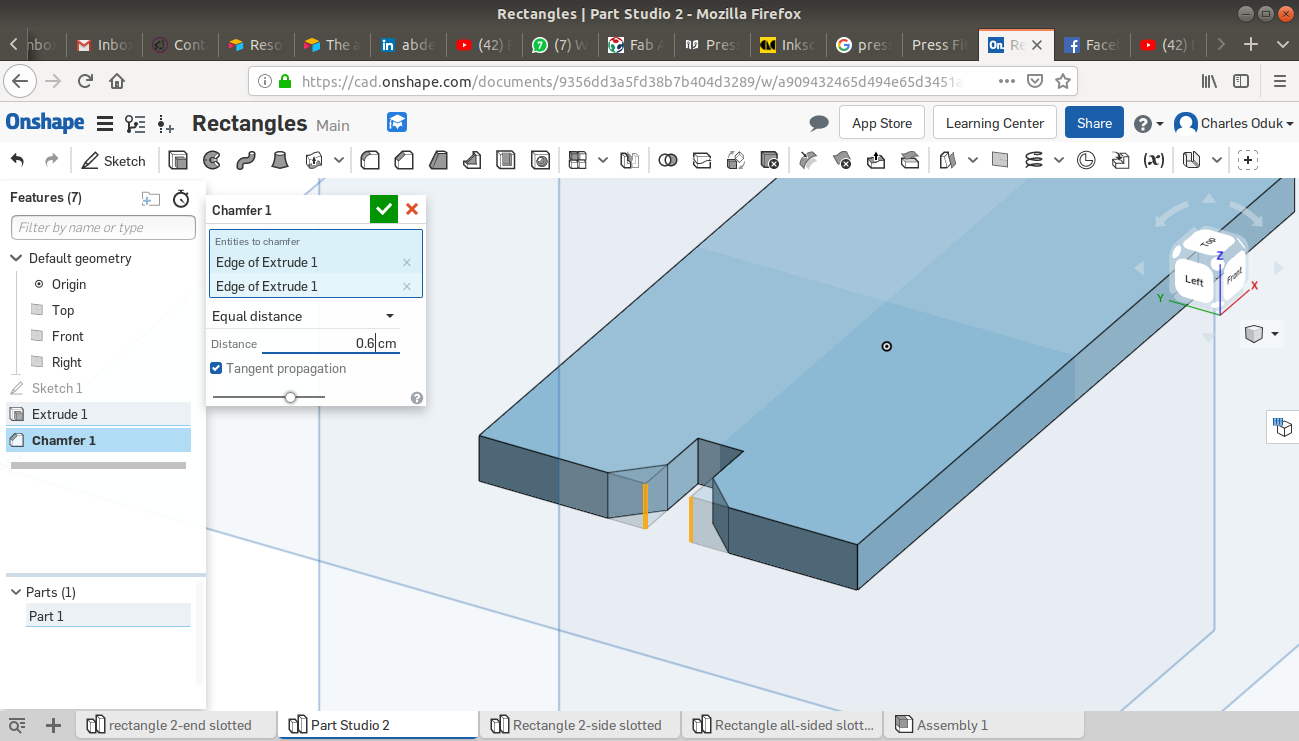
- Extruding the 2D Designs to 3D to allow for Chamfering:
Chamfering allows the drawn objects to be more 'accomodating' thus reducing the rigidity and sharpness of the mating edges. Chamfering is only possible with 3D objects on ONSHAPE.

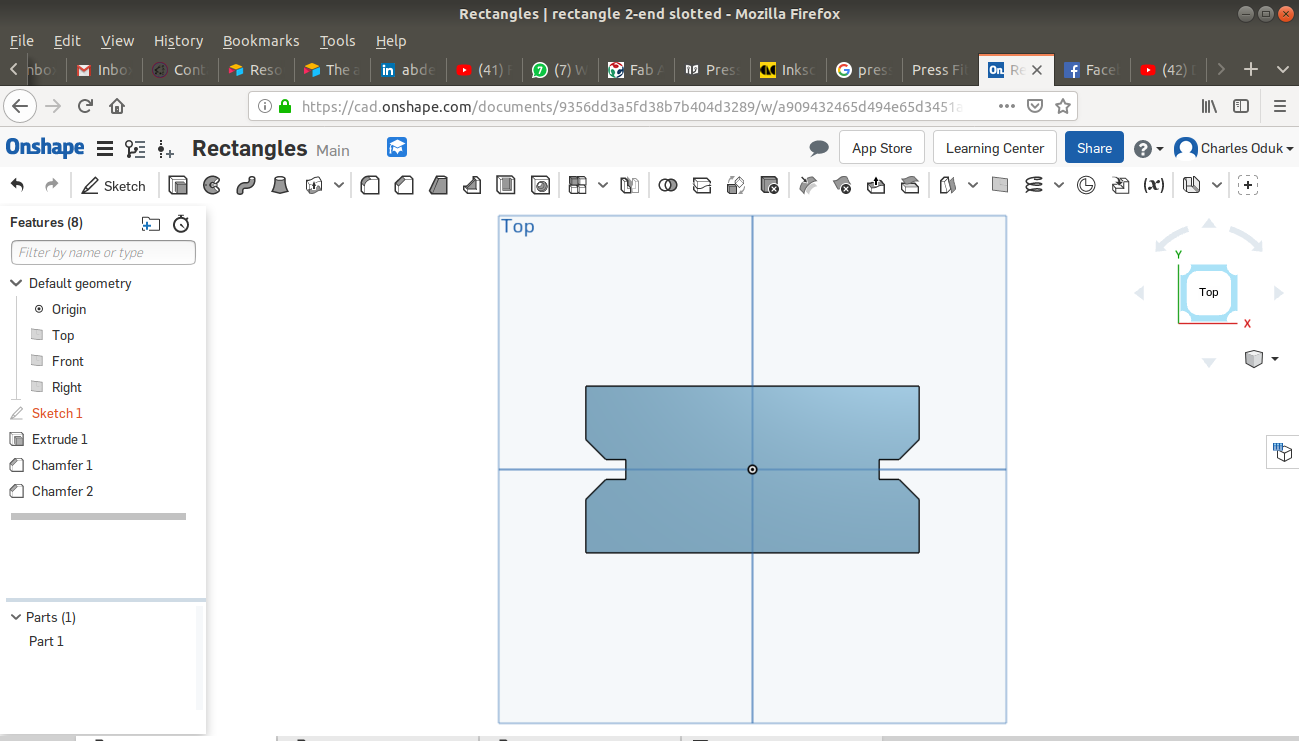
- Chamfering the 3D parts: by distance of 6mm-which is also the thickness of the wood we will be laser cutting.
- Saving the various files waiting for convertion to dfx and machine language formats.
Vinyl cutter Designs.
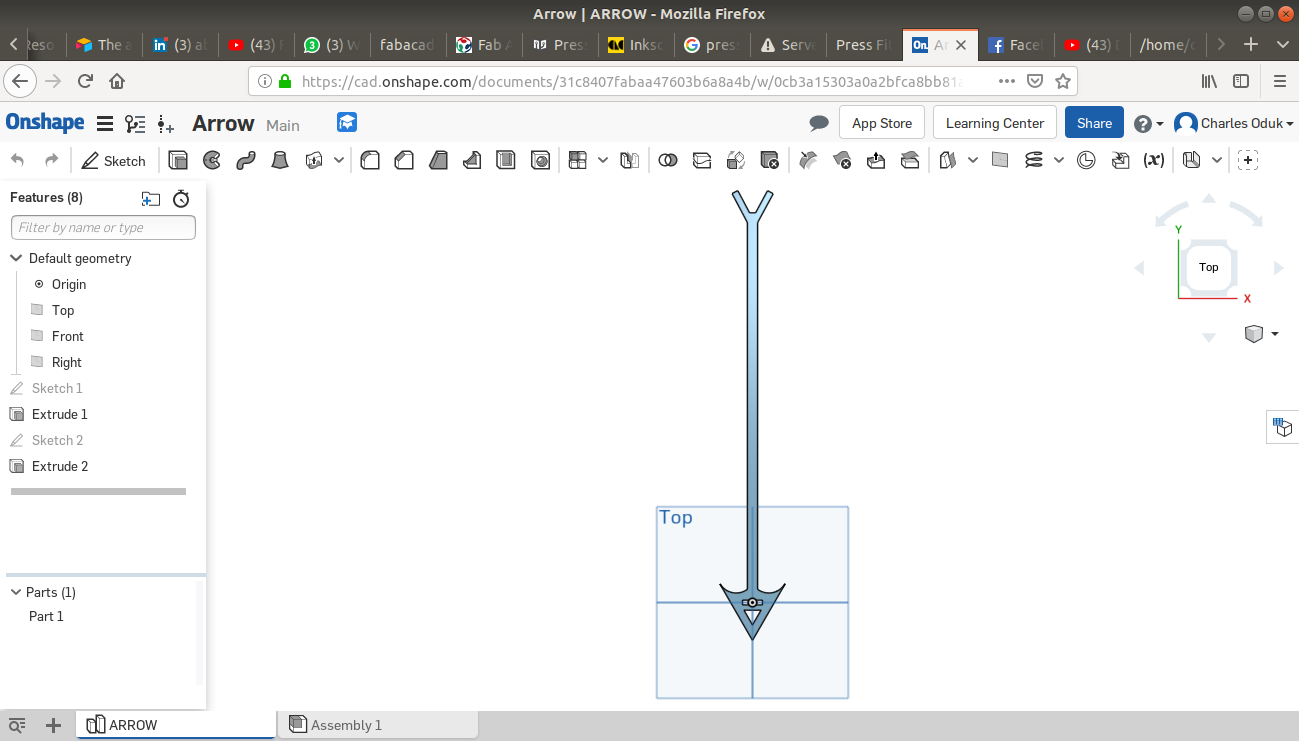
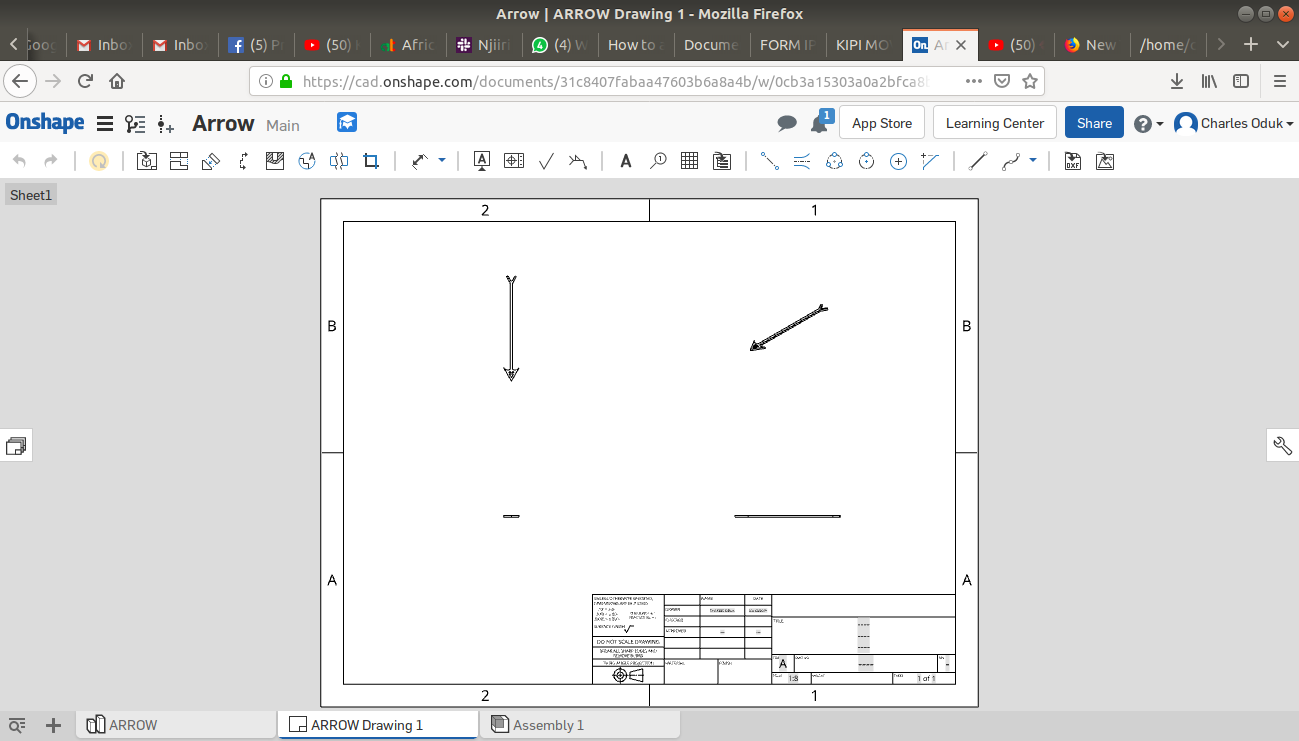
For this task I picked on designing and cutting an arrow on the vinyl cutter.
I followed the same steps as for the above described step on ONSHAPE. My final design is shown below:

Files Conversion:
The laser cutter and the vinyl cutter machines read different formats from the ONSHAPE 3D design formats and from each other. I thus had to convert the files into the appropriate formats as outlined below.
Laser cutter files:
For ease of machining(cutting) on the laser cutter machine, I downloaded the files in DXF format that is readable by the laser cutter softwares and other CAD softwares such as AutoCAD and Inventor.
Below are attached downloadable files of my fit-press designs.
Vinylcutter files:
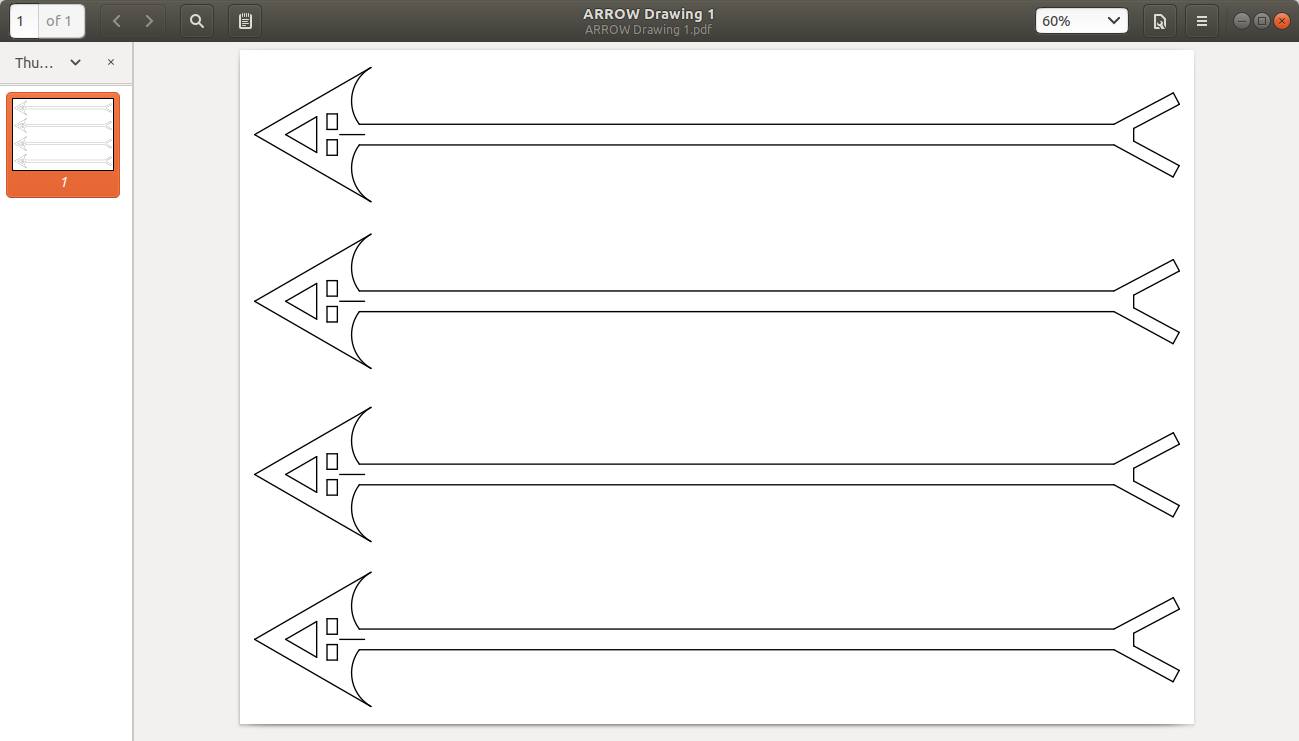
Just like in the laser cutter, the vinyl cutter also has its own machine language file formats. For the vinyl cutter files I had to safe the files as PDF so that the Adobe illustrator could easily detect and edit out any errors.To do this ONSHAPE I had to use the import function as a drawing on pdf format as shown below:
After this step I then opened the pdf file on Adobe illustrator and made necessary corrections and re-arranged the arrow pattern on an A3 page in 4 shapes as shown below.
Below are attached downloadable files of my arrow, Vinylcutter designs.
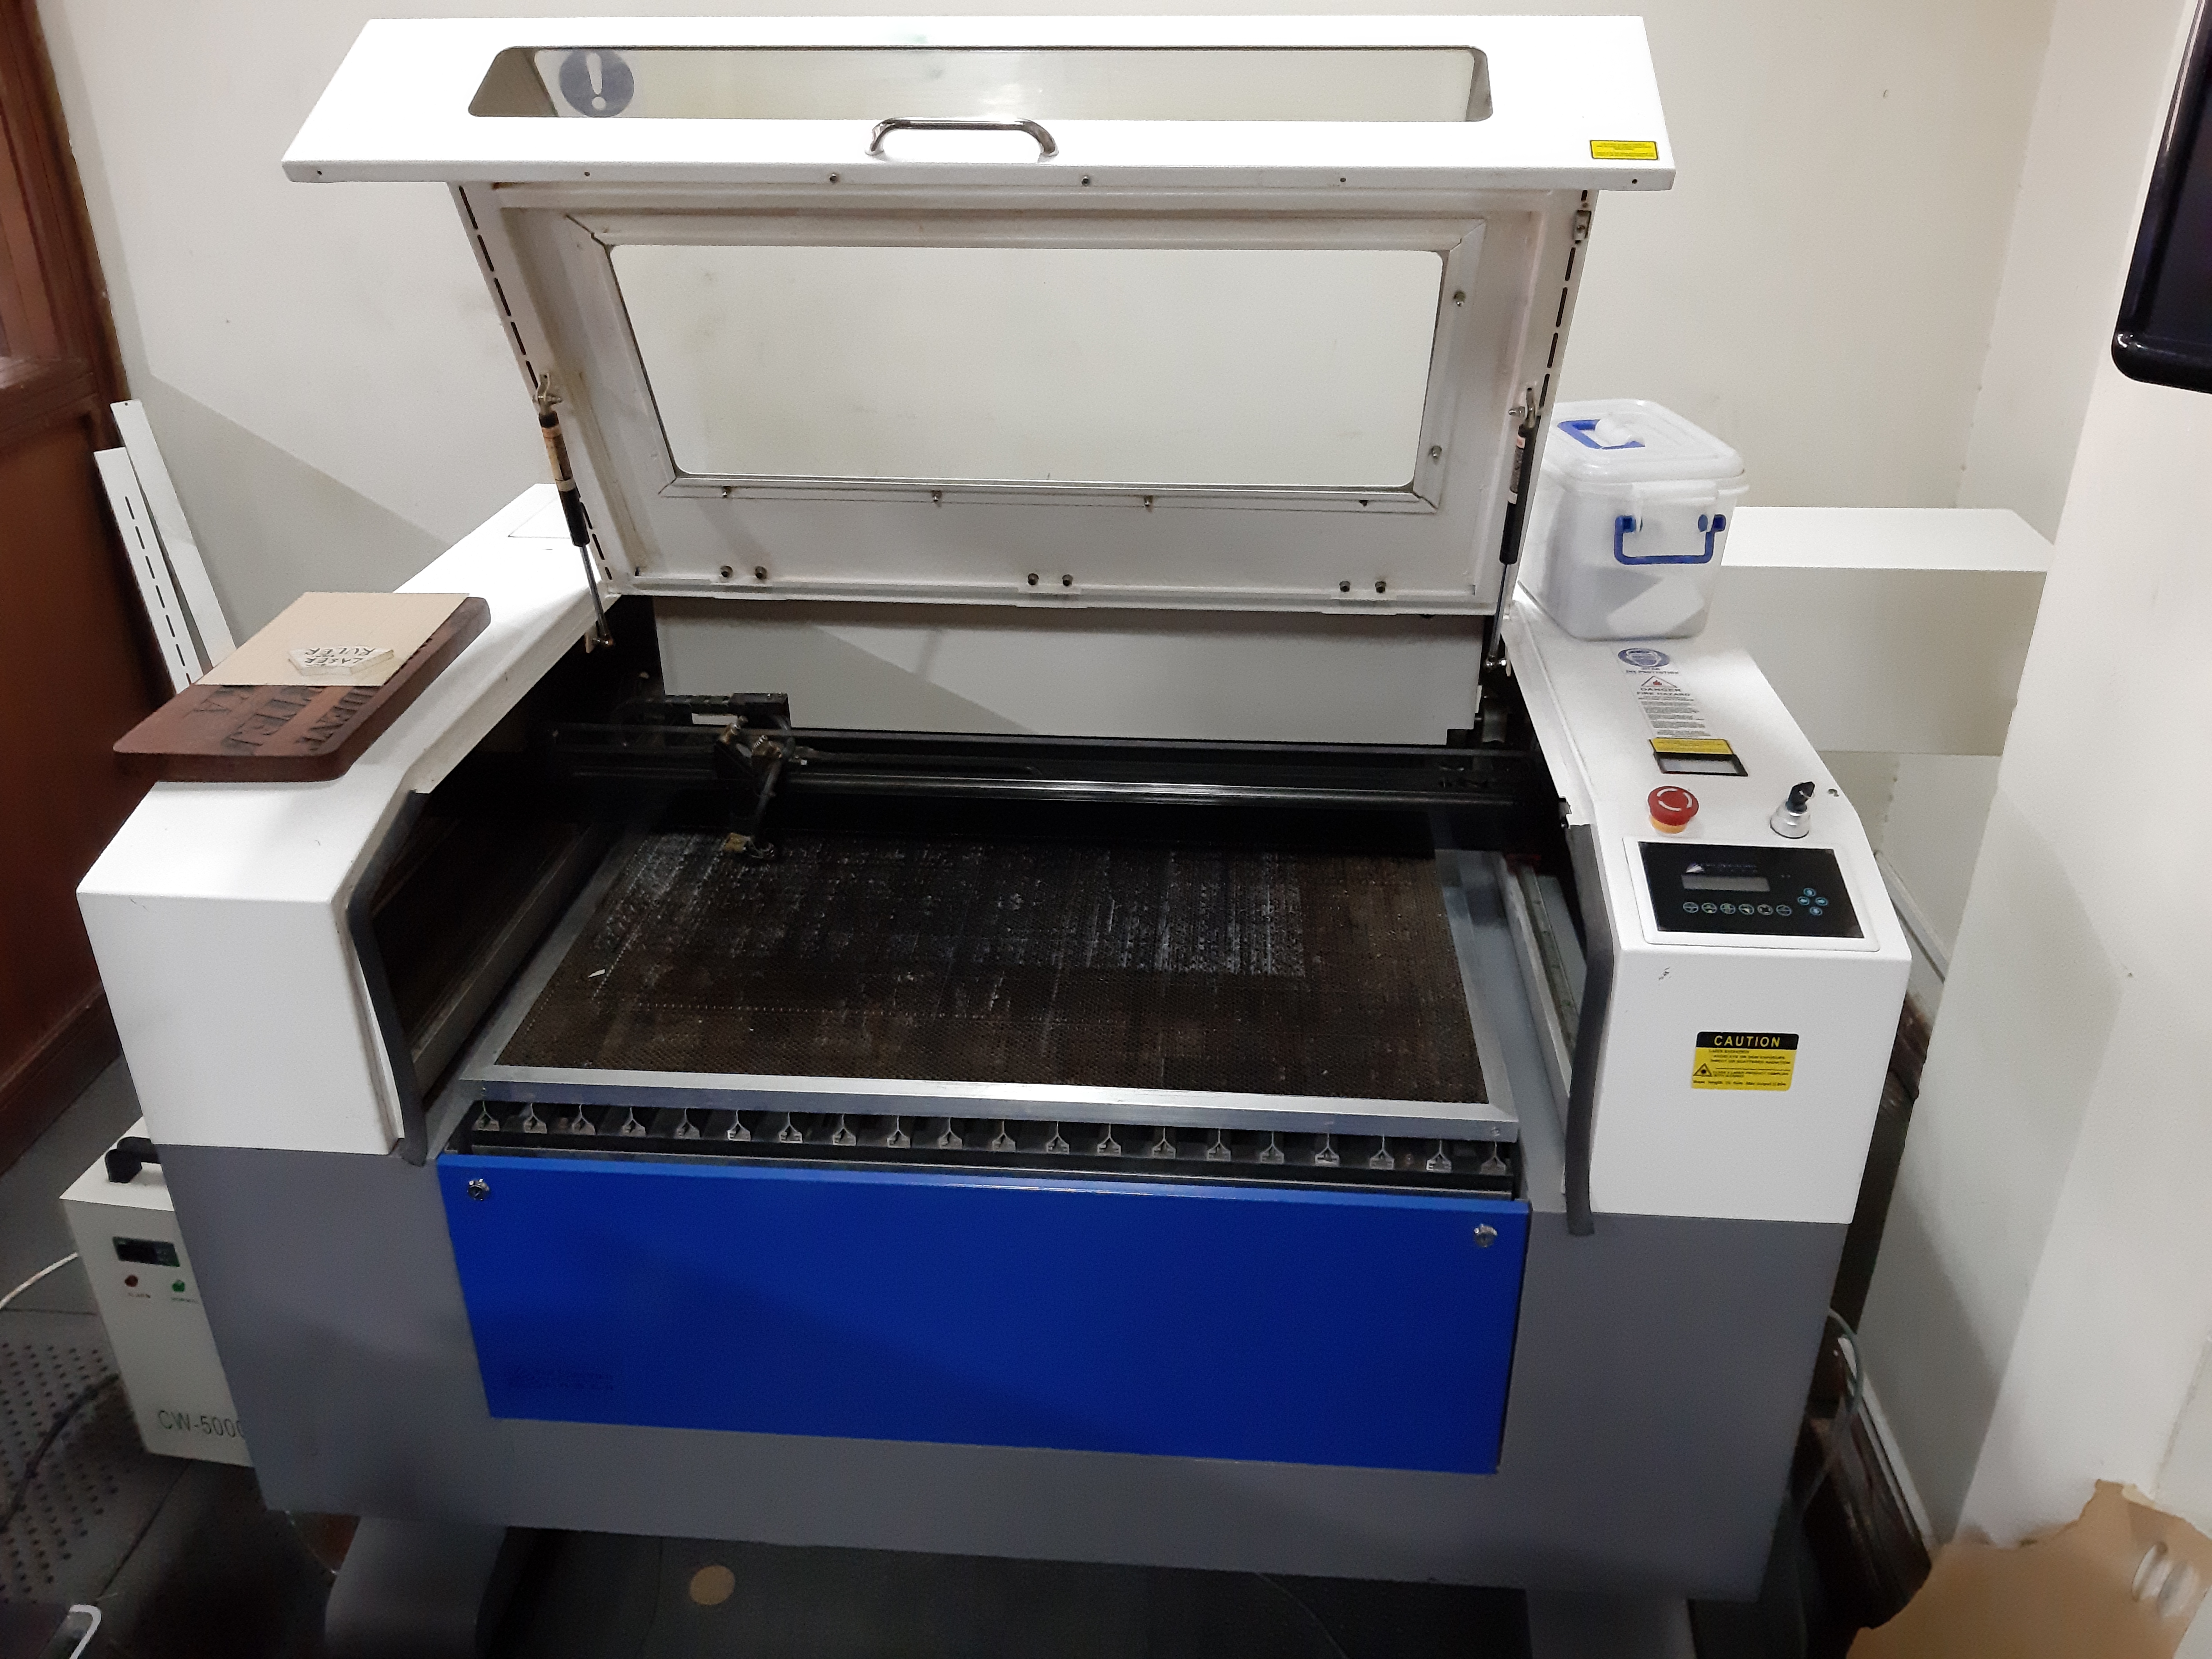
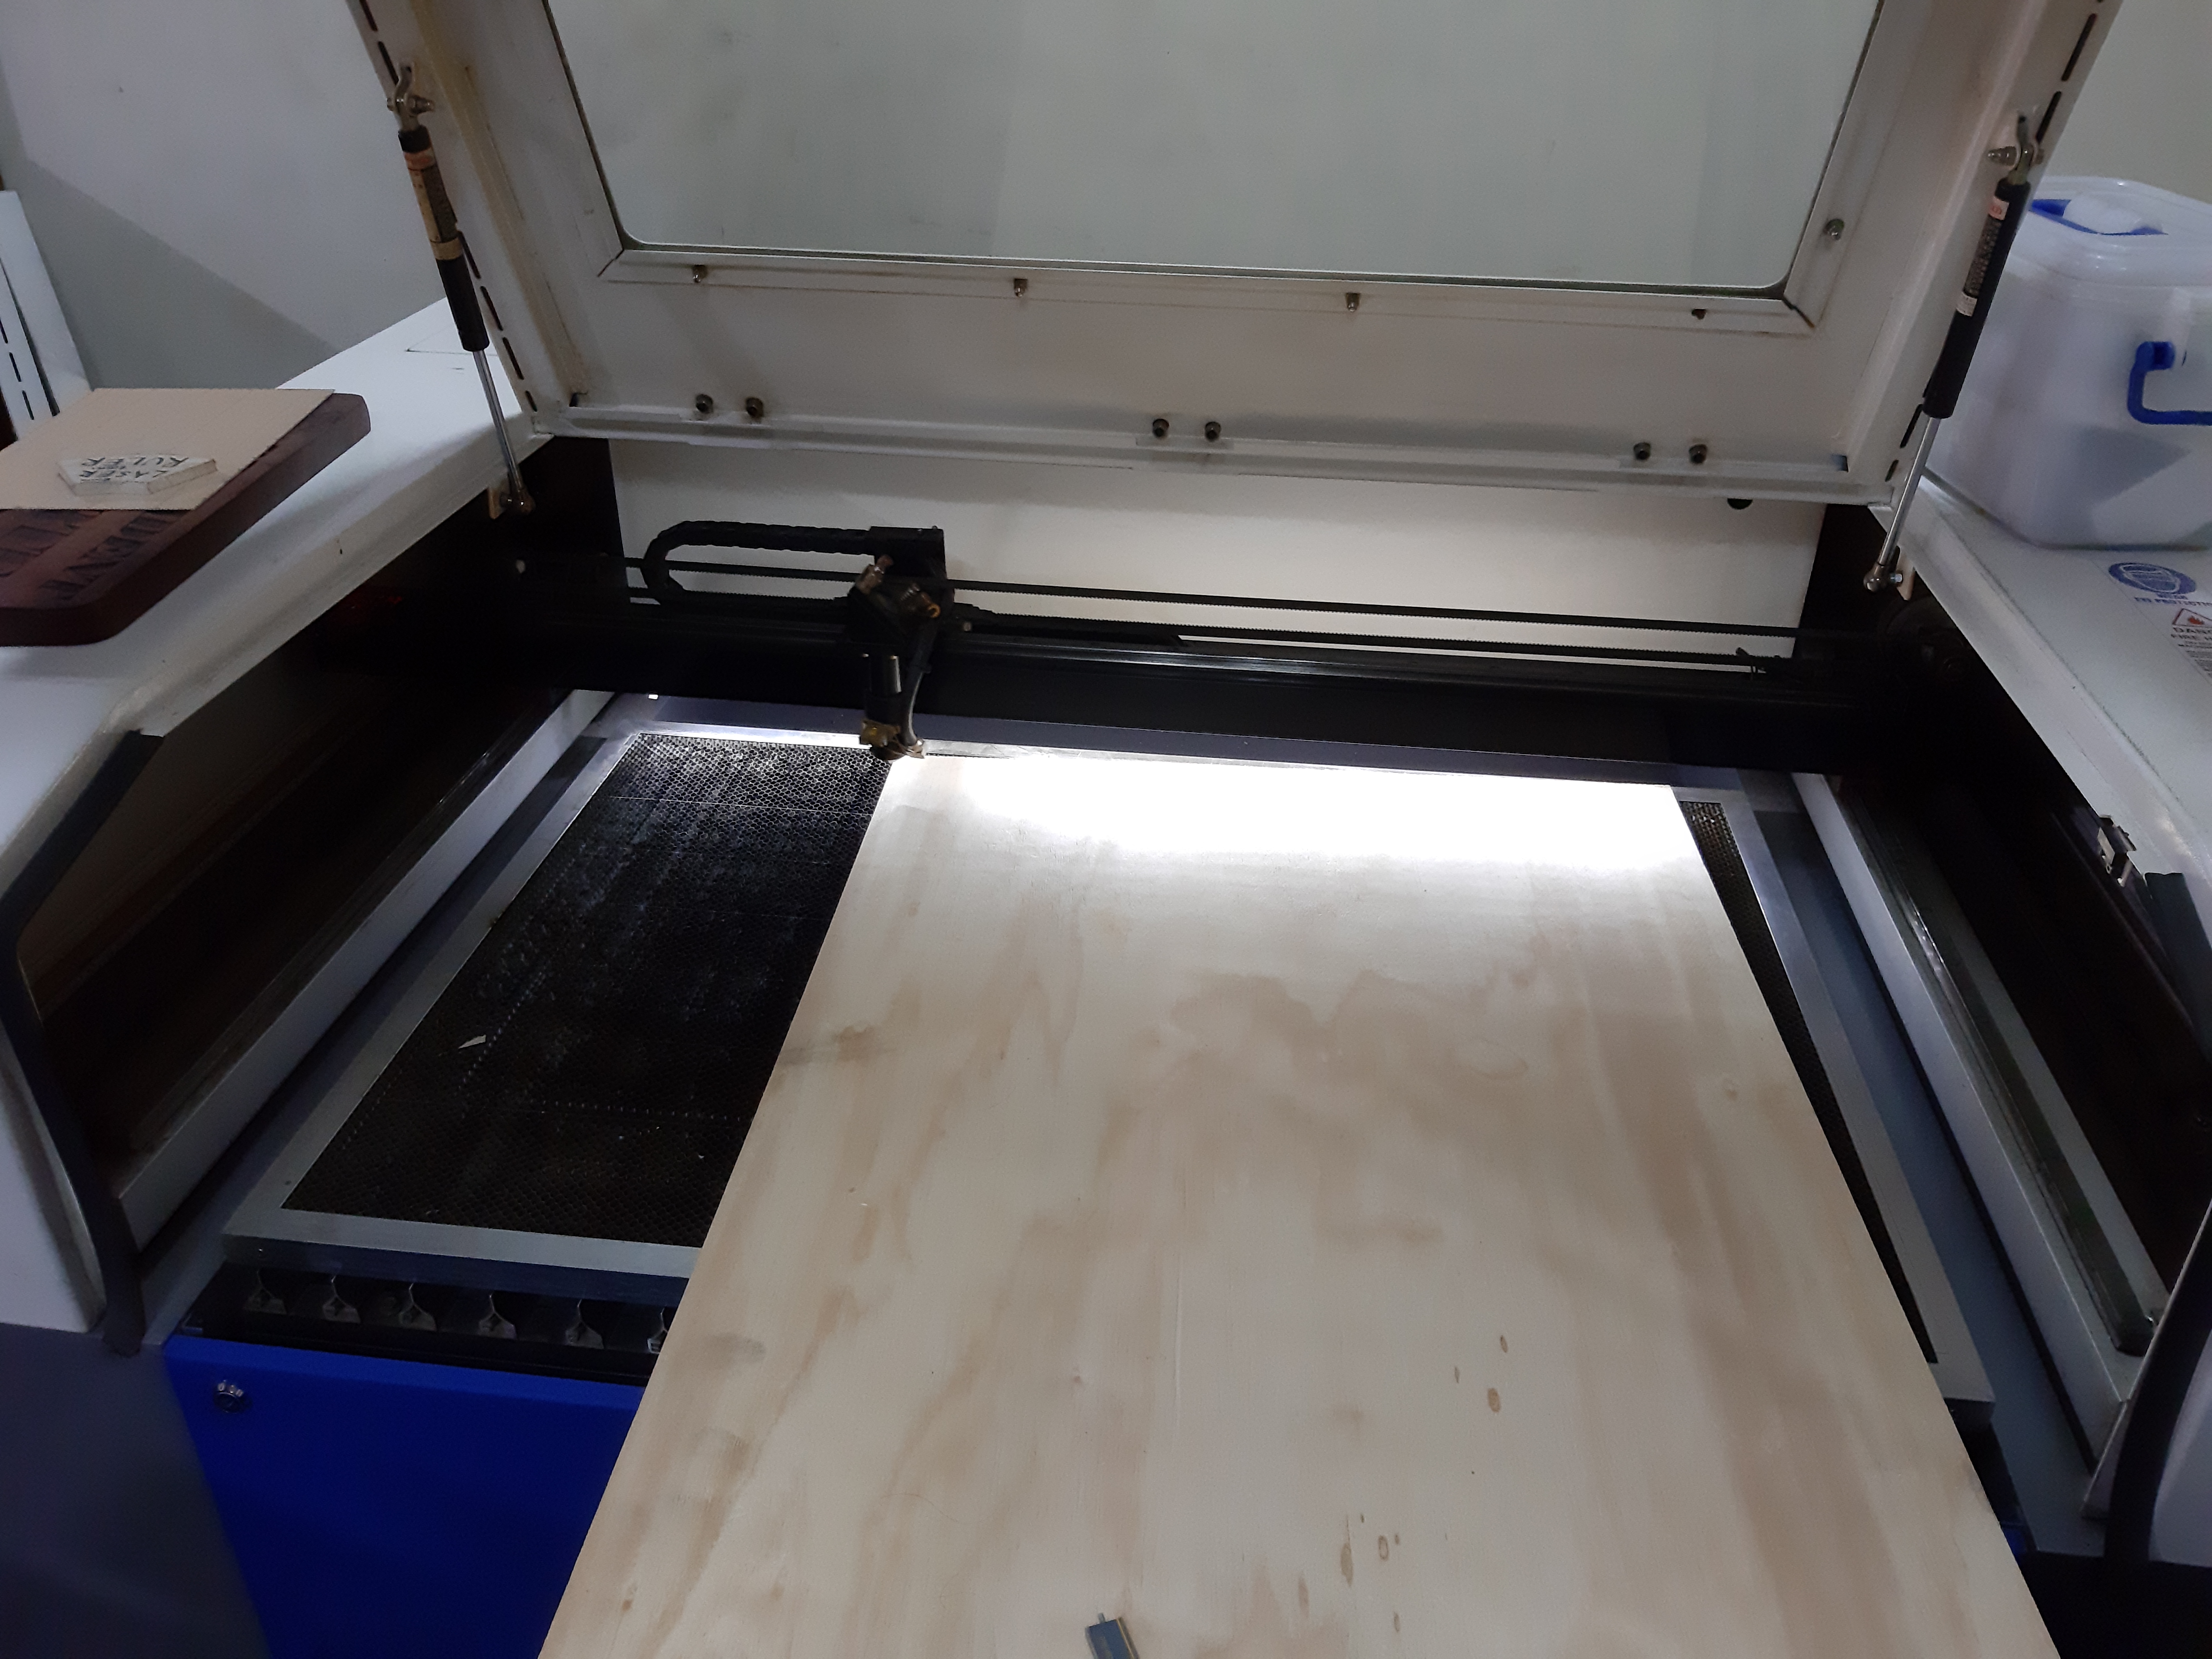
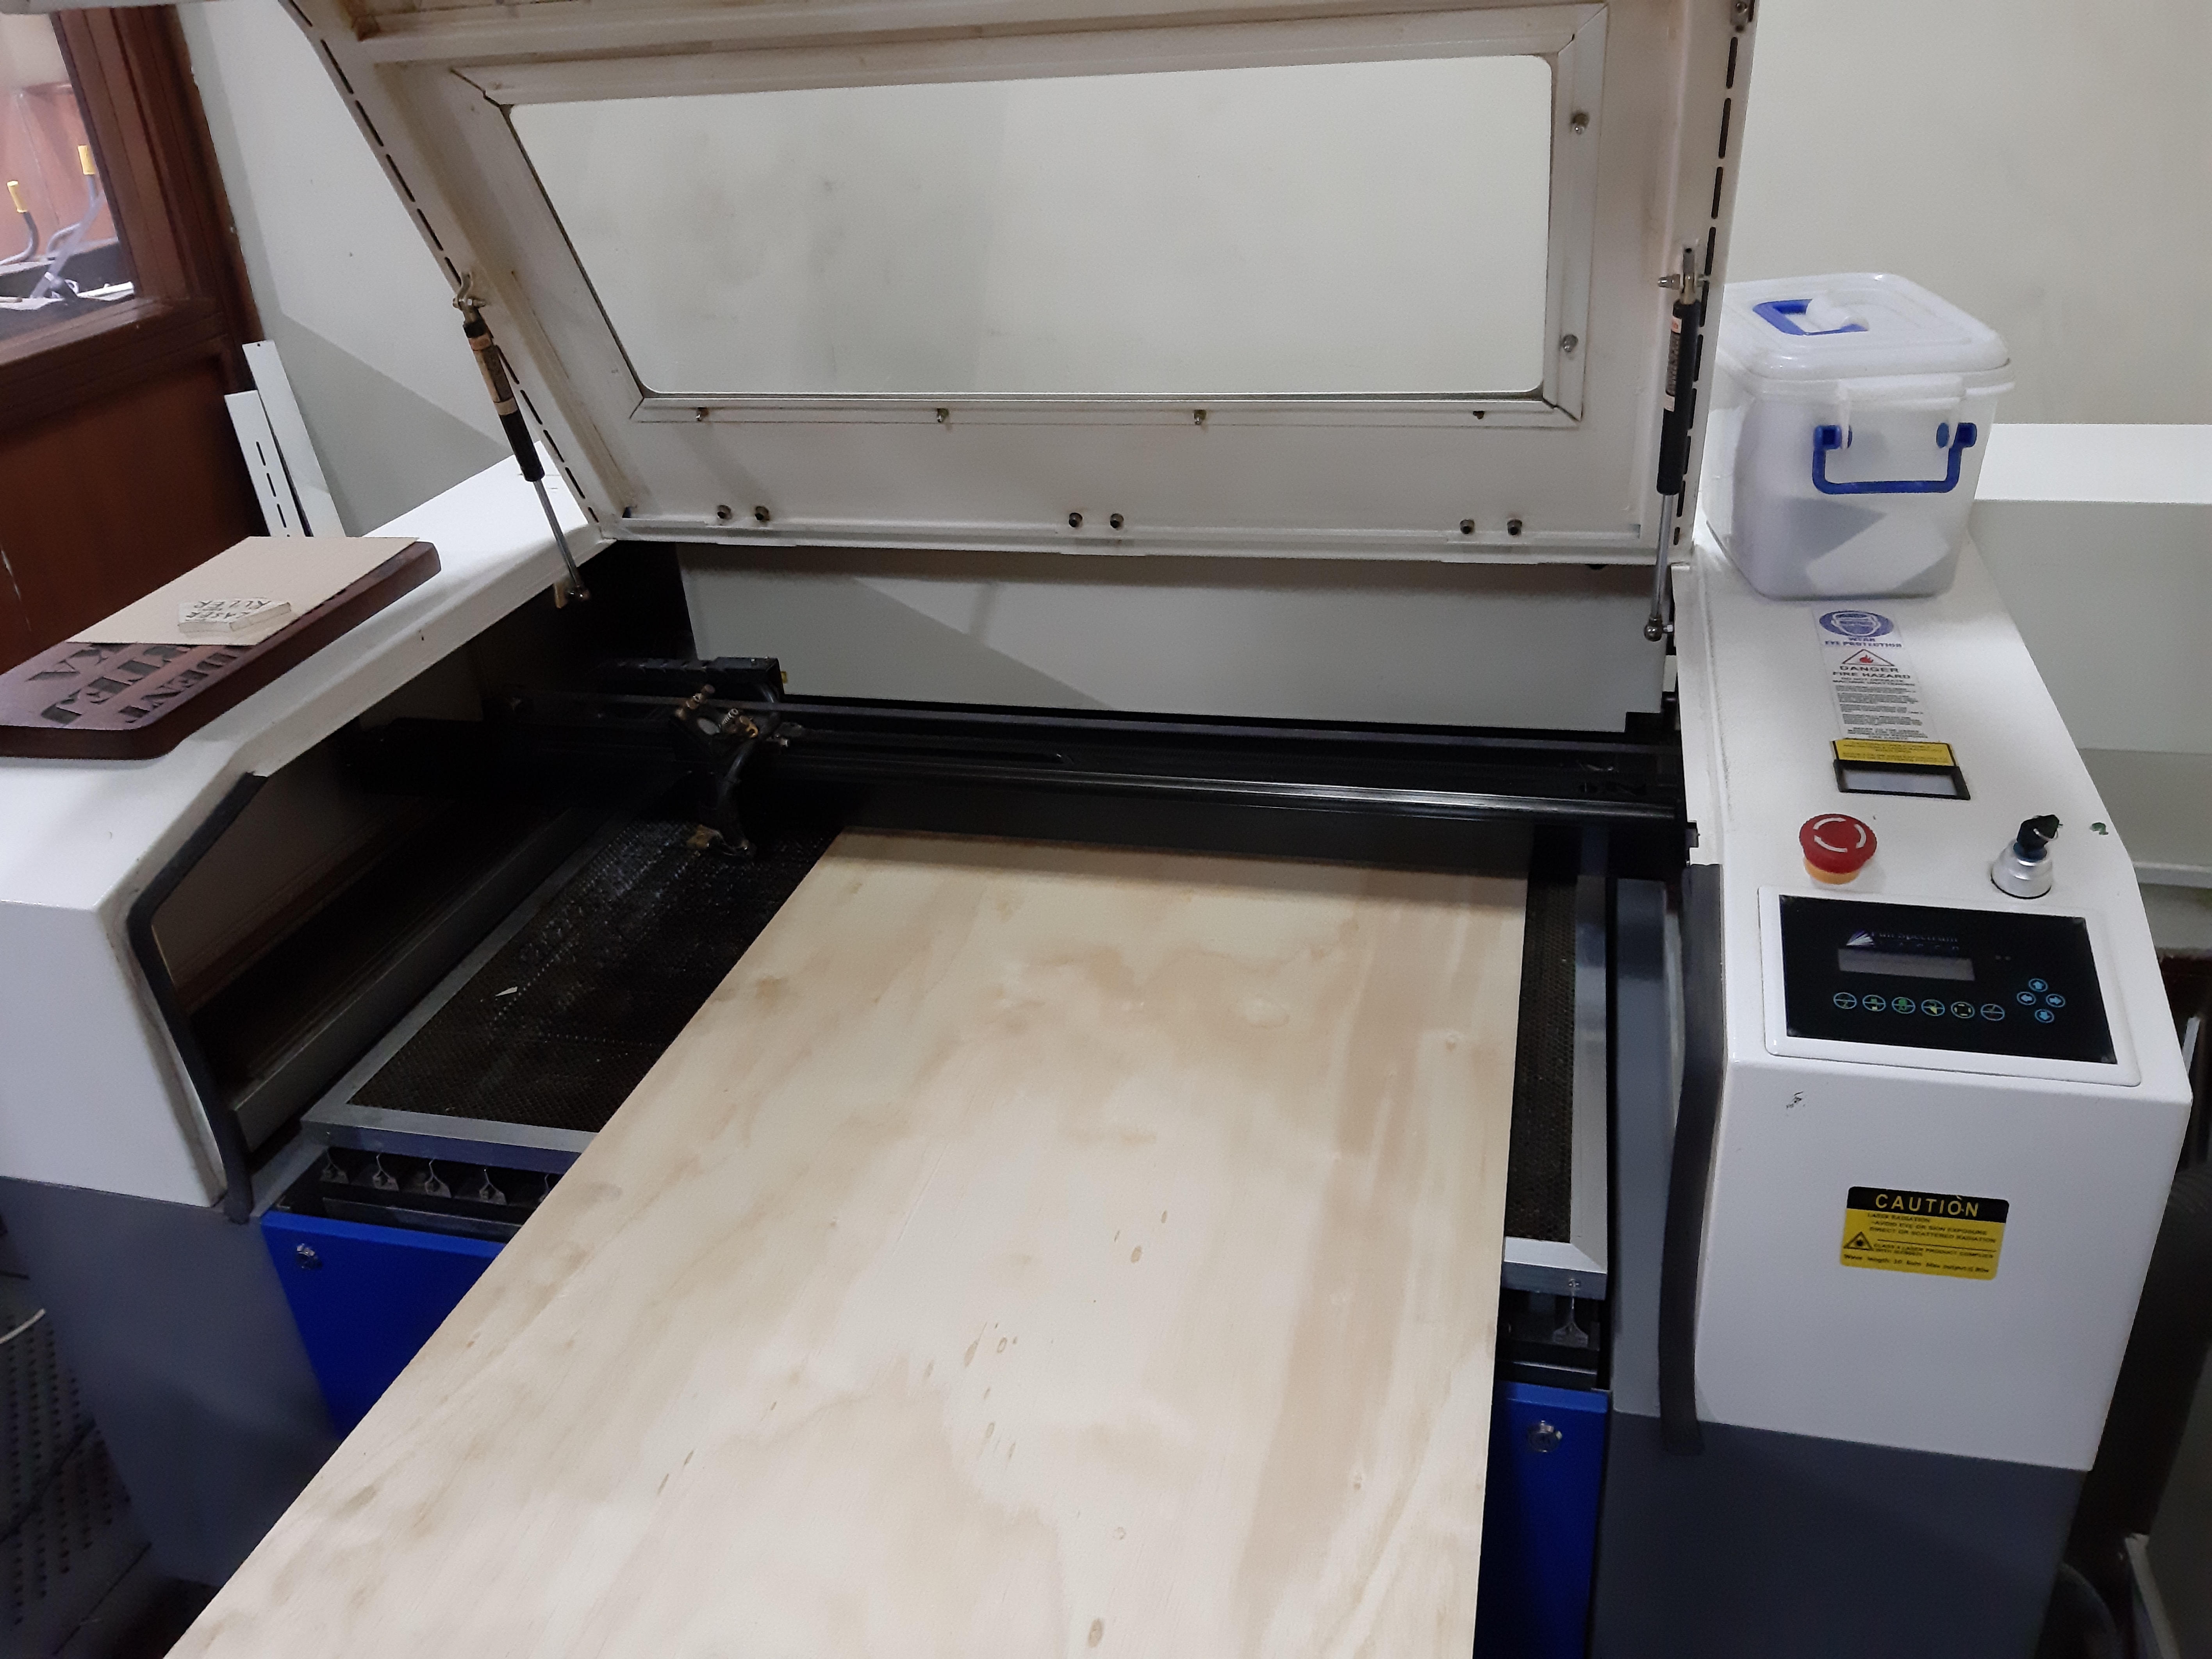
Laser cutting:
The laser cutter I used for this task is the ********. Which has the following specifications:
- Bed
software set up
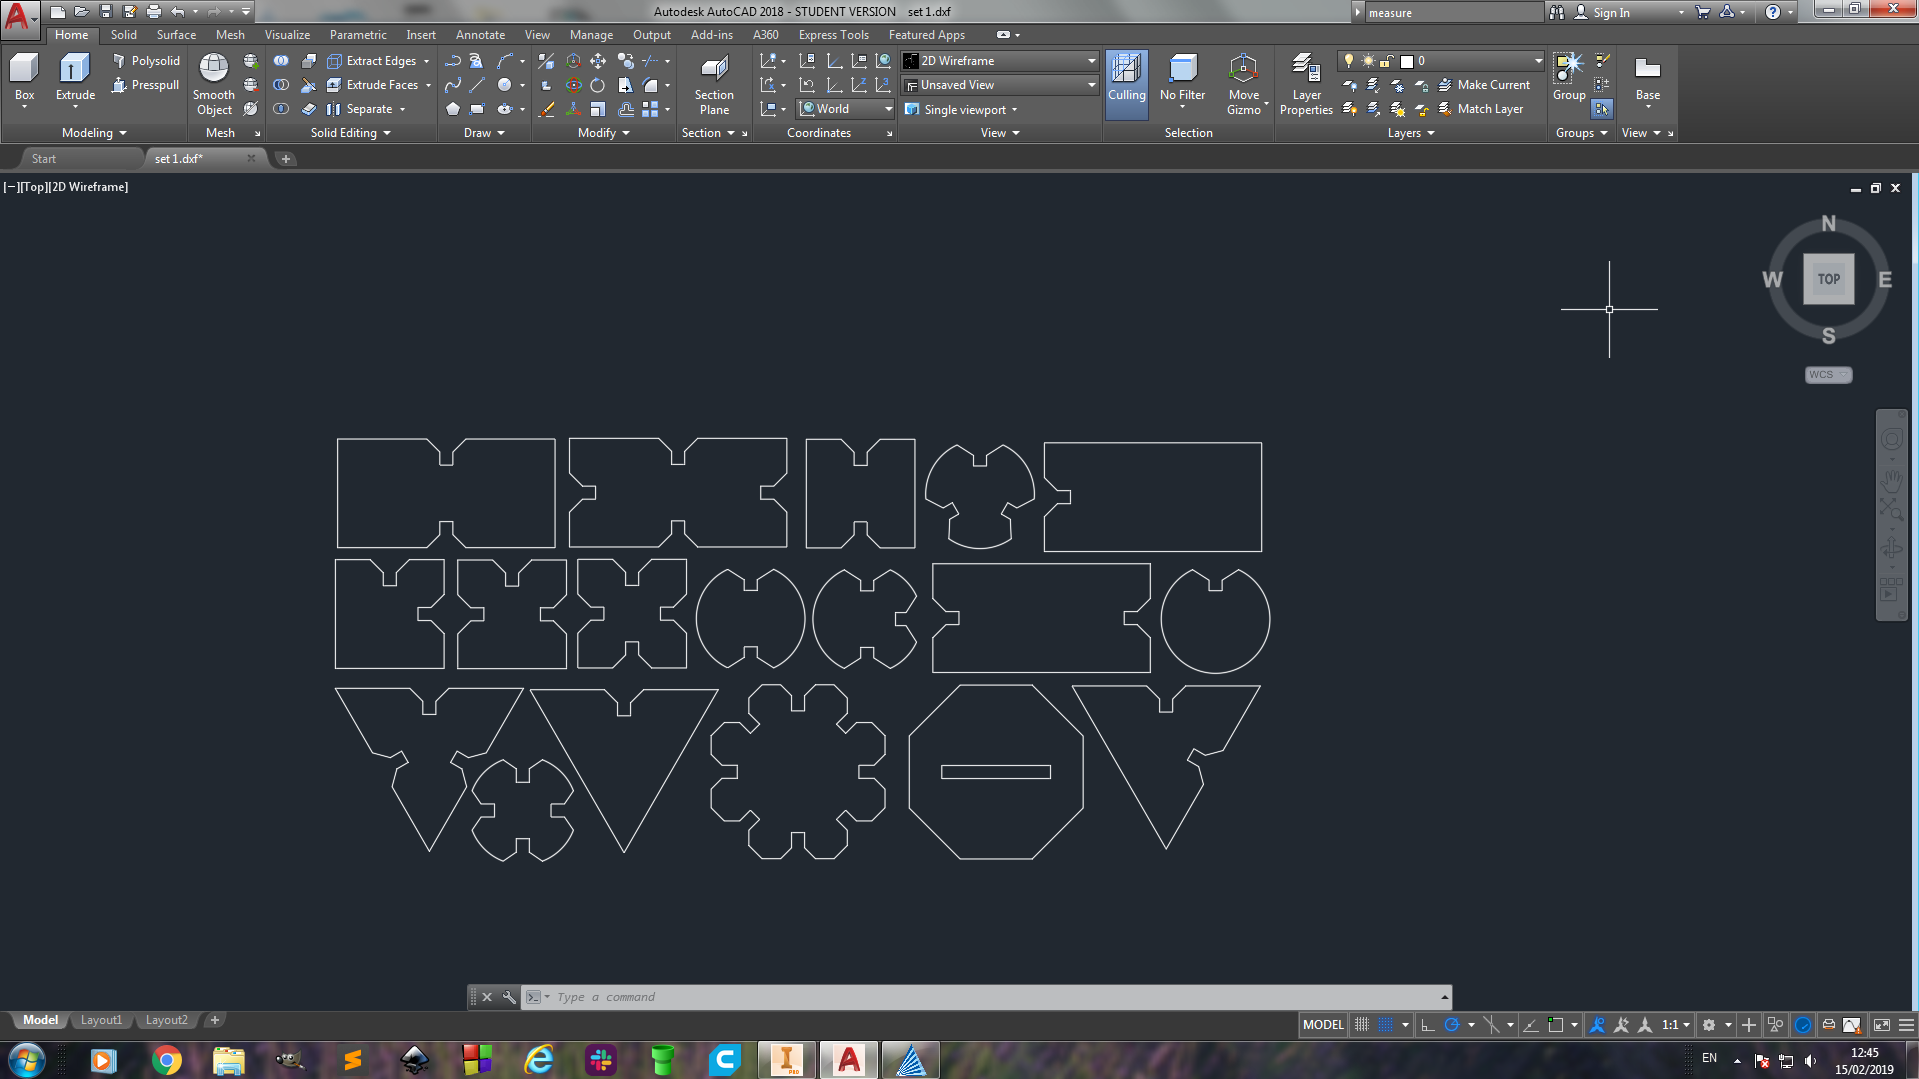
The files to be laser cut had to be organised to ensure optimum material usage as well as to ensure the laser head did not go out beyond the material datum. I thus did this on the Autodesk Inventor since I couldn't get many laser cutter softwares to work on Ubuntu LINUX, the set up was as shown below.
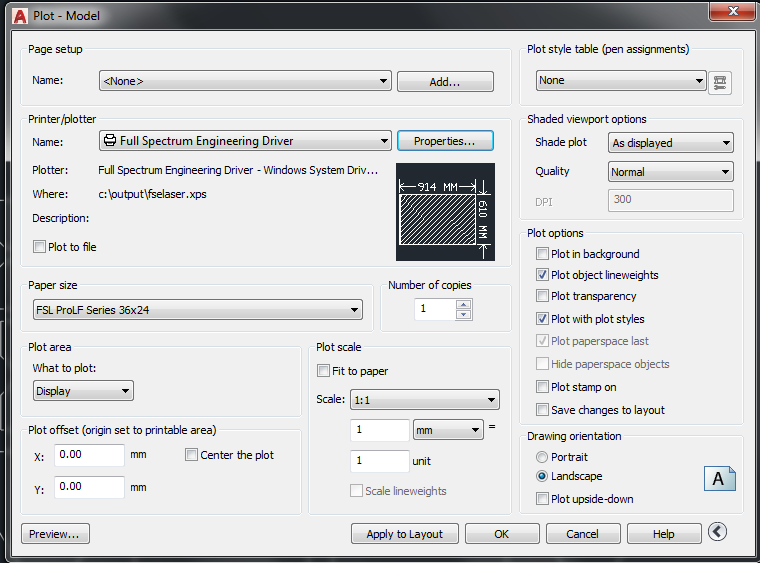
The plot model parameters were set as below:
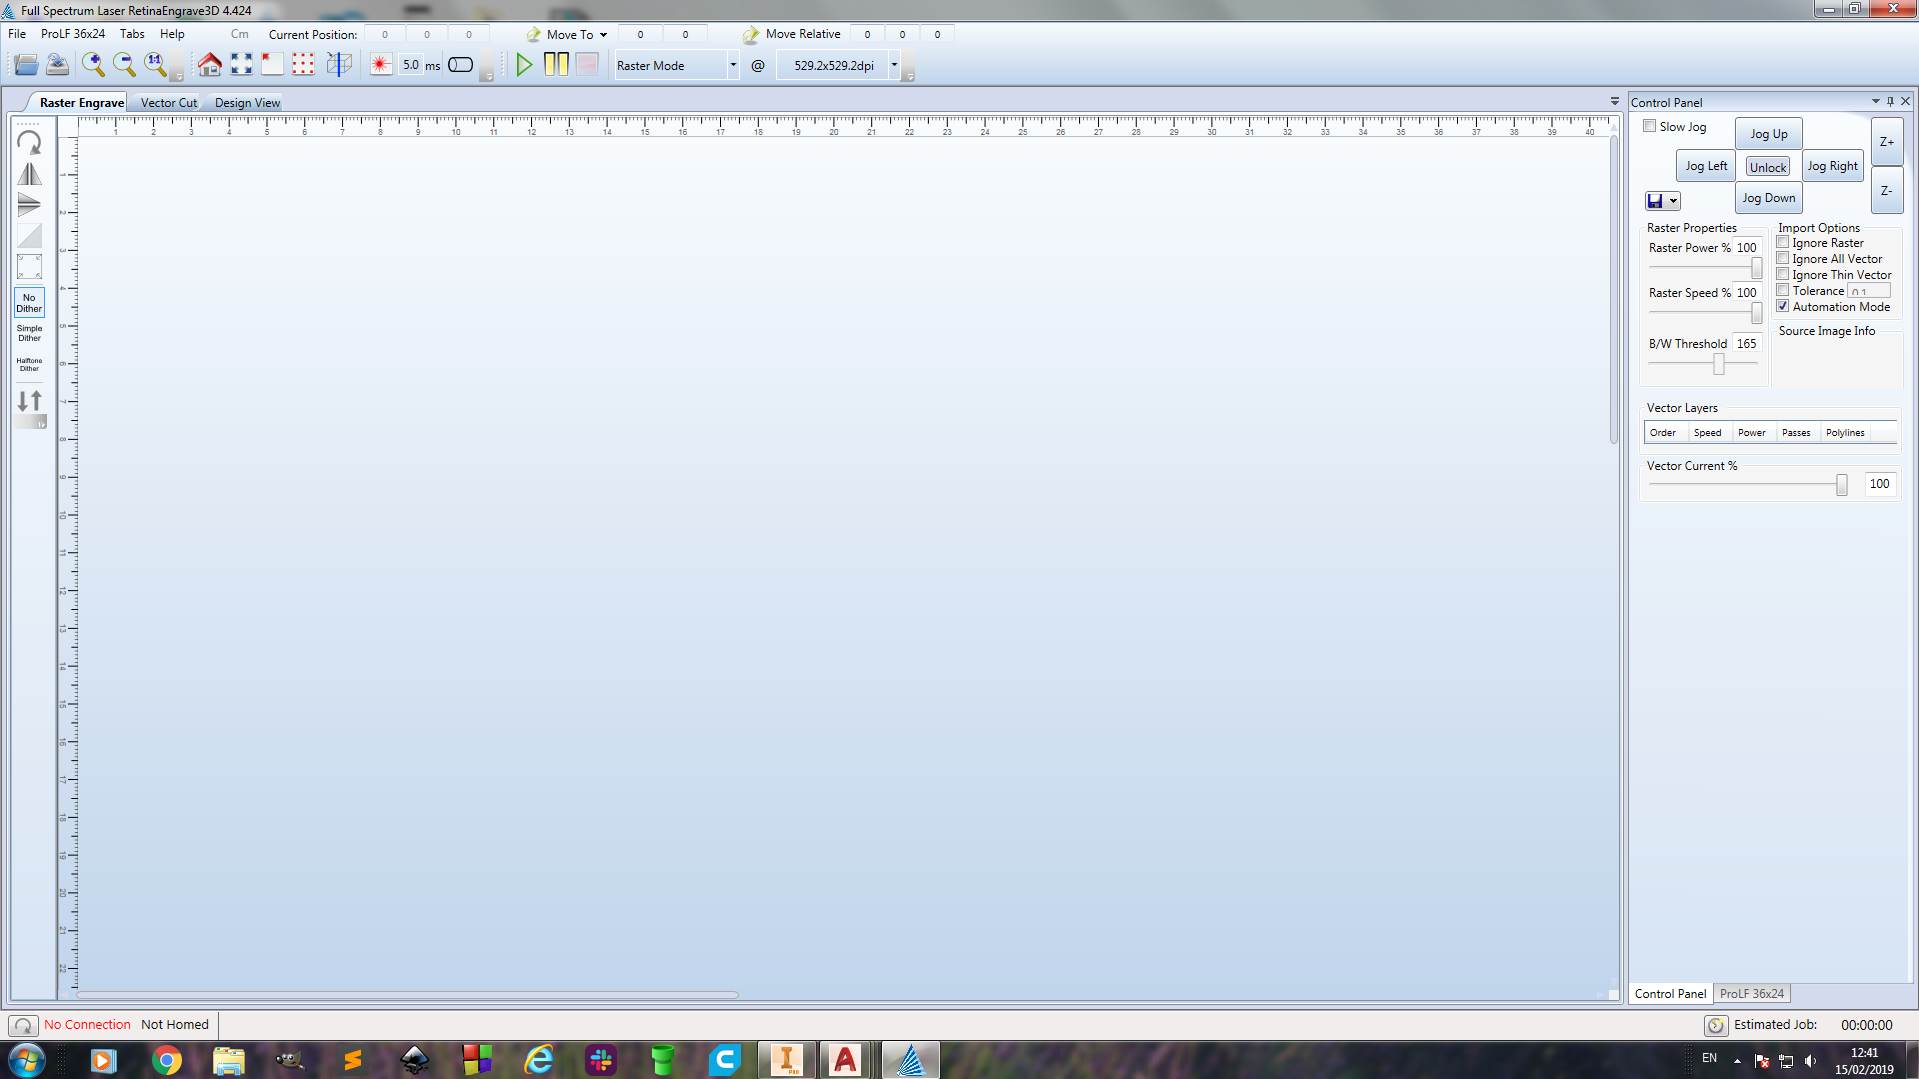
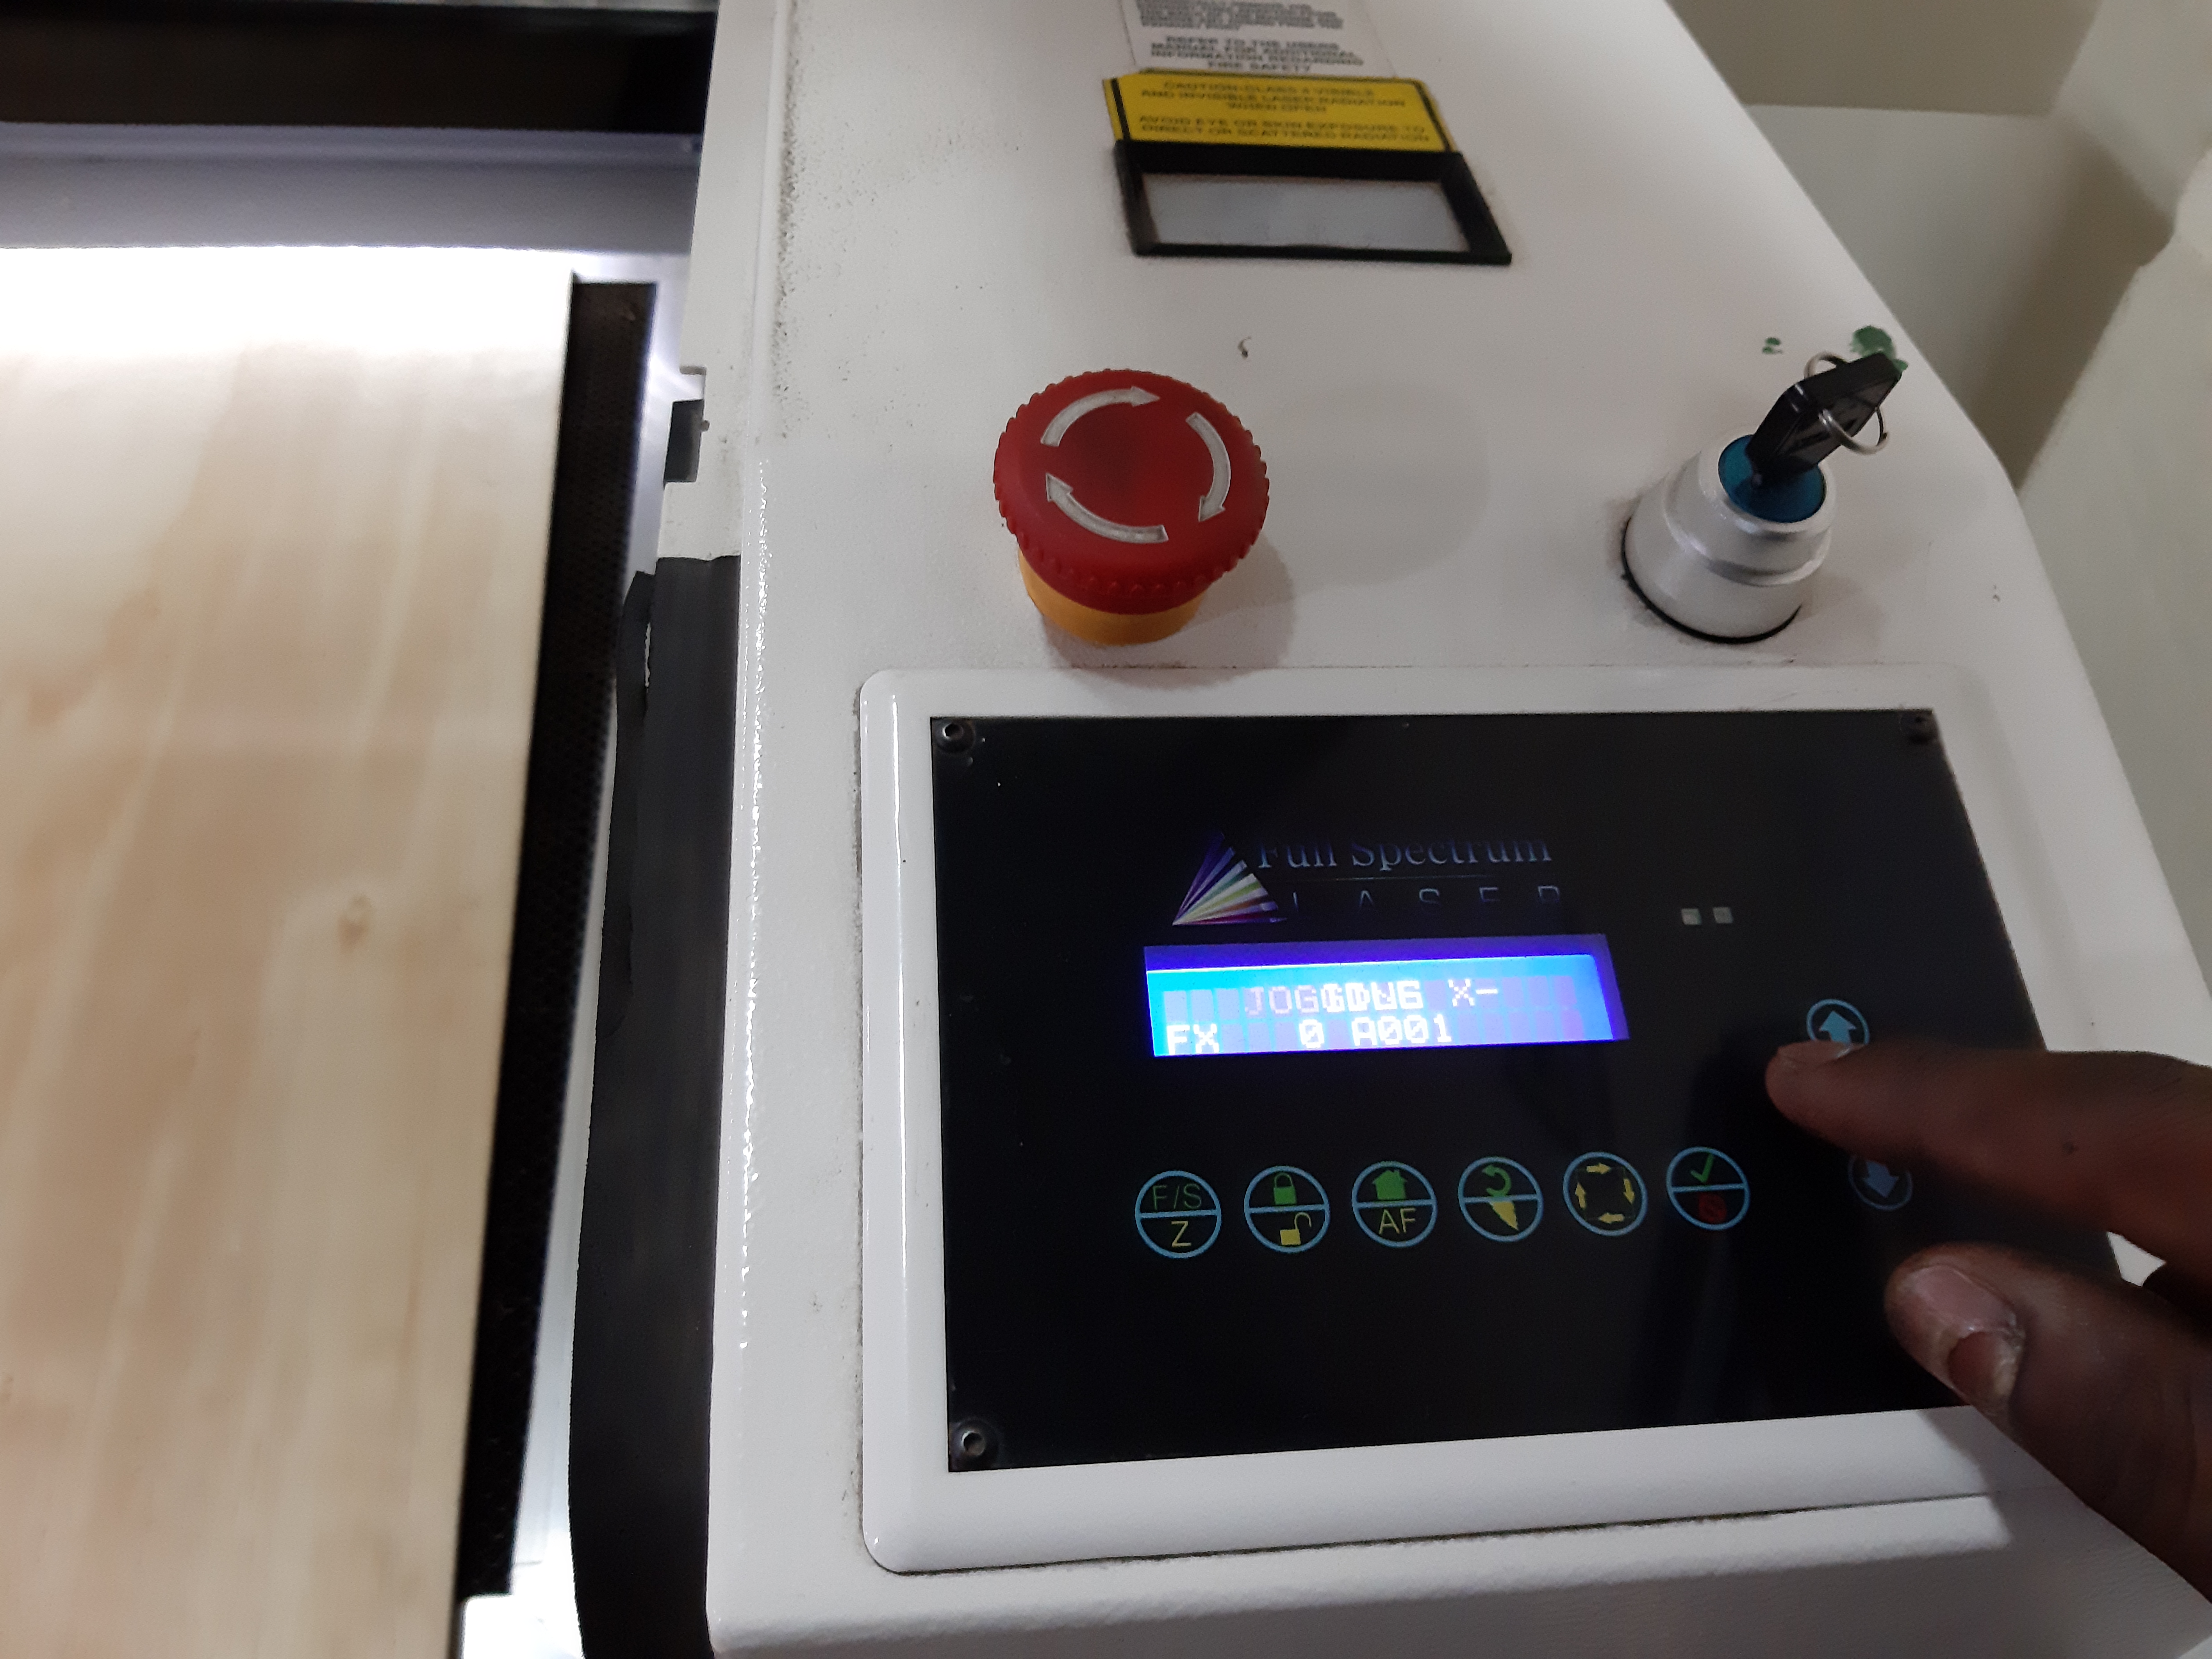
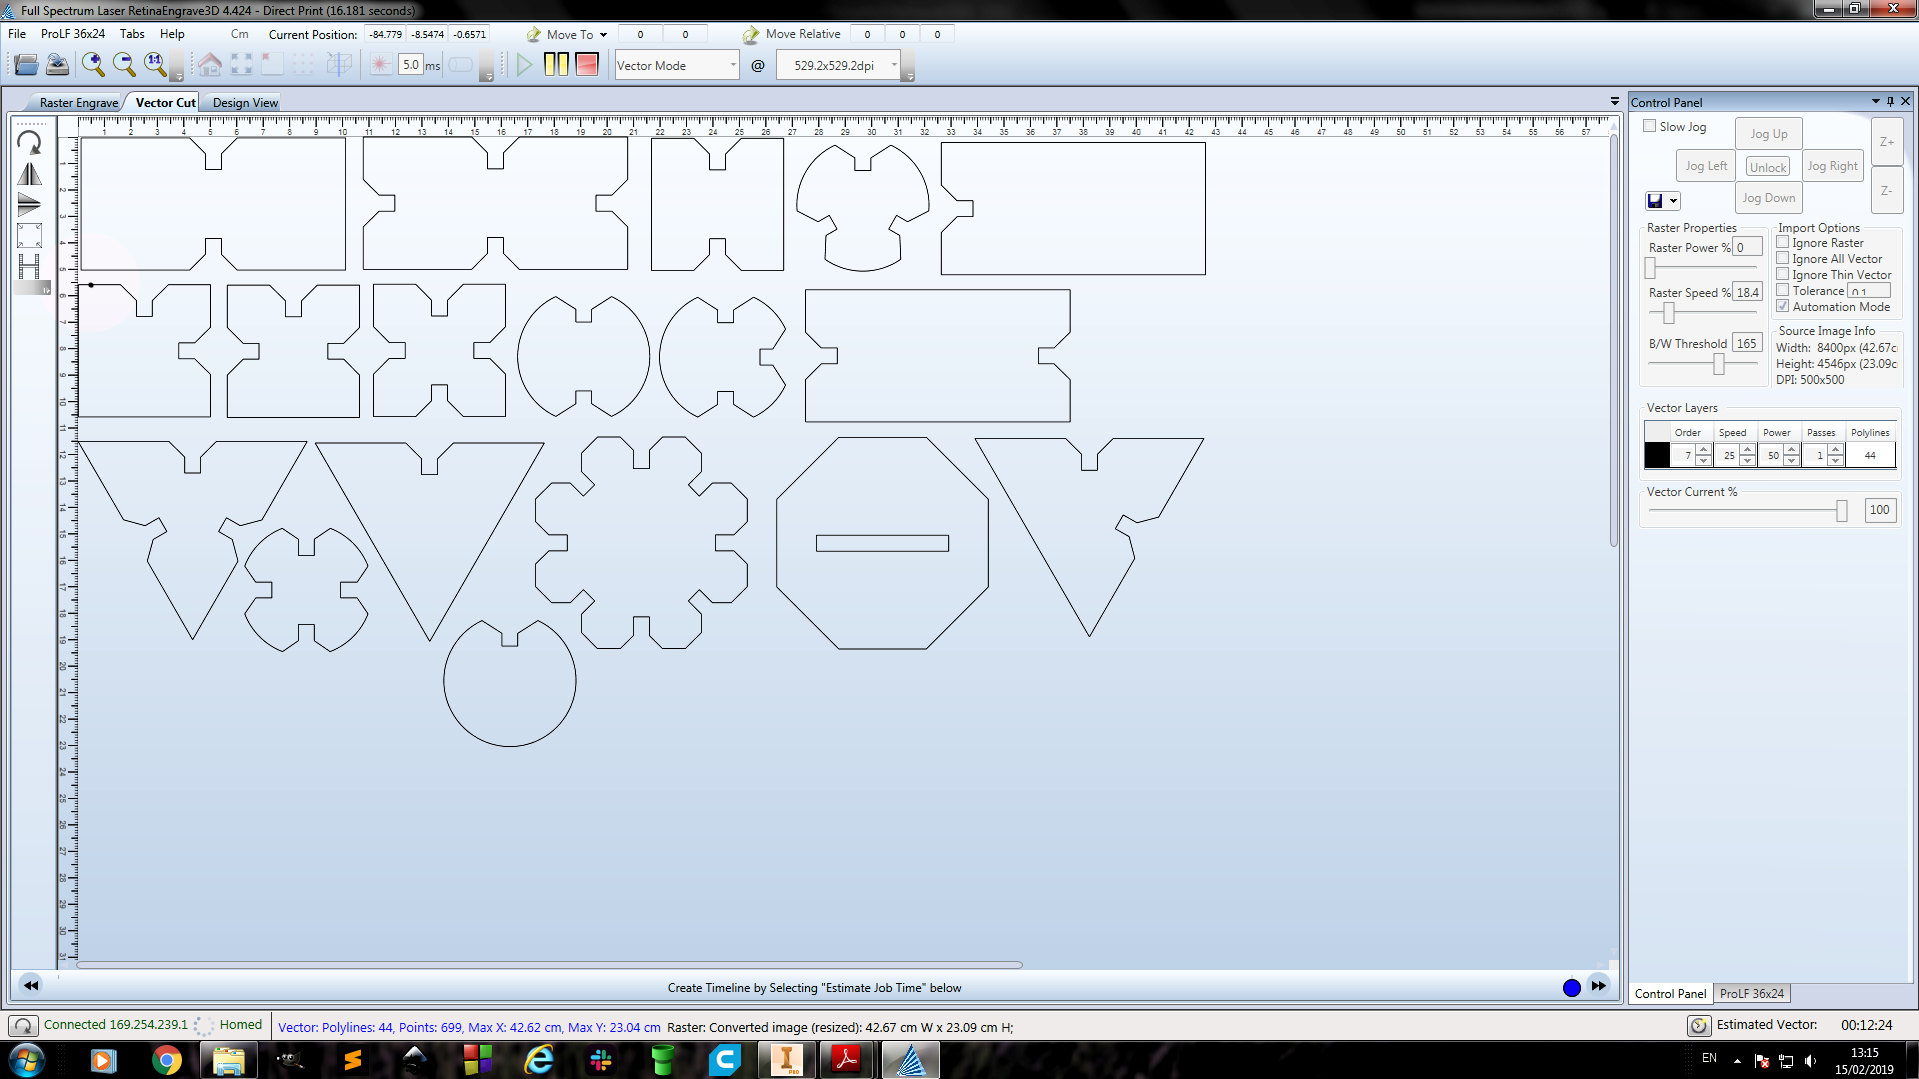
After preparing the print layouts, I then switched to Full Spectrum Laser RetinaEngrave 3D cutter software software which is what the laser cutter would directly get commands from.
Exporting the files from Autodesk Inventor:
The full spectrum control software parameters were set as below:
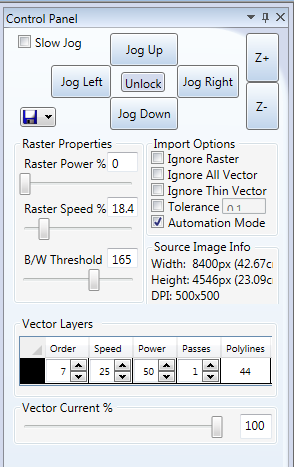
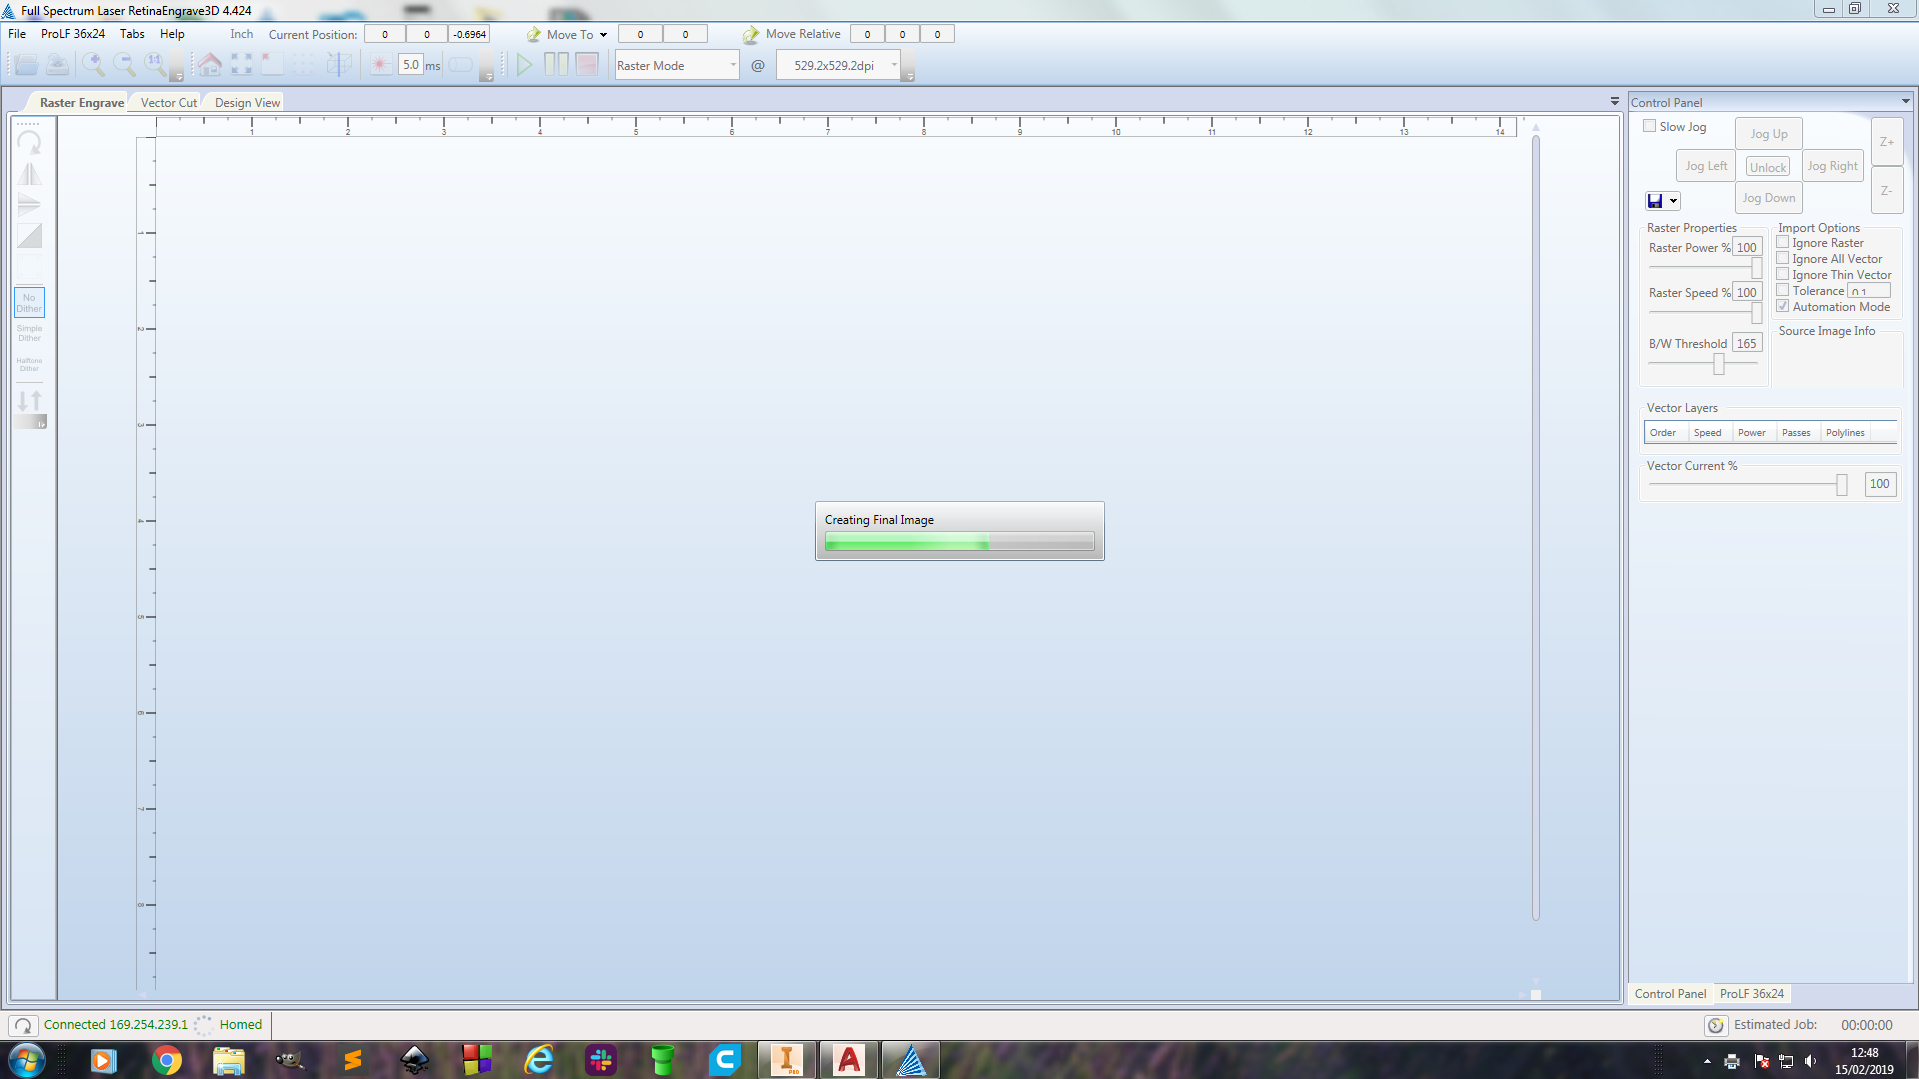
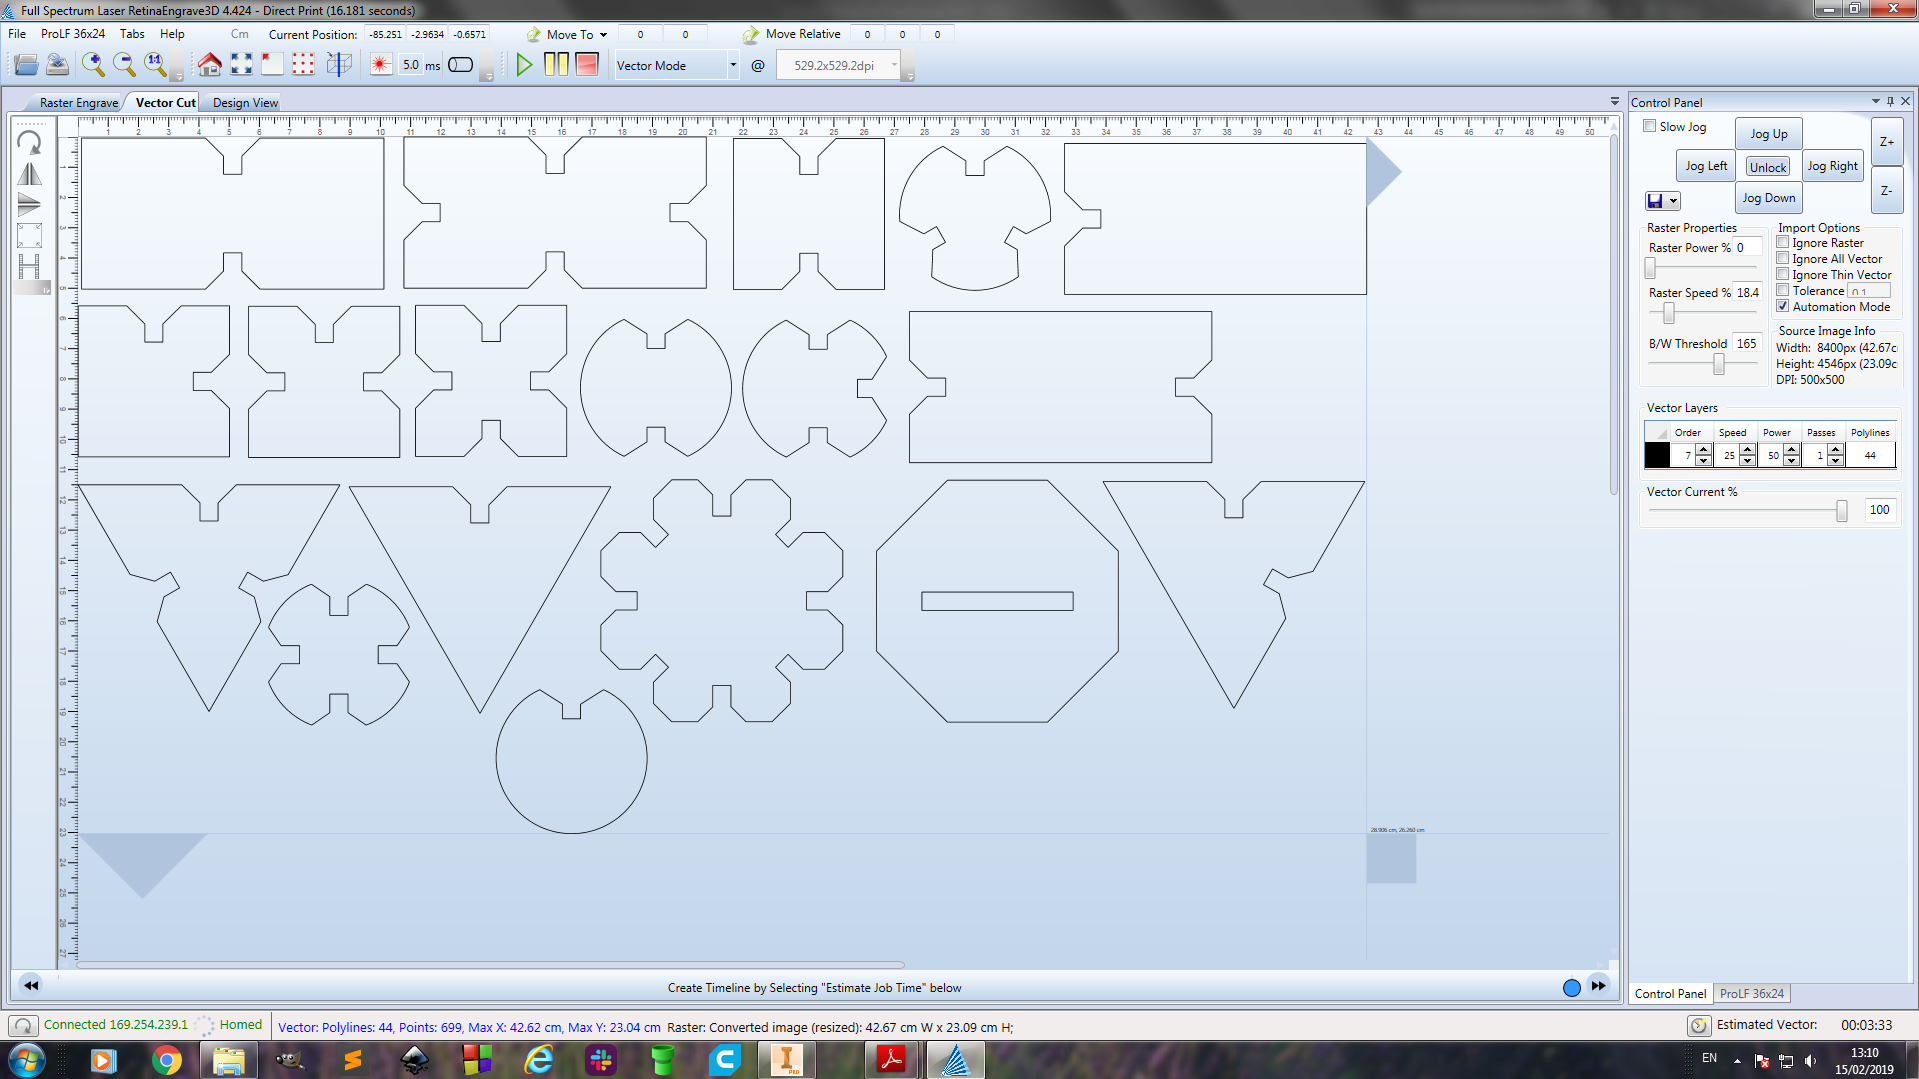
The press-fit file outlines on the full spectrum softwares:
The kerf for this machine was at 0.1mm which served in as just the right allownace I would need for my grove clearance.
Setting up the laser cutter with the workpiece.

Cutting:
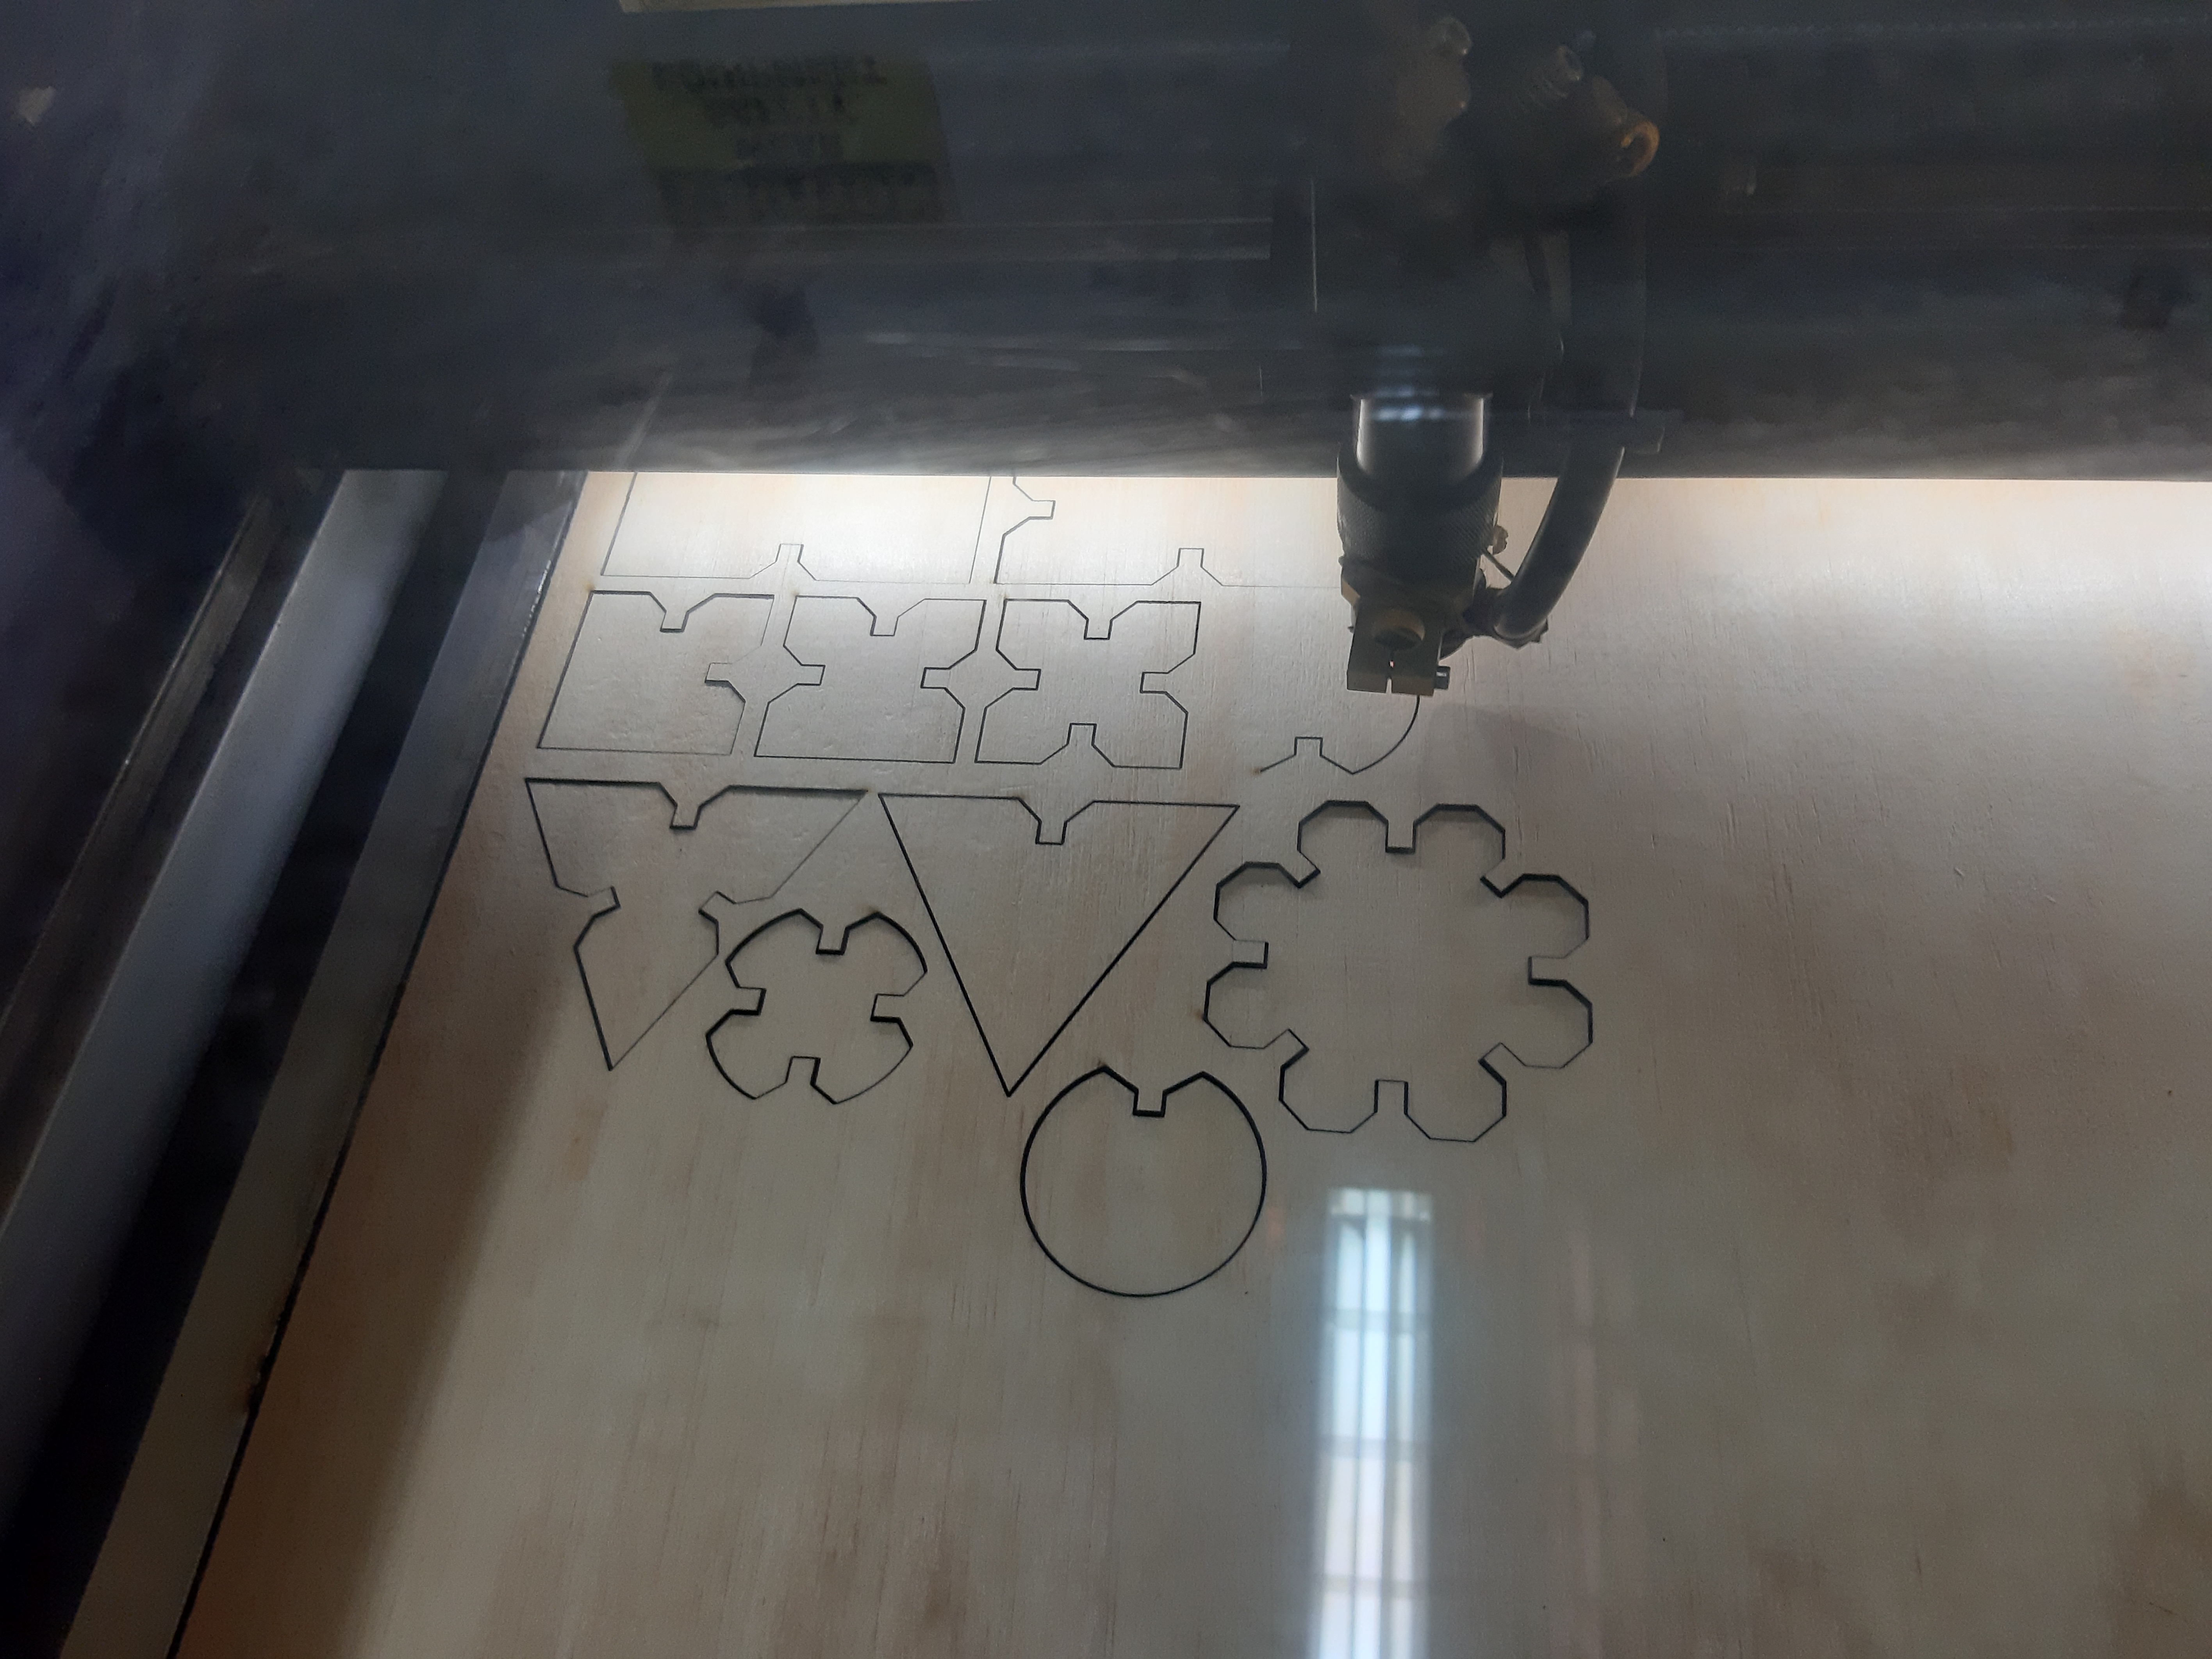
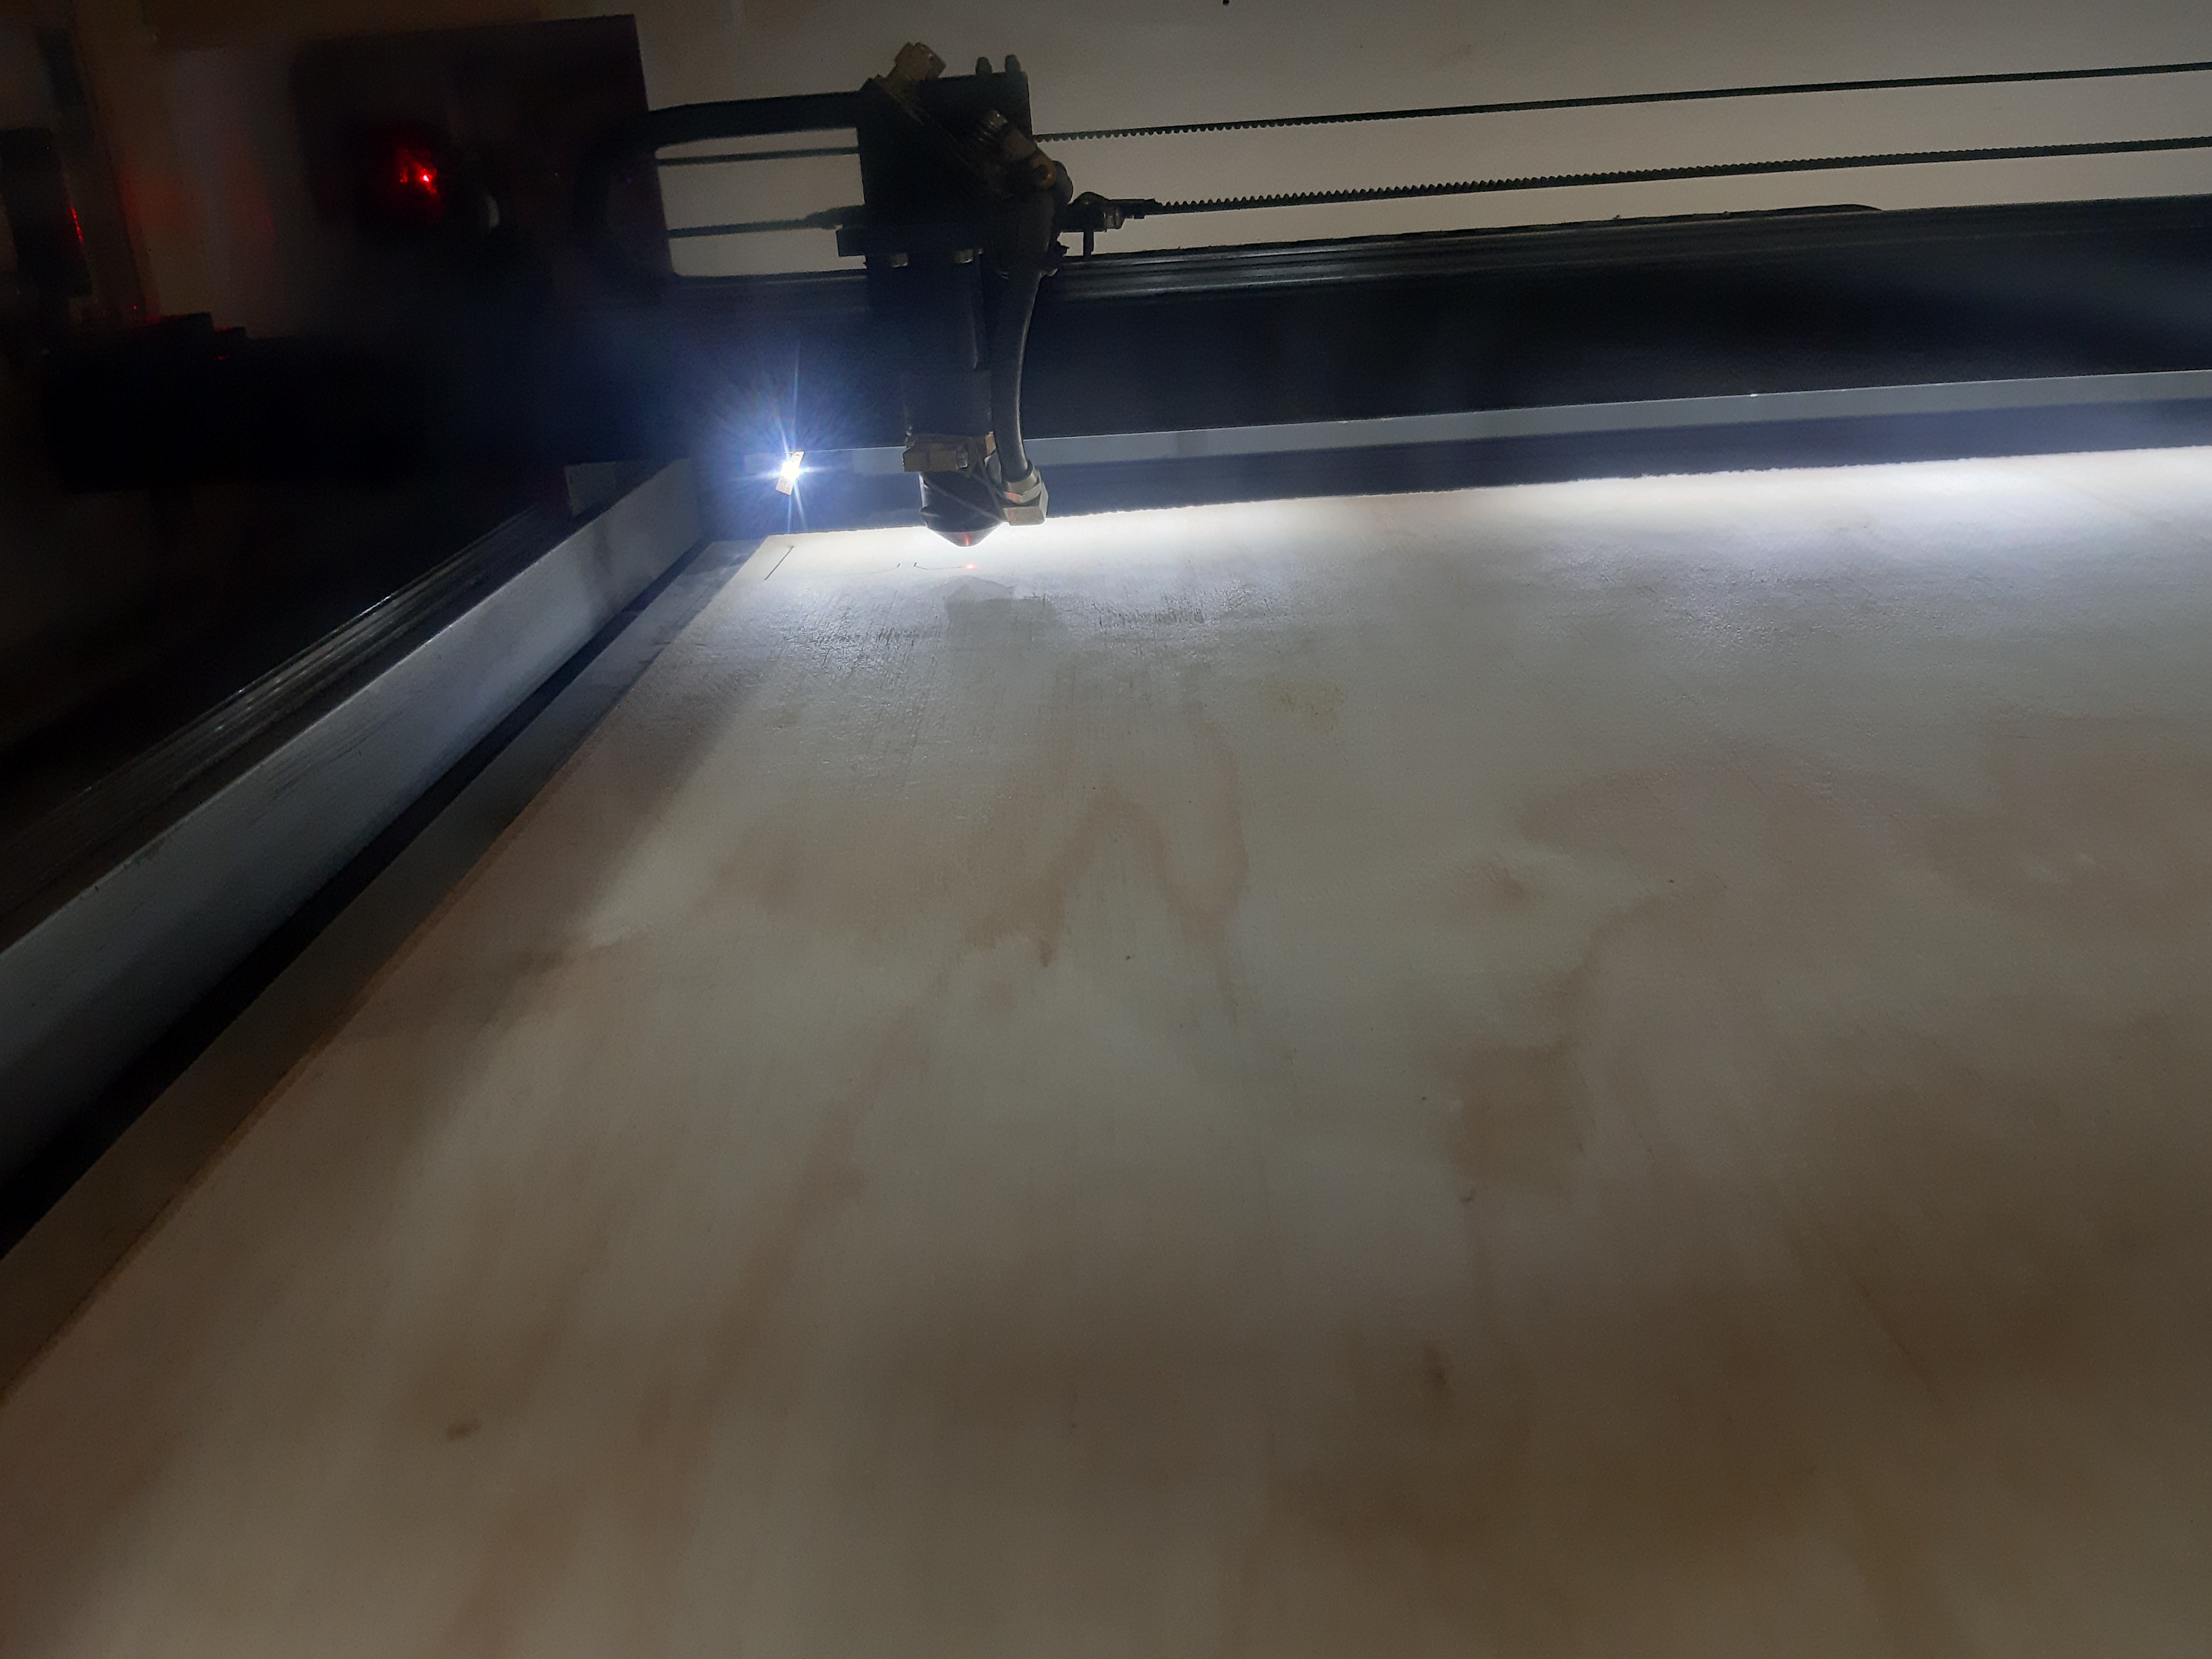
The Full Spectrum Laser RetinaEngrave 3D cutter software shows with aid of a red dot the progress of the cutter.
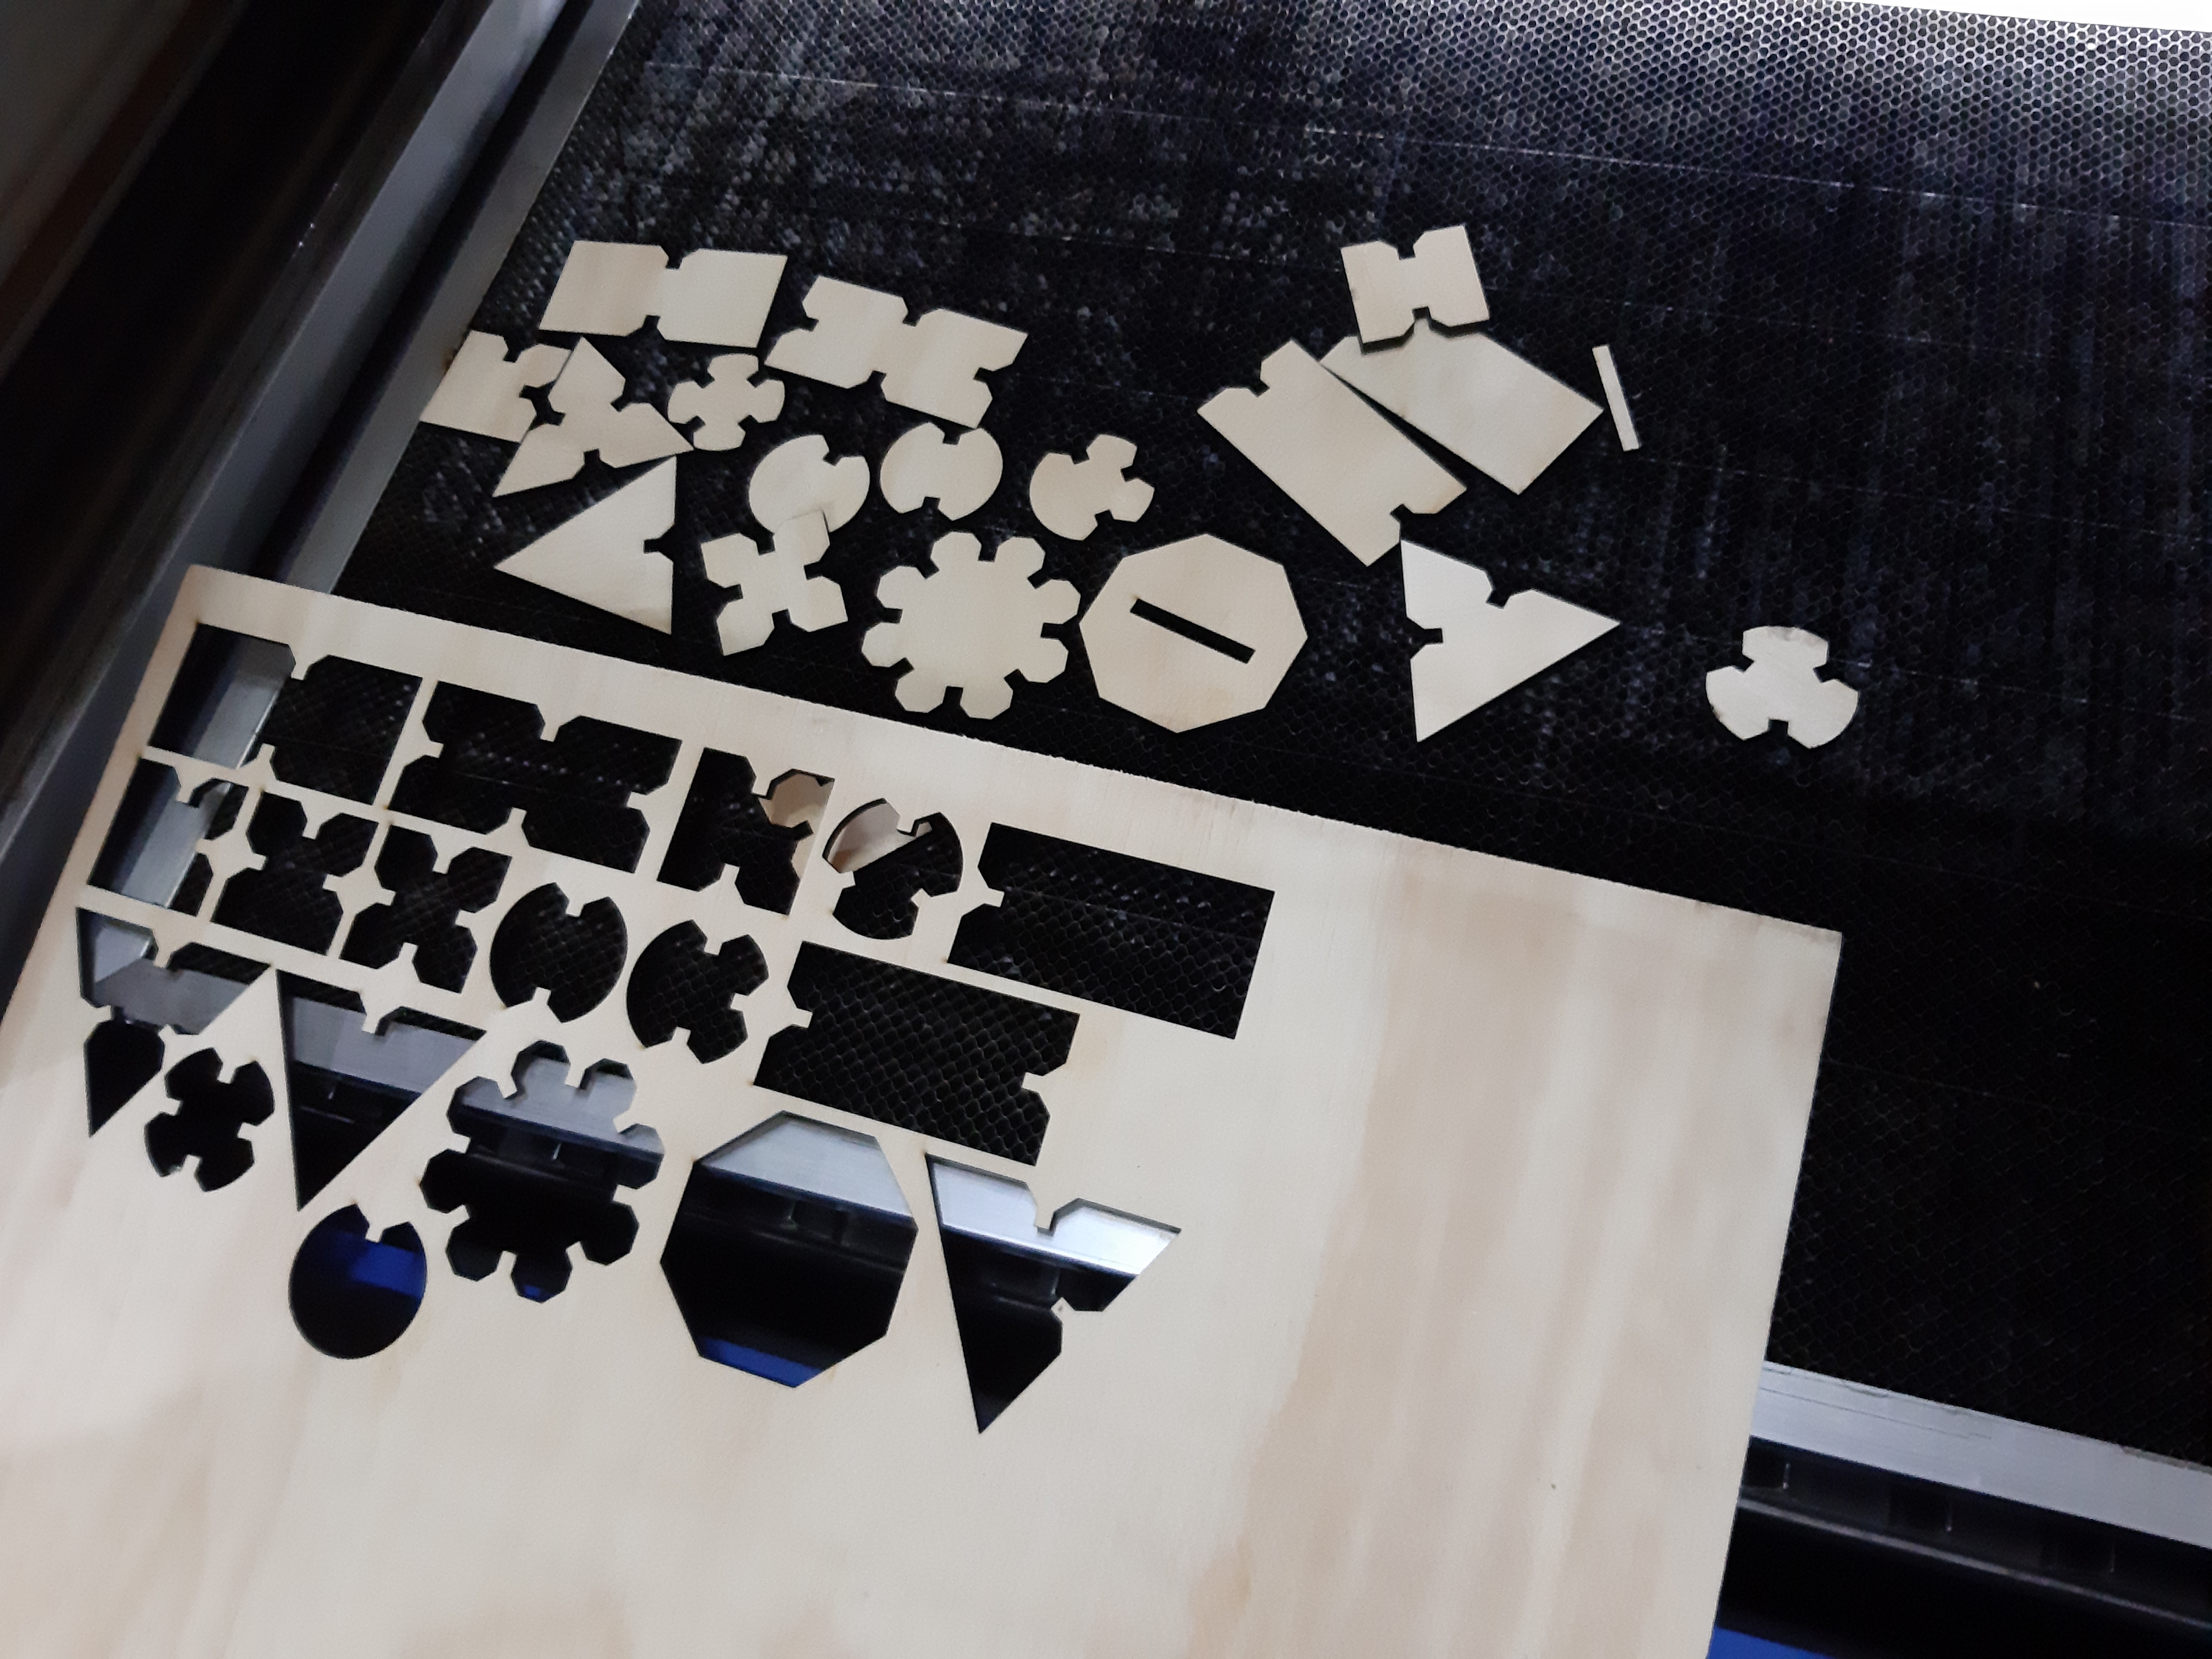
The cut out material that remained.
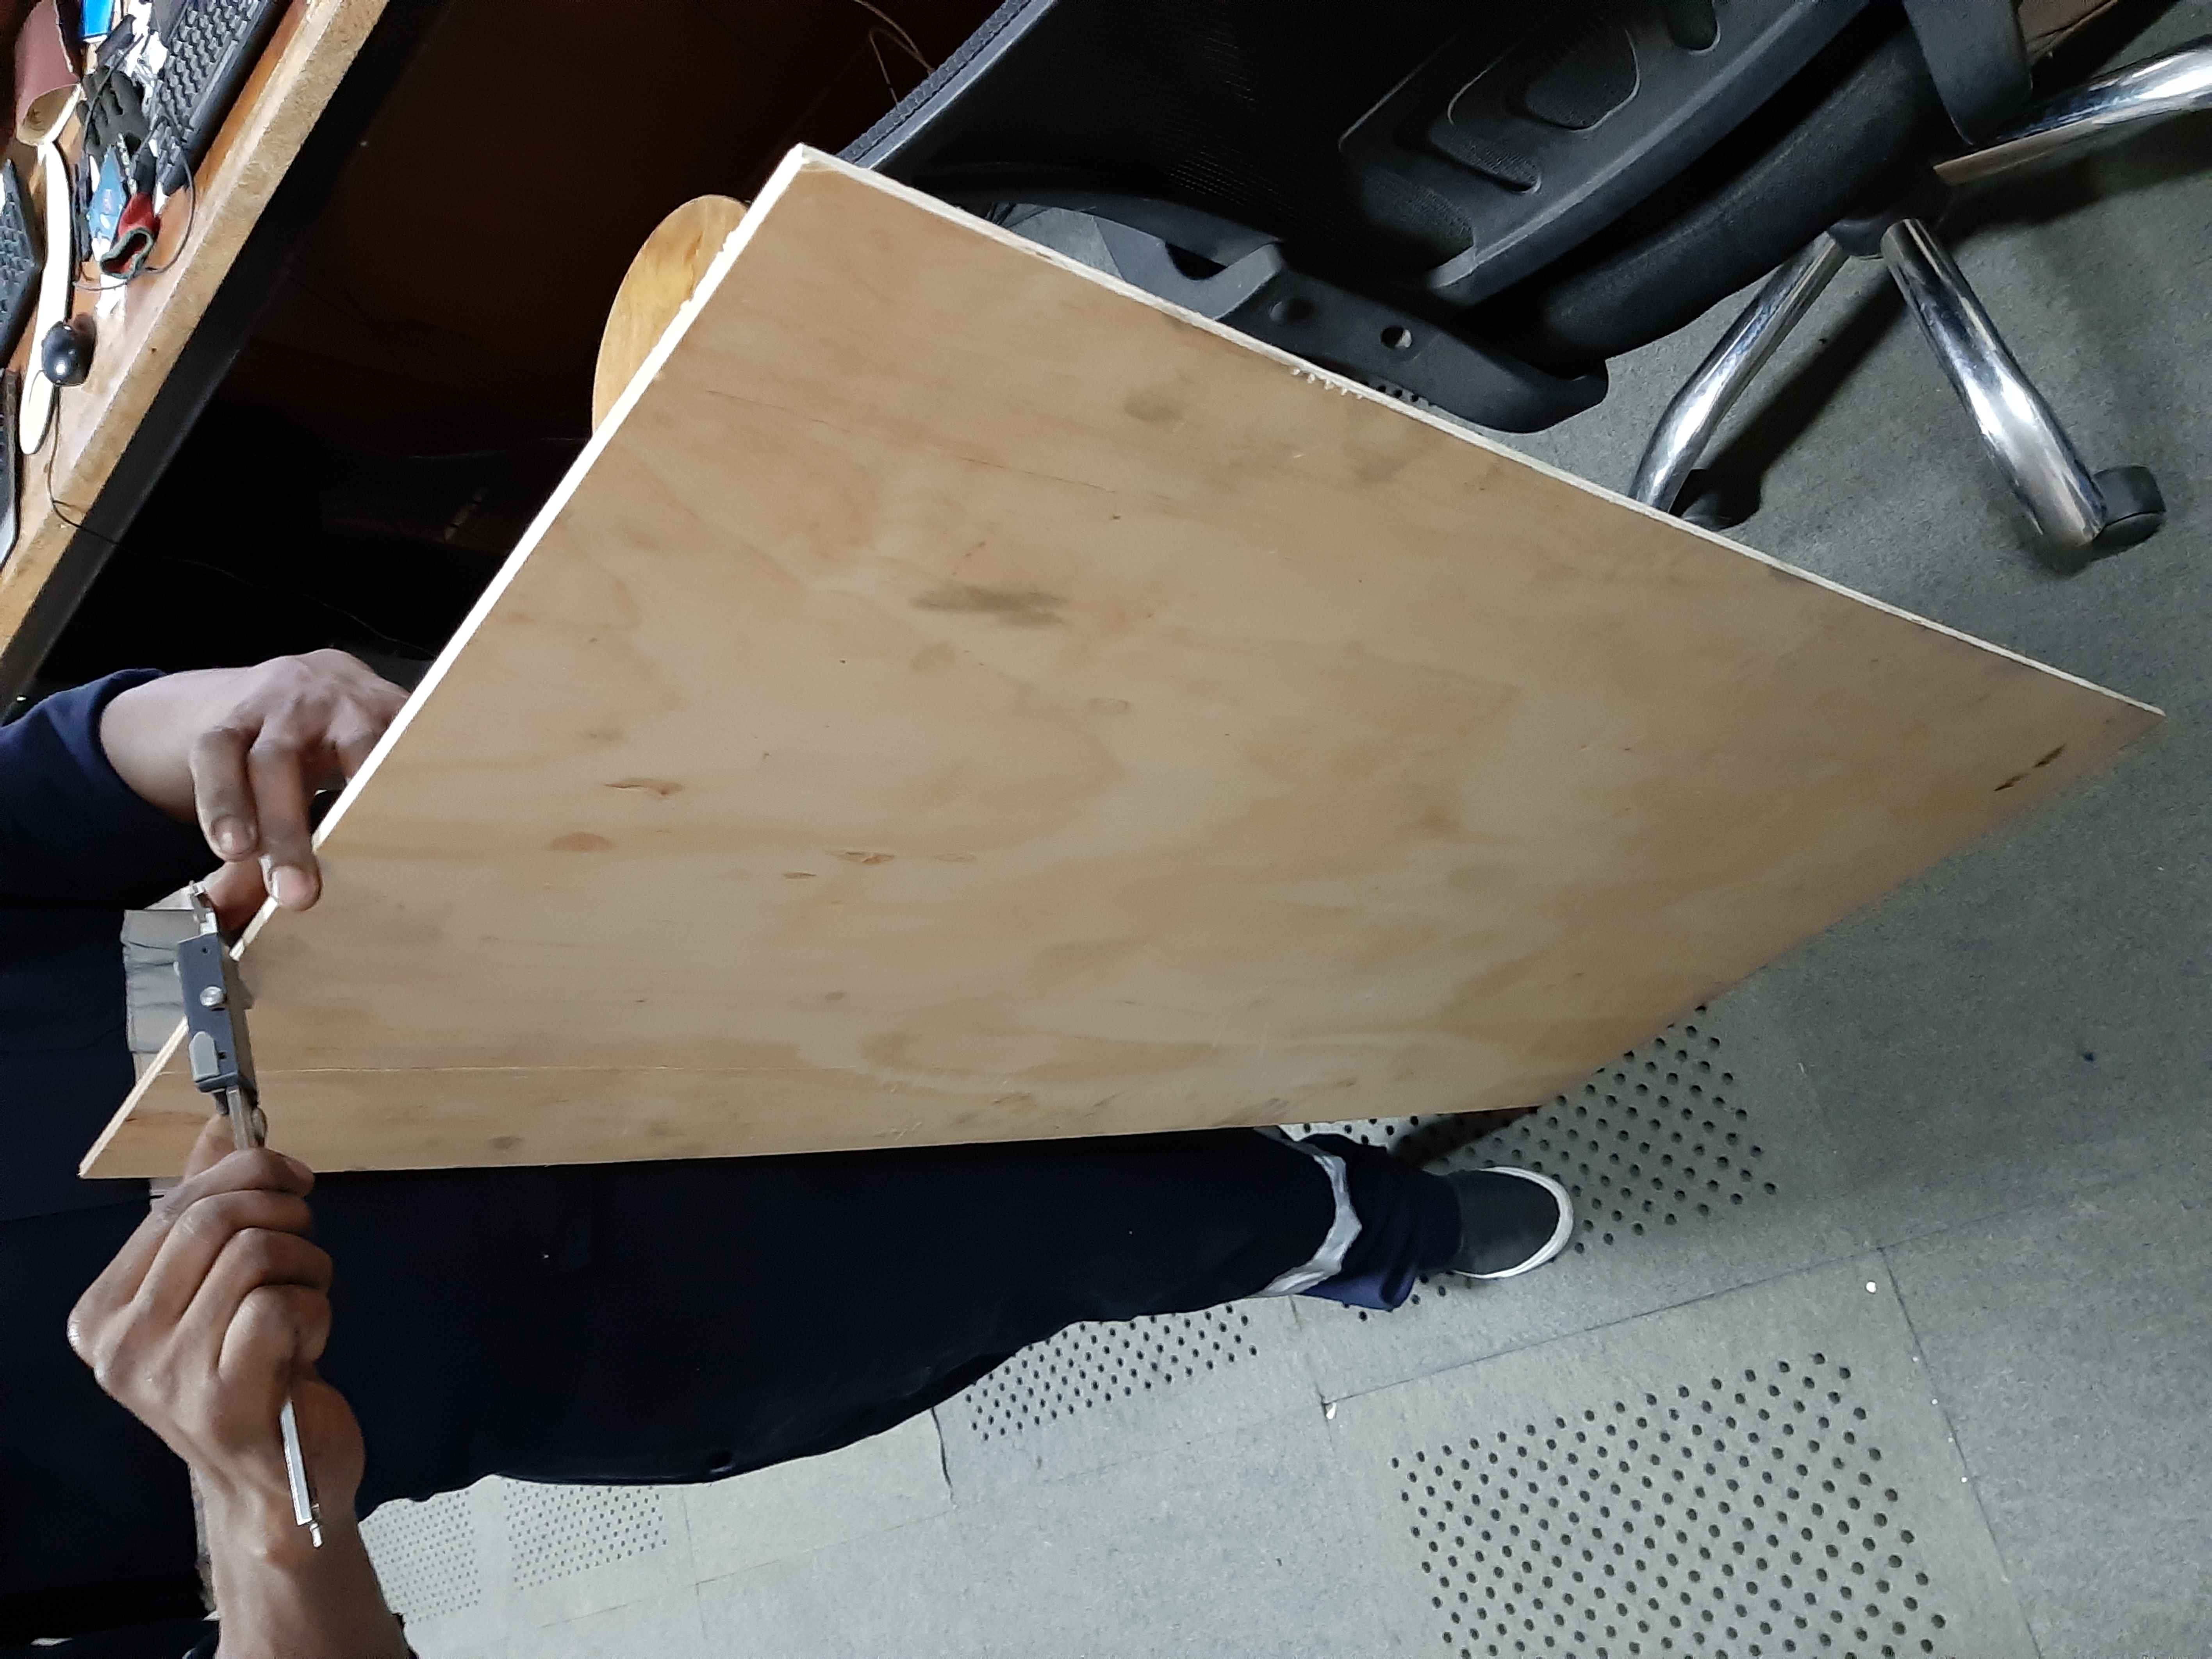
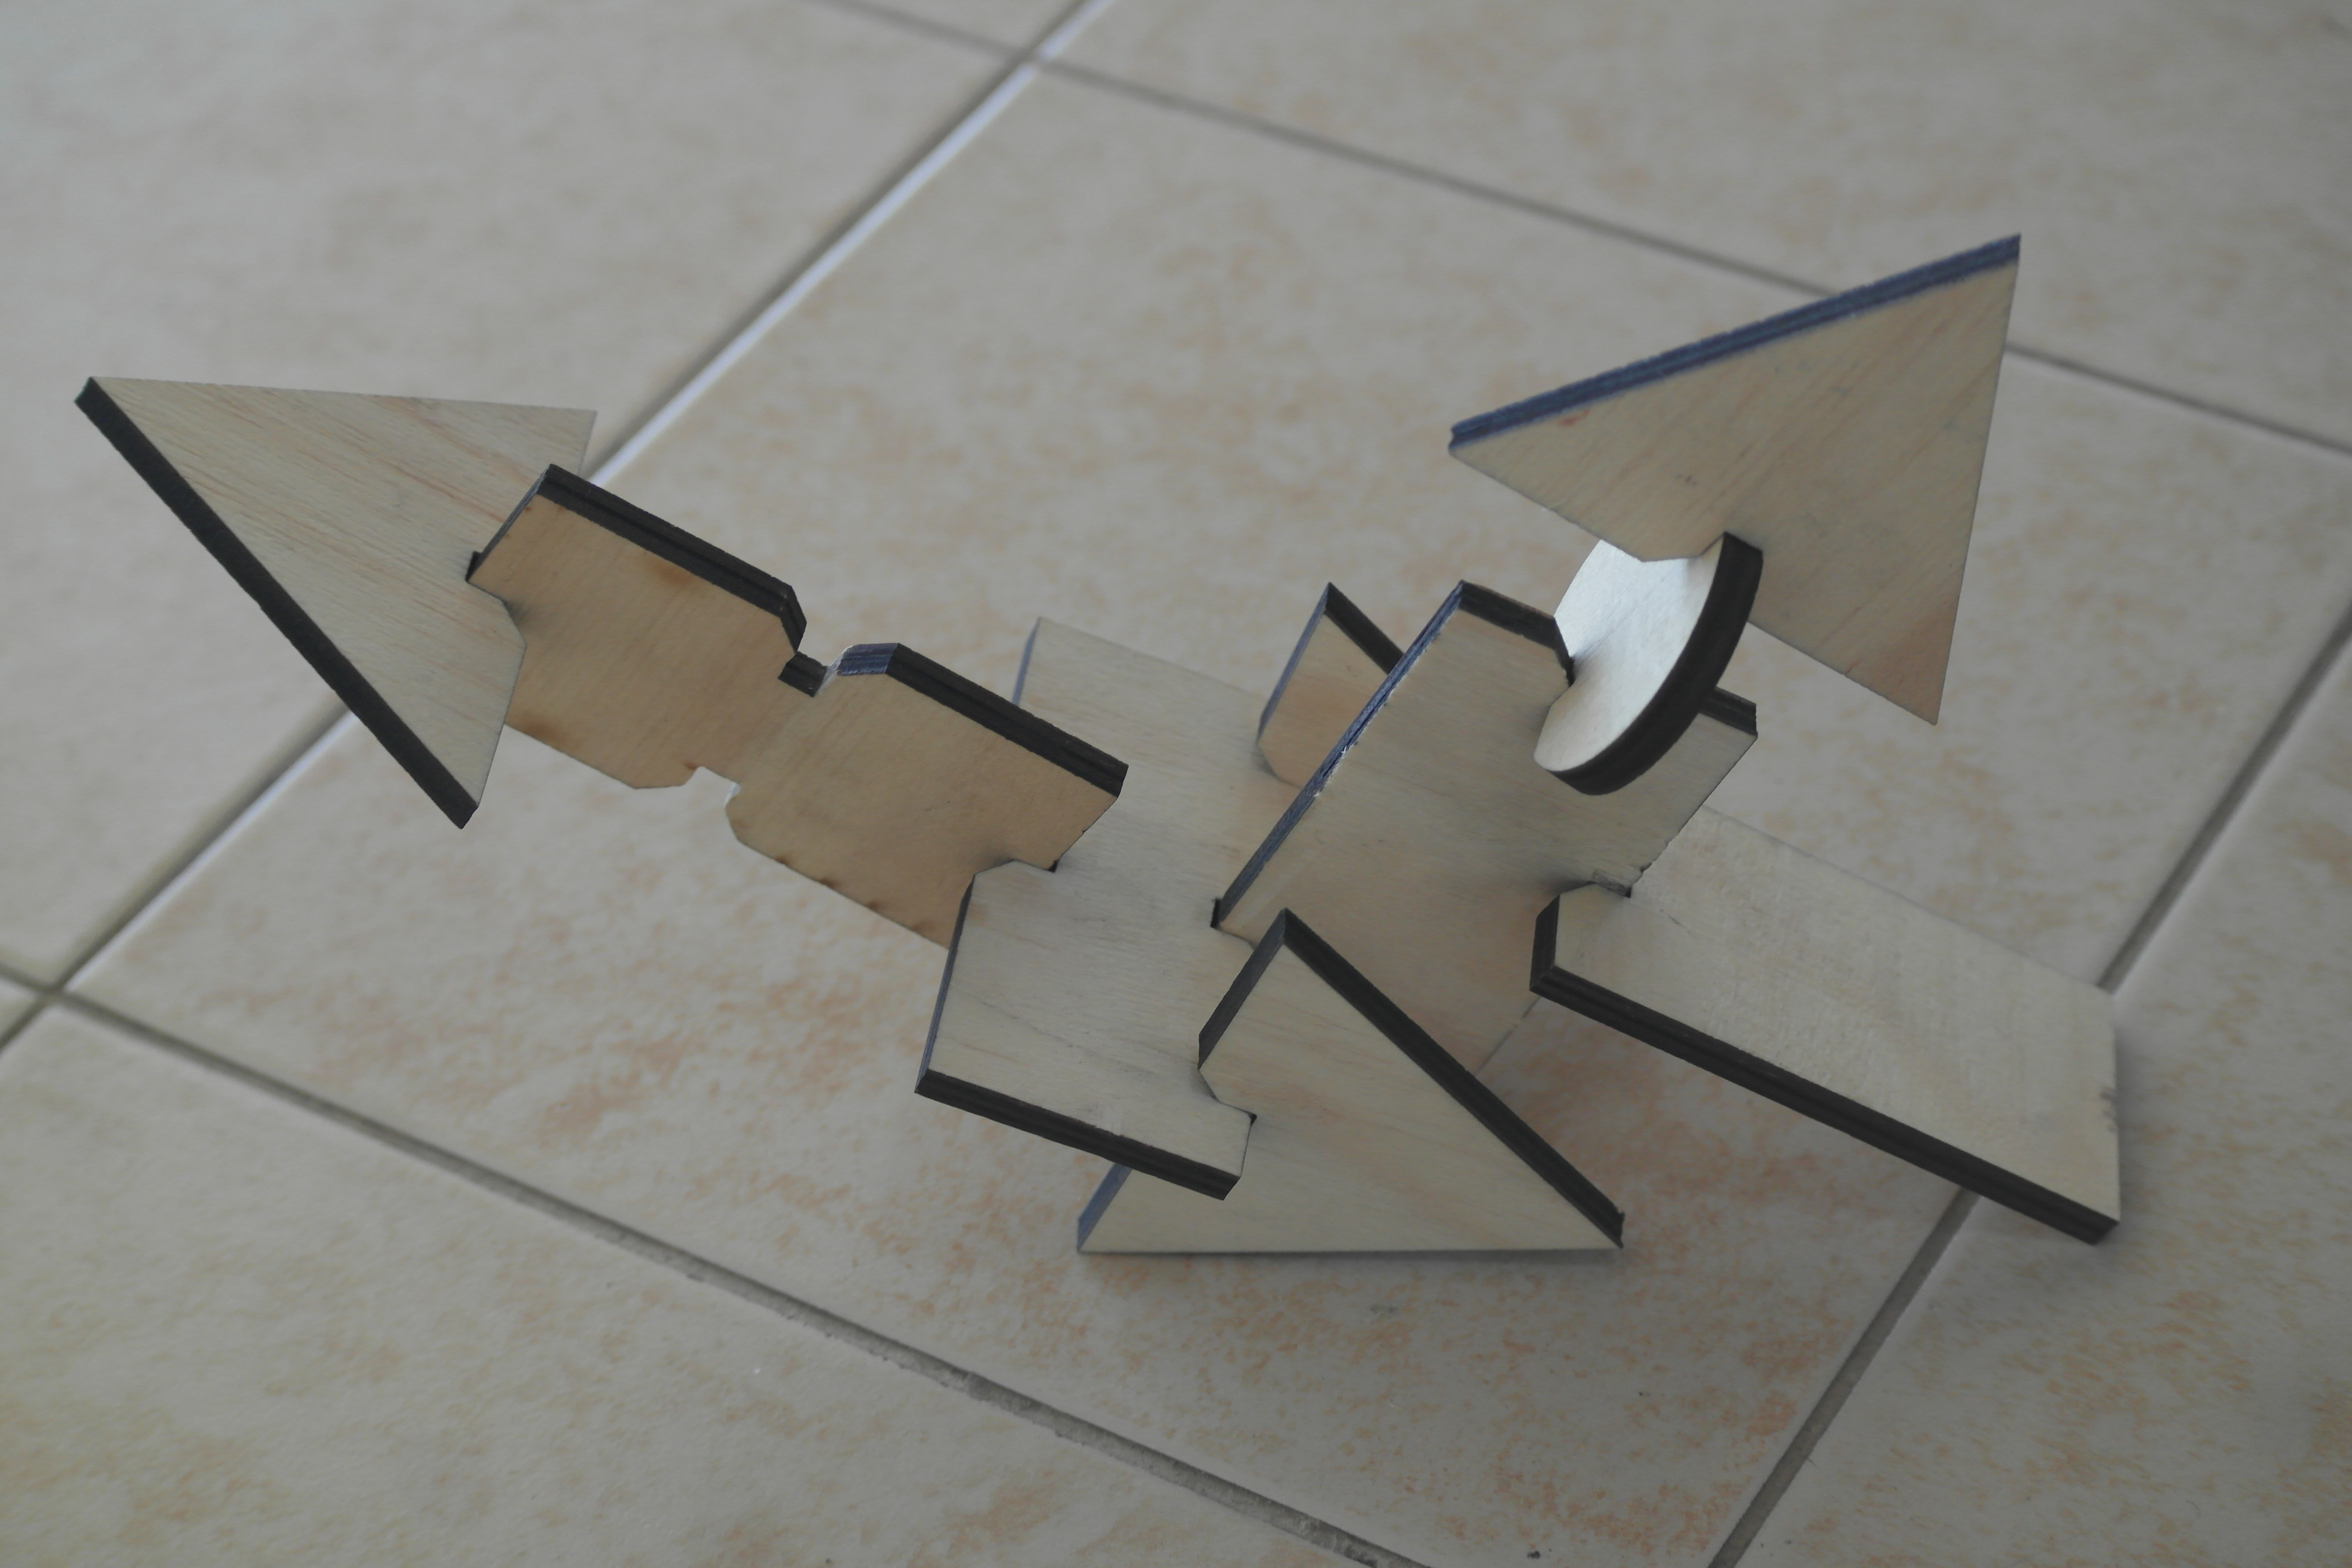
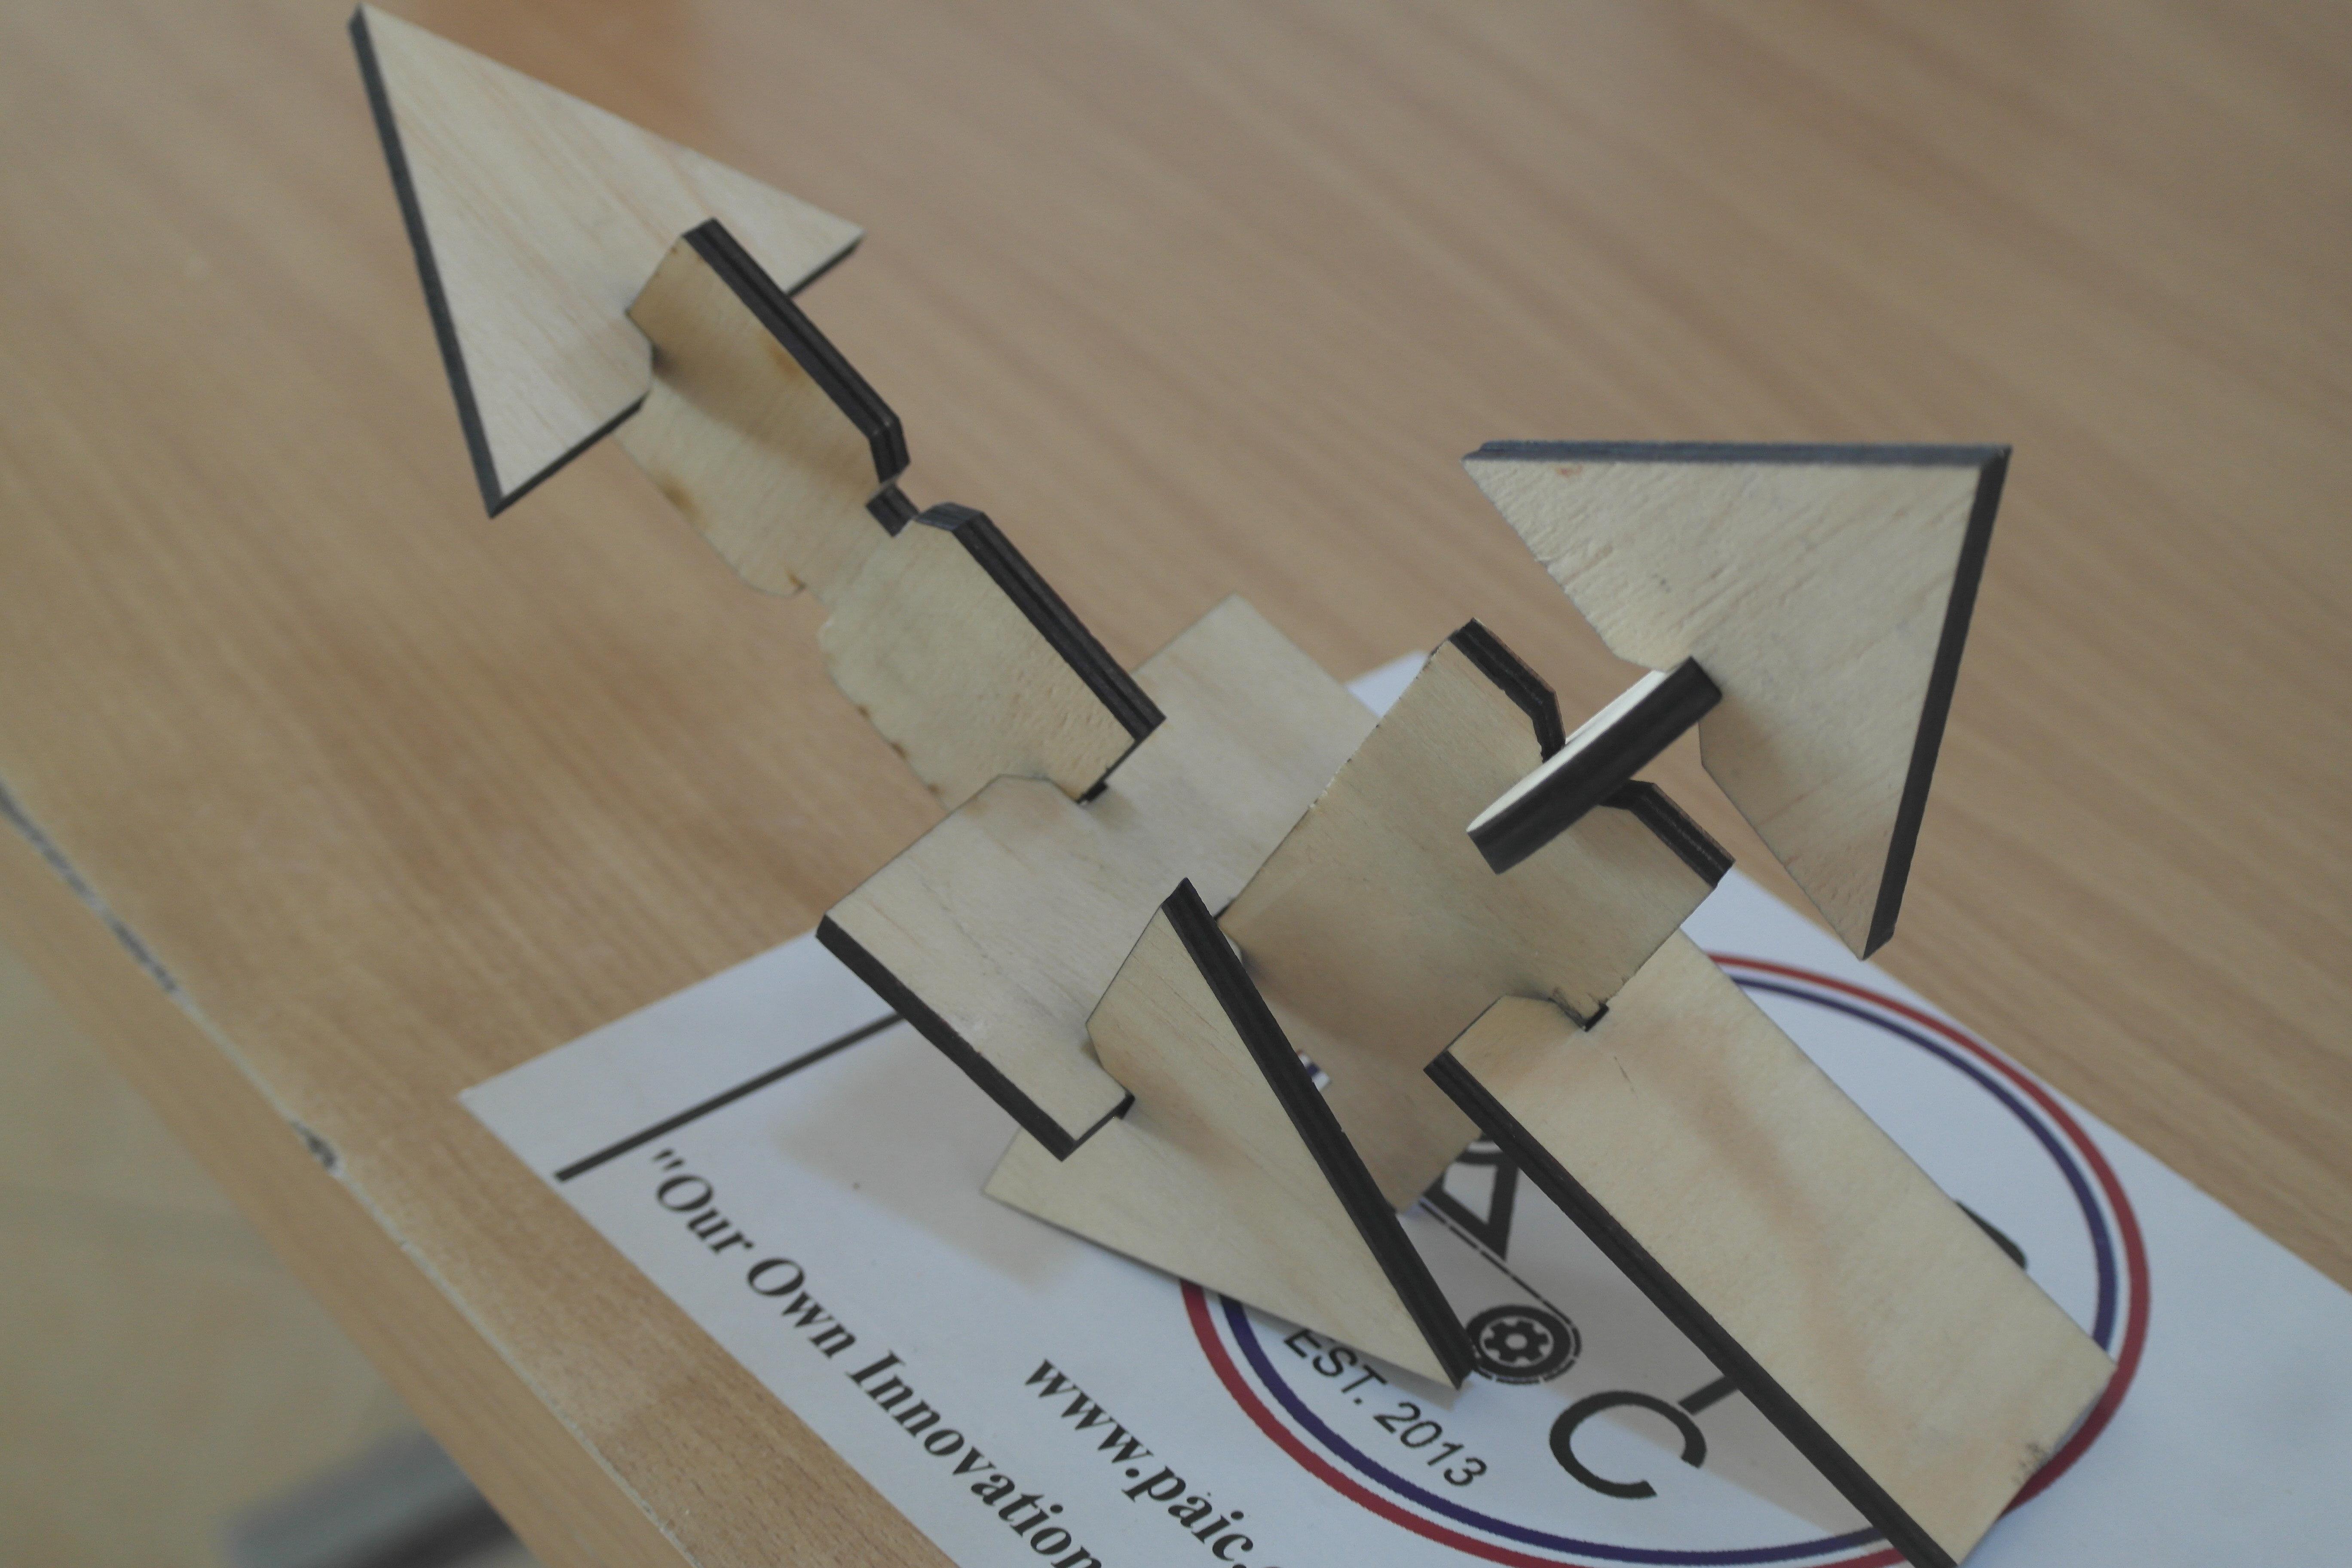
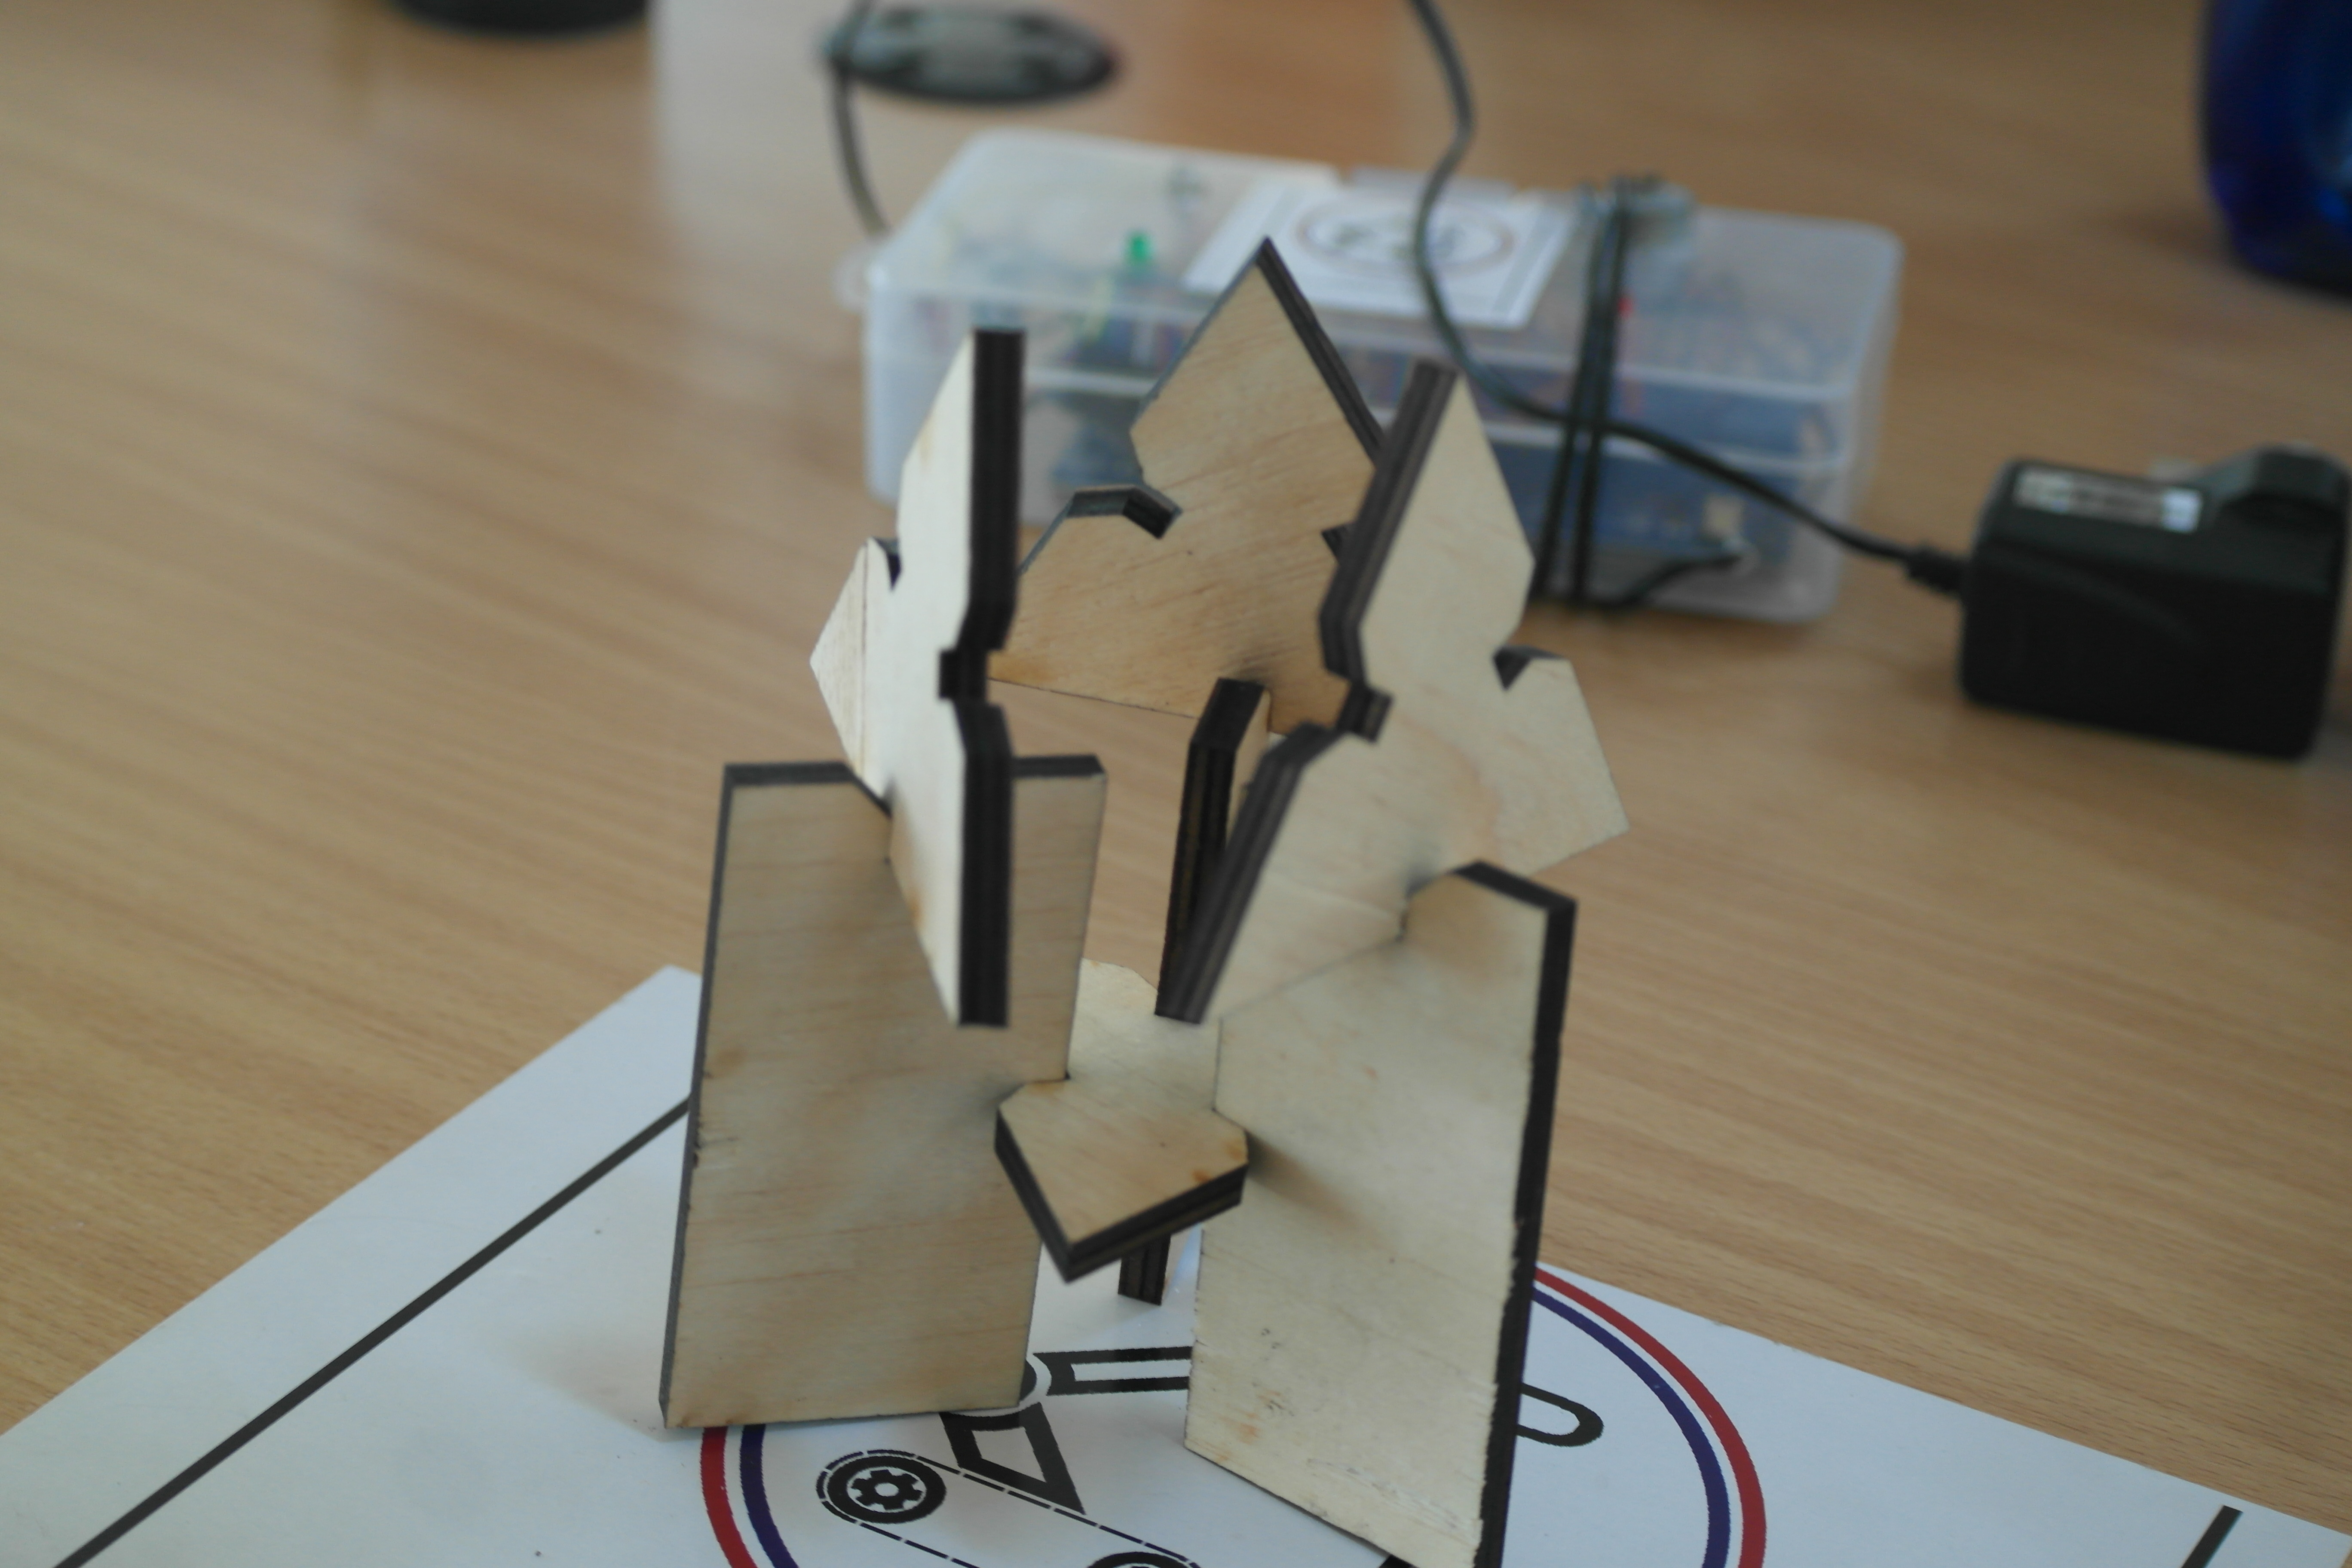
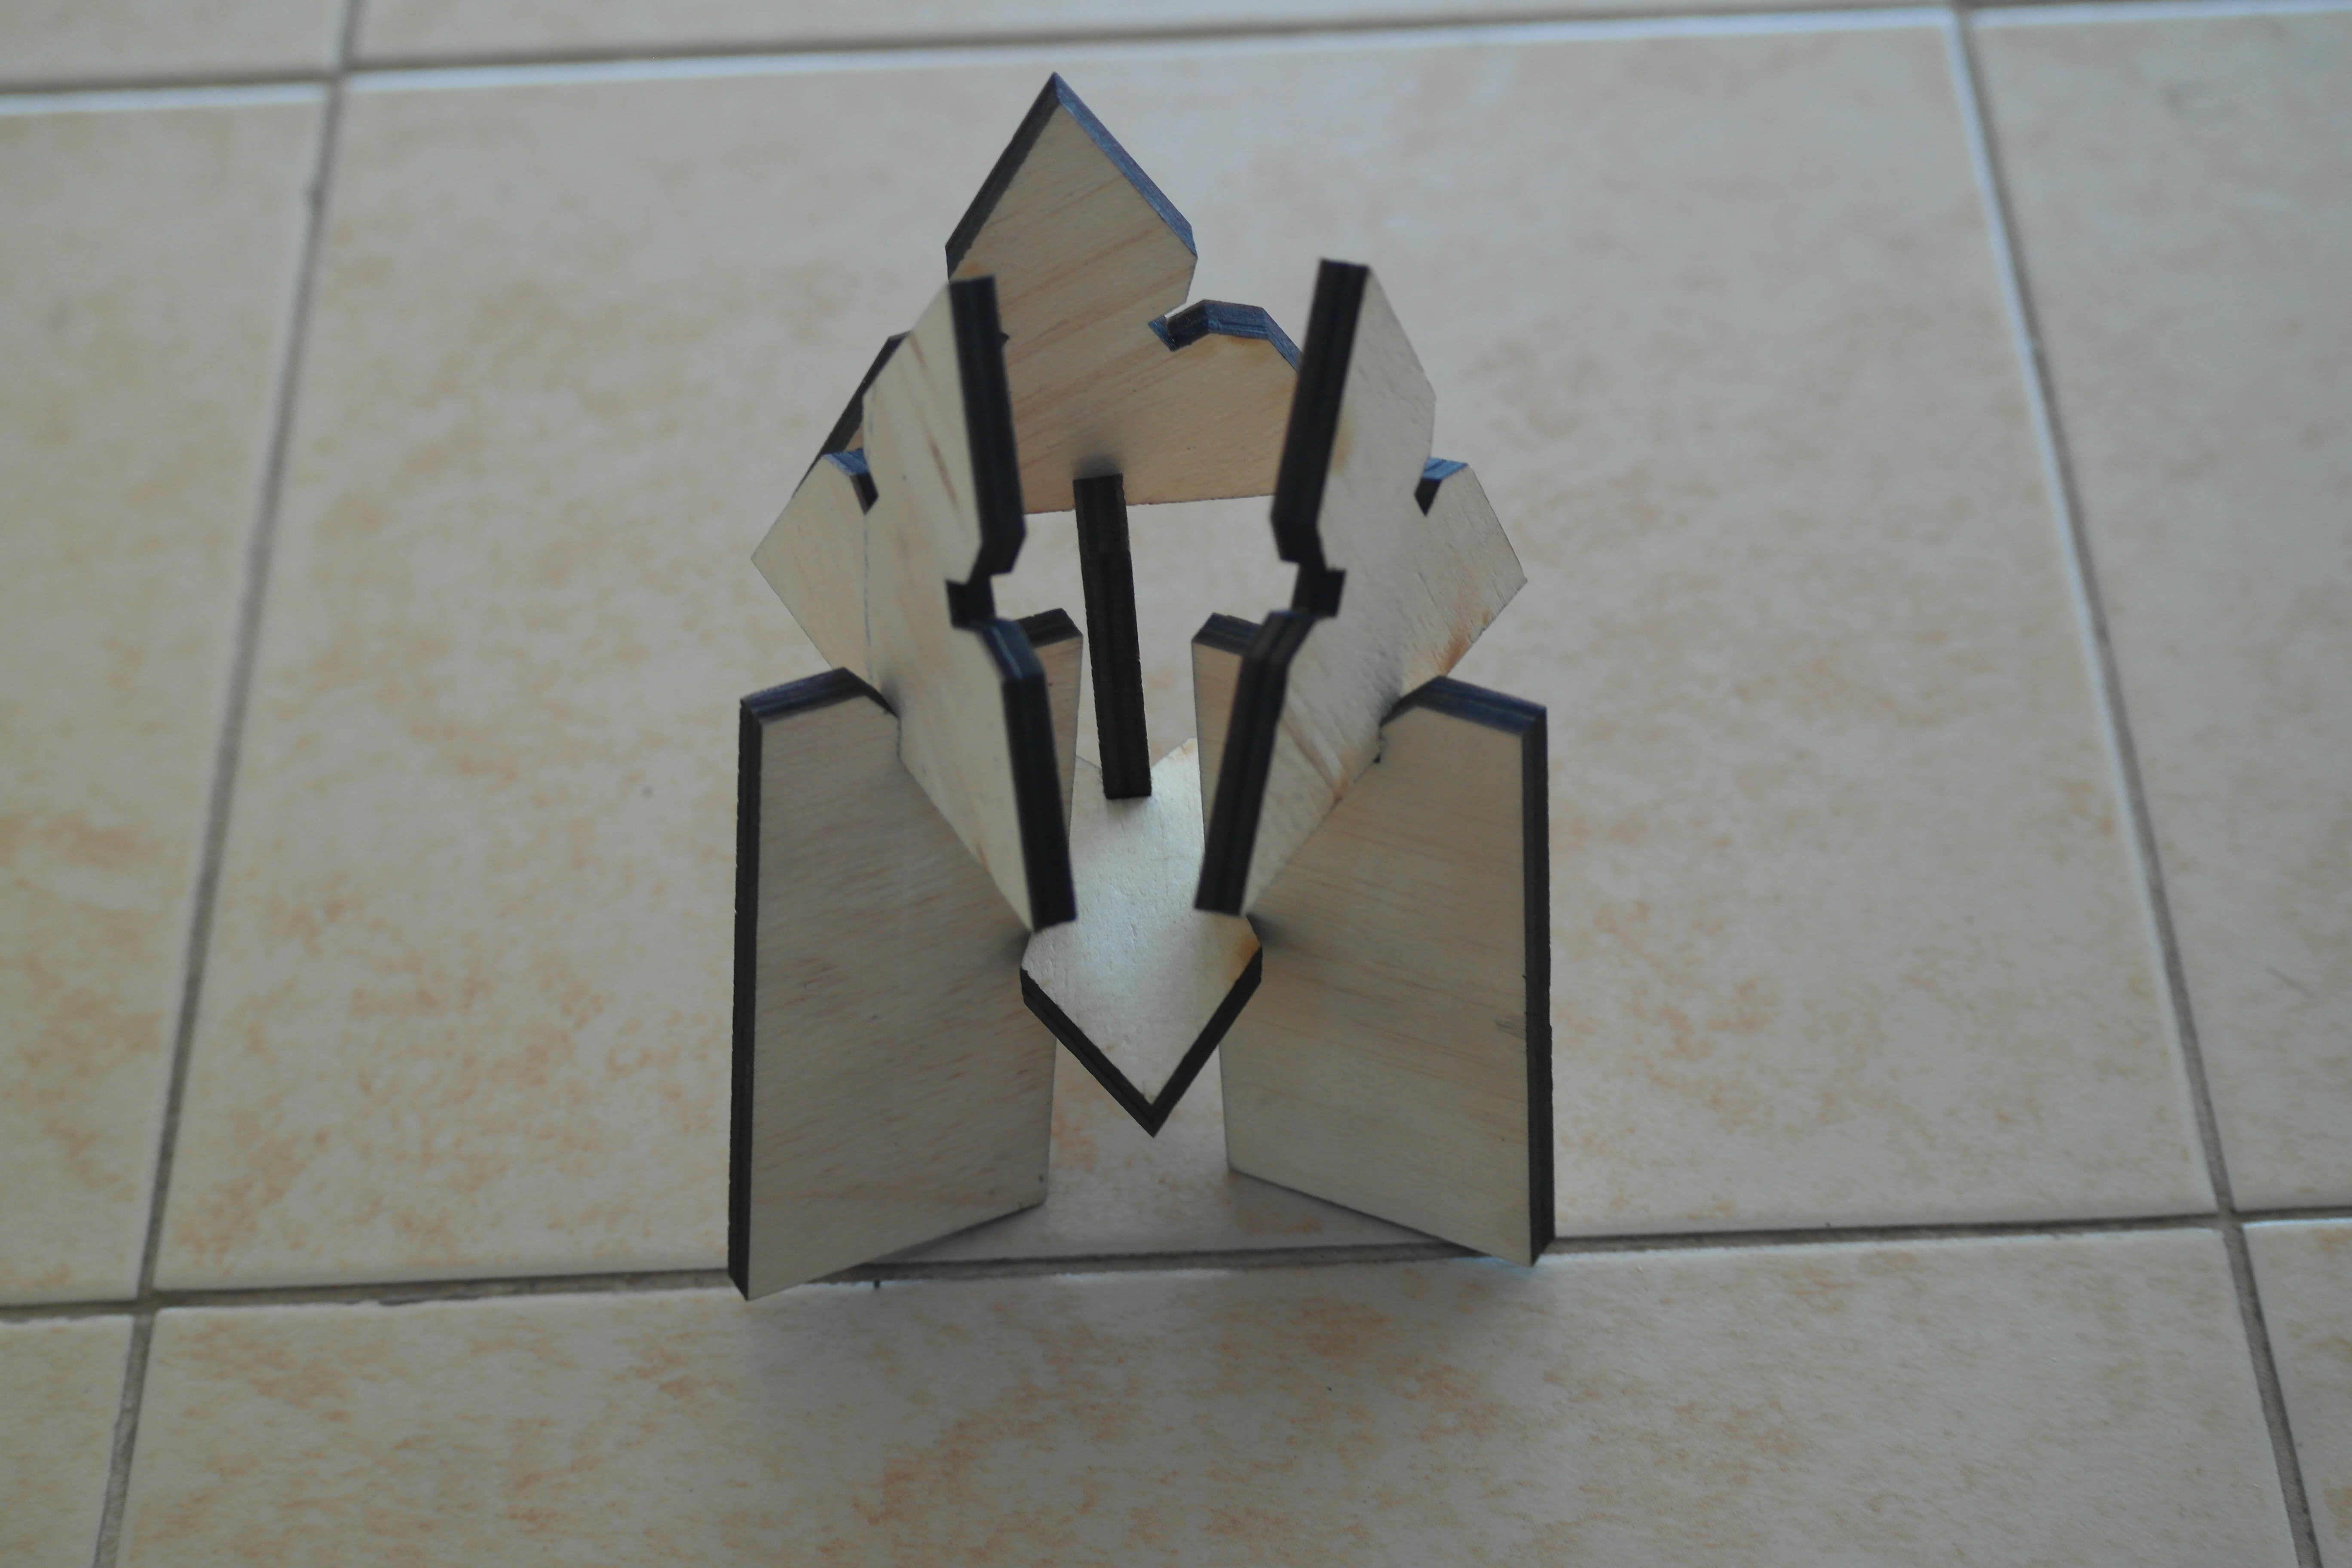
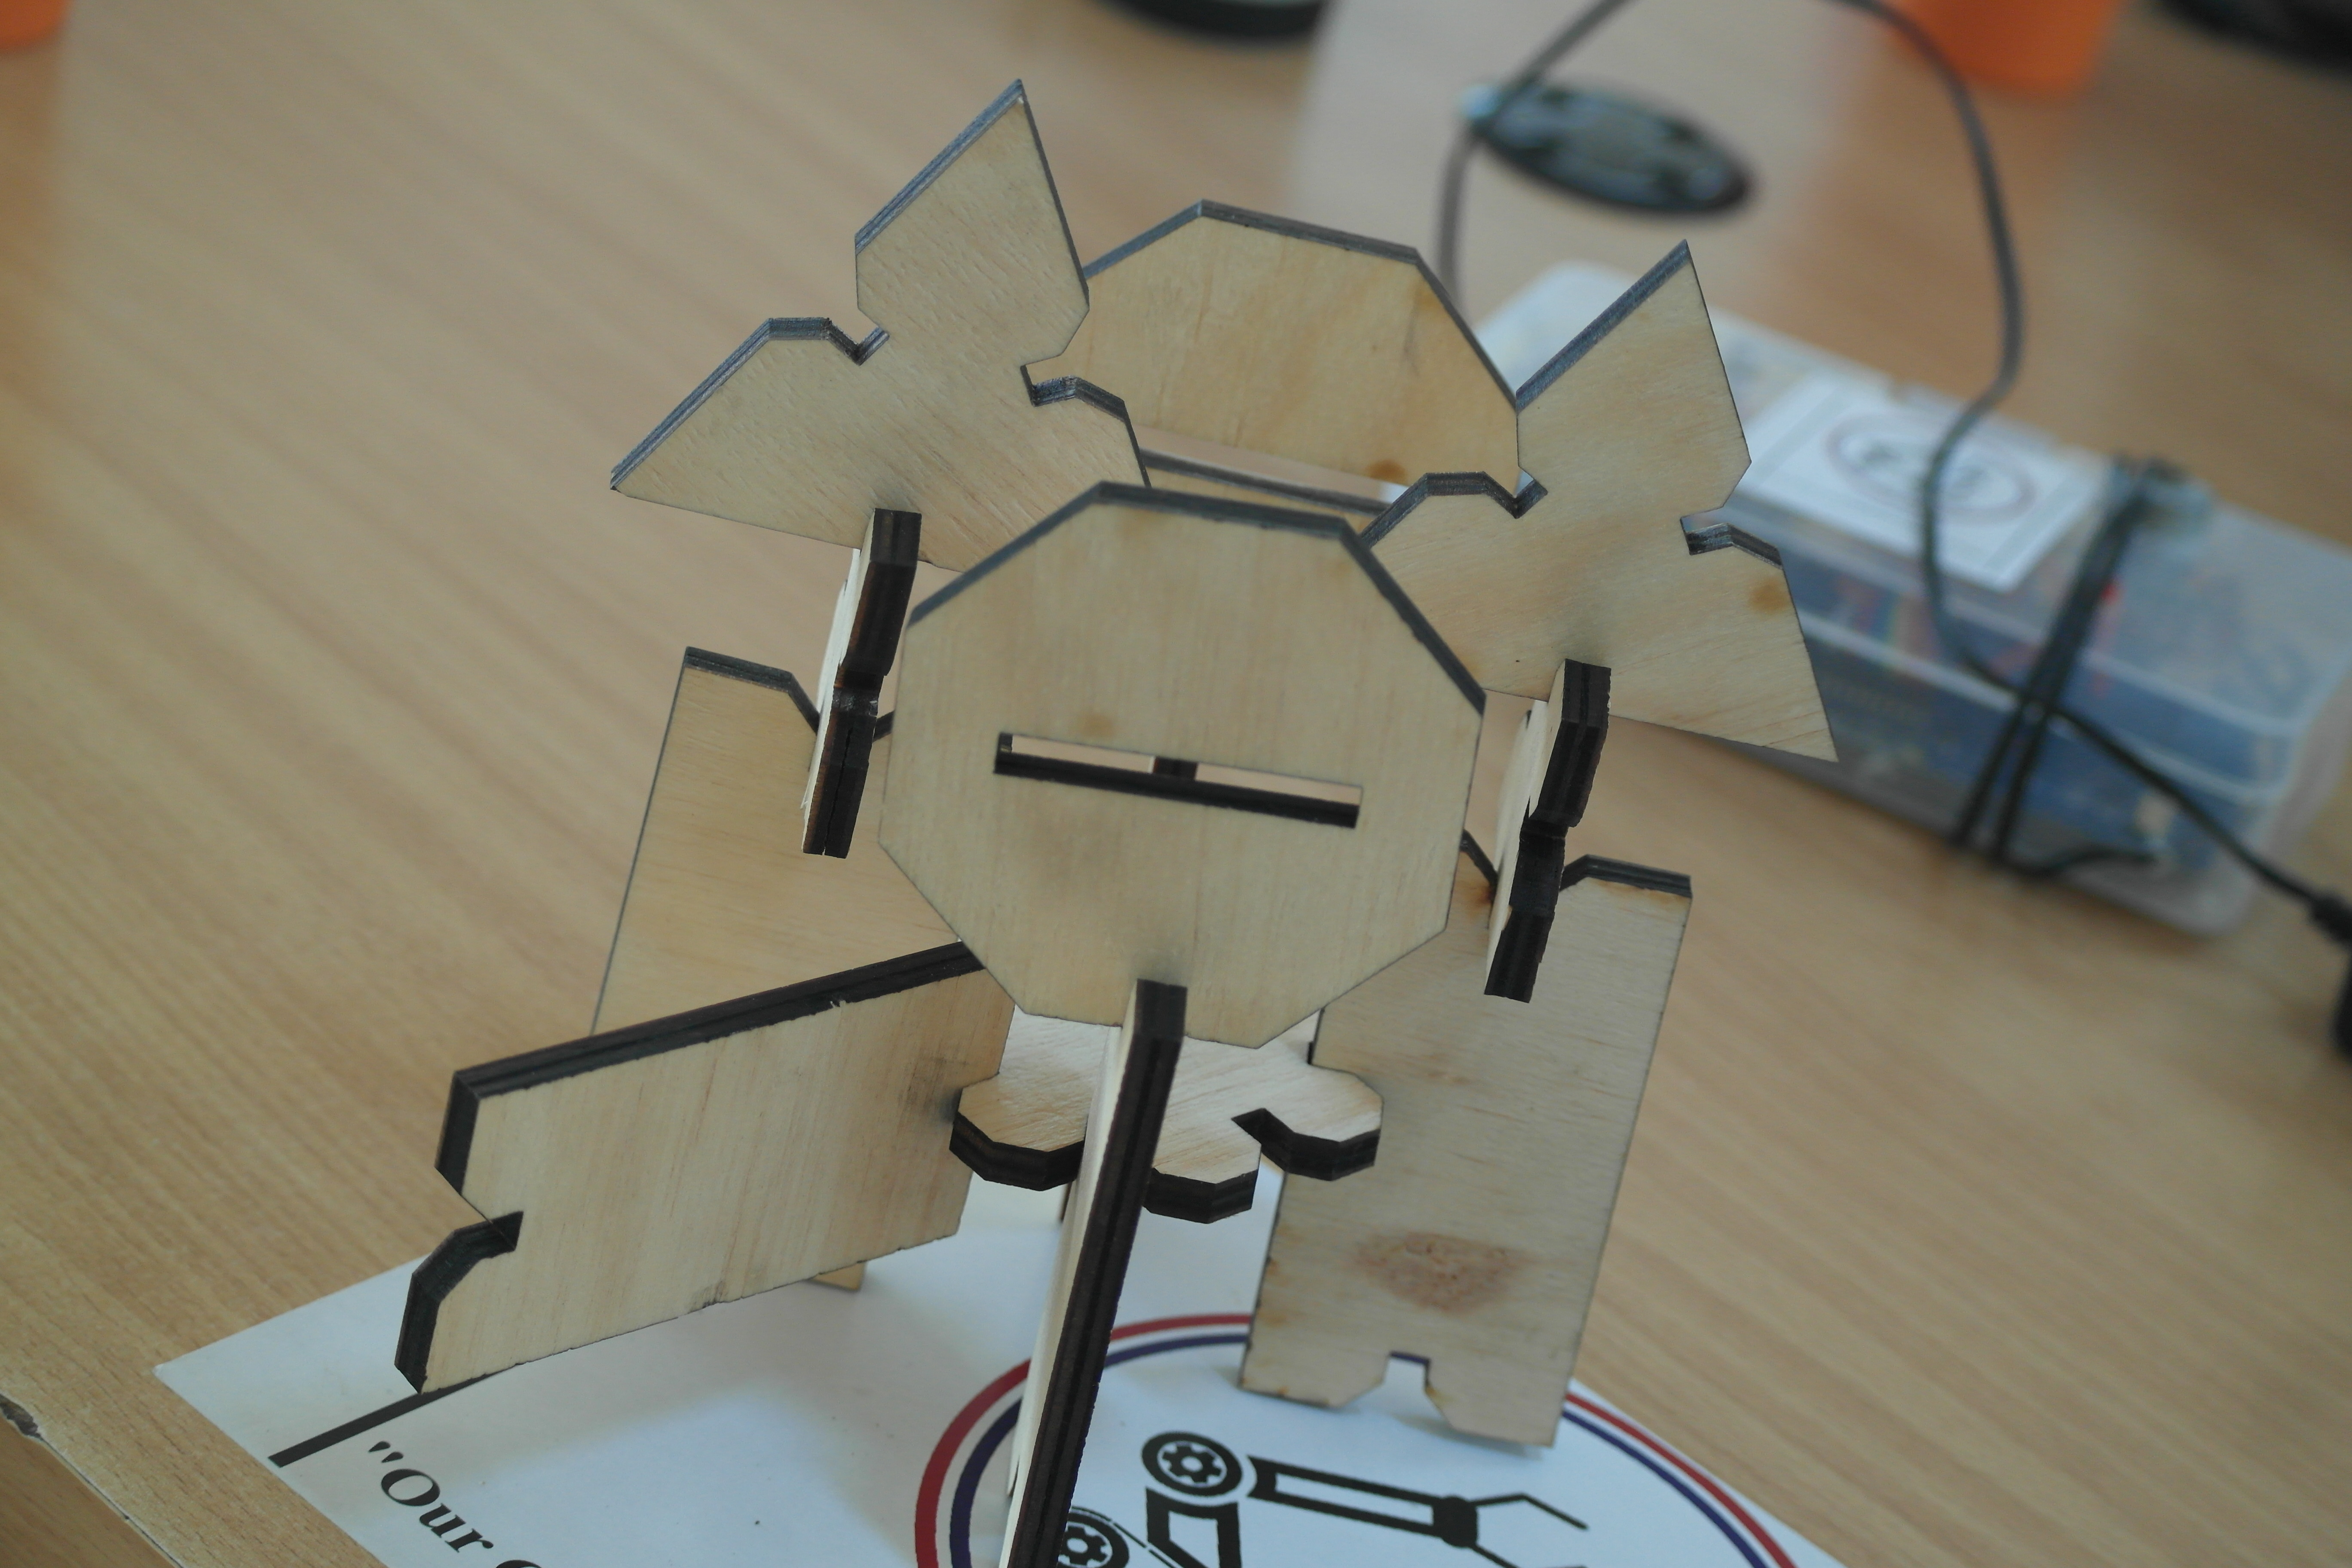
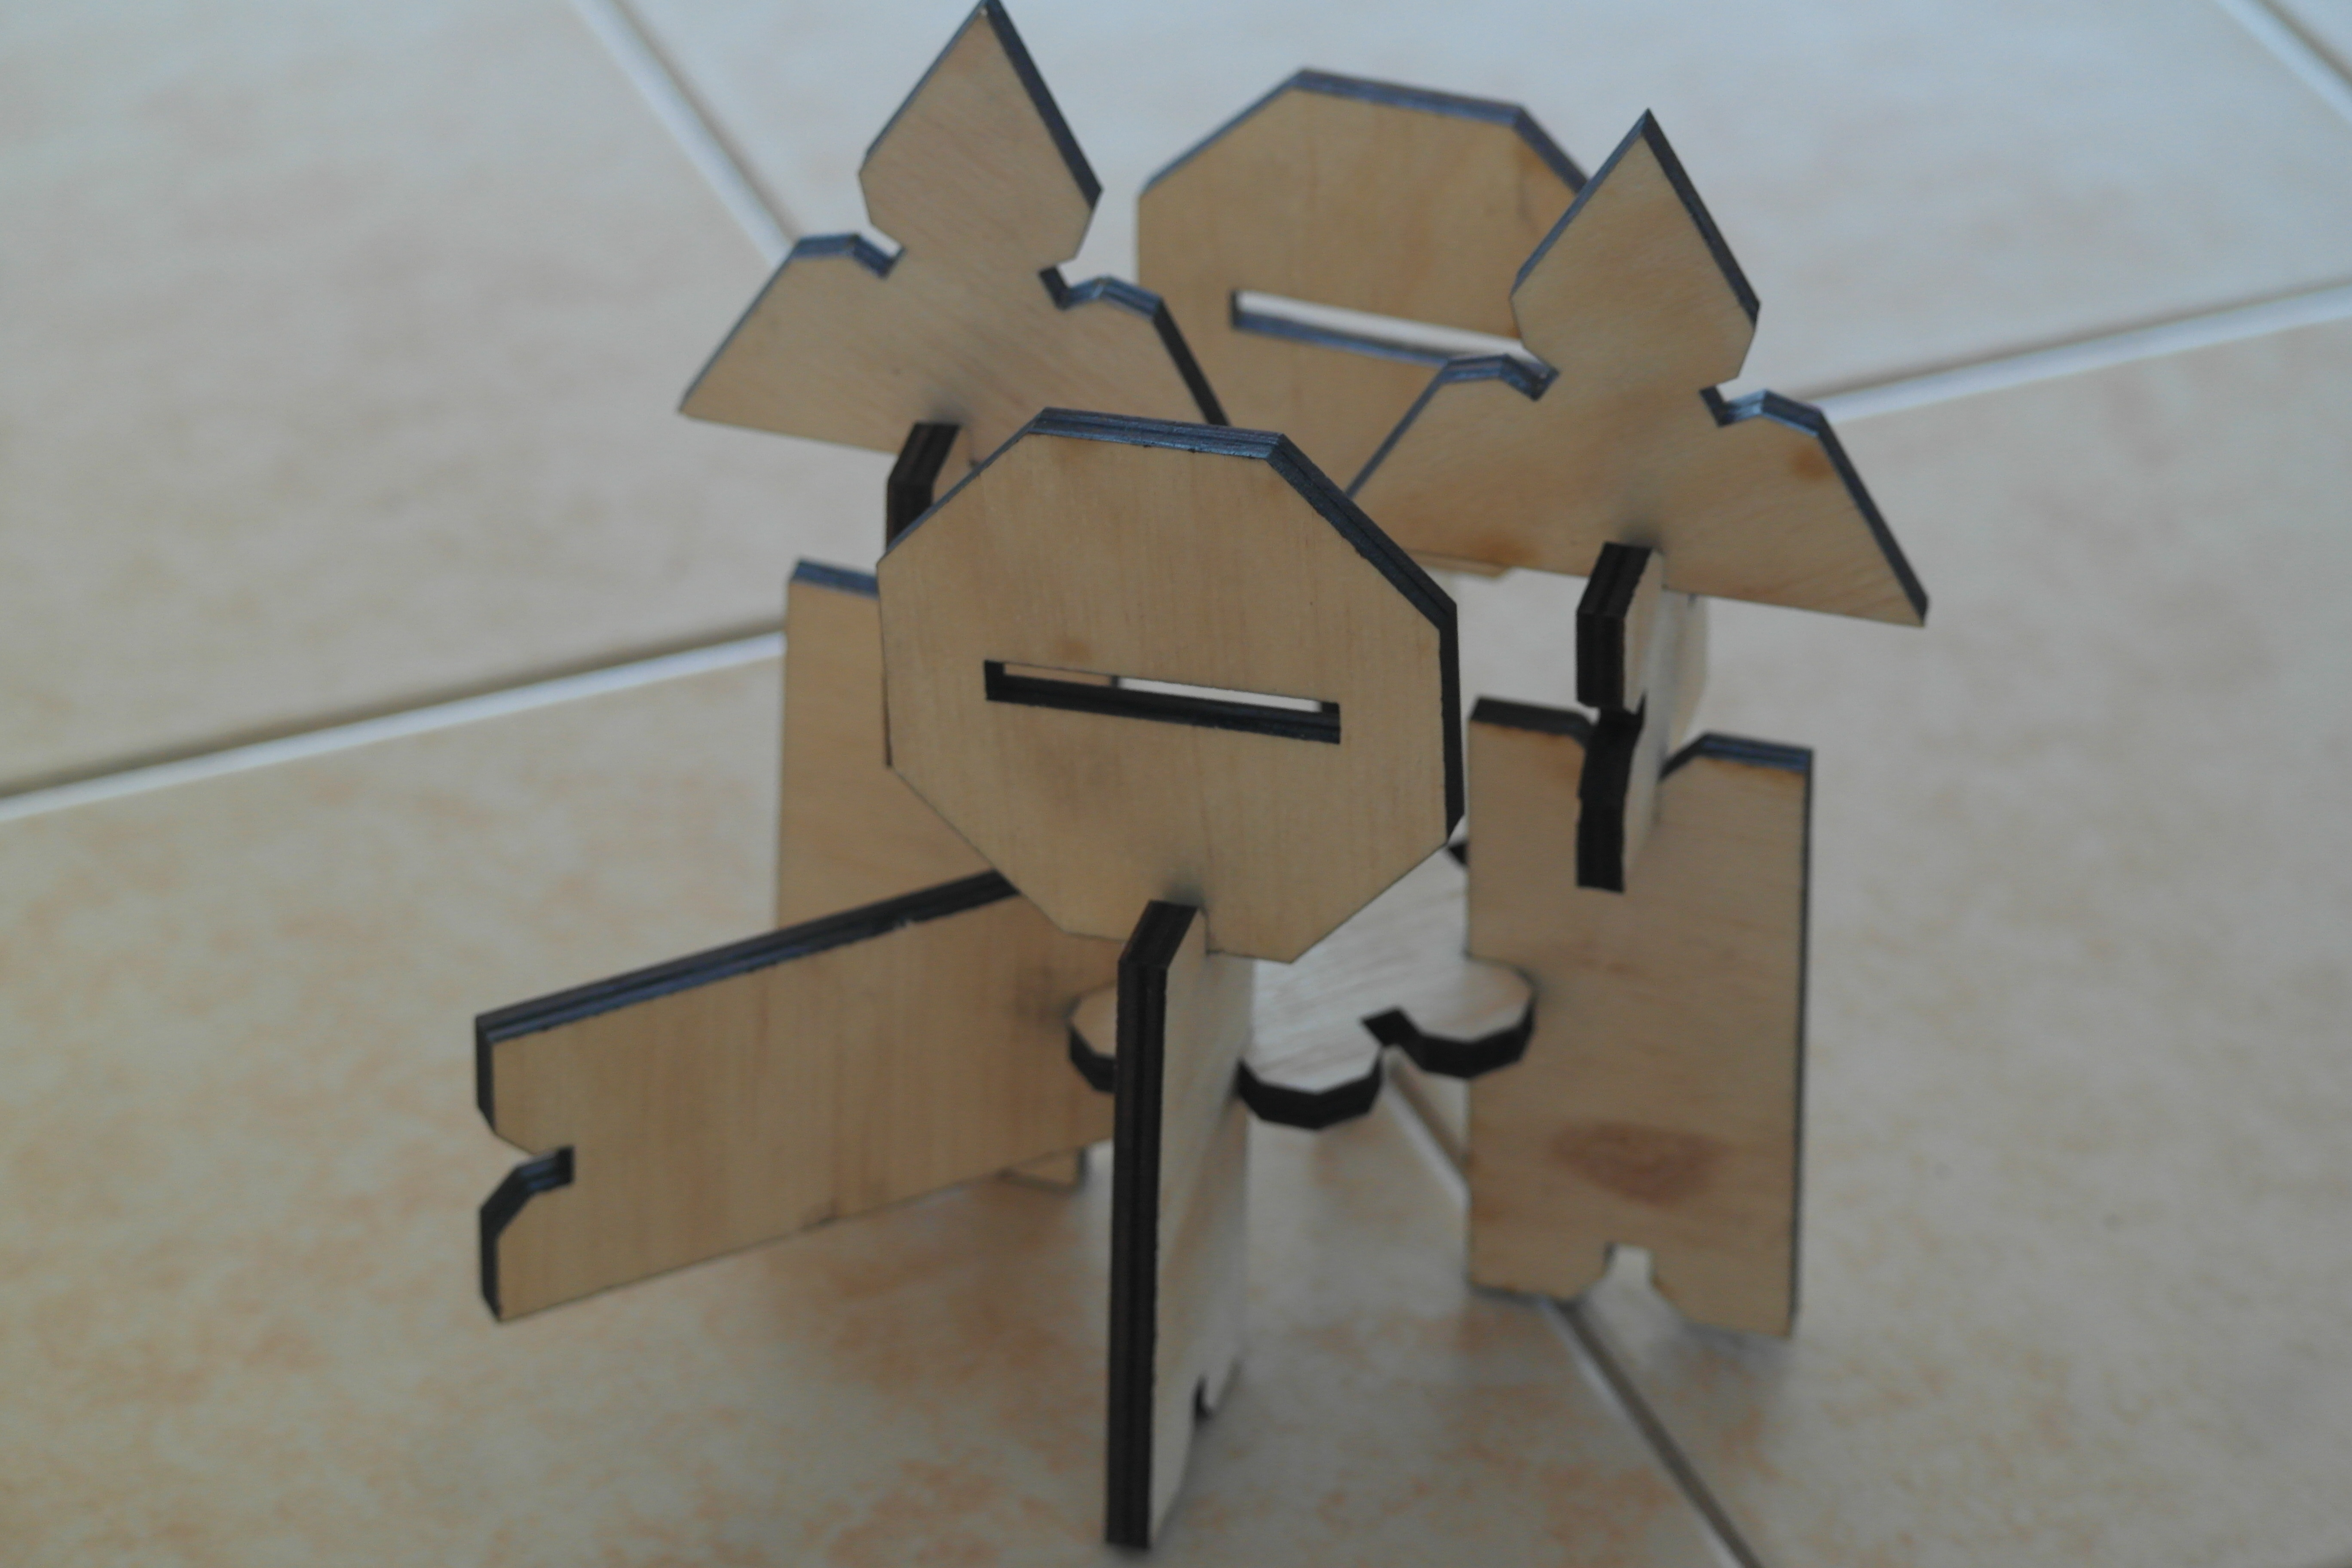
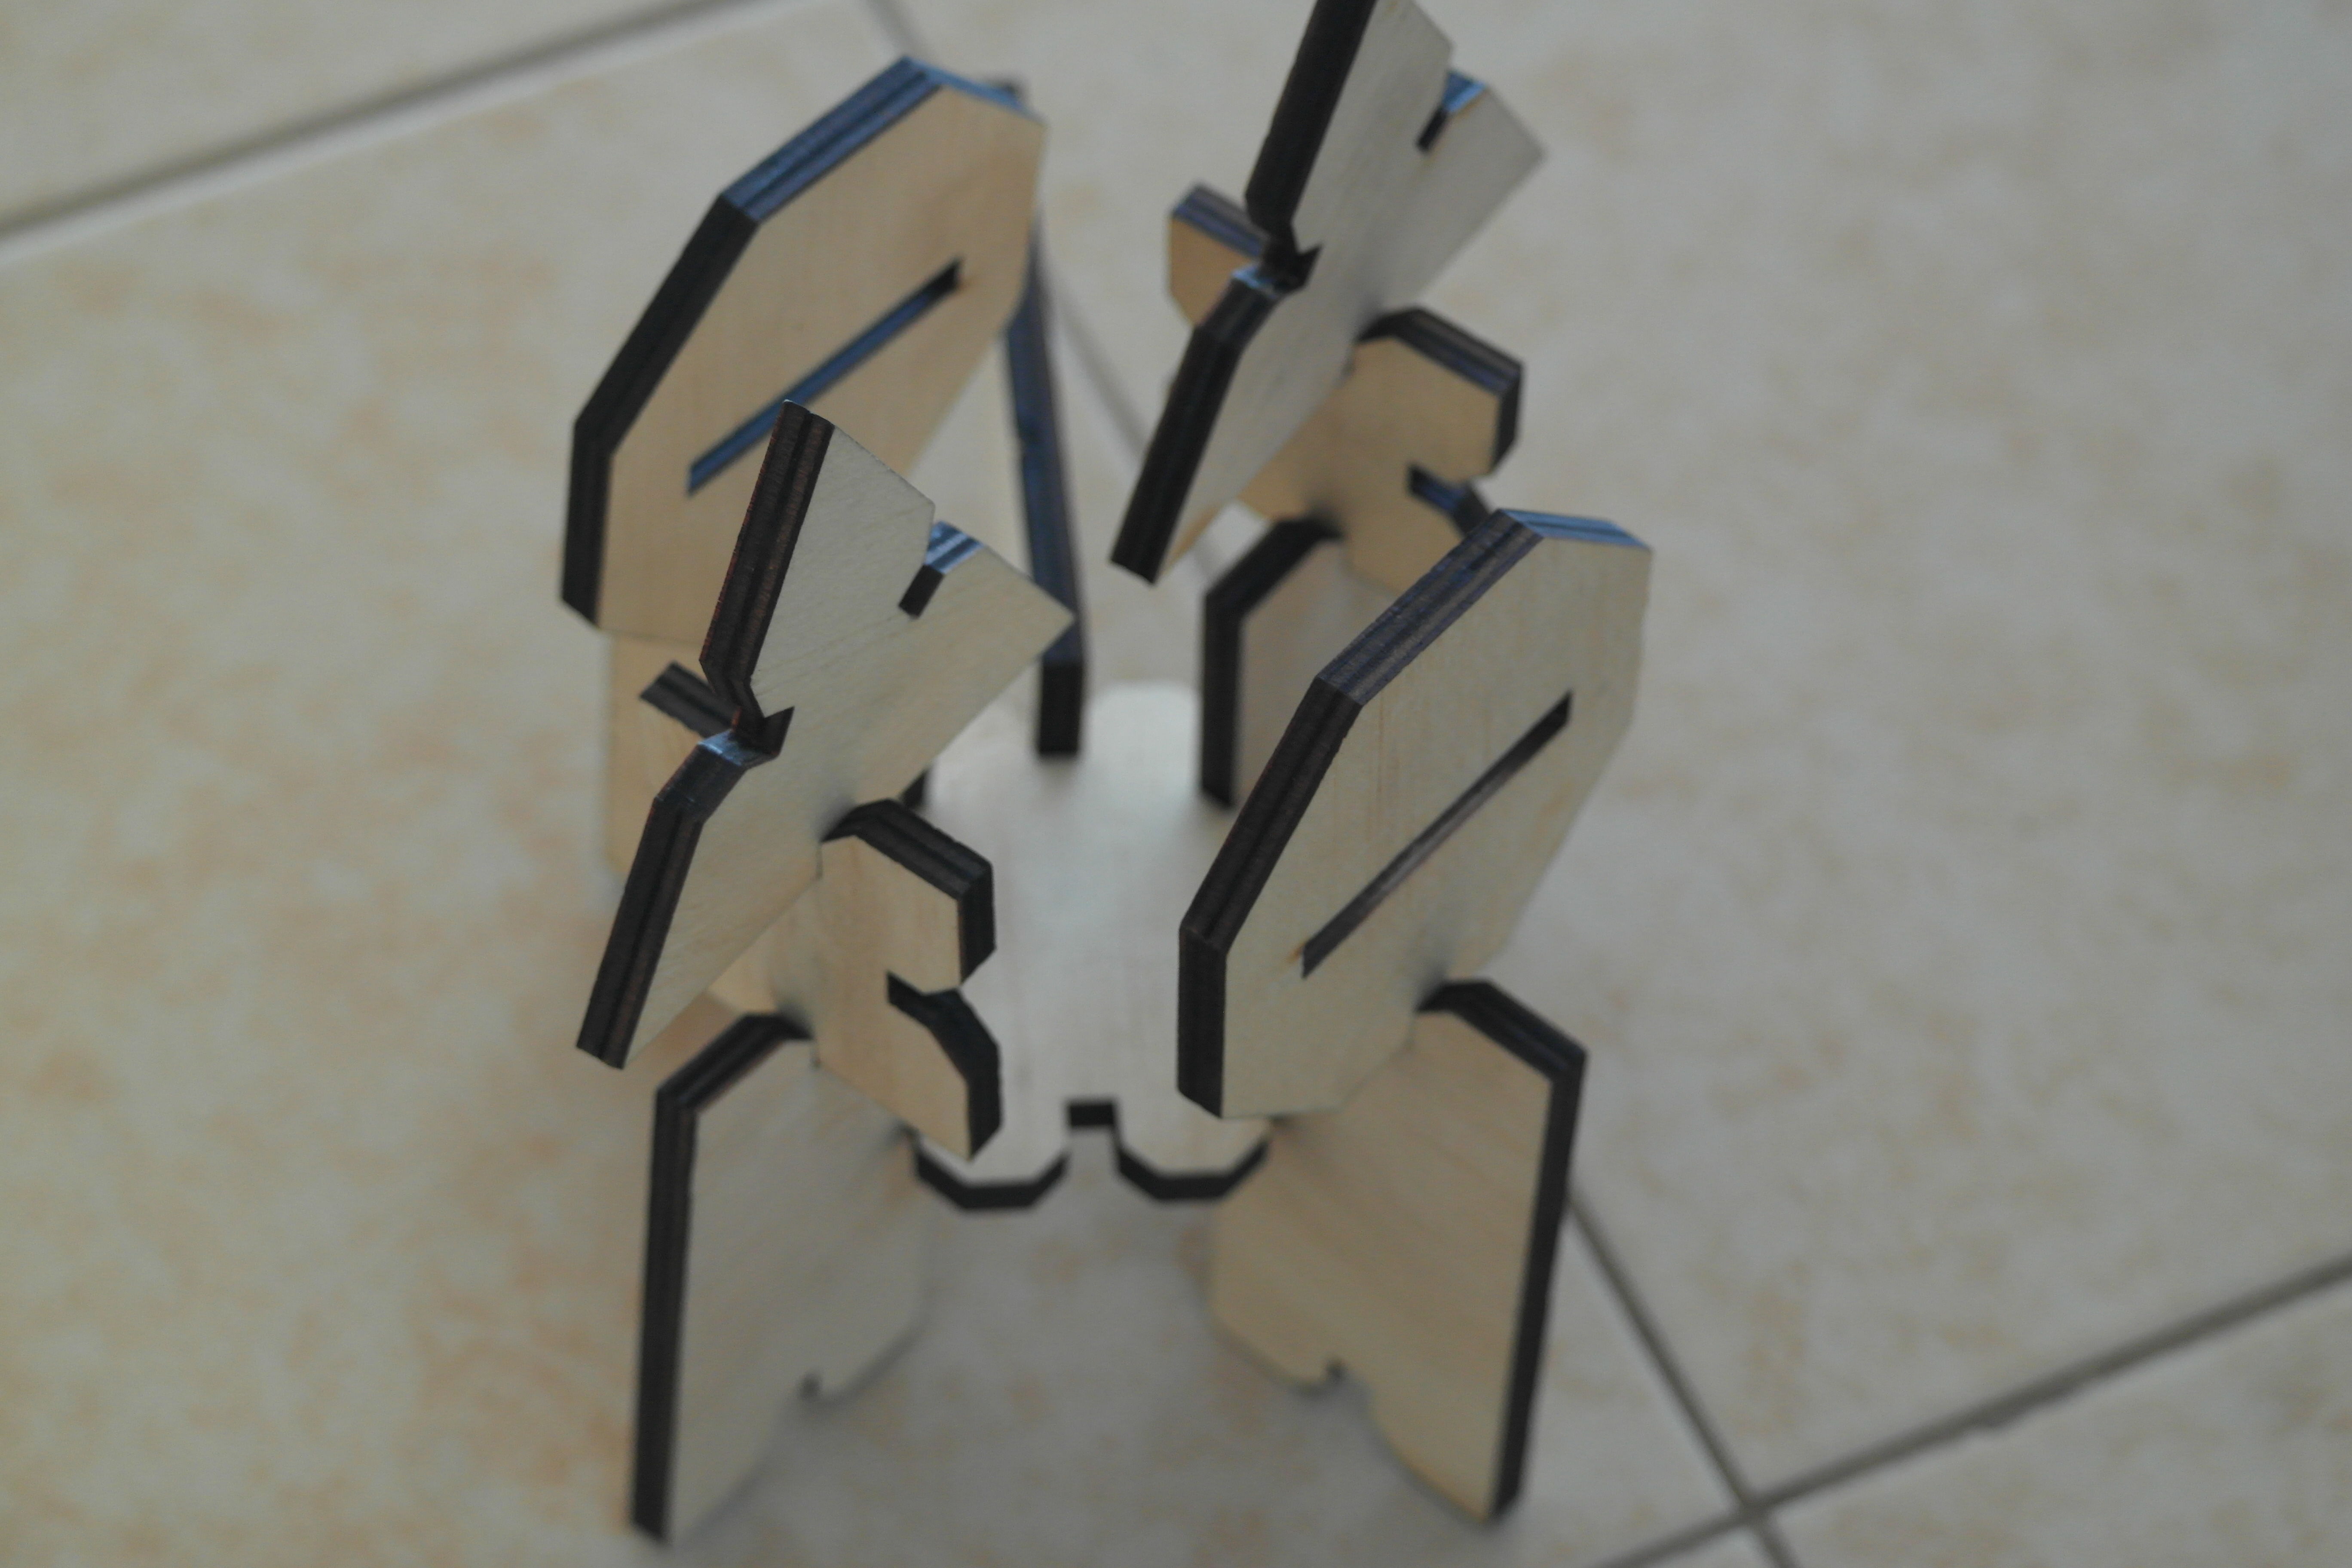
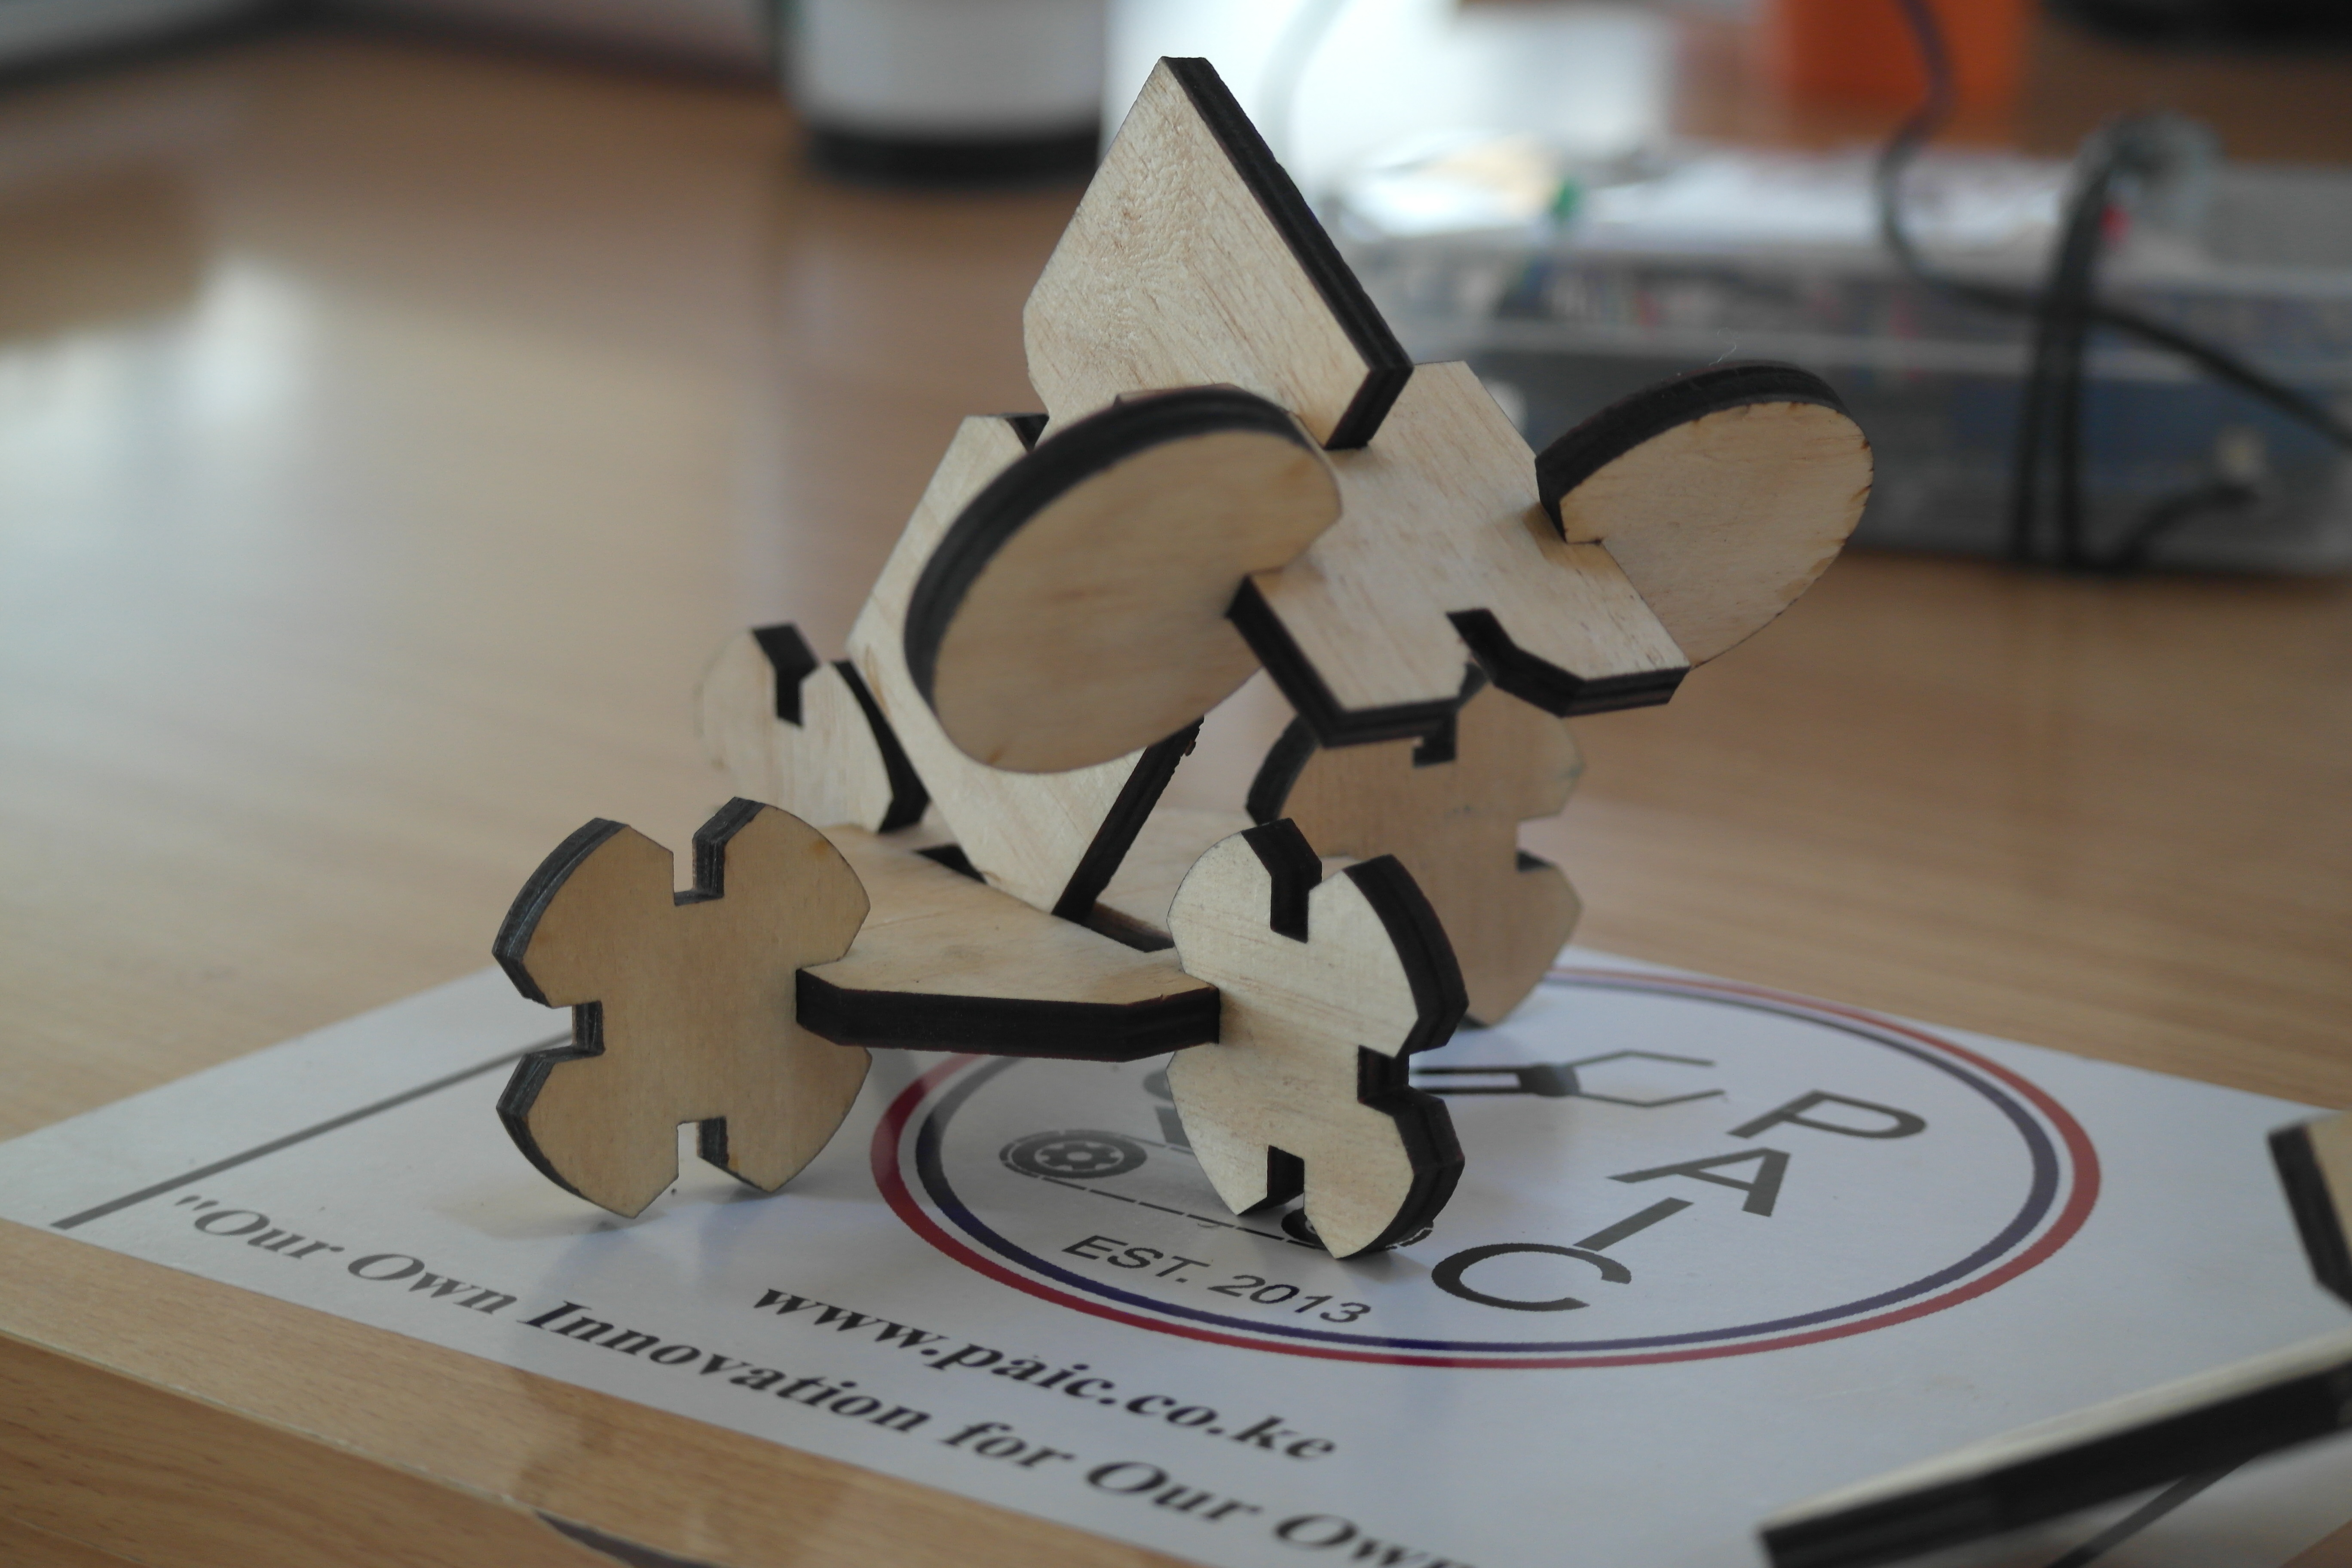
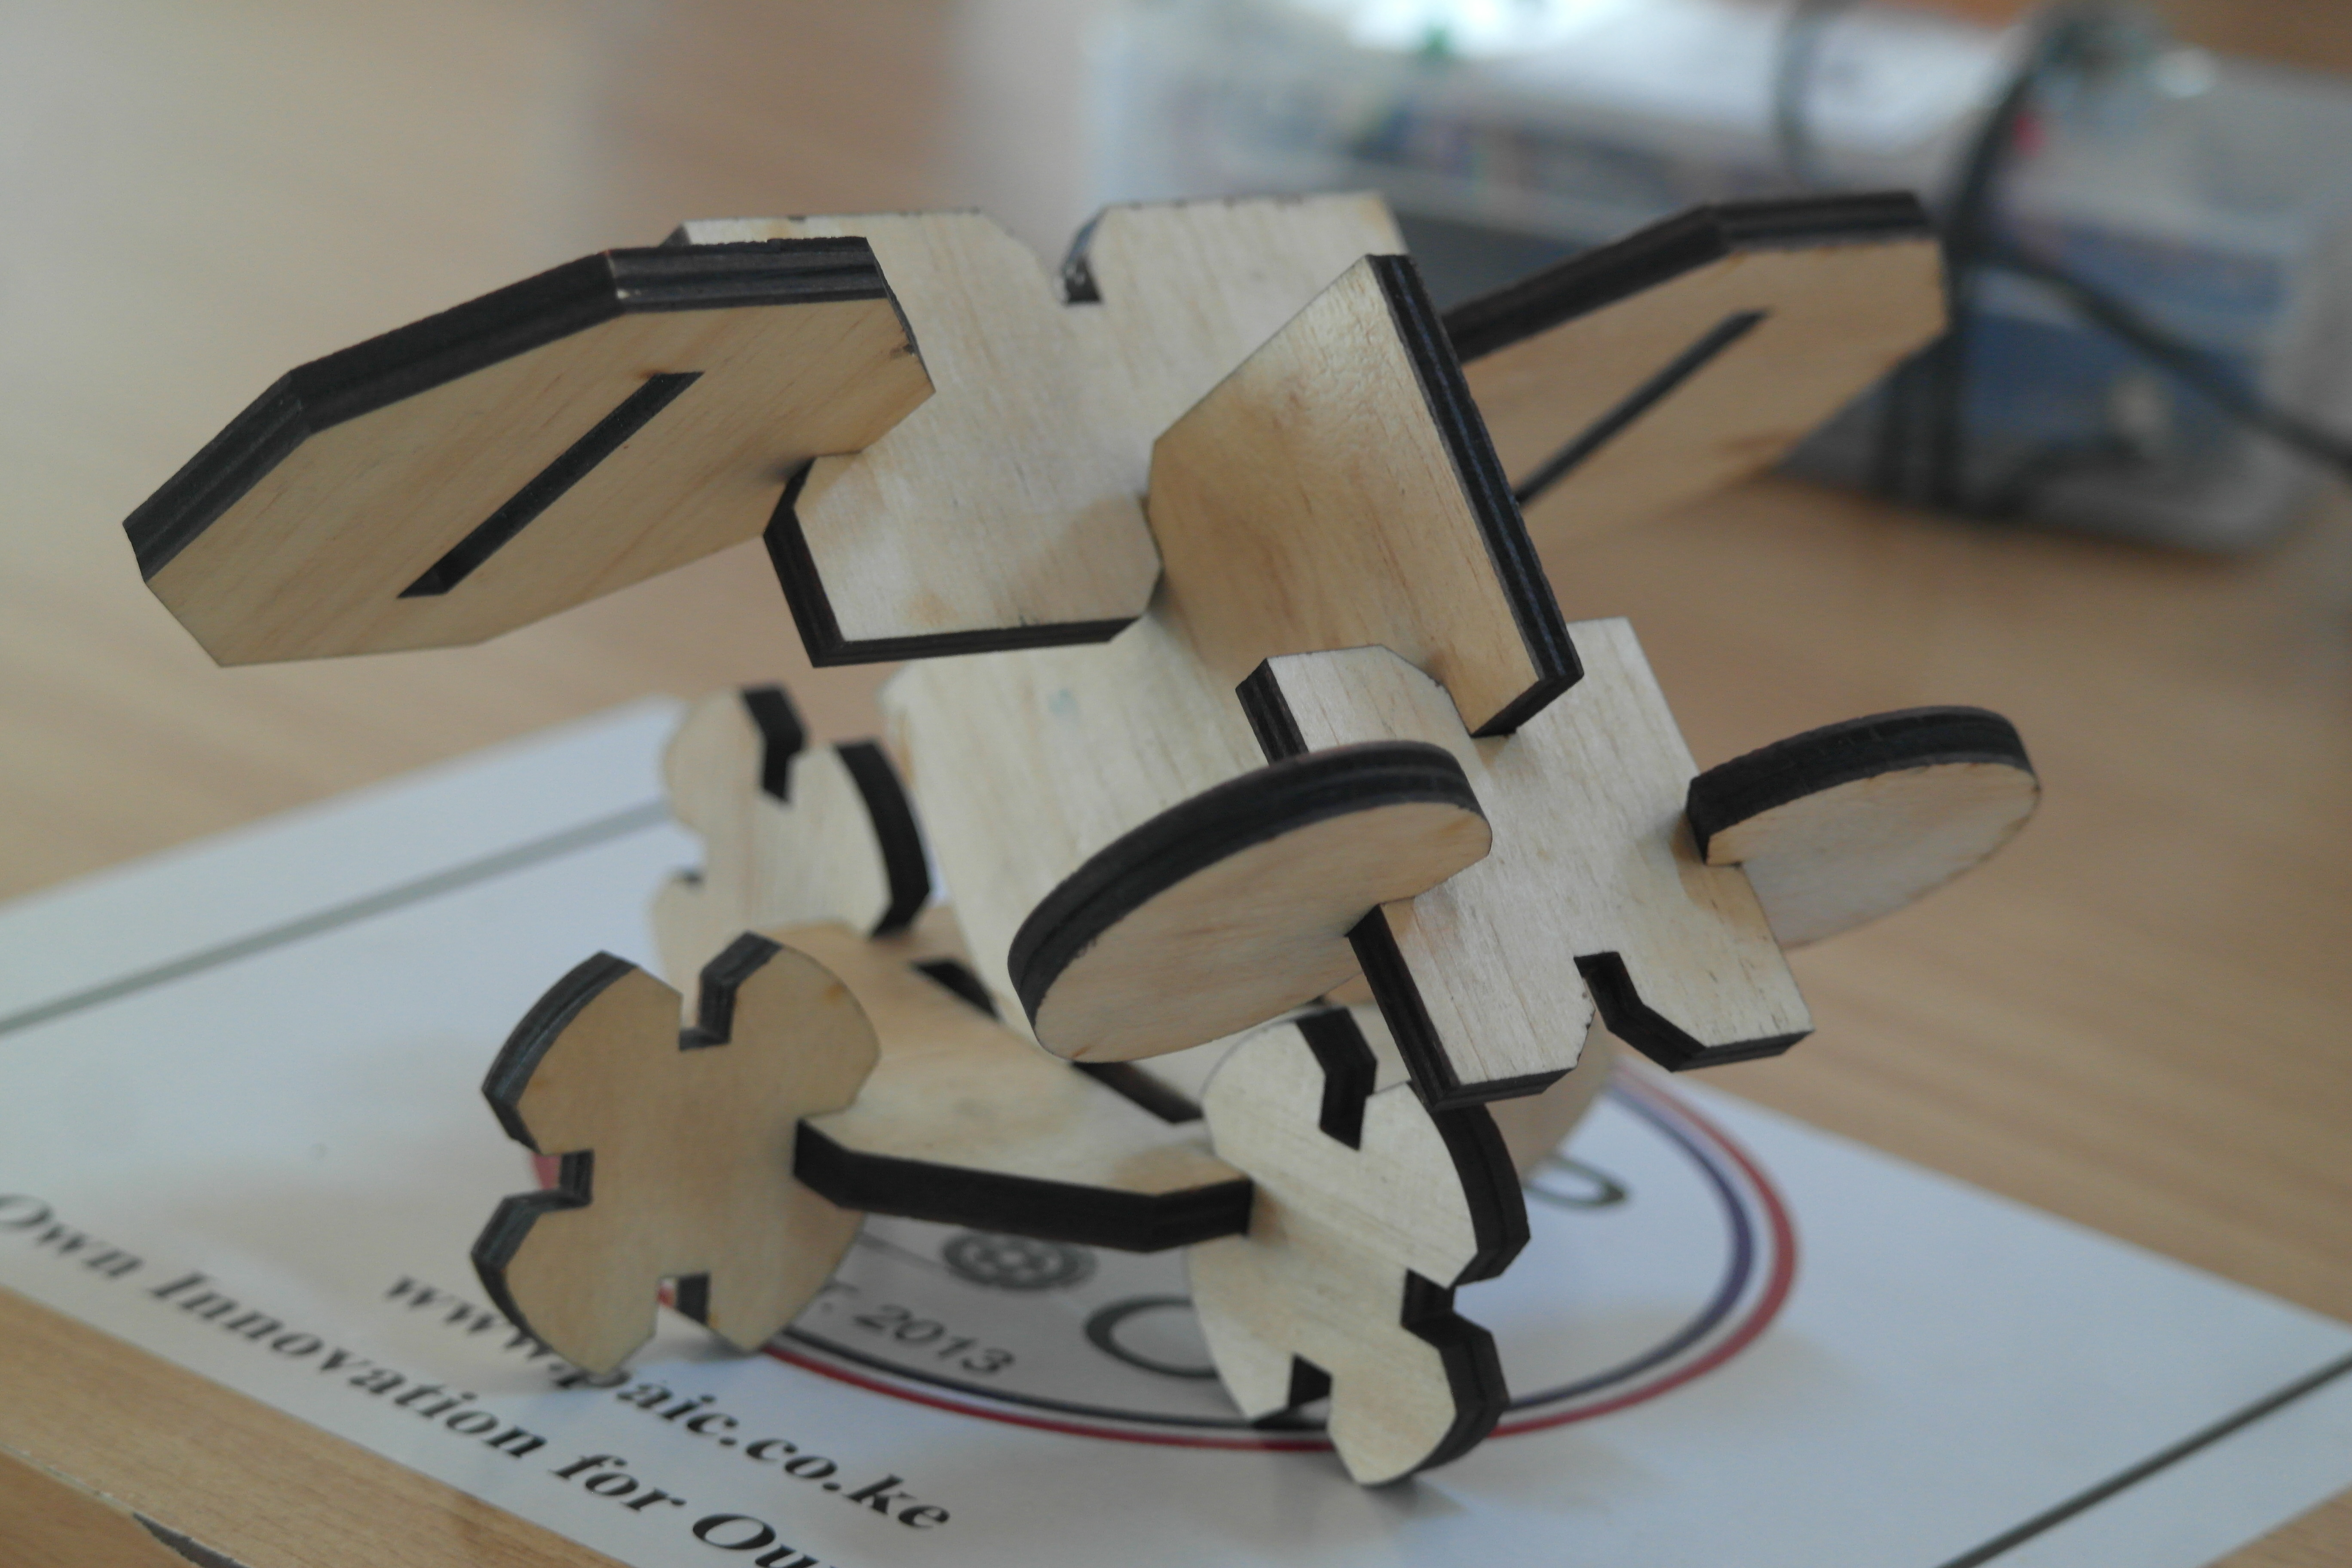
The fit-press kit laser cut pieces

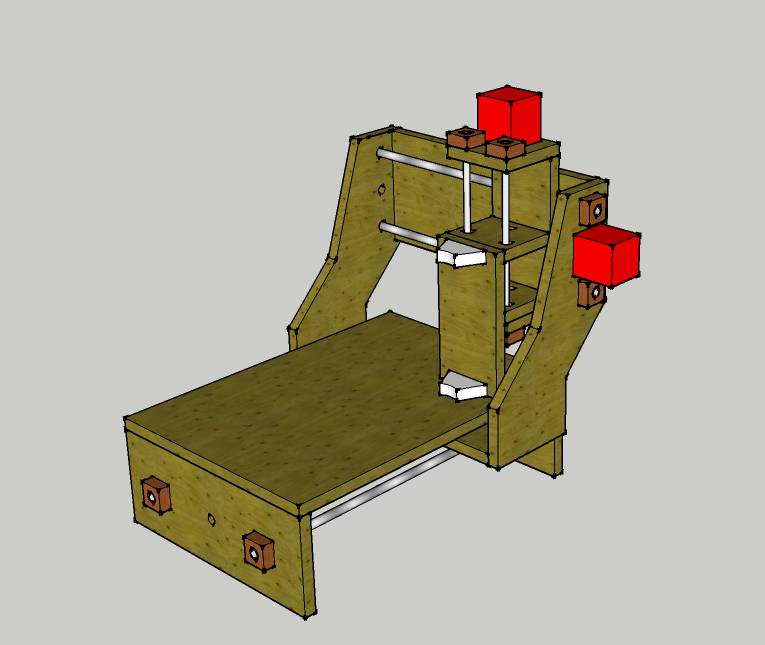
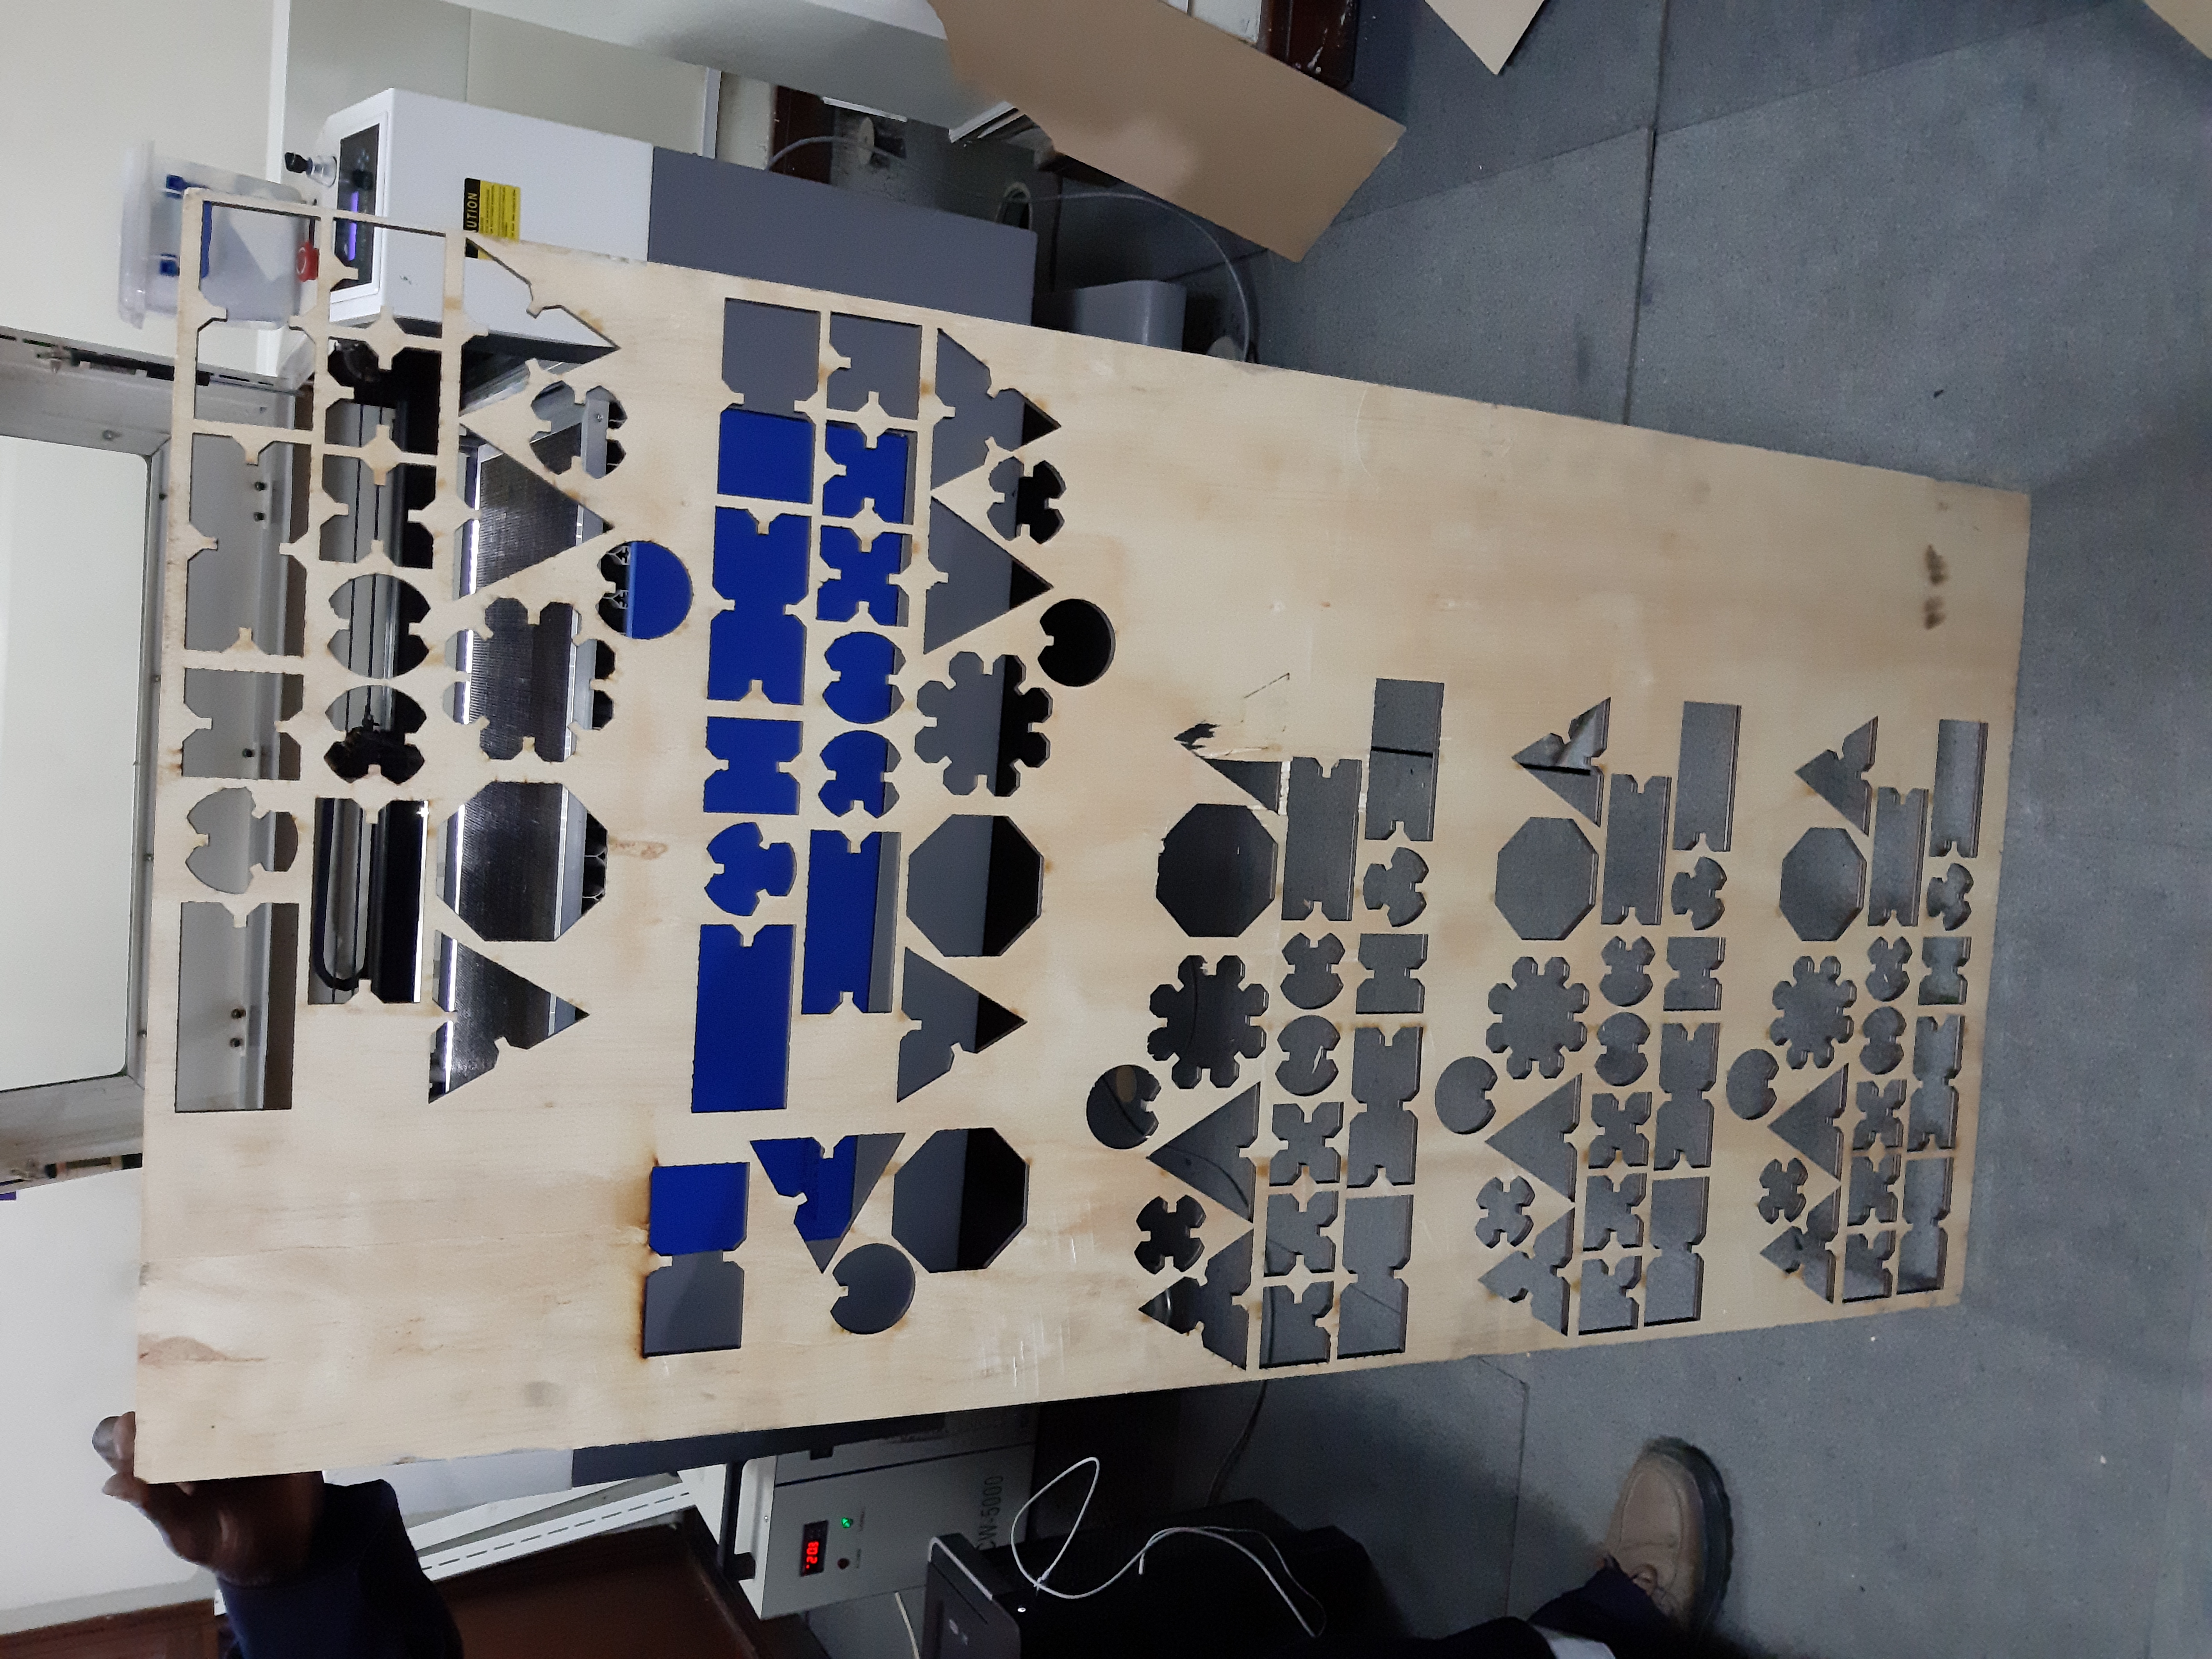
Press-fit structures built from the kit:

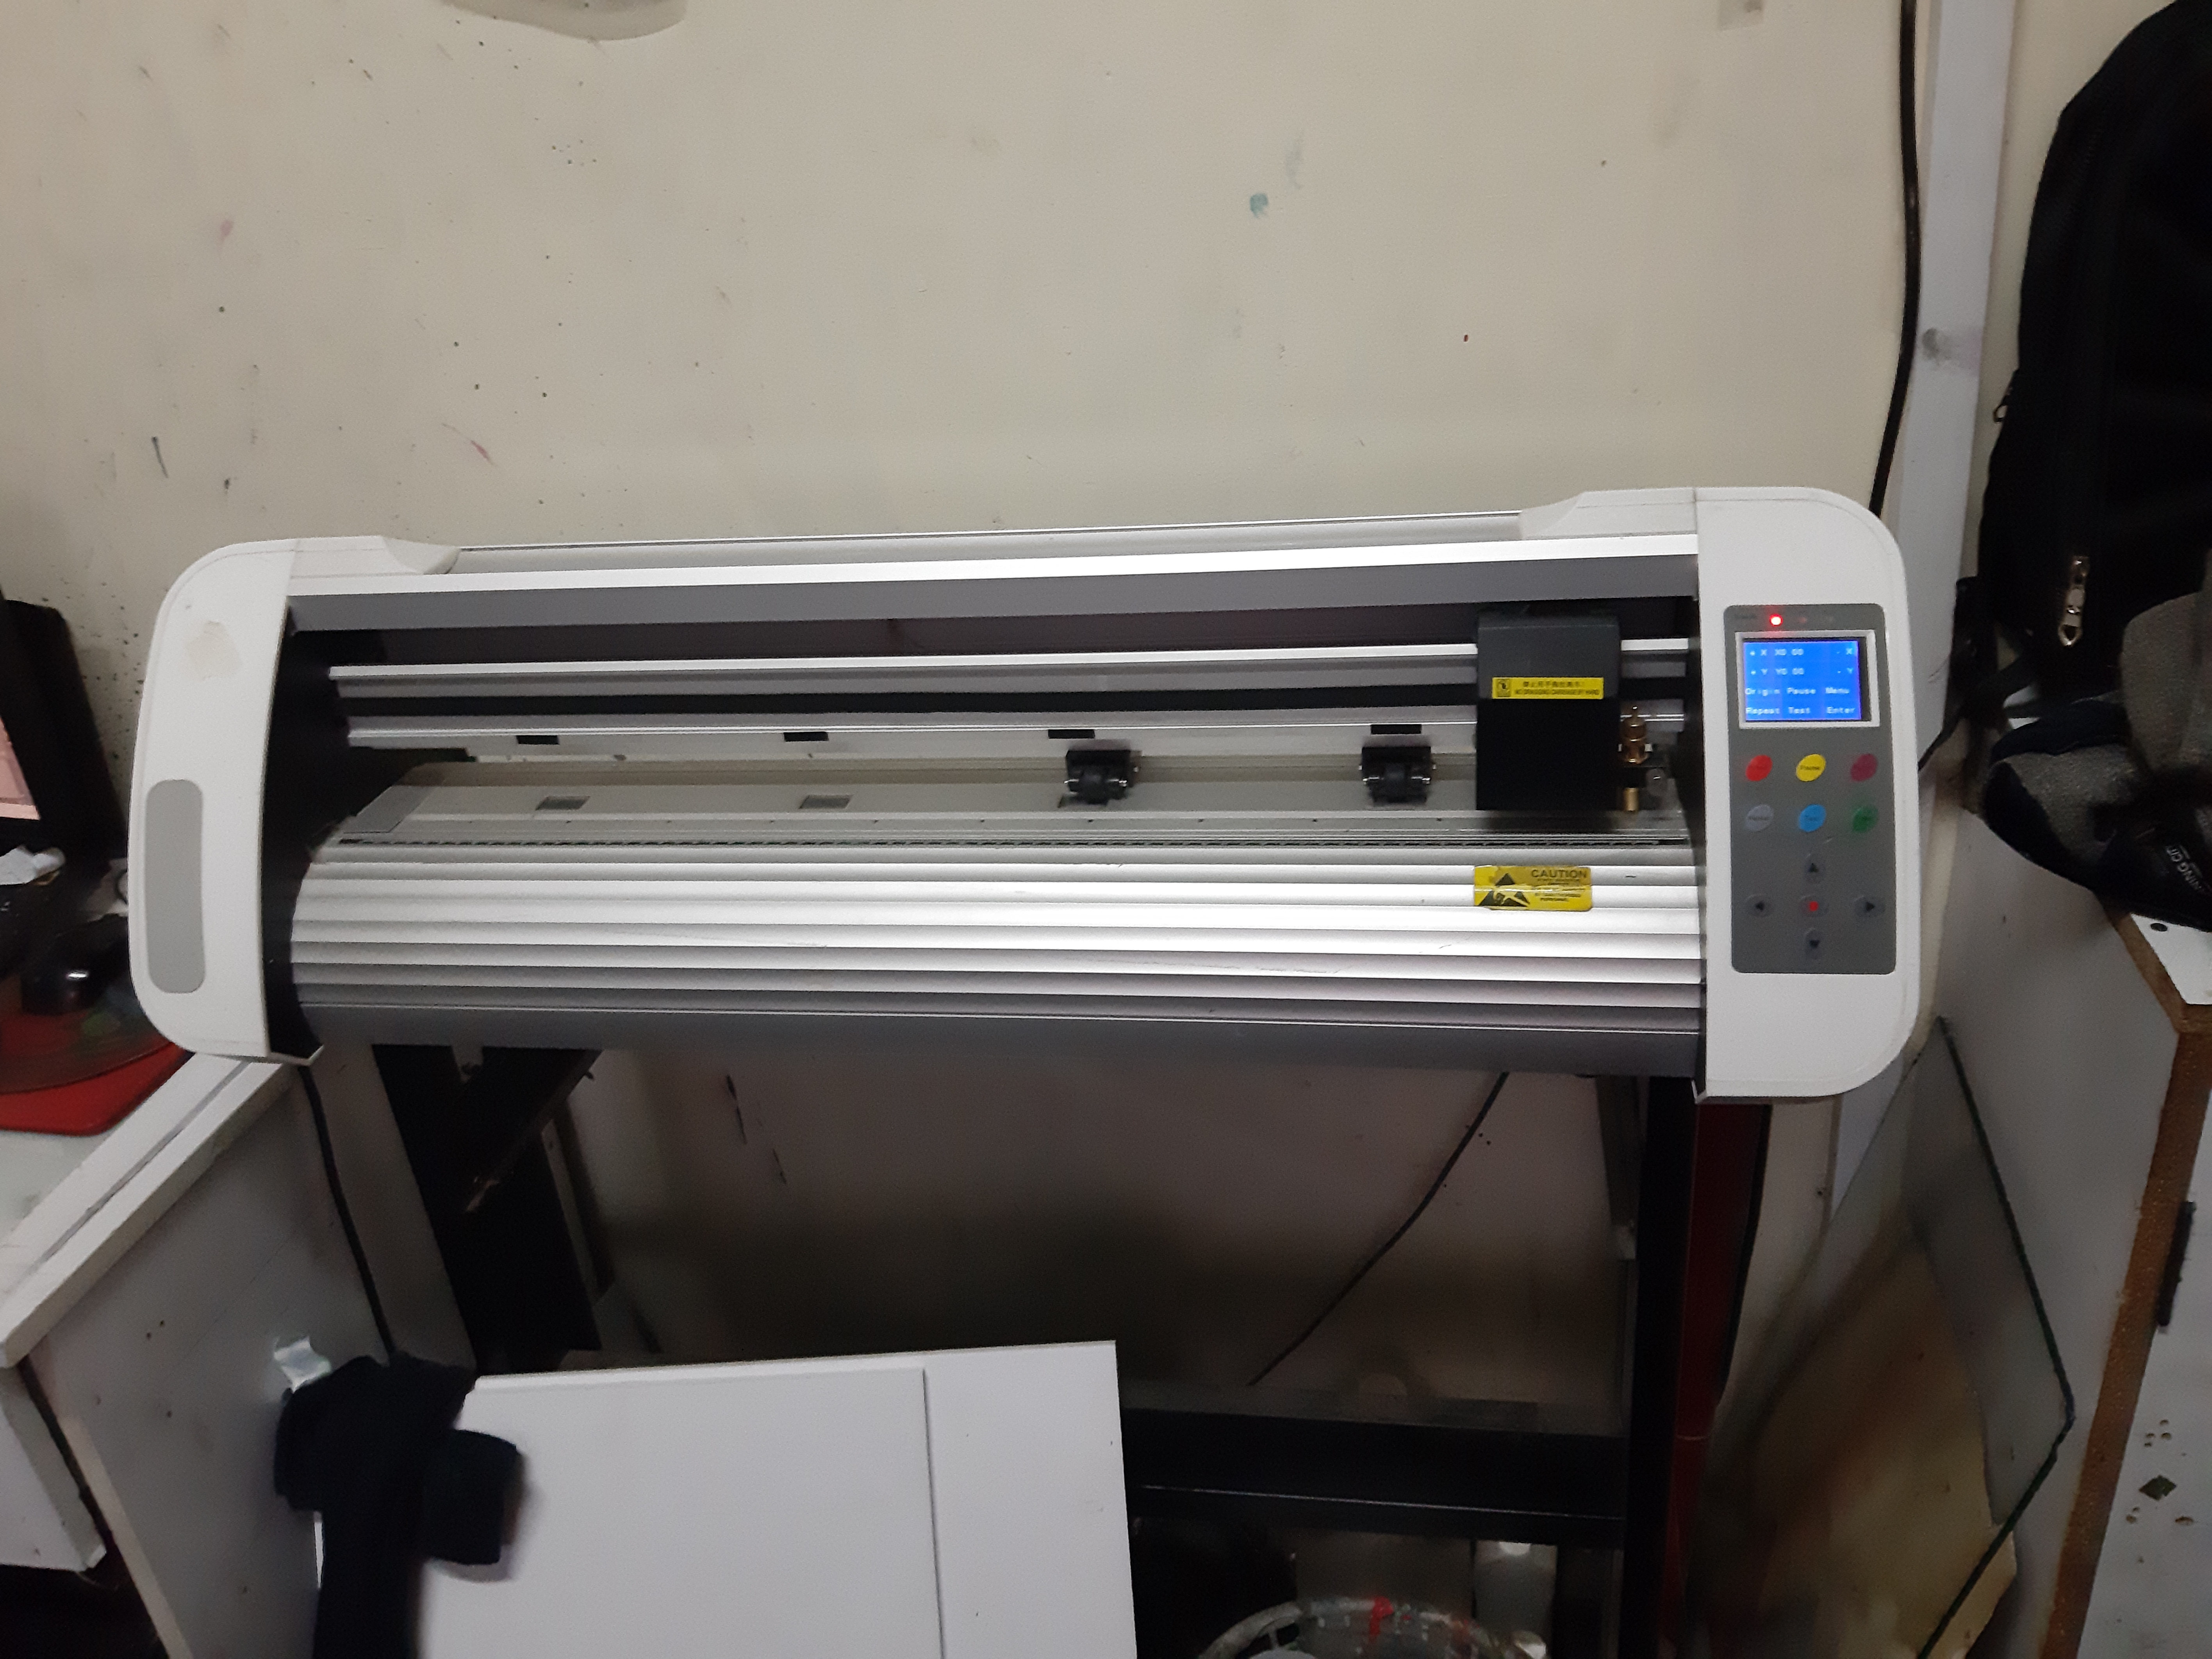
Vinyl cutting:
The Vinylcutter machine used for this task is the GCC Teneth Vinyl cutter. It has the following specifications:
- Bed
software set up
The file format for this procedure was entirely PDF.
Just like in the laser cutter,organising the files had to be done to ensure optimum material usage as well as to constrain the cutting profile.This was done on the Adobe illustrator as described earlier. After this, the editable PDF files were transferred to a viny cutter softwaree known as SIGNMASTER V3 CUT(BASIC EDITION)

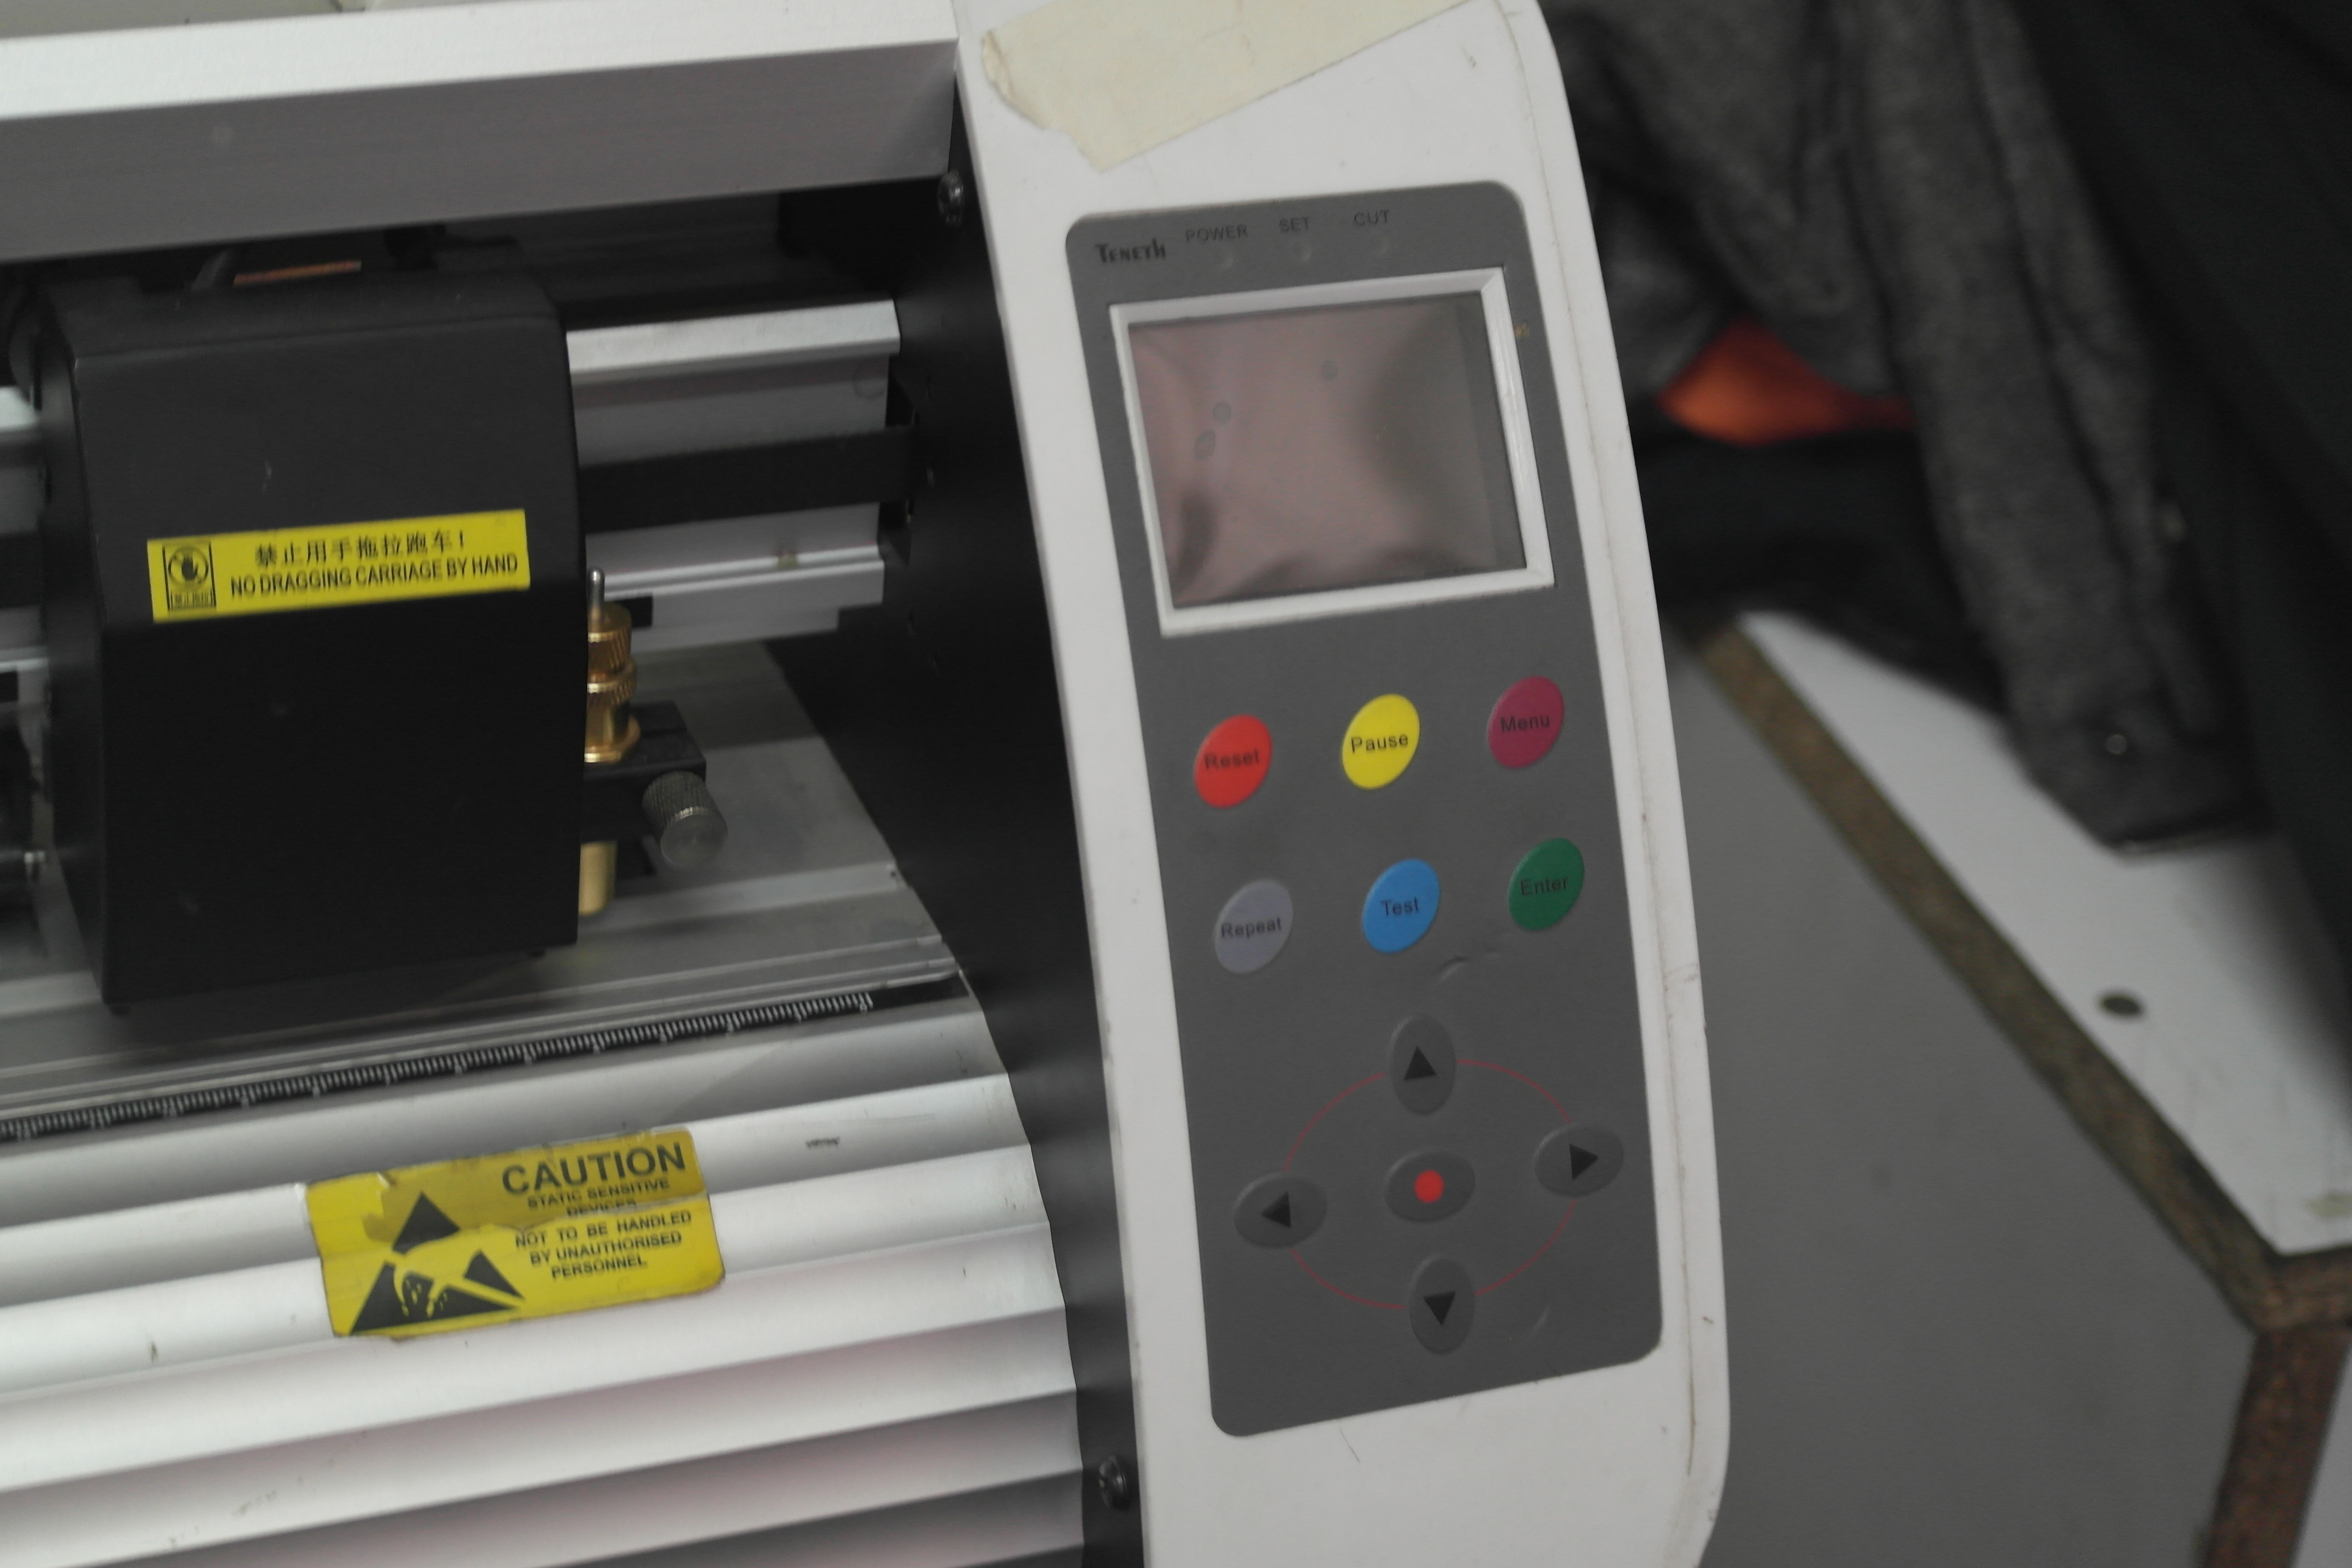
The cutter user interface:
The UI is configured well enough to enable the operator to input control parameters manually with the onboard switches.
File preparation:
The files in PDF format were then exported to a vinyl cutter software called SIGNMASTER V3 CUT(BASIC EDITION)

The SIGNMASTER V3 control software parameters were set from the UI as below:
- Material Cutting size atA3
-
- Cutting speed set at 250m/s
-
- Cutting feedrate set at 60
-
- Vinyl cut materialGreen color ****
-
- Cutting feedrate set at 60
-

Material and machine set up
The maerial was manually set to ensure the blade would cover areas within the material boarders.
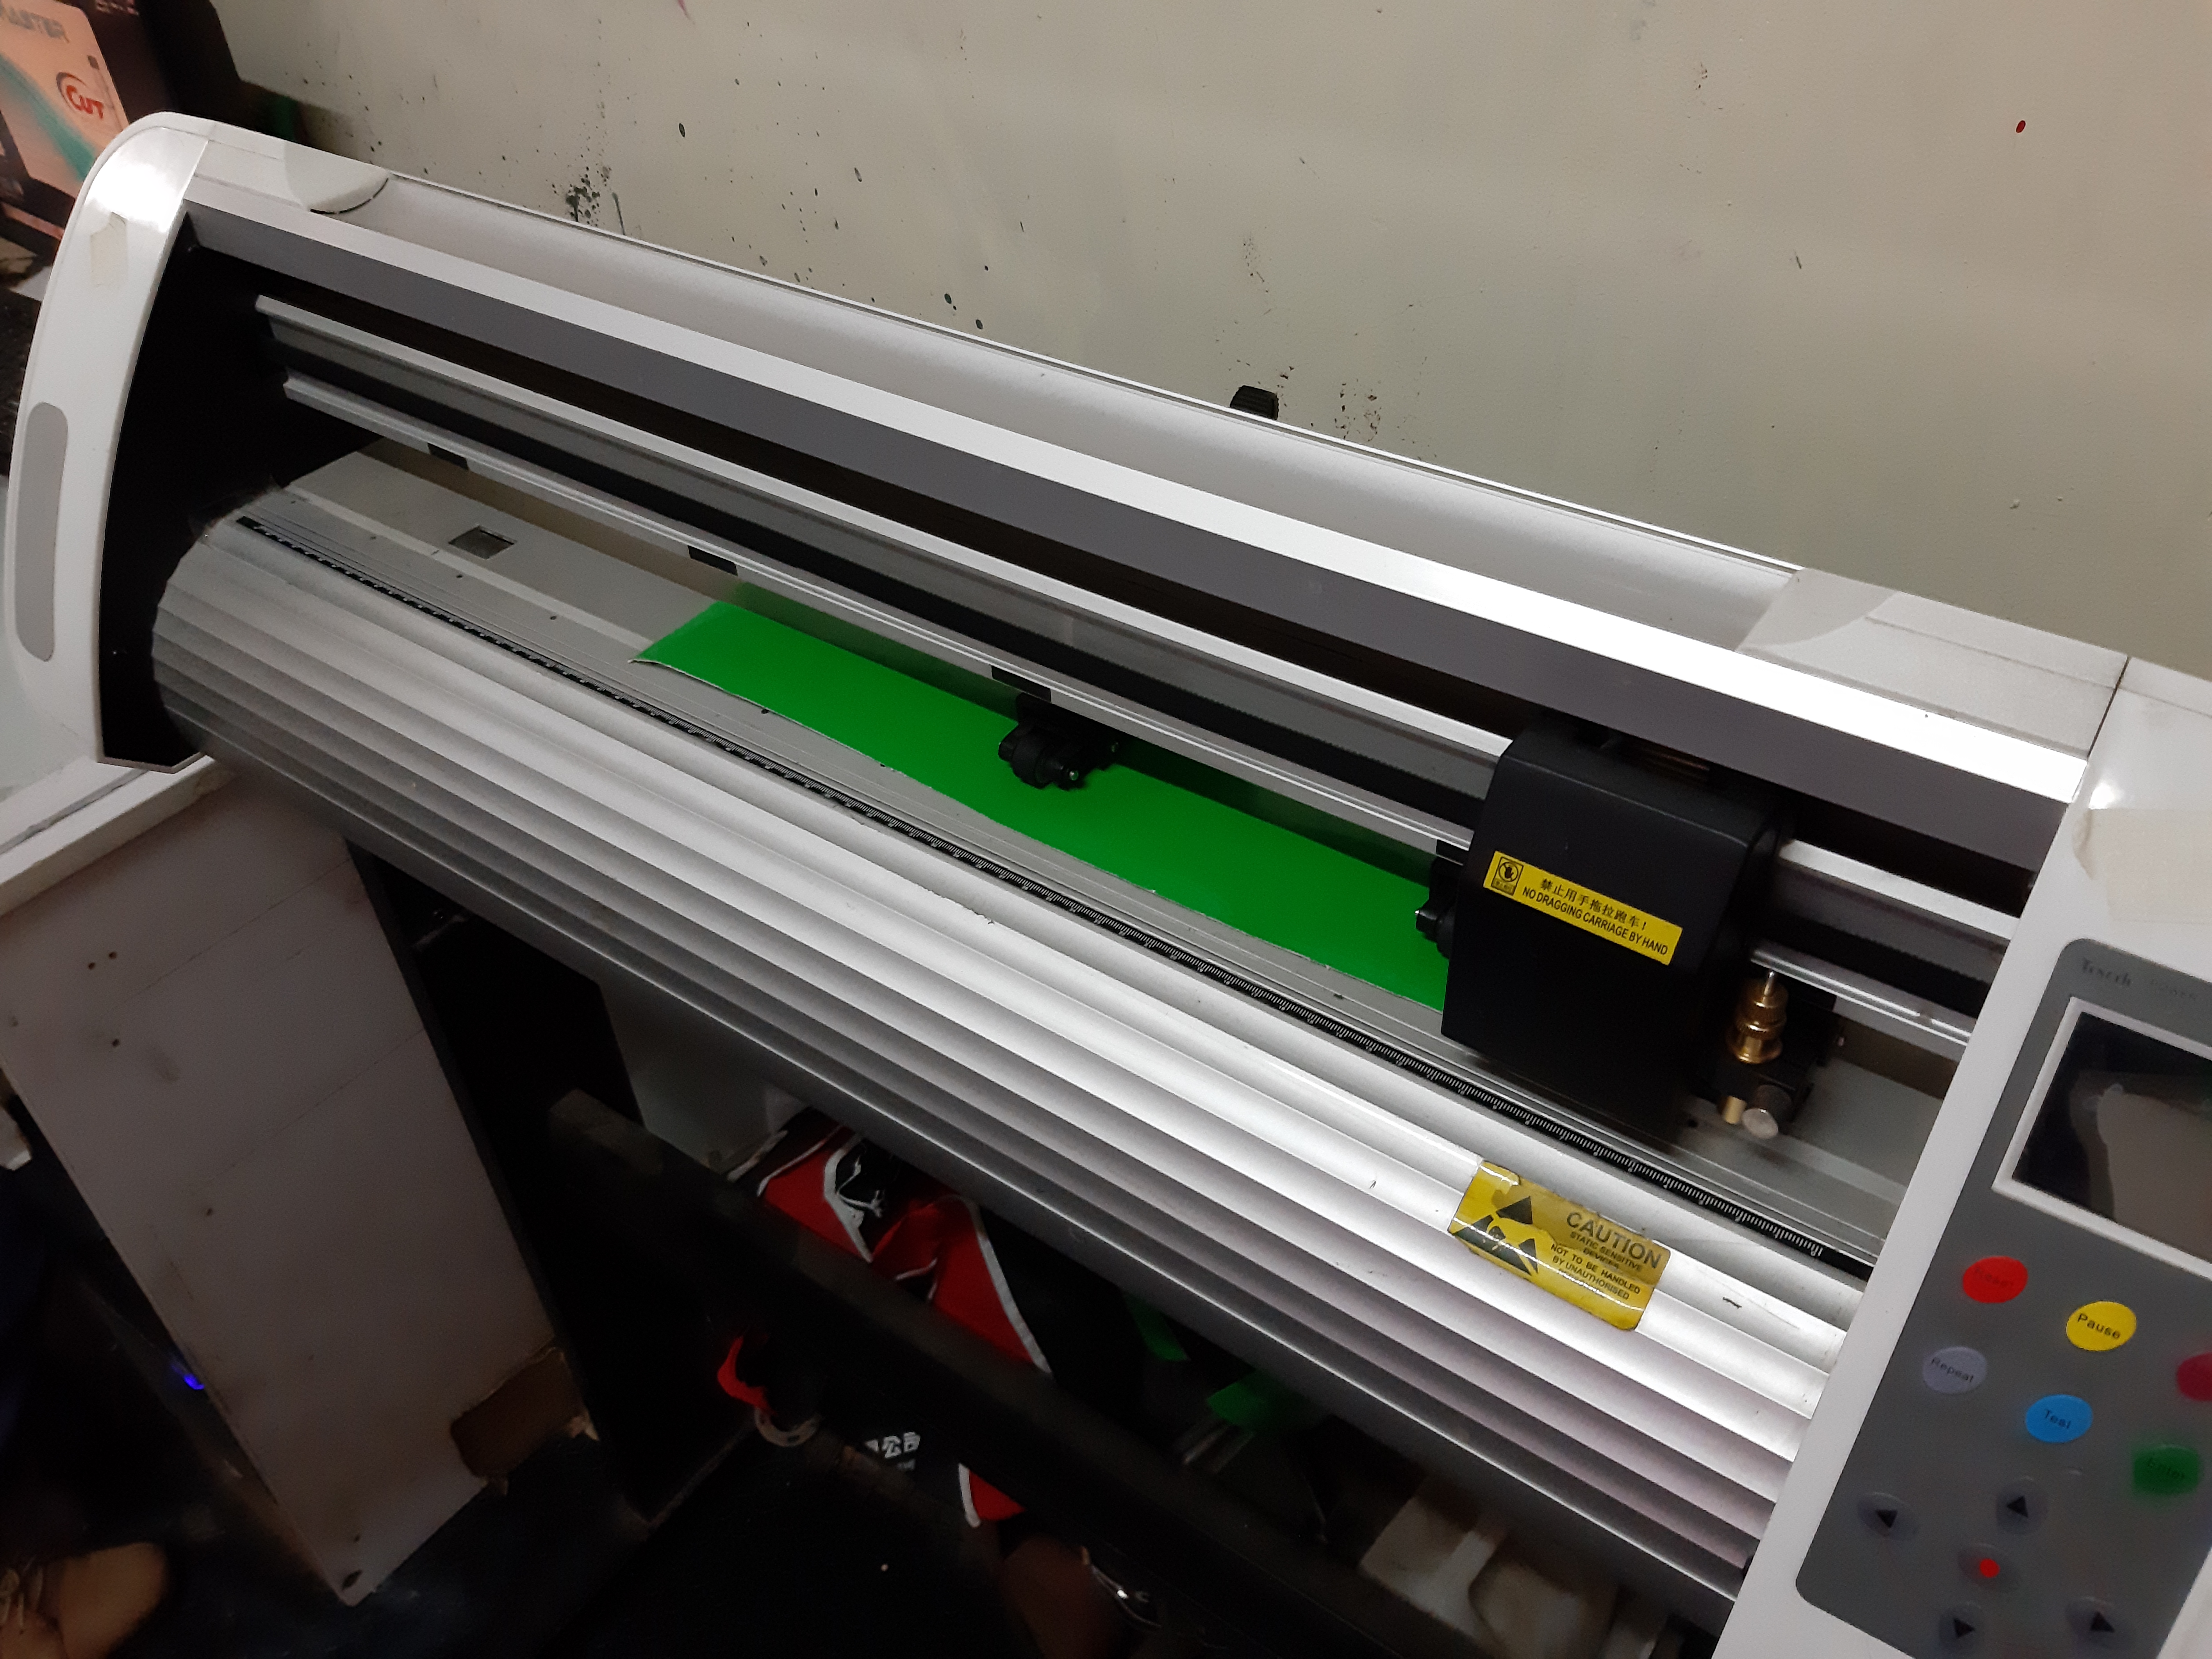
Cutting:
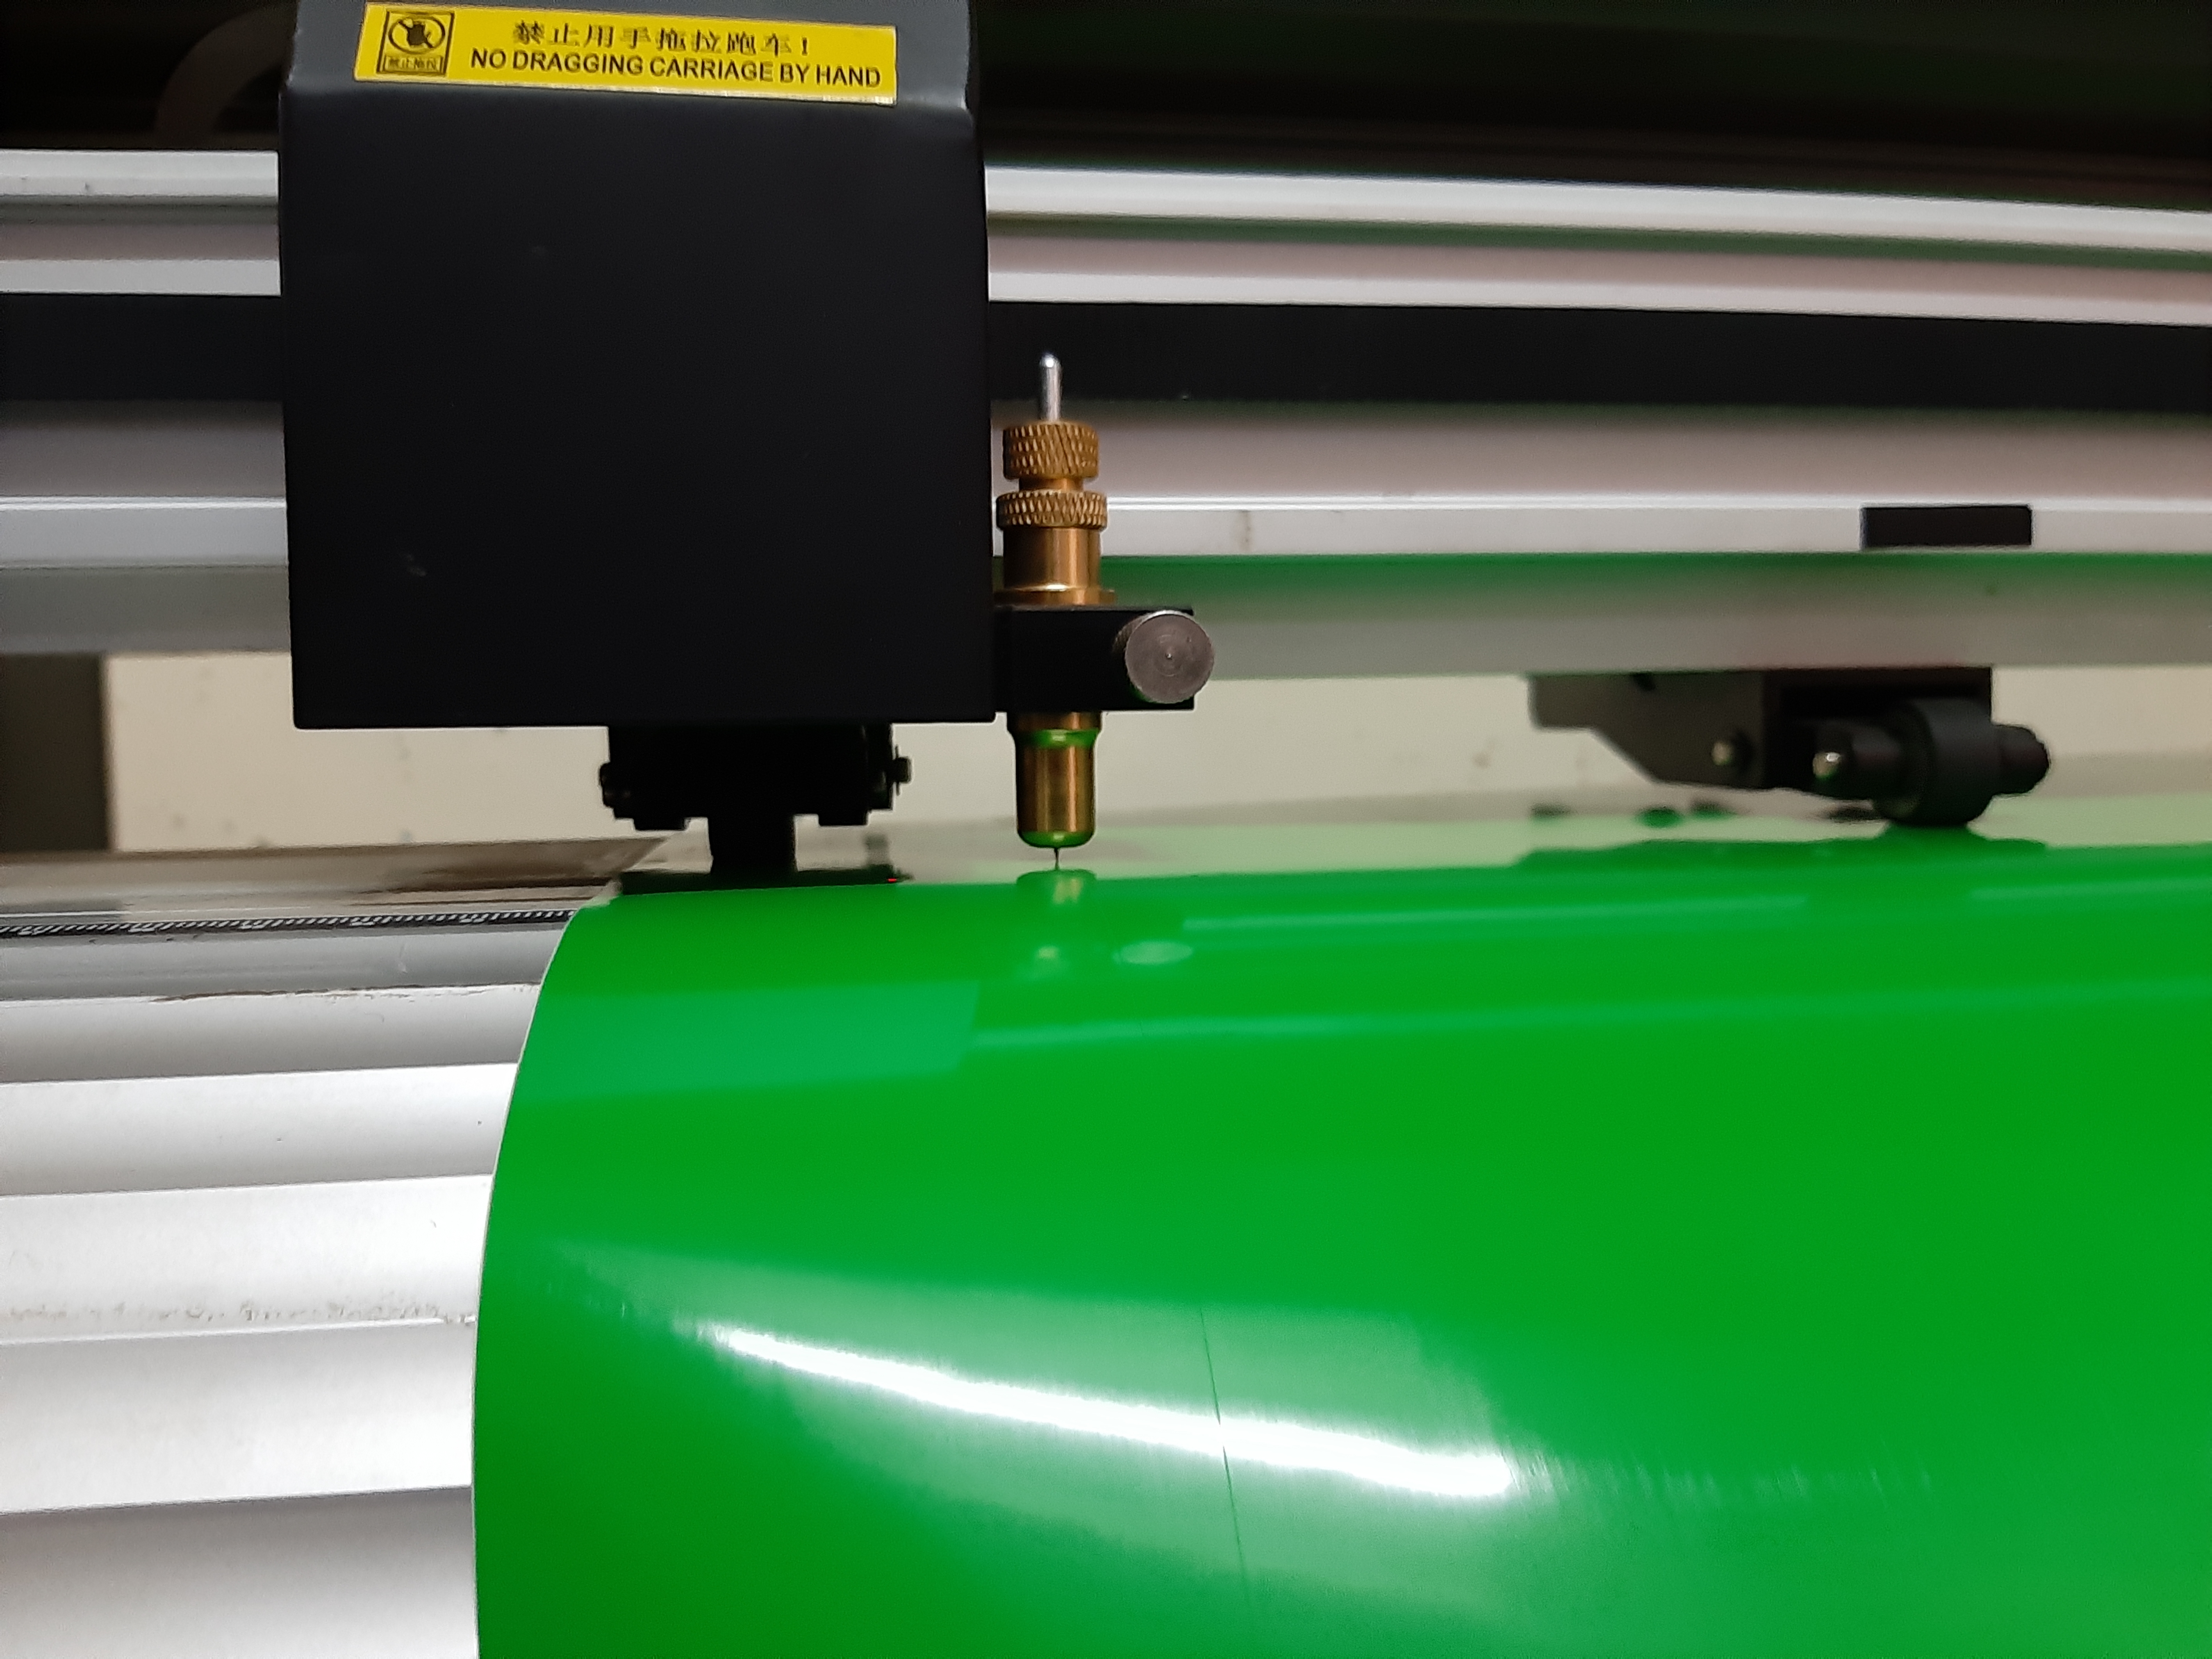
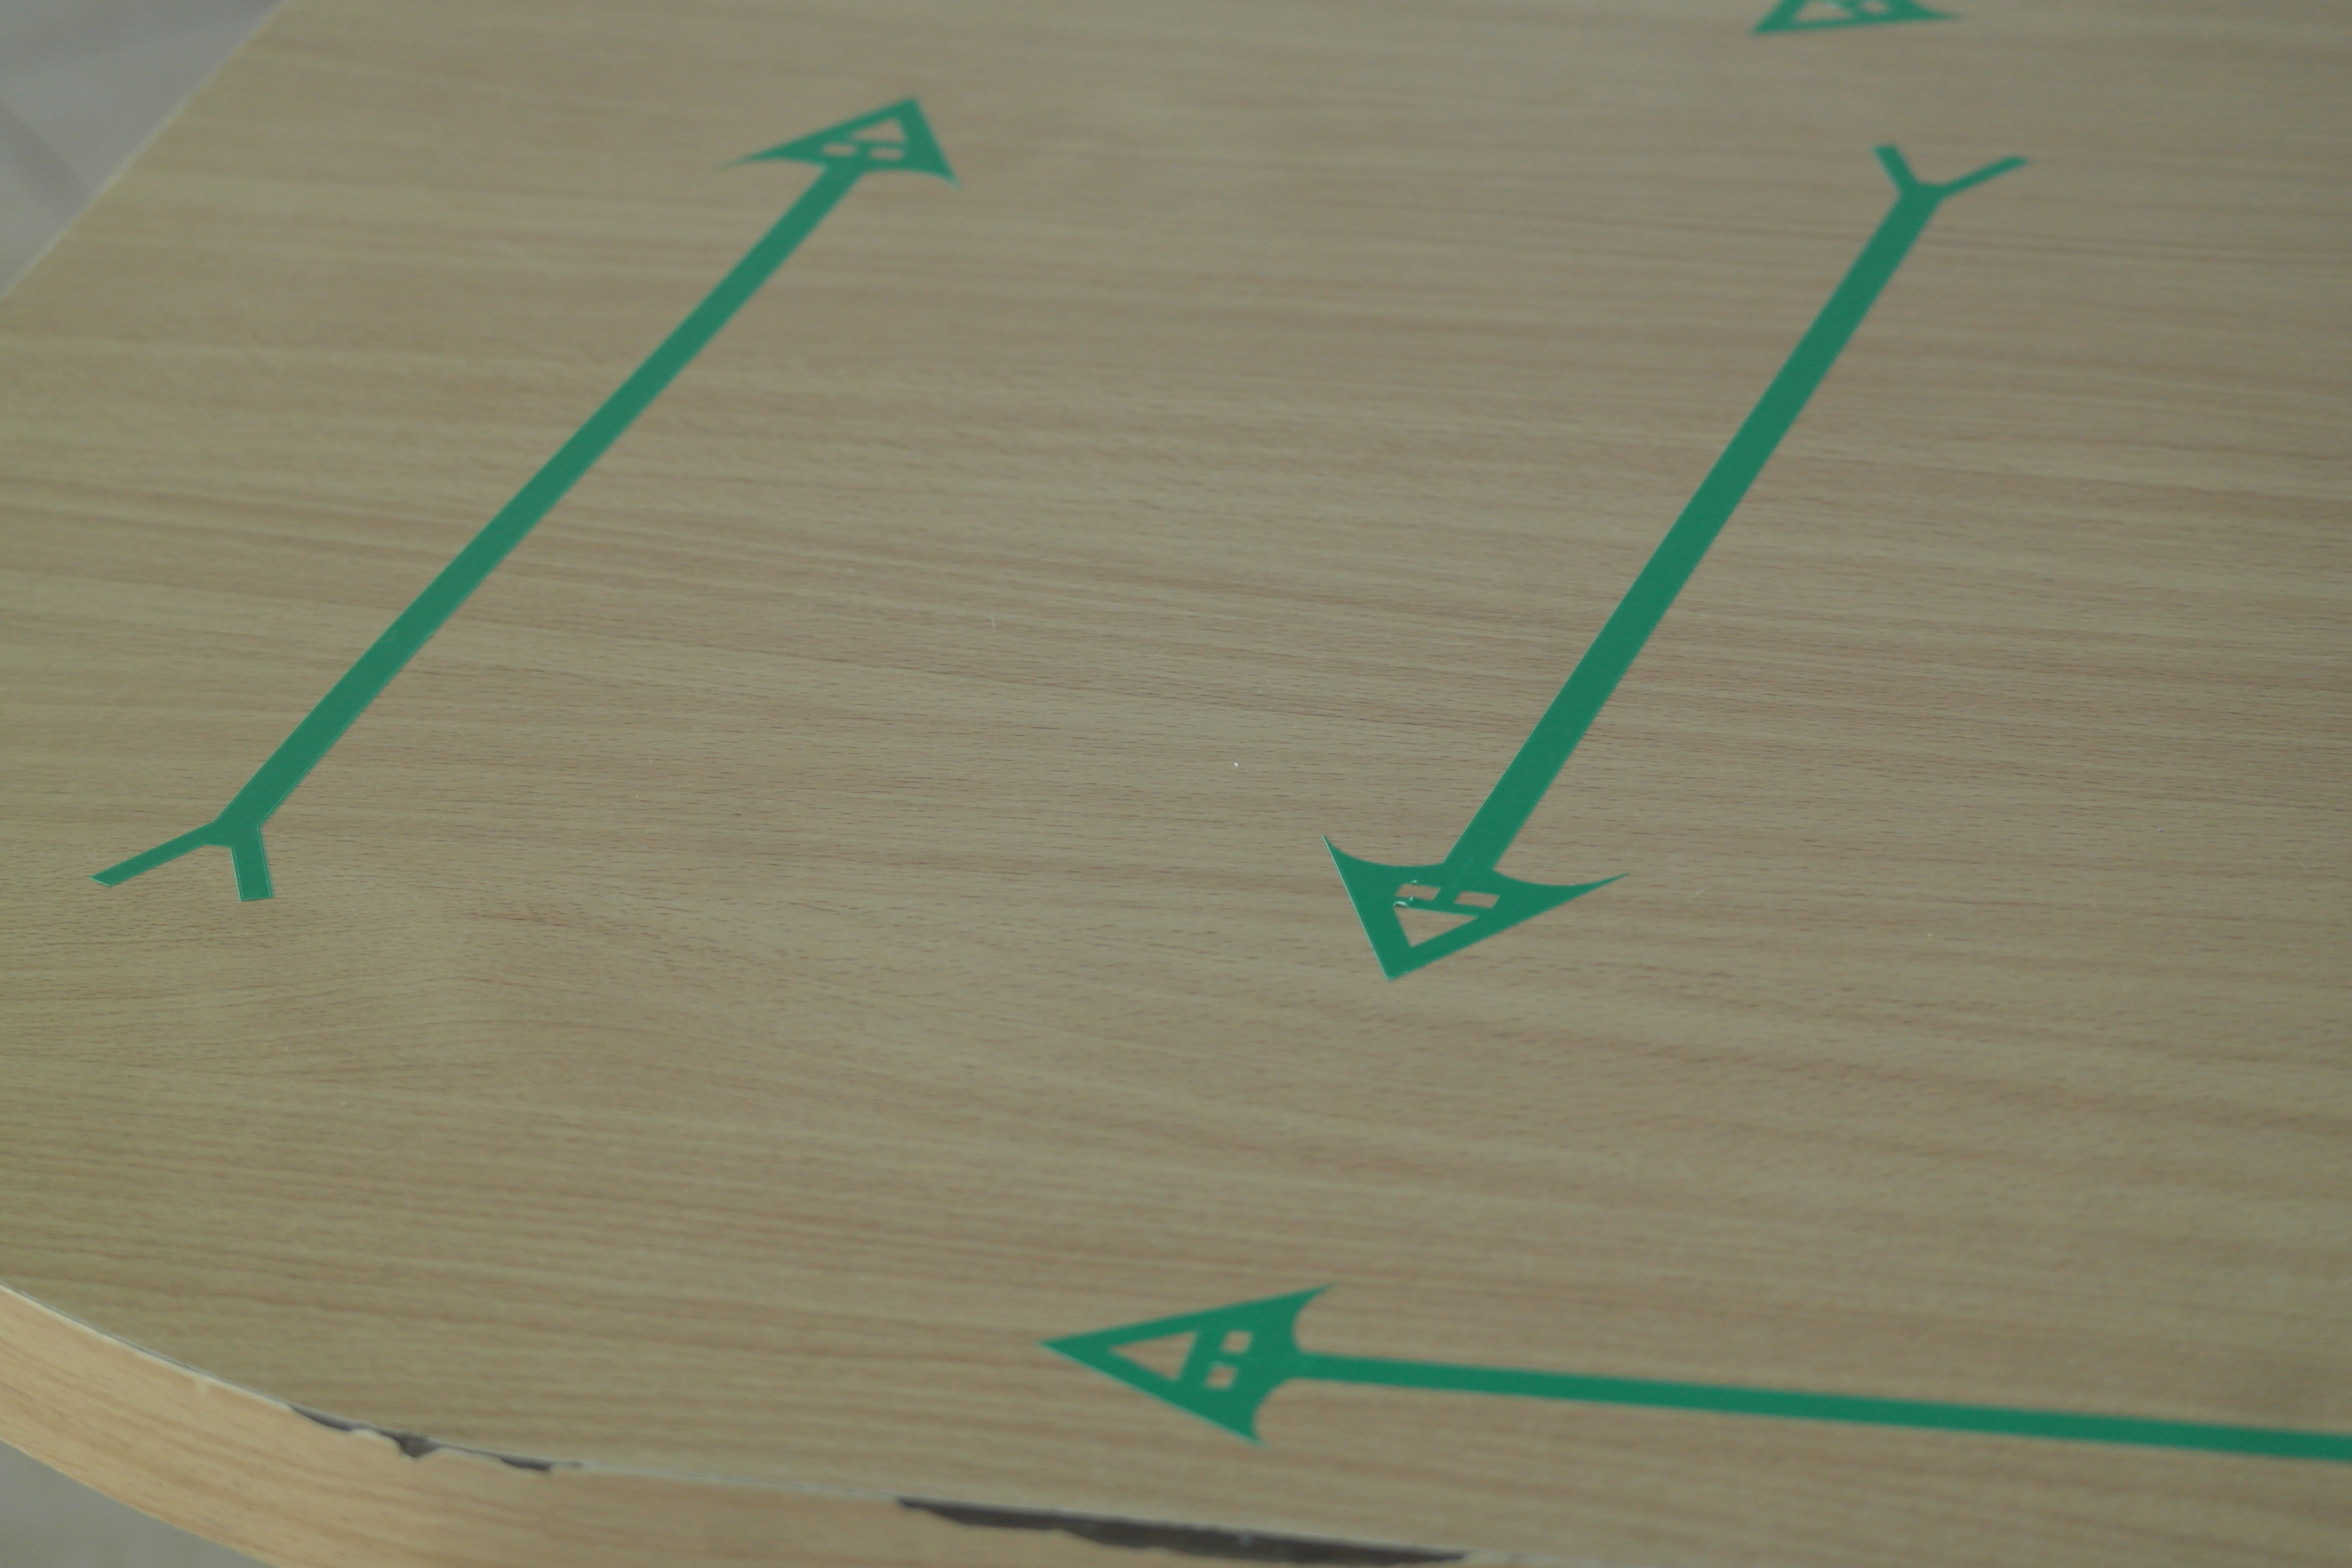
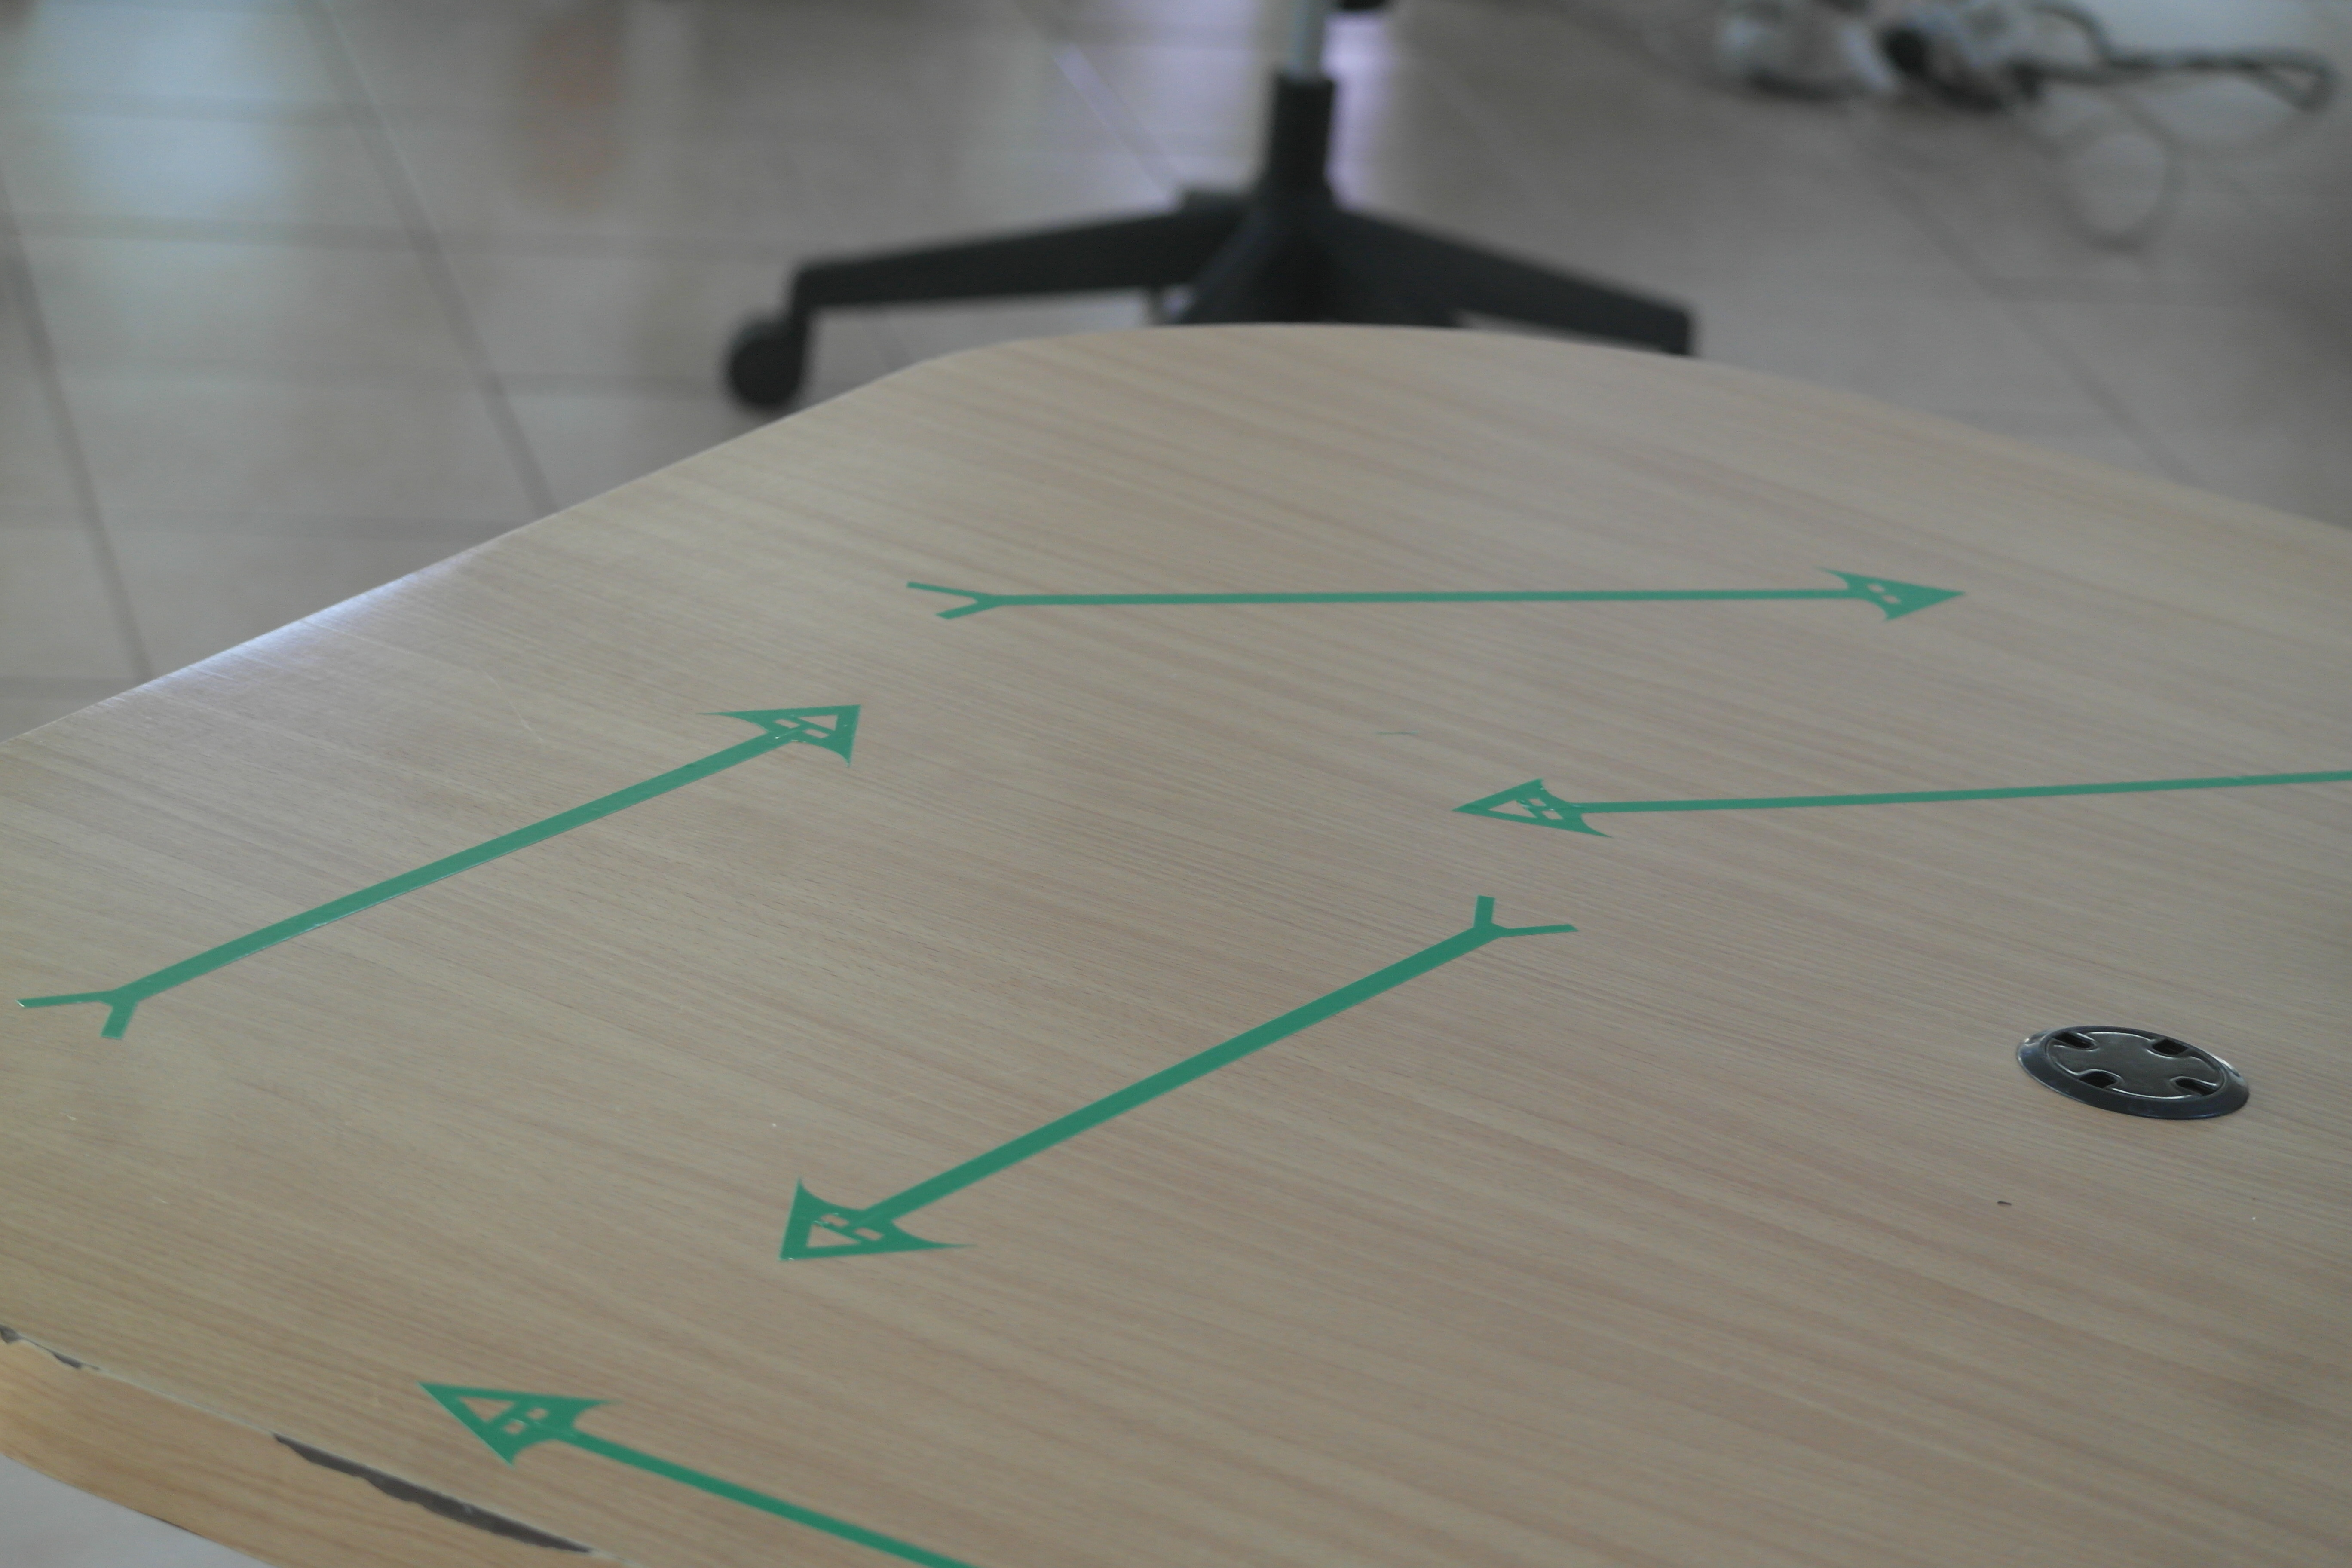
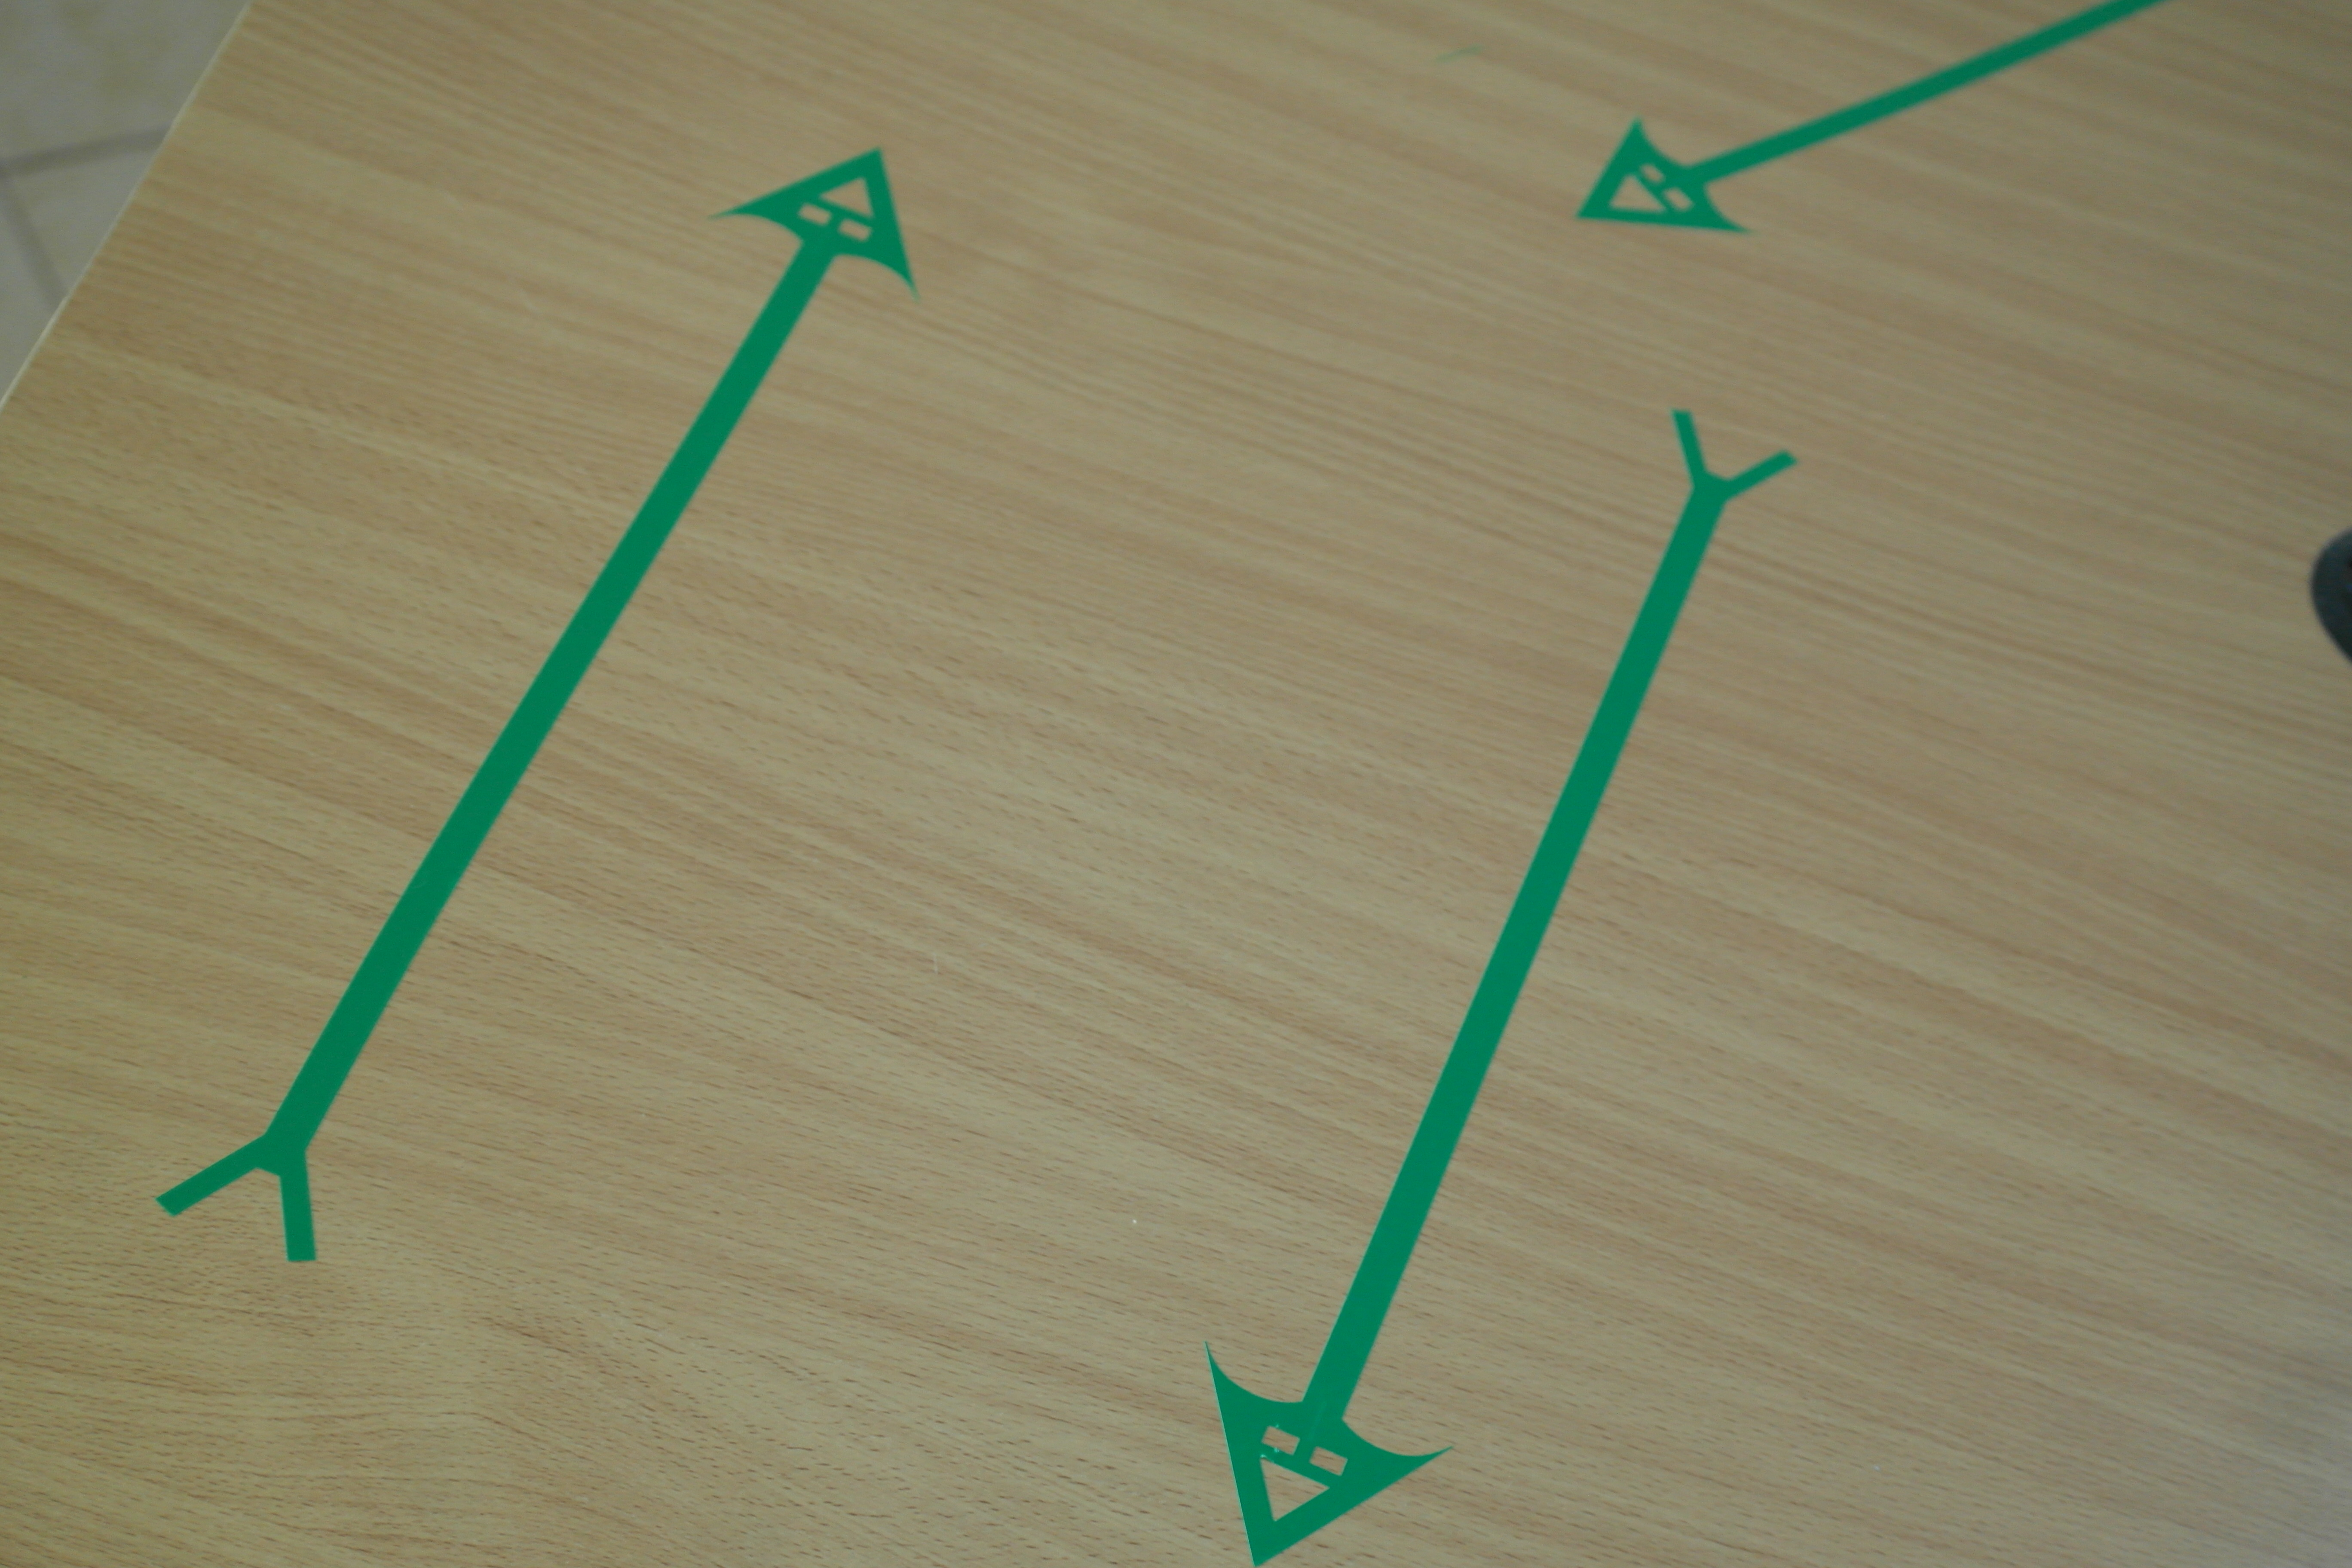
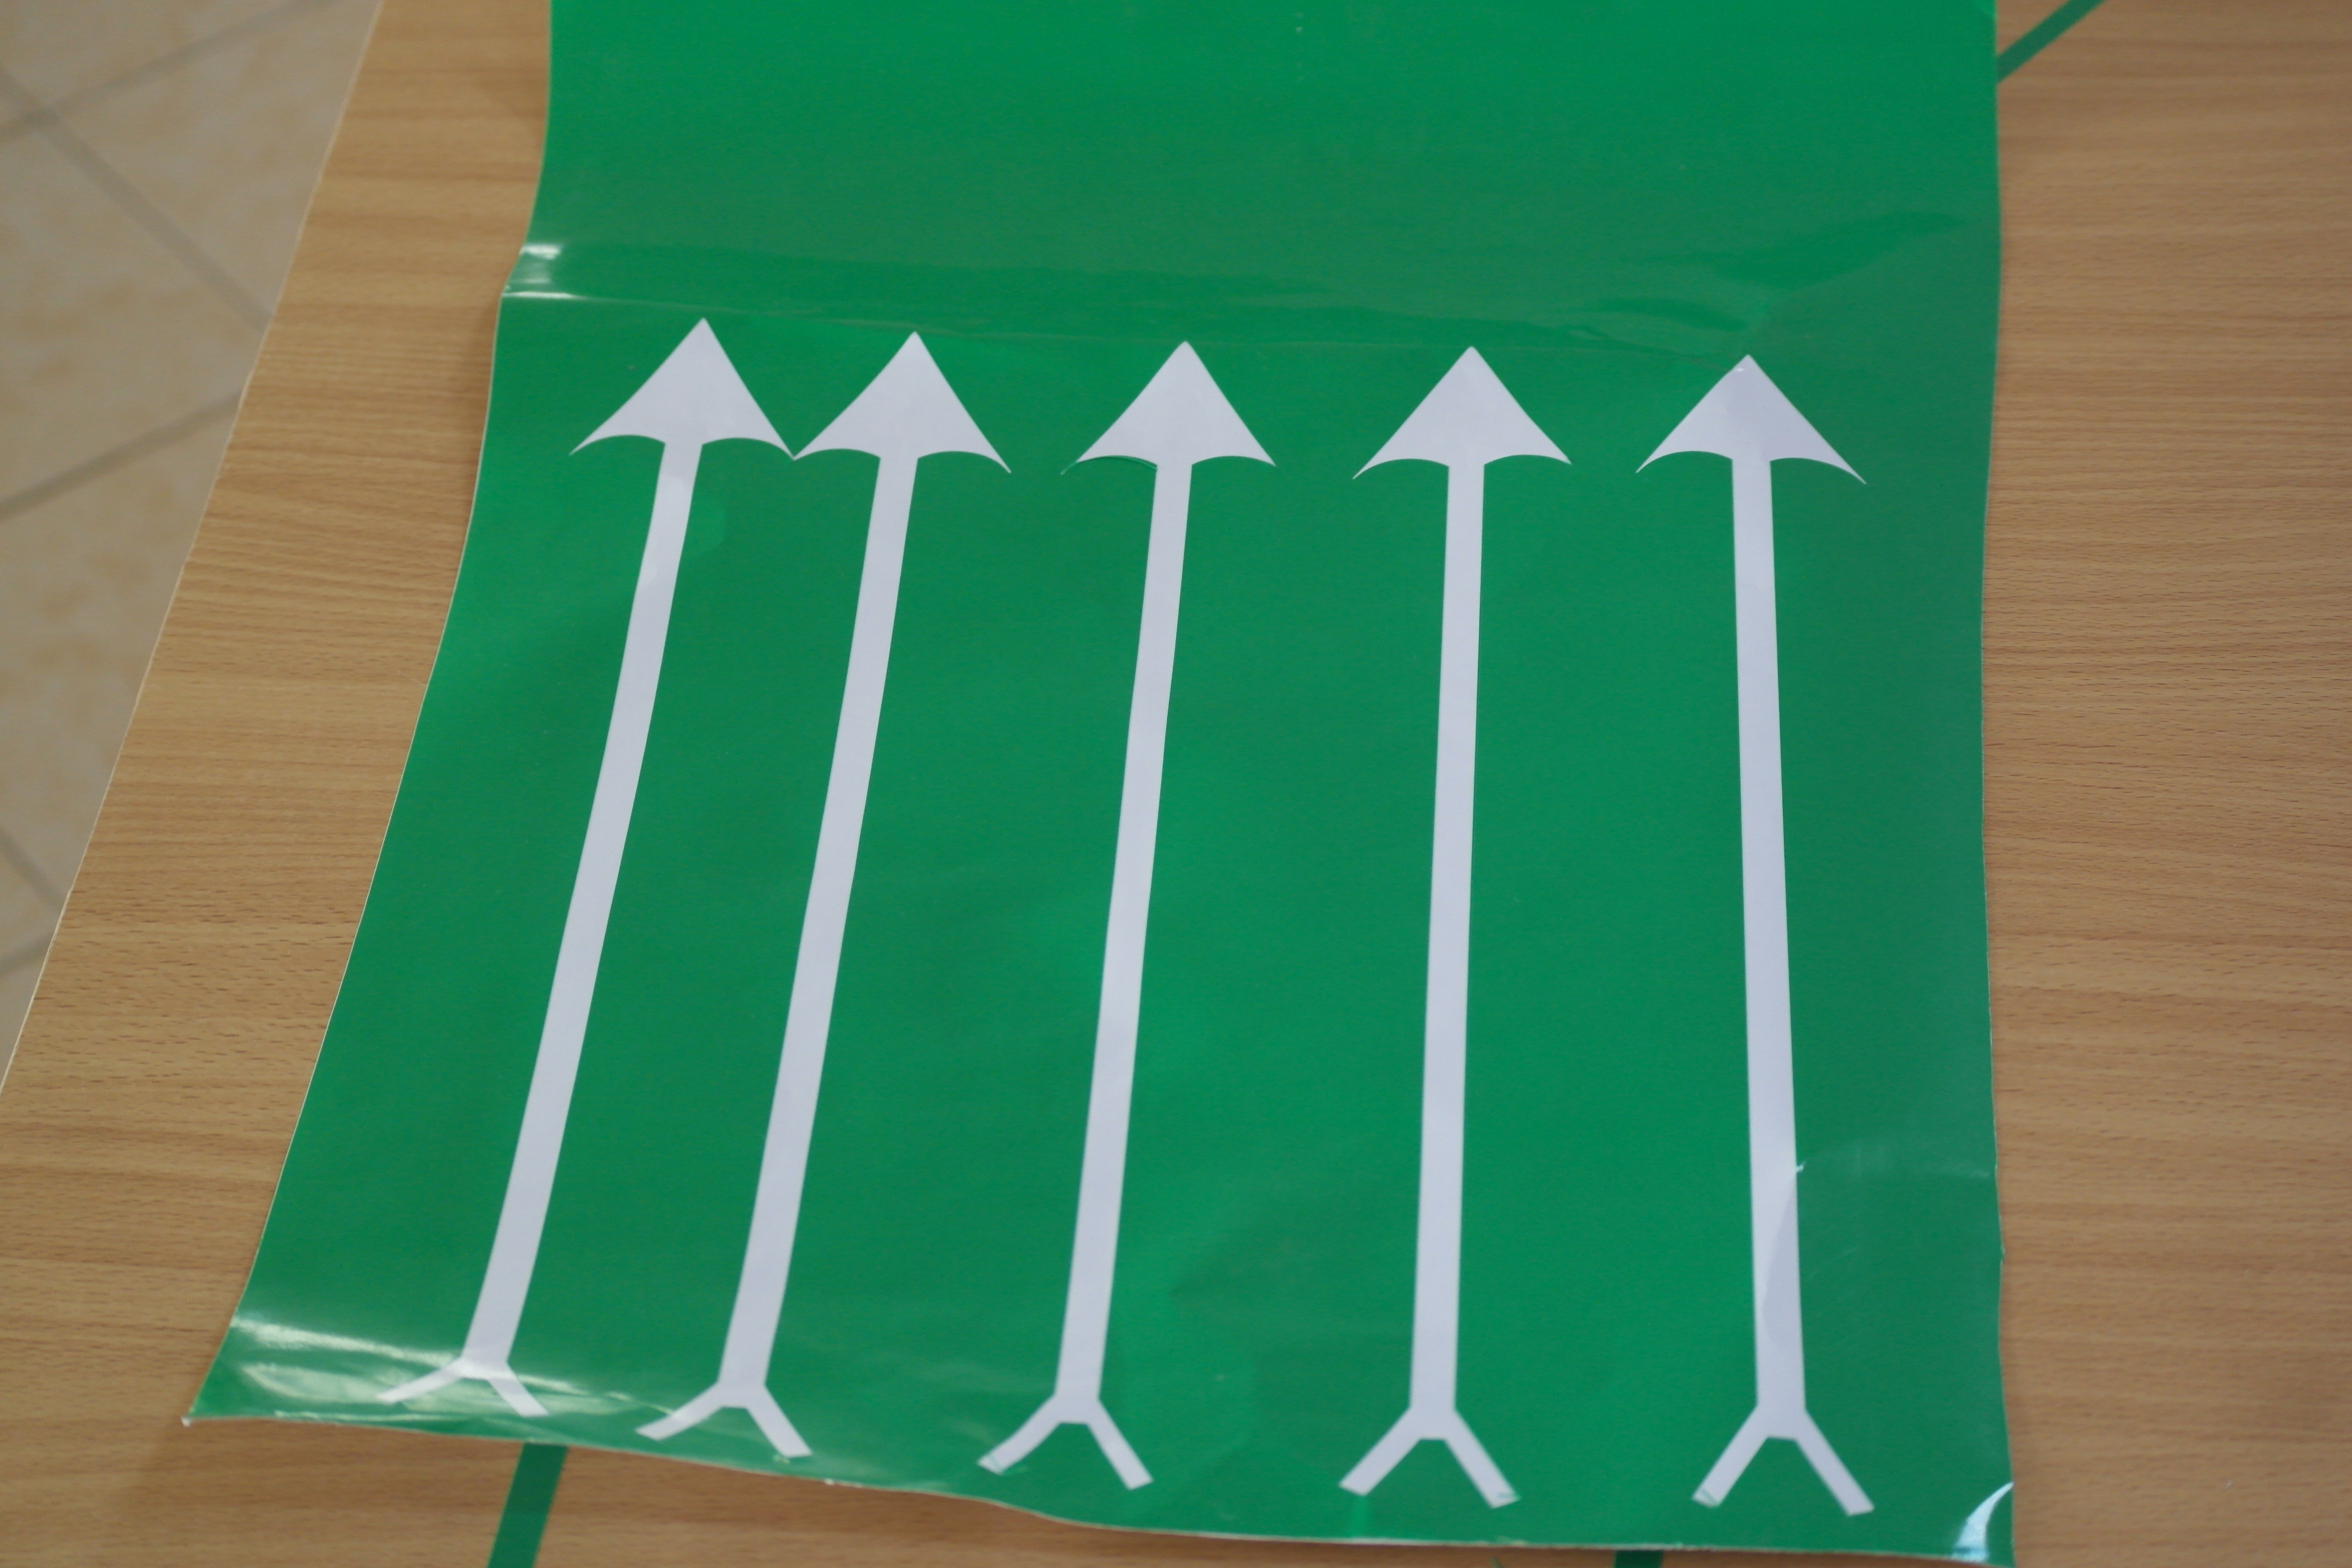
Final Vinyl Cut
I stick my vinyl cut stickers on my office table as you can see below:
Remaining Material:
Downloads
- SLOTTED SQUARE1
- SLOTTED SQUARE2
- SLOTTED SQUARE3
- CIRCULAR PATTERN1
- CIRCULAR PATTERN2
- CIRCULAR PATTERN3
- CIRCULAR PATTERN4
- CIRCULAR PATTERN5
- OCTAGON PATTERN1
- OCTAGON PATTERN2
- RECTNGULAR PATTERN1
- RECTNGULAR PATTERN2
- RECTNGULAR PATTERN3
- RECTNGULAR PATTERN4
- SYMMETRICAL PATTERN1
- TRIANGULAR PATTERN1
- TRIANGULAR PATTERN2
- TRIANGULAR PATTERN3
- ARROW FOR VINYL CUTTER.
Problems encountered this week:
- As stated earlier our laser cutter ran out of Carbon diOxide. We thus had to outsource from another fabrication workshop within our locality.