- Design and 3D print an object (small, few cm3, limited by printer time) that could not be made subtractively
- 3D scan an object (and optionally print it)
Solution:
3D Printing:
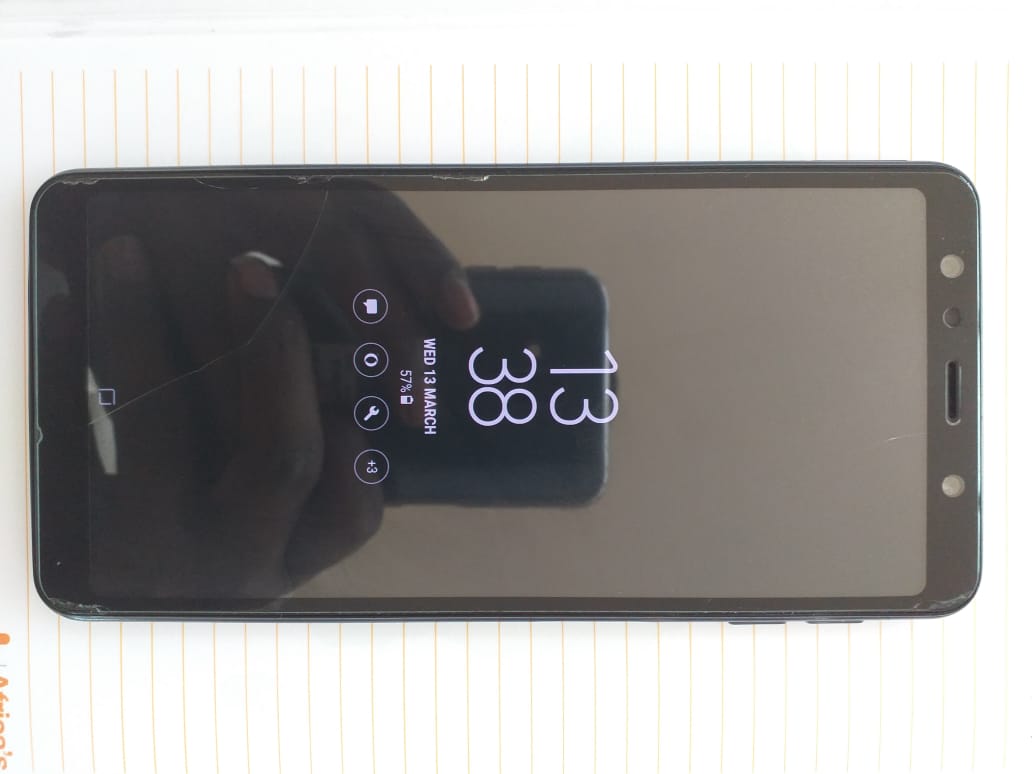
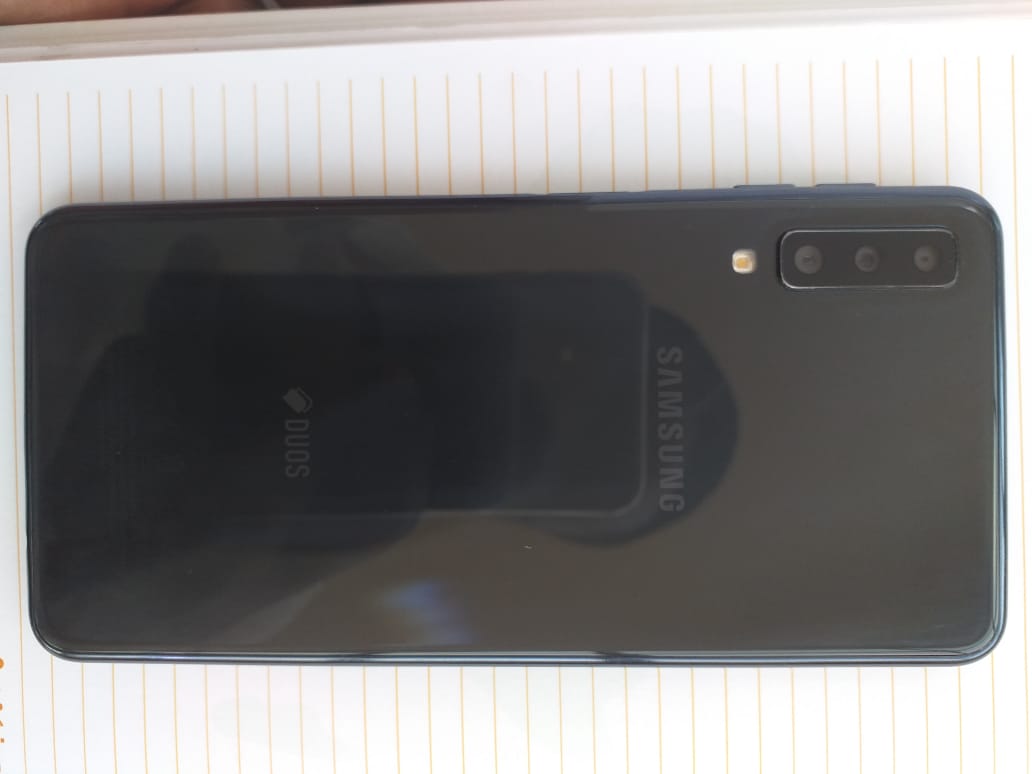
For my 3D assignment, I chose to design my smartphone's(Samsung galaxy A7 2018 model) stand that I could use to listen to music, charge or even use the touchscreen without hand holding it; Something I personally find inconvenient while working at the office.Below are pictures of the phone itself.
i. Top.
ii. Back view.
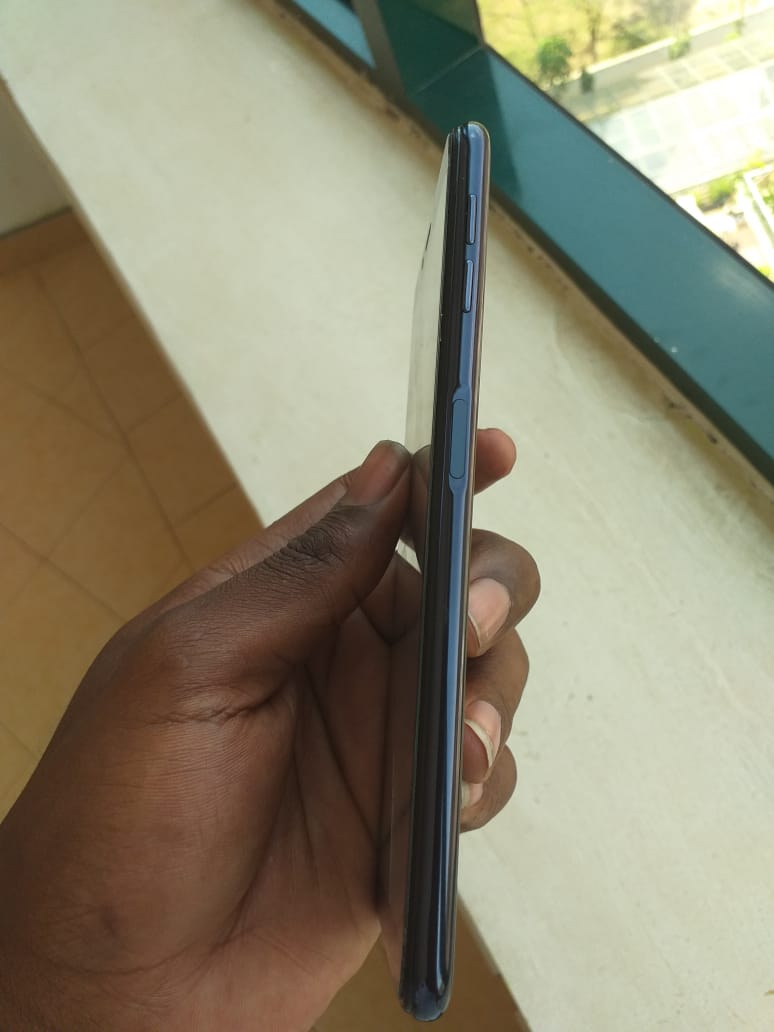
iii. Side View(with volume, fingerprint scanner and unlock button).
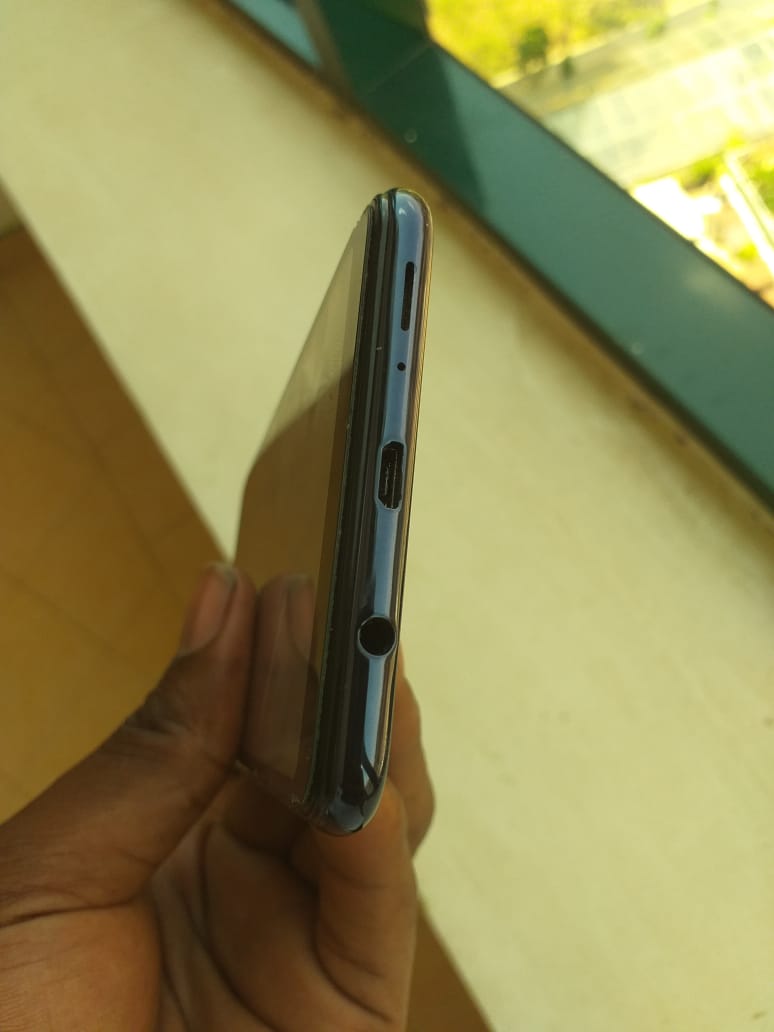
iv. Bottom view(with charging/USB port and earphone jack port).
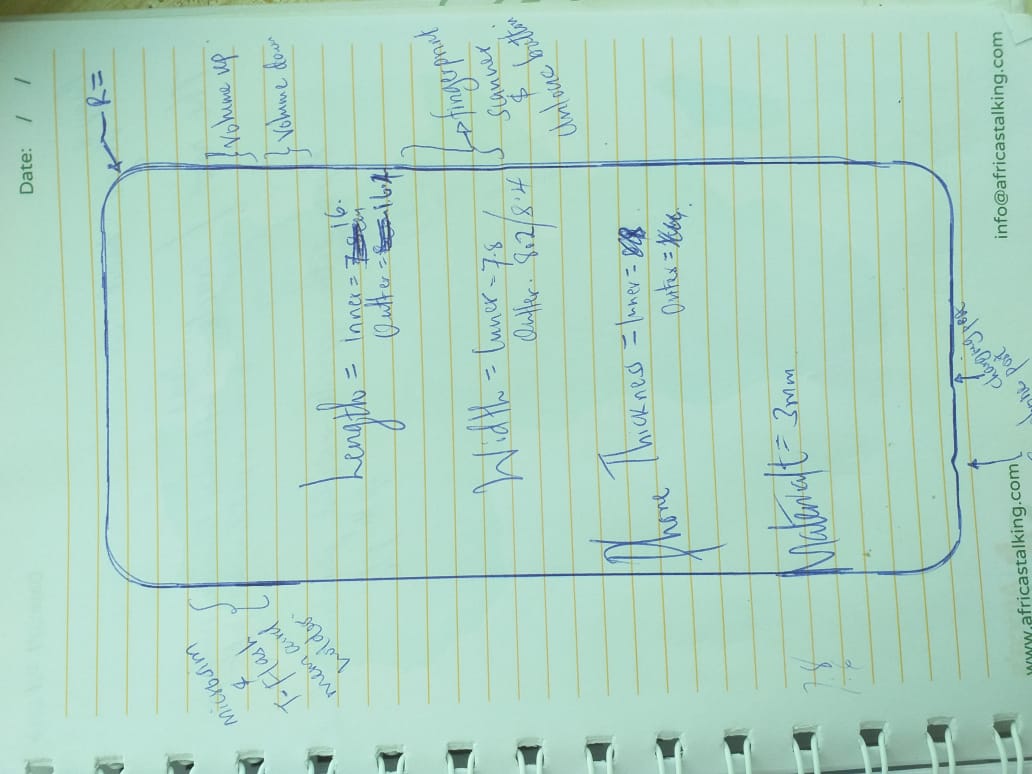
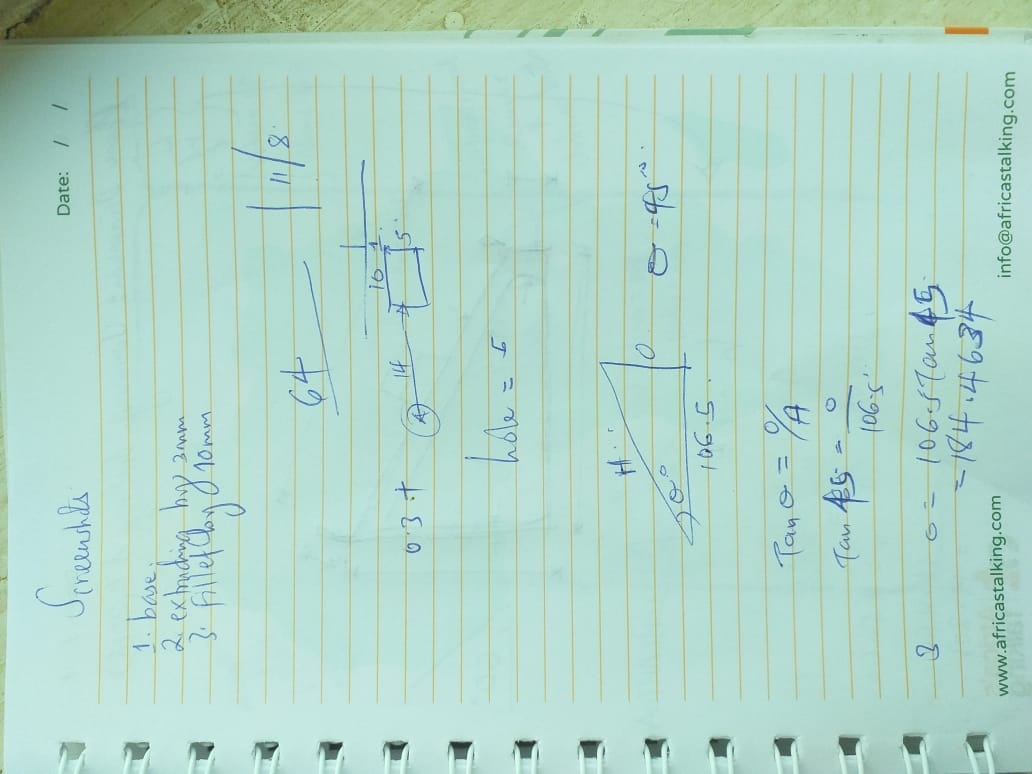
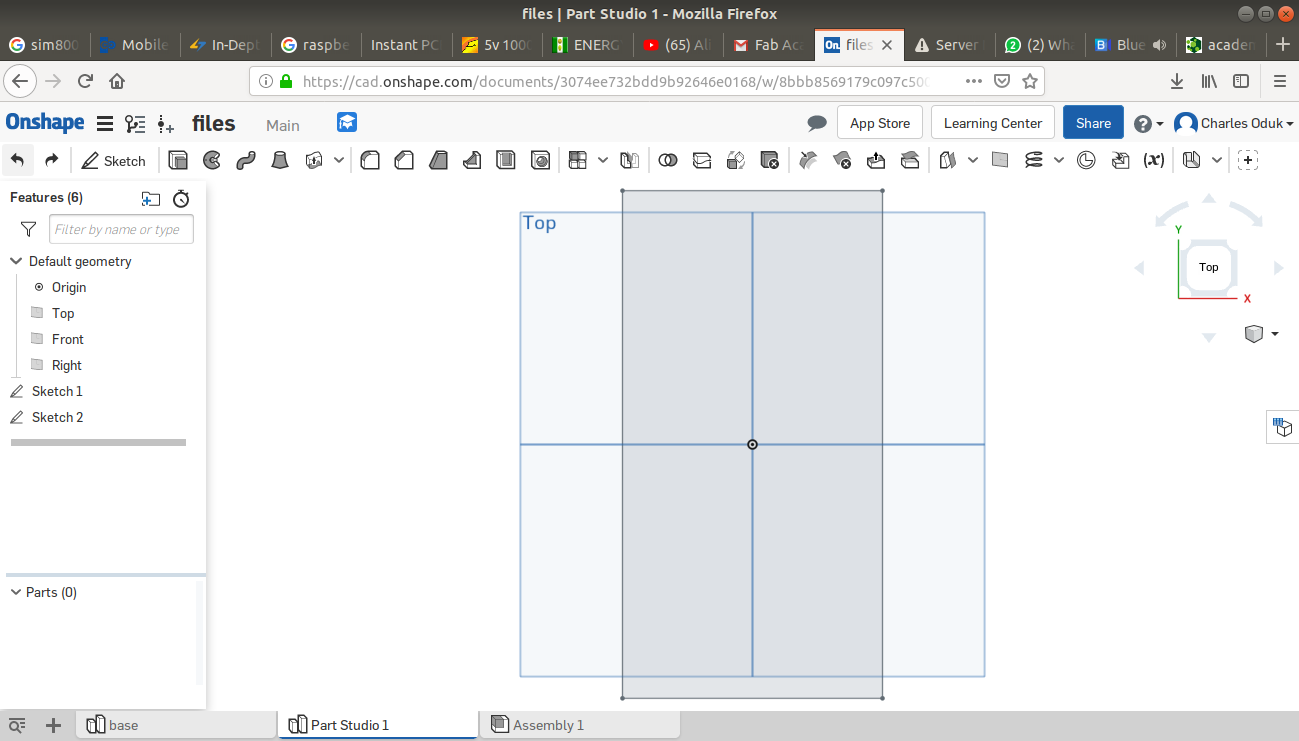
Sketches and dimensioning.
For my design, I made handsketches for my smart phone to make it relatively easy to dimesion, design and draw on the CAD software.
Below are pictures showing the handsketches and dimensions.
i. I traced the smartphone outline on a paper using a biro pen.
ii. I then designed sketches for the stand.
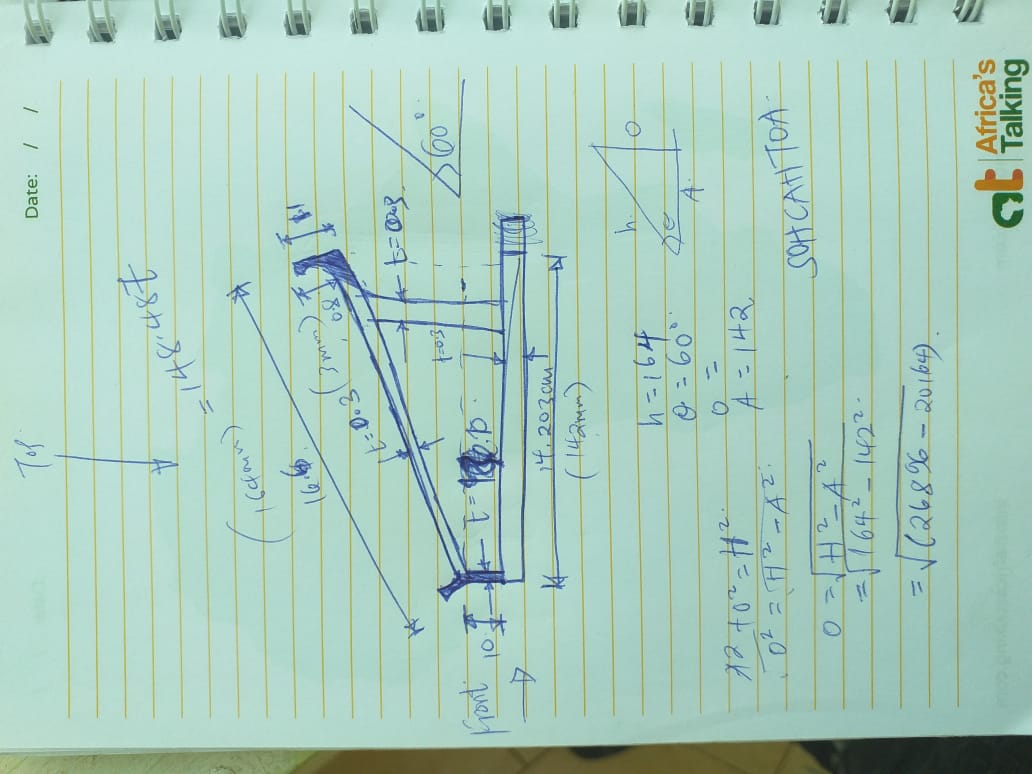
iii. And finally made calculations for the necessary dimensions.
3D CAD design.
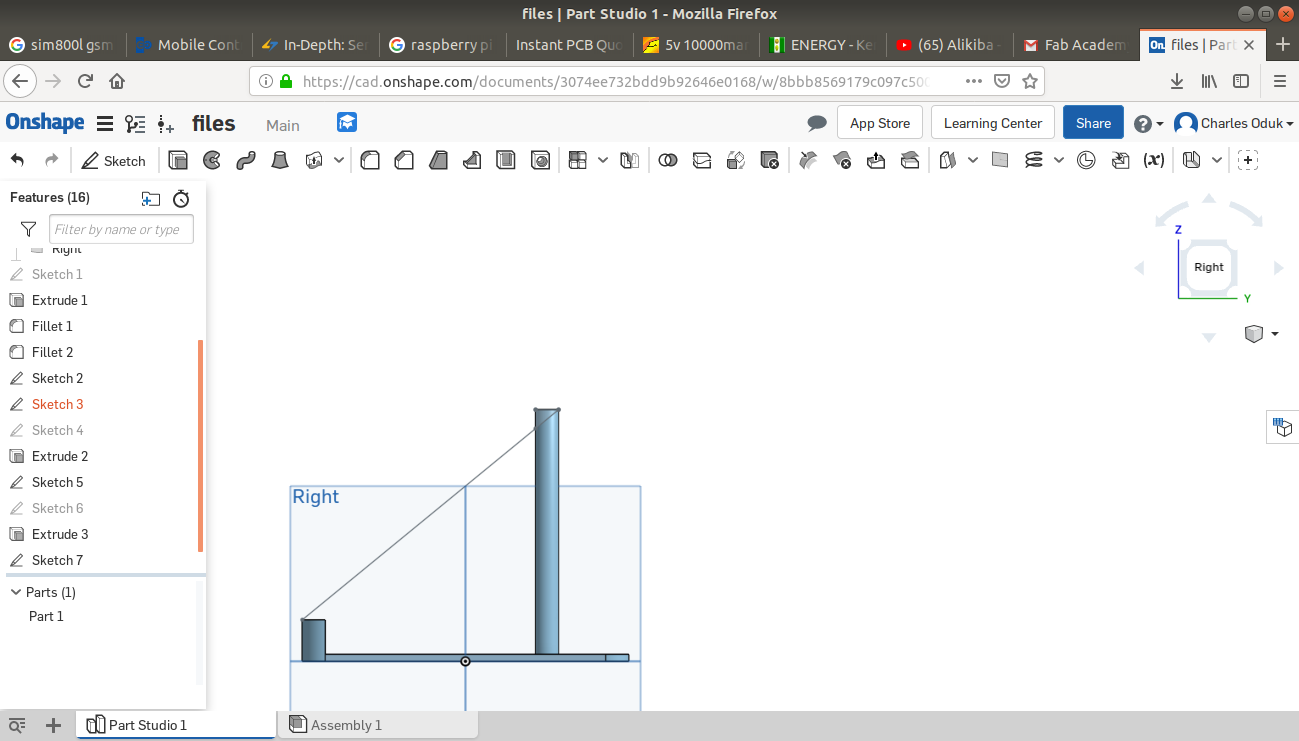
I used the ONSHAPE CAD design platform available free for use online.The following are the steps I followed for my design:
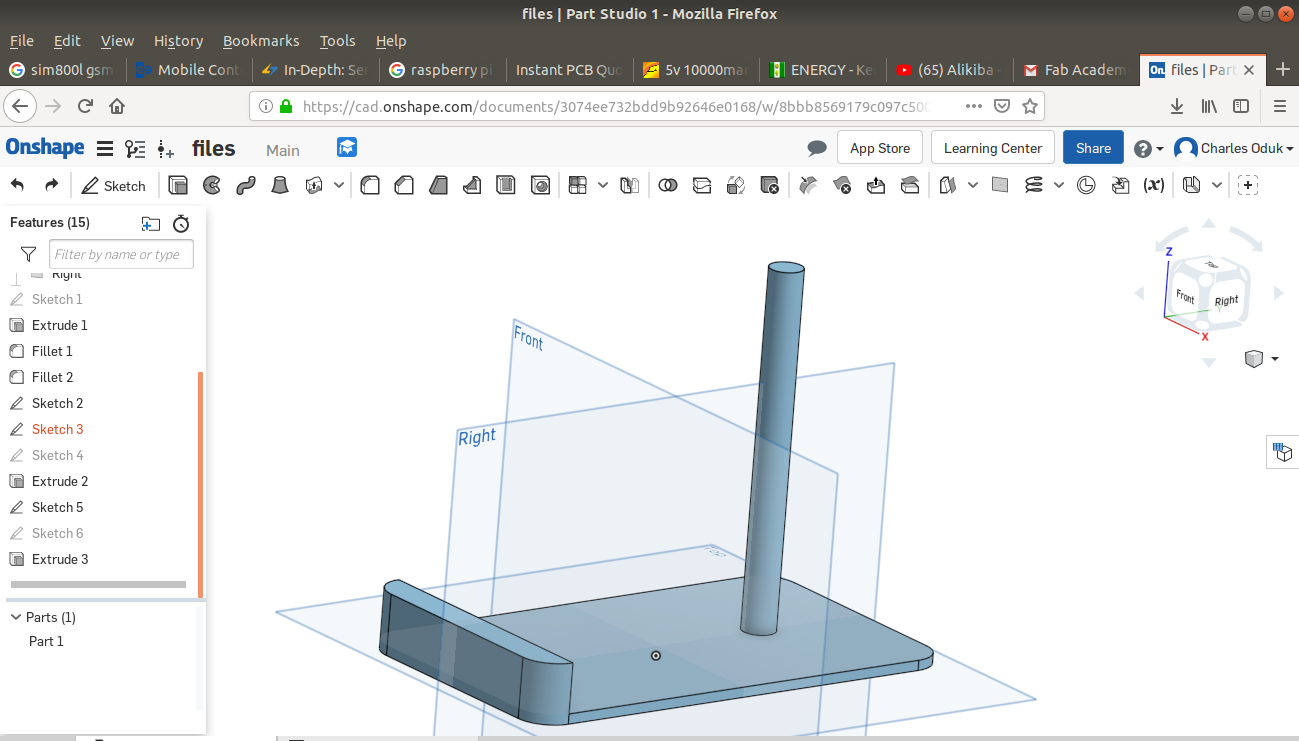
i. The base: contained the flat surface that holds the entire stand and a cylindrical support rod.The design was as shown below:
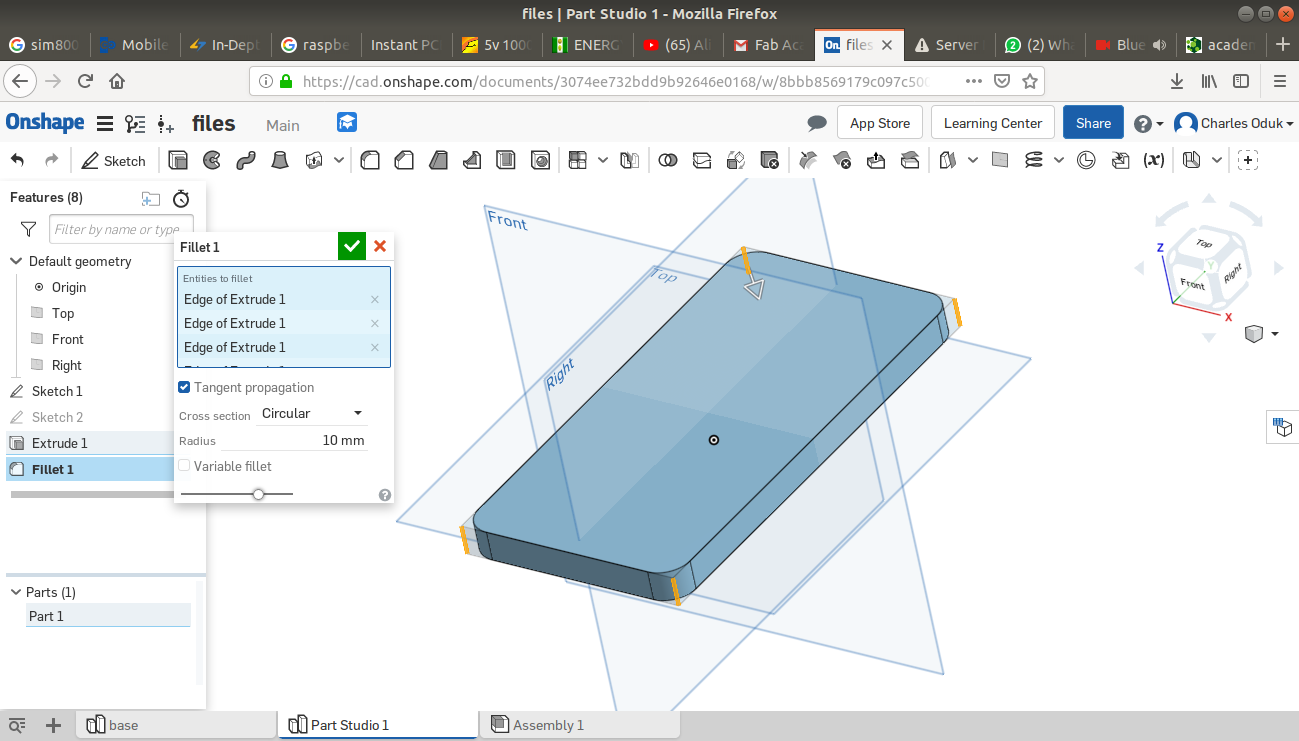
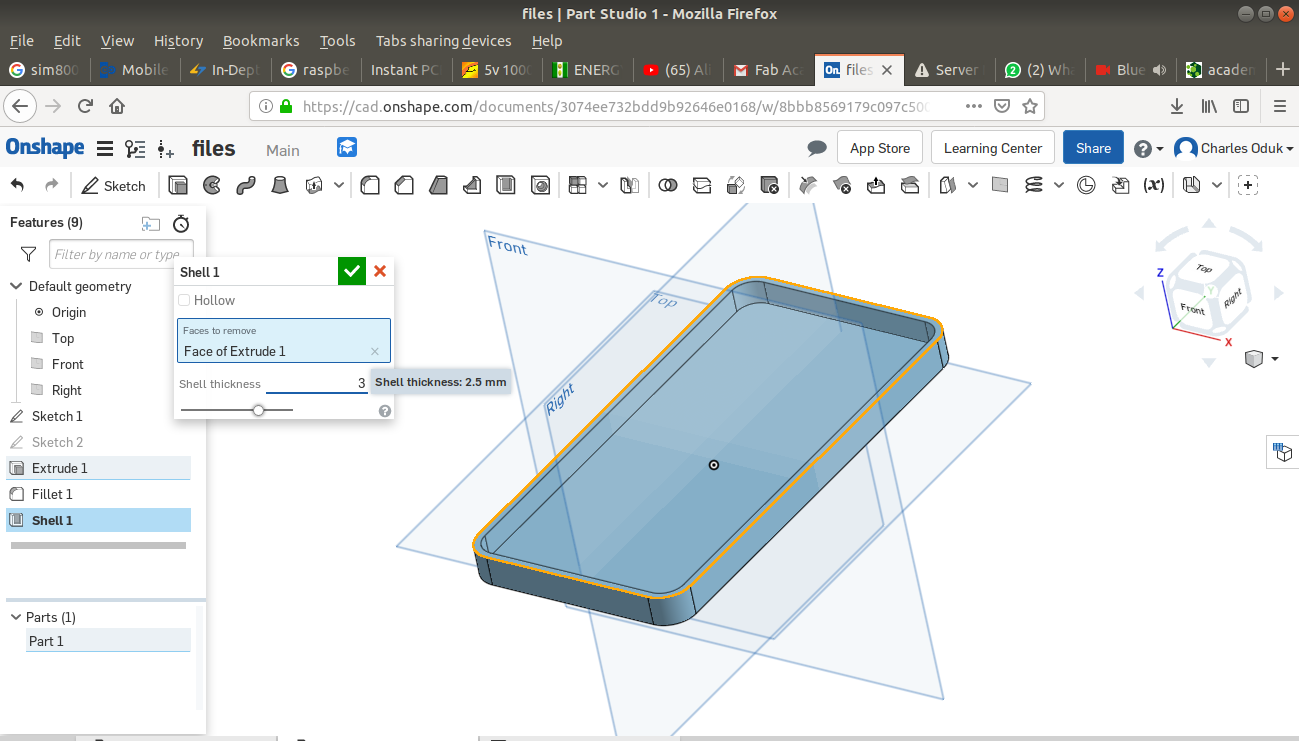
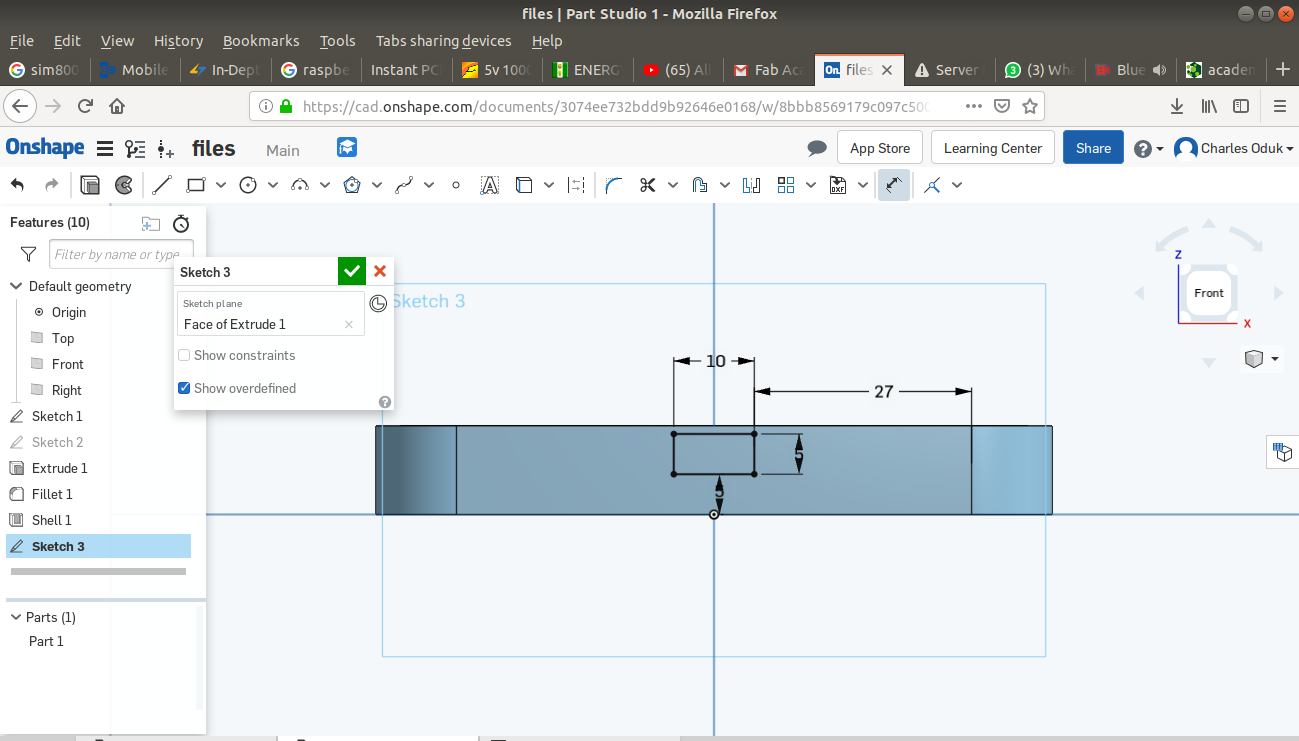
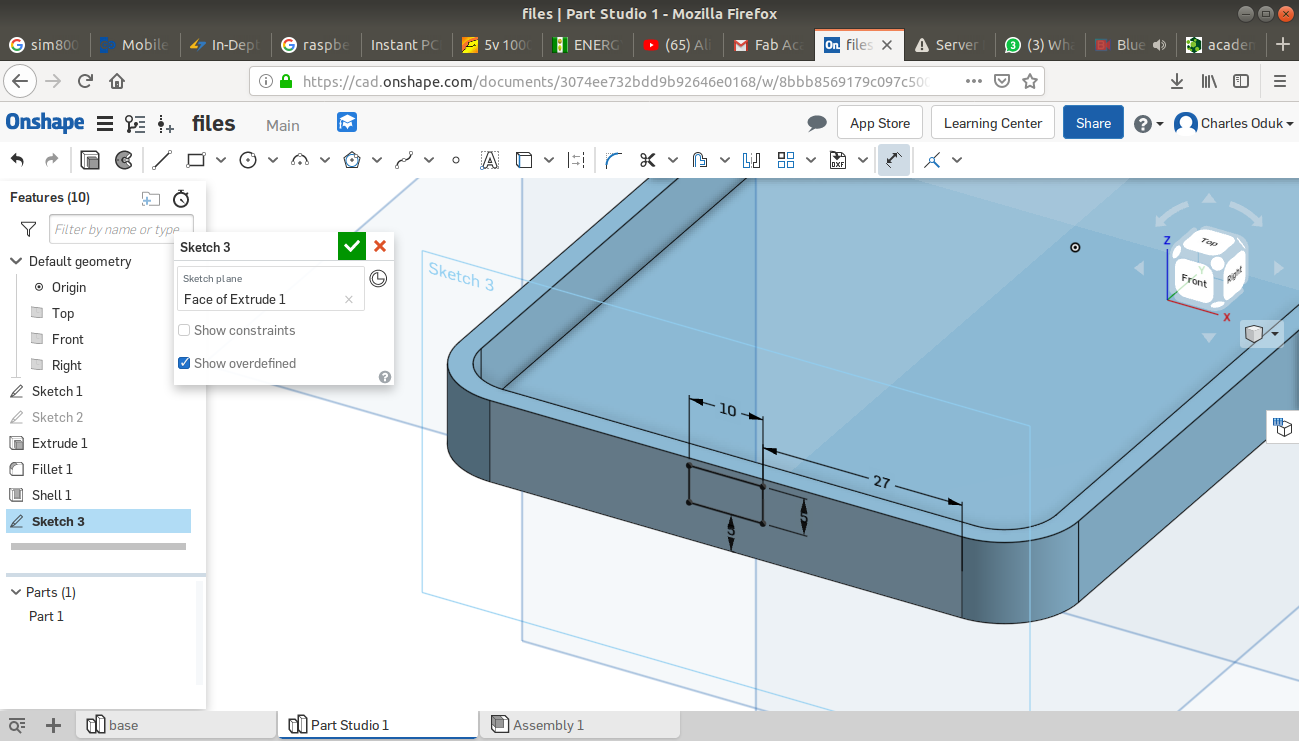
ii. The Phone holder: is like the "bed" where the phone would lie.
Creating a 2D sketch
Extruding at with a thickness of 3mm and Filleting at a radius of 10mm.
Shelling at a wall thickness of 3mm.
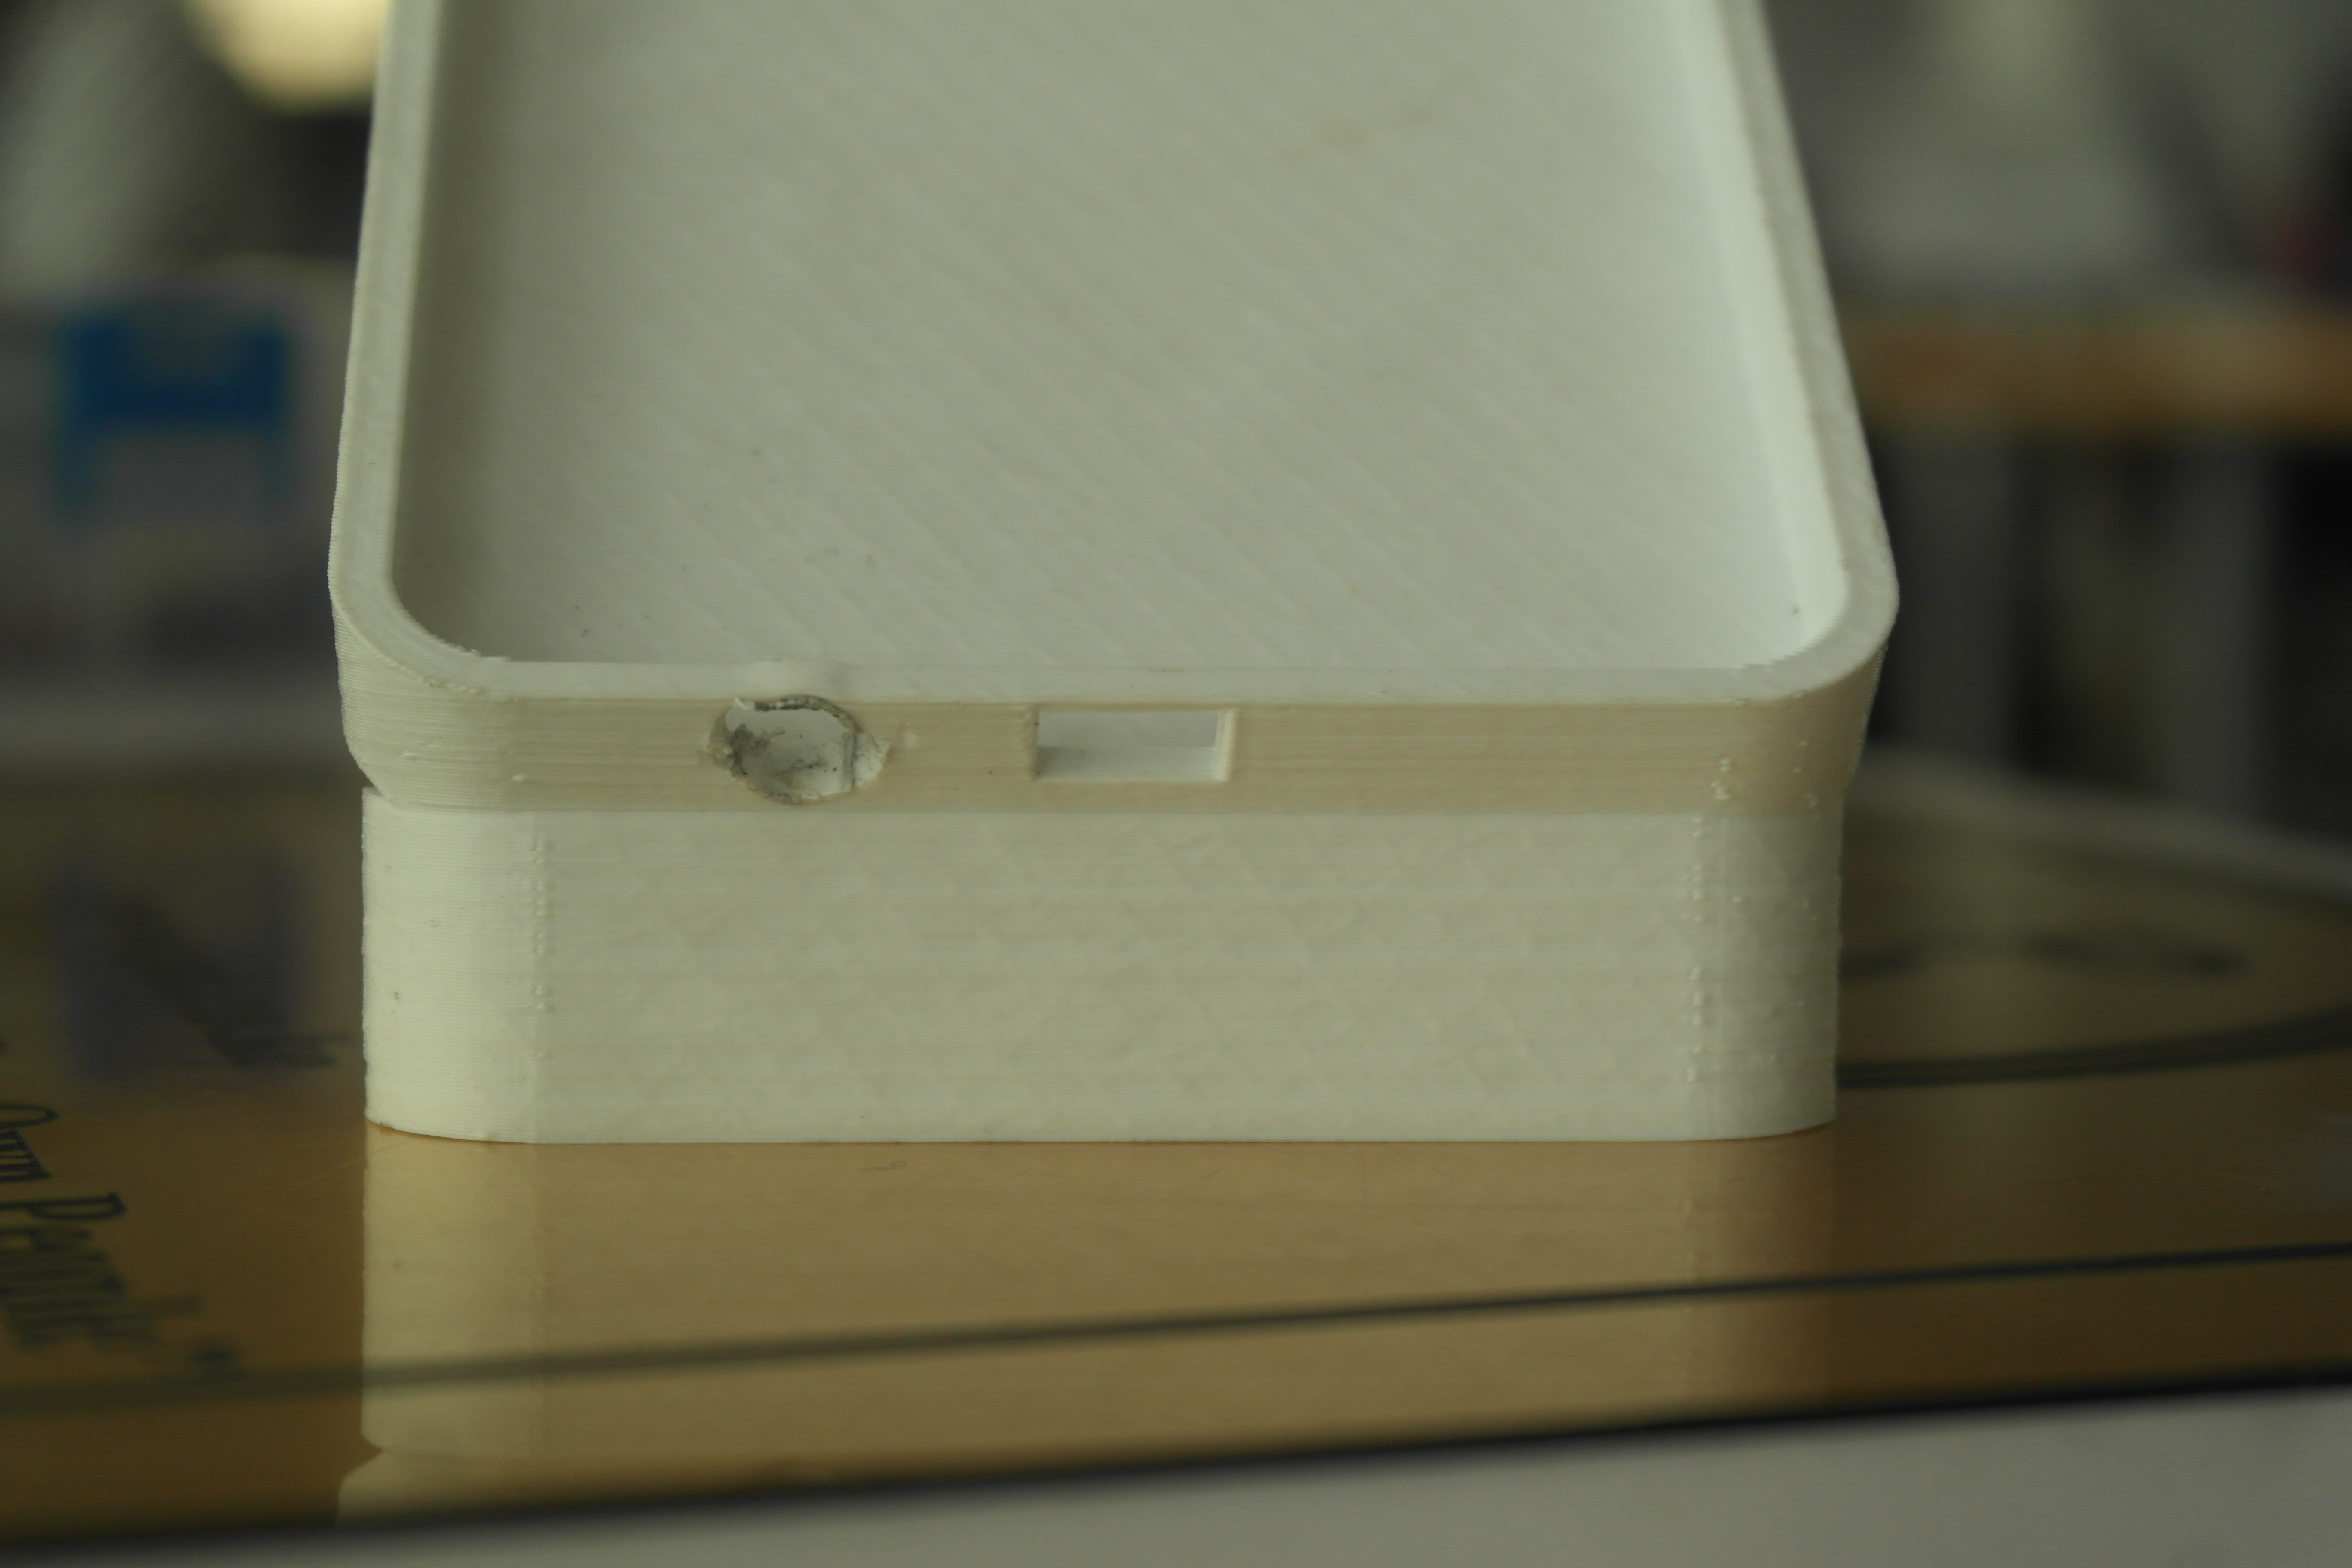
Creating the earphones jack port and the charger/USB port on the bottom.

Assembling and constraining the two parts.
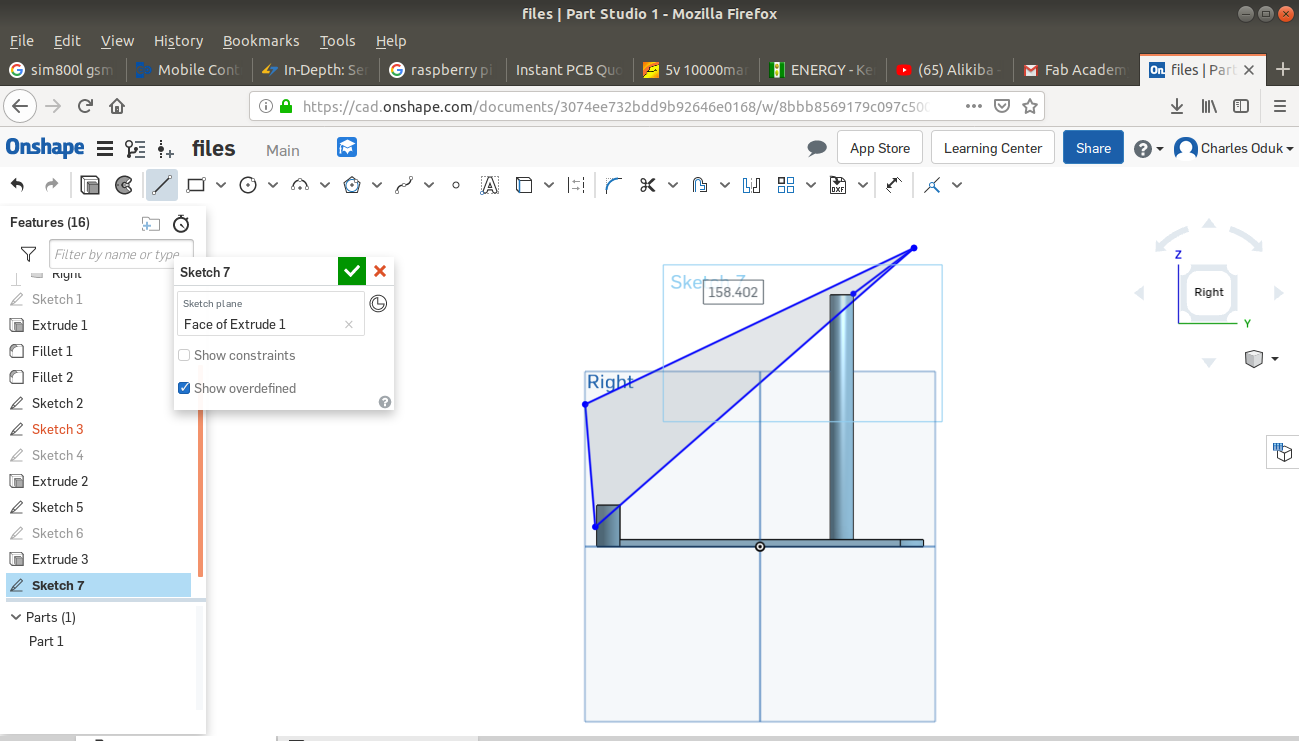
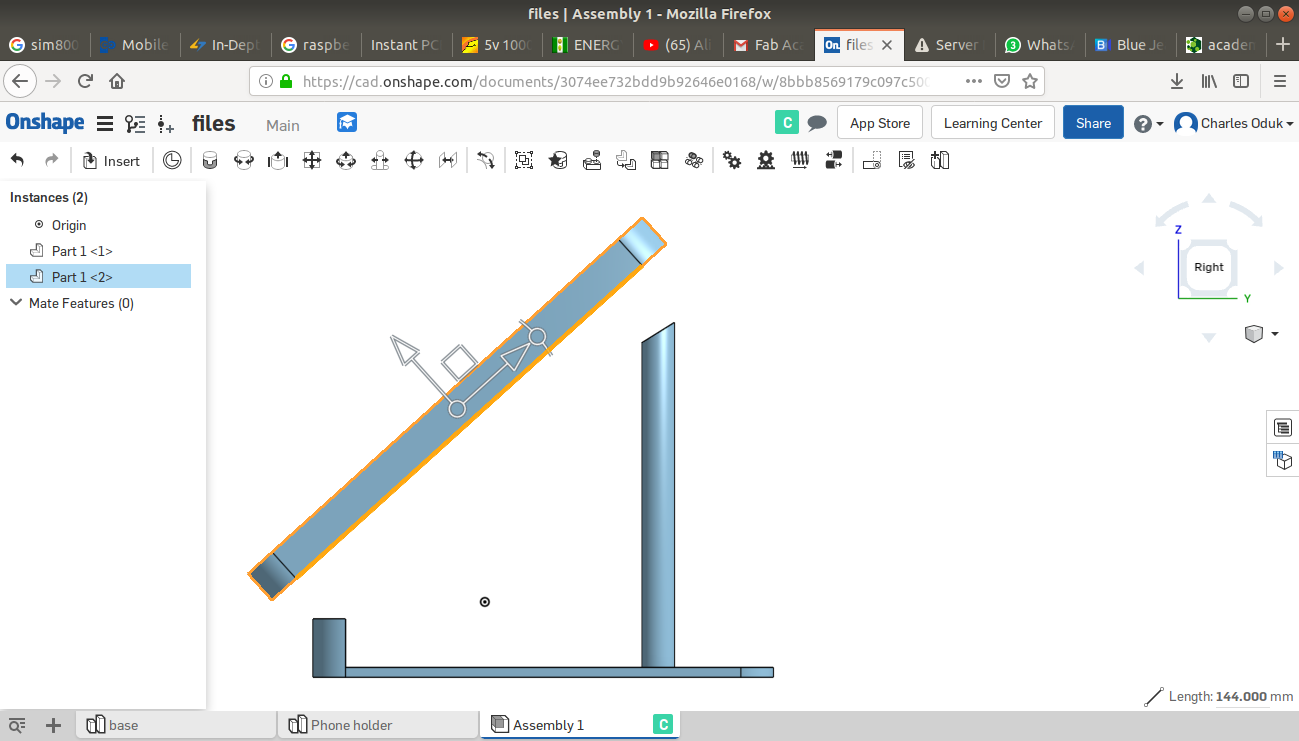
Since the phone was to be at an ergonomic position, the phone holder would be at an incline angle of 60 degrees.The following pictures outlinet he steps I followed to achieve this:
i. I first made a cut on the vertical cylindrical support to accomodate this angle.
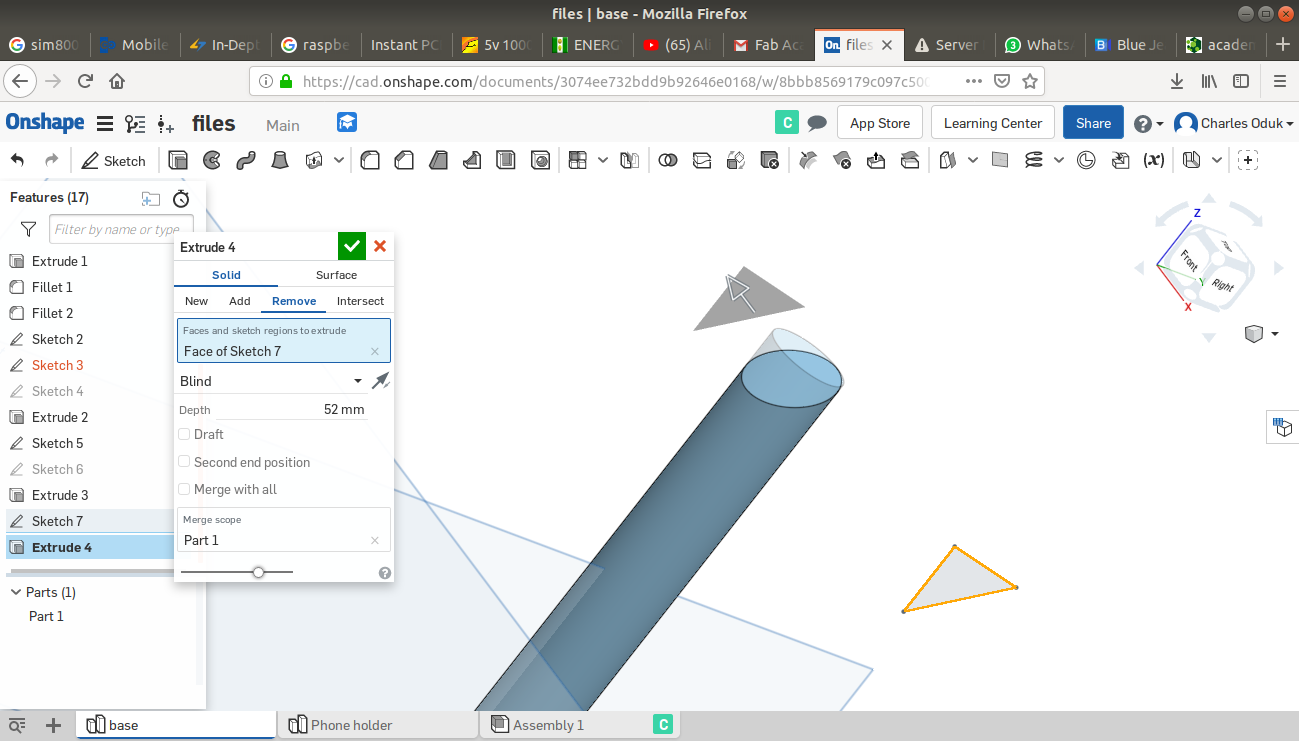
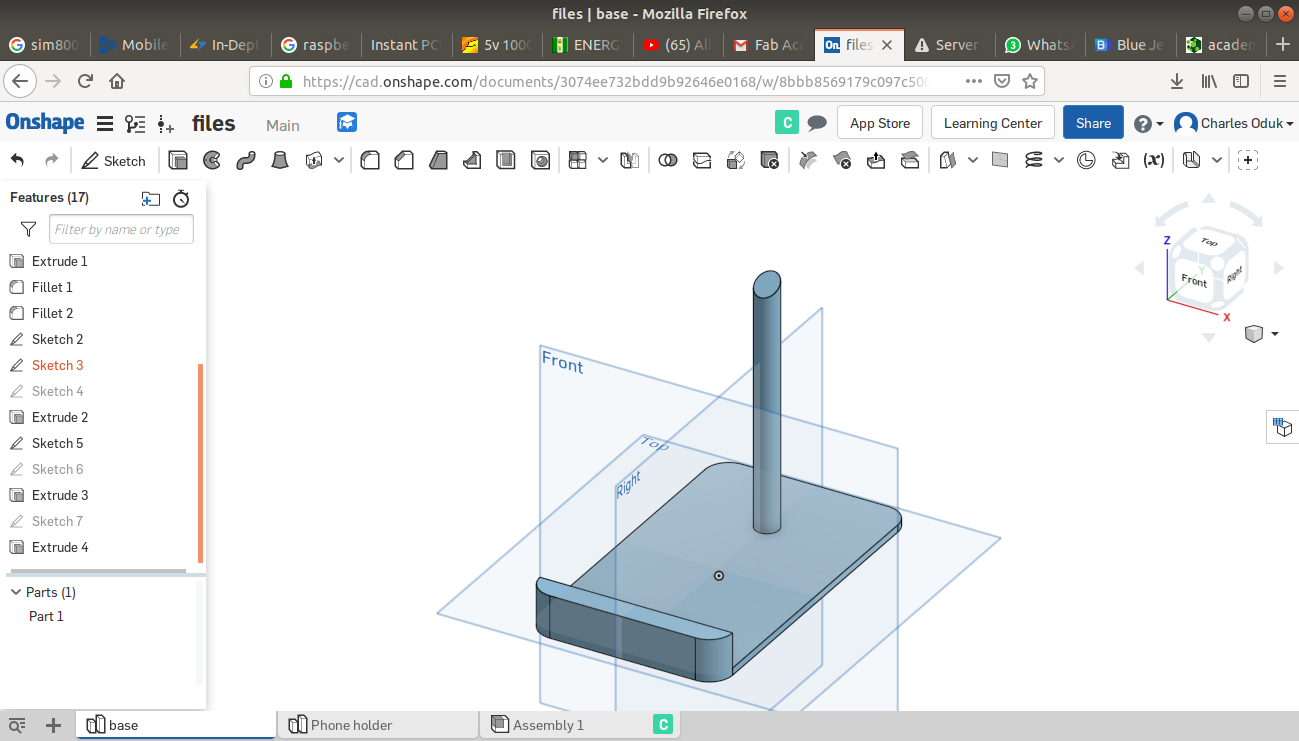
ii. I then proceeded with the assembly and constraints.
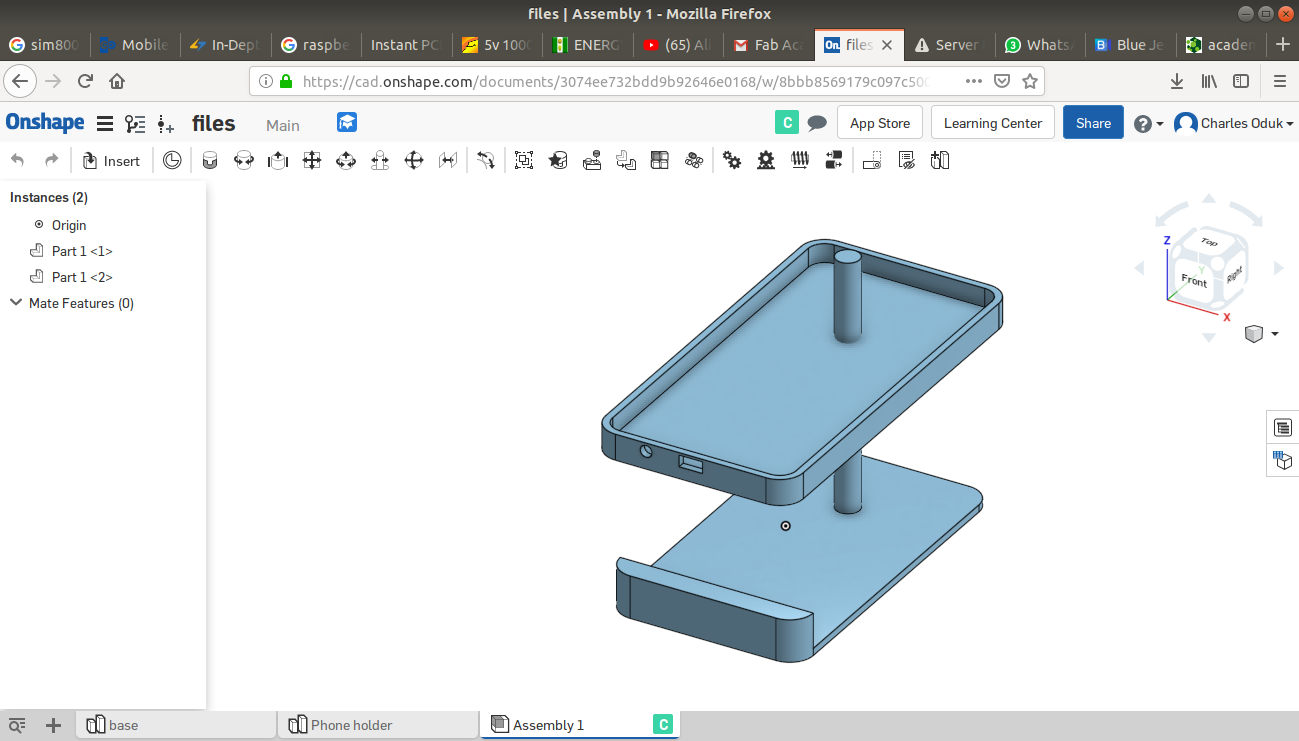
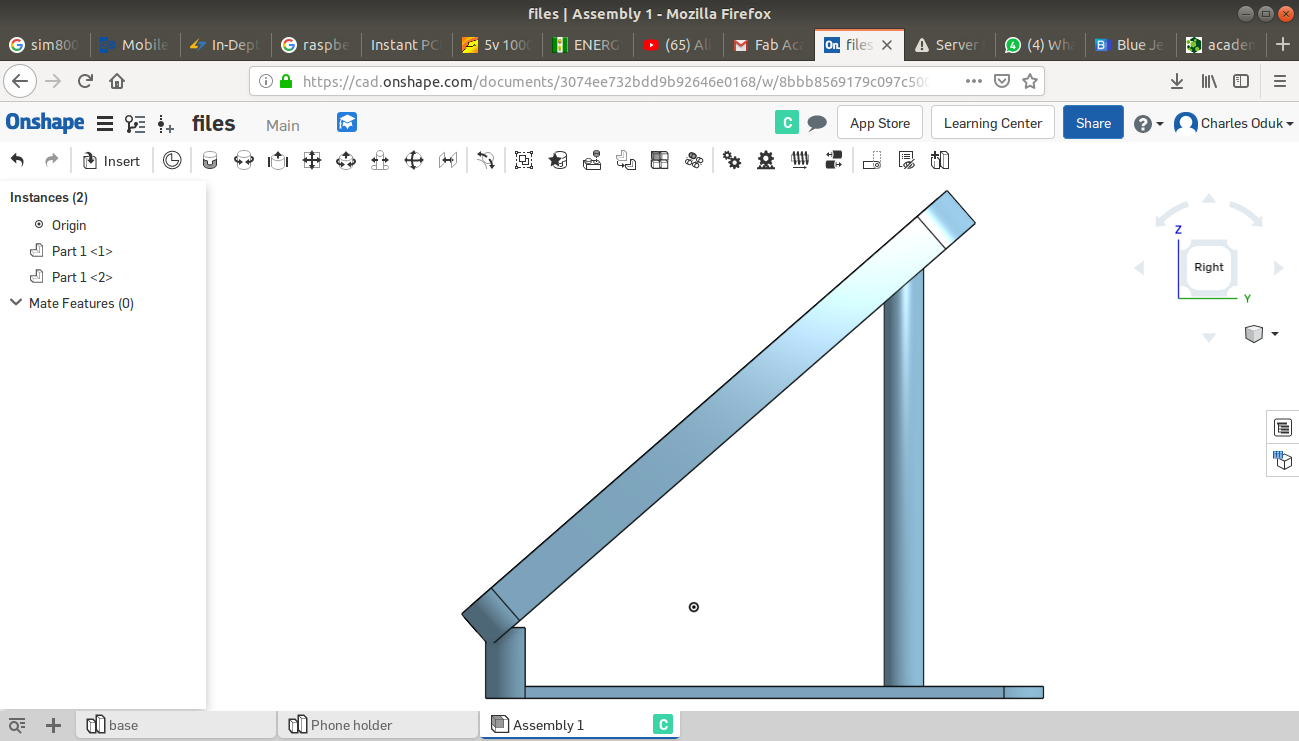
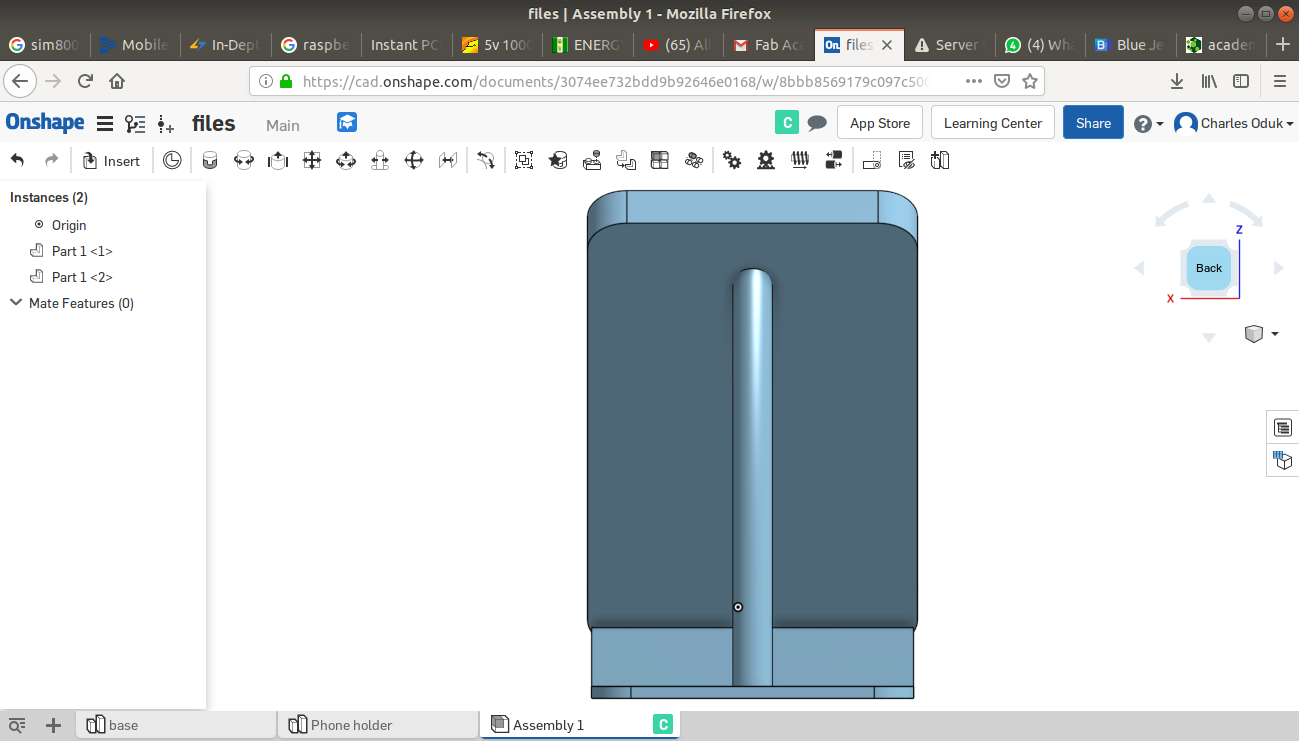
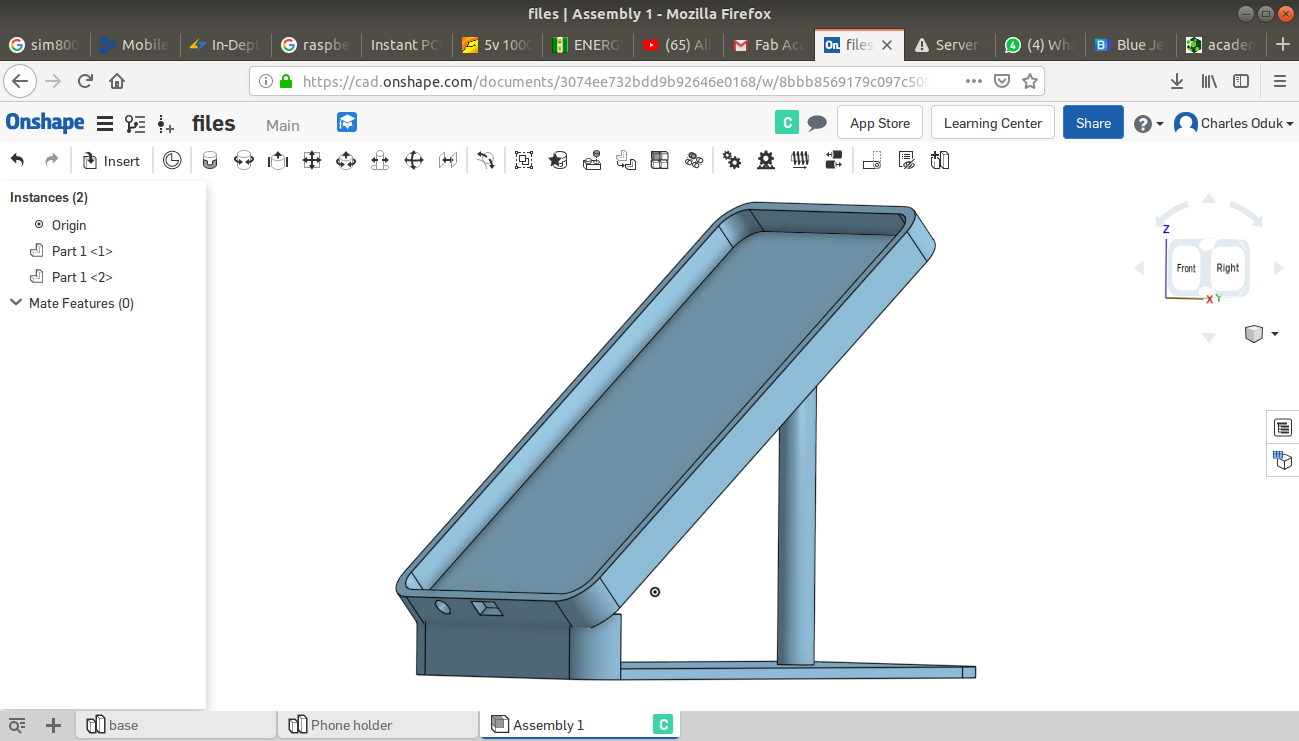
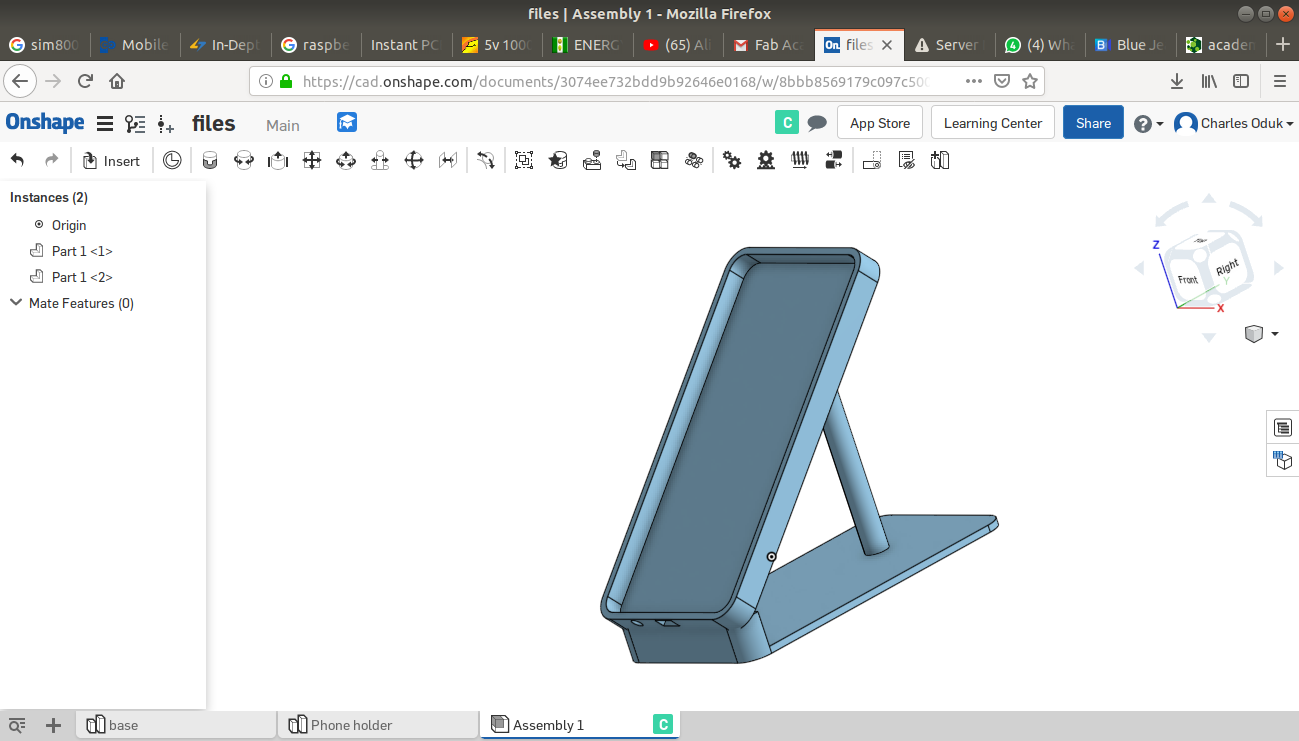
The final Assembly looked as below:
i. Side
Rear view.
The Samsung Galaxy A7 2018 model smartphone stand assembly.
Preparation of the files for 3D printing
Unfortunately towards the end, I realised that ONSHAPE CAD platform has no merging function. This left me with an option of either begin drawing the entire design using another software or exporting the files into a readable file with another software that had the merge function.
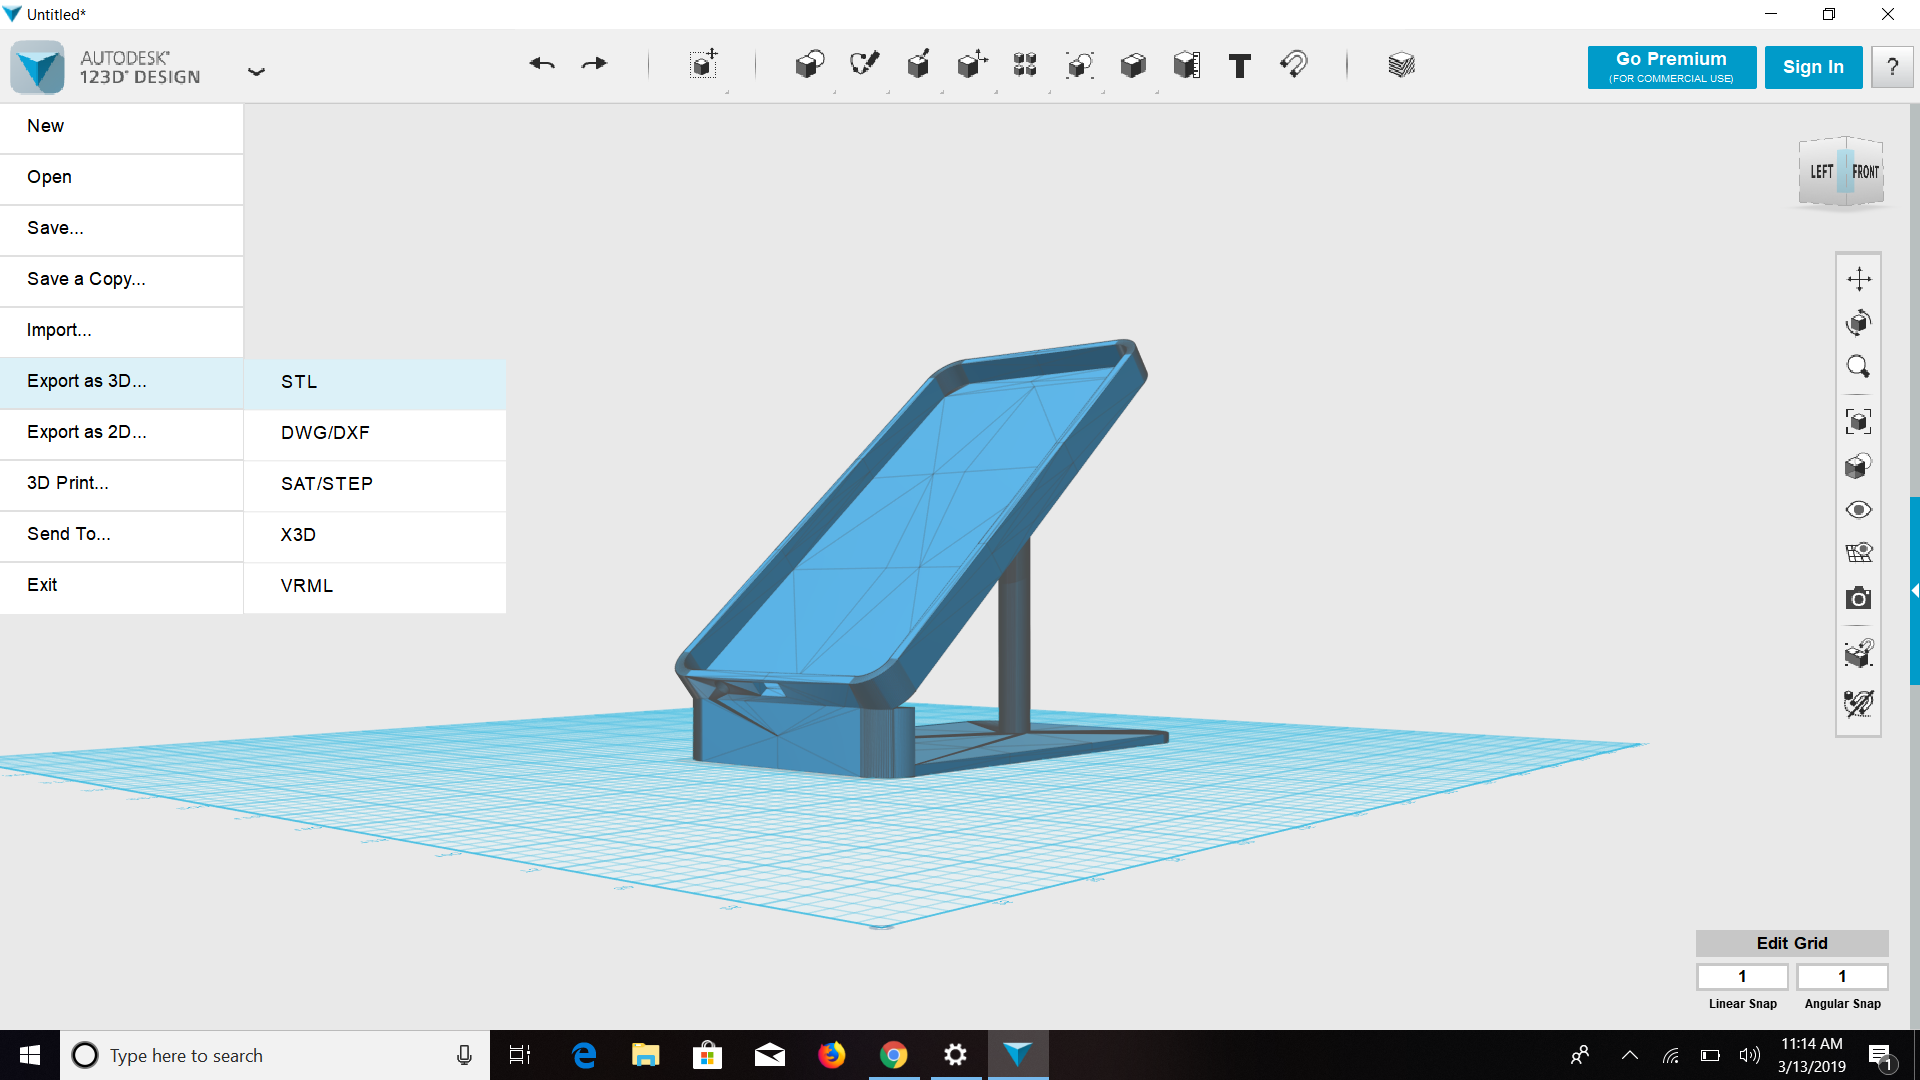
I thus settled on exporting the files as STL files and open using another CAD software.
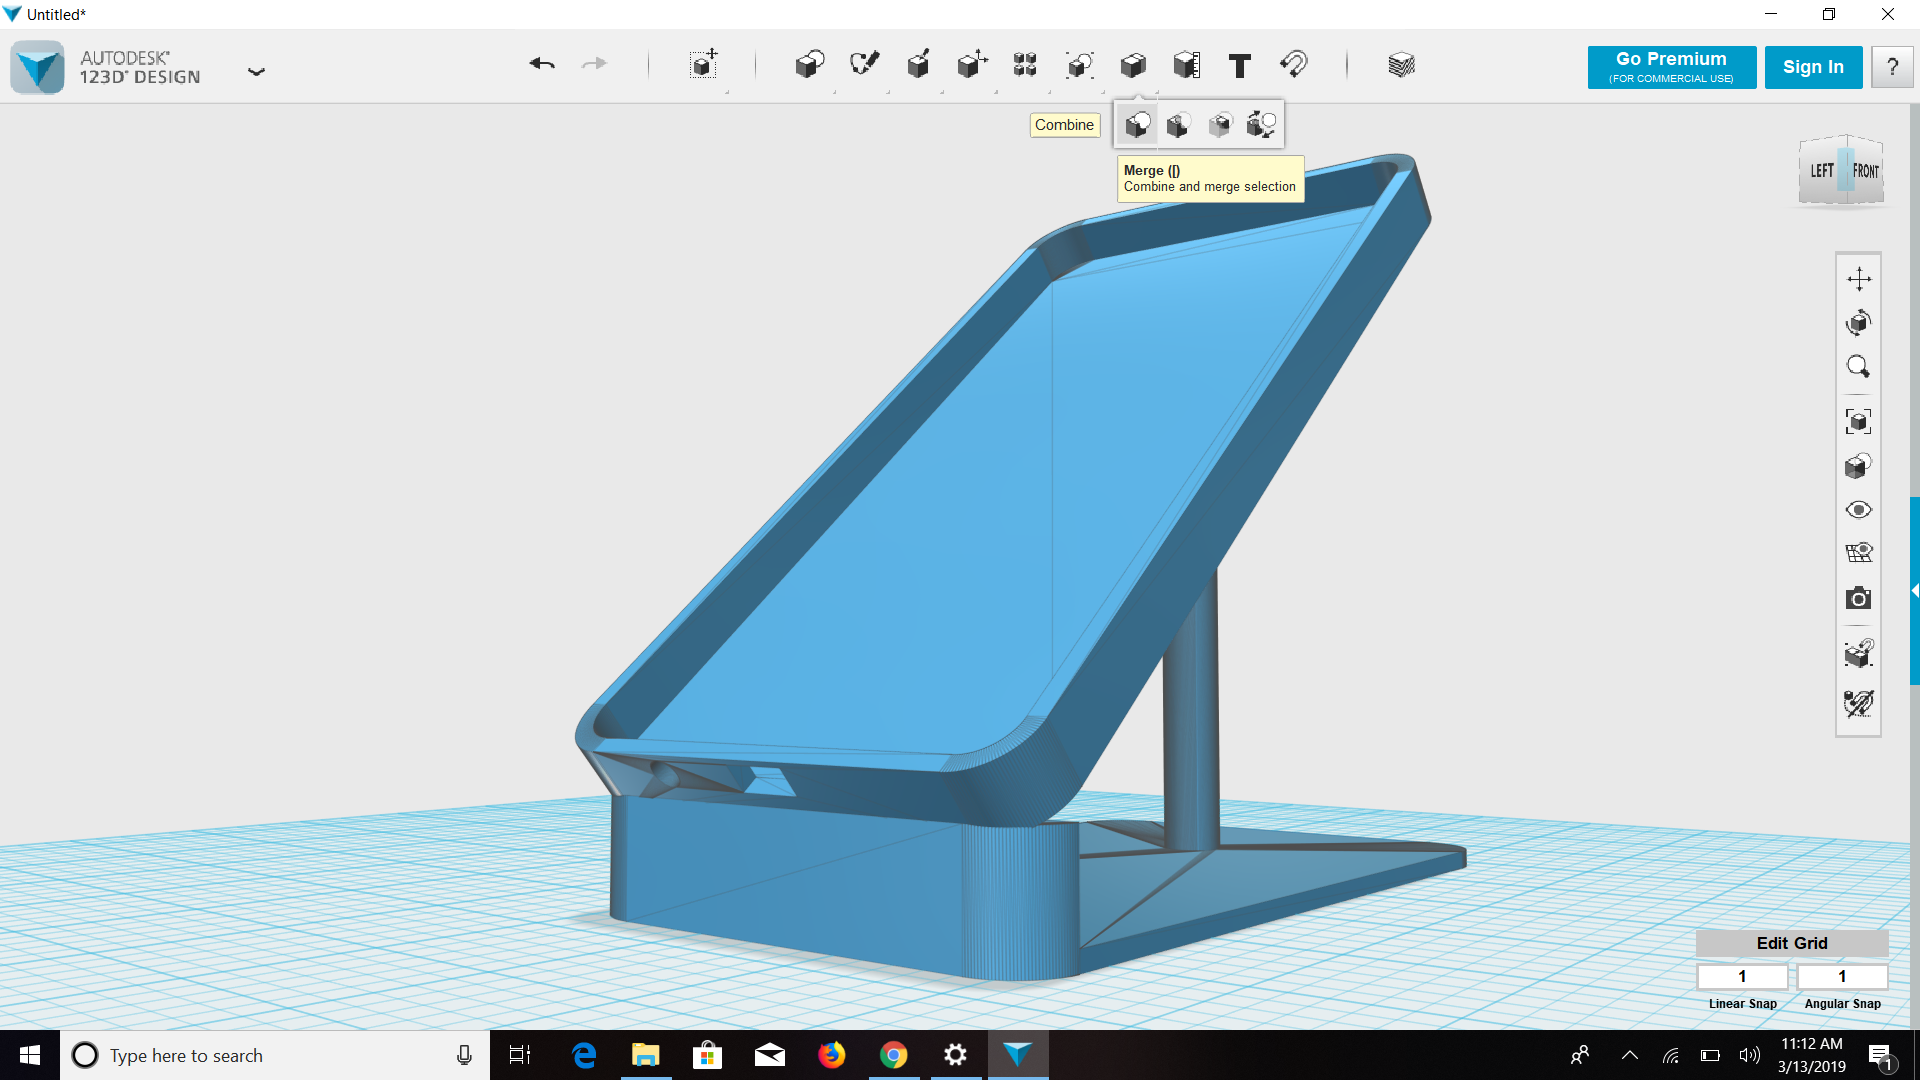
After exporting the files to my local computer(which uses ubuntu linux OS), I still couldn't use any Autodesk CAD software. Lucky enough I had another laptop with windows 10 OS that allowed me install Autodesk's 123D design software and perform the reassembly and merging as shown below.
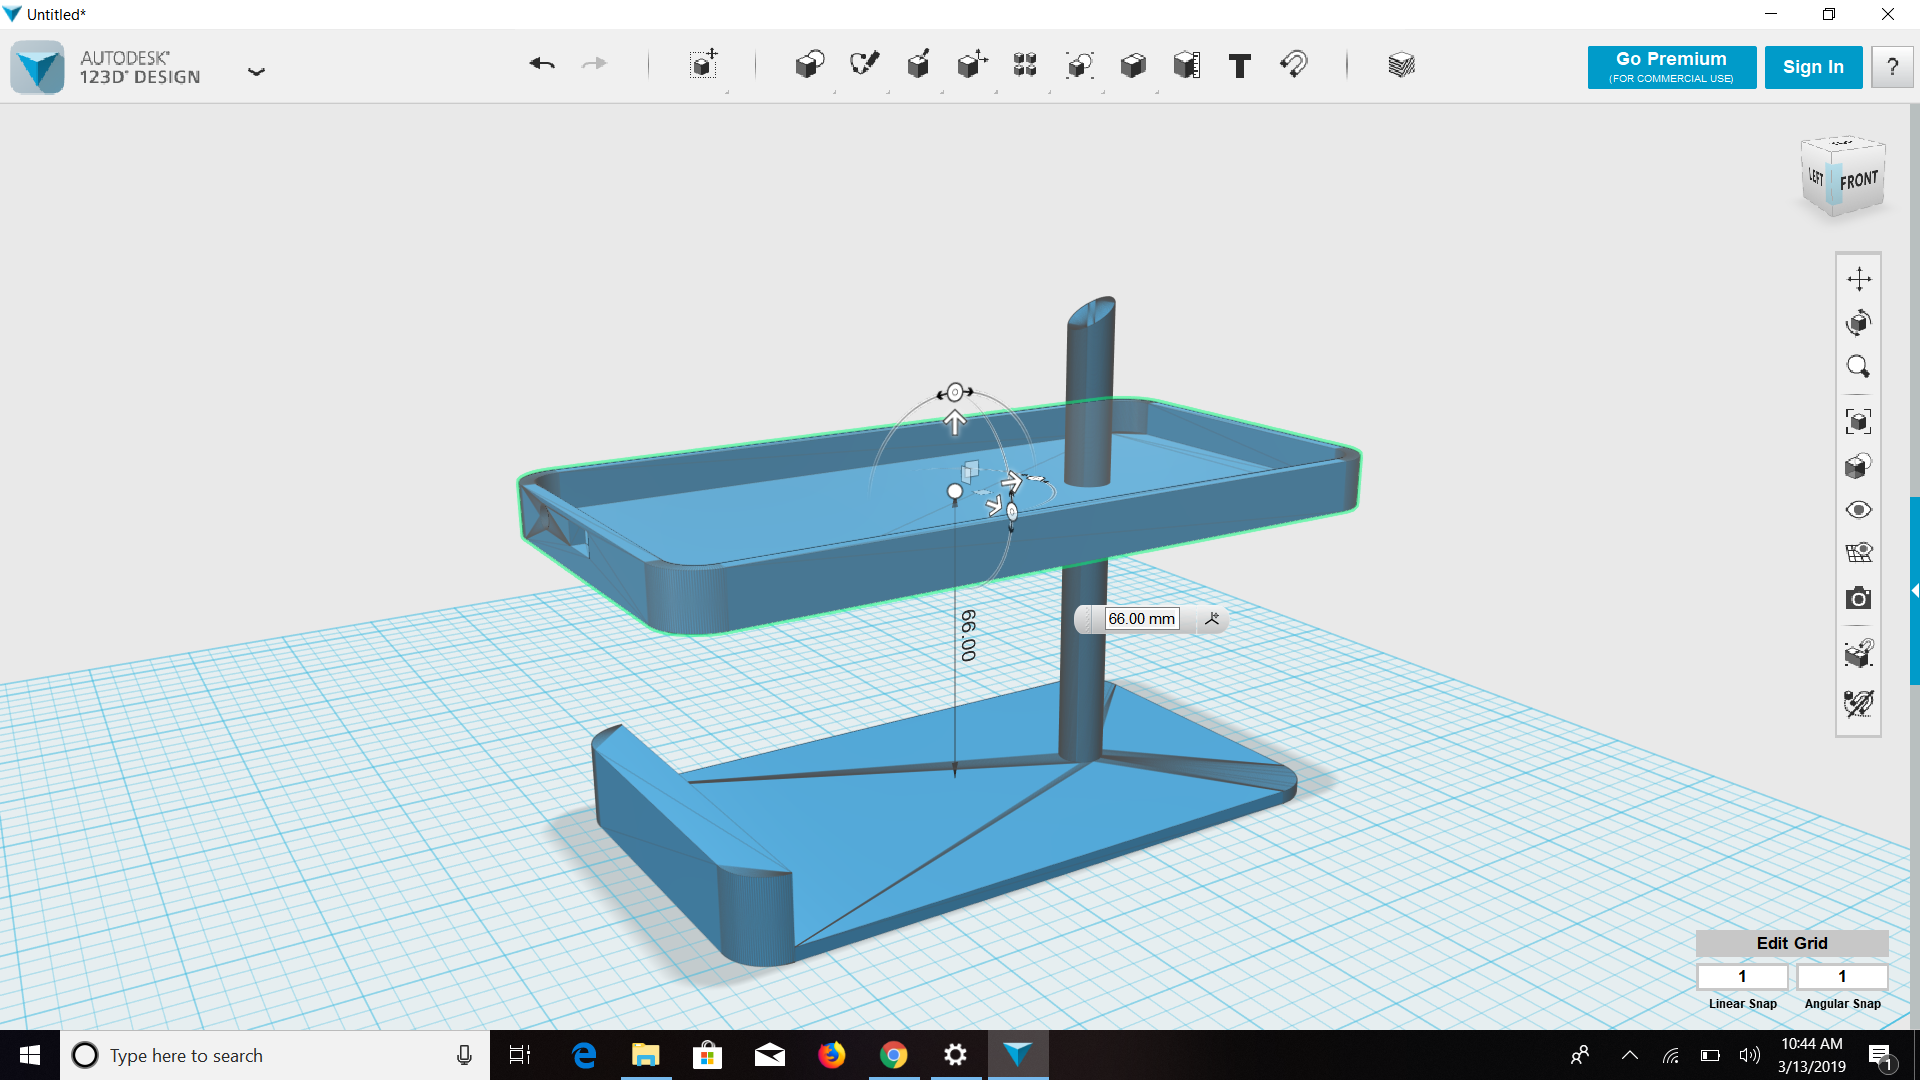
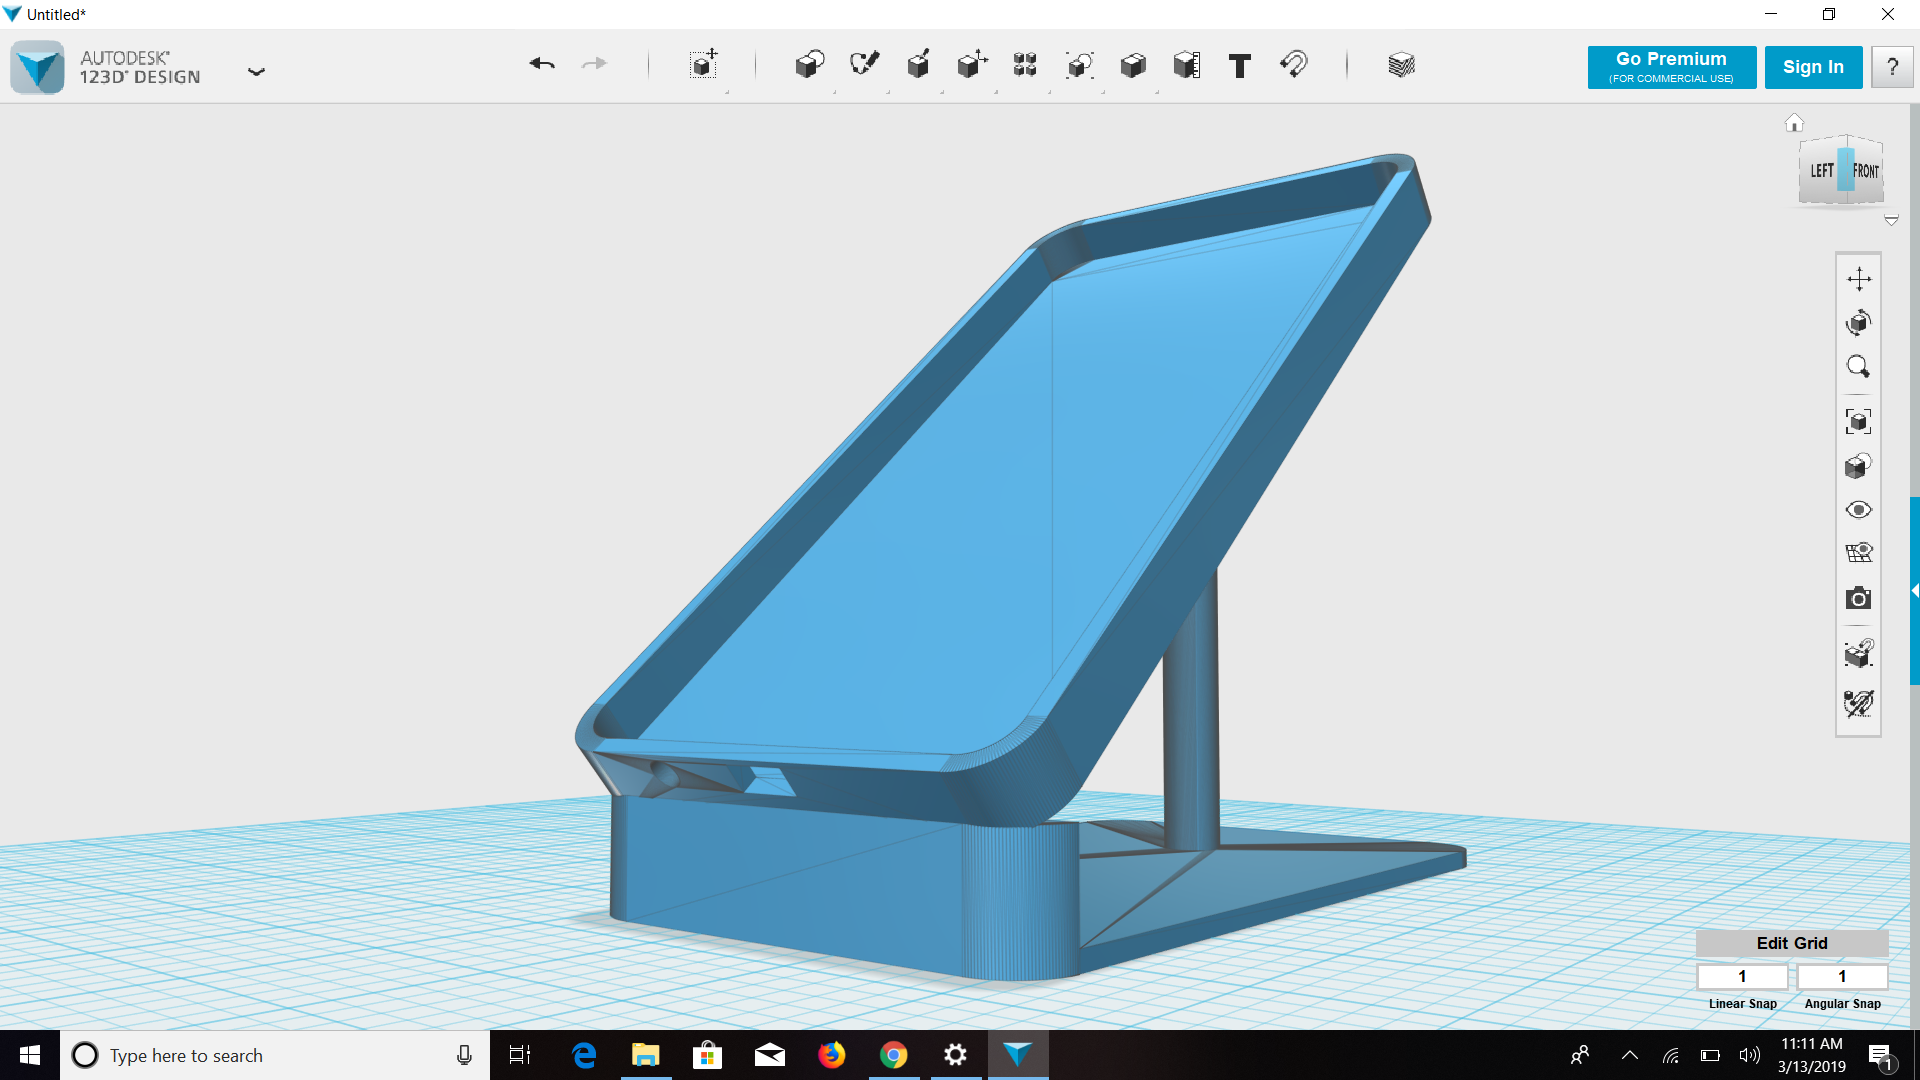
Merging the two design parts to form one solid 3D object
Exporting the files to STL formats.
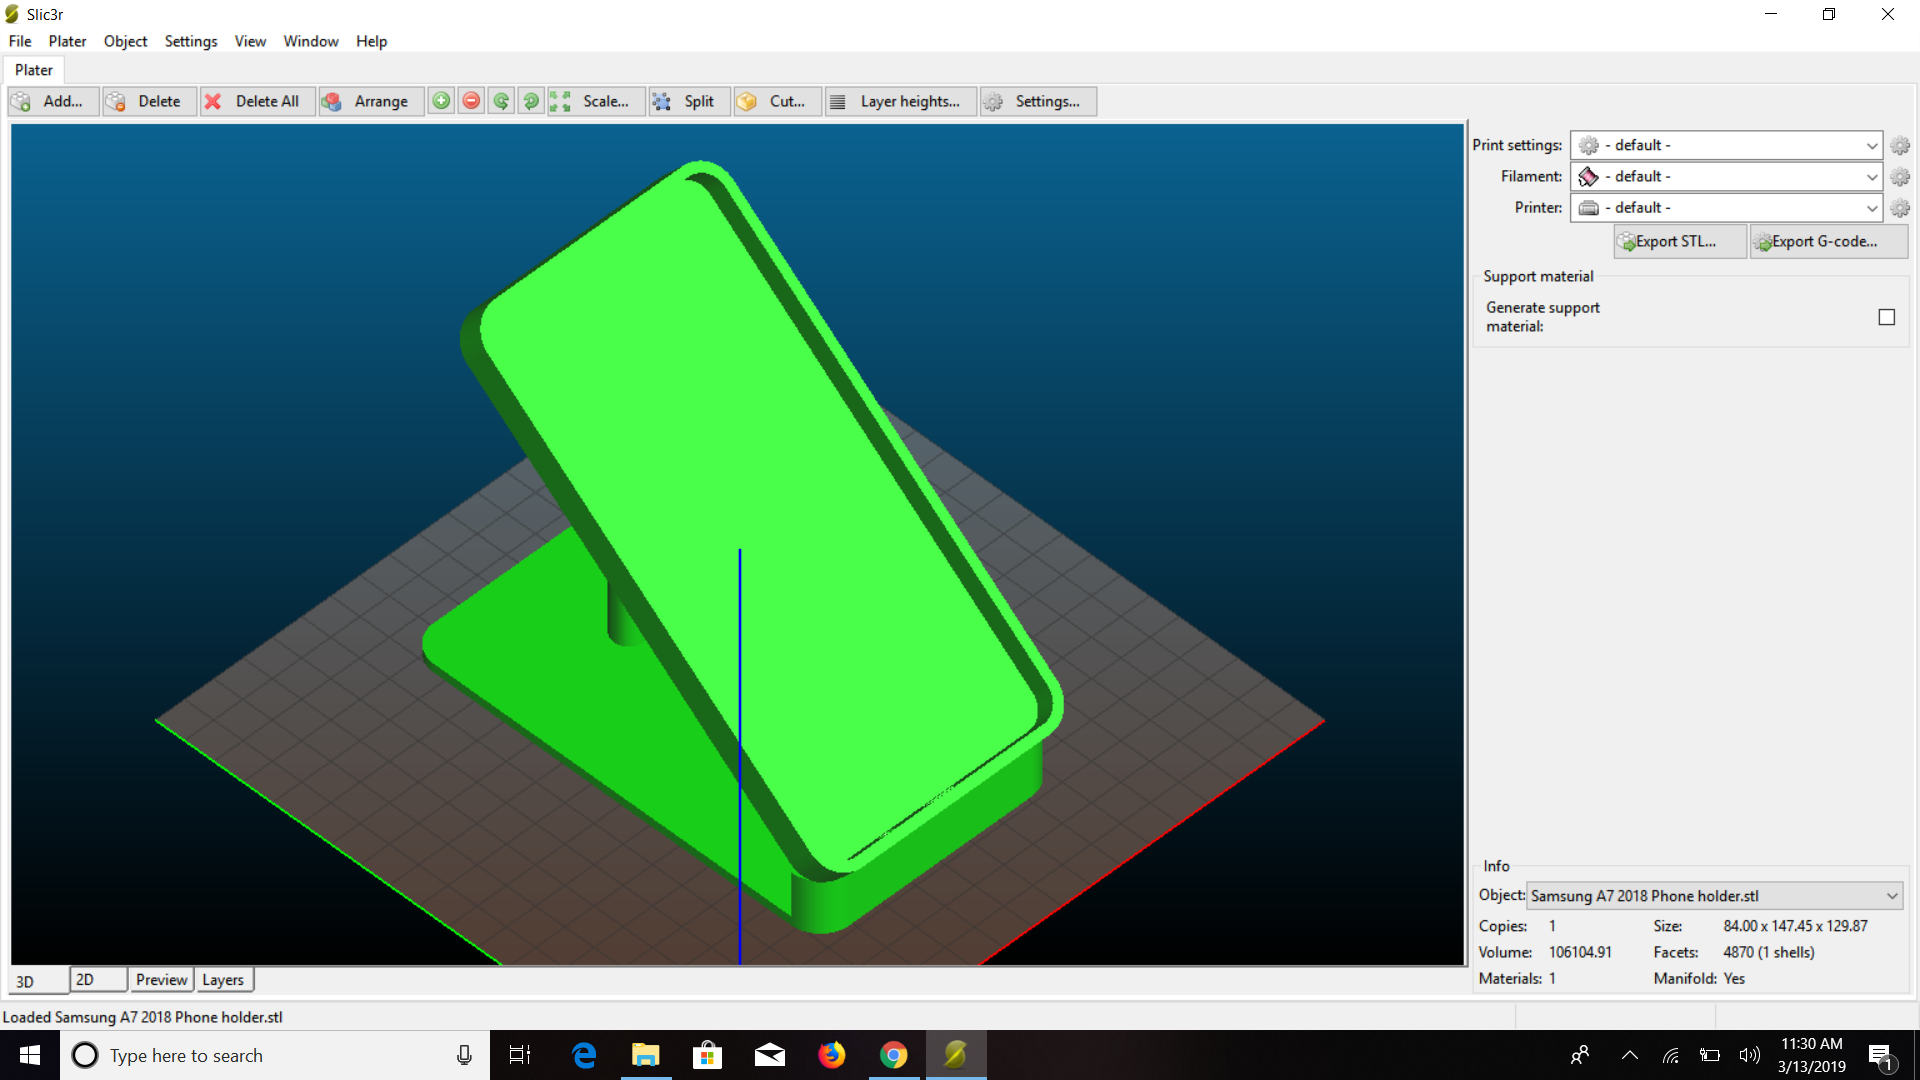
Loading the stl file to Sli3r software to confirm if the image is as expected: this step was to countercheck if there could be any errors within the design before printing begins.
The Slic3r software confirmed everything was in place as shown:
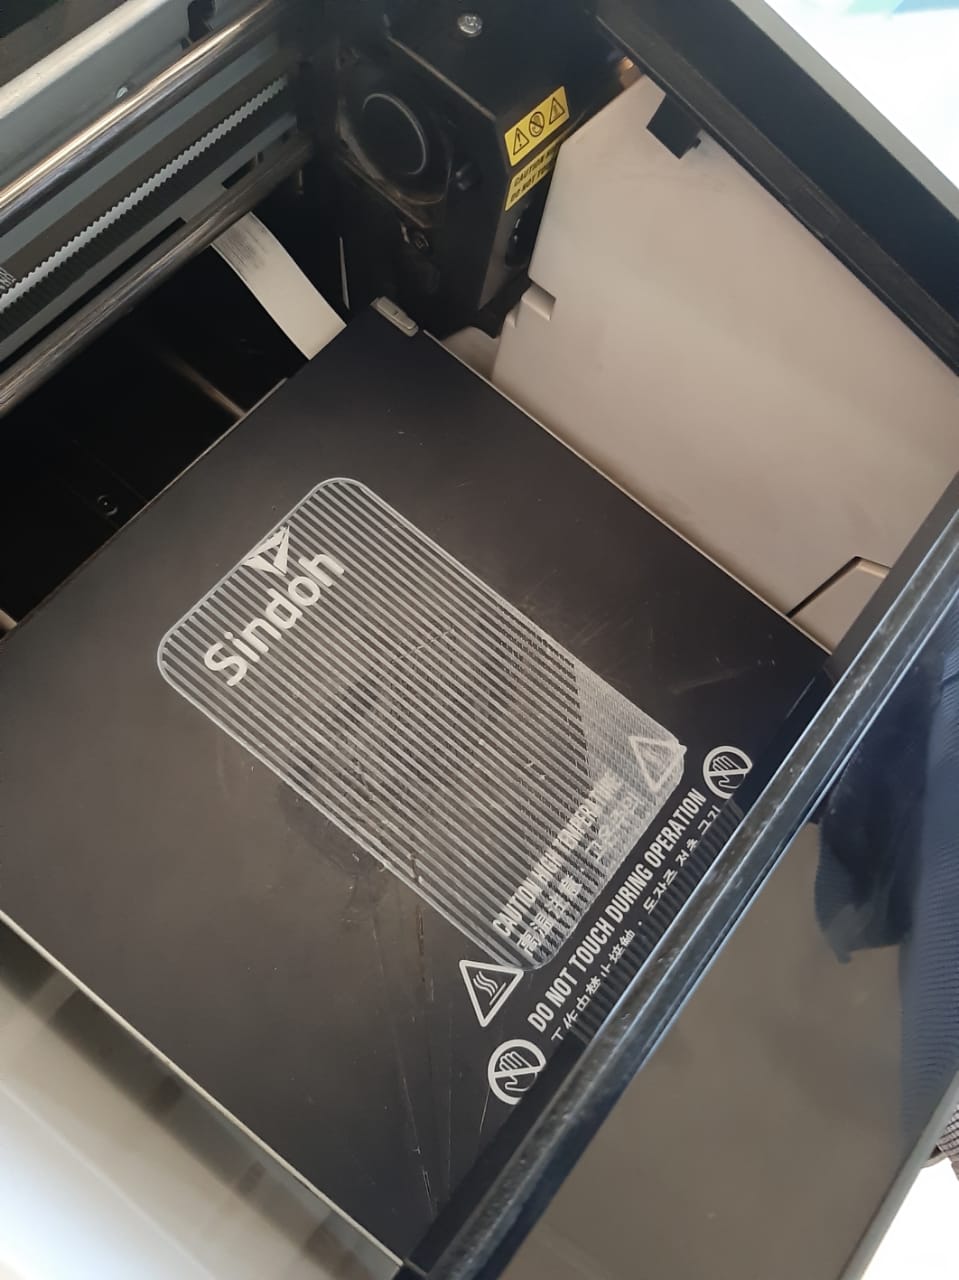
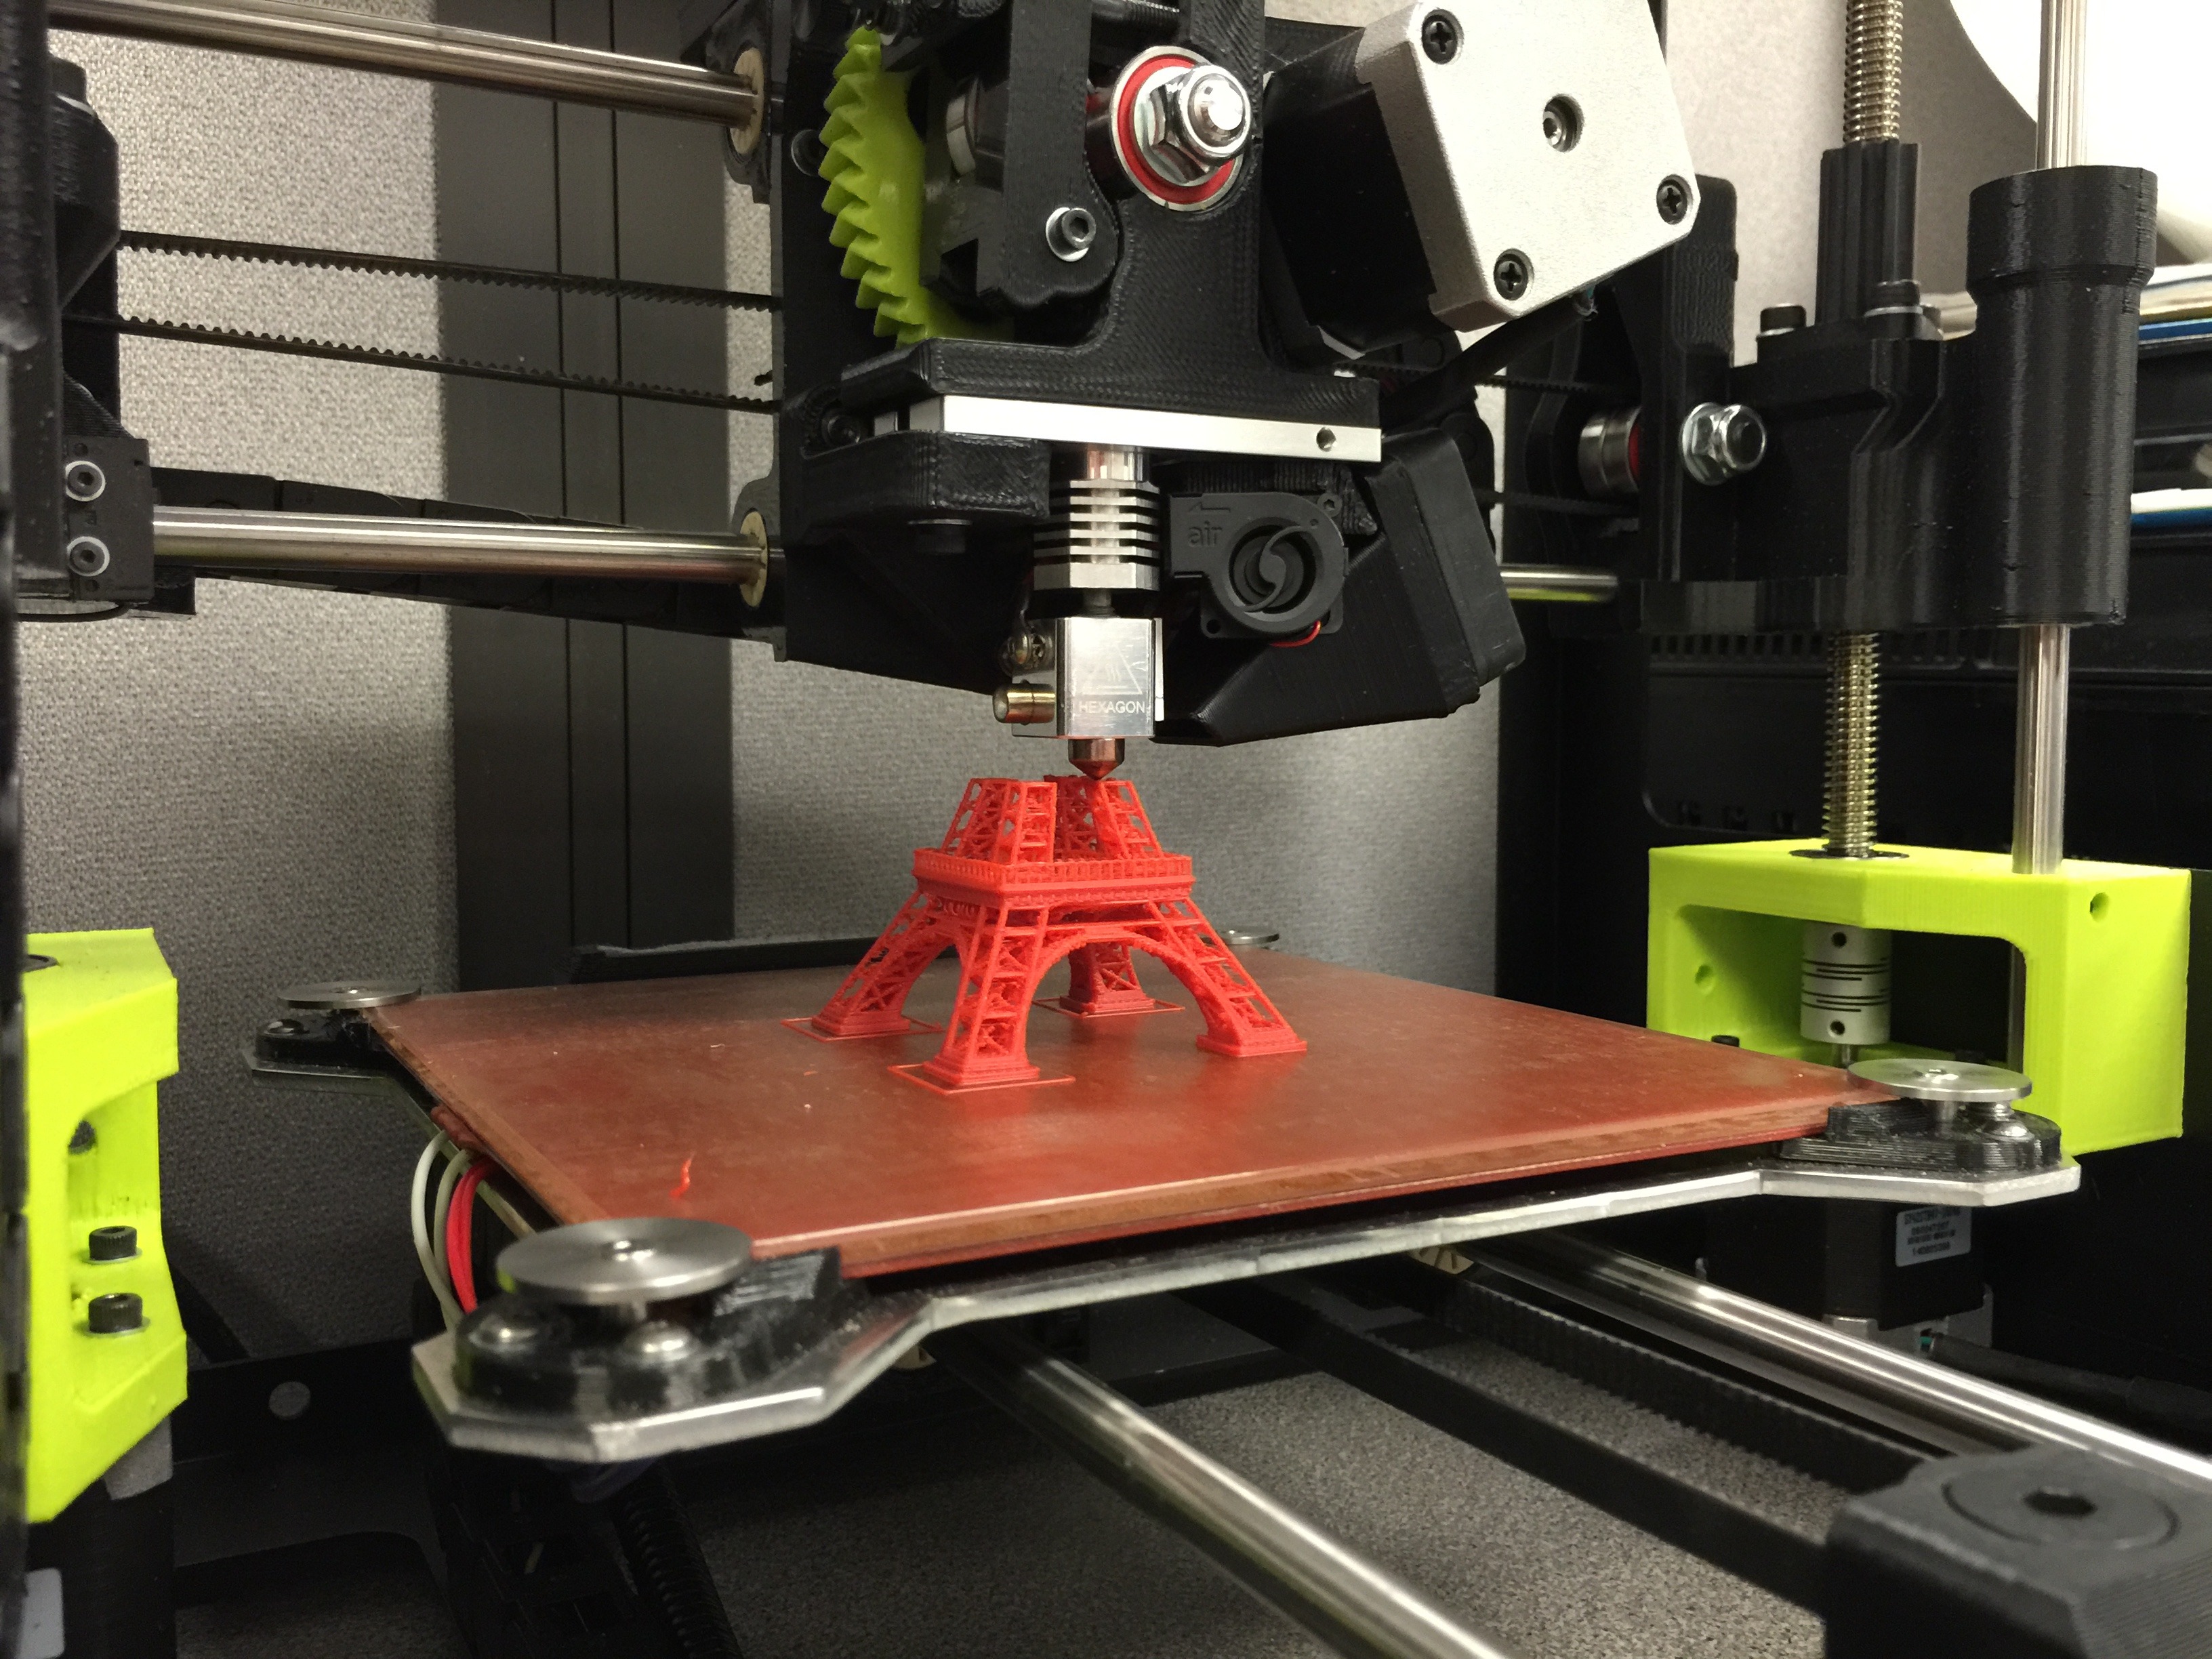
3D printing process:
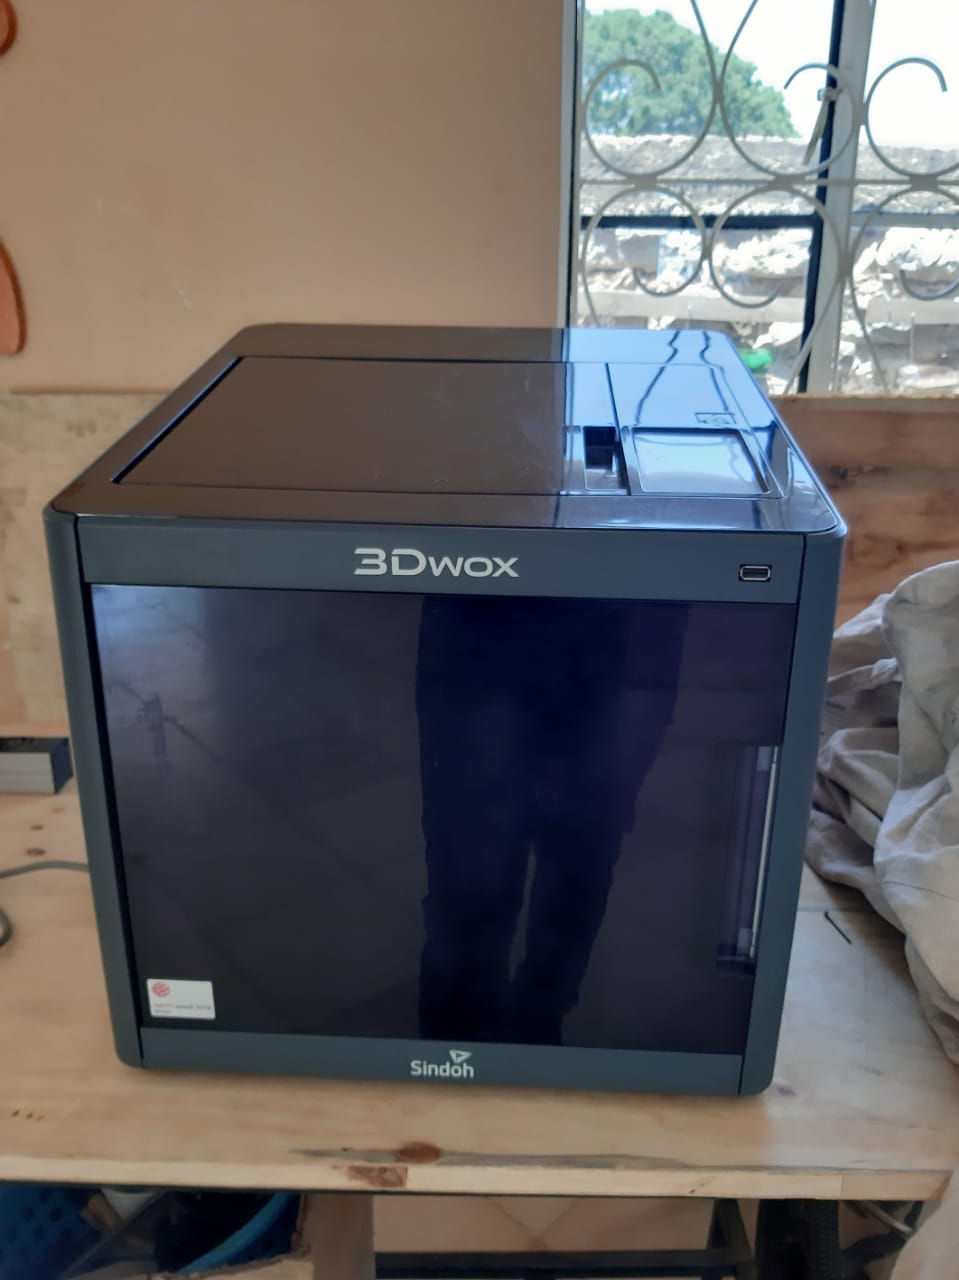
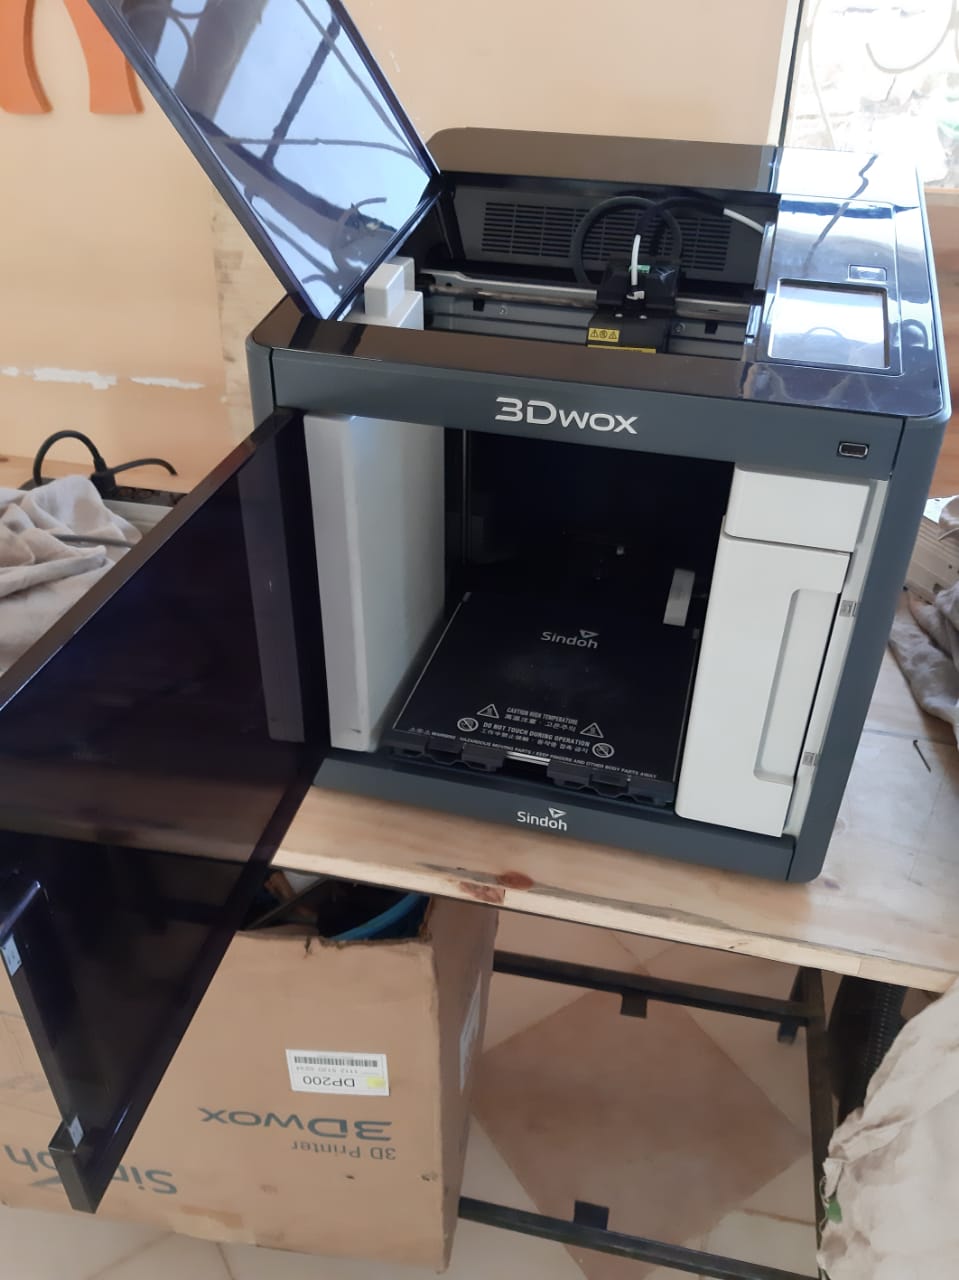
I loaded the stl file into a flash disk and fed to our lab's Sindoh 3Dwox Printer. This printer is a high end, good surface finish and easy to use UI.I printed the phone stand with a white spool.
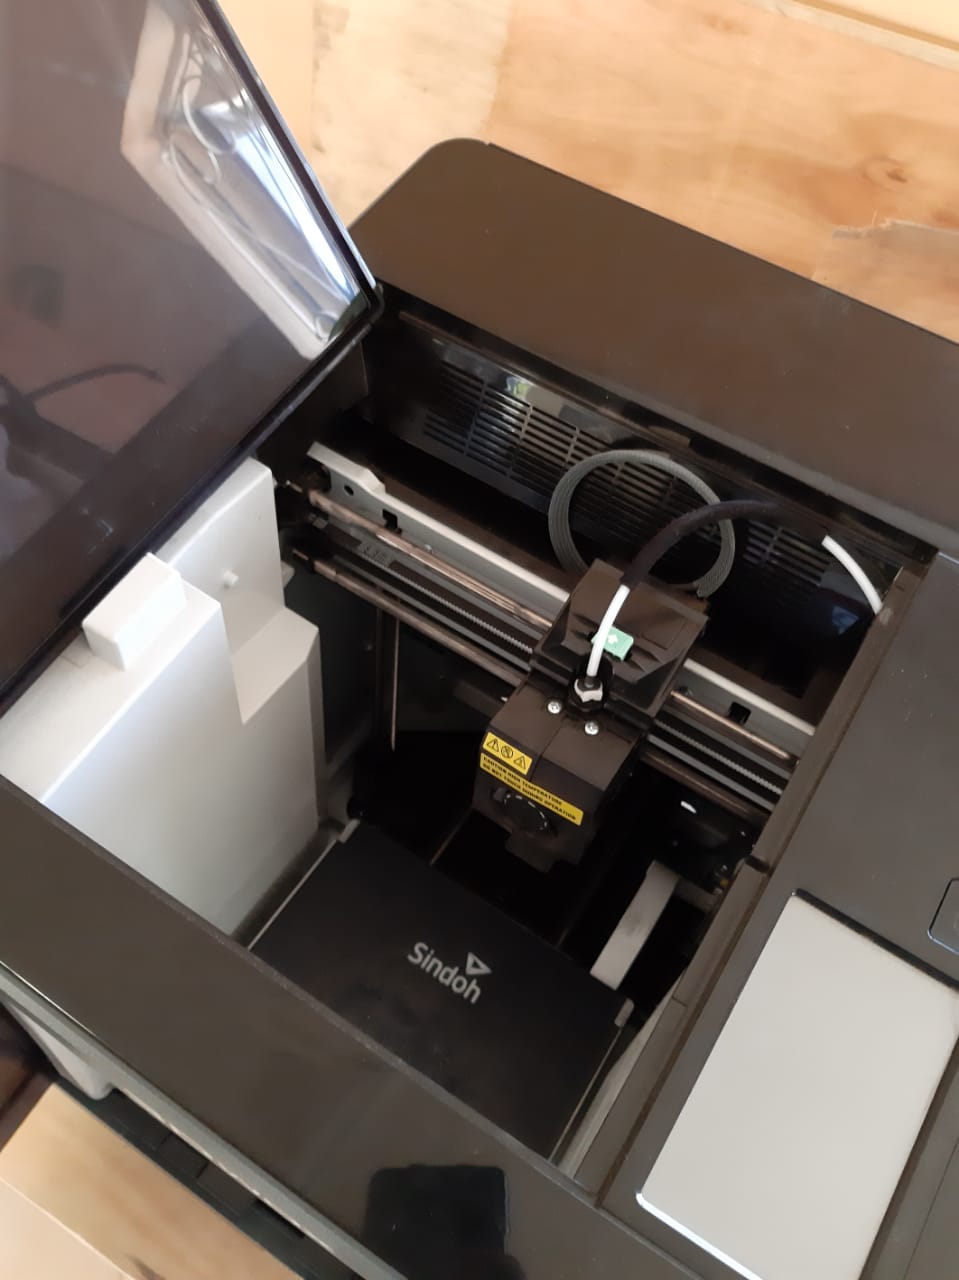
The 3D printer set up parameters:
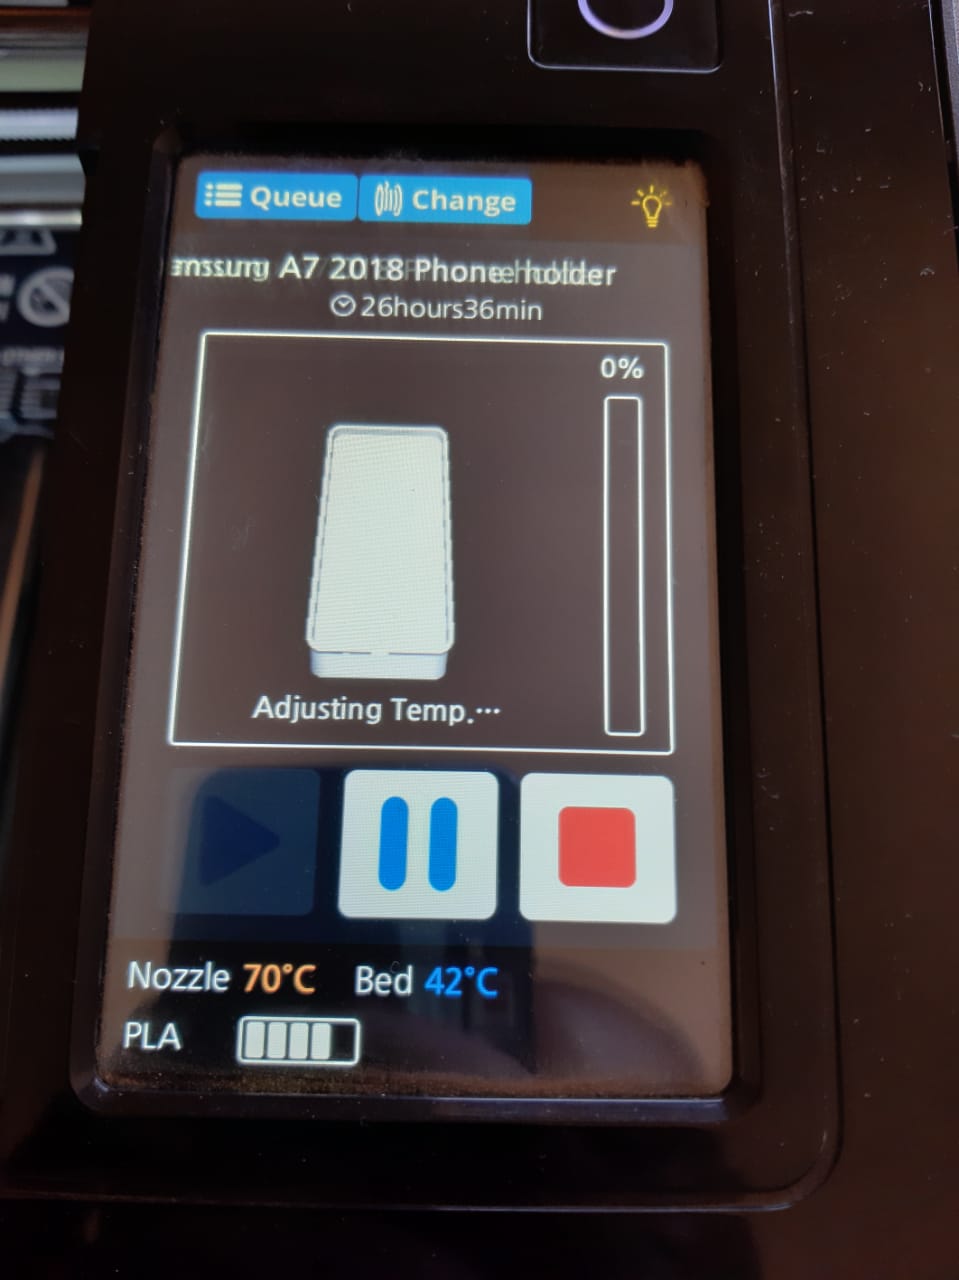
This piece took about 6hours to complete printing.
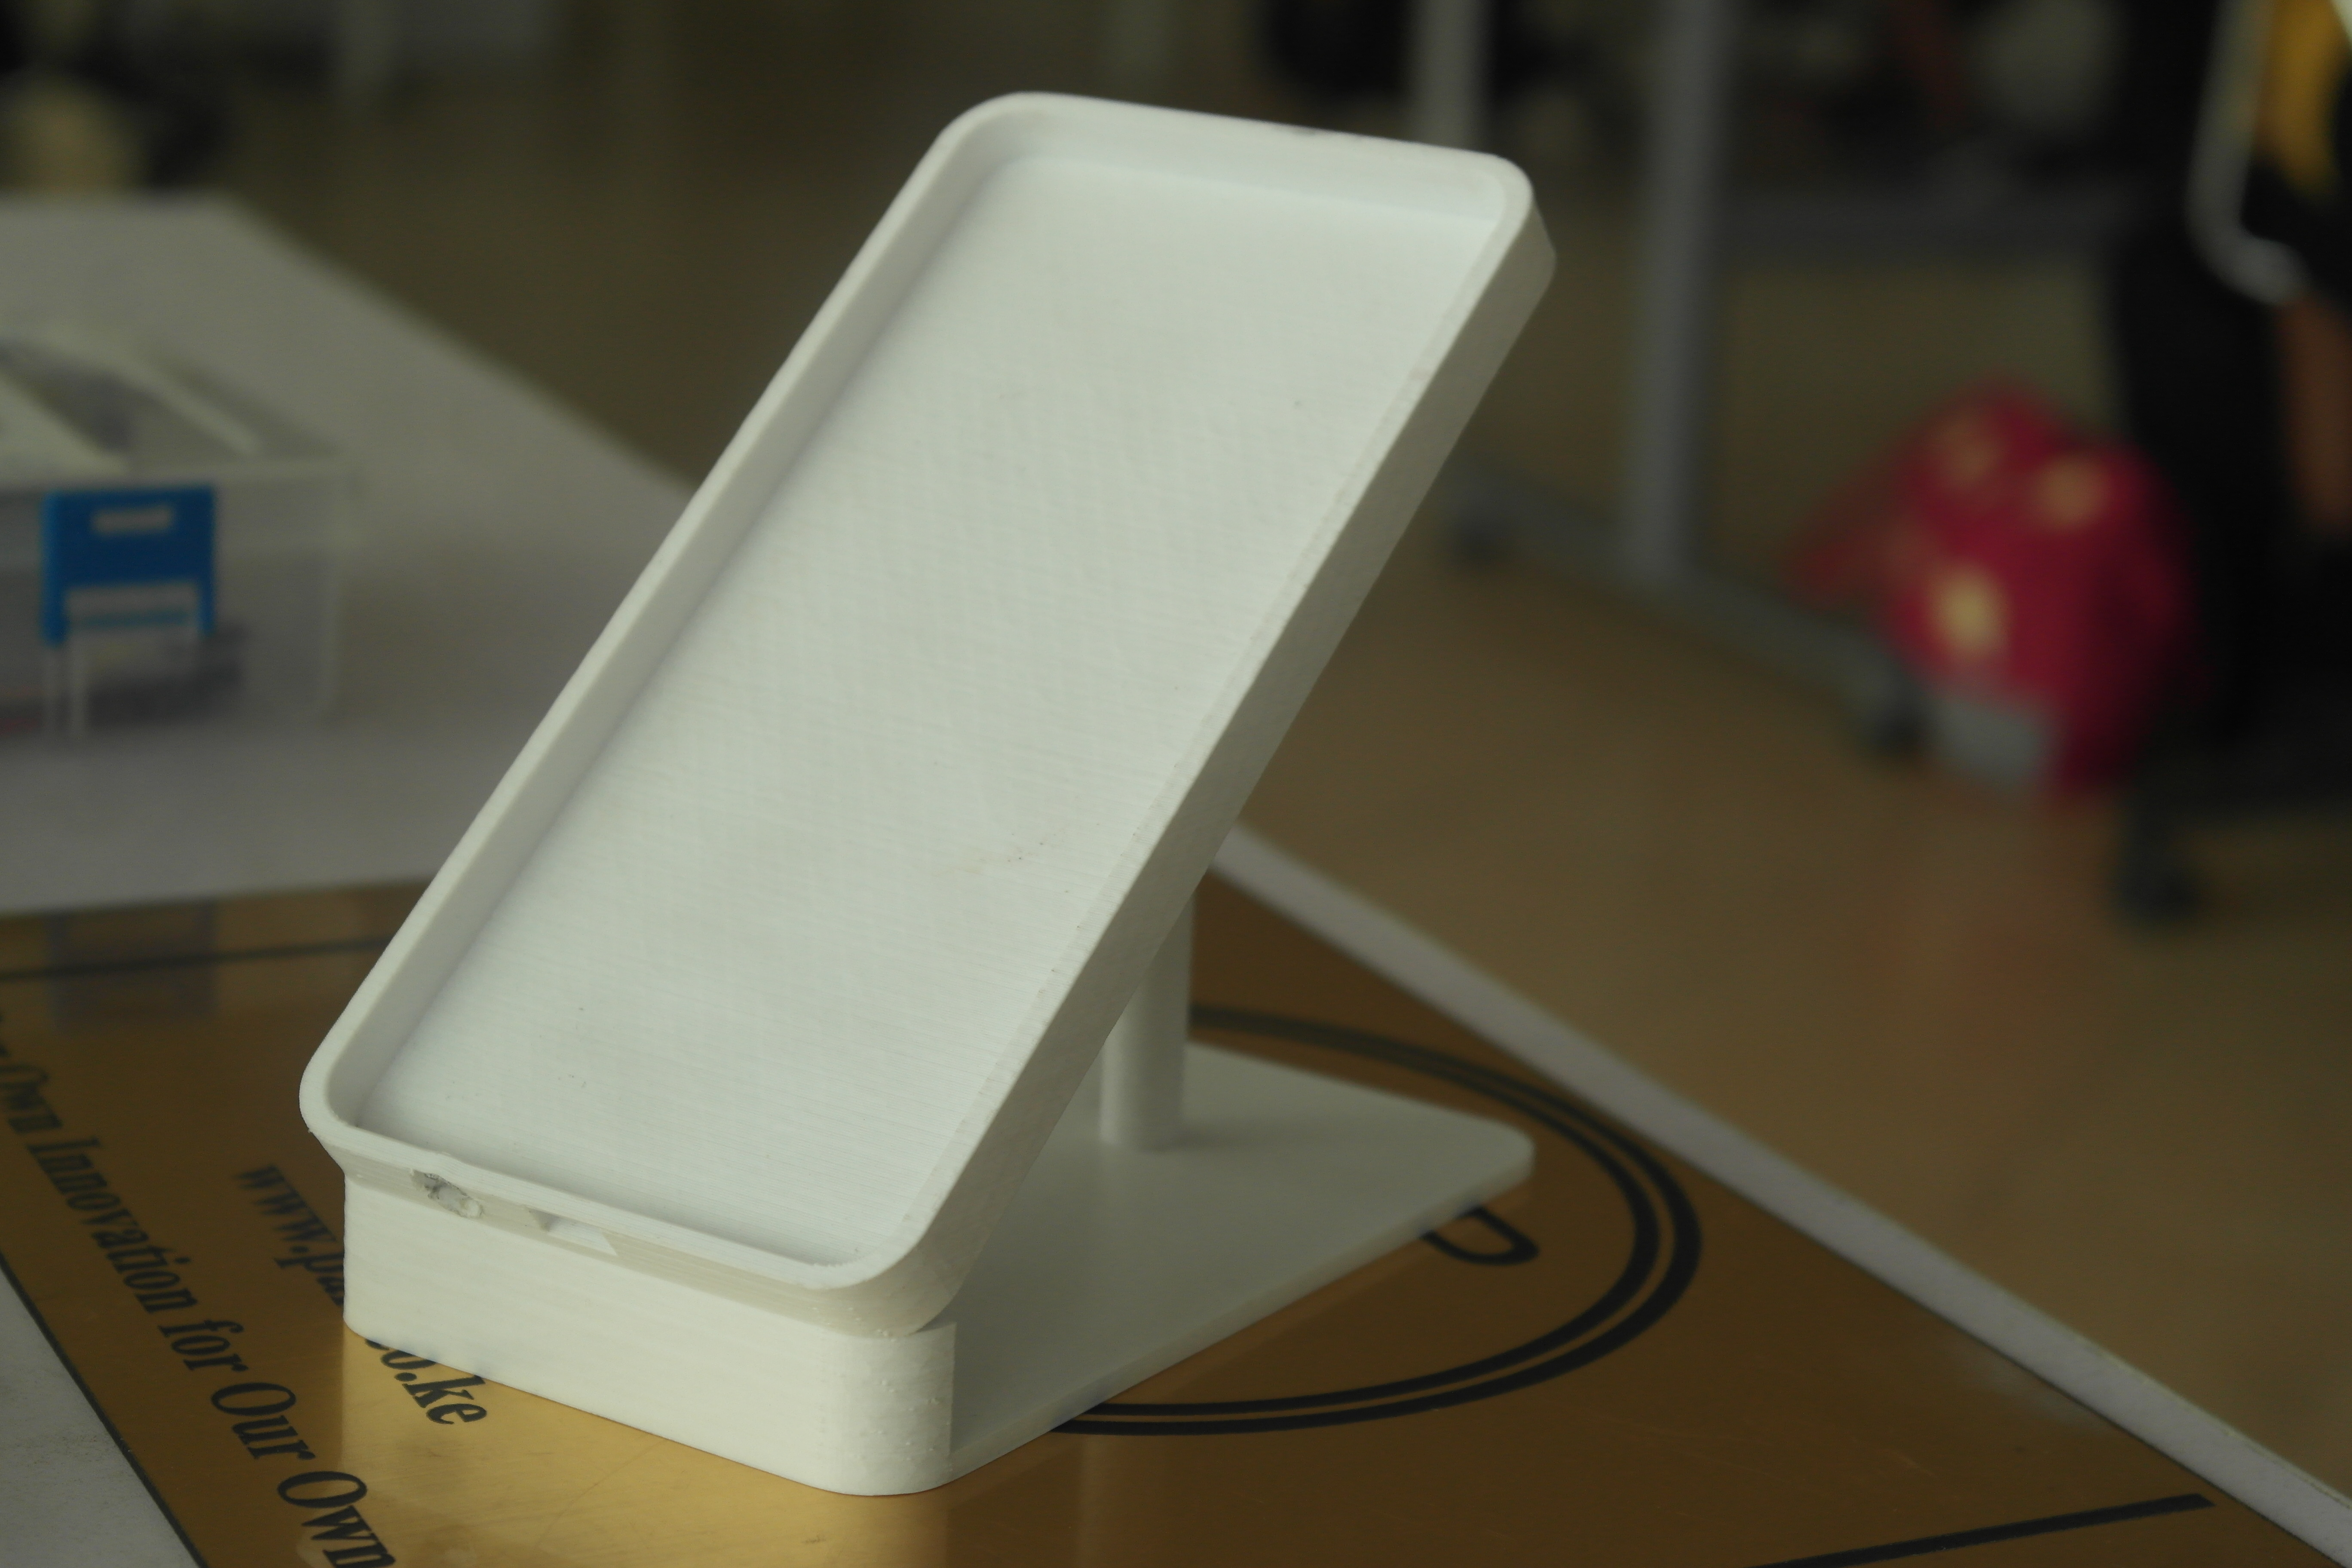
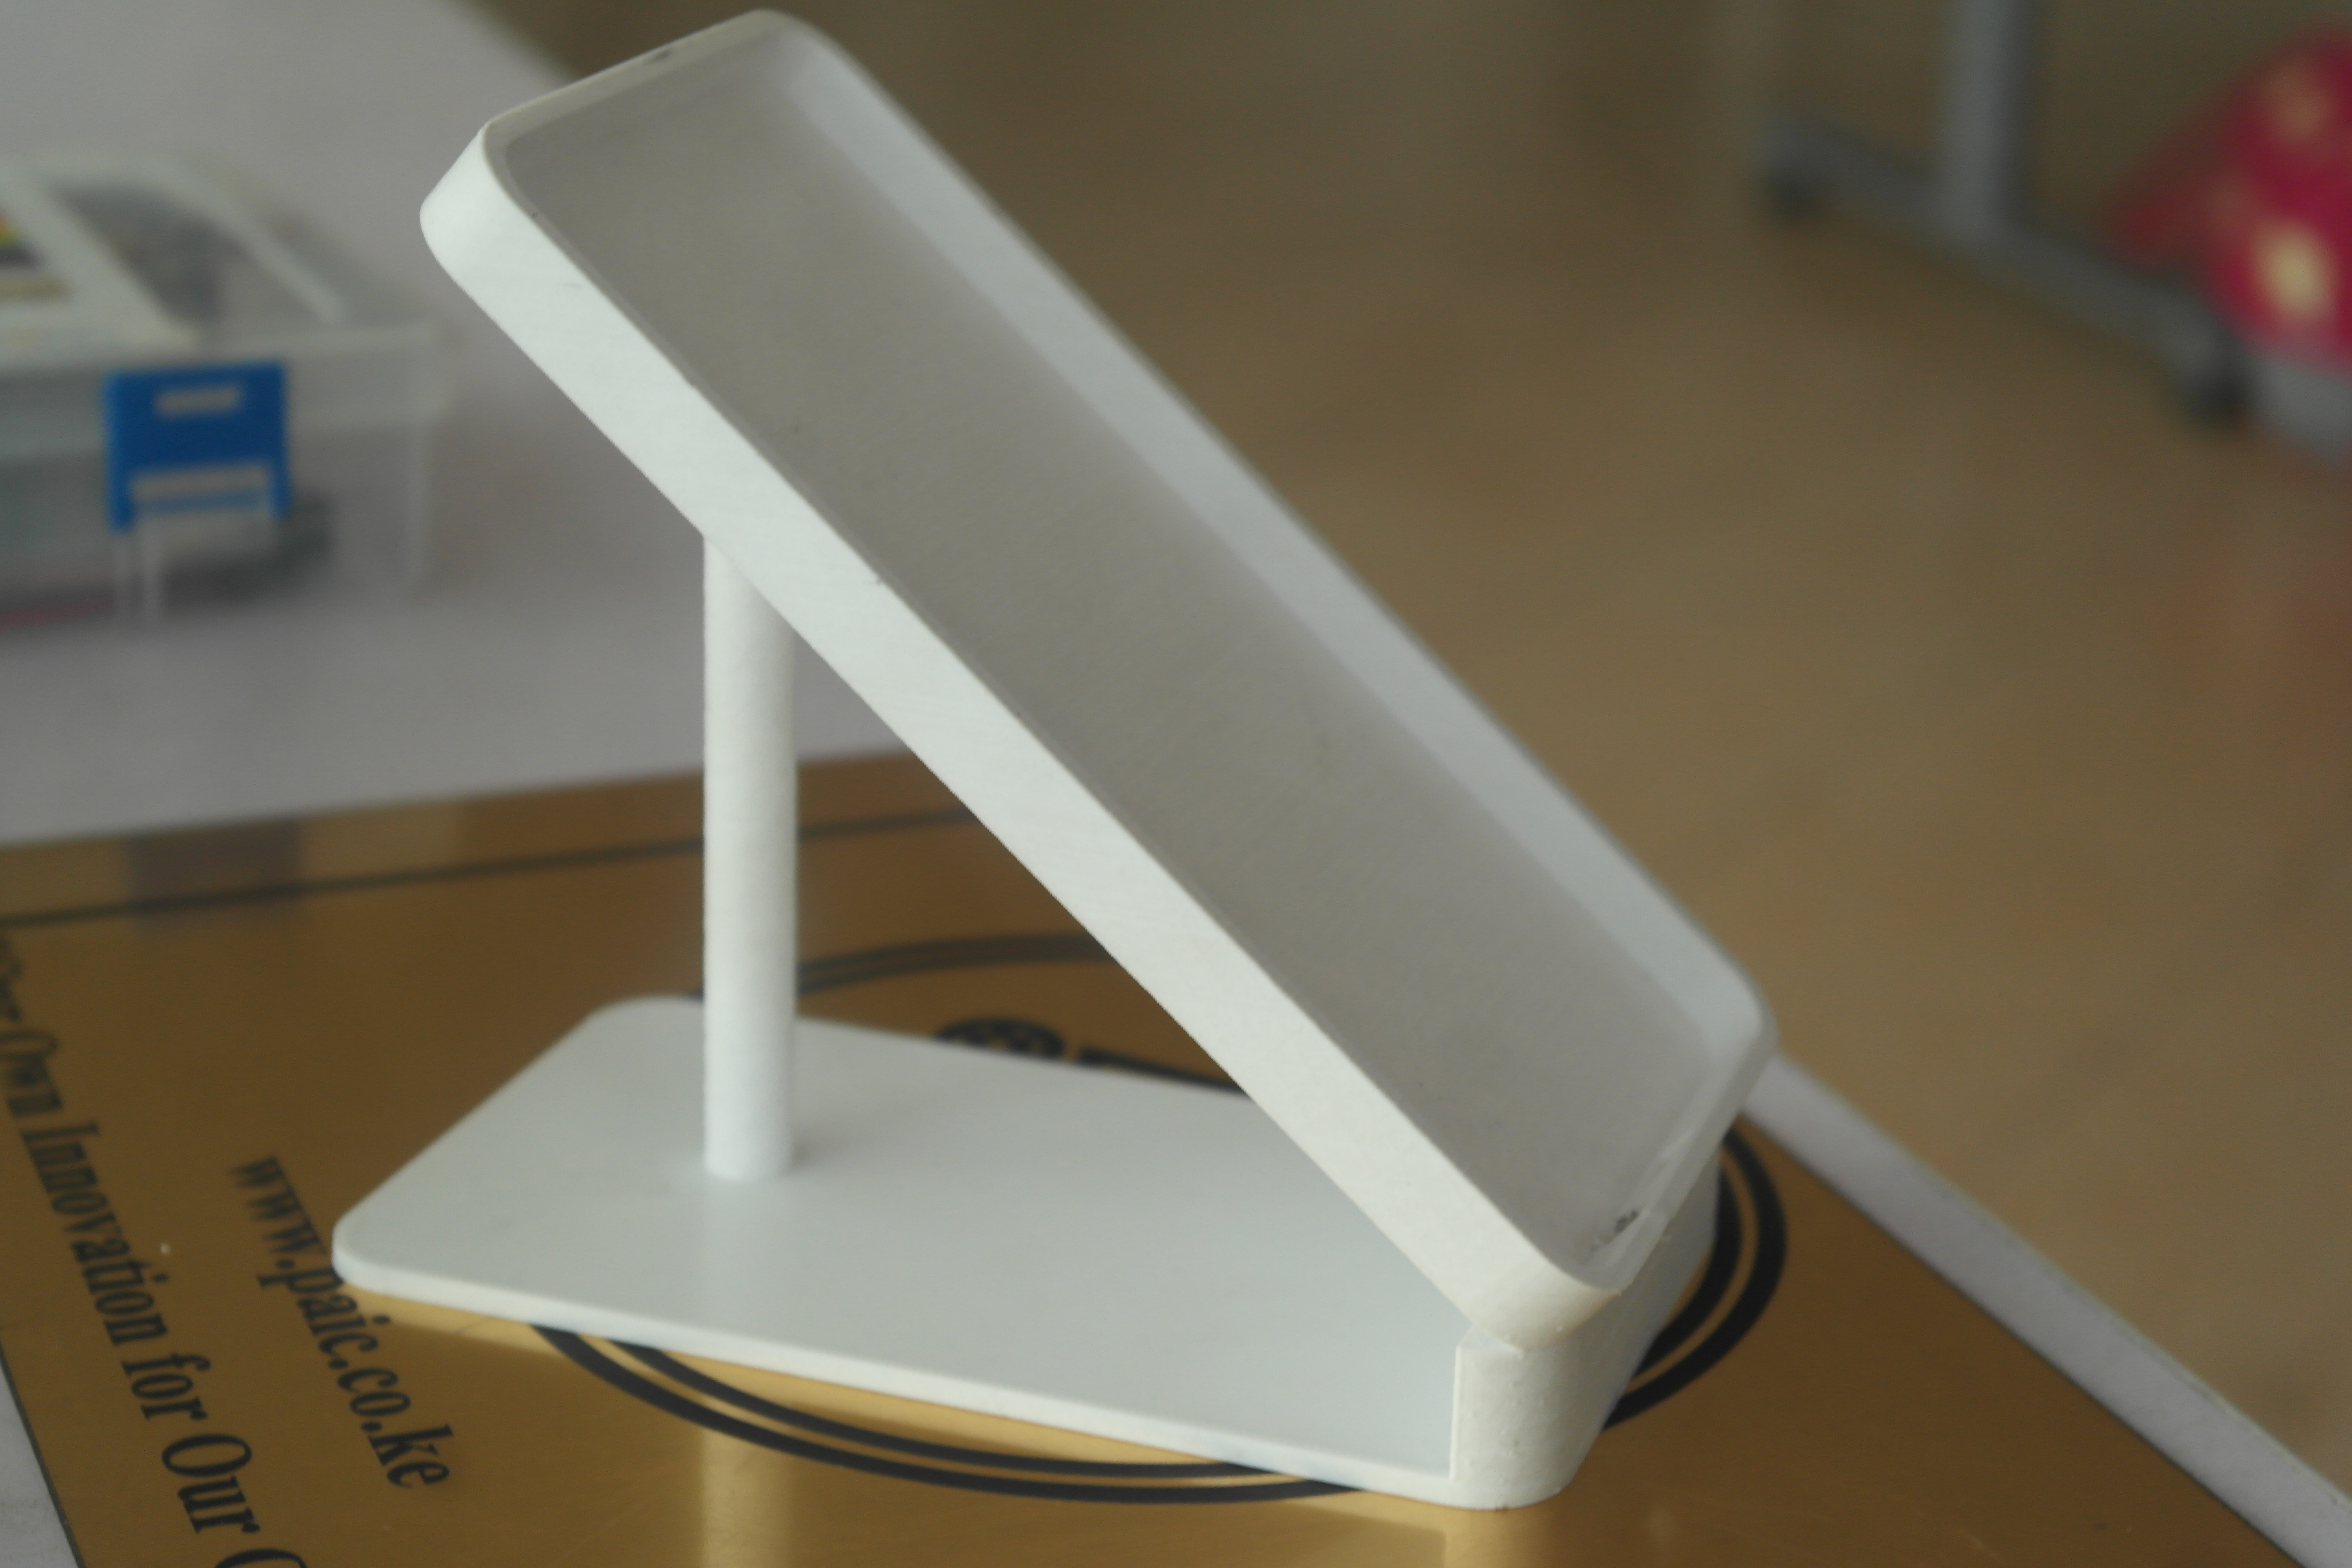
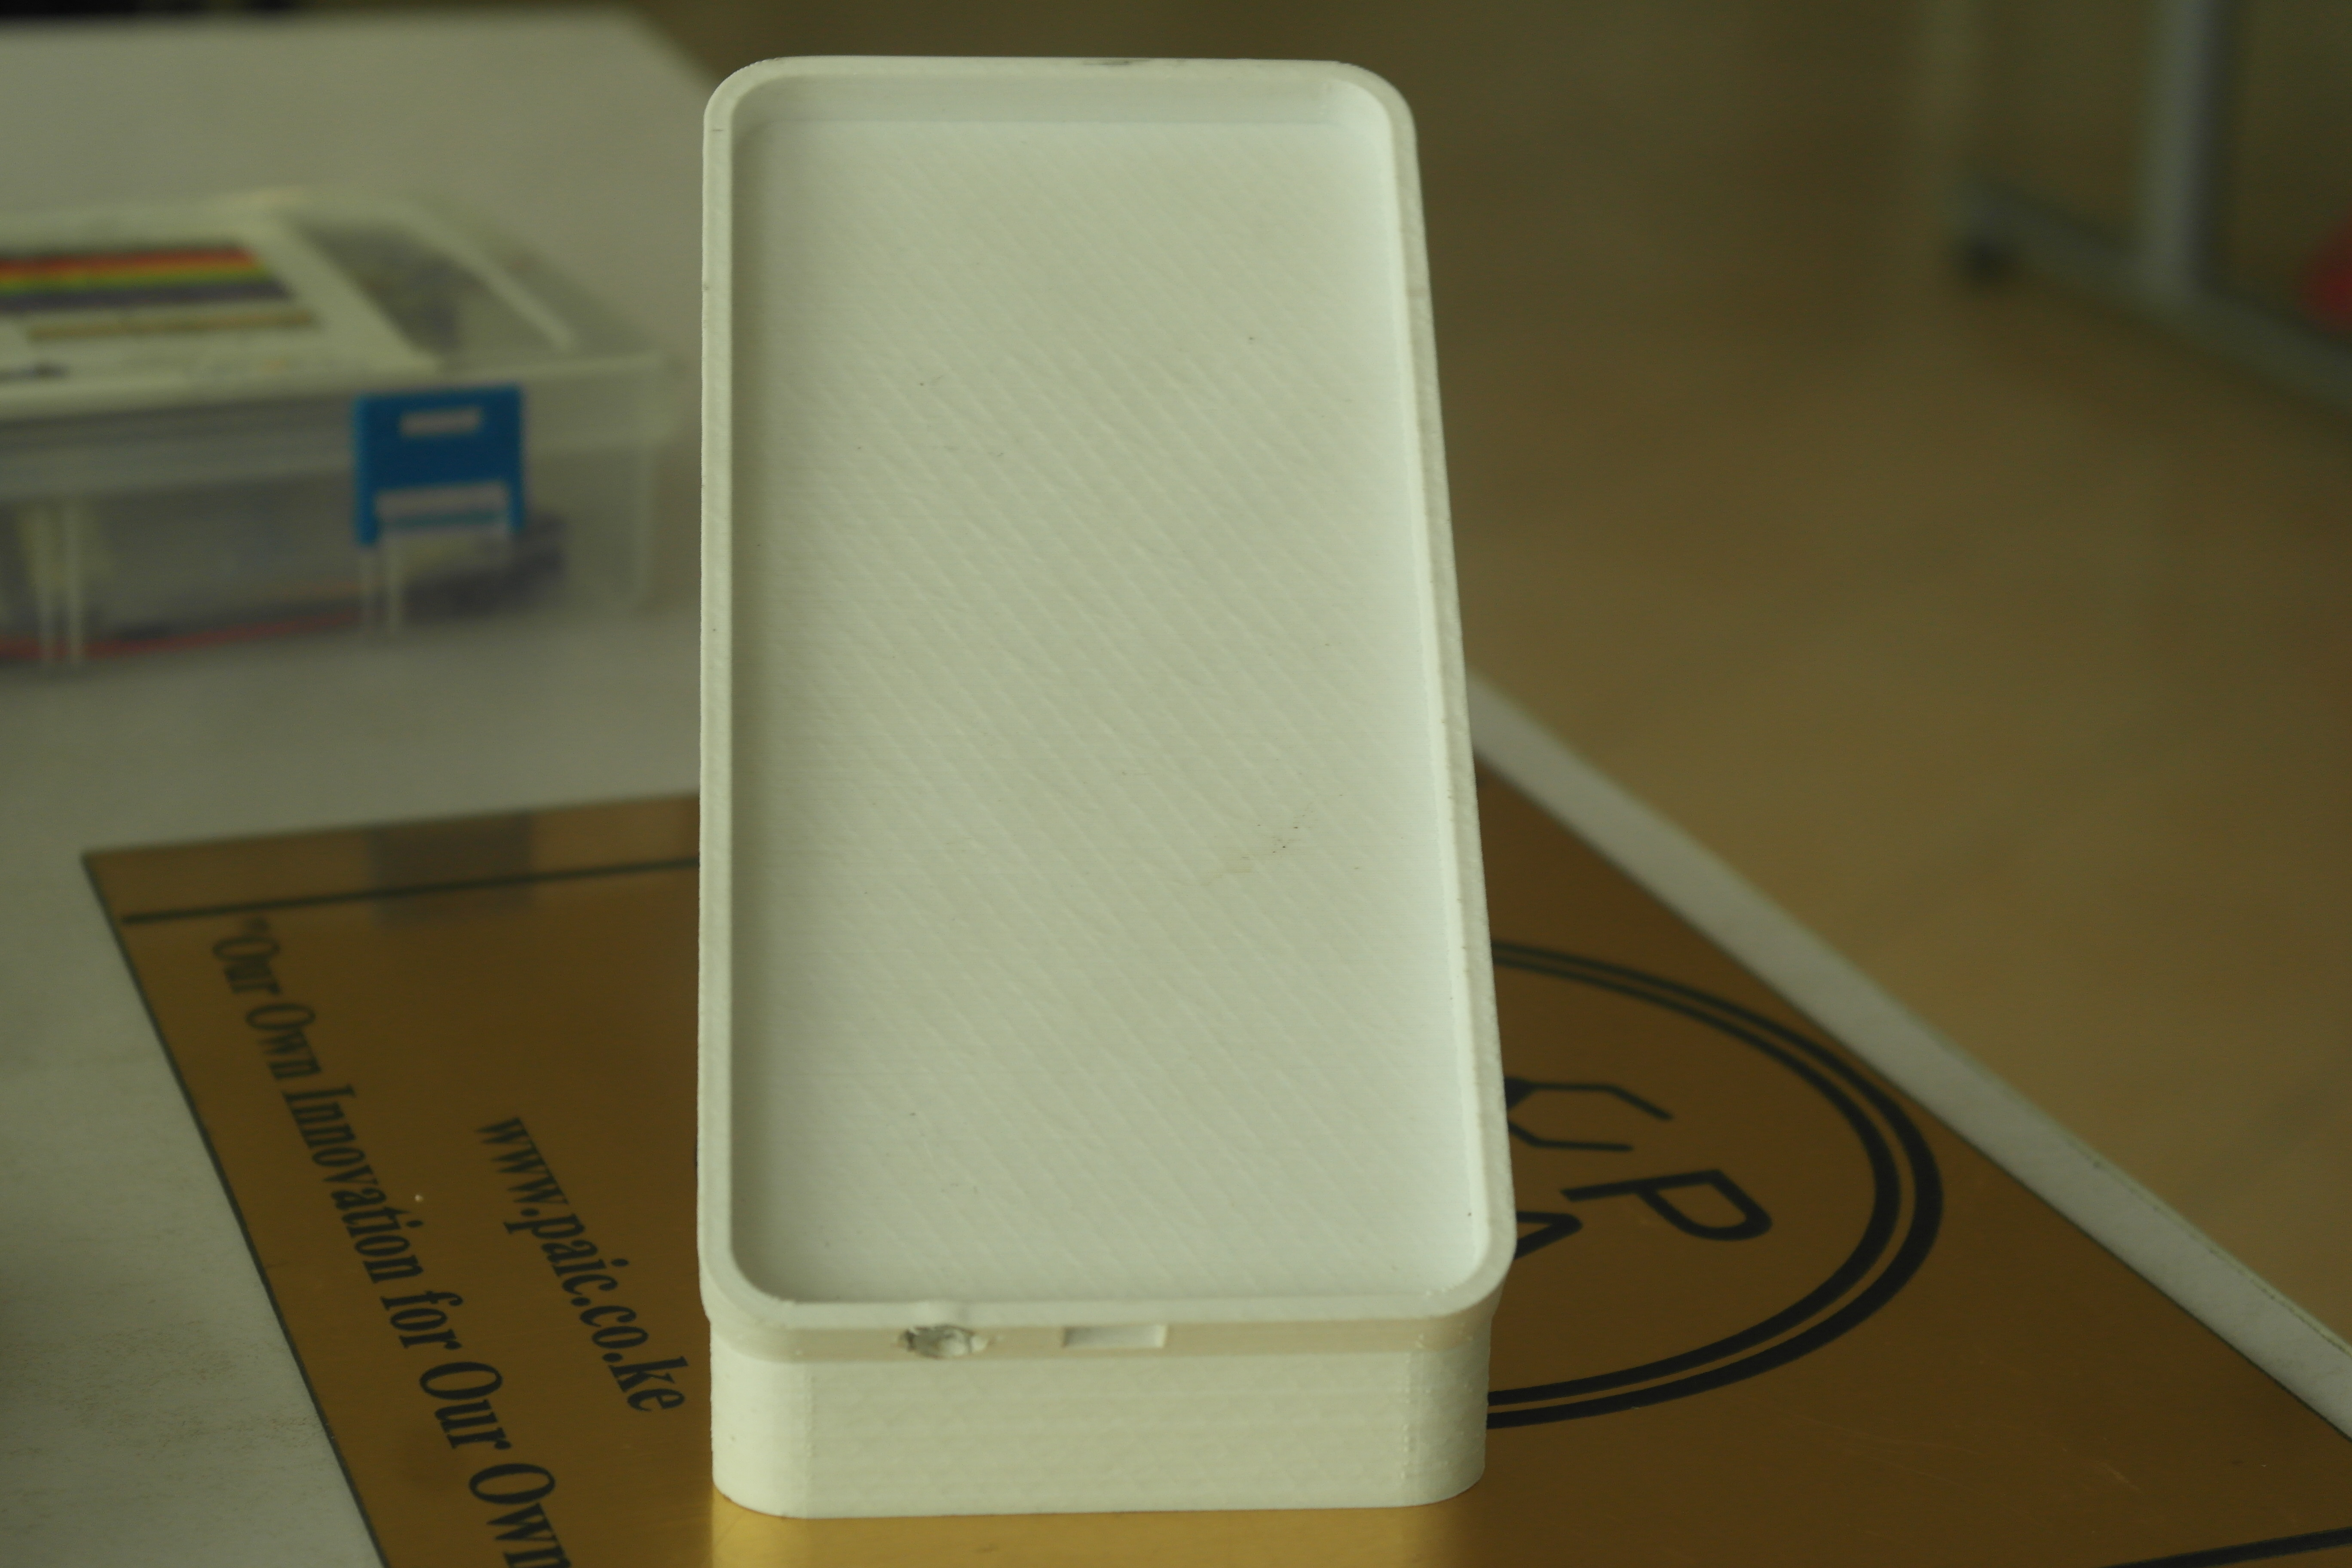
Final results: The Samsung galaxy A7 2018 smartphone desktop stand.
- 3D printed stand.
- Charging and earphone ports
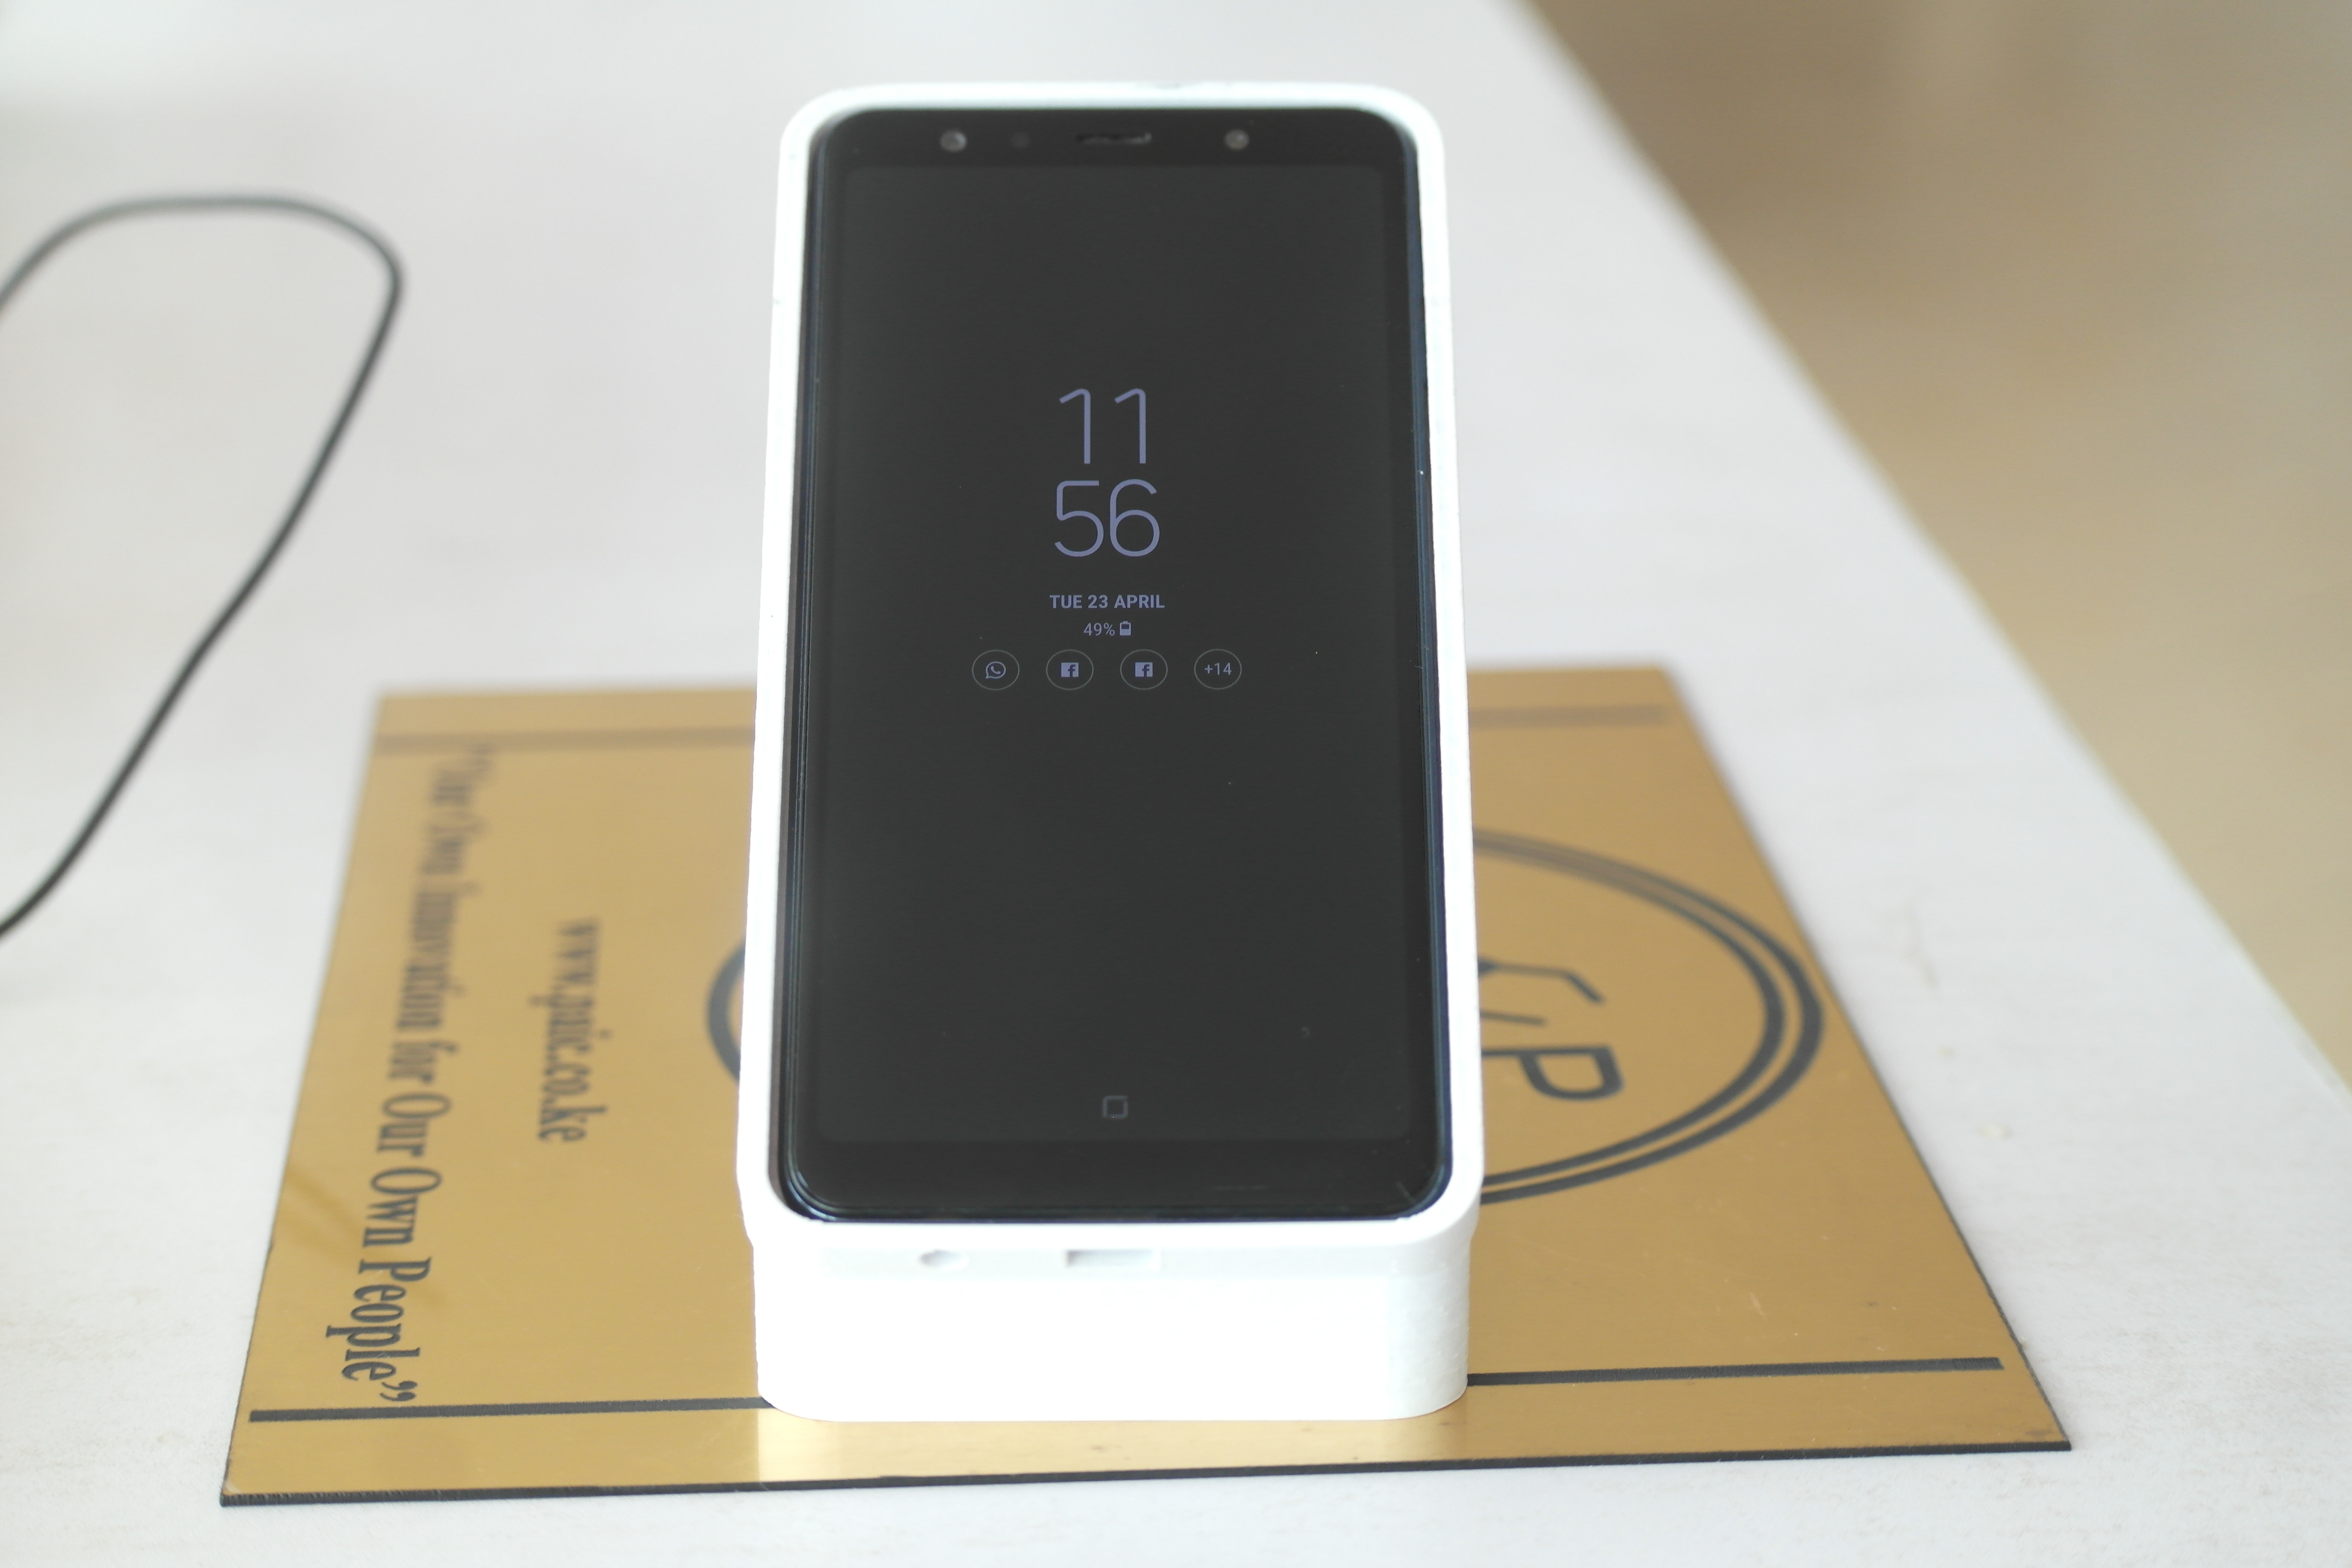
- Fitting my phone on the stand for its purpose.
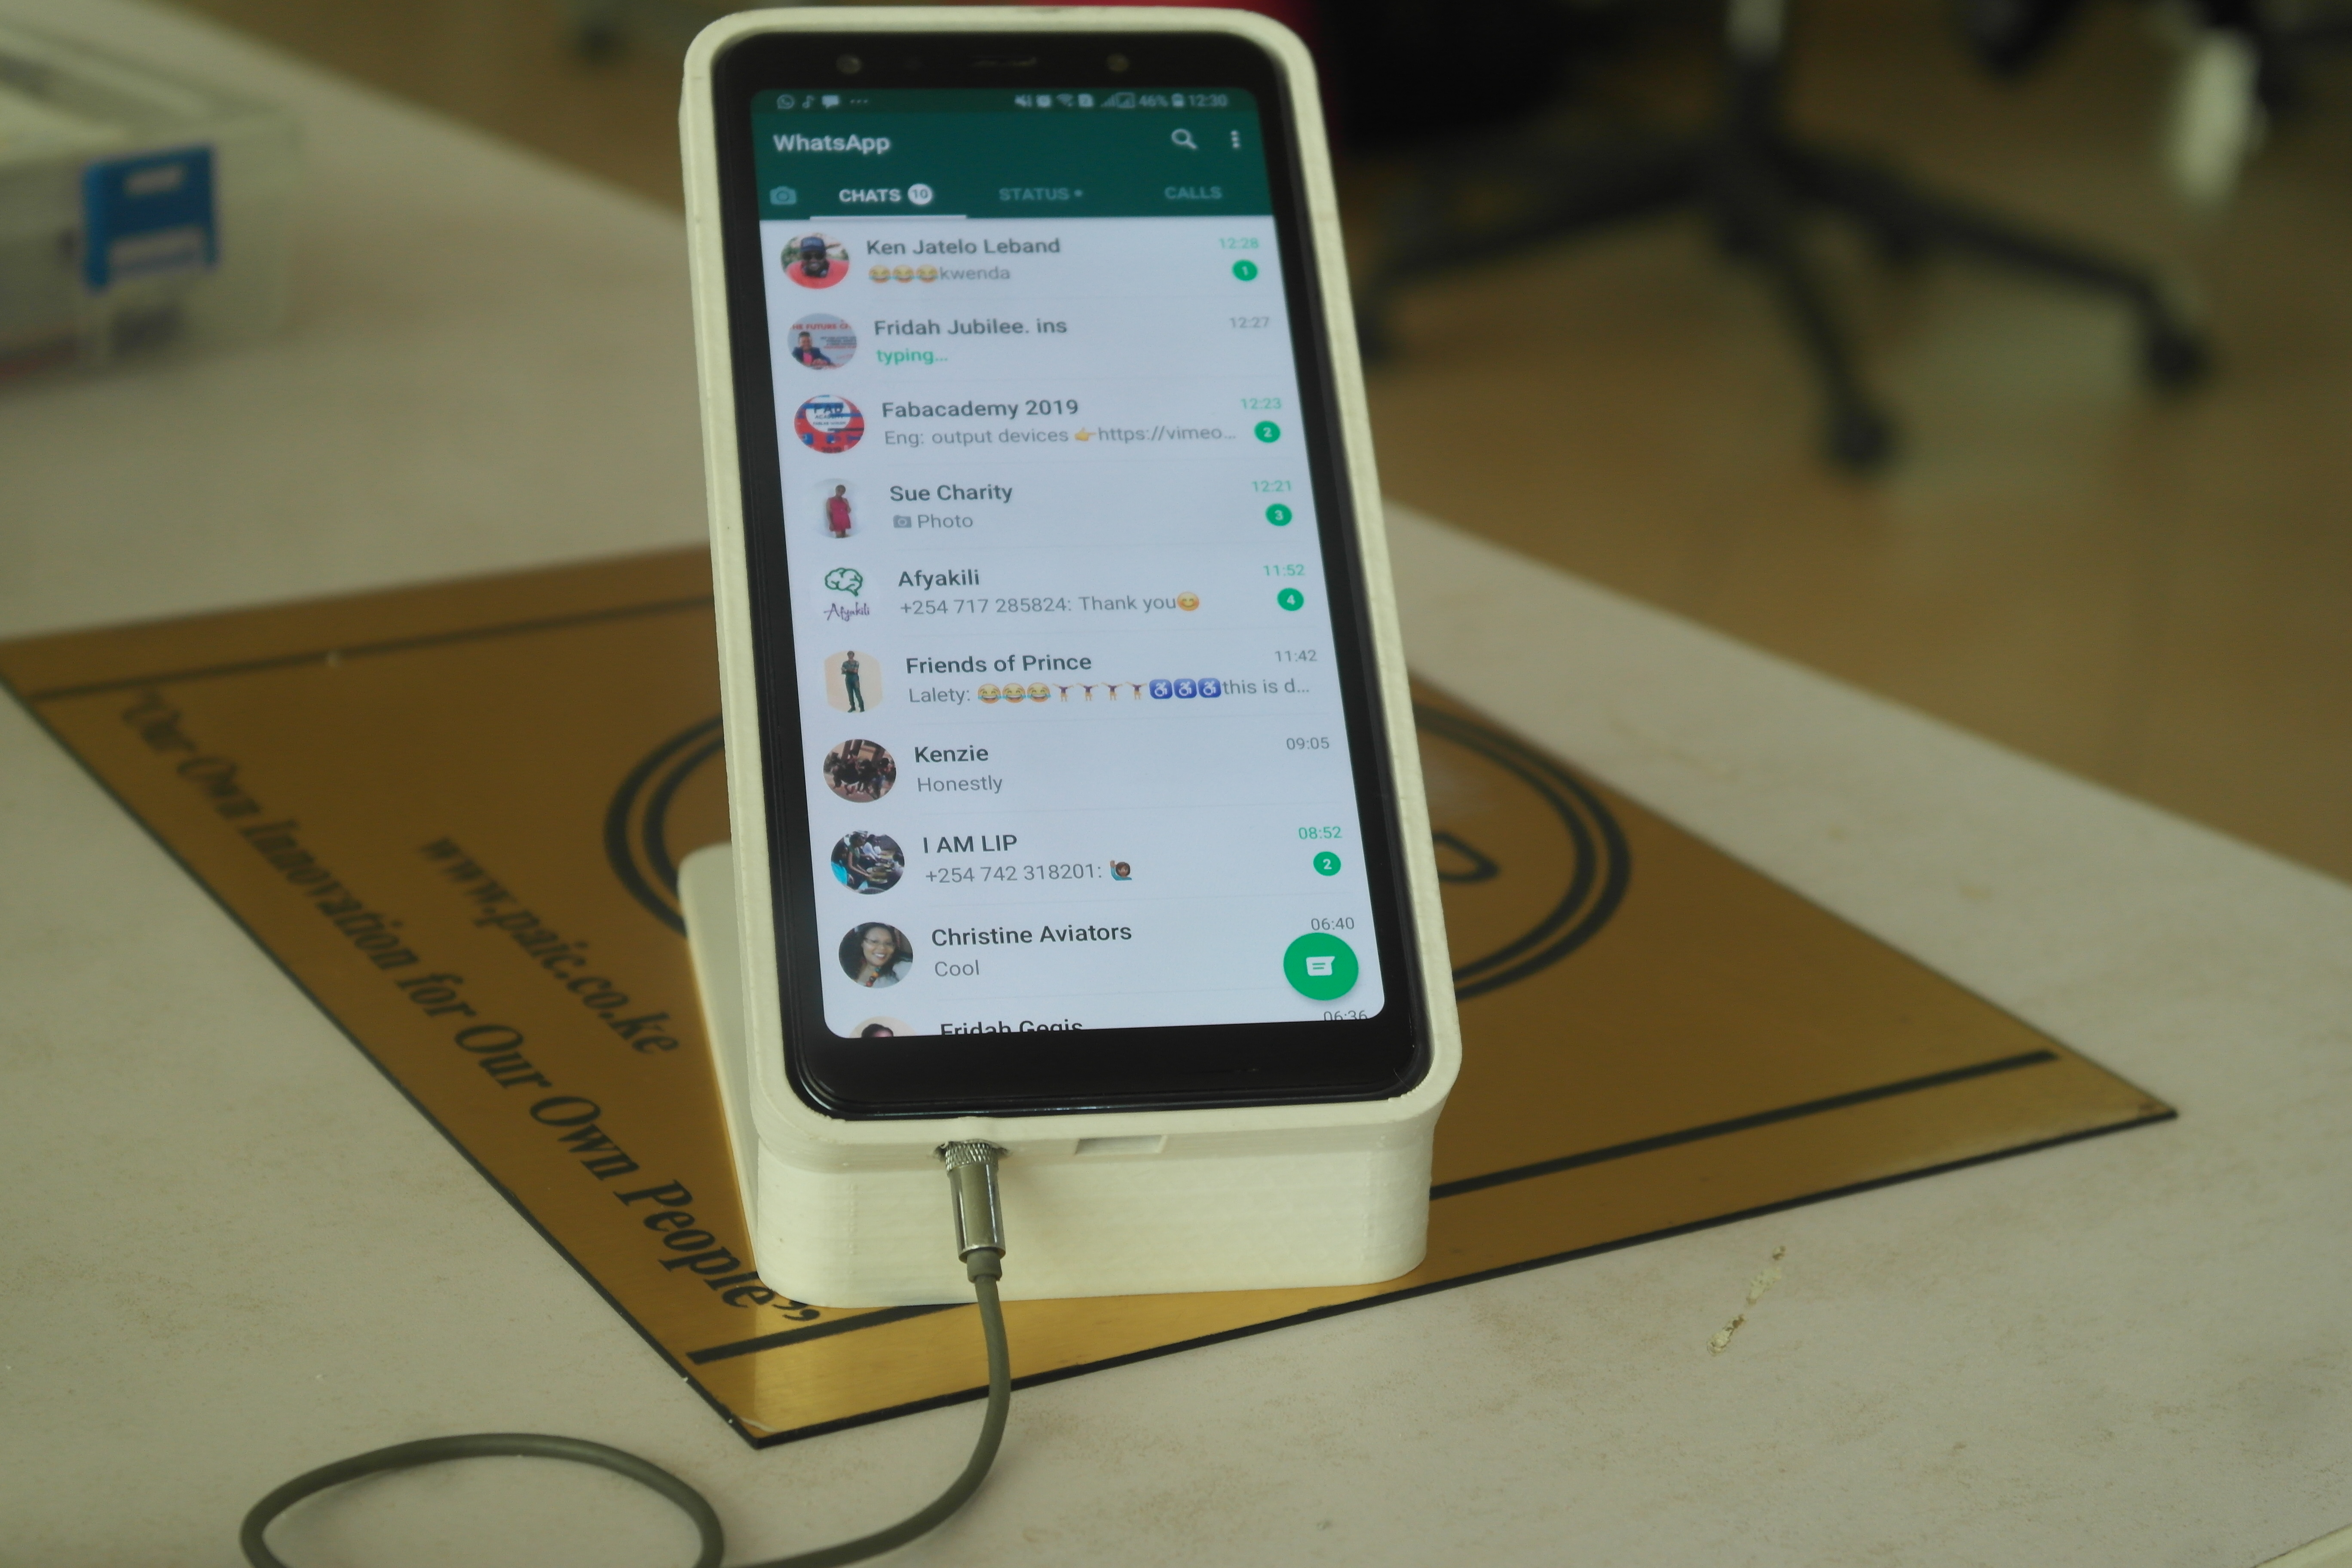
- Using my smartphone comfortably on the stand.

Downloadable files.
3D Scanning;
- No content.
- No content.
- No content.
- No content.
- No content.
- No content.
- No content.
- No content.
No content.
No content.
No content.
Problems encountered this week:
- Switching between softwares during the design process of the smartphone stand proved tideous since some application had no tools to perform the design function required.
- Lights went out on numerous occassions. Forcing me to keep repeating the printing as the 3DWOX sindon 3D printer has no auto-resume function. This thus made us waste quite printing material(spool).