Final Project Development
Smart Diffuser
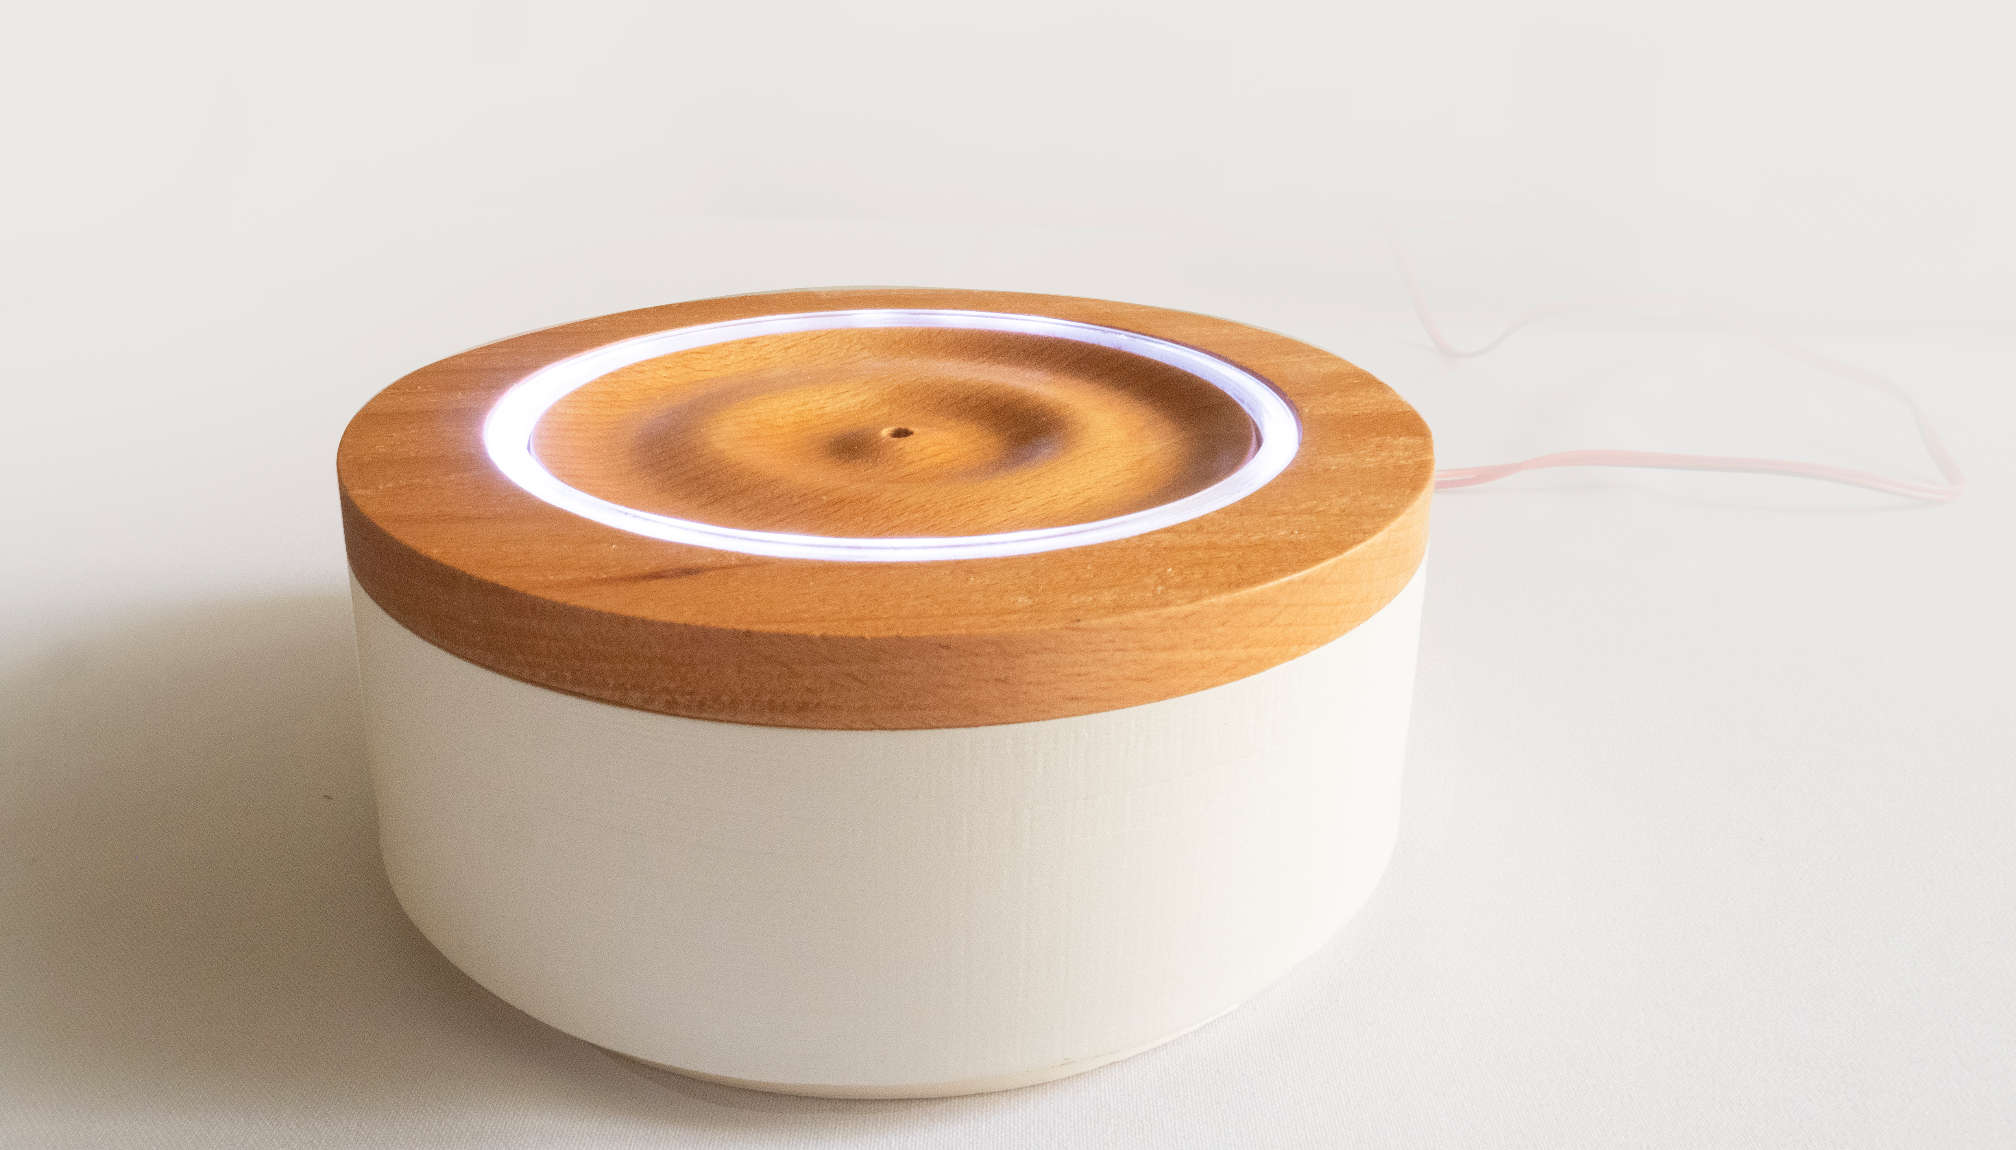
I decided to make my first electronic product (as a product designer I usally work in the overall look or casing) and use all the new skills I have learned thru the course. This diffuser uses water and ultrasonic vibrations (Piezoelectric Disc) to disperse molecules of the oil into the air through a fine mist. It can function as a light (adafruit neo pixel leds) that will turn off/on with a clap (sound sensor). However, if the user does not make any sound it will automatically turn off after 30 minutes.
The purpose of my final project is to design a final product that blends with the enviroment and interacts with the user by developing an easy, intuitive product, beautifully crafted with honest materials that evoque calmness and well being, taking into consideration the semiotics (relationship between an object, and a meaning) and the purpose of the product.
I devided my development in different seccions:
- Design, CNC Milling, Electronics, Laser Cut, 3d printing and Assembly.
Preliminar testings
During Week 9 I tested some imput and output components, specifally the sound sensor. I decided to use it as the on/off sensor for my final proyect. I made some modification, for my final project I am using neopixels led and a piezo electric disc to create the mist. Both turn on and off when the sound sensor detects some noise. The advatage of using Neopixels is that you can program each led individually and creat different effects like rainbow or swipe (the one im using) Here is a video of my first test during week 9.
Design
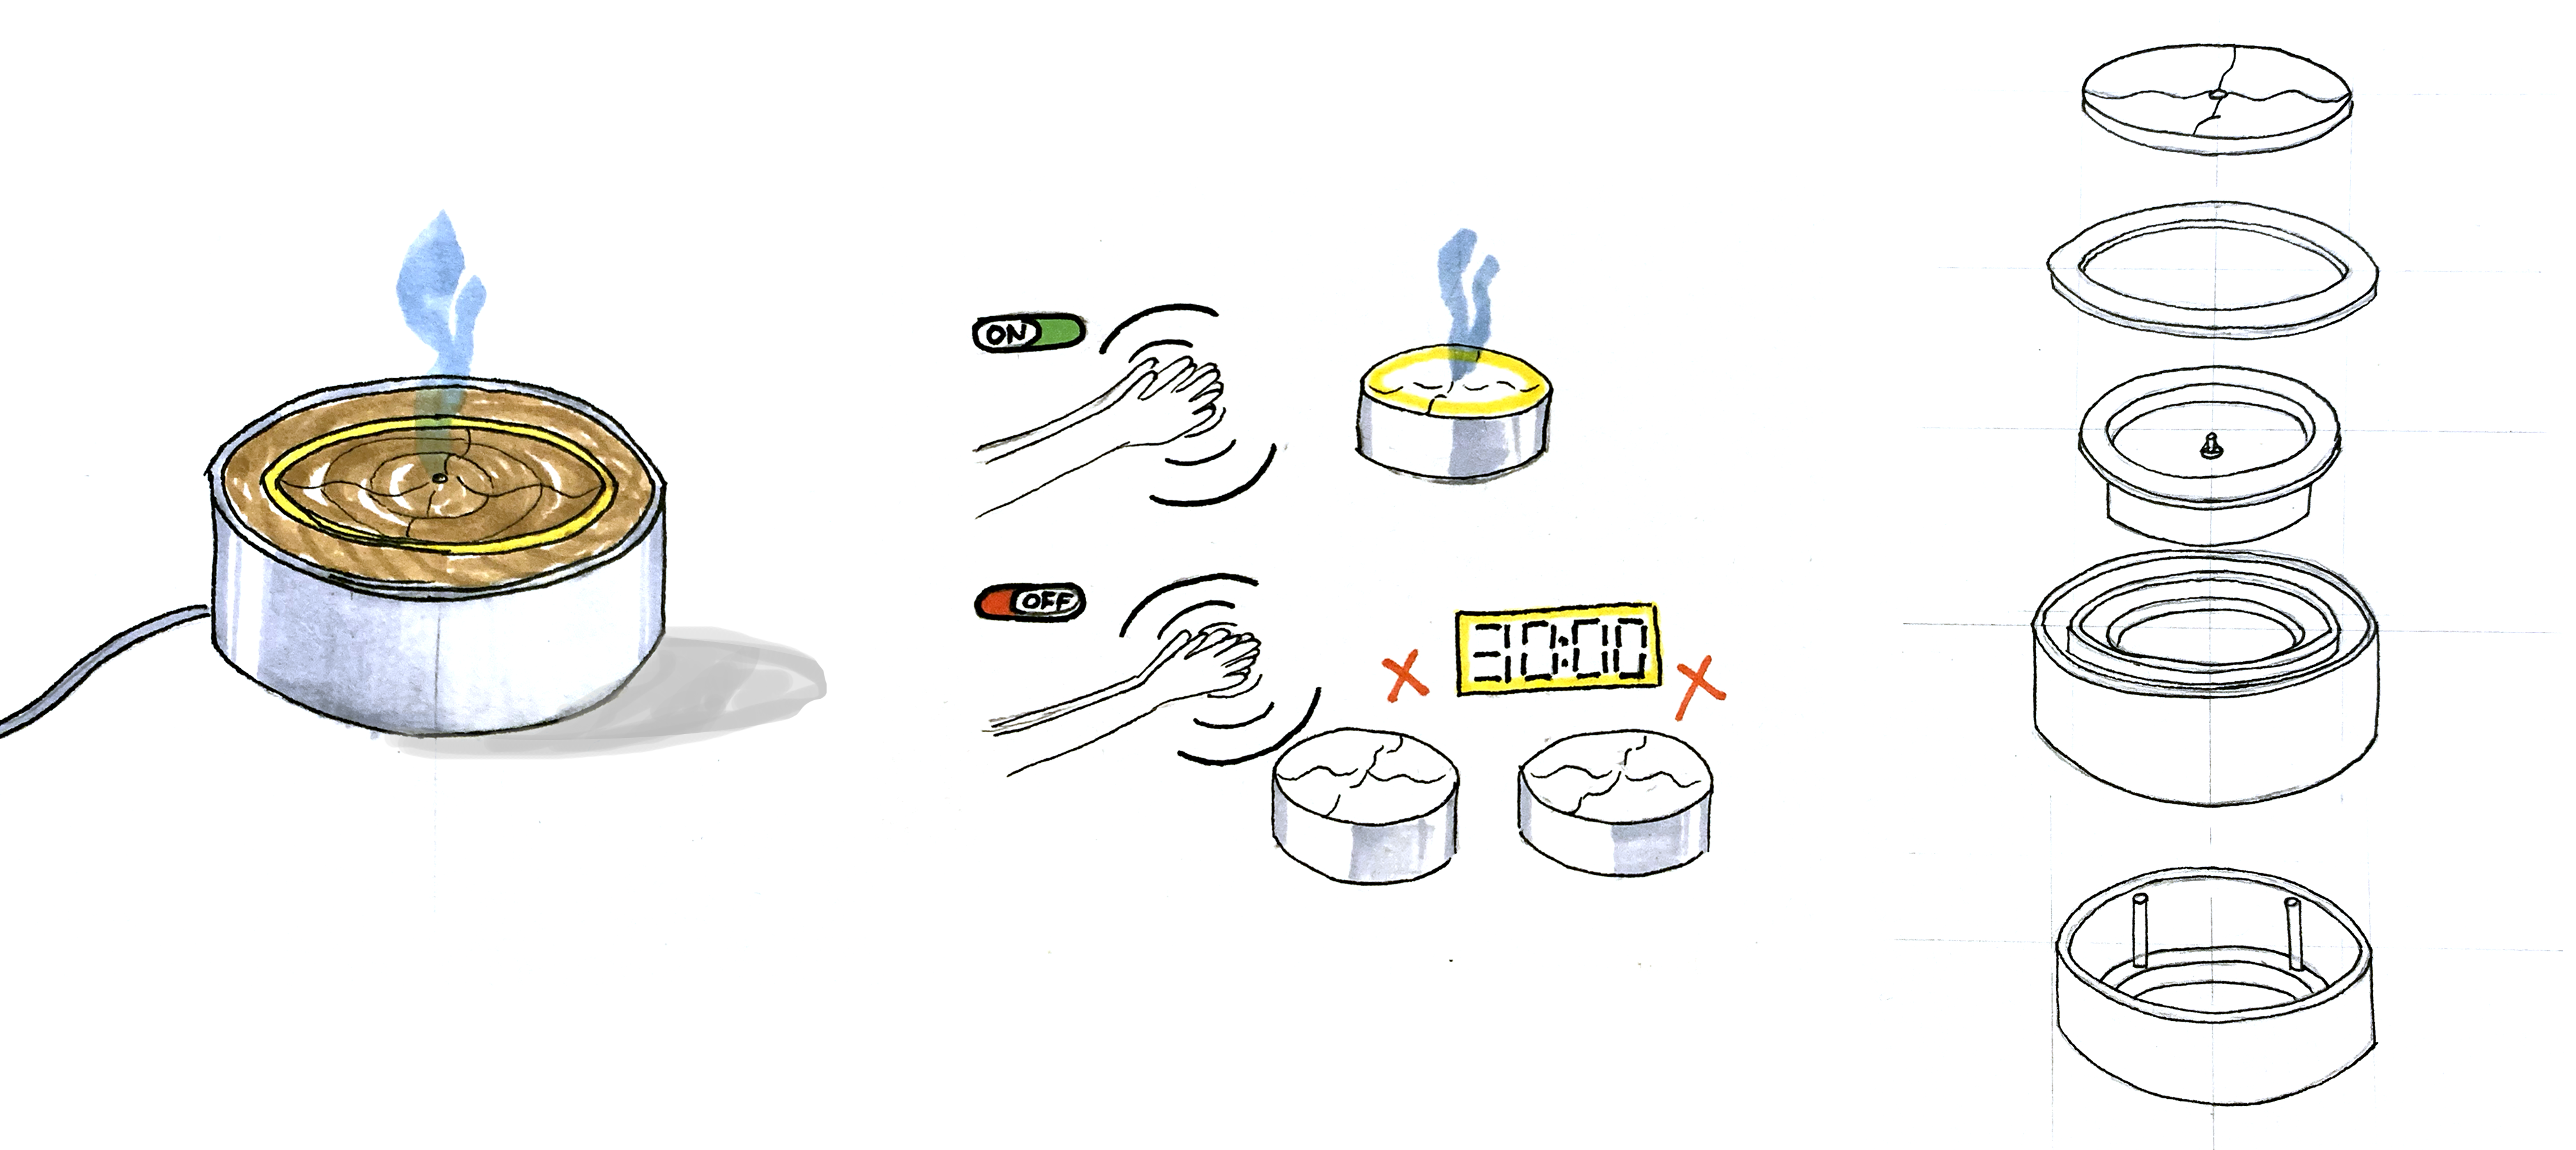
Before sketching the smart diffuser I did some research on how the piezo disk works, how to place it in water, how to hold it, and based on that I started sketching my project. I took inpiration in the waves creates when a small drip or object touches the water. The semiology of the shape is quite relaxing and appealing and goes along with the product I am designing. Diffusers are usually use to relax or relief breathing issues.
 After sketching I staed modelling my 3d in Rhino. Taking in consideration the dimensions of my components (relay, sound sensor, board, piezo)
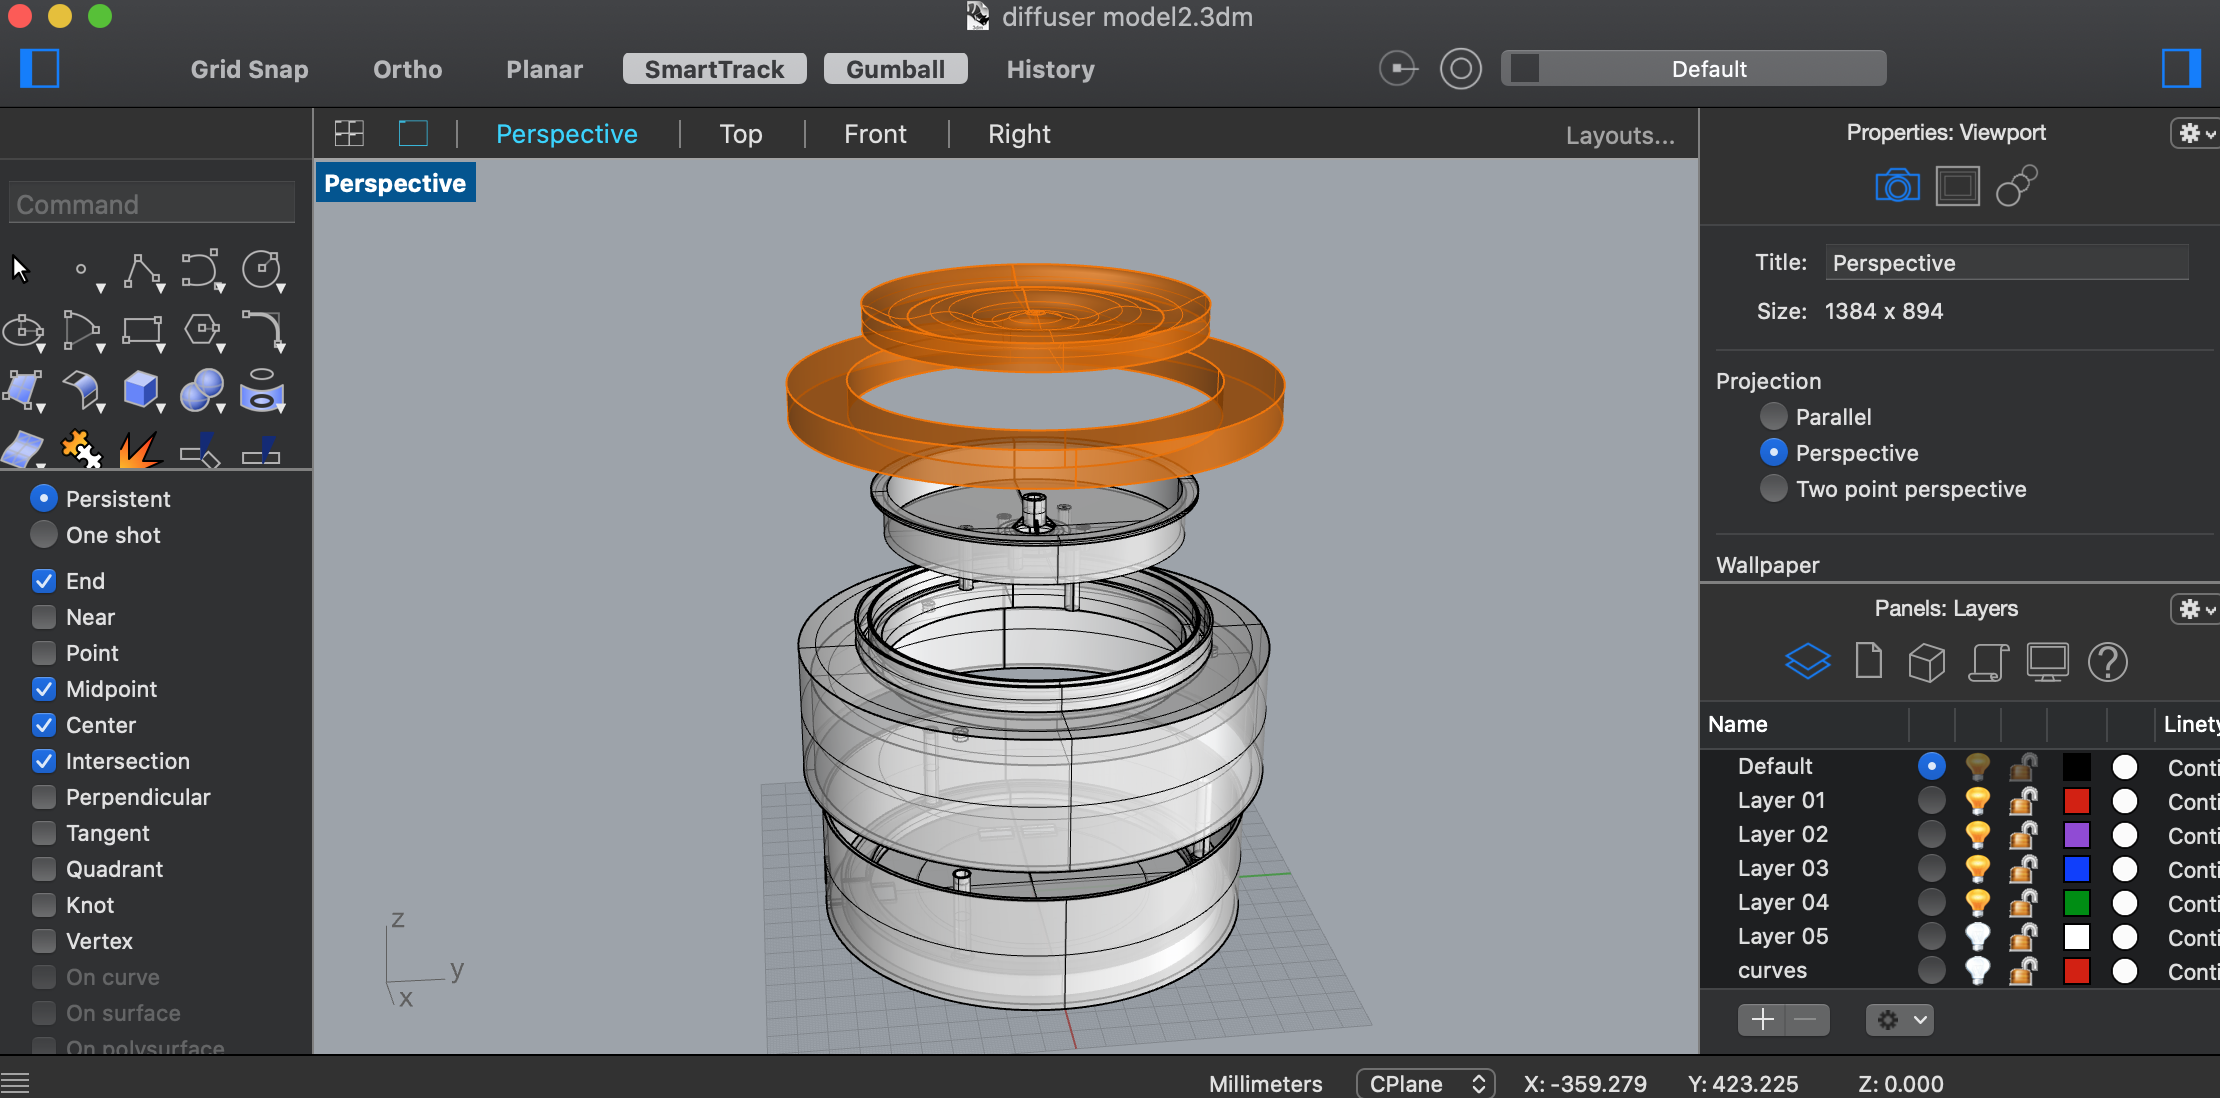 During the process I made some modifications regarding the tolerance, and my colleague gave me some magnets to use instaed of screws.Here is the final render:
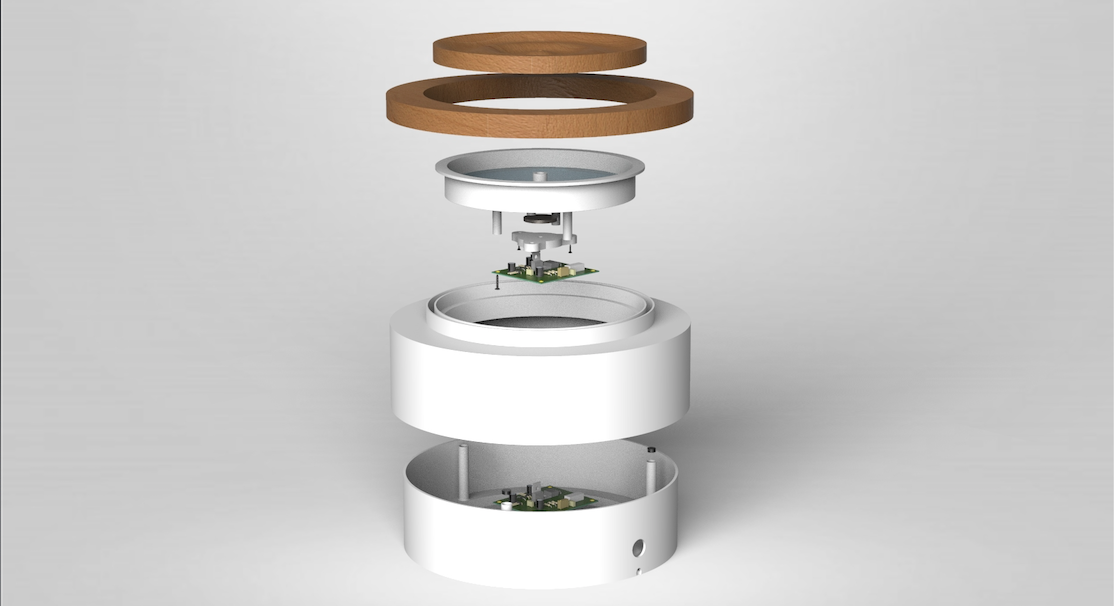 When I had my design ready I exported all the parts to STL and DXF so I could mill and print the pieces.
CNC Milling
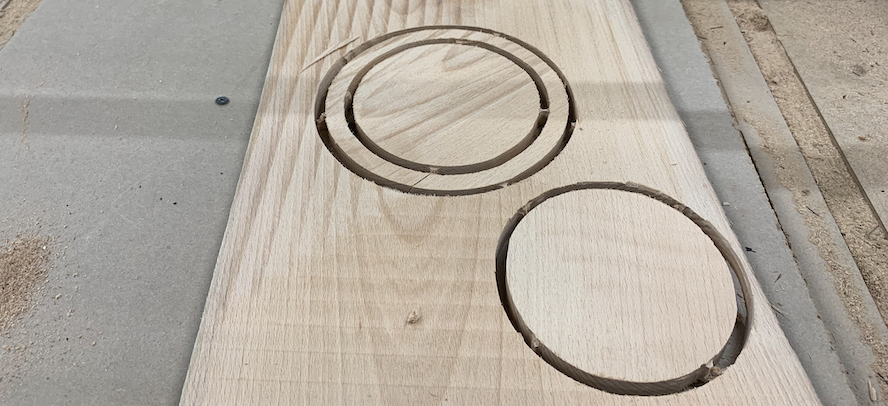
For the ring and the lid I am using Beach wood which is really good for milling and a beautiful wood.
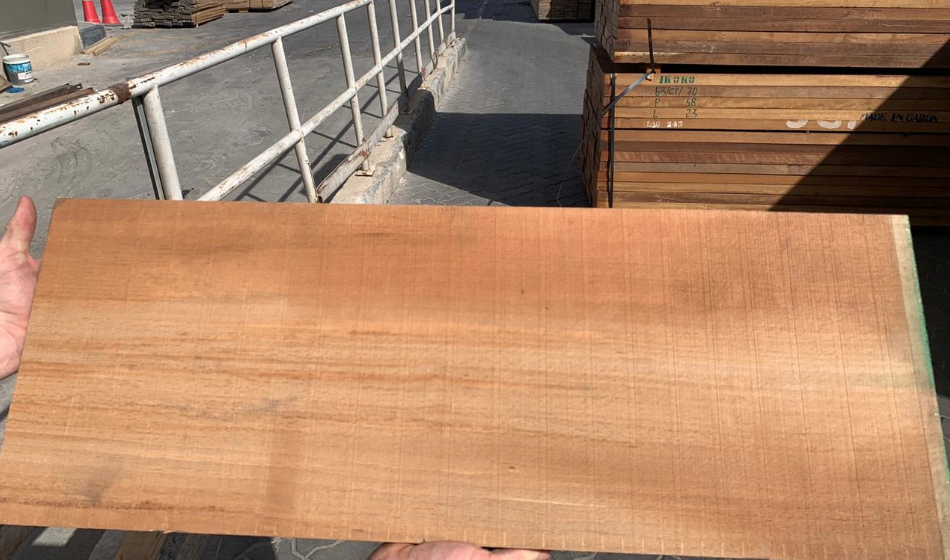 The only issue was that the wood blanck was 2 inches thick and my design 9 mm. So I had to mill it down to 9mm and then mill the ripple texture on top by making a "pocket" on each side with an end mil 29mm bit.
 Then I cut the circle and the ring, I added some tabs to hold the pieces on place and repeated the process twice since the pieces broke the first time.
 That where removed after and sanded.
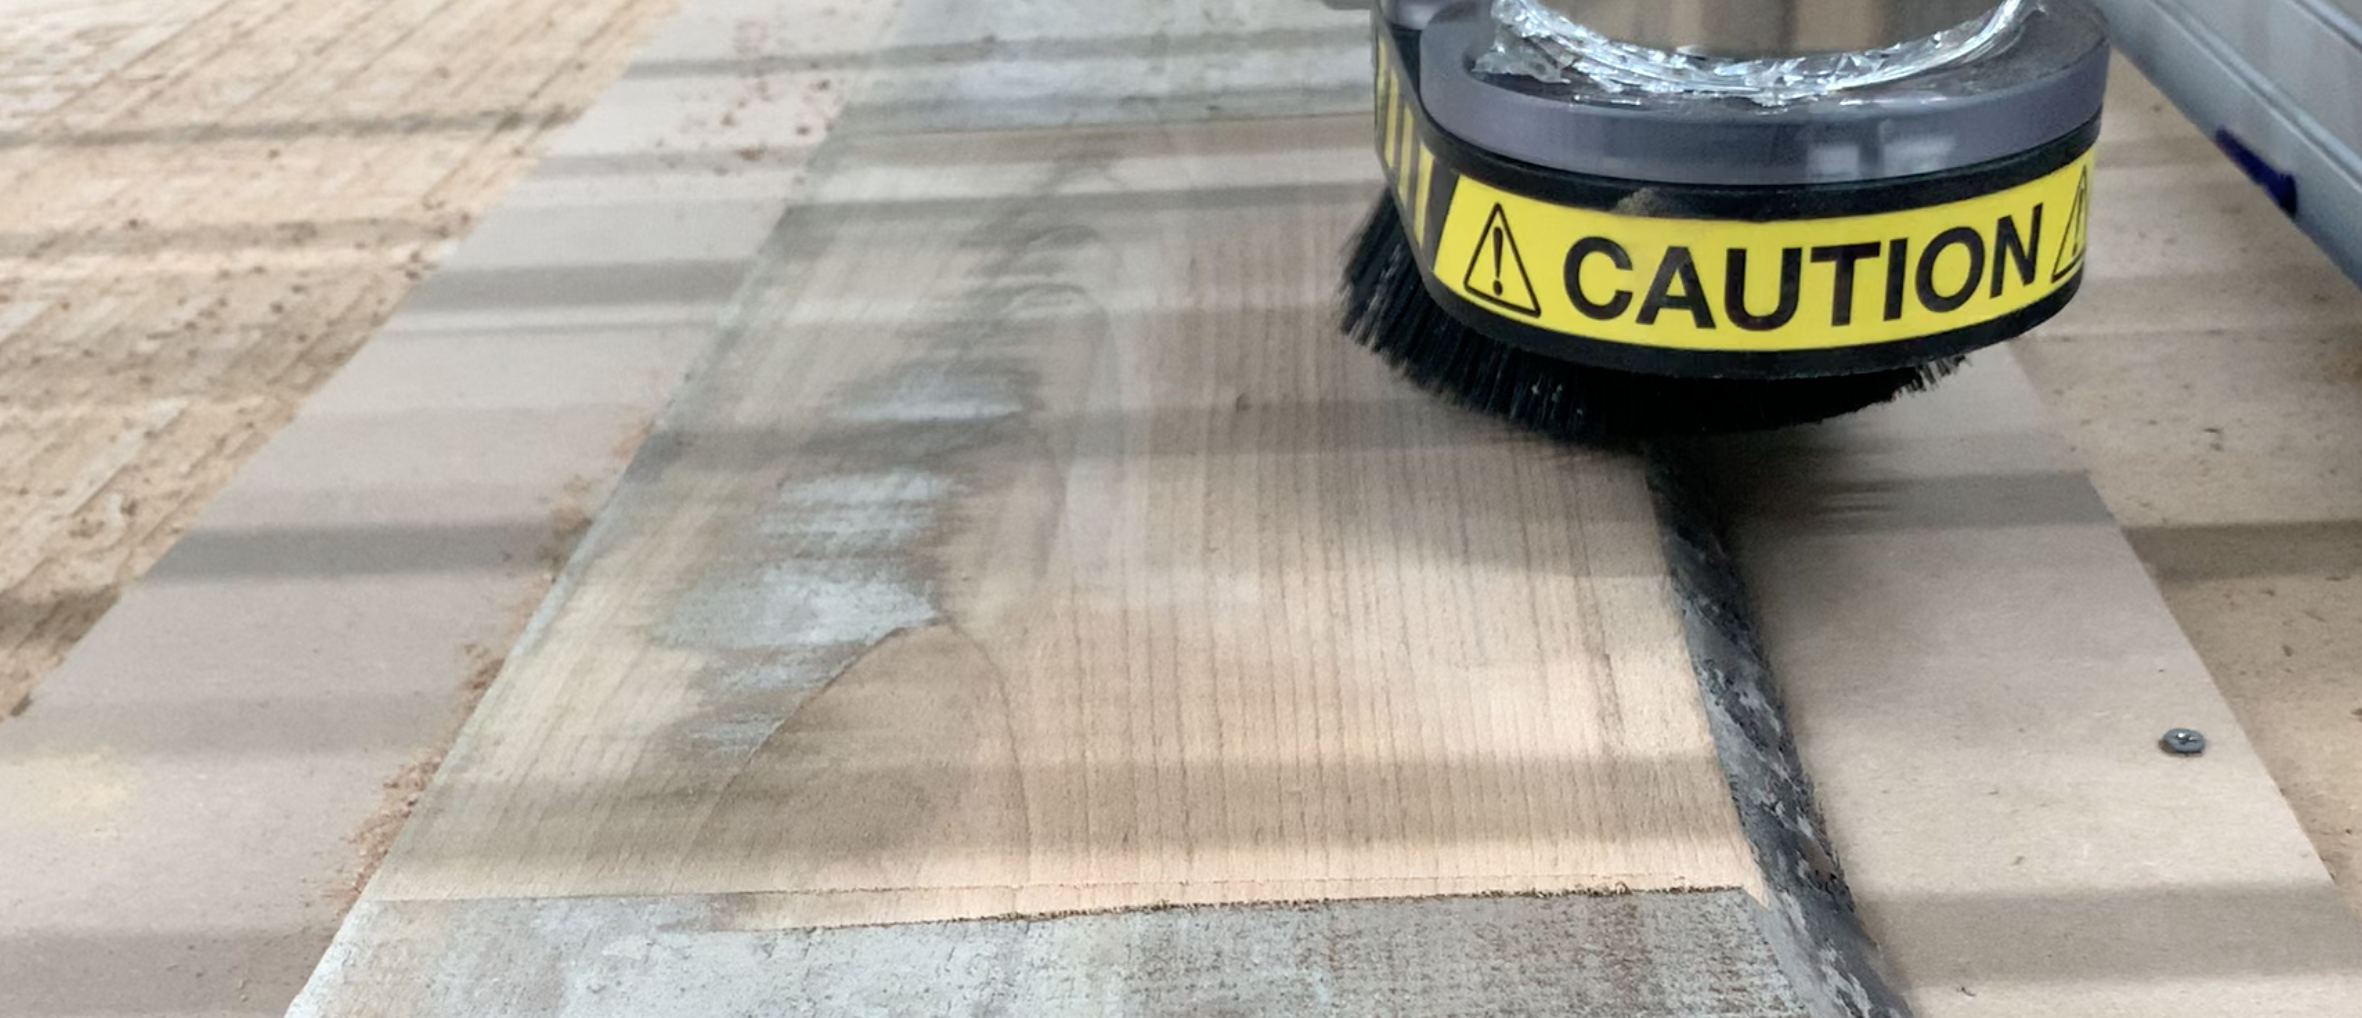
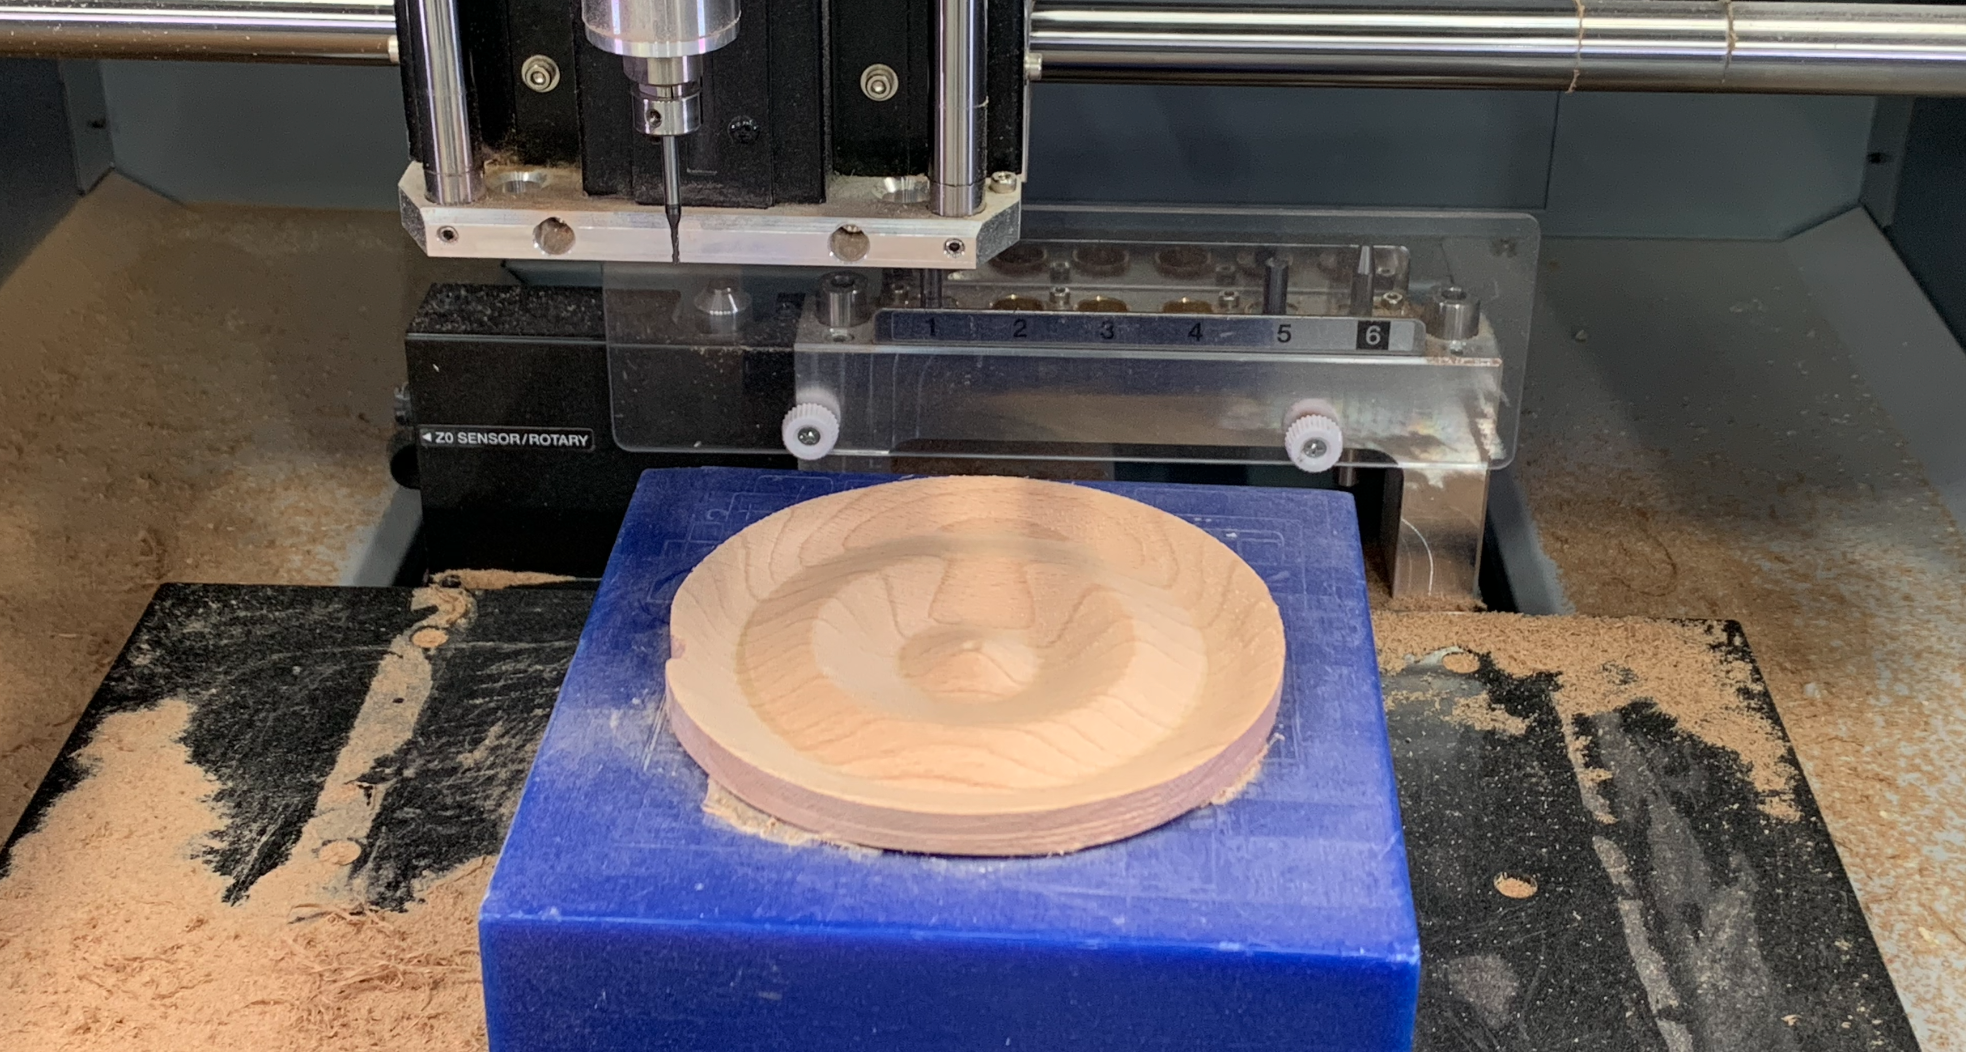
For the Ripple texture, I used the Roland-40 and after placing my piece on place and doing the Z-sense. I followed this guide.
That where removed after and sanded.
For the Ripple texture, I used the Roland-40 and after placing my piece on place and doing the Z-sense. I followed this guide.
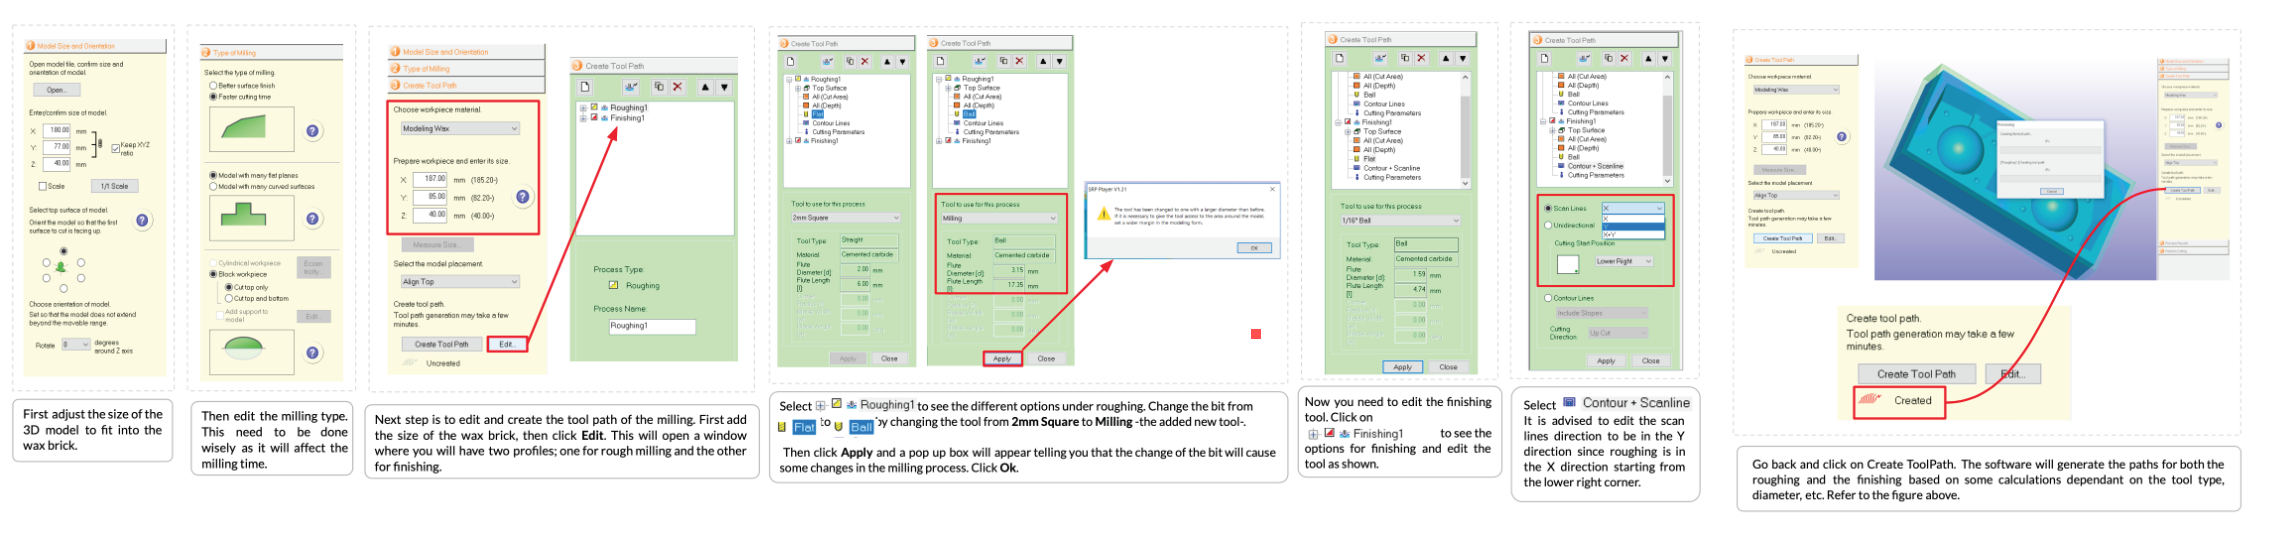 and waited for 6 hrs, also I did this process twice.
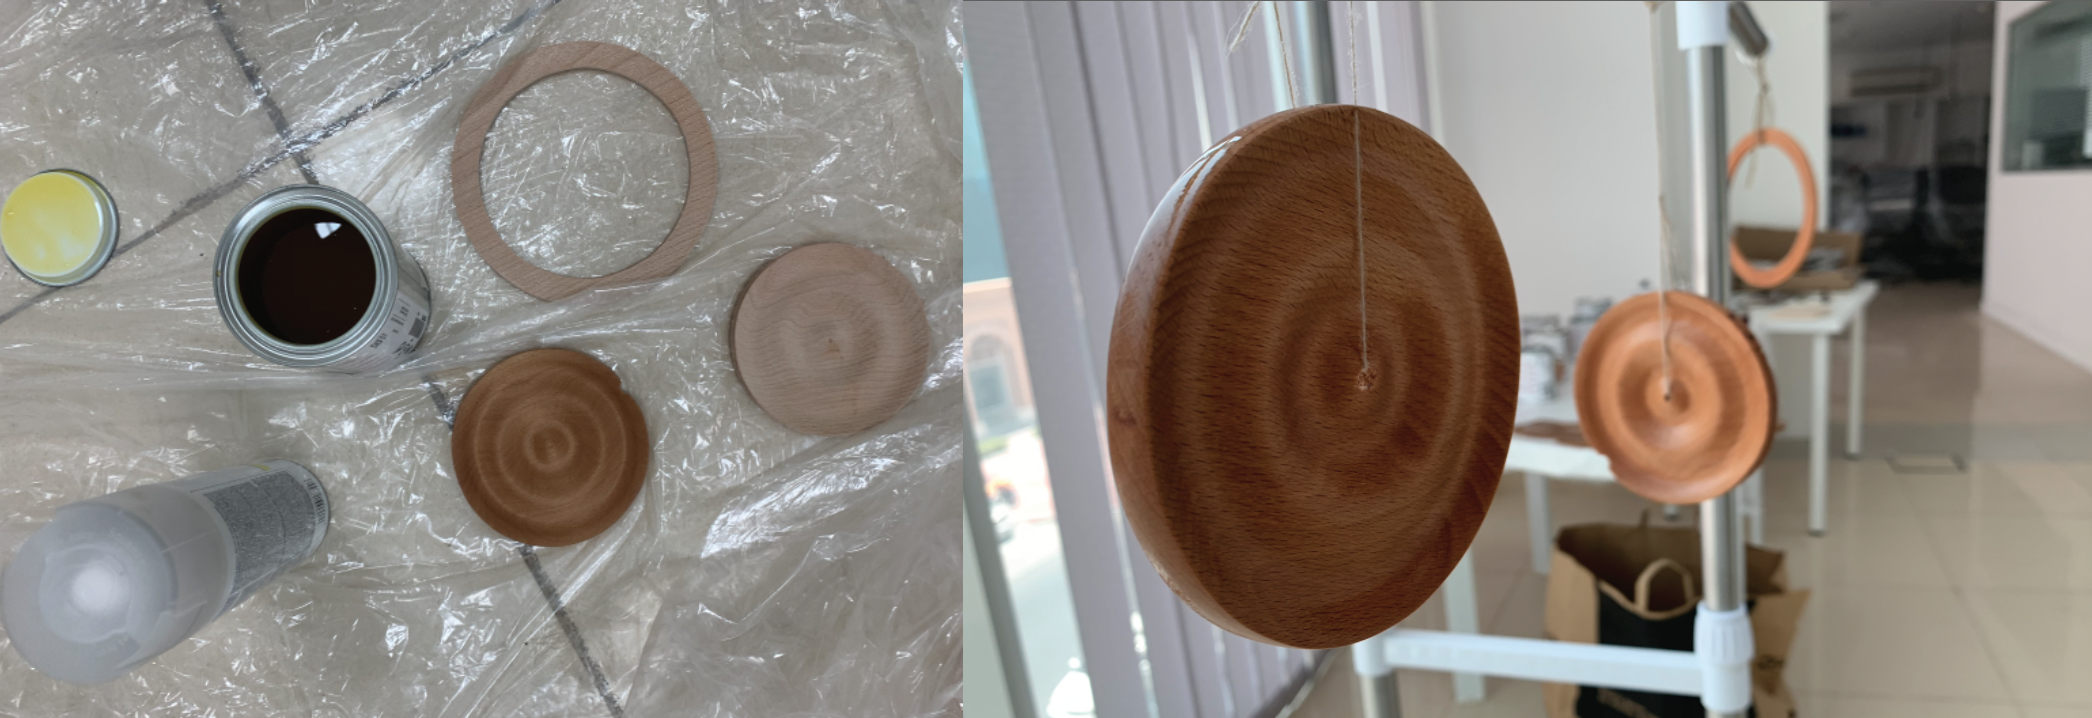
 Whenver the 2 pieces where ready I finished them with oil and polyurethane varnish.
Oil- Apply with a sponge or fabric and then whipe the excess. Let it dry for 24 hrs.
Varnish - Spray thin layers every 5 minutes until you are comfortable with the results. Let dry for 24 hours.
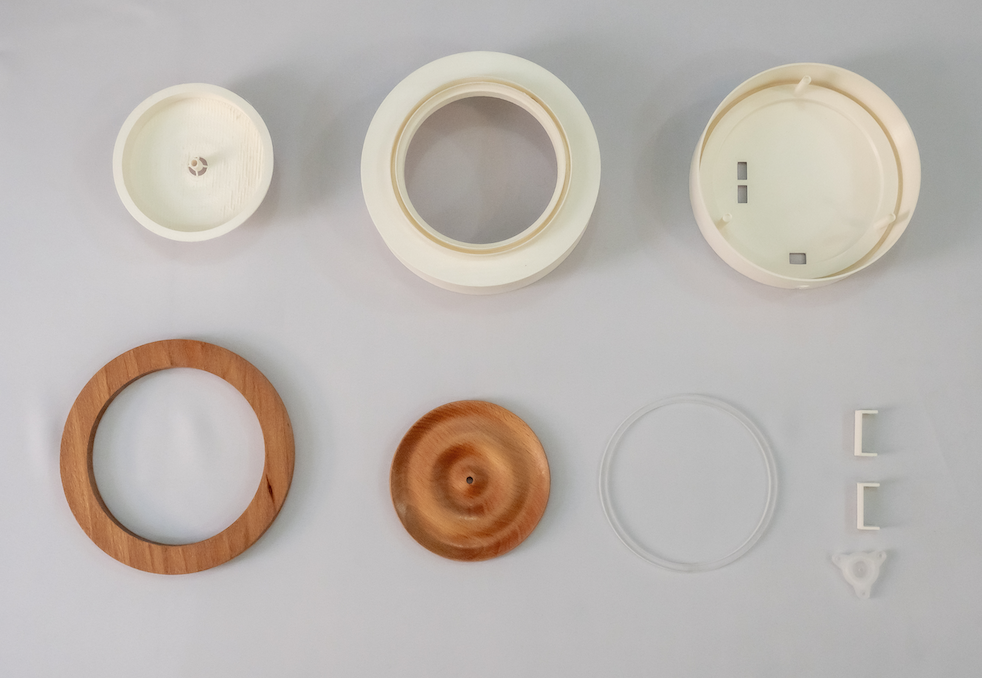
3D printing
To print the pieces, I used Ultimaker 2 and Cura as a slicer and PLA Plastics, the same settings for all the parts. You just drop the STL file on top of the buildplate in cura and select your parameter, I, personally, think 30% infill work great for almost all designs. It took around 2 day to print all the pieces.
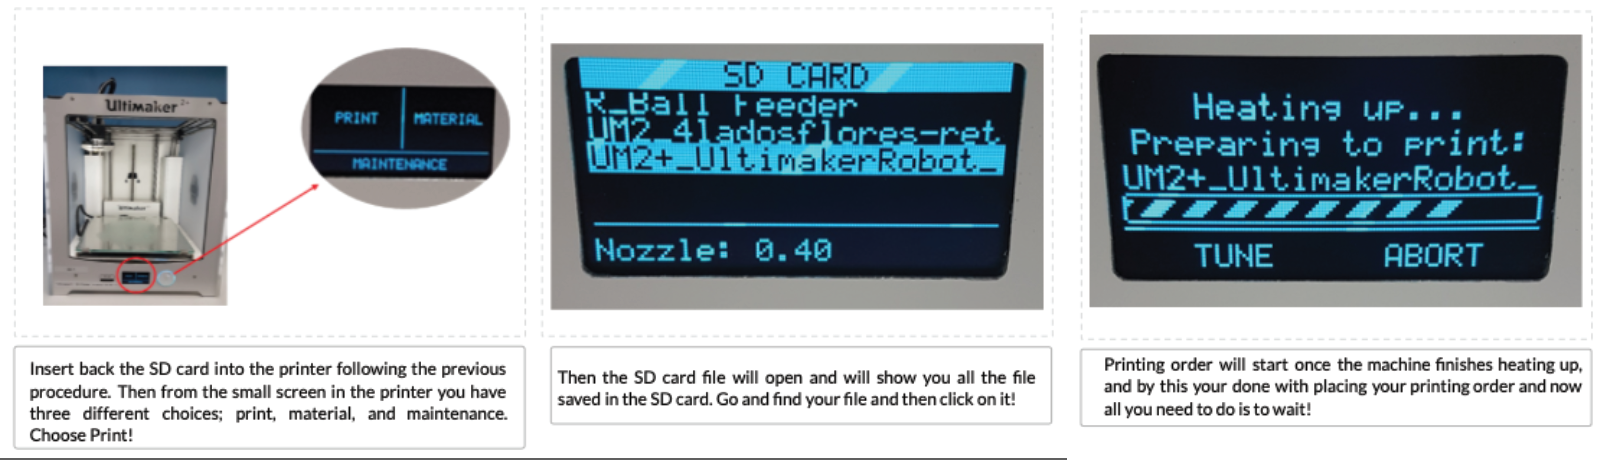
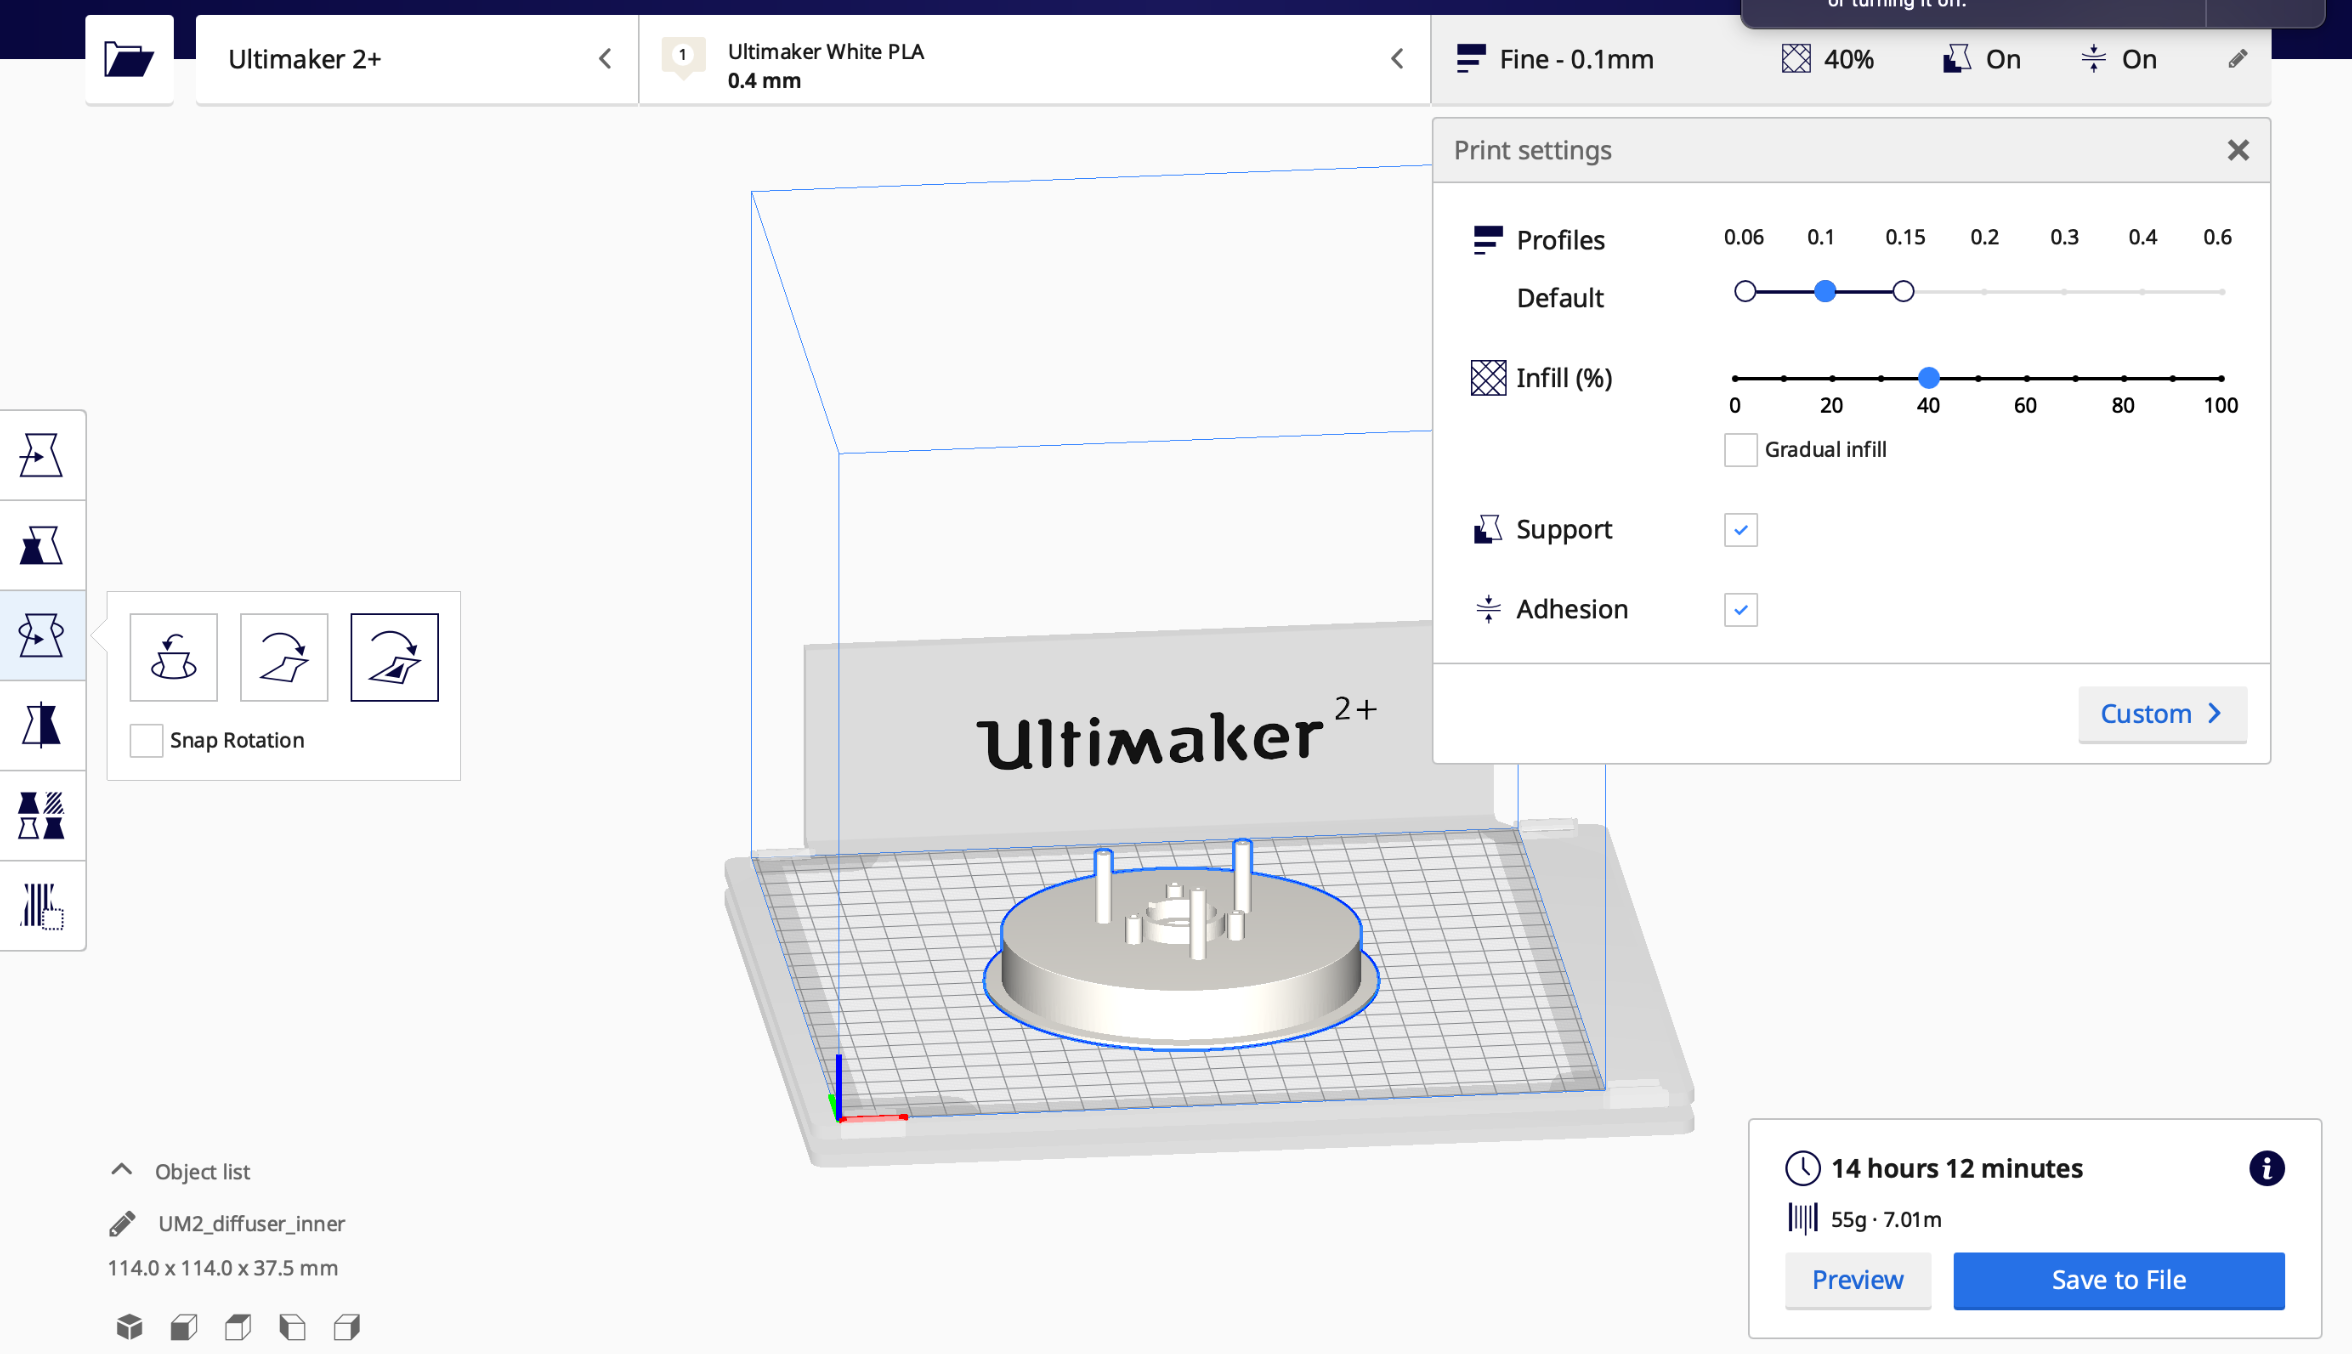 and you save it to the SD card and bring it to the printer.
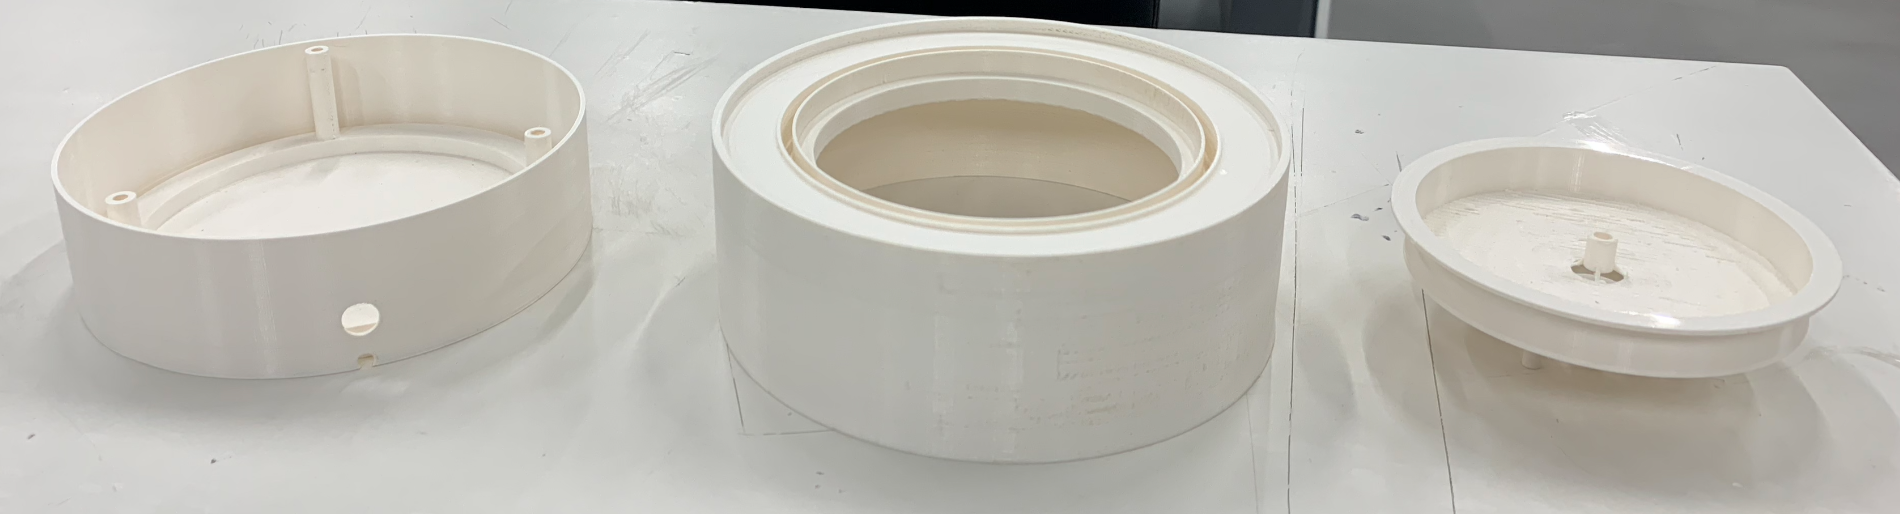
After removing the prints I removed the support with tweezers and here are the final prints:
Laser Cut
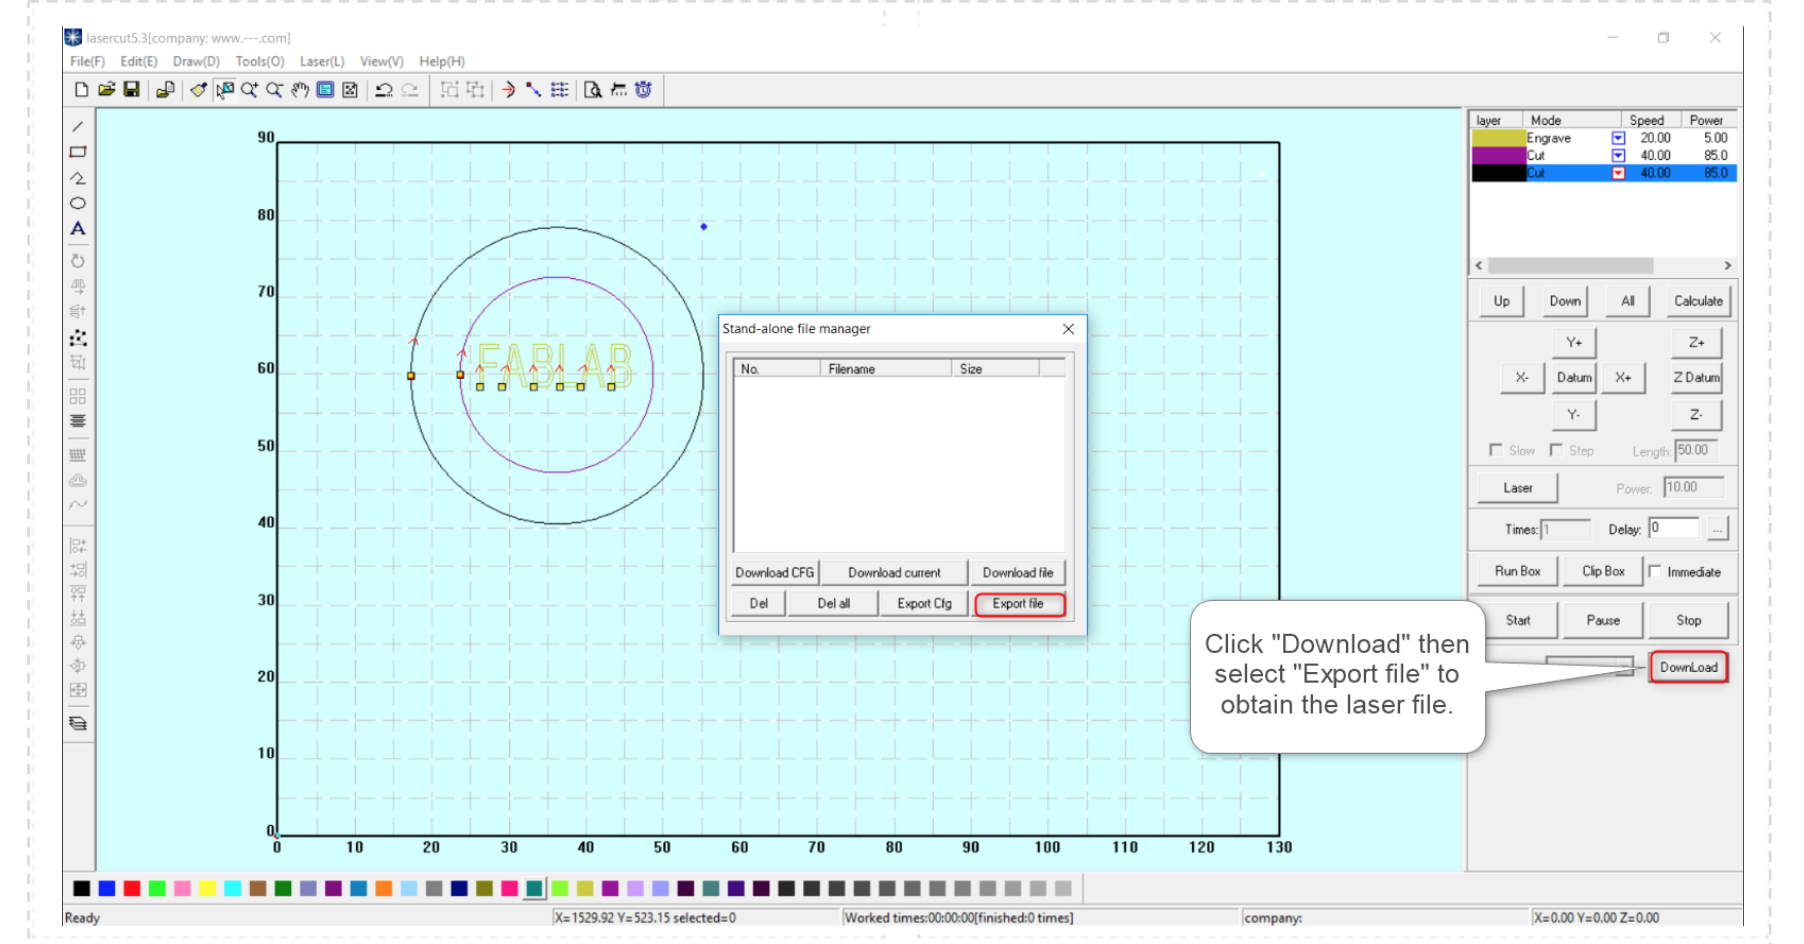
To cut the led cover I am using the lase cuter, I Just import my ring in "lasercut" software and select the parameters.
Acrylic 3mm = Speed 20, Power 100.
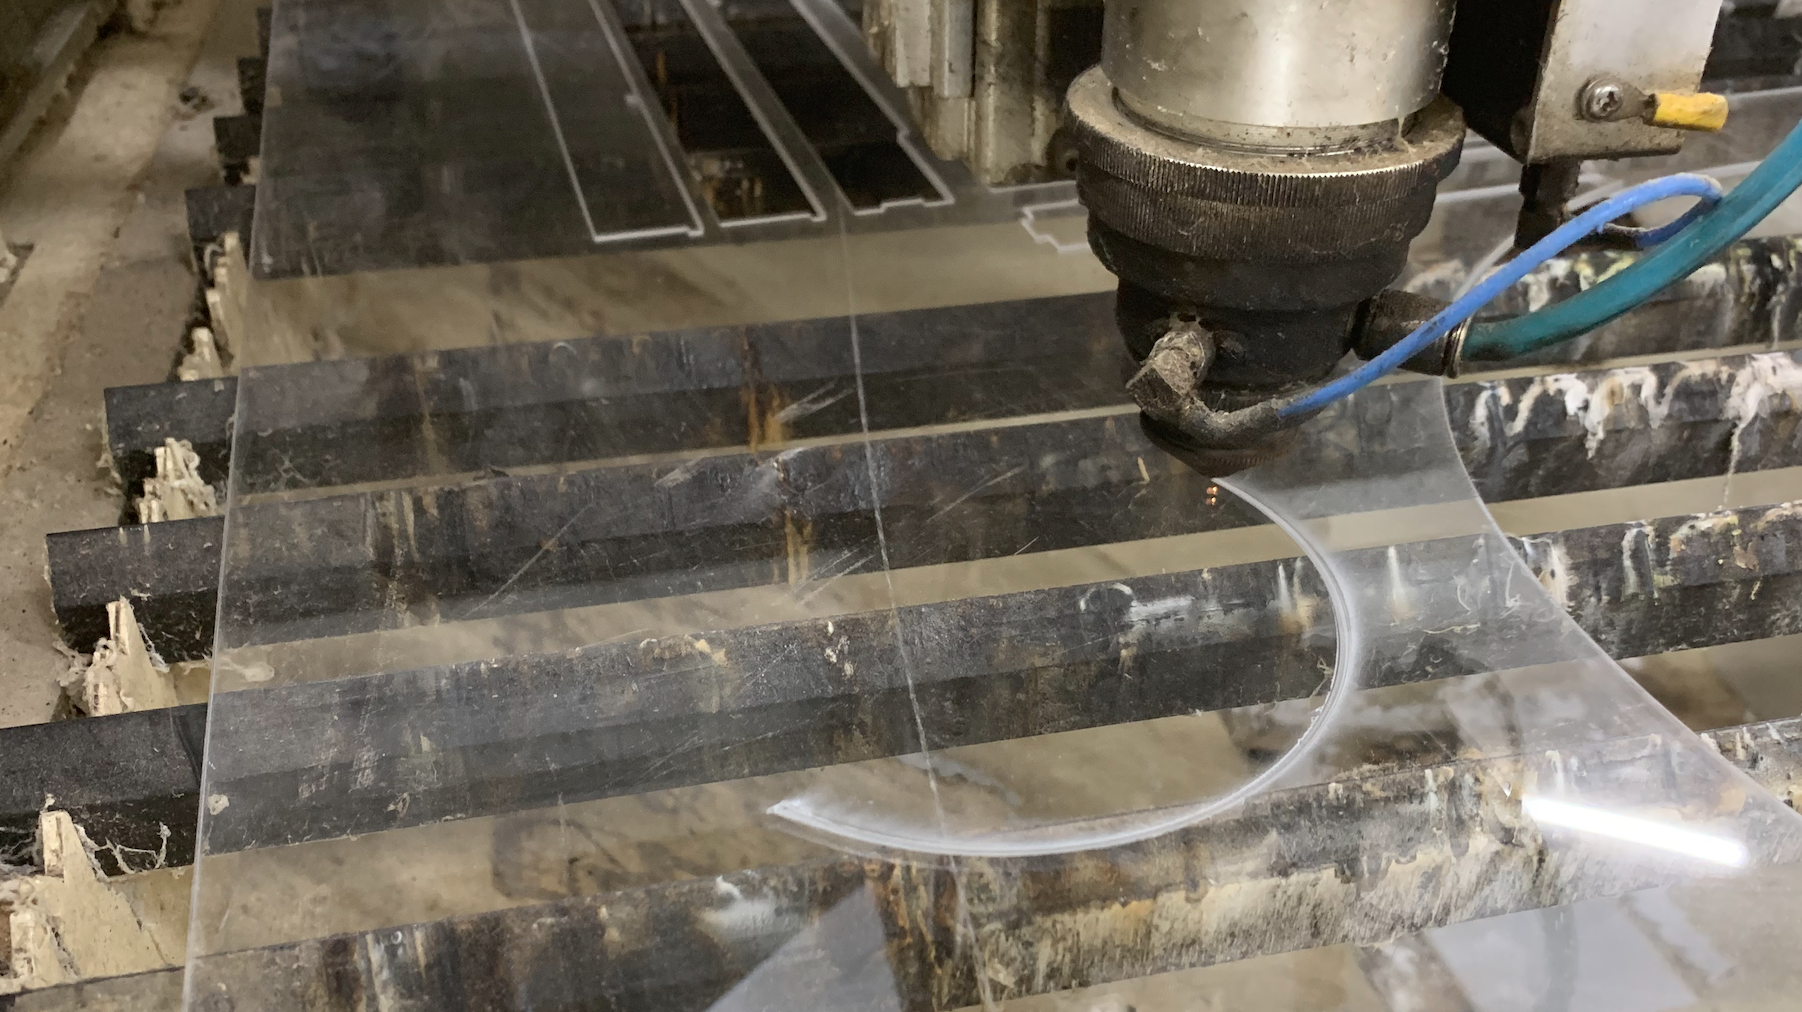
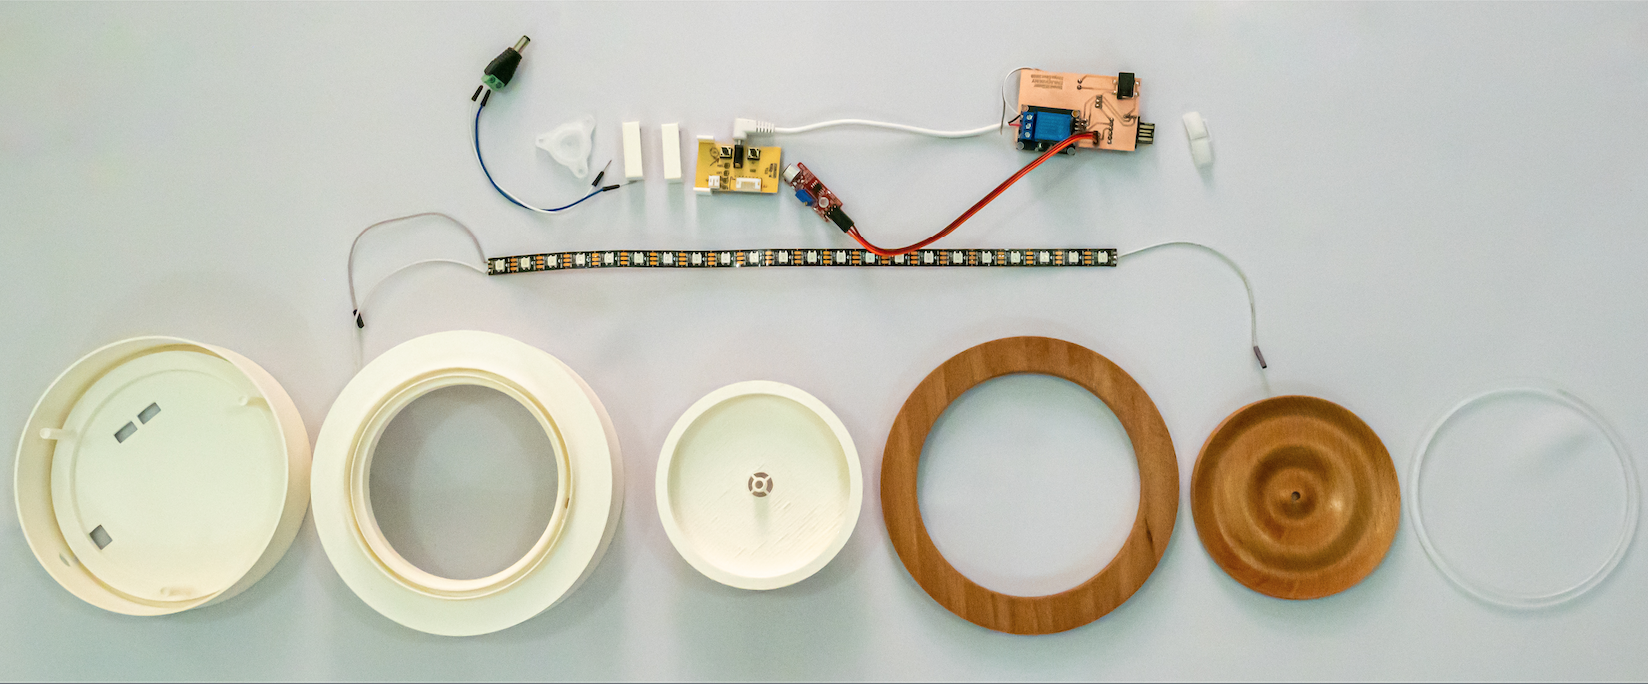
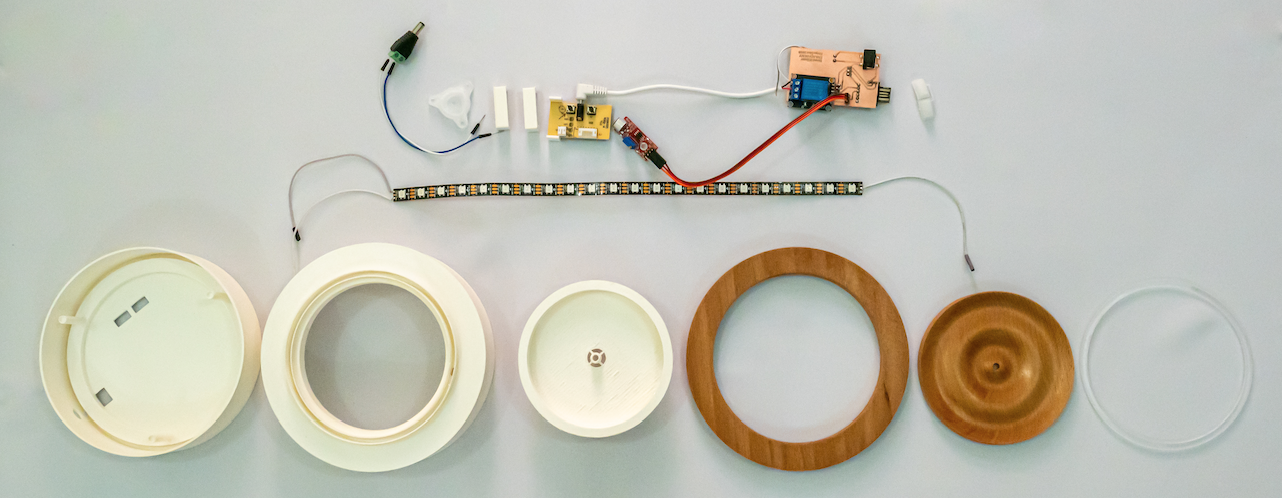
AND FINALLY THE CASING IS READY
Electronics
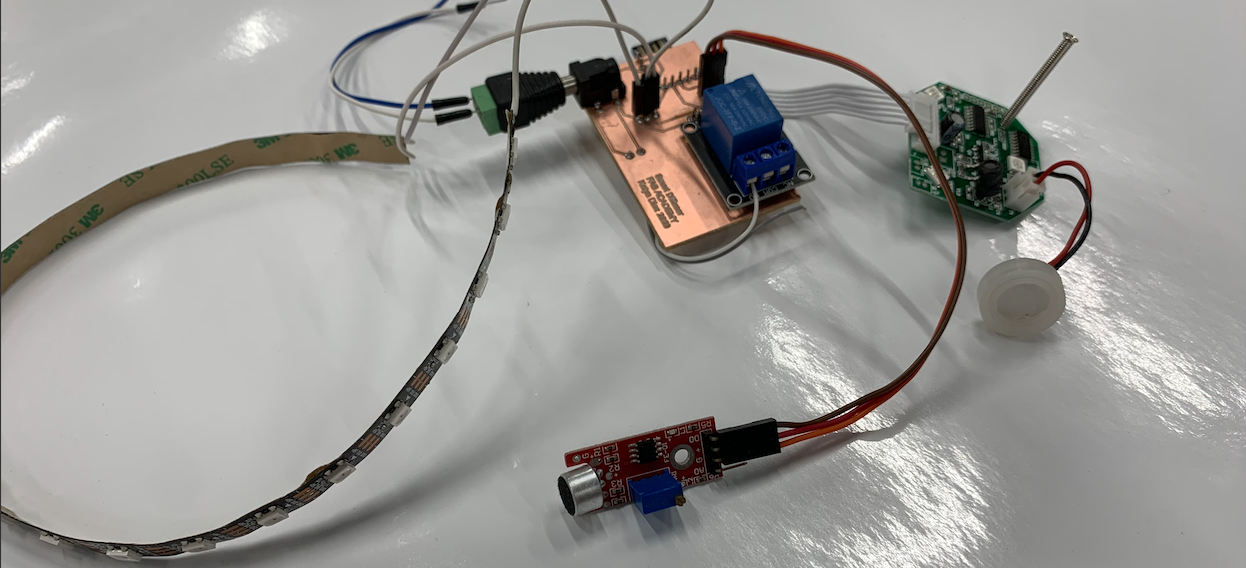
The electronics was the most challenging part for me, first I couldnt ship the piezo on time so I had to buy a diffuser and take the component.
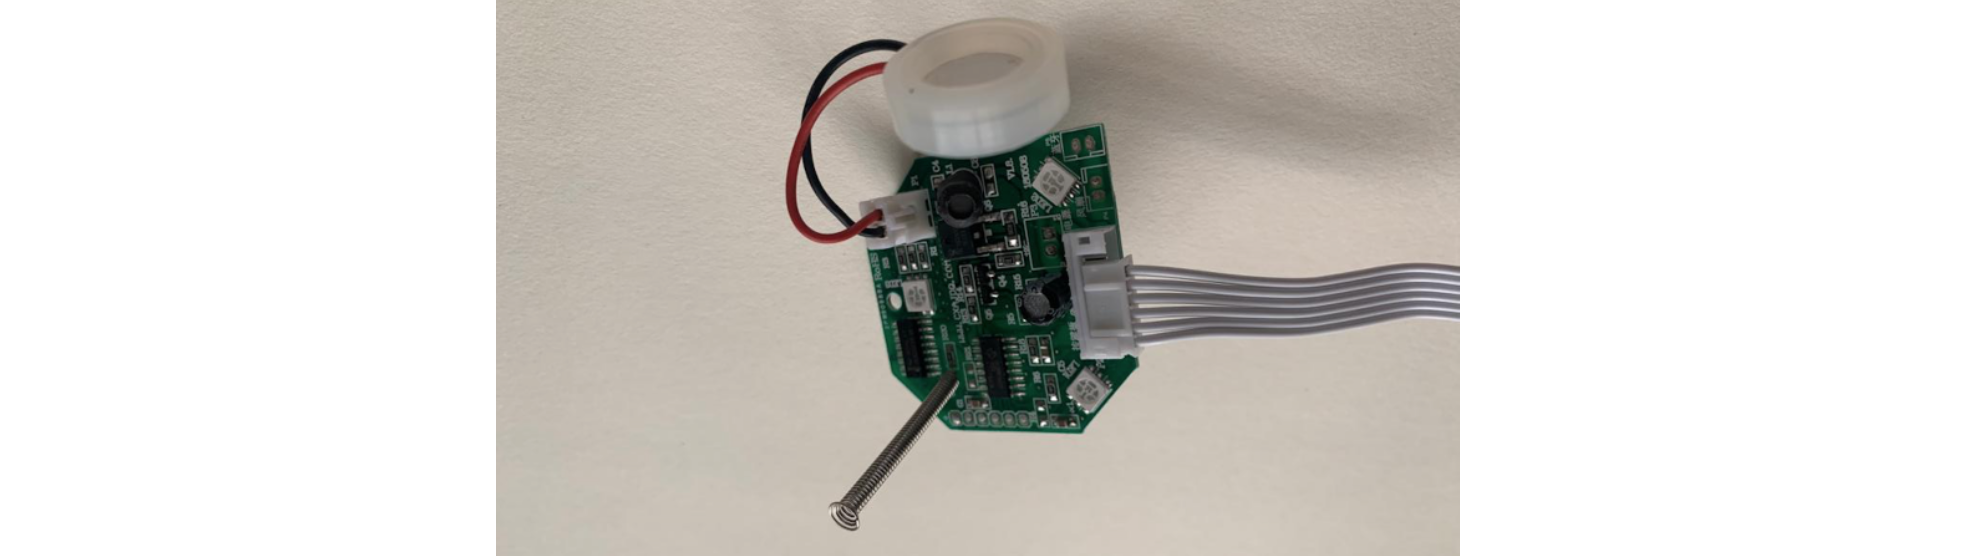 The driver had a button, so it needed to be soldered in order to create a short circuit and skip the button.
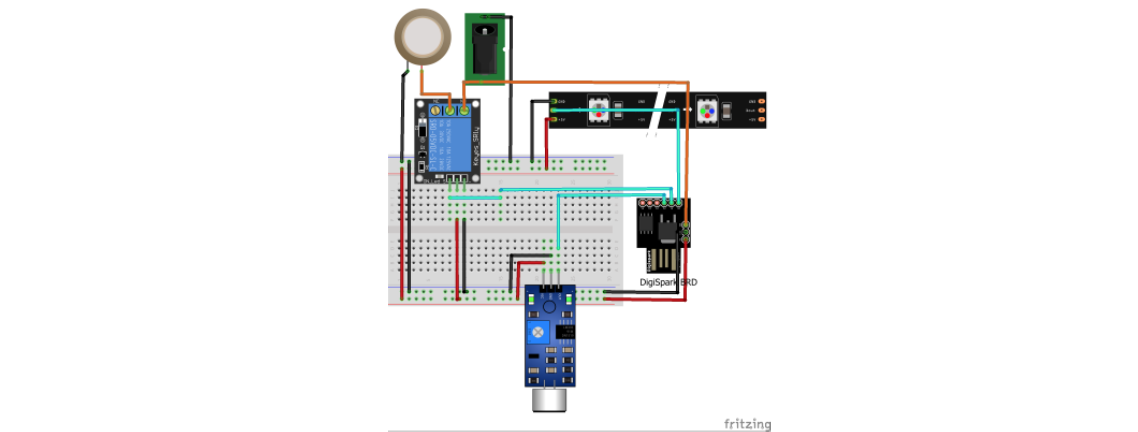
Afet that the piezo has to be conected to the relay that's controlled by the sound sensor. Previusly in week 9 I tested the sound sensor to turn on and off a LED so this time im adding the piezo bye conecting it to the relay. Here is a diagram:
The driver had a button, so it needed to be soldered in order to create a short circuit and skip the button.
Afet that the piezo has to be conected to the relay that's controlled by the sound sensor. Previusly in week 9 I tested the sound sensor to turn on and off a LED so this time im adding the piezo bye conecting it to the relay. Here is a diagram:
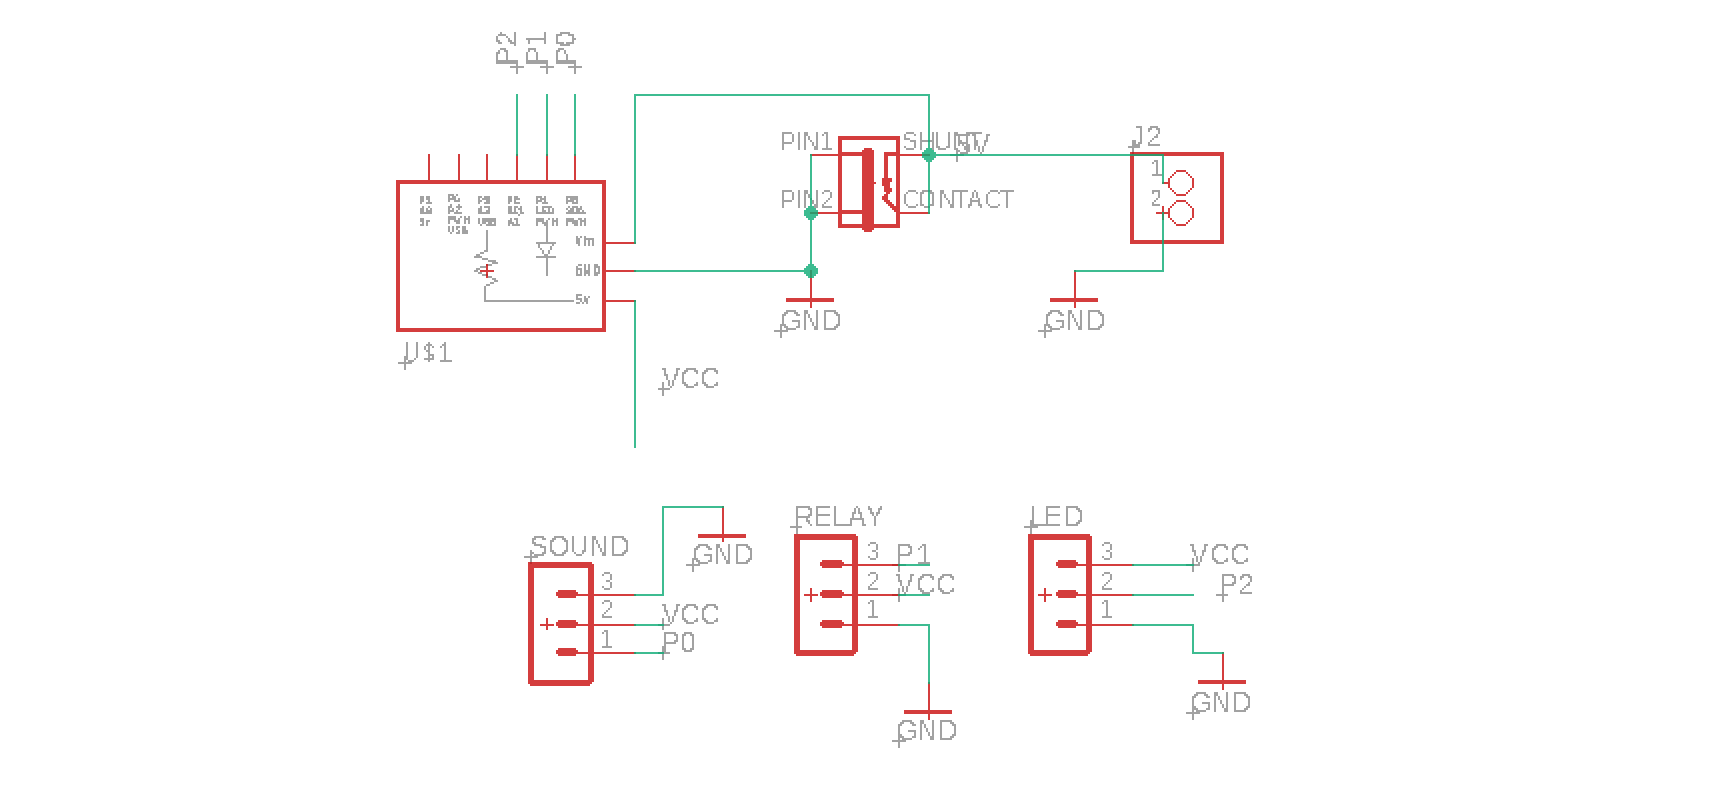
 Using the diagram as a guide, the schematic is designed.
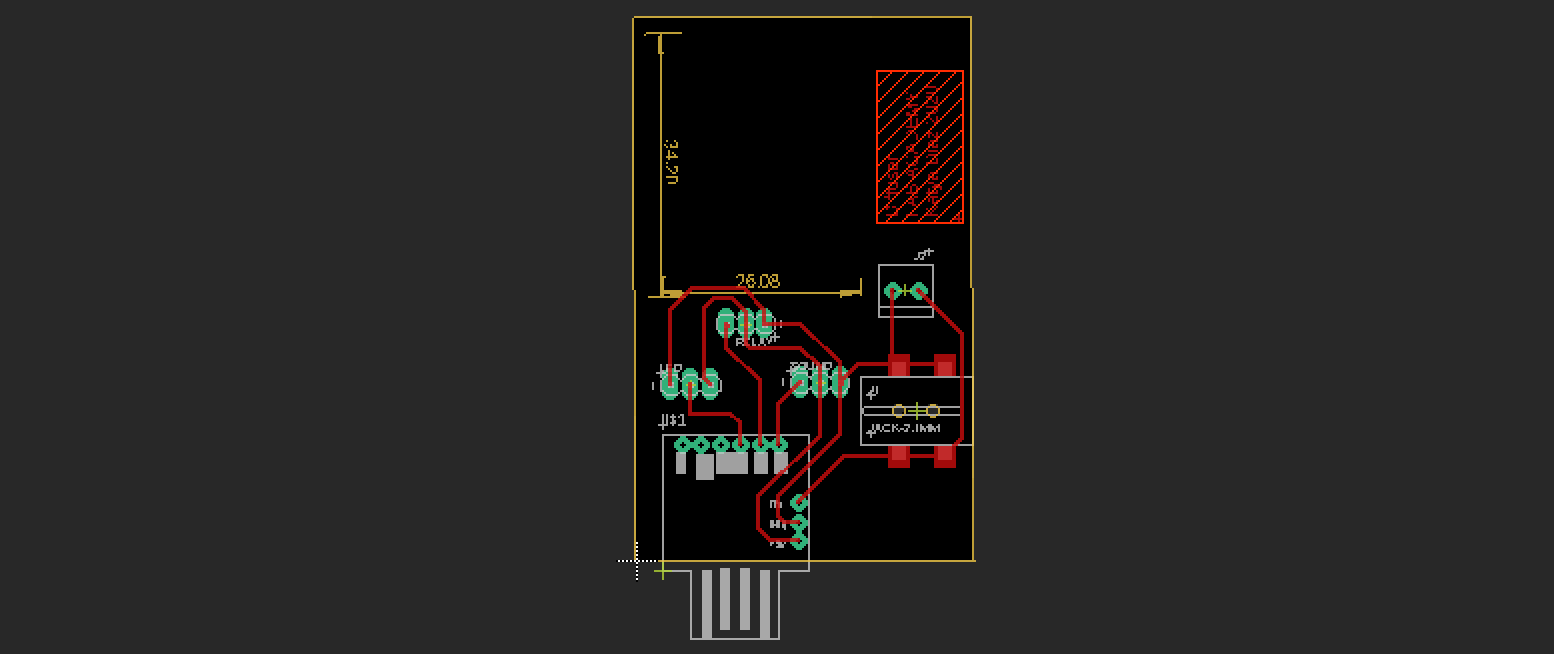
 and so is the board.
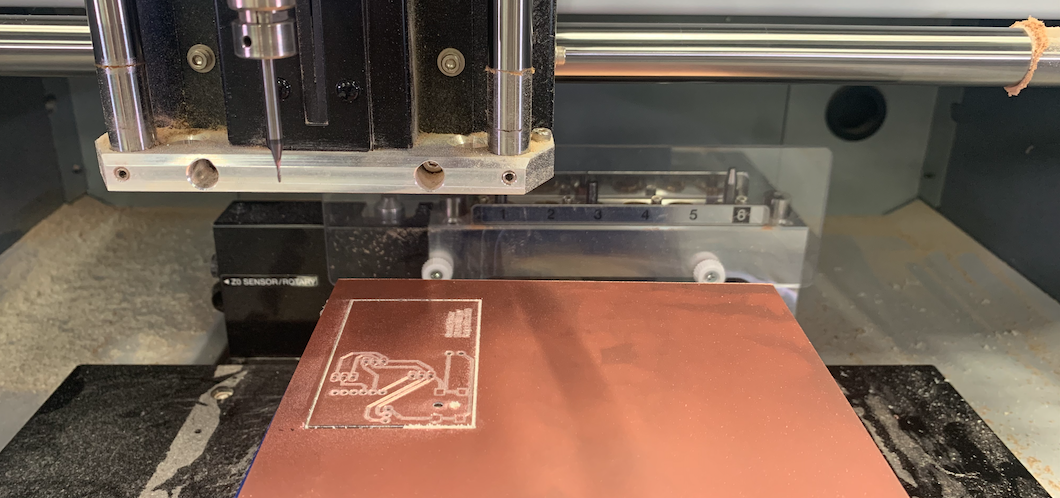
 After running the Design Rules Check, we continue by milling the PCB.
 and then the soldering
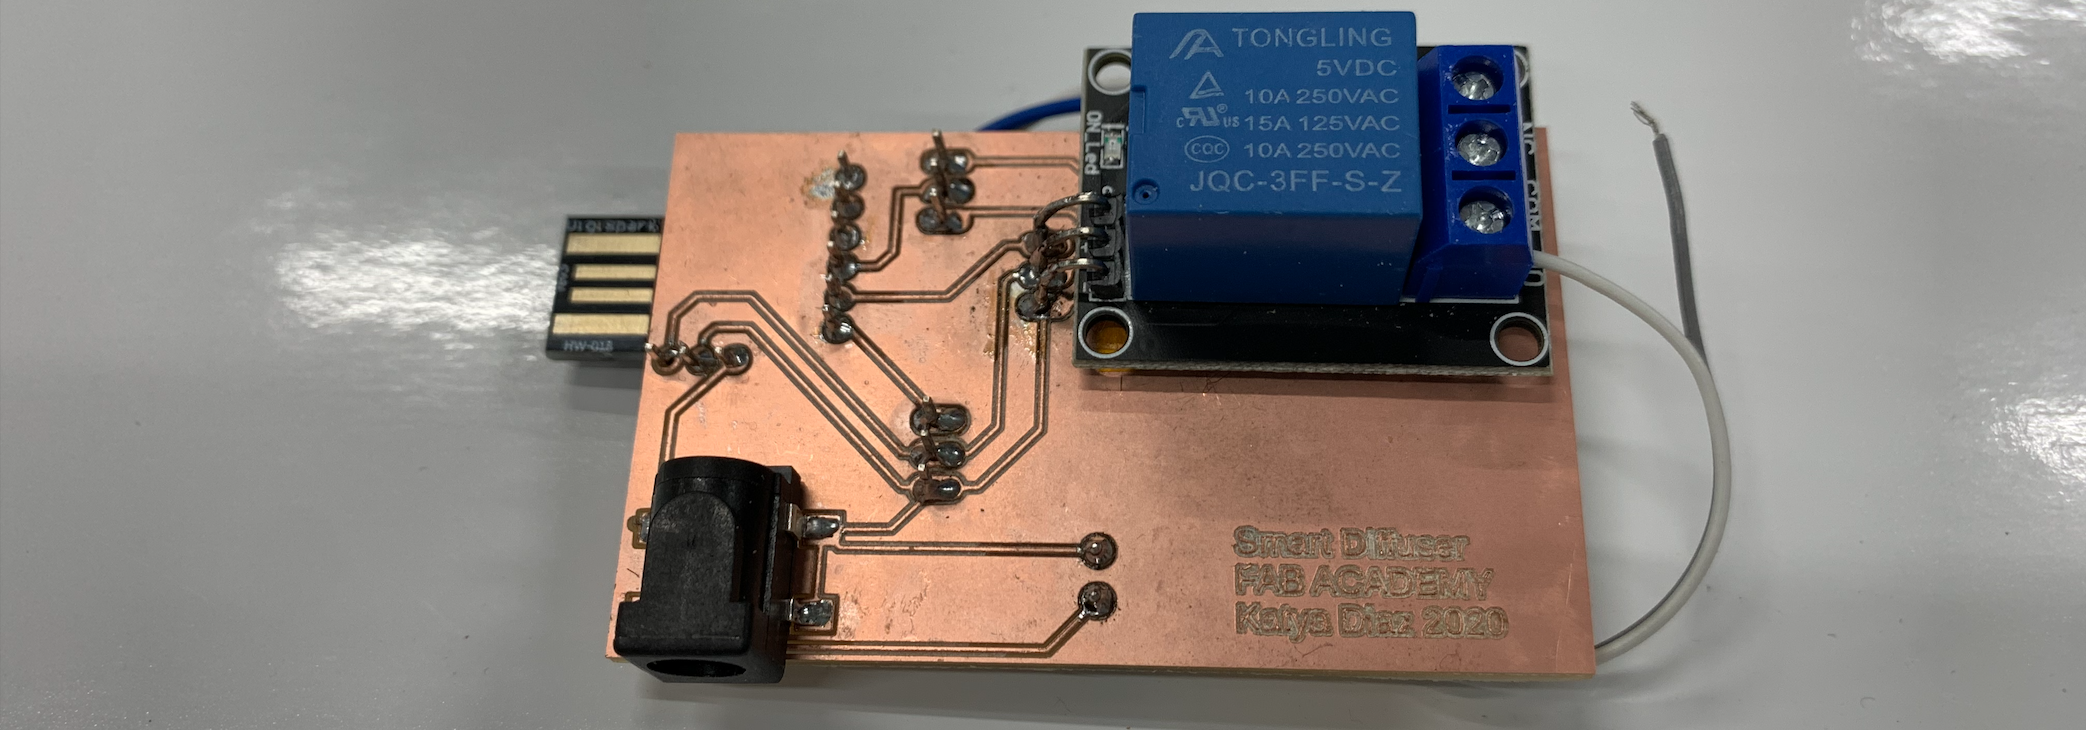 Now that we have all the pieces ready we try the connection.
 And now its programing time:
The Diffuser will automatically turn off after 30 min, to do that I started using "millis" after few attempts it didnt work so my colleague suggested to include the time library. I work in the same code I used in week 9. The main changes were the time library and the Neo pixels.
Here is the final code:
And now its programing time:
The Diffuser will automatically turn off after 30 min, to do that I started using "millis" after few attempts it didnt work so my colleague suggested to include the time library. I work in the same code I used in week 9. The main changes were the time library and the Neo pixels.
Here is the final code:
To upload the code I used this guide:
http://digistump.com/wiki/digispark/tutorials/connecting
Assembly
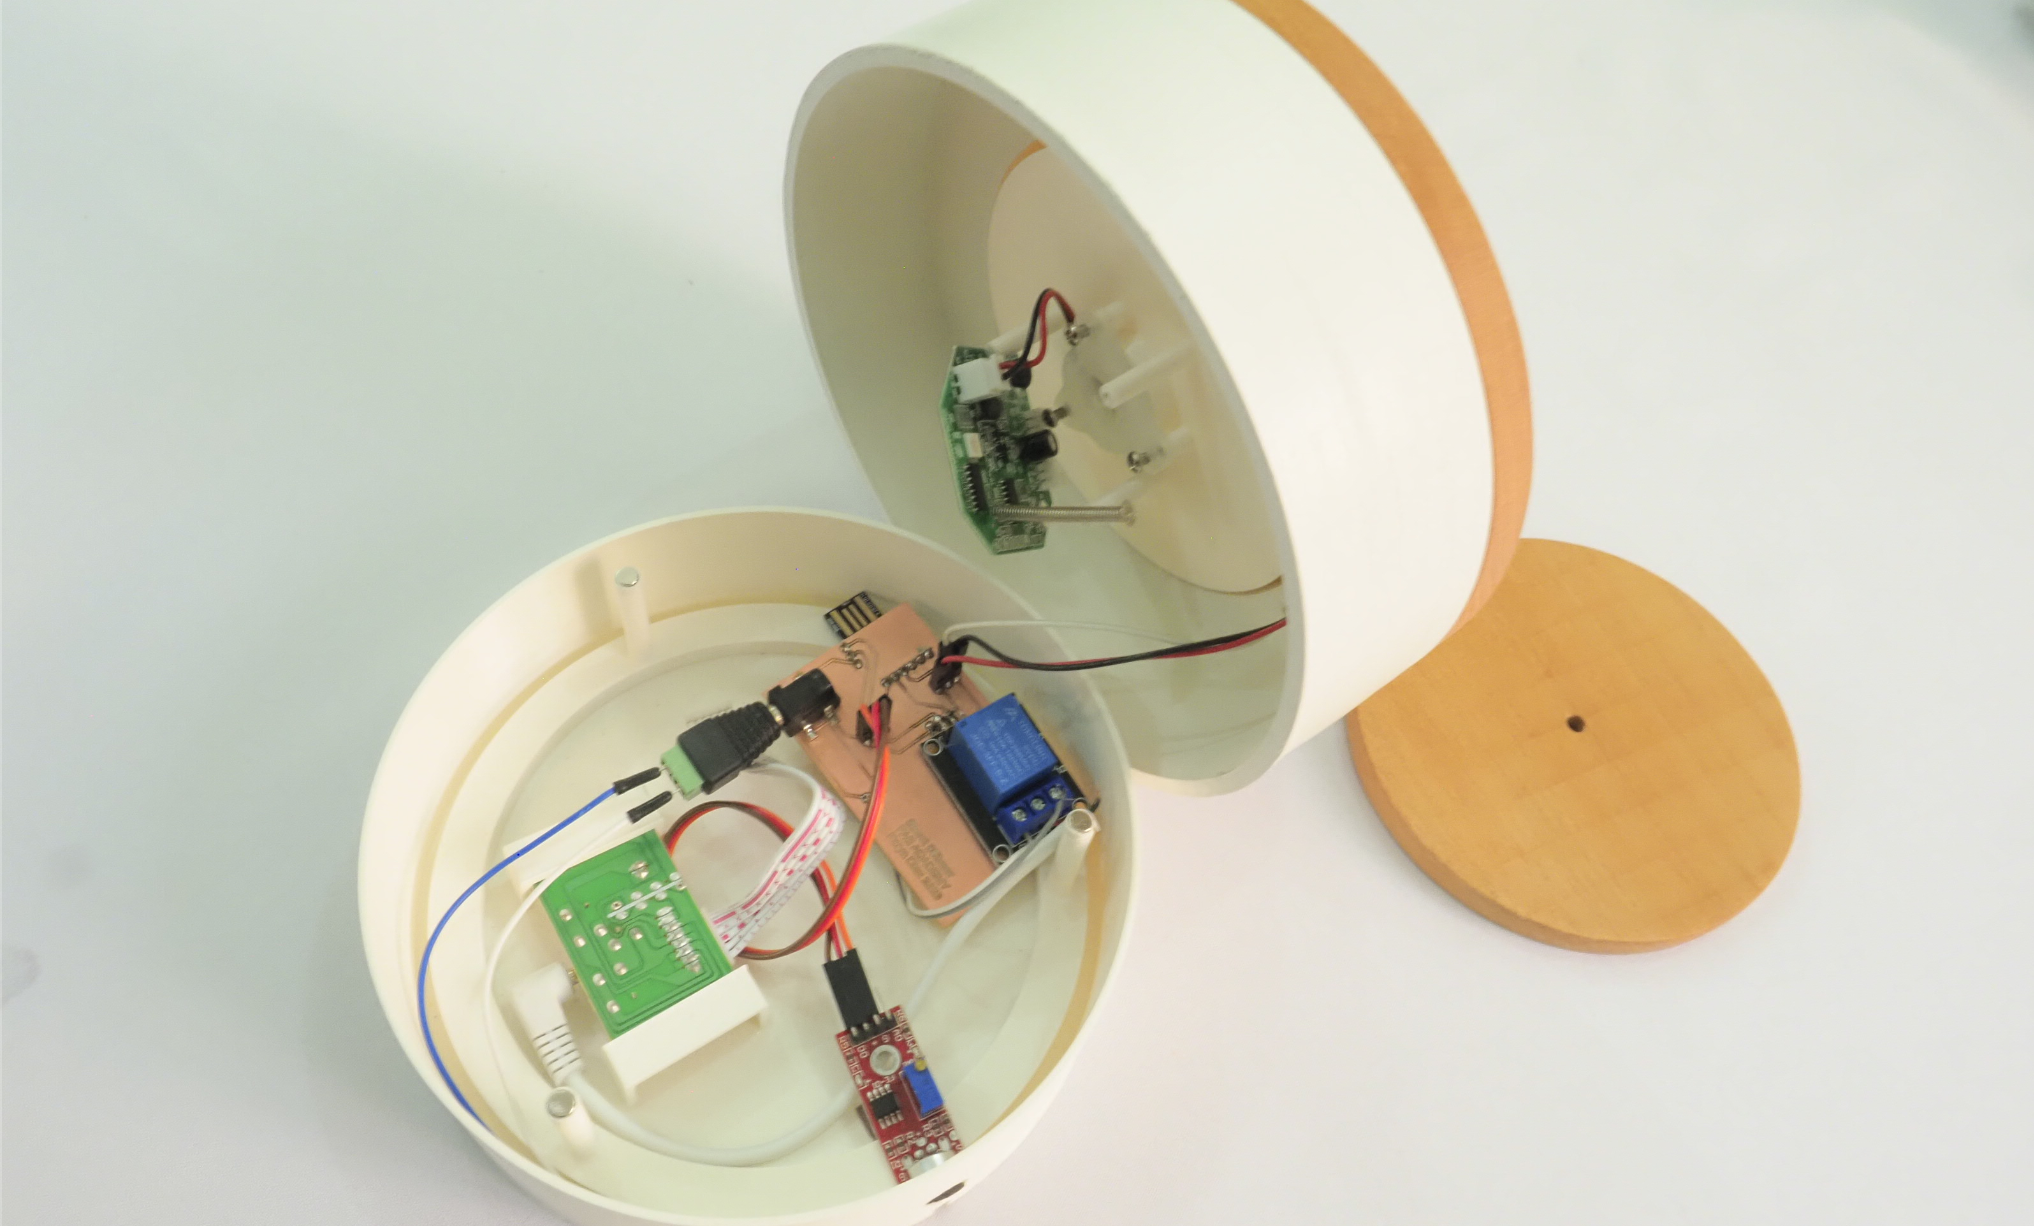
Final Project