Exercise, Week 02 - Computer-Aided Design
Raster
vs Vector
Scaling a raster image reveals the pixels while scaling a vector image preserves the shapes.
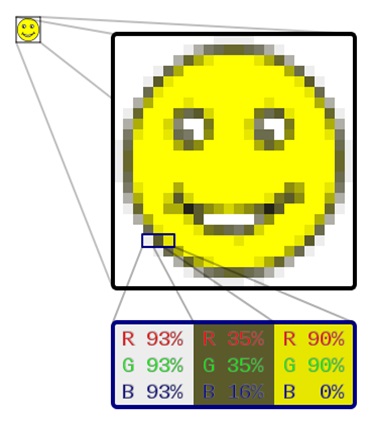
Raster graphics are resolution dependent. They are bitmap or pixel map images made up a rectangular grid of pixels. When resize a raster graphic to a larger size, the square pixels will become apparent. Meaning they cannot scale up to an arbitrary resolution without loss of apparent quality (loses resolution). The smiley face (1) in the top left corner is a raster image. When enlarged, individual pixels appear as squares. Enlarging in further, they can be analysed, with their colours constructed by combining the values for red, green and blue.
 Vector graphics are
resolution independent. They are based on mathematical expressions and use
points, lines, curves and polygons to represent images. Because they use
mathematical formulas, they can be resized, bent and stretched without losing
resolution. Lines remain crisp and sharp when the size of the drawing is
increased. The letter S in the bottom left is a vector image (2), scaling the
vector image preserves the shapes.
Vector graphics are
resolution independent. They are based on mathematical expressions and use
points, lines, curves and polygons to represent images. Because they use
mathematical formulas, they can be resized, bent and stretched without losing
resolution. Lines remain crisp and sharp when the size of the drawing is
increased. The letter S in the bottom left is a vector image (2), scaling the
vector image preserves the shapes.
A 2D Design Tools "INKSCAPE" is used to
show two identical images, a JPEG(a raster graphic) and an SVG image on the
right (a vector graphic), explaining their differences when these images are
enlarged.
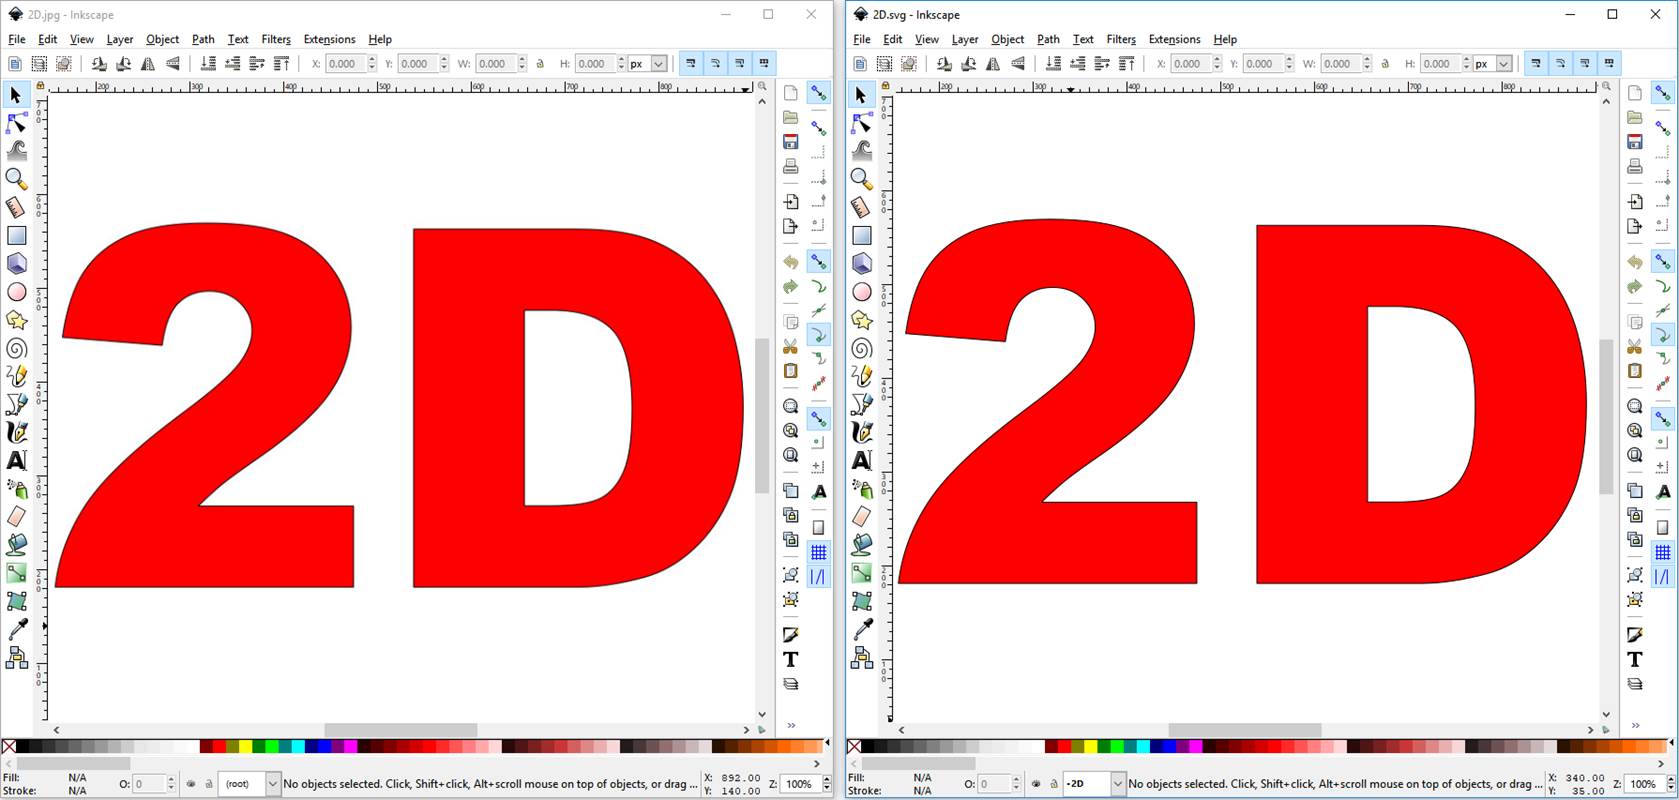
Here's a raster
graphic (left image) and a vector graphic (right image) at 100% zoom.
Both images above
look the same at zoom setting 100%.
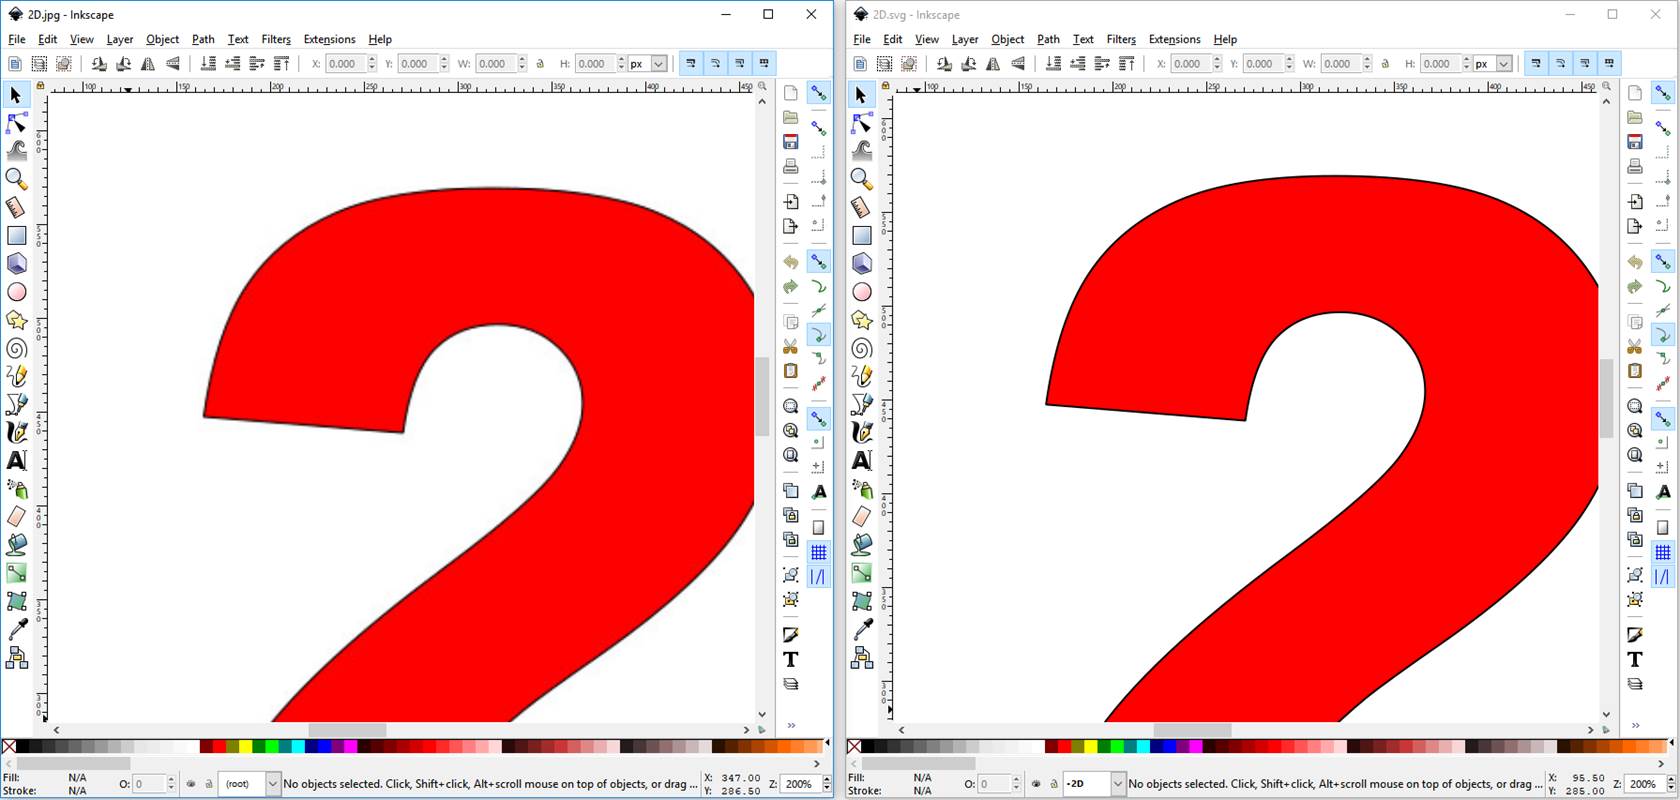
At 200% zoom,
raster graphic show no obvious changes compare with the vector graphic.
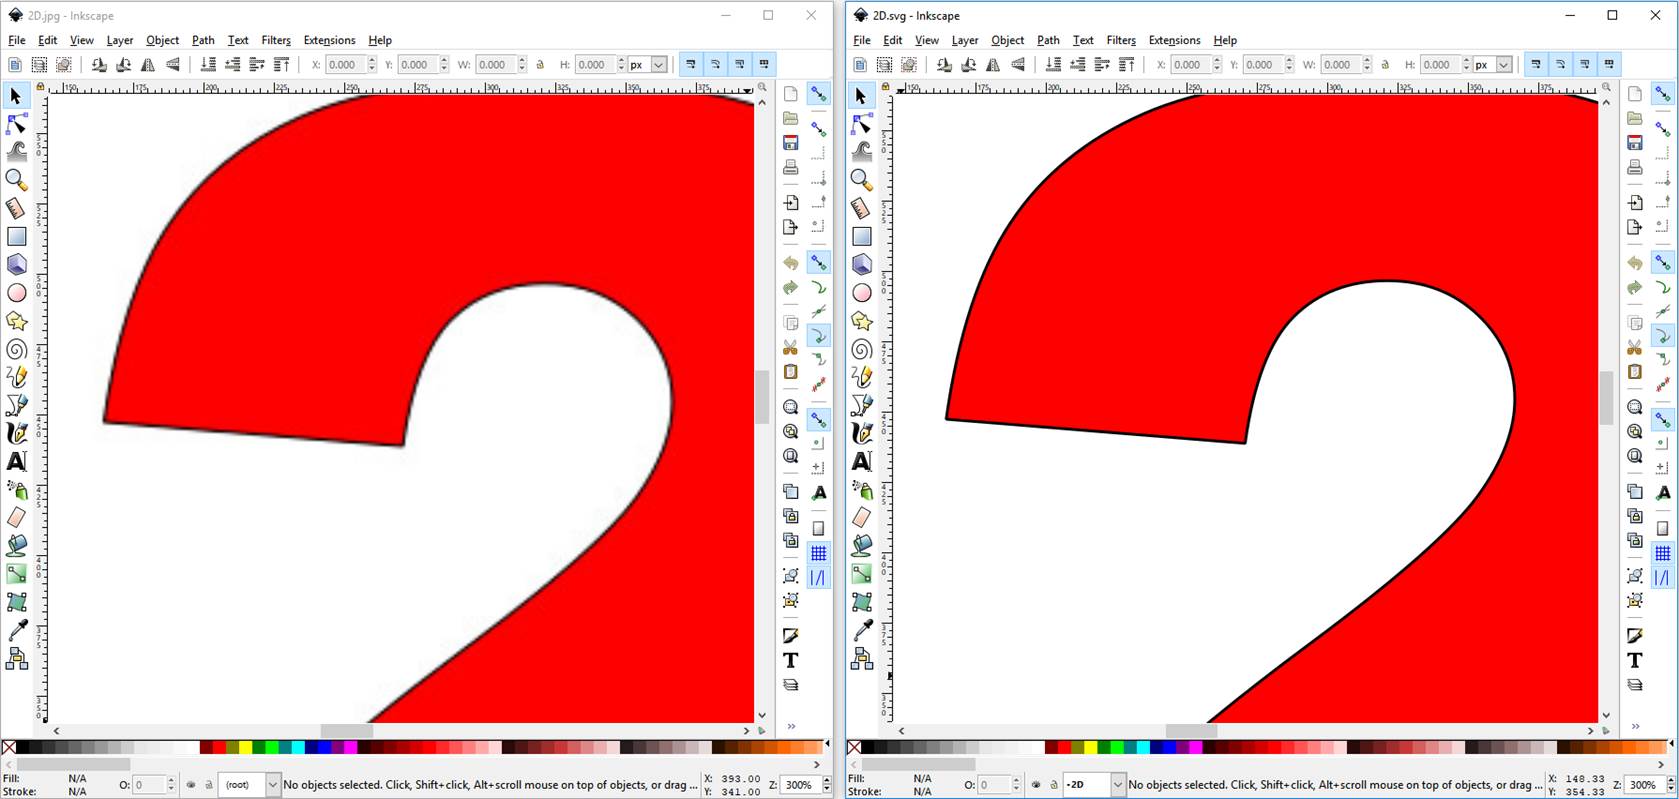
At 300% zoom, small
pixels become visible on raster graphic. Vector graphic remain unchanged.
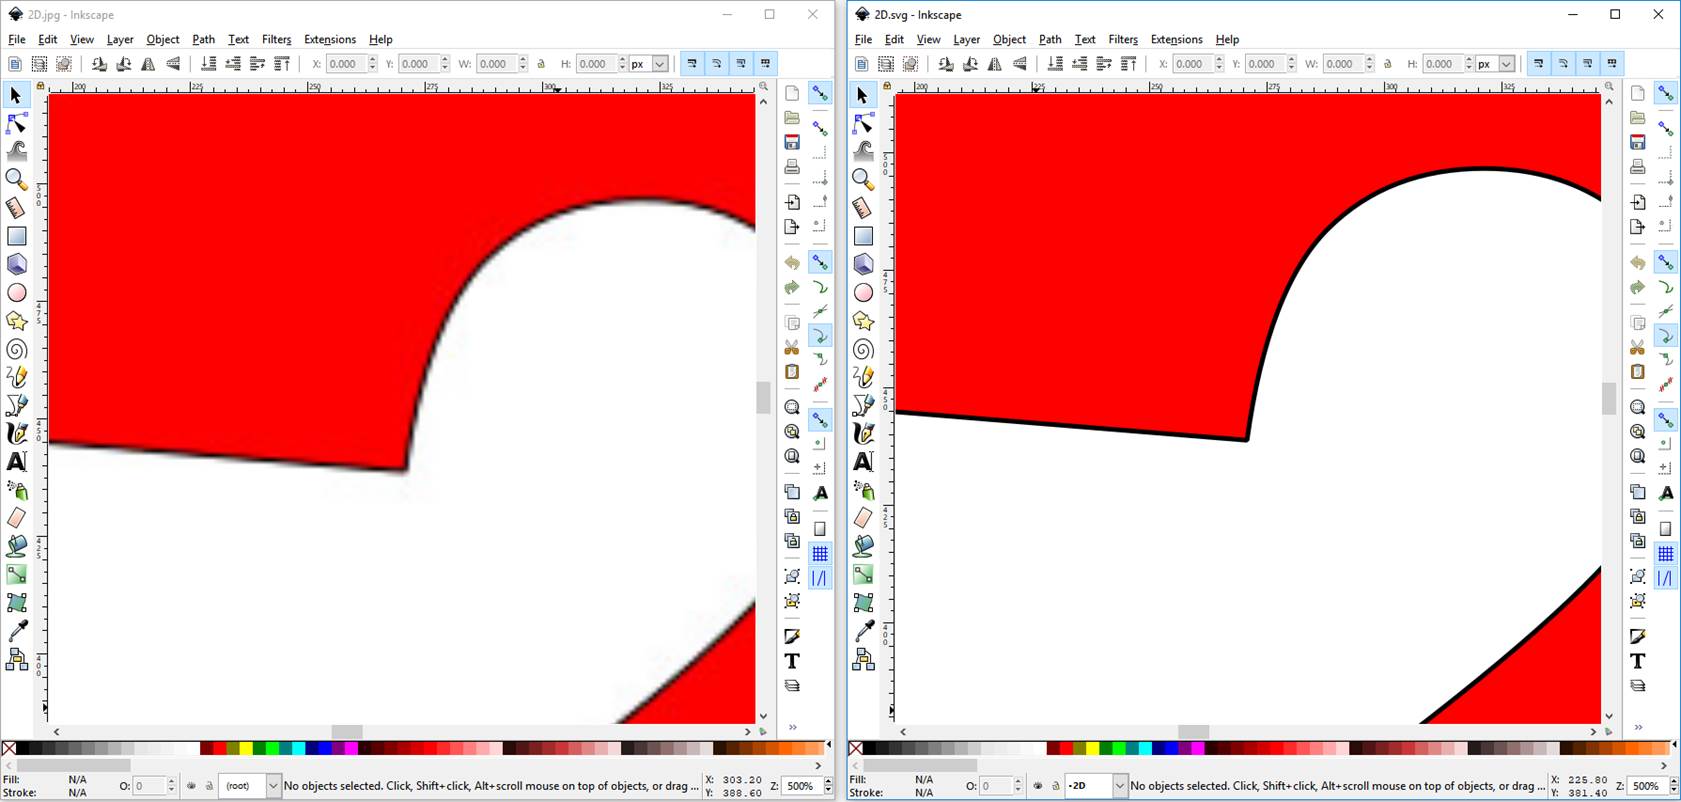
At 500% zoom,
square pixels become apparent on raster graphic. Resolution of vector graphic
remain unchanged.
Scaling
a raster image reveals the pixels, meaning they cannot scale up to an arbitrary
resolution without loss of apparent quality (loses resolution). While
scaling a vector image preserves the shapes, vector graphic is resolution
independent; its lines remain crisp and sharp when the size of the drawing is
increased.
Vectorizing an
Image in Inkscape
I learned to vectorize a betta fish
image in Inkscape after watching a youtube video
"Inkscape Image to Vector" (4). My steps using
Inkscape are as follows.
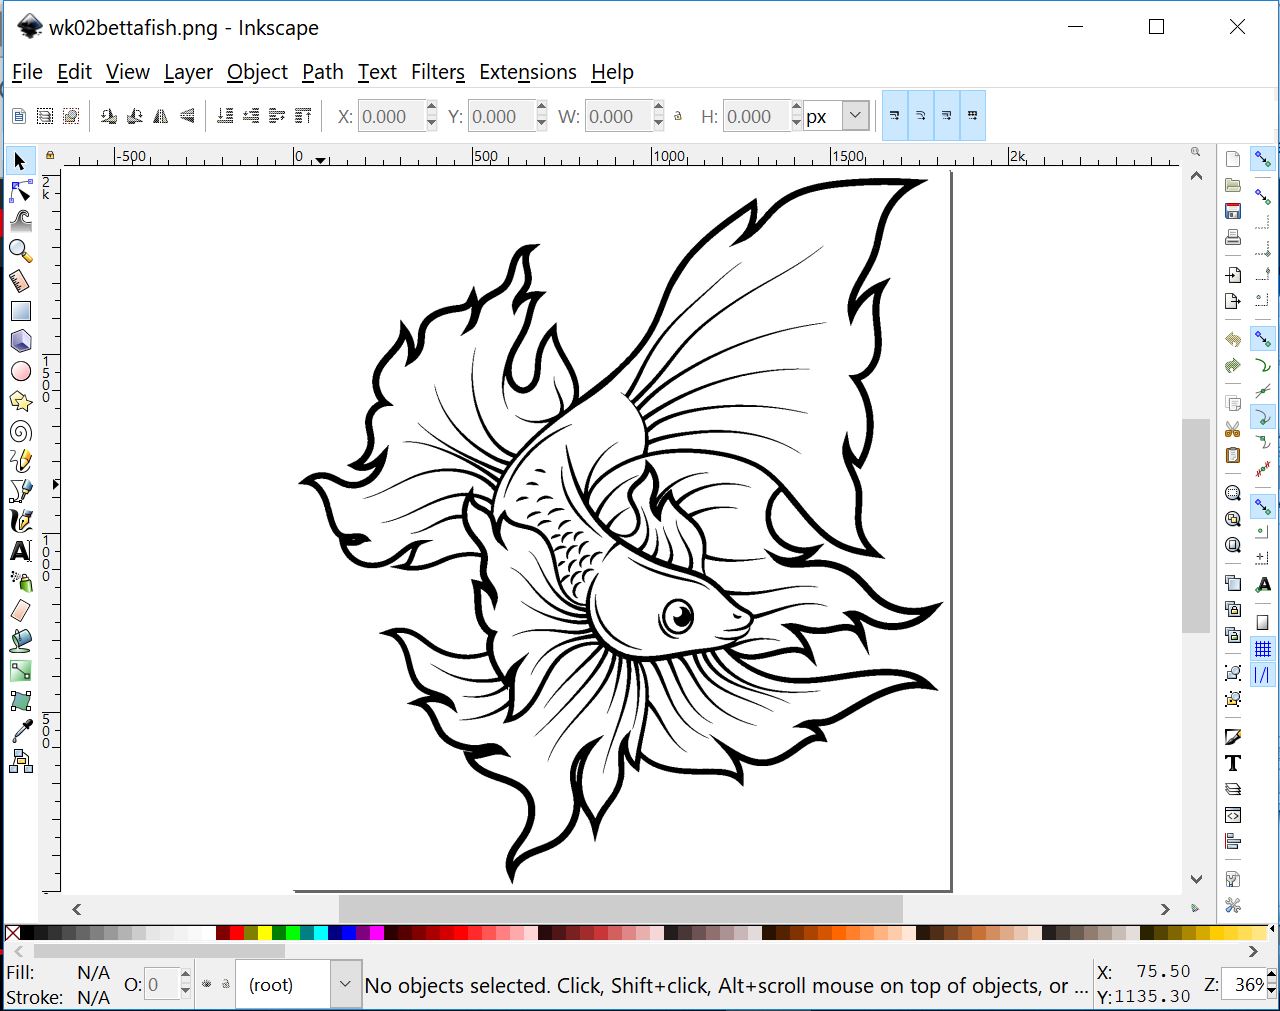
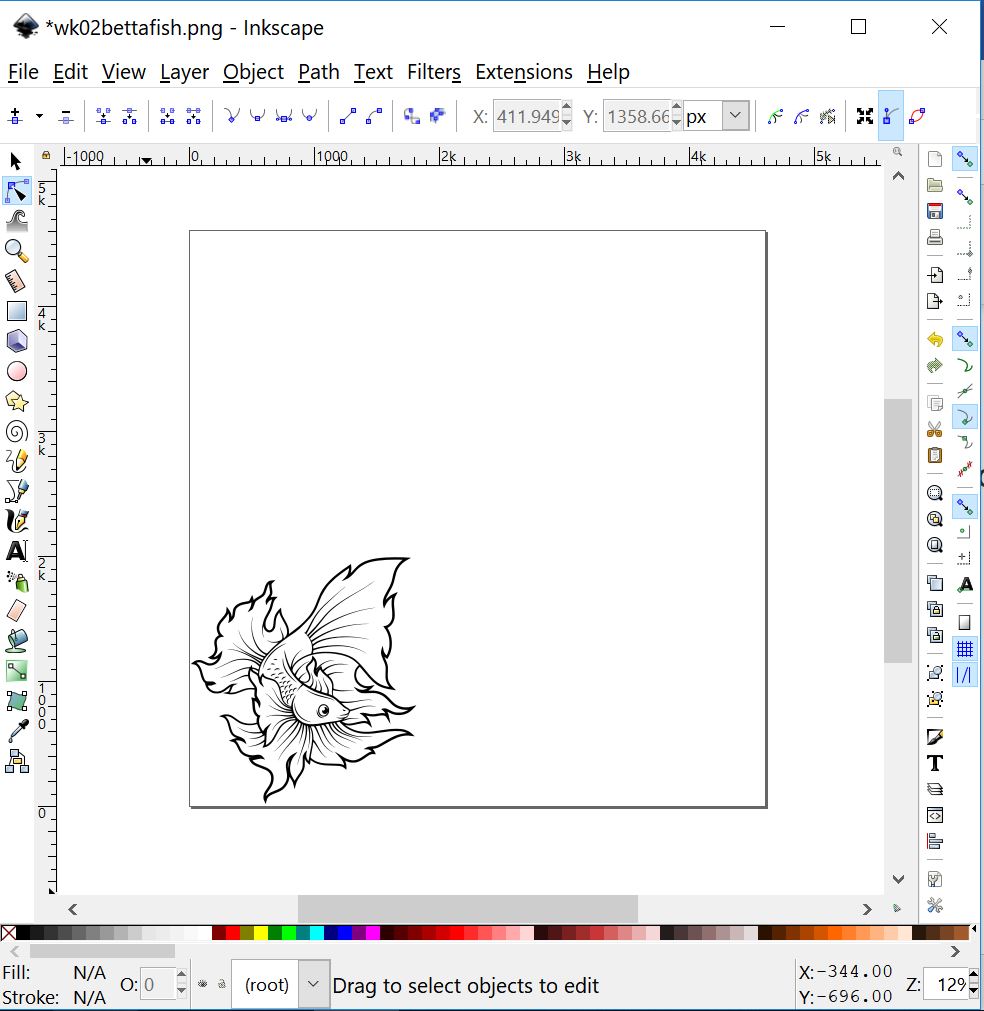
Open a betta fish
image (3) in Inkscape and select the image

Path>Trace
Bitmap>Threshold set 0.54>OK
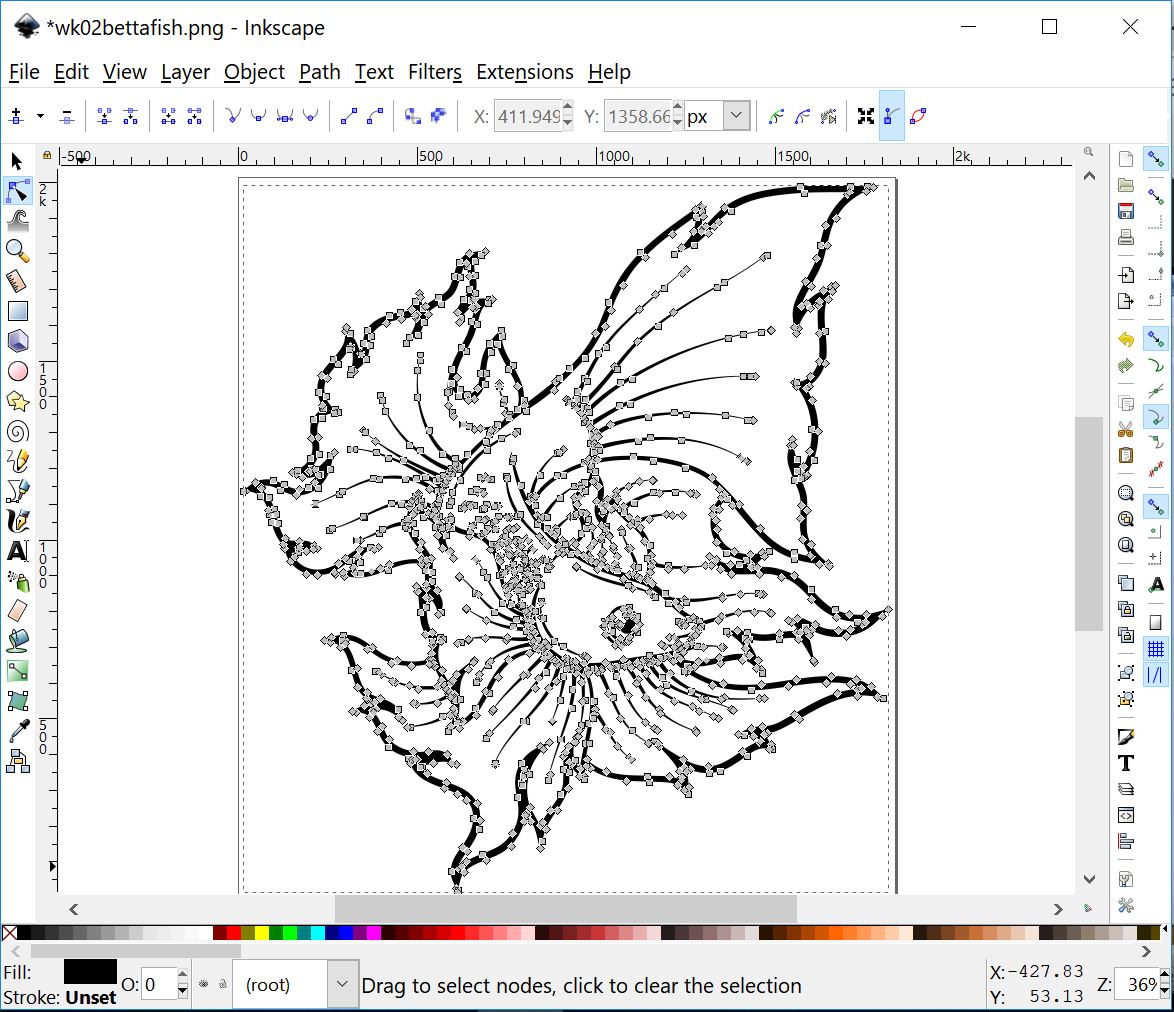
Remove original
image, remain the new image. Click on Edit paths by nodes (F2) to see all the
points on the image
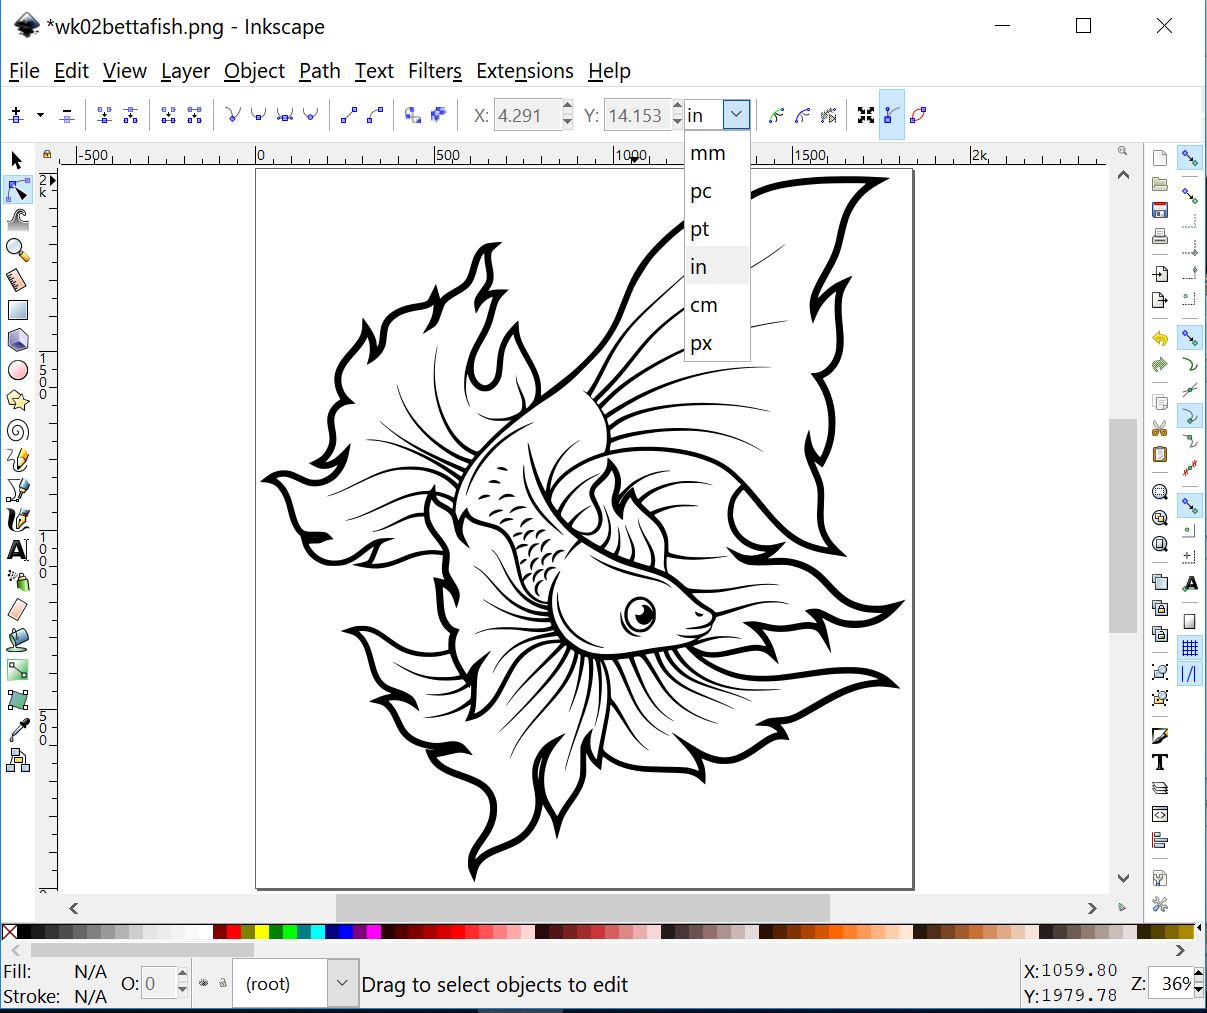
Change the image to
inch, and also the prefer image size value.

Select
File>Document Properties>change the Custom size value
See the page size
is enlarged
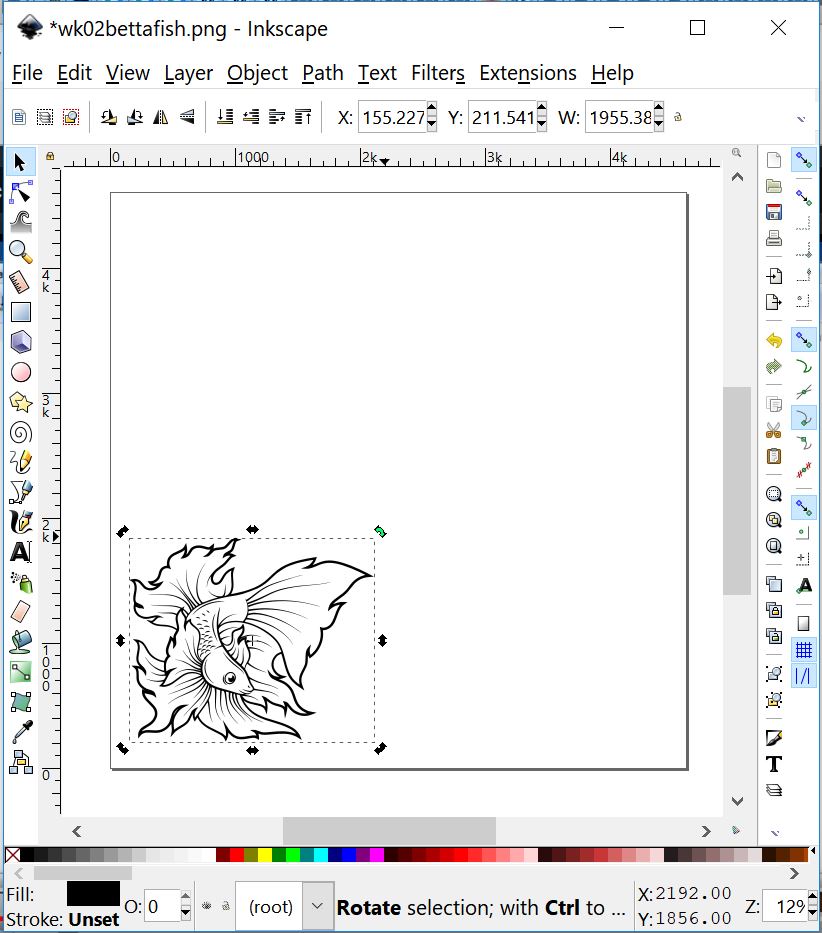
Select the image to
rotate using the corner arrow and position the image to fit the document.
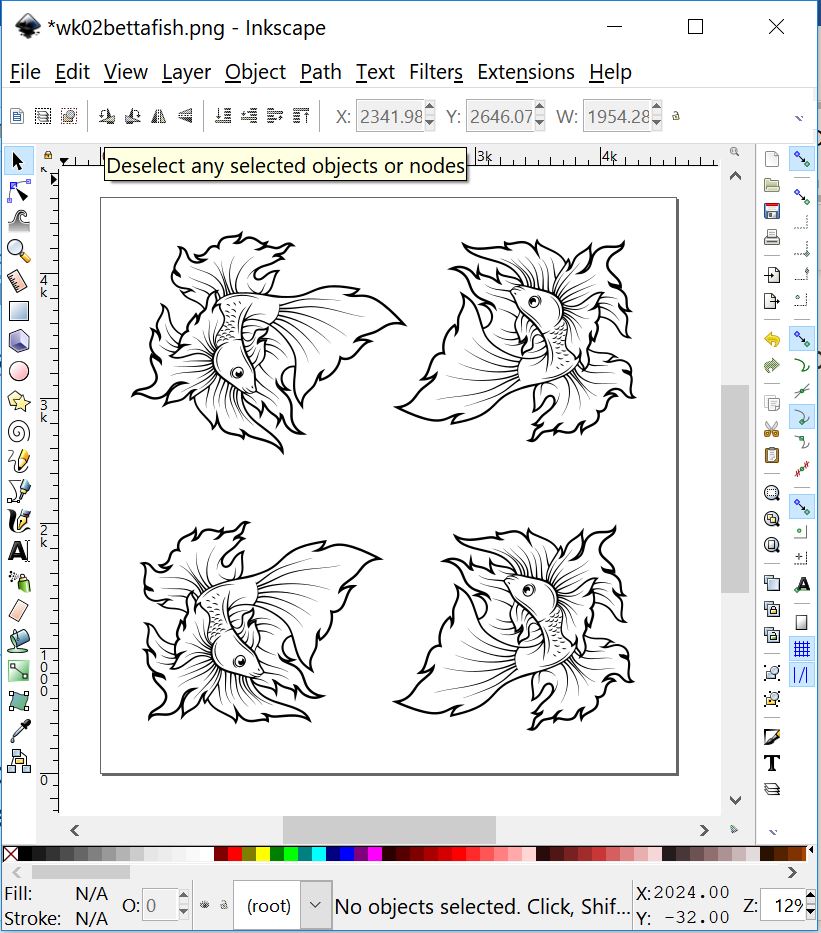
Copy and paste more
images in the document.
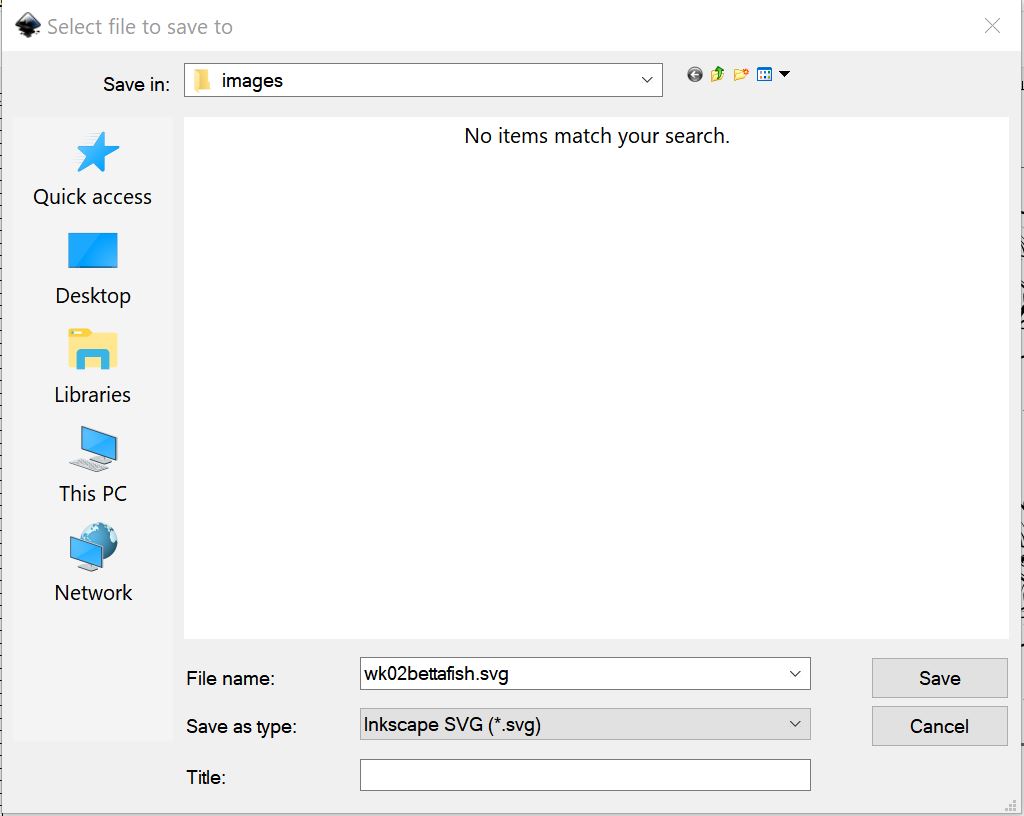
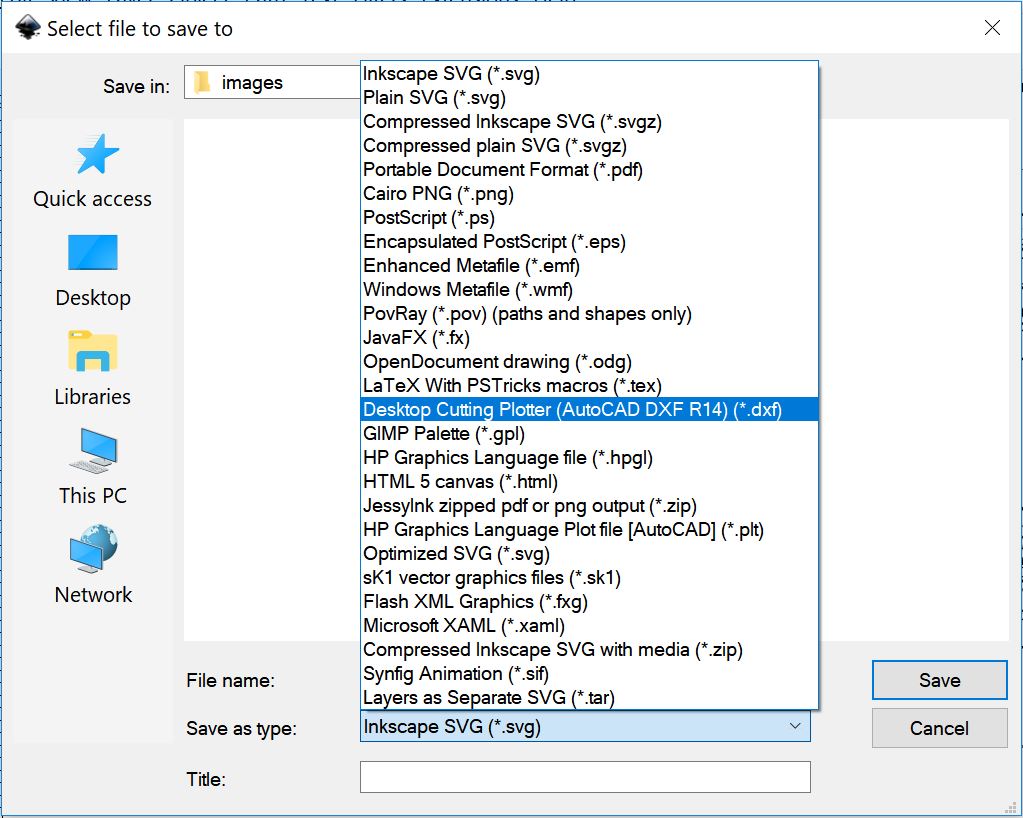
Save as SVG or DXF
format, completed vectorizing an image in Inkscape.
This is my SVG file, right mouse click and save link: wk02bettafish.svg
Manipulation of
Image using GIMP
GIMP is a very powerful image manipulation software. I learned to remove the background of my portrait image and make it transparent in GIMP after watching a YouTube video “Gimp: Remove The Background And Make It Transparent” (5). My steps using Gimp are as follow.
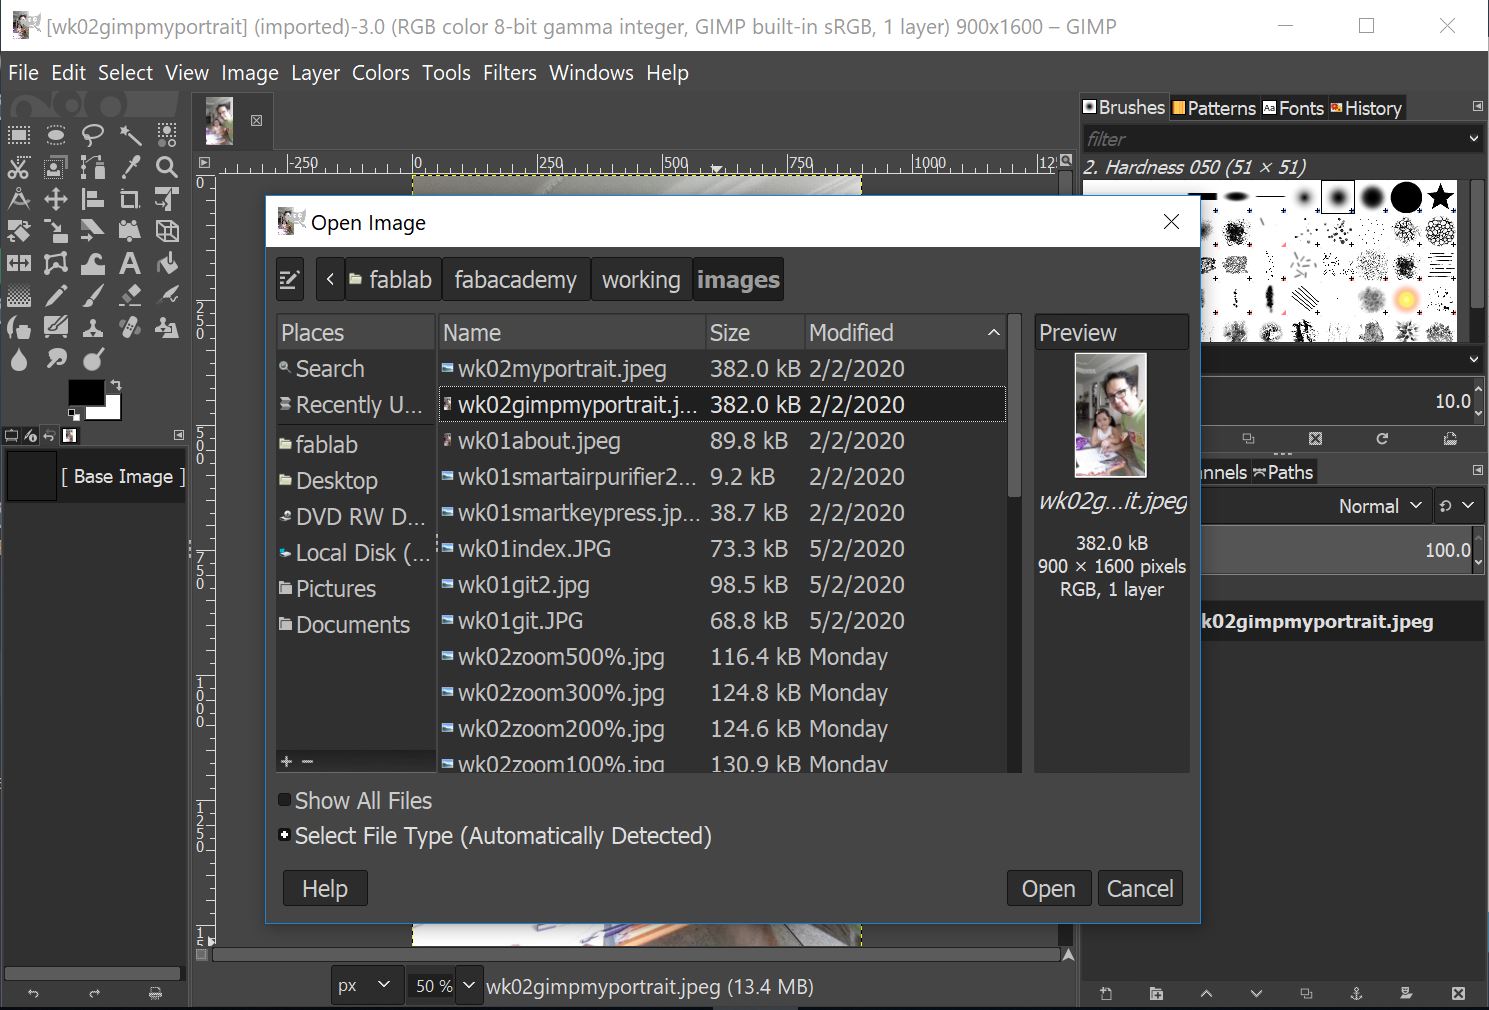
Open my portrait
image. File>Open
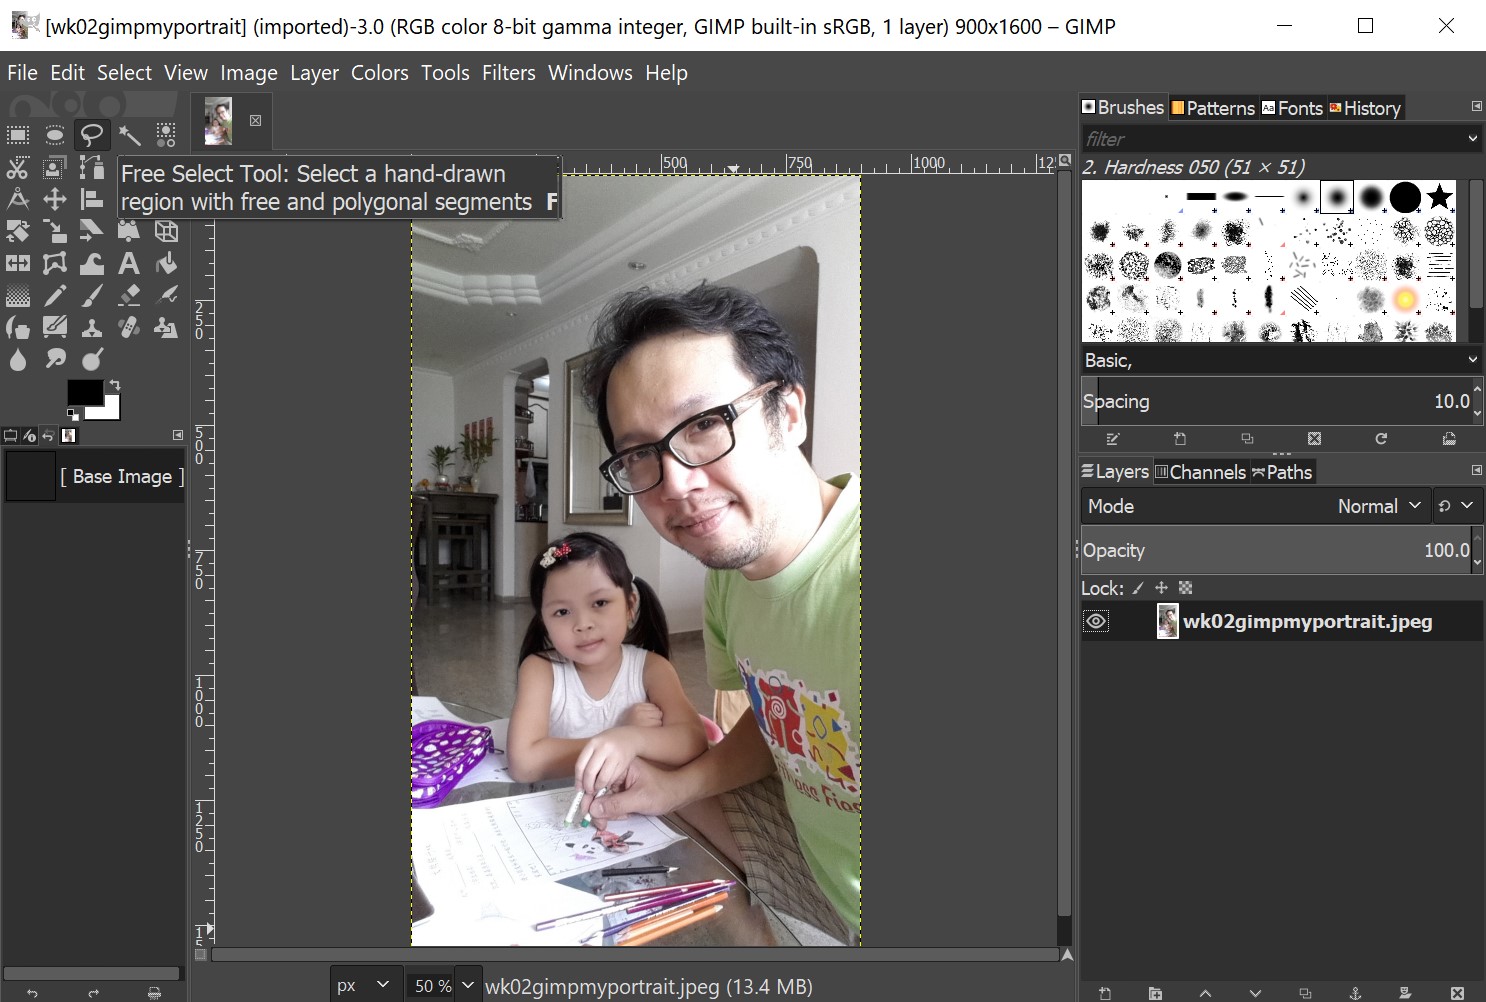
Select Free Select
Tool
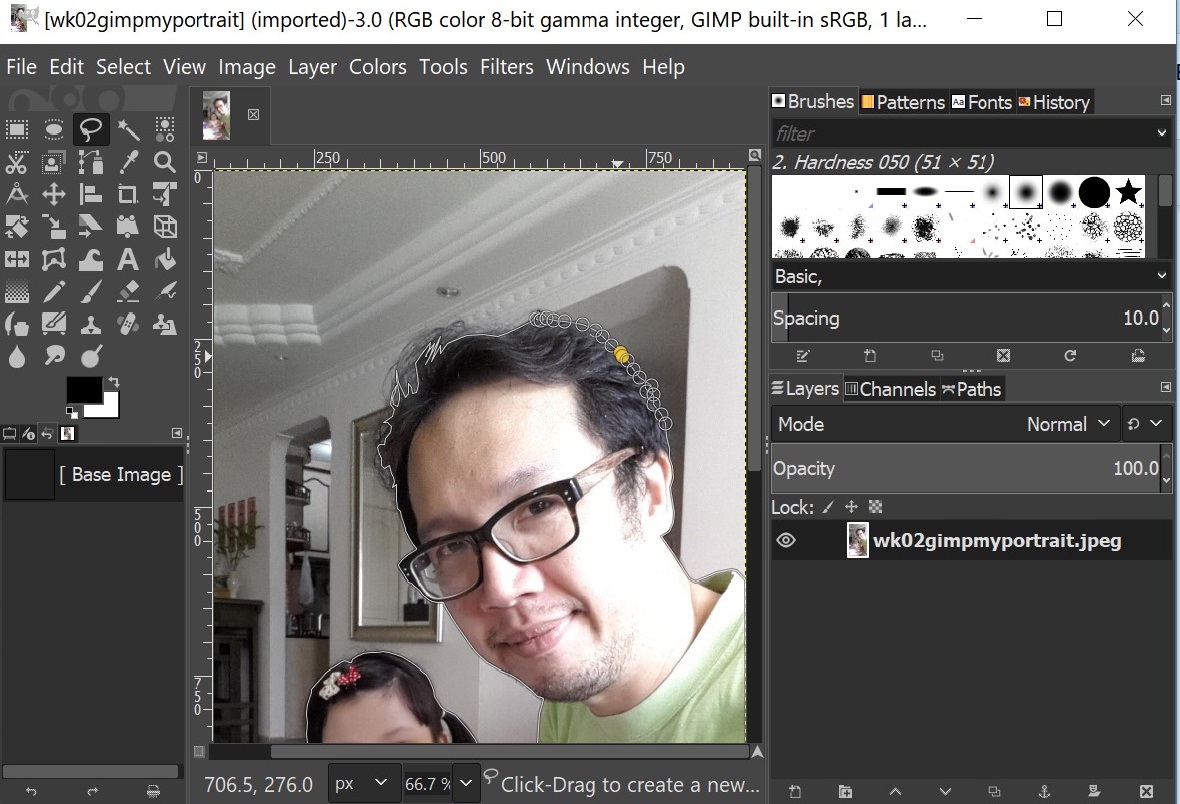
Use mouse icon to
select the parameter of objects (my daughter and me).
Ctrl+ scroll mouse
= zoom in/out. Press scroll mouse and move the mouse.
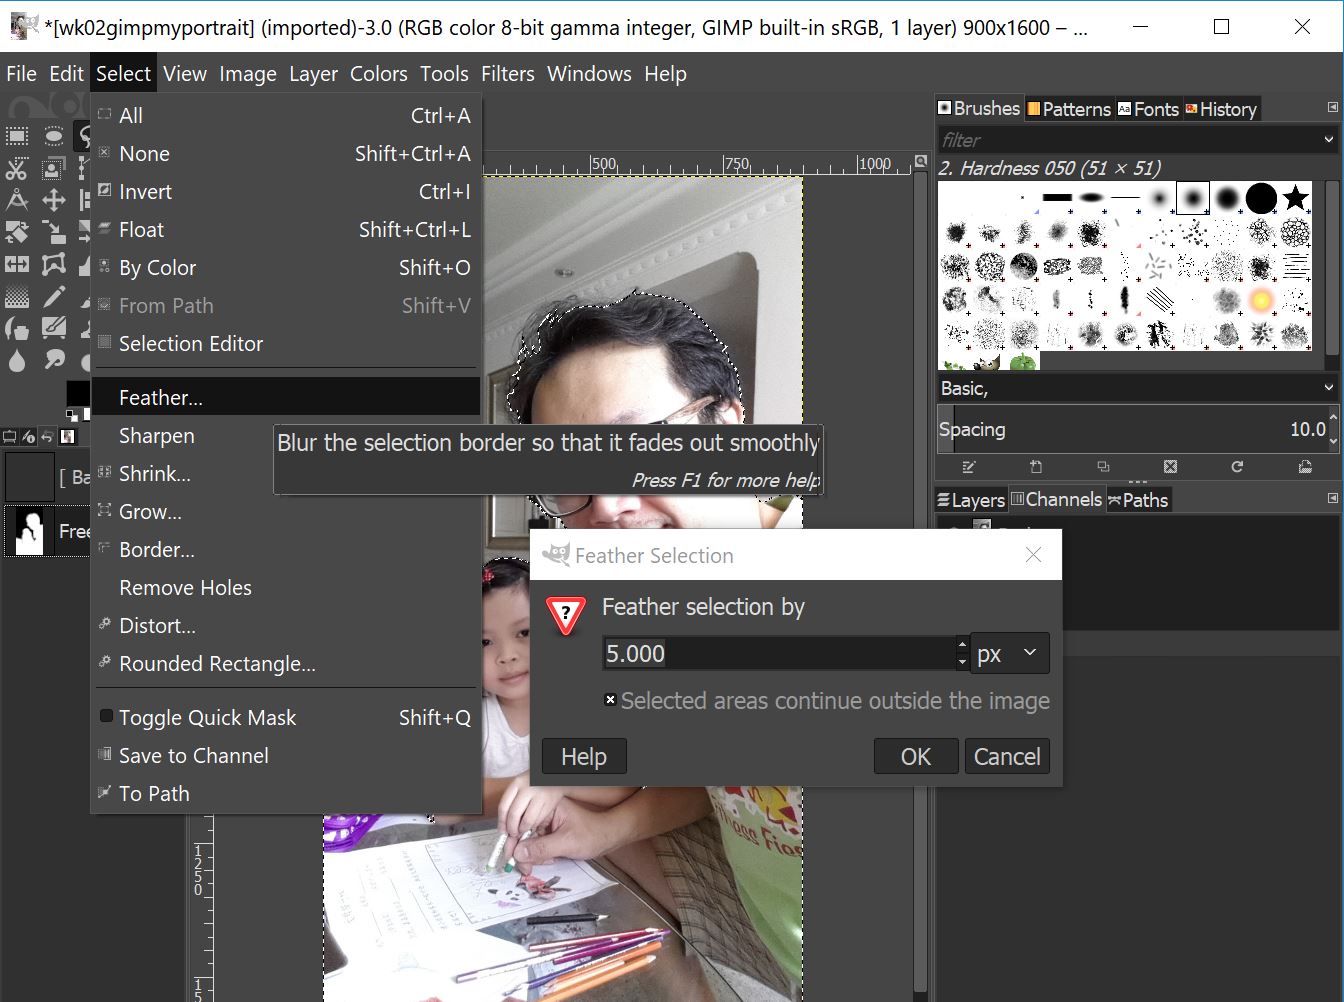
Feather selection
by 5 px
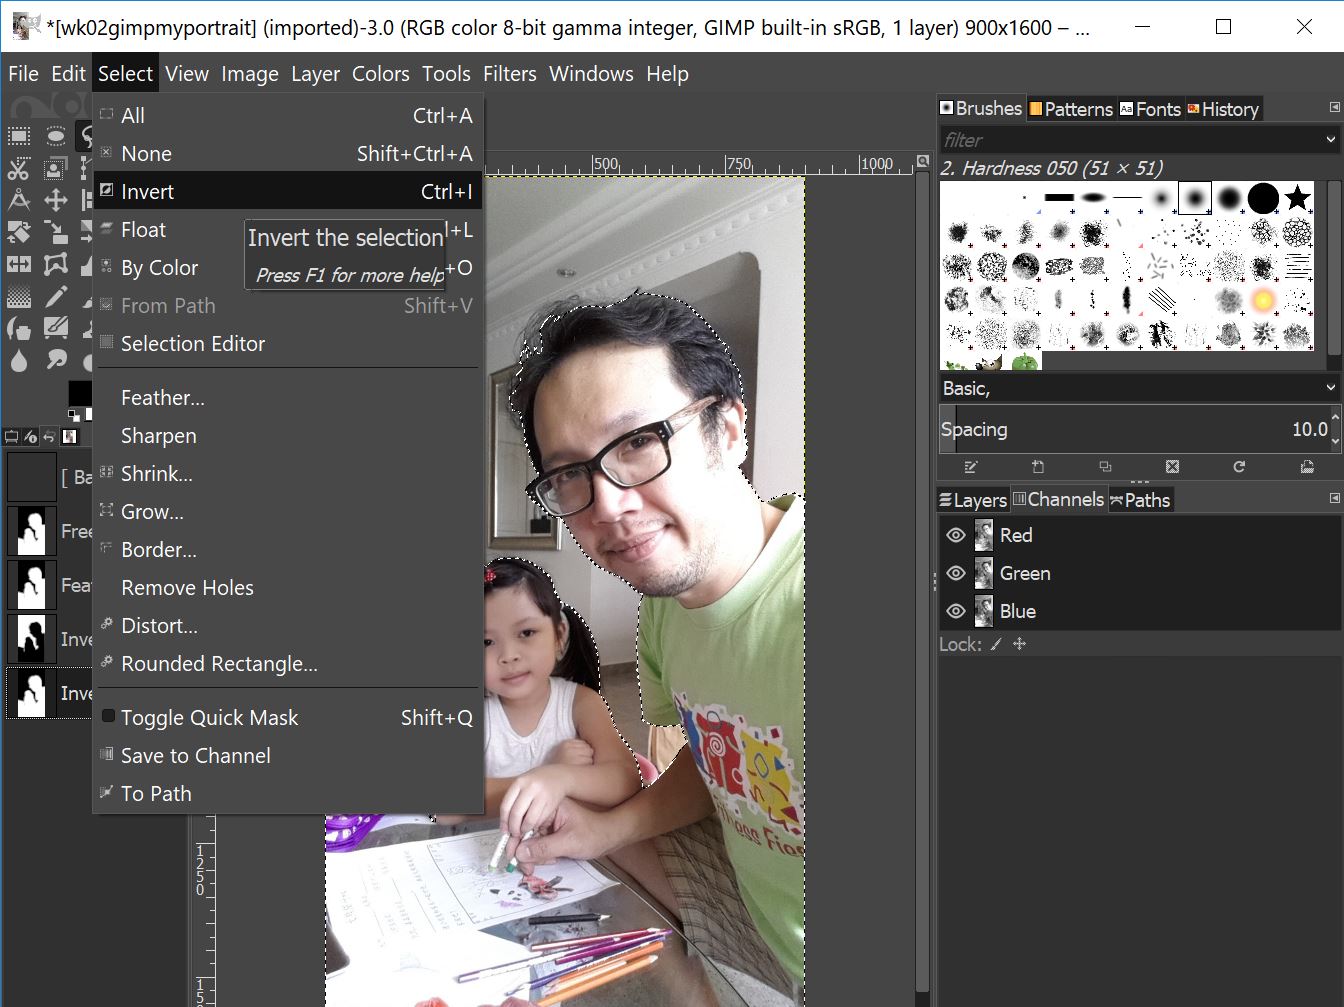
Select>Invert
![]()
Edit>Clear
![]()
Background removed
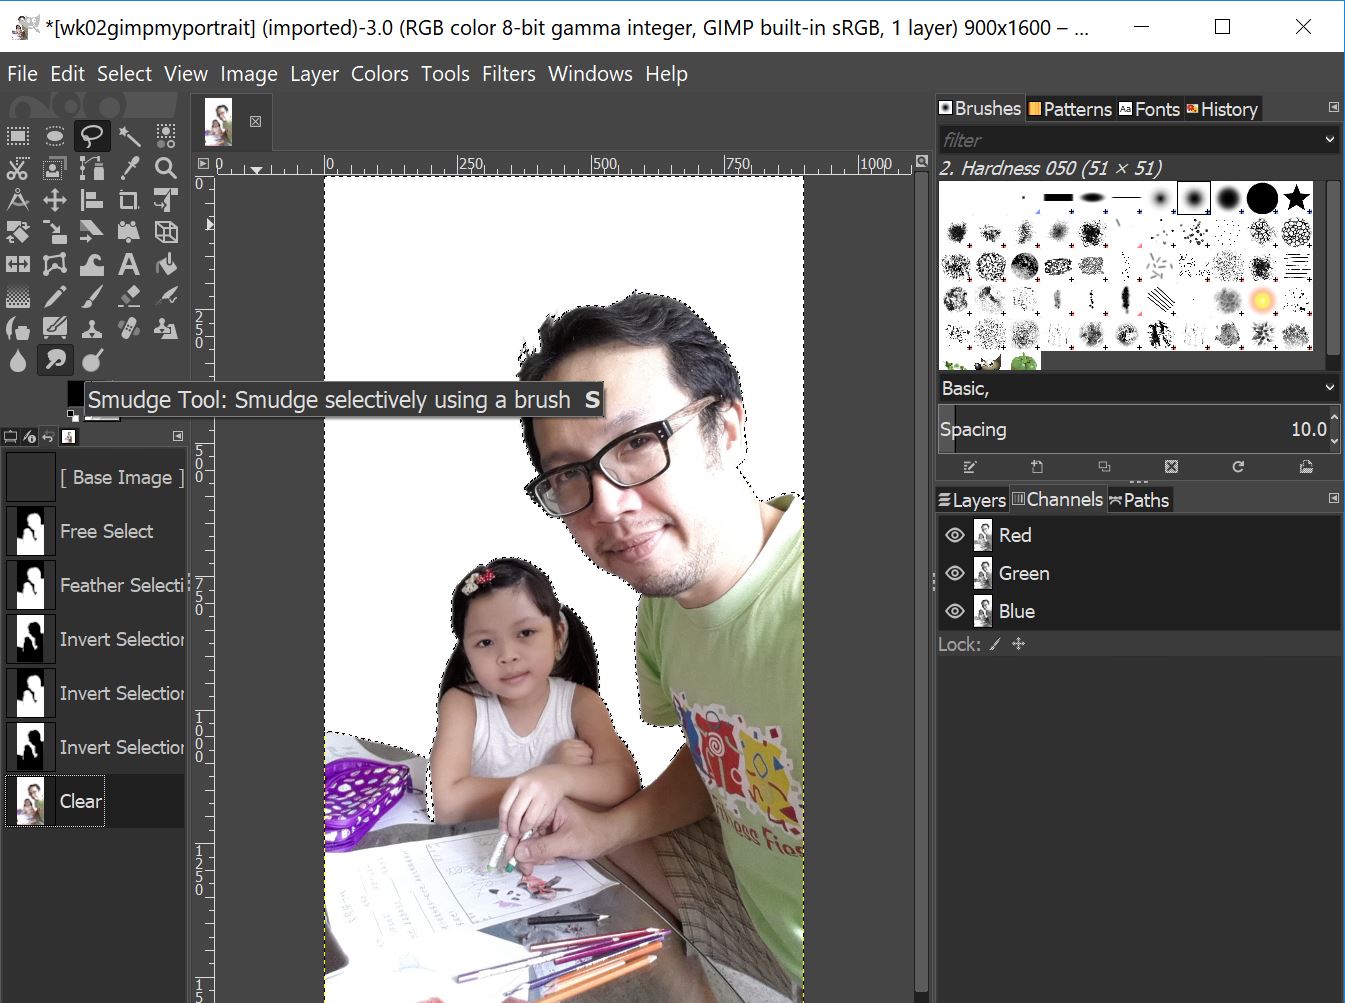
Select Smudge Tool
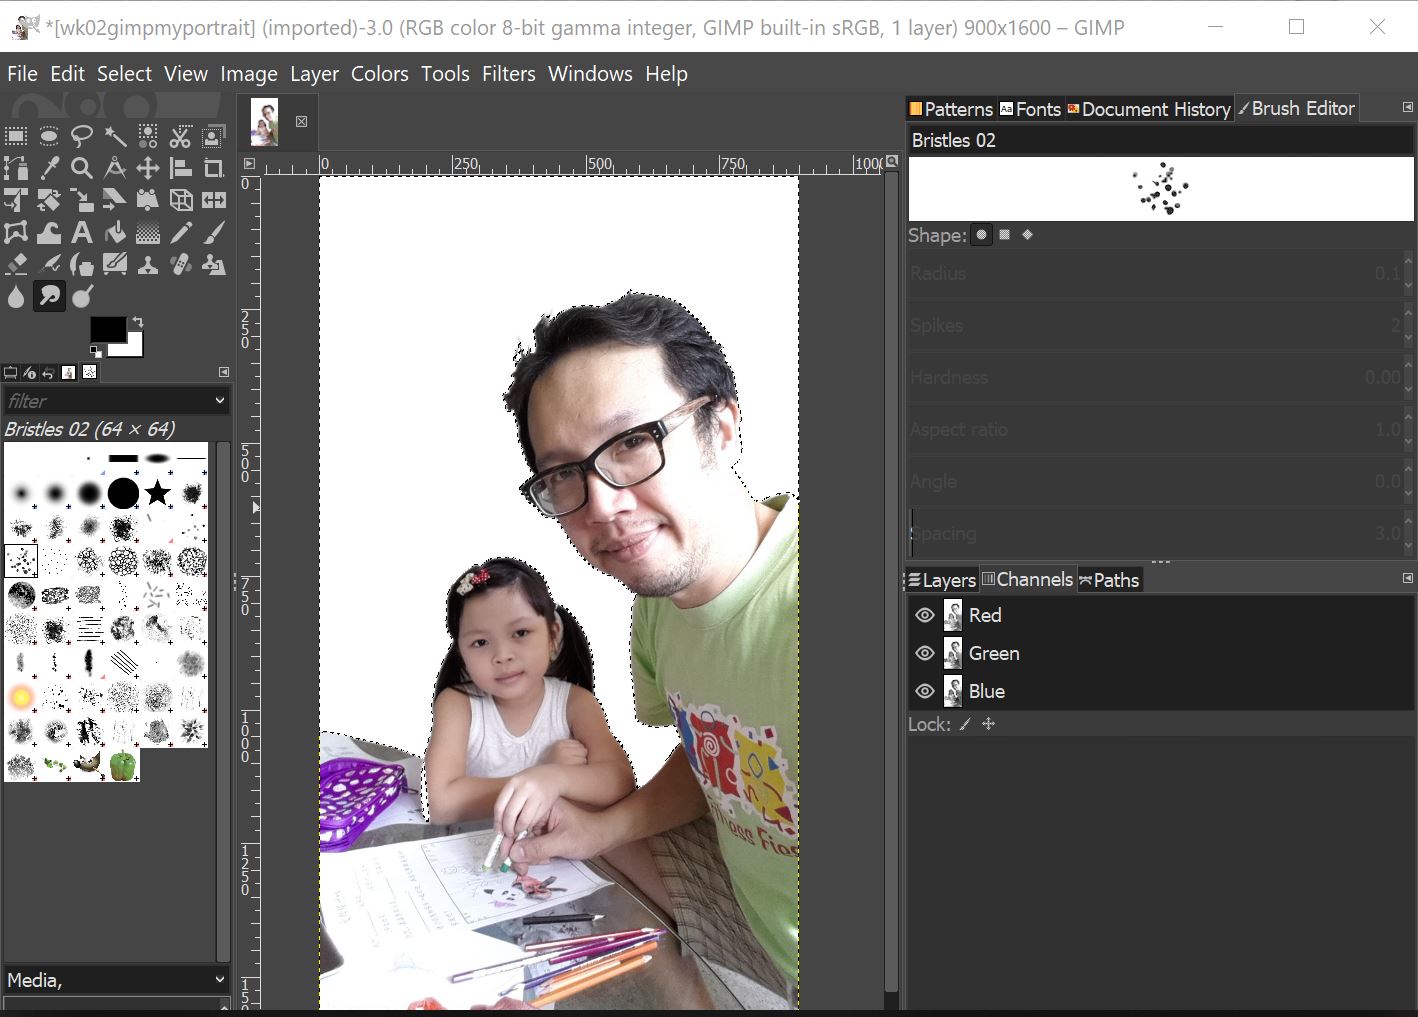
Select Bristles 02
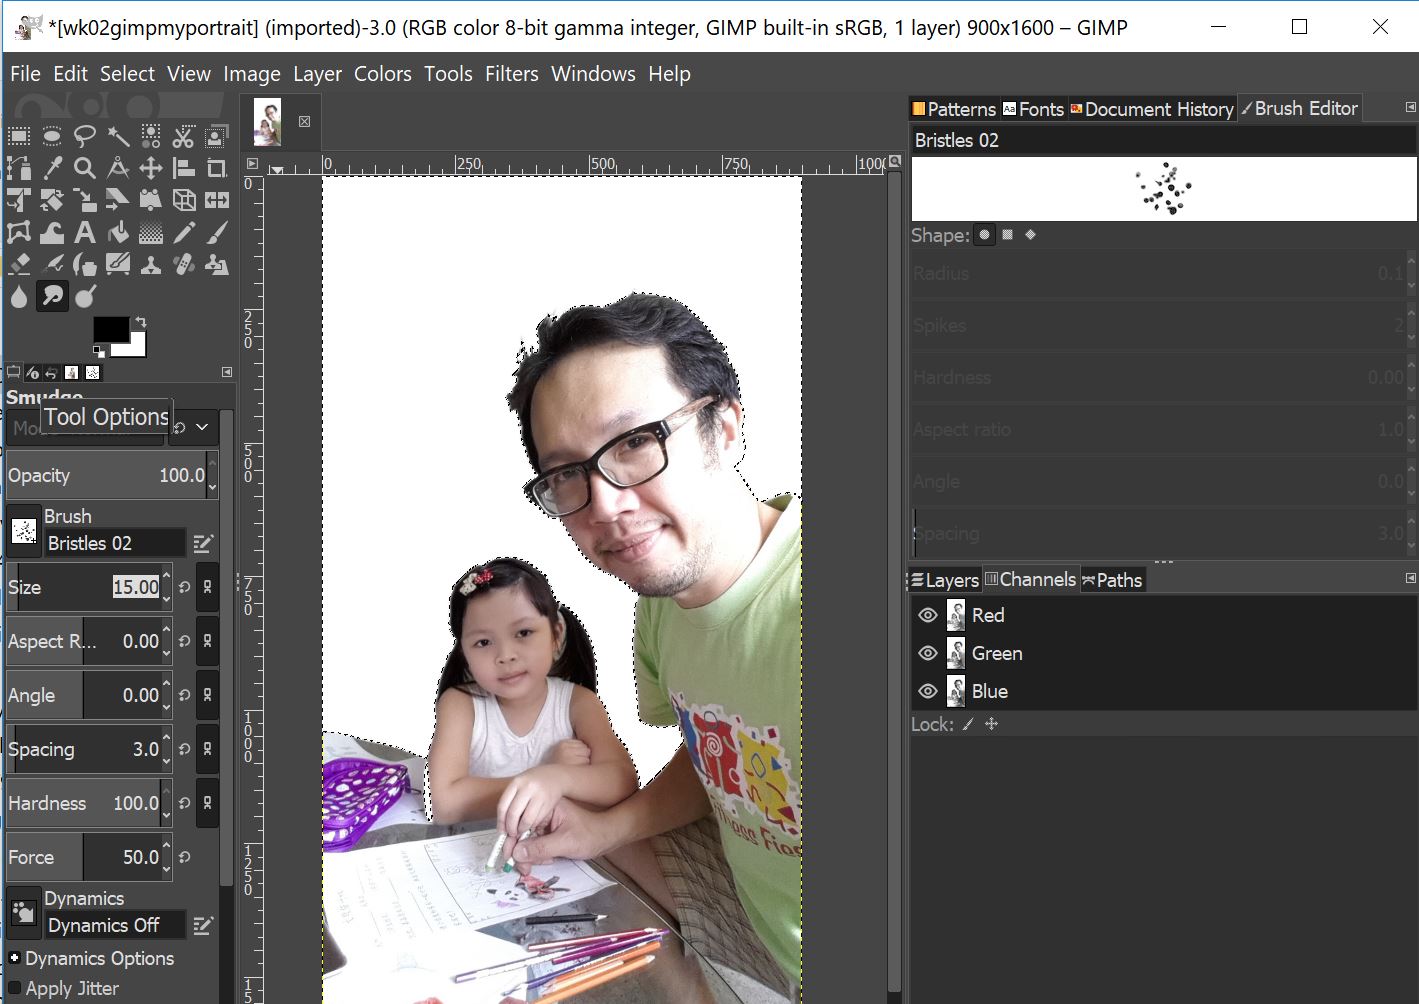
Select tool
option>Size=15
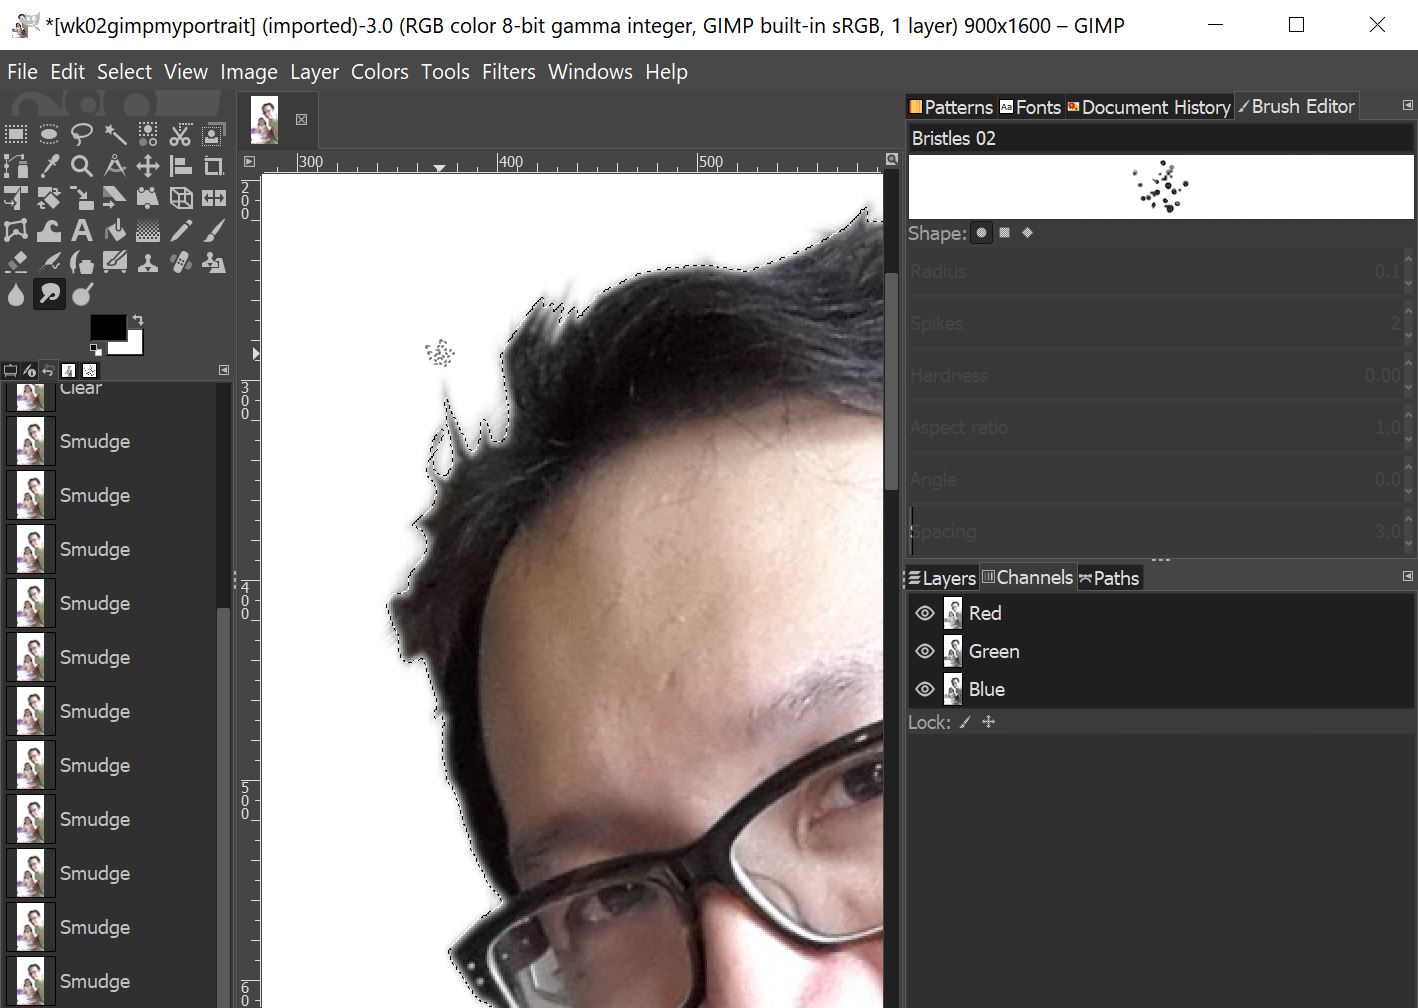
Smudge the edges
for the hairs.
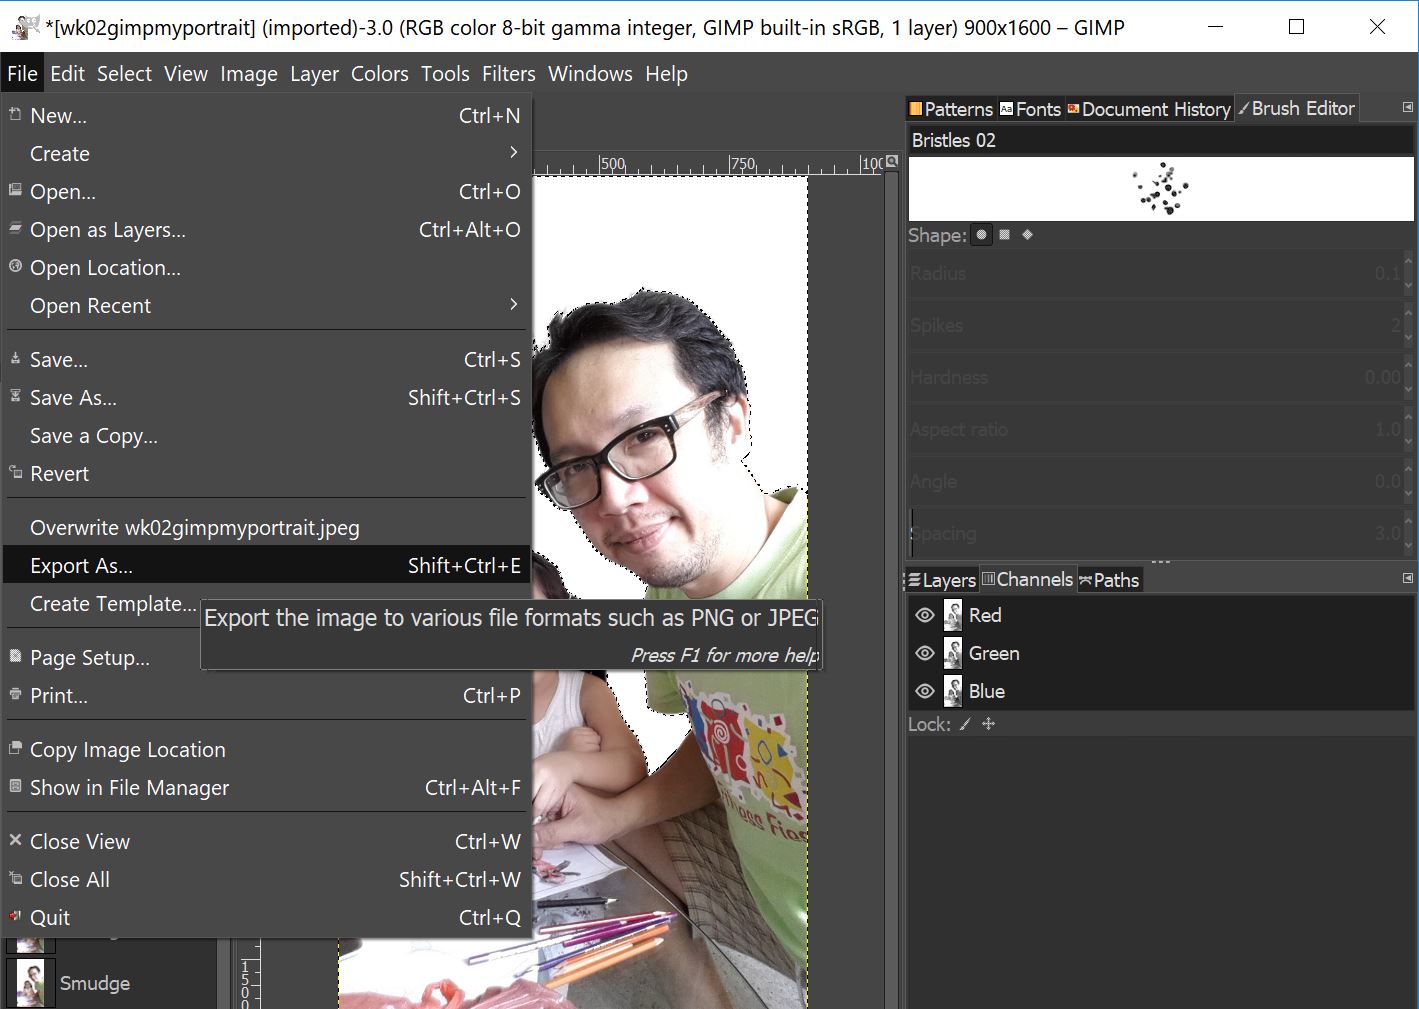
After Smudge
process, select File>Export As
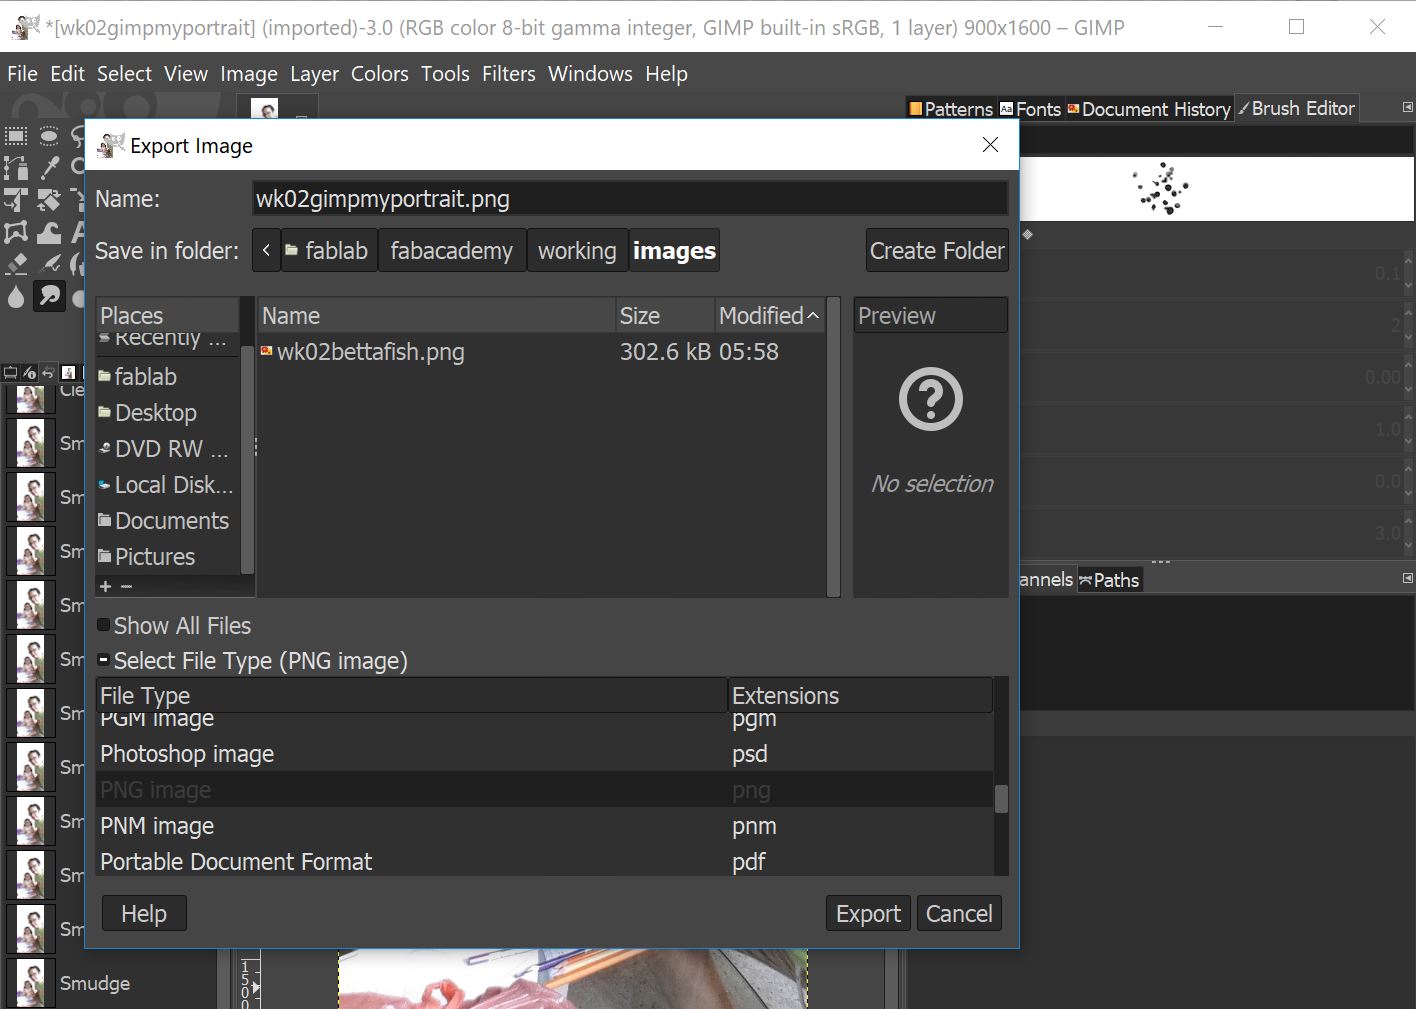
Select export
location and PNG image for file type.
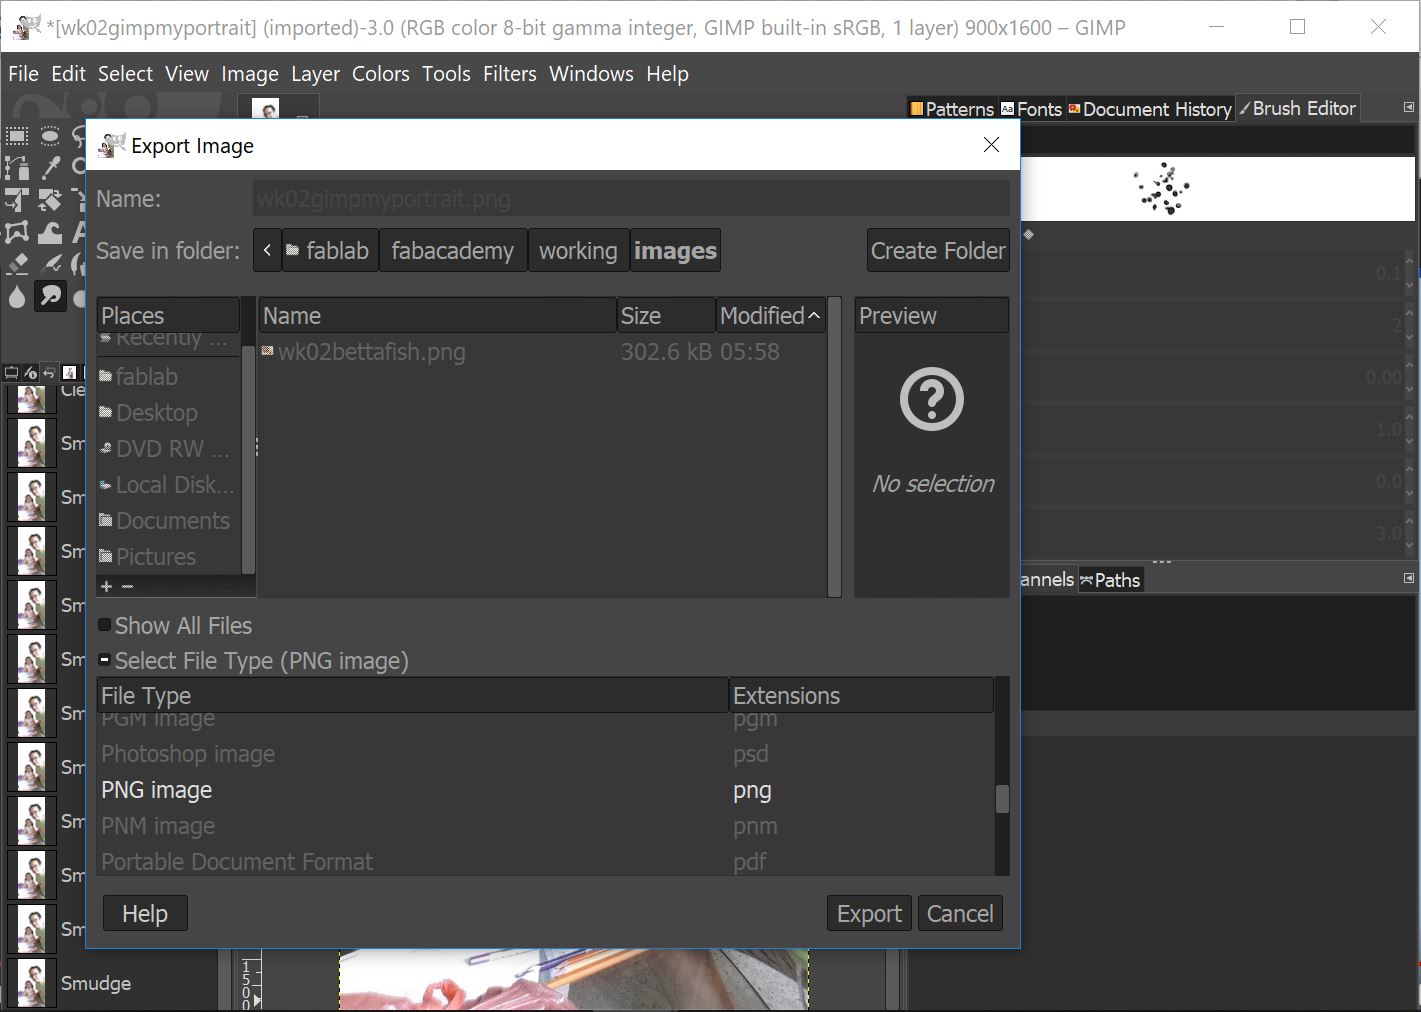
Select Export,
completed removing the background and make it transparent.

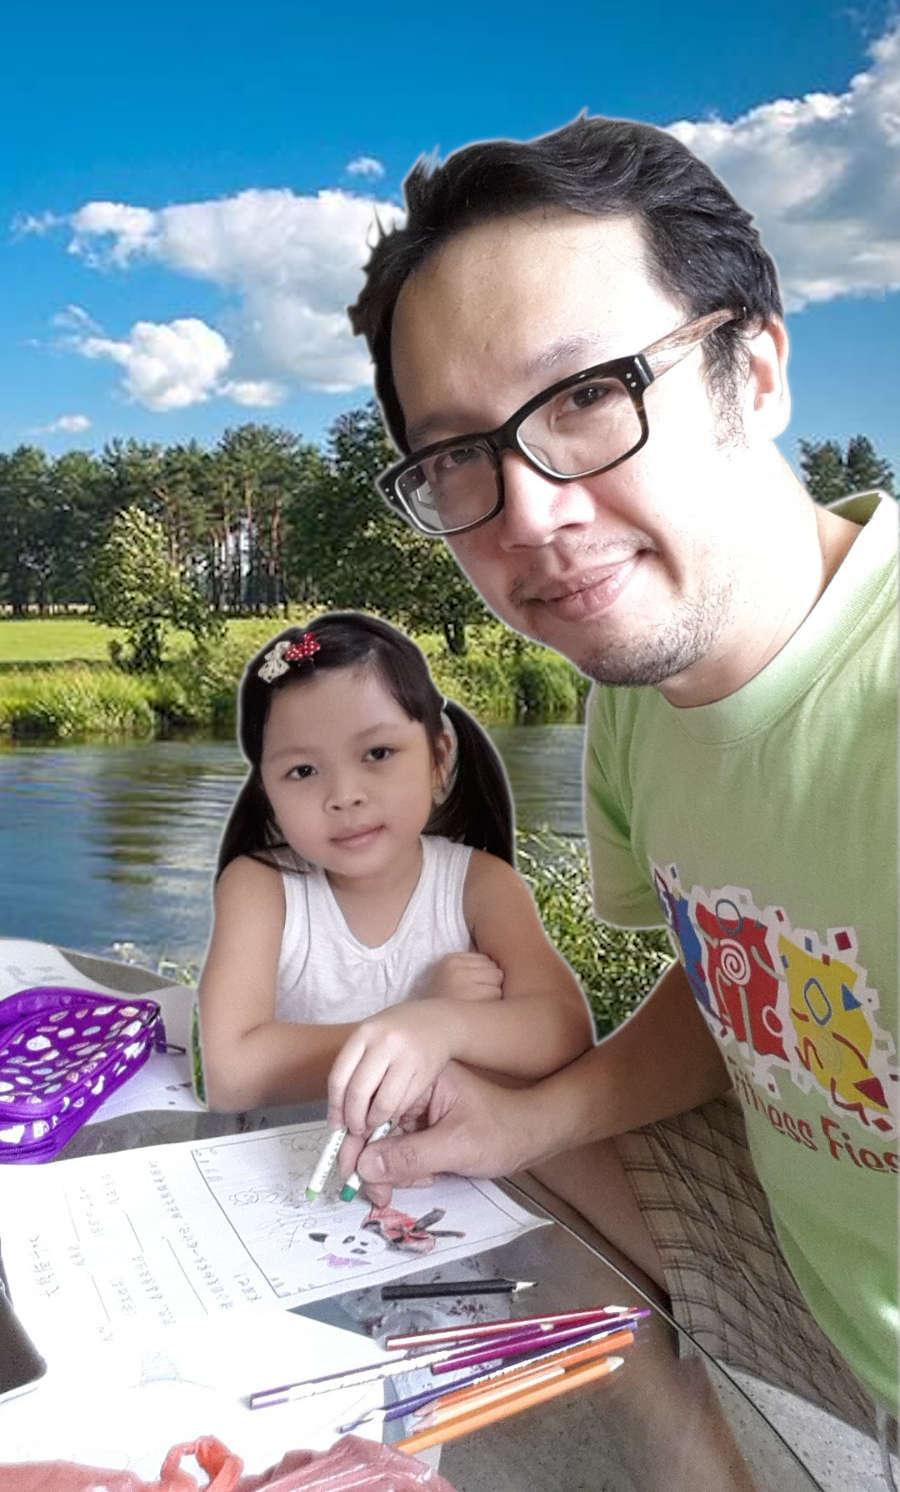
Insert background
image openfieldriver.jpg (6) and drag to scale it to suitable size for the
transparent image.
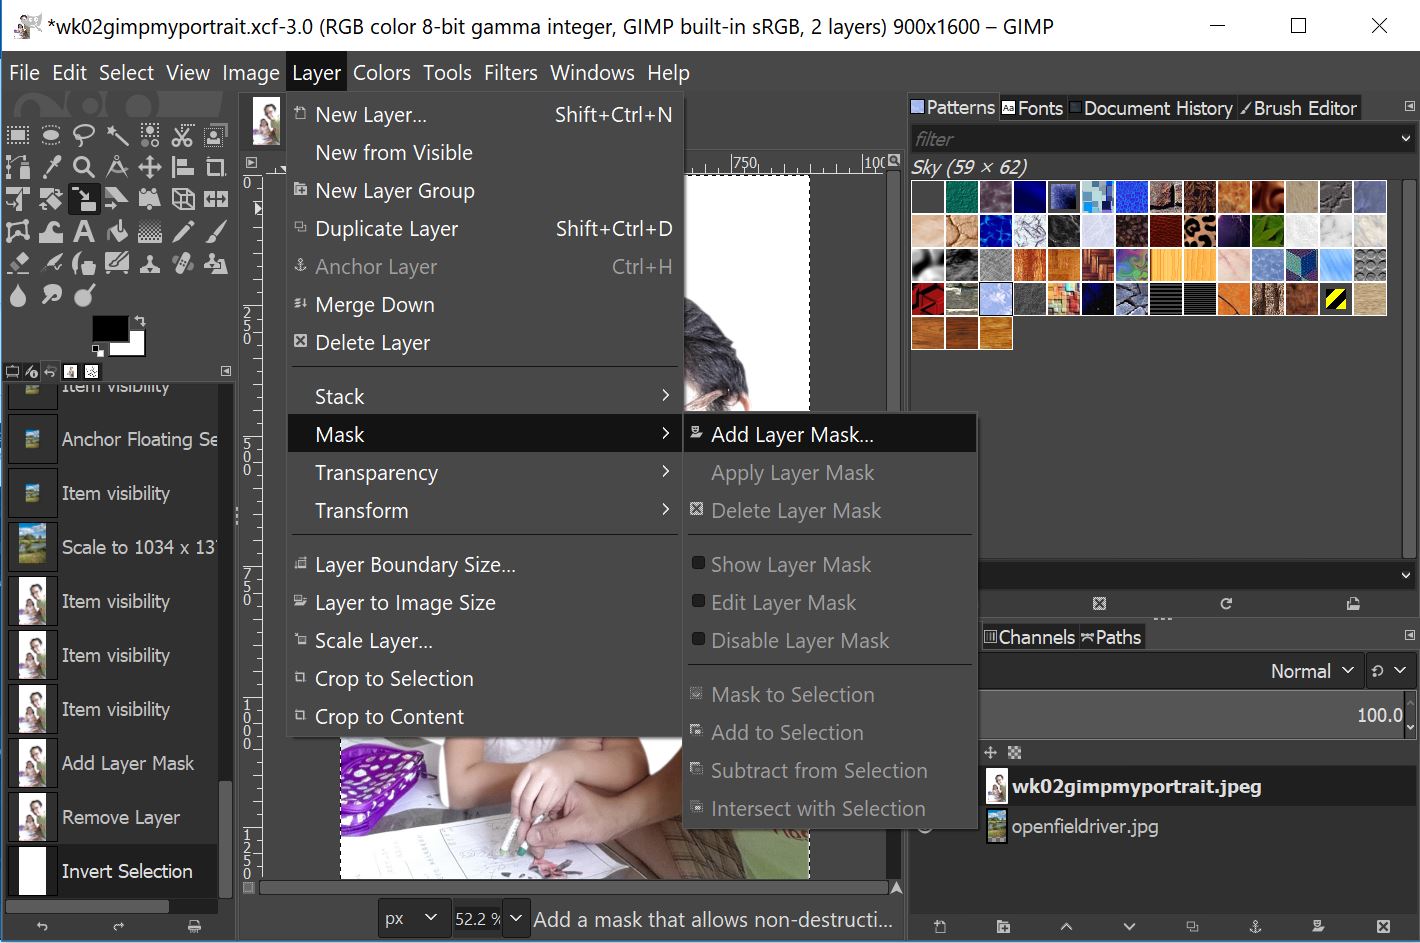
Select
Layer>Mask>Add Layer Mask>Add.
![]()
Select Paste
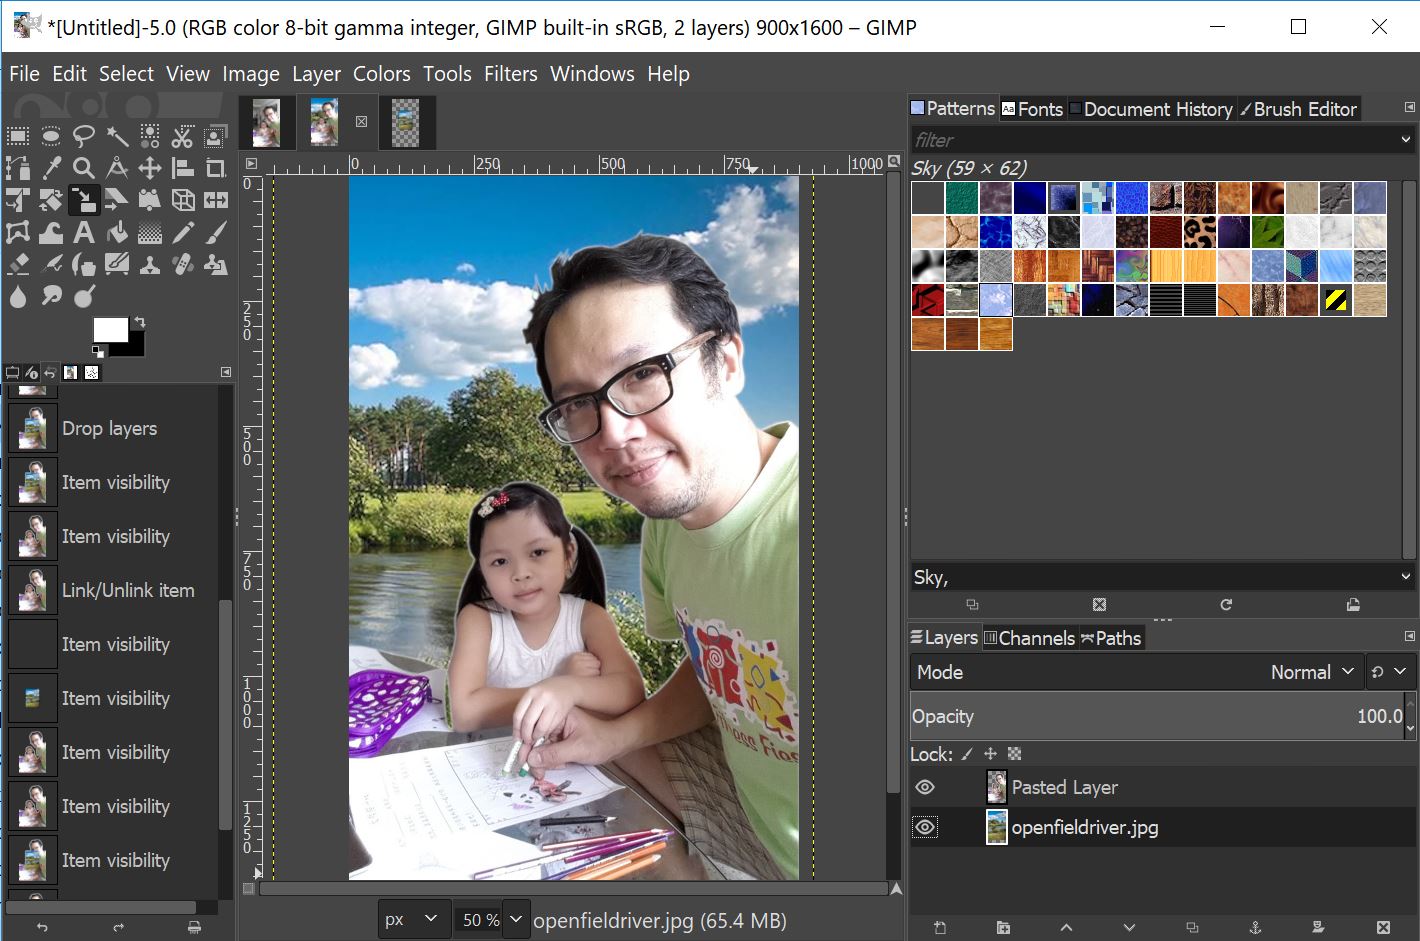
Move back ground
layer down.

Select Rectangle
Select Tool to select my image area, and select Image>Crop to Selection
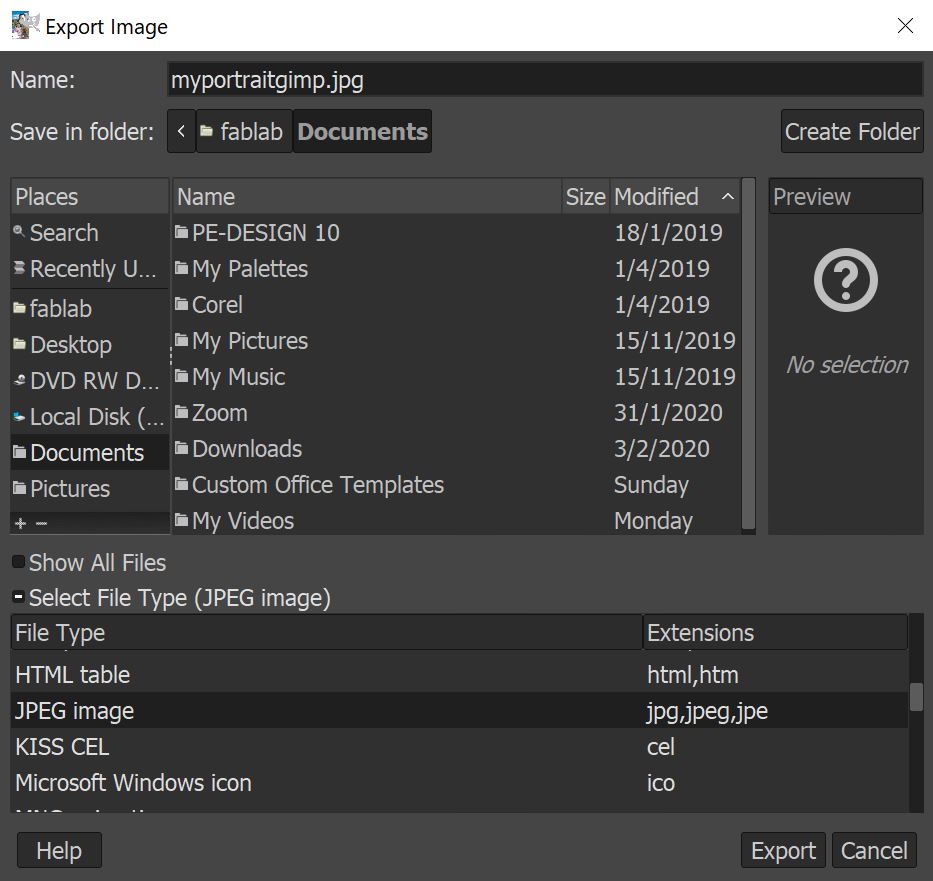
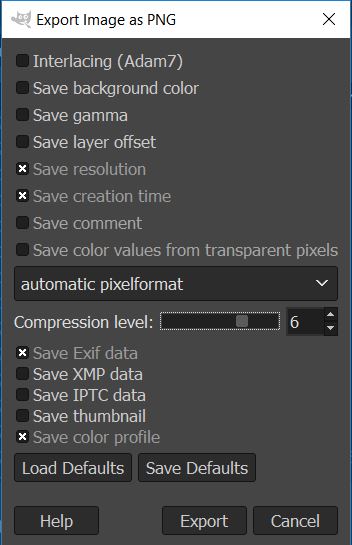
Select
File>Export As>select JEPG image>compress level: 6
Created my new
compressed JEPG portrait (320KB to 145KB)
3D Image using
Fusion 360
Fusion 360 is a powerful CAD software, it unify design, engineering, and manufacturing into a single platform. I had created my final project design ideas in 3D form, and a video for my final project.

Created a body 1000mm by 50mm using Fusion 360.
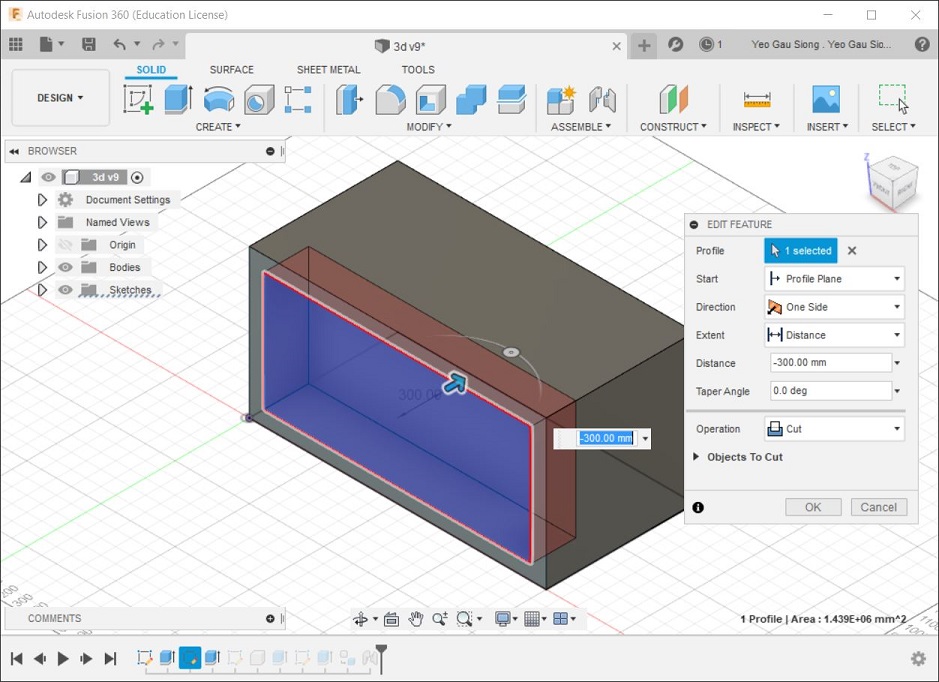
Extrude a profile into the body by 300mm.
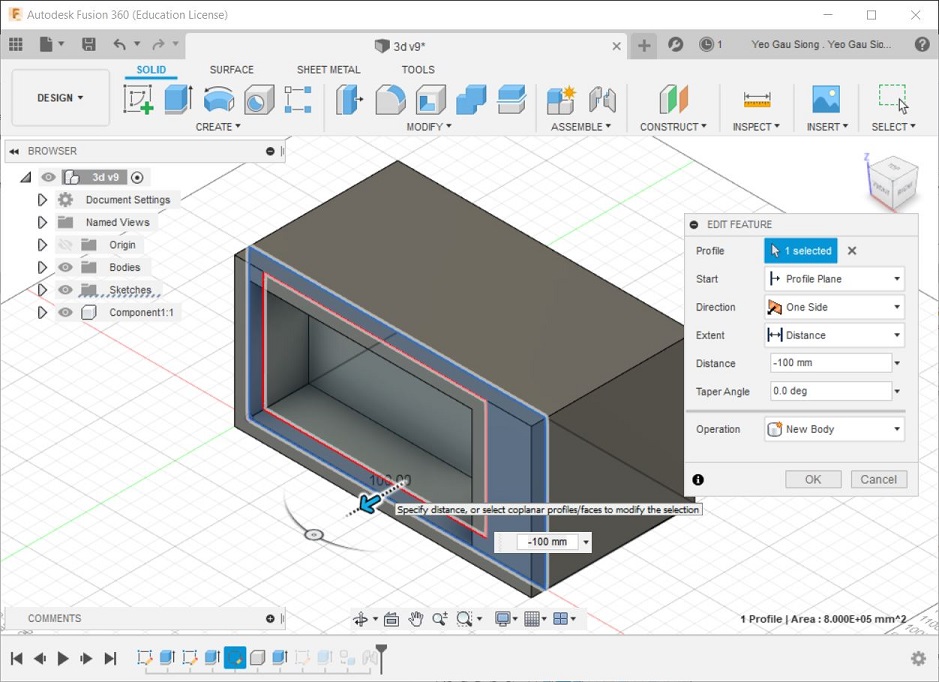
Created a new body, extrude by 100mm
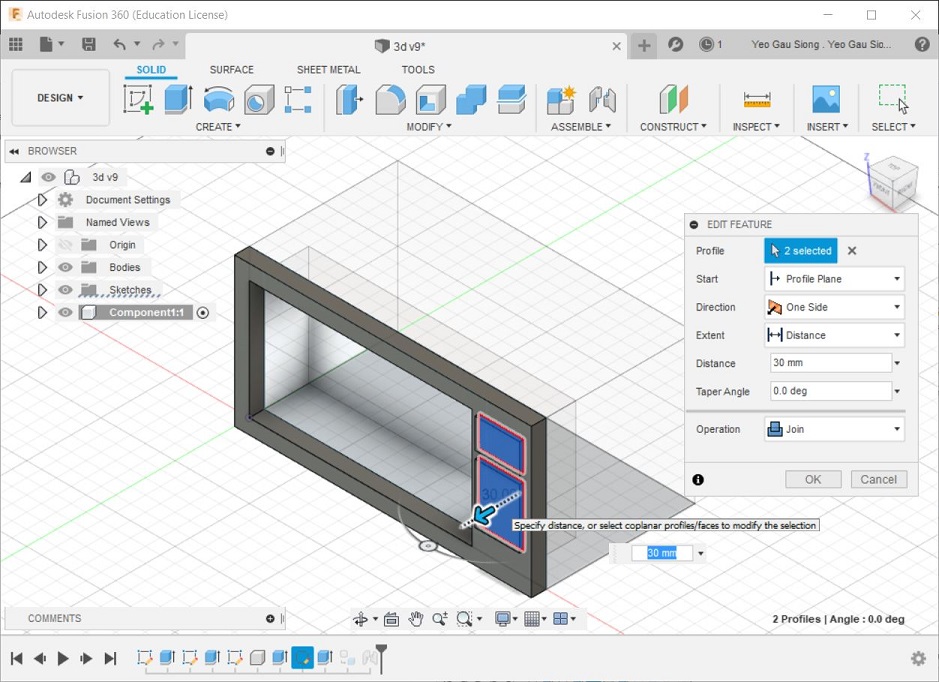
Extrude 2 profile on the new body by 30mm.
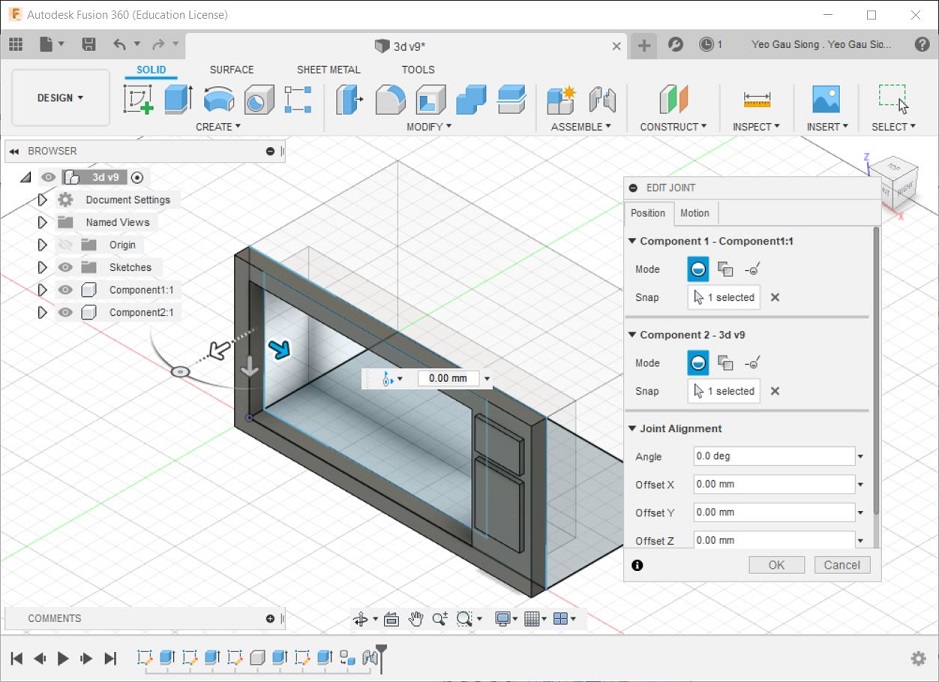
Added a joint to connect the 2 bodies, this allow the 2 bodies to opens and closes.
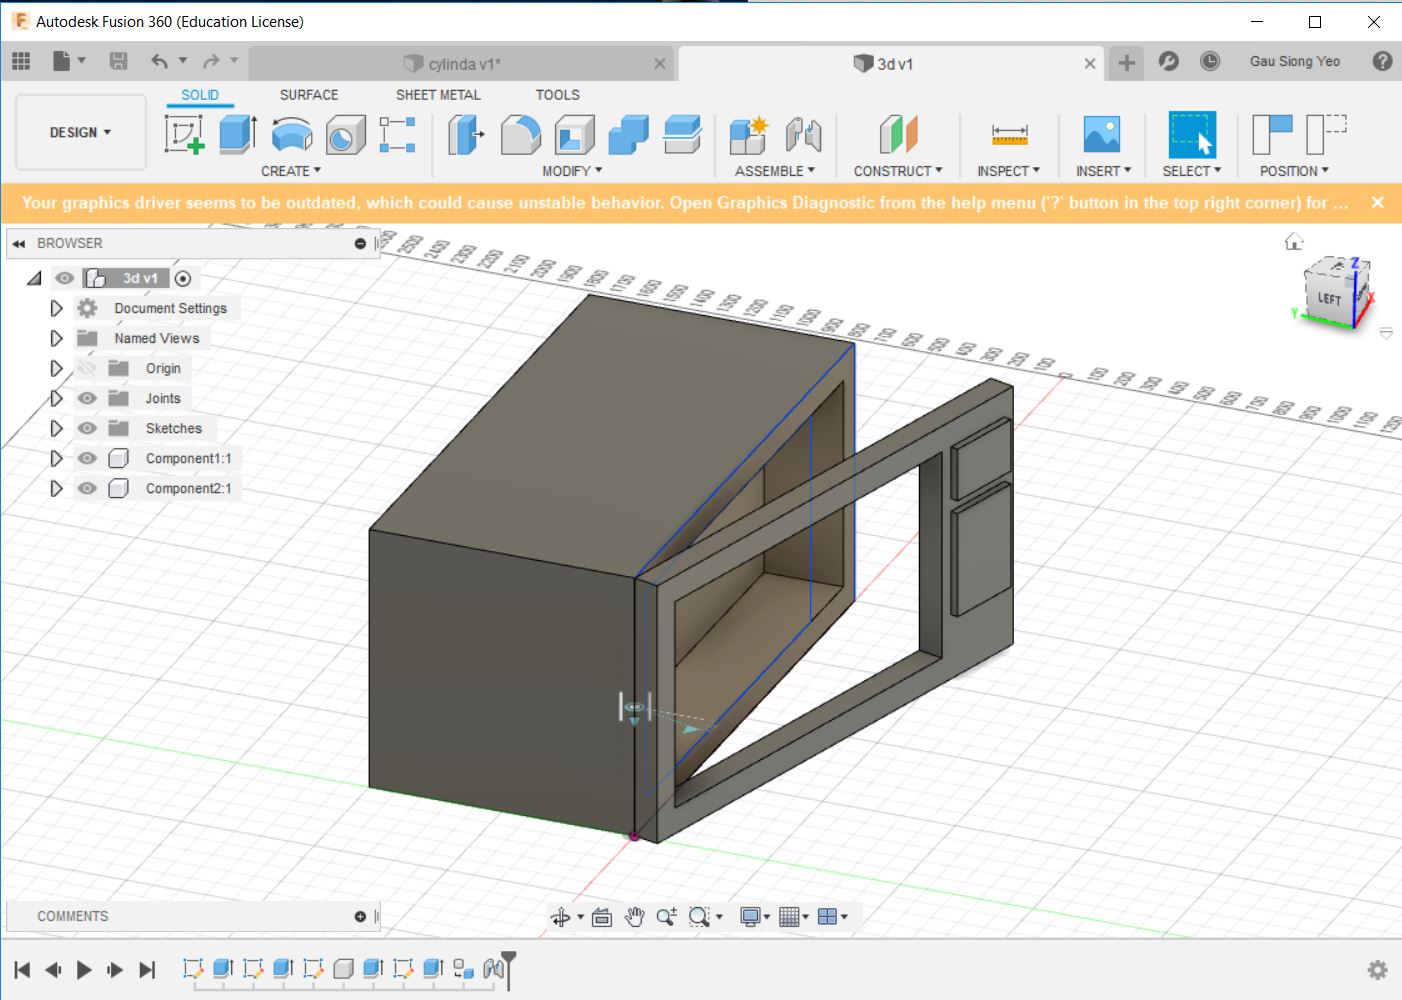
Fusion 360 3D image
for my final project.
This is my fusion 360 f3d file, right mouse click and save link: wk02F3dv10.f3d
Video
Compression using HandBrake
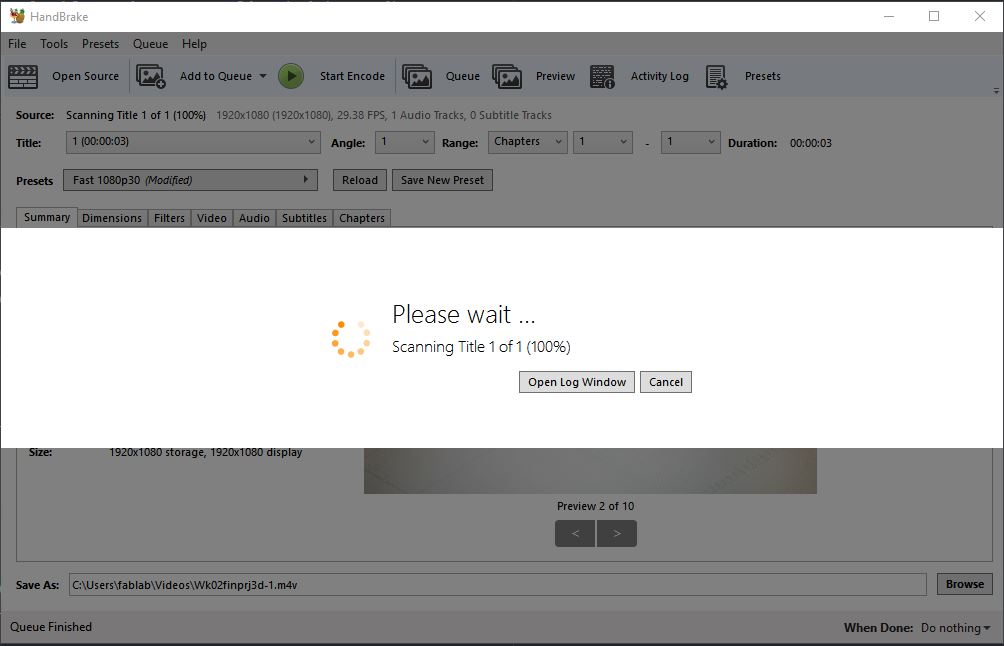
HandBrake is a tool for converting
video from nearly any format to a selection of modern, widely supported codecs.
Using HandBrake, I managed to compress my final
project video into a web optimized video. Using HandBrake,
my new video is compressed to 32% of my original video (7185KB to 2310KB)
Drag
my video into HandBrake window
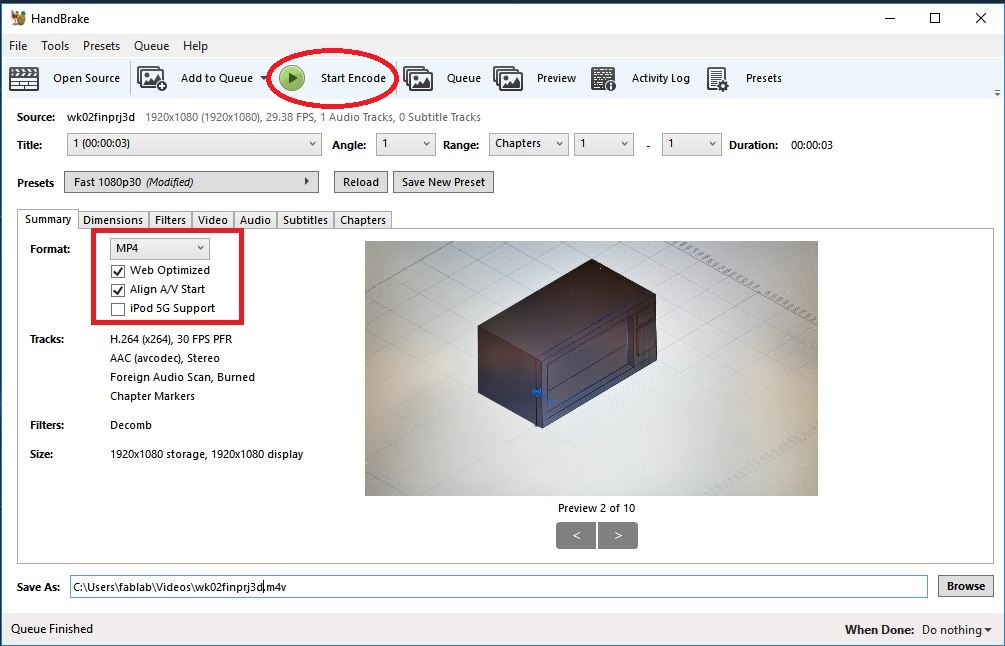
Select
MP4 and Web Optimized. Confirm by selecting Start Encode, and a compress video
will be generated.
Video for Final Project
Citation
(1) reference from URL
on 110220: https://en.wikipedia.org/wiki/Raster_graphics)
(2) reference from URL
on 110220: https://en.wikipedia.org/wiki/Scalable_Vector_Graphics
(3) reference from URL
on 110220: https://www.dreamstime.com/betta-fish-siamese-fighter-line-art-tattoo-design-image153466354
(4) reference from URL on 110220: https://www.youtube.com/watch?v=XNEnQW_rOGw
(5) reference
from URL on 120220: https://youtu.be/C0tg2mRroSY
(6) reference
from URL on 120220: https://www.pinterest.com/pin/693695148834840215/