Exercise 17. ⚙ Machine Building 🔧📽🚀
This week is a fun week because as a group we are supposed to:
1. Design a machine that includes mechanism + actuation + automation
2. Build the mechanical part and operate it manually to demonstrate the mechanical mechanism,
With the Covid-19 situation in our mind, we decided to design and build an automated soap/sanitizer dispensing machine.
The details of the design is documented in THIS GROUP PAGE.
I was tasked to design the dispensing mechanism and in this individual page I will document the process of designing the mechanism. I will use Fusion 360 to design and simulate the mechanicsm.
But because we still don't have access to Fab Lab, I will solely describe the design process.
⚙Design of the dispensing mechanism🍾🍼
There are many resources available on the hand soap/sanitizer dispenser. To evaluate them, we decided to use these criteria:
1. It allows the changing/replacing of the bottle of container easily
2. Must include a simple mechanical system that allows containers with various shapes and dimensions
With these 2 criteria in mind, there were 2 resources that I closely examined, they are:
1. Fabri Creator design.
2. Mr. Innovation design.
With these 2 design concepts in mind, I combined some of the best aspect of both and build upon those 2 designs.
To design the parts, I downloaded and build upon the .stl files of the Fabri Creator design and modified the files into a f3d file which is the native fusion 360 files that consist of components and solid body.
Stl file is mesh file made up of triangles surfaces. It is a surface, not a solid body, it stands for "Standard Triangle Language".
Mesh file is collection of vertices, edges and surfaces that define a 3-dimensional shape.
It is almost impossible to modify .stl files hence I need to learnt how to convert stl files into f3d files.
This is a great tutorial on how to do it.
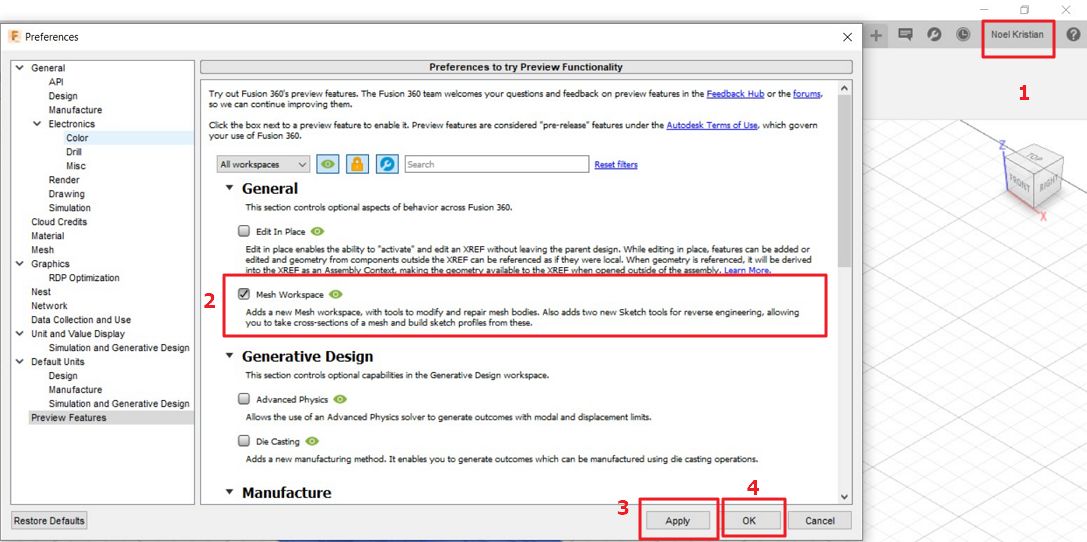
The first step is to enable mesh workspace is enable by selecting preferences from the profile drop-down menu and select preview and tick the mesh workspace as shown below.
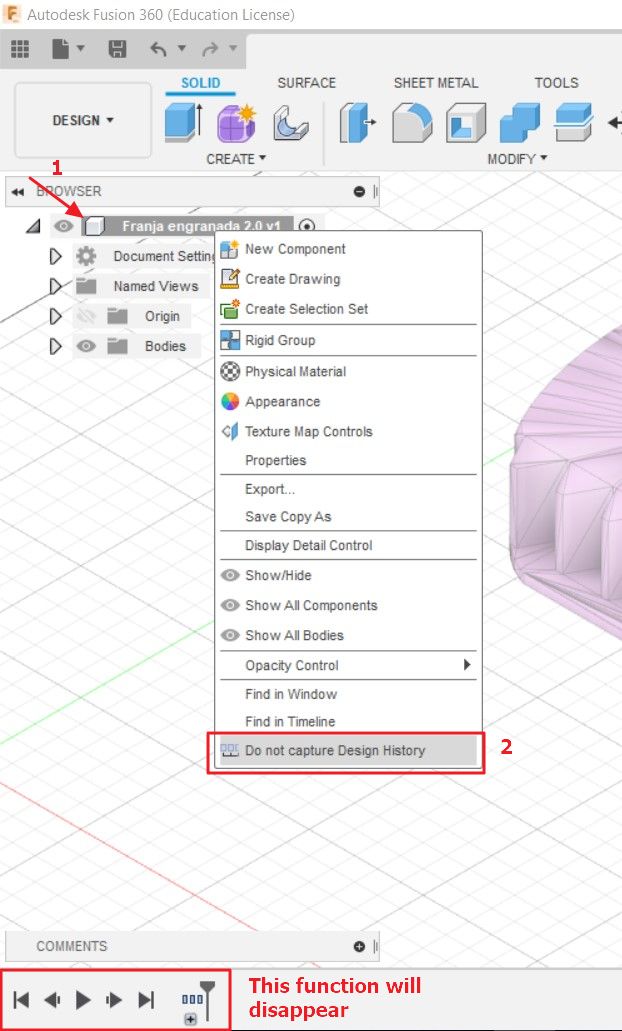
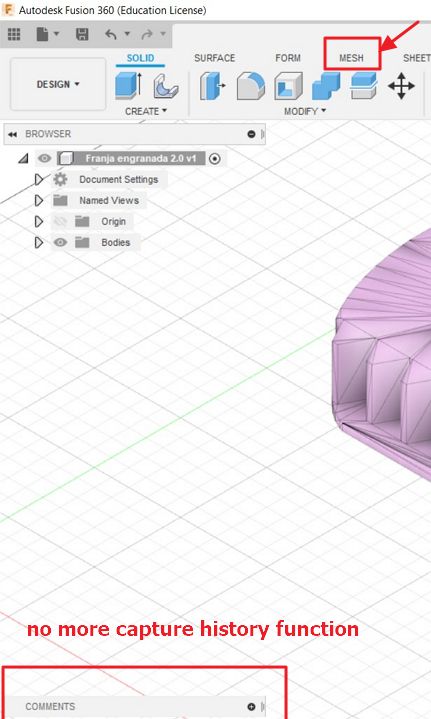
 In the mesh workspace, the design history is not able to be captured. Hence we need to disable this function by clicking on the file and select "do not capture design history" as shown below. After doing this then we are able to work in the mesh workspace (this can't be selected if the design history is still captured).
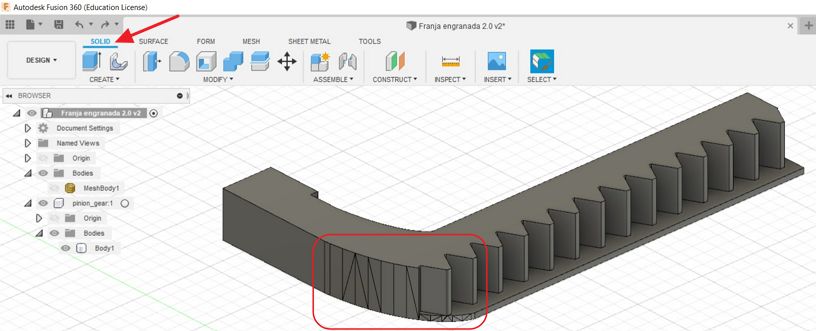
The next step is to convert the mesh into body by right clicking on the mesh surface and select mesh to Brep as shown below:
 Under the select mesh, you will see 2 options, as a new body or as a new component. Select as a new component.
Now we have new component. The next step is to reduce the number of faces significantly by merging them. The easier way is to delete few triangles on the flat plane and fusion360 will attempt to combine the facets hence the number of facets will reduce significantly.
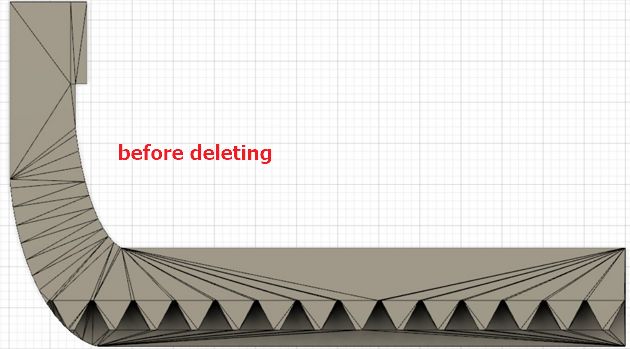
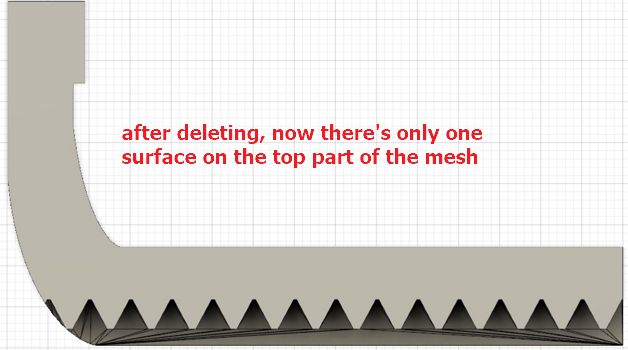
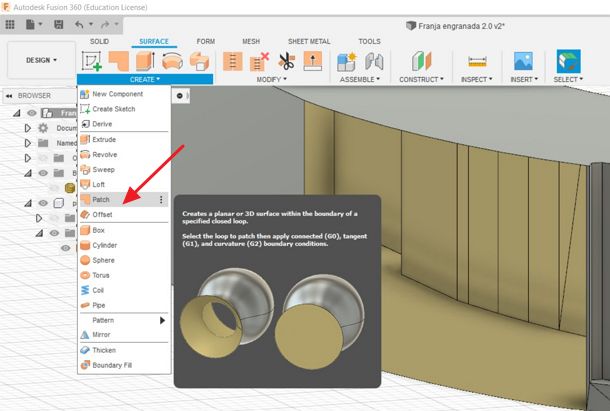
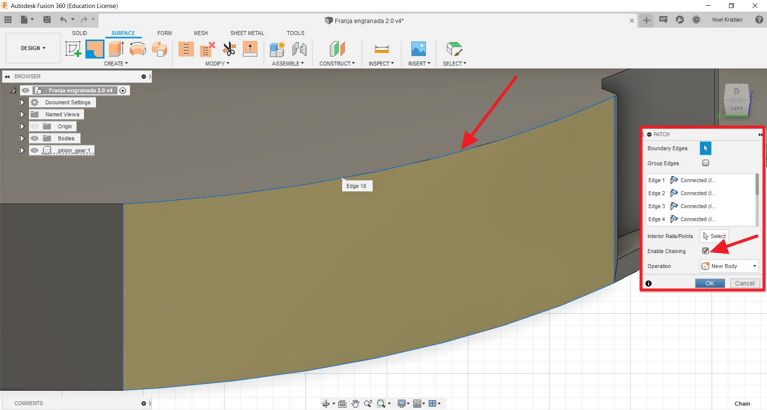
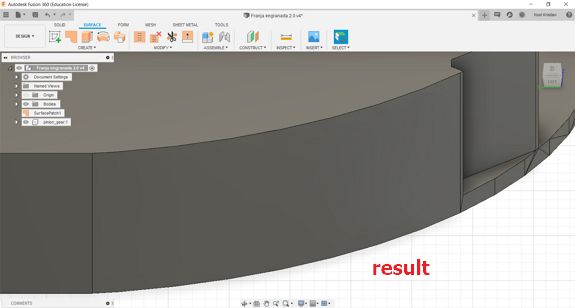
 For the triangles on curve surface, this method can't be used. One of the way is to select to work under the surface tab and select patch after deleting the triangles that we want to merge.
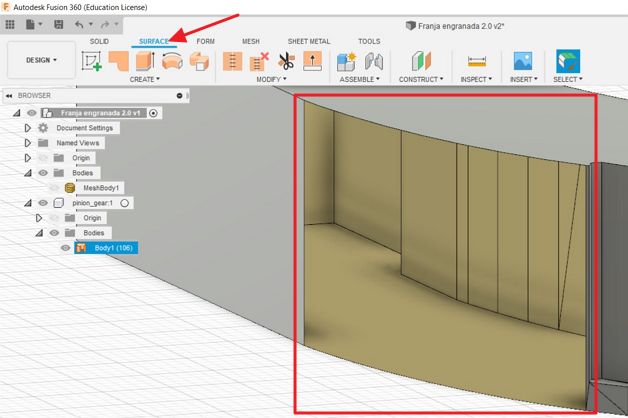
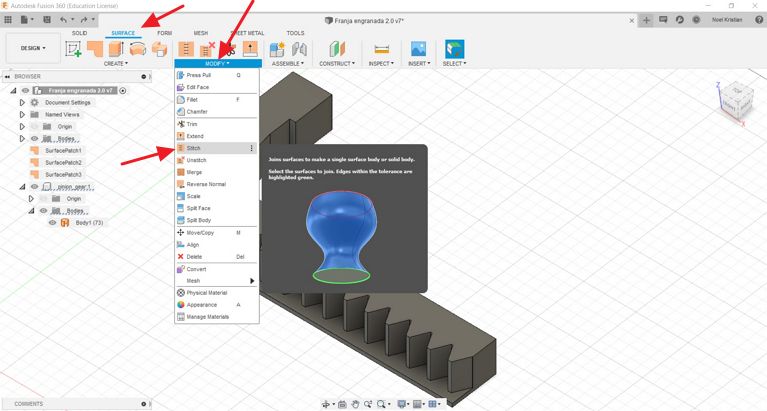
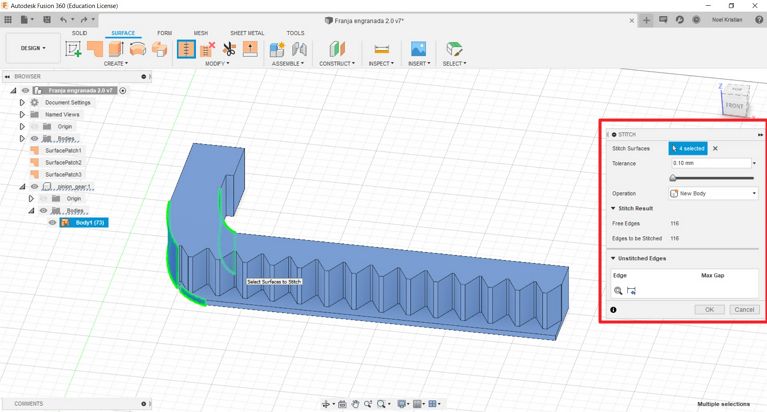
The last stage is to stich all the surfaces to form a single solid body that we can use to work on fusion 360.
Under Surface tab select > Modify > Sticth and then select all the surfaces that i want to join together. Result is shown below:
to download the .f3d file of the pinion gear.
By following similar steps, I turned all the .stl files into easily modifiable .f3d files
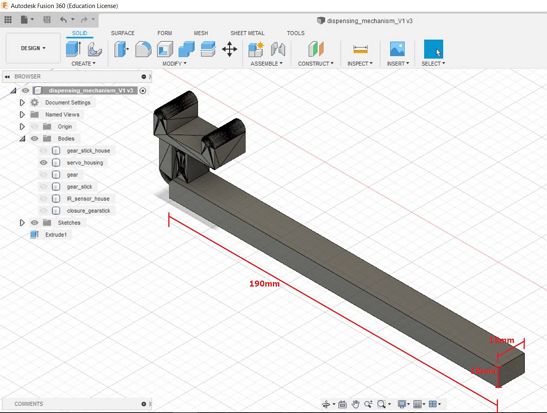
Using that design, I modify the dimension and add a bar as a support for the rotating bottle mechanism.
by using ht hand sanitizer bottle as reference (190mm height), i added the bar that 190 mm tall, 10 mm thick and 15 mm wide.
 The completed Fusion 360 design files can be seen and downloaded in the GROUP PAGE
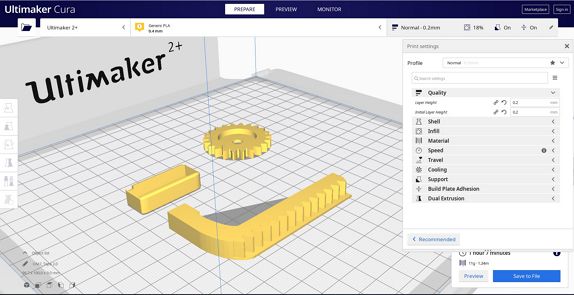
I use 3D printing to make all the parts as shown below.
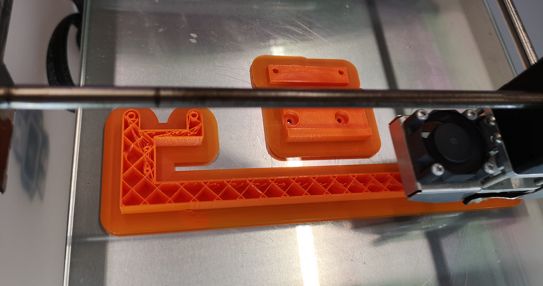
And after finish printing all the parts, I tested them to see how the parts function altogether.
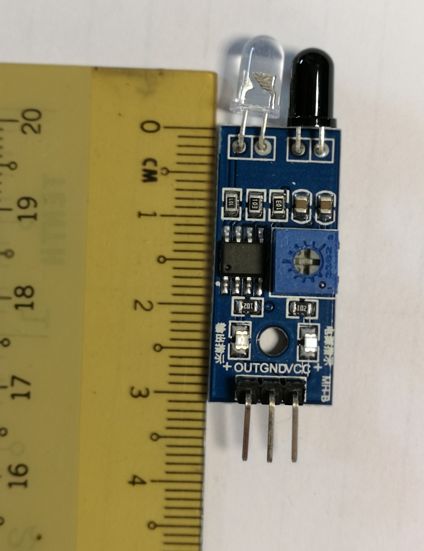
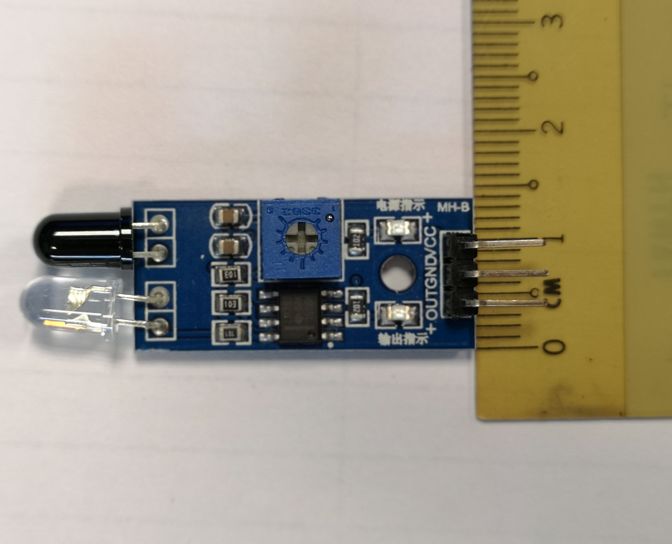
But then I realized few problems. FIRST the IR sensor housing is too small, hence I need to redesign the IR sensor housing by measuring the actual size of the IR sensor.
And the design in Fusion 360 can be seen below:

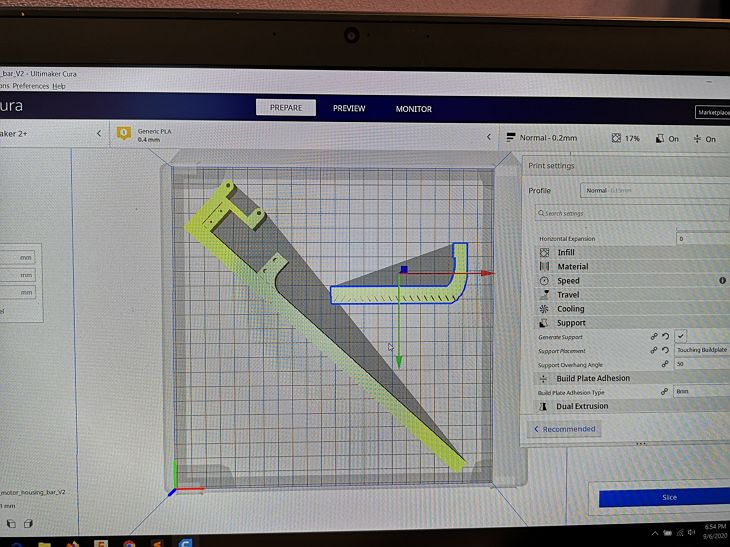
SECOND the bar was too short when it is mounted on the bottle changing mechanism, hence I need to design the bar to be taller to 230mm. But when I want to 3D print this bar, it exceed the size because the base plate of the Ultimaker 2+ that I used is only 223 mm x 223 mm, hence I need to reorient it into diagonal like shown below.
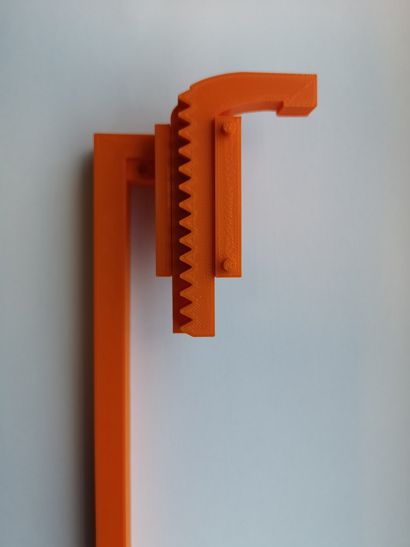
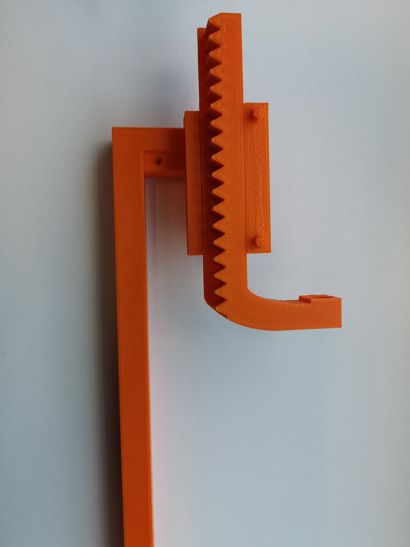
THIRD The rack design is reverse, where the part that will push the top of the bottle down to dispense the liquid should be at the bottom, not at the top as shown on the 2 figures below. Left figure is the old design and right figure is the new design. I also make the rack 2 cm longer.
to download the .f3d file of final dispensing mechanism.
to download the .stl file of final dispensing mechanism.
After finish printing all the mechanical parts including the bottle changing mechanism and the base by Ting Kok Eng, we tested the mechanical parts altogether to see how they functions as a system as shown in the video below:
After the other 2 members completed the electronics design and everything is assembled, all parts working well together as seen below:
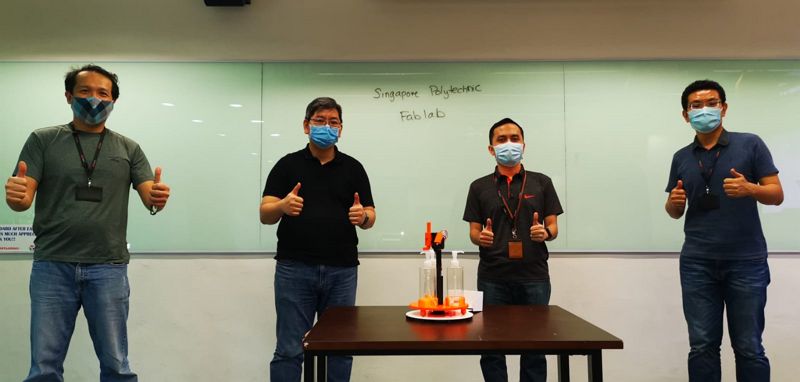
Groupshot of the group that made this automatic hand sanitizer dispenser.