12. Molding and casting
This week I worked on milling a mold, mold silicon inside, and cast candies in silicon mold.
Assignment:
   group assignment:
      review the safety data sheets for each of your molding and casting materials,
         then make and compare test casts with each of them
   individual assignment:
      design a mold around the stock and tooling that you'll be using,
         mill it (rough cut + (at least) three-axis finish cut),
         and use it to cast parts
For this week I decided to make candies, as haribo crocodiles. I will mill wax on the CNC, then mold food safe silicon, and after cast gelatin melt candies.
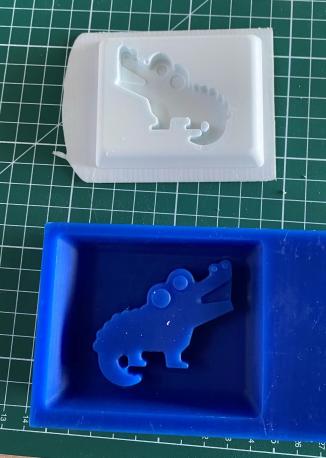
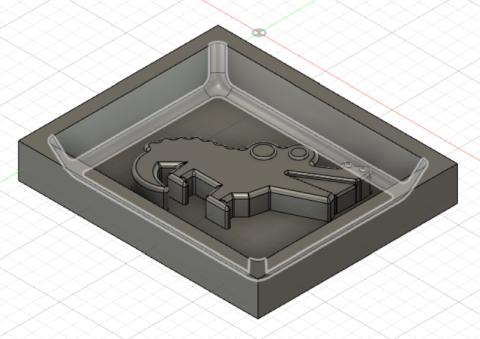
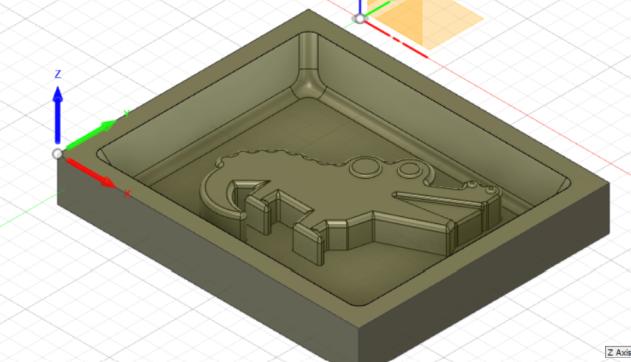
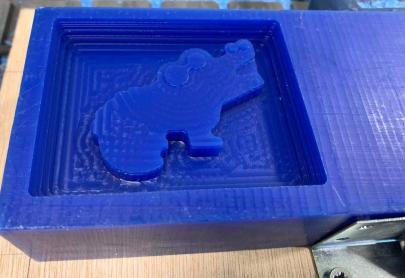
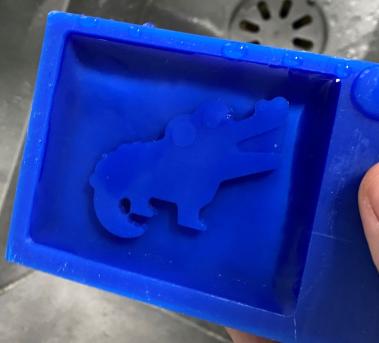
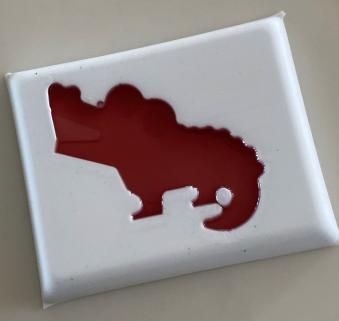
Hero shot of the molds: 7 cm by 8 cm.
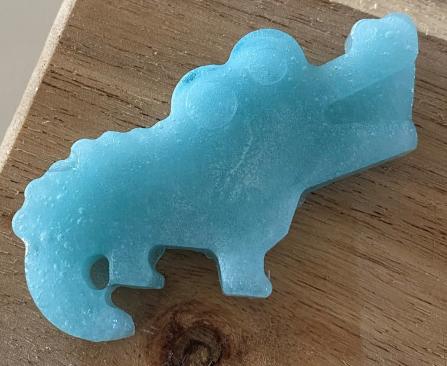
Candie made of melt gelatin candies.
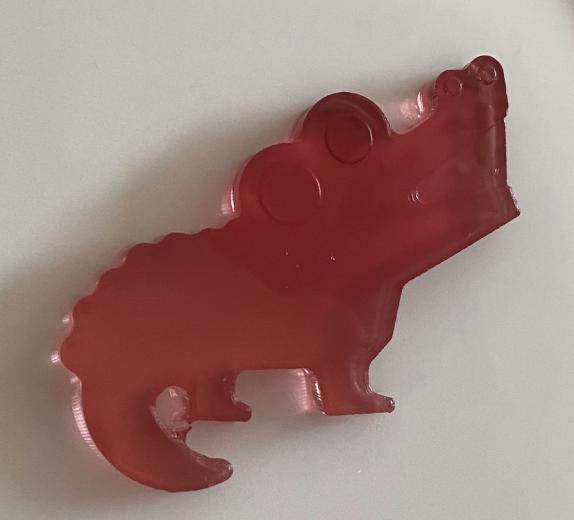
Candie made with gelatin sheet and grenadine syrup.
Design on Autodesk Fusion 360
To do the drawing, I looked for a picture of small crocodile on internet. I found a cover of a french book.

Then with Inkscape I trace the vectorized line to be able to import the picture in Autodesk Fusion 360.
To do that I imported my image in Inkscape, did a right click and trace Bitmap.
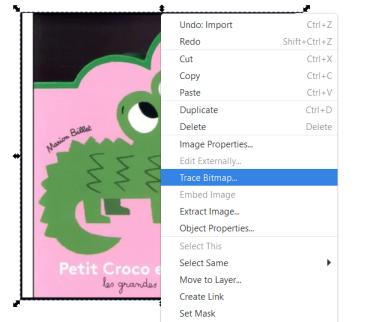
I checked the update part at the right to see the image it will do accorcing to the setting.
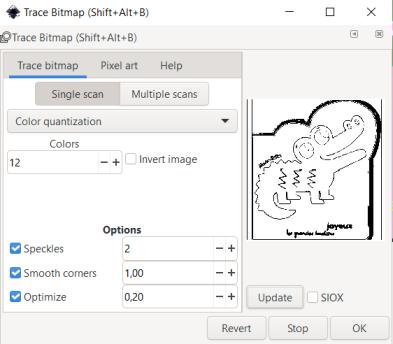
And then I removed all the lines from the vectorized image I do not want.
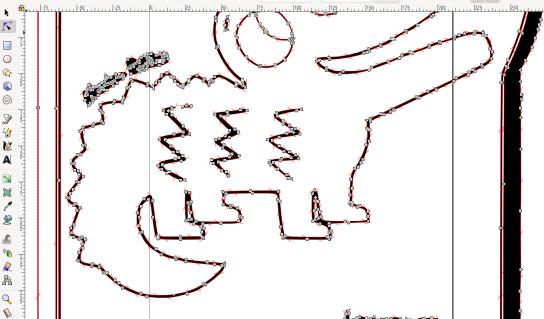
And this is the result.
From this sketch, first I tried to extrude the shape like that, but when I did the fillet, it comes to many problems because of the constraints on the sketch, the sketch is too complicated. I tried to remove the back of the crocodile and do only circles, then extrude the crocodile in different parts as seperated bodies.
At the end I didn’t reach to make one simple body that can be easily milled with the CNC.
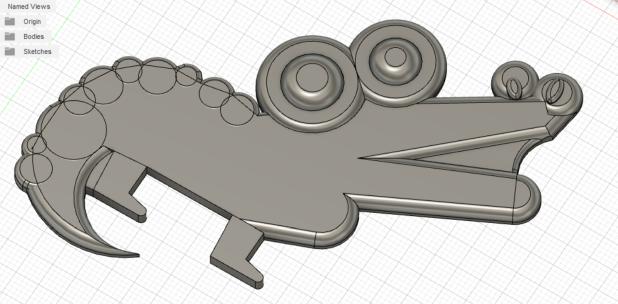
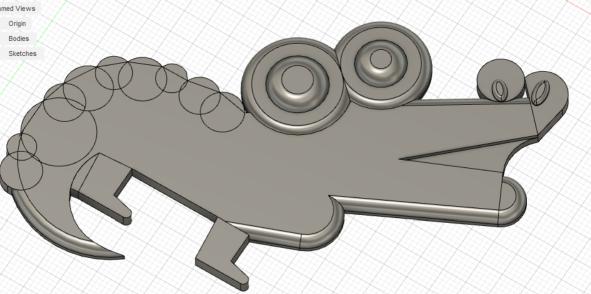
I decided to make another crocodile with only simple shapes, circles and straight lines. I drew my other crocodile on a sketch above the drawing I have made with Inkscape. It is like the rough shpae of the crocodile.
Now I am able to extrude it and have fillet everywhere.
To do the eyes and the nose I extruded it a little bit more and add fillet.
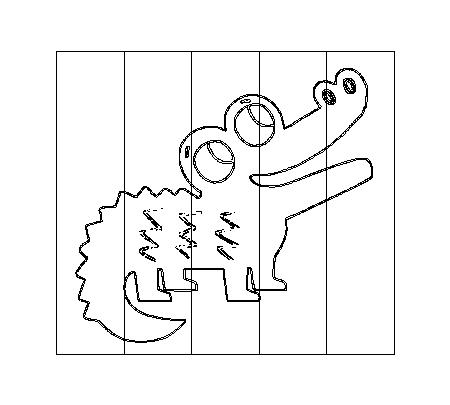
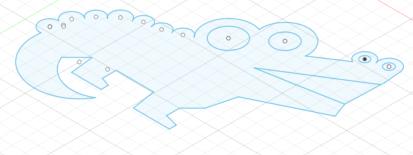
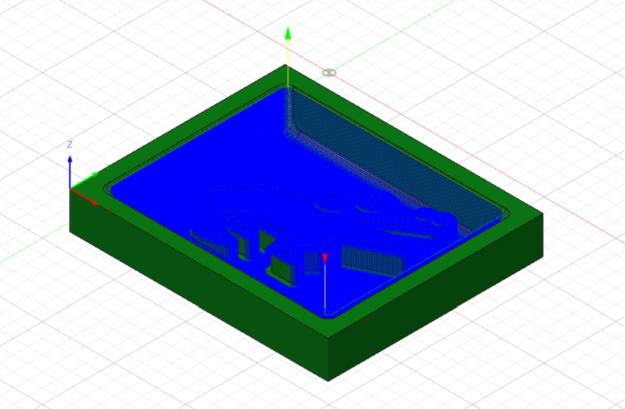
To make a mold around the shape, I drew rectangles around the crocodile that not exceed the width of my piece of wax.
When I will put the silicon inside the mold, I have to give the edges of the mold some obtuse angle. I add some fillet to smooth the shape.
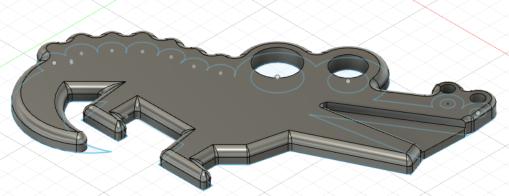
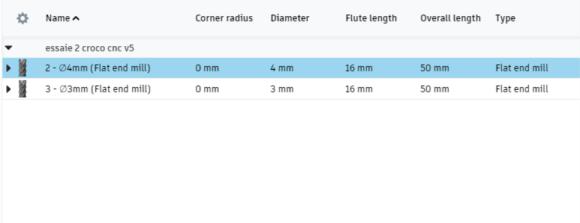
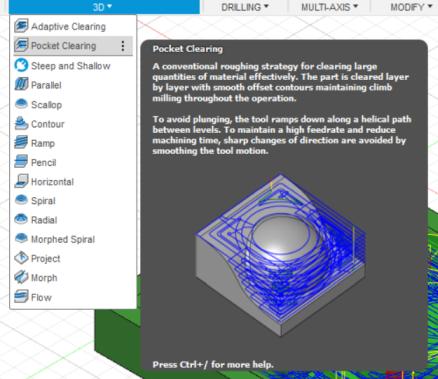
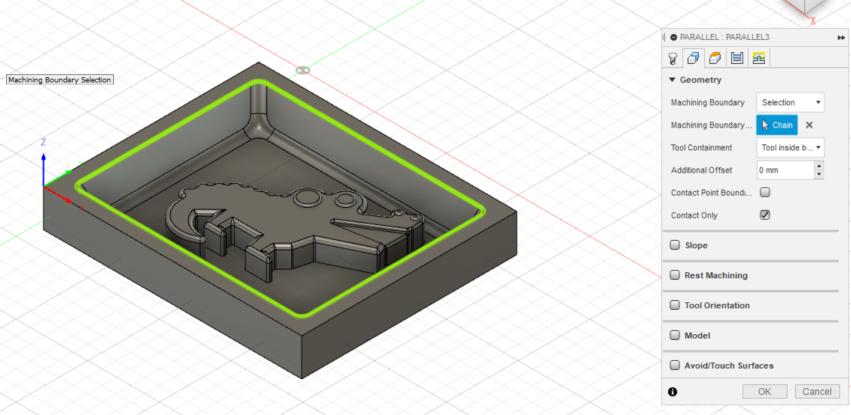
For the manufacture process, Theo helped me to find the good settings of the milling. First I did a pocket clearing with a 4 mm flat end mill and then to do the finishing, I did a parallel cut (in 3D) with a 3 mm flat end mill. First I set the material to cut, with the right origin in the right direction, according to the CNC device.
I first add those 2 tools in the library.
I first selected the pocket to do a rough cut of my piece, to do it quickly.
After discussing with Theo, I choose those settings for the cutting.
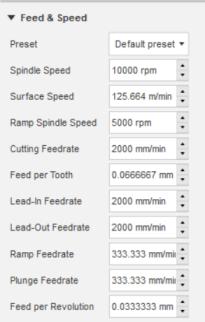
For the boundary of machining I selected the outline of the mold.
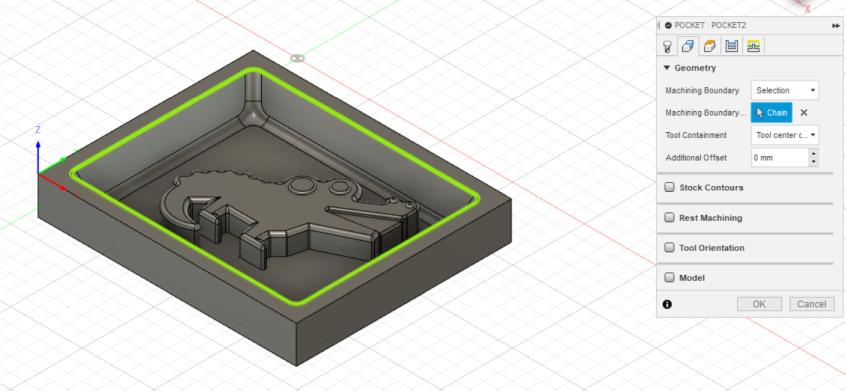
And then the 2 important settings I selected is the maximum roughing stepdown at 2 mm, and a stock to leave at 0.5 mm.
This step takes 12 minutes.
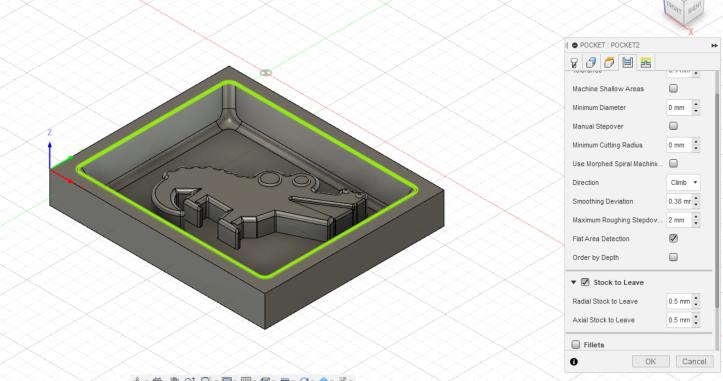
After cutting roughly the shape and the mold, I picked the cut parallel in 3D to have a nice rendering of the mold.
I selected the second tool in the library. Here is the settings for the cutting.

For the machining, I payed attention to select the outline of the mold as the boundary machining as previously.
The stepover of 0.2 mm means that the goings and comings of the tool will be very close.
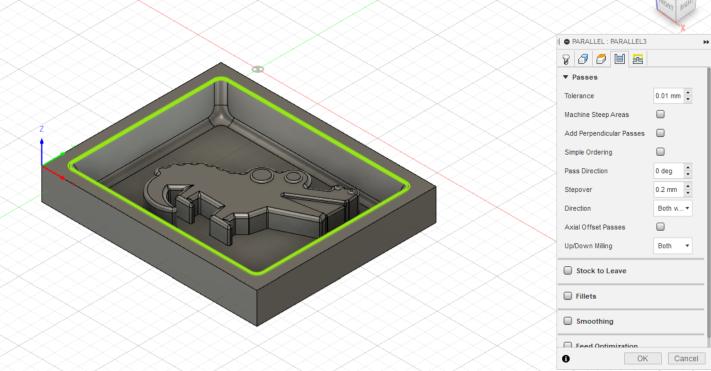
The total time of the cutting in the simulation is 35 minutes. I generate two files for the CNC, one for the pocket, and one for the parallel for the 3D cut.
Milling on the CNC
To mill the wax block, I need to fix it on the CNC.

To do that I use the fixture Theo has made. We use this kind of fixture because the CNC has a vacuum table to hold big material in place, but not small ones. To use the vacuum table, we had to add a piece of rubber around the hole to keep in place the wax with the fixture system. Now we are able to use to depressure table.

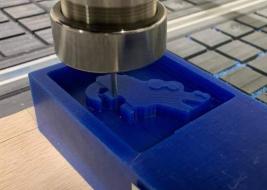
First I launch the file for the rough cut, the pocket. I set the Z as I already did during the computer controlled machining week.
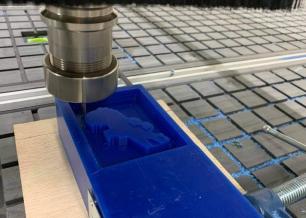
And here the result, we already see the crocodile shape.
Then I changed the tool, and launch the second file to have the parallel cut.
We can see a small layer of wax removed, and the shape refined.
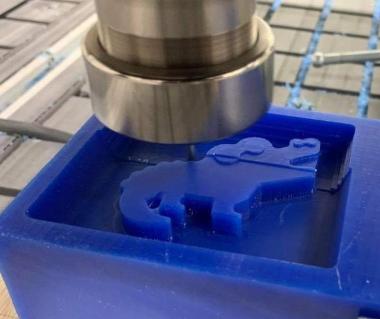
And here is the result.
Molding of the foodsafe silicon
I used a foodsafe silicon RTV 3428 from Esprit Composite. The silicon is made of 2 parts, the base and the catalyzer. I searched on the vendor website the datasheet of the compounds.
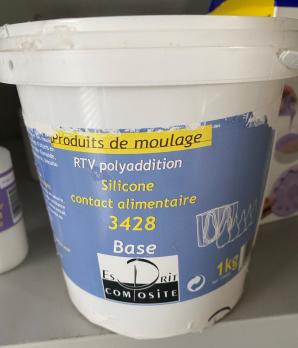
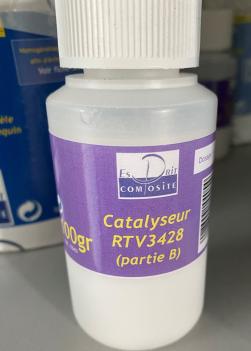
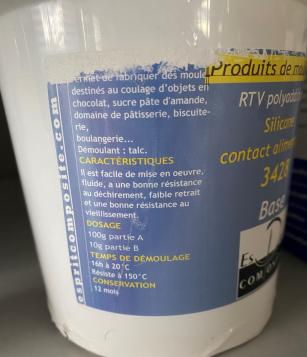
The instructions are written on the pot. The proportion are 100g of A, the base, for 10g of B, the catalyzer. I have to wait at least 16 hours to unmold, and the mold made of silicon will handle until 150°C.
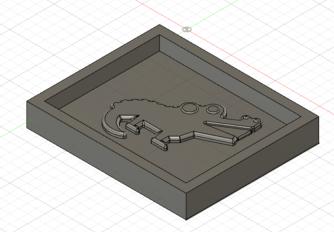
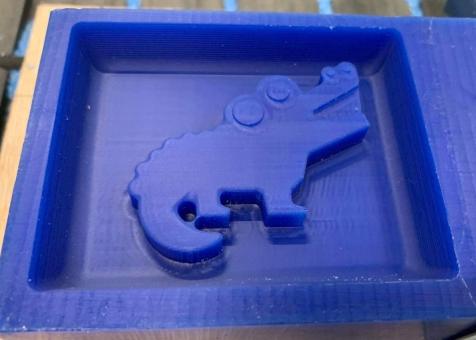
Here is the mold made of machineable wax.
To know which amount of product I have to mix, I fill the mold of water and then pour this water in a glass to see approximately the quantity to make.
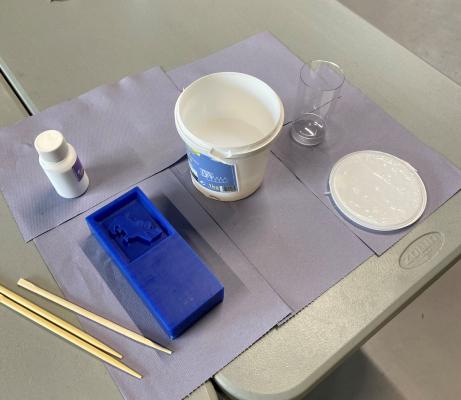
I protected the area of working, and get all the stuff I need to prepare the silicon.
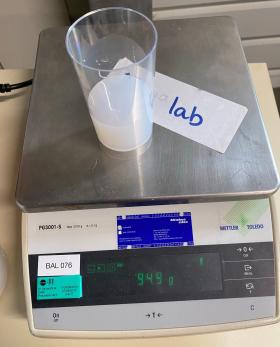
First I put the base part in the glass, the same quantity as the water, and I checked on the weighing balance how many grammes it makes, 95g.
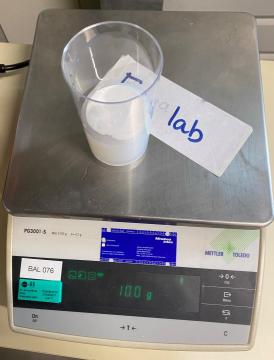
Then I put 10 percent by mass of a catalyzer, 10g. The catalyzer is not that liquid, that’s why it was hard to put the exact amount.
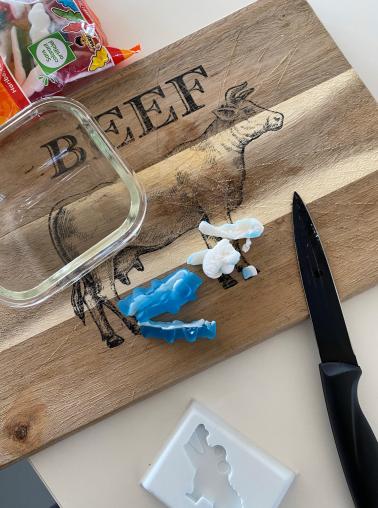
After mixing the two components together, I filled the wax mold with the silicon.
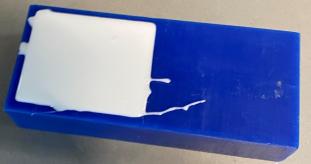
To remove all the air bubbles, I used a vacuum pump.
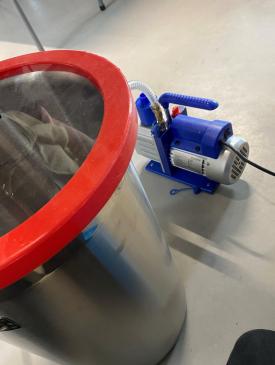
I put the wax mold with the silicon paste in the pot, and then start the pump.
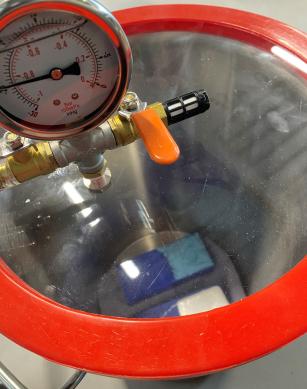
I made the mistake of having too much depressure inside the pot, all the bubbless in my mold have surfaced at the same time, it overflowed. I stopped the vacuum, and I restart step by step. I switched on the vacuum while shaking the pump, then when the air bubble stopped coming, I add a little bit more of vacuum, then I was shaking the pot, and add again the vacuum until having a complete vacuum without overflowing the silicon everywhere, and no more air bubbles that go up, it took an hour.
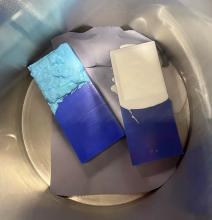
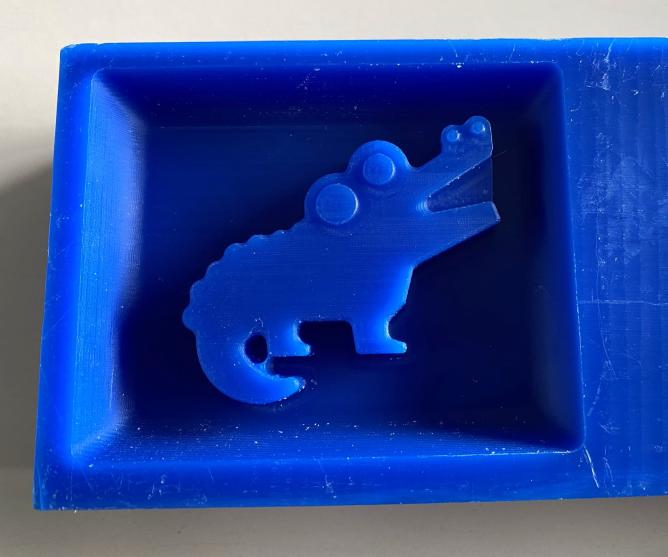
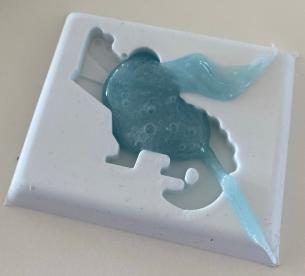
And after waiting during the whole weekend, I unmold the silicon very easily and here is the result.
Datasheet of foodsafe silicon
Here is the datasheet of foodsafe silicon RTV 3428. For the group assignment, I read this datasheet, which is in French.
The silicon is foodsafe. For the mix of the two products, it is a ratio in weight, 100g of A for 10g of B. A is the base, B is the catalyzer. It is pretty easy to use because of the viscosity of the components. We can use it under vacuum to do the degassing. It is no irritants or sensitizers to the skin.
Technical details :
| Datasheet | Silicon RTV 3428 A&B |
|---|---|
| Mixing ratio by weight | 100A:10B |
| Viscosity | A: 25 000 / B: 1 000 |
| Time to use the mix | 90 minutes, at 23°C |
| Cure time | 16 hours |
| Useful Temperature Range | up to 150°C |
| Appearance | Viscous liquid, translucid for A, white for B |
| Time for storage | up to 12 months, between -5°C and 30°C, not open |
Casting of gelatin candies
I bought some candies haribo in gelatin.
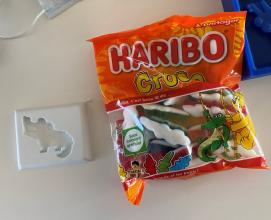
First I wanted to do it quickly, so I removed the white part of the candies, and make them melt in the microwave.
Then I pour it in the mold, but it cold very quickly.
I had to spread it out by hand.
And here is the result. Because I melt the candies in the microwave, the sugar made a lot of bubbles and apparently it denatured the structure of the candies, and not very good to eat.
I did a second test with melting the candies in a bain-marie, to only melt them.
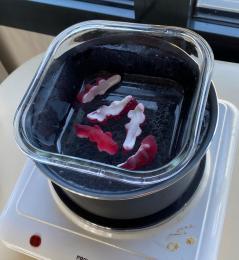
I mixed them. I don’t the exact temperature of melting the candies, but when every candies were melted and it forms a uniform dough, I stopped the melting.
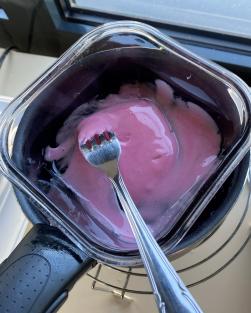
And after I pour it in the silicon mold. The mix is pretty tasty, and still have the taste of candies. The problem is still that the melted candies cold very quickly and it is hard to pour in the mold.
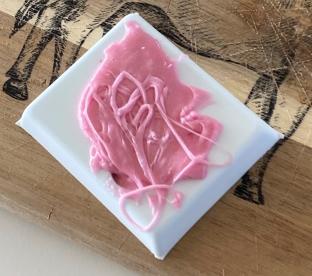
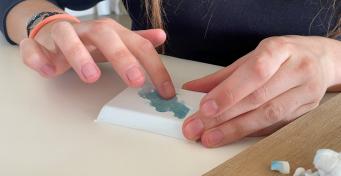
Adter waiting a little bit, around 15 minutes, I unmold the crocodile candie. We can see the shape but not the details.
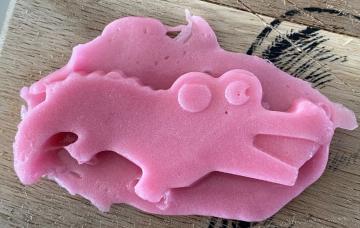
I did a final test with gelatin, water and syrup. I melt a sheet of gelatin in the bain marie, with a spoon of water and a spoon of grenadine syrup.
I put it all the night in the fridge, and at the end the result is pretty good. It has the shape of my crocodile, and the taste of grenadine syrup, and the shape stay like this. It does not have the taste of haribo candies but it still good.
I am happy with the process, the silicon is easy to mold, and doing candies is fun and tasty. I would take more time to draw a better shape, especially removing the small cylinder I have between the paw and the tail, but I am happy with the process and the result.