Wildcard week
WILDCARD WEEK
This is the content we had covered this week:
W15 - Wildcard week
This week was very inspiring but at the same time quite overwhelming week as there were so many things that I’d like to try but I had to focus on doing something that it could help me develop some components for my final project.
After some conversations with Edu, I decided to take a look at Vacuum forming / Thermoforming to try casting the shape for my “pixels”.
THERMOFORMING | VACUUM FORMING
I’ve never used this technique and even though it sounds quite straighforward the machine we have at the lab is DIY so I felt I had to understand well how the process works to avoid messing it up.
STEP 1: DOCUMENTATION
After talking to Den, we decided to work on the thermoforming process together. See her process here
I checked this two very useful resources to learn more about the process. I was really surprised to see how well Isabel’s molds turned out. Not sure if the combo machine + material set was the key in this case.
link to DIY vacuum forming machine by Brent Richardson
STEP 2: DESIGN 3D MODEL TO MOLD
FORM STUDY
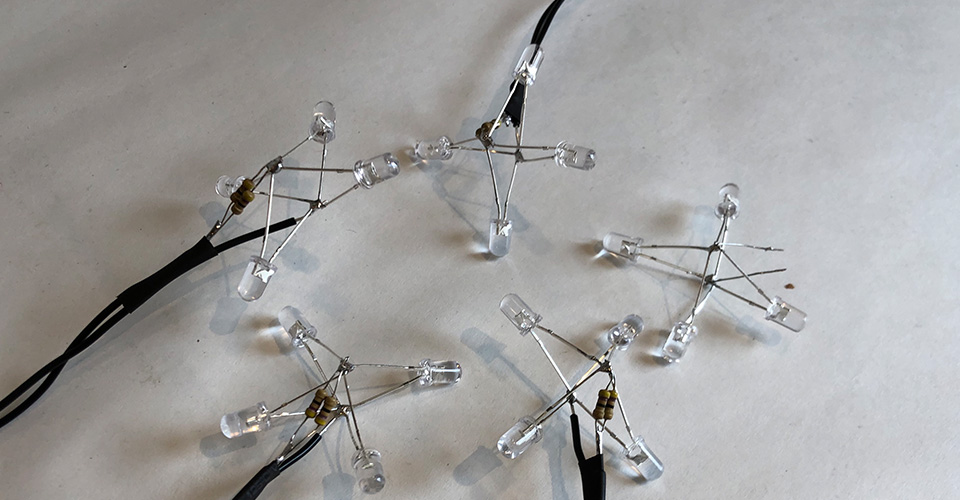
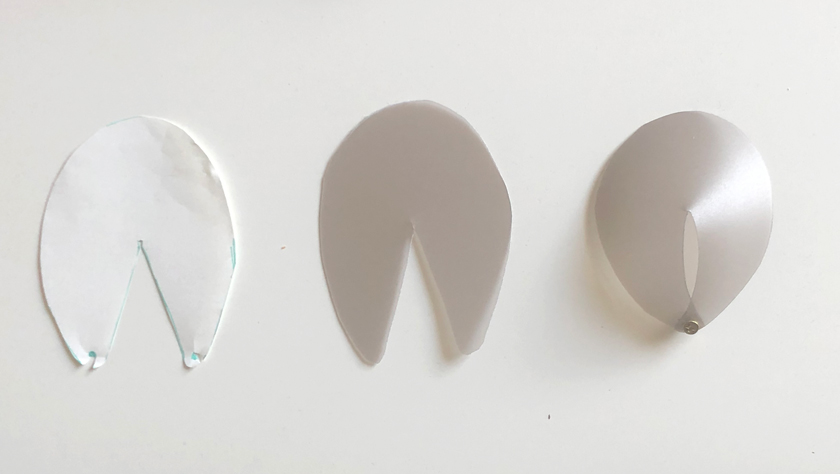
As the form I wanted to achieve was quite tricky to 3D model, what I did was doing first a form study by cutting by hand different pieces of polypropylene and securing them in place with screws.
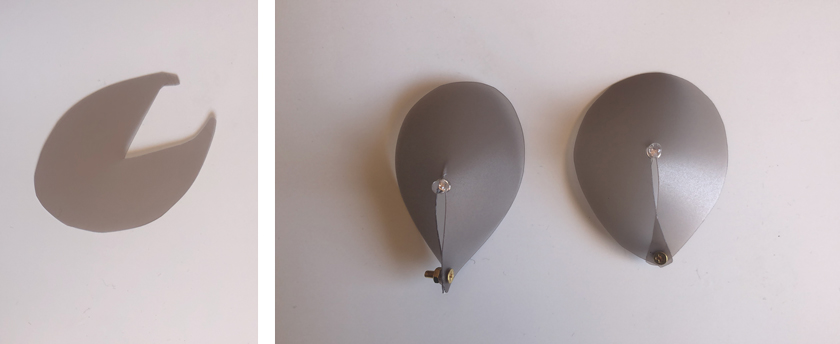
"Hand crafted 3D objects seeking form to 3D model."
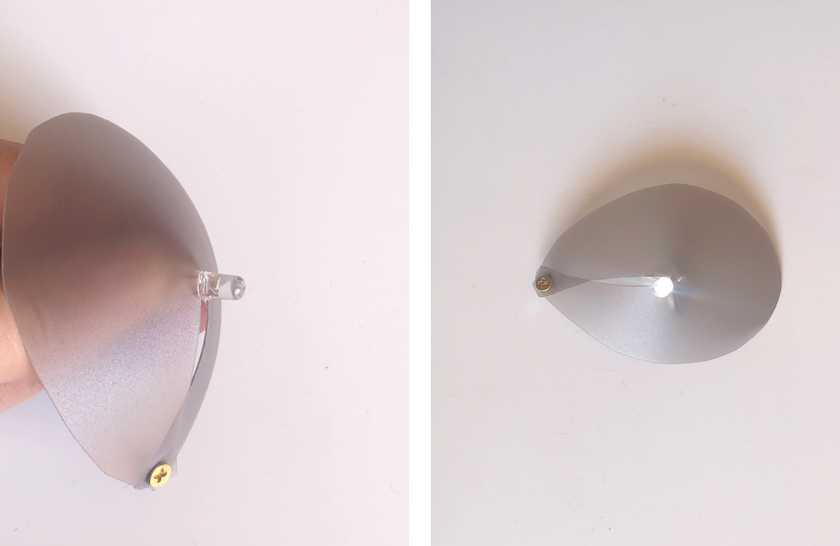
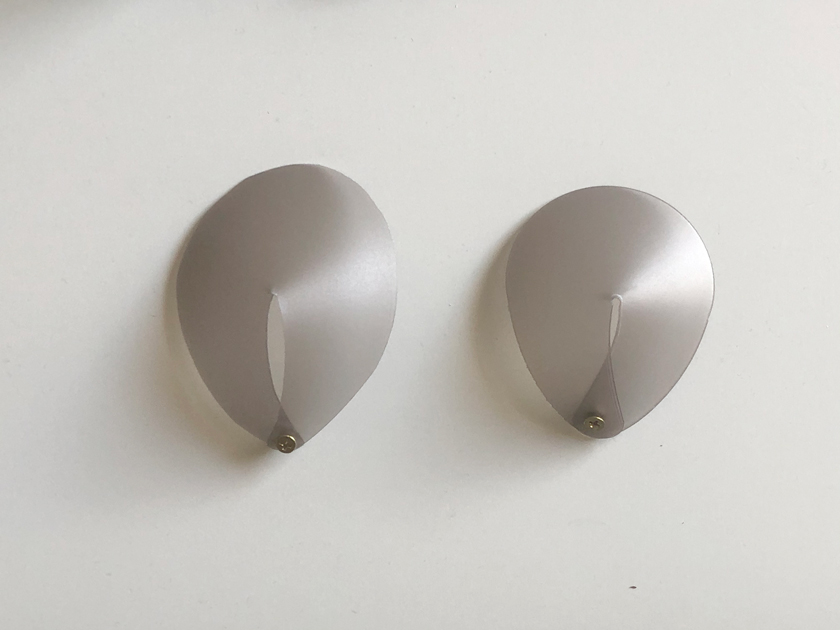
"Hand crafted 3D objects seeking form to 3D model + LED."
3D MODEL USING FUSION 360
By measuring with the caliper one of the cutout shapes I created and designed the form in 3D as close as I could. After a couple of iterations I was able to get quite close to a form I was happy with, which had minimal seams.
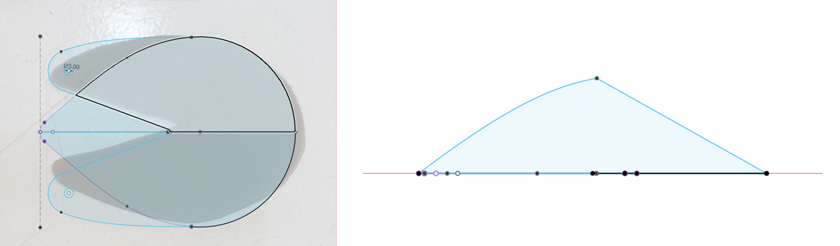
"Building 3D Model from cutout plane."
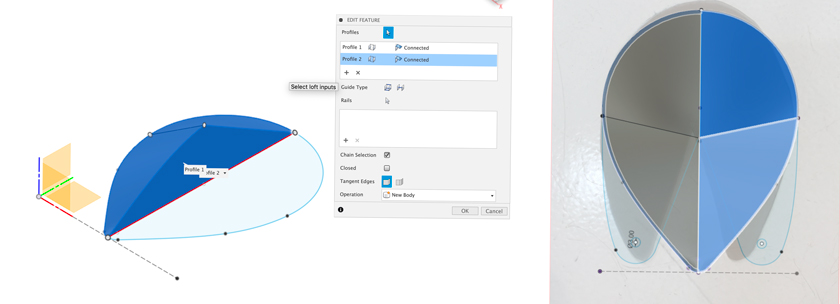
"LEFT: Lofting base + height sides. RIGHT: Mirroring half of the shape to get symmetry."
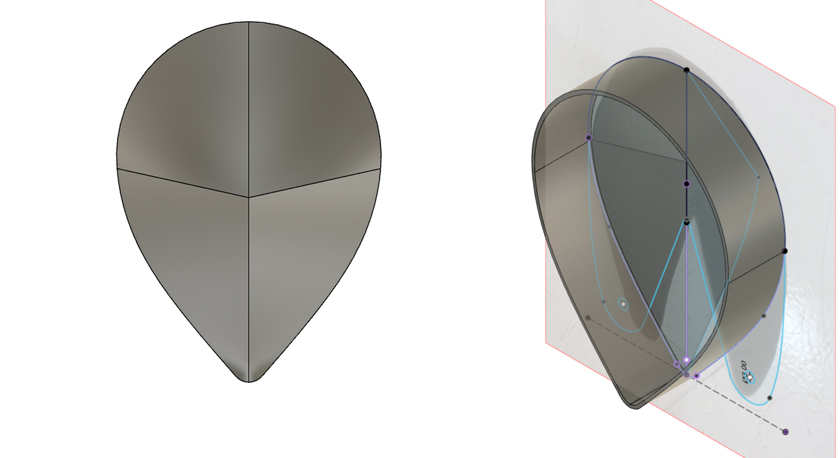
"LEFT: Top view finished model. RIGHT: View from the bottom showing rised base + wall thickness."
Find here the two different pieces I printed. There’s a common part, but one has a base as I thought it could work better with the vacuum to get a seamless piece.
STEP 3: 3D PRINT 3D MODEL TO MOLD
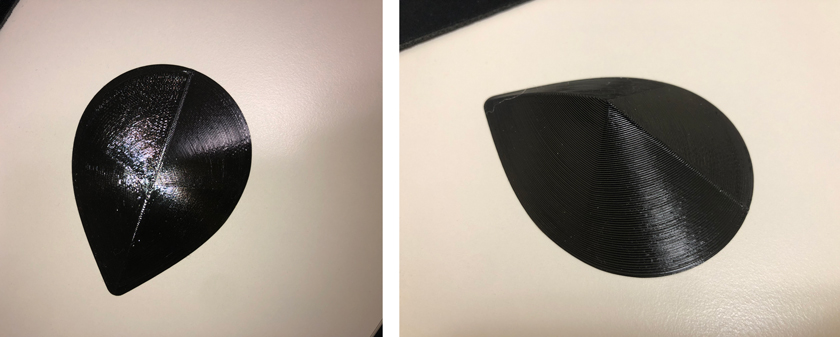
"Hand crafted 3D objects seeking form to 3D model + LED."
Download Fusion 360 File Download Petal STL Download Petal STL with base
STEP 4: CHECK SETUP
After checking that the machine is in a good state we summarized all steps we need to follow to coordinate the process:
- Place material in the frame and lock it.
- Turn on machine connecting the two outlets.
- Place the frame attached to the magnets.
- Wait until the material has heated up, it will have a “belly”.
- Place object/s on the surface with release agent.
- Plug vacuum cleaner on the proper hole
- Grab the frame (with gloves as it’s HOT) and sync to pull down the heated plastic sheet on top of the objects to thermoform.
The theoretical process so far so good.
STEP 5: MOUNTING FRAME
We grabbed the prolypopylene sheet and place it in between to steel pieces that we clamped together using bolts, washers and nuts.
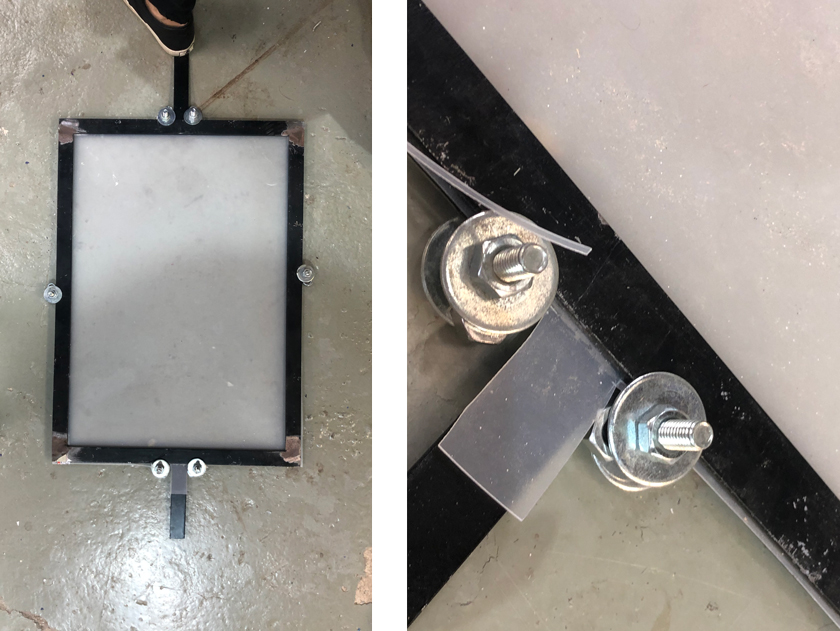
"LEFT: Polypropylene ( Plakene) sheet placed in the frame and secure with bolts + washers + nuts. RIGHT: detail of secured frame."
STEP 6: PLACE FRAME + TURN ON MACHINE
We attached the frame to the magnets on the upper part of the machine and turned on the heaters.
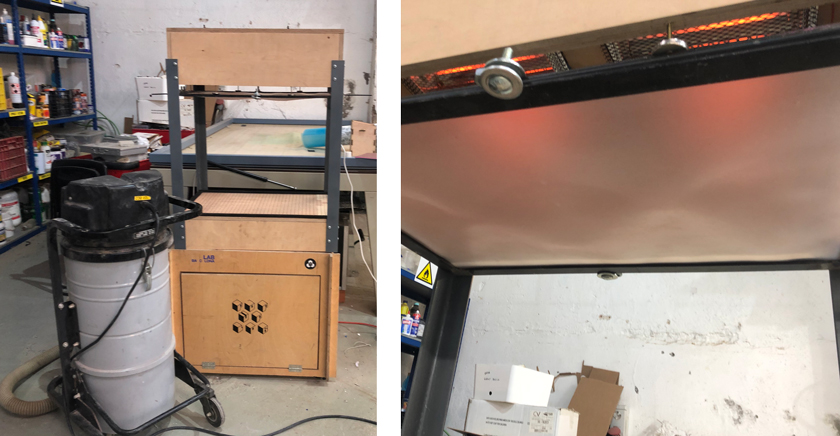
"LEFT: Thermoforming machine setup. RIGHT: Heat turned on."
STEP 7: EXTRA HEAT NEEDED
After waiting for what seemed an eternity we realized that the type of plastic we choose was taking way longer than expected and it wasn’t heating either properly neither evenly. So with Edu’s help we went for a more drastic approach, using a heat gun.
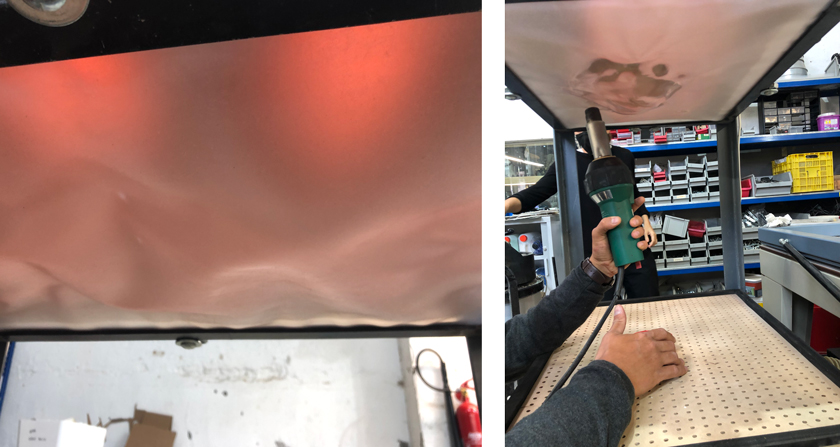
"LEFT: Bubbly plakene. RIGHT: Heating up plakene with the heat gun."
"Heating Plakene with the heat gun."
STEP 8: PLACE OBJECTS
We planned to add multiple objects to reduce the amount of waste of material. We added release agent to all of them to after realize that the area we could use which was properly heated was way smaller.
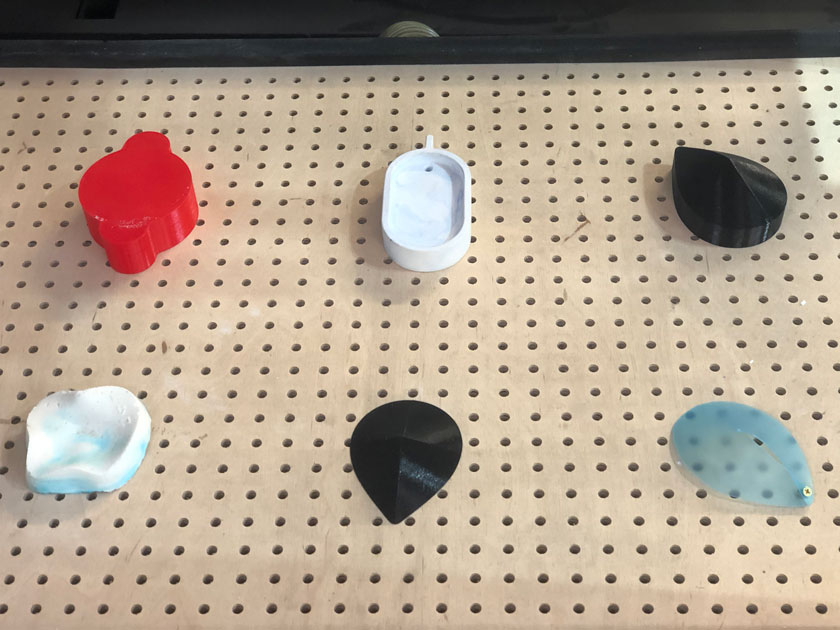
"Original setup."
STEP 9: 1,2,3 GO
So, in the end Den and I chose the objects we were the most interested in thermomolding and went for it with “perfect” sync.
"Finally the awaited moment, creating the molds!."
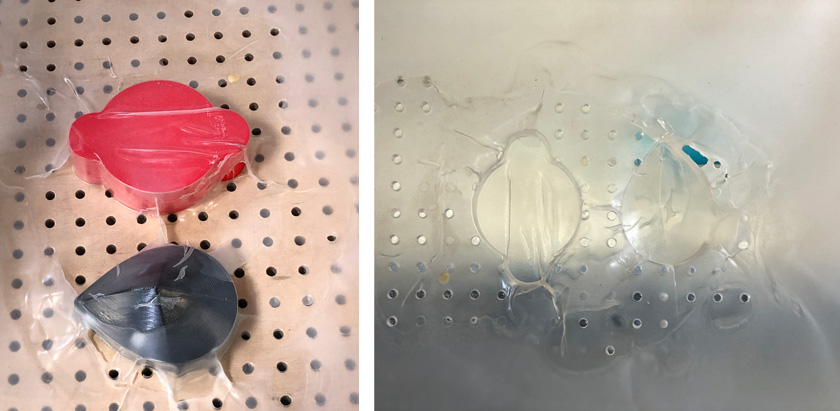
STEP 10: RESULT & EXPECTATION VS REALITY SHOCK
Unfortunately, at least for my expectations, the result was terrible. I could see the many problems we had when heating the material and all the wrinkles resulting from it.
"Original setup."
STEP 11: “HERO” SHOTS
The results weren’t far from what we would hope for our projects. However it was a very interesting process to learn. I’ve decided to move forward with a different technique as polypropylene doesn’t seem a proper material for thermoforming, and it was the material I want to use for my DNA Pixels.
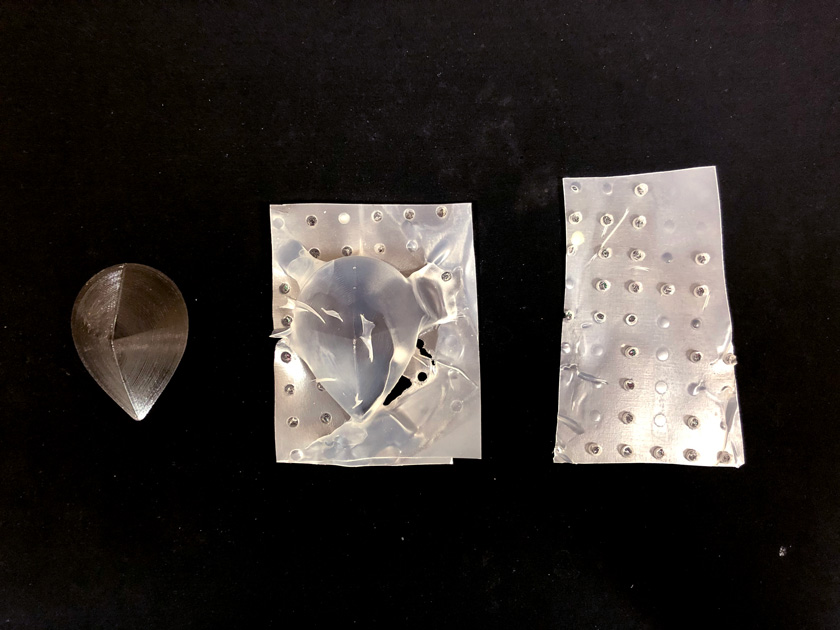
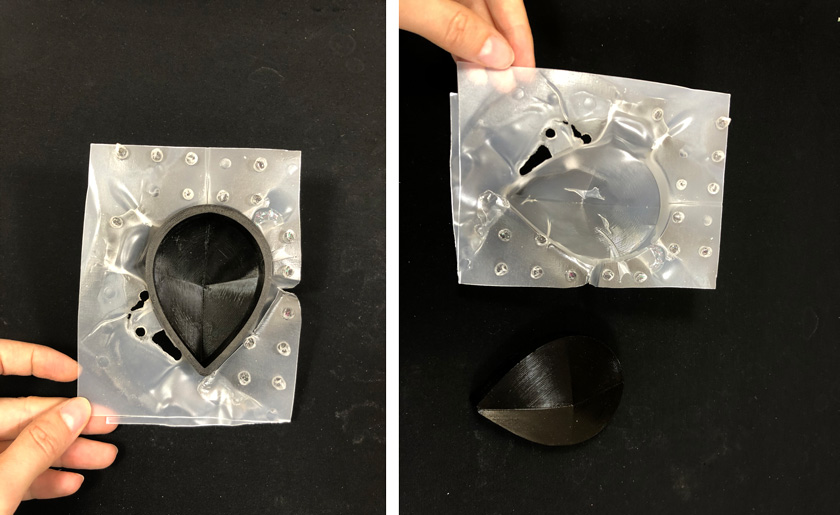
"LEFT: 3d printed piece inside the mold. RIGHT: 3D printed piece + thermoformed mold."
"3d printed piece + mold + scrap with almost perfec vacuum holes."
WHAT WENT WELL
New technique: Because of my background, I had never used this technique. Regardless of the result, it was very nice to learn it and I see myself using it in the future (with other materials).
WHAT COULD BE BETTER
Results: I bet that the results could be better using any other plasting that doesn’t need that much heat. I wished it had worked because it could have been a very nice way to solve my serial production for the pixels.
BONUS TRACK | DEVELOPING THE PIXELS
Even though thermoforming didn’t work as I expected to create the final form for my petals; I decided to keep working on them to advance on this part of the spiral. So my plan is to solve 4 issues:
- Polypropylene pixel
- Pixel rod attachment
- Gear shaft
- Led wiring management
POLYPROPYLENE (PLAKENE) ROTATION PIXEL
CREATING FINAL PIXEL DESIGN
As the shaped I created for the Thermoforming design it was one I quite liked a lot, I decided to base the final one from one of the hand-made designs.
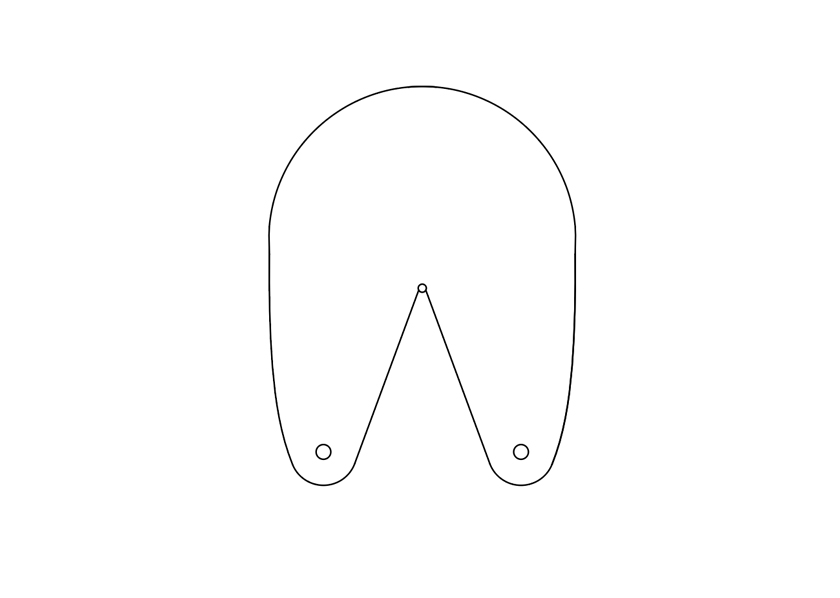
"2d design for the Plakene cut out. It includes a middle circle as a relief for the material's tension"
Download Illustrator File Download eps File Download svg File
LASER CUT BLUE PLAKENE COVER
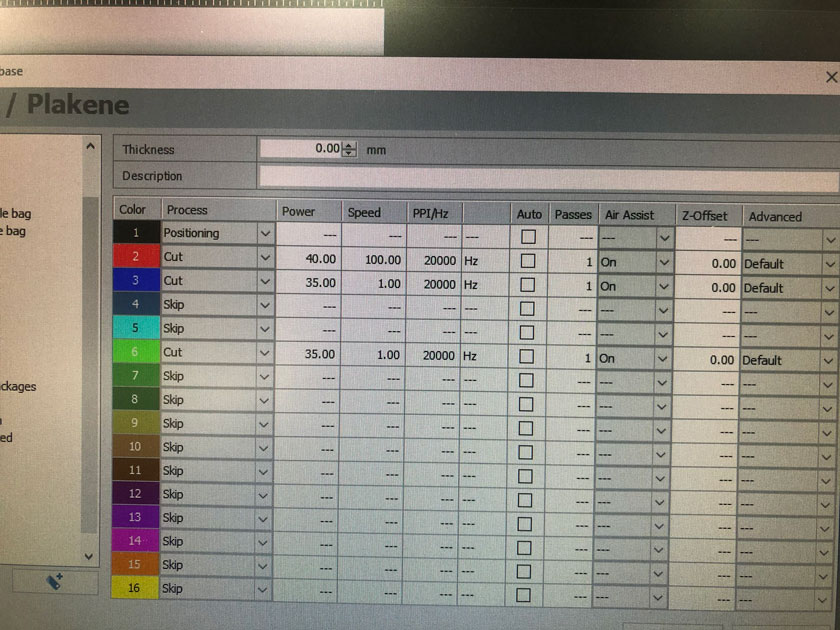
"Trotec Laser cutter settings for Plakene ."
"From paper to laser cut pixel form."
"Finding right diameter for the inner stress circle."
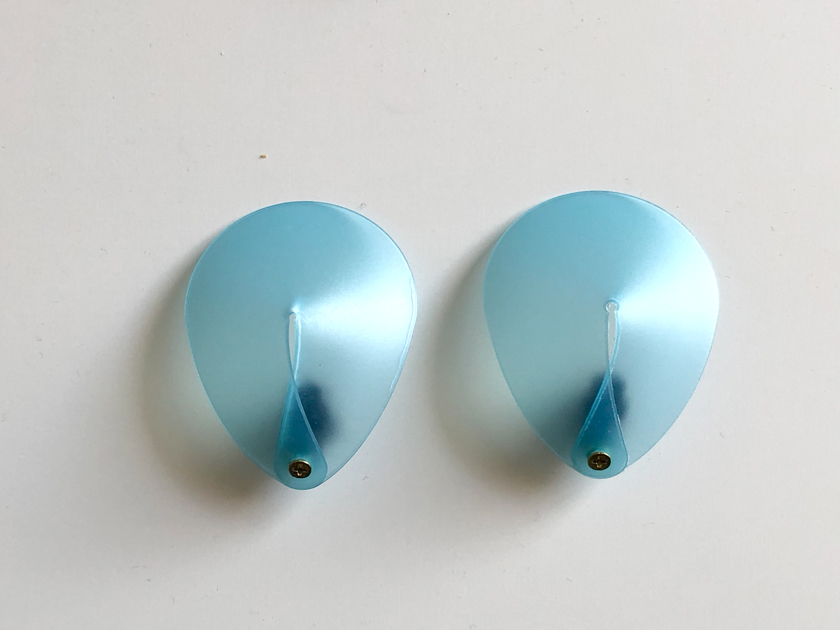
"Finding right diameter for the inner stress circle using final material (blue plakene)."
PREPPING ALUMINIUM RODS
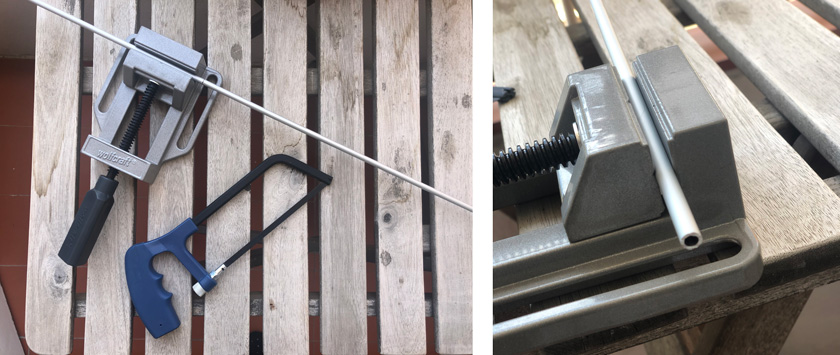
"LEFT: Aluminium rod ready to be cut. RIGHT: Rod after cutting."
DESIGNING A GEARED SHAFT FOR THE GEAR BOX
This part was crucial to find the best part possible to connect the gearbox to the pixel.
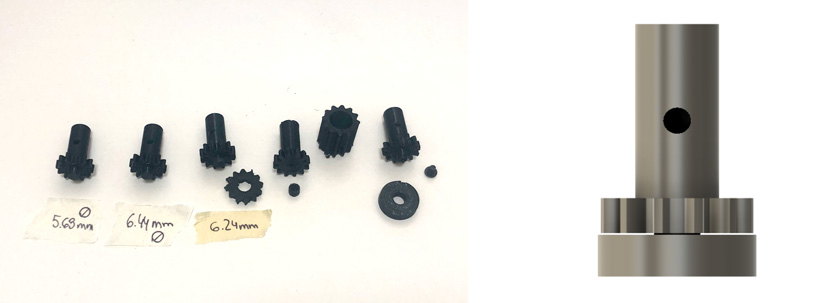
"LEFT: Design evolution for the geared shaft (3D printed). RIGHT: final 3D model for the geared shaft."
ROD TOPPER JOINT | PIXEL ROD ATTACHMENT
I had to design a piece to connect the rod to the blue pixel piece. I had two iterations until the final form, see process here.
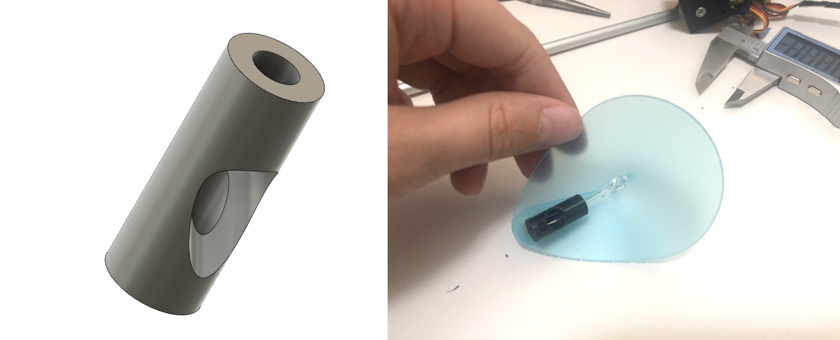
"LEFT: 3d model first design for the rod topper piece.RIGHT: Testing fit for the piece."
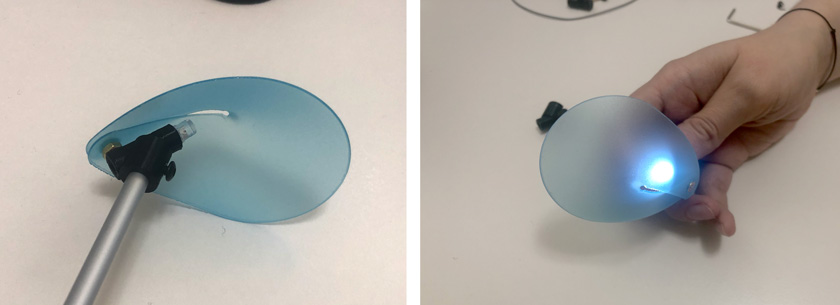
"LEFT: Second iteration of the rod topper (3d printed). RIGHT: Testing Led on the pixel."
PIXEL ASSEMBLY
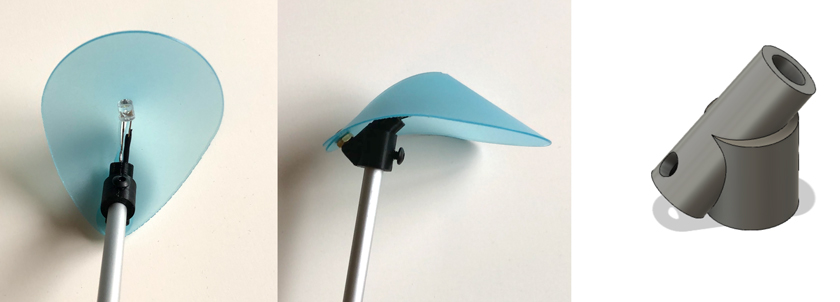
"LEFT: wired led inside the pixel. MIDDLE: side view of the attachment. RIGHT: 3D model of the final attachment."
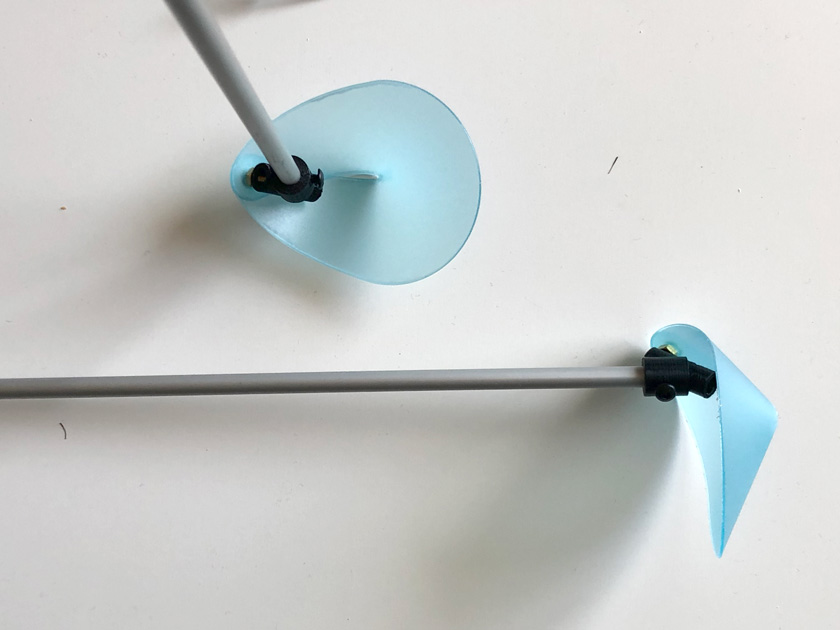
"Different views of the assembled pixel."
WIRING MANAGEMENT
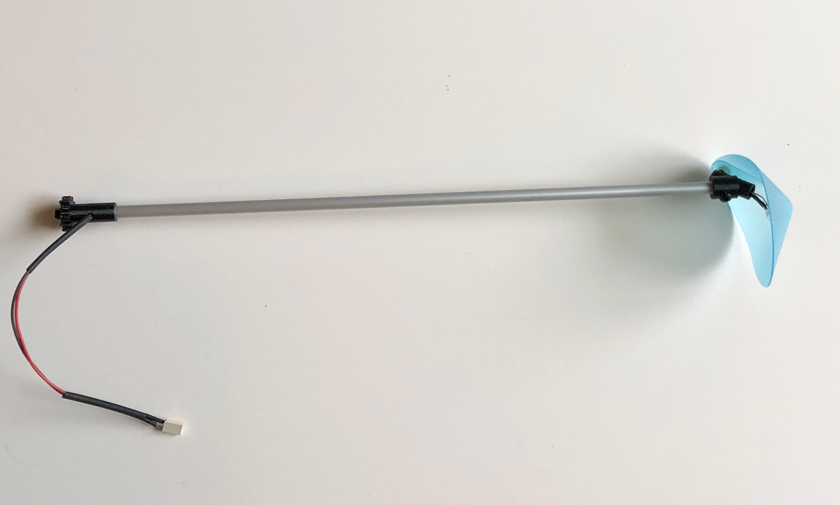
"Finished pixel ready to be attached to the gear box including wiring."