3D Printing and Scanning
3D PRINTING AND SCANNING
This is the content we had covered this week:
W5 - 3D printing & 3D scanning
- 3D printing: different systems
- 3D scanning
Assignment
-
Group assignment: Test the design rules for your 3D printer(s).
-
Individual assignment: design and 3D print an object (small, few cm3, limited by printer time) that could not be made subtractively + 3D scan an object (and optionally print it).
This week we’ve been working to create learn 3D printing and 3D scanning. We covered some principles on additive manufacturing and photogrammetry.
HOW TO 3D PRINT
SUBSTRACTIVE VS ADDITIVE MANUFACTURING

"Diagram showing the differences between substractive and additive manufacturing"
After learning some subtractive production last week, it was interesting to have these two columns to compare features with additive manufacturing.
ADDITIVE MANUFACTURING TYPES
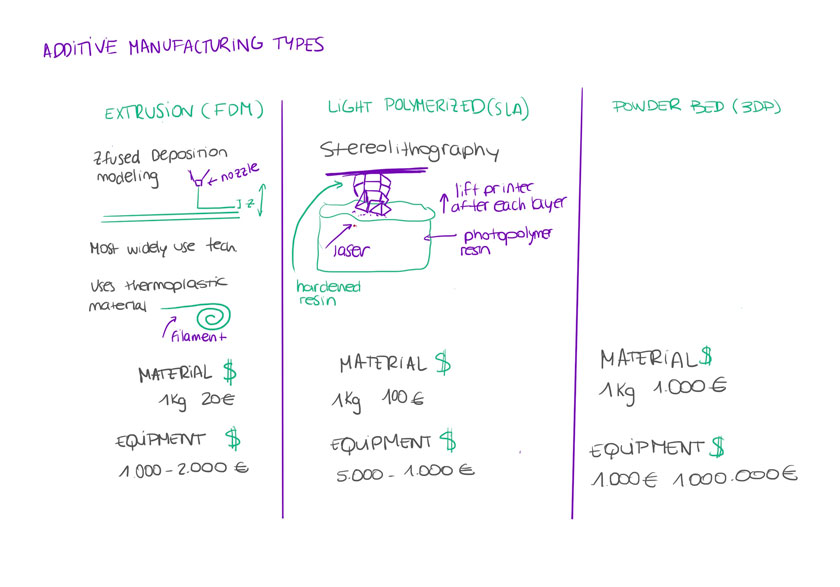
"Diagram showing additive manufacturing types"
During the lecture, we saw different additive manufacturing types. It was a great comparison to realize various price tags and qualities.
ADDITIVE MANUFACTURING PRINCIPLES
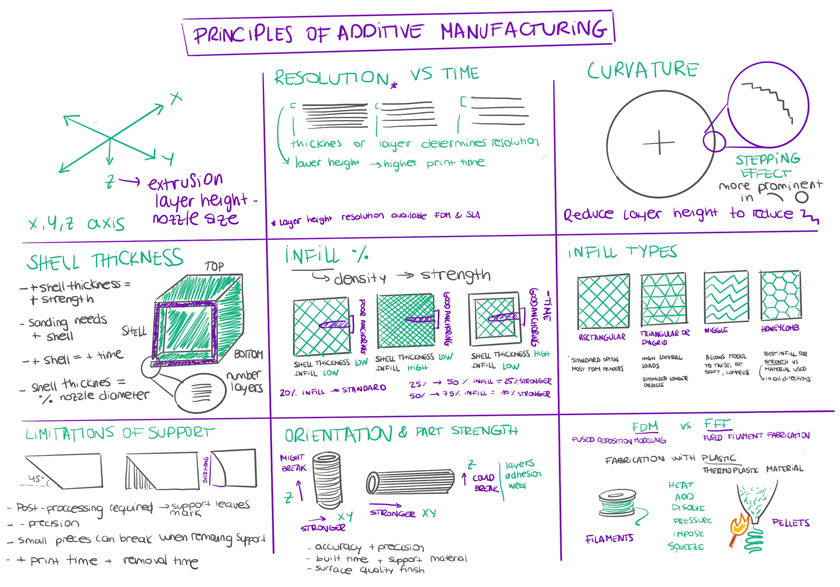
"Diagram showing additive manufacturing principles"
To me, this table is the best exercise I’ve done to understand some fine-tuning elements of additive manufacturing. It’s quite visual, but it also offers an additional layer of depth.
FDM PRINTING PROCESS
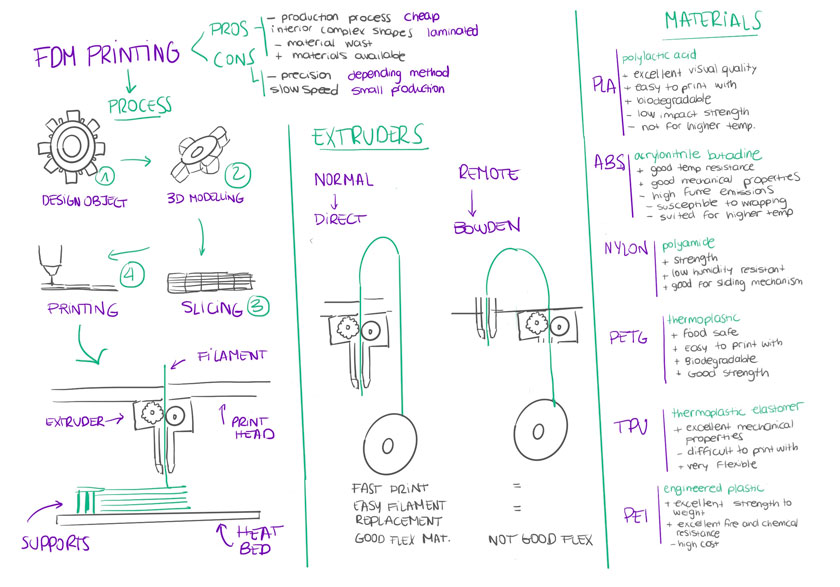
"Diagram showing FDM printing process"
Another handy visual summary, mainly, is a reminder of the two kinds of extruders and the different materials’ properties.
3D PRINTING PROCESS
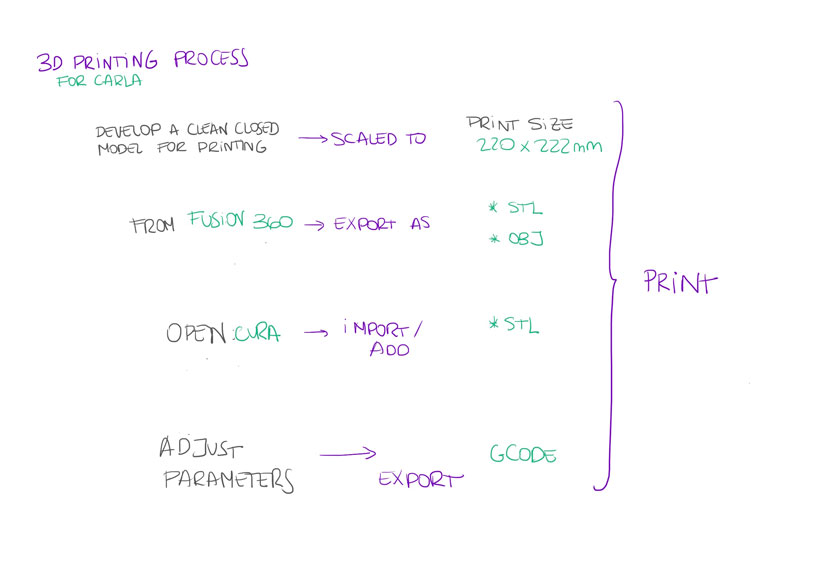
"Diagram showing 3D printing pipeline"
The printing process pipeline is relatively straightforward, and these are the key points that must be covered to go from a model to a 3D print.
DESIGN PRINCIPLES
There many resources only from other makers and companies that can be helpful when designing or troubleshooting some things. I found this one that I’d like to check later!
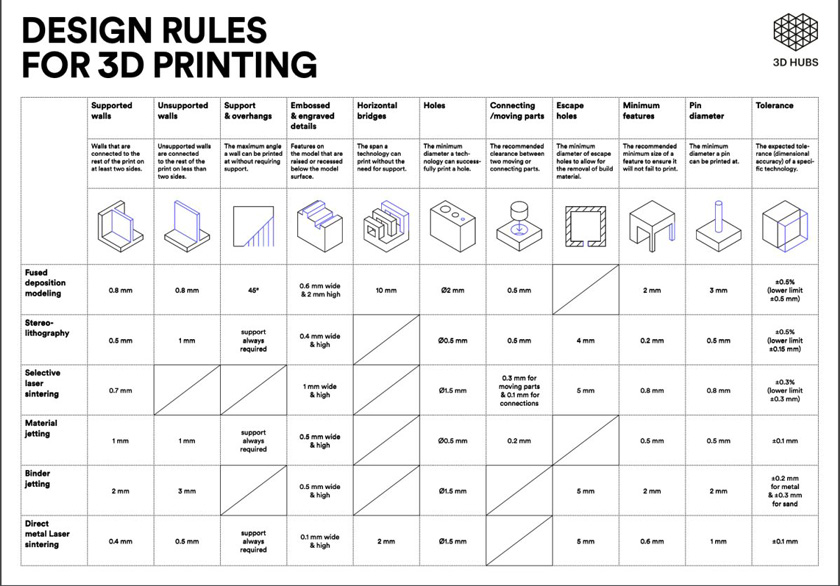
"Diagram showing 3D printing pipeline"
3d hubs Design Rules template.
3D PRINTING TRAINING
During the 3D printing, we saw different machines, materials, and finishes.
DIFFERENT MACHINES
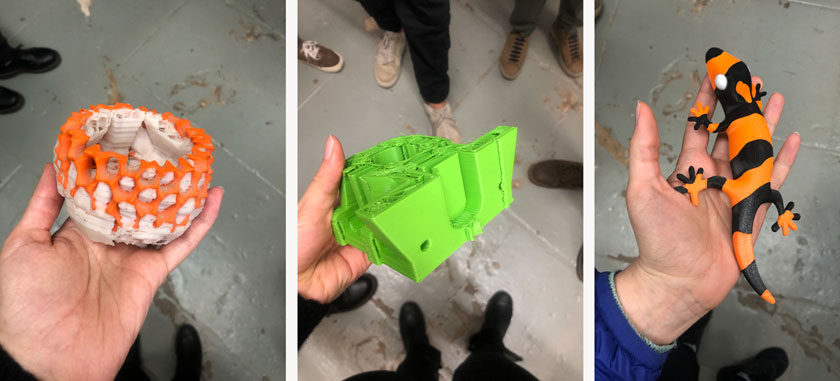
"Some 3D printing samples.LEFT: Pla print with two colors with plenty of supports. CENTER: 1mm filament print. RIGHT: Two color filament print with PRUSA"
There is an Octoprint system in place at IAAC that allows us to print from the local network.
OCTOPRINT

" LEFT: Octoprint control panel. RIGHT: Octoprint status page."
SLA PRINTING
This process was fascinating. Even though it’s quite a messy process, the resolution and the detail at a tiny scale are stunning!.
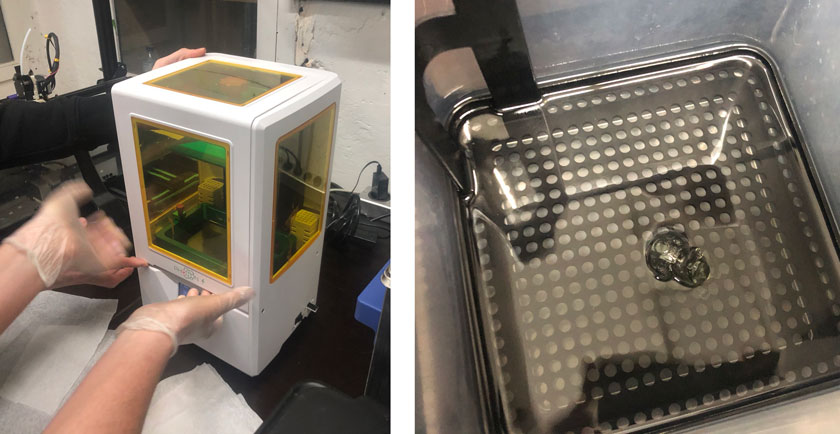
" LEFT: Loading resin into the Anycubic Photon printer. RIGHT: Bathing print in alcohol."
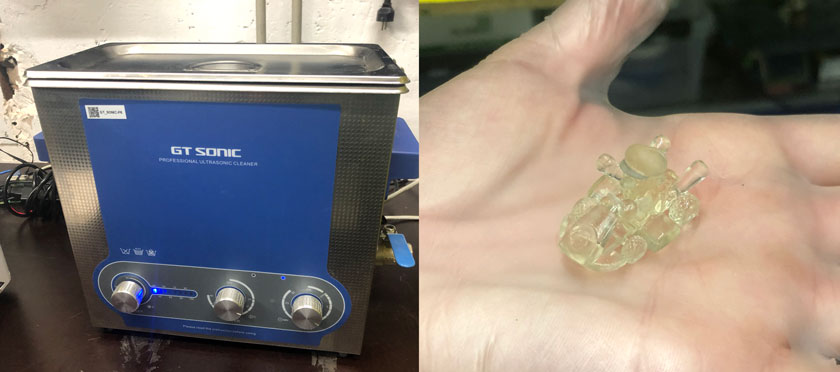
" LEFT: Giving an ultrasonic bath to the print. RIGHT: Finished Mario Kart SLA print."
All in all, the trainings this week were very useful to see the fully potential of all the equipment that we have available.
HOW TO 3D SCAN
We had an overview as well on different systems to 3D scan. We have a Roland with an accessory that substitutes the milling one that has a probe. We also used a Kinect and some phone apps. The process goes from the object to a mesh object.
3D SCANNING TRAINING
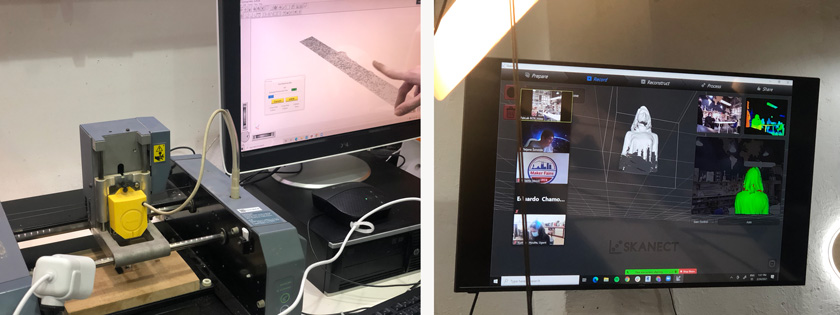
" LEFT: Roland probe scanning PCB. RIGHT: Skanect using Kinect to scan Den."
GROUP ASSIGNMENT
As a group, we’ve decided to have as many machines as possible using the most similar possible settings to have a fair comparison.
We used this 3D models from Thingiverse to have all the same reference file.
3D printing test 1; 3D printing test 2
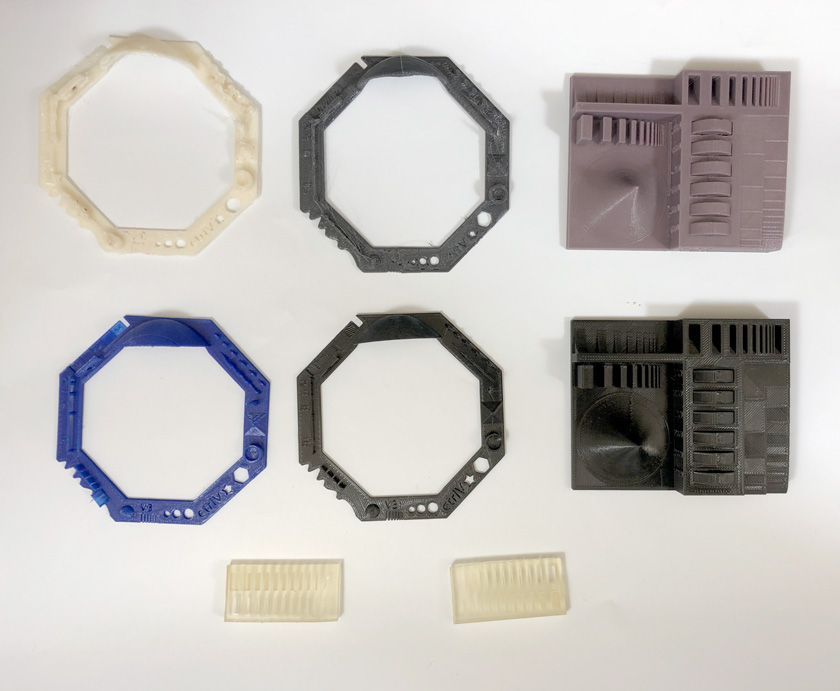
" Set of prints for the design test rules. Top to Bottom, Left to Right: RepRap with Flex Filament, RepRap with PLA, Prusa with PLA, Delta printer with PLA, Ender 3 Pro Biodegradable PLA,Ender 3 Pro Biodegradable PLA, SLA clear resin, SLA clear resin. "
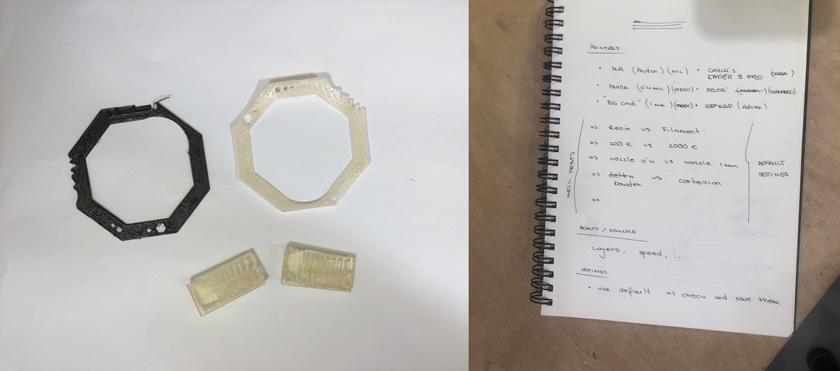
" LEFT: Things that didn't go so well. RIGHT: To do list with all specs."
This was a good exercise to see the differences of all the machines, nozzles and different types of material. As we were using out-of-the-box standard settings, what mattered the most was how well-calibrated the machine and bed were.
See Adrien’s blog for full analysis of all printers tested as a group Adrien’s Full 3D printing analysis.
WHAT WENT WELL
Good workflow: There was a great team planning to develop so many samples.
Tests: Most test turned out good enough to be able to throw great conclusions.WHAT COULD BE BETTER
Some tricky machines: The Rerap machine gave some trouble with the Flex filament. The 1mm nozzle one also needed some fine-tunning to get the test working.
Further testing: I’d have been nice to test multiple materials with each machine. For the sake of time we had to simplify a bit and divide tasks.
WEEKLY ASSIGNMENT | 3D PRINT FABRIC
STEP 0: WHAT TO DO? AND WHY? REFERENCE
This project has been in my mind since a while ago. This is the main reference it always comes to my mind.
Back to work on my #3Dprinted dress! Must! Finish! @Fillamentum Wizard’s Voodoo PLA printed on nylon tulle fabric. pic.twitter.com/878cJ4U96f
— sophy wong (@sophywong) June 19, 2020
" Sophy Wong's 3D printed fabric reference on Twitter."
By 3D printing directly on the fabric, you remove the need to use any adhesive. Hot PLA adheres to the tulle fabric wonderfully. This process is optimal to do using 3D printing instead of a subtractive fabrication method in which you’ll need to create the modules and then glue/ attach them afterward.
STEP 1: DESIGN MODULE TO 3D PRINT
I wanted to create a wobbly piece that could work in two different directions and being a nice module for the whole set.
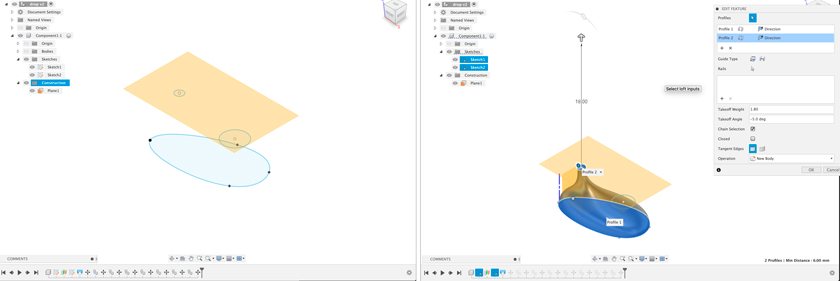
"LEFT: Basic shapes that will define the module. RIGHT: Lofting using two of the basic shapes in different planes."
Download Drop .STL File; Download Drop .OBJ File; Download Drop .DXF File
"Fusion360 file of the 3D printable modules"
Download Drops Matrix .STL File; Download Drops Fusion 360 File
STEP 2: 3D PRINT MODULES ON TULLE FABRIC
The first test was just to print one set of 5 pieces on top of Tulle. Tulle was my choice for various reasons, one because I’ve seen cases where PLA has good adherence and second because it allows seeing what’s underneath.
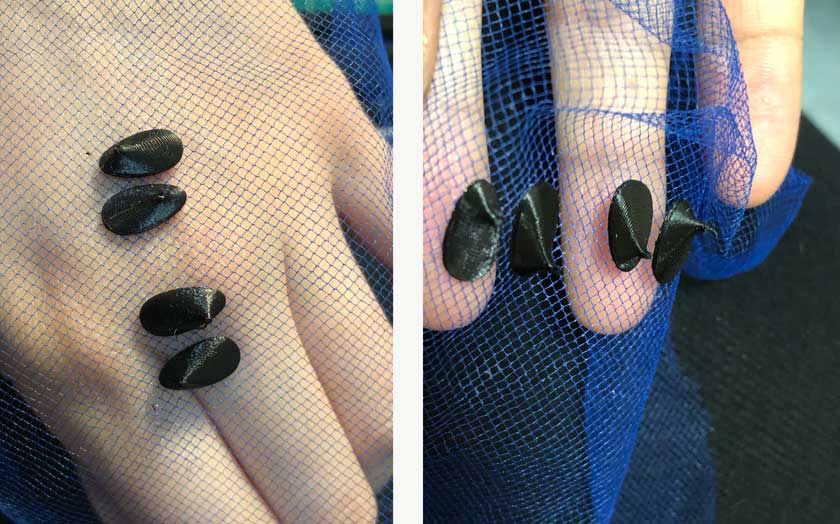
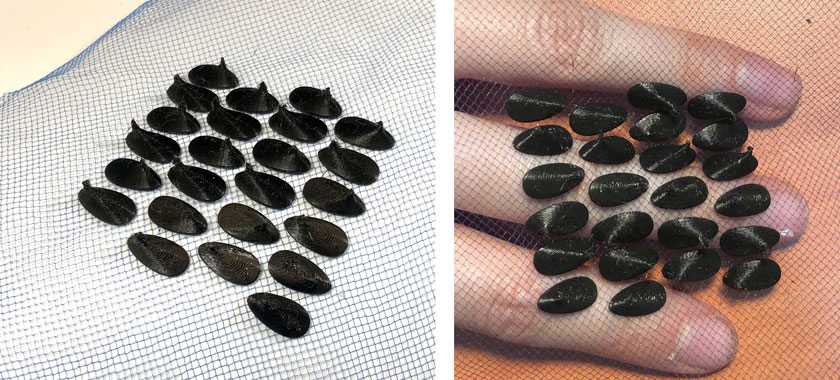
"LEFT: First 4 (+1) modules printed . RIGHT: Modules on skin"
"Ender-3 Pro printing PLA modiles on Tulle"
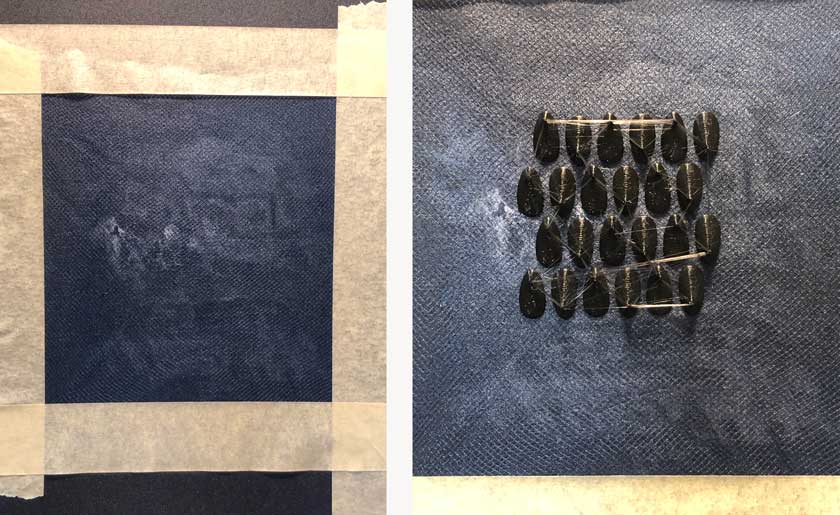
" LEFT: Very stretched tulle fabric. RIGHT: Finished print with some threading issues "
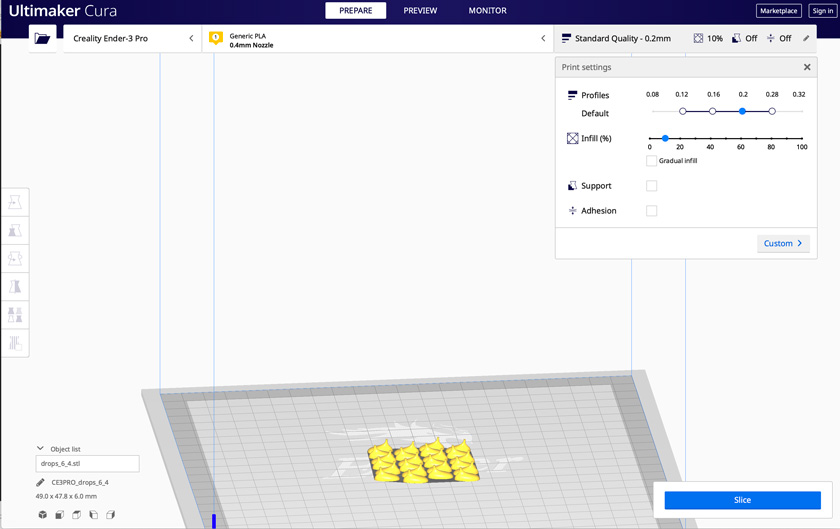
"Slicer Cura Standard quality settings for Ender-Pro 3."
I choose quite basic default settings to see which problems came from either the material or the print without anything fancy to debug. To my surprise it turned out pretty well so I decided to keep going with them. For bed (60ºC) & nozzle temperature (200ºC) I also used default only adding a bit of glue ( the clear school bar type) to the bed help stretching the tulle.
STEP 3: CLEAN THE PRINT
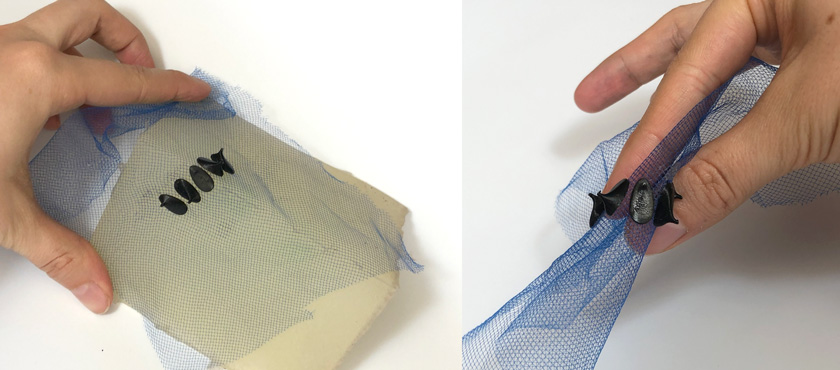
" LEFT: Print after PLA strings removal. RIGHT: Clean print on skin."
STEP 4: FINAL SHOTS
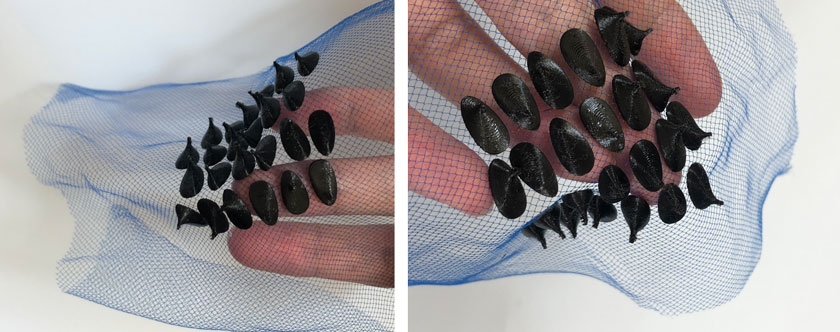
" LEFT: Small print ( 5 modules) on top of an irregular surface. RIGHT: Fabric fully folded. "
" Two images showing the final result of the print on an irregular surface."
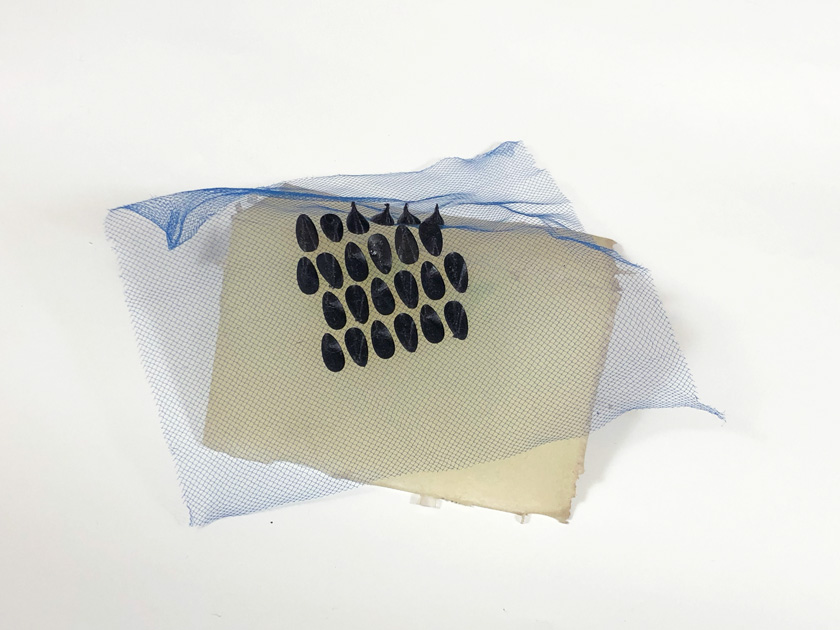
" 3D printed PLA on tope of Tulle final shot."
WHAT WENT WELL
It worked! I was extremely pleased to achieve my goal. I read some very
The Ender-3 pro I used was very well calibrated which helped to be precise with the adherence of the PLA to the tulle.WHAT COULD BE BETTER
Improve settings: Some modules were a bit fragile, I decided to strenghten the connection with some Beacon fabric glue.
Less stringing: I had some stringing issues on the top layers of the piece, which required lots of cleaning and polishing.
More variety: I wish I’d had time to test different fabrics and filaments.
WEEKLY ASSIGNMENT | 3D SCAN + PRINT (BONUS)
Photogrammetry was one of the cores of the 3D scanning assignment. I’ll be showing the multiple tests I’ve done. Definitely ones more successful than others.
MESHROOM
ATTEMPT 1
This is the first attempt, to get a simple object. It failed at the earlier stage as it didn’t have enough images.
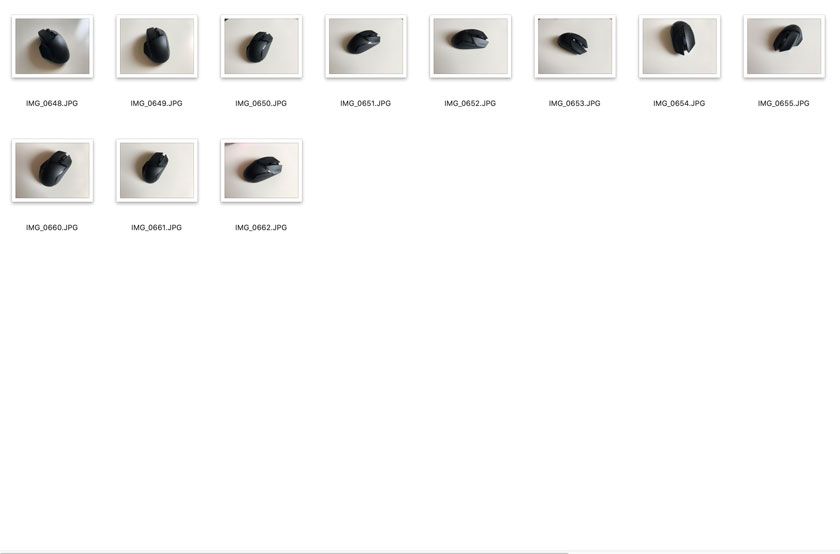
" Set of images of a mouse"
ATTEMPT 2
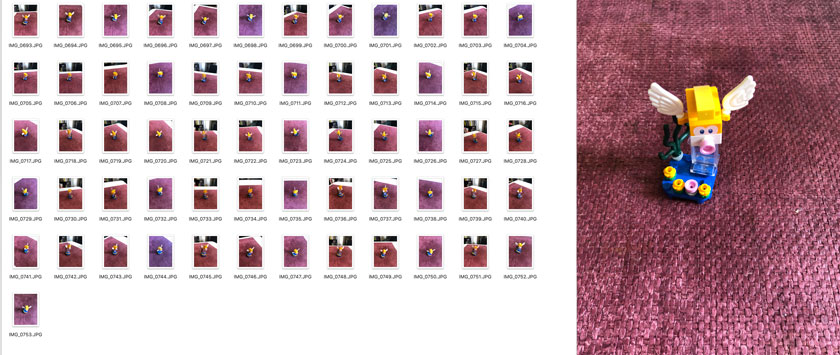
"LEFT: Set of images of a Lego figure. RIGHT: Lego figure image."
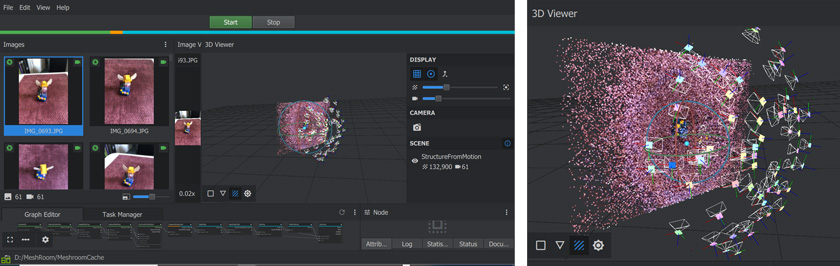
"LEFT: Meshroom pipeline in process. RIGHT: Meshroom images mapping."
ATTEMPT 3
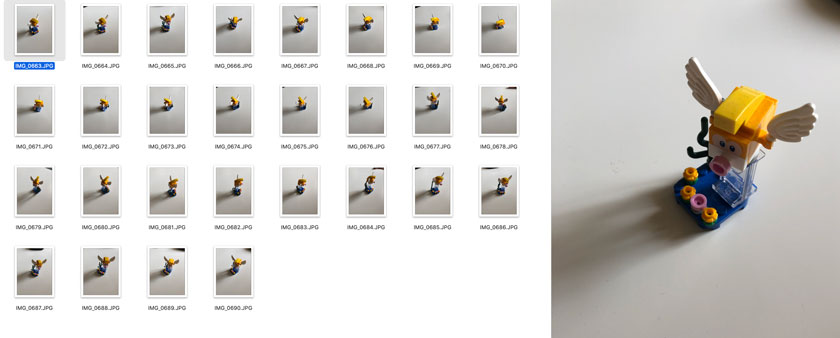
" LEFT: Set of images of a Lego figure with a white background. RIGHT: Lego figure image."
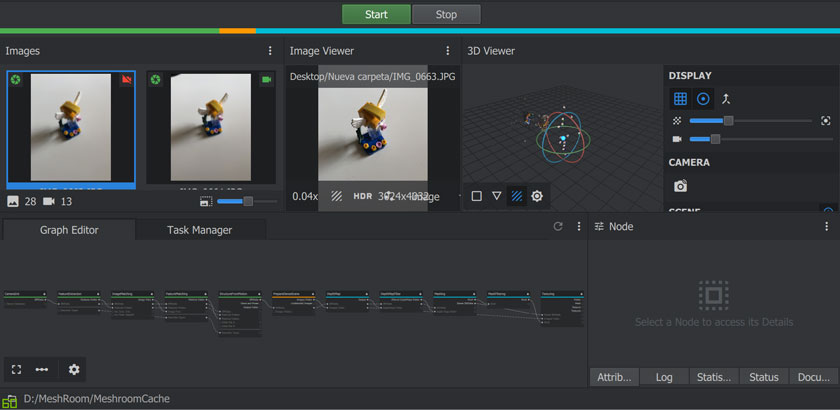
"Meshroom pipeline for the Lego figure."
Meshroom didn’t work to create a usable mesh.
"Recap photo Mesh Model"
Recap creating a quite interesting textured mesh. Without the texture the mesh is quite a mess.
ATTEMPT 4
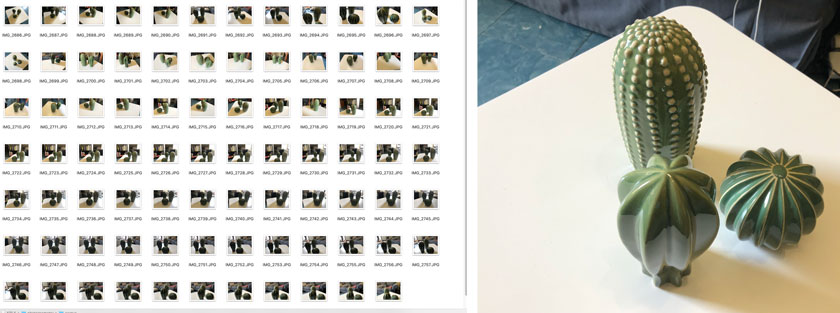
" LEFT: Cactus images set. RIGHT: Image sample of the cactus set."
" Meshroom work on the cactus set to create a 3D mesh."
"Meshroom 3D Textured model in the Windows viewer. "
" Meshroom 3D mesh imported and cleaned using Fusion 360. "
"Windows 3d Model viewer features. "
MESHMIXER
As a last attempt to save the scan I used Meshmixer to try to clean again and close the mesh to see if I could get something that it was printable. This is the resulting mess but it seems printable:
RECAP PHOTO
Using Recap photo was quite easy compared and user-friendly compared to Recap photo. I’m using the same image dataset than with Meshroom.
"Recap Photo 3D mesh imported into Fusion 360 . "
"Recap Photo 3D texturized."
The result is far from what I was expecting. I feel like working with a new set of pictures would be the way to go. Taking notes for future self: Better lighting contidions, better background and more pictures.
SKANECT
After the disappointment of using photogrammetry, taking pictures from the cellphone, and using software to reconstruct them into a 3D model, I decided to try the Kinect.
"Cactus figure scanned with Kinect and Skanect."
"Reducing features of Skanects free version to export mesh."
"Cactus mesh fixed with Fusion 360 and ready to 3D print."
Download Cactus Fusion 360 File; Download Cactus .OBJ File
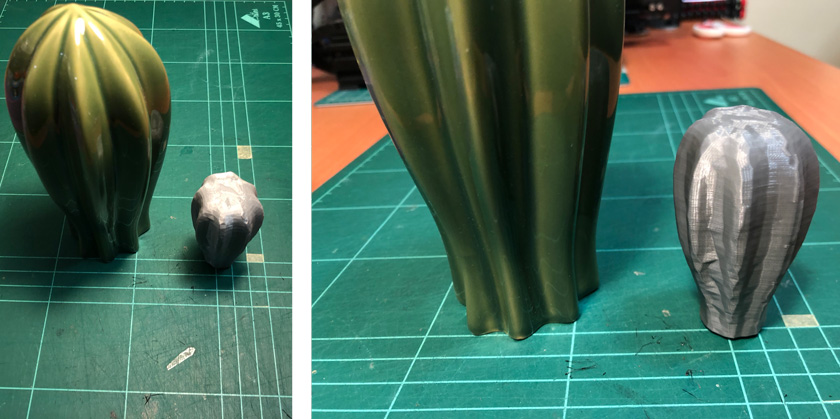
" LEFT: Cactus figure vs printed miniature. RIGHT: Zoomed Real vs printed Cactus."
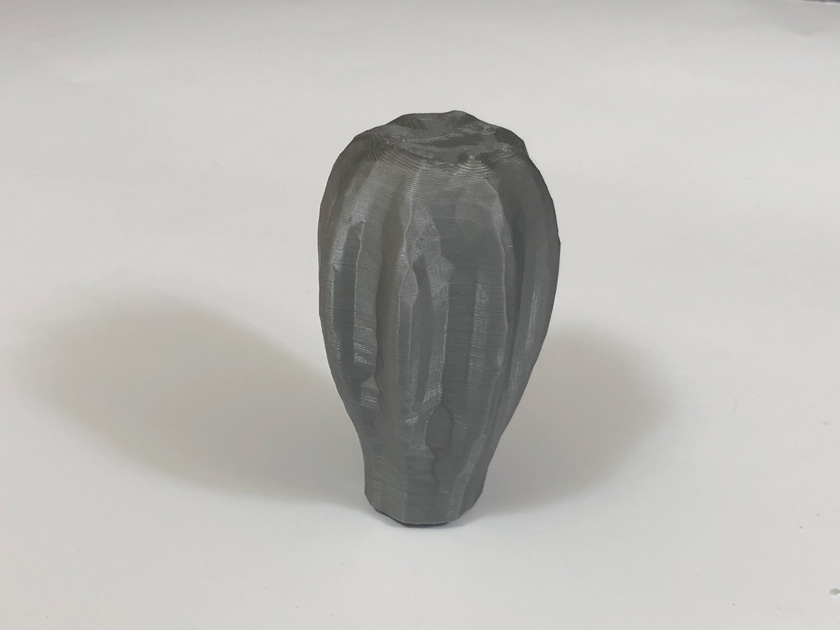
" Final shot of the 3D printed cactus"
WHAT WENT WELL
Multiple options: It was great to see many options that would work in different scenarios.
I could print something: Even if the resolution was lower than expected I was able to print a mesh that I scanned with Skanect.
WHAT COULD BE BETTER
Pipeline: The pipeline is quite tricky, it requires multiple elements and features to be considered beforehand. Even so it might not work as expected.
Frustrating: It can be a process that makes you think about giving up many times.
FINAL PROJECT
As my final project takes shape, I’m continuing to improve the existing first prototype I designed. To do so, I revised some of the connectors that didn’t work well when laser cutting. Therefore, I’m using 3D printing now to achieve a twisted form that will connect the modules.
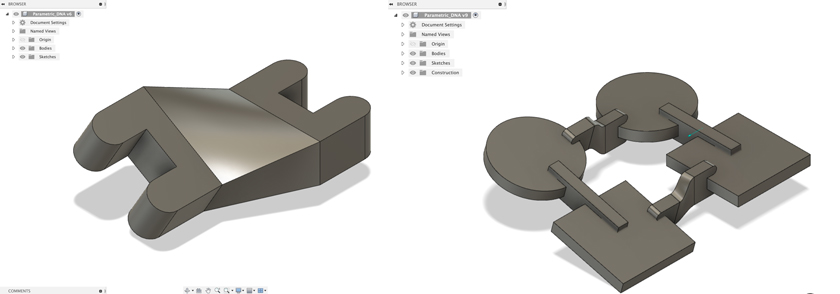
" LEFT: Redesigned connector version 1. RIGHT: Redesigned connector version 2 in place with the other modules."
Download Twisted connector v1 .STL; Download Twisted connector v2 .STL
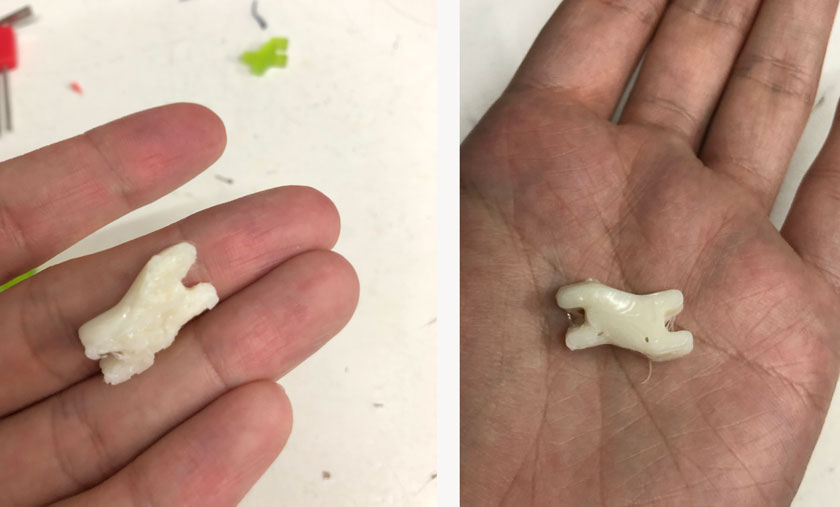
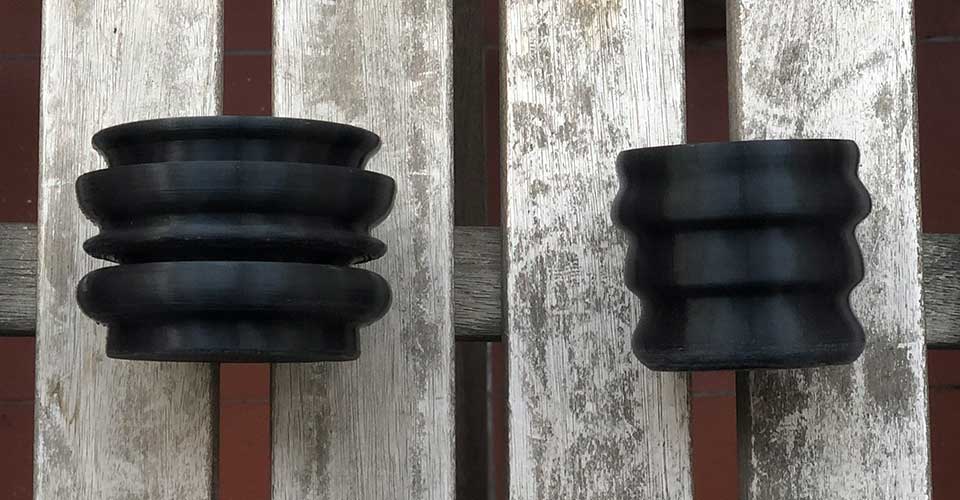
" LEFT: Failed FLEX filament connector. RIGHT: FLEX filament connector."
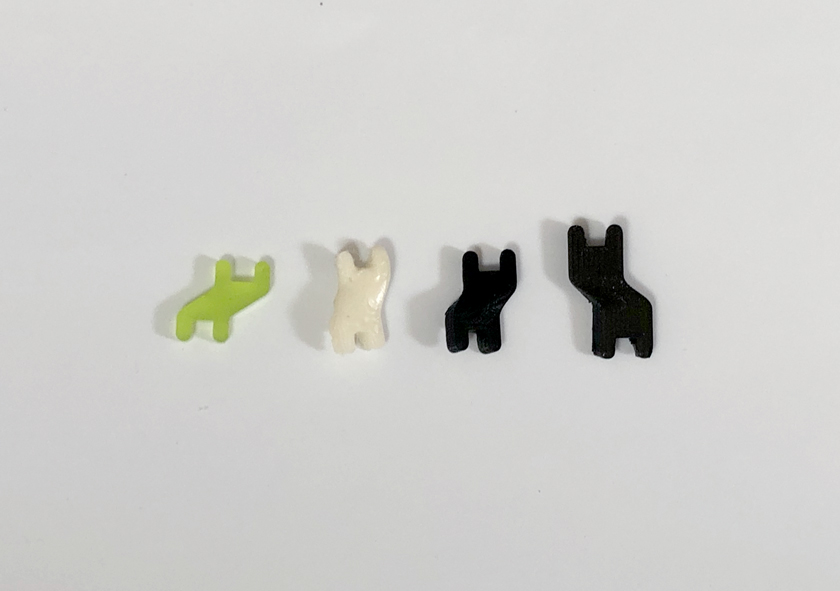
" Image showing the progress of the different connectors. From Left to Right: Acrylic, FLEX Filament, PLA version 1 (45 degrees twist), PLA version 2 ( 15 desgrees twist.) "
Download Twisted connector v3 .STL
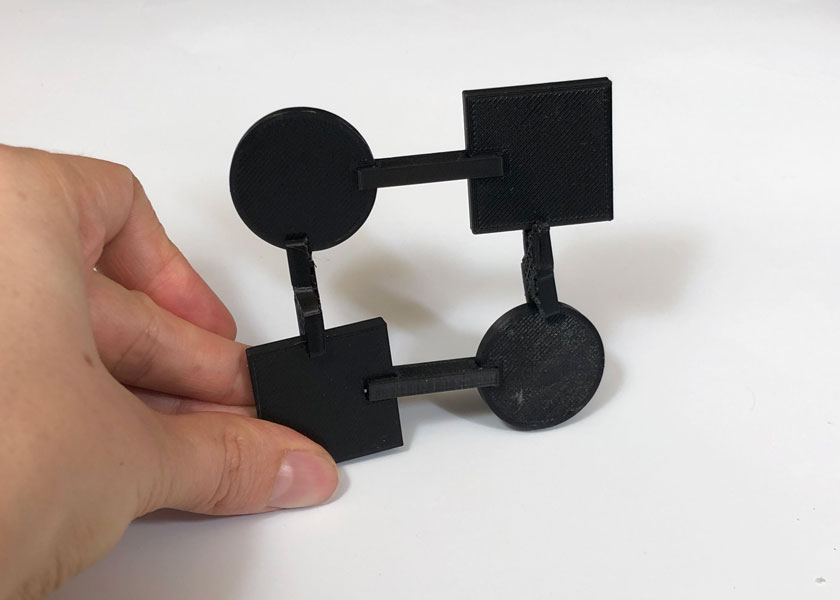
" Final shot of 3D printed modules and new connector all together."
" Fusion 360 model of the different modules including the new connector."
Download DNA kit Fusion 360 File; Download DNA kit model .STL; Download DNA kit model .OBJ
WHAT WENT WELL
Better component: With the design and material iteration the joint imporoved its functionality.
Learning process with iteration: The development of the piece allowed me to learn more CAD skills
WHAT COULD BE BETTER
Accuracy: I need to study better the tolerances of the material to get a better fit of the joints. However I’m pleased with the current stage.
More ideation: I want to be able to create more prototypes technology specific rather than just keep improving the current proposal I have.