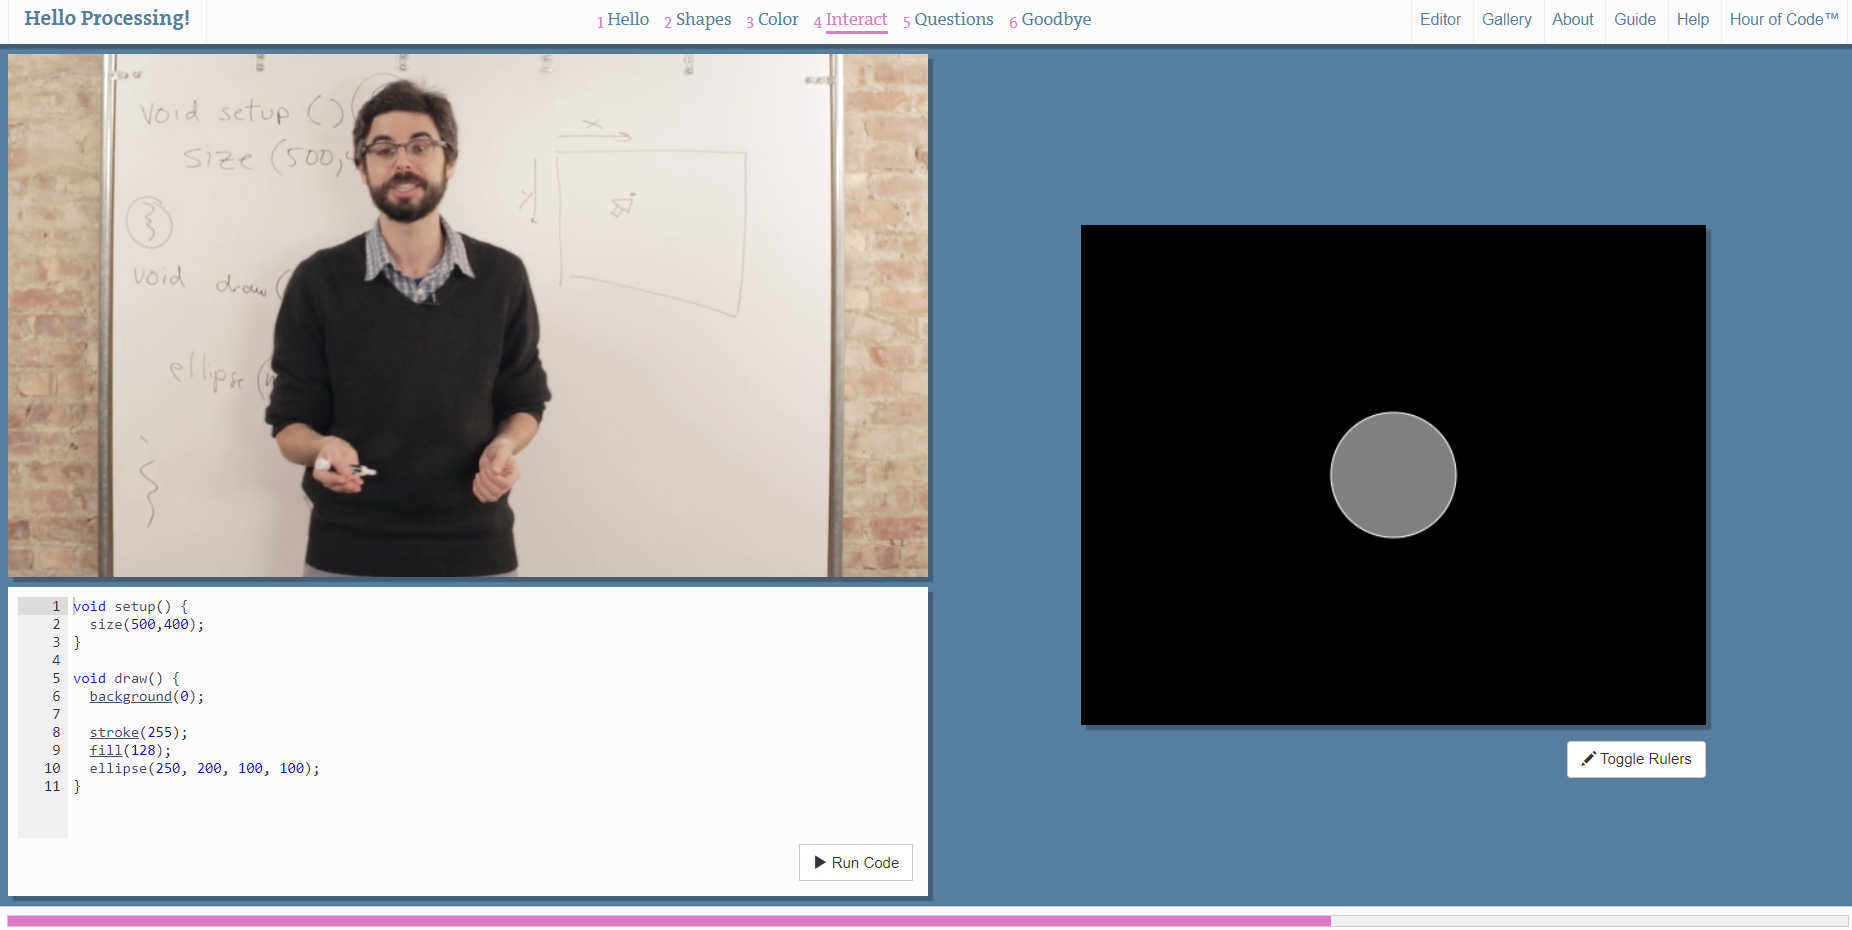
This new week at Fab Academy I have learned about creating an interface and the interaction I can achieve with it. Thanks to the recommendation of my instructors I chose a very accessible and friendly program for beginners like me, as I have no experience in programming topics, this week has taken me a considerable time of learning and above all a lot of patience. Here I tell you how I did and how I solved the challenge. 💪
To solve the individual assignment we are asked to write an application that interconnects a user with an input and/or output device that I have created, for this part I used processing, a program that I liked a lot and that I could understand thanks to the tutorials and the official page that has a very good learning platform. 😃
My experience
First
As a first step I had to visit some sites on the internet to understand the logic of this program, it was very useful to watch explanatory videos about the practical part, I mean, exercises that helped me to build step by step a small example. As my final project will use my Ottino Move board, I made a simulation of an interface where I can use my board to power my final project. Below I first share images of some initial exercises, starting with the installation of the program and the explanation of the learning process I had. 💪
What is processing?
Processing is a user-friendly, Java-based, open source programming language and environment that serves as a medium for teaching and producing multimedia and interactive digital design projects. It was initiated by Ben Fry and Casey Reas from reflections in the Aesthetics and Computation Group at the MIT Media Lab. (source: "here" )
Processing is an accessible, free and open source space for learning to code with the goal of linking design and computer science, and is used by many artists and creatives to create graphic and interactive prototypes.
Program installation:
Official download page
Processing Interface
How to start?
One of the things that surprised me was that Processing is very similar to Arduino IDE, the software I was using in the electronics weeks, and the reason for this similarity is because Arduino IDE has used this language created in Processing for its platform. It would have been interesting to learn Processing first but anyway it has helped me a lot to know a little of a similar software like Arduino IDE.
Well, as in all the previous weeks I started to look for tutorials, I found it very good to find tutorials in Spanish, it helped me to understand it much faster, one of my recommendations is to save the codes or formats in a notepad, it was very useful to follow some videos where they explained me step by step and write down and then put together the logic that I wanted in my tests. Next I will show some exercises and I will share the structures of the assembled code.
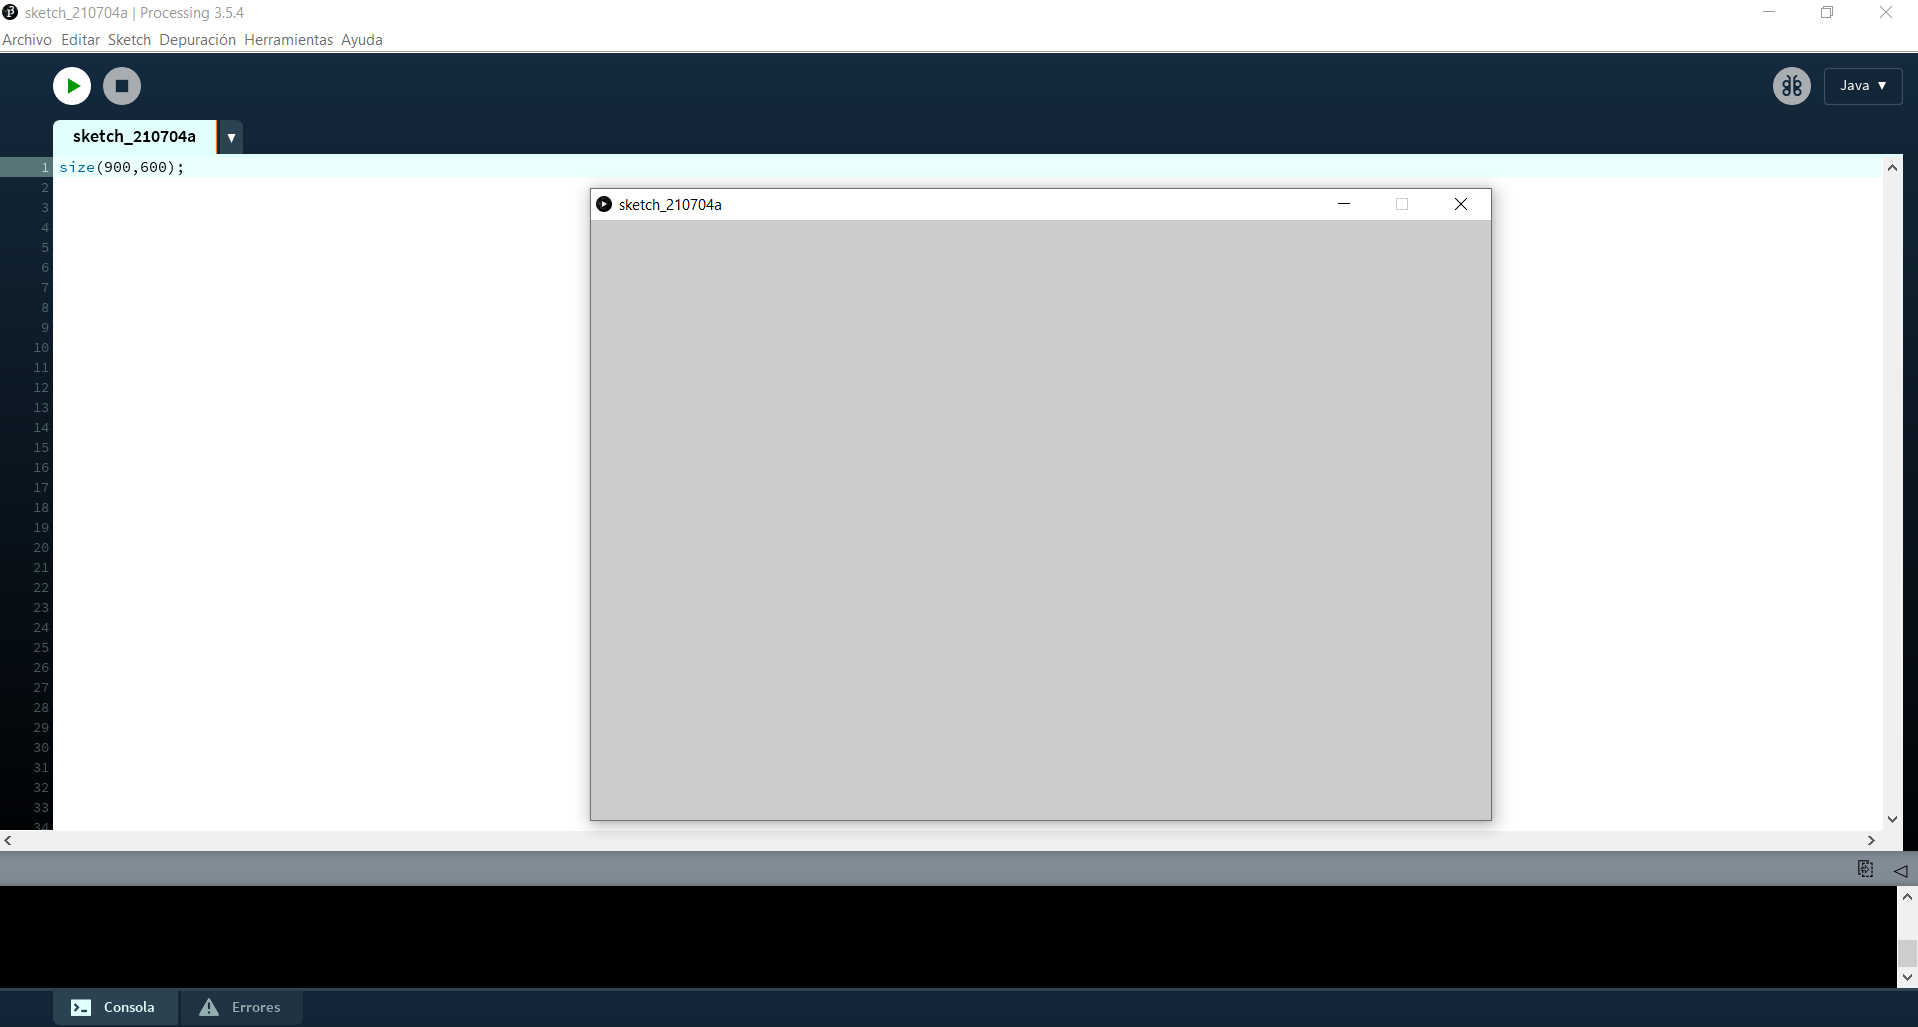
General window size
Changing background color and adding a liner
Changing overall dimension and adding thicknesses
Modification of the overall dimension and addition of fillers
Exploring geometries
Testing texts
Testing texts
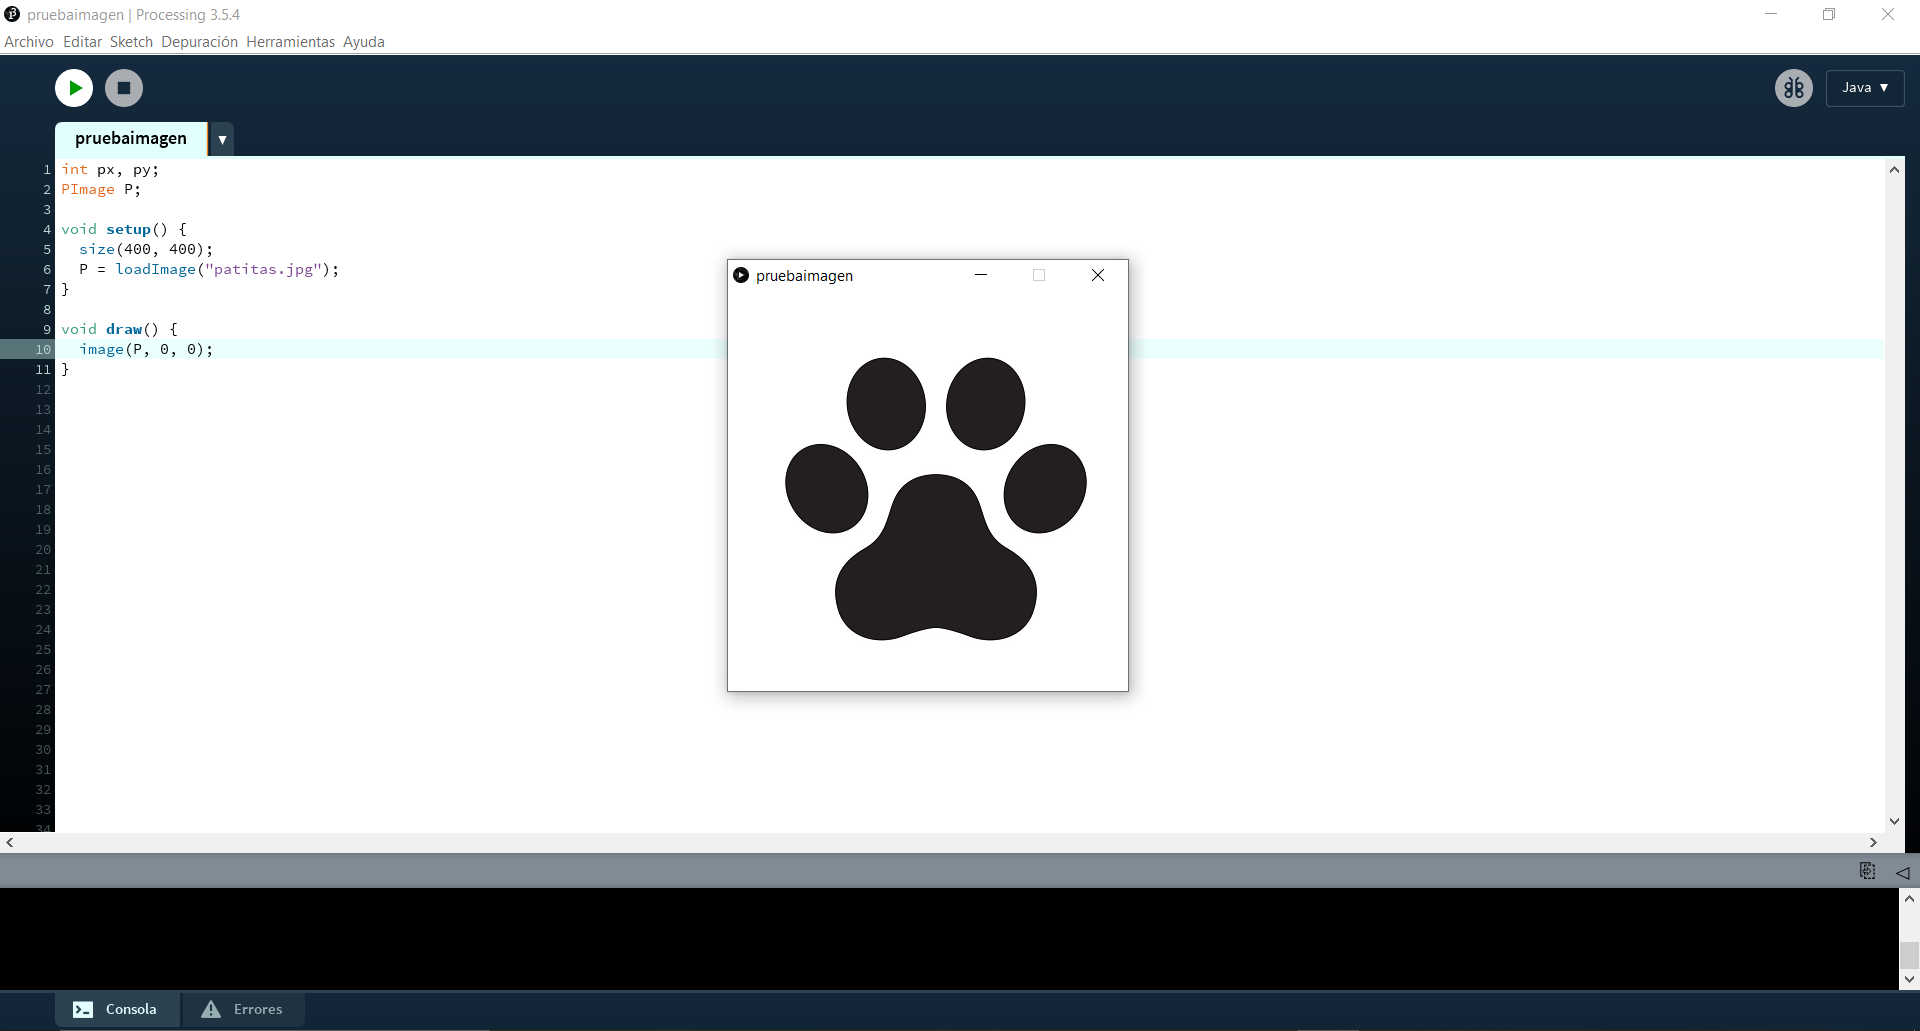
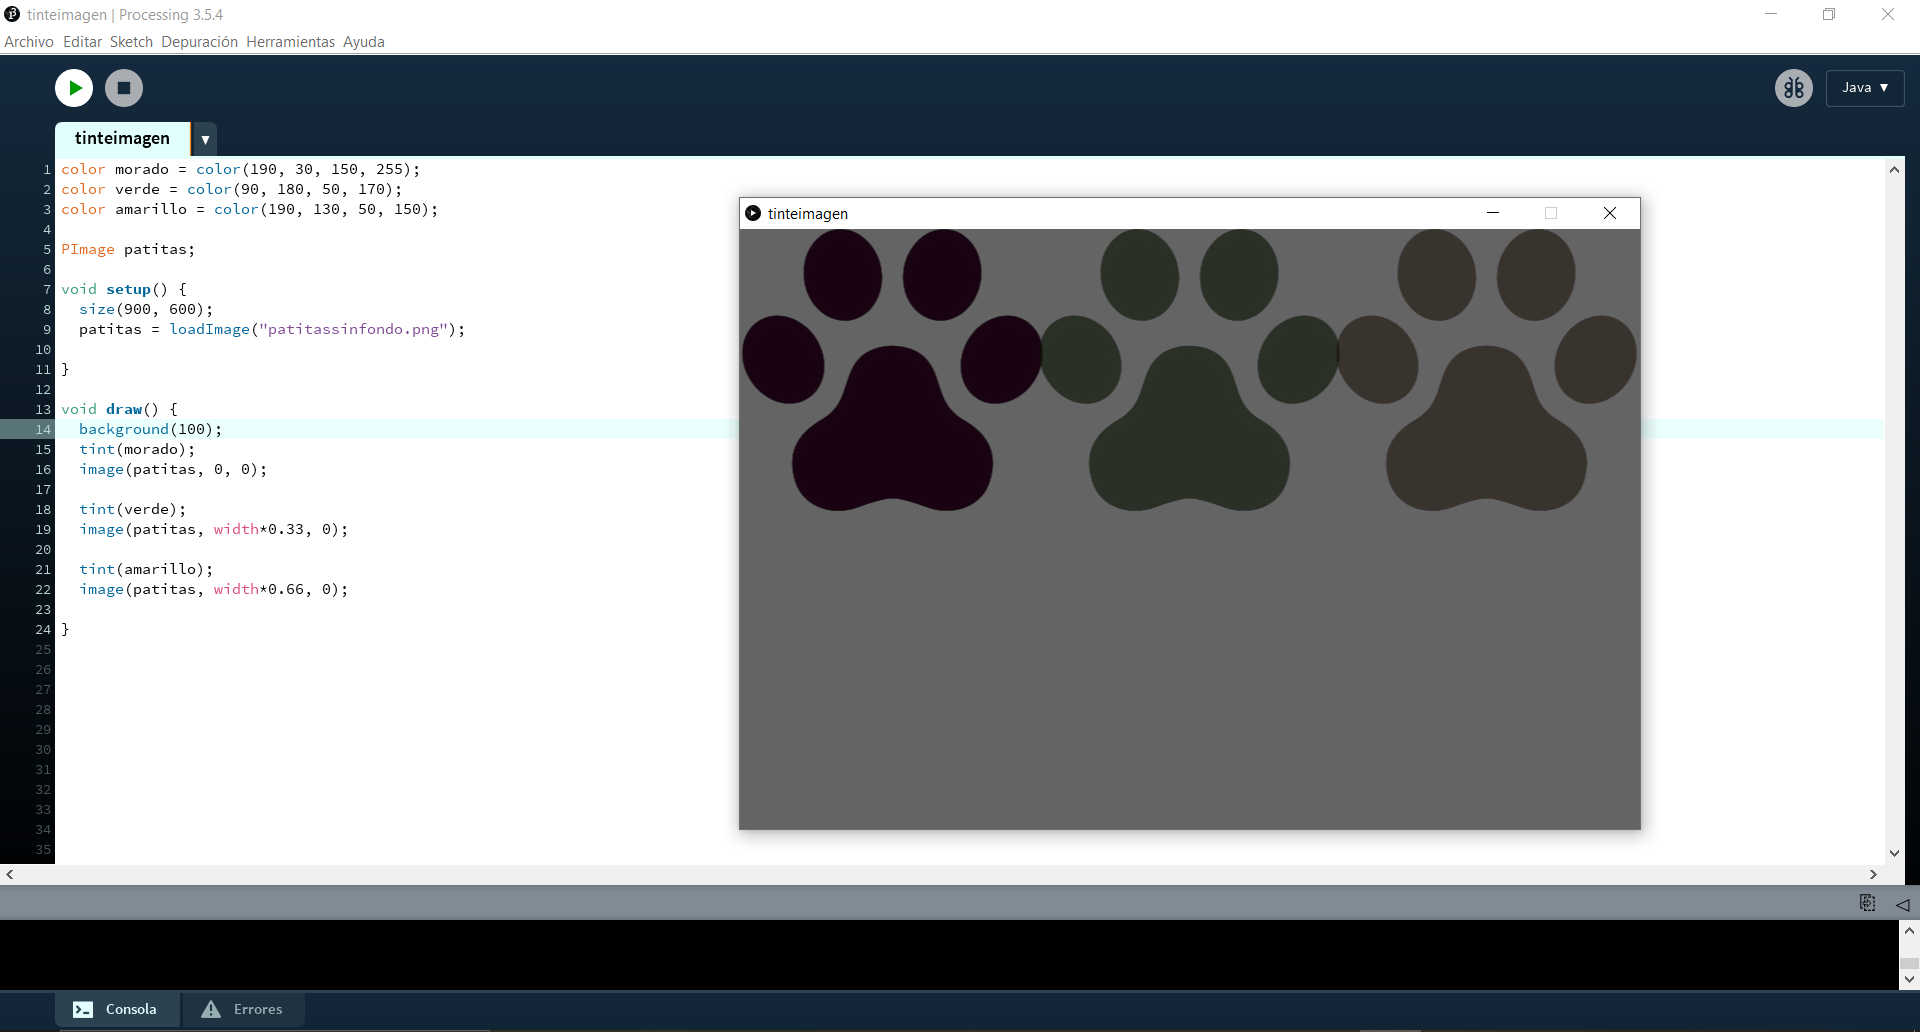
Importing images
Images and texts
Coloring images
Below I share the summary of all the codes that appear in the above photographs, next to each argument I have placed as comments what each one means. I found it very useful to have it saved in a notebook when creating the exercises and doing my tests.
//Mayra Ascencio Calderón
//Fab Academy 2021
//Summary
------------------ How does it work?
The order is from top to bottom, line by line, what happens at the top happens first and can be seen behind what happens
after.
Behind what happens next.
------------------ Main instructions
size(600,600); // comments
fullScreen(); // set (2) if you have two screens.
background(180);
//background colors the entire background screen.
//background (number), in grayscale 0-255, 0 is black, 255 is white.
//background (number, number, number), R, G, B (each color has a range from 0 to 255).
see colorspire on google for RGB codes
------------------ Line
Structures:
void setup() // setup contains the instructions that are executed only once at startup
{
size(300,300); //example
background(0,100,0); //example
line(0,0,100,100); // line draws a line from a point 1 and a point 2
// line(x1, y1, x2, y2);
// everything that goes inside the parentheses is called arguments
}
void draw() // contains the instructions to be executed repeatedly
{
line(0,0,100,100);
}
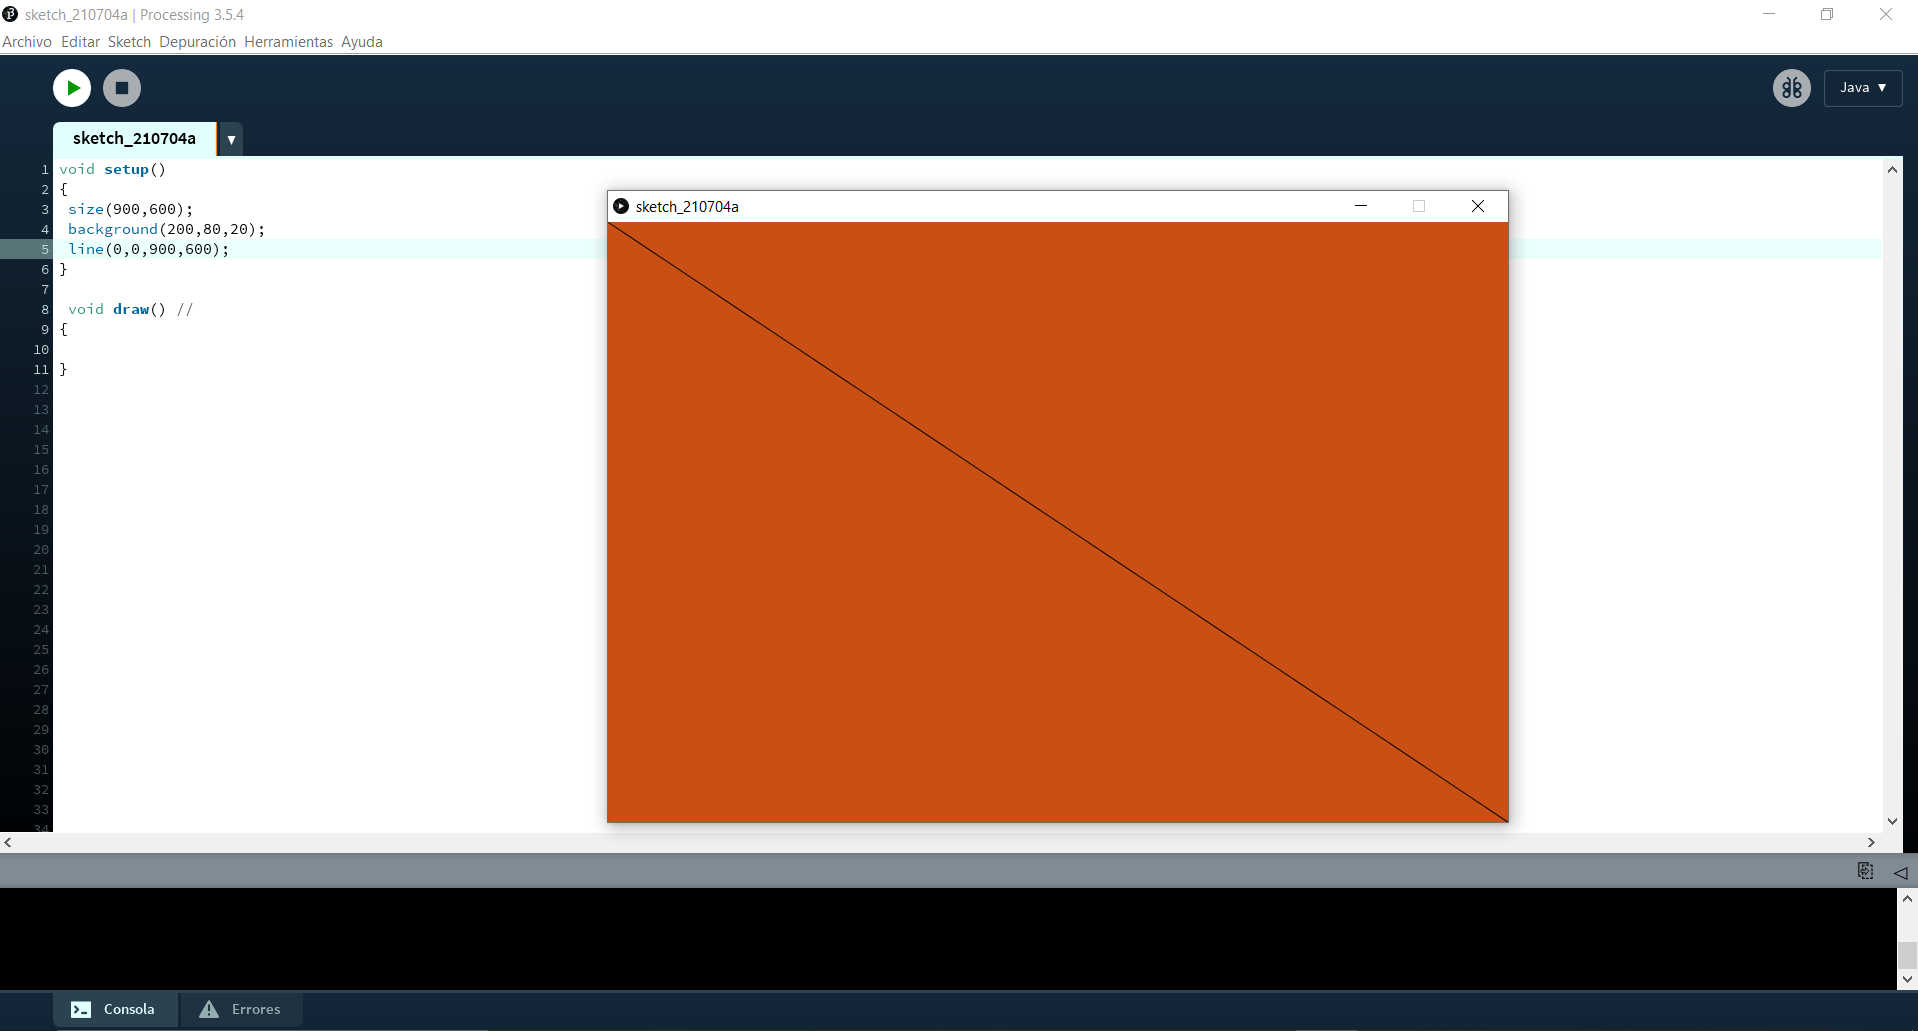
------------------ Contour
void setup() // setup contains the instructions that are executed only once at startup
{
size(300,300);
background(0,200,255);
stroke(200);
//stroke( number ); grayscale from 0 to 255, 0 is black, 255 is white
//stroke( number, number, number); R G B (0-255)
line(0,0,300,300);
}
void draw() // contains the instructions to be executed repeatedly
{
}
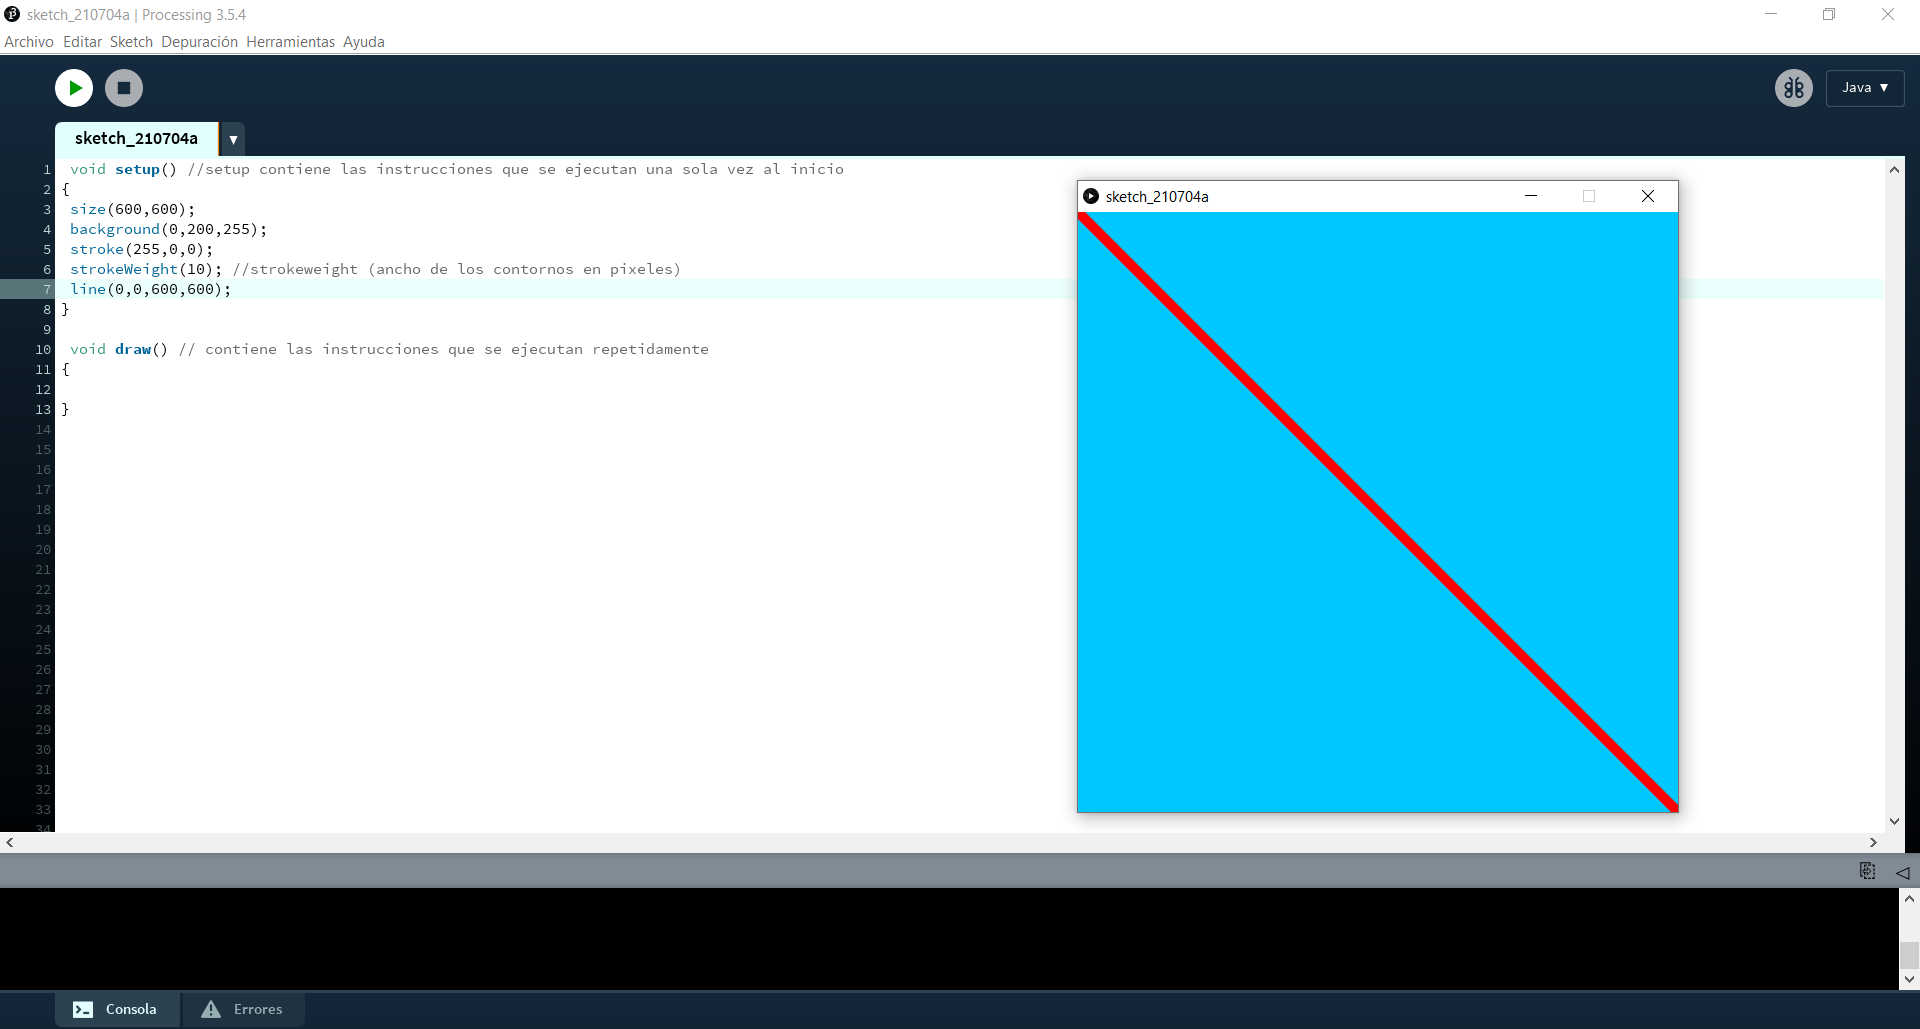
------------------ Contour width
void setup() // setup contains the instructions that are executed only once at startup
{
size(300,300);
background(0,200,255);
stroke(255,0,0);
strokeWeight(10); //strokeweight (contour width in pixels)
line(0,0,300,300);
}
void draw() // contains the instructions to be executed repeatedly
{
}
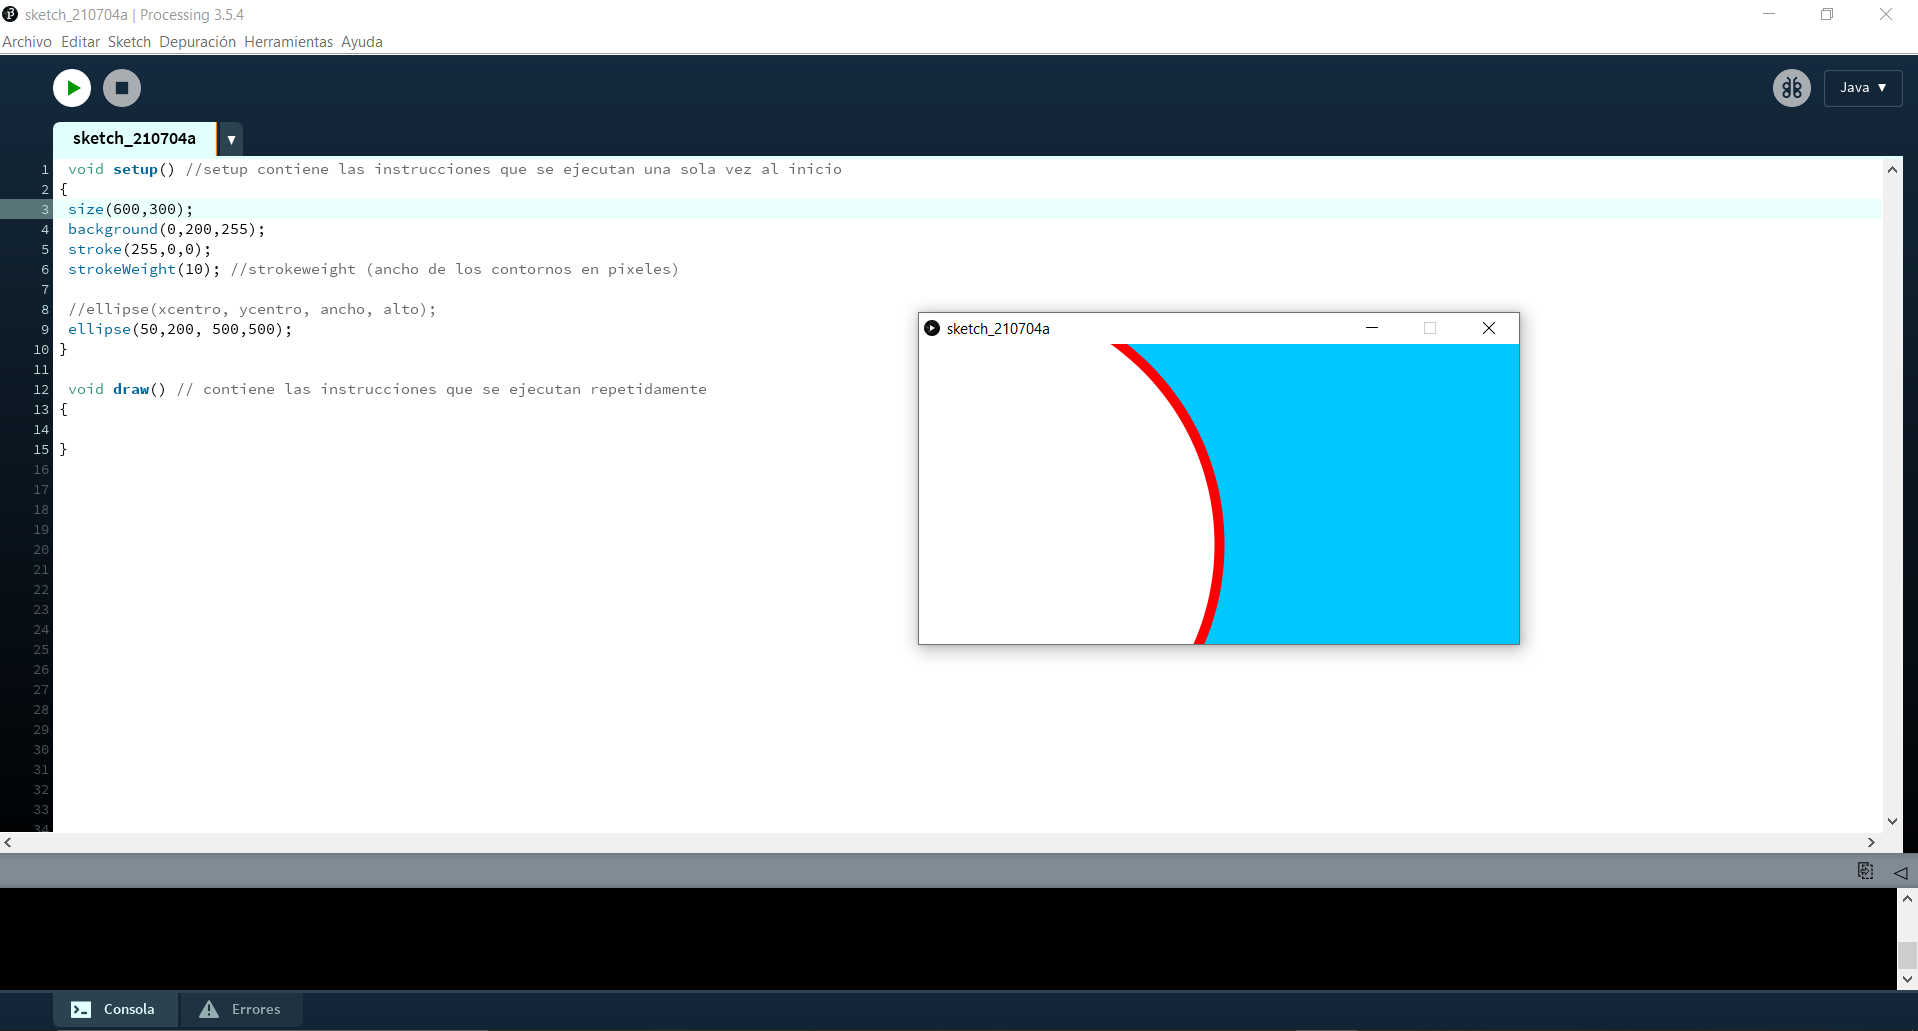
------------------- Circular shape
void setup() // Setup contains the instructions that are executed only once at startup
{
size(300,300);
background(0,200,255);
stroke(255,0,0);
strokeWeight(10); //strokeweight (contour width in pixels)
line(0,0,300,300);
//ellipse(xcenter, ycenter, width, height);
ellipse(50,200, 50,50);
}
void draw() // Contains the instructions to be executed repeatedly
{
}
-------------------- Rectangle
void setup() //
{
size(300,300);
ellipse(50,200, 50,50);
rect(100,40,100,200);
//rect (x_esqSupIzq, y_esqSupIzq, ancho, alto);
}
void draw() //
{
}
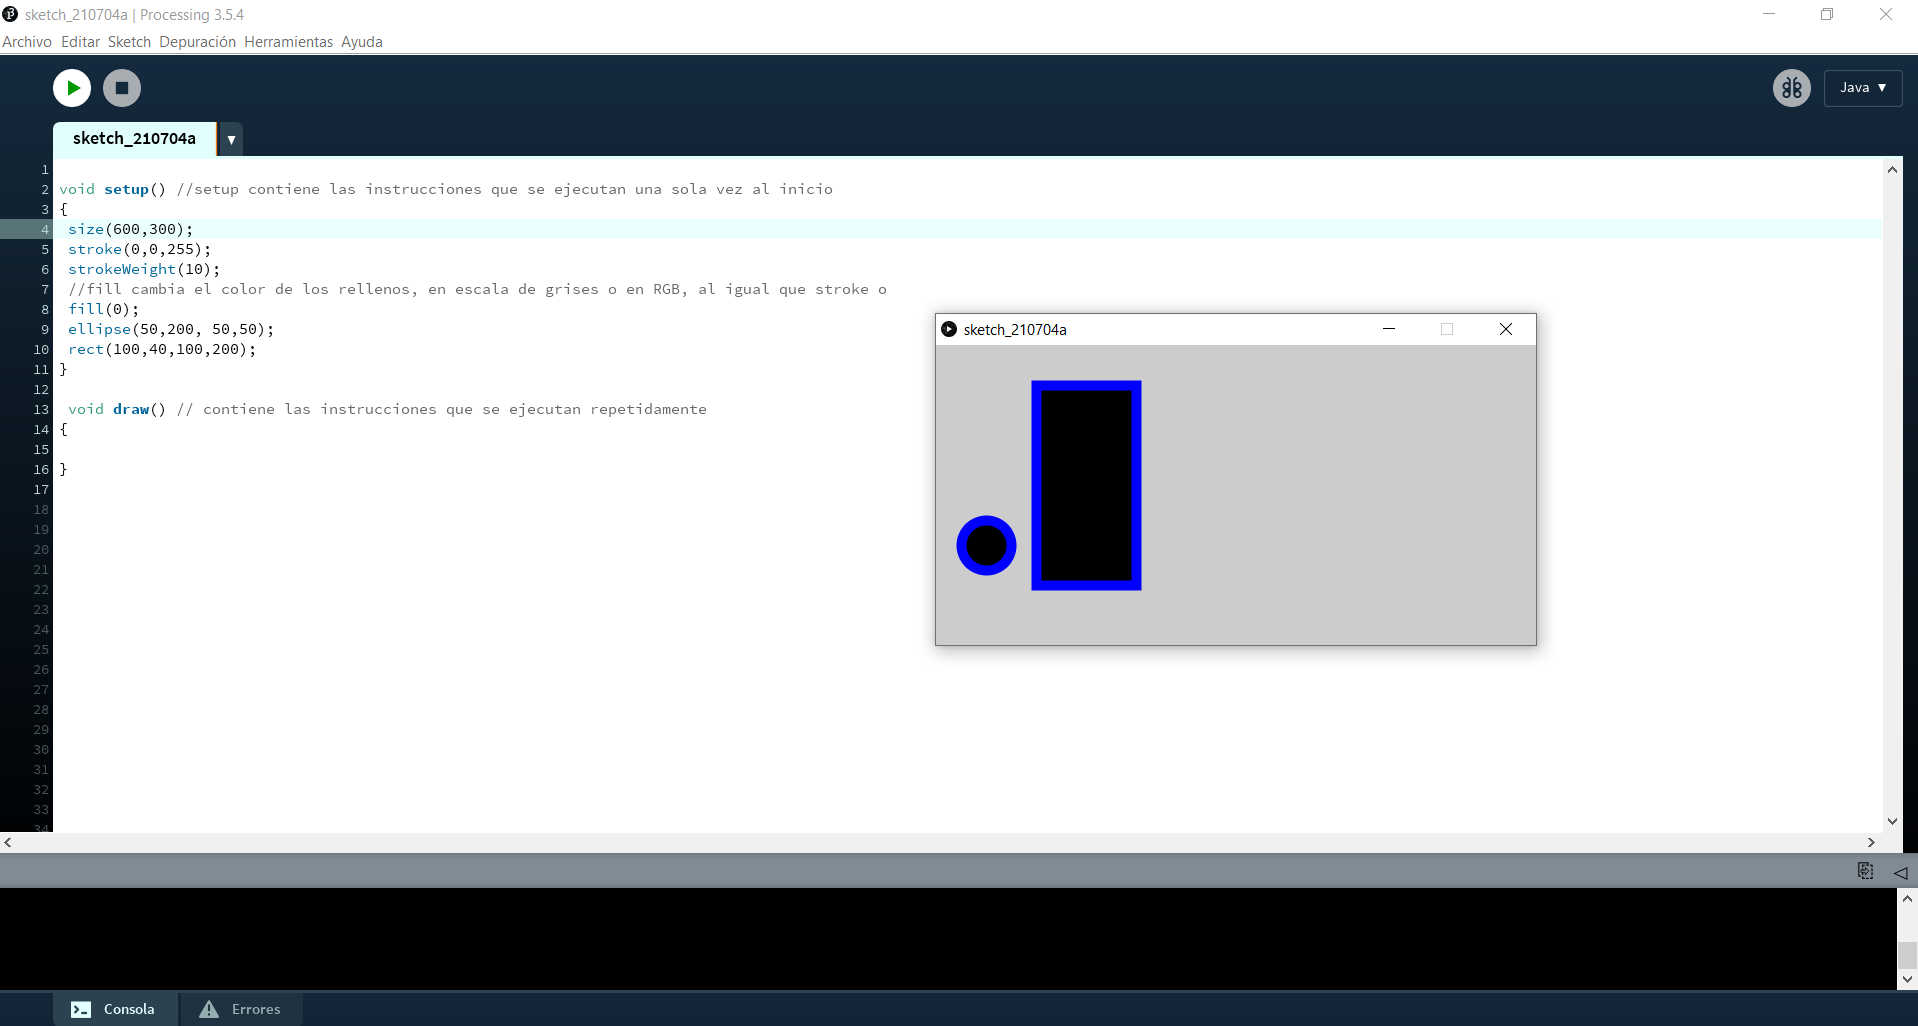
--------------------- Fill (Change the color of the fillings)
void setup() //
{
size(300,300);
ellipse(50,200, 50,50);
strokeWeight(10);
//fill changes the color of the fills, in grayscale or RGB, as well as stroke or background
fill(255); //can also have 3 RGB numbers
ellipse(50,200, 50,50);
rect(100,40,100,200);
}
void draw() //
{
}
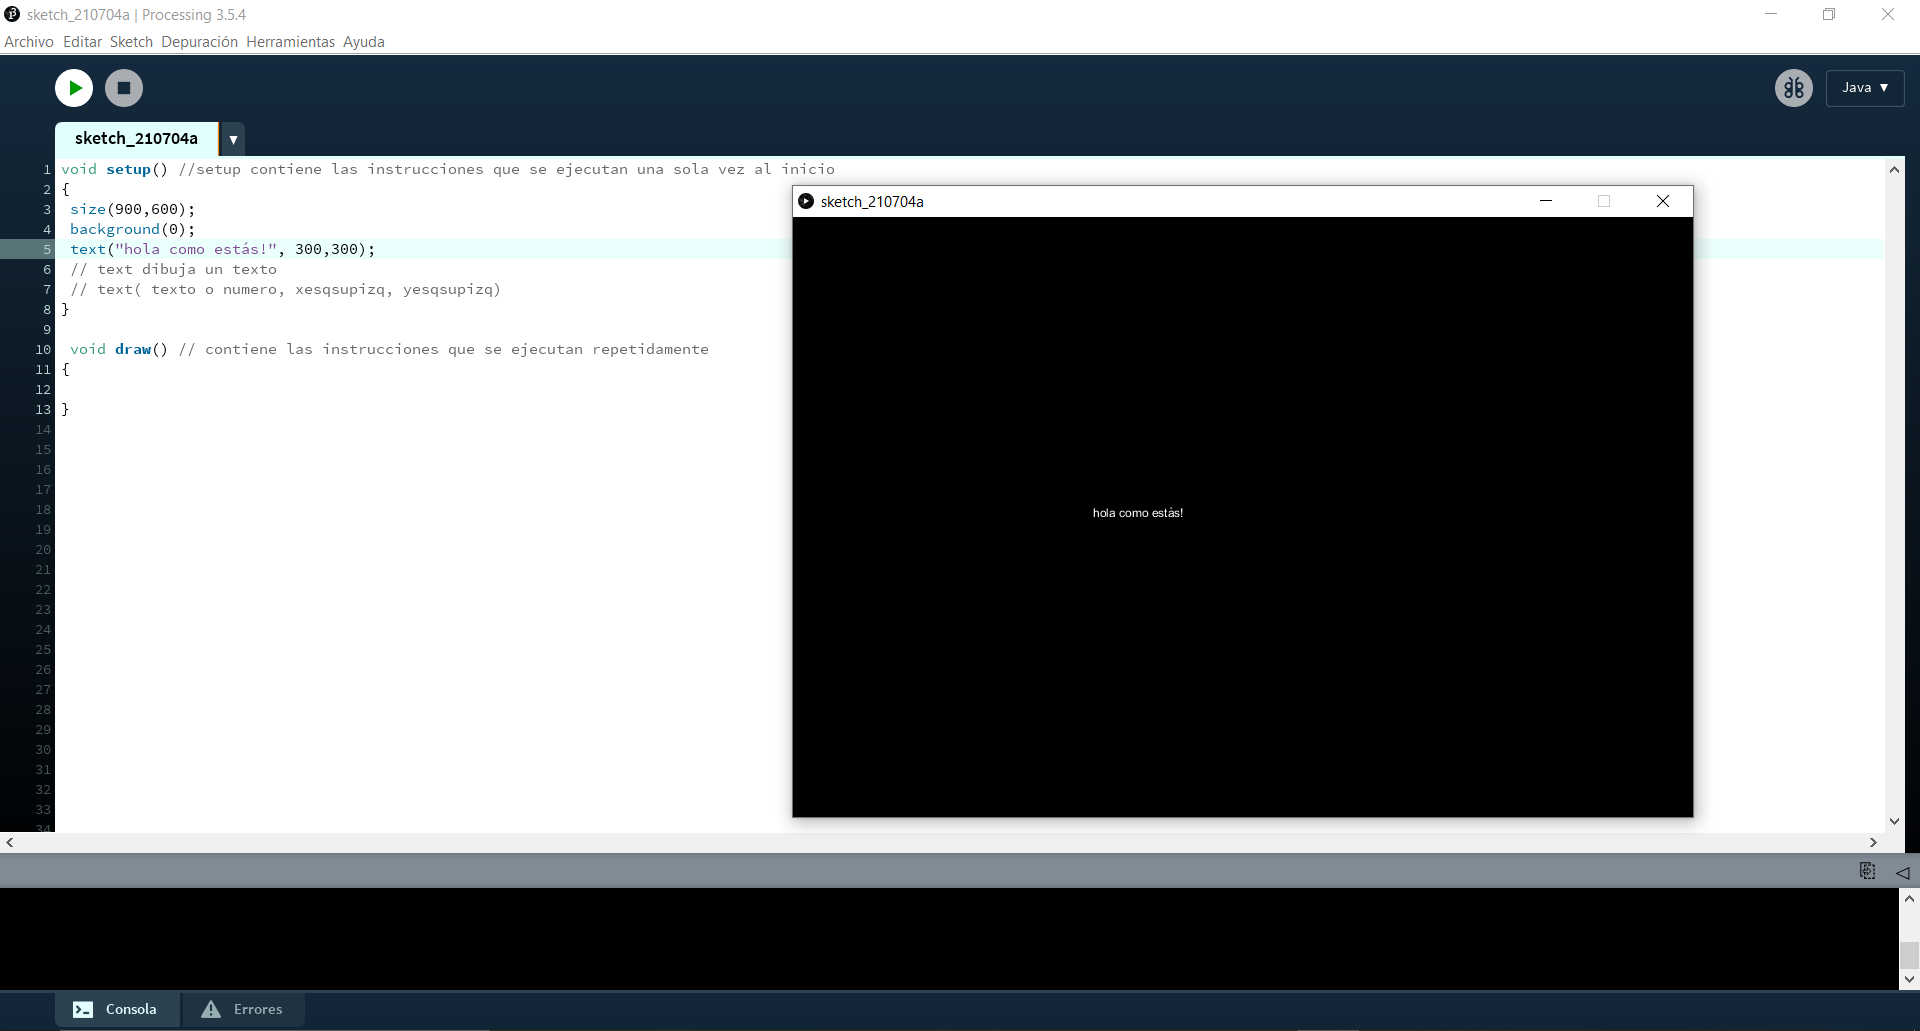
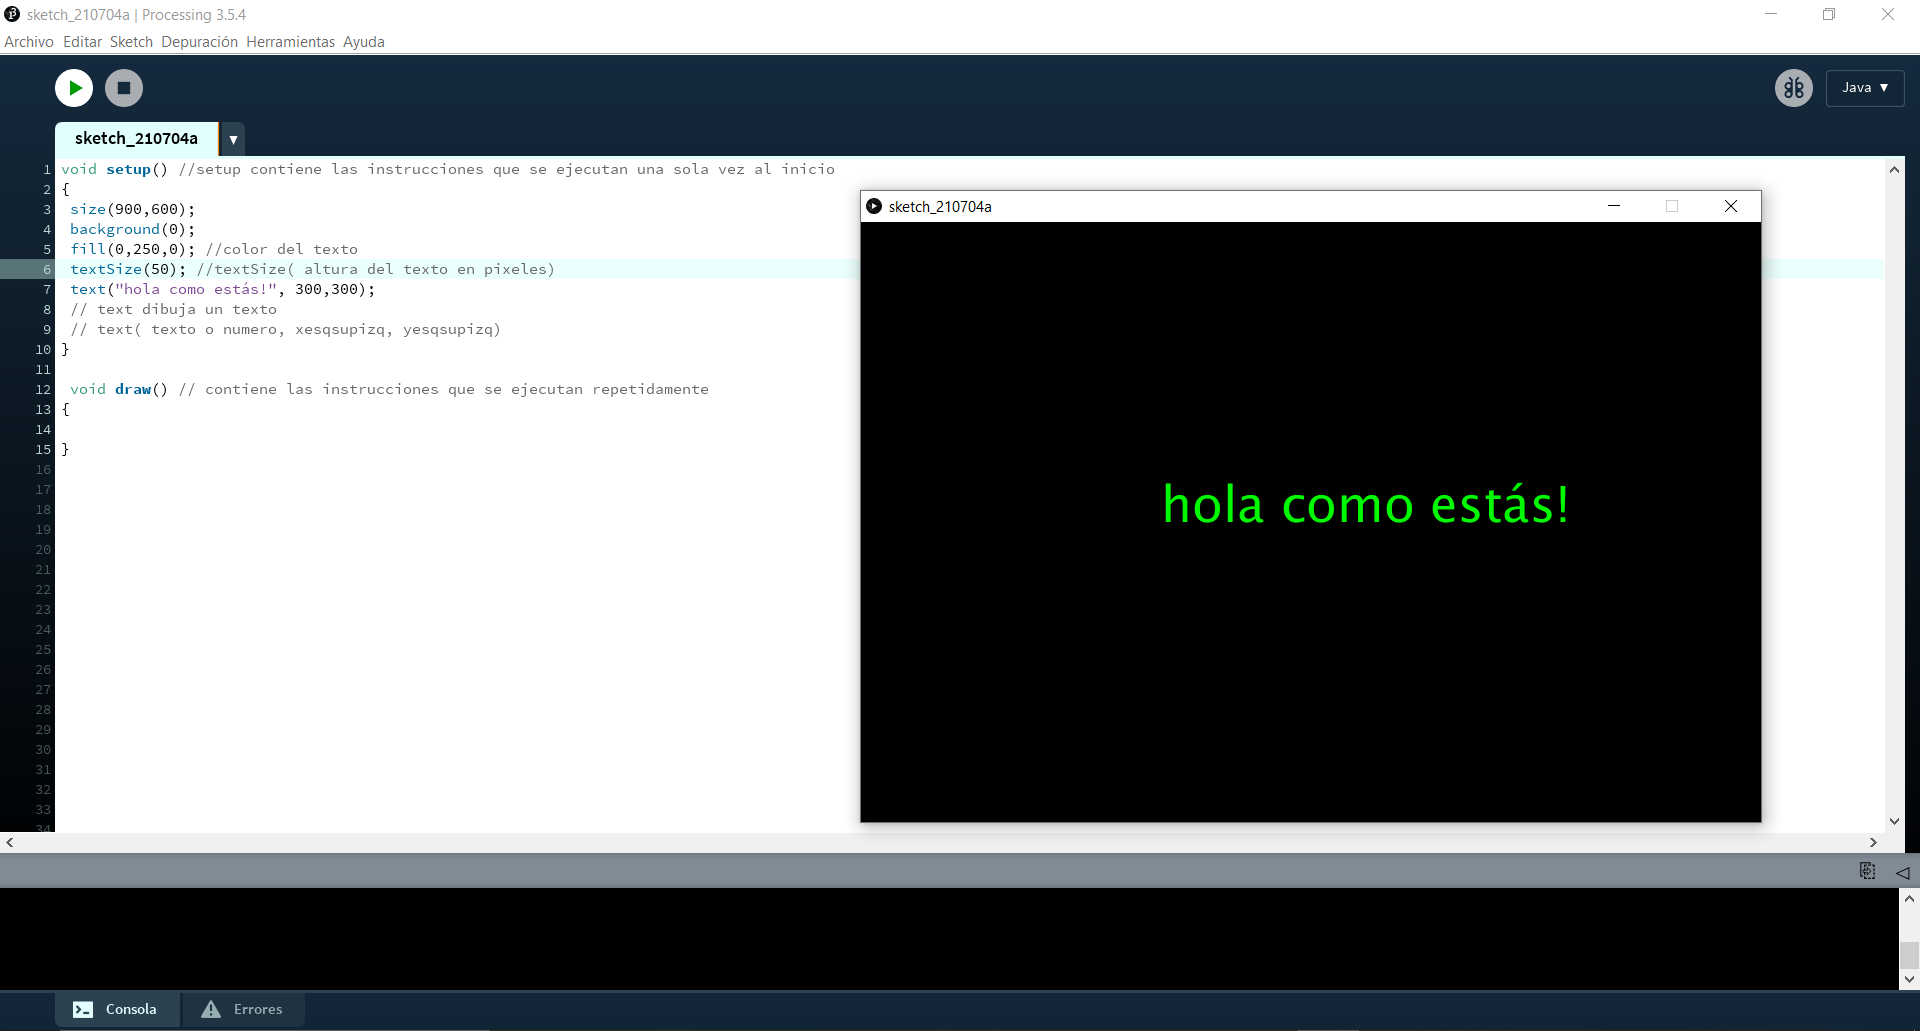
---------------------- Text
void setup() //
{
size(600,300);
background(255);
fill(0,250,0); //text color
textSize(50); //textSize( text height in pixels)
text("hola como estás!", 300,300);
// text draws a text
// text( text or number, xesqsupizq, yesqsupizq)
}
void draw() //
{
}
------------------------
Conclusions
1). As can already be seen, graphical things can be done by means of texts (programming). At the top of the workspace there is a section that says File/Examples, these come by default when downloading the program and allows you to see the texts of many interesting animated graphics, I recommend exploring them to understand the logic of their construction.
2). As basic instructions I started by understanding the dimensions of the working window executed with "size", the correct way to use is "size(300,300);" where two numbers are displayed corresponding to the width and height of the window to be created. As a note, it is important to keep the text correct since any slight difference such as putting lower case instead of upper case will cause processing not to recognize the instructions. Adding the semicolon at the end is also vital. ✋
3). Another important resource that is often seen is the use of the double diagonal accompanied with a text, this serves to make comments and / or annotations that we want to save. It is very useful. A list of instructions/references can be found at "here"
4). Another important point is that there are variations within each instruction, for example in background, if we want to color we can do it in two ways, the first with a single argument and the second with three. In the first case we would use the numbers from 0 to 255 for being the grayscale and in the second we would use the RGB colors (each color has a range from 0 to 255).
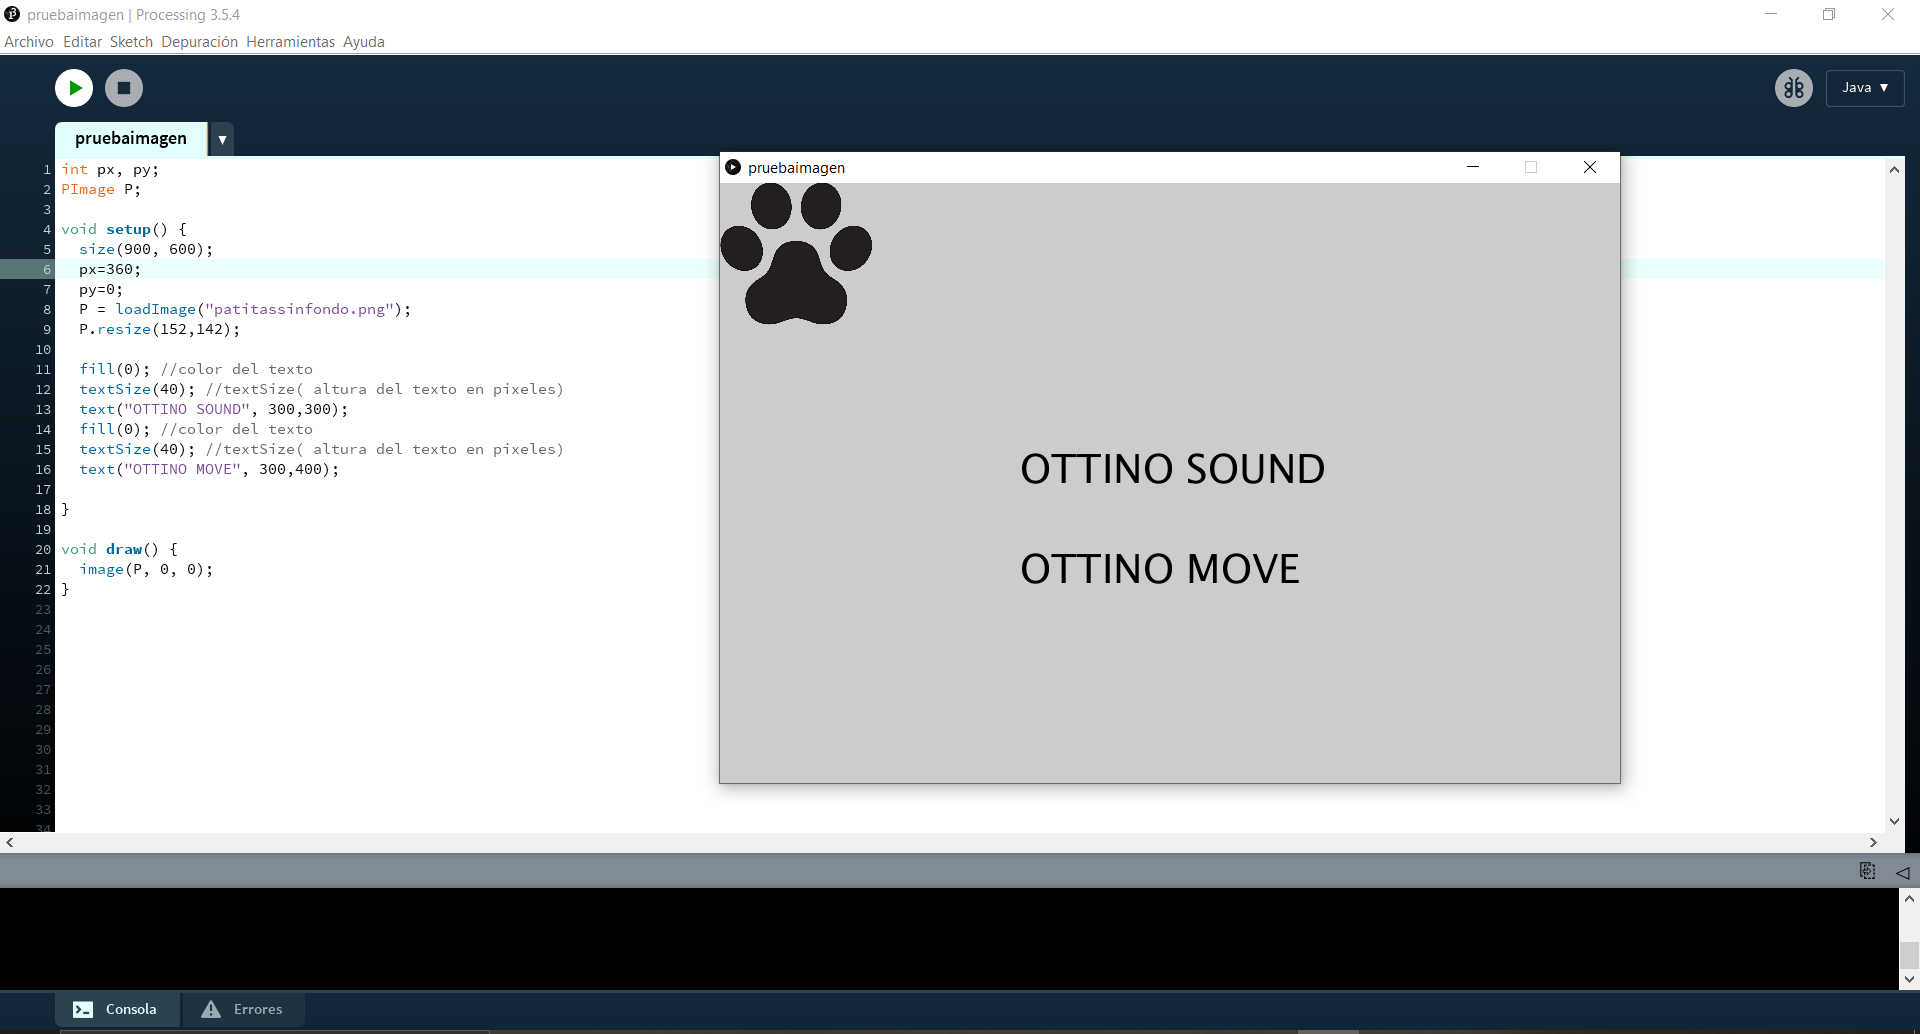
About my proposal
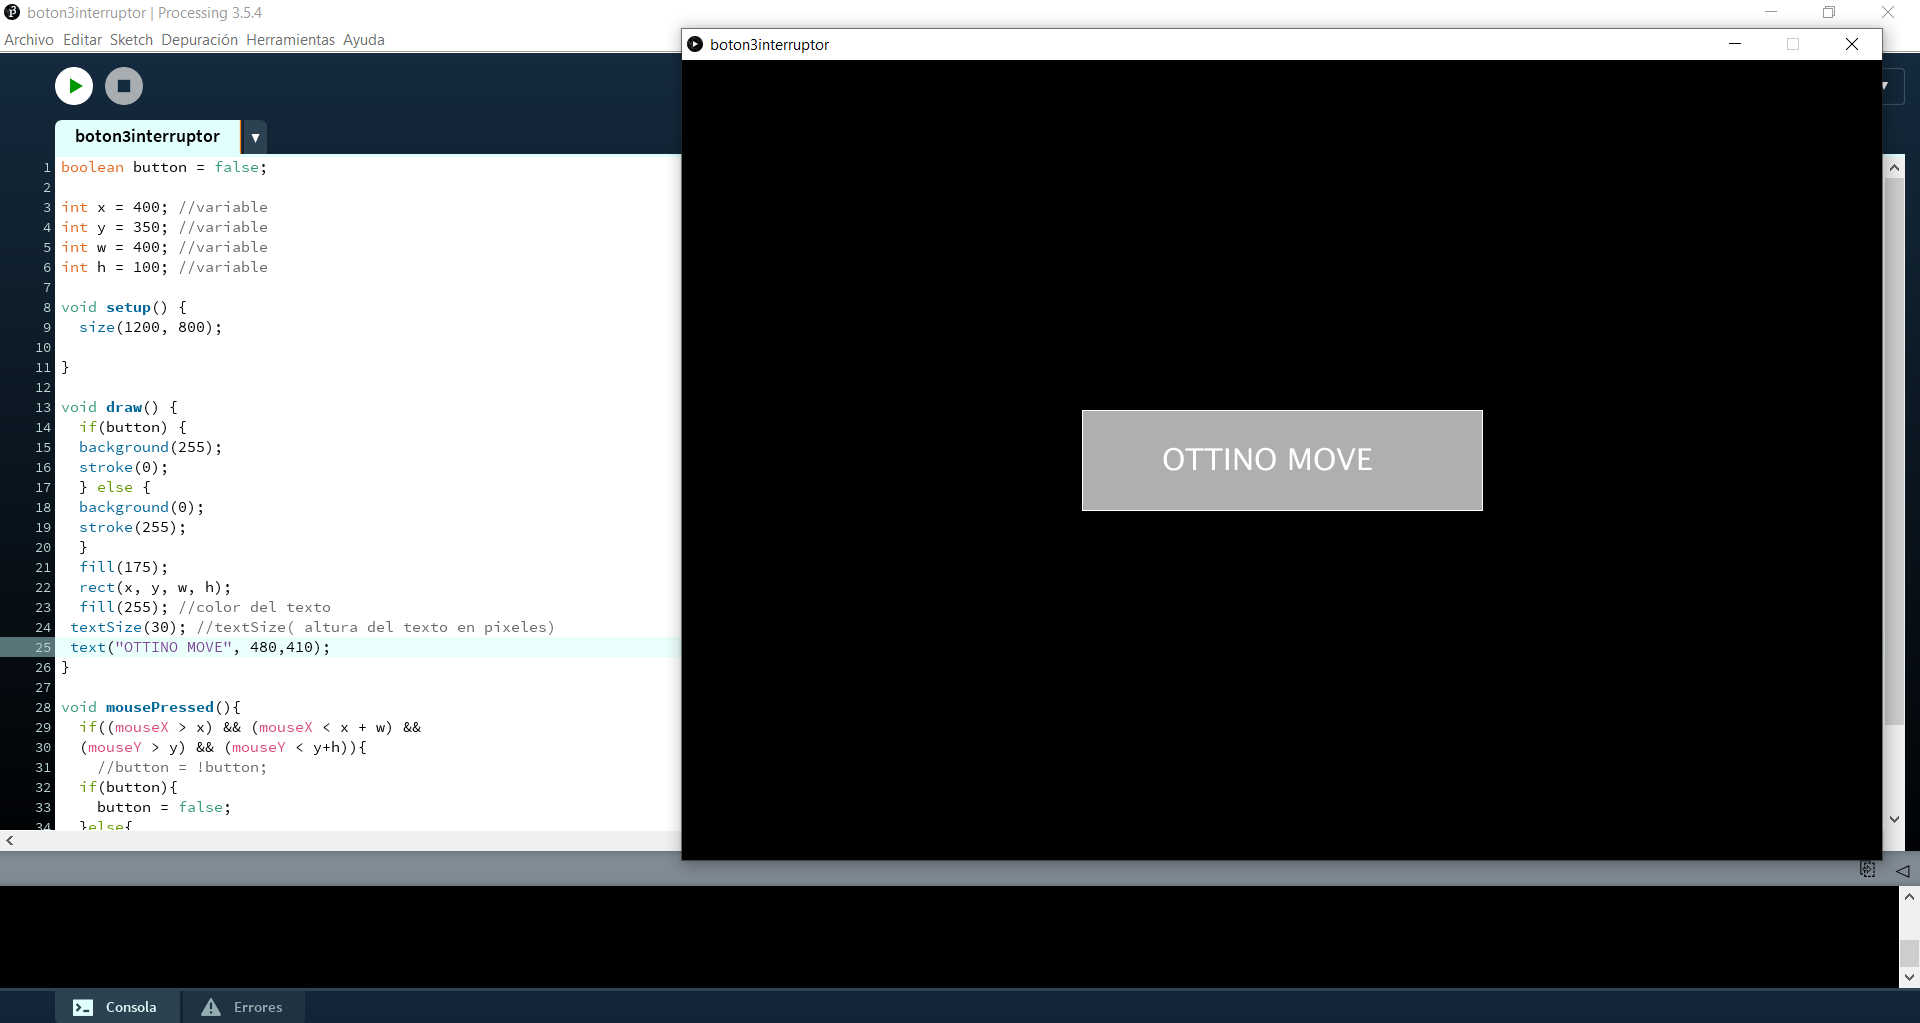
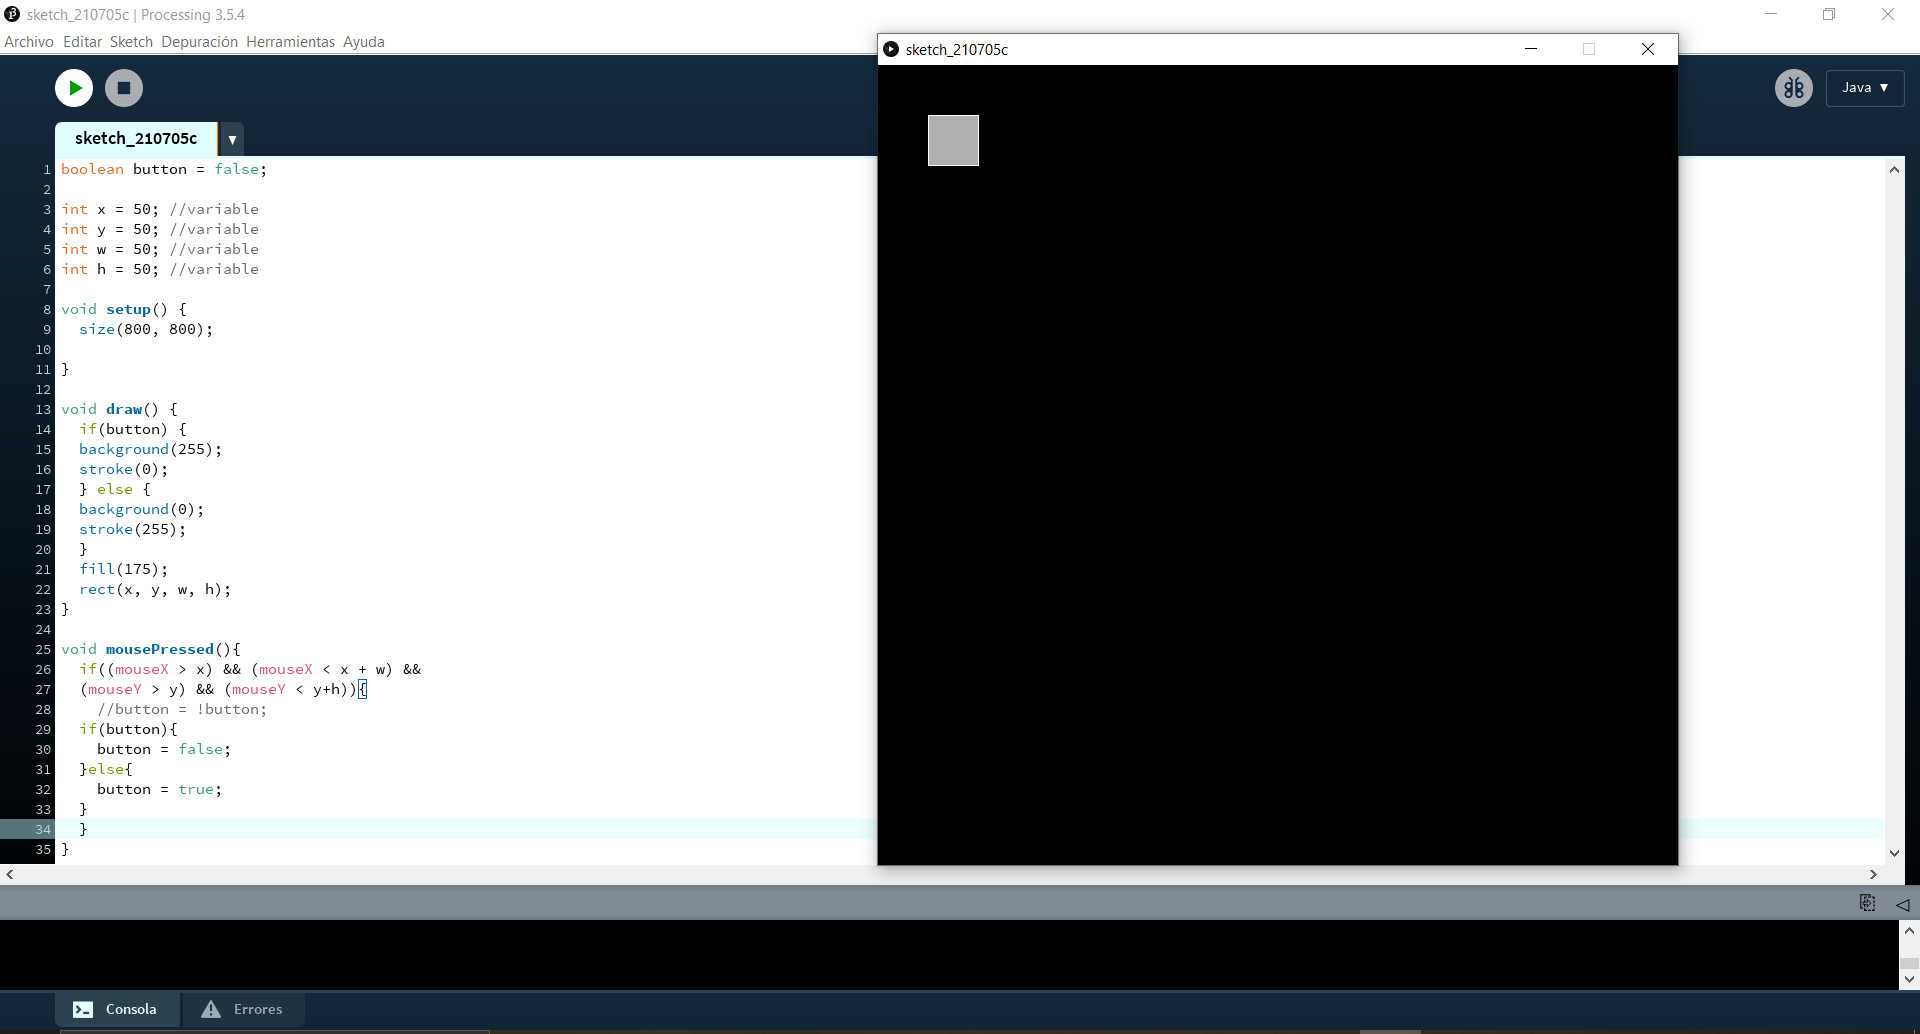
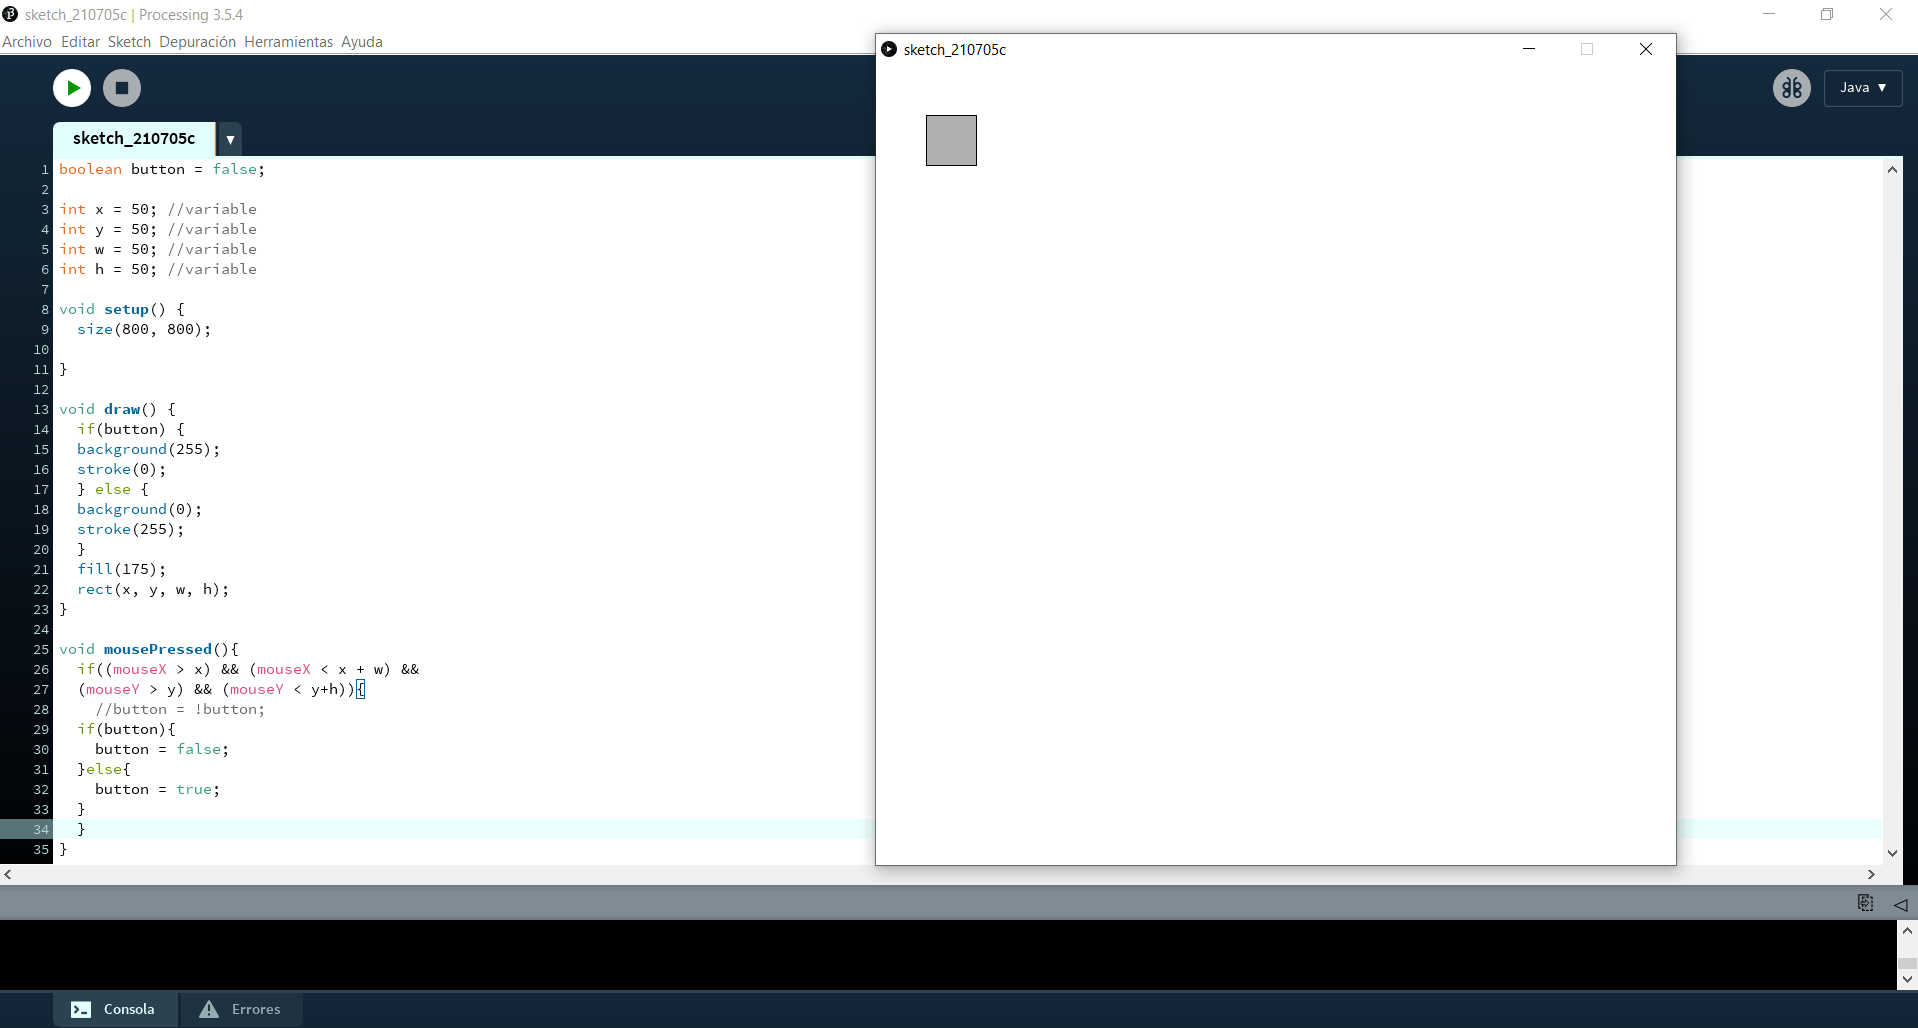
In order to perform the interactive part of processing I was guided by many examples both from the internet and from former Fab Academy students. One of the concerns I had was to get the simulation of a switch, this exercise was important to solve in order to create an interface for my final project.
First simulation
As you can see in the example I managed to make the background color change when clicking on the "Ottino move" button, the structure I put in processing was a mix of all the initial exercises I did. This is how I built each block. At the end of this page I attach the files. Next I share other practical exercises that helped me to understand the logic.
Click 1
Click 2
What's the next?
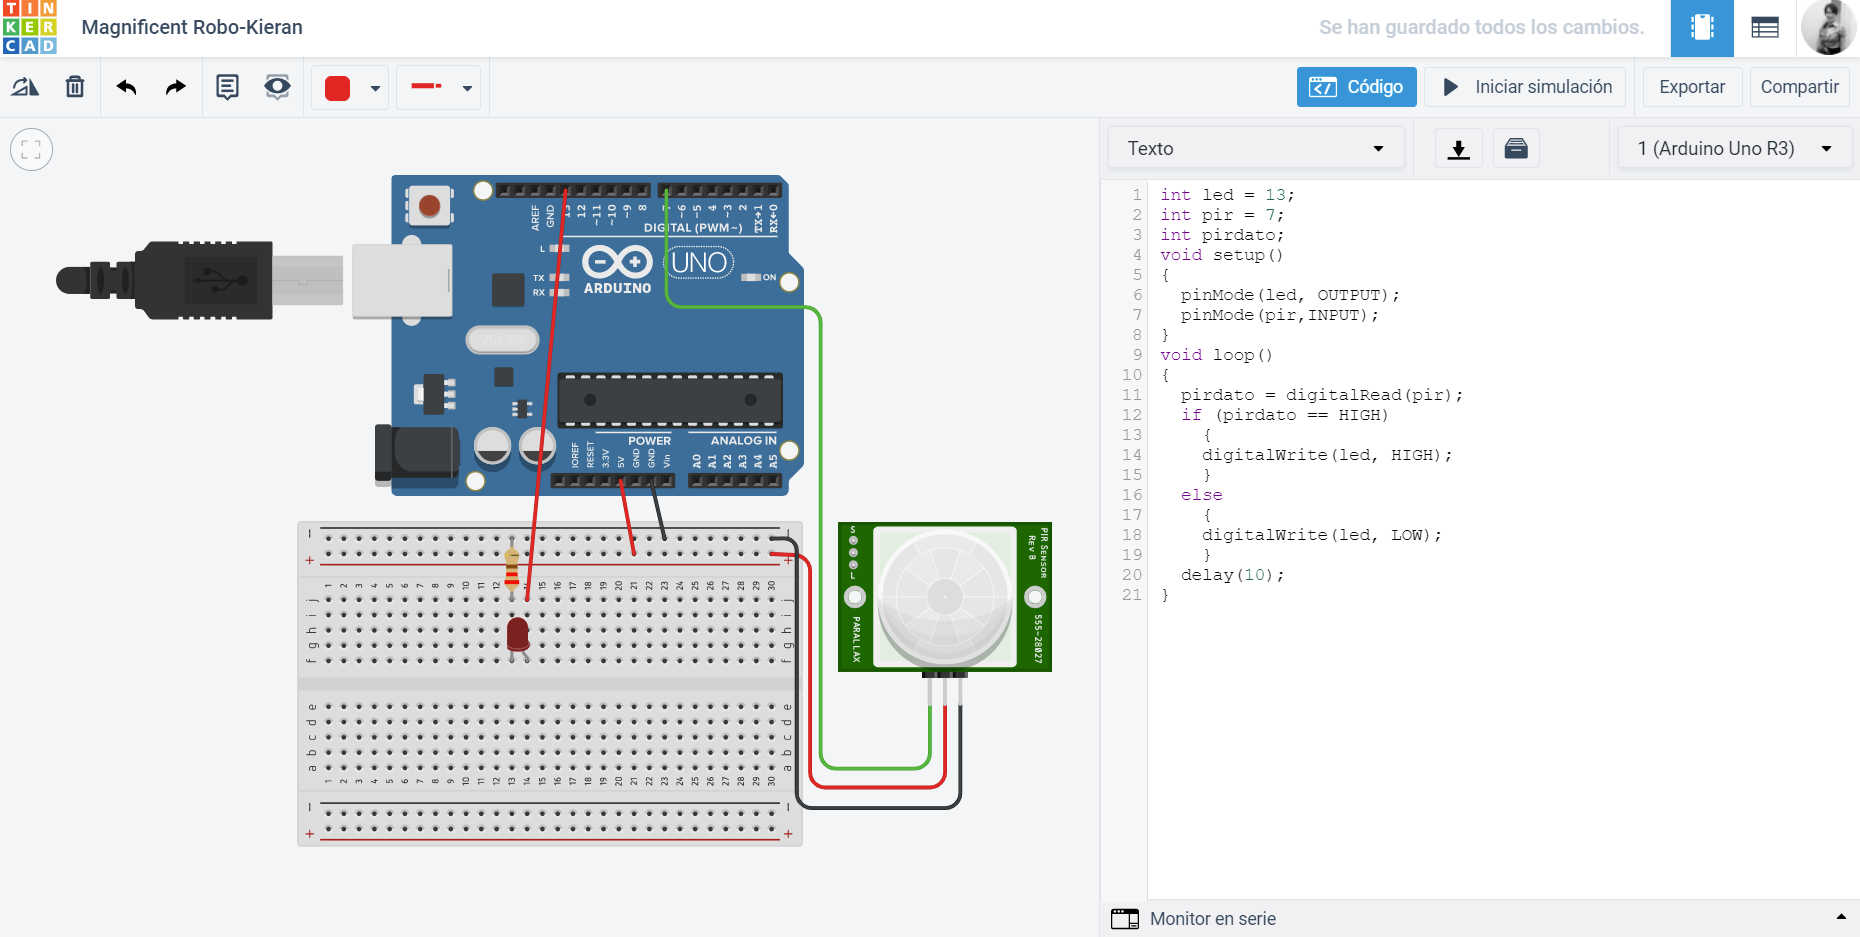
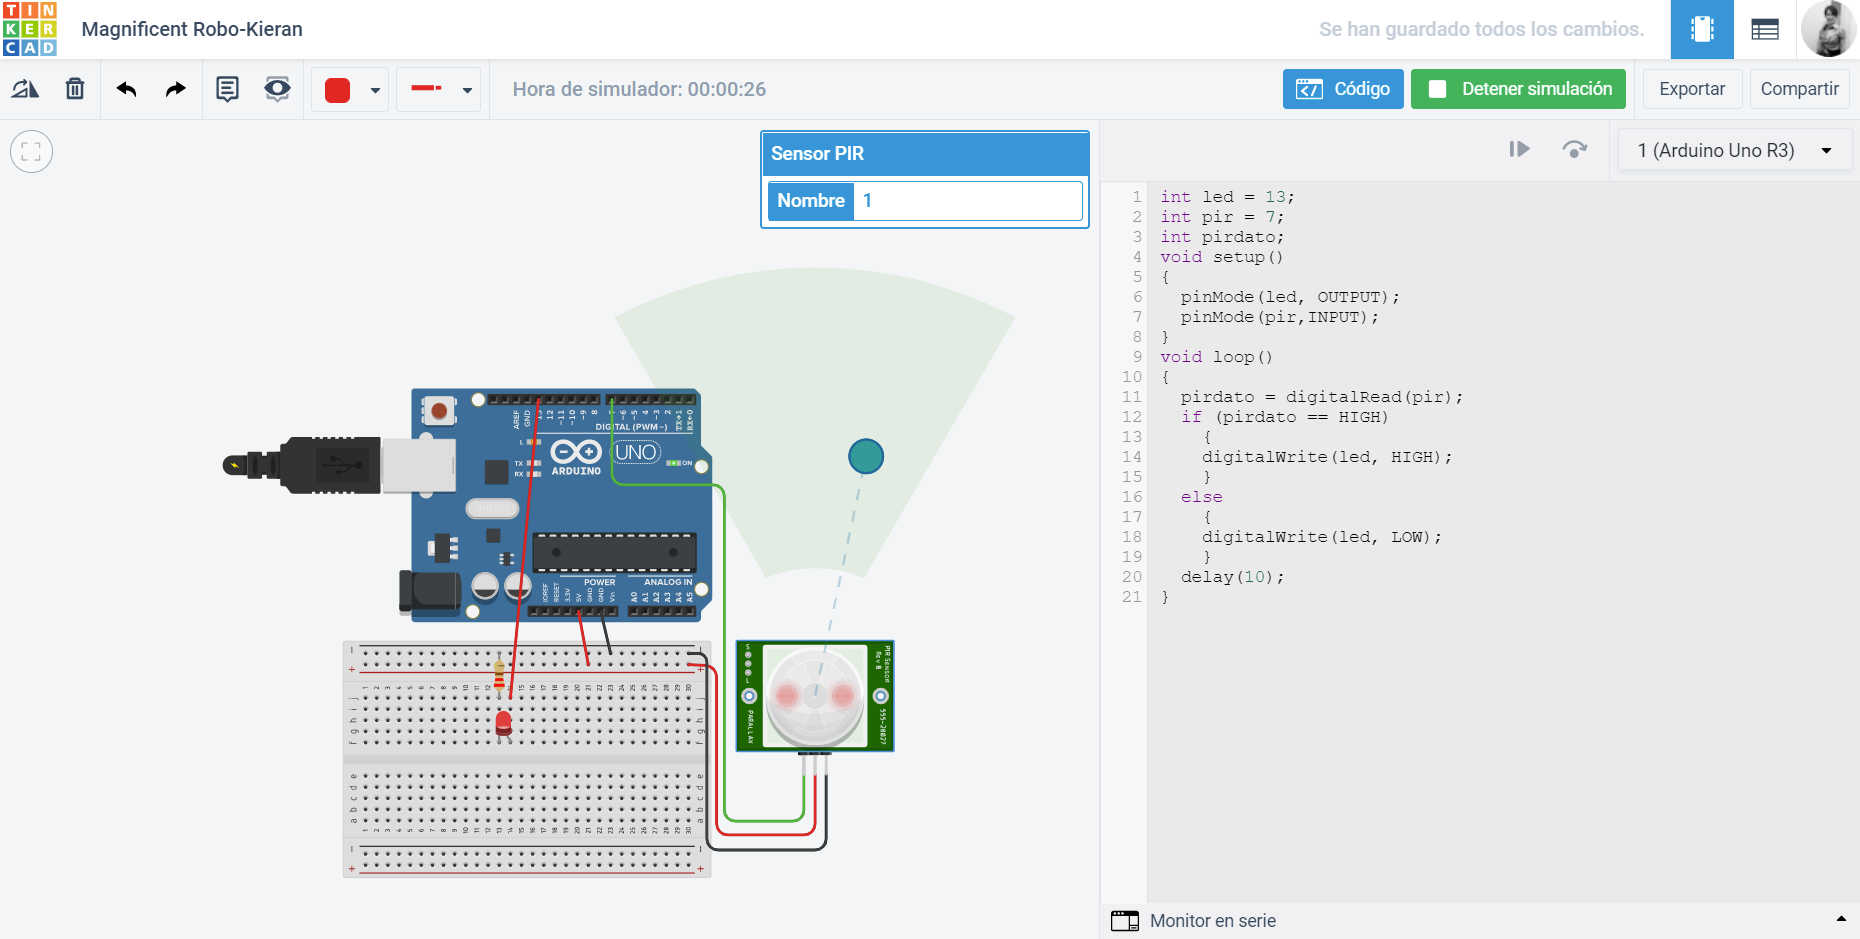
After understanding the structure (in code) of an example switch I had to move on to understand the connection with the next step; the arduino, to be able to connect my board with the interface designed in processing this step is important. Thanks to some examples I was able to make a simulation with the Arduino UNO and the PIR motion sensor, I chose to use this sensor because I will use it in my final project so it seemed pertinent to do it this week. To start I made a test in Tinkercad, here I could see for the first time the connection of a PIR sensor with the Arduino UNO board. Next I will show the graphic in the virtual platform.
Tinkercad 1
Tinkercad 2
Here I share the code to perform this simulation.
	//Mayra Ascencio Calderón
	//Fab Academy 2021
	//Sensor test in Tinkercad

	int led = 13;
	int pir = 7;
	int pirdato;
	void setup()
	{
	pinMode(led, OUTPUT);
	pinMode(pir,INPUT);
	}
	void loop()
	{
	pirdato = digitalRead(pir);
	if (pirdato == HIGH)
	{
	digitalWrite(led, HIGH);
	}
	else
	{
	digitalWrite(led, LOW);
	}
	delay(10);
	}
As I have already discussed in "Input Devices Week" , the motion sensor works with a detection range of 110°, when the infrared radiation starts to work, the LED connected to the protoboard lights up, this way we confirm that our sensor is working.
To perform the following exercise I was guided by a "project" from the academy, it contained the same logic I needed to make the PIR sensor work so I used the model and modified it. To know how to connect the sensor with the arduino I read the datasheet and investigated how to make it work, I will now share the first simulation.
First simulation
How does it work?
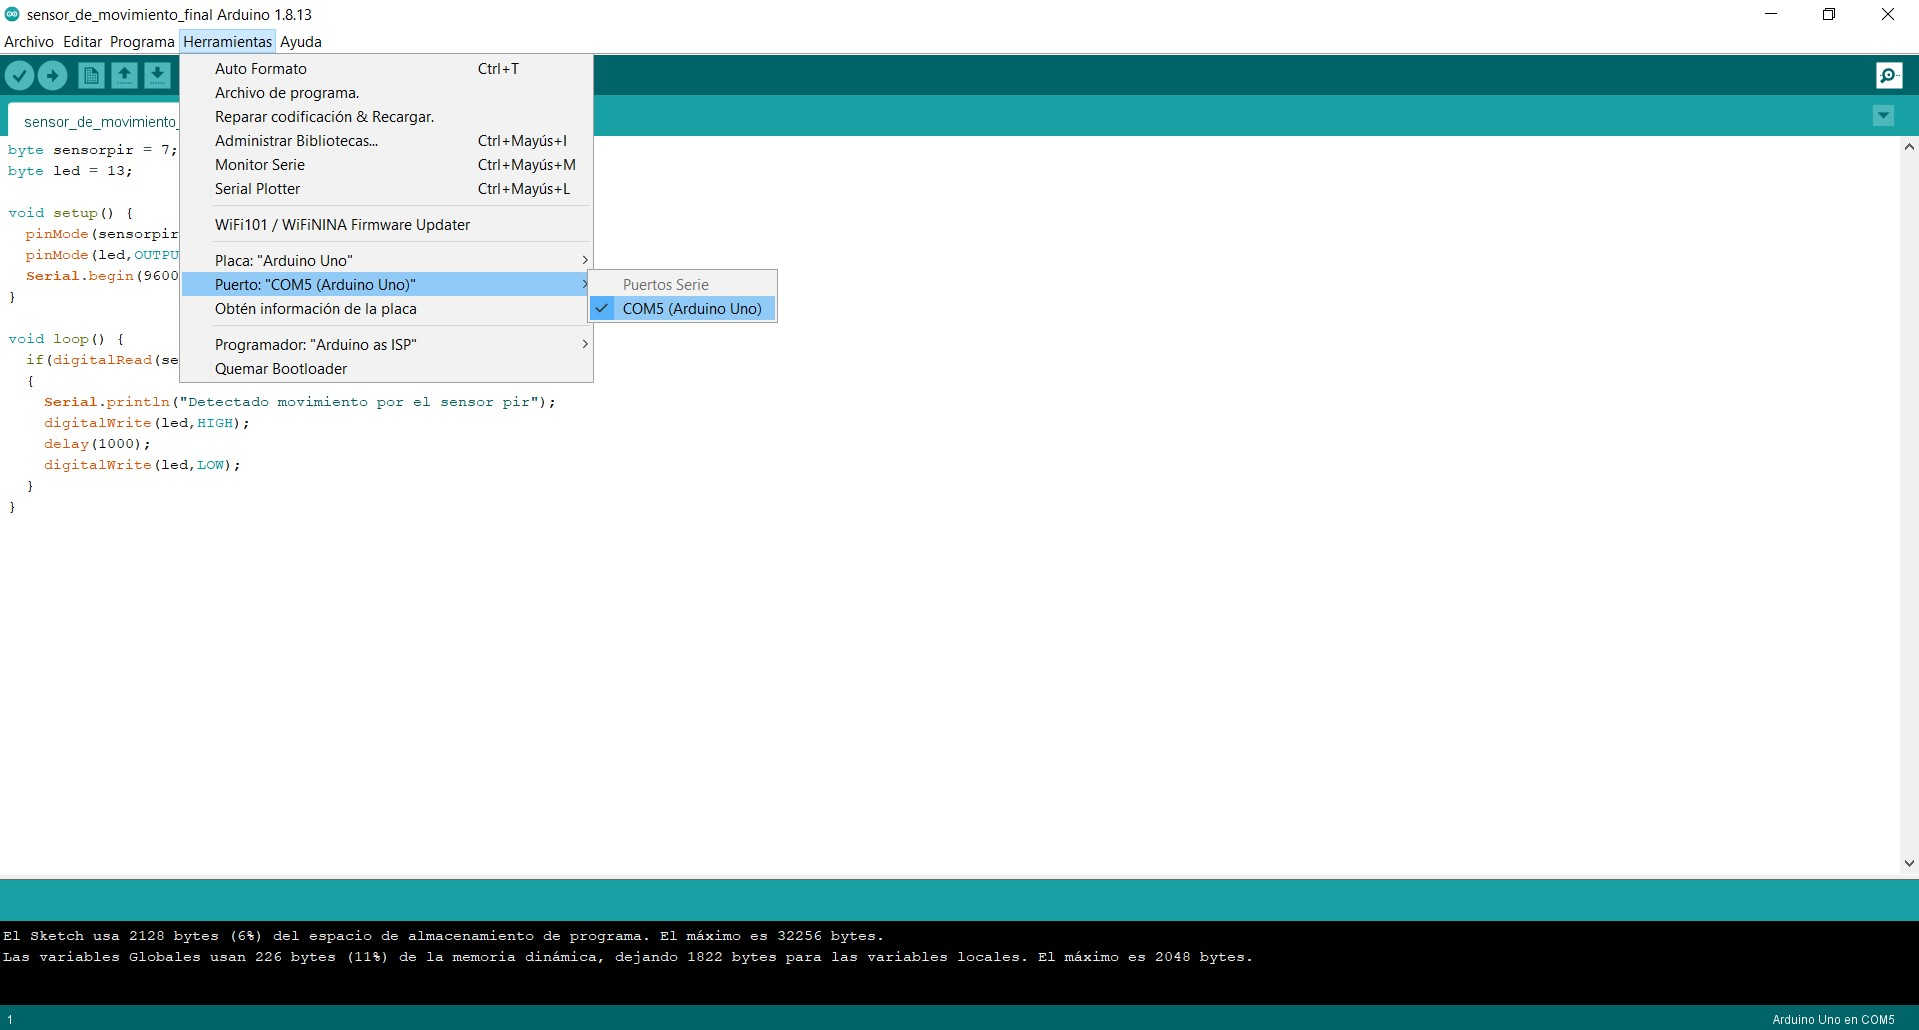
I will show the step by step for this simulation, to start with I had to work with both ARDUINO IDE and Processing, when I tried to follow the past tutorials I couldn't get the complete working so here I share how I was able to achieve it.
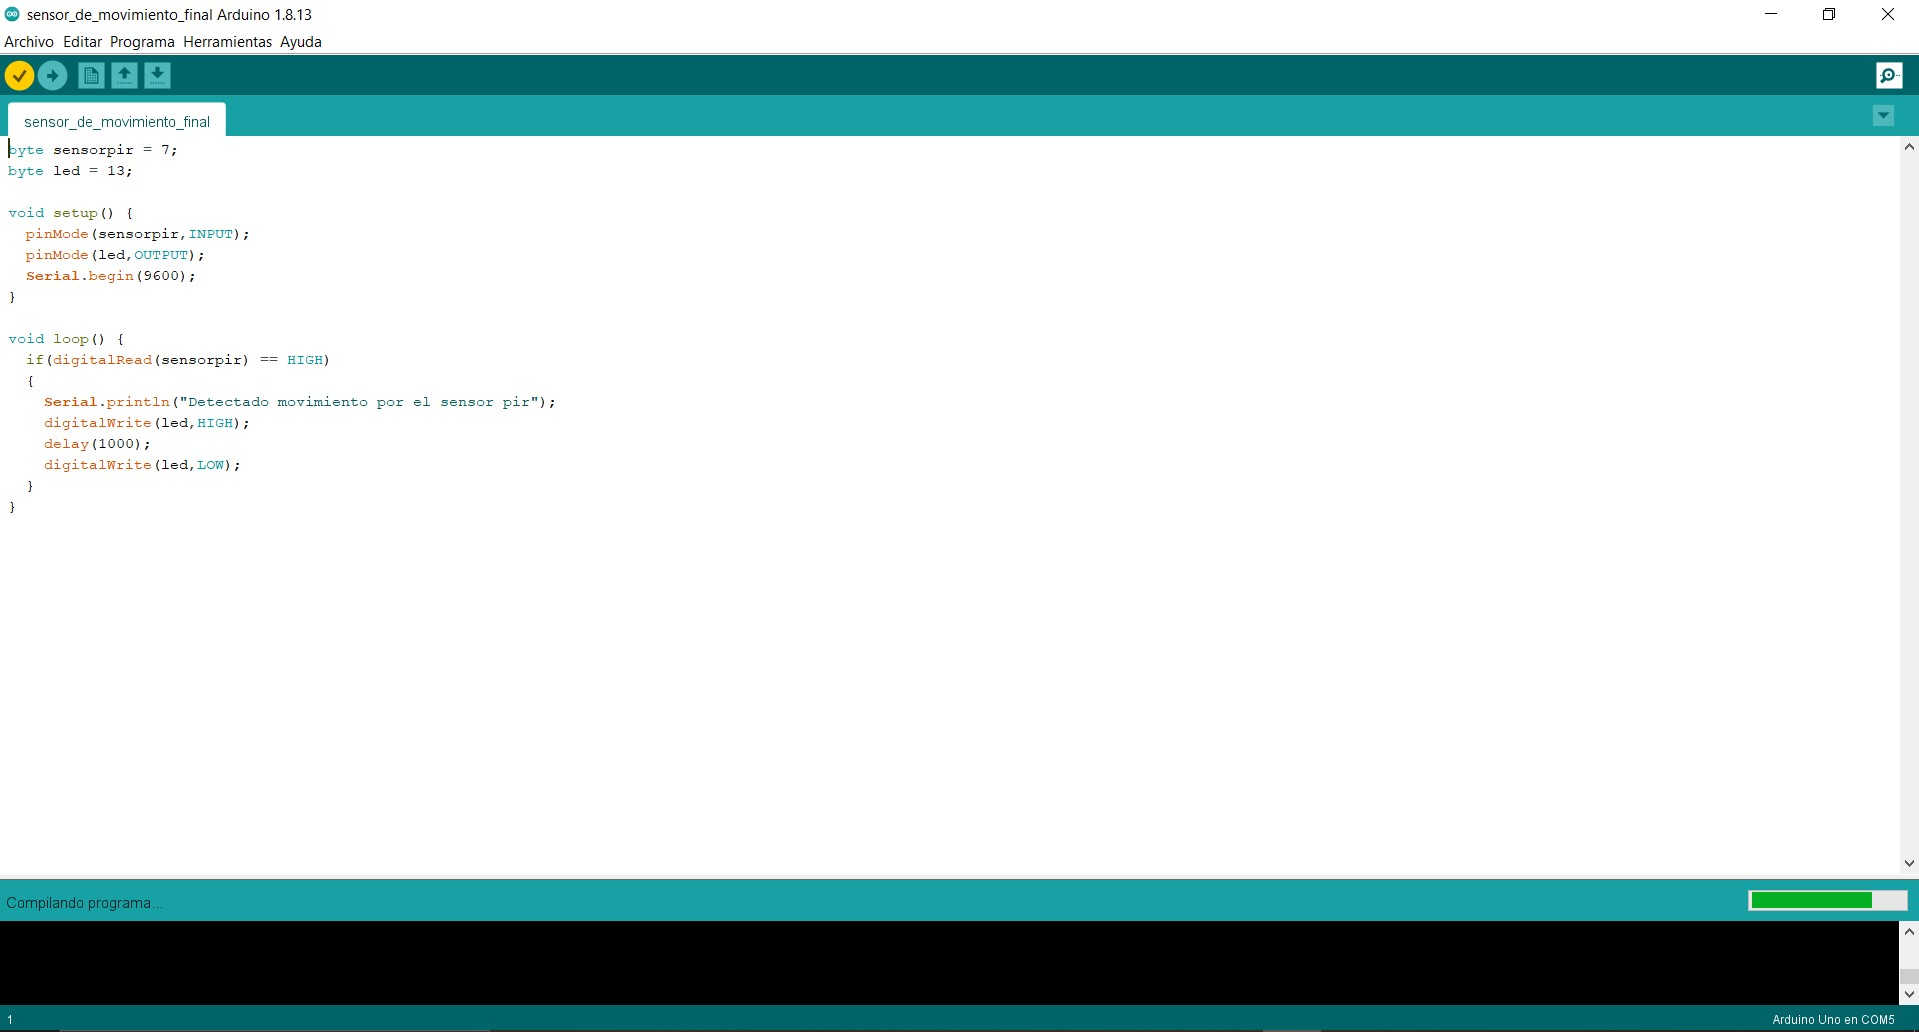
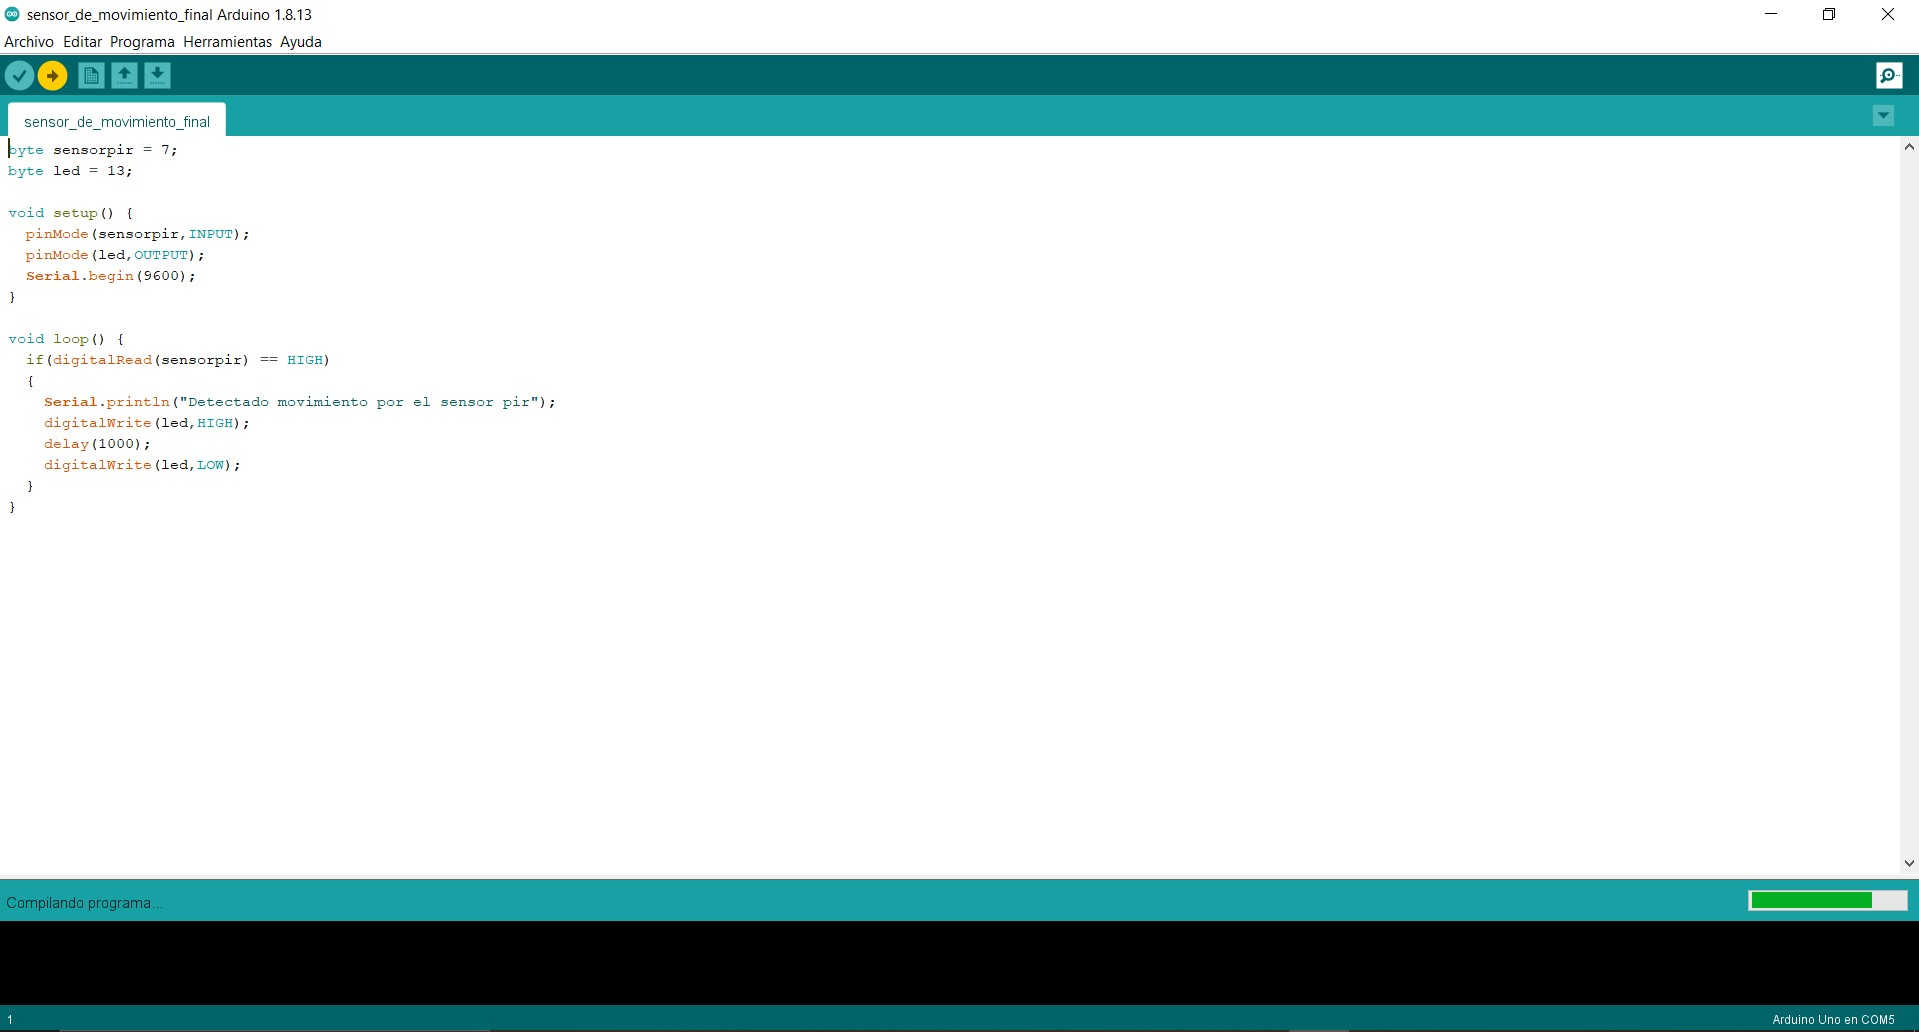
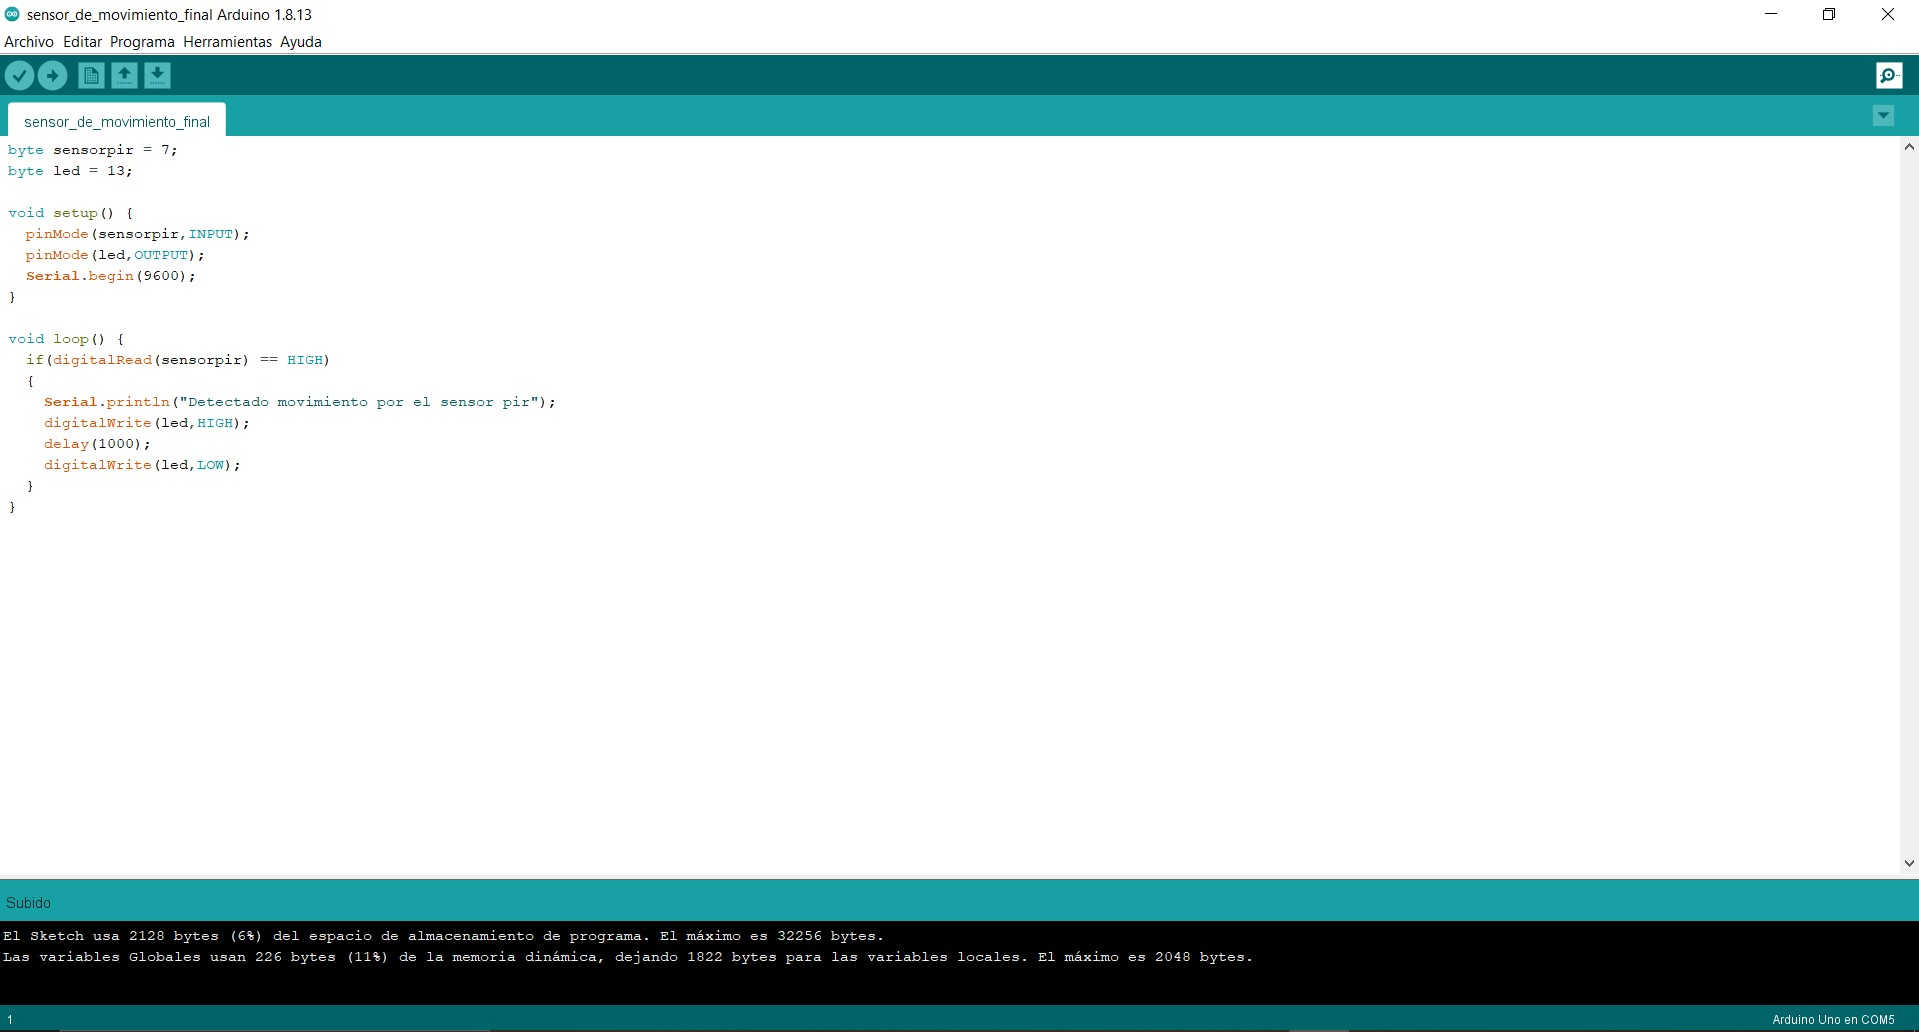
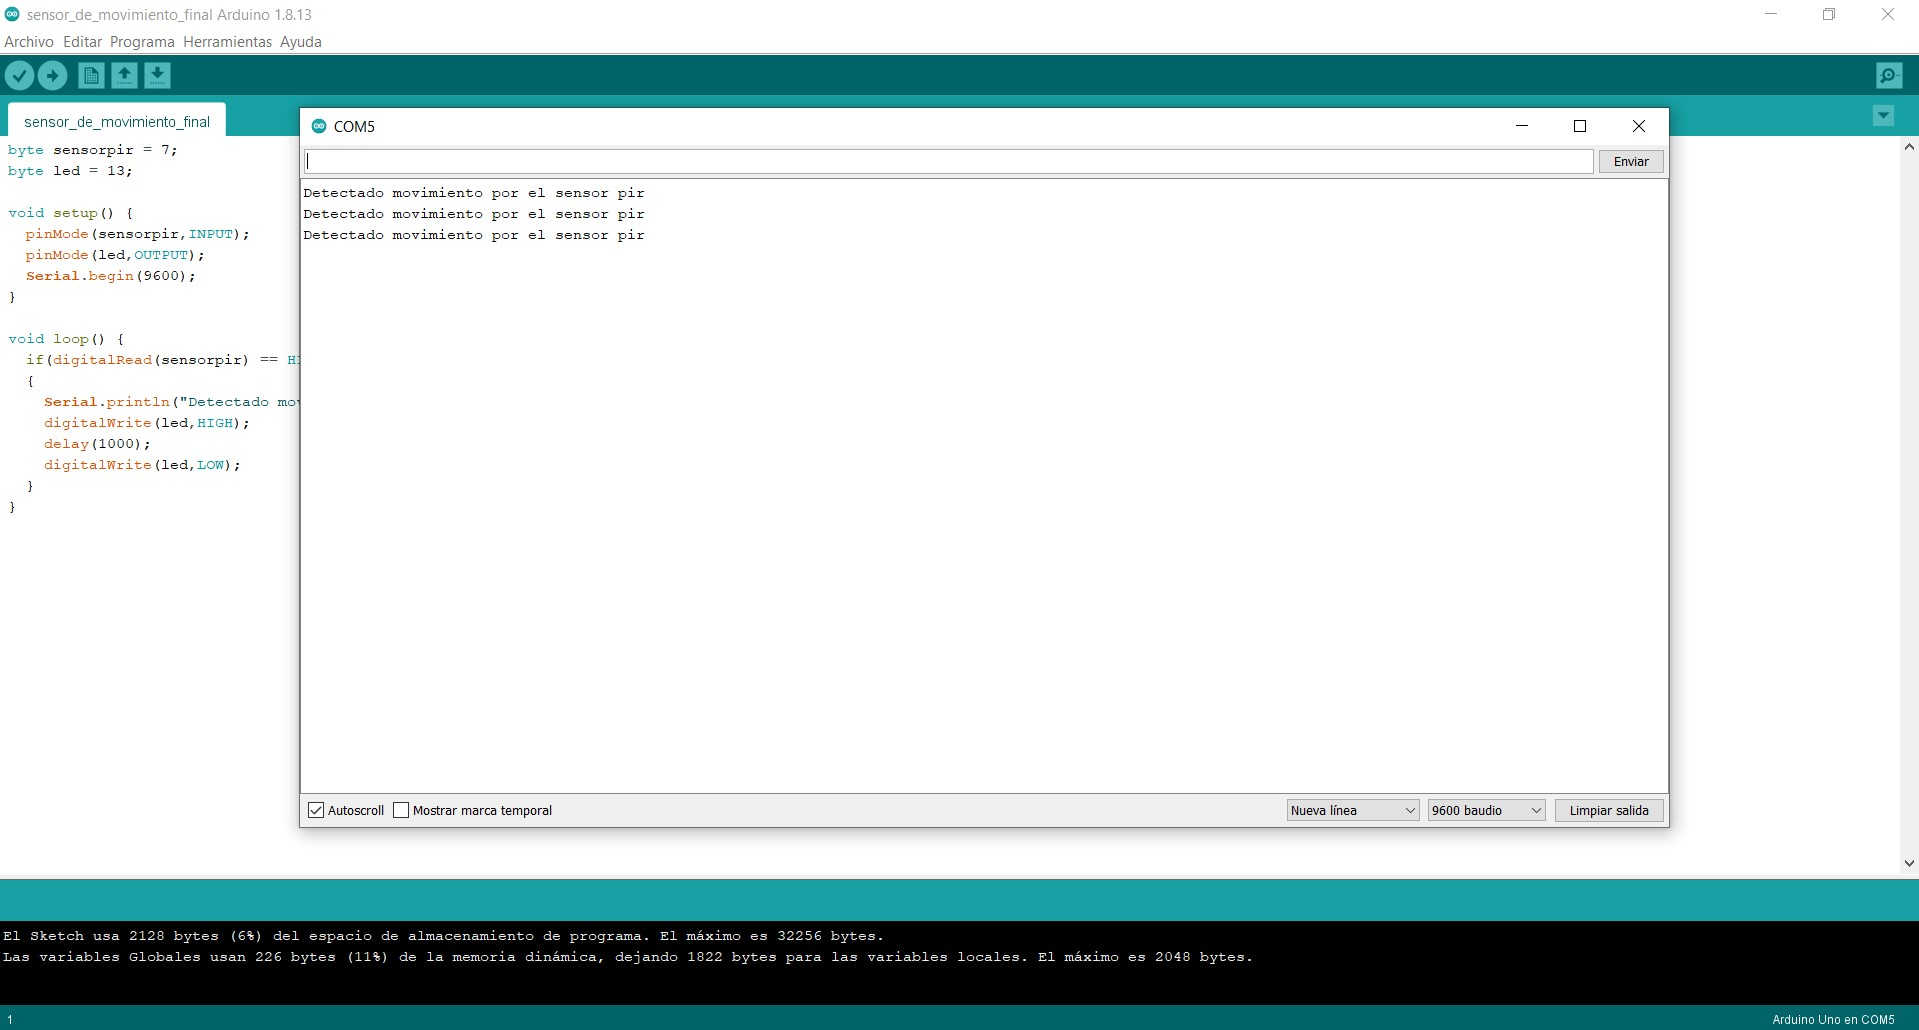
First steps in Arduino IDE:
COM 5 Port
Compiled
Uploading
Uploaded
Testing in serial monitor
Working sensor
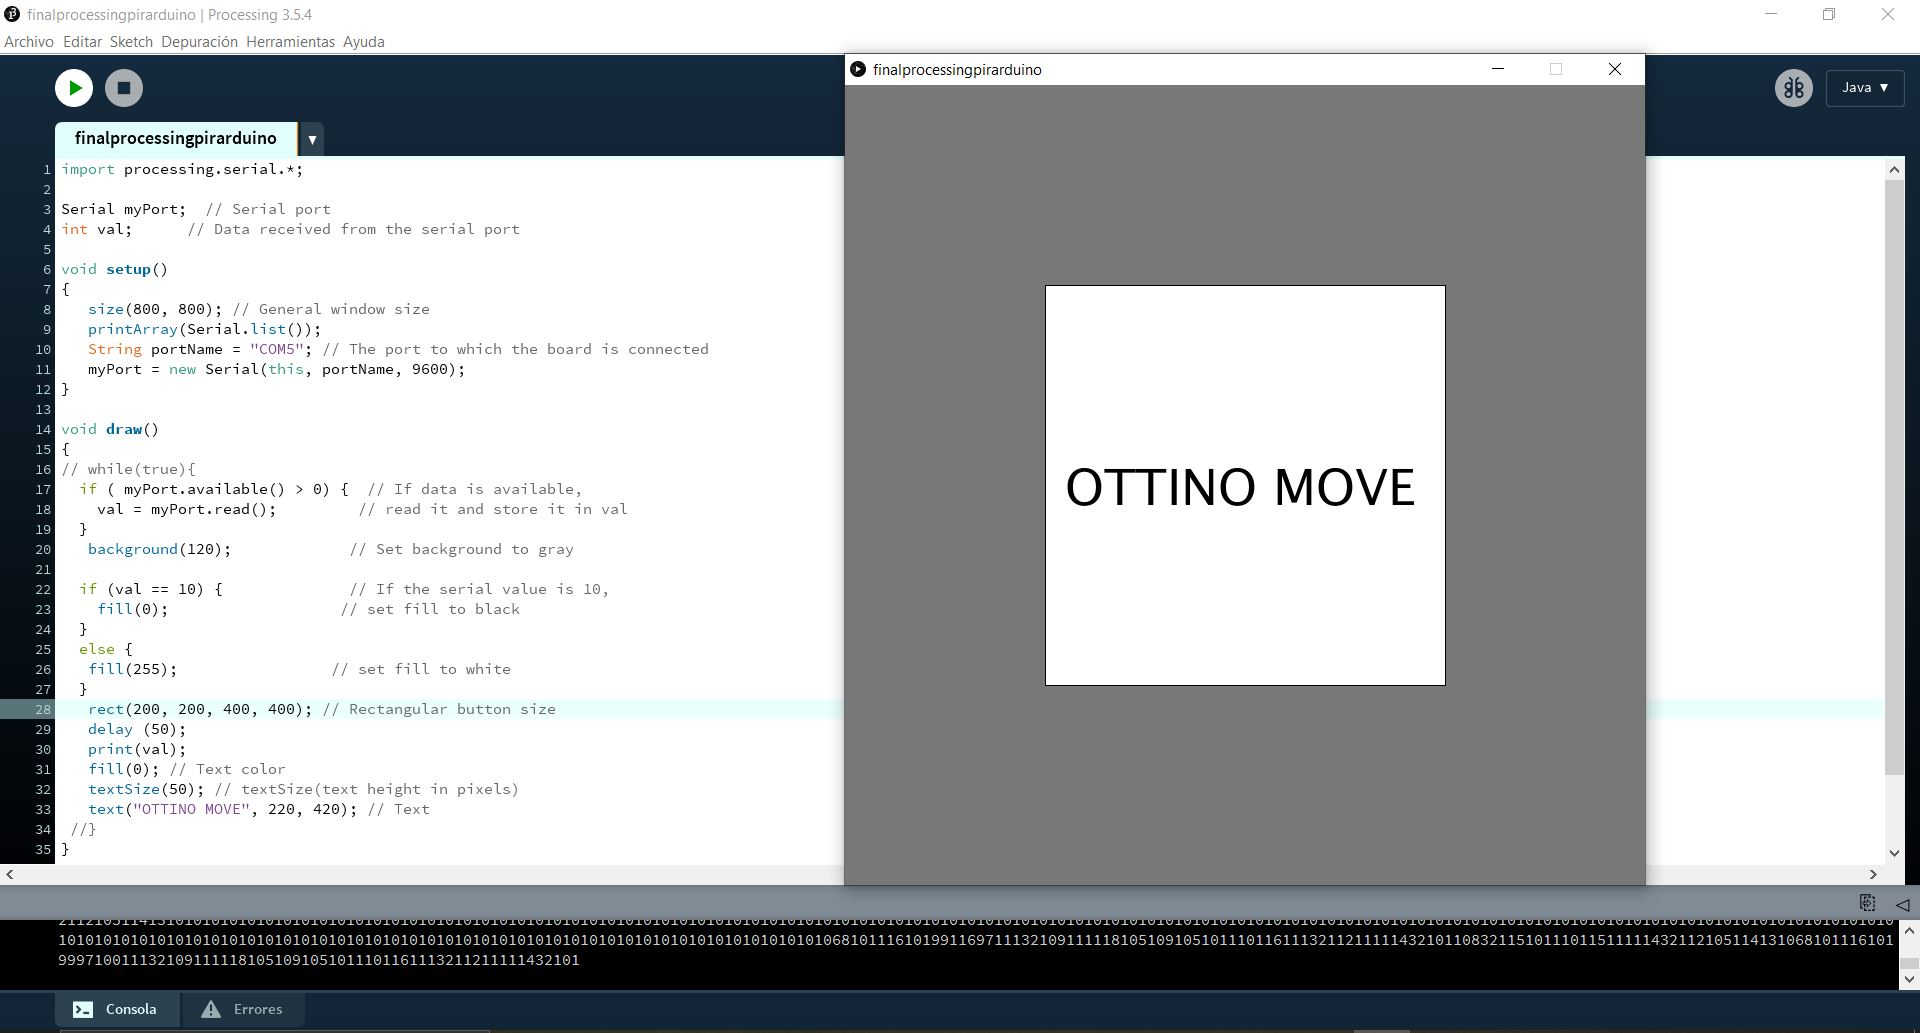
After correctly uploading the code to the arduino I went on to build the code in processing, for this I used the exercises done in the first part of this documentation, depending on the design you want to choose the configurations, then I share the final code and how I uploaded it to the processing platform.
Off
On
	//Mayra Ascencio Calderón
	//Fab Academy 2021
	//Ottino Move

	import processing.serial.*;

	Serial myPort;  // Serial port
	int val;      // Data received from the serial port

	void setup()
	{
	size(800, 800); // General window size
	printArray(Serial.list());
	String portName = "COM5"; // The port to which the board is connected
	myPort = new Serial(this, portName, 9600);
	}

	void draw()
	{
	// while(true){
	if ( myPort.available() > 0) {  // If data is available,
	val = myPort.read();         // read it and store it in val
	}
	background(120);             // Set background to gray

	if (val == 10) {              // If the serial value is 10,
	fill(0);                   // set fill to black
	}
	else {
	fill(255);                 // set fill to white
	}
	rect(200, 200, 400, 400); // Rectangular button size
	delay (50);
	print(val);
	fill(0); // Text color
	textSize(50); // textSize(text height in pixels)
	text("OTTINO MOVE", 220, 420); // Text
	//}
	}