3D Scanning and Printing
Assignment
- I -- group assignment:
- - test the design rules for your 3D printer(s)
- II -- individual assignment:
- -design and 3D print an object (small, few cm3, limited by printer time) that could not be made subtractively, - 3D scan an object (and optionally print it)
- I -- group assignment:
- II -- individual assignment:
- II -- individual assignment: 3D Scan
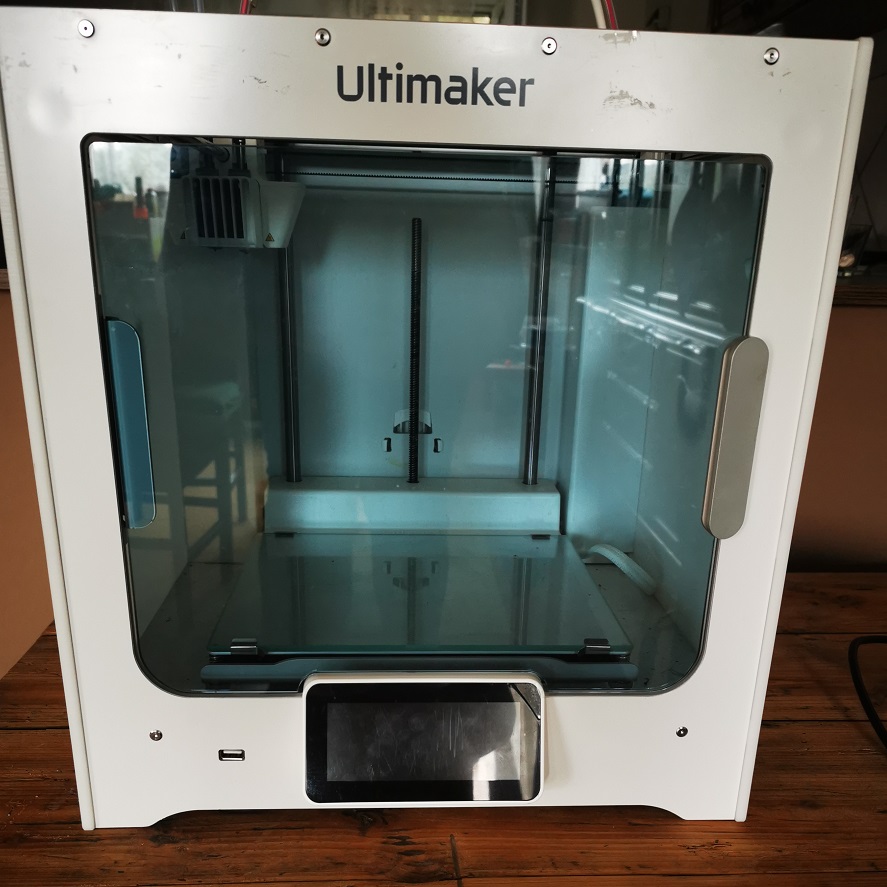
 For this weekly task I used an ULTIMAKER S3 3D printer
| Printer and printing properties | Technology | Fused filament fabrication (FFF) |
|---|---|---|
| Print head | Dual extrusion print head with a unique auto-nozzle lifting system and swappable print cores | |
| Build volume (XYZ) | 330 x 240 x 300 mm (13 x 9.4 x 11.8 in) | |
| Layer resolution | 0.25 mm nozzle: 150 - 60 micron 0.4 mm nozzle: 200 - 20 micron 0.6 mm nozzle: 300 - 20 micron 0.8 mm nozzle: 600 - 20 micron | |
| XYZ resolution | 6.9, 6.9, 2.5 micron | |
| Build speed | < 24 mm3/s | |
| Build plate | Heated glass build plate (20 - 140 °C) | |
| Nozzle diameter | 0.4 mm, 0.25 mm, 0.6 mm, 0.8 mm | |
| Operating sound | < 50 dBA | |
| Connectivity | Wi-Fi, LAN, USB port | |
| Physical dimensions | Dimensions (with Bowden tubesand spool holder) | 394 x 489 x 637 mm (15.5 x 19.3 x 25.1 in) |
| Net weight | 14.4 kg (31.7 lbs) | |
| Software | Supplied software | Ultimaker Cura, our free print preparation software Ultimaker Connect, our free printer management software Ultimaker Cloud, enables remote printing |
| Supported OS | MacOS, Windows, and Linux |
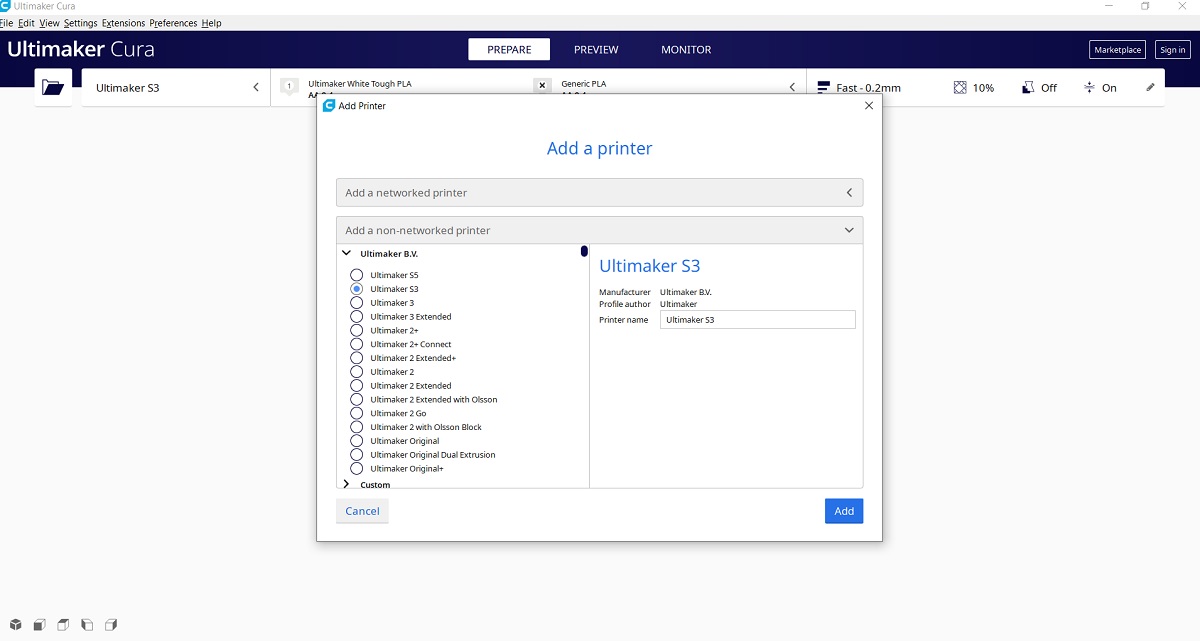
For 3D printing, I first had to install the Ultimaker Cura program.
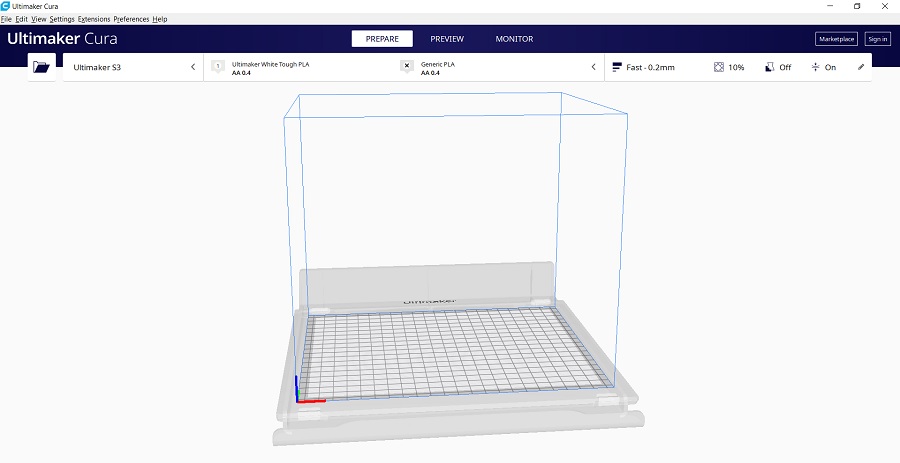
I added Ultimaker S3 printer.
I tested the printer's capabilities with the help of test files.
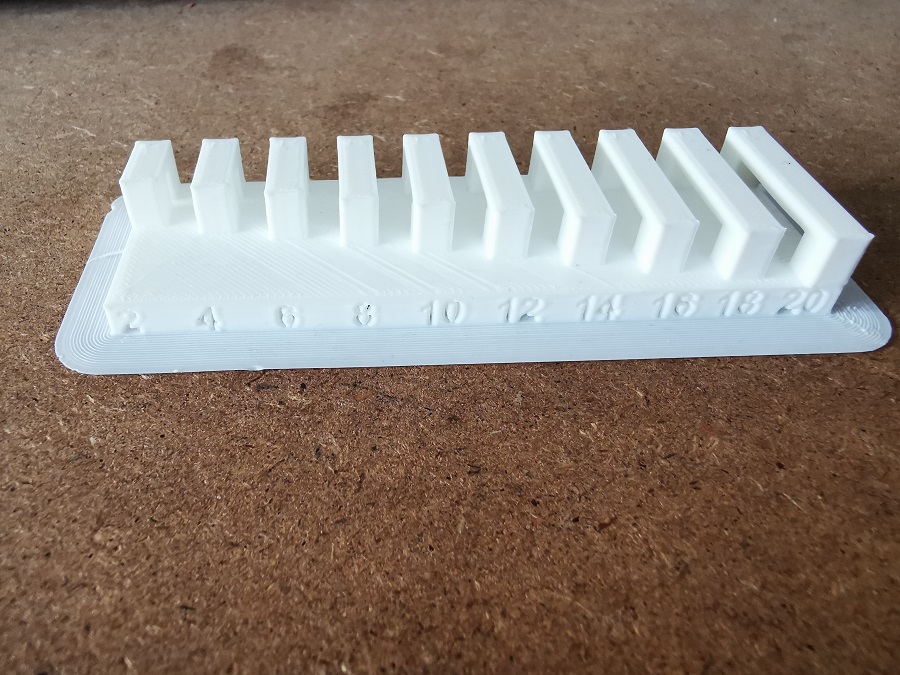
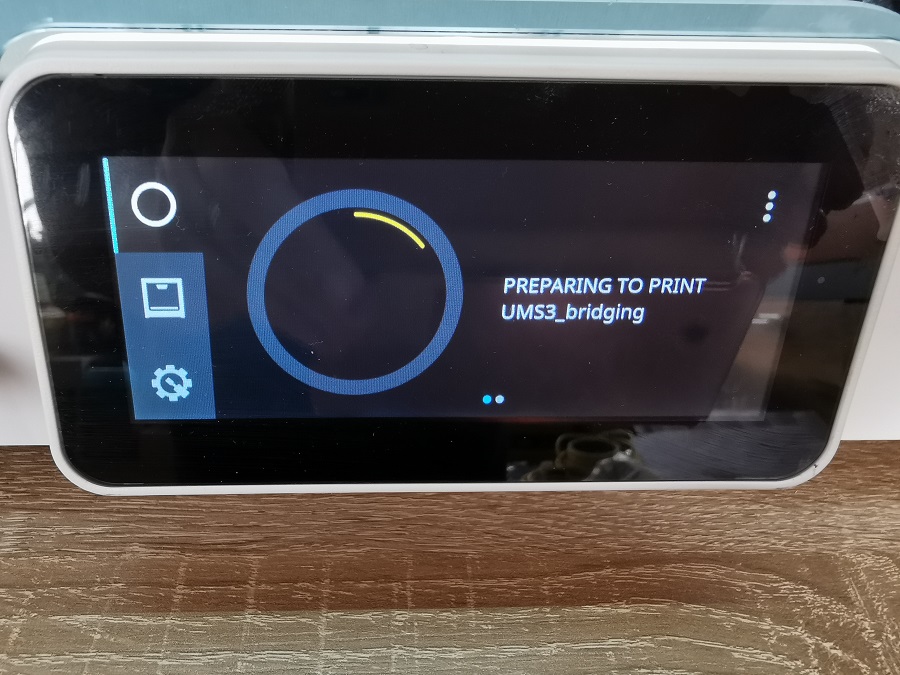
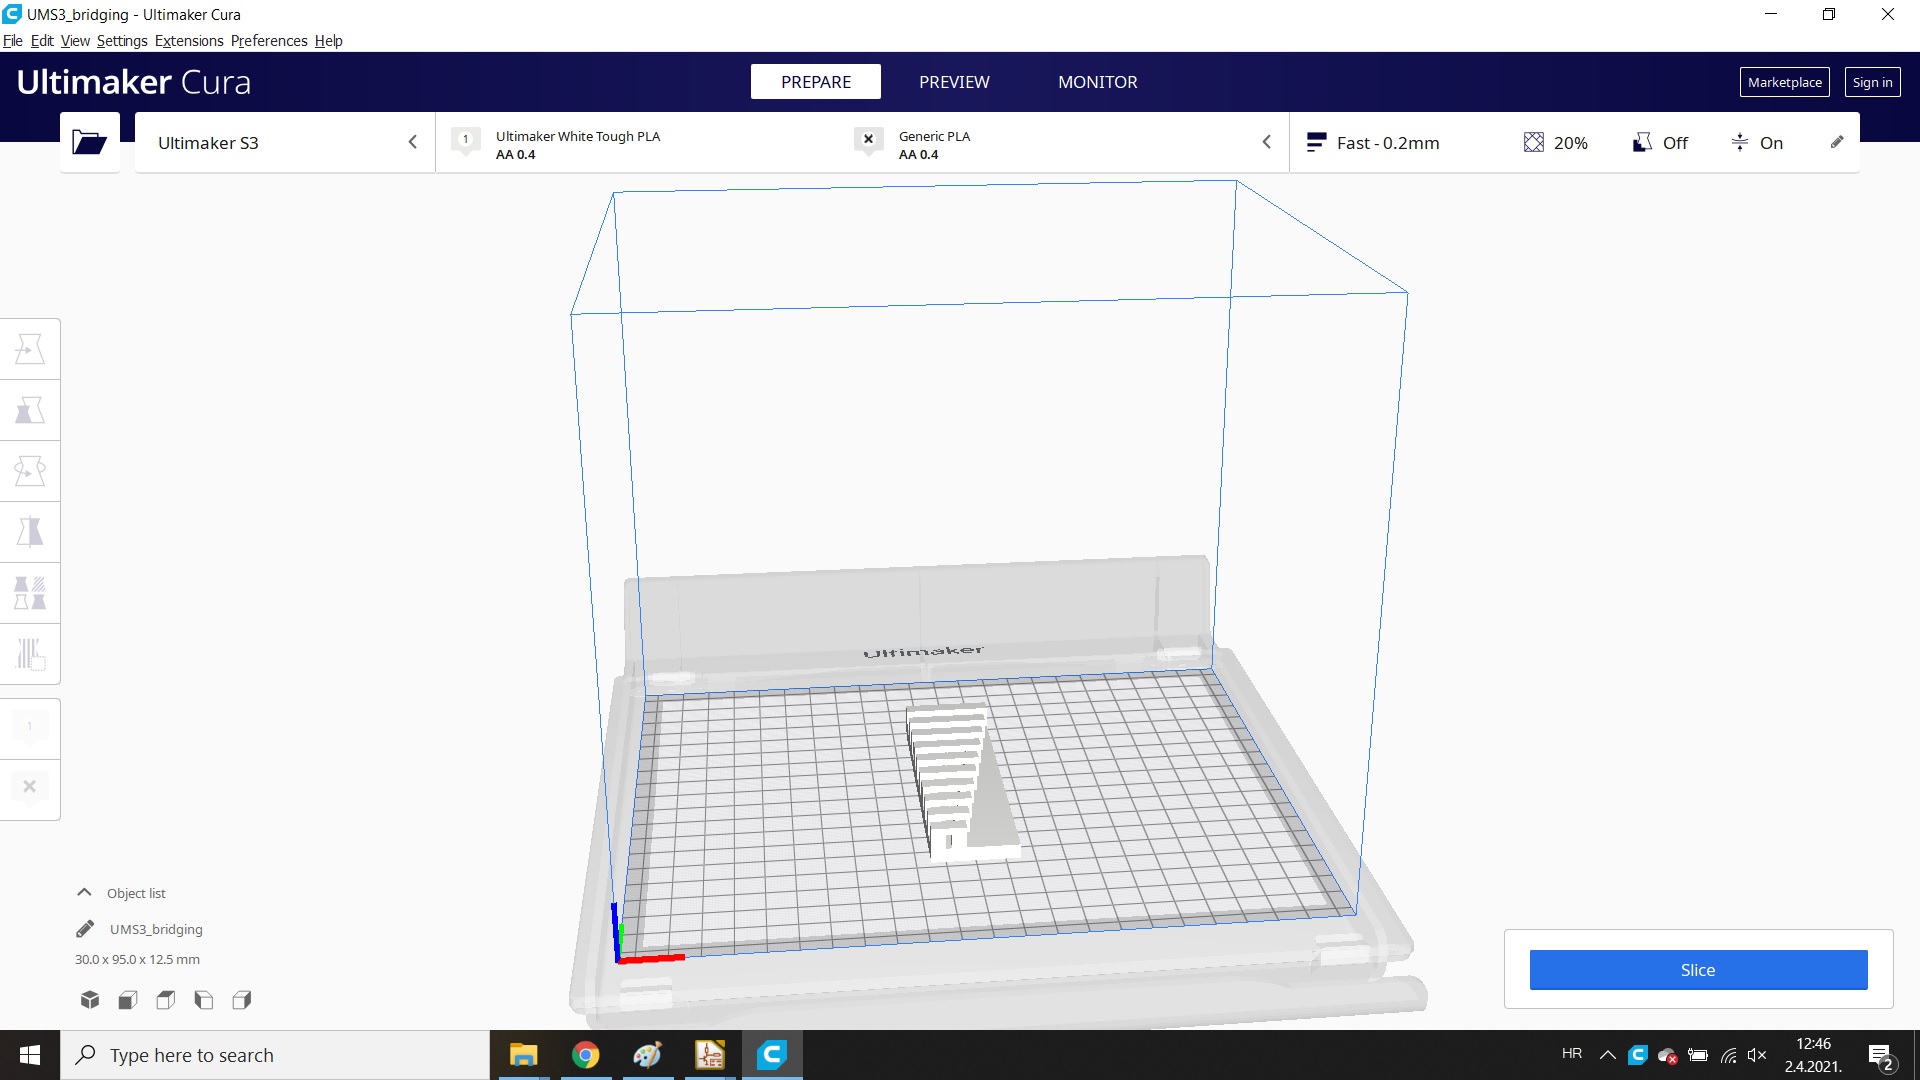 For testing printer capabilities, I used ready-made files - I took the Bridging test first.
On the example of making 10 bridges that increase the distance between the supporting pillars.
For testing printer capabilities, I used ready-made files - I took the Bridging test first.
On the example of making 10 bridges that increase the distance between the supporting pillars.
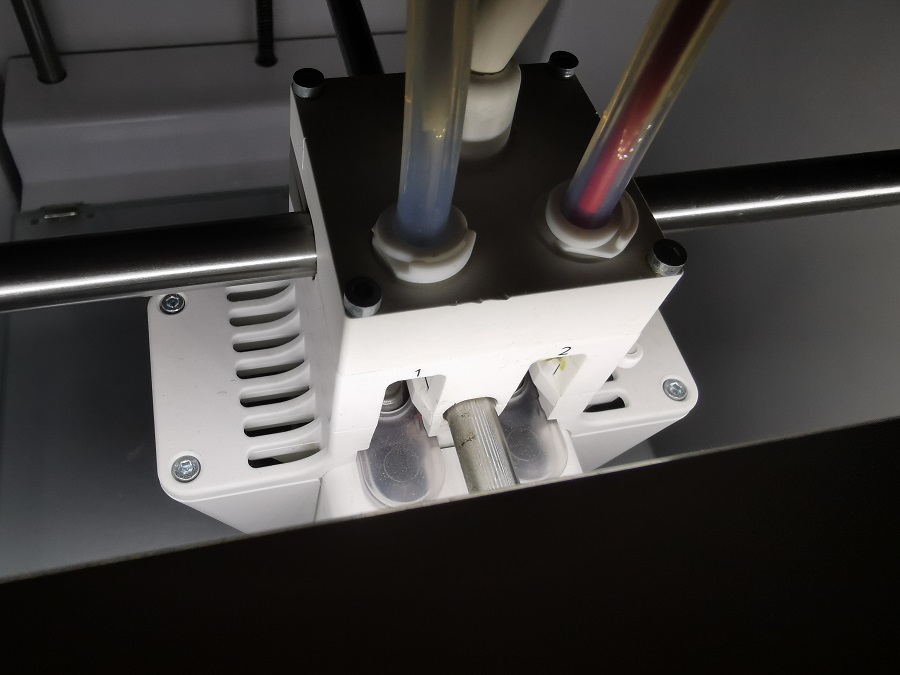
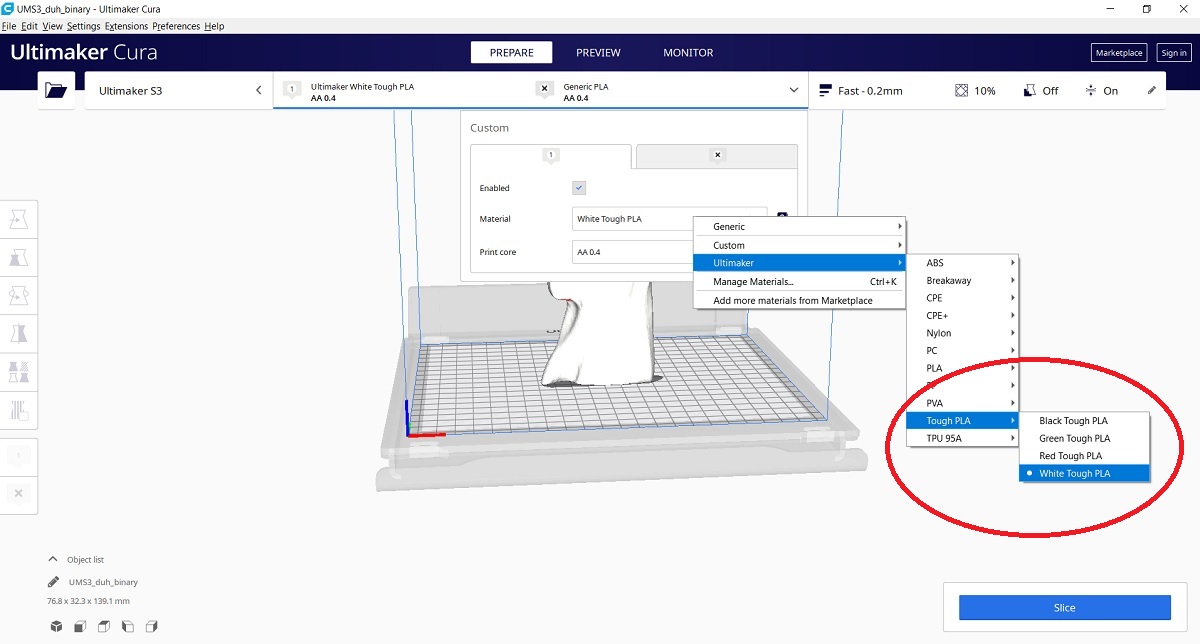
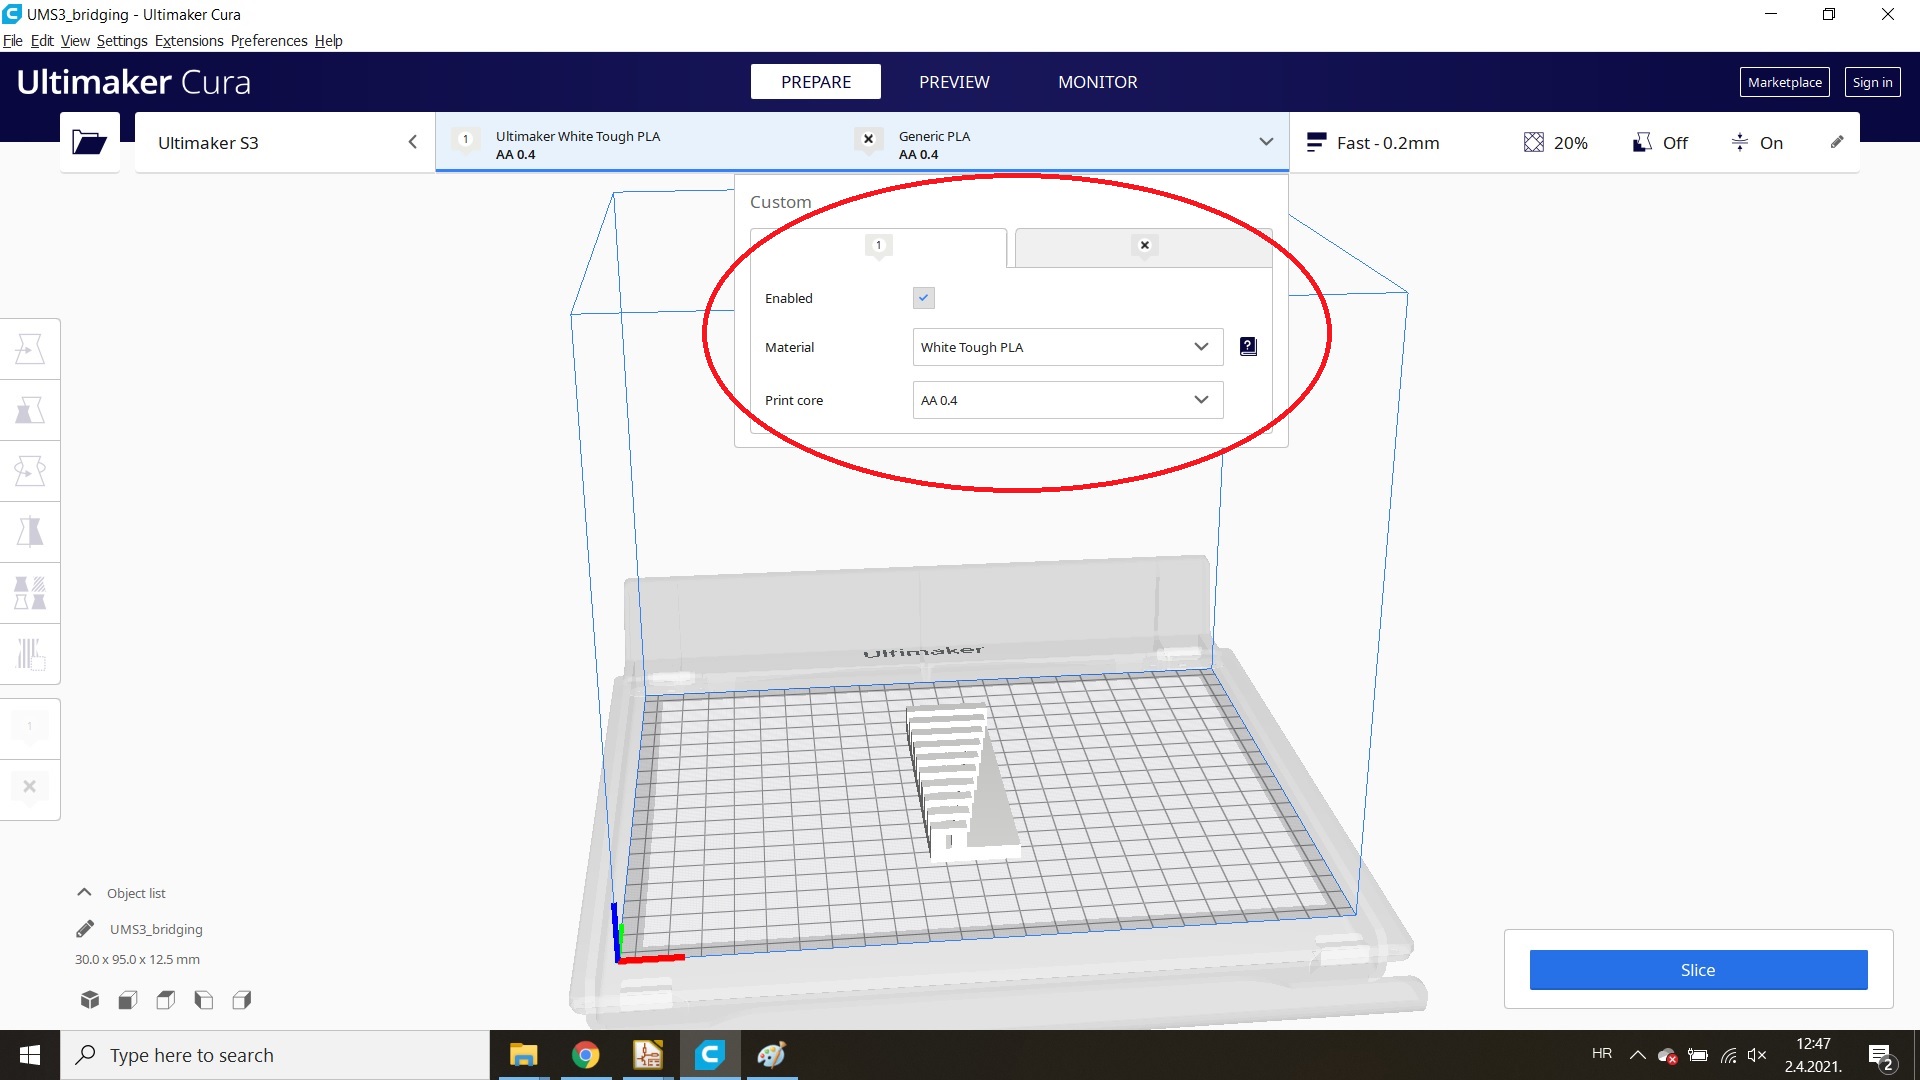 The Ultimeker S3 has the ability to print with two nozzles. For testing purposes, I turned off nozzle no.2.
On nozzle no.1 I set the Ultimaker PLA tough white material.
The Ultimeker S3 has the ability to print with two nozzles. For testing purposes, I turned off nozzle no.2.
On nozzle no.1 I set the Ultimaker PLA tough white material.
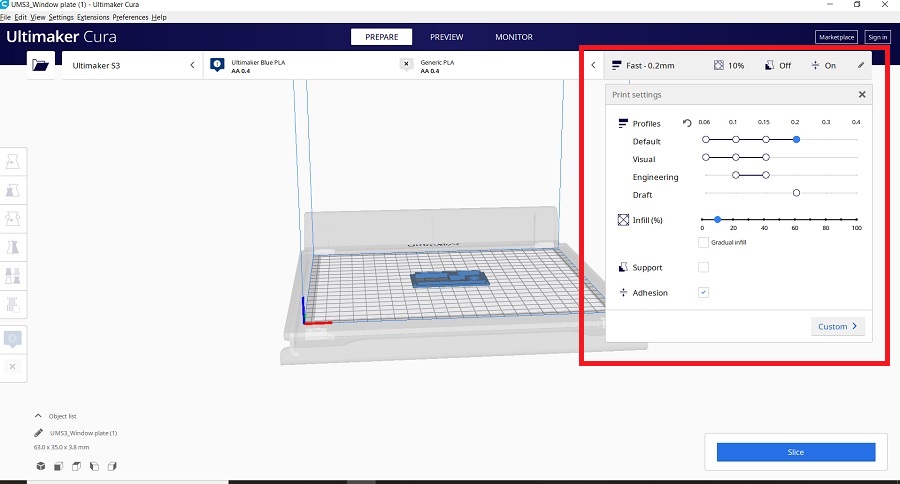
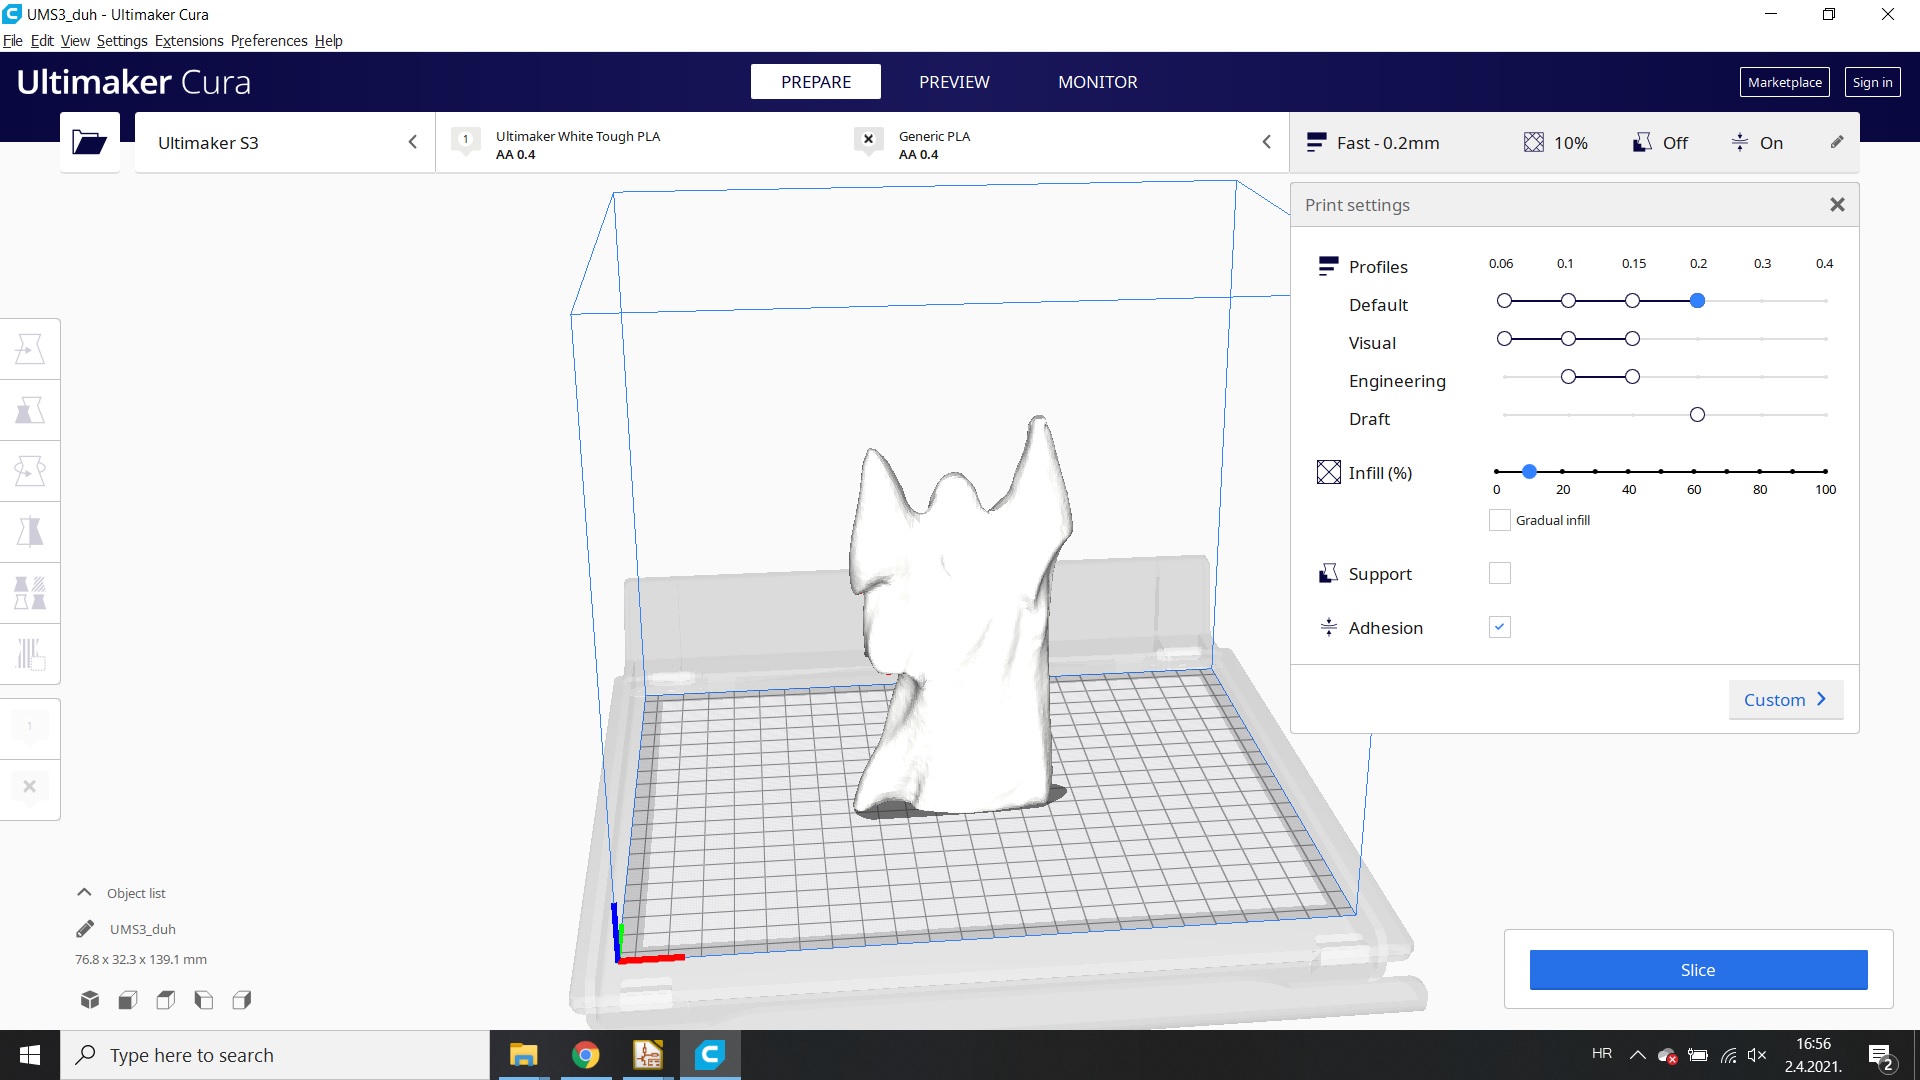
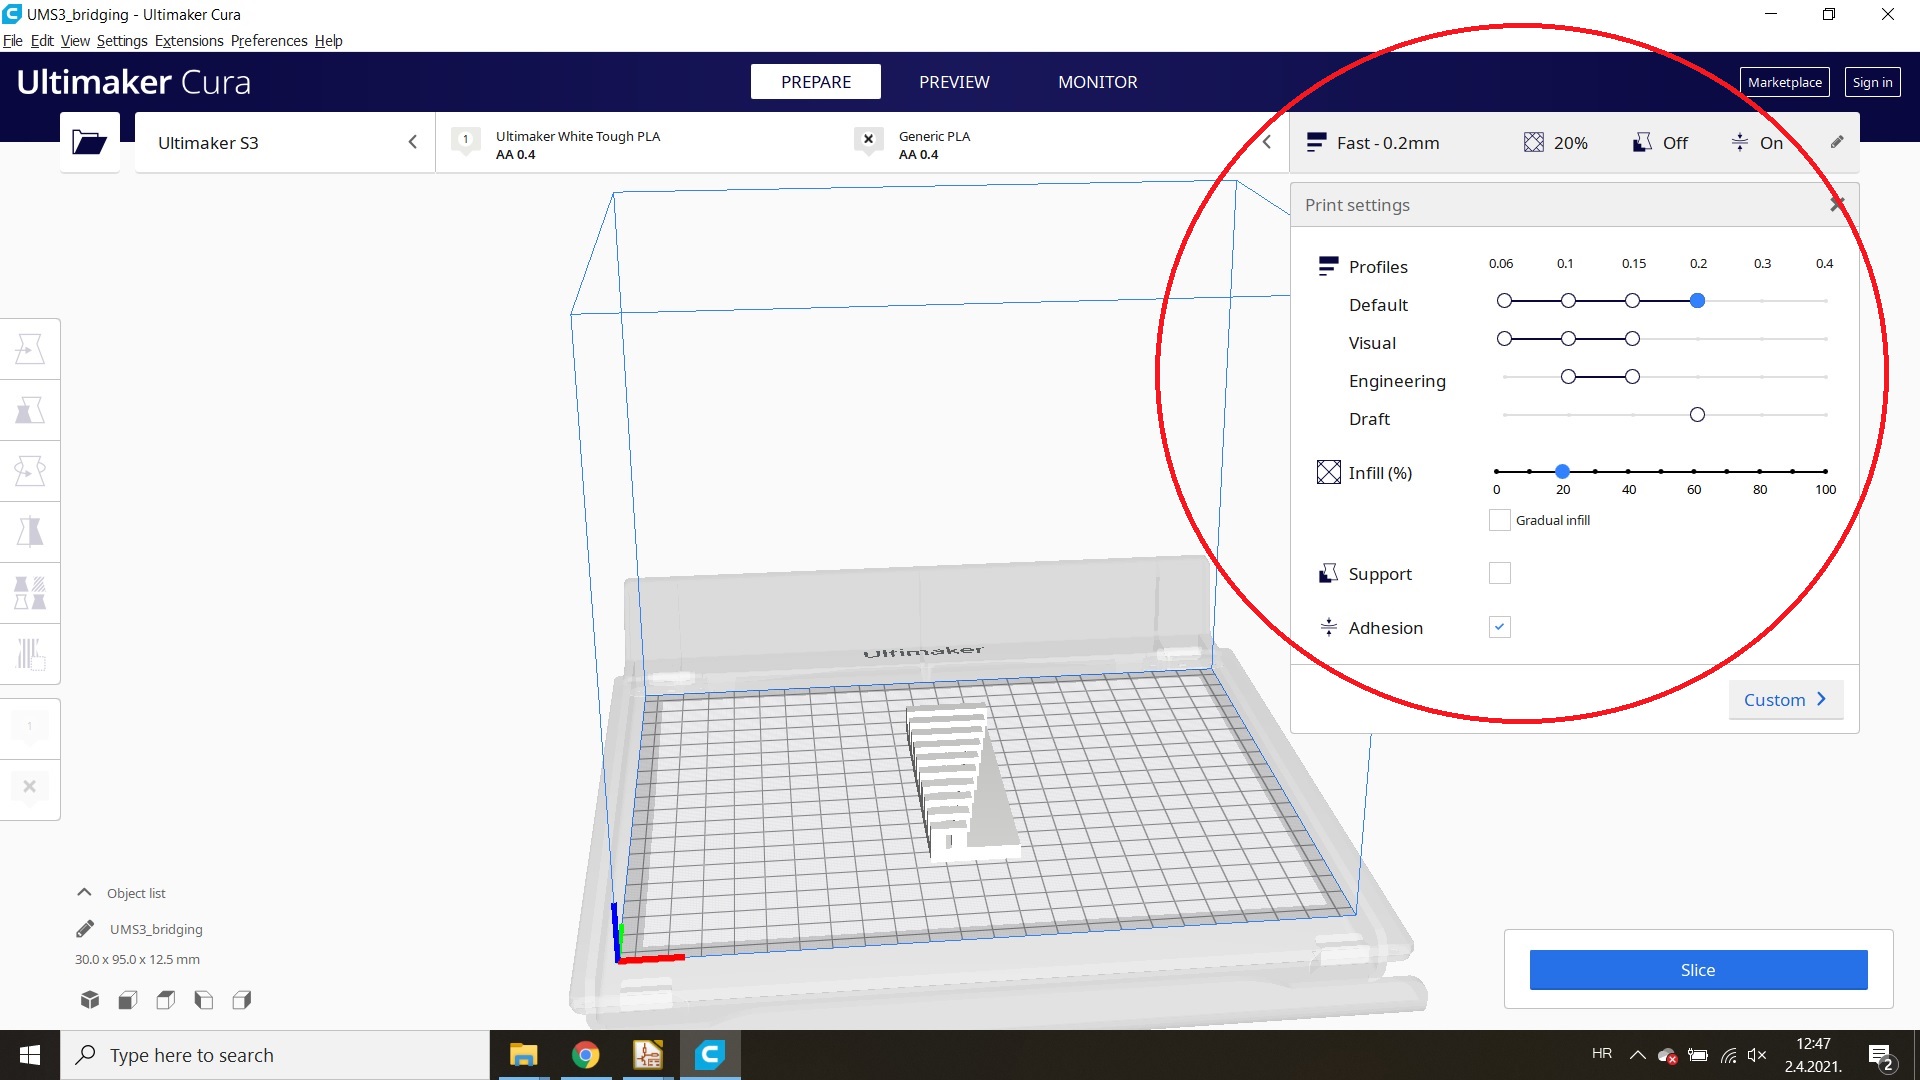 To be able to make 3D models I had to specify printer settings, profile, fill, support and additional settings.
Profile - layer thickness - I set to 0.2, infilling I set to 20%.
To be able to make 3D models I had to specify printer settings, profile, fill, support and additional settings.
Profile - layer thickness - I set to 0.2, infilling I set to 20%.
 1. Print settings panel. This panel shows the current printing strategy at a glance
2. Print profiles. The available profiles for the current configuration are visible.
3. Some Ultimaker 3D printers offer intent-based profiles, fine-tuned to meet specific needs
4. Infill.The infill slider can be used to easily set the overall model strength
5. Support. Enable or disable automatically generated support structures, with either of the available extruders, to get reliable and successful prints when necessary
6. Adhesion. Enable or disable additional adhesive printed parts, the type of adhesion is automatically set by the print profile
7. Custom mode. This will open the custom mode to manually finetune printing profiles
1. Print settings panel. This panel shows the current printing strategy at a glance
2. Print profiles. The available profiles for the current configuration are visible.
3. Some Ultimaker 3D printers offer intent-based profiles, fine-tuned to meet specific needs
4. Infill.The infill slider can be used to easily set the overall model strength
5. Support. Enable or disable automatically generated support structures, with either of the available extruders, to get reliable and successful prints when necessary
6. Adhesion. Enable or disable additional adhesive printed parts, the type of adhesion is automatically set by the print profile
7. Custom mode. This will open the custom mode to manually finetune printing profiles
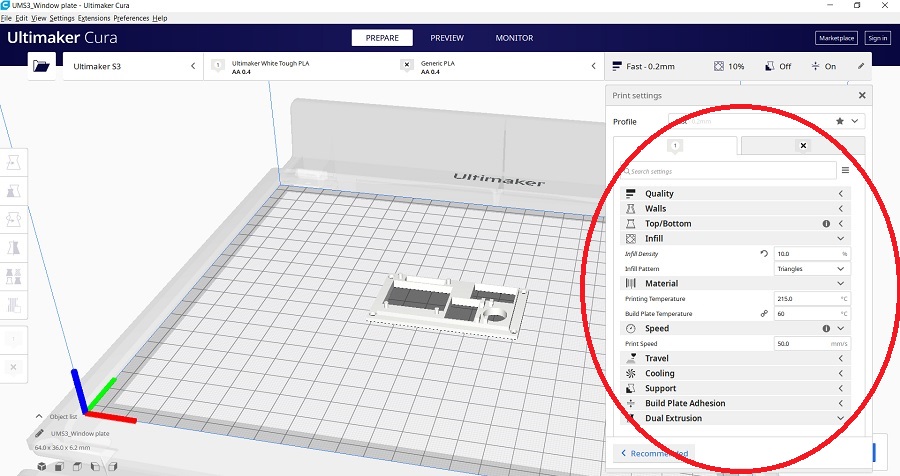 If necessary, additional settings can be made, such as the filling, material, speed,...
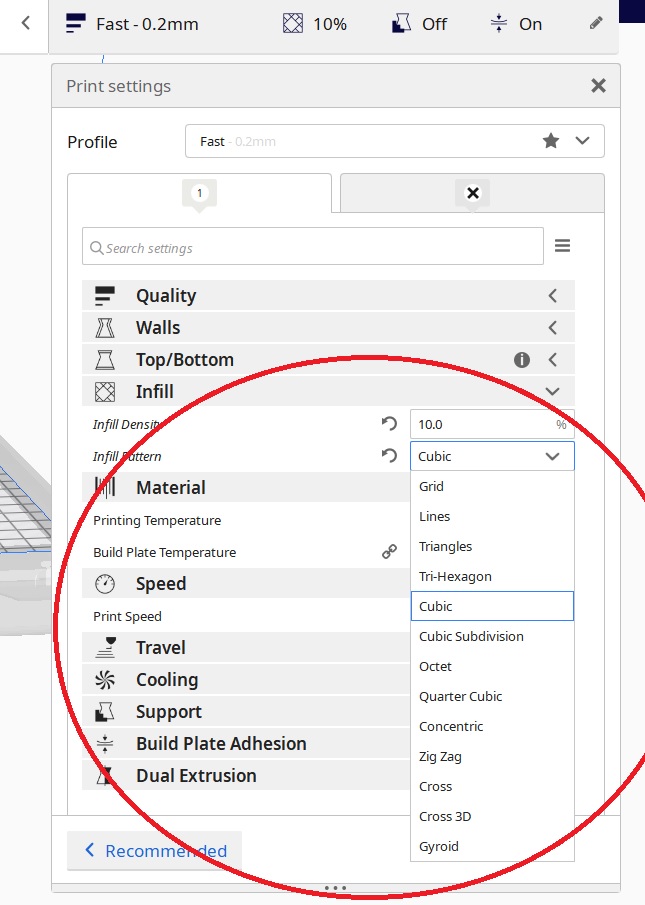 I chose the triangular filling because it is the strongest. It is also possible to select cubic fill shapes.
 Triangular in fill.
 Cubic in fill.
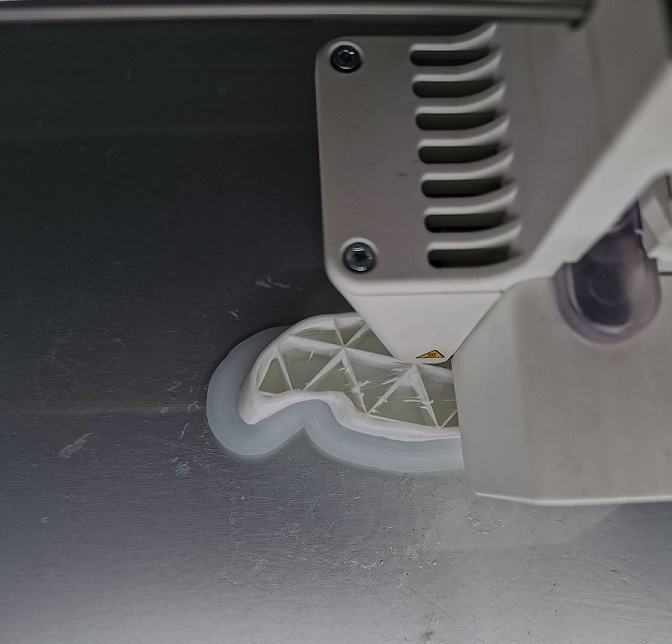
 Bridging test.
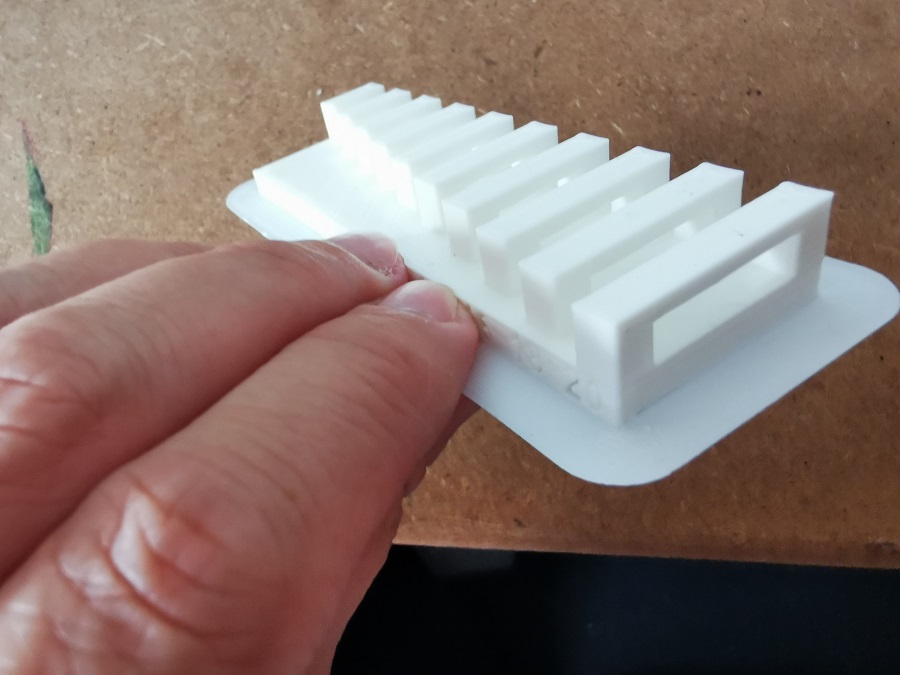 After the bridging test was completed I did not notice any irregularities on the printed part.
The bridges are printed quite precisely - accurately, without twisted parts - bridges.
After the bridging test was completed I did not notice any irregularities on the printed part.
The bridges are printed quite precisely - accurately, without twisted parts - bridges.
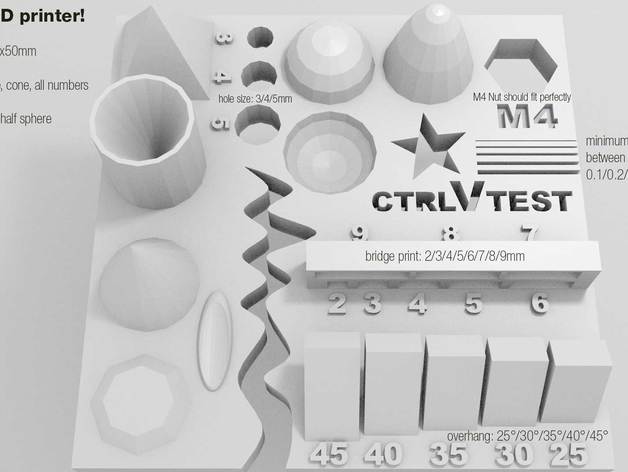
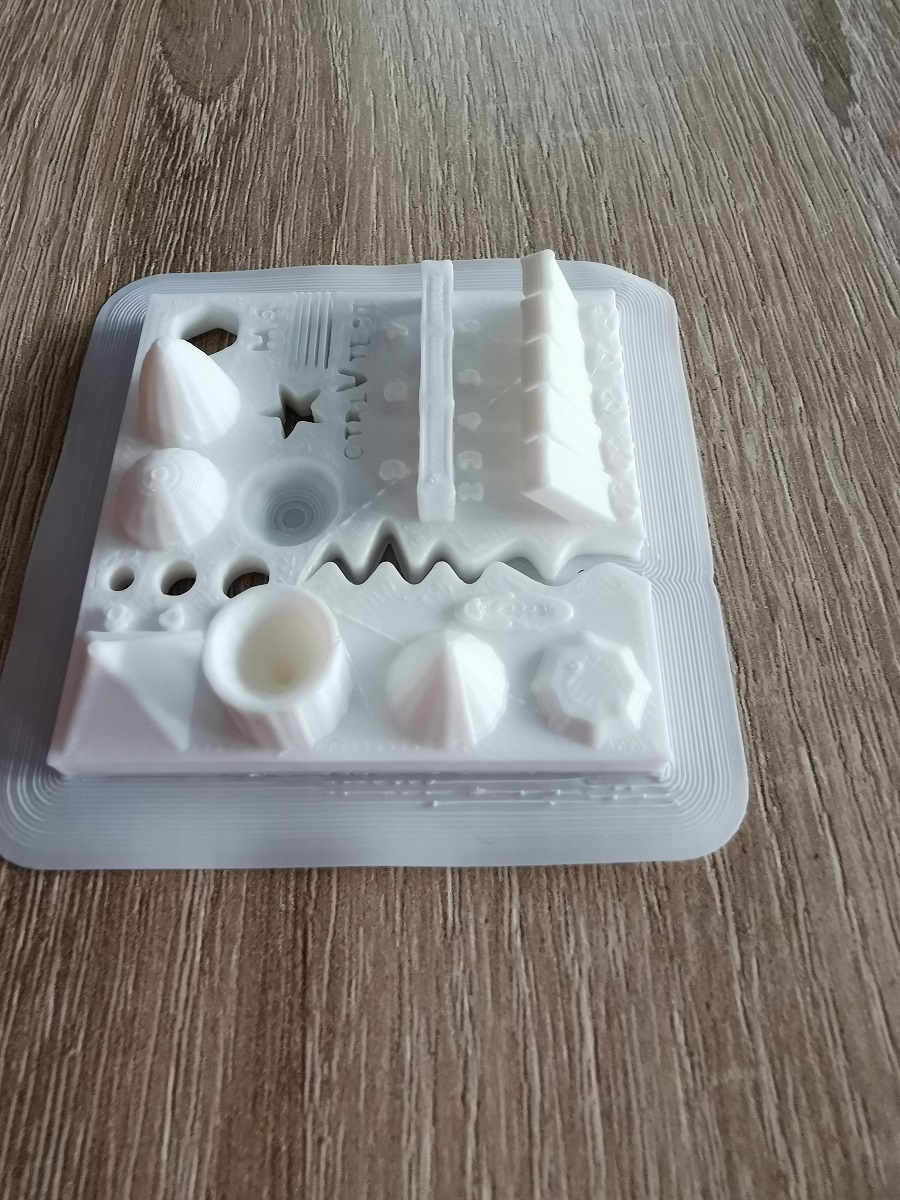 After this test I did the following test in which I could see even better precision printing details for this printer.
These test included:
- size: the object is 4x50x50mm (baseplate)
- hole size: 3 holes (3/4/5mm)
- Nut size: M4 Nut should fit perfectly
- fine details: pyramide, cone, all numbers
- rounded print: wave, half sphere
- minimum distance between walls: 0.1/0.2/0.3/0.4/0.5mm
- overhang: 25°/30°/35°/40°/45°
- bridge print: 2/3/4/5/6/7/8/9mm
- surface: all the flat parts
For the purposes of this test, I have adjusted the following settings:
- infill: 33% infill
- layerheight: 0.1mm
as recommended for this test
After this test I did the following test in which I could see even better precision printing details for this printer.
These test included:
- size: the object is 4x50x50mm (baseplate)
- hole size: 3 holes (3/4/5mm)
- Nut size: M4 Nut should fit perfectly
- fine details: pyramide, cone, all numbers
- rounded print: wave, half sphere
- minimum distance between walls: 0.1/0.2/0.3/0.4/0.5mm
- overhang: 25°/30°/35°/40°/45°
- bridge print: 2/3/4/5/6/7/8/9mm
- surface: all the flat parts
For the purposes of this test, I have adjusted the following settings:
- infill: 33% infill
- layerheight: 0.1mm
as recommended for this test
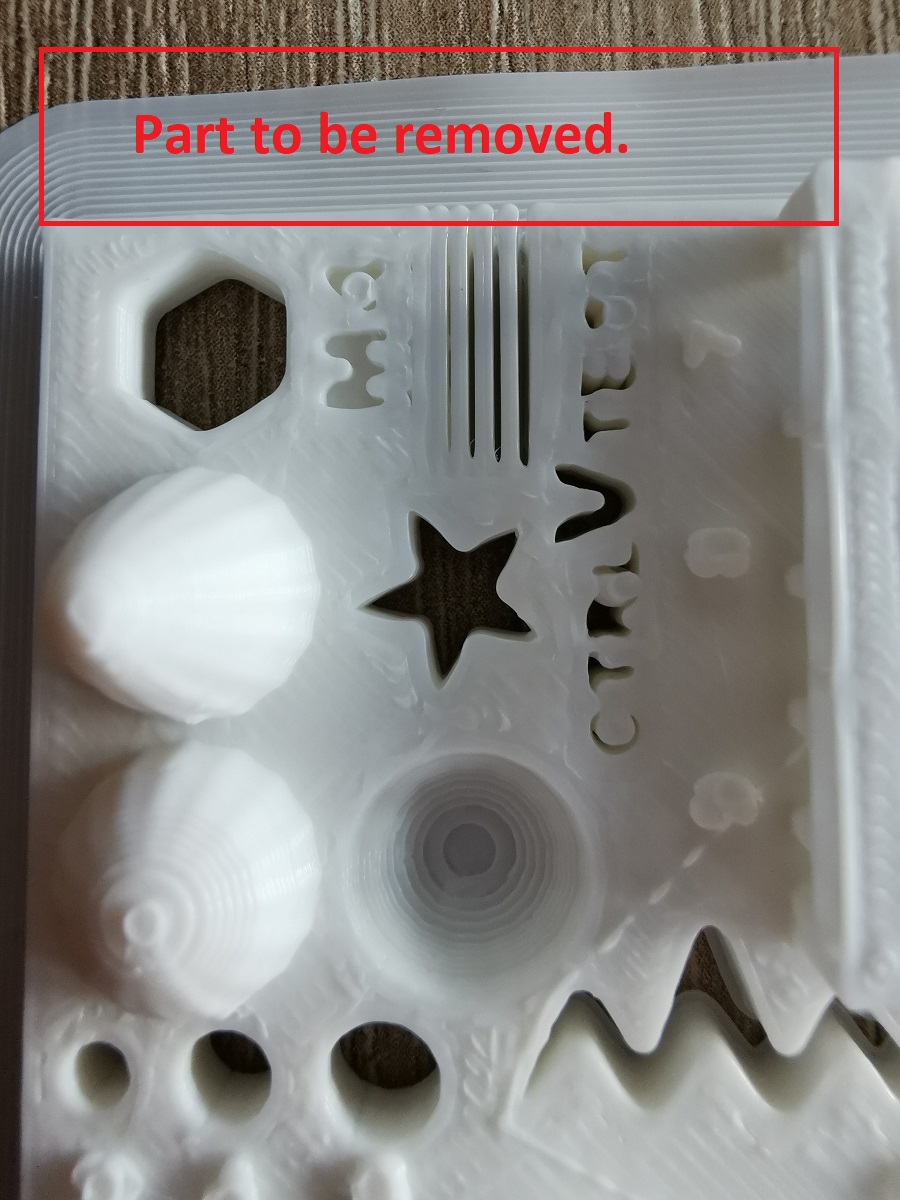 In order to keep the object on the printing plate,
there is a layer of filament around each printed object, which is then removed with a scalpel or cut.
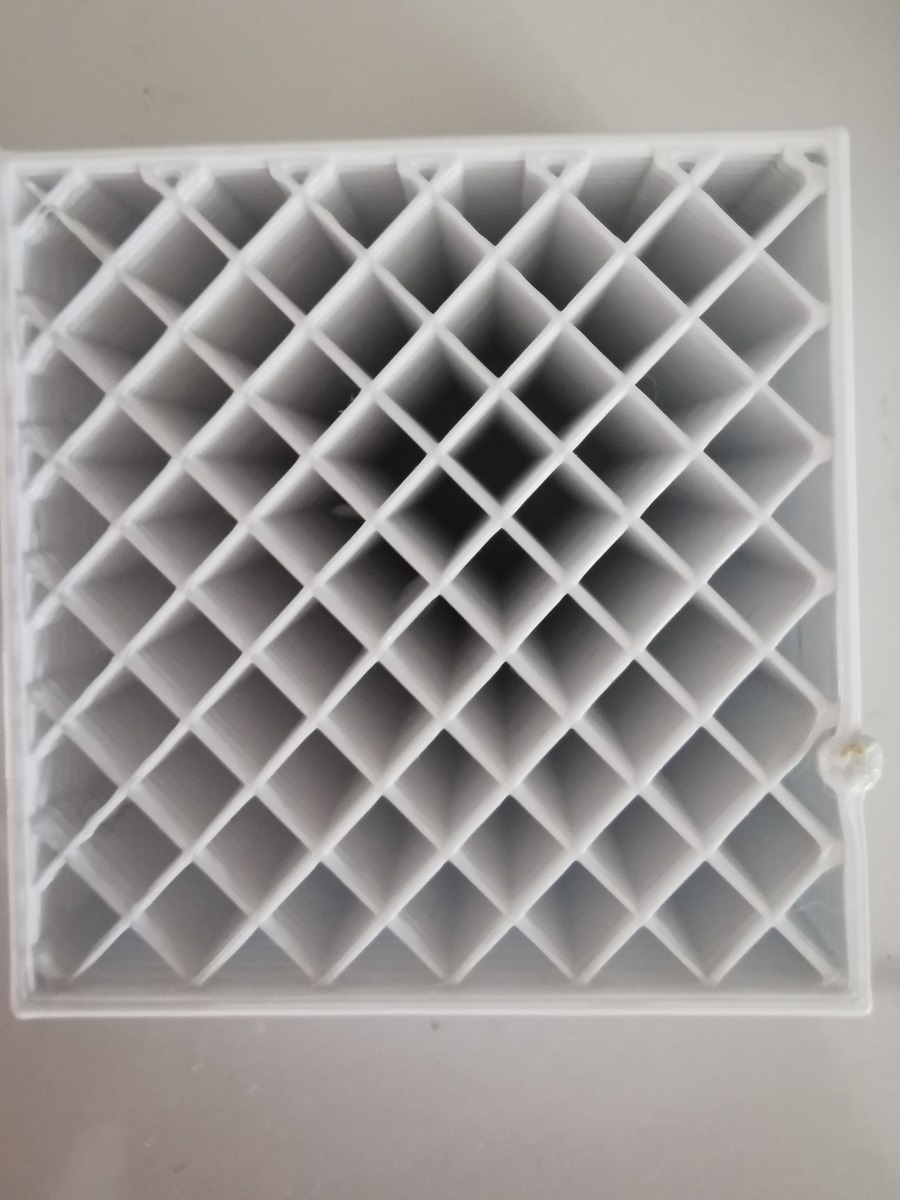
The letters or numbers in this test are not printed very well. Below is a photo of the test as it should look like.
In order to keep the object on the printing plate,
there is a layer of filament around each printed object, which is then removed with a scalpel or cut.
The letters or numbers in this test are not printed very well. Below is a photo of the test as it should look like.
 What the printed part should look like.
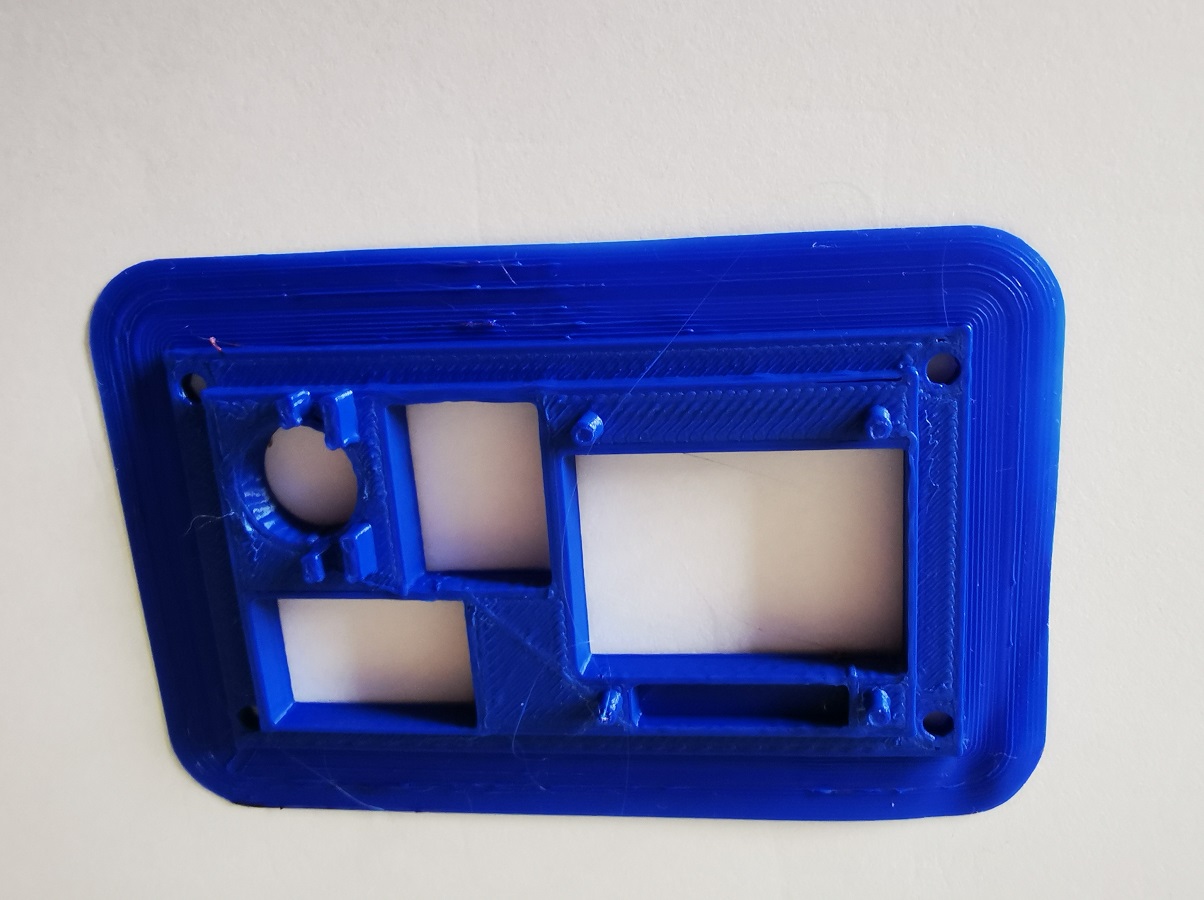
For my individual task, I chose designing and making windows for my final project.
It is a sensor lamp window in which the sensors and the switch are located.
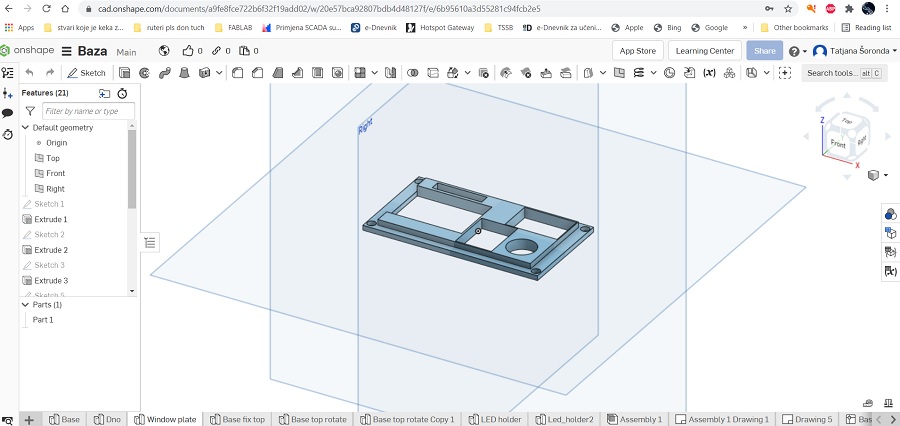
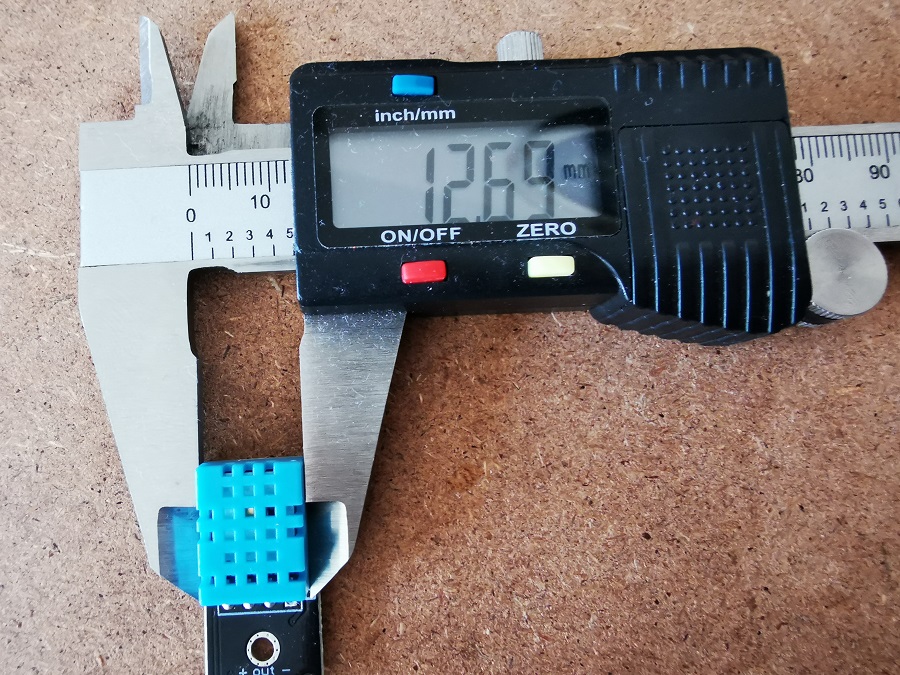 Since this is the window in which I place the sensors, I first had to accurately measure all the sensors
to determine the dimensions of the window.
Since the base of the lamp itself is rounded I couldn’t make the window too big.
Every millimeter had to be put to good use.
I need to place an OLED display, a microphone, a temperature and humidity sensor and a switch in the window.
Since this is the window in which I place the sensors, I first had to accurately measure all the sensors
to determine the dimensions of the window.
Since the base of the lamp itself is rounded I couldn’t make the window too big.
Every millimeter had to be put to good use.
I need to place an OLED display, a microphone, a temperature and humidity sensor and a switch in the window.
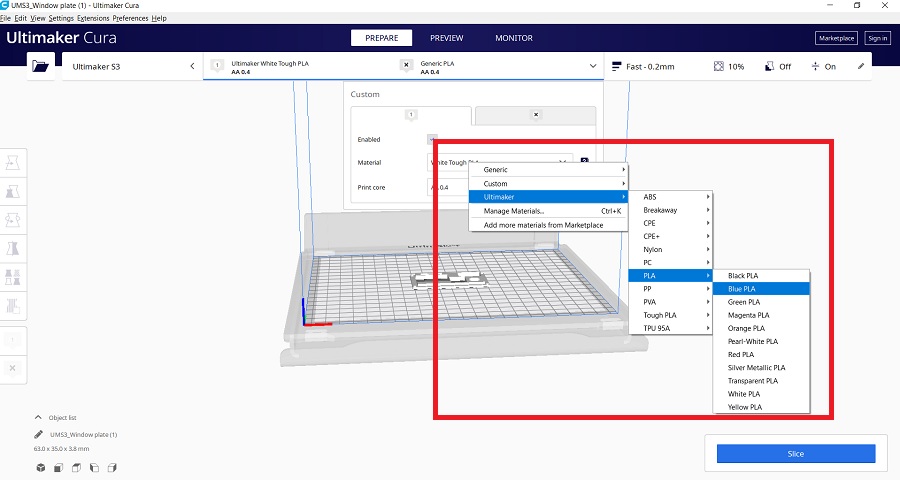 Since I envisioned a blue lamp I got a PLA filament in blue. In the printer settings, I changed the PLA filament from white to blue.
 I set the layer thickness to 0.2 and in fill to 10% because the window itself is not large in size and
the sensors that are placed inside it are not heavy.
I set the layer thickness to 0.2 and in fill to 10% because the window itself is not large in size and
the sensors that are placed inside it are not heavy.
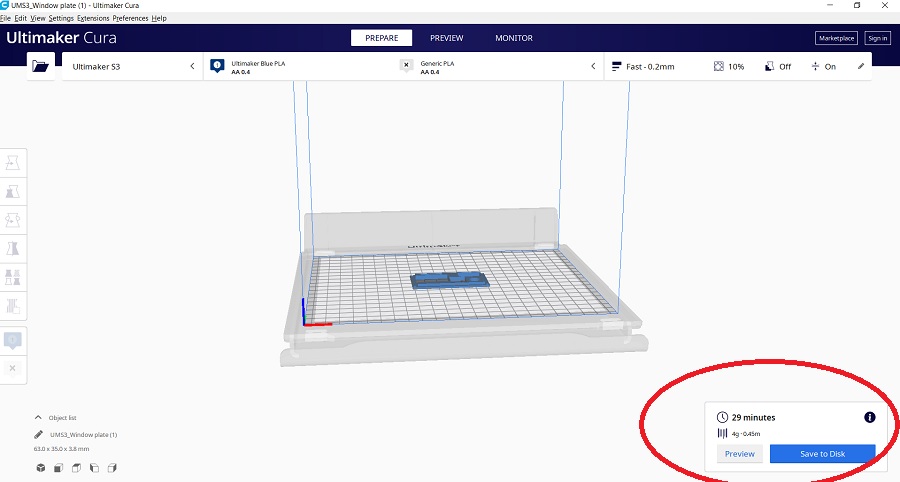 I put a smaller filling which saved me printing time. This way the print time is 29 minutes.
After selecting the parameters, I ran the SLICE command, which creates the layers of the 3D object we want to print,
so we got the ufp extension file that we need to print on the printer itself.
I saved the file to USB and loaded it into the printer.
I put a smaller filling which saved me printing time. This way the print time is 29 minutes.
After selecting the parameters, I ran the SLICE command, which creates the layers of the 3D object we want to print,
so we got the ufp extension file that we need to print on the printer itself.
I saved the file to USB and loaded it into the printer.
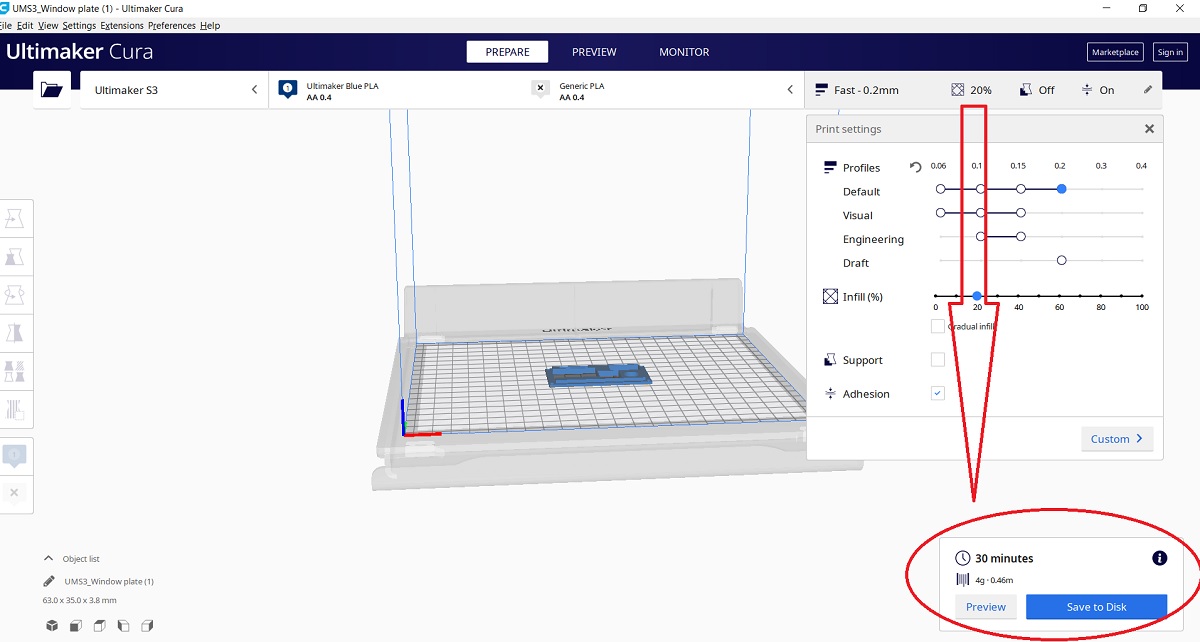 If I increase the filling to 20% there is a slight increase in material consumption as well as an
increase in time but if we take the part that is larger then the situation is completely different.
If I increase the filling to 20% there is a slight increase in material consumption as well as an
increase in time but if we take the part that is larger then the situation is completely different.
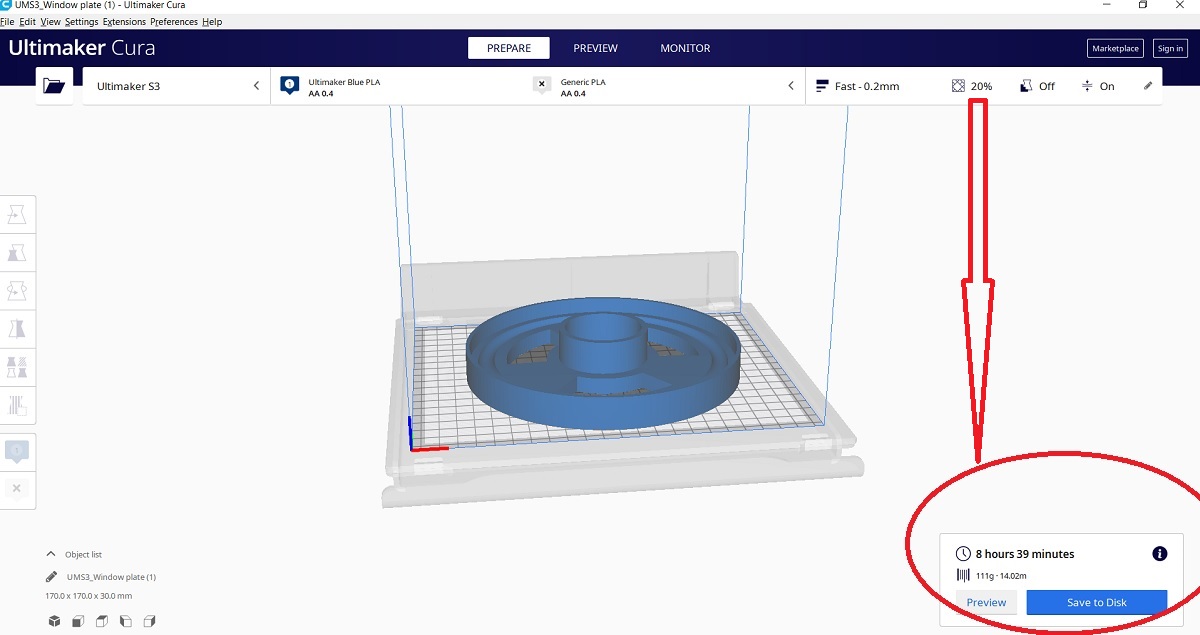 If we compare the printing of the upper part of the rotating lamp and set it to in fill 20%, the production time is 8 h 39 min.
 If I increase the base filling to 40%, the production time increases to 9 h and 59 min, which is a significant increase in time.
At the same time, there is an increase in material consumption in this case from 4 m - from 111 g to 143 g.
If I increase the base filling to 40%, the production time increases to 9 h and 59 min, which is a significant increase in time.
At the same time, there is an increase in material consumption in this case from 4 m - from 111 g to 143 g.
 Loading file from USB to printer.
 After printing is completed, the back of the window or the sensor holder looks like this.
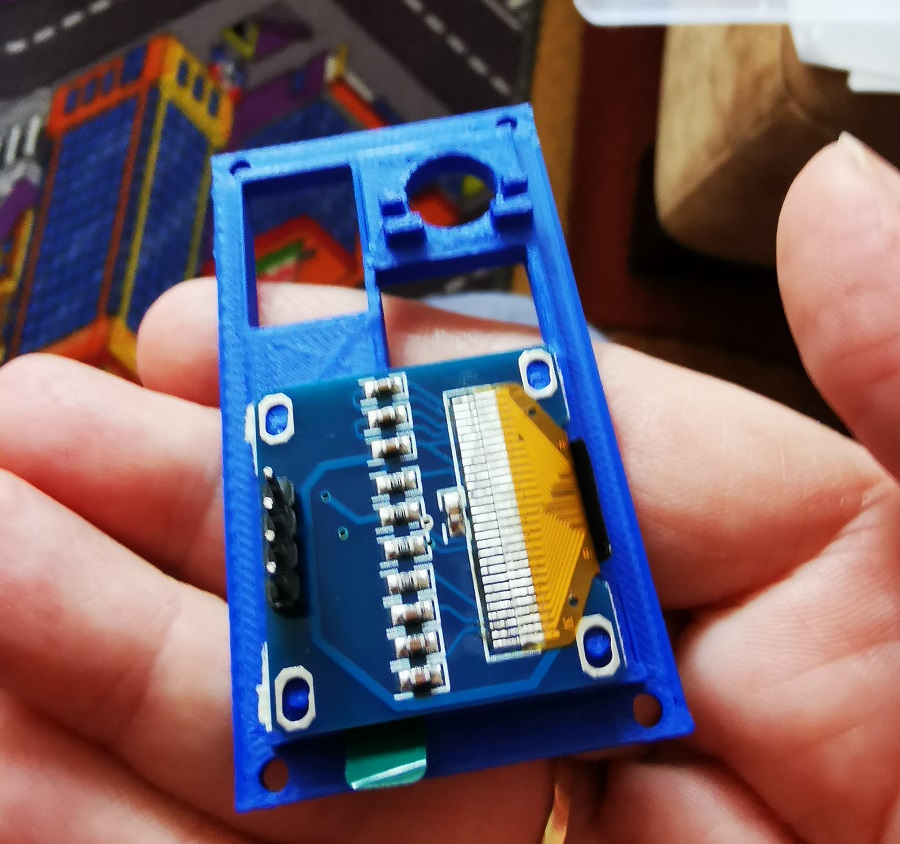 After I printed out the part I had to check if the OLED display and sensors could fit in the provided openings.
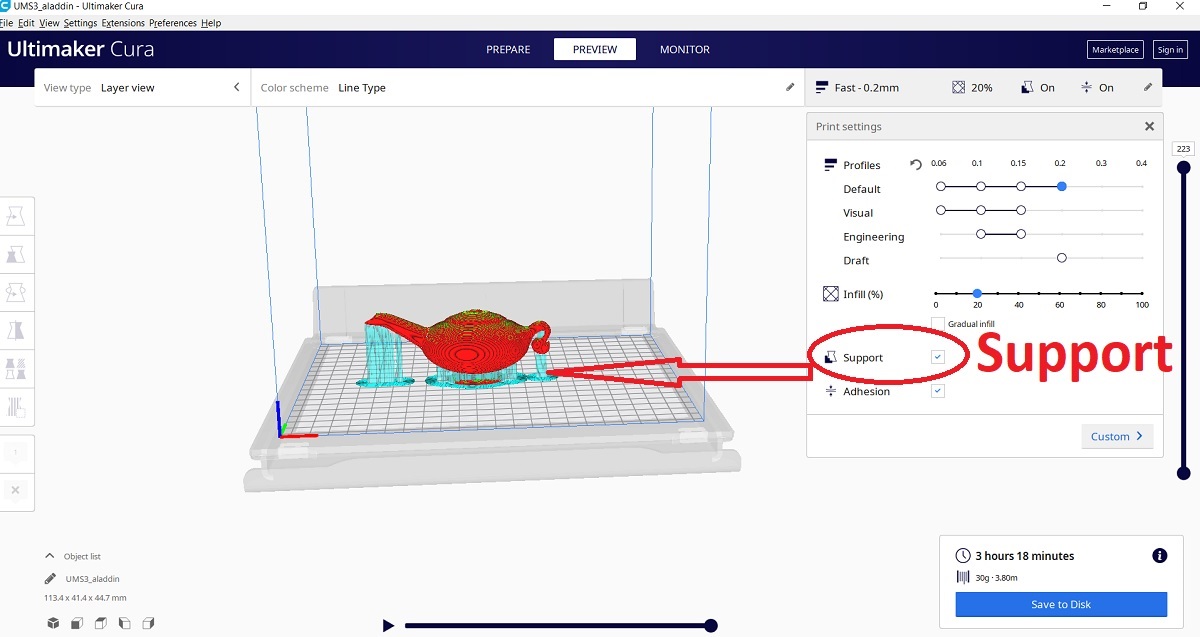 Of course, not everything turned out as I expected. For my son’s rehearsal and play, I put
a 3D Aladdin lamp to print for him. Since the handle and the front of the
lamp are longer than what the first test showed - bridging - that can be printed without support, I included support in the options.
Of course, not everything turned out as I expected. For my son’s rehearsal and play, I put
a 3D Aladdin lamp to print for him. Since the handle and the front of the
lamp are longer than what the first test showed - bridging - that can be printed without support, I included support in the options.
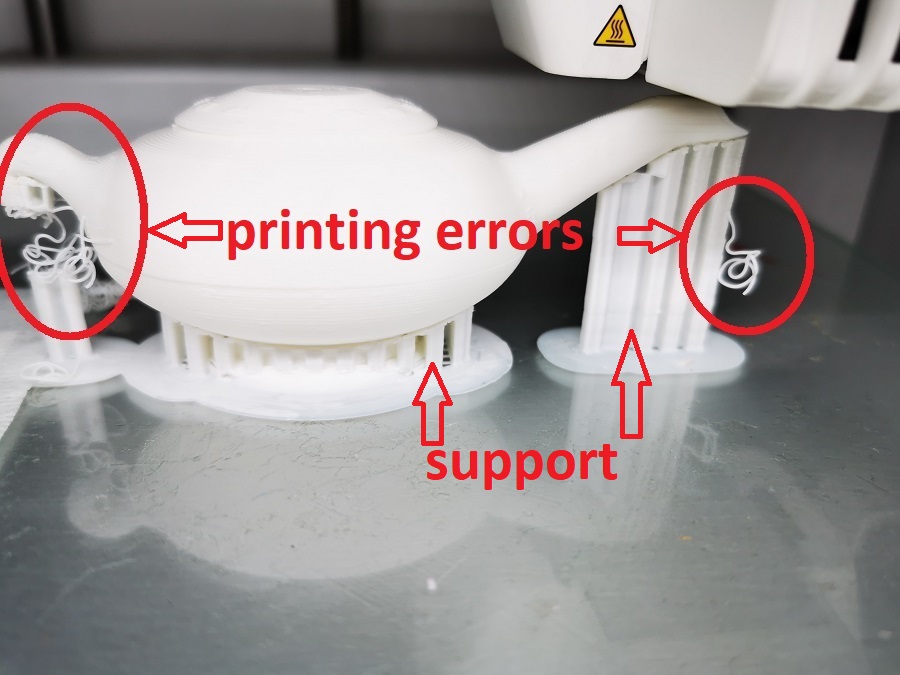 But the print result was not what I expected. an error occurred while printing the support and the lamp handle was not printed properly.

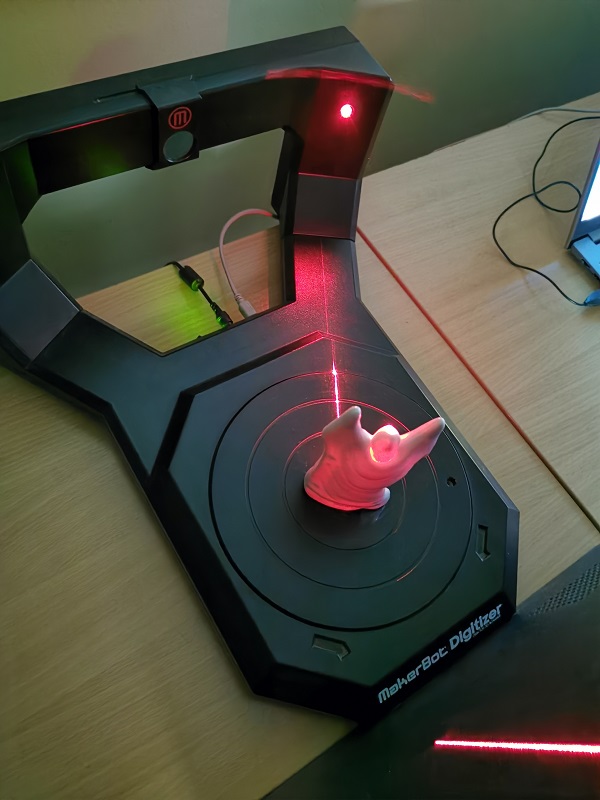
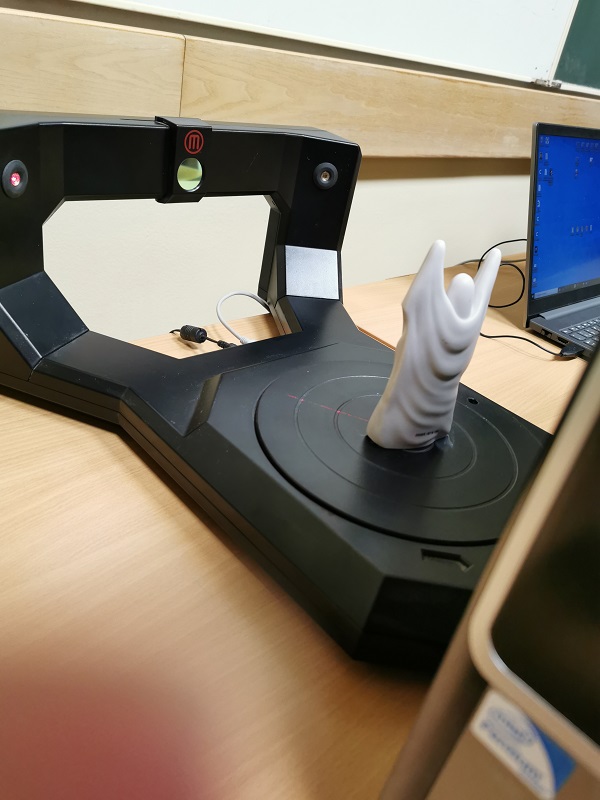
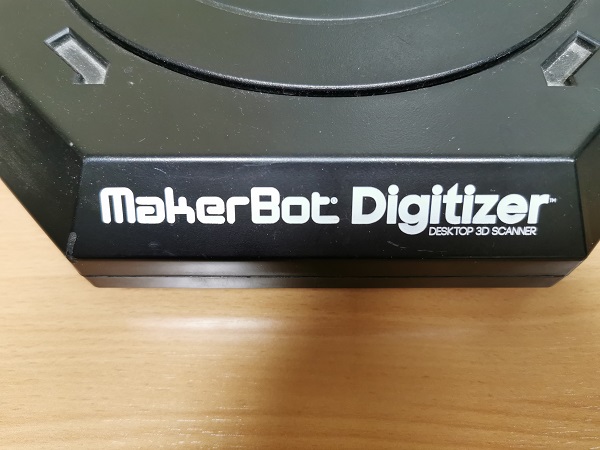 For this task I used an makerbot digitizer desktop 3d scanner.
Scanning with the MakerBot Digitizer is a fast and easy way for anyone to create 3D models.
For this task I used an makerbot digitizer desktop 3d scanner.
Scanning with the MakerBot Digitizer is a fast and easy way for anyone to create 3D models.
 The MakerBot Digitizer Desktop 3D Scanner creates a digital 3D model of a physical object
by taking a rapid sequence of pictures as the object rotates on the MakerBot Digitizer
turntable.
The MakerBot Digitizer Desktop 3D Scanner creates a digital 3D model of a physical object
by taking a rapid sequence of pictures as the object rotates on the MakerBot Digitizer
turntable.
 1. Two lasers, mounted on the left and right corners of the MakerBot Digitizer, create laser
lines that outline the profile of the object, while a camera takes a series of photographs.
2. MakerWare for Digitizer software takes the photographs of the laser lines and combines
them to create a point cloud.
3. If a completed scan still needs improvement, MakerWare for Digitizer can rescan
the object from a different angle and combine the two sets of scan data using
MakerBot MultiScan™ Technology.
1. Two lasers, mounted on the left and right corners of the MakerBot Digitizer, create laser
lines that outline the profile of the object, while a camera takes a series of photographs.
2. MakerWare for Digitizer software takes the photographs of the laser lines and combines
them to create a point cloud.
3. If a completed scan still needs improvement, MakerWare for Digitizer can rescan
the object from a different angle and combine the two sets of scan data using
MakerBot MultiScan™ Technology.
 GREAT TO SCAN:
• Objects that are larger than a 50 x 50 mm (2 x 2 in) cylinder
• Objects that are smaller than a 203 x 203 mm (8 x 8 in) cylinder
• Objects weighing less than 3 kg (6.6 lbs)
• Stationary objects
• Opaque objects
DIFFICULT TO SCAN
• Transparent objects
• Shiny or reflective objects
• Very dark objects
• Fuzzy objects
GREAT TO SCAN:
• Objects that are larger than a 50 x 50 mm (2 x 2 in) cylinder
• Objects that are smaller than a 203 x 203 mm (8 x 8 in) cylinder
• Objects weighing less than 3 kg (6.6 lbs)
• Stationary objects
• Opaque objects
DIFFICULT TO SCAN
• Transparent objects
• Shiny or reflective objects
• Very dark objects
• Fuzzy objects
.jpg)
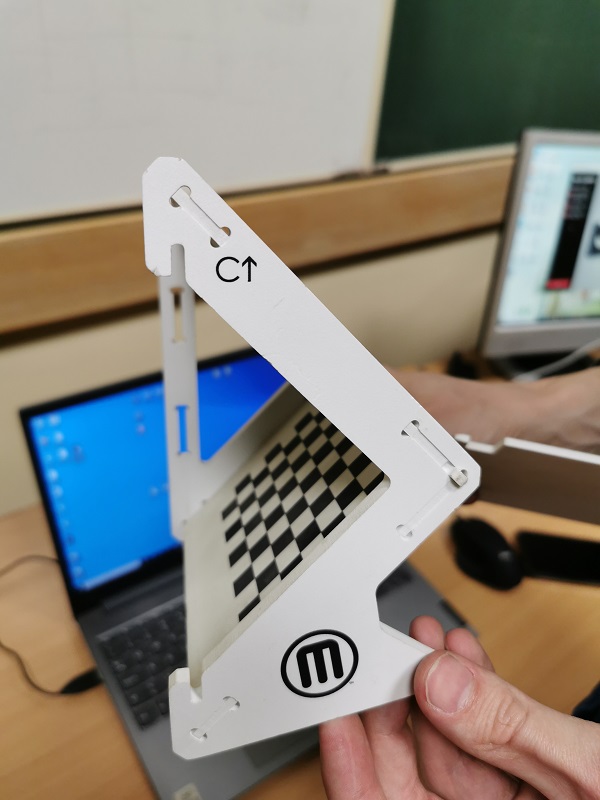
 Before scanning, the scanner must be calibrated so that the calibration tool rotates in the A, B and C directions.
.jpg)
.jpg)
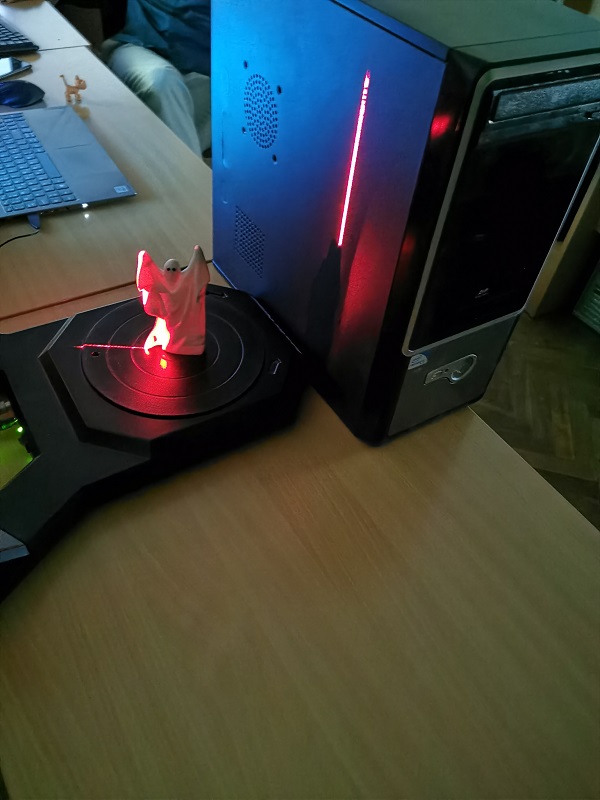
.jpg) After calibration, I started with a 3D scan.
I chose a light shade for my item - a toy ghost and I
and I clicked START SCAN in the lower left corner of the screen
After calibration, I started with a 3D scan.
I chose a light shade for my item - a toy ghost and I
and I clicked START SCAN in the lower left corner of the screen


 The scanning process takes 9 minutes.
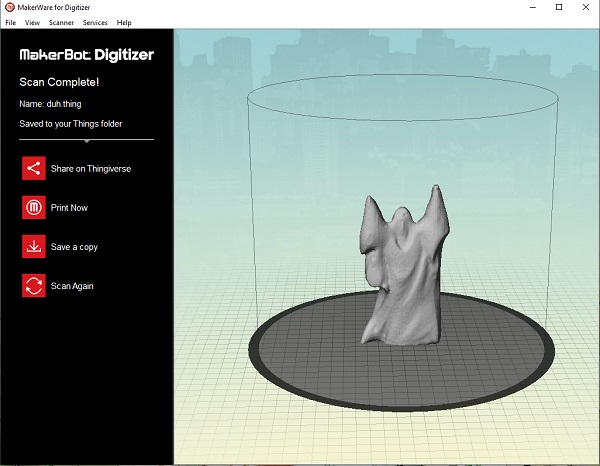
 After the scan was done I got a stl file which I could now upload to the Ultimaker Cura 3D printing program.
 For the ghost print, I chose a white PLA to make it as similar
as possible to the original.
For this purpose, I changed the material selection to tough PLA white.
For the ghost print, I chose a white PLA to make it as similar
as possible to the original.
For this purpose, I changed the material selection to tough PLA white.
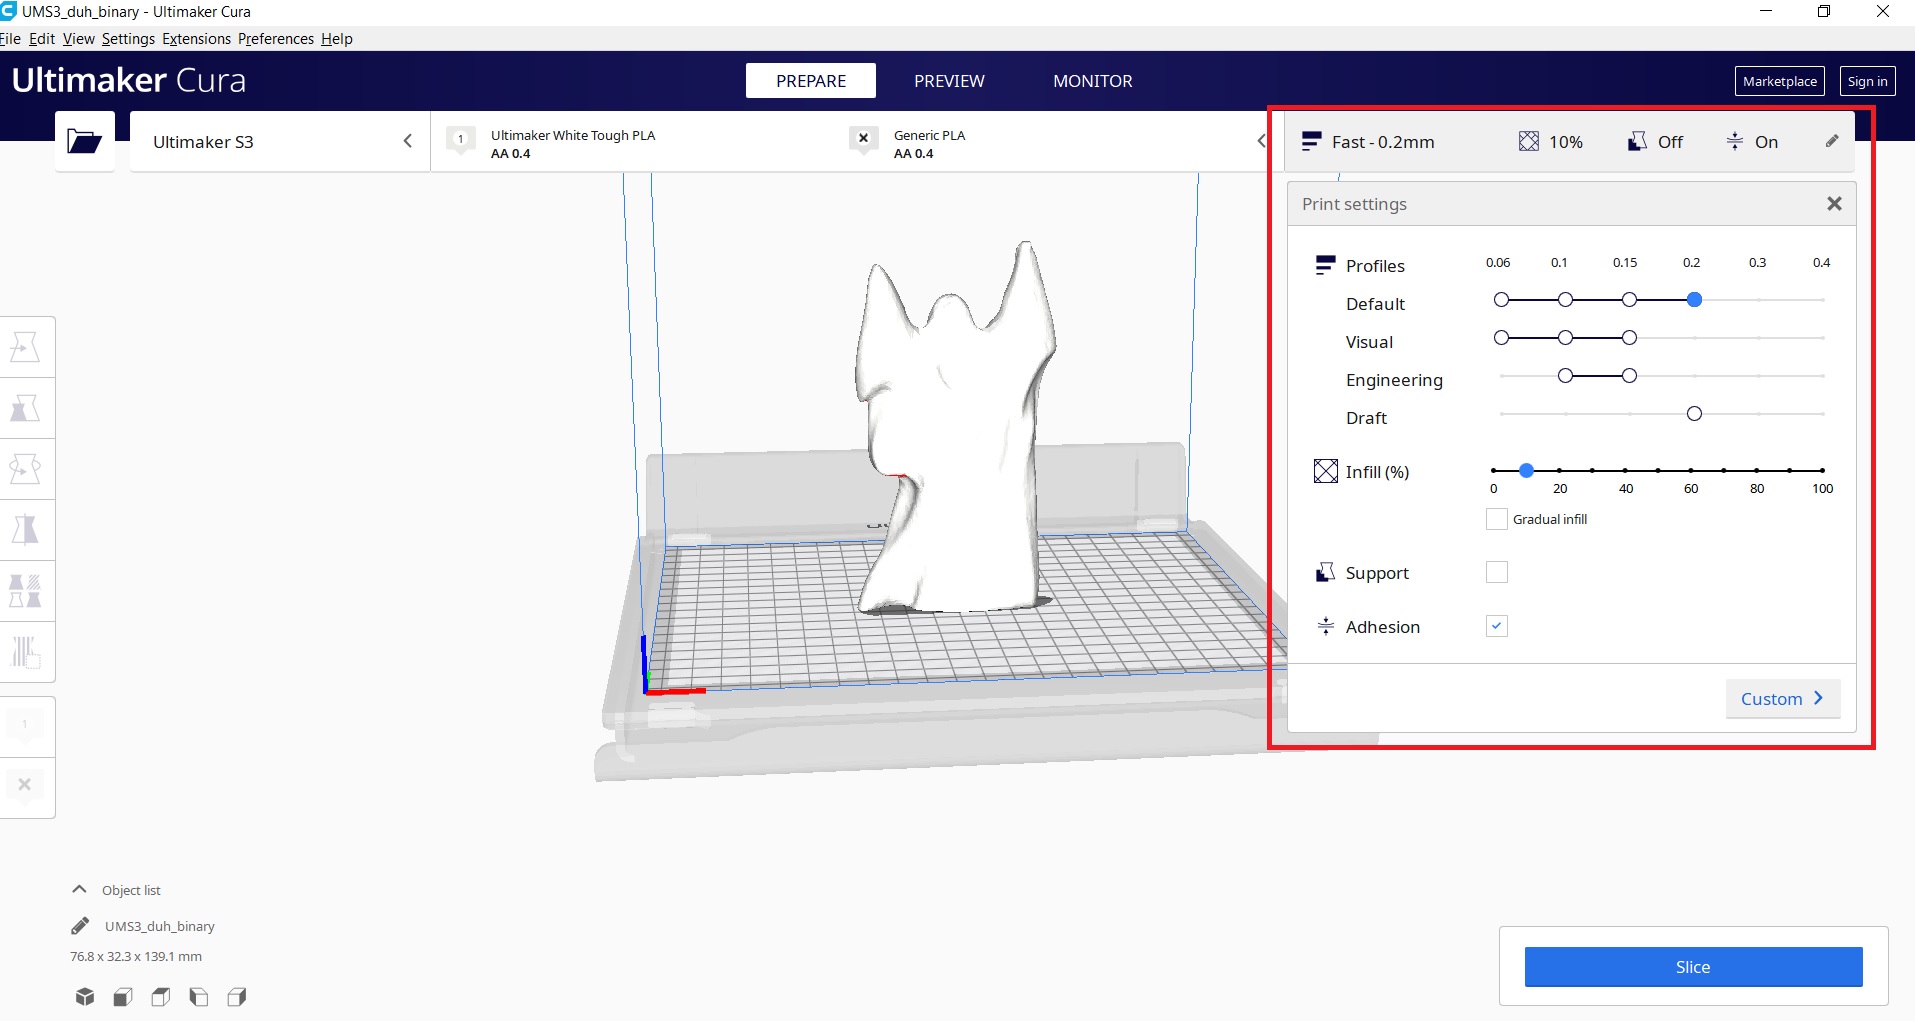 I set the profile to 0.2 and infill to 10% and ran the Slice command.
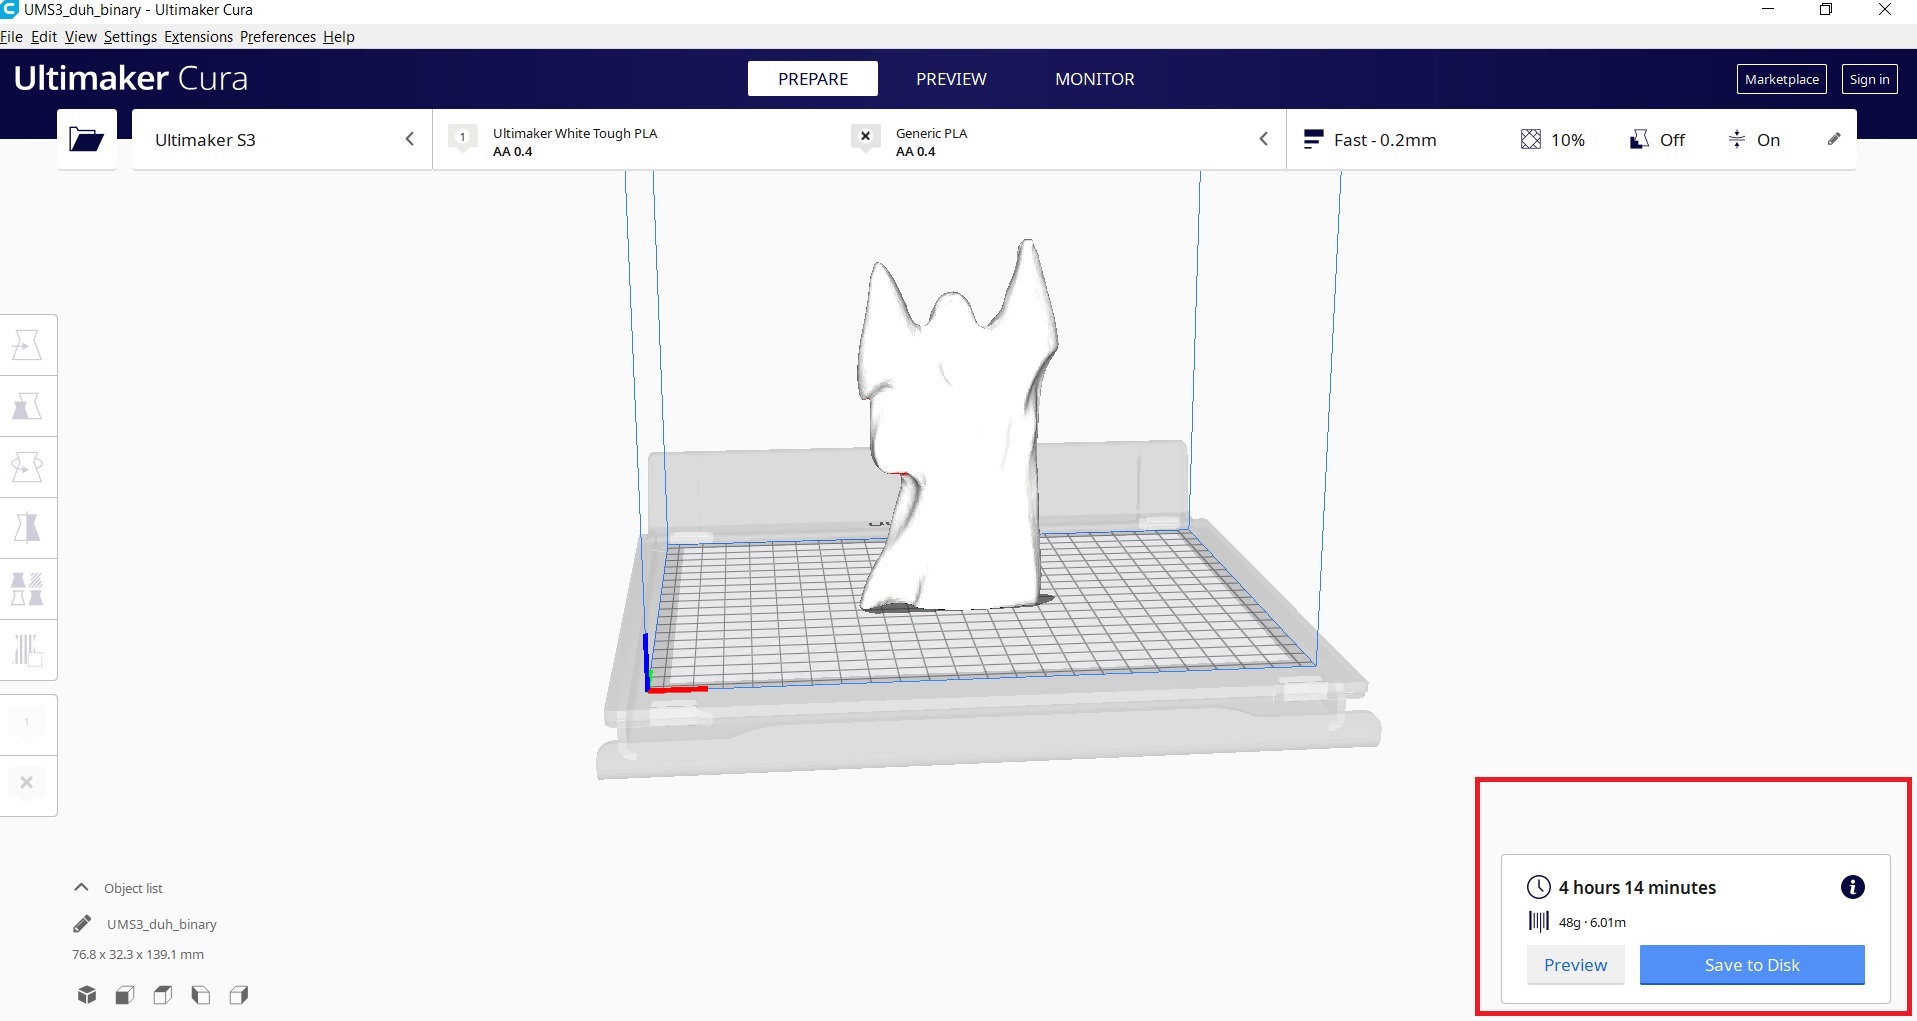 Time for printing this toy is 4h 14 min.
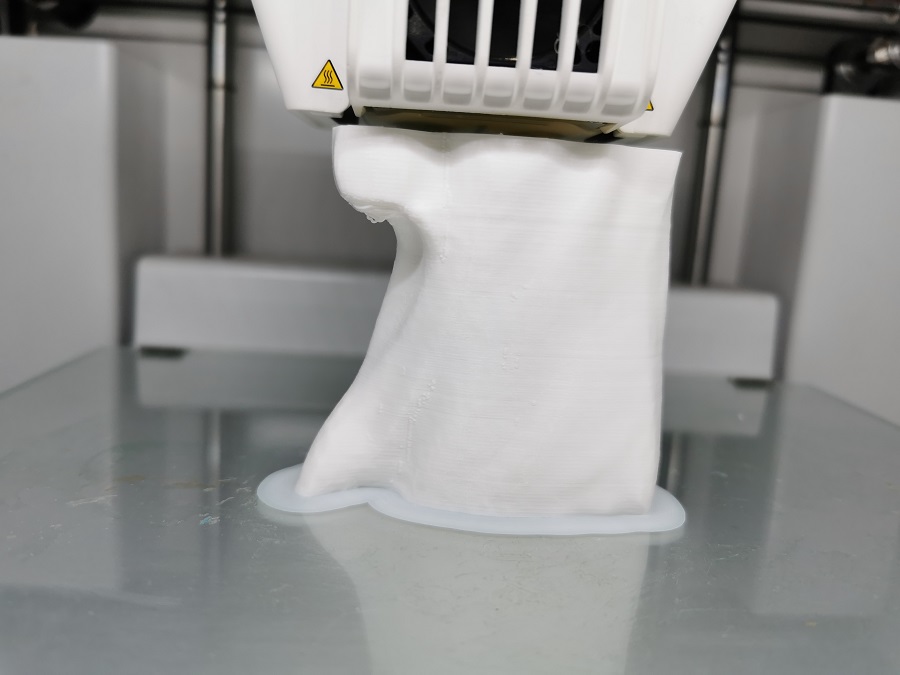
 ANDDDDDD the result is ........
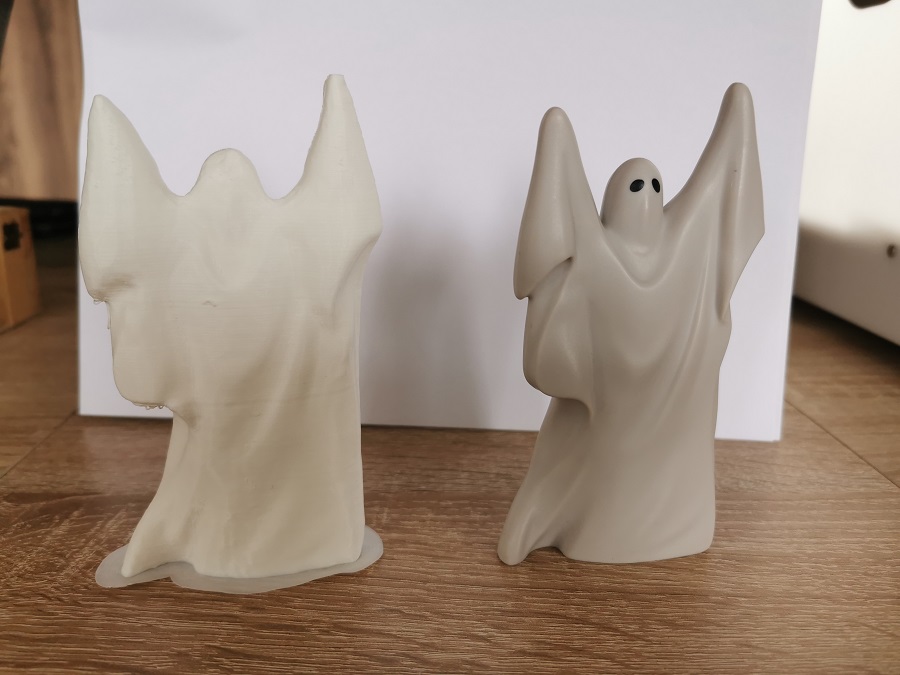 Jeeeeeee..... :)
I used PLA material to print all these parts and toys. Before the printing process itself, I did a little research on the types of materials and on the PLA material itself. Amazing how many different types of materials for 3D printing, how many quality and those lower quality PLA materials and their suppliers. Sites I visited : PLA Filament Buyer’s Guide WHAT ARE 3D PRINTED MATERIALS AND HOW ARE THEY USED? Ultimate 3D Printing Materials Guide
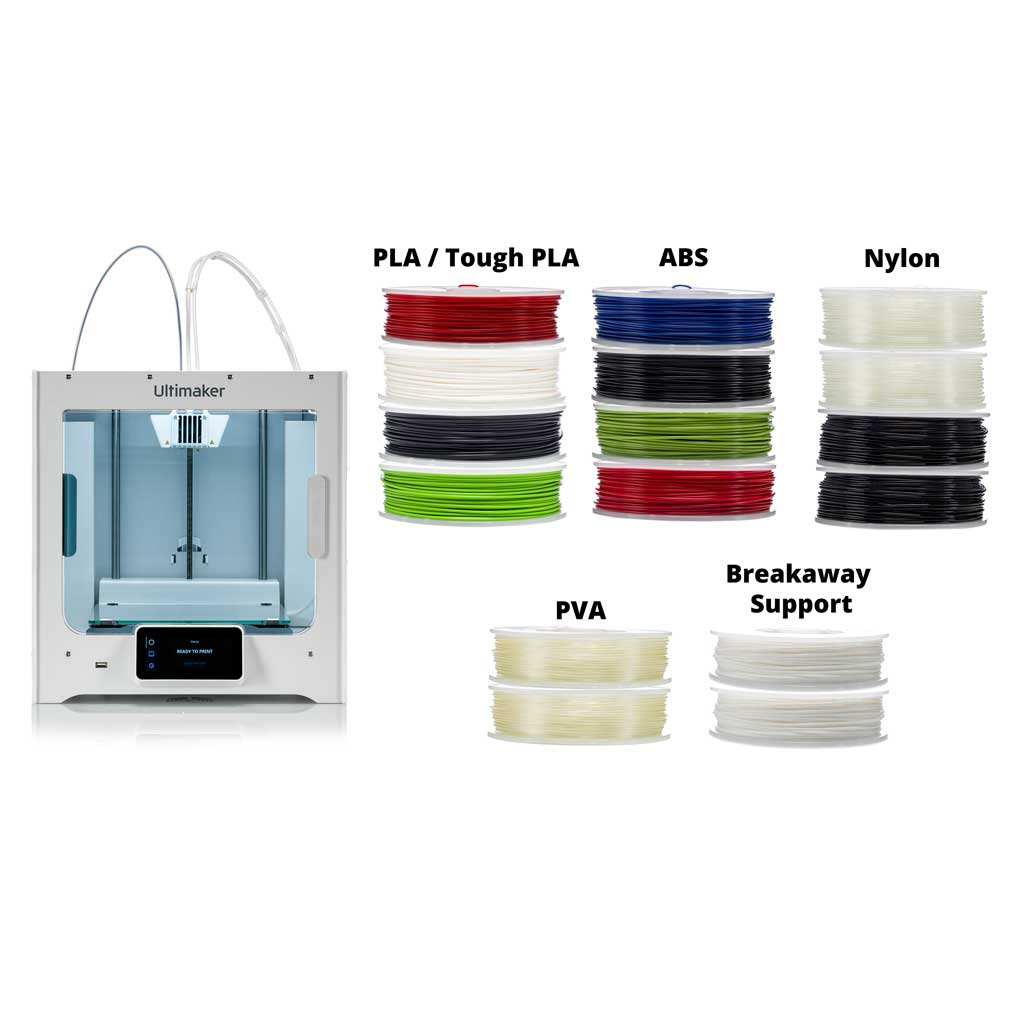 Ultimaker S3 3D printer can use different types of filaments - Tough PLA, PLA, Nylon, ABS, CPE, CPE+, Polycarbonate, TPU 95A, Polypropylene, PVA.
PLA:
Polylactic Acid, commonly known as PLA, is one of the most popular materials used in desktop 3D printing. It is the default filament of choice for
most extrusion-based 3D printers because it can be printed at a low temperature and does
not require a heated bed. PLA is a great first material to use as you are learning about
3D printing because it is easy to print, very inexpensive, and creates parts that can be used for
a wide variety of applications. It is also one of the most environmentally friendly filaments on the
market today. Derived from crops such as corn and sugarcane, PLA is renewable and most importantly biodegradable.
As a bonus, this also allows the plastic to give off a sweet aroma during printing.
Ultimaker Tough PLA:
Ultimaker Tough PLA is a technical PLA filament with toughness comparable to ABS.
Offering the same safe and easy use as regular PLA, Tough PLA is ideal for reliably printing technical models at larger sizes.
Key Features:
- Impact strength similar to ABS
- Higher stiffness compared with ABS
- Less brittle than regular PLA
- Gives a more matte surface finish quality than regular PLA
- Heat resistance is similar to standard PLA filaments, so printed parts should not be exposed to temperatures above 60C
- More reliable than ABS for larger prints, with no delamination or warping
- Compatible with Ultimaker support materials (PVA and Breakaway) giving full geometric freedom when designing parts
Applications:
- Functional prototyping
- Tooling
- Manufacturing aids
Ultimaker S3 3D printer can use different types of filaments - Tough PLA, PLA, Nylon, ABS, CPE, CPE+, Polycarbonate, TPU 95A, Polypropylene, PVA.
PLA:
Polylactic Acid, commonly known as PLA, is one of the most popular materials used in desktop 3D printing. It is the default filament of choice for
most extrusion-based 3D printers because it can be printed at a low temperature and does
not require a heated bed. PLA is a great first material to use as you are learning about
3D printing because it is easy to print, very inexpensive, and creates parts that can be used for
a wide variety of applications. It is also one of the most environmentally friendly filaments on the
market today. Derived from crops such as corn and sugarcane, PLA is renewable and most importantly biodegradable.
As a bonus, this also allows the plastic to give off a sweet aroma during printing.
Ultimaker Tough PLA:
Ultimaker Tough PLA is a technical PLA filament with toughness comparable to ABS.
Offering the same safe and easy use as regular PLA, Tough PLA is ideal for reliably printing technical models at larger sizes.
Key Features:
- Impact strength similar to ABS
- Higher stiffness compared with ABS
- Less brittle than regular PLA
- Gives a more matte surface finish quality than regular PLA
- Heat resistance is similar to standard PLA filaments, so printed parts should not be exposed to temperatures above 60C
- More reliable than ABS for larger prints, with no delamination or warping
- Compatible with Ultimaker support materials (PVA and Breakaway) giving full geometric freedom when designing parts
Applications:
- Functional prototyping
- Tooling
- Manufacturing aids