Assignments
1. Principles and practices
2. Project management
3. Computer Aided design
4. Computer controlled cutting
5. Electronics production
6. 3D Scanning and printing
7. Electronics design
8. Computer controlled machining
9. Embedded programming
10. Mechanical Design
11. Input devices
12. Molding and Casting
13. Output devices
14. Networking and communications
15. Interface and application programming
16. Wildcard week
17. Applications and implications
18. Invention, intellectual property and income
19. Project development
12. Molding and casting
Assignment:Group assignment:
Review the safety data sheets for each of your molding and casting materials
Individual assignment:
Design a 3D mould around the stock and tooling that you'll be using, mill it (rough cut + (at least) three-axis finish cut), and use it to cast parts.
Planning
I designed everything in fusion so at the end it looked like this: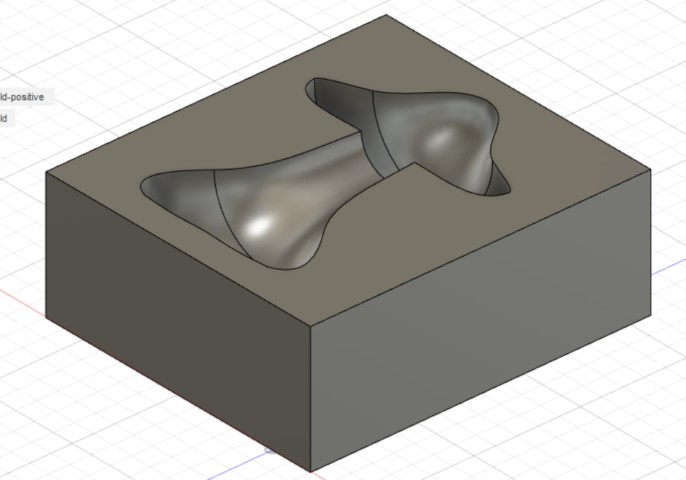 Then I was told we need to do a "3 step process" which was quite confusing because it was nowhere really
explained. That's why I made a positive mold:
Then I was told we need to do a "3 step process" which was quite confusing because it was nowhere really
explained. That's why I made a positive mold:  I will still use that negative mold for a 3 step process!
Making the mold
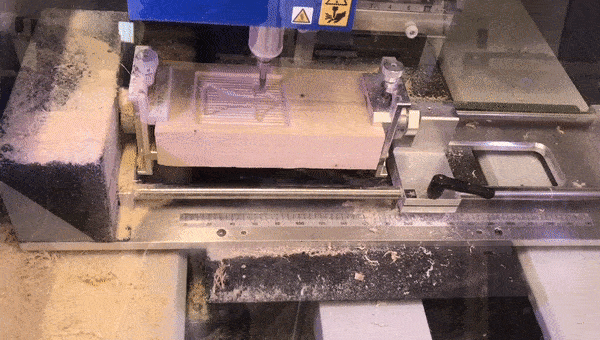
Since I was visiting an other lab, I used an other mill.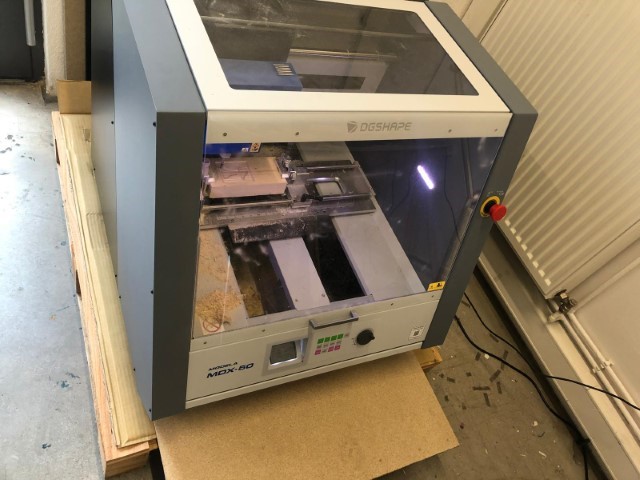 This is the Roland Modela MDX-50.
Here are some specs:
This is the Roland Modela MDX-50.
Here are some specs: | Acceptable materials | Resins such as chemical wood and modeling wax (metal not supported) |
| Operating range | X: 15.80in (400mm) Y: 12.00in (305mm) Z: 5.315in (135mm) |
| Table size | W: 15.80in (400mm) D: 12.00in (305mm) |
| Loadable workpiece size | X: 15.80in (400mm) Y: 12.00in (305mm) Z: 3.90in (100mm) |
| Axis drive | Stepper Motor |
| Feed rate | XY: 0.3in to 141.7 in/min (7 to 3600mm/min) Z: 0.3 to 118.1 in/min (7 to 3000 mm/min) |
| Software resolution | RML-1: 0.001 mm/step NC code: 0.001 mm/step |
| Mechanical resolution | 0.01 mm/step (0.39 mil/step; half step) |
| Spindle rotation speed | 4500 ~ 15000 rpm |
| Tool Change Method | Automatic Tool Changer (ATC) |
How to get the design into the machine
First of all open SRP Player and load your stl. It is an easy 5 step process. You have to confirm the object measurements and align the object first. It is possible that the program will tell you that your object doesn't fit. If that happens get a bigger piece of material.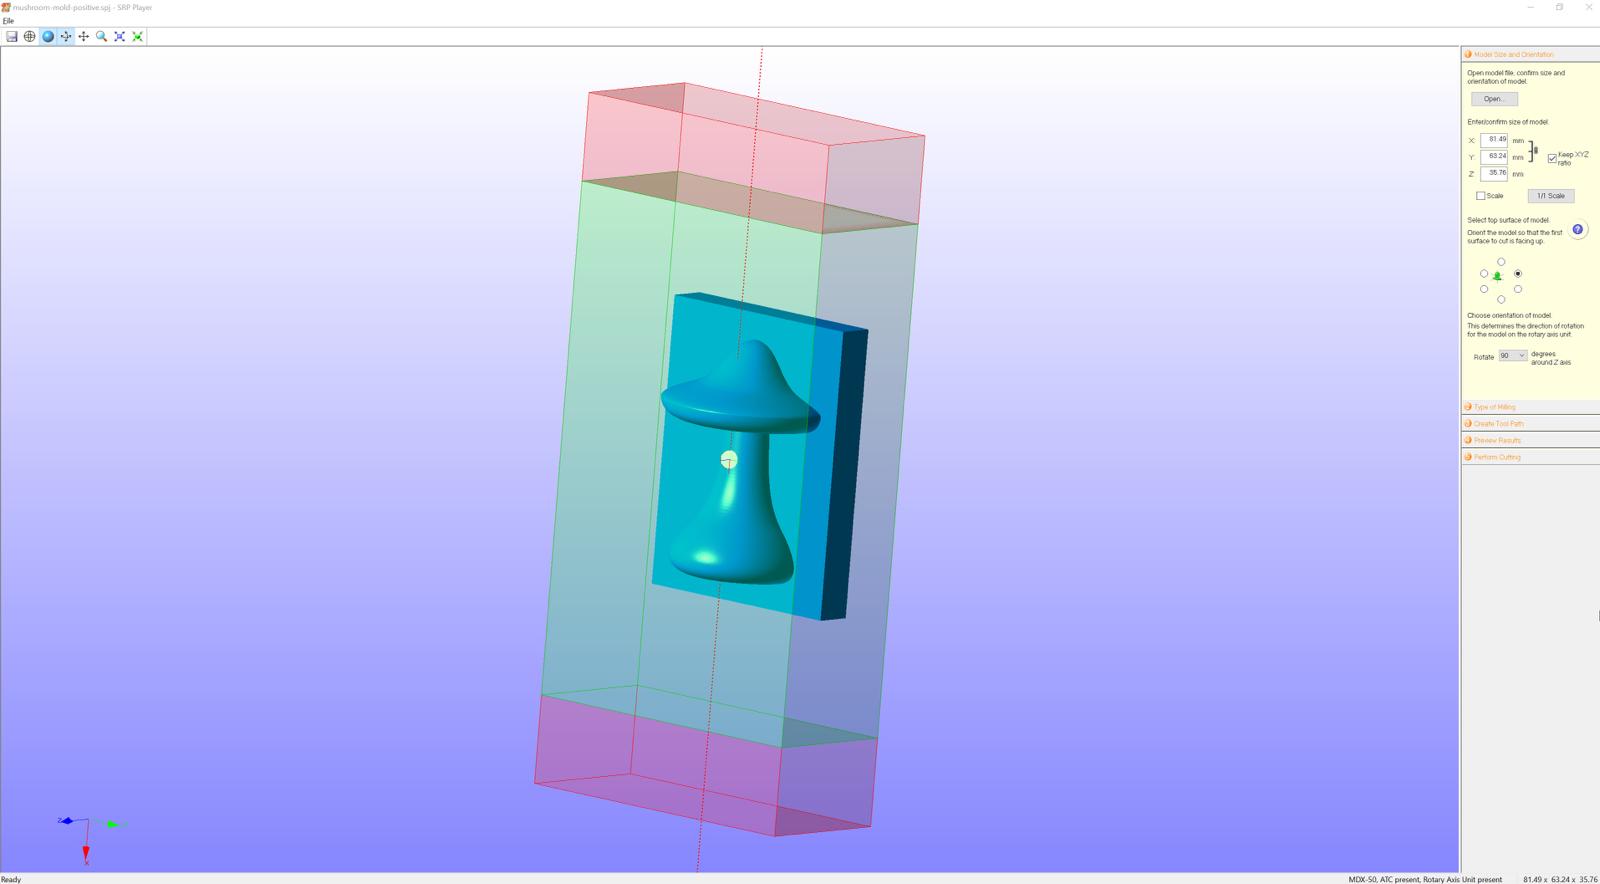
Now in the next step you select the finish.

After that you set the size of the material piece and what type it is. In the very same setting you select your milling heads. I used the R3 Ball (6mm diameter) and the 4mm square bit. For the other mold I used the 2mm square bit instead of the 4.

Here you can see that you can move the object freely. This is very good for observation.
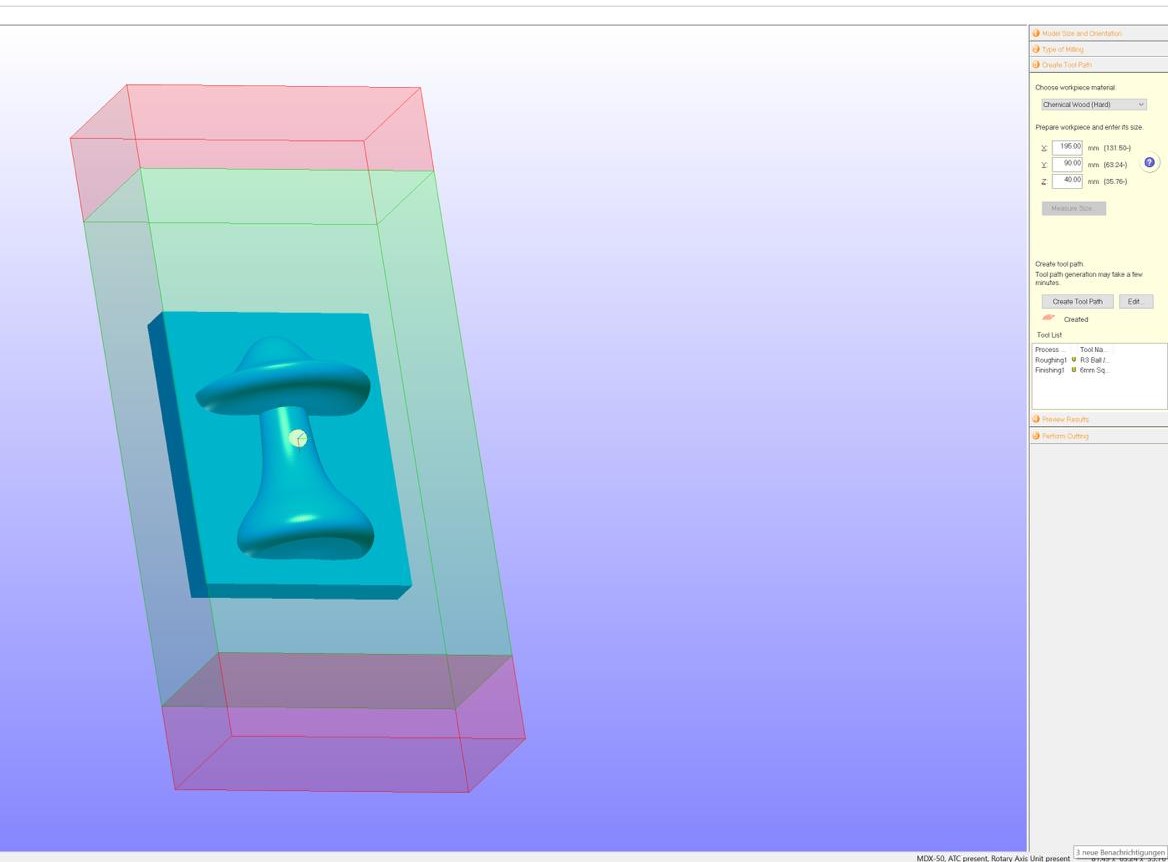
Click on the next step. Now you can click on "show model". Here it is and it looks good!
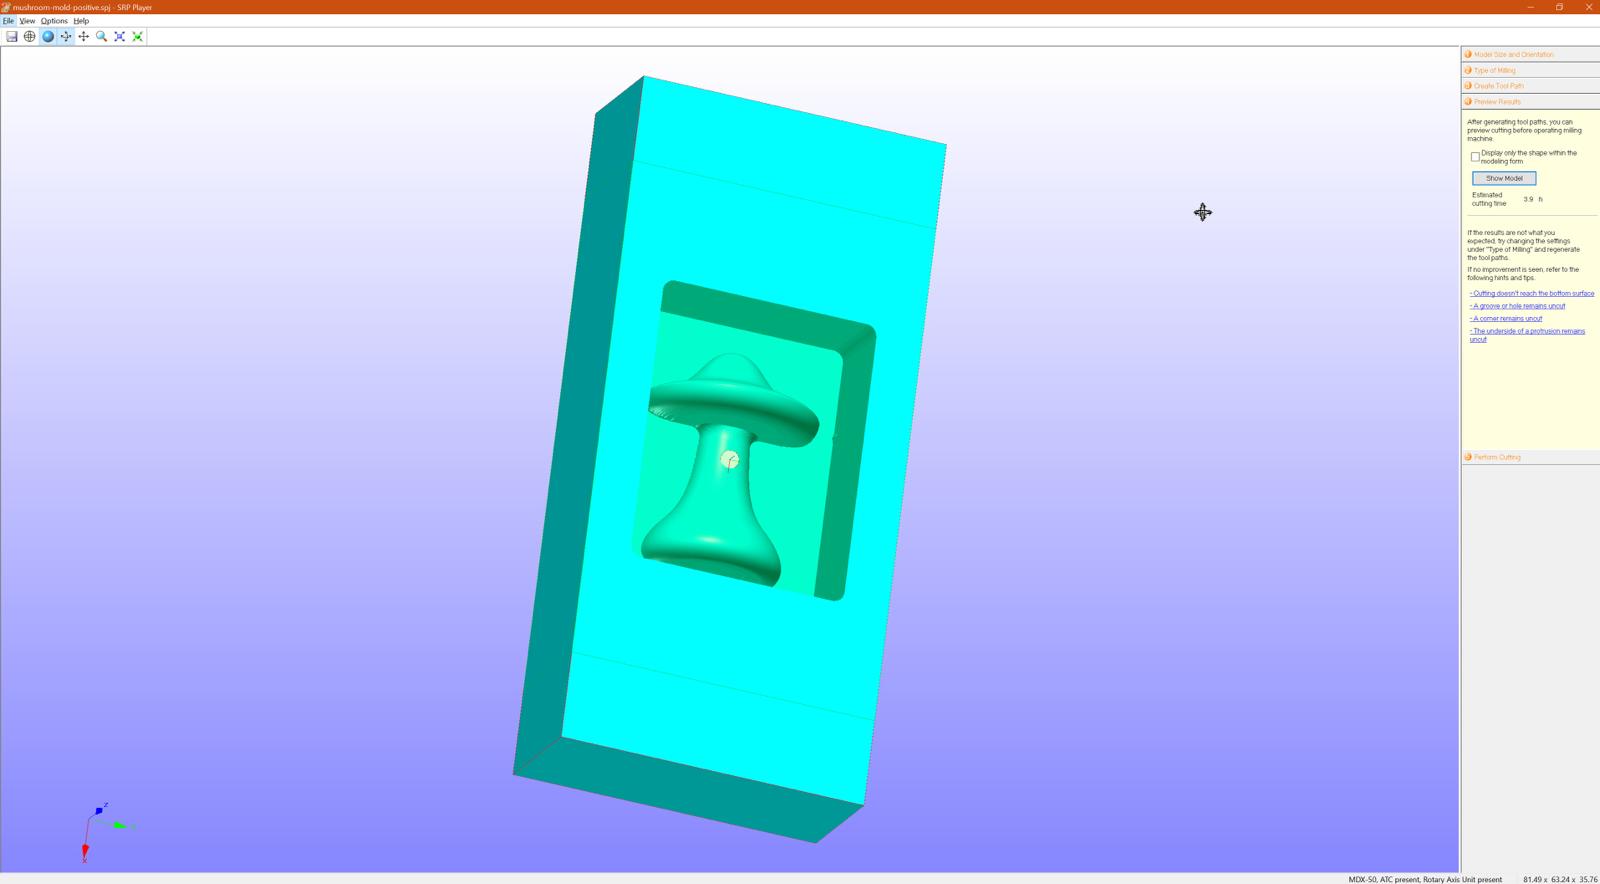
The very last step is to click on "perform cutting", right under it. You're done!
Here you can see how it operates:

 And this is the finished product!
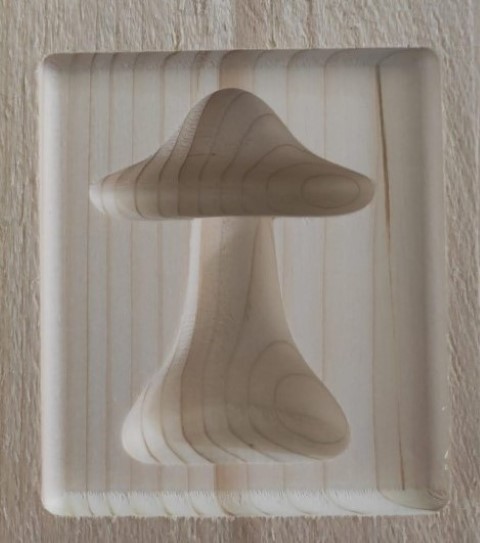 It looks beautiful!!! I redid everything with the other mushroom.
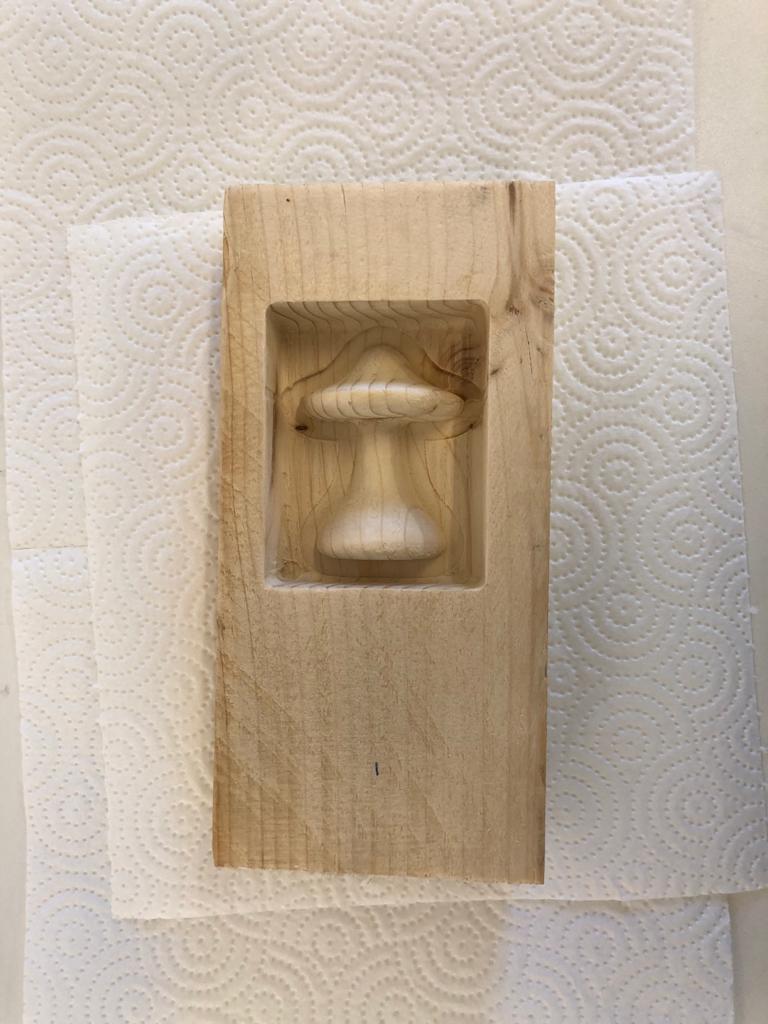 Here it is!
Casting
The first casting was done with a food friendly silicone (because I'd like to do a chocolate mushroom).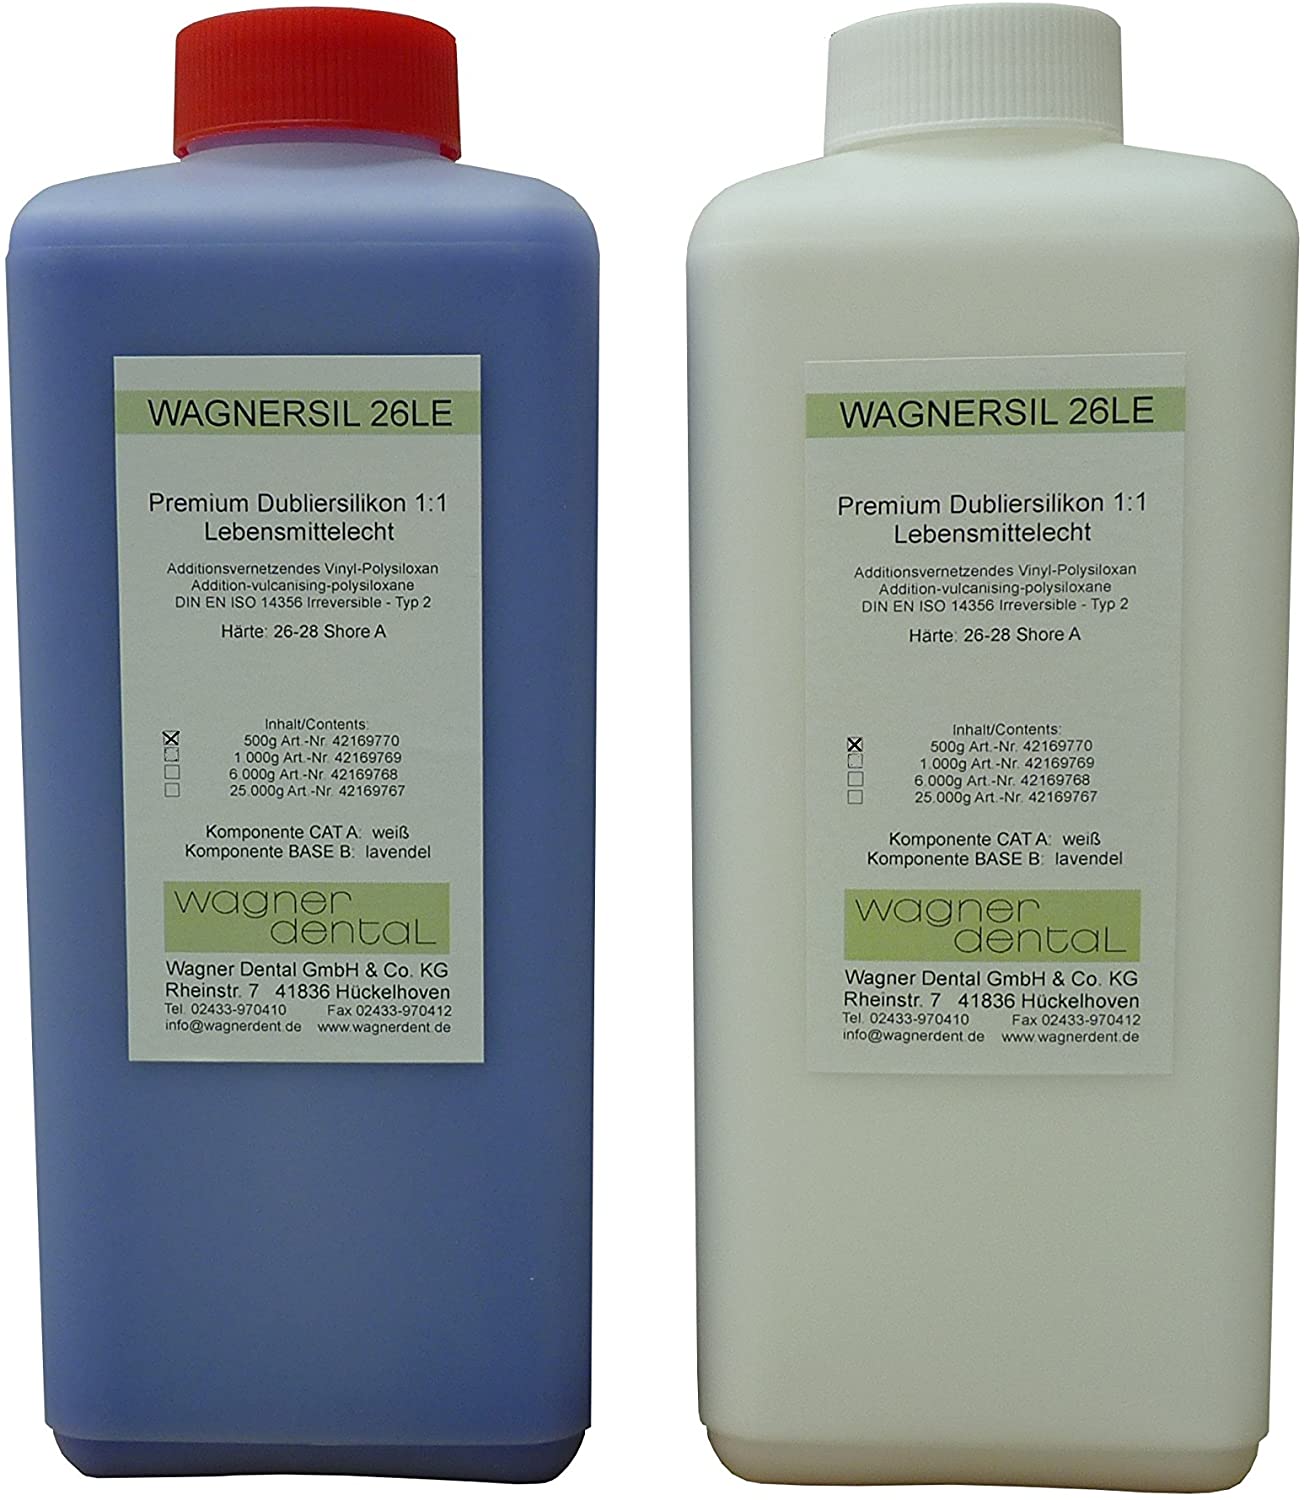 This was the only brand I could find for a quicker delivery.
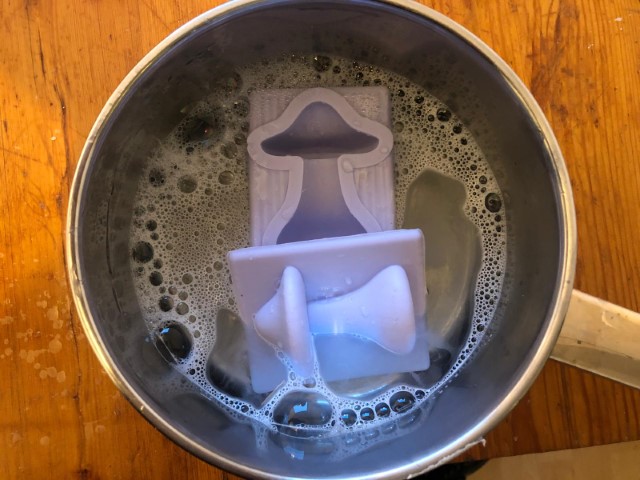
We mixed them 1:1 and poured it into the wooden mold. It was no oil or vaseline necessary. They came right out!
You can see that here. I washed them before use just to be extra safe.
This was the only brand I could find for a quicker delivery.
We mixed them 1:1 and poured it into the wooden mold. It was no oil or vaseline necessary. They came right out!
You can see that here. I washed them before use just to be extra safe.
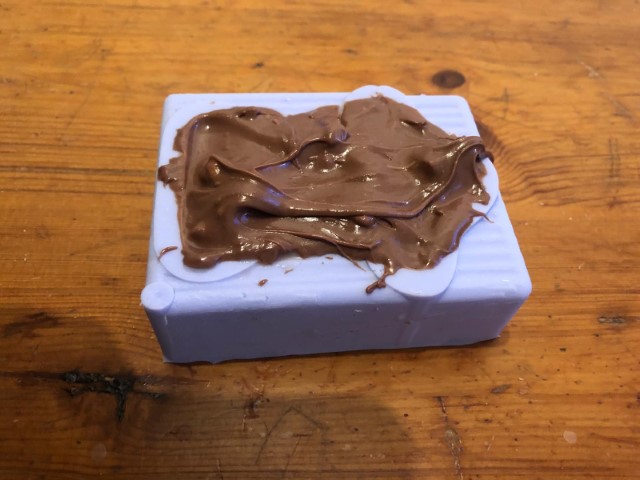
 After that, I let them dry and heated some chocolate. Then I put them in the fridge.
 And here we go! Chocolate mushrooms!
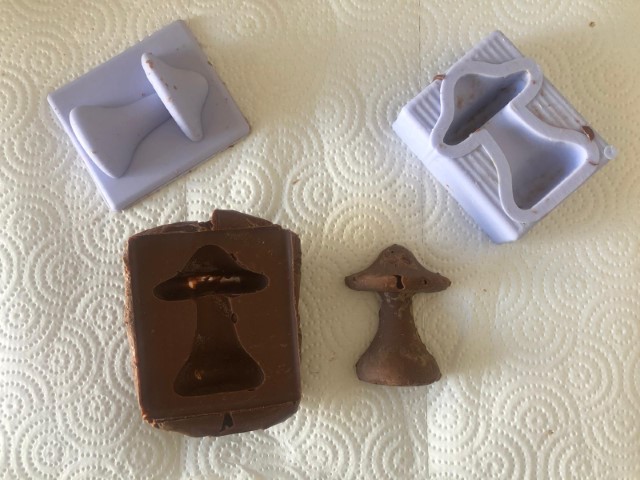 The nice thing about those molds is that you can stack them together lol.
Group Assignment
Now let's rewiev the safety data sheet for this silicone:
We had the sheet there, but as you can see there are no real safety instrucitons. It is food safe and physiologically harmless.
