15. Wild Card Week
The assignment for this week was to Design and produce something with a digital fabrication process (incorporating computer-aided design and manufacturing) not covered in another assignment, documenting the requirements that your assignment meets, and including everything necessary to reproduce it. I decided to use our Fab Labs industrial sewing machine for this week’s assignment.
Sewart
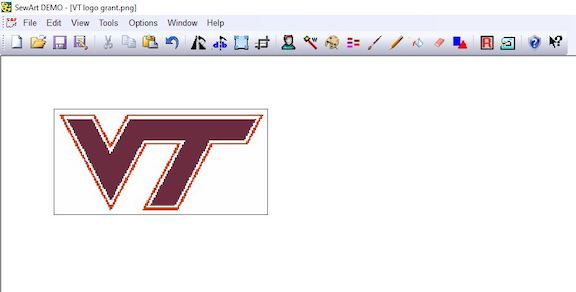
To begin my embroidery file for this week’s assignment I first decided what I wanted to create. I decided to create the Virginia Tech logo as both my parents attended this university for college. I then downloaded an .png file type that I was satisfied with as this was the accepted file type for the stitch generating software, Sewart, that I was using. Once I saved my file I opened it in Sewart.

Above is the image that I used to create the stitch pattern for my embroidery file.
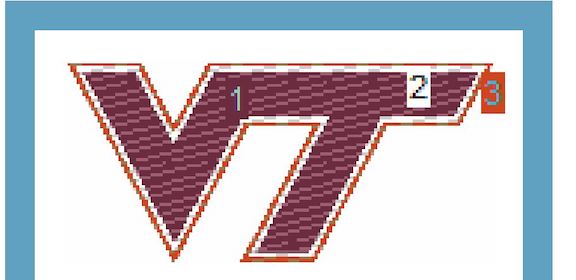
Above is the same image of the Virginia tech logo, except in this image I have scaled it down to the size of the hoop that I will be using on the embroidery machine. As you can see the image lost a lot of quality and now has a blocky figure to it.
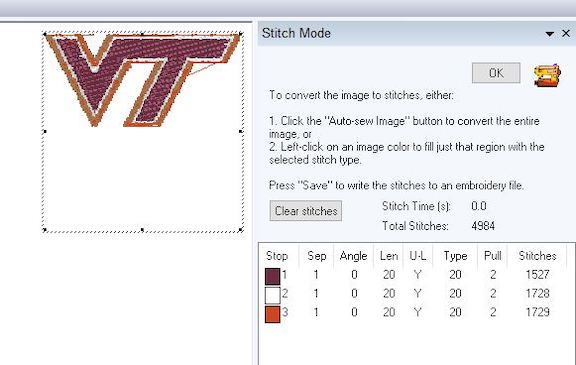
Once I had the Virginia Tech logo in the software it was time to convert it to stitches so that I could sew it with the embroidery machine. The first step I had to do was go to the stitch menu and select each different color that would be used in the logo. The machine then generates different numbered groups based off of how many thread swaps needed to occur. I went in afterwards and blended multiple colors together to mitigate error and reduce the number of thread swaps. I also had the option of choosing my settings for the stitch including offset and length. After watching a video on the different types, I decided the best for my purpose was an all around setting with 1mm offset and 20mm stitch length. After this step it was time to export my file.
The first image above shows the three color groups that are present in my file which also indicate how many thread swaps need to occur. The second image shows the specifics of the colors as well as stitch information and a better rendering of what my completed stitch would look like.
Embroidery Machine
The embroidery machine our fab lab features is an industrial grade machine which includes all the features below. In order to set my file up on the machine I had to download it onto a USB drive and import it onto the machines interface. I also had to familiarize myself with the process of operating the machine. I watched various videos on operation and setup to guide me through the process of sewing my file.
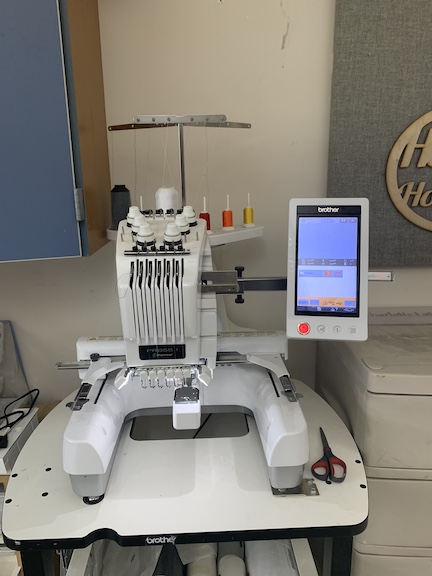
6-Needles
8” x 12” Maximum embroidery area
1000 stich per minute embroidery speed
Intuitive Color Management for easy design customization
Color Sort feature to reduce thread changes when combining designs
Setup and Stitch
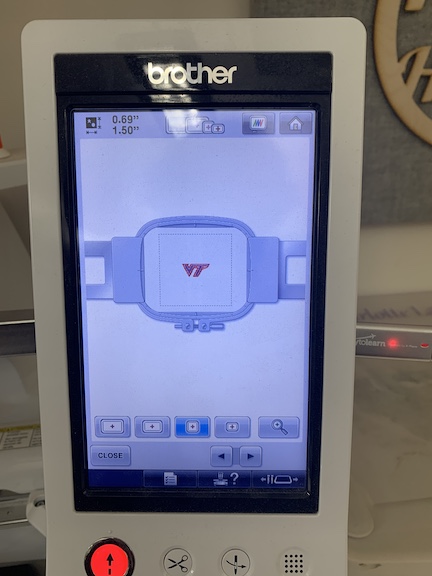
The first step to setting up the embroidery machine to be able to sew my file was to prepare the fabric material on the hoop. For this step I used the hoop provided to me and applied the baking before attaching the fabric. Once this was completed I inserted the hoop with the fabric into the machine. Afterwards, I was able to begin setting up my file to sew on the fabric. I had already scaled the file down to fit correctly.
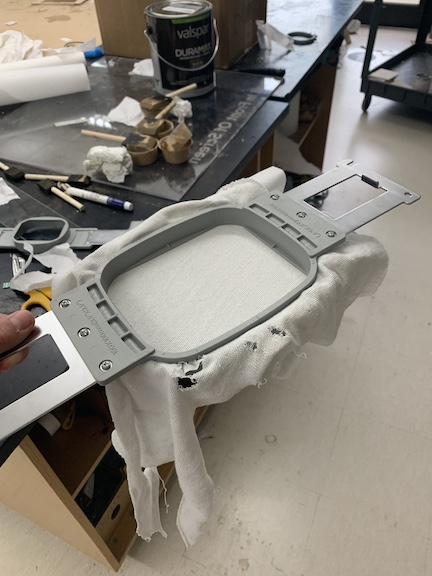
The first image above shows the fabric and backing placed in the hopper ready to be inserted into the machine. I had to ensure that the fabric is taught so that no errors would occur while the machine was sewing my file. The image below shows the Virginia tech logo once I imported it onto the embroidery machine. It automatically centered my file within the hopper. Next was to prepare the spools and sew.
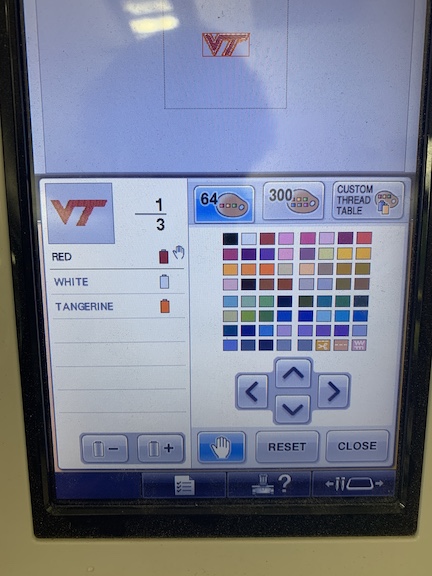
The image below shows where I had to select the colors for the file I was sewing. Although Sewart gave me colors, our lab did not have those colors so instead I selected the closest colors that we had on the machine which was red, orange and white. I also had to set the number to the correct spool for the color so the machine knew which was the correct needle to swap to while sewing my file.
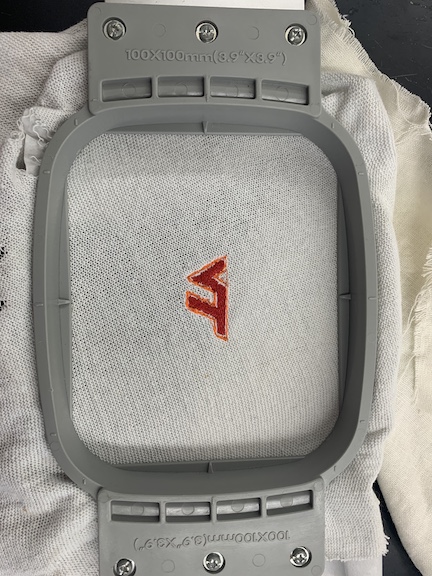
The video above shows a timelapse of the machine sewing my file. As you can see it starts with the red then swaps the material to the white spool then finishes the white portion then swaps to the orange spool. The design came out very well in my opinion and the image below shows the final product once I took it off the machine.
Finished Product
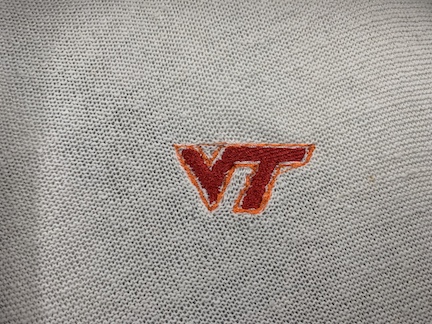
Above is the final product after taking the stitch off the embroidery machine. I am very satisfied with the results and would enjoy making a gift for my parents using a larger version of the same file.
Summary
In conclusion to this week, I learned a new skill that I had never used in my extensive time in the Latin Fab lab. I am very interested in the embroidery machine as well as I plan on making gifts for family members with it. I learned a lot about sewart and how it merges color groupings together as well as keeps track of the number of stitches. I encountered no problems while completing this week’s task.