12. Molding & Casting
1. Weekly Brief Summary
I learned how to create mold and cast things.
2. Weekly Assignment Requirement
Group assignment:
- Review the safety data sheets for each of your molding and casting materials
- Make and compare test casts with each of them
Individual assignment:
- Design a 3D mould around the stock and tooling that you’ll be using, mill it (rough cut + (at least) three-axis finish cut), and use it to cast parts.
3. Group Assignment
FabLab KAMAKURA 2021 Lab site / Molding and Casting
4. Design
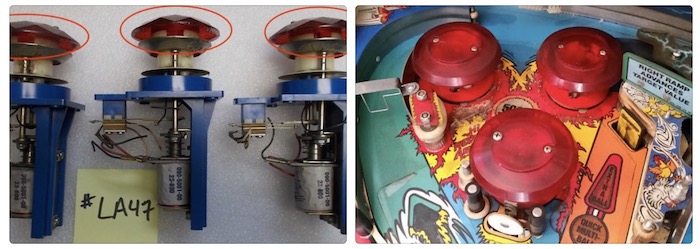
I’d like to make caps of button and pop bumper. I need enough amount of copy, and transpearent color should be nice.(Images from coinoppartsetc and enteryourinitials).
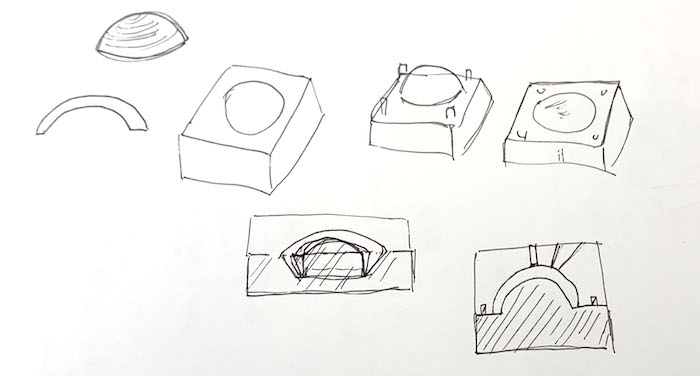
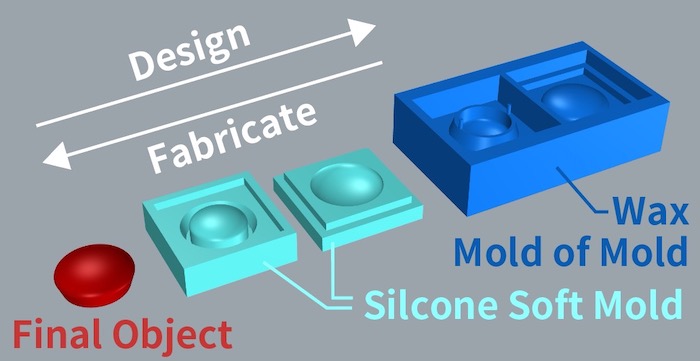
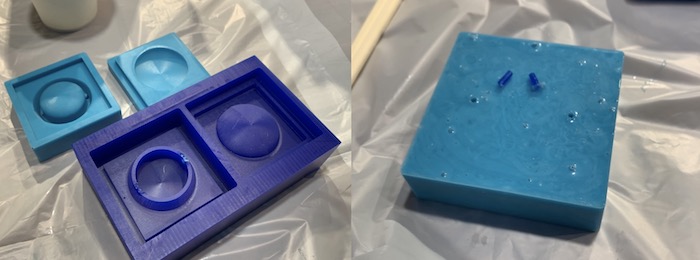
Here is Kamakura tutorial, instructor Rico made. The important and interesting point is that we need to design final object, soft mold and mold of mold, and the order of design and fabricate process is opposite.
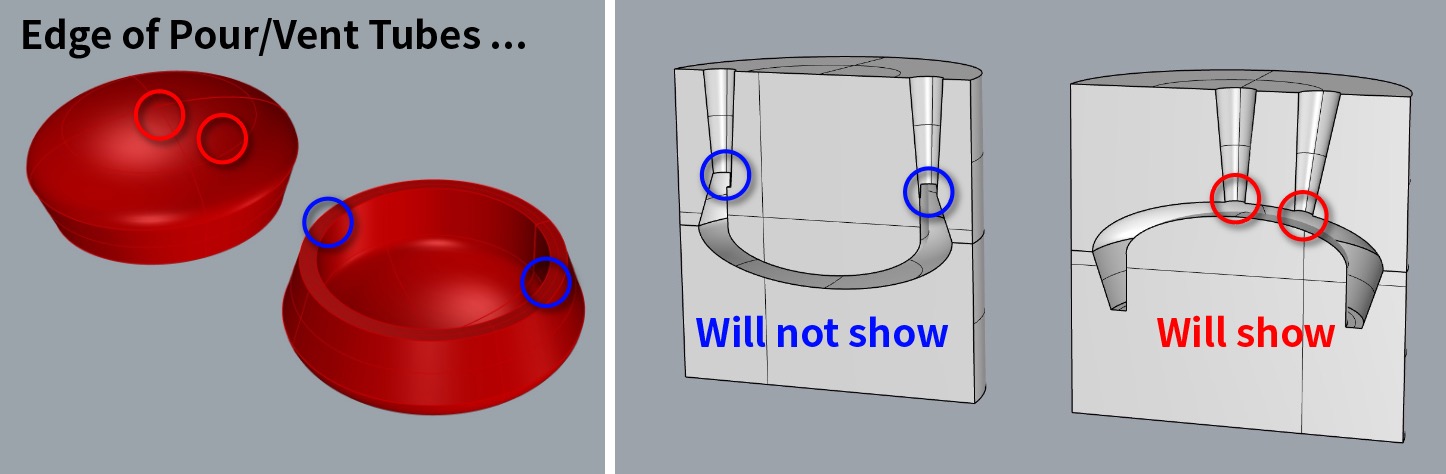
Also I need to think about material/air path. At first I attached pour/vent tubes on the surface of case, but its dirty edge may will show. So I changed the place to the bottom side of case.
5. Path Generation
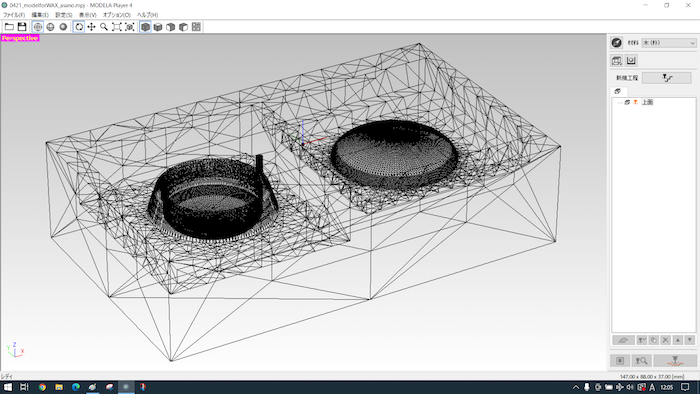
I use MODELA Player 4 for making path.
If not yet, need to set parameters of your tools(bits), for example, tool shape(straight or ball), tool strength, tool diameters. In addition, also need to set cutting conditions, material to cut, cutting & finishing speed, etc. In this time, I refer to the numbers of Toshiki Tsuhchiyama’s one(Kamakura 2020).
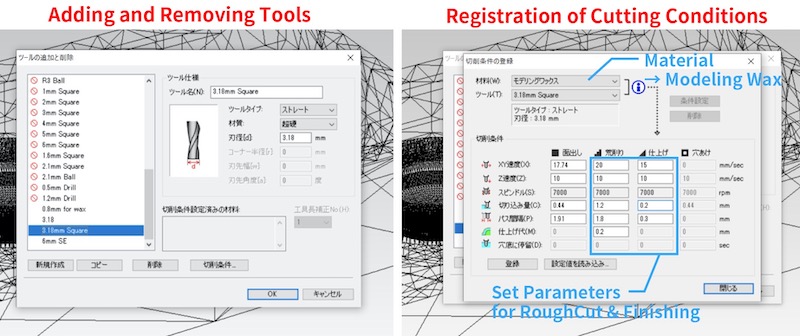
| Parameter | RoughCut | Finishing |
|---|---|---|
| XY Speed | 20mm/sec | 15mm/sec |
| Z Speed | 10mm/sec | 10mm/sec |
| Splindle | 7000rpm | 7000rpm |
| Cutting-in Amount | 1.2mm | 0.2mm |
| Path Interval | 1.8mm | 0.3mm |
| Fisnih Margin | 0.2 mm | 0 mm |
Set cutting areas to shorten processing time.
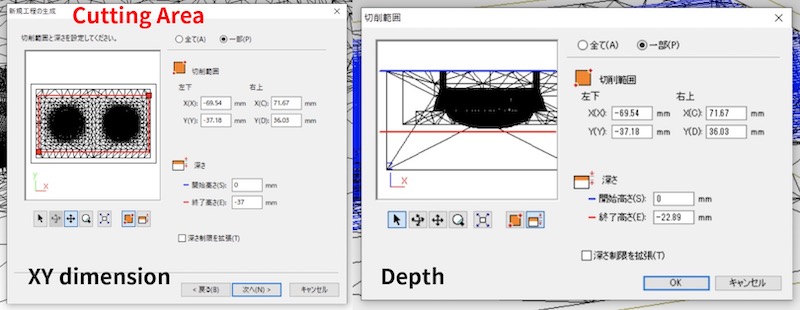
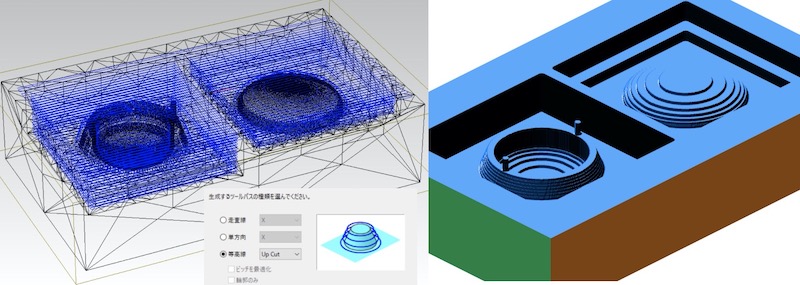
You can see result image of cutting. Shape and time depend on tool shape and cut path pattern, scanning(走査線) and contour(等高線). In this time, I found ball mills cannot make right angle around air paths.

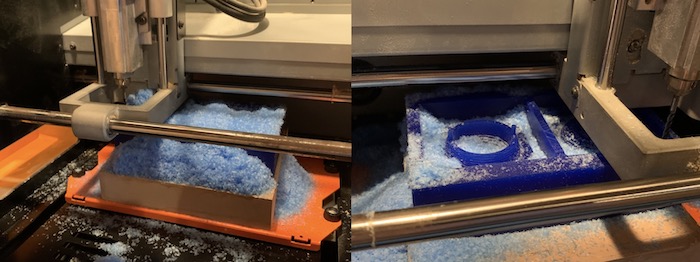
6. Milling Wax
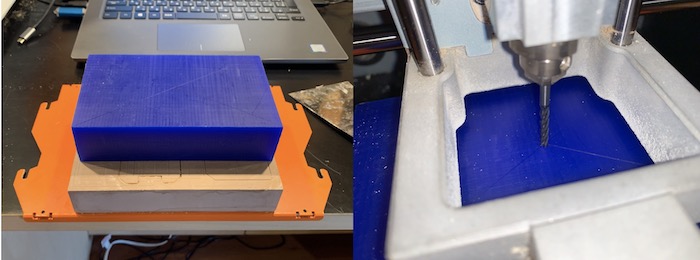
We in FabLab Kamkura, used SRM-20 for making mold. I used 3.18mm diameter square mill for milling, its size is larger than mills for PCB, but basic usage (how to fasten/lossen, how to adjust Z-zero axis) is same as them. Here is our group assignment about how to use SRM-20.
Paste wax on the table. Write diagonals on surface, and mark center point. From VPanel, set XY origin on center point, set Z origin on surface of wax.
Output pass data from MODELA Player 4.
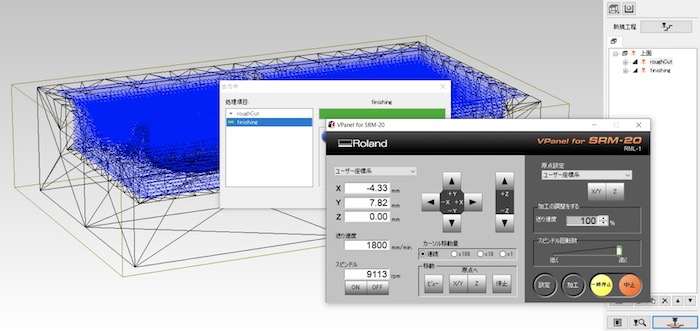
During milling, lots of shavings appeared, I sometimes stop machine and swept them. Rought cut and finishing takes 1hr for each.
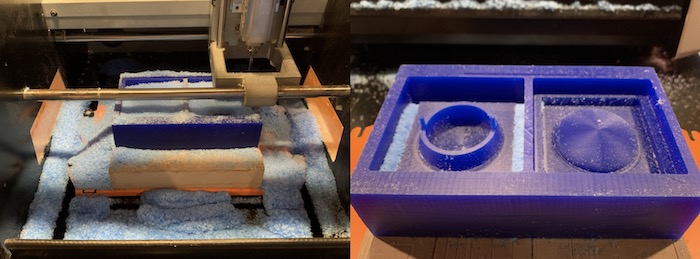
While swept wastes, I accidentally broke a pin, so I reinforced it with glue. I regret that it was too thin…
7. Material Safety
In this week, I use Mold Star 16 FAST for soft mold, Smooth-Cast 325 for final object. I read MSDS, material safety data sheet for each.
Both instructions says Wear safety glasses, long sleeves and rubber gloves for minimize contamination risk.

Each Instruction contains NFPA(Flammable and Combustible Liquids Code, published by the National Fire Protection Association) marks. This shows risks of materials. According to this slide, its meanings are below.
| Level | BLUE(Health Hazard) | Red(Fire Hazard, Flash Point) | YELLOW(Reactivity) |
|---|---|---|---|
| 4 | Deadly | Below 73F | May Detonate |
| 3 | Extreme Danger | Below 100F | Shock and Heart May Detonate |
| 2 | Hazardous | Below 200F | Violent Chemical Change |
| 1 | Slightly Hazardous | Above 200F | Unstable If Heated |
| 0 | Normal Material | Will not Burn | Stable |
White zone can show OXY(Oxidizer), ACID(Acid), ALK(Alkali), COR(Corrosive), W with strike through line (Use NO WATER) and Radiation Hazard.
- Mold-Star 16 FAST have low risk about health hazard
- Smooth-Cast 325 part A is more sensitive than others, health hazardous and burnable above 200F, also unstable if heated.
- Smooth-Cast 325 part B is as safe as Mold-Star 16 FAST.
8. Molding and Casting
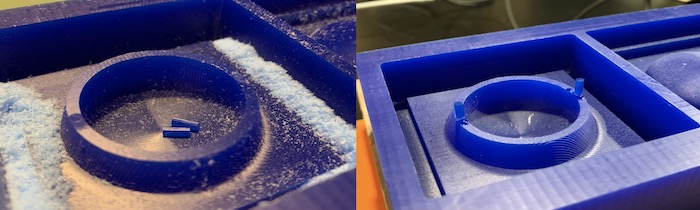
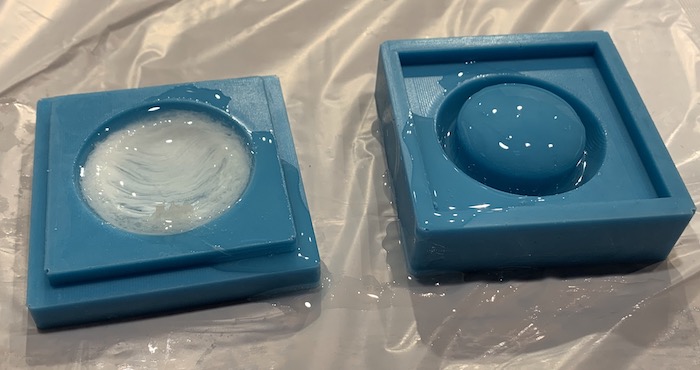
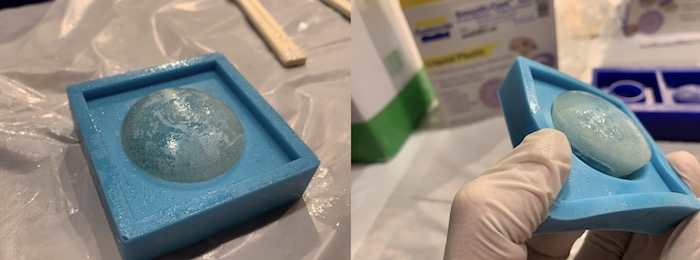
For making soft mold, we used Mold Star 16 FAST. Pot Life:6min, Cure time:30min. When I peeled them off, I couldn’t get the pins for air path right and had to cut it apart again.
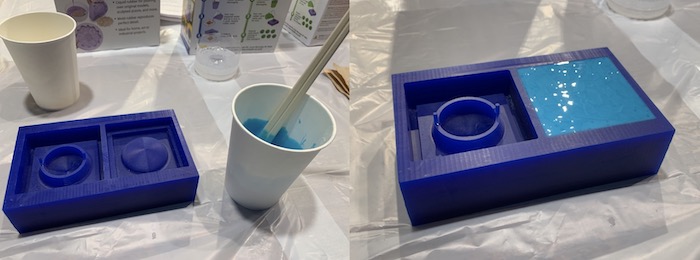
A hole was too small, I used disposal plastic pipette for pouring cast material, Smooth-Cast 325. However, there was not enough space to pour at one time by gravity, it took a long time and exceeded pot life. As a result, cast material wasn’t cure in soft mold perfectly, I cannot get good cast model.
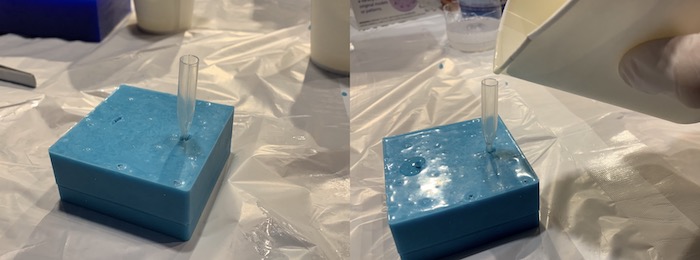
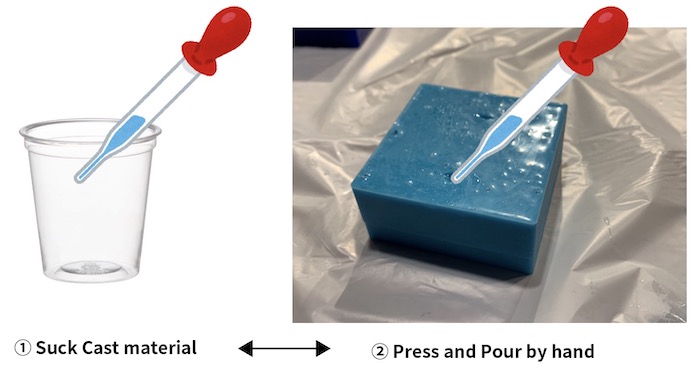
In second time, I also used pipette, sucked up the cast material and poured it directly into soft mold repeatedly until it overflows from the air hole. (I know its pushy approach, but need to shorten time…)
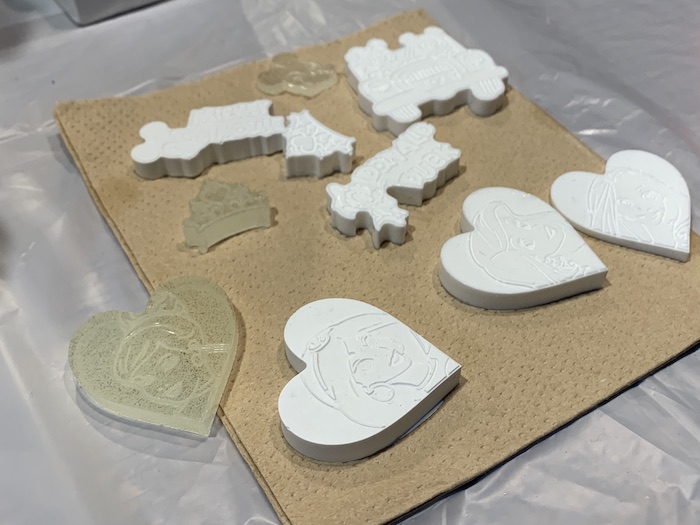
Finally, I got cast model. It is a little sticky, contains lots of bubbles. I need to work more accurately, less hurriedly, and in a hurry.

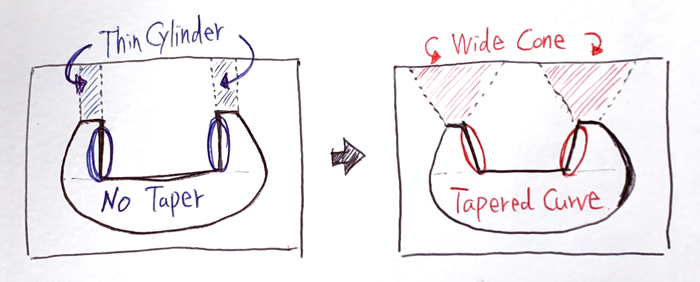
I didn’t get much time to make another mold and cast, neither for this week and for final project. Hoeveer, when if I make another one, mold should be improved as below. Pour/Vent tube’s shape is cylinder, and don’t set no tapered straight line.