
Wildcard Week
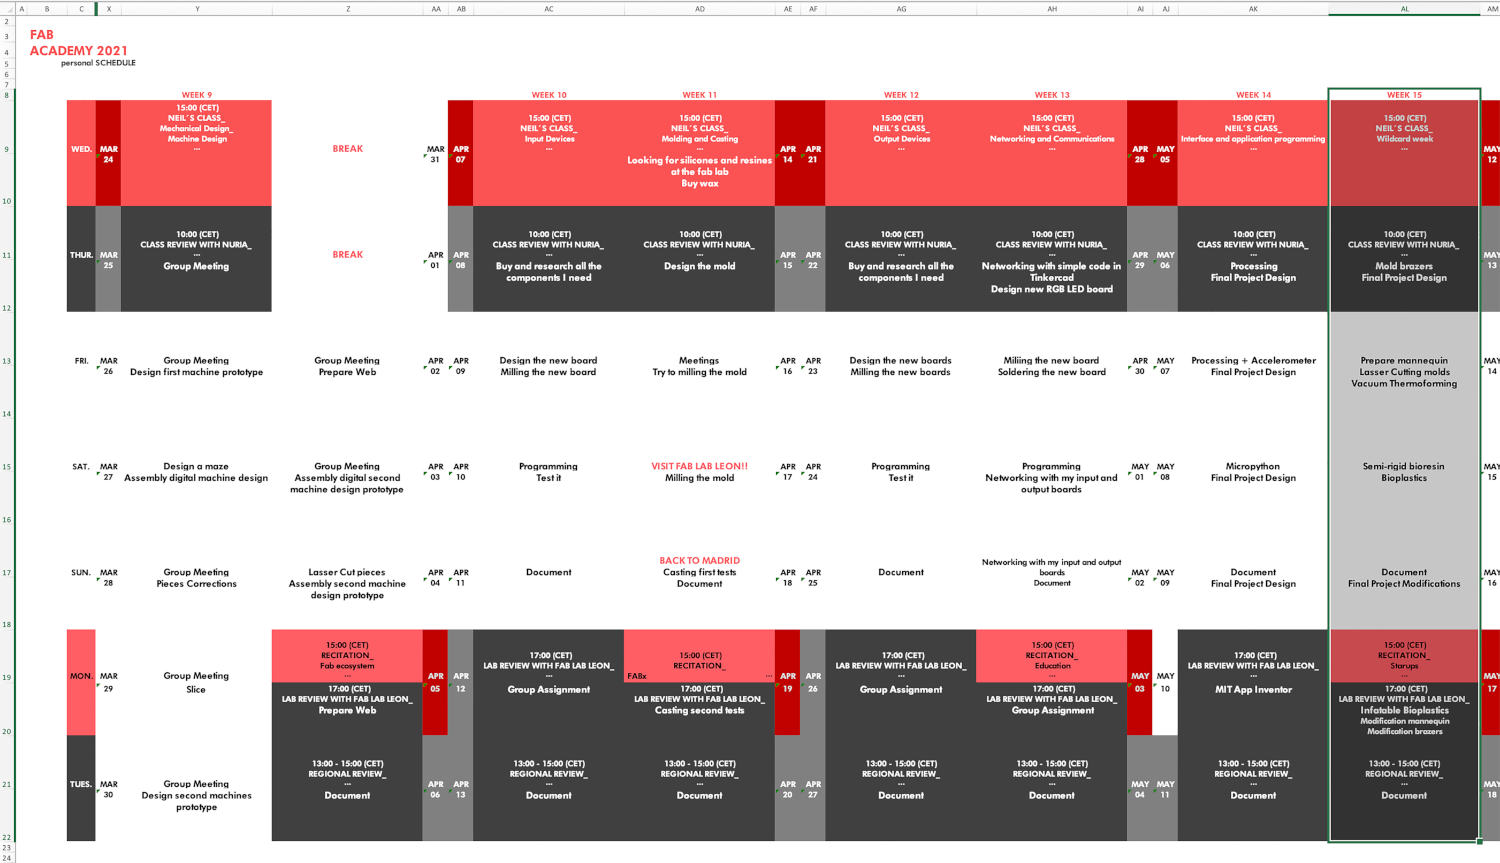
WEEK 15
After Neil's class, Wilcard Week looks like fun! Here we can experiment with machines, materials, composites and a diversity of incredible themes.
As part of my project and background is focused on experimentation with biomaterials, I would like to create a series of 2D and 3D molds to be able to do some tests for my project and make new biomaterials that I plan to do.
(14/05/2021 09:24 a.m.). I've finally my confinement at home is over! 🎉🎉 and I no longer have to wear a mask at home! What a thrill! 😍😭 I make the most of Friday to produce what I can in the fab lab. On Saturday Alberto and me had planned to go to fab lab UE Madrid to produce and advance what we could in our assignments and projects, but in Madrid it is a holiday, so we have to advance on the assignment at home. 😅
Likewise, to give it energy to the week, we have to start with good Rock and Roll, . So this week's song is going to star with Thunderstruck by AC/DC .
In the middle of a railroad track
Looked round
And I knew there was no turning back
Organizing tasks
In this occasion, we have one assignment, if we are not going to work with composites. So as usual, I organize my schedule and here the following Evaluation Criteria that we have to approach to complete the Assignment:
- ✓ Design and produce something with a digital fabrication process (incorporating computer-aided design and manufacturing) not covered in another assignment
- ✓ Documented the requirements that our assignment meets
- ✓ Documented our process and what we have learned from this assingment
- ✓ Explained problems and how you fixed them
- ✓ Included our design files and everything necessary to reproduce it
Extra credit
- ✓ Include a "hero shot" of our wilcard results
Individual Assignment
At fab lab IED Madrid, in one of the screen printing rooms we have a Vacuum Thermoforming machine.
We used this machine a lot last year to make various plastic molds and castings in some group projects at the Master in Fashion Futures with our classmates of Master in Digital Fabrication.
This machine is quite simple to use and fun at the same time. The question is to get the hang of it to avoid that the plastic does not get too hot and does not crack when we make the vacuum on the figure that we are going to thermoform.
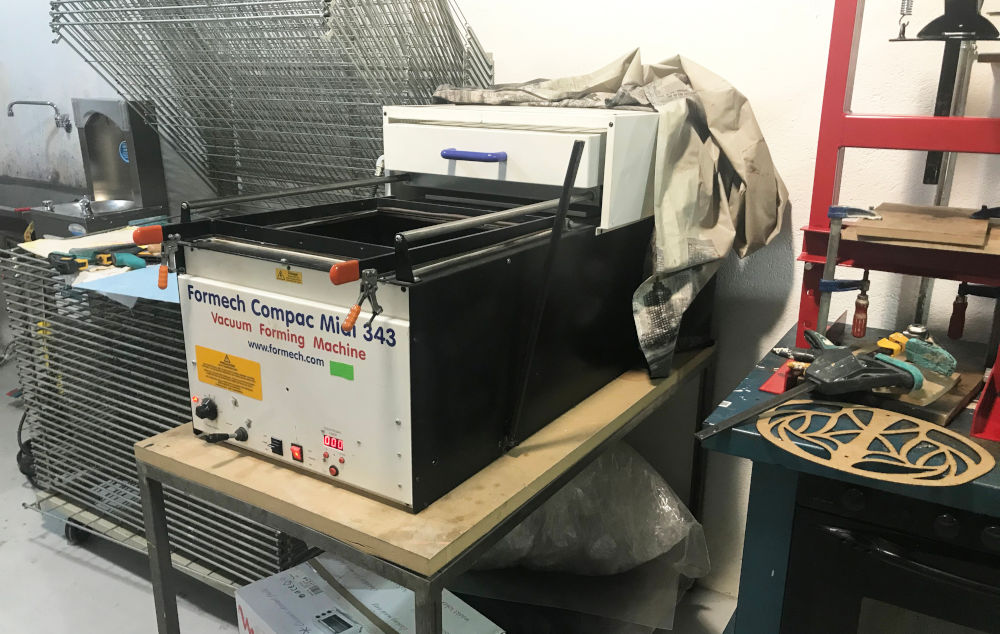
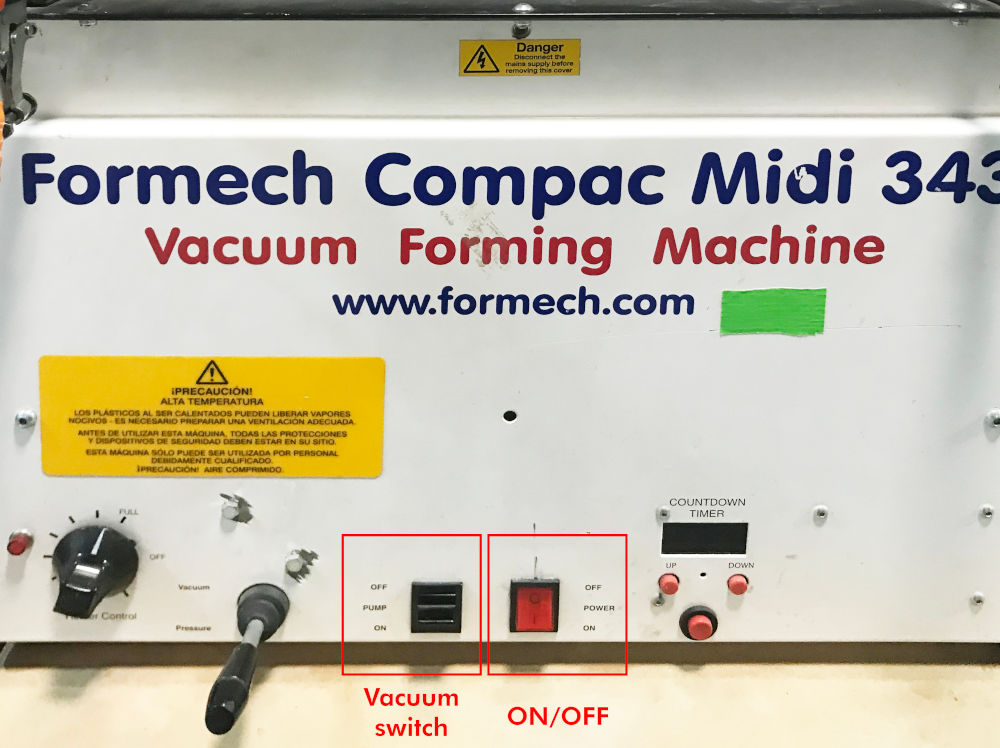
The characteristics of the machine are these:
- Model: Formech Compac Midi 343
- Work area: 431,8 x 431,8 mm
- Max Depth of Draw: 177,8 mm
- Maximum thickeness of the material: 5 mm
- Materials to thermoform: Styrene and PVC. Acrylic, polypropylene or polycarbonate will form but with greater difficulty
For this part of the assignment I want to use the thermoforming machine to make the molds of one of the layers of my final project. 😊
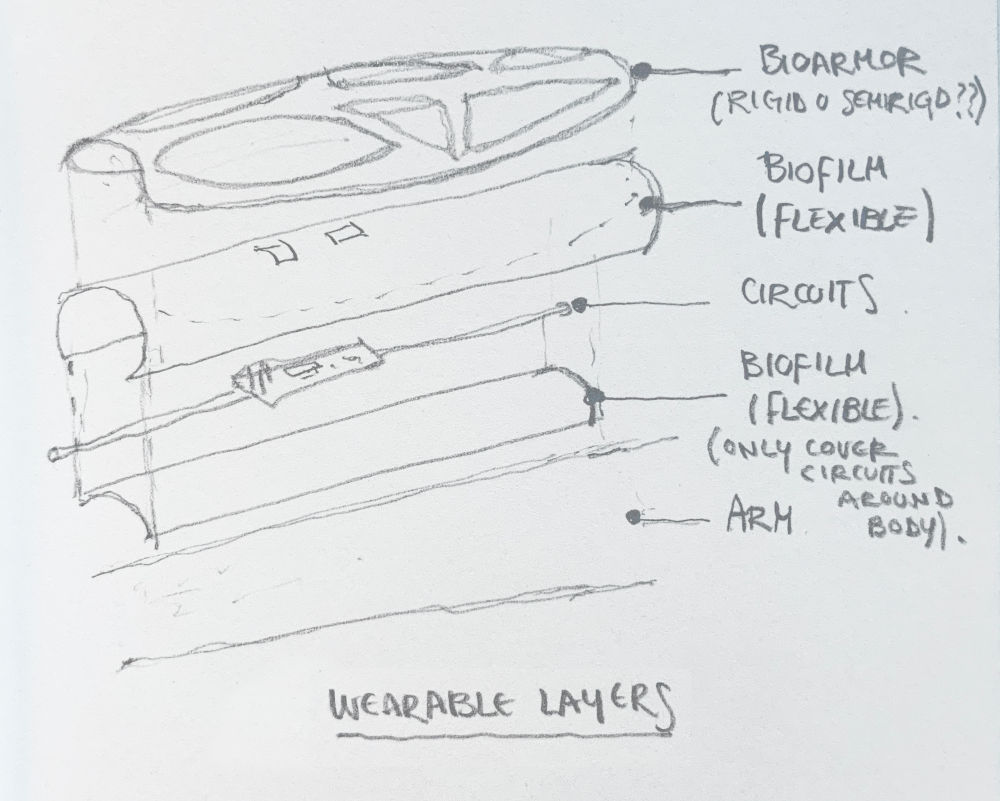
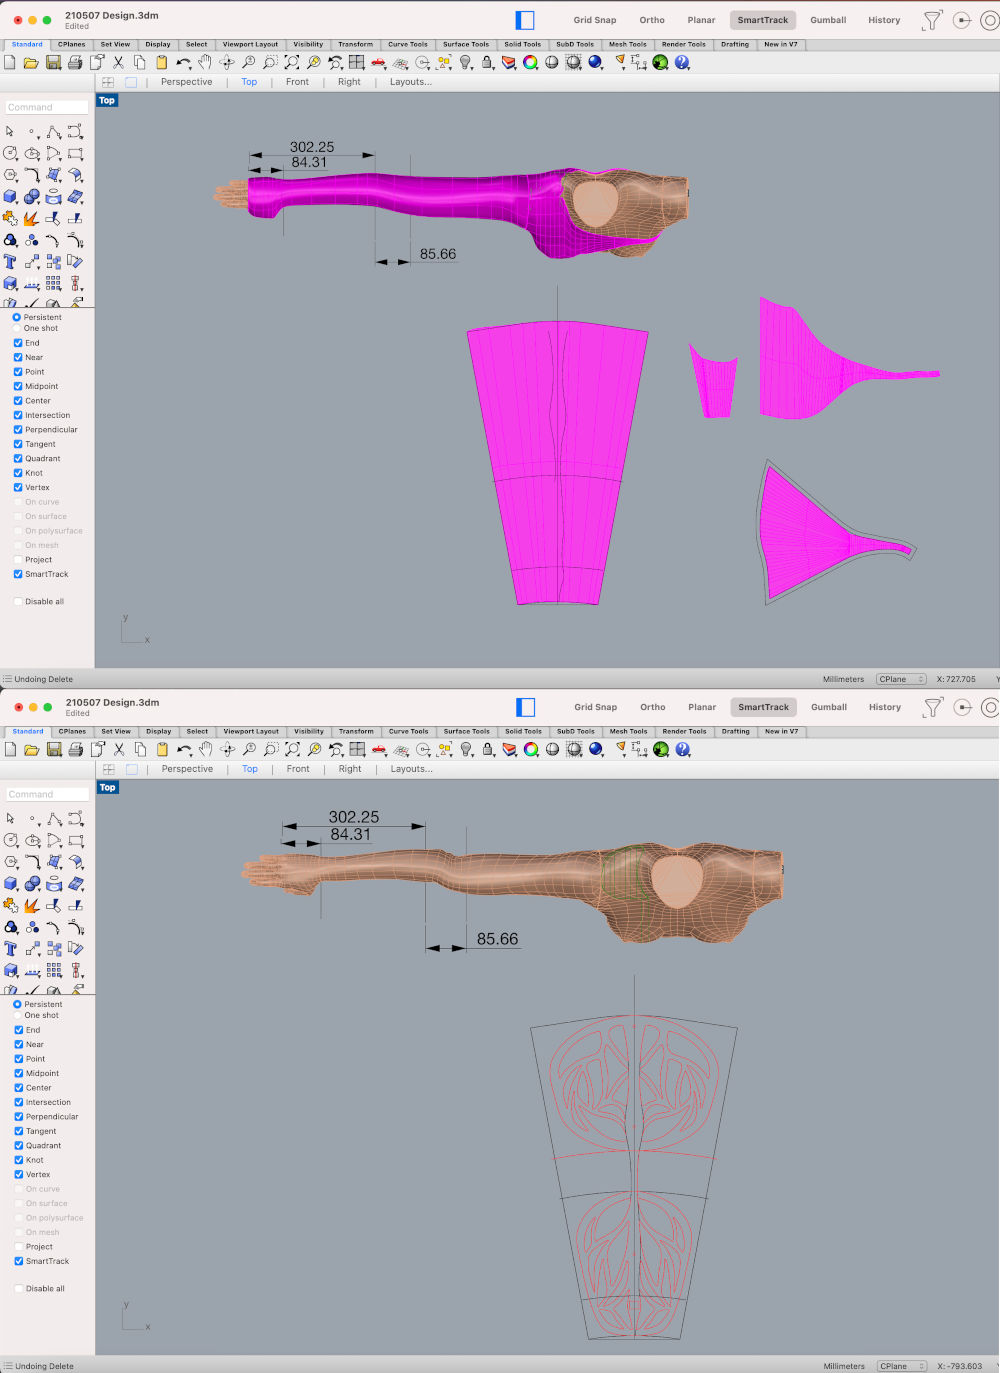
My project will be going to be a wearable I want to make entirely with biomaterials, and will consist of: a flexible biofilm sublayer that cover the circuits around the skin, an upper bioflexible film layer> that cover completely the arm, and finally a outer layer (with a shape of a cuirass or armor) that will completely or almost completely cover the circuits, made of rigid or semi-rigid biomaterial.
In this case, I am going to make the molds for the outer layer of the garment, which will be made of rigid or semi-rigid biomaterial.
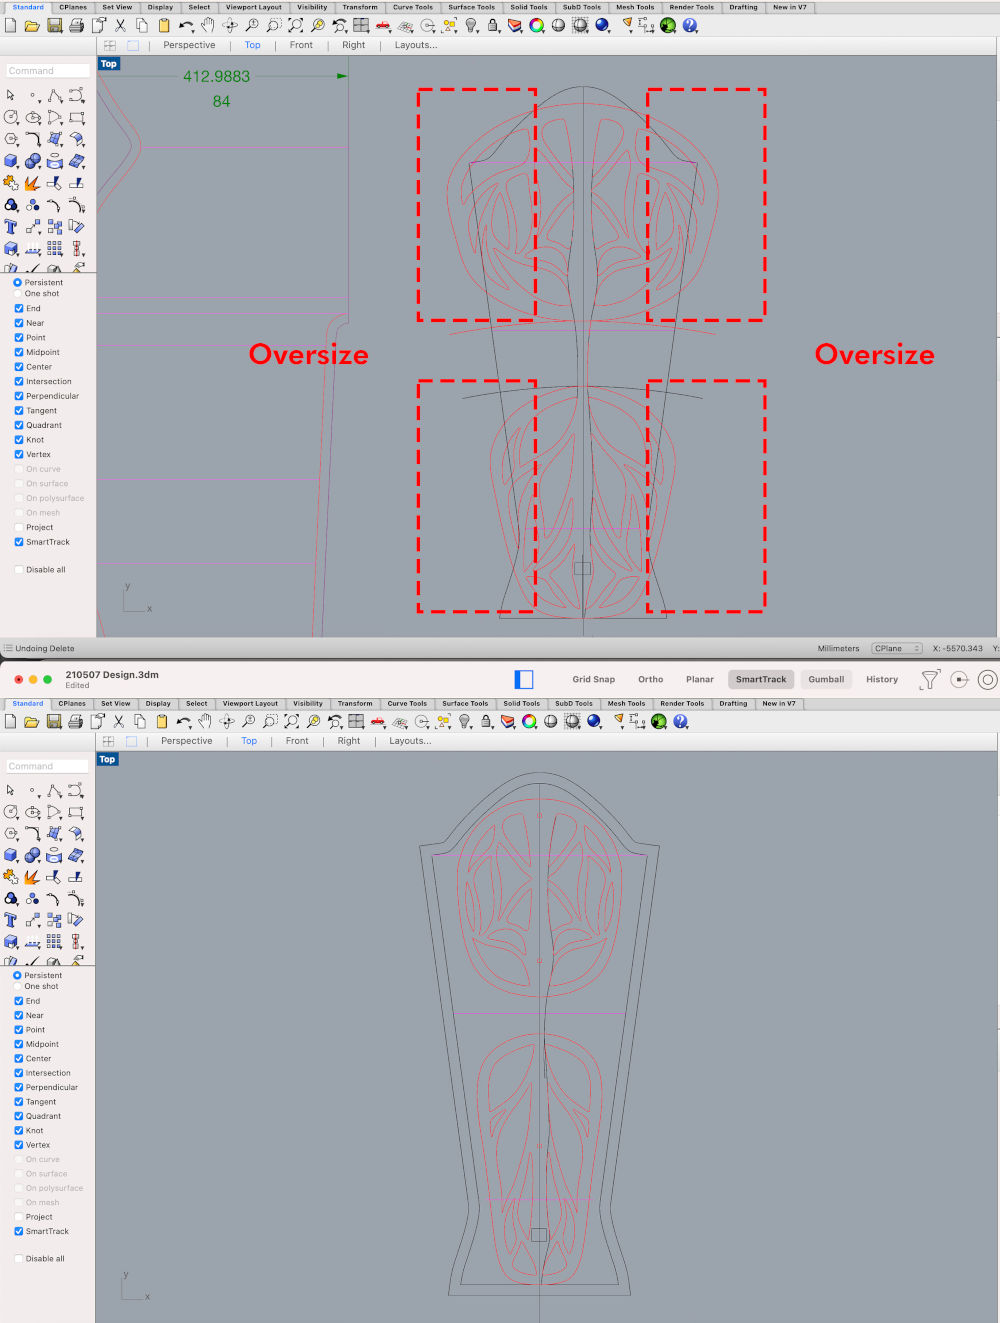
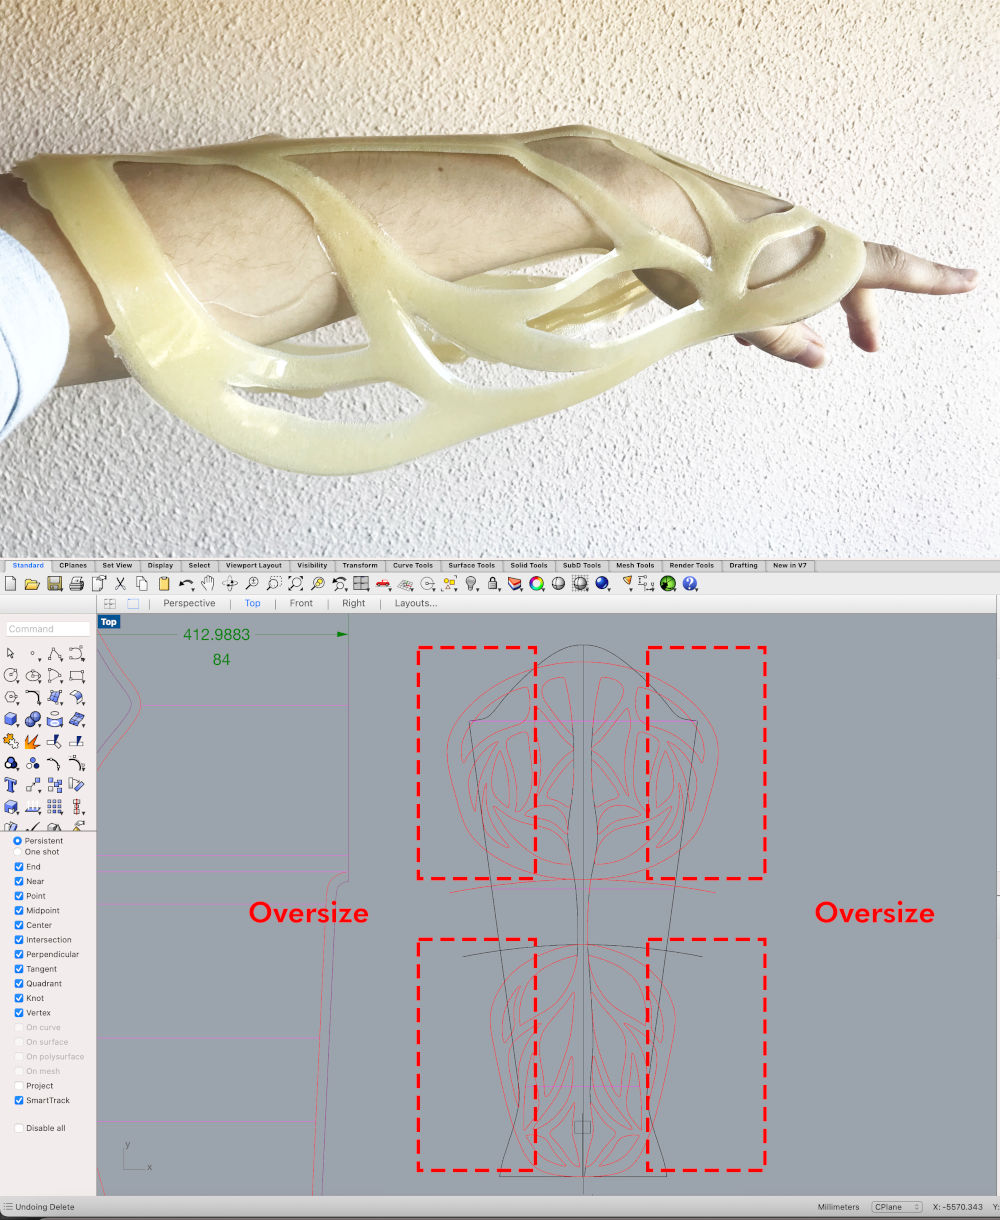
To do this, from the base 3D model I have made, I extract the 2D patterns using the Smash command in Rhinoceros. From the sleeve pattern, I design an organic pattern around the lower and upper arms (leaving a free space around the elbow for the best joint movement).
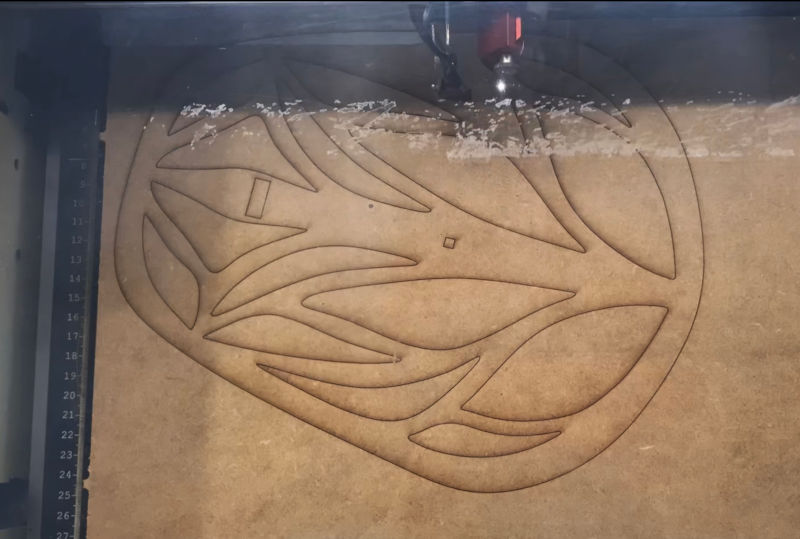
When I have the pattern drawn, I cut in 3 mm MDF Wood for base templates on the laser cutting machine. I need the thickness of the template to be no more than 3mm, because the thickness of the final biomaterial model has to be as thin and light as possible, and not too heavy to approach its functionality.
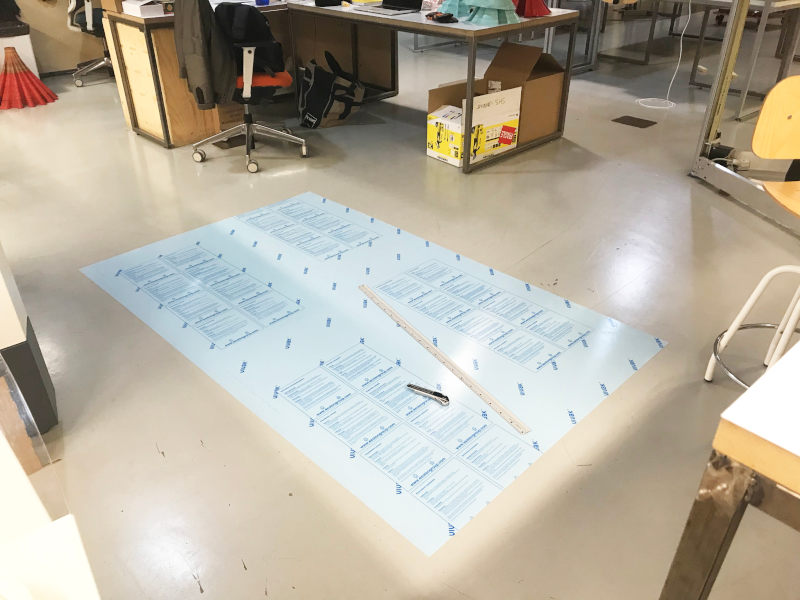
Once I have the templates cut, I am ready to cut the plastic that I am going to thermoform. At IED Madrid we use 2 x 1.5 m sheets of extruded copolyester that we have to cut by hand to a dimension of 50x50 cm.
While we cut the plastic board of 50 x 50 cm, we turn on the vacuum thermoformer about 15 minutes before at least so that it heats up.
When we have already cut the boards, we place our templates on the vacuum bed and place the copolyester plate firmly fixed with jacks for greater support.
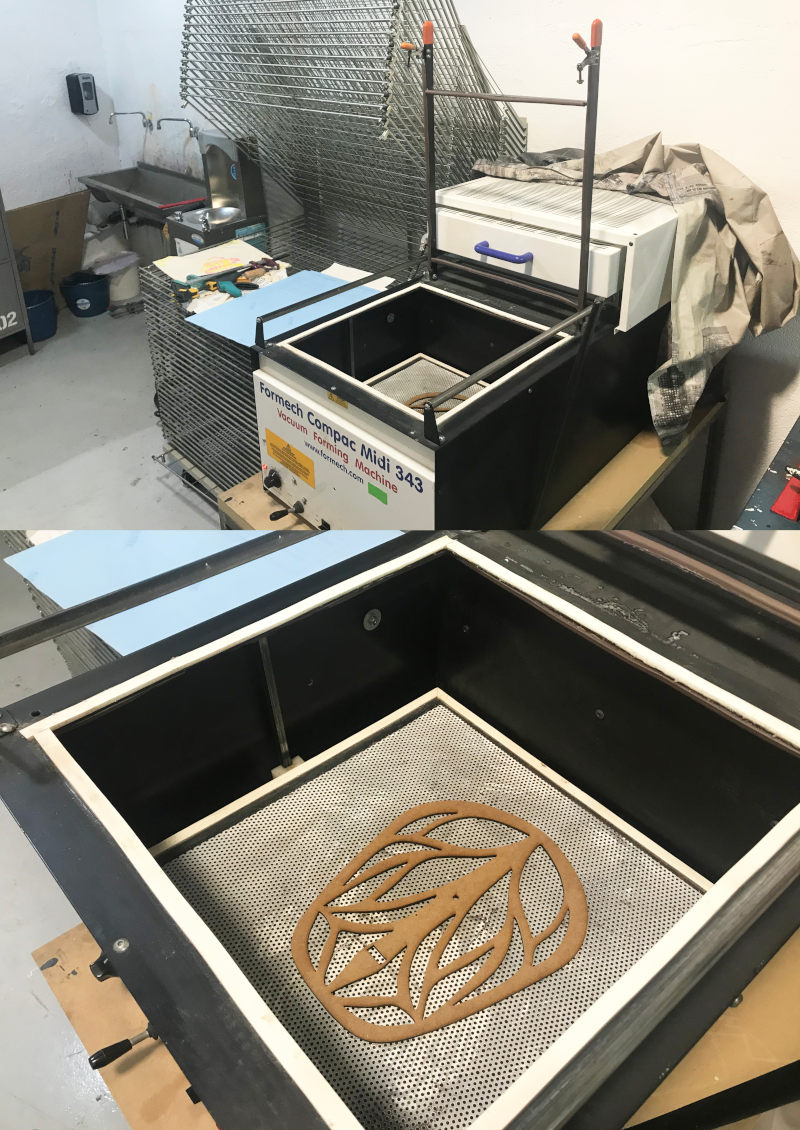
In the thermoforming machine there are two switches we have to become familiar with. The On/ Off switch of the machine, and the vacuum switch that we use once we heat the plastic and press between the templates and the hot plastic.
Here you can see a video in which I carry out the thermoforming process on one of the templates of the garment 😍.
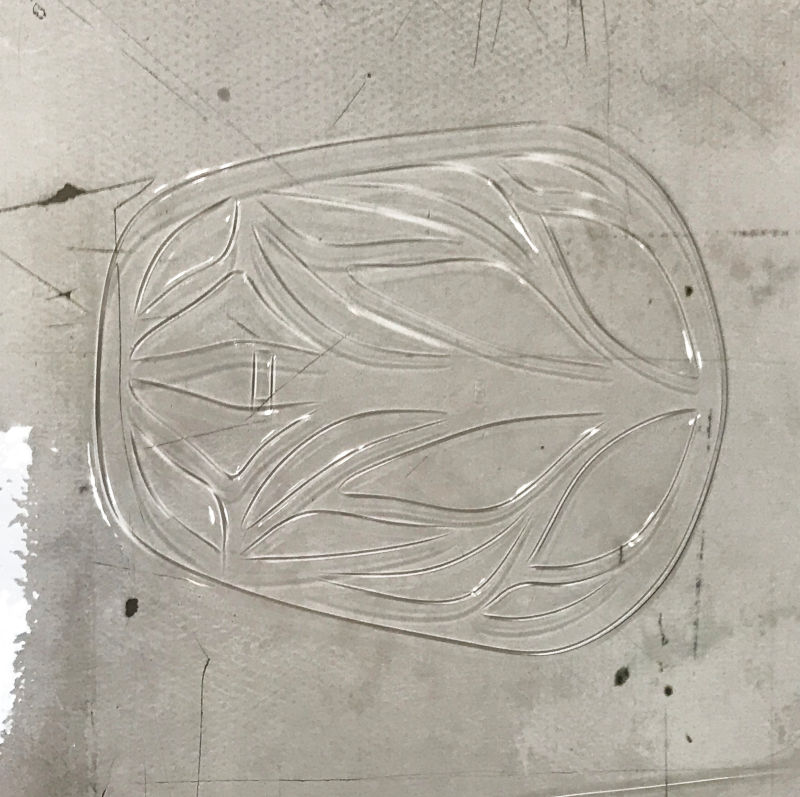
The end result when thermoforming the template is this! Surprisingly they came out at the first time! I'm generally used to having a lot of machine glitches 🙃 and learning from them. But this time, everything went incredibly well. 👌
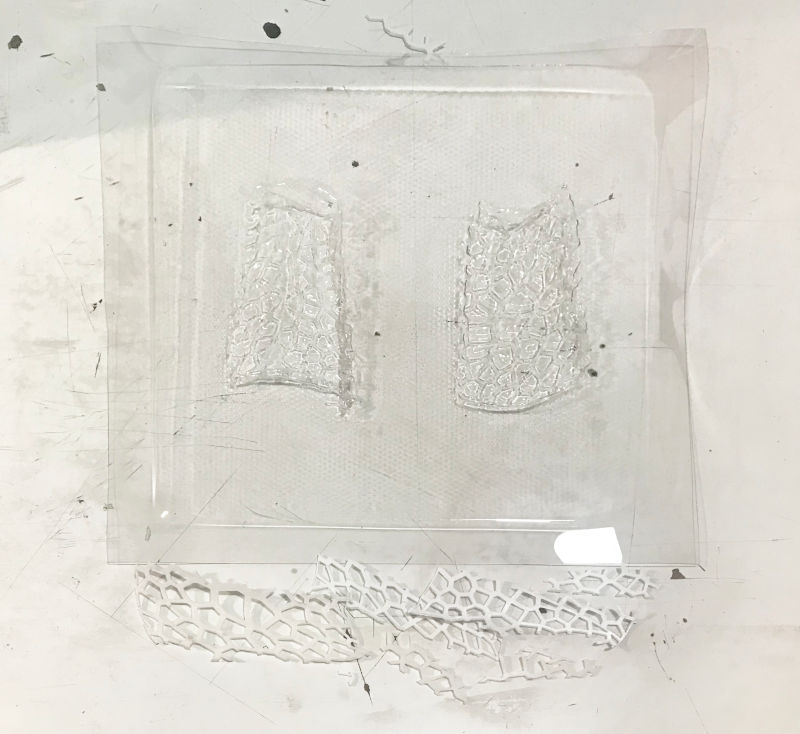
But as usual in my assignments, I had an oversize problem in the template patterns 😳. When I made the first semi-rigid bioresin casts in the molds, they were larger than usual. Apparently when I smashed the patterns, the mesh was larger than it be. 🤔
After several attempts to fix this problem, I finally had to resort to a traditional sleeve pattern to figure out the oversized areas of the templates, and re-adapt the design. 😅
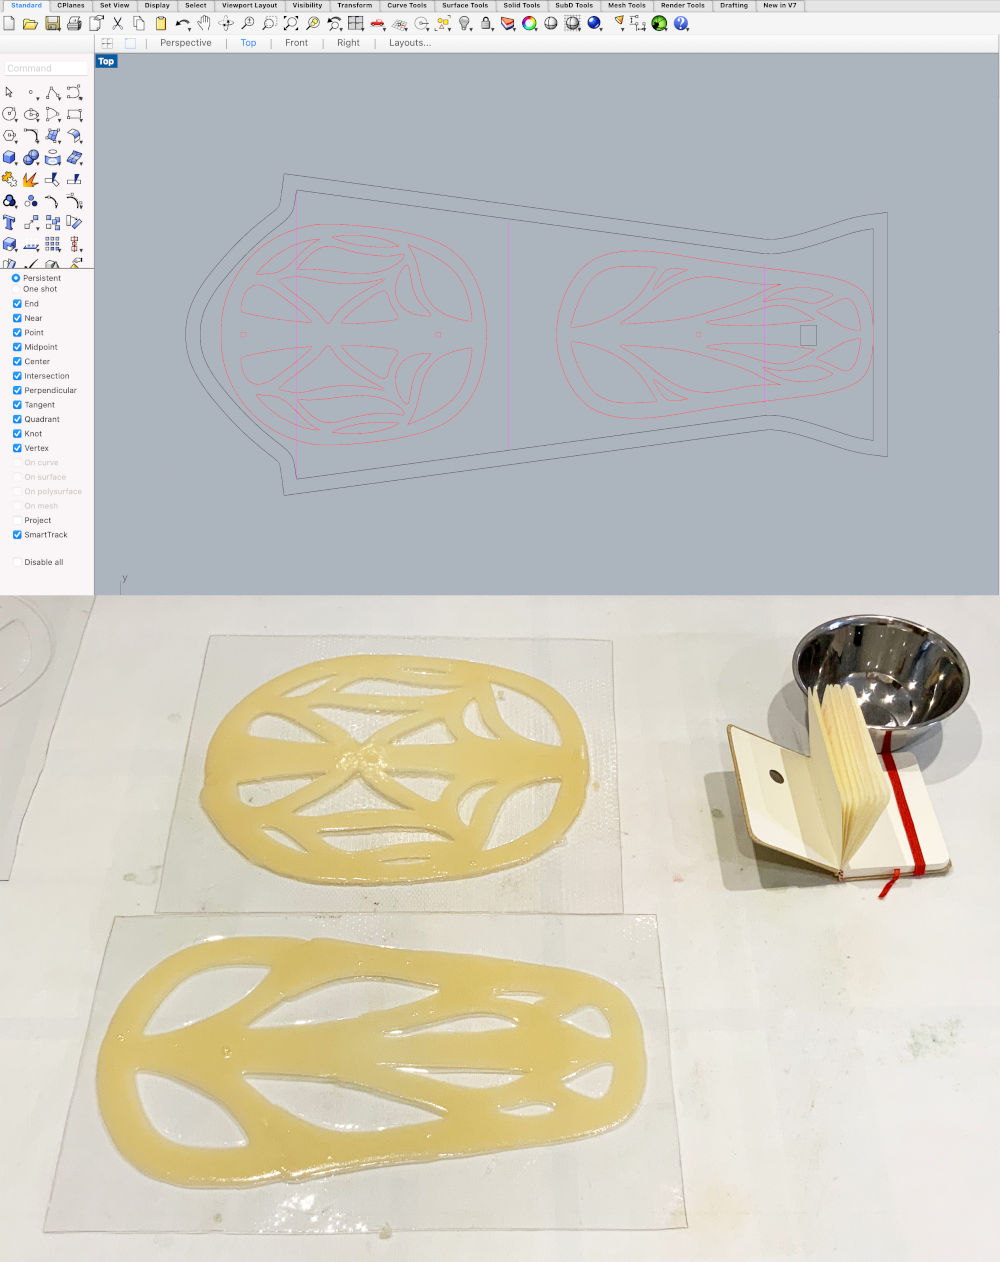
Once the templates were redrawn, I cut them again on the laser cutter machine and these were the final results. 🤩🤩
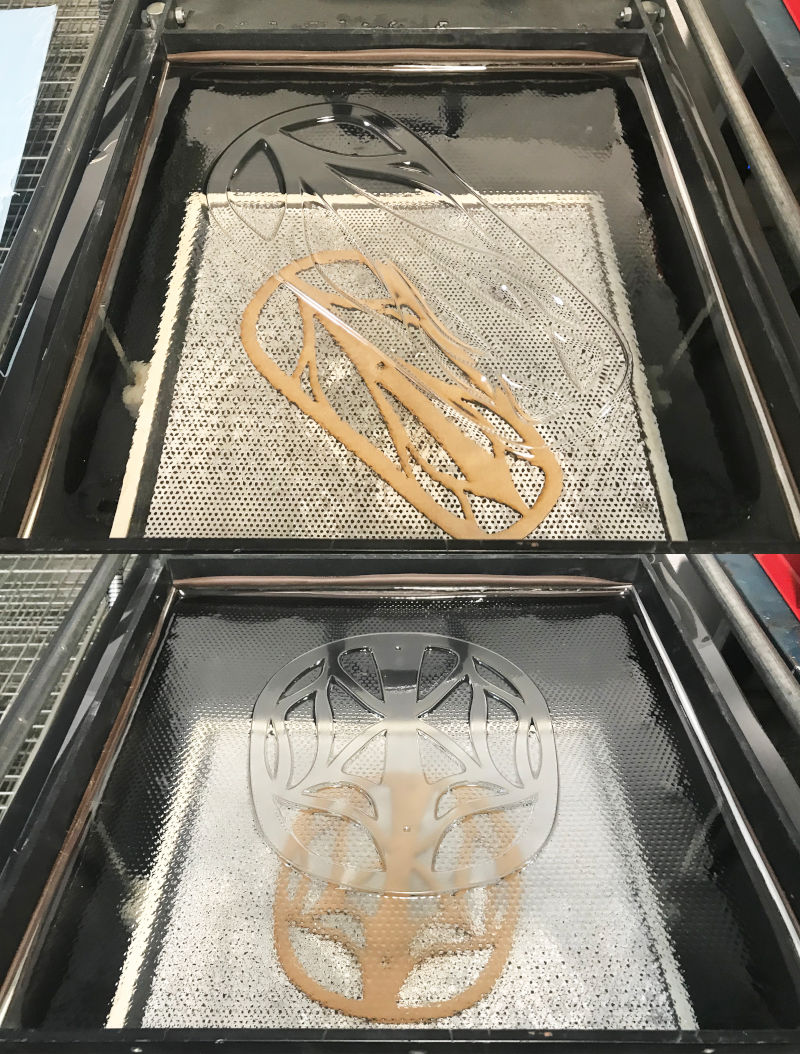
On the other hand, I tried to do some thermoforming tests with some bracers that I printed in the 3D printing week to try to do some 3D casting.
However, I made a serious amateur mistake 😅. In this video you can see how after preparing everything, I was not aware that the printed piece was hollow inside, and when the vacuum bed emptied the piece and the hot plastic, the mold crushed and broke the bracers.
This was the end result of thermoforming! 😆. Despite the broken bracers, the pattern that was drawn on the plastic seemed very interesting to me to work with for future research with biomaterials.
As I have already explained in the Vacuum thermoforming section, I wanted to make some of the pieces of the wearable with a kind of rigid or semi-rigid bioresin.

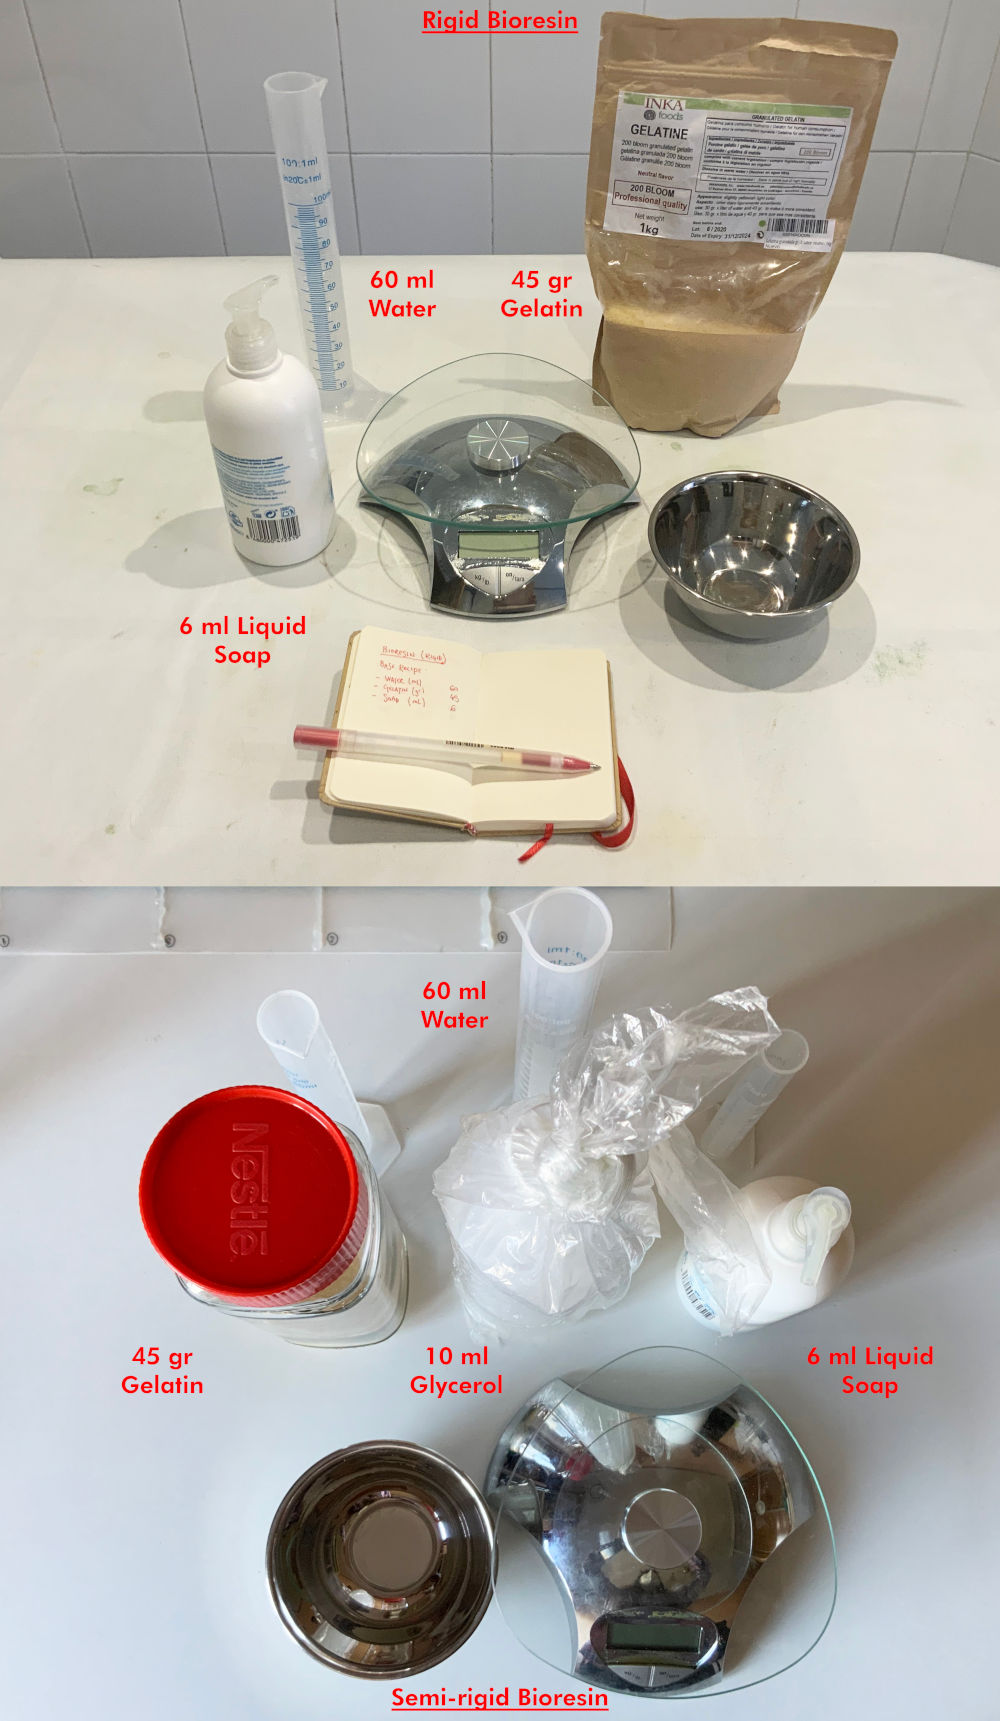
To make the recipes, I used my wonderful recipe notebooks that I have been making since last year. For this tests, and made two types of mixes with the following ingredients:
- Rigid Bioresin
- Semi-rigid Bioresin
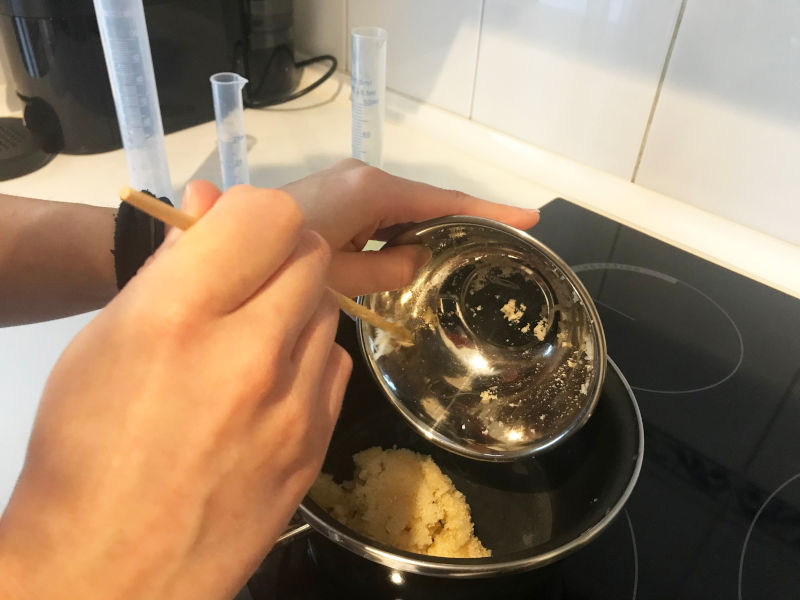
To cook these bioresins, the following criteria must be this:
(NOTE: To make the bioresin completely rigid, just skip STEP 3).
You cast it on the surface you want (preferably on non-porous surfaces), and it will take to dry in open air between 12-24 hours (depending on the thickness you have given it).
IMPORTANT!: Before casting the mixture, disinfect well all the utensils, molds or fibers that you are going to use (if you are going to do it type biocomposite). To disinfect utensils and molds, cleaning it with 96º alcohol is enough.
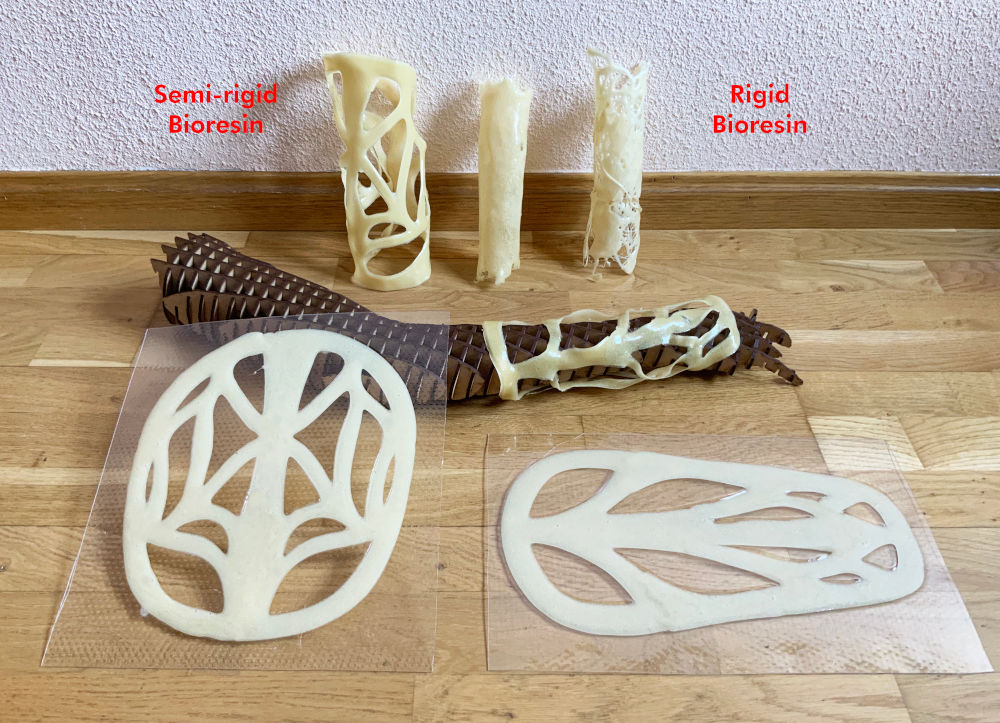
These are the results of the two types of bioresins that I experimented with. 😊😊
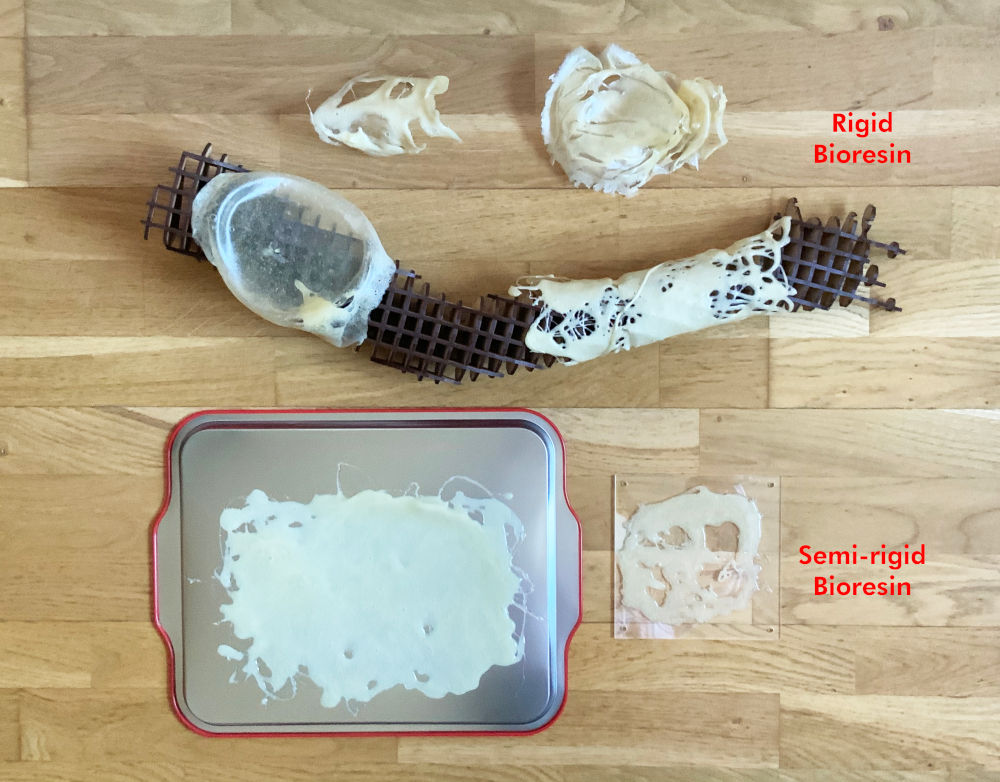
After these first prototypes, I realized that the rigid bioresin for my final project may be too rigid for my purpose. So I continued with the semi-rigid bioresin, which offers me a certain degree of flexibility.
However, this type of rigid bioresin can be perfectly used to make biocomposites. For this we will only have to add burlap or linen fabric, and follow the same criteria as composites.
SEMI-RIGID BIORESIN (OR GELATIN FOAM BIOPLASTIC) IN THERMOFORMING MOLDS
(15/05/2021 08:03 a.m.). With the molds made on the vacuum thermoforming, I recalculate the proportions approximately to make the semi-rigid biomaterial pour over the pattern.
To do this, I follow the same criteria and cooking steps previously explained in bioresins. To make this type of pouring on organic patterns, I have used a small test tube to cast the material onto the mold.
After half an hour has passed, the mixture will be solid, but it will not be dry yet. This is good for us to be able to mold the biomaterial on the tridimensional surface that we want without the greatest problem.
However, at the moment I started to model the biomaterial around the mannequin, here I realized that I had a problem of resizing the pattern, as I have previously explained. 😅
(18/05/2021 17:12 p.m.).So after re-adapting the design and making the molds again in the vacuum thermoforming machine, I made another mix and I have let them dry to mold them on the arm in the next few hours.
To get the material to be completely dry, between 12 and 24 hours it will begin to be dry. However, these times can depend a lot on the season of the year and the climate of the place and the interior space where it is drying.
Finally, these are all the results of the tests carried out, currently with the bioresins!! 😉😍
BIO INFLATABLES
For several months, I have seen a few references on how to make inflatables with biomaterials like this one, from Cultivated Fashion.
In this case, the inflatables they make have a very small scale, but ... could we make a bigger inflatable with biomaterial? 🤔
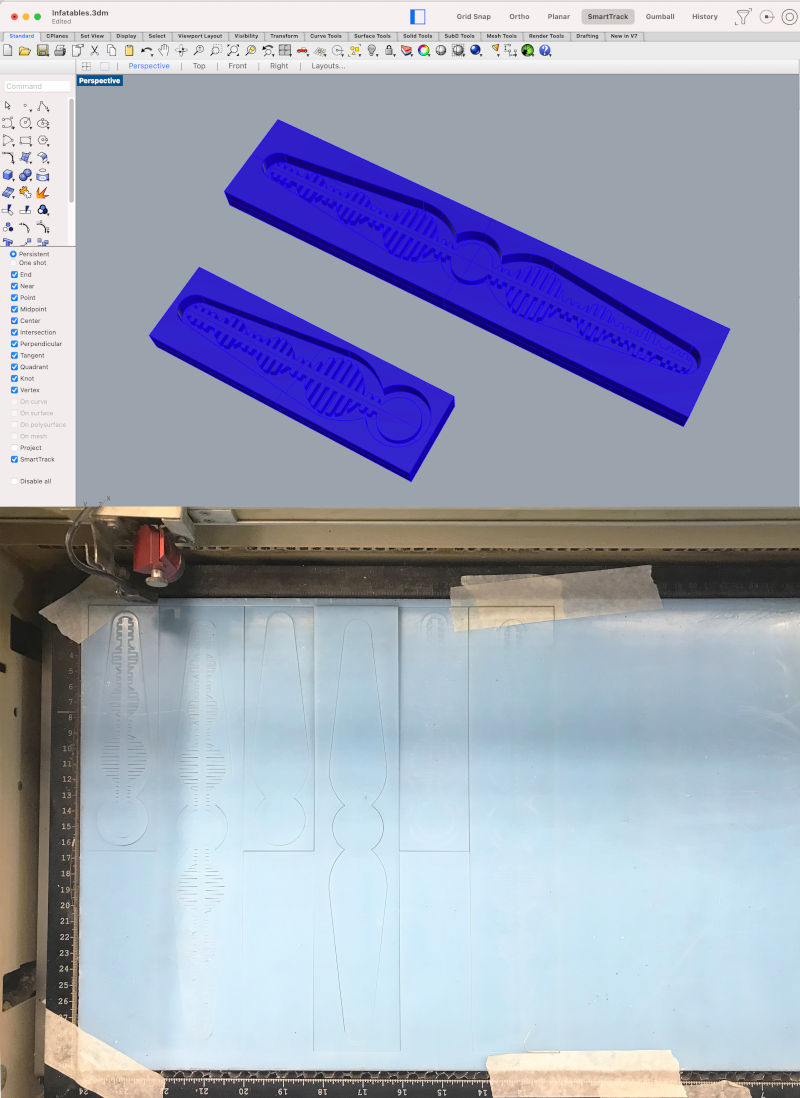
(13/05/2021 10:32 a.m.)During our local review, Adrián showed us how he made soft robotics with silicone last year. So taking as a reference his assignment and Montserrat Ciges assigment, from Fabricademy, I designed three types of molds to cut layers in the laser cut machine.
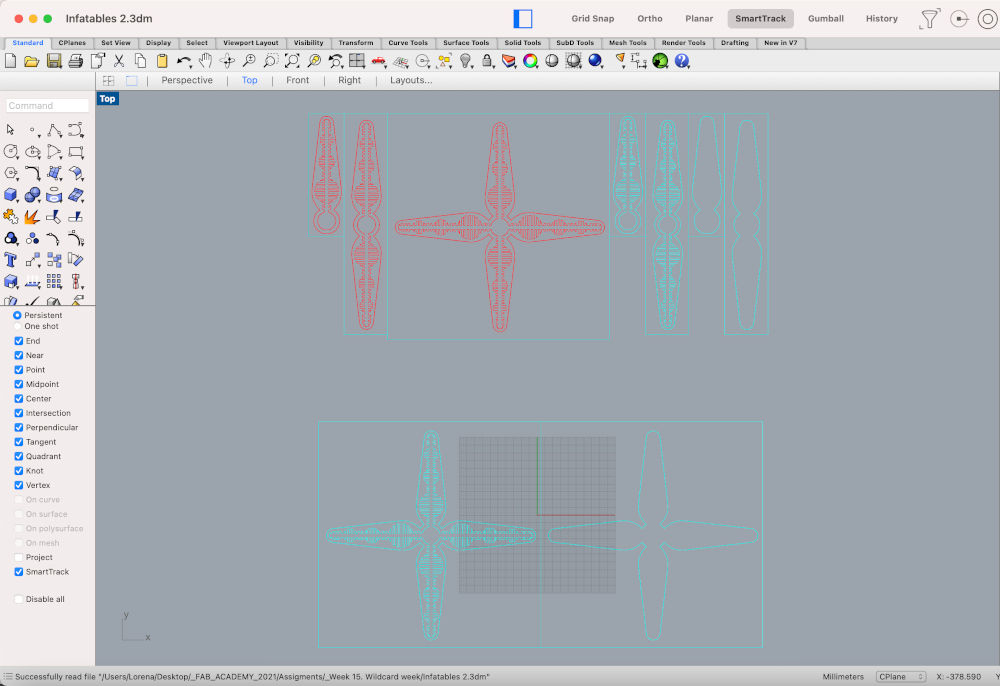
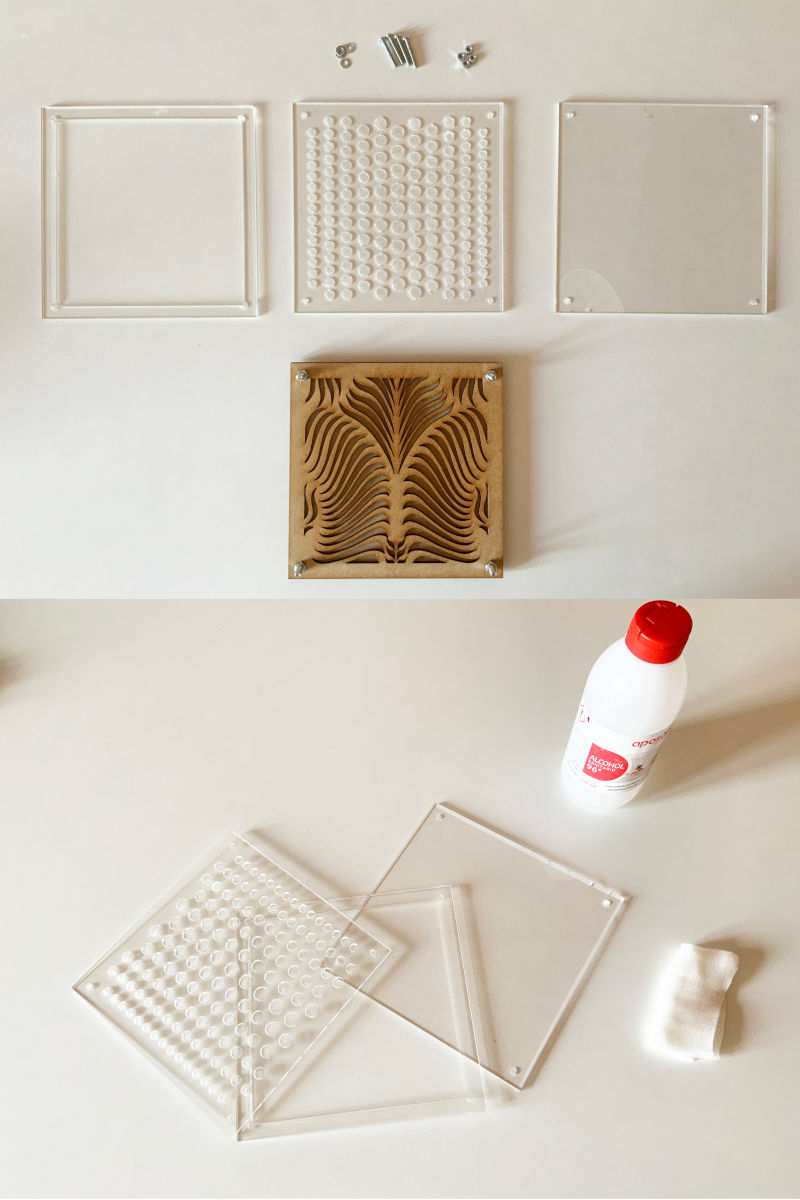
initially, I was going to make three types of casts, with three levels of difficulty. But I have decided to save the most complicated one for later in which case the first two work. So, once the model is designed, I cut over 5mm acrylic the pieces on the laser cut machine.
(14/05/2021 22:39 p.m.) Once cut, the first thing I do is wash the pieces well with soap and bleach, to disinfect the entire surface of the acrylic. After cleaning and drying them, with a brush and normal white glue, we glue the pieces together and let them dry overnight.
(15/05/2021 09:12 a.m.) In the morning, the molds are completely dry! So we proceed to make the biomaterial mixture! 😍.
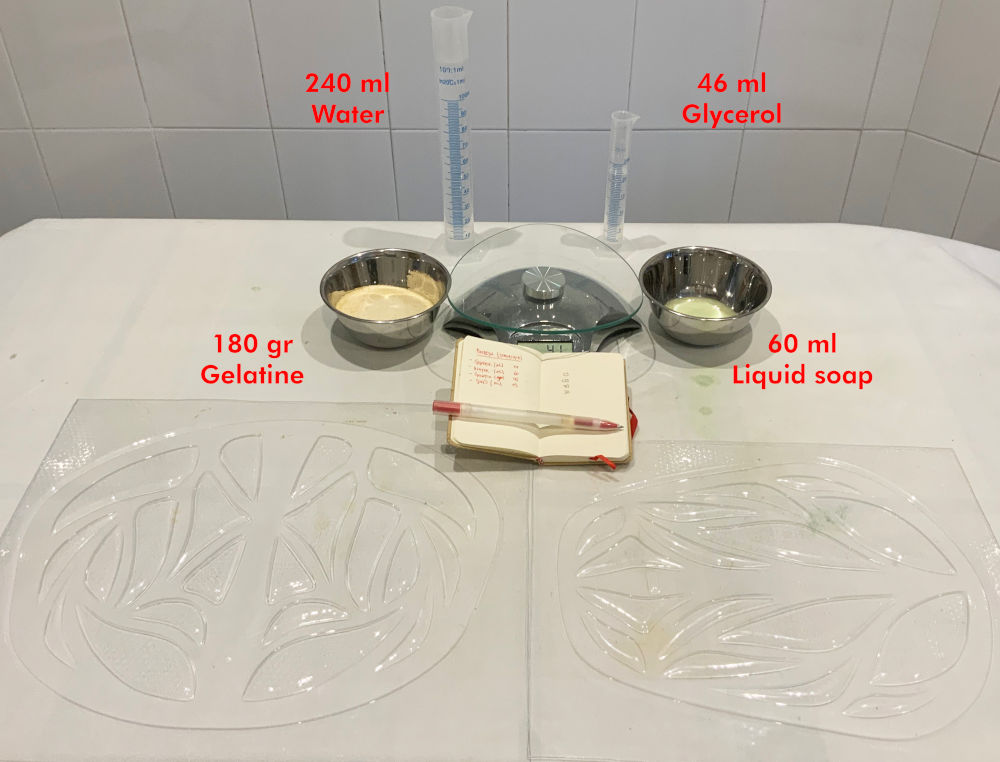
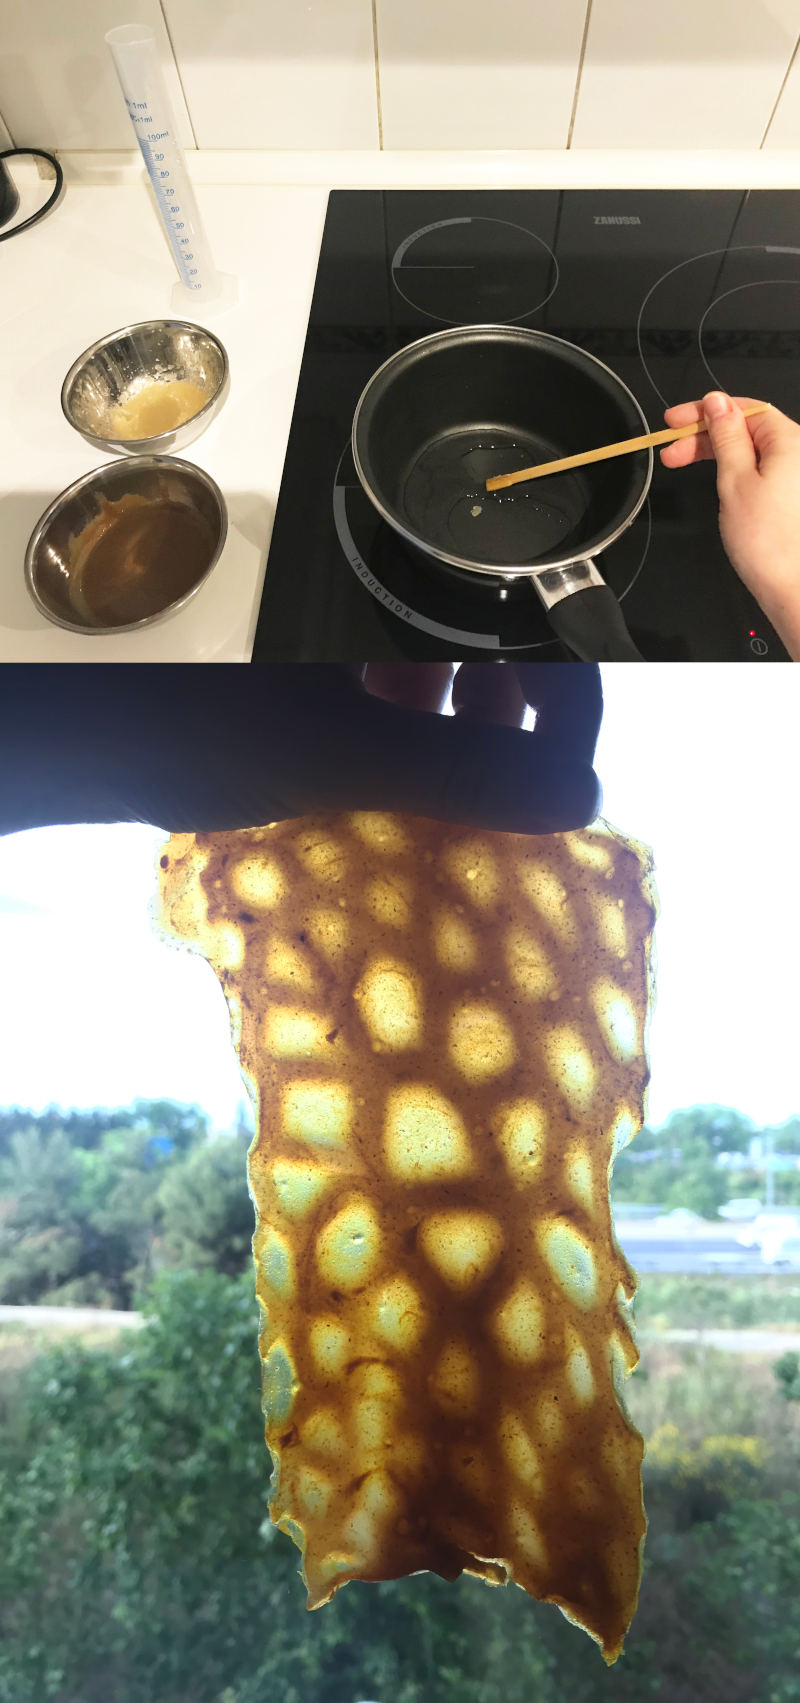
To make the bio inflatable I am going to use the Spitulina + Gelatin biomaterial, which up to now is the most elastic biomaterial I have.
For this I need:
- Elastic Bioplastic (Spirulina + Gelatin Bioplastic)
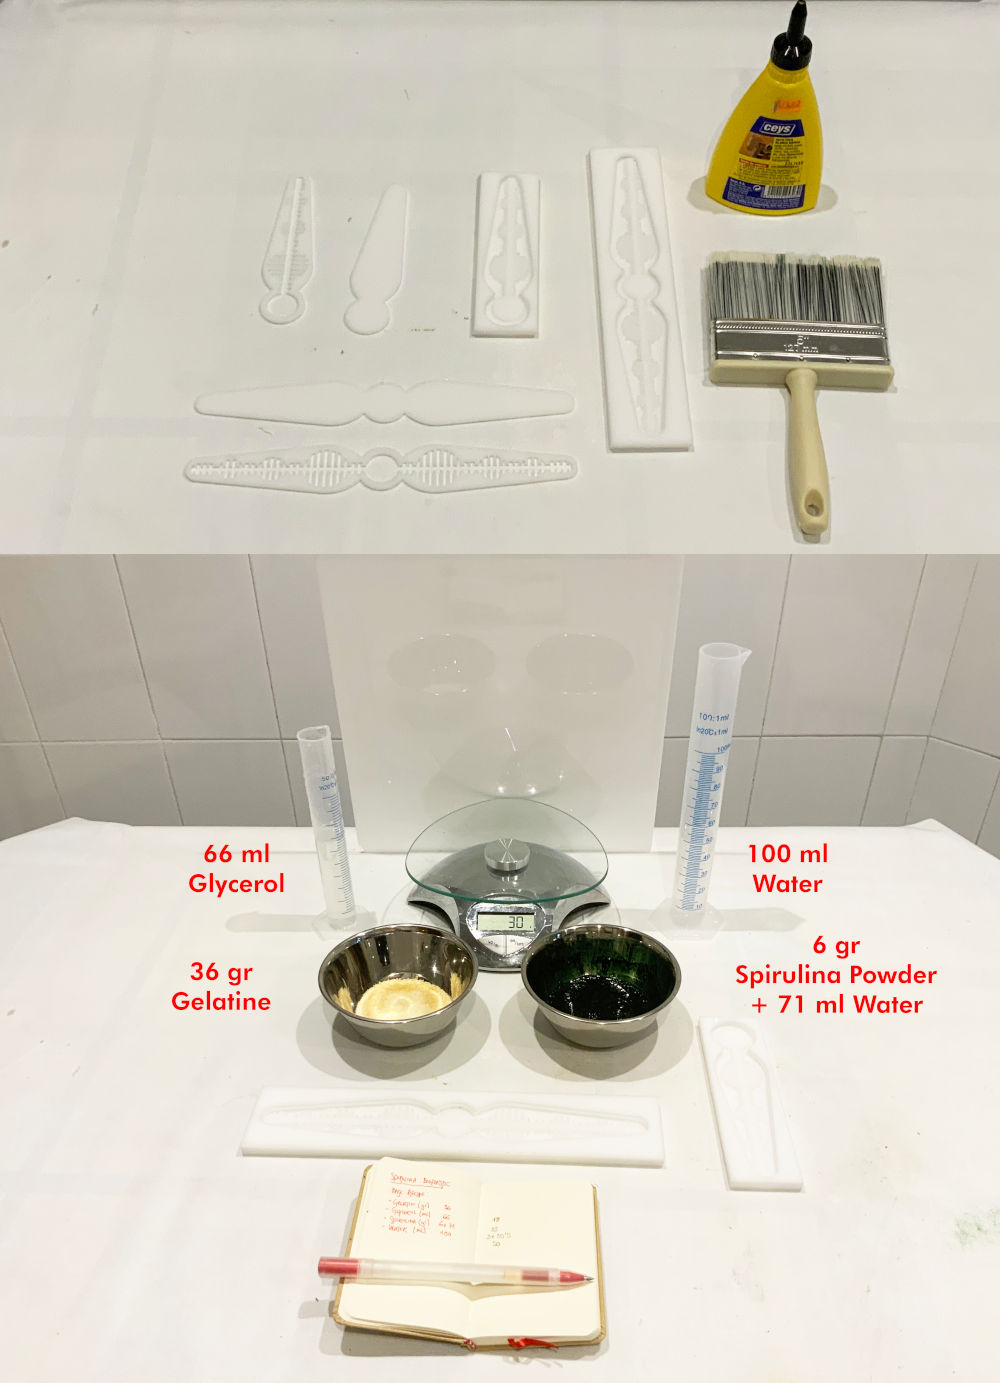
To cook these bio elastic material, the following criteria must be this:
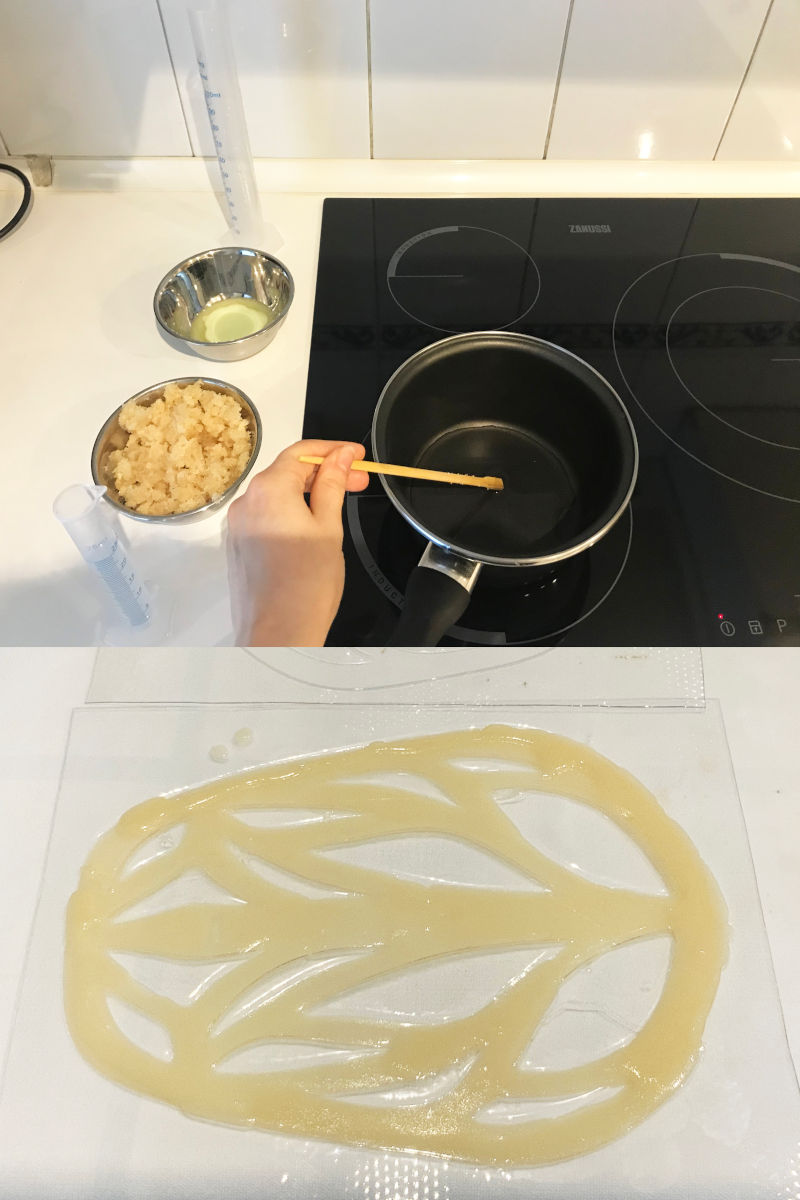
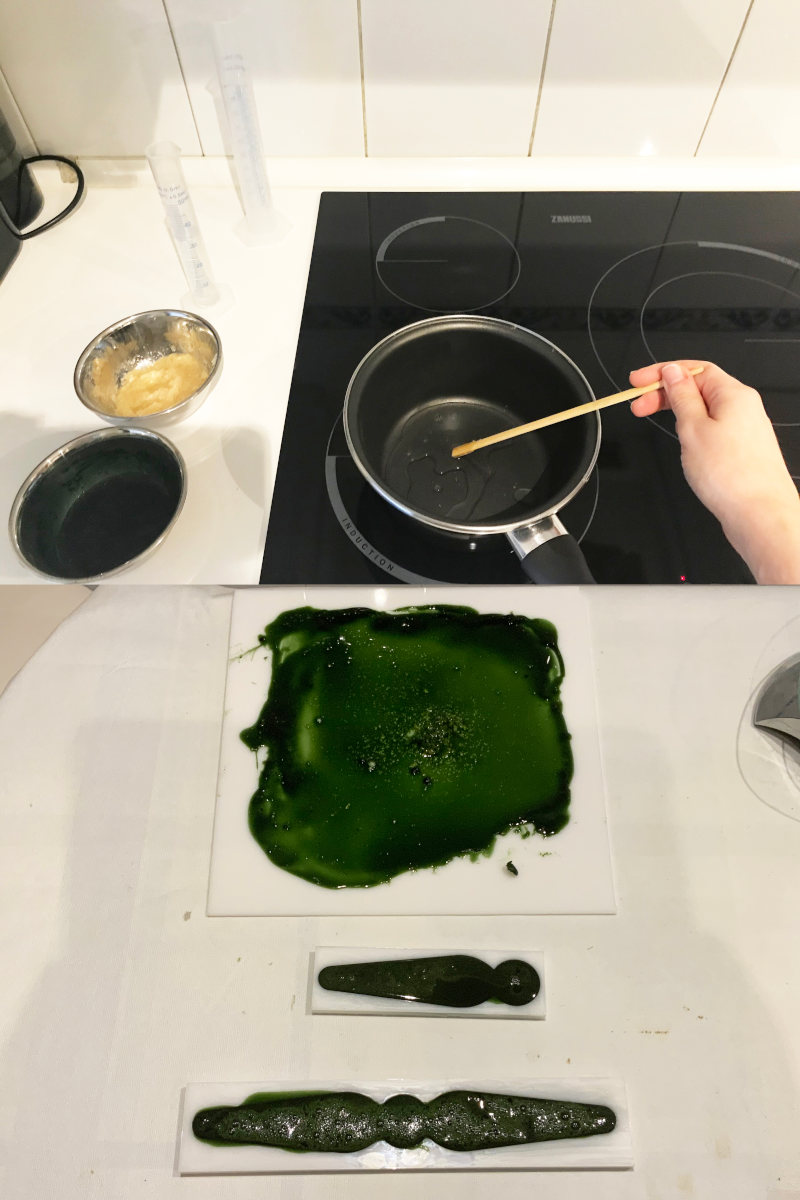
We pour the mixture into our molds, and the remaining excess is poured on a completely smooth surface to make the second part of the inflatable.
With the mixture we are going to leave flat, we have to be careful to avoid having too many bubbles and holes in the biomaterial. In my case, I had to overcook the mixture 3-4 times again, because the gelatin had not mixed well and my mixture had too many bubbles. 😅😅
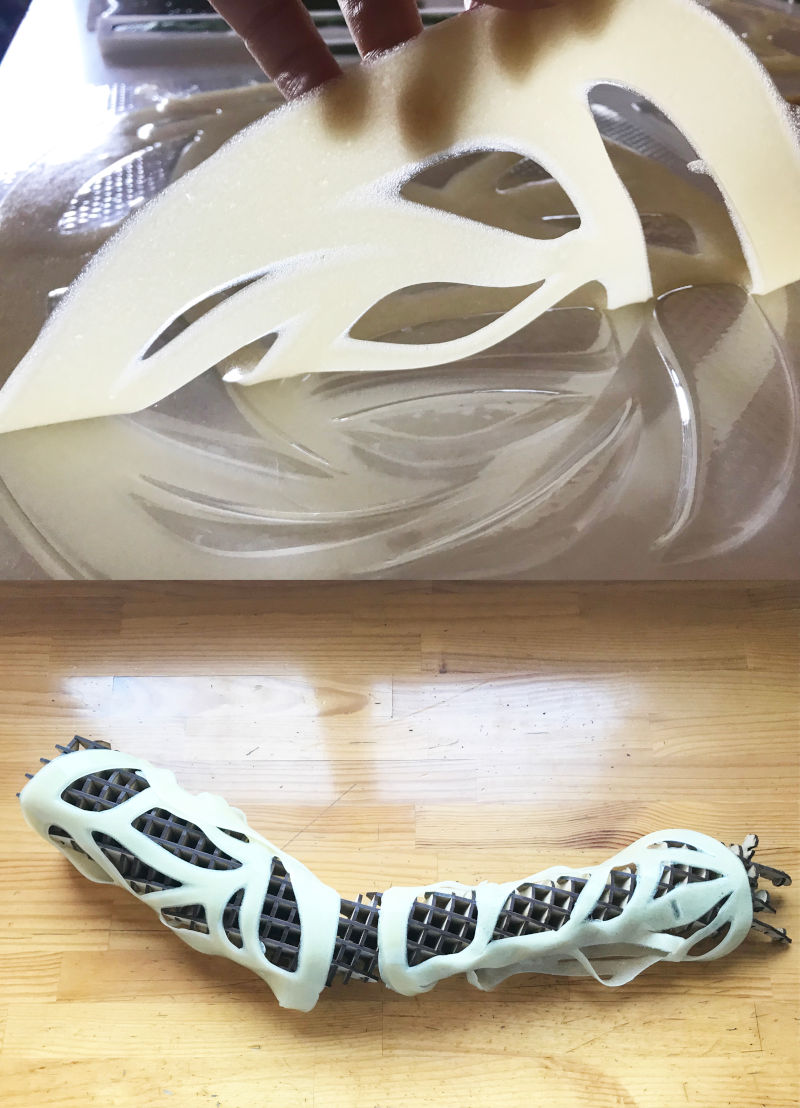
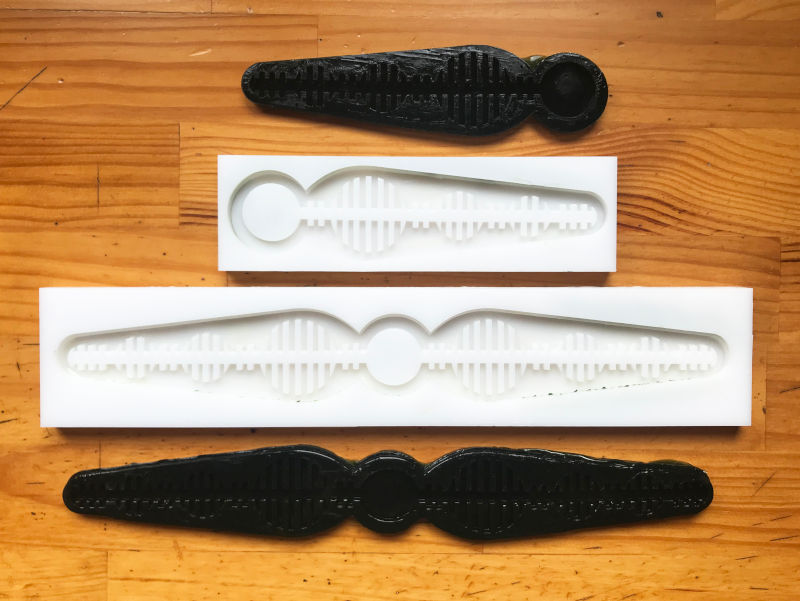
After a day and a half of drying, we remove the castings from the molds, and these are the results!
On the biofilm cast I made, I placed the mold castings and I cut around the perimeter. With the remaining biomaterial, I am going to overcook it again the biomaterial to make the bio-joints around the entire perimeter of the mold, and I put a PVC tube to blow before do the bio-joints. It is important to verify that there is no hole around the perimeter through which air can escape.
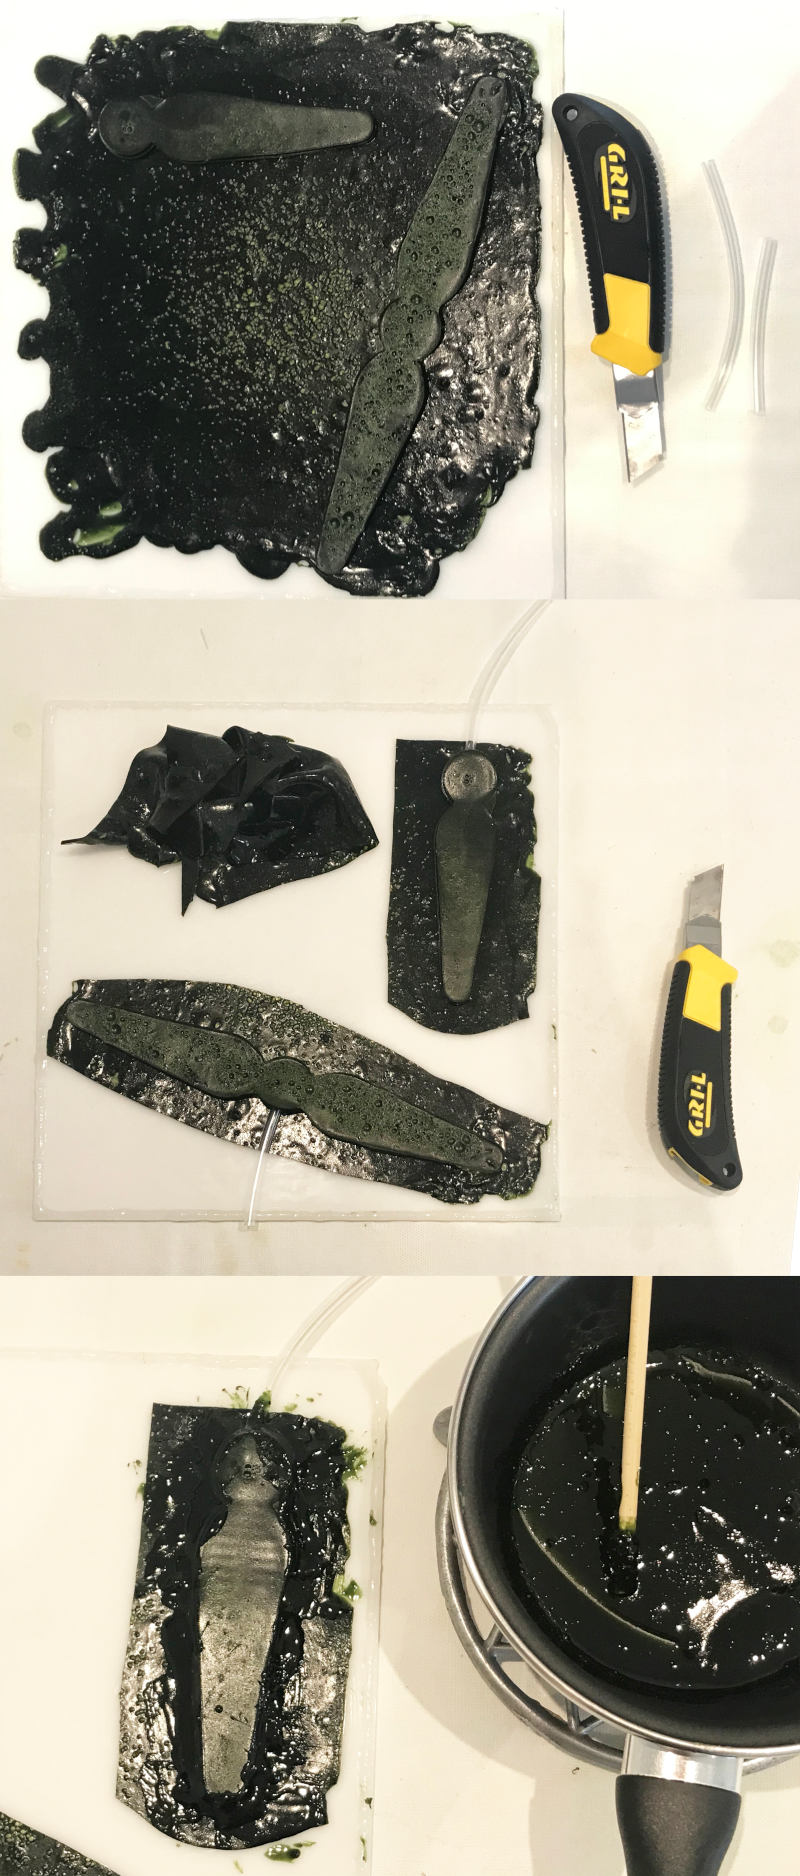
This was the first test I did with a single "octopus leg": 😉
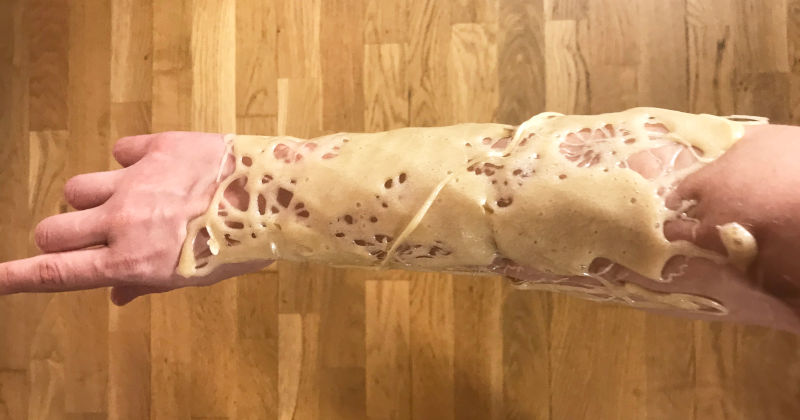
And this is the second test I did with "two octopus legs" made with biomaterial: 😮😮
After several attempts at inflation, the more uses we make, the biomaterial begins to remove the air through the microbubbles that are around the biofilm. Another curiosity that I observed is on smaller surfaces the biomaterial allows us to inflate the octopus leg better than if we have two or more. 🧐
This first prototyping, it would probably be necessary to use another biomaterial more consistent and smooth to be able to make this type of bio inflatables. I will keep researching! 💪💪
NEW SUCCEED BIOMATERIALS
Continuing with my research and experimentation with biomaterials, I am going to use some of the molds that I made with the vacuum thermoforming machine and some molds I previously designed few months ago and I cut in the laser cut machine on wood (for the more porous biomaterials) and acrylic (for biomaterials with less porosity).
The first thing, as I have indicated before, is to wash and disinfect all the molds well, to prevent microparticles, fungi or bacteria from contaminating our examples.
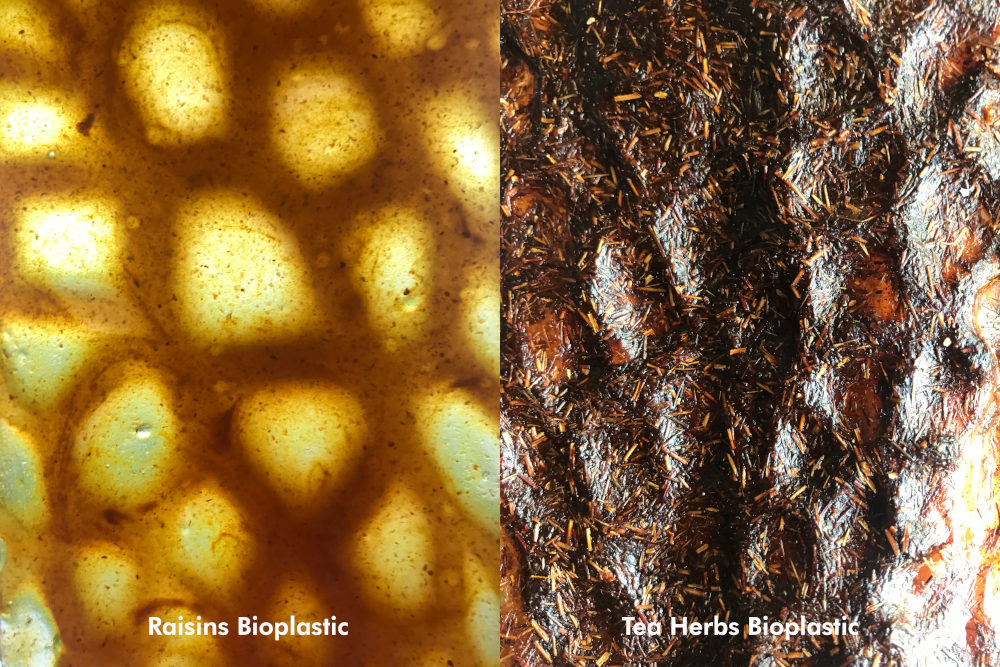
From the variety of biomaterials I managed to make this week, only two biomaterials have been successful: the raisins and tea herbs biomaterials.

These are some photos of the textures that both biomaterials have. 😍😍
-
_ RAISINS BIOPLASTIC
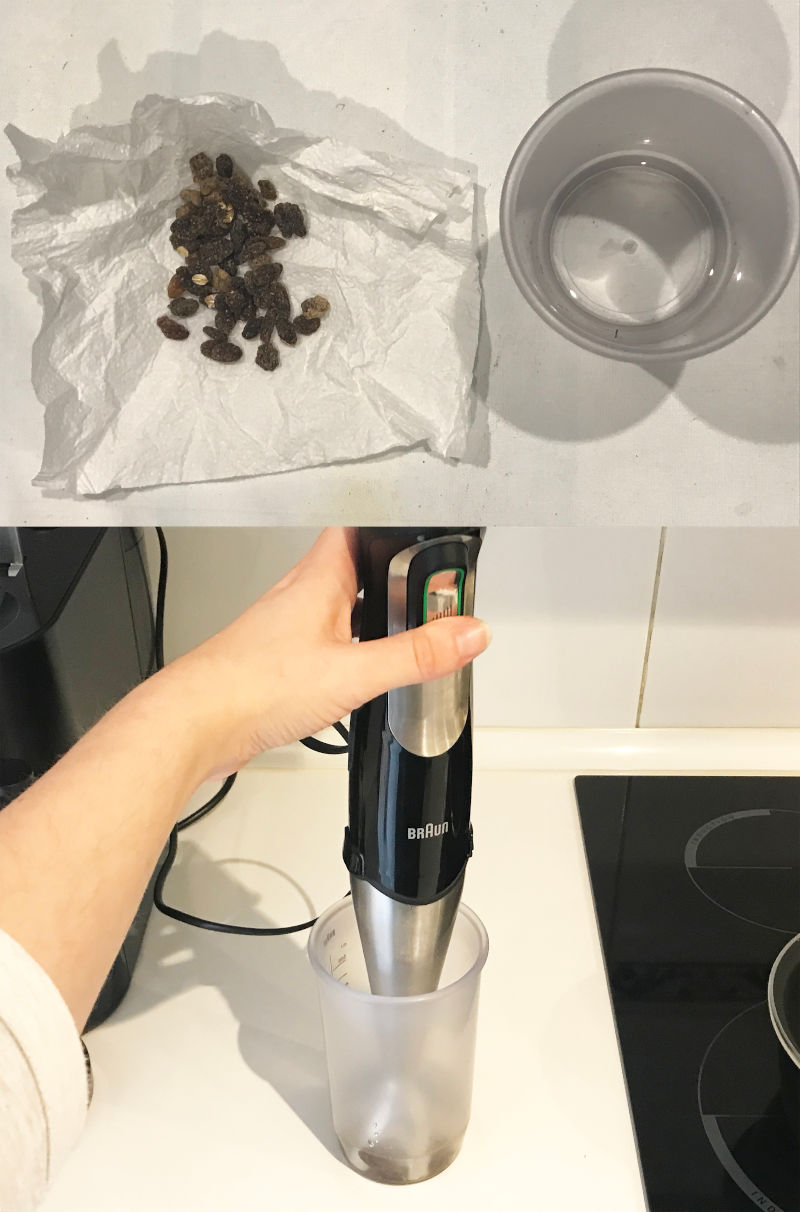
This recipe is completely experimental. At my house, we usually buy a mix of nuts that we like a lot, except for one of the ingredients: raisins 🤢.
None of us like them. So we usually throw them away to the trush. This time I came up with the idea of collecting and saving them to see what kind of biomaterials I could get to do with them.
So the first thing I did was, take 5 grams of raisins and crushed them with the blender together with 22 ml of water until it was a watery paste.
Once the raisins are processed, we will need the following ingredients:
- Elastic Bioplastic (Raisins Bioplastic)
- Extra (to dye it)

To cook these bio elastic material, the following criteria must be this:
We pour the mixture into one of our molds with a Voronoi pattern, and at that moment we add the mixture of water + turmeric with a surgical syringe to give some yellowish touches.
After 24 hours drying, this was the final result! 🤩. Surprisingly I discovered that the texture of the biomaterial was very smooth, without any bubbles and very elastic! Here you can see a video where I stretch the biomaterial:
Observing the behavior of this material, I realize that it is probably the most suitable for making bio inflatables in the future. I will test it soon!! 🧐💪.
-
_ TEA HERBS BIOPLASTIC
This biomaterial is also completely experimental. During the days that I was confined and ill, I drank a lot of tea for my cough.
With the tea herbs, as I did with the raisins, I let them dry for a few days and I collected them to make some biomaterial examples.
After drying well, the first thing to do is crush the herbs well in a mortar and then pass them through a strainer until are obtained some very fine fibers.
When we have it, the ingredients that we will need are:
- Flexible Aromatic Bioplastic (Tea Herbs Bioplastic)
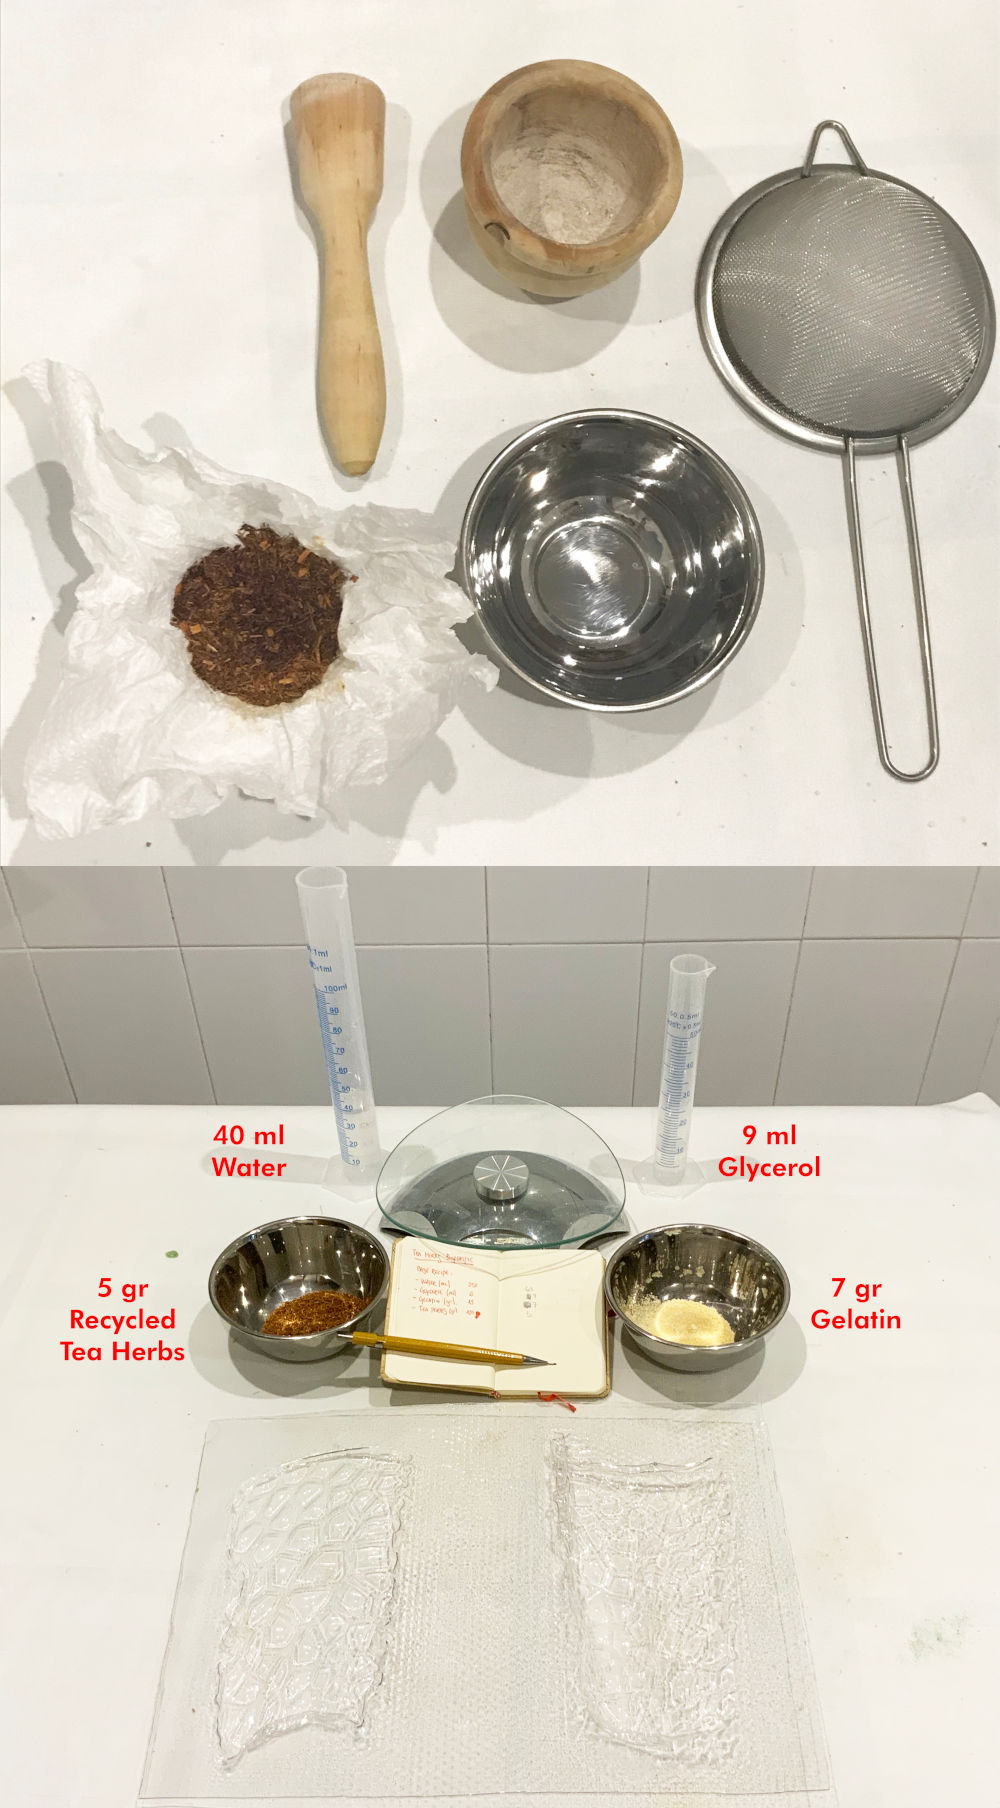
To cook these bio flexible material, the following criteria must be this:
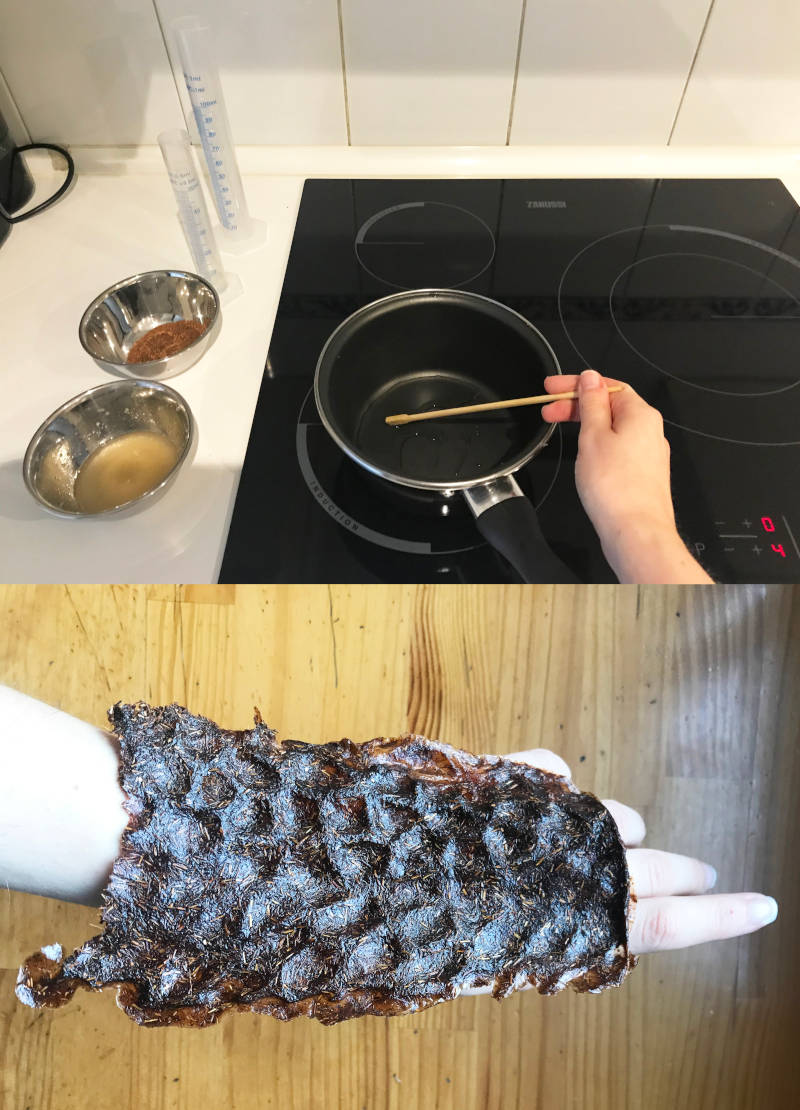
After 24 hours drying, this was the final result! 🤩. In this case, the biomaterial is very flexible and roughest and it is one of the most aromatic biomaterials I have made so far.
BIOMATERIALS FAILURES
Just as we have achieved very good results with some biomaterials, there has also some failed examples, from which we learn and rectify the recipes.
In this case, I made two types of biomaterials with variations in some of the tests I did with: eggshell and conductive agar.
-
_ BIOCERAMIC (EGGSHEEL BIOPLASTIC)
For this bioceramics recipe, I relied on a Materiom recipe. I collected a series of eggshells at home, and as we did with the tea herbs, we crushed them with a mortar and strained until we obtained an eggshell powder.
In this recipe, I have made some modifications and followed this proportions to make the recipe:
- Bioceramic Bioplastic (Eggshell Bioplastic)
This mixture is made cold. First mixing the water with the calcium alginate, and when it begins to thicken, the eggshell powder is added.
This bioplastic must be done quickly and poured within 3 minutes, which is the time it takes to solidify the mixture of water with calcium alginate.
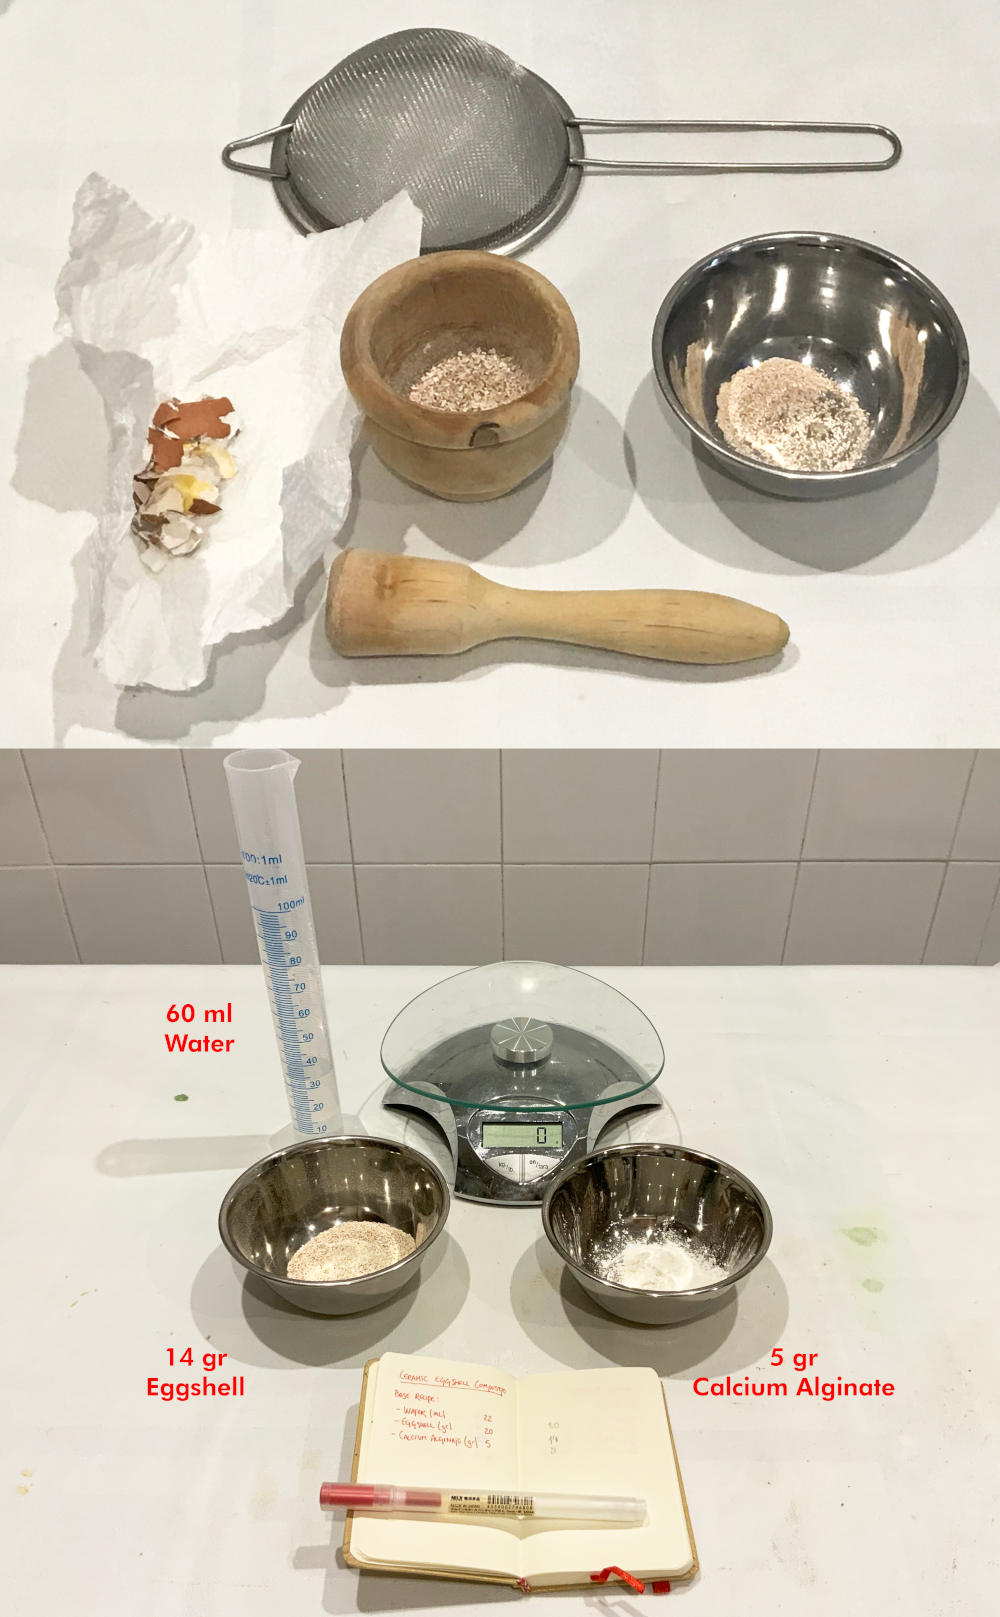
Unfortunately, after three days drying, it cracked in several areas of the holes in the mold, although we have verified, despite its brittleness, it is very rigid.
-
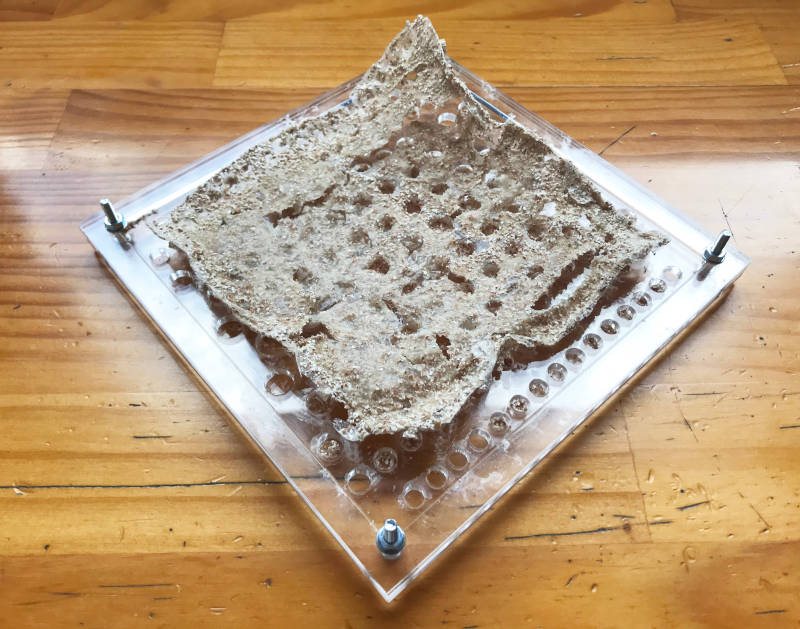
_ TRANSPARENT CONDUCTIVE BIOPLASTIC (AGAR-AGAR BASE)
For this type of biomaterial, we have used another Materiom recipe. In this case, I have reproported the measurements of the ingredients, and I have followed this measures:
- Transparent Conductive Bioplastic (Agar-agar Bioplastic)
- Extra Option II(to experiment it)
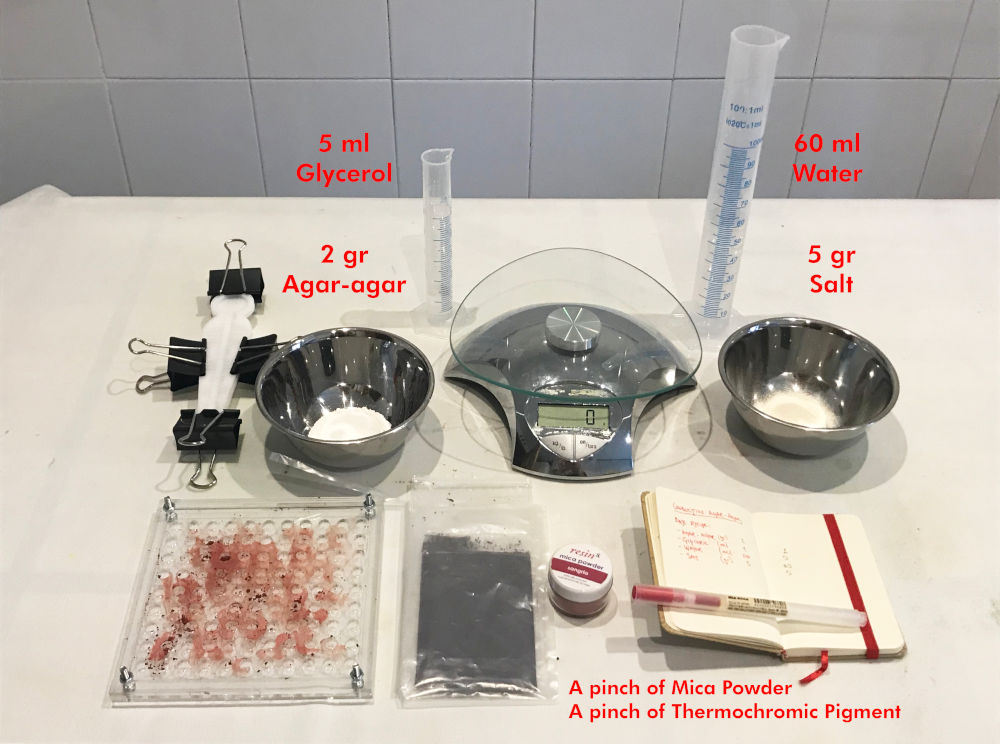
To cook these unsuccessful material, the following criteria must be this:
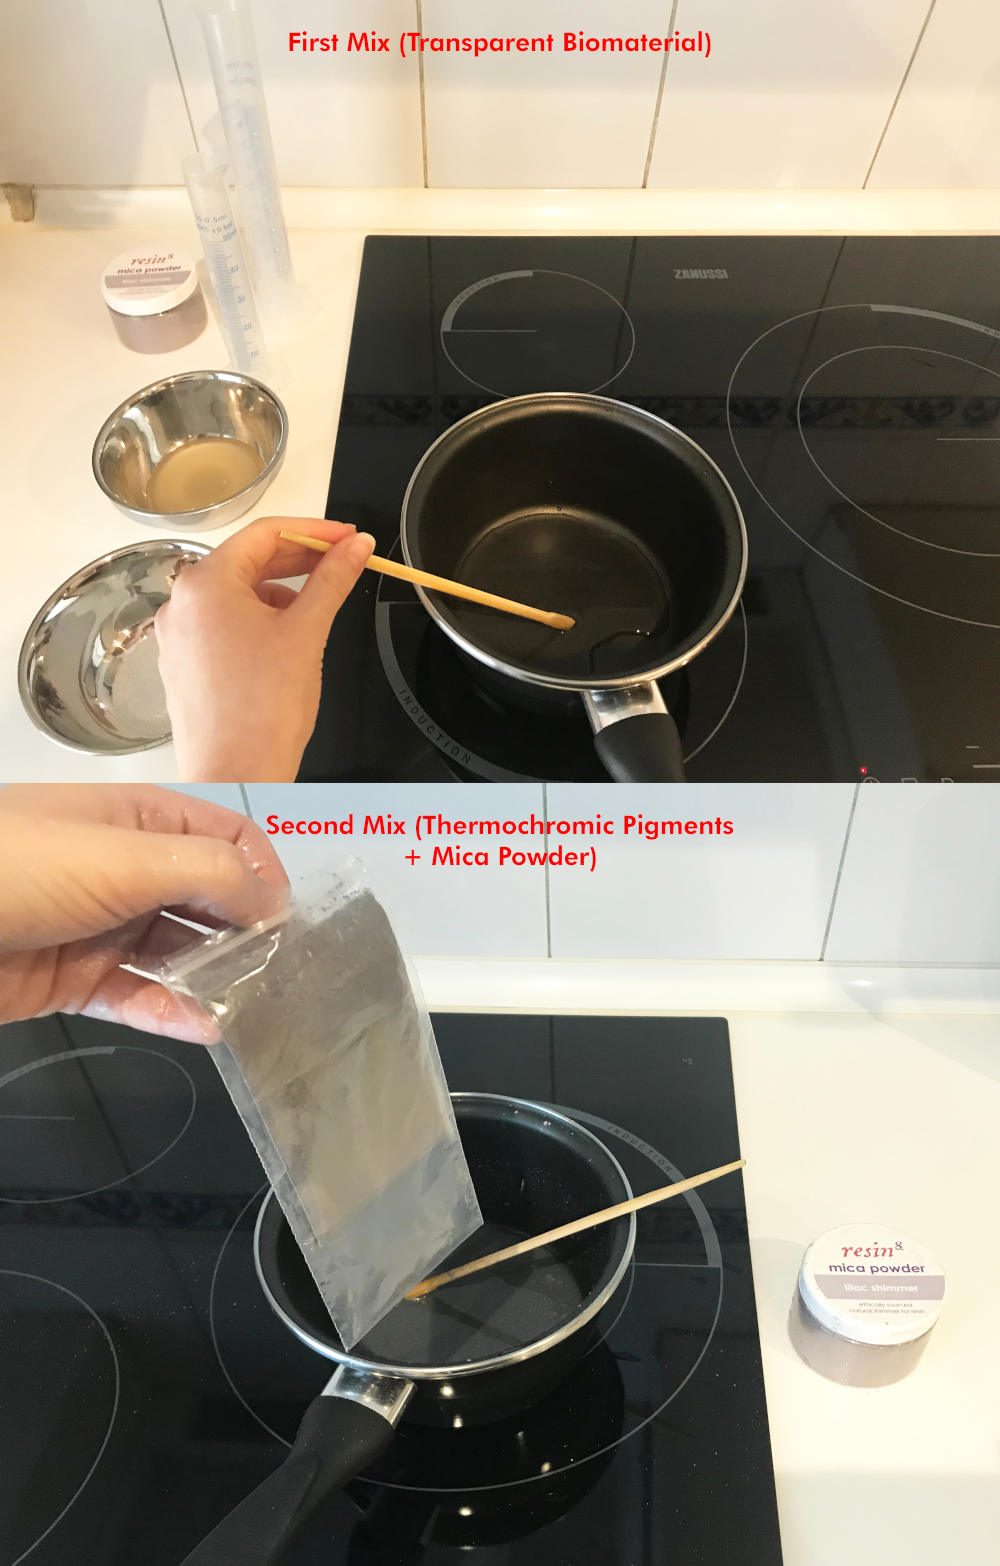
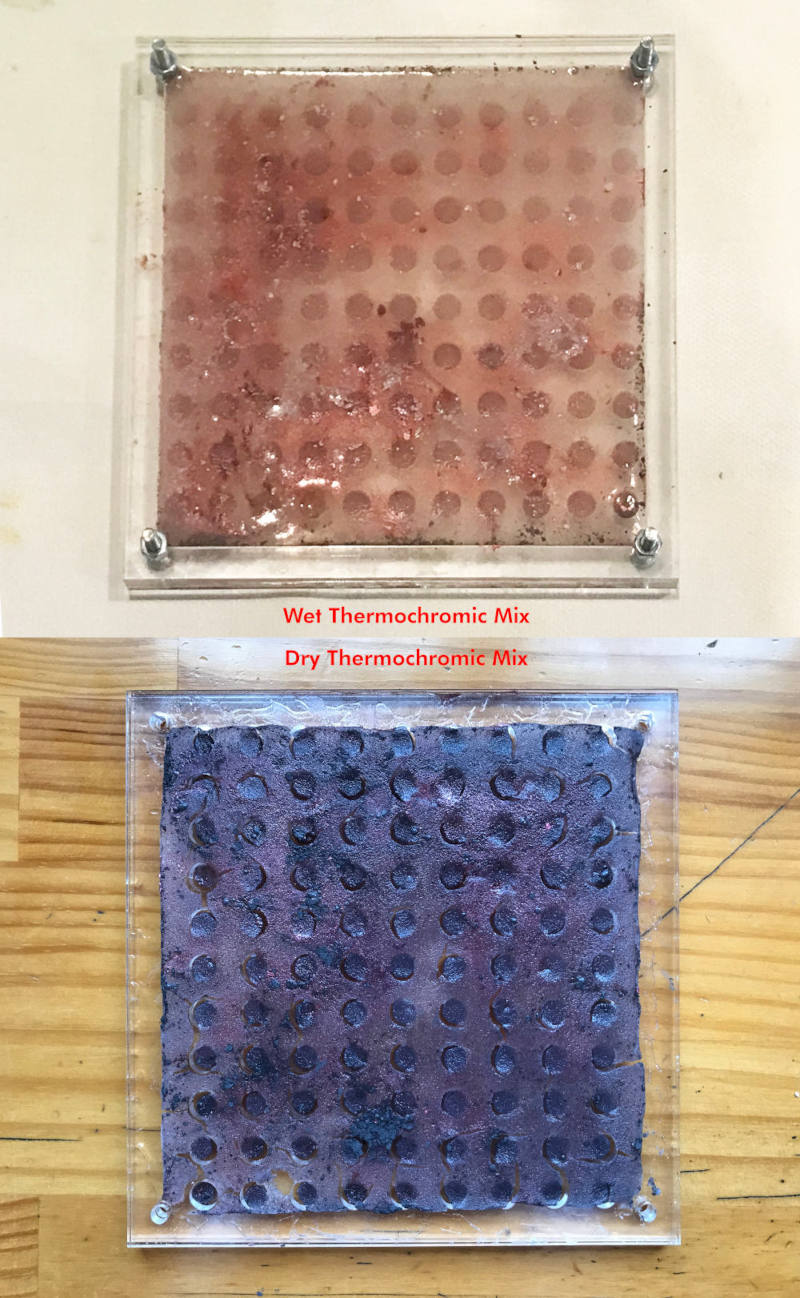
From this mixture, we separate half and mix on it with mica powders and black thermochromic pigments that I had at home at 26-31º.
I cast the original mix in some of the residual molds of the bio inflatables, and after two days of drying, the material began to crack around the walls of the mold and these small remains were left. 😞😞
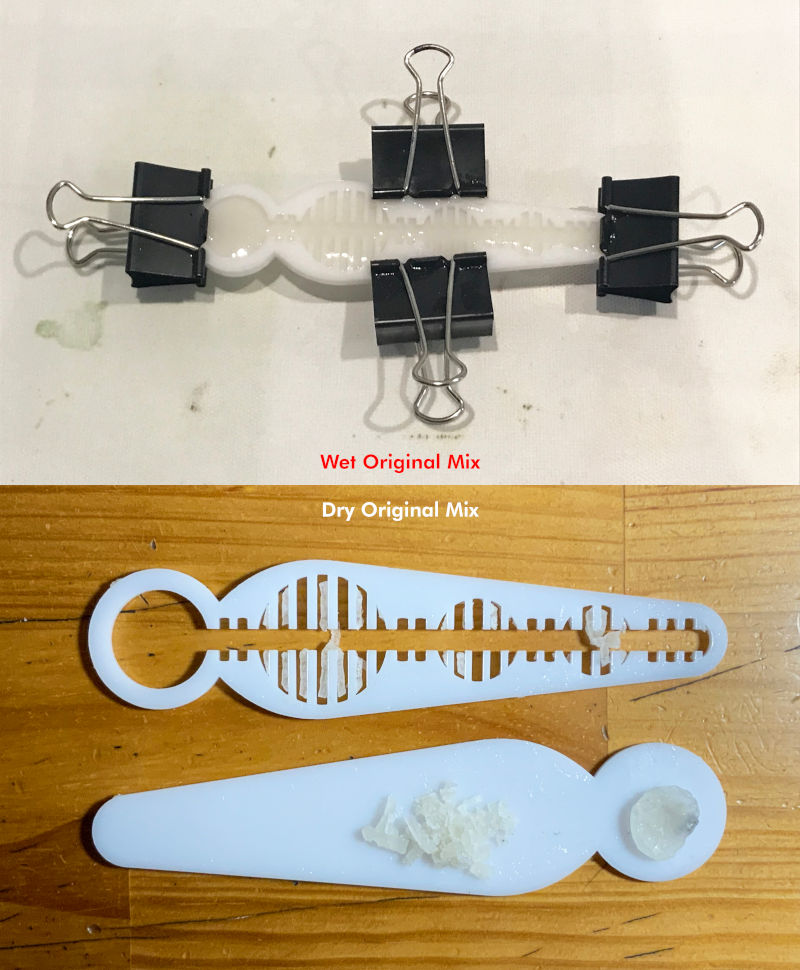
Regarding the biomaterial with thermochromic paint, we achieve the effect of color change! However, as happened in the first mold of this mixture, the biomaterial began to crack when it dried and is not very stable.
SUMMARY
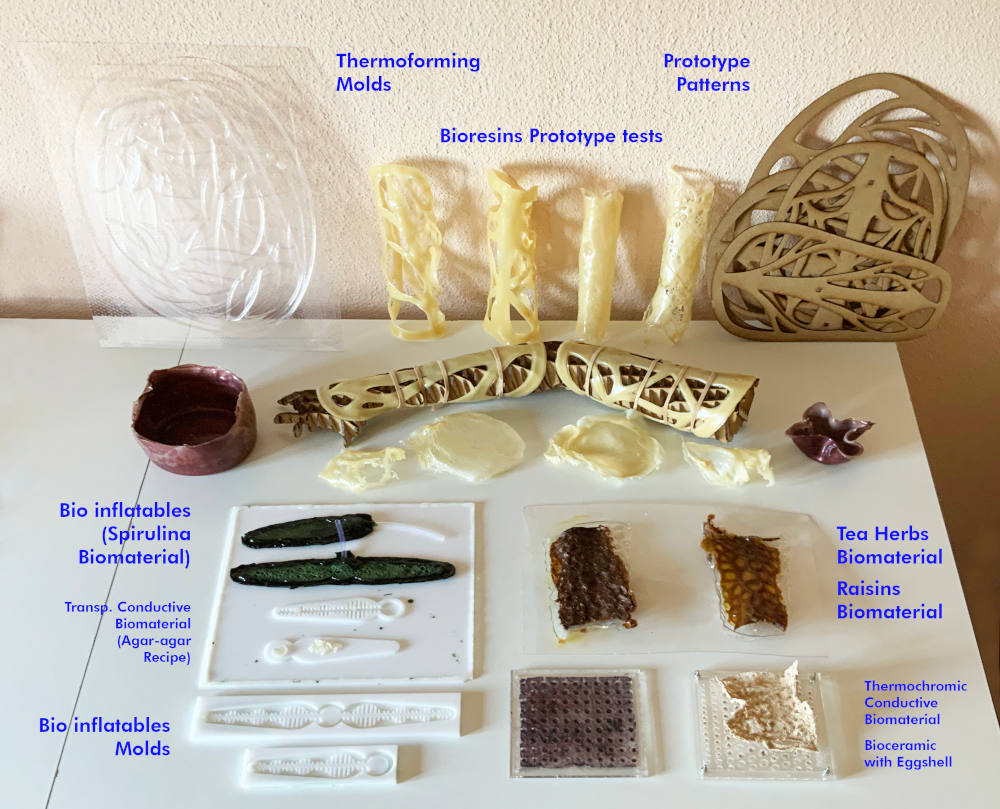
After a whole week of successes and failures, these are the final results I have had throughout the whole week! I hope you like them as much as I have enjoyed making them. 😊😊
FILES
VACUUM THERMOFORMING MACHINE
BIO INFLATABLES
REFERENCES