This is still about week one. However the topic of working on your final project is so different from the Project Management that I decided to create a new post for it.
Assignments
Our tasks for this week are:
- Plan and sketch a potential final project
Final Project Idea
While brainstorming ideas there were two aspects that kept coming back as things that I wanted to incorporate. First, it should look aesthetically pleasing and be used more for fun instead of being useful. And second, I really wanted to play with light. Either with how light and shadow would interact, or with colored lights that can be programmed and that would hopefully interact with something. And the following idea got quite stuck in my head:
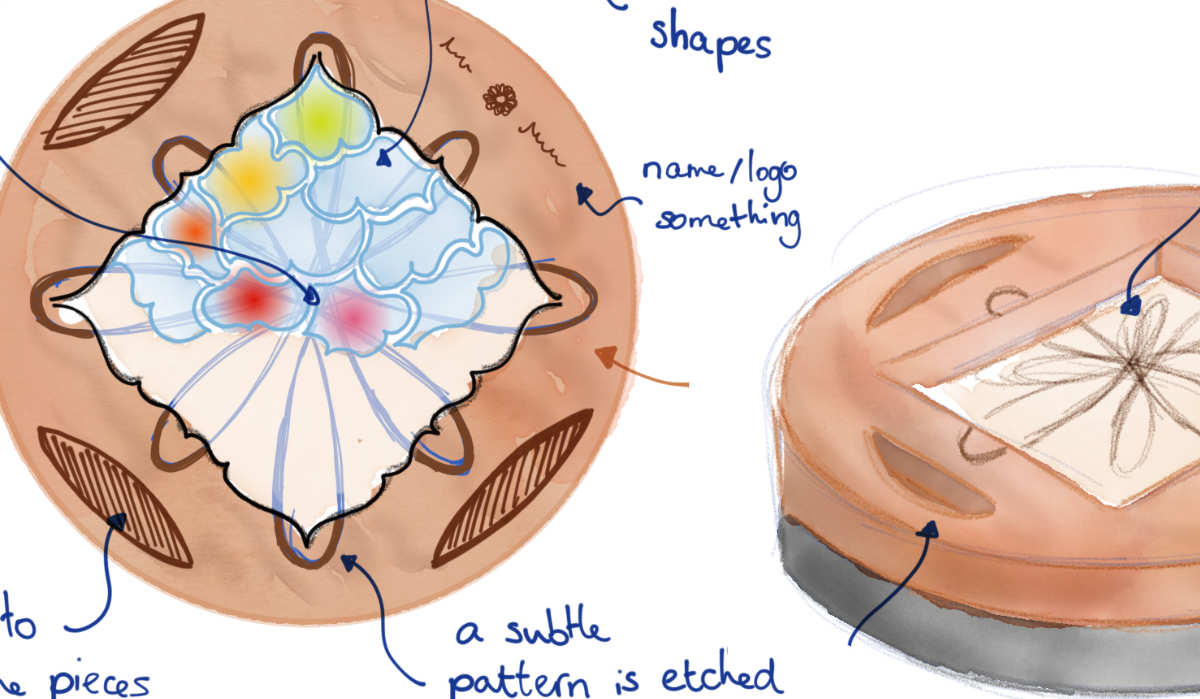
A jigsaw puzzle where placing each piece correctly will spark a mini light show.
I love doing jigsaw puzzles. It’s a great way from me to just zone out for a bit from thinking about code and math, and just using my eyes. It’s probably my math side, but I love how there’s only one correct solution to a puzzle, consisting of many tiny correct solutions (the placement of each piece), and if you try hard / long enough, you’ll find it.
Many people enjoy the feeling of clicking / pushing each piece into a puzzle, me included. For my final project I want to make the act of puzzling and placing each piece correctly even more fun and exhilarating for any puzzle enthusiast.
Nevertheless, I’d be making this puzzle for myself, as a fun project to learn about creating something physical and playing with light, that is connected to a hobby of mine, puzzles.
Design
This would be a puzzle where each piece is made of either clear acrylic or some see-through matte material. Each piece would either contain a light, or the location below each piece (the board on which you assemble the puzzle) would have a light. When you correctly place a piece, it would spark a mini light explosion / light show that would use all the pieces already assembled on the board. The more pieces you’ve already assembled, the more elaborate the light show becomes.
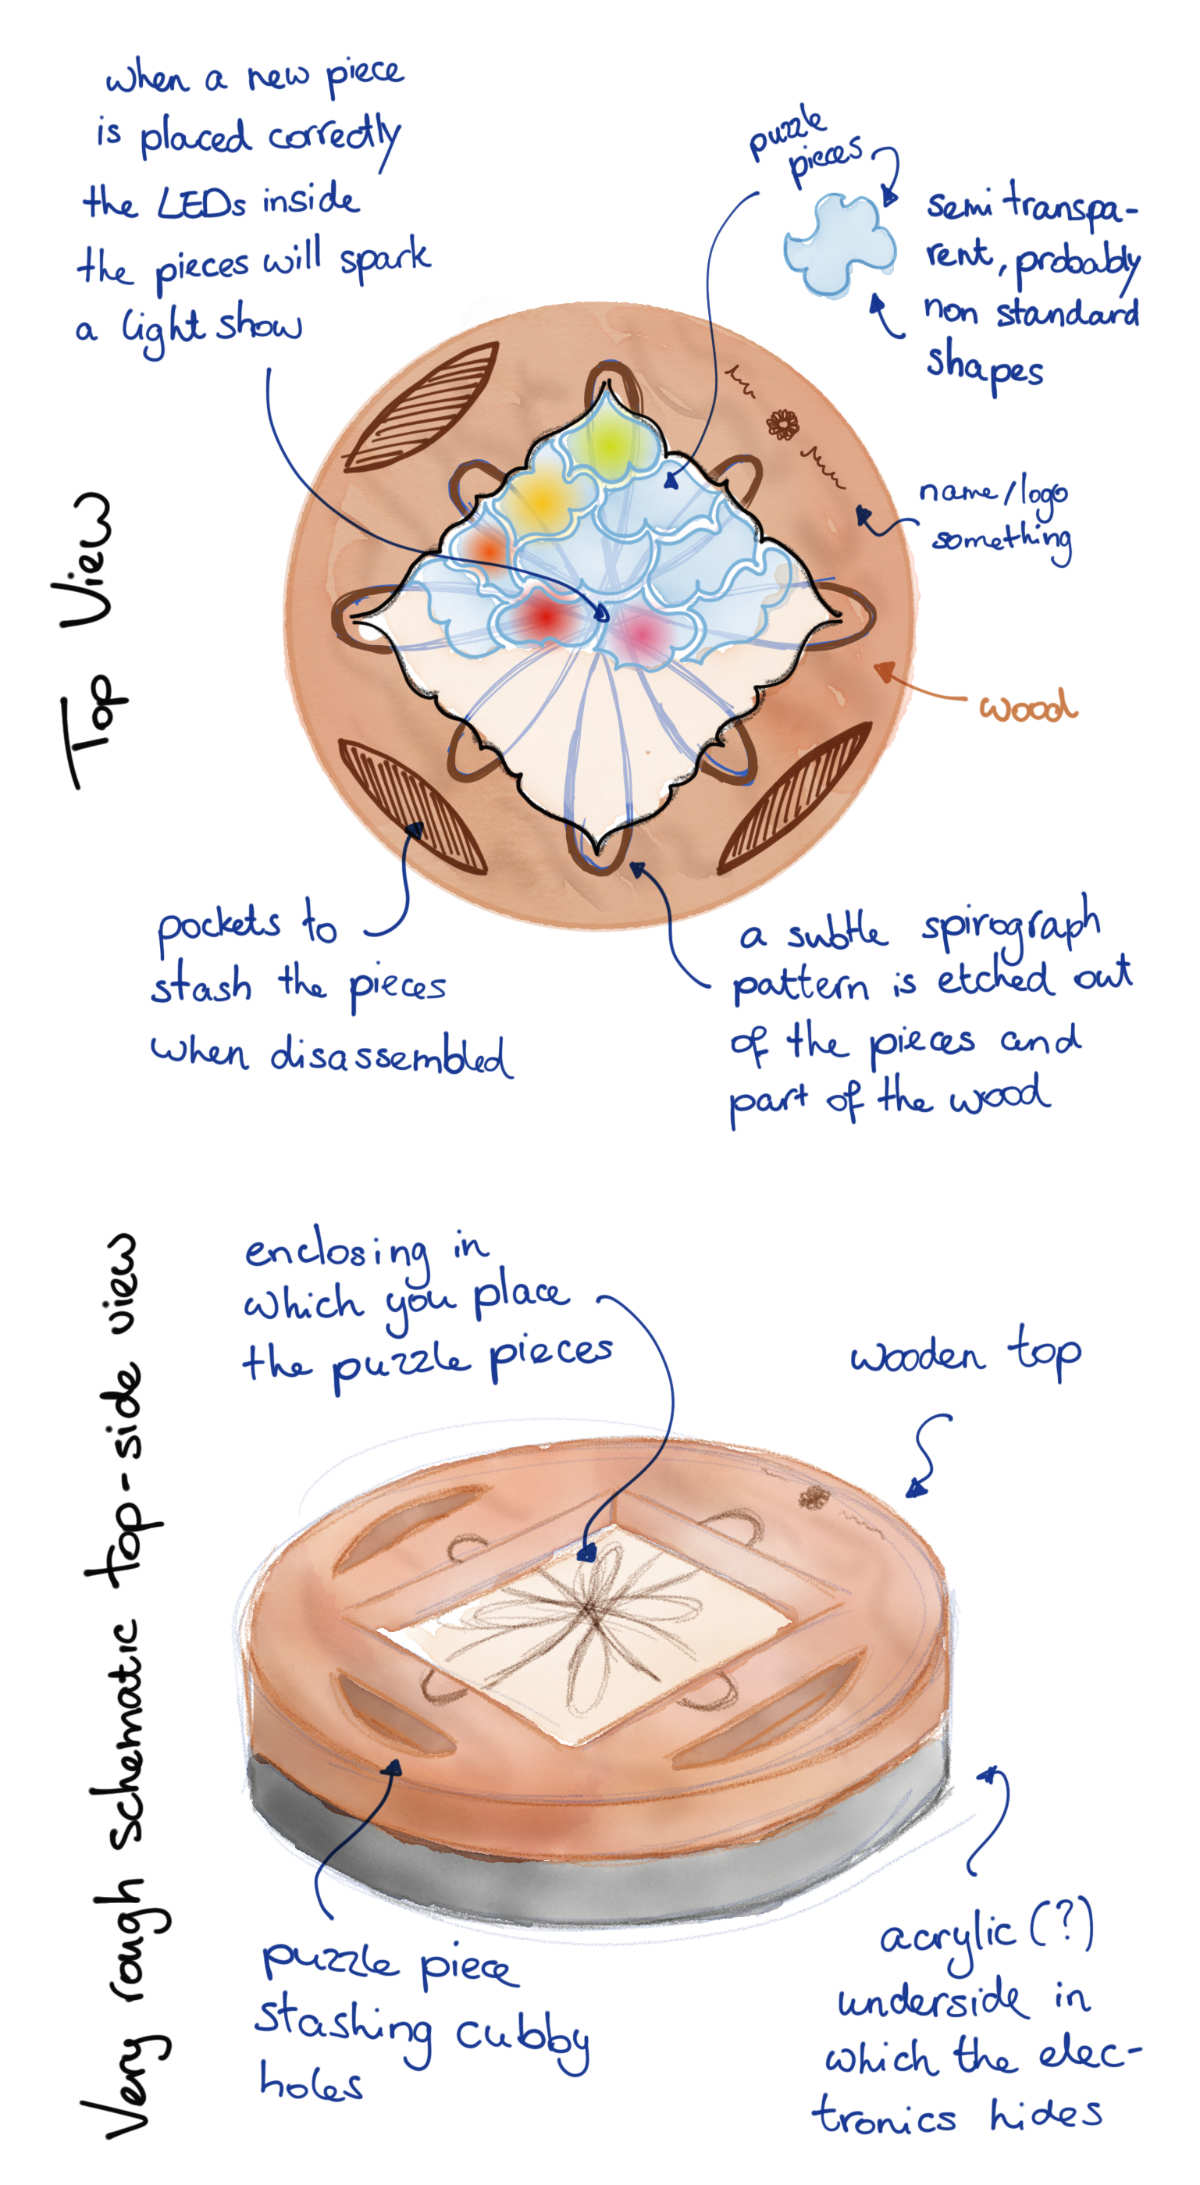
You would make/place the puzzle pieces within an outline, an enclosing box, and hopefully this box would be made of beautiful wood. The enclosing would have pockets along the side for the puzzle pieces when you haven’t assembled it yet, and an area below would have / hide the wiring below the puzzle board.
Since doing puzzles where there’s no design on top of the pieces are quite hard, and because I think it will look beautiful, I would want to etch out a simple design from the top of the puzzle pieces. A spirograph for example. And maybe this etched-out spirograph design would extend a little into the wooden board surrounding the puzzle as well.
Preferably I would want to go for ±50 pieces, but I’ll start with far fewer, and wouldn’t be surprised if the final project ends up with only 16 pieces (*^▽^*)ゞ . I think that I would want to use abstract puzzle piece shapes, not the standard ones. However I’m not sure if I want to create these shapes through some coding process, or drawing by hand. I would prefer the former if it doesn’t take some serious time to create. Due to the (expected) electronics inside I don’t mind if the pieces are much thicker and somewhat larger than your average puzzle piece, but I hope to keep the general shape within ±7cm diameter and no thicker than 4cm.
A mini stretch-goal would be to create a nice hood to go over the box.
Questions
I literally don’t know enough about fabrication and electronics to figure out how to make the puzzle at this point. Below are some questions that are swirling through my mind. And there are probably things that I don’t even know about that could possibly/hopefully be solutions to my problems below.
- Where does the LED reside?
- A LED inside each puzzle piece
- The LED (per piece) is in the bottom. However, I don’t want the LEDs to be visible in the bottom (when the LED is off).
- Does each puzzle piece also need a chip/board, or is one board in the puzzle bottom, that has a connection to each piece, enough?
- If I need a separate chip/board per puzzle piece, does it reside in the piece itself or below/in the puzzle bottom?
- How to power the LED? (if inside the puzzle piece)
- Battery inside each puzzle piece
- Contact point in the bottom of each piece that supplies power if a placed on the board
- Induction??
- How to measure that a puzzle piece is placed correctly?
- RIFD chips could be used to recognize that the correct puzzle piece is placed in the right location. However, is it precise enough to know that the piece is placed exactly correct, and not one position off?
- Contact points that are along the edges of each puzzle piece (and the enclosing box), where a new piece that is placed, comes into contact with the edge of another piece (which is connected to other pieces, etc. until they reach and connect to the enclosing box), and thus be able to tell when a new piece is placed?
Some extremely vague thoughts on how to create the puzzle pieces:
- Create a mold where each puzzle piece is separate, fill one mold with a matte whitish goo (hot glue?) and place the LED / other electronics in it and let it settle? (would this be too hot though?)
- Cut the pieces from one sheet of rather thick matte acrylic? (is that even possible?) Then hollow out each piece, place the LED and whatever might be needed, then fill up the piece again?
Links
A collection of links with code or tutorials about puzzles that might come in handy:
- Nervous System puzzles | Beautiful generatively “grown”, very abstract puzzle pieces. These are too stringy and don’t have enough “body” to fit any electronics in though.
- Abstract Puzzles [instagram] | Perhaps I can get ideas from this code on how to create puzzle pieces.
- Waves Puzzle Co. | Company that creates acrylic puzzles
- Custom LEDs inside shapes | An instruction on how to get a color LED inside a cute shape filled with either clear resin or matte hot glue.
Here are some videos about laser cutting puzzles, in wood, acrylic and cardboard:
- Laser cutting a wooden puzzle
- Laser cutting a wooden reindeer | The wood looks really nice after the cutting, no smoke/black burn marks along the edges.
- Laser cutting a cardboard puzzle | A tutorial for a cardboard puzzle with a print on top (uses masking tape to reduce burn marks).
- Laser cutting an acrylic puzzle | Includes a printed design on the bottom. The acrylic pieces seem to come out looking very nice without any smoke/black marks from the cutting.
- Laser cutting a wooden and acrylic puzzle | A very elaborate video, however almost all of his results show very heavy scorch / burn residue.
- Not sure if this is relevant, but this video uses poly urethane protection on top to eventually remove smoke residue with distilled white vinegar.
Other Ideas
Besides the puzzle, I had several other ideas for my final project. Below you can read about them and (usually) why they weren’t the chosen idea.
You can only pick one
These are ideas that I think are concrete enough and would fit the Fab Academy, but I can only have one final project, and the puzzle idea makes me most enthusiastic. Although the earrings idea below is a very close second. I’ve placed them in order of how much I like the ideas.
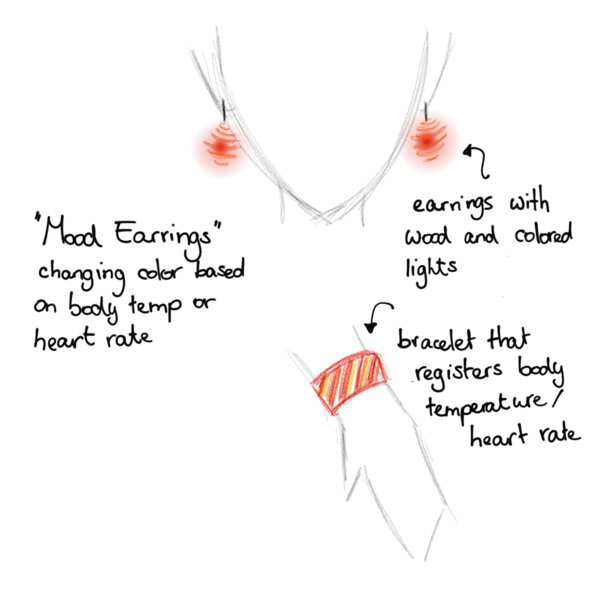
- Earrings with lights that change color based on body temperature | I’m imagining earrings with an LED in the center enclosed by a lovely wooden design with holes that let through light. These would have a connection with something, perhaps a bracelet, that would measure your body temperature (or heart rate) and the earring lights would adjust color based on the (changing) values that are registered. Instead of body temperature, the lights could perhaps also adjust color based on other data, such as weather predictions. However, I like the idea of body temperature / heart rate because it keeps it very personal. And it reminds me of those flimsy but fun color changing “mood” rings I had as a kid.
- A twinkling starry sky light | Imagine a wooden circle of about ±1m diameter that has a few hundred tiny holes drilled into it at specific placed (of different sizes, but generally all tiny) that represent the stars in the Northern Hemisphere. Using glass fiber you would create a tiny light coming from each hole/star, that could twinkle. Around the edge (between the wooden board and the ceiling) will run a (hidden behind a diffuser) LED string that can provide more/standard light. You would turn on the light / twinkling stars with a simple app or remote.
- A mini air-hockey table with multiple disks that interact with each other | In many arcades you have these fun air-hockey table games where you bounce hockey pucks across a table to try and score a goal. These tables have small air holes, and the hockey puck floats on top making it seem as if it’s gliding across ice, so effortlessly. I was thinking of creating a mini air-hockey table. However, I’d then have multiple tiny pucks that have lights. You can move the pucks around by pushing them, and when they get close, lights within the pucks would start to slowly react by increasing and decreasing in brightness. When they crash into each other, there would be a more intense light “show” coming from those pucks. I still like the idea, but I think perhaps creating the air-hockey table is too complex. Especially when it needs to be combined with the pucks that have lights and react to one another.
- A cat feeder that releases food when the cat puts an ball in it | I would then hide the balls throughout the house, and would force my cat to work for her food. That way I hope she has a little more fun, and doesn’t gobble down the food in one minute. But this is…. too useful in a way, and I really want to make something that is mostly aesthetically pleasing and fun instead of useful. Also, no light show in this.
- A bird feeder with a camera that records and recognizes the bird | It would recognize if a (small) bird is feeding, with some sort of pressure sensor. It then takes a photo and uses machine learning to figure out the species, which you could see in an app. A bonus would be if it also possibly did sound recording and recognition from that as well. I would definitely want it to look like a lovely bird house made from wood, not an acrylic box. However, I actually don’t want to have to create an app, creating user-interfaces is one of the things I dislike in my current job. Furthermore, after some googling I discovered that it already exists! The Bird Buddy. Maybe I should just buy this (*^▽^*)ゞ
Not Concrete Enough
I had several ideas that remained too vague and I couldn’t make them more specific.
- An automatic marble run | Where the marbles are moved upward/around automatically. I can’t remember how often I set-up a marble run at home with the plastic pieces of track and then pour a hundred marbles down it in one go and see the whole track shake as they sped down. An automatic marble run would be something that I could look at endlessly, like a fire or a lava lamp. I especially like this short video that I’ve seen often while waiting to embark from a KLM flight. But what would be the unique angle? The input/output?
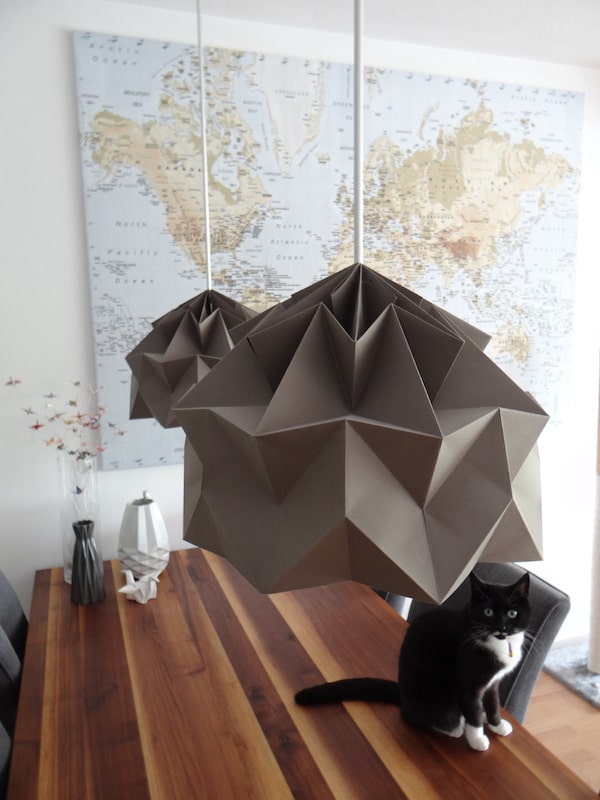
- Lamp shades or jewelry inspired by (simple) origami | Not using plain paper, but perhaps more textile or bendable materials. I’ve made origami lamp shades from actual paper before, but they can’t be cleaned and are losing their shape after a few years (the paper takes up moisture). So making something more durable, and perhaps make it more complex with the use of stronger materials. But I don’t quite know what to make of it as a fuller project, beyond the scope of a lampshade. I’m perhaps secretly hoping that during the week we get to work with cutting wood, I’ll make a lampshade (even though that has little to do with my final project).

- Projection or Topographic mapping | This comes from my wish to work with light. I’ve seen really beautiful things with projection mapping. Or with topographic mapping, such as using sand to create mountains and fjords. But I wouldn’t want to make my own projection mapping system, I would want to create something with the technique, and I don’t think that would be using the skills I’m learning during Fab Academy.
Already Executed to Perfection
There were also a few ideas that I jotted down to explore where the inspiration is very specific. It’s already a beautiful, mesmerizing piece of work. However, I couldn’t think of a way to make it mine in a way; how to remix the idea to not basically create a copy.
- SISYPHUS - The Kinetic Art Table | Creating patterns in sand with a ball that is moved by magnetism, brilliant! And so mesmerizing to watch. I want one of these tables! I can’t afford it though (◍•﹏•) . It reminds me of the pen plotter I already have, but with the option to erase the canvas and have a textured 3D feel to it.
- A Million Times | I didn’t necessarily want to create a clock, but I did like this idea of many smaller “objects” coming together to create patterns, both functional and beautiful. It is a similar kind of inspiration as the sand table above I think.
- Magic Mirrors | I find the work of Daniel Rozin just wonderful. This short video explains his work really well. I especially love his pompom mirror and the original wooden mirror.
So many options to explore. Who knows, maybe I’ll revisit some ideas after I’ve managed to complete Fab Academy (I’m hoping for that).