10. Molding and Casting

This week I decided to create something practical, a replacement strap handle for my bicycle pannier. This section talks through the steps from sketch to wax mould, silicone mould and finally, acrylic resin.
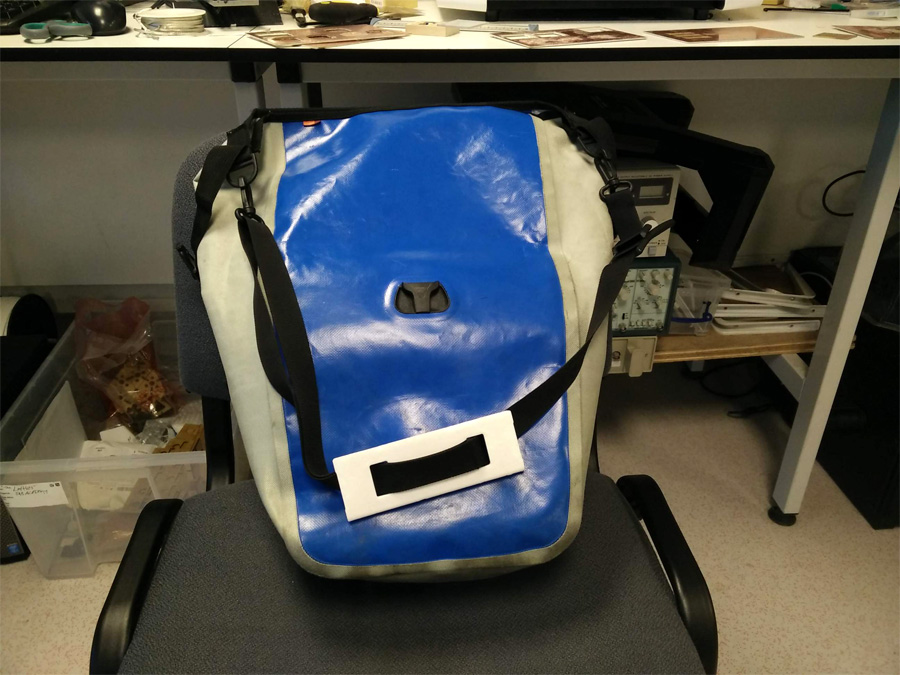
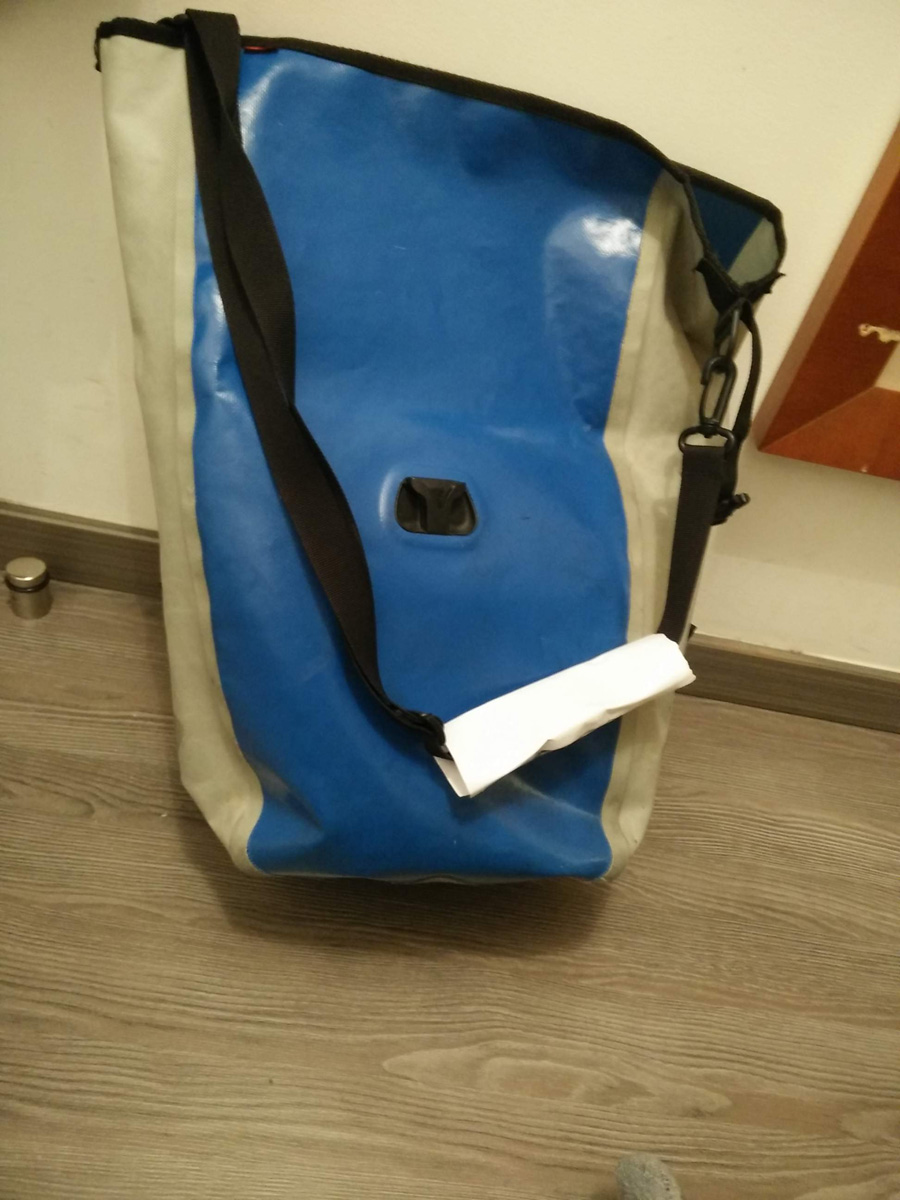
Vaude Pannier Strap
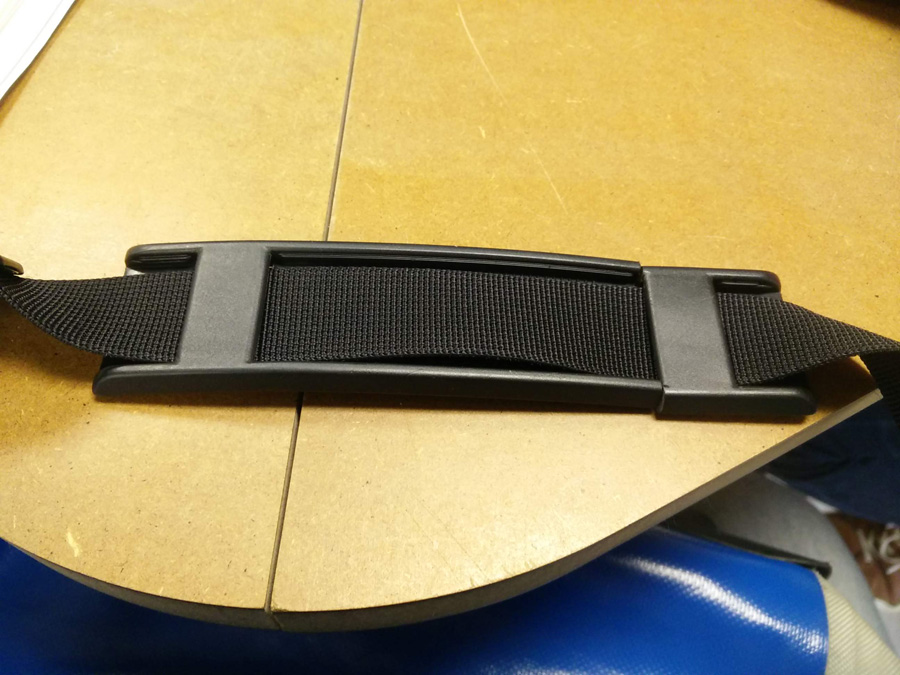
The original strap was broke with wear and tear – It is quite narrow and thin in comparison to other strap handles, so I decided to vary the dimensions to allow for better shoulder support and comfort.
Sketches
I sketched up a rough dimensions, considering that I would need first need to create of both a positive of the handle and walls around it to support the liquid silicone. In other words, a 3D model of the handle on which I would form a silicone negative – This negative would in turn be used to create a positive handle in acrylic resin.
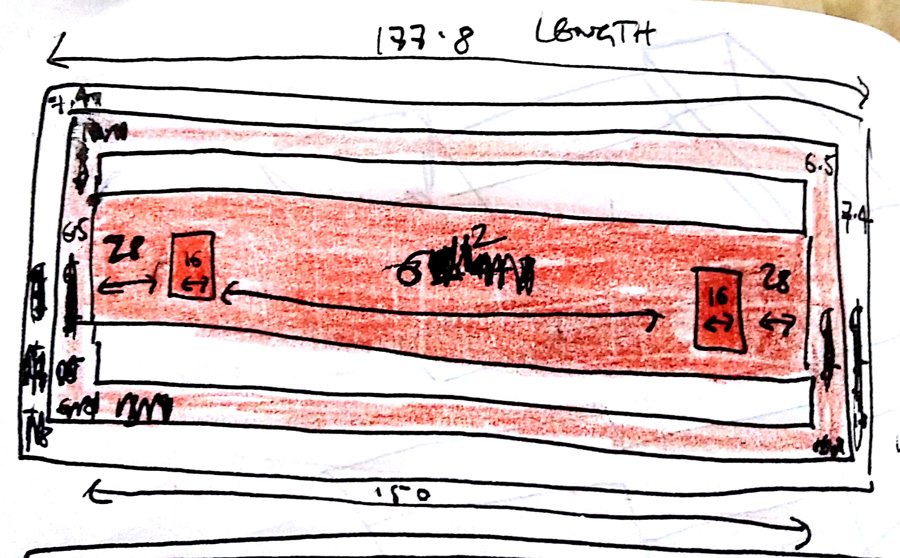
Using a measuring tape, I extended the design to make it wider and thicker, but still matching the original strap. The new strap would measure 150 x 50 x 20 mm.
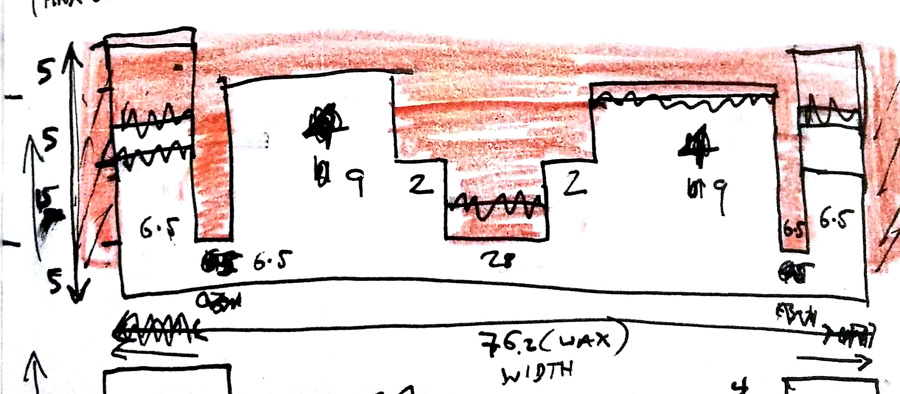
I used a piece of paper with the dimensions to test its shape and position on the strap. It was a good match, so I proceeded the parametric design.
Fusion 360
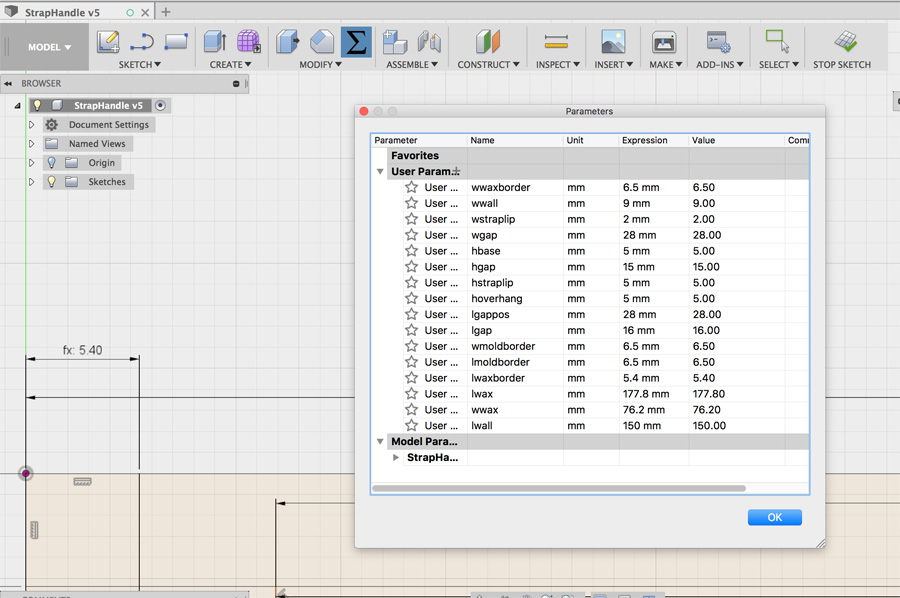
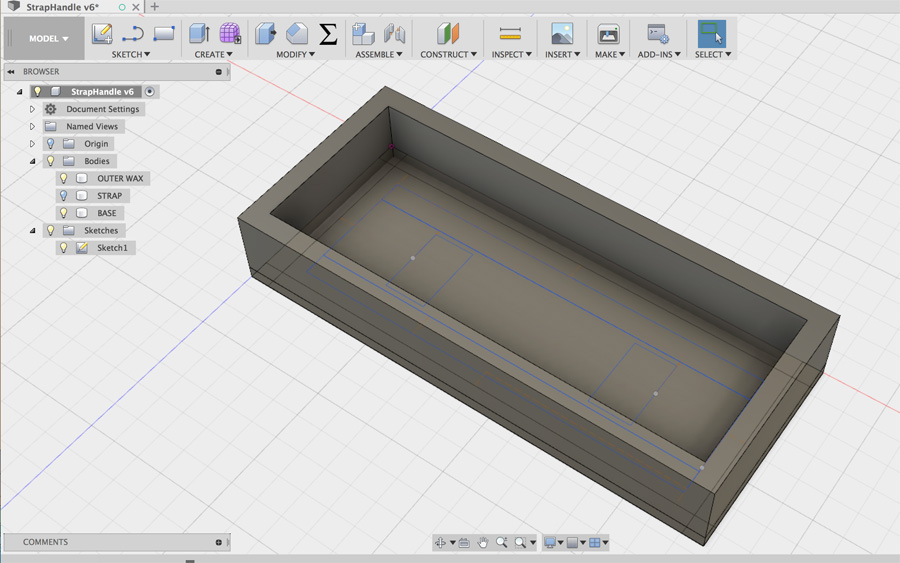
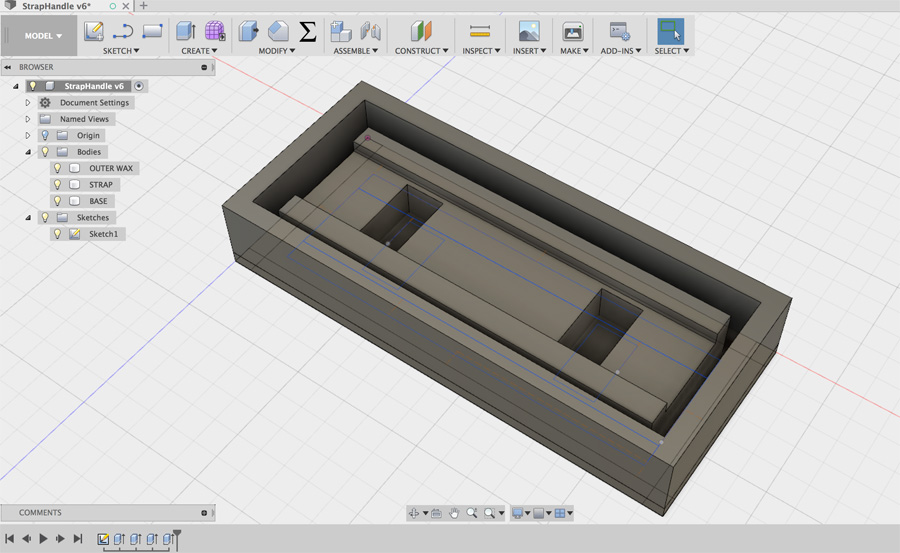
In Fusion 360, I entered a series of parameters to reflect the dimensions of the positive strap handle.
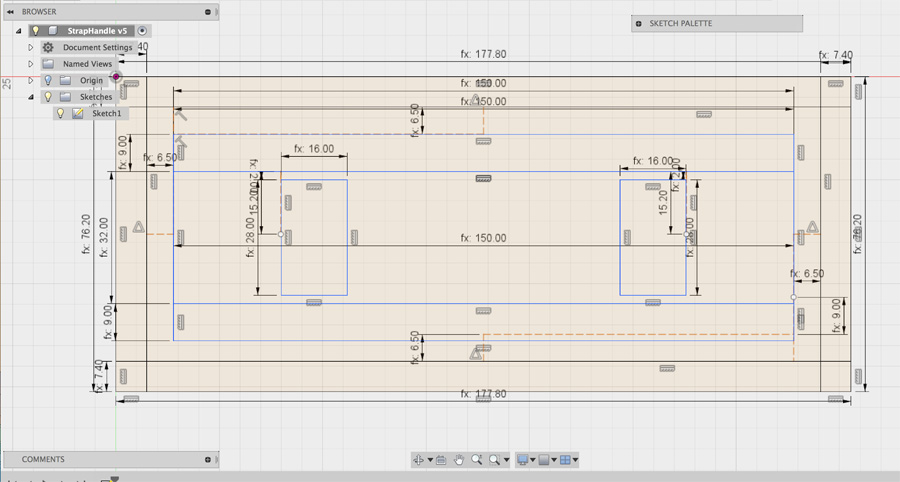
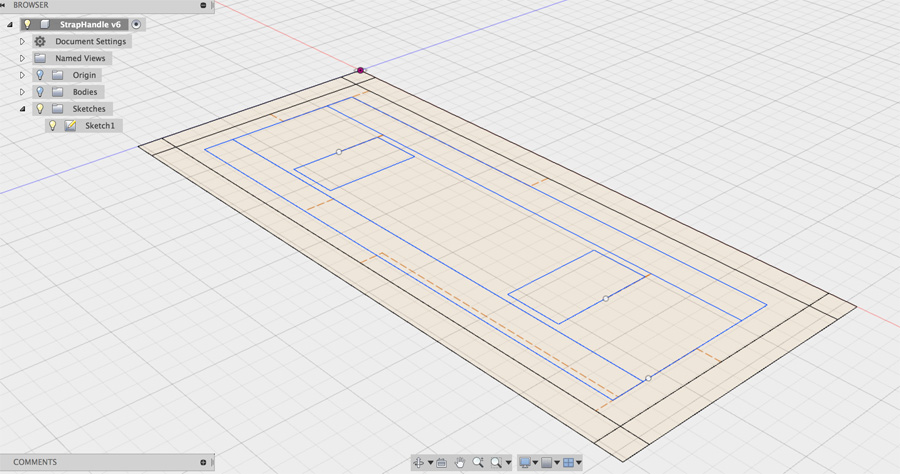
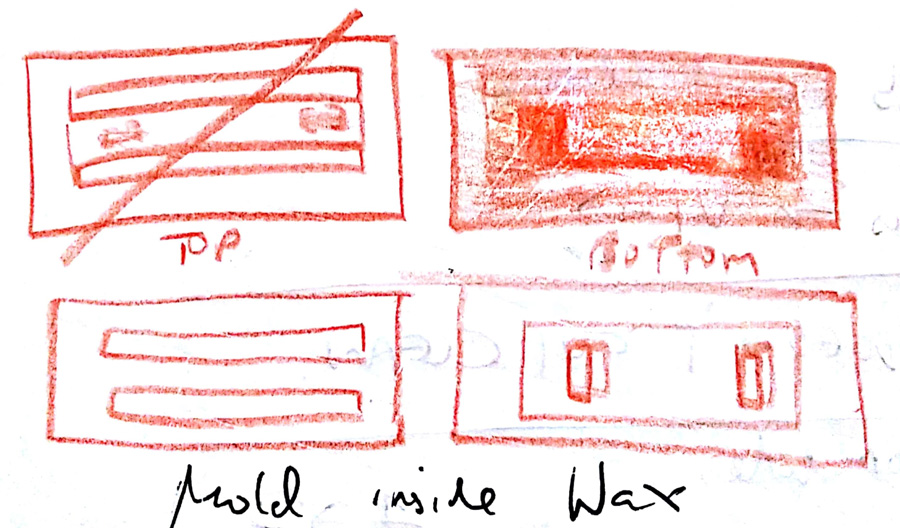
I used these dimensions to layout a sketch, reflecting the position of walls and gaps in the handle frame. I used construction lines to position the gaps and frame accurately.
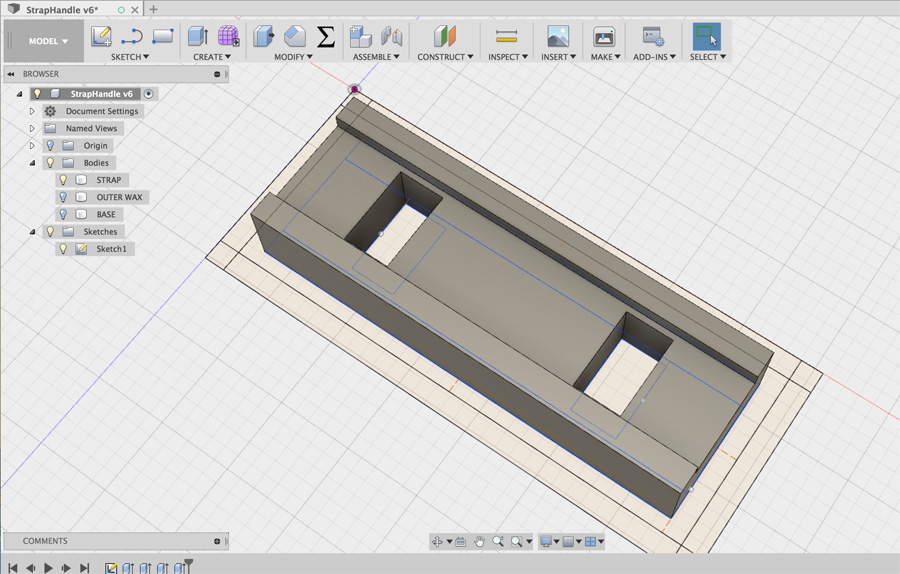
I extruded the handle, floor and walls as separate bodies. This allowed easy visibility on the parts involved when communicating with colleagues. I exported all bodies as one .STL using the Make > 3D Print menu.
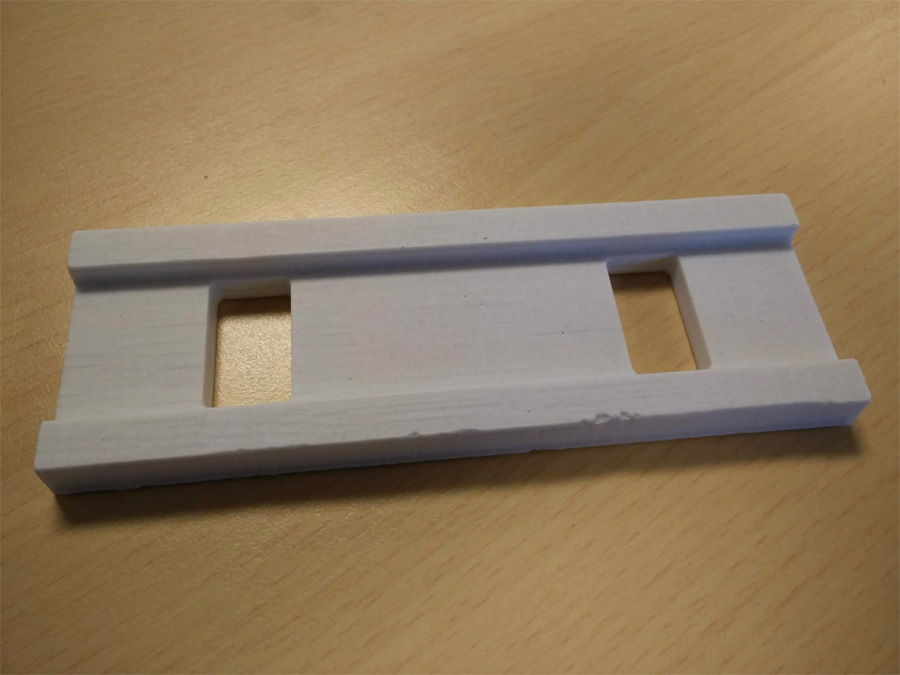
Milling the Wax

In Vcarve Pro on the CNC computer (PC) I prepared a cut file with the same dimensions as the wax mold, 177.8 x 76.2 x 38.1 mm.
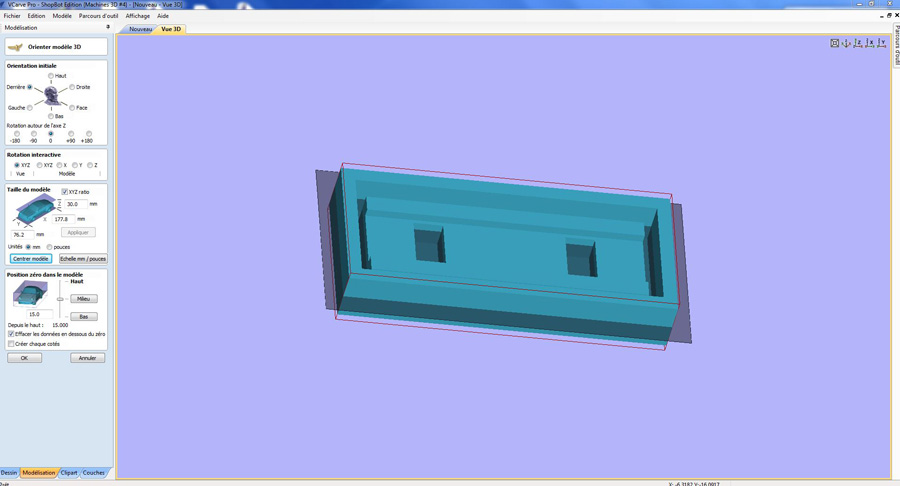
I then selected 'Modelisation' to create an empty wireframe for a 3D cut. In this menu, I imported my STL and set the inital orientation to behind – sitting the handle within the wireframe.
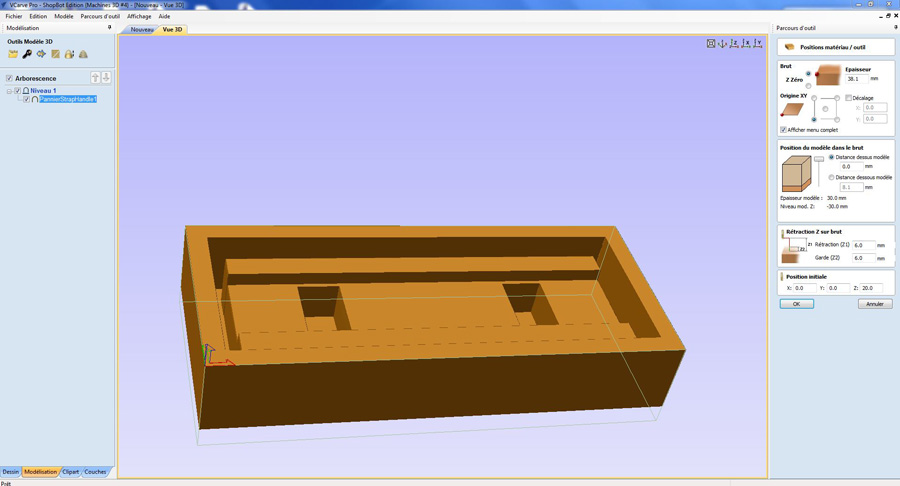
At this point, I defined the material thickness (38.1mm) on the right-hand menu and set the retraction on the surface and guard to 6mm.
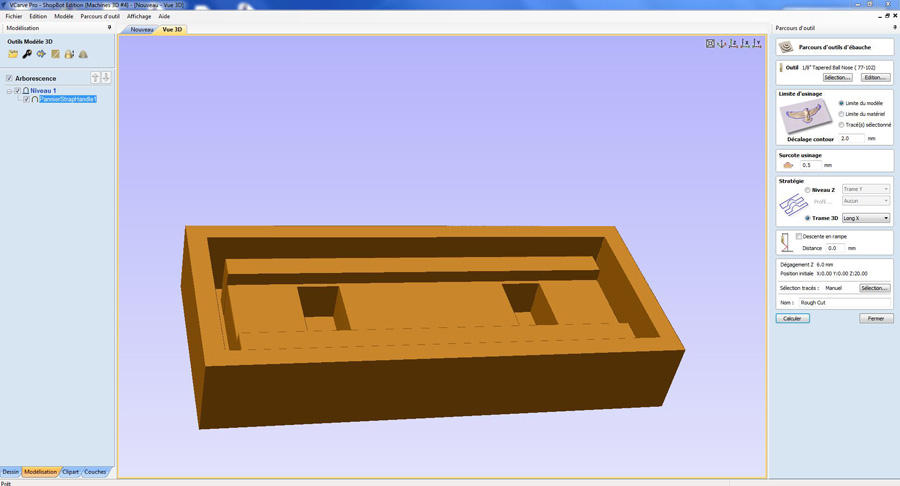
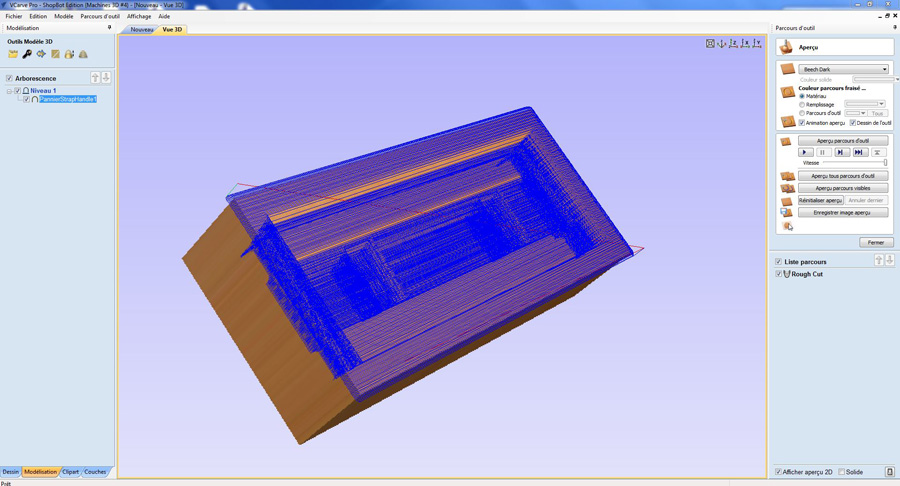
A 3D cut is done in two stage, rough then fine. Using the menu on the right, I selected rough cut with the following settings,
- Toolbit: 1/8” Tapered Ball Nose
- Machining Limit: Model limit
- Premium Machining: 0.5mm
- 3D Weaving: X-axis
The fine cut was then selected from the menu, also using a 1/8” Tapered Ball Nose toolbit.
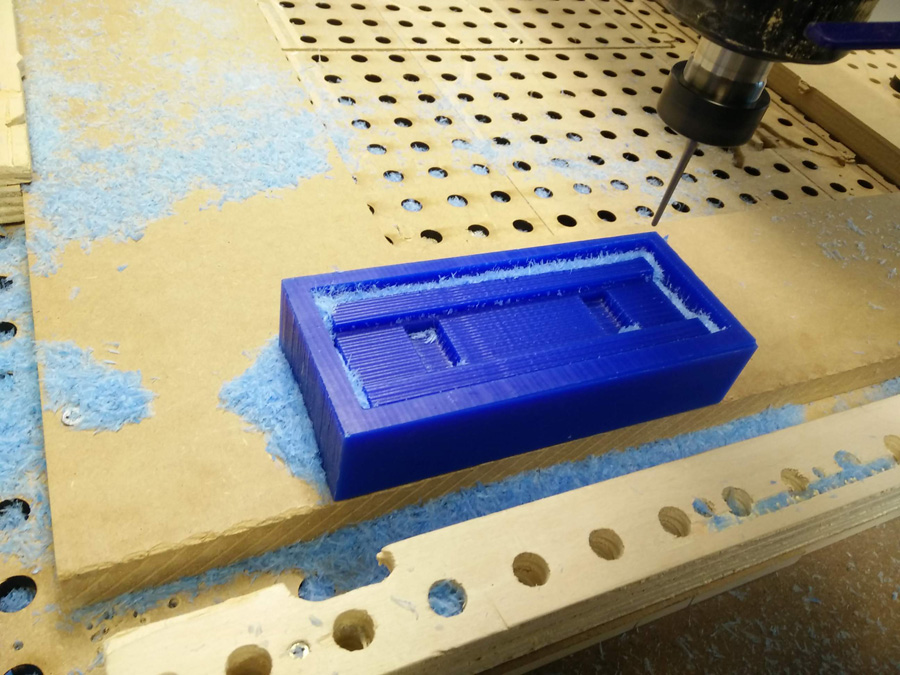
The wax mold was attached to the CNC bed using sticky tape – This failed on an initial cut and I had to stick and re-glue it. Using the raised wall on one side of the bed gave better support and also helped to measure x/y coordinates accurately – The wax mold must run straight along the bed in order for it to cut accurately. I had some margin for error on the borders of this mold but it may not always be the case.
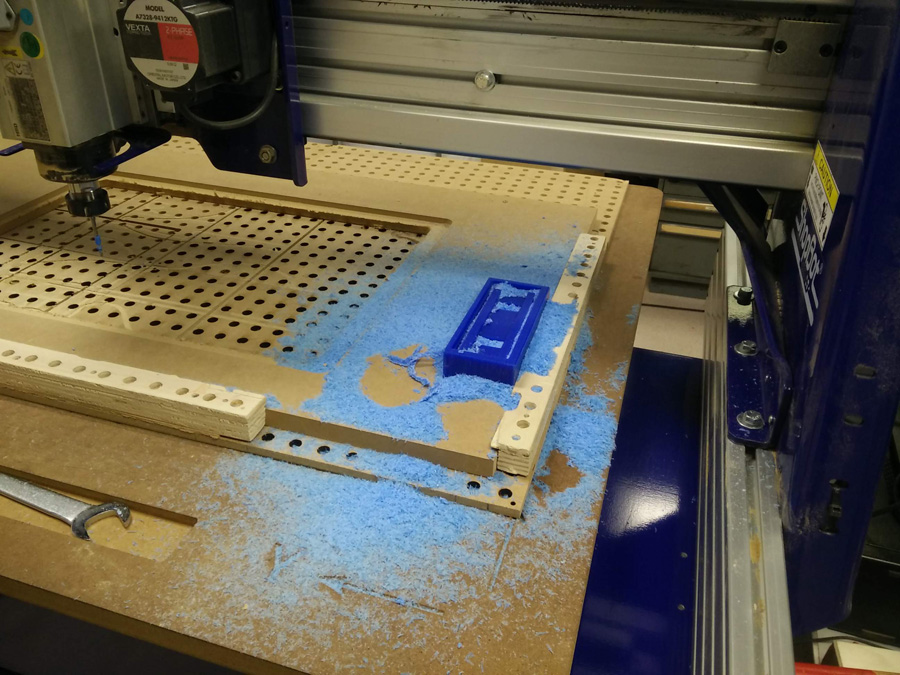
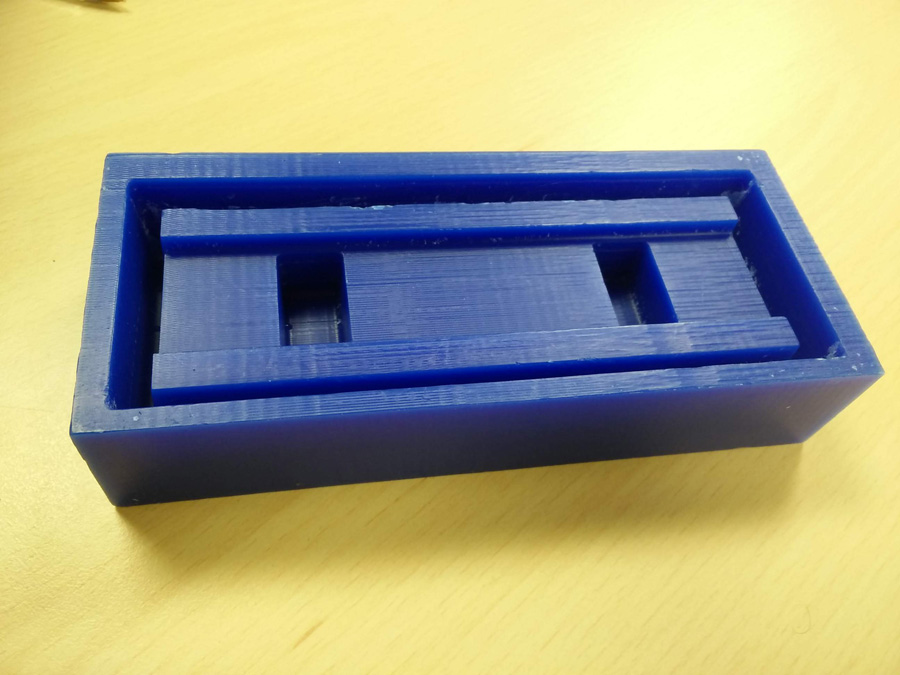
The end result was a mold that took 30mins to cut. I cleared away the excess wax/paraffin using a pair of scissors – in hindsight I should have done this with something more delicate to avoid scratches on the surface.
Silicone Mold
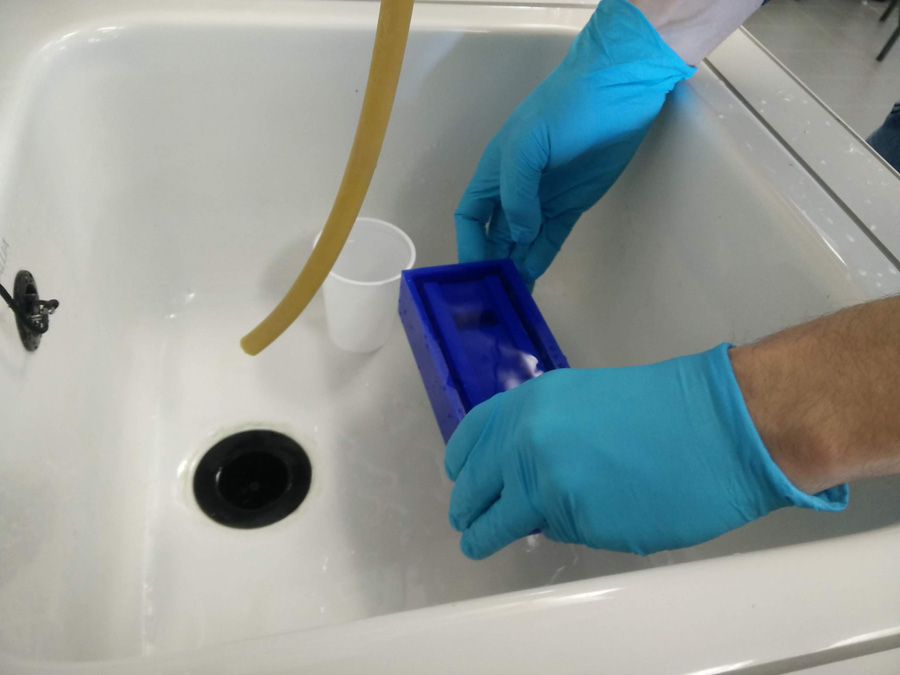
For the silicone and acrylic resin molds, we moved to the Chemistry lab at Sorbonne. It's necessary to work out how much liquid you need for casting. To do this you simply fill the (clean) wax mold with water and measure it's weight.
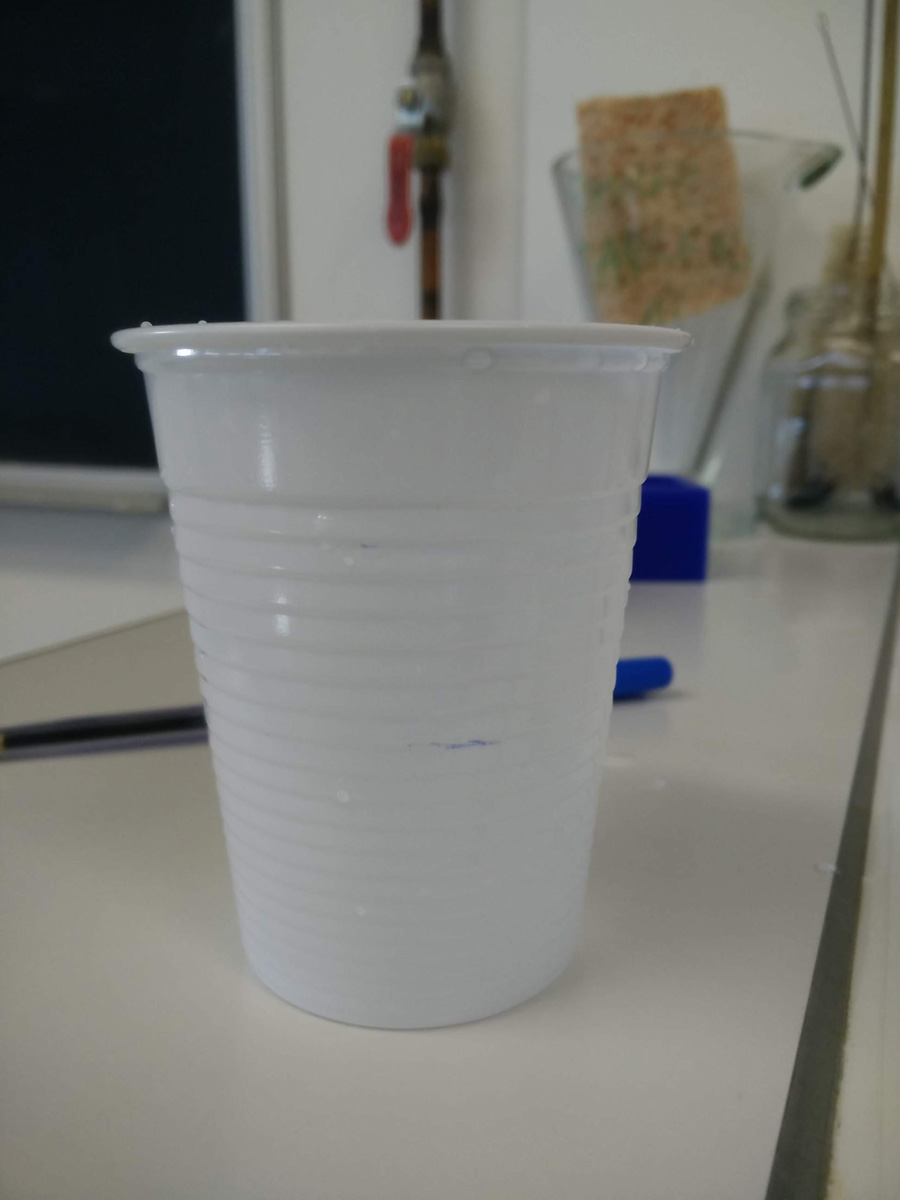
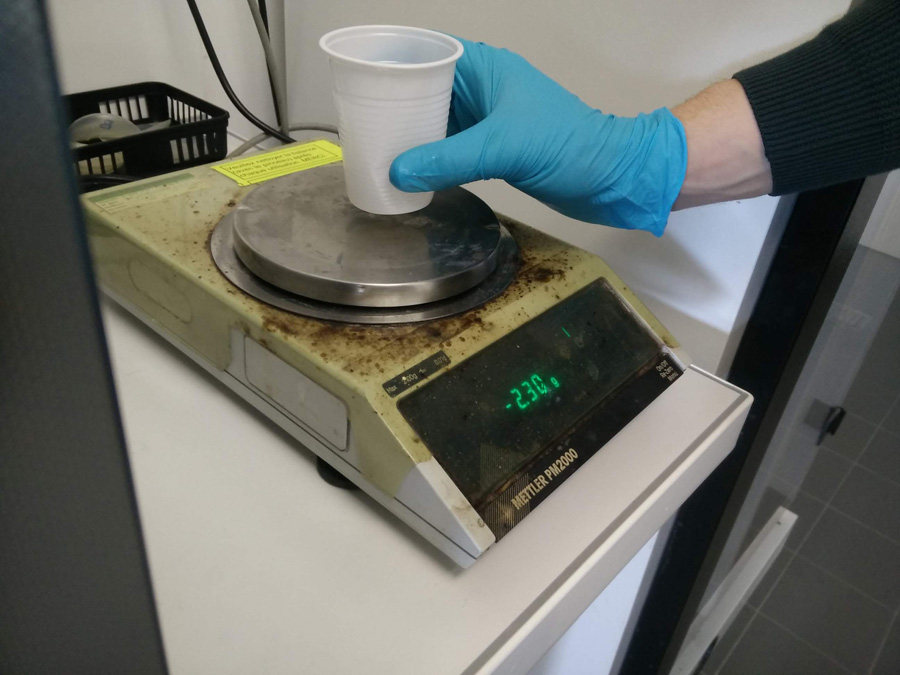
I used a simple plastic cup to transfer the same amount water to the weighing scales, marking the cup with a biro.
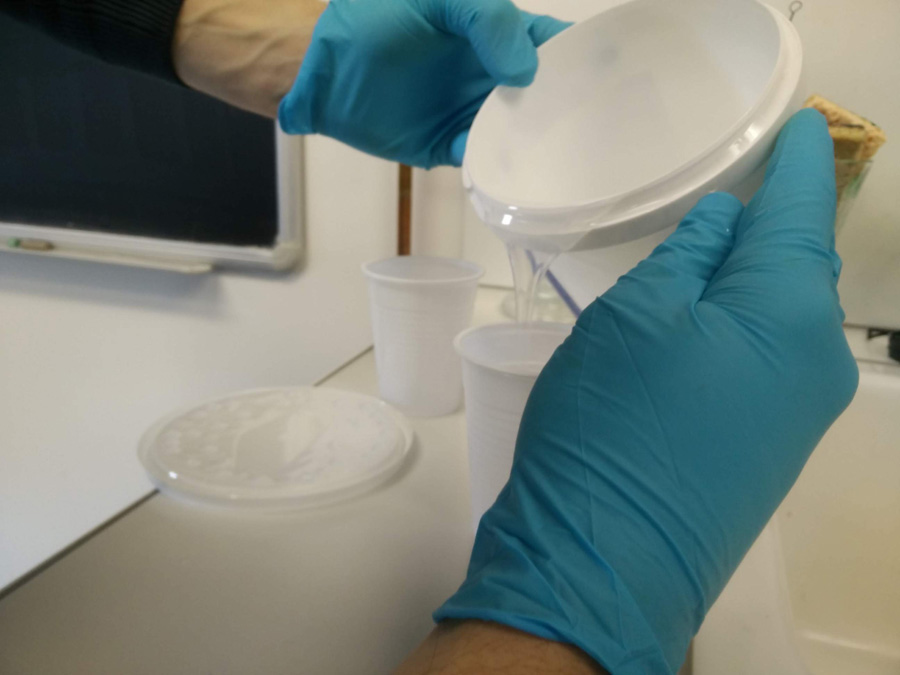
The silicone mix was made of two parts, to be mixed 10:1 between parts A (base) and B (catalyst). To work this out I measured the weight of the water in the cup and subtracted the weight of the cup, 135.89 – 2.3grams (133.59 grams). I then removed the water and added 120.29 grams (133.59 less 10%) of part A.

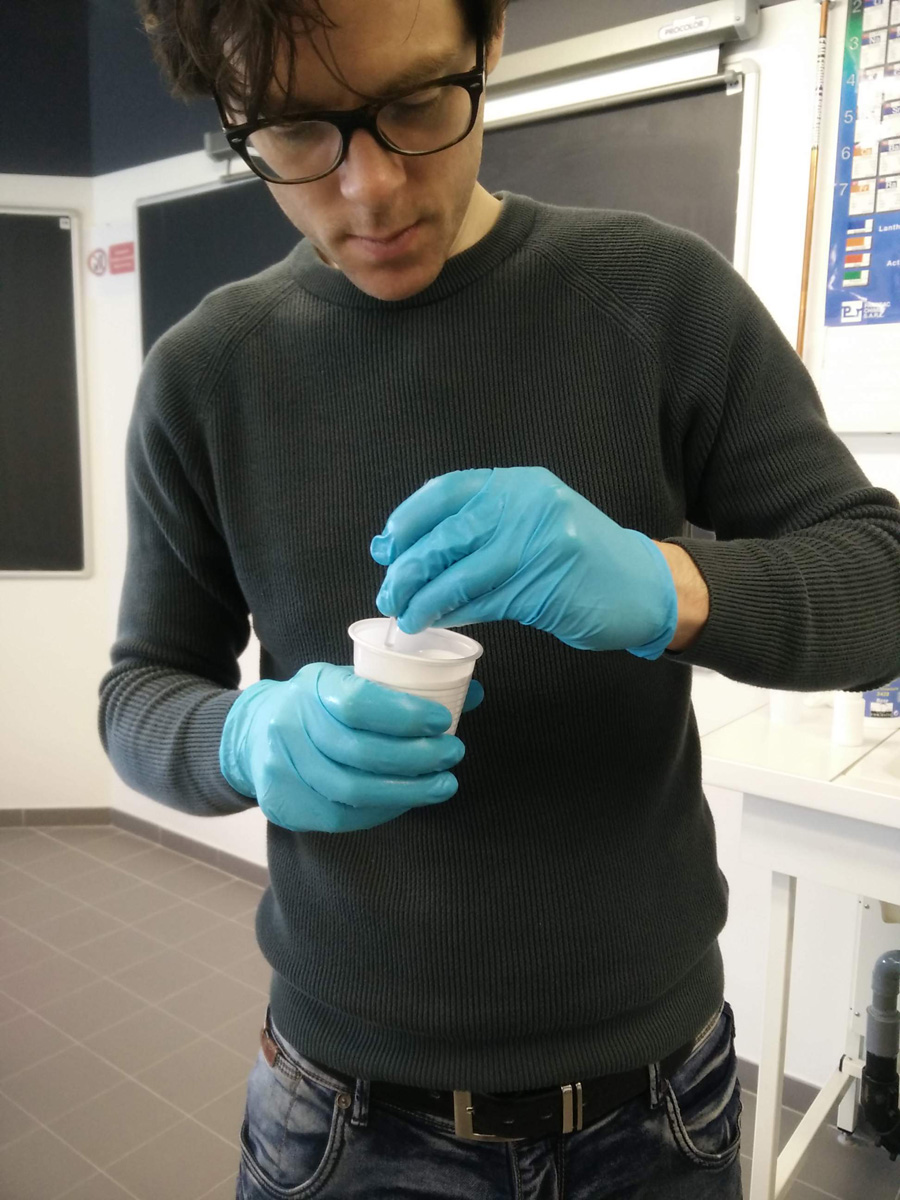
I then mixed this material for a period of 5-10minutes, making sure to stir both the base and wall of cup to avoid any clumping of material.

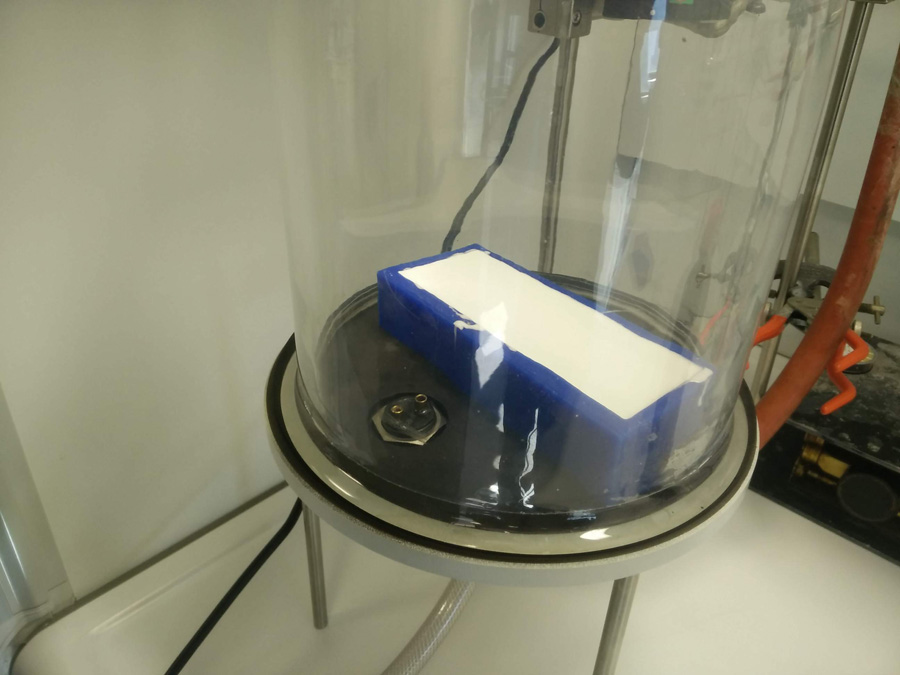
The next step was to use an air extraction chamber to remove any bubbles within the model. The mold fit on the base and I was careful to give access to both the pipe extracting air and also the release valve.
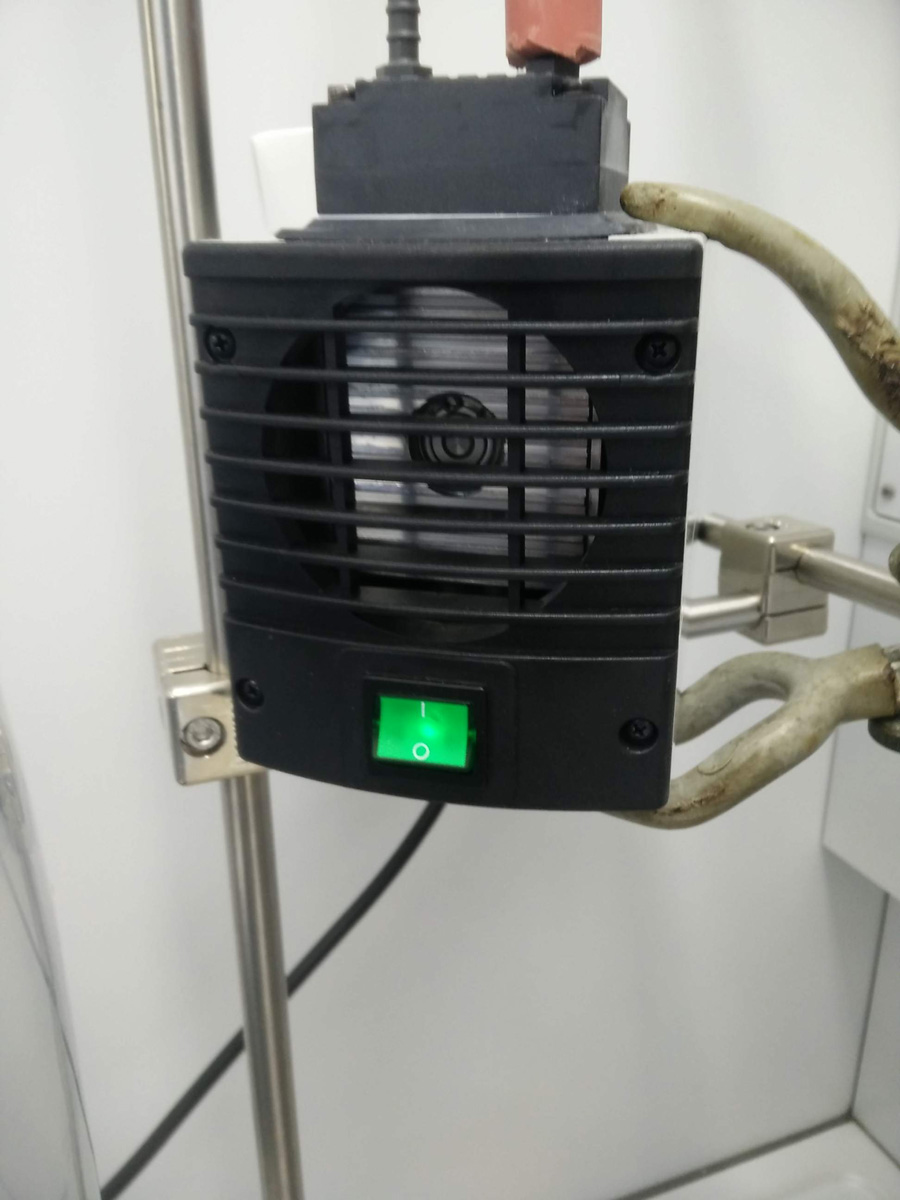
The extractor works with a small motor on a separate unit as seen above. I had to run the extractor several times (4-5) to remove a significant amount of bubbles. After each run, I turned of the extractor and released the valve – If you don't, it is impossible to release becasue there is a vaccuum inside the bed.
Acrylic Resin Mold
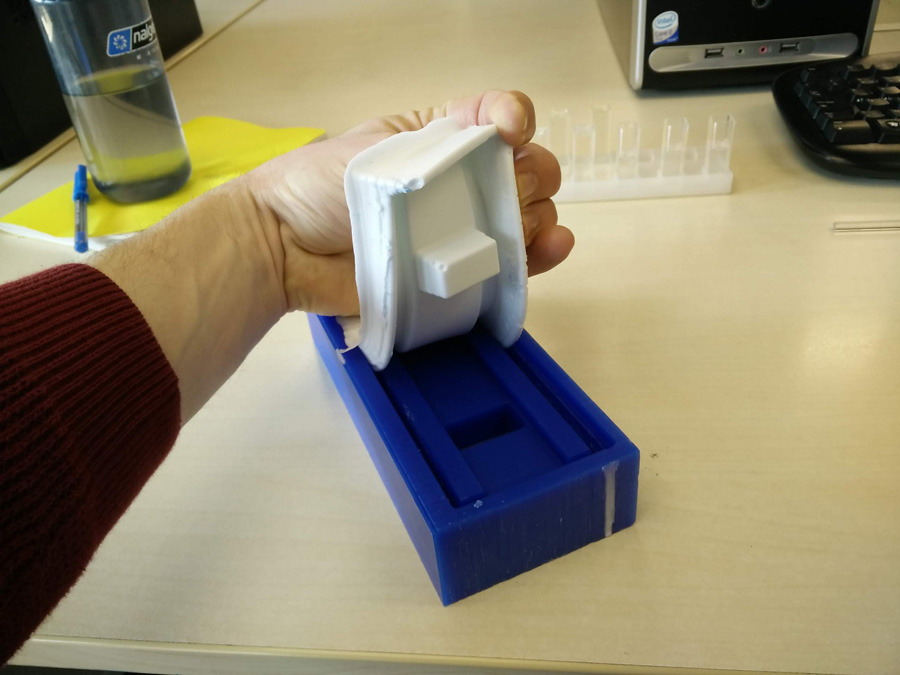
The silicone mold take approximately 24 hours to set. The silicone removed easily from the wax mold and is light and flexible. One error that occurred was only apparent at this stage: The CNC had failed to fully cut a gap on one side of the wax mold. It was only apparent when reviewing the silicone because the gap was quite tight. For the same reason, the toolbit was unable to travel in this tight gap, therefore hadn't cut. I therefore only poured the acrylic resin to this depth and the handle became thinner.
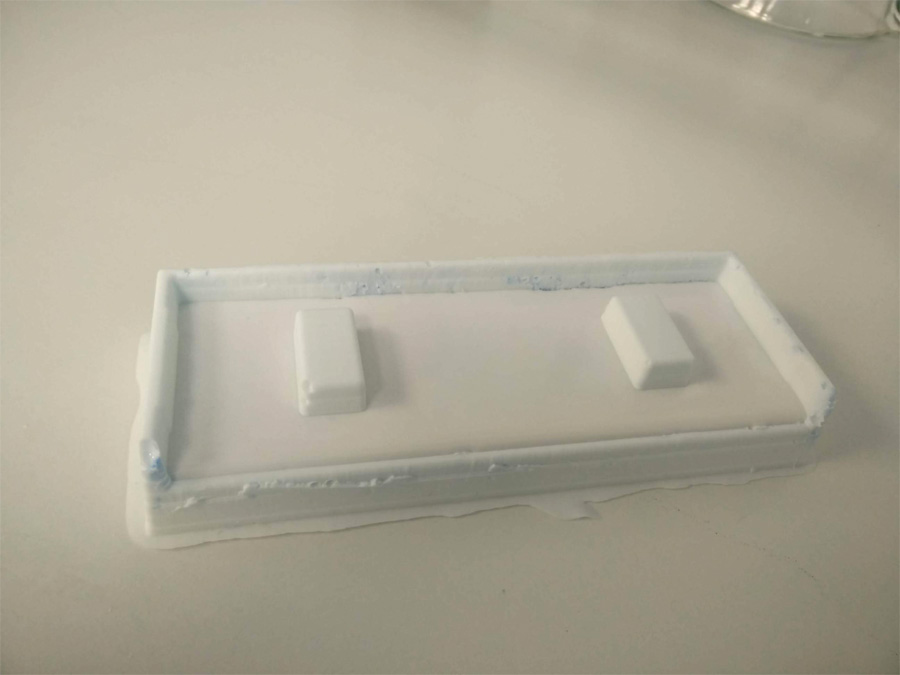
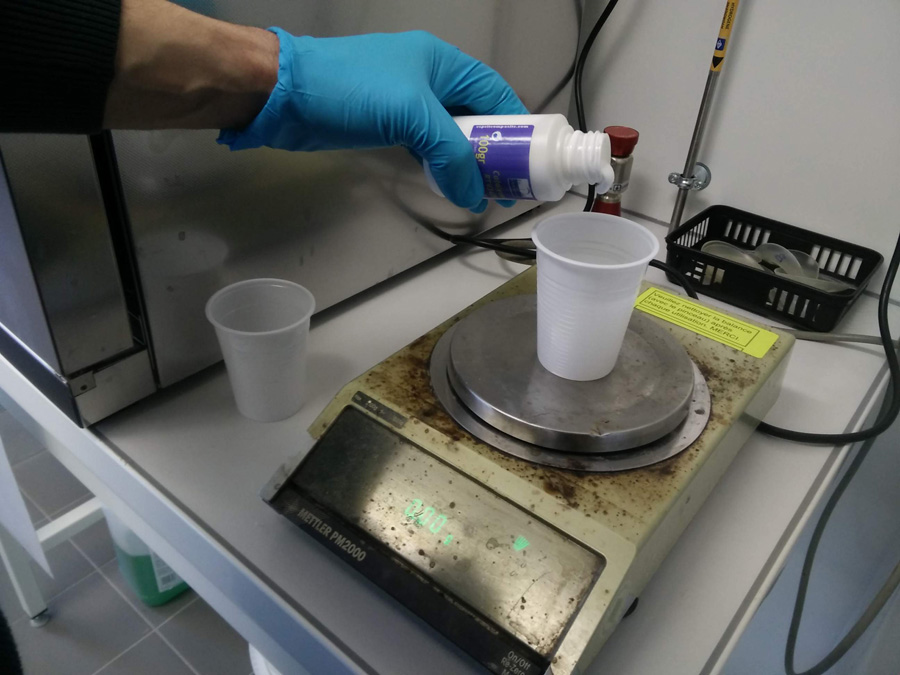
The acrylic resin was also prepared by mixing two parts in a small cup. Part A comes in powder form and is mixed 2:1 with Part B. The consistency of acrylic resin is more like liquid but requires a bit of stirring. Again, I used the weighing scales to measure the amount accurately, based on the amount of water needed to fill the mold. There is no issue with bubble on acrylic resin so I simply left it to set after pouring.
The end result is a good solid handle for my pannier.