TASK TO DO:
- review the safety data sheets for each of your molding and casting materials, then make and compare test casts with each of them
- Design a 3D mold around the stock and tooling that you'll be using, machine it, and use it to cast parts.
- Explained how I designed my 3D mold and created my rough and finish toolpaths for machining.
- Shown how I made my mold and cast the parts.
- Included my design files and 'hero shot' photos of the mold and the final object.
- POP (Plaster of paris)
- Oil(any type) and shampoo
- water and pot for mixing
- Diameter - The diameter of your tool in millimeters. If you are using a different size bit, make sure to change this value to match your bit diameter in millimeters.
- Overlap - How closely the toolpaths overlap each other.
- Speed - How fast the machine moves. This setting is under "Maker RML" Make sure to crank it up to 20. The default is 20 for both rough and finish cuts if using a STL.
- Top height - This setting tells the Modela where to begin milling your material. The default setting is: 0 for both rough and finish cuts Starting at zero will begin milling your model at the very top of the wax, where you zeroed the Z axis.
- Bottom height- This must be a negative value or you will get an error. STL: If you are using a .stl file - this setting should be the height of the model in millimeters.
- Cut depth - This setting determines how deep each individual cutting pass will be. You can make this smaller (for a finer cut) or bigger (for a rougher cut), depending on your model. The finer the cut, the longer it will take to mill the model.
- Path - This tells the Fab Modules which plane to use to create the toolpaths for milling. You only need to change this if you modeled a 3D object on a different plane.
Group Work -
Individual Work -
WHAT I HAVE DONE:
MOLDING -
It is the process of manufacturing by shaping liquid or pliable raw material using a rigid frame called a mold or matrix.
CASTING -
Casting is a manufacturing process in which a liquid material is usually poured into a mold, which contains a hollow cavity of the desired shape, and then allowed to solidify.
Process:- make mold -> negative mold -> positive mold -> casting
Group Work -
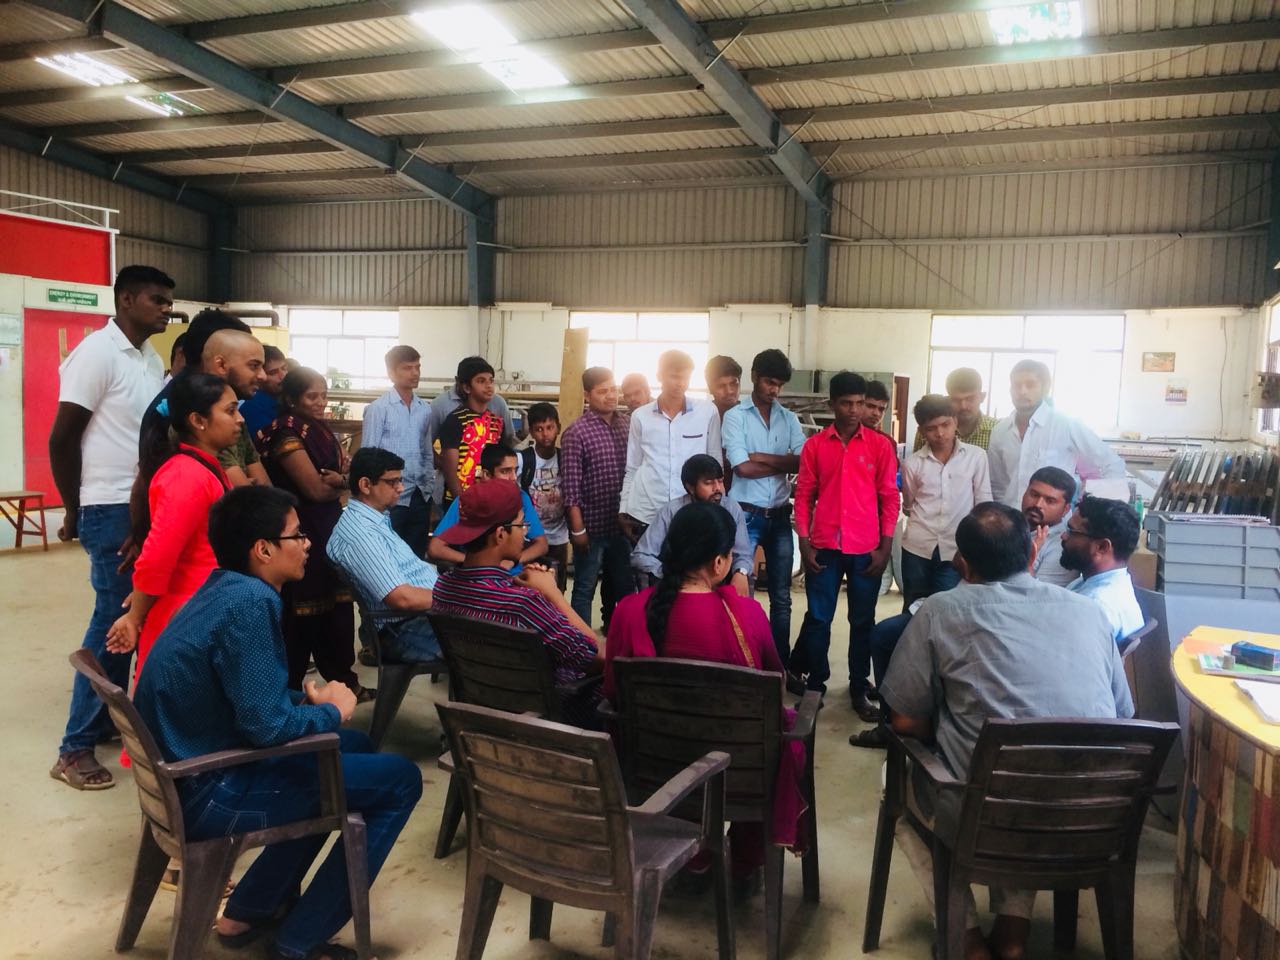
When we think about molding and casting there are many ways or things to do in this assignment. For this assignment, we gathered two times and spent two days for group work.
POP(Plaster of paris)-Whole vigyan ashram celebrated "ART DAY" on 18th feb. for remembering Meera Kalbag(AMMA). We spent our whole day with different artist like fabric and stone painter, sculpture artist, painter,etc.
We (FABIANS) try to understand and learn the molding and casting by using POP.
The artist Mr. .... is a great and famous artist in Pune. We are total 15 people for this work. We decided to do mold in POP and also cast in POP.
For this, we selected one lady with big hand...
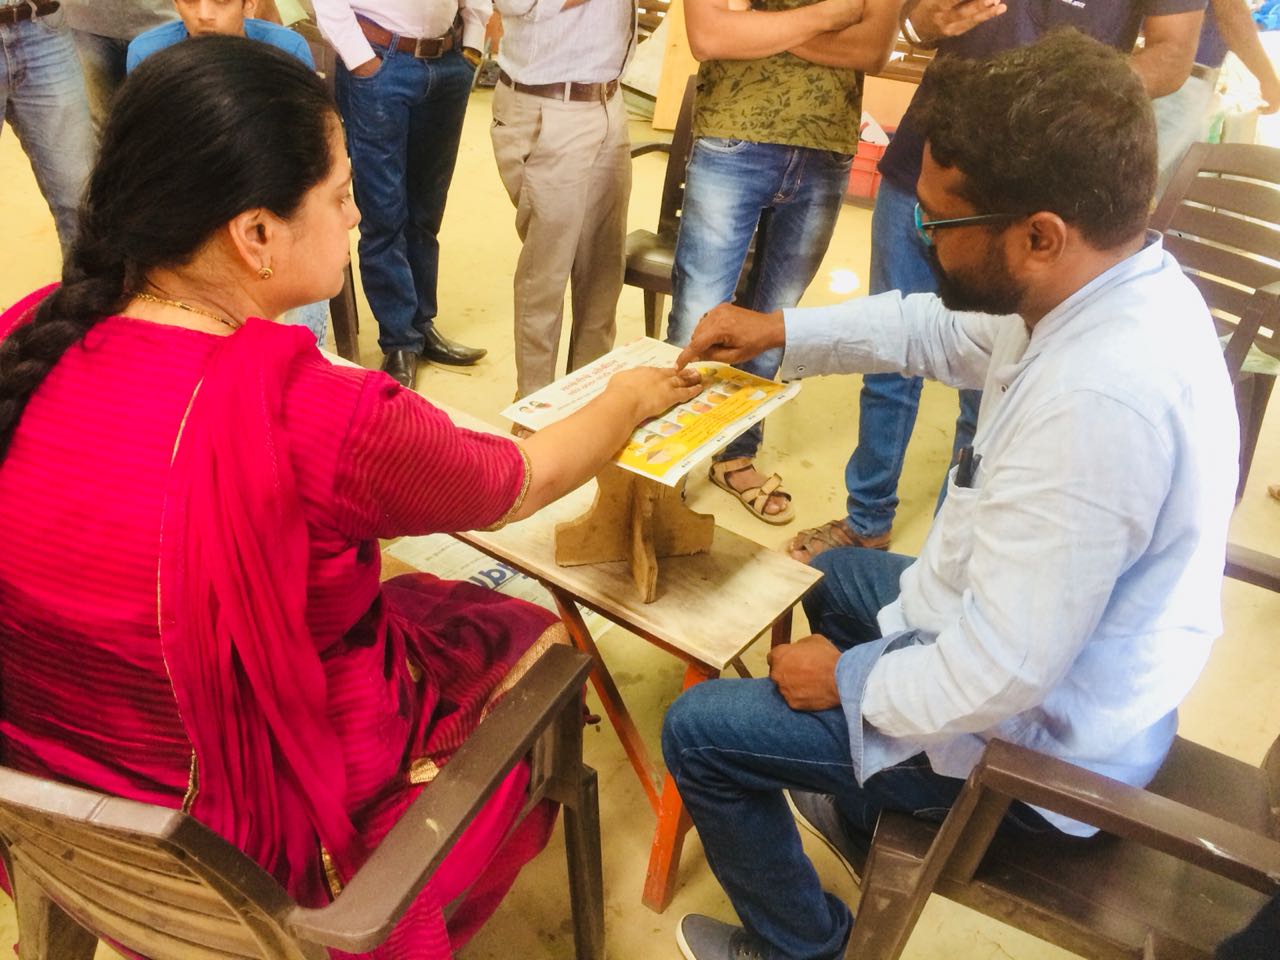
Materials needed-
Here we started.. First we mix the oil and shampoo in 1:2 proportion. Then We have to take POP as per our requirement. We took around 150g for the first layer. After this add water as you want. Just check the first layer will be make thick and also make sure it will set properly on hand. Before going for setting the POP, apply the oil and shampoo mixture well on the hand.
After first layer, we are going for making second layer. Make second layer more runny than first layer. When first layer becomes little dry then apply the second layer.

Then wait until it gets dry. Check the dryness of the layer and if you feel dry then turn your hand upside down.
Again apply the mixture on the hand as well as on the nearby (dry POP). Then again do the same procedure i.e first and second layer.
Wait until it gets dry. After half an hour we can get two different mold. Then we have to join or bind them with the help of string and add the POP mixture into it.
It looks like this.....
Then after 6hrs. the mold looks like this.....
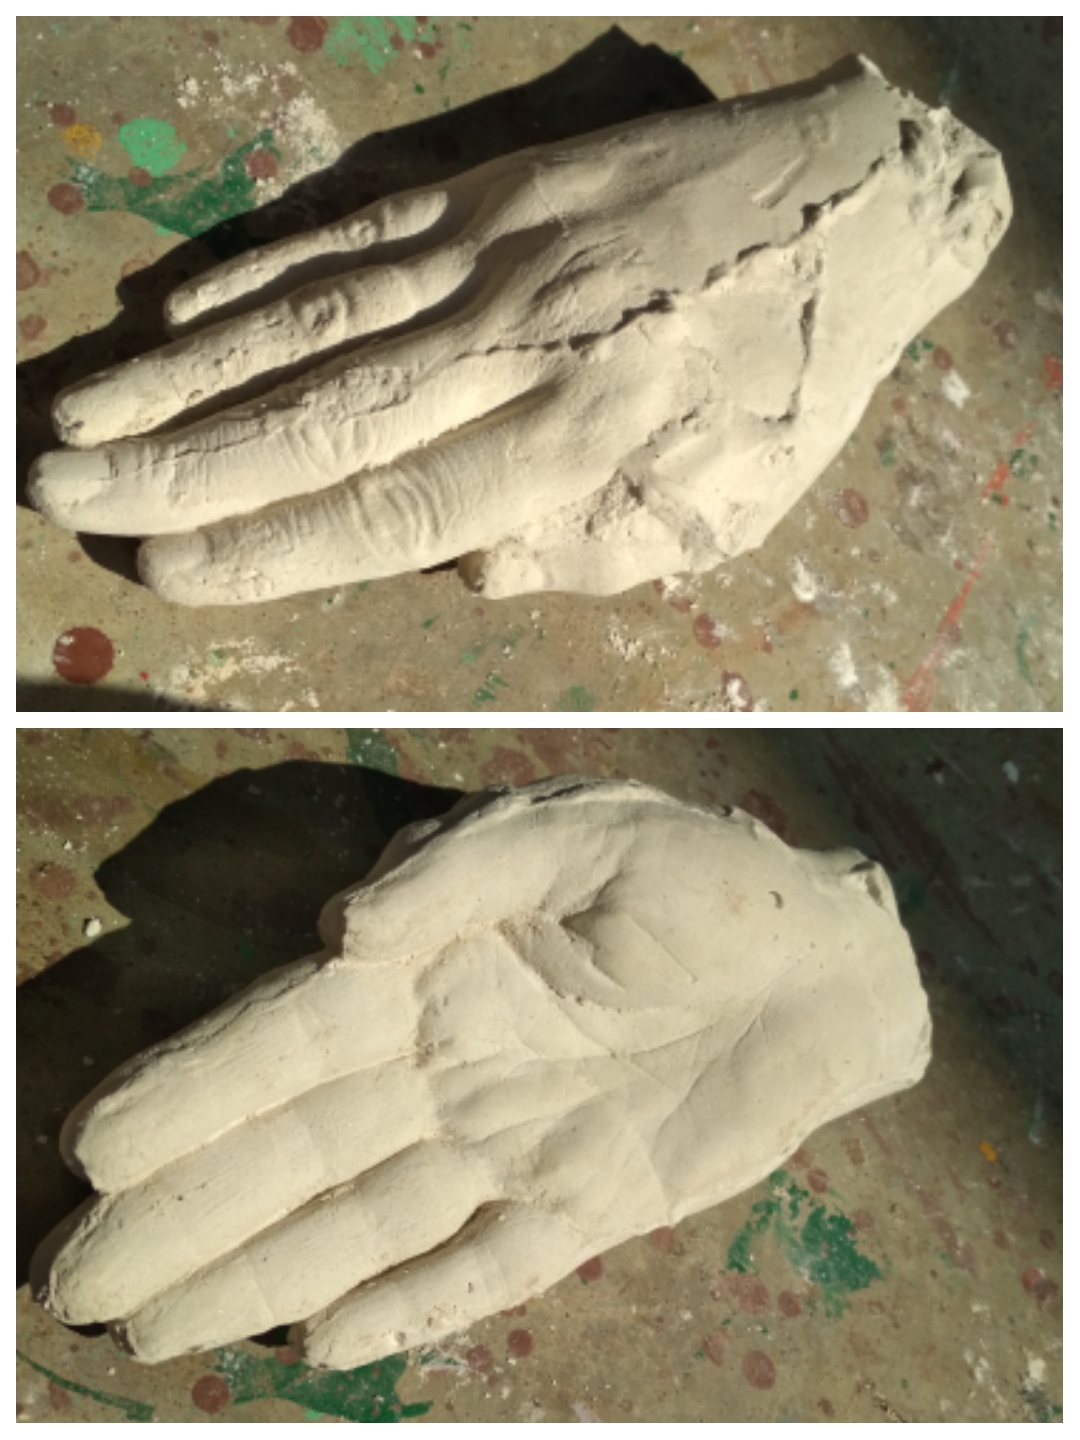
Ohhh...finally we did our first molding part successfully!!
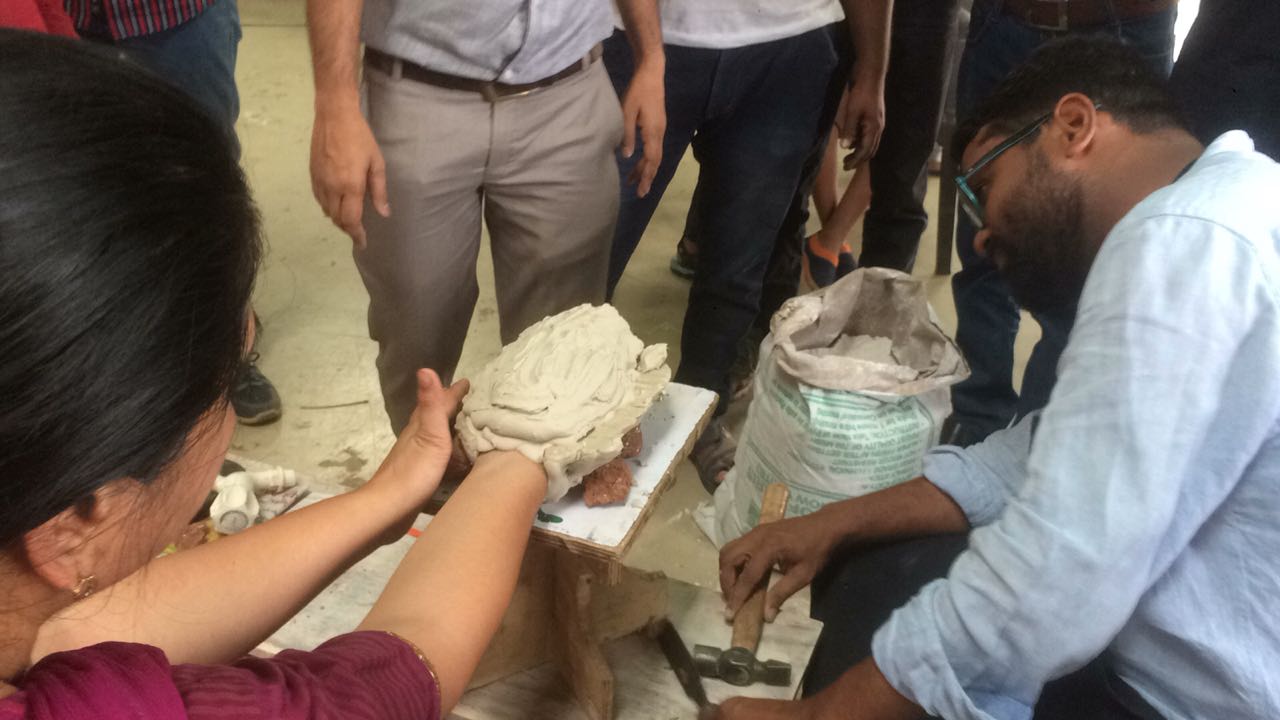
We also had visited to one school in pune, where they taught about molding and casting. We spent our whole day in the Gurukul to learn about aluminum casting. Nice introduction given to us by school's professor.
Actually they are working on traditional method. So, they are using sand like this...
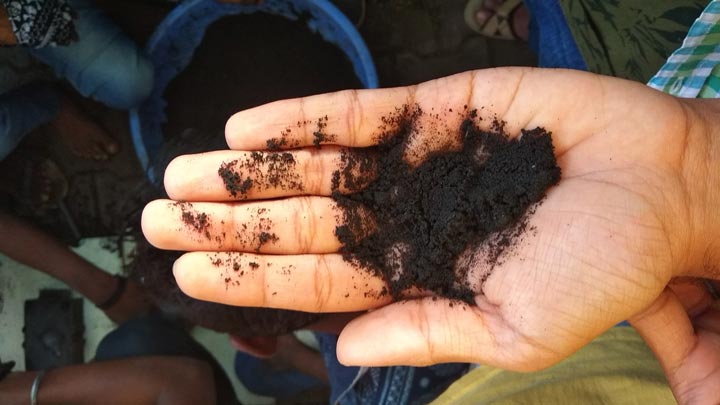
They bought this sand from waste casting industries in Chakan (Industrial hub).
Our colleague Arefin did some work with the school students.
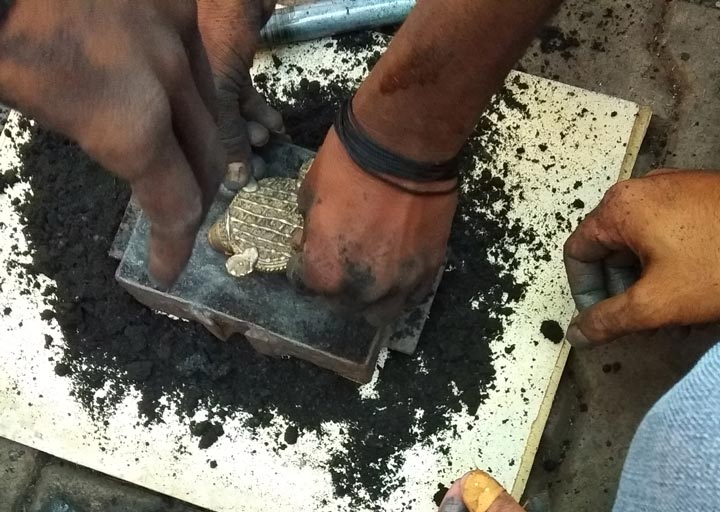
Firstly they mix the sand properly and took a flat surface for the base. Then we keep the first pattern on the surface.
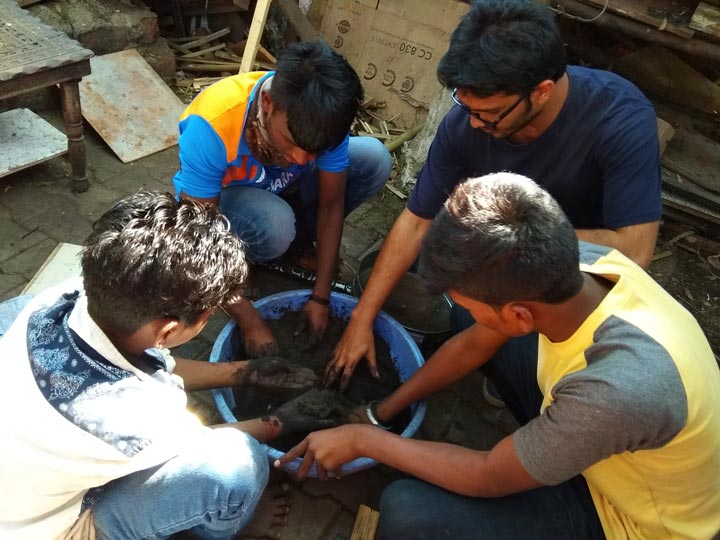
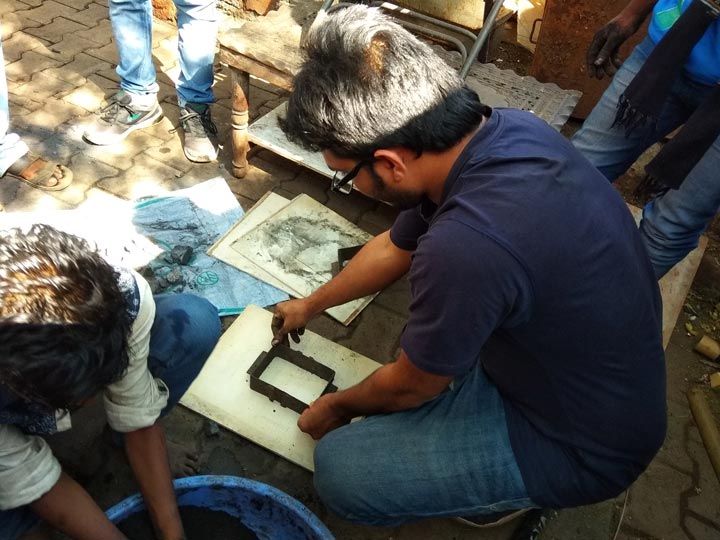
Then put the sand in the pattern and try to apply the pressure while packing it so there is no air gap.
Then we take the object i.e turtle and apply the silica powder on it so that it doesn't stick to the sand. After this press the turtle on the sand.
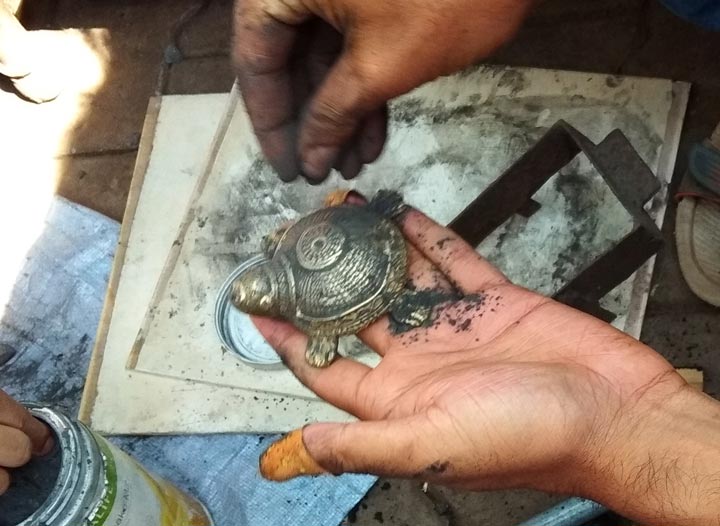
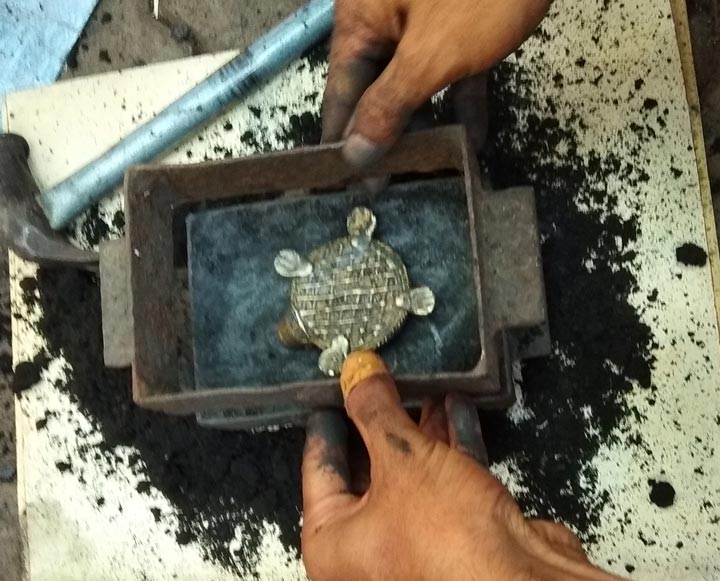
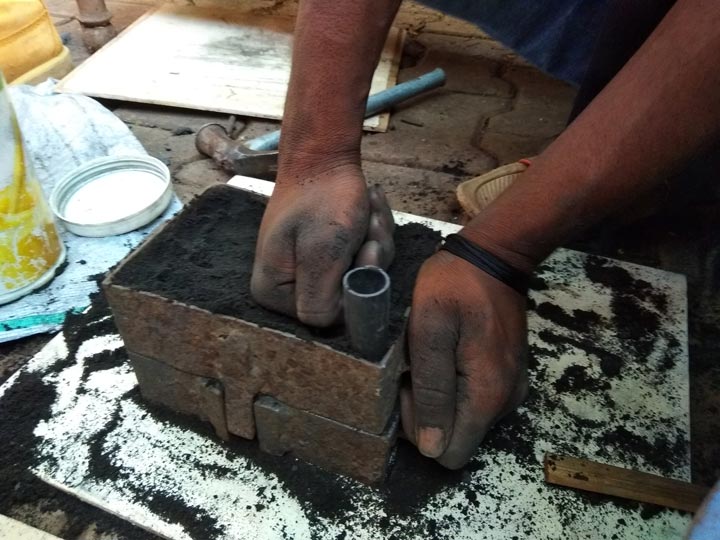
Then put the second pattern and make one hole for relief. Here we use pipe for hole. Then pack the remaining sand.
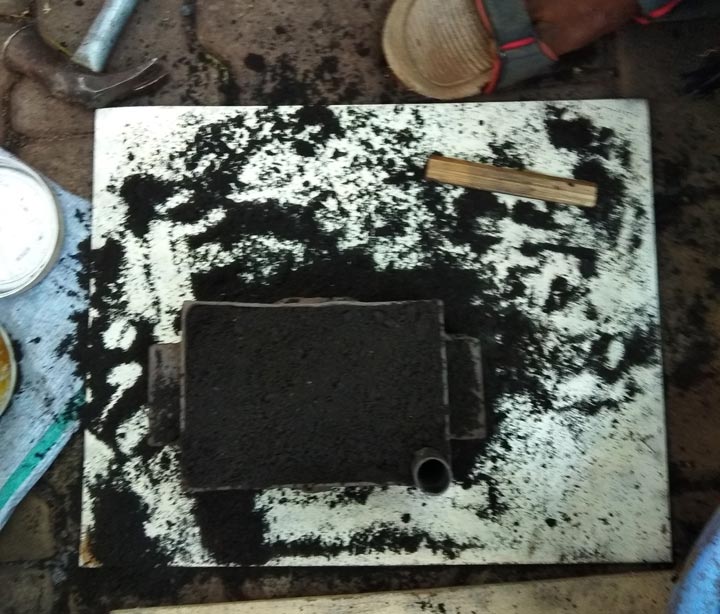
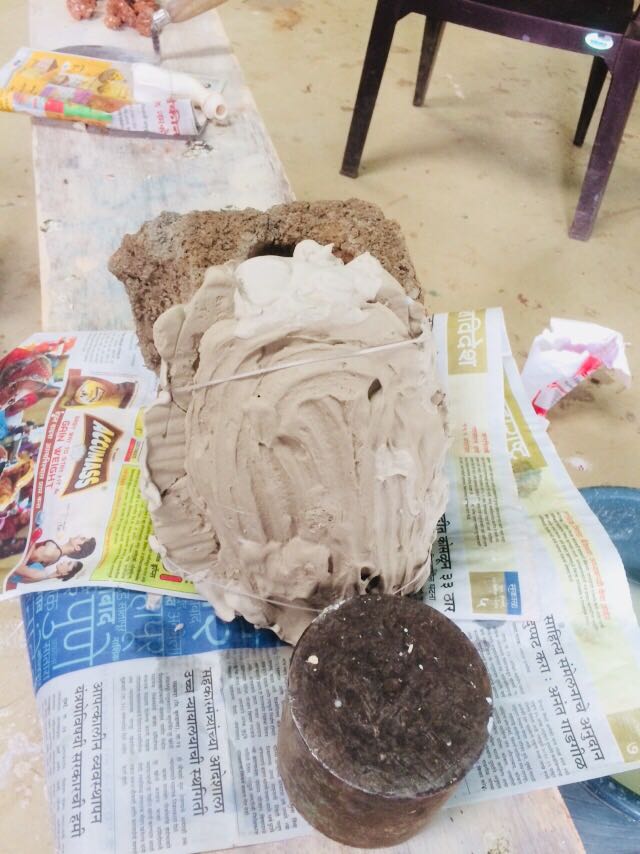
Then separate the two parts and remove the turtle and again align the parts for casting.
We keep the aluminum in the furnace for molten. Then pour the molten aluminum through hole and set it for cooling.
We couldn't see the output as we couldn't wait for the idol to cool as we had to return back to Pabal the same day.
For this assignment we started by discussing possibilities for molding and casting in Vigyan ashram. We list out the available material. Then we took one of each and decided to discuss the properties of them. We used weighing machine to weigh the right quantity which is very essential I believe when you make molds.
Materials:-
1. Machining Wax
2. Silicon Rubber
3. Instamold
4. Flexwax
5. Epoxy
6. POP
7. Hydro-stone
8. Rubber Solution
9. Soldering rod
HYDRO-STONE gypsum cement:-
Hydro-stone is one of the hardest and strongest gypsum-cement. We are using for casting which produces extremely hard surface.
The important thing, always add powder to the water, never the reverse. (Sprinkle the powder into water slowly and evenly.) Mix with a 1750rpm drill and mixing blade. Pouring should be smooth and steady into the center of the base of the mold.
DRYING- All casts should be dried as quickly as is safely.
We read the instruction on the box which explained how much quantity and time required for the material.
Specification:
1. Product : Hobby plaster - general use (for 100g powder, use 65g water)
2. Product : Molding Plaster (for 100g powder, use 70g water)
INSTAMOLD -
InstaMold is perfect for making a quick and 3D objects. InstaMold is a temporary mold making compound and is simply activated with water. This wonderful material is perfectly safe to make a body cast with and will make a replica which includes the finest of detail. InstaMold does not stick to the original object and once you have your temporary mold you can then make a number of permanent castings using other materials such as ArtPlaster, Permastone, resin, or wax.
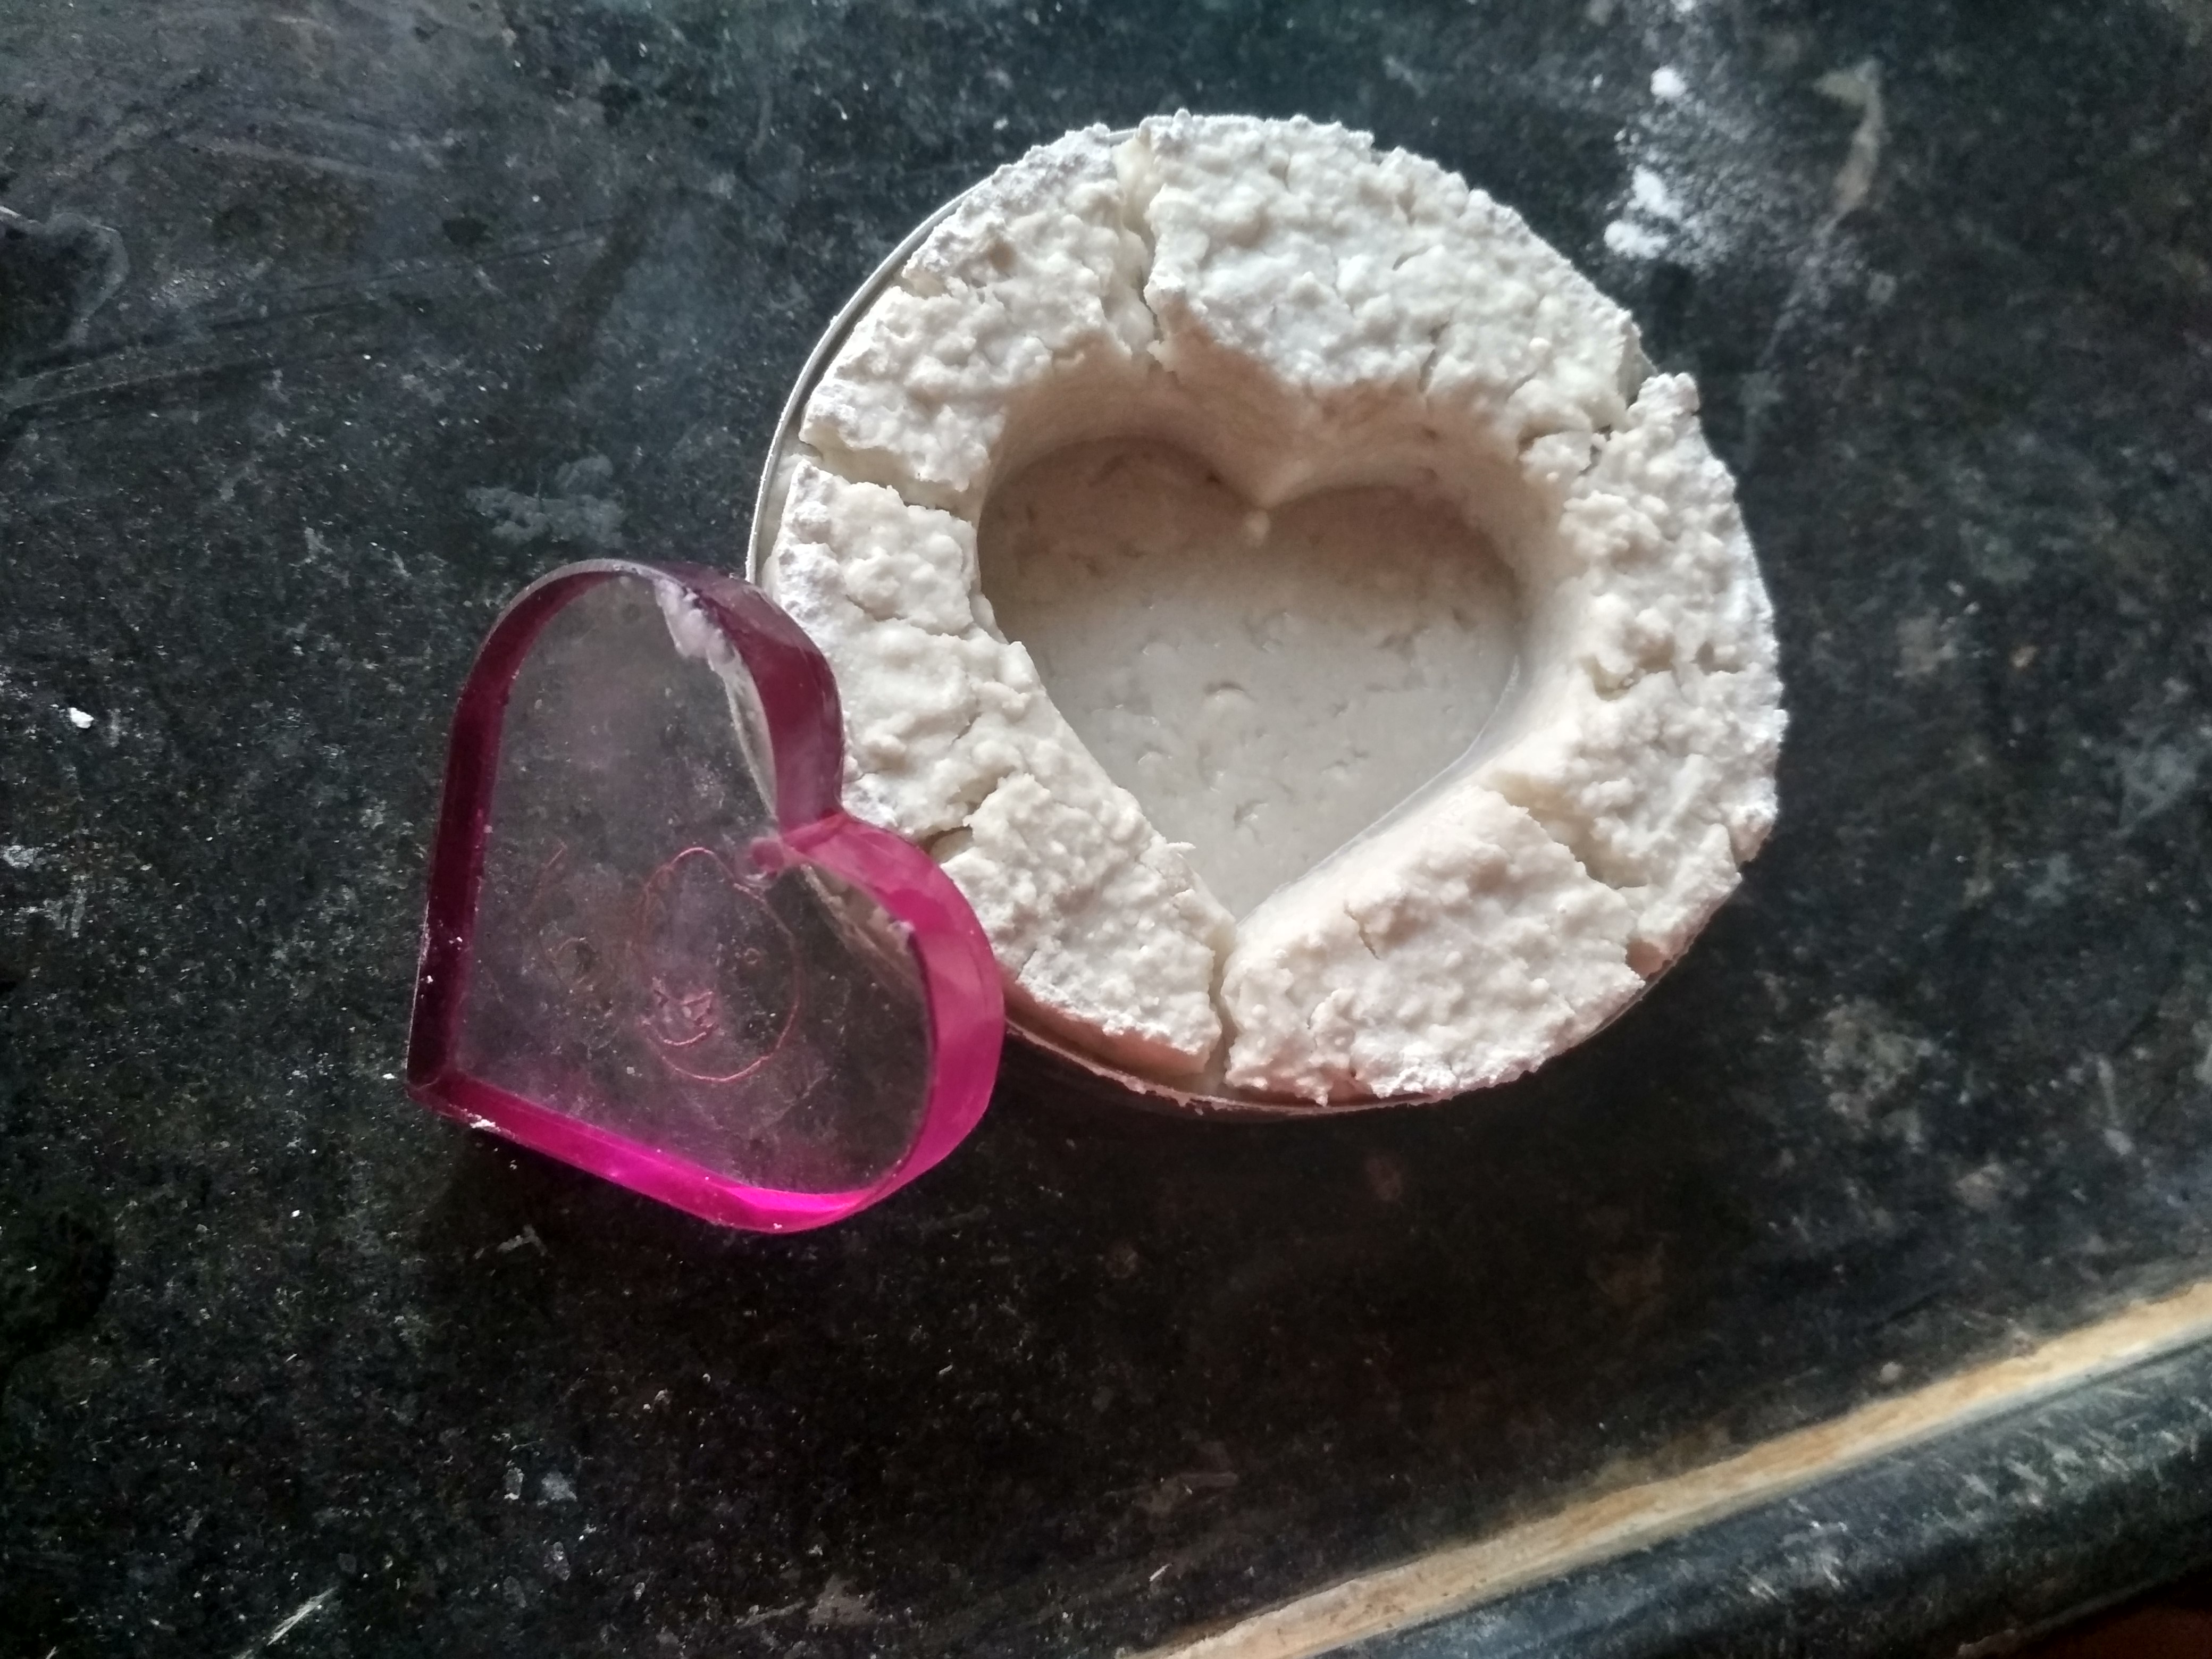
Our lab had 2-3 molds so I used those just for testing purpose. As instructions given, I tried 1:3 where 1 is Instamold and 3 is Water. I just mix the powder and water. Then I took one laser cut heart shaped part and press on the mixture for making mold of it. But the result was not at all as mentioned or expected.
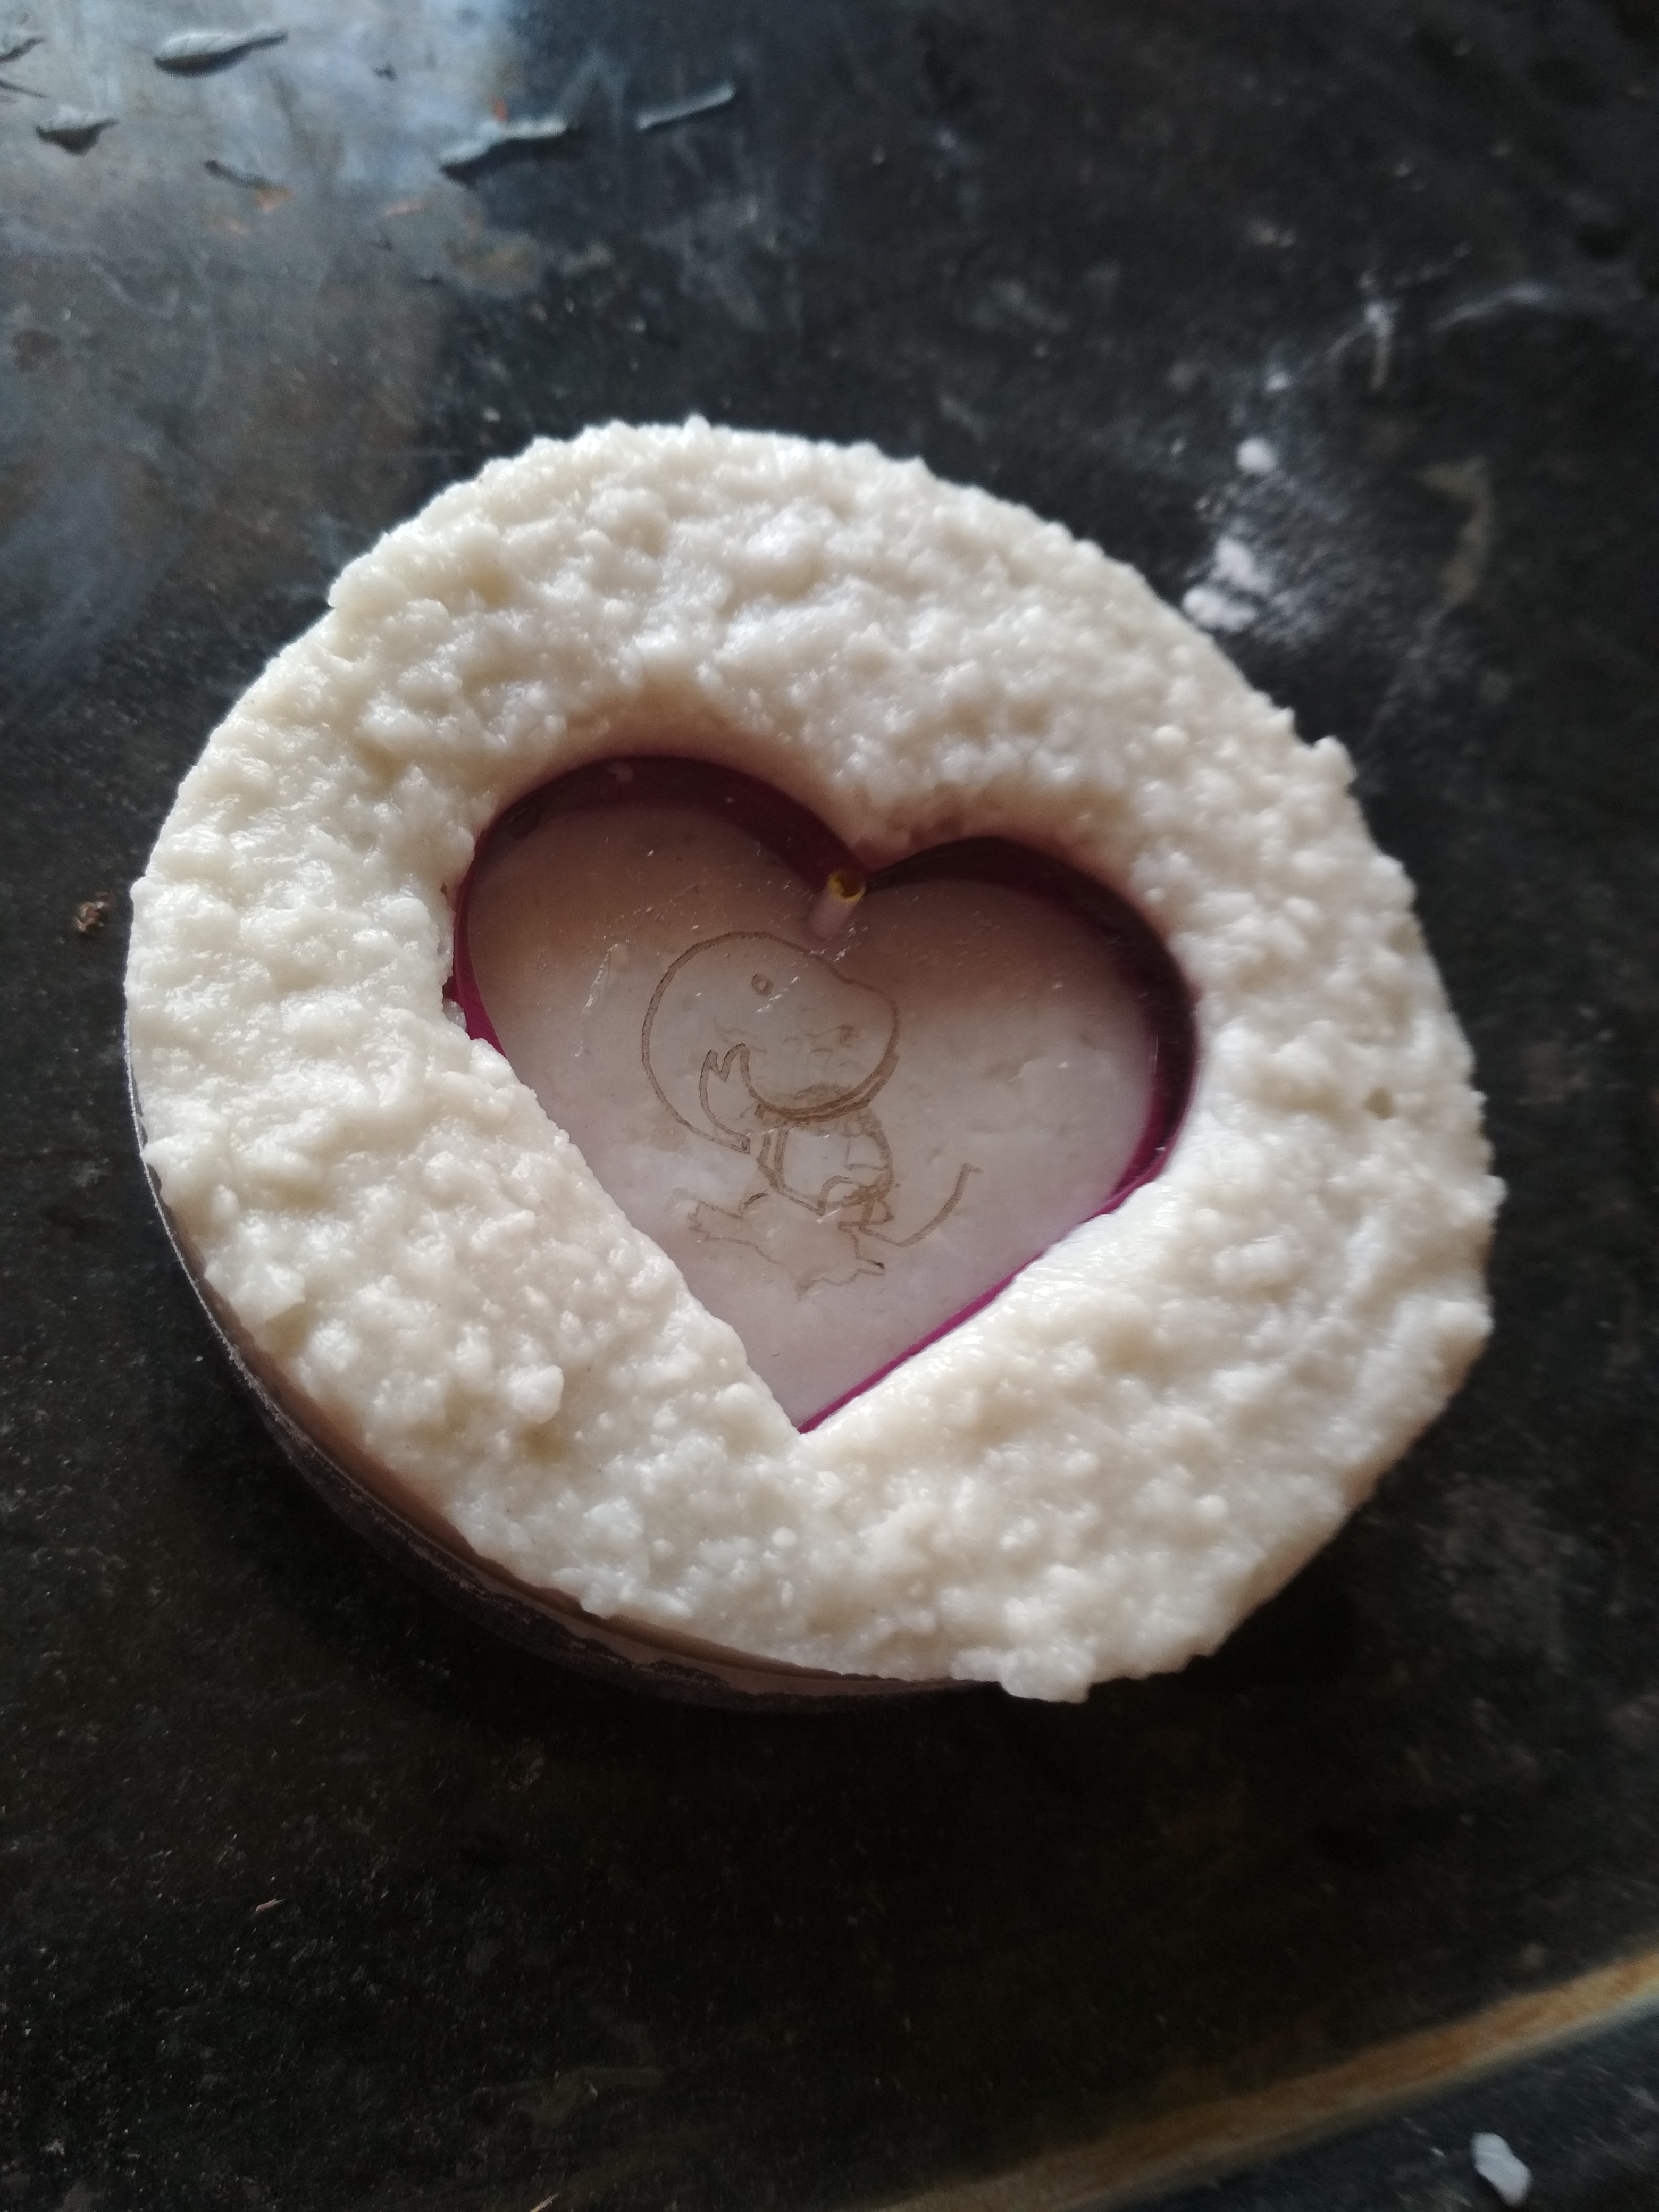
After checking, I realised that the material has expired long back. The usage of such material should be within 6 months of manufacturing. But I decided to try for 1:4, 1:5 ratio by using same process and It wasn't that bad for molds.
So, this is final mold and I cast wax in this mold and made candle.

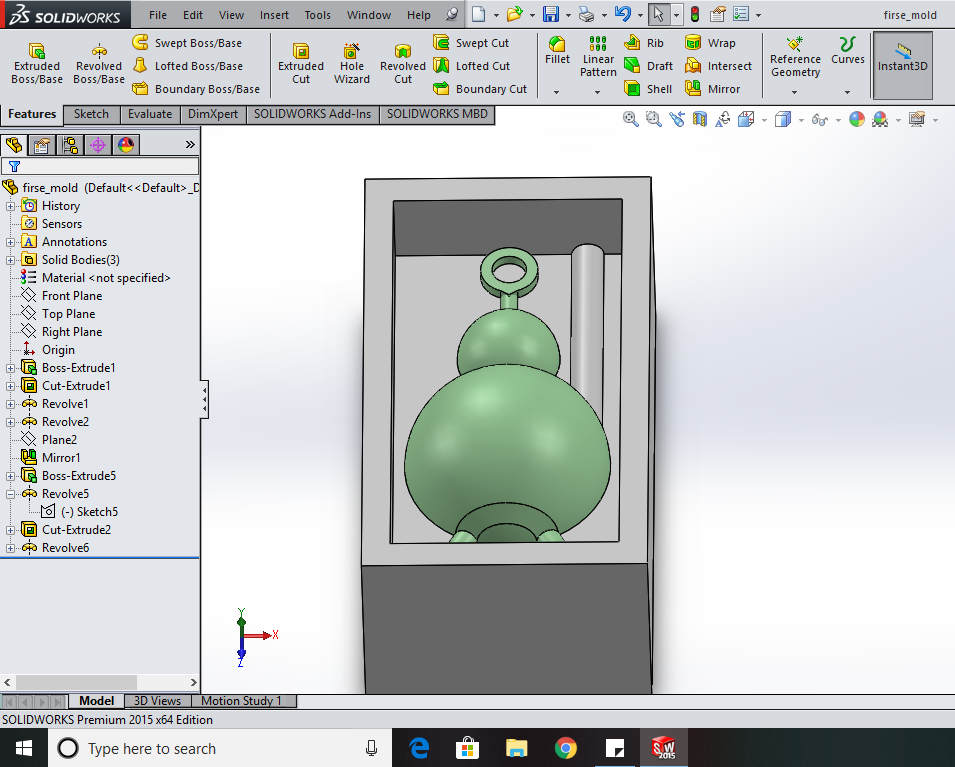
Designing, Machining -
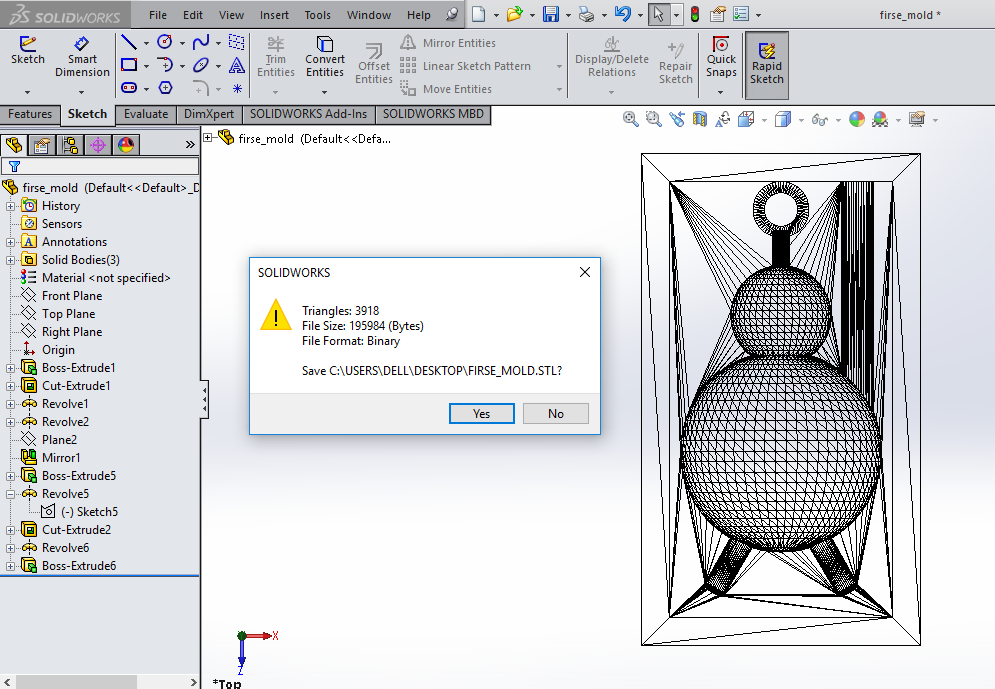
I decided to do simple shapes for candles which will be casted in wax. The first mold made out of the wax will be the positive shape of the job. I gave 5mm thickness to the edges and 10mm depth. I made design in solidworks. I save the file in binary .stl form will be used by the modella to carve out the shape in a machinable wax.
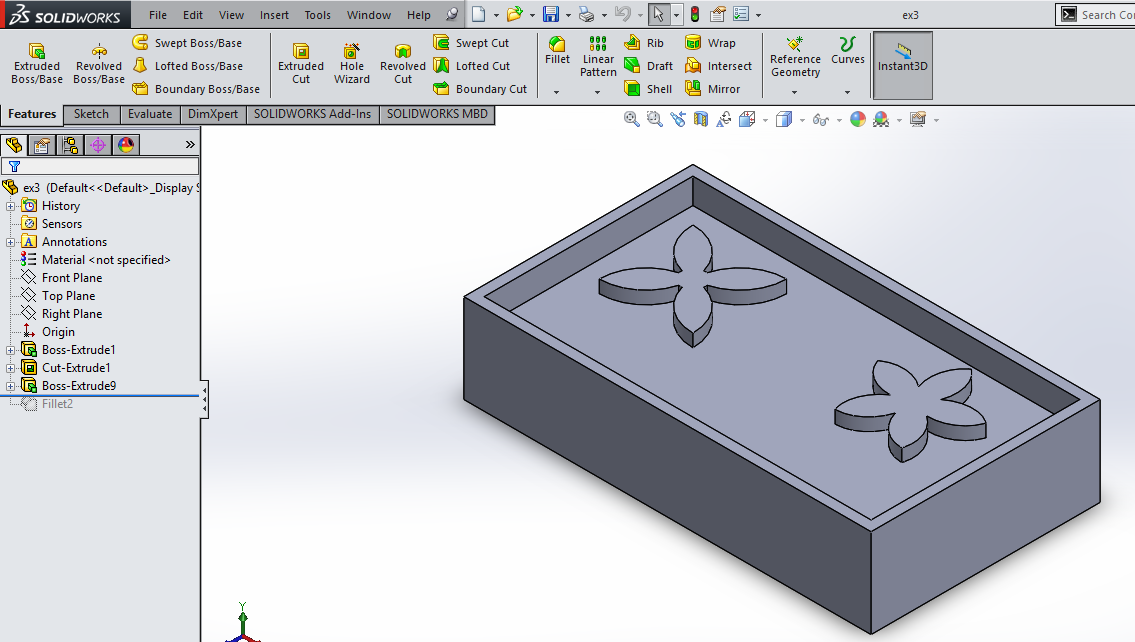
Note - If you want to create a one part mold - design a 3D file with a flat back side. The flat back side can rest on the ground in the final cast.
You can download the solidworks file from here and .stl file from here.
I moved to the modella machine, We are using the offline version of mods as there are frequent network problems at Vigyan Ashram.
Steps -
1. I Open Fab Modules (from terminal > type 'fab') Select STL to Roland Modela stl to roland.
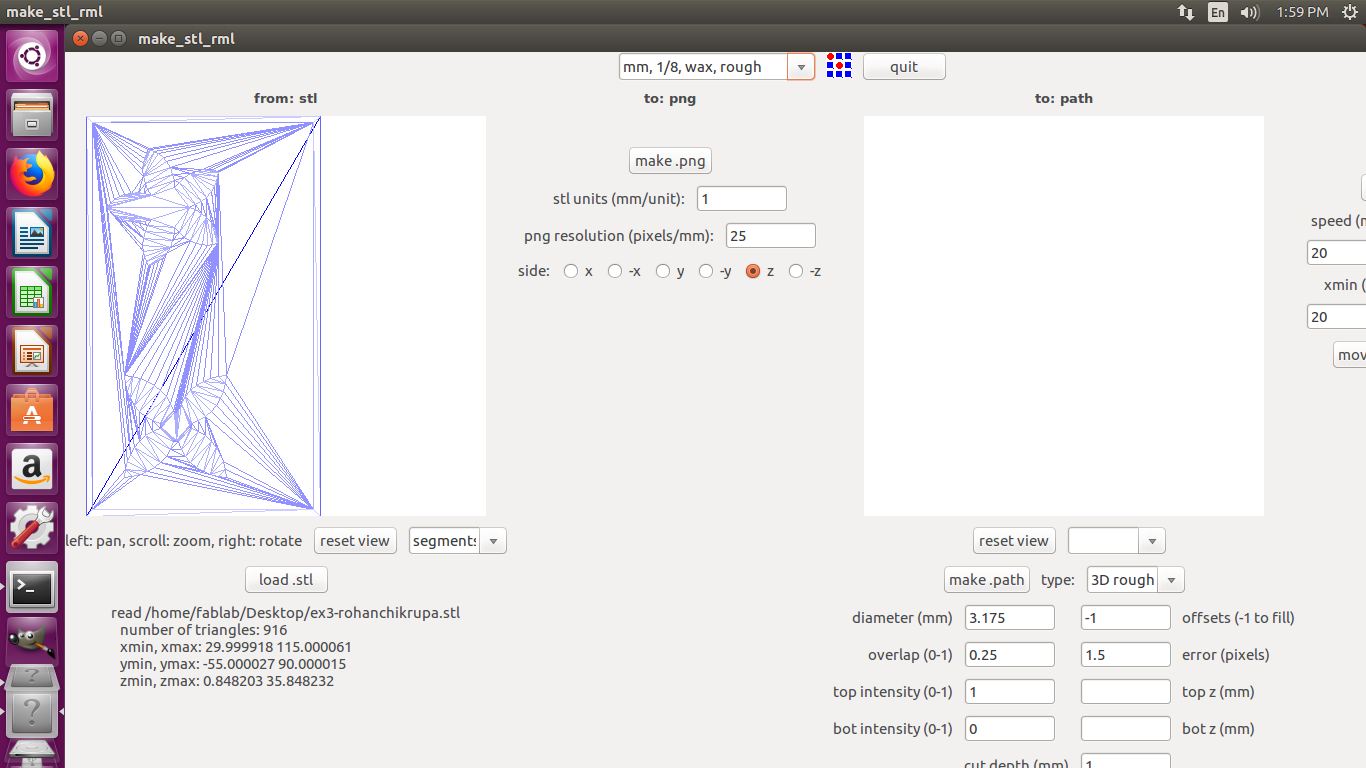
2. A new window opened. I Selected 'Load STL' stl to modella.
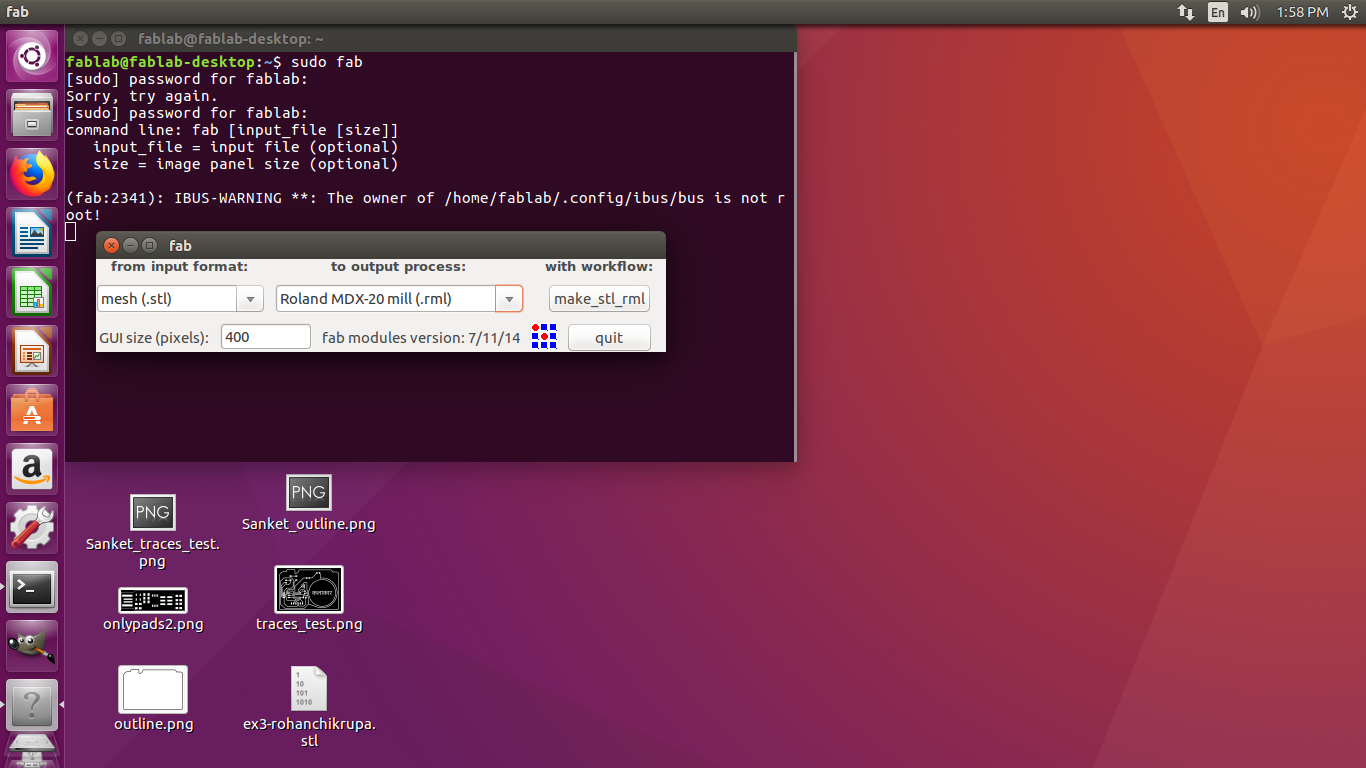
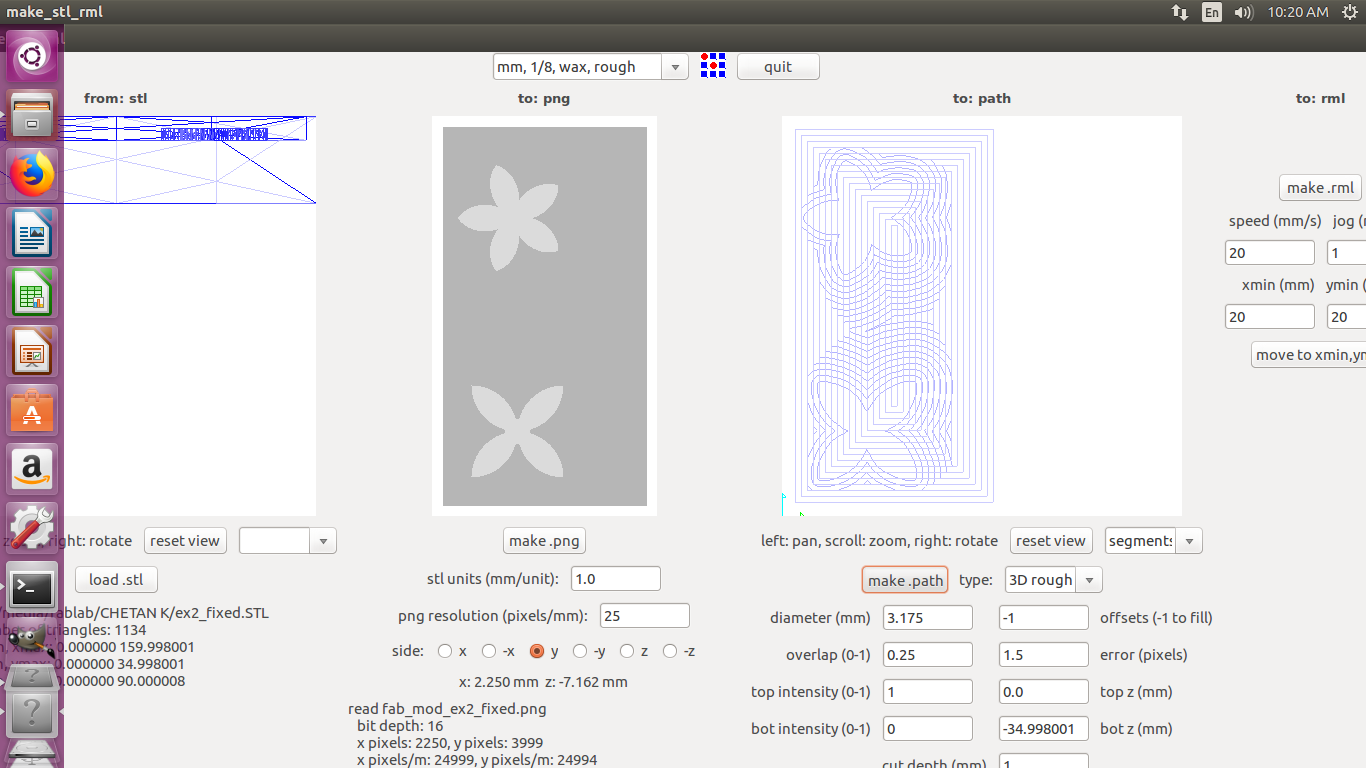
3. Then click "make png". A PNG representation of my STL will appear but my model is not showing up, try changing the "side" axis. My instructor told me to check the orientation.
My fab friend rohan help me to solve this problem. So we changed the orientation of object in 3D builder.
This is orientation of my object.
Orientation is important because PNG representation depends on how you set up your model.
4. First I selected 1/8" rough drill as a machining tool and then smooth drill. Before click on make path command, check the settings as per your object. (from tutorial)
For my object settings are:-
5. Before cutting we need to do "X" and "Y" origin to setup the start point in our piece of wax.
6. Set gravity or Manually zero out the Z axis until the endmill touch the wax smoothly.
7. Then click on make rml and start milling.

Rough cut finish:-
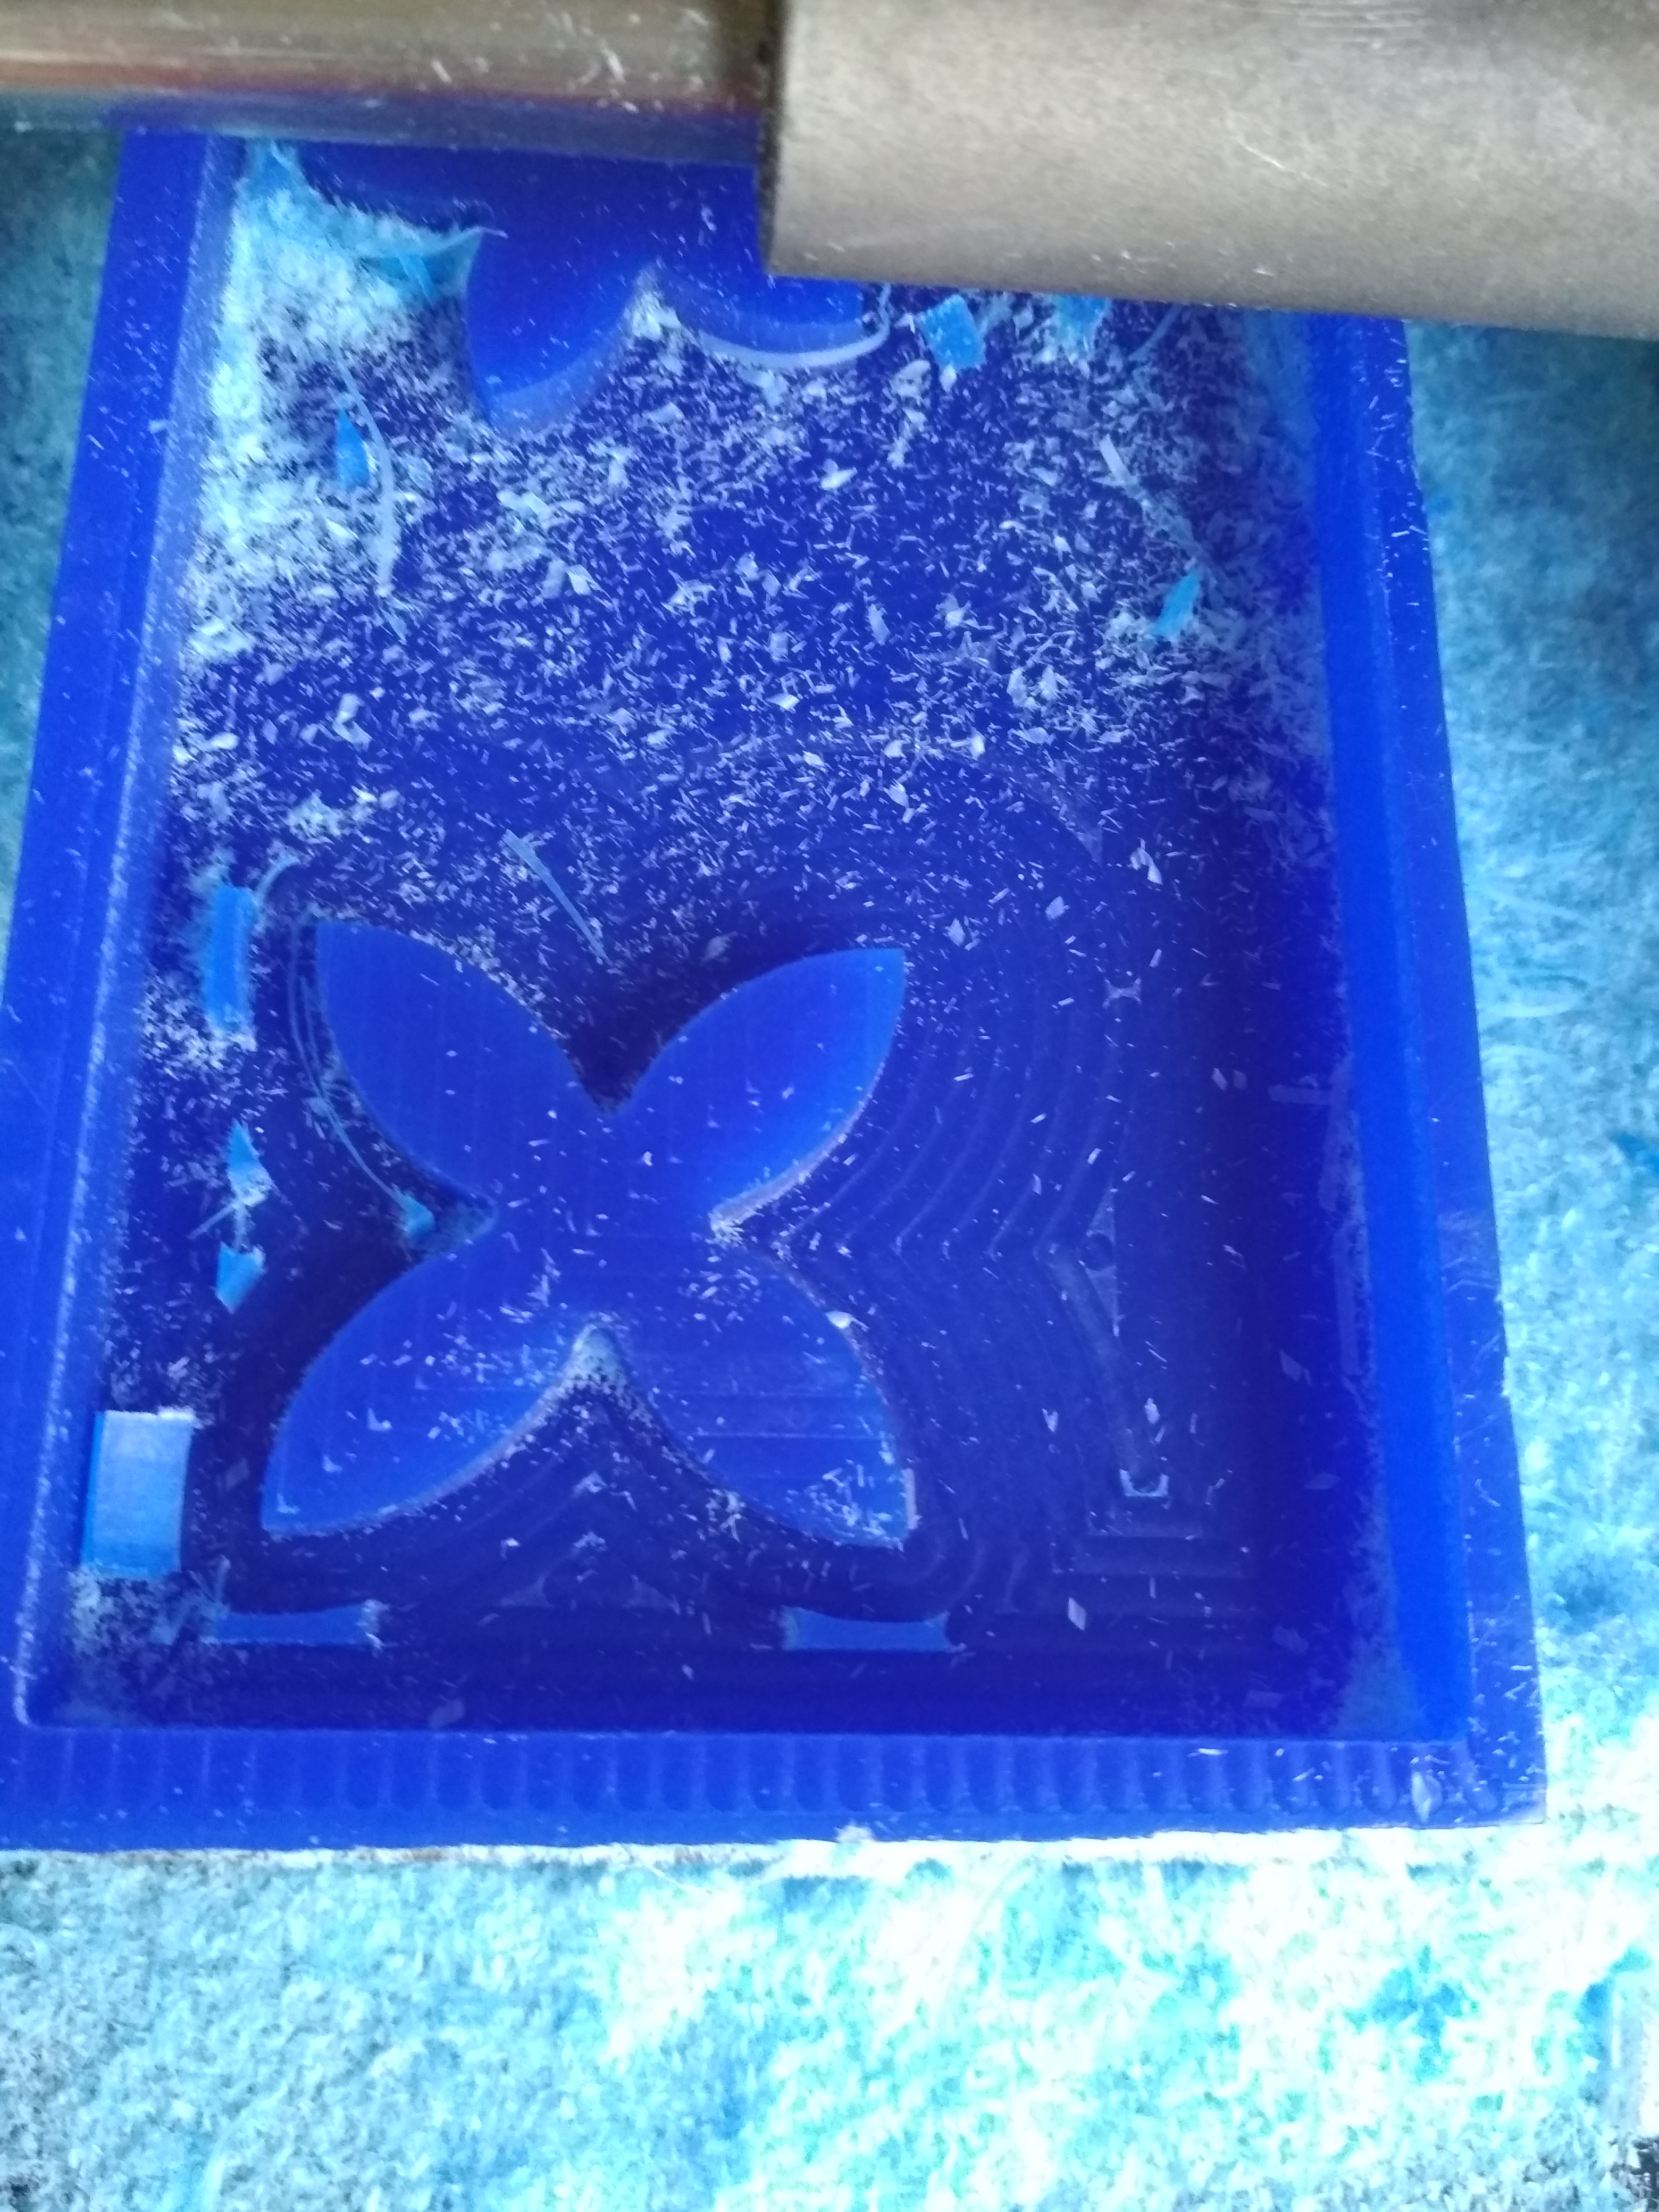
Finish cut is required.
I got the wax carved nicely.
CASTING
Silicon Rubber:
I am using silicon rubber which will be poured in this wax mold and this will form the negative.
Collect all required material because the solution will start to set fast, we cannot waste time in fetching things that we want, we need to have everything in place before we start.

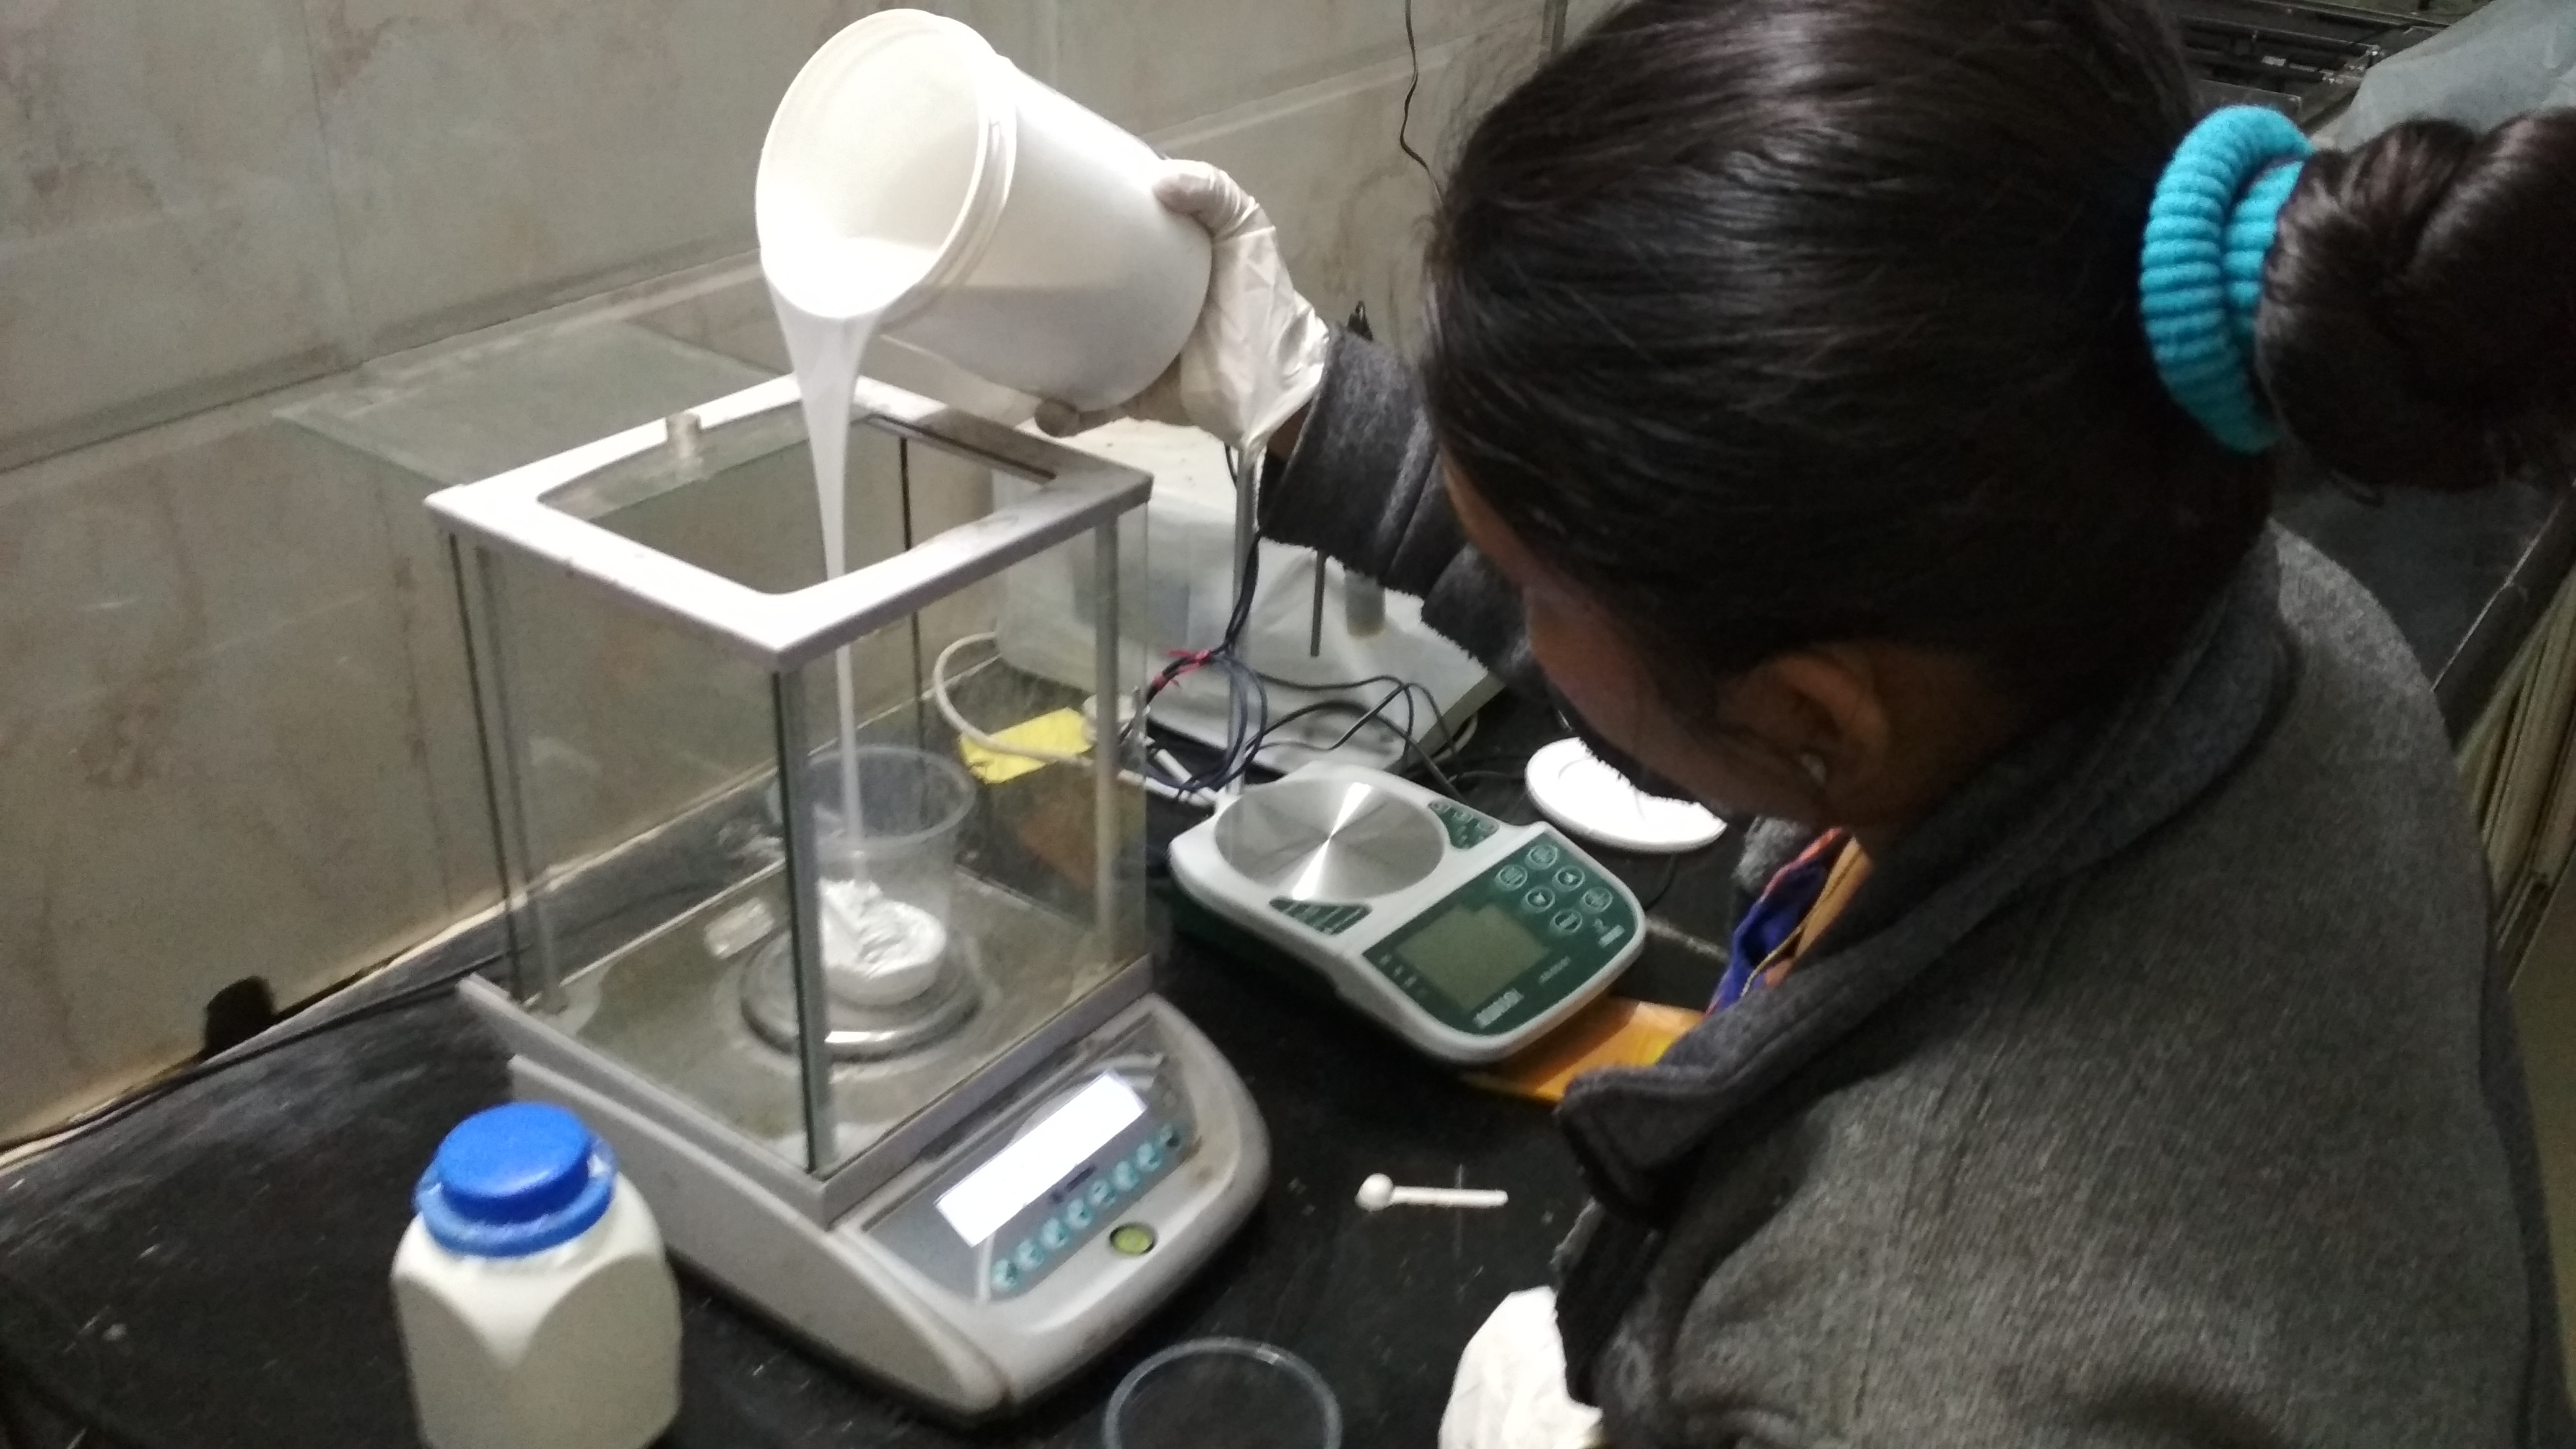
It consists of two parts, a rubber solution and another is the hardener. The mix proportion is 1:10. (for ex. 100g of silicon and 10g of hardener) but all in the terms of weight of both the items, but i had all the measurements in terms of the volume, so instead of calculating all things I poured water in the mold and then poured the same amount of silicon and measured the weight of it.
Then I mixed the hardener into the silicon rubber and stirr it well. I made solution and poured the silicon rubber solution in the mold, we need to be really quick at this step.
I tapped the mold with my hand so that the bubbles are not formed, but still there are some bubbles on the surface. I think it is okay because I just want the inside of the mold to be perfect.
Then leave it for some hours it's depend upon the silicon and hardener ratio. After 3 hrs my mold become hard and removed easily.
My mold looking like this :
Wax -
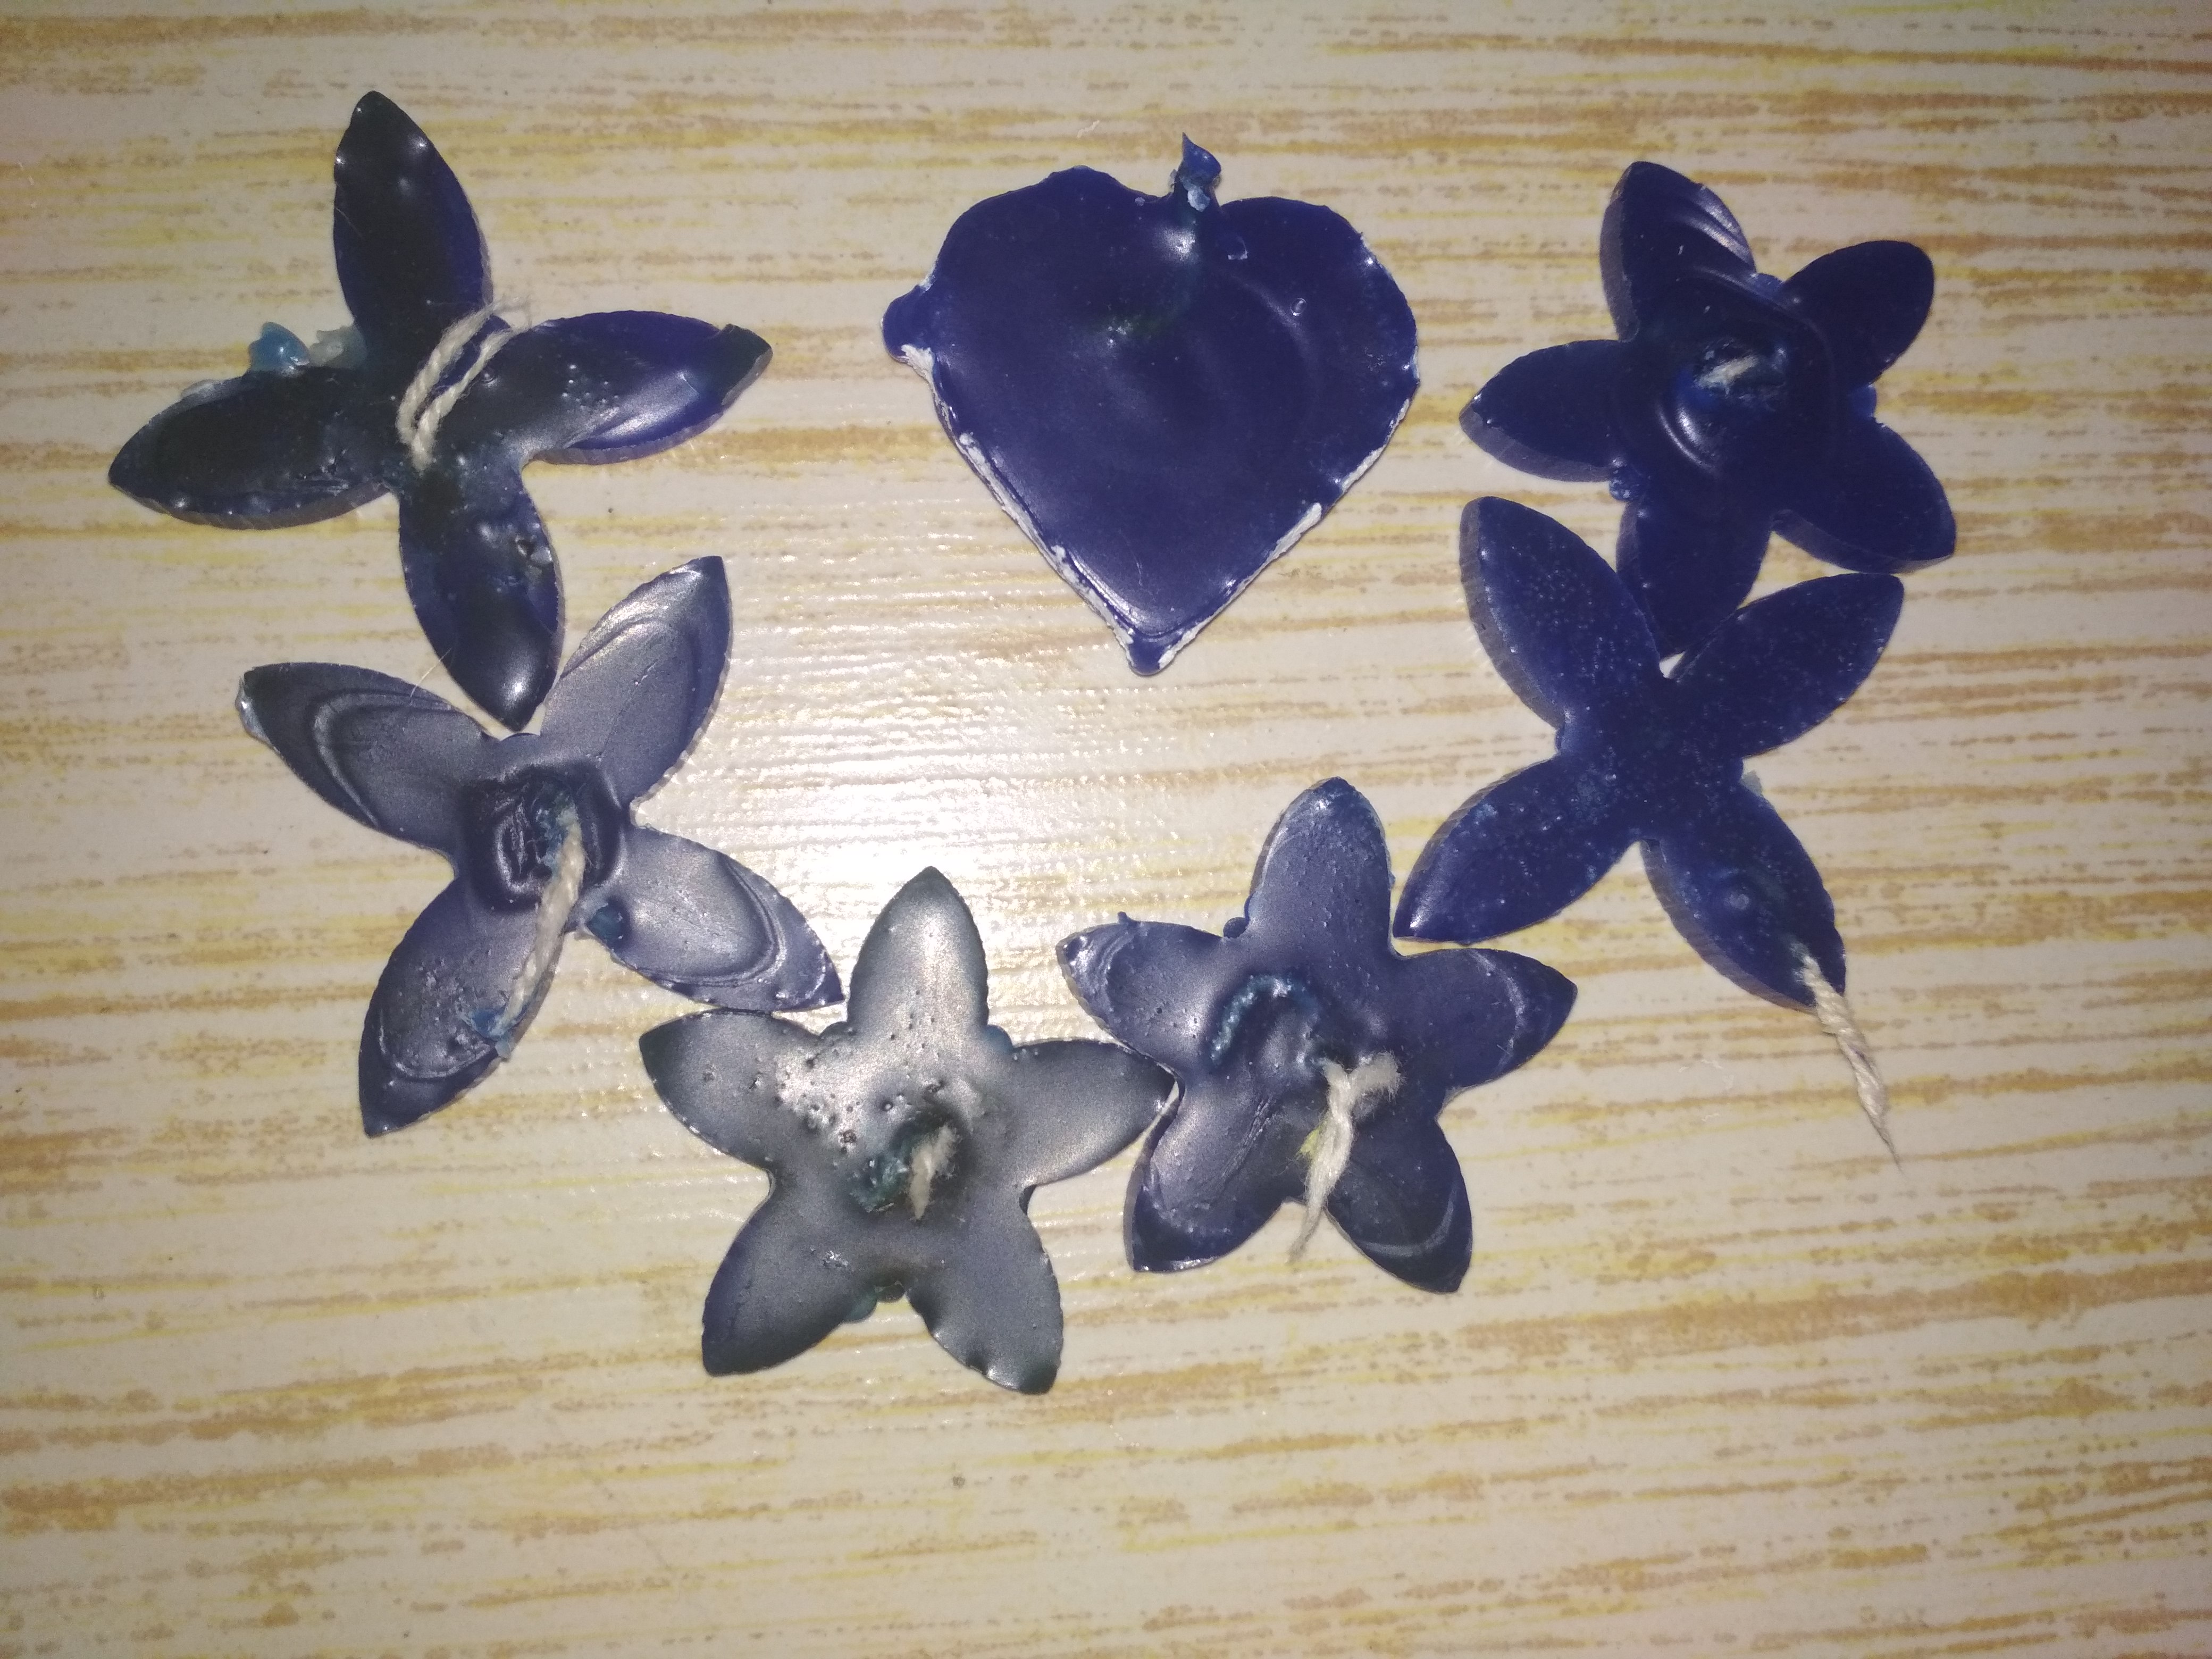
I decided to poured wax in the silicon rubber mold for making candles. For this I took wax dust and melt it on heating plate.
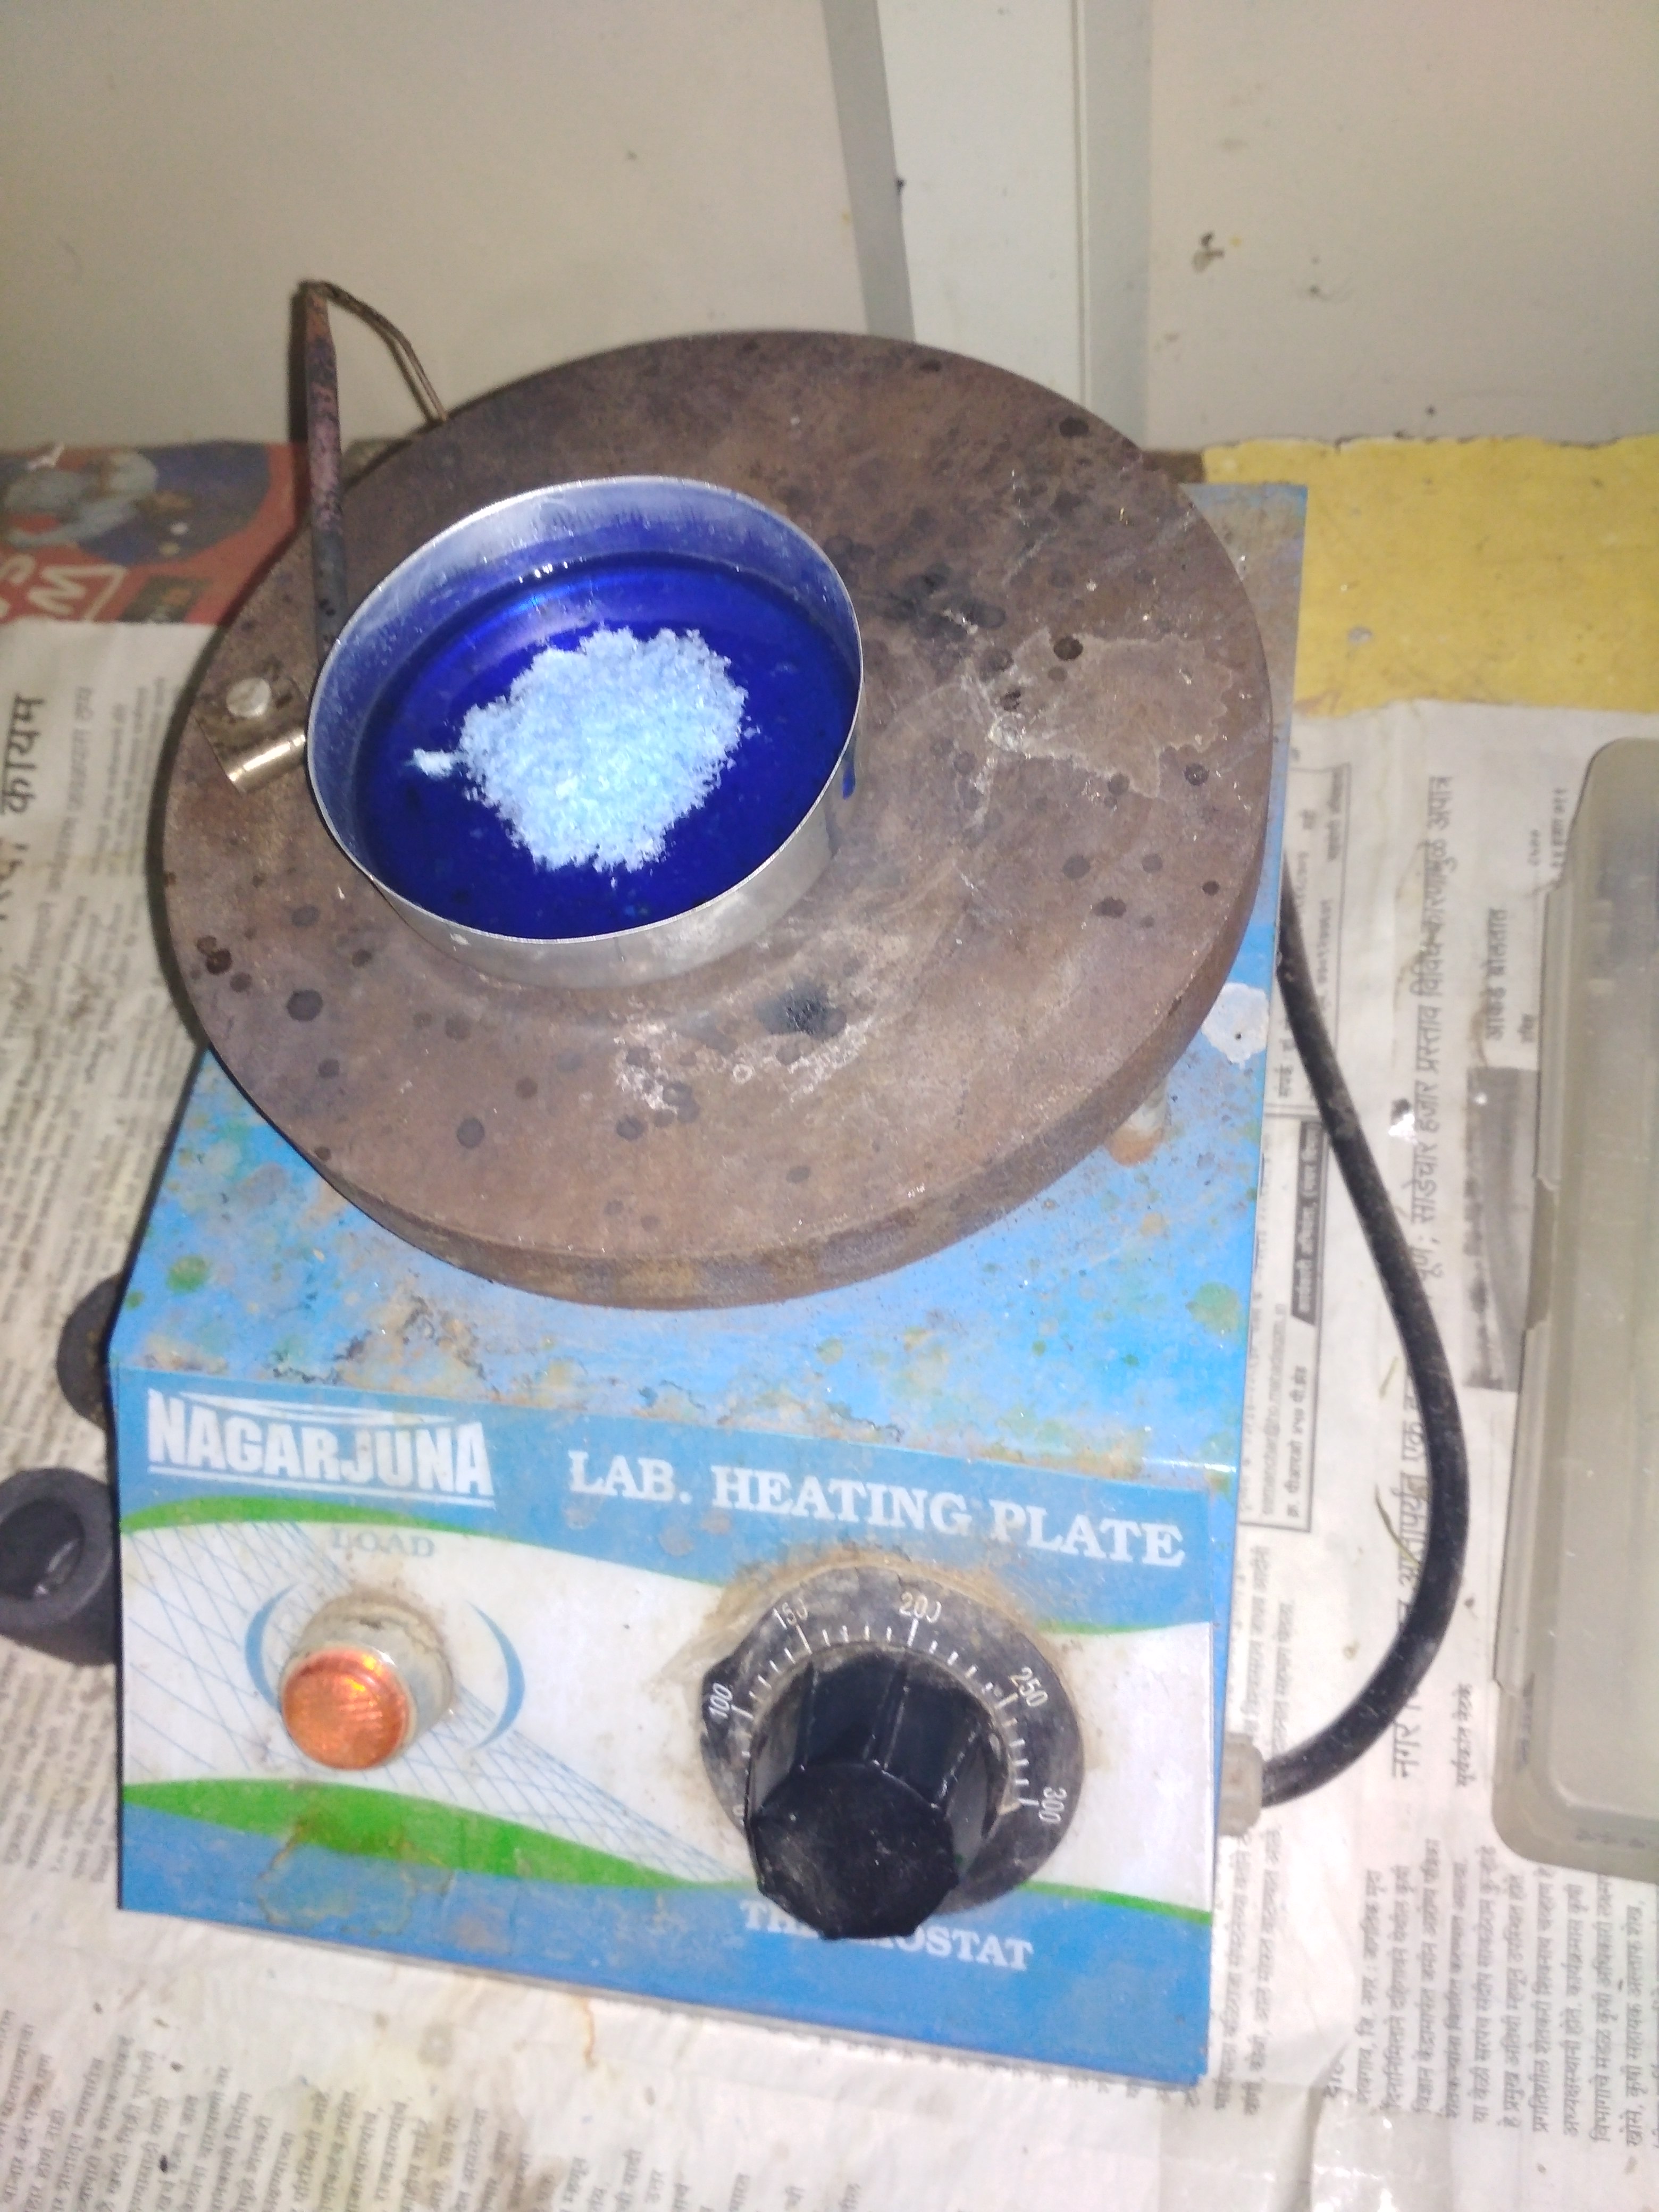
When the wax melted, I poured into silicon mold and leave it for setting for 5-10mins. After some time mold became hard and remove easy.
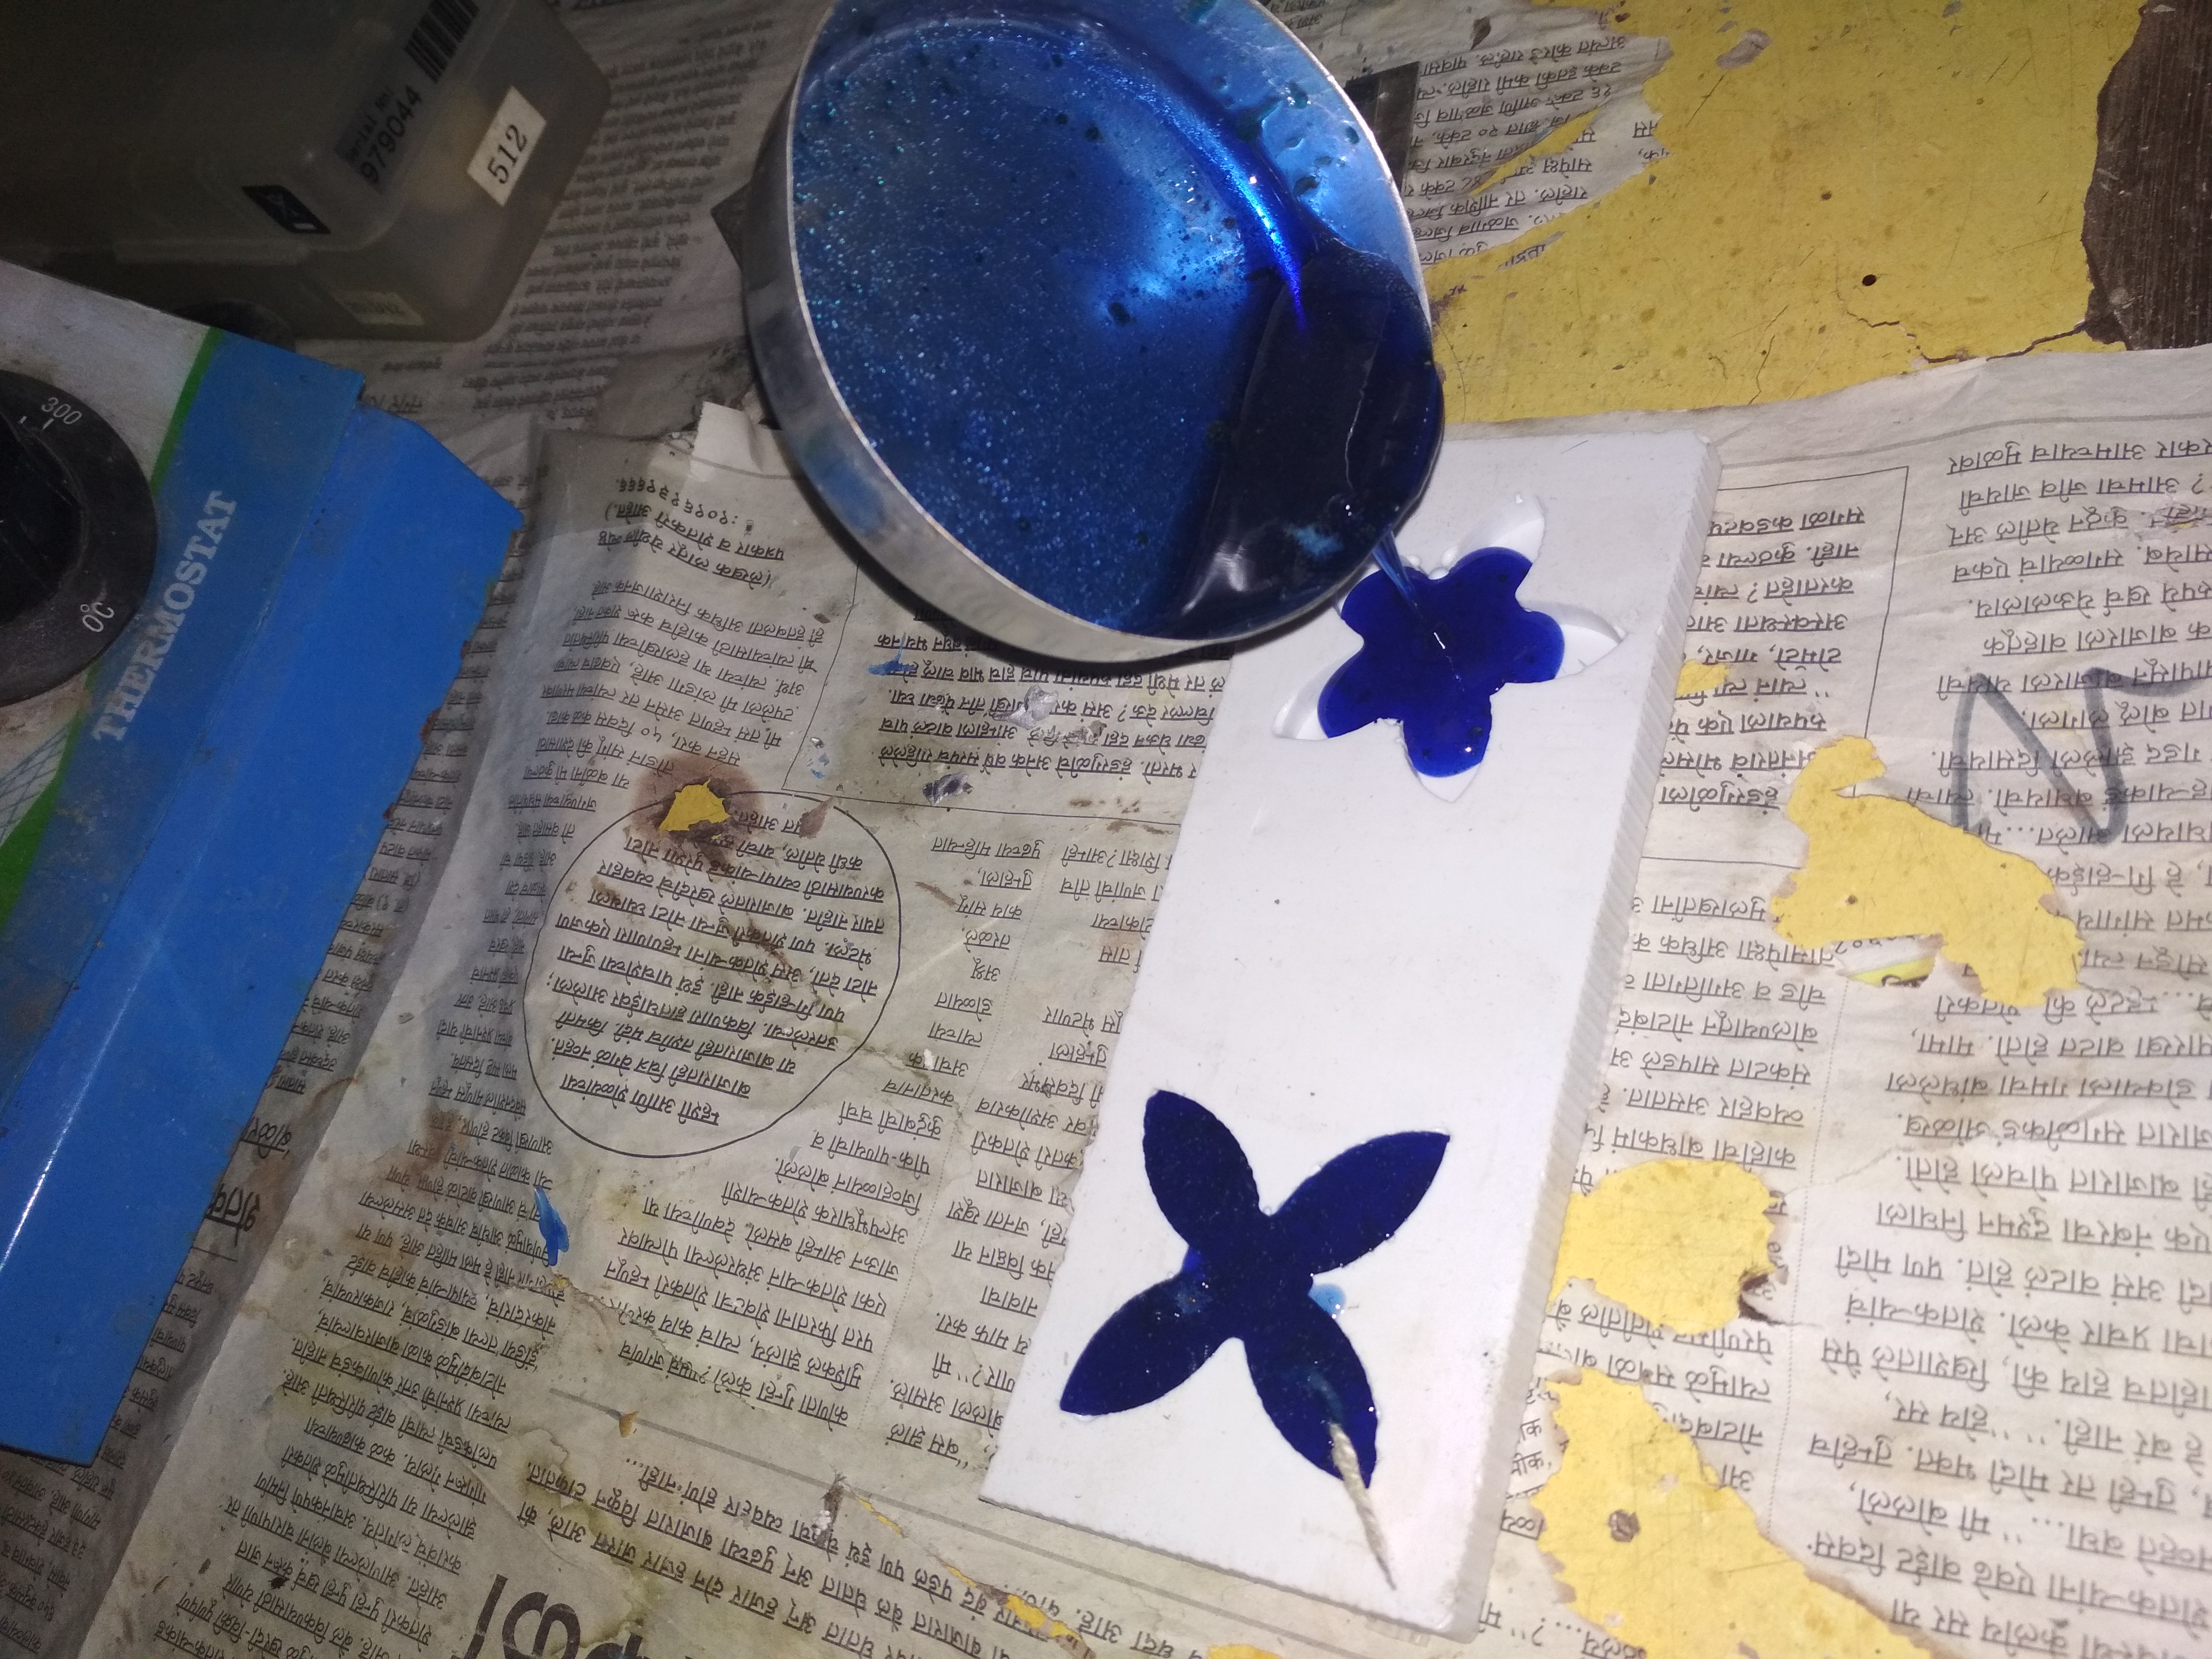
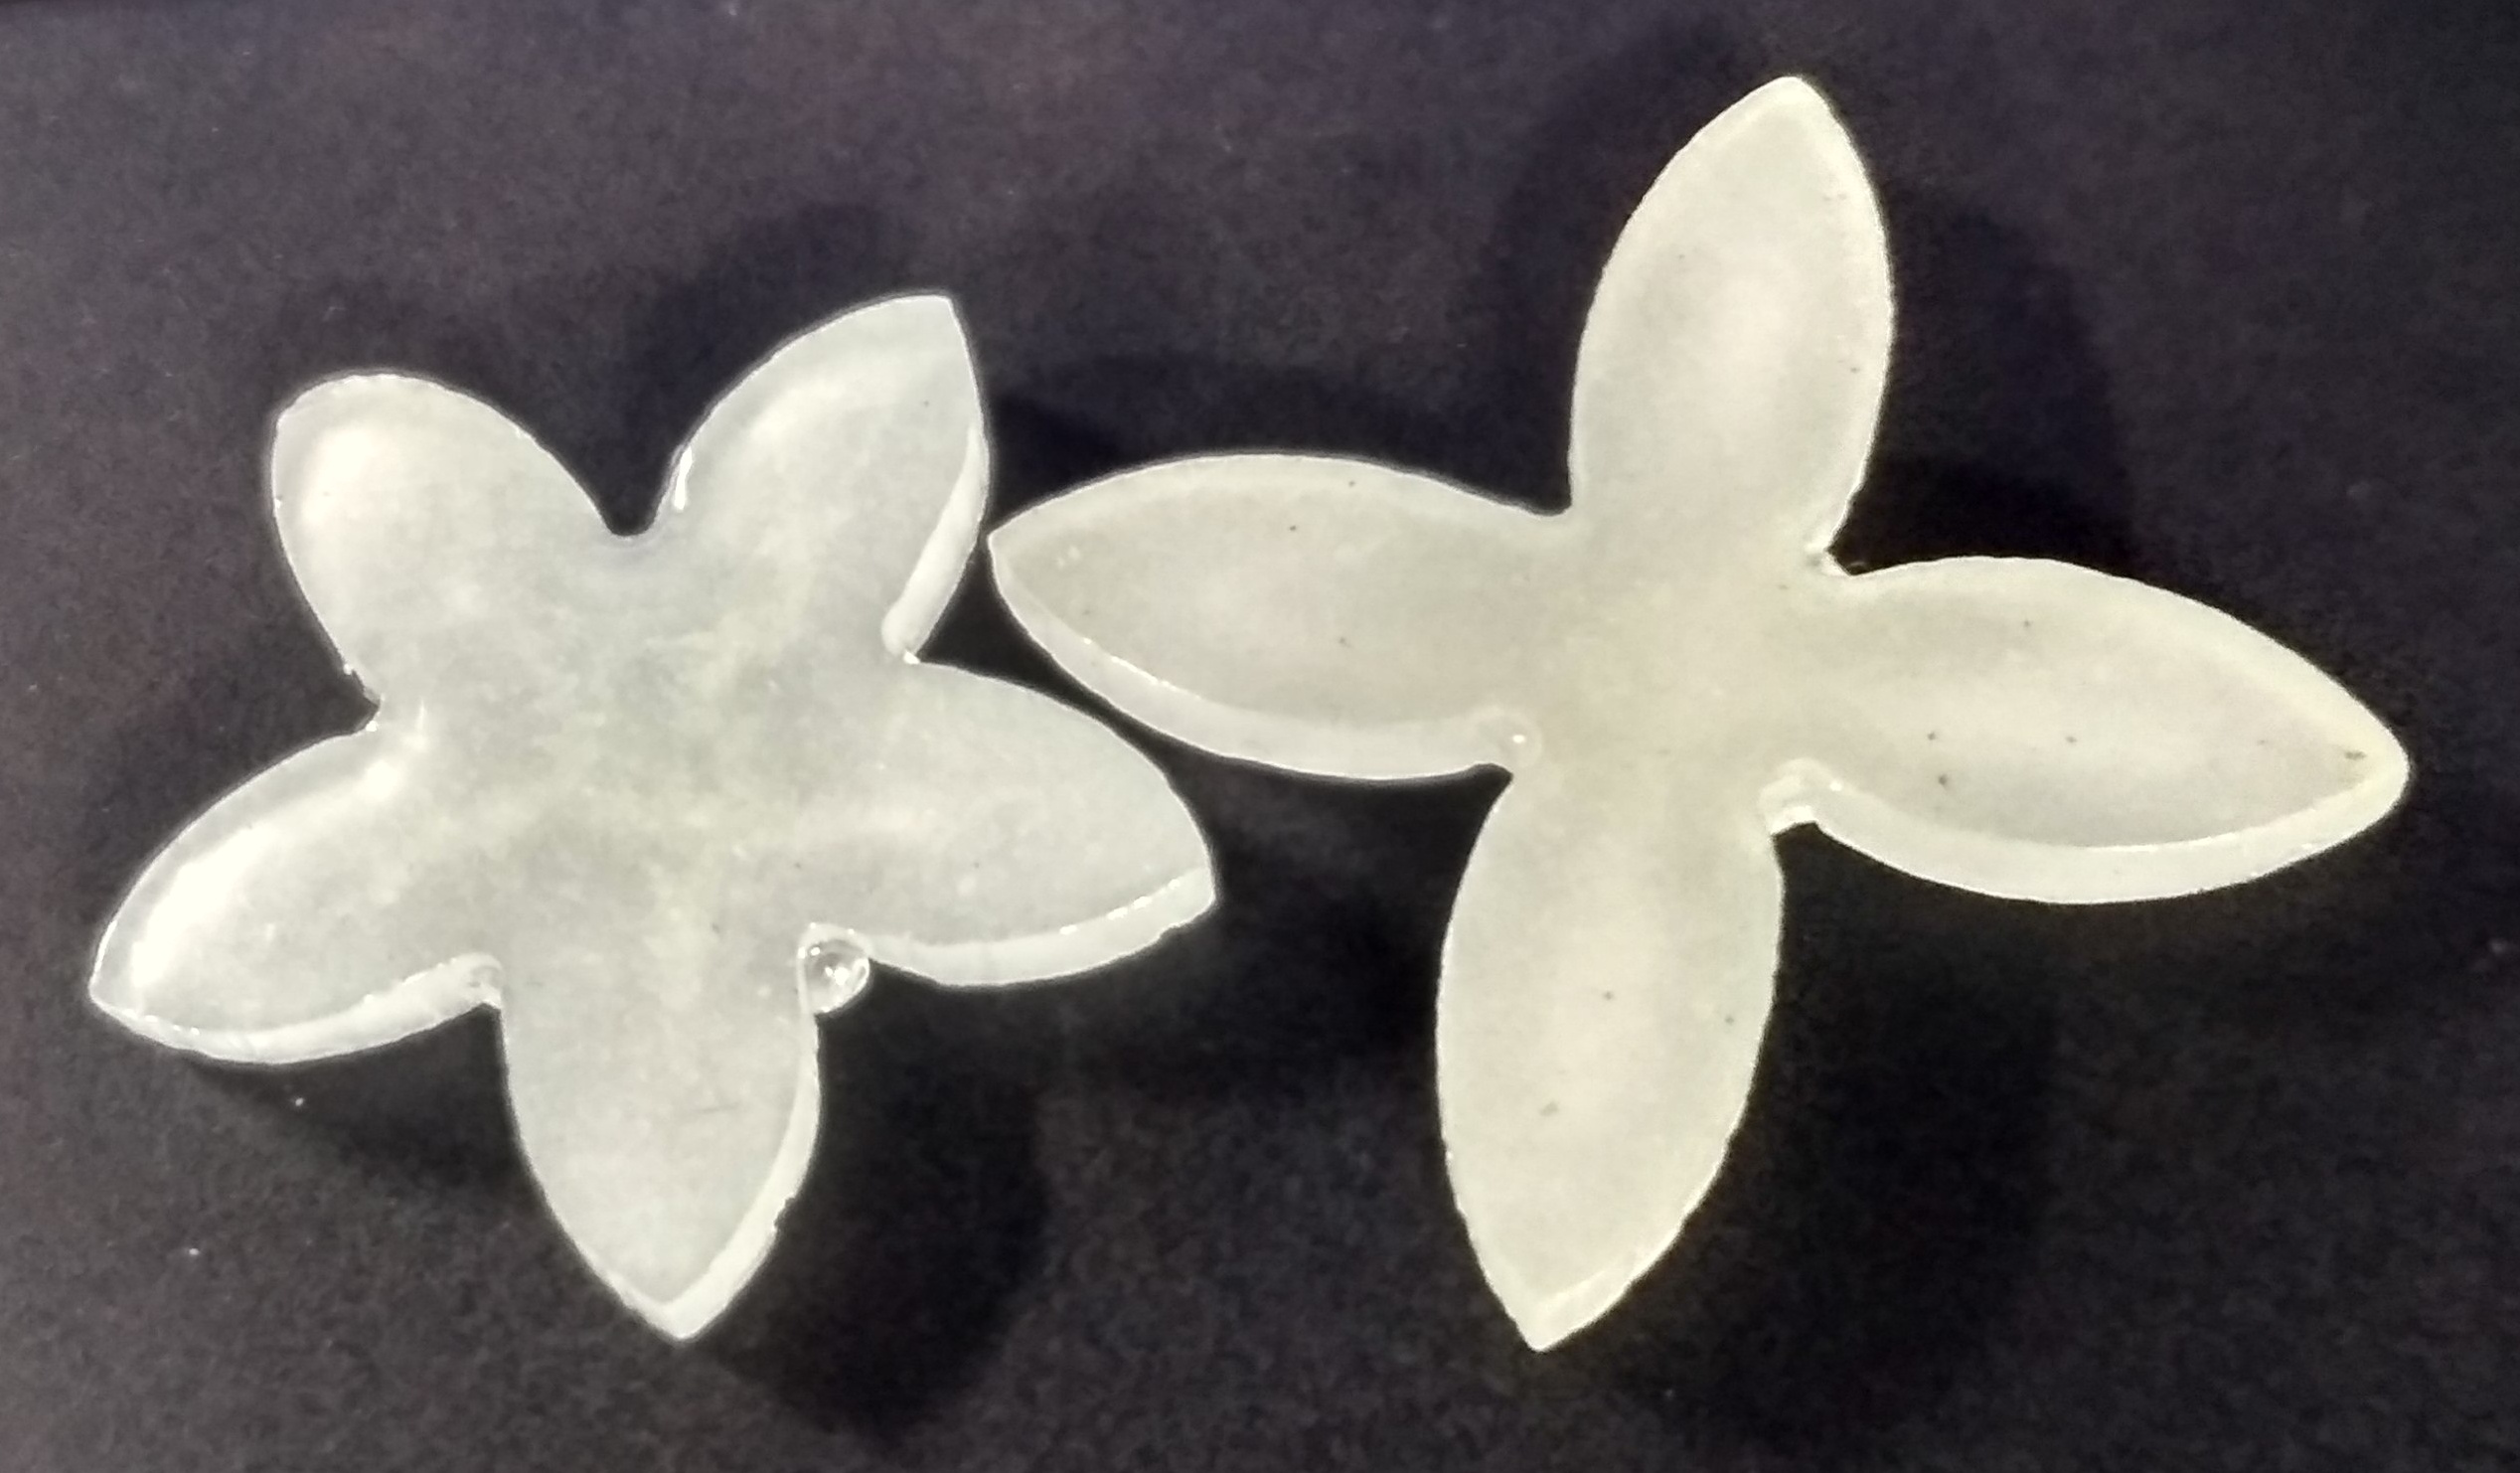
I made many different shapes like this:
Epoxy Resin -
Epoxy resins are low molecular weight pre-polymers or higher molecular weight polymers which normally contain at least two epoxide groups.
Its transparent and looks beautiful. In general, epoxies are known for their excellent adhesion, chemical and heat resistance, good-to-excellent mechanical properties.
This is the epoxy resin and hardener.....
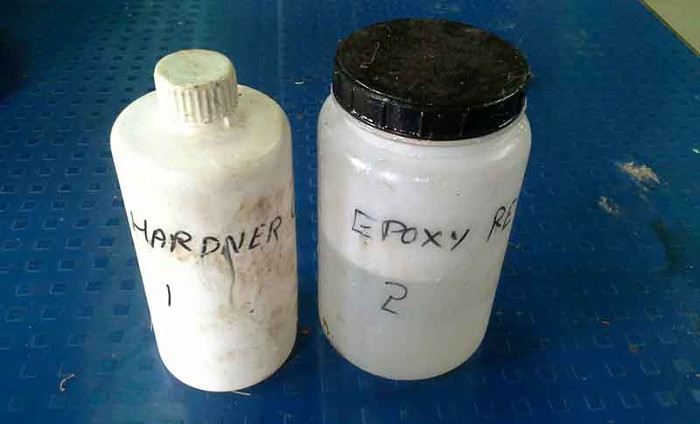
We took the epoxy and hardener is in ratio 1:2.
I checked by volume how much epoxy is require for my mold. I took epoxy resin and hardener and stirred it well.
Poured into the silicon rubber mold and wait for 4-5 hrs.
Here my cast part is ready.....
You can download solidworks original file and .stl file from here.
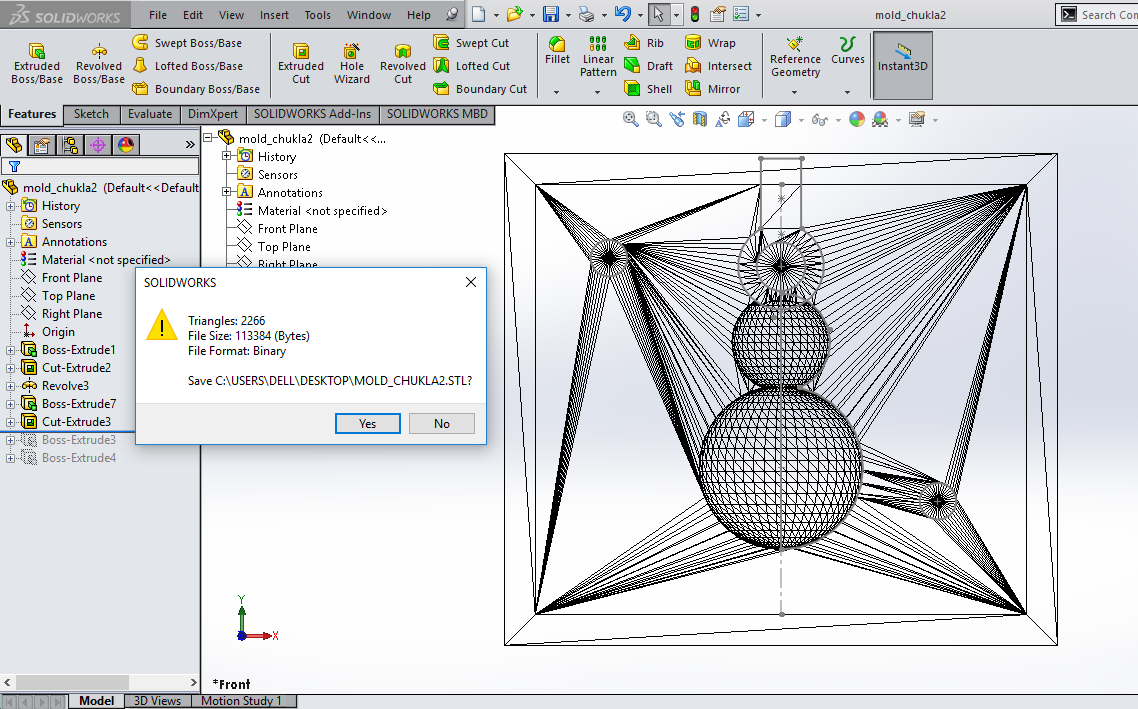
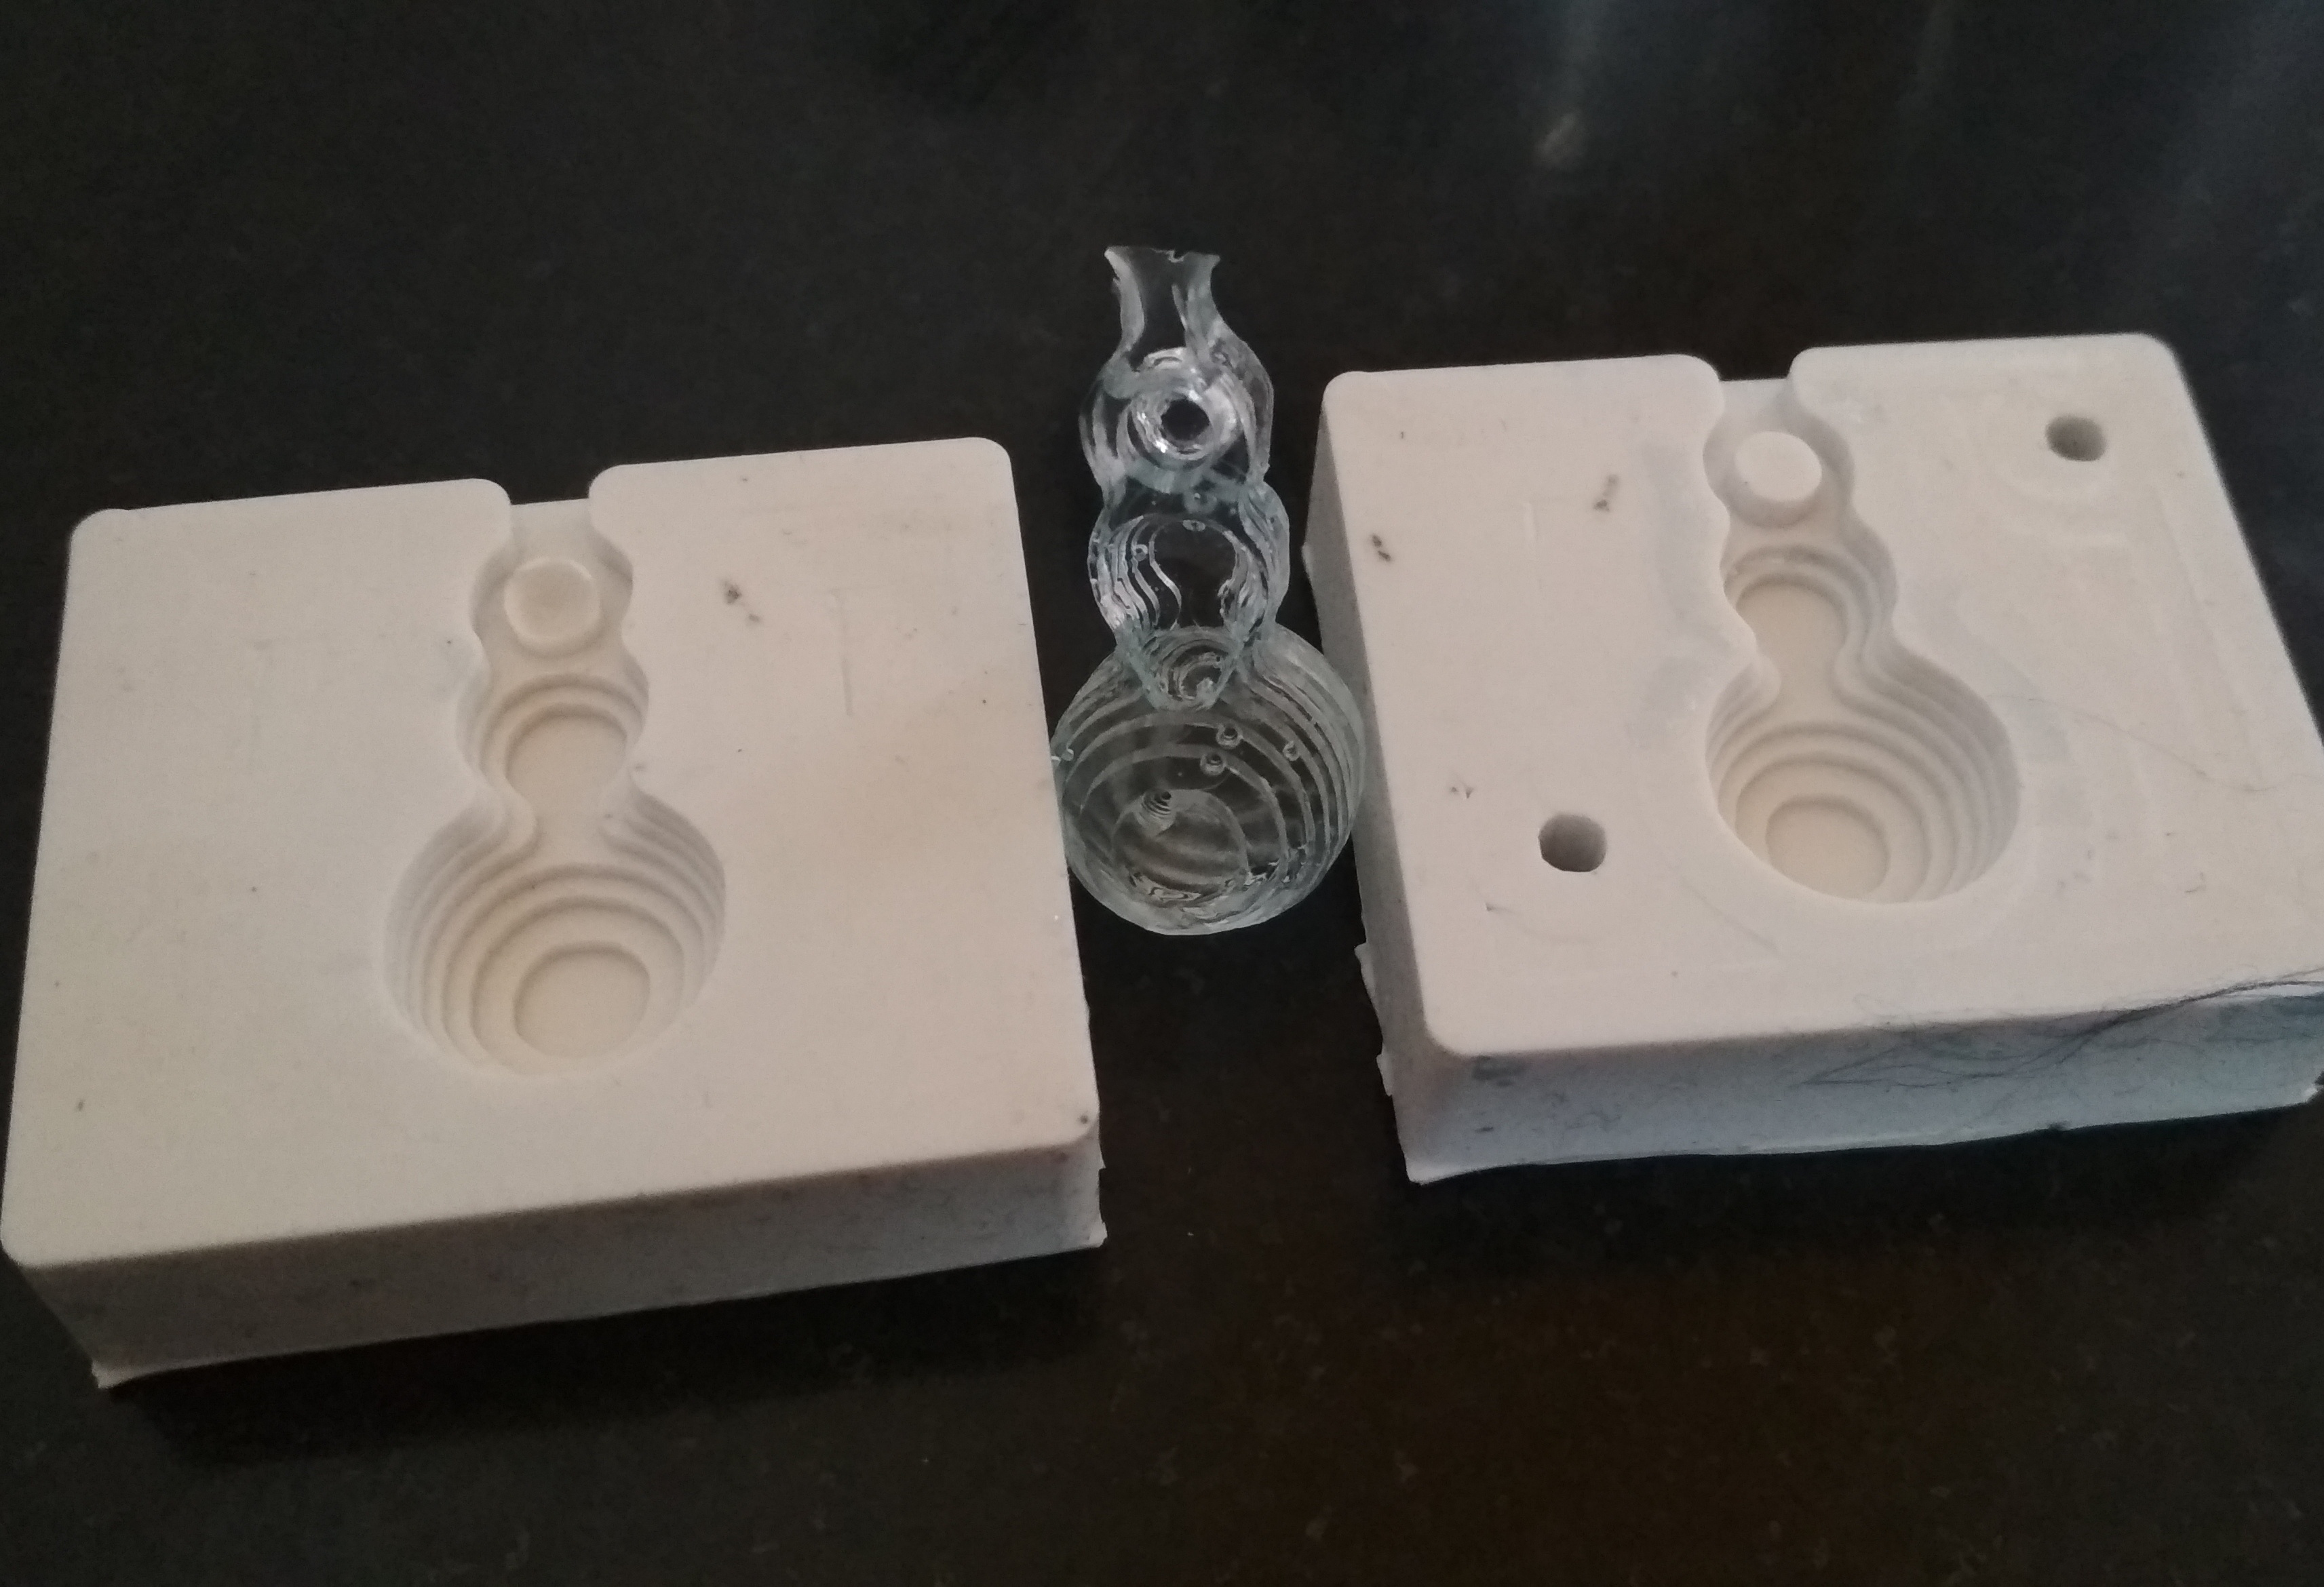
As my evaluator suggested me to do this assignment again. So, I decided to do double sides mold, and design nozzles for air ventilation and material pouring.
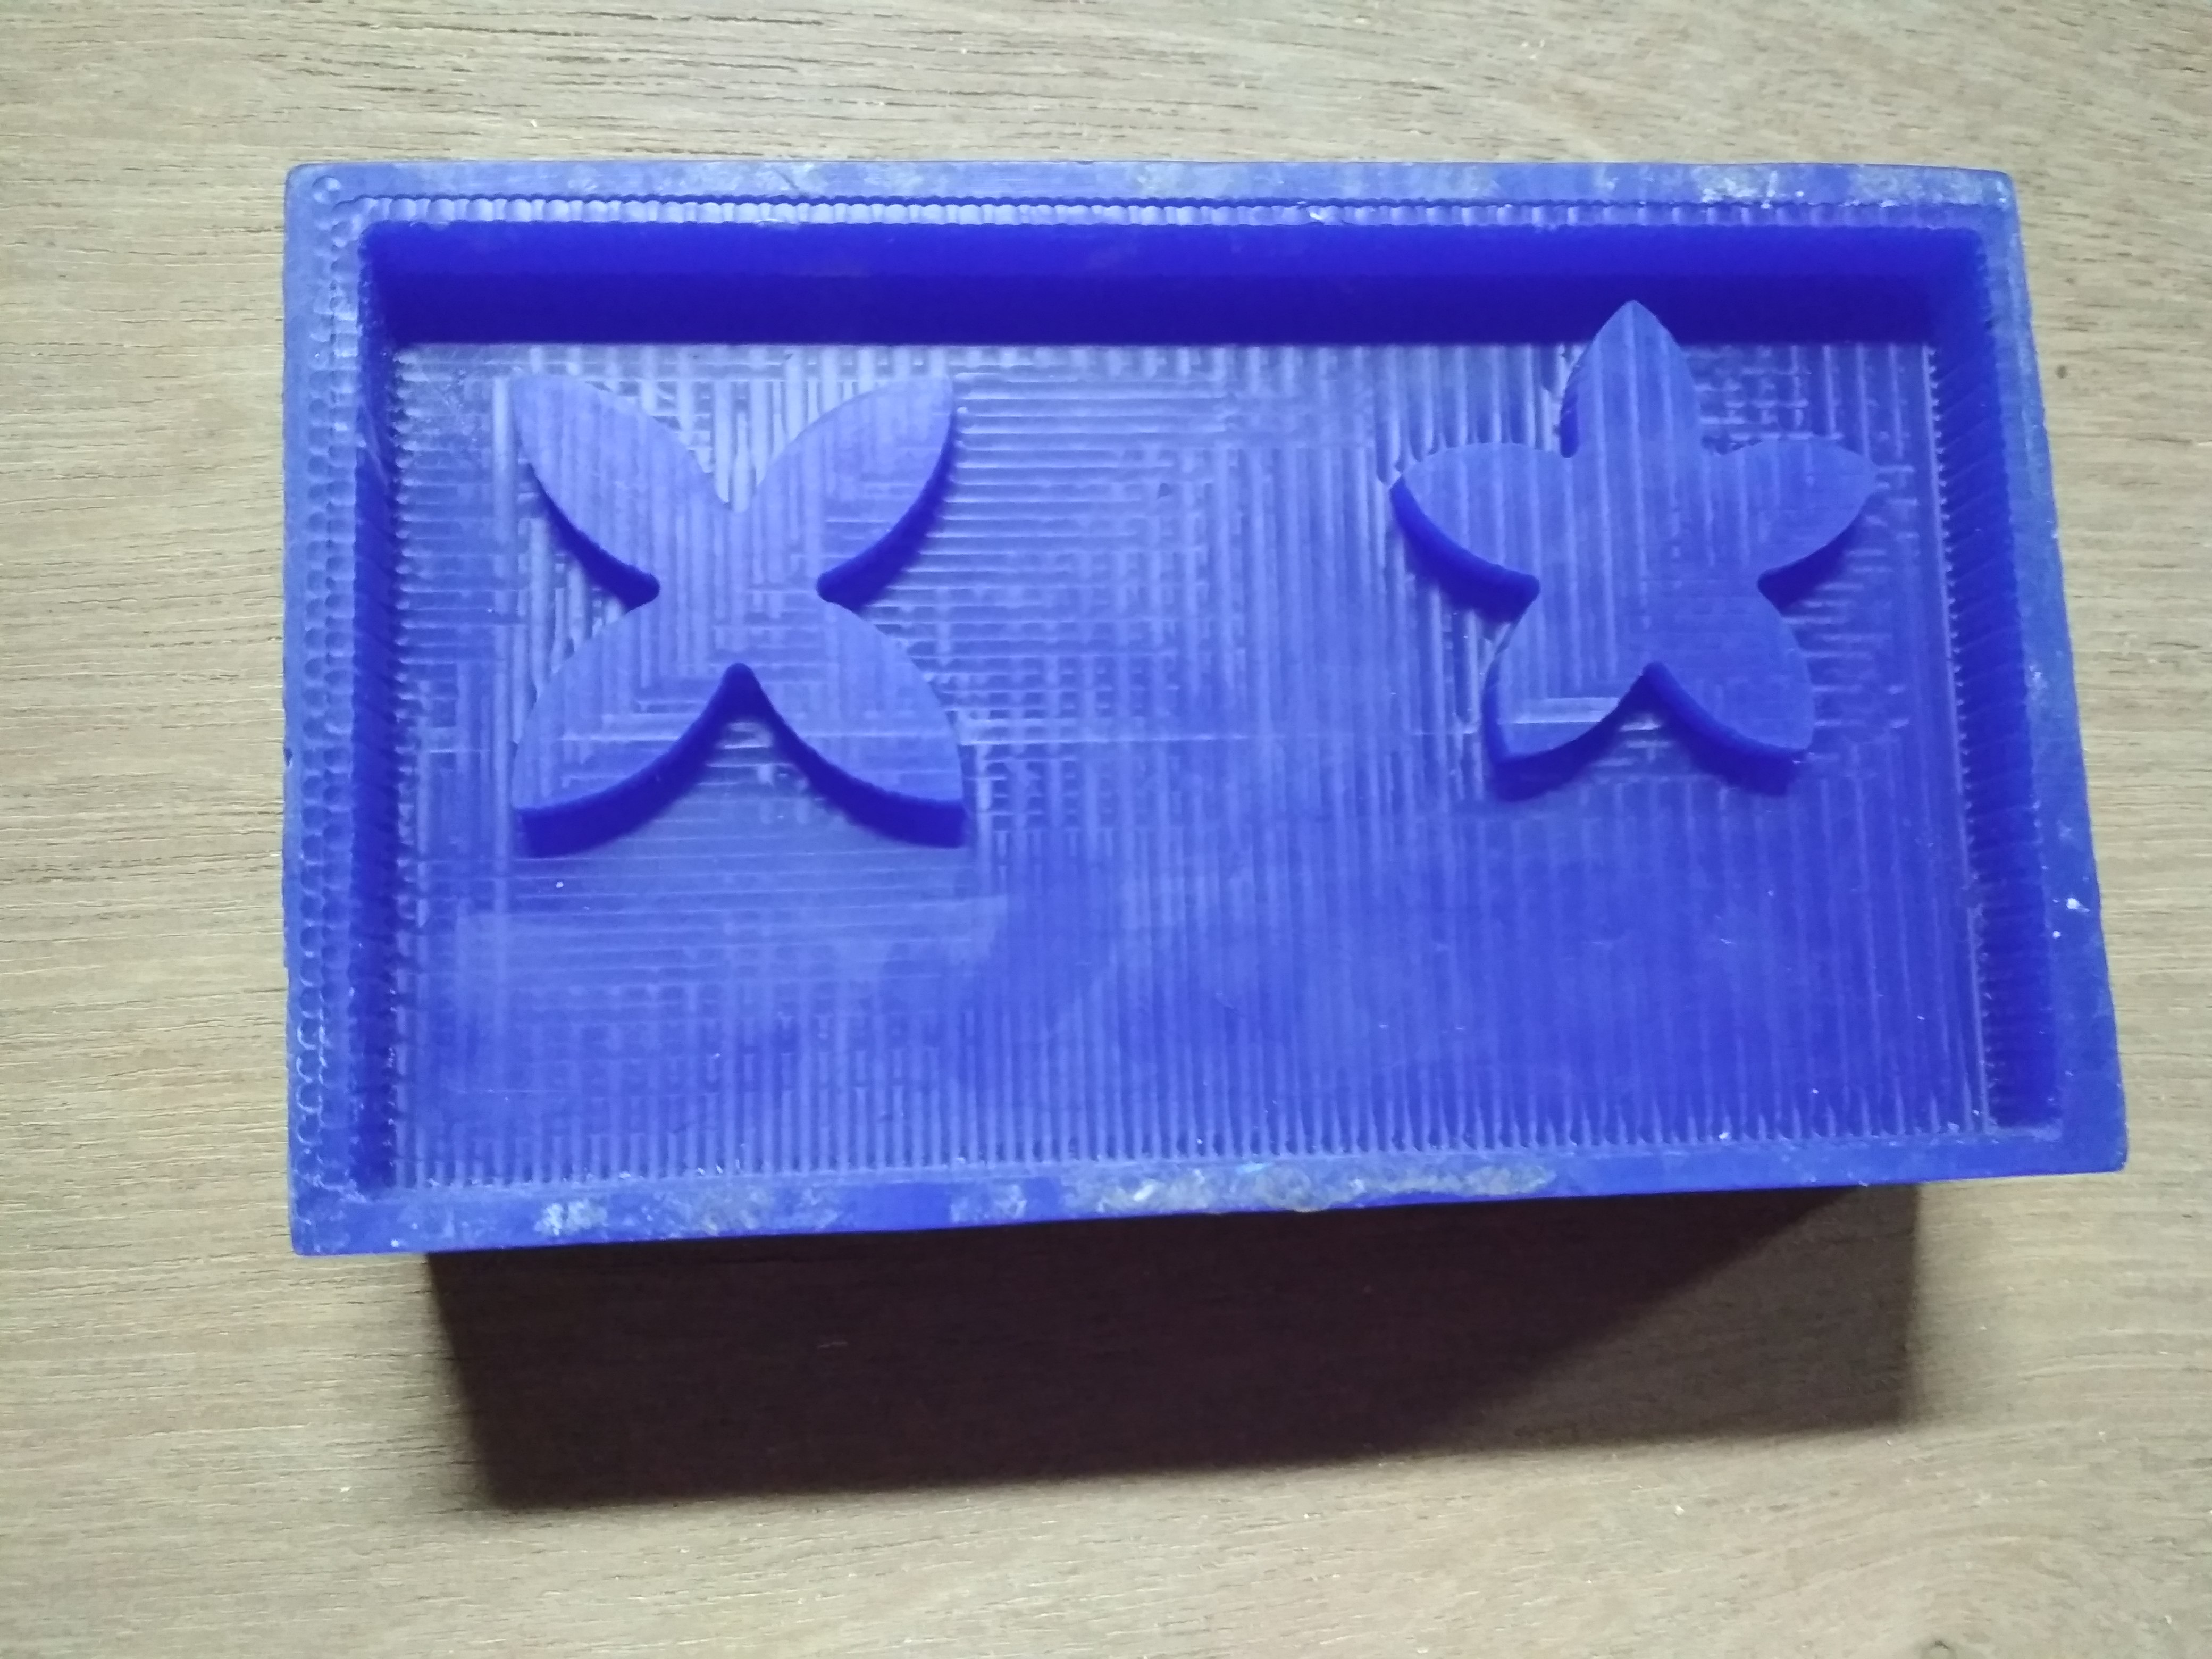
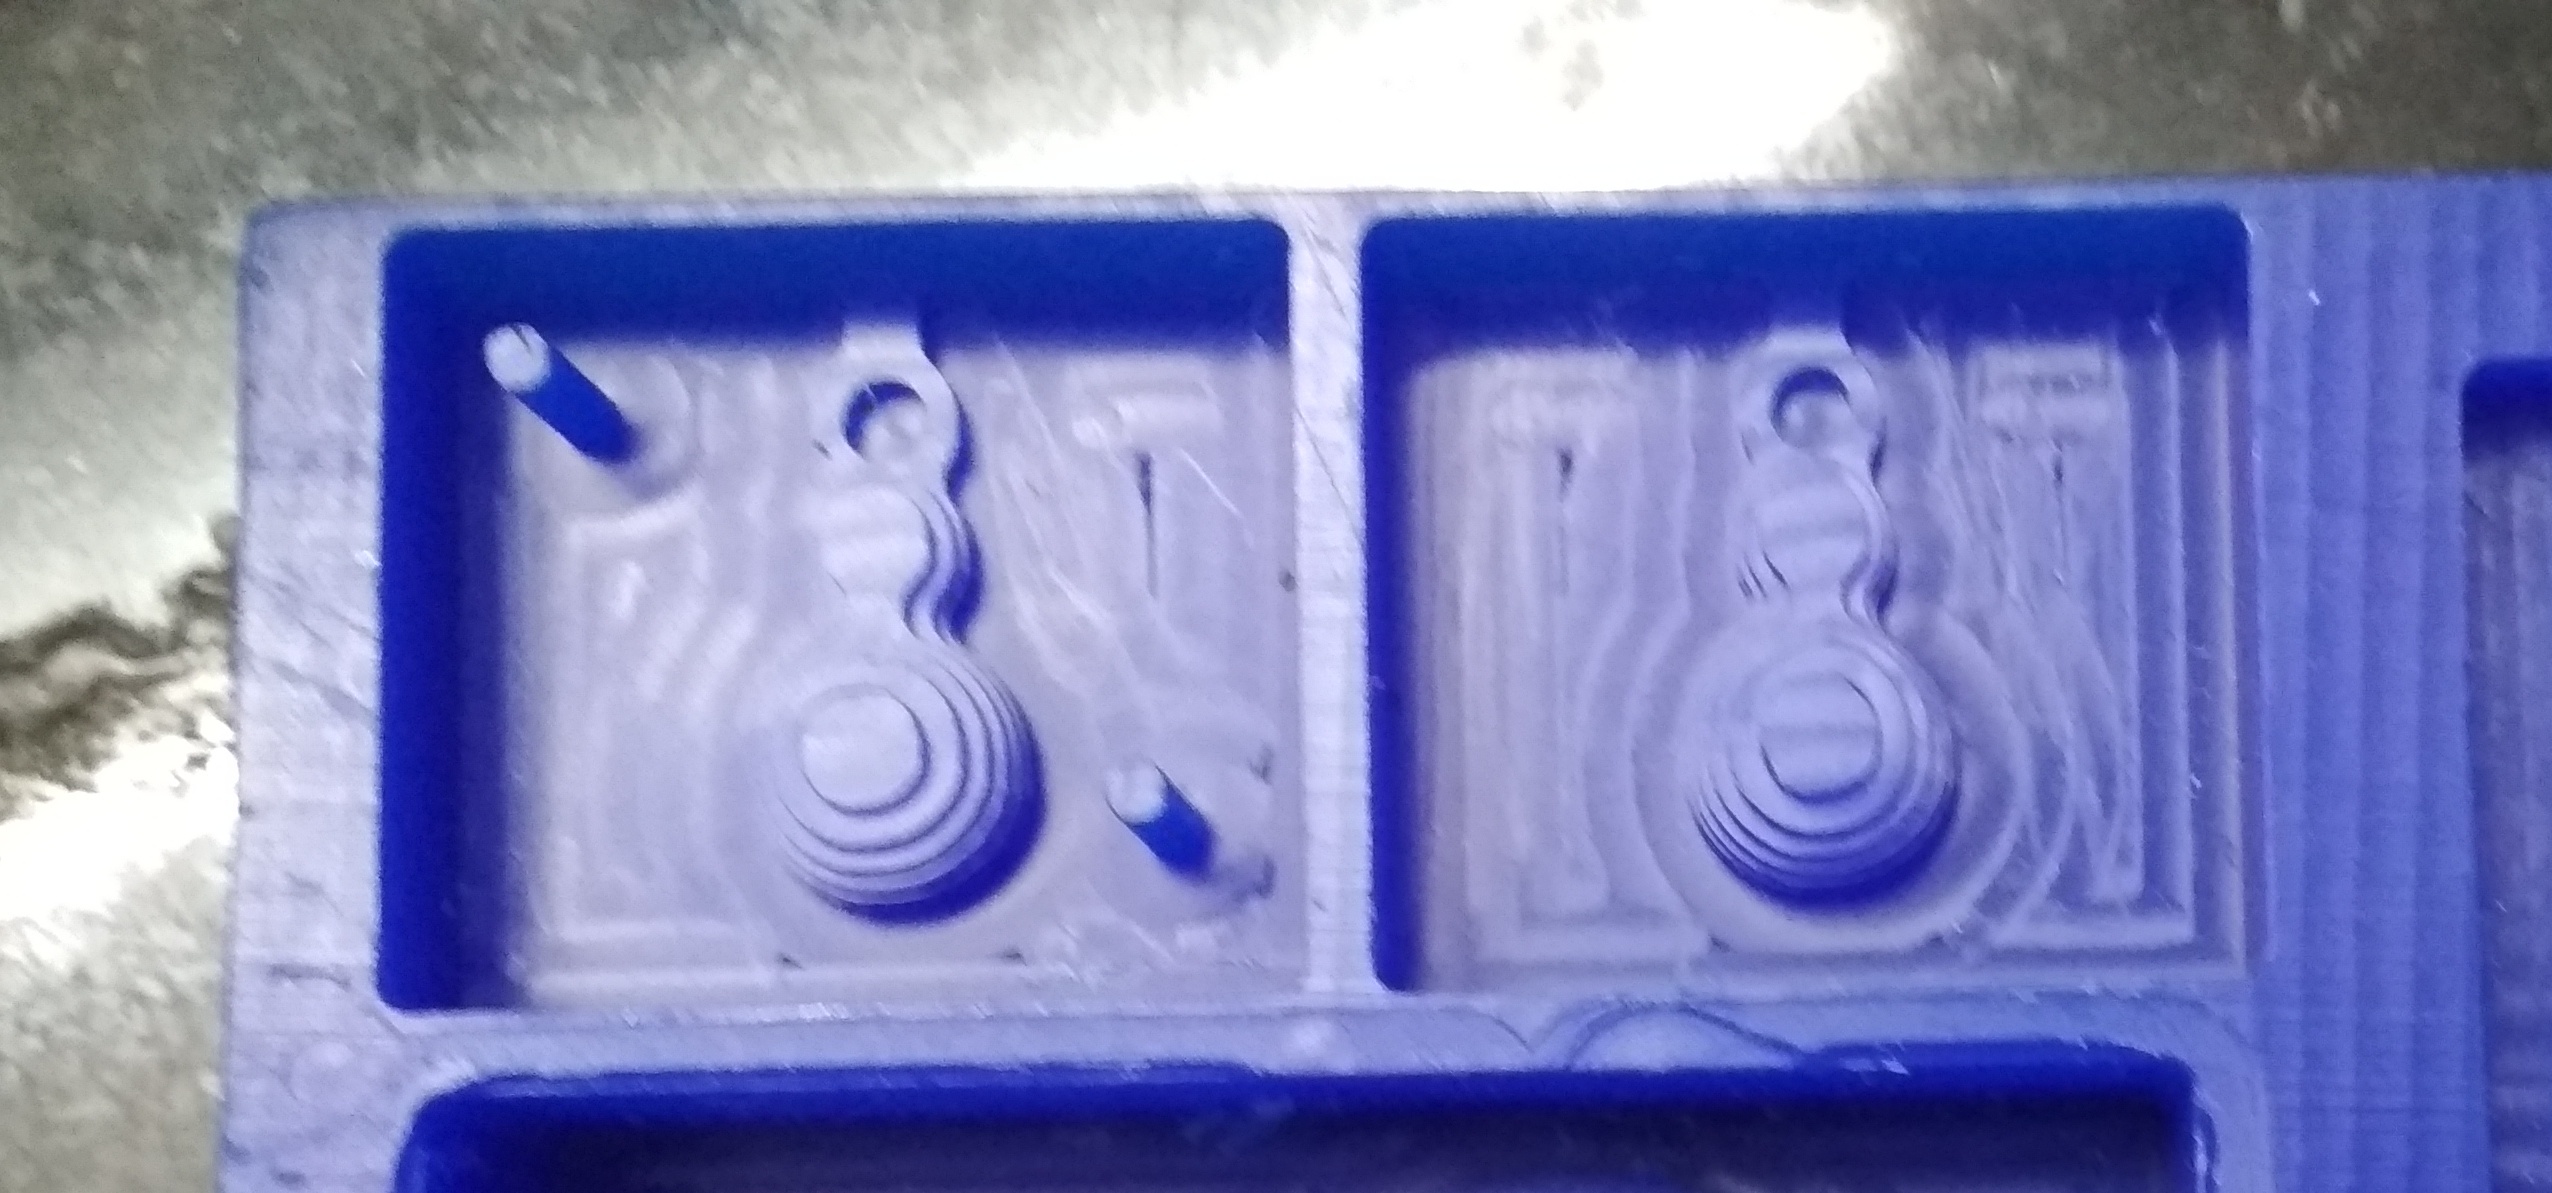
Here I made small design and save as .stl format. In this design I have made hole for material pouring and registration. Then I moved towards Modella for milling.
I milled my design by using modella. Here I don't go for finish cut because I want this texture for my casting part. In milling, the registration holes which I have made in design are not milled properly. The reason was I have not consider total depth of mold and length of the milling bit after fixing in the modella.
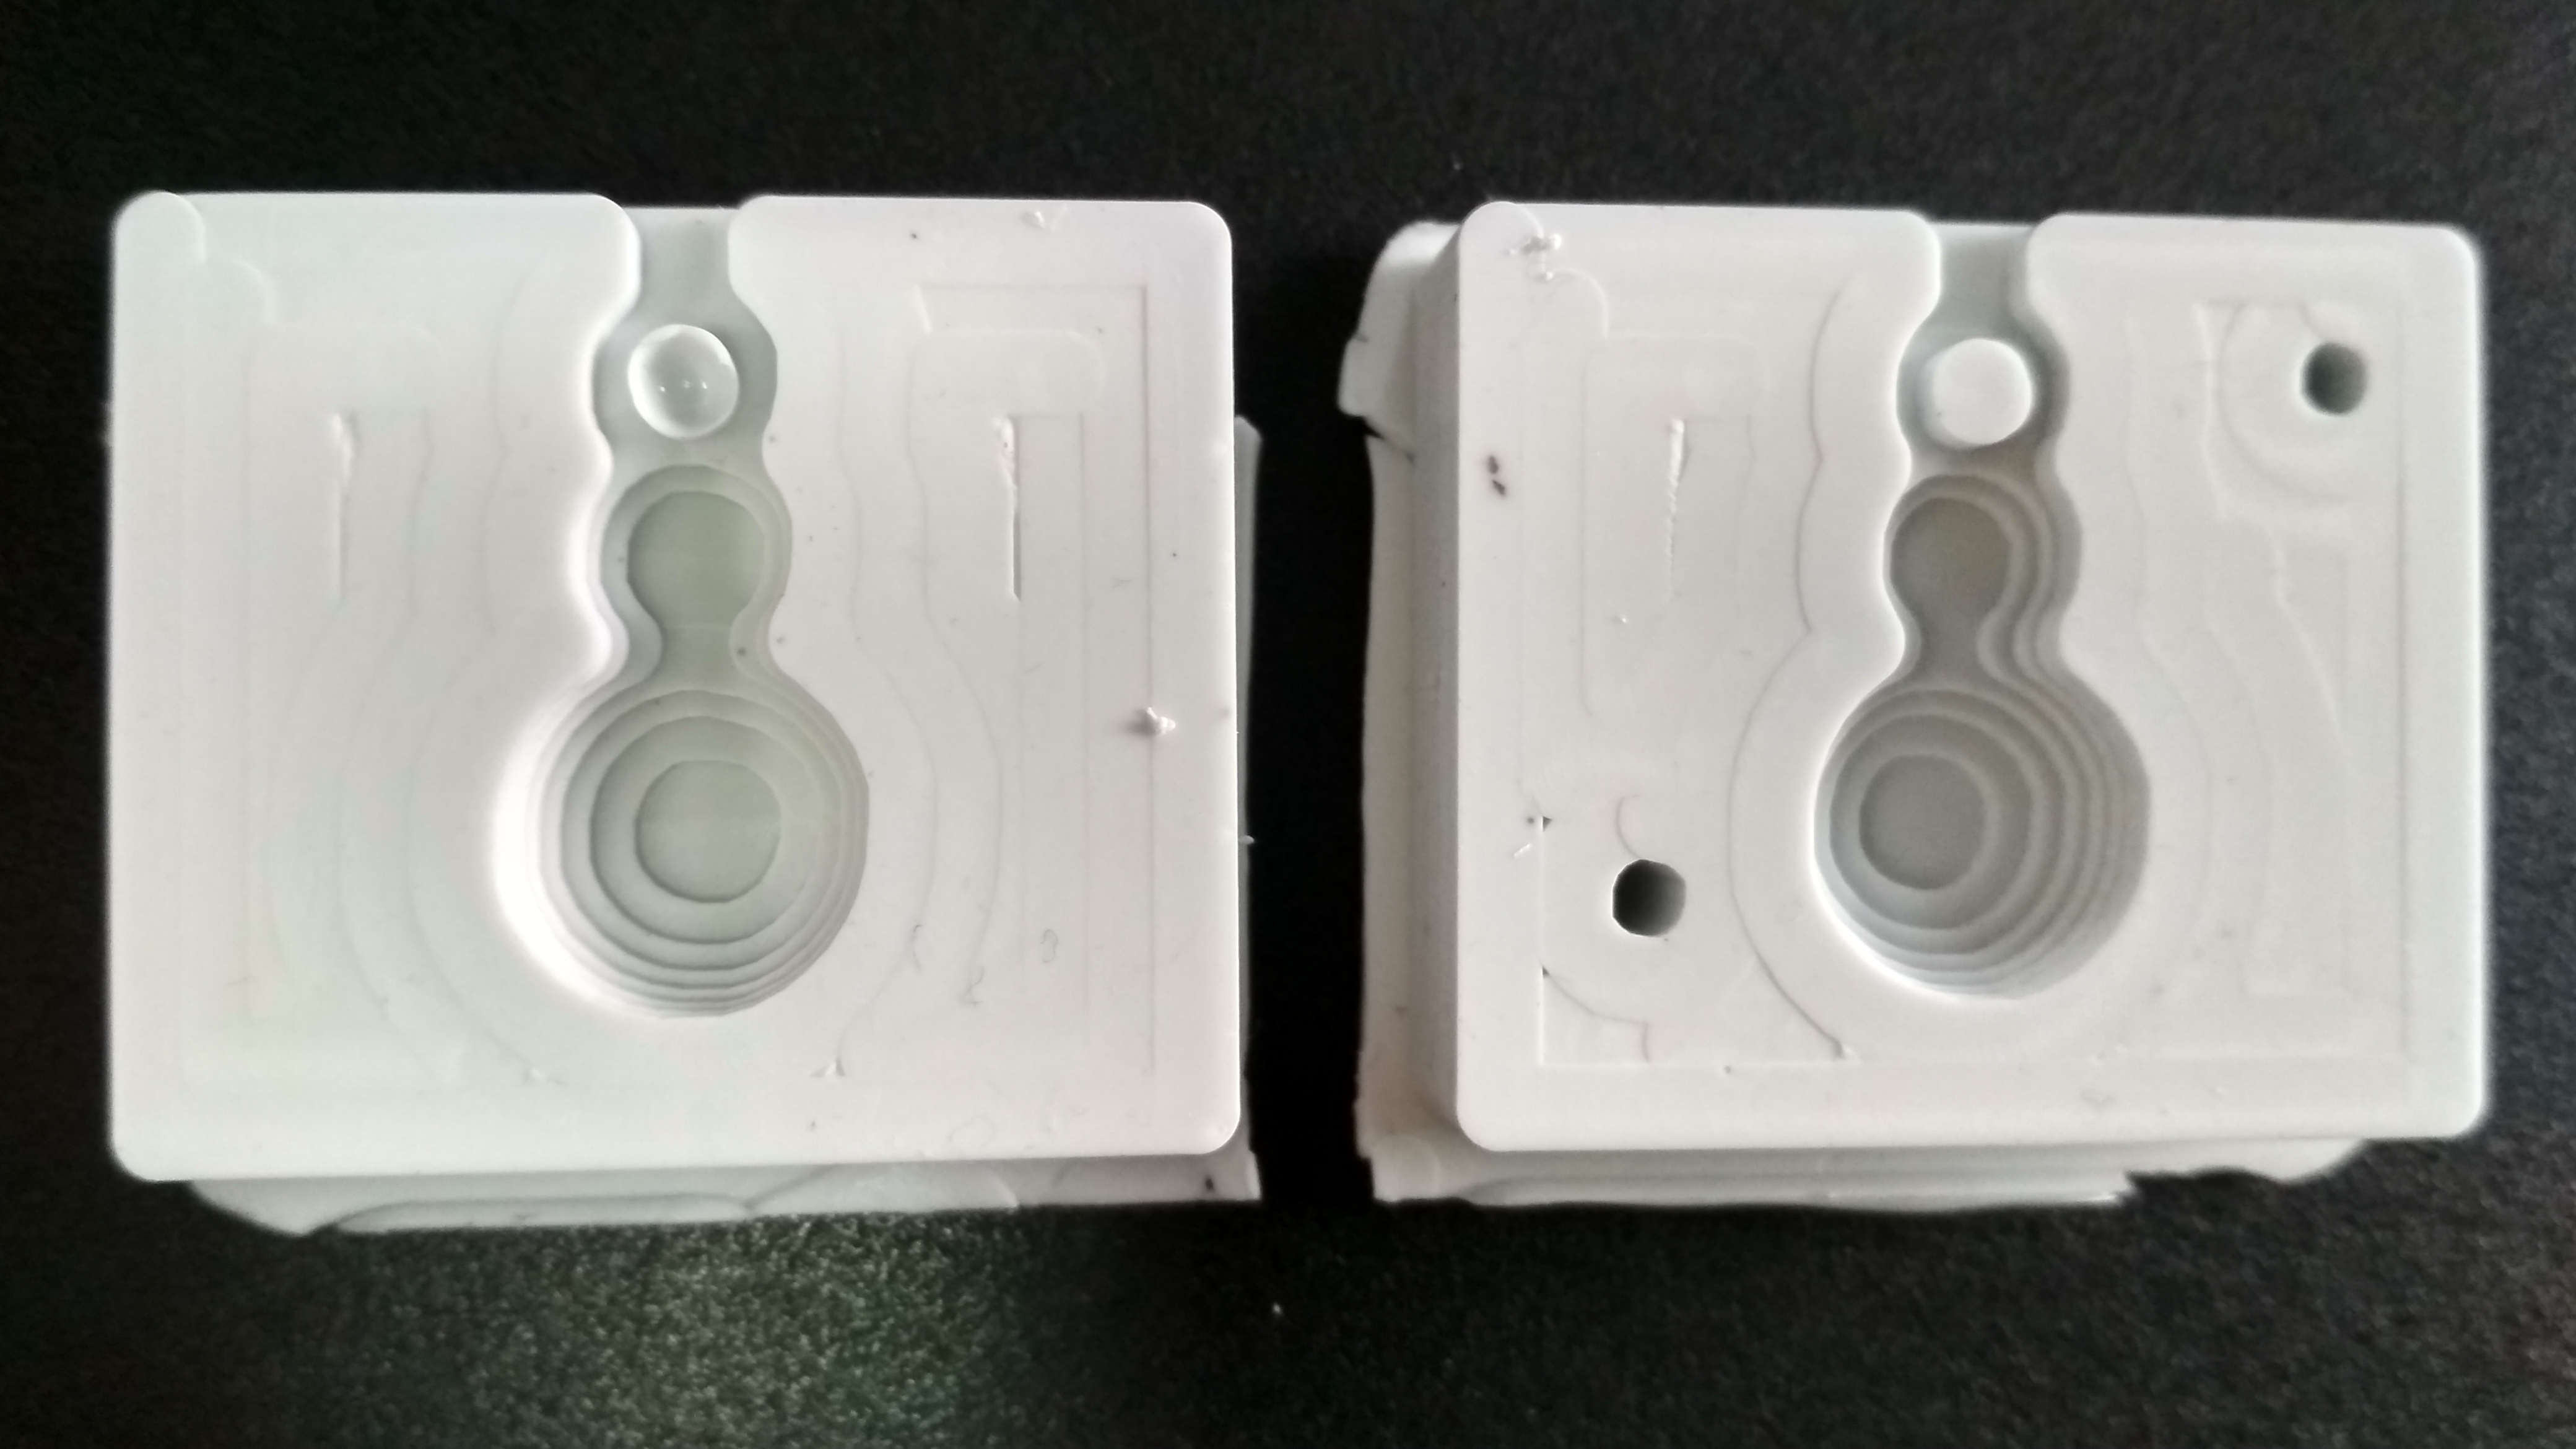
The mold looks like this....
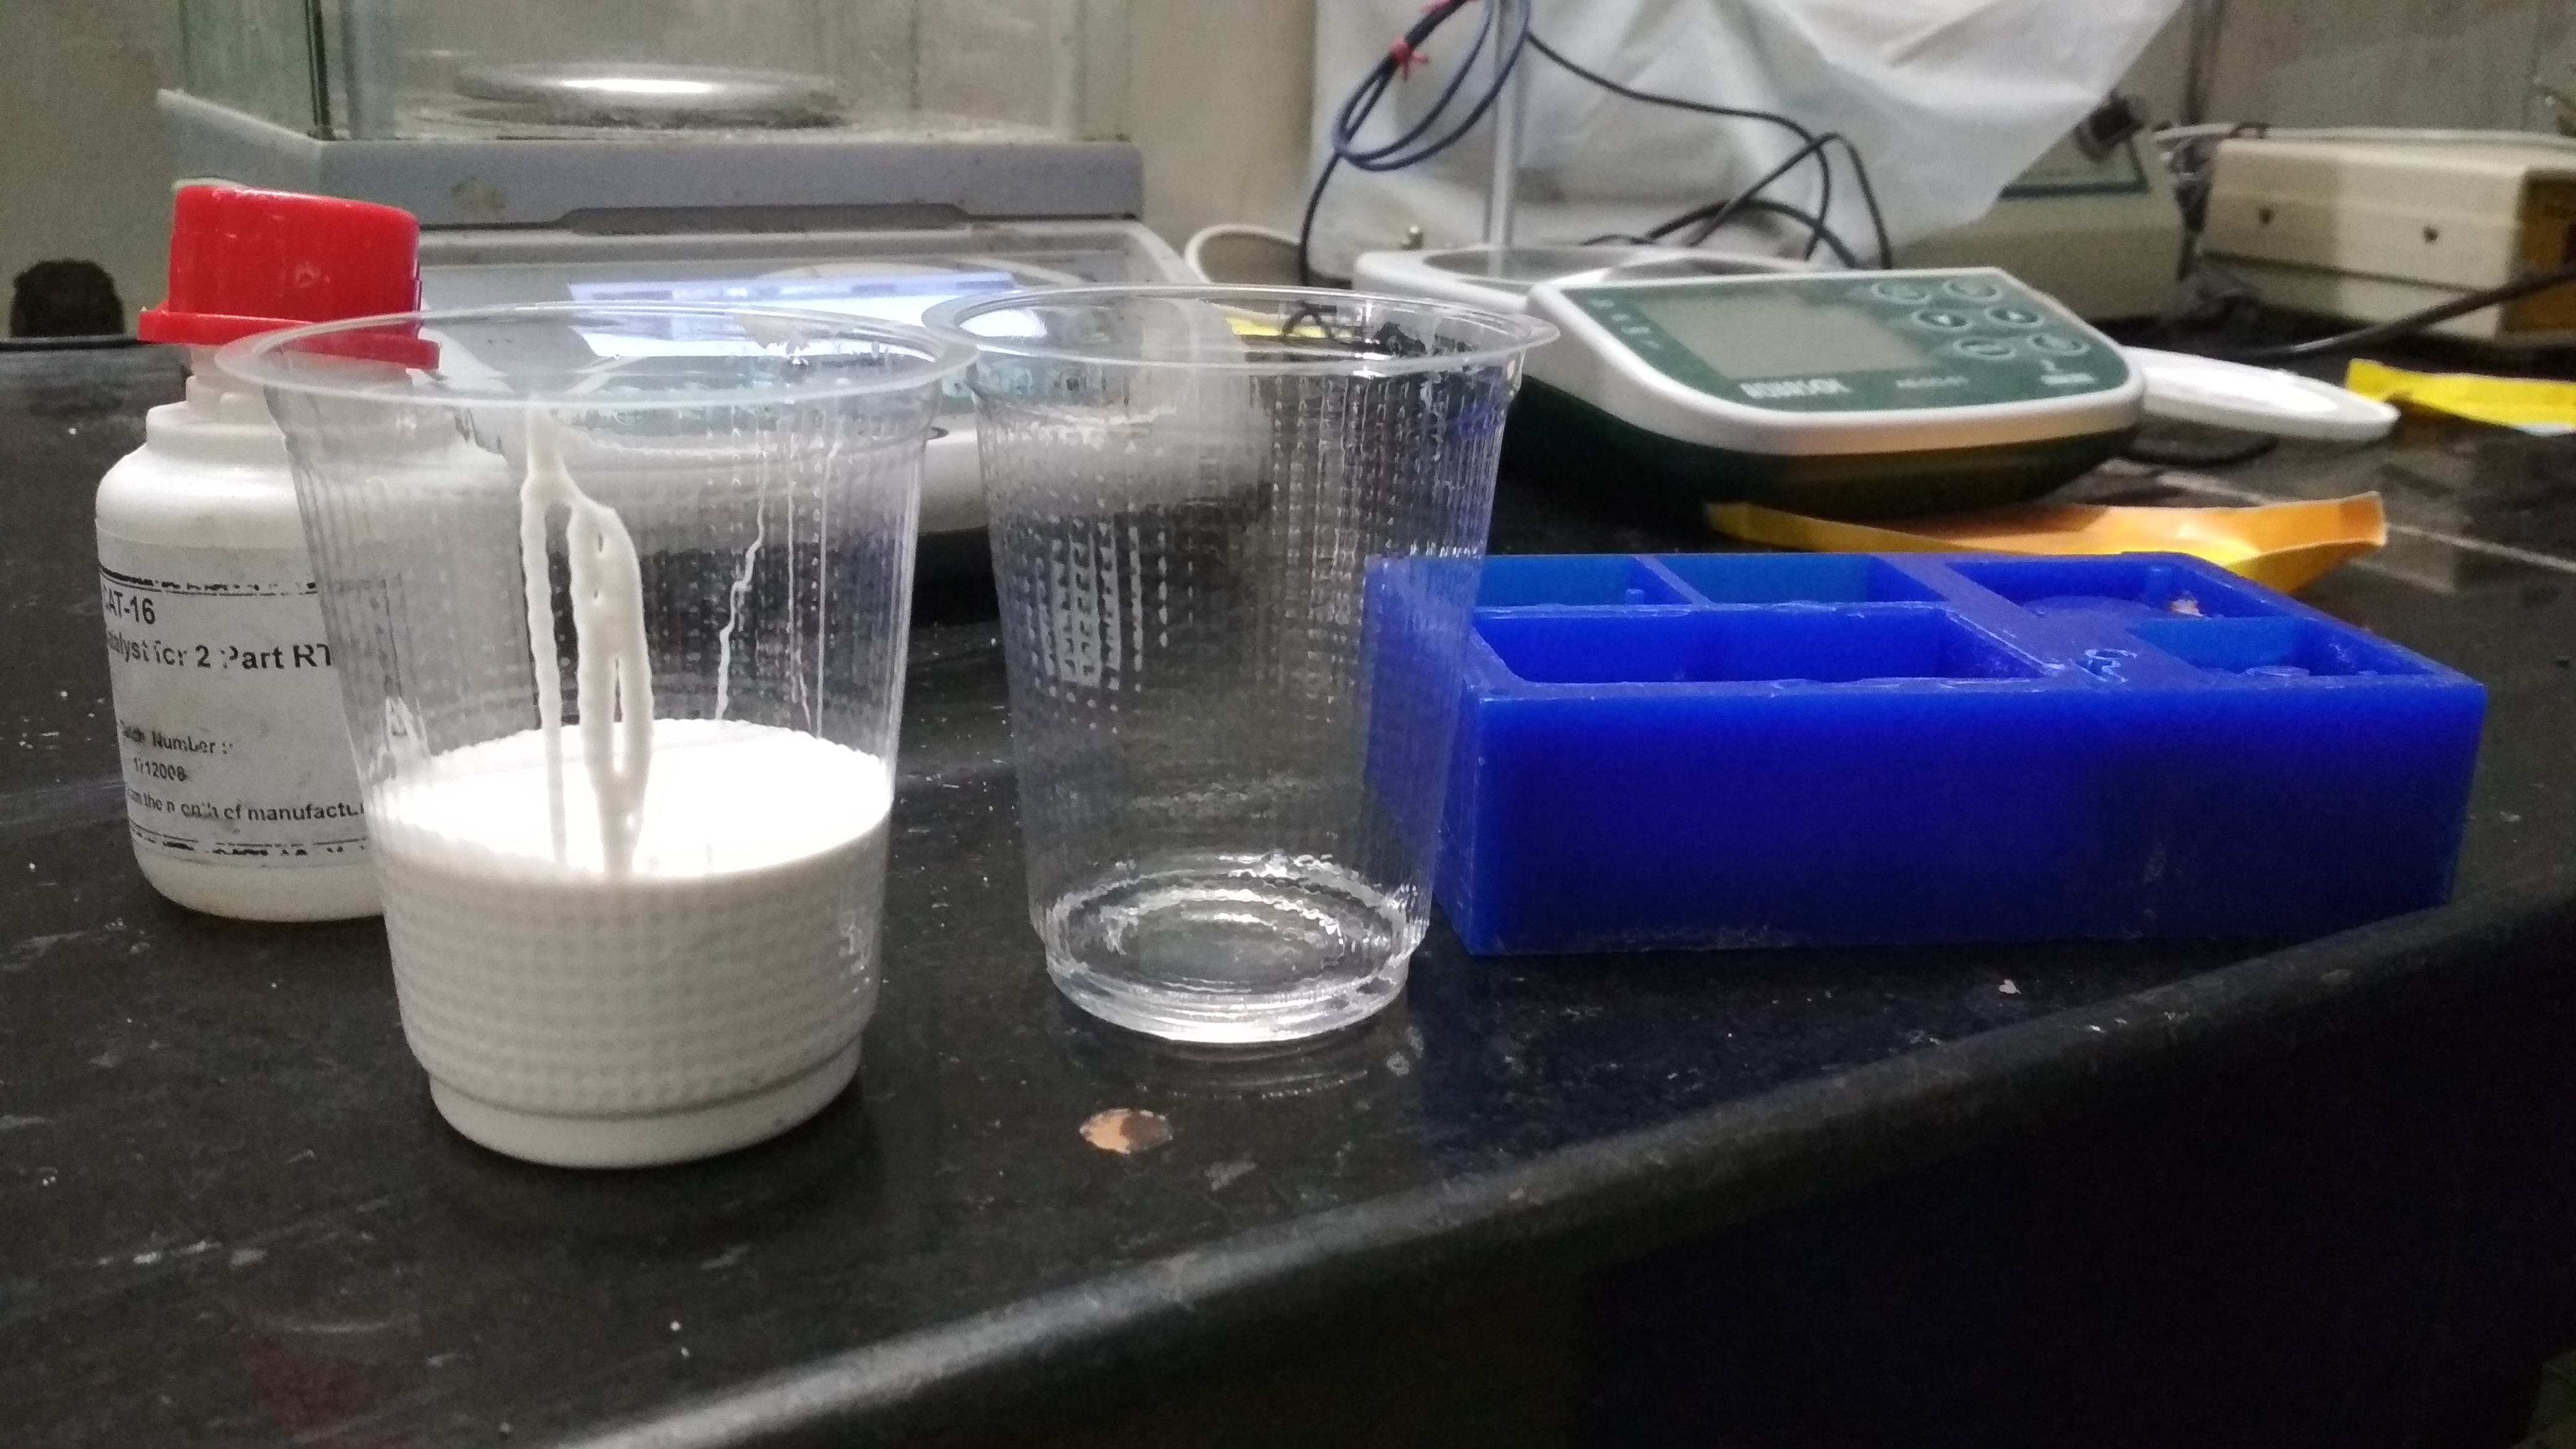
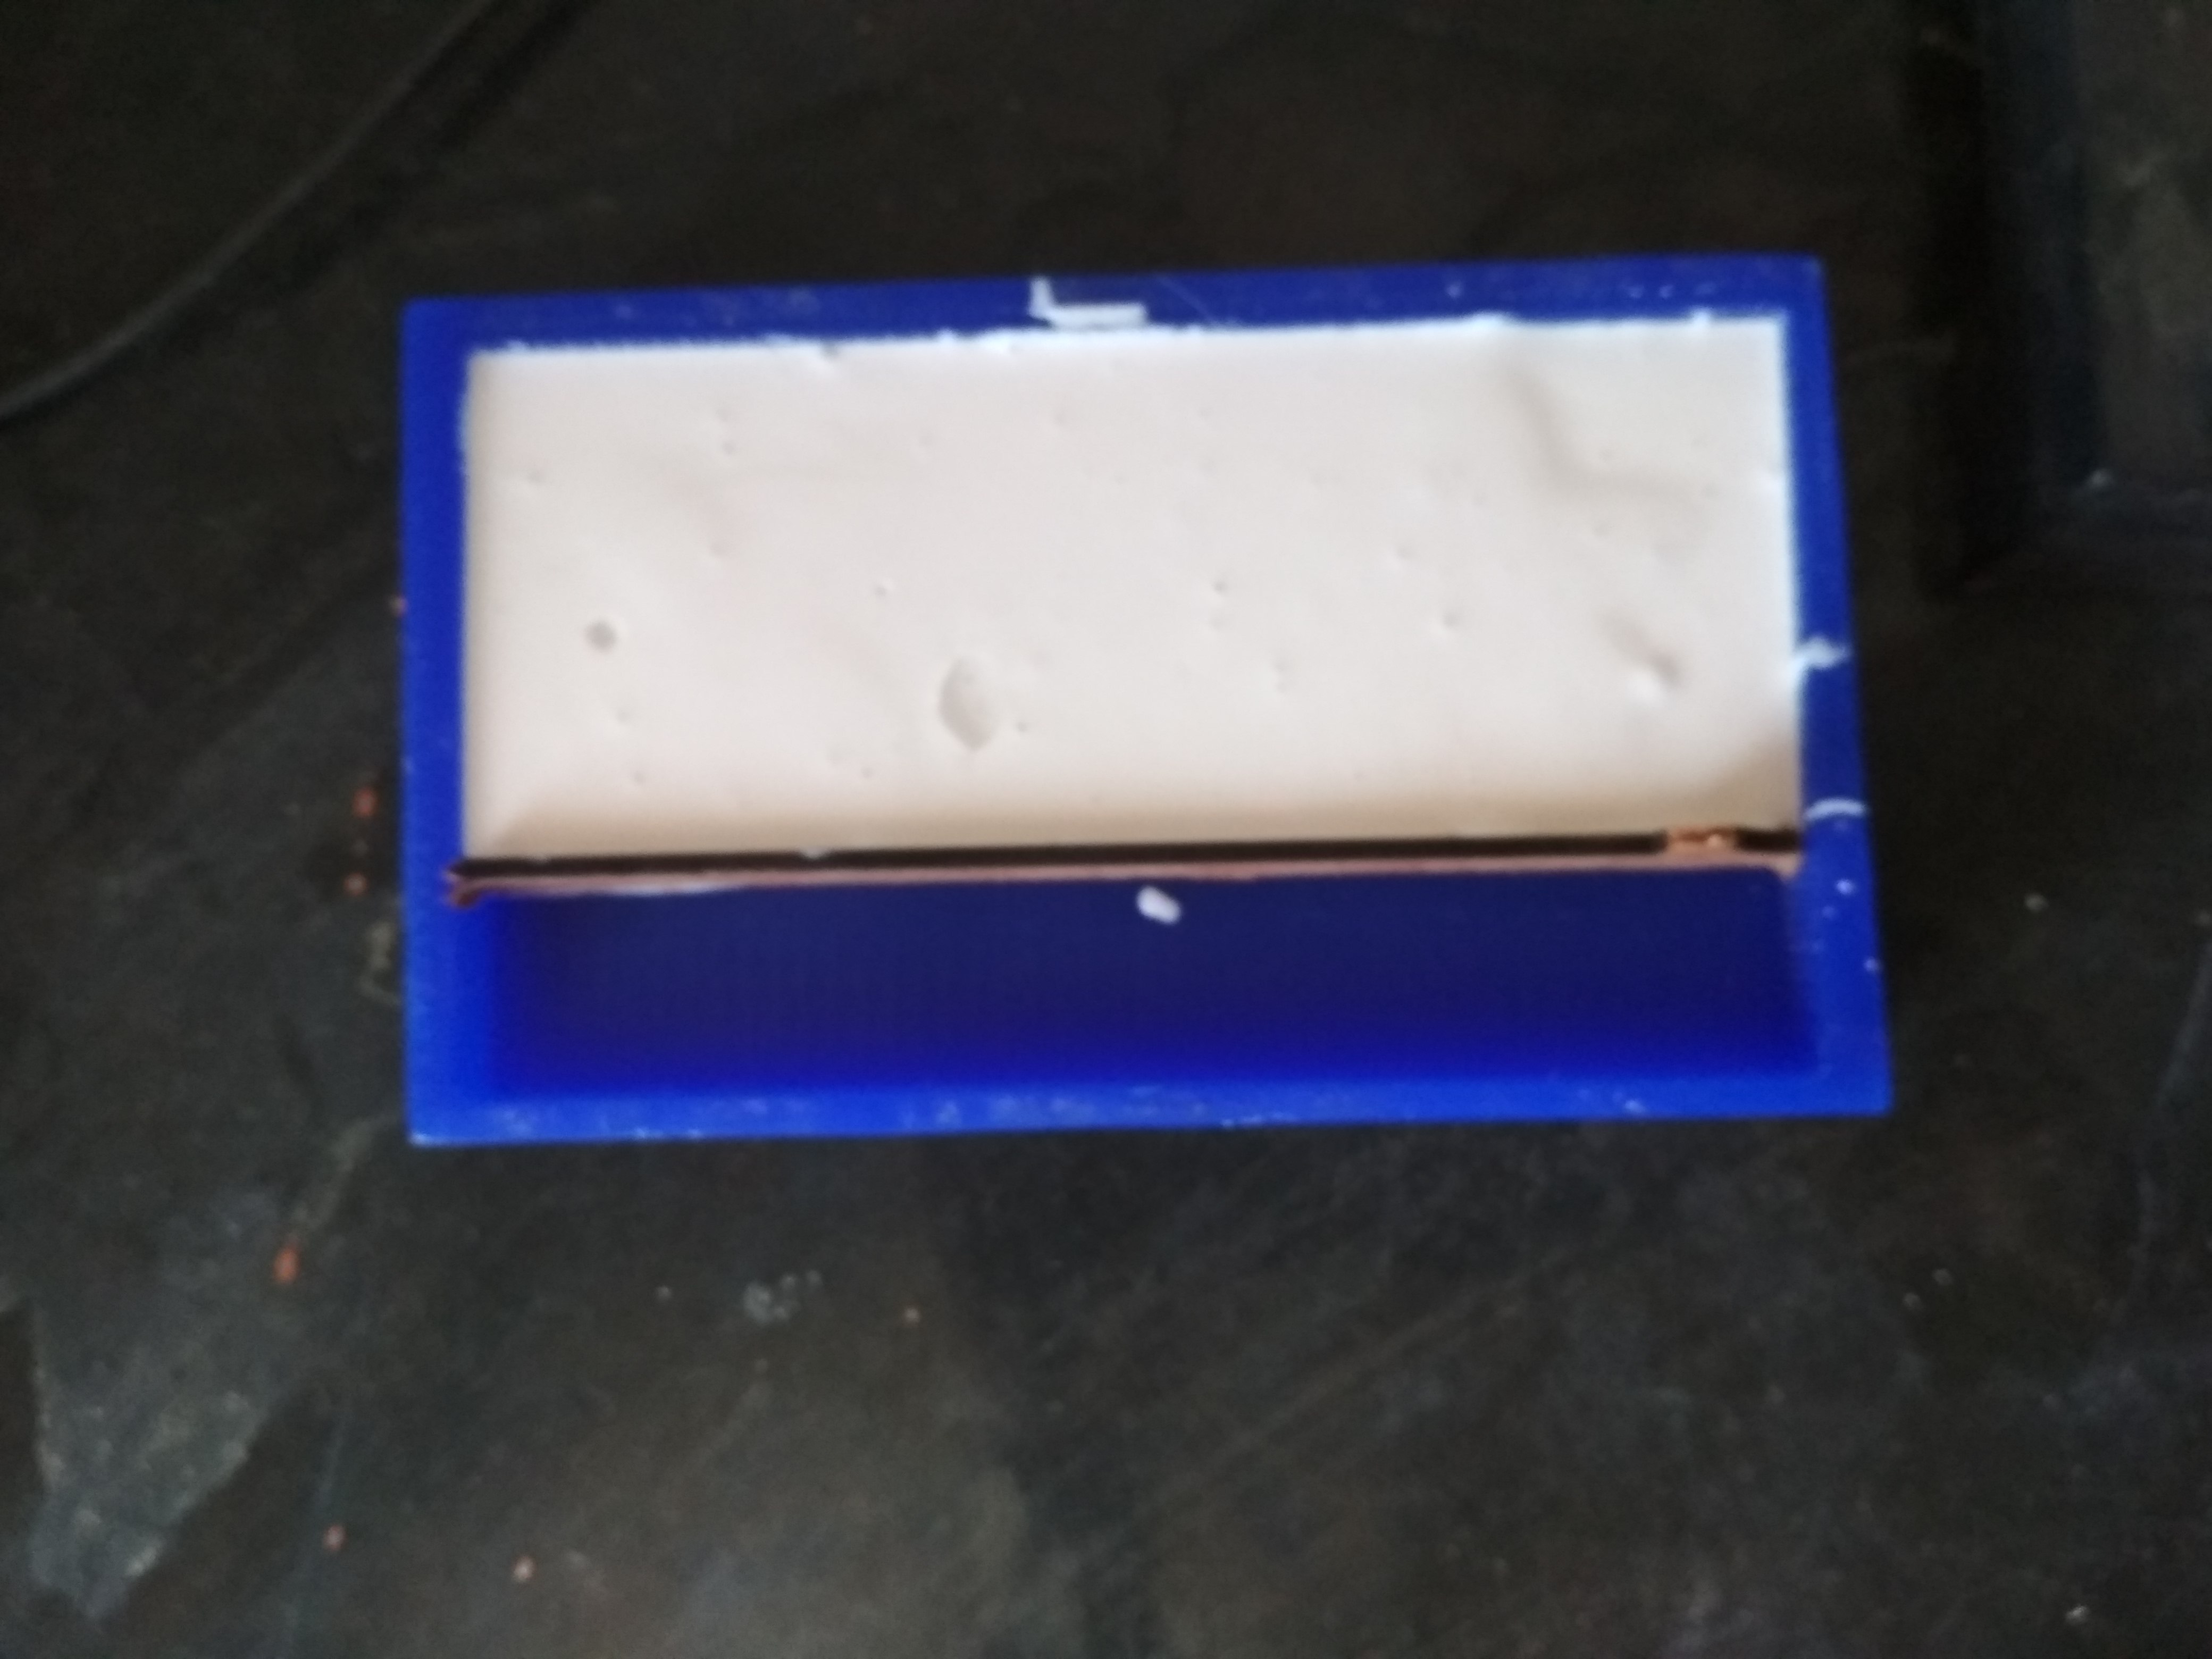
Then I moved for negative mold and get silicon and hardener mixture for this. It require 50g silicon and 5g hardener.

The negative mold looks like this:
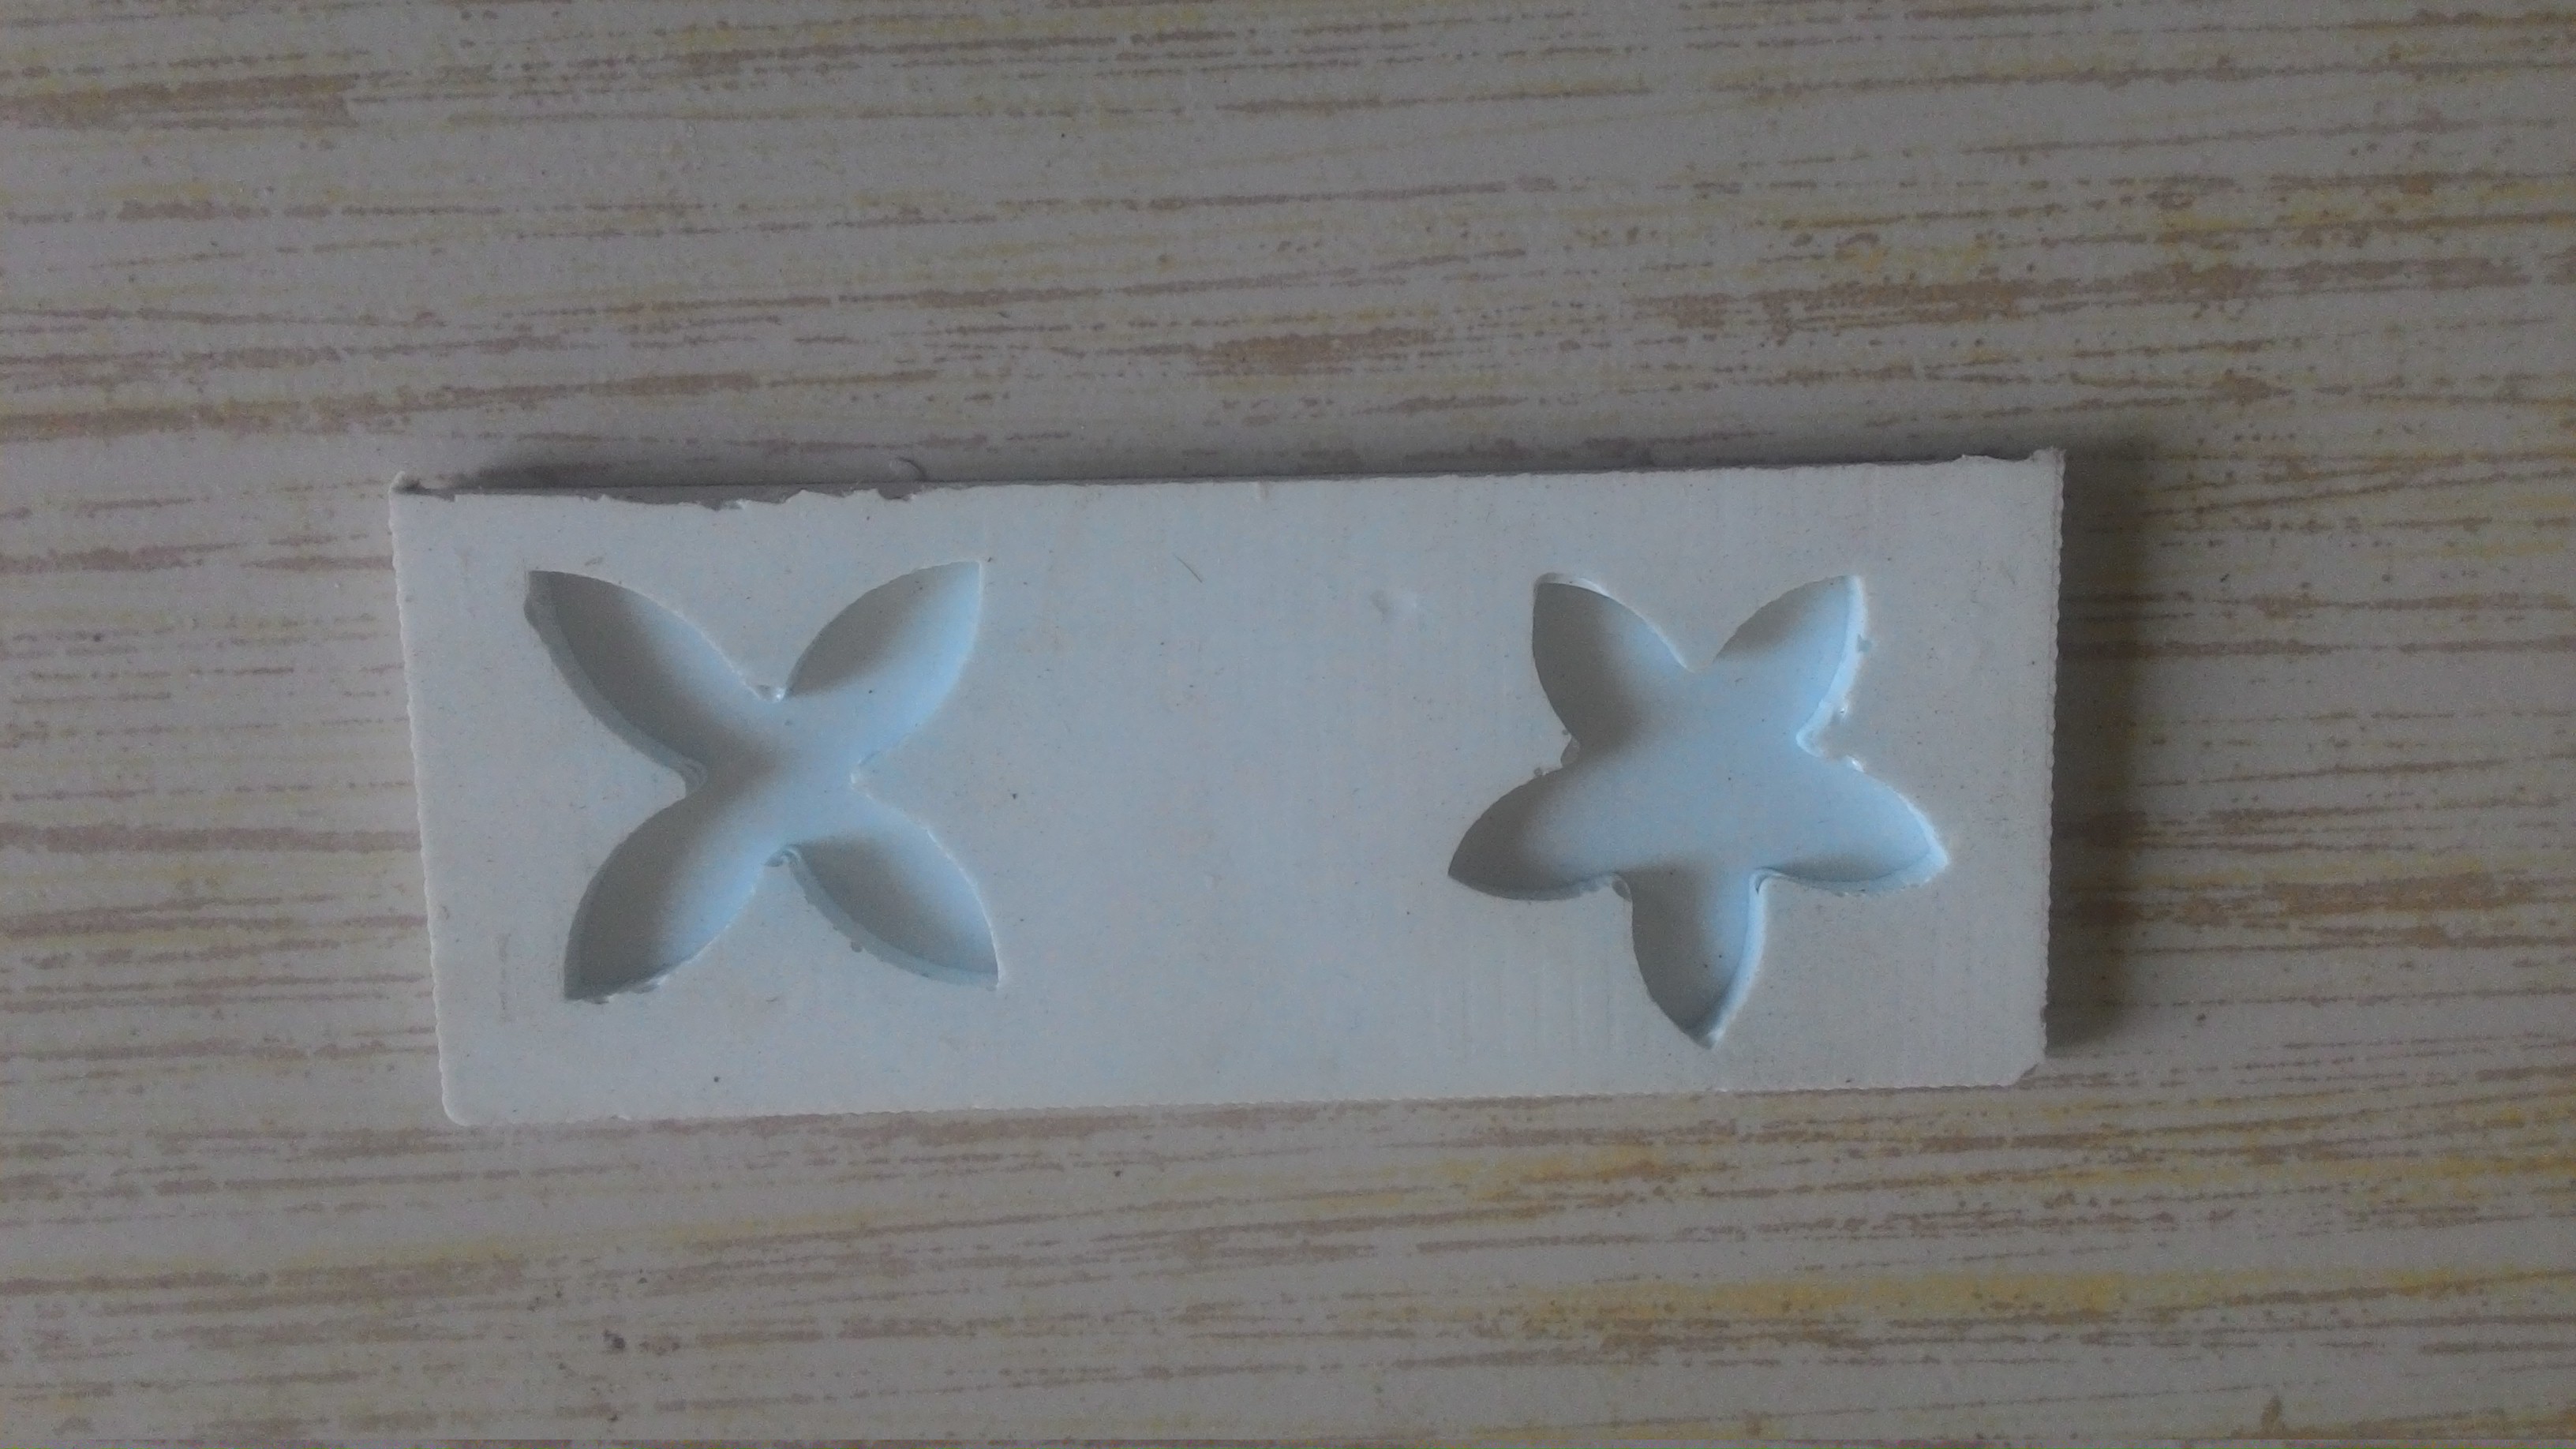
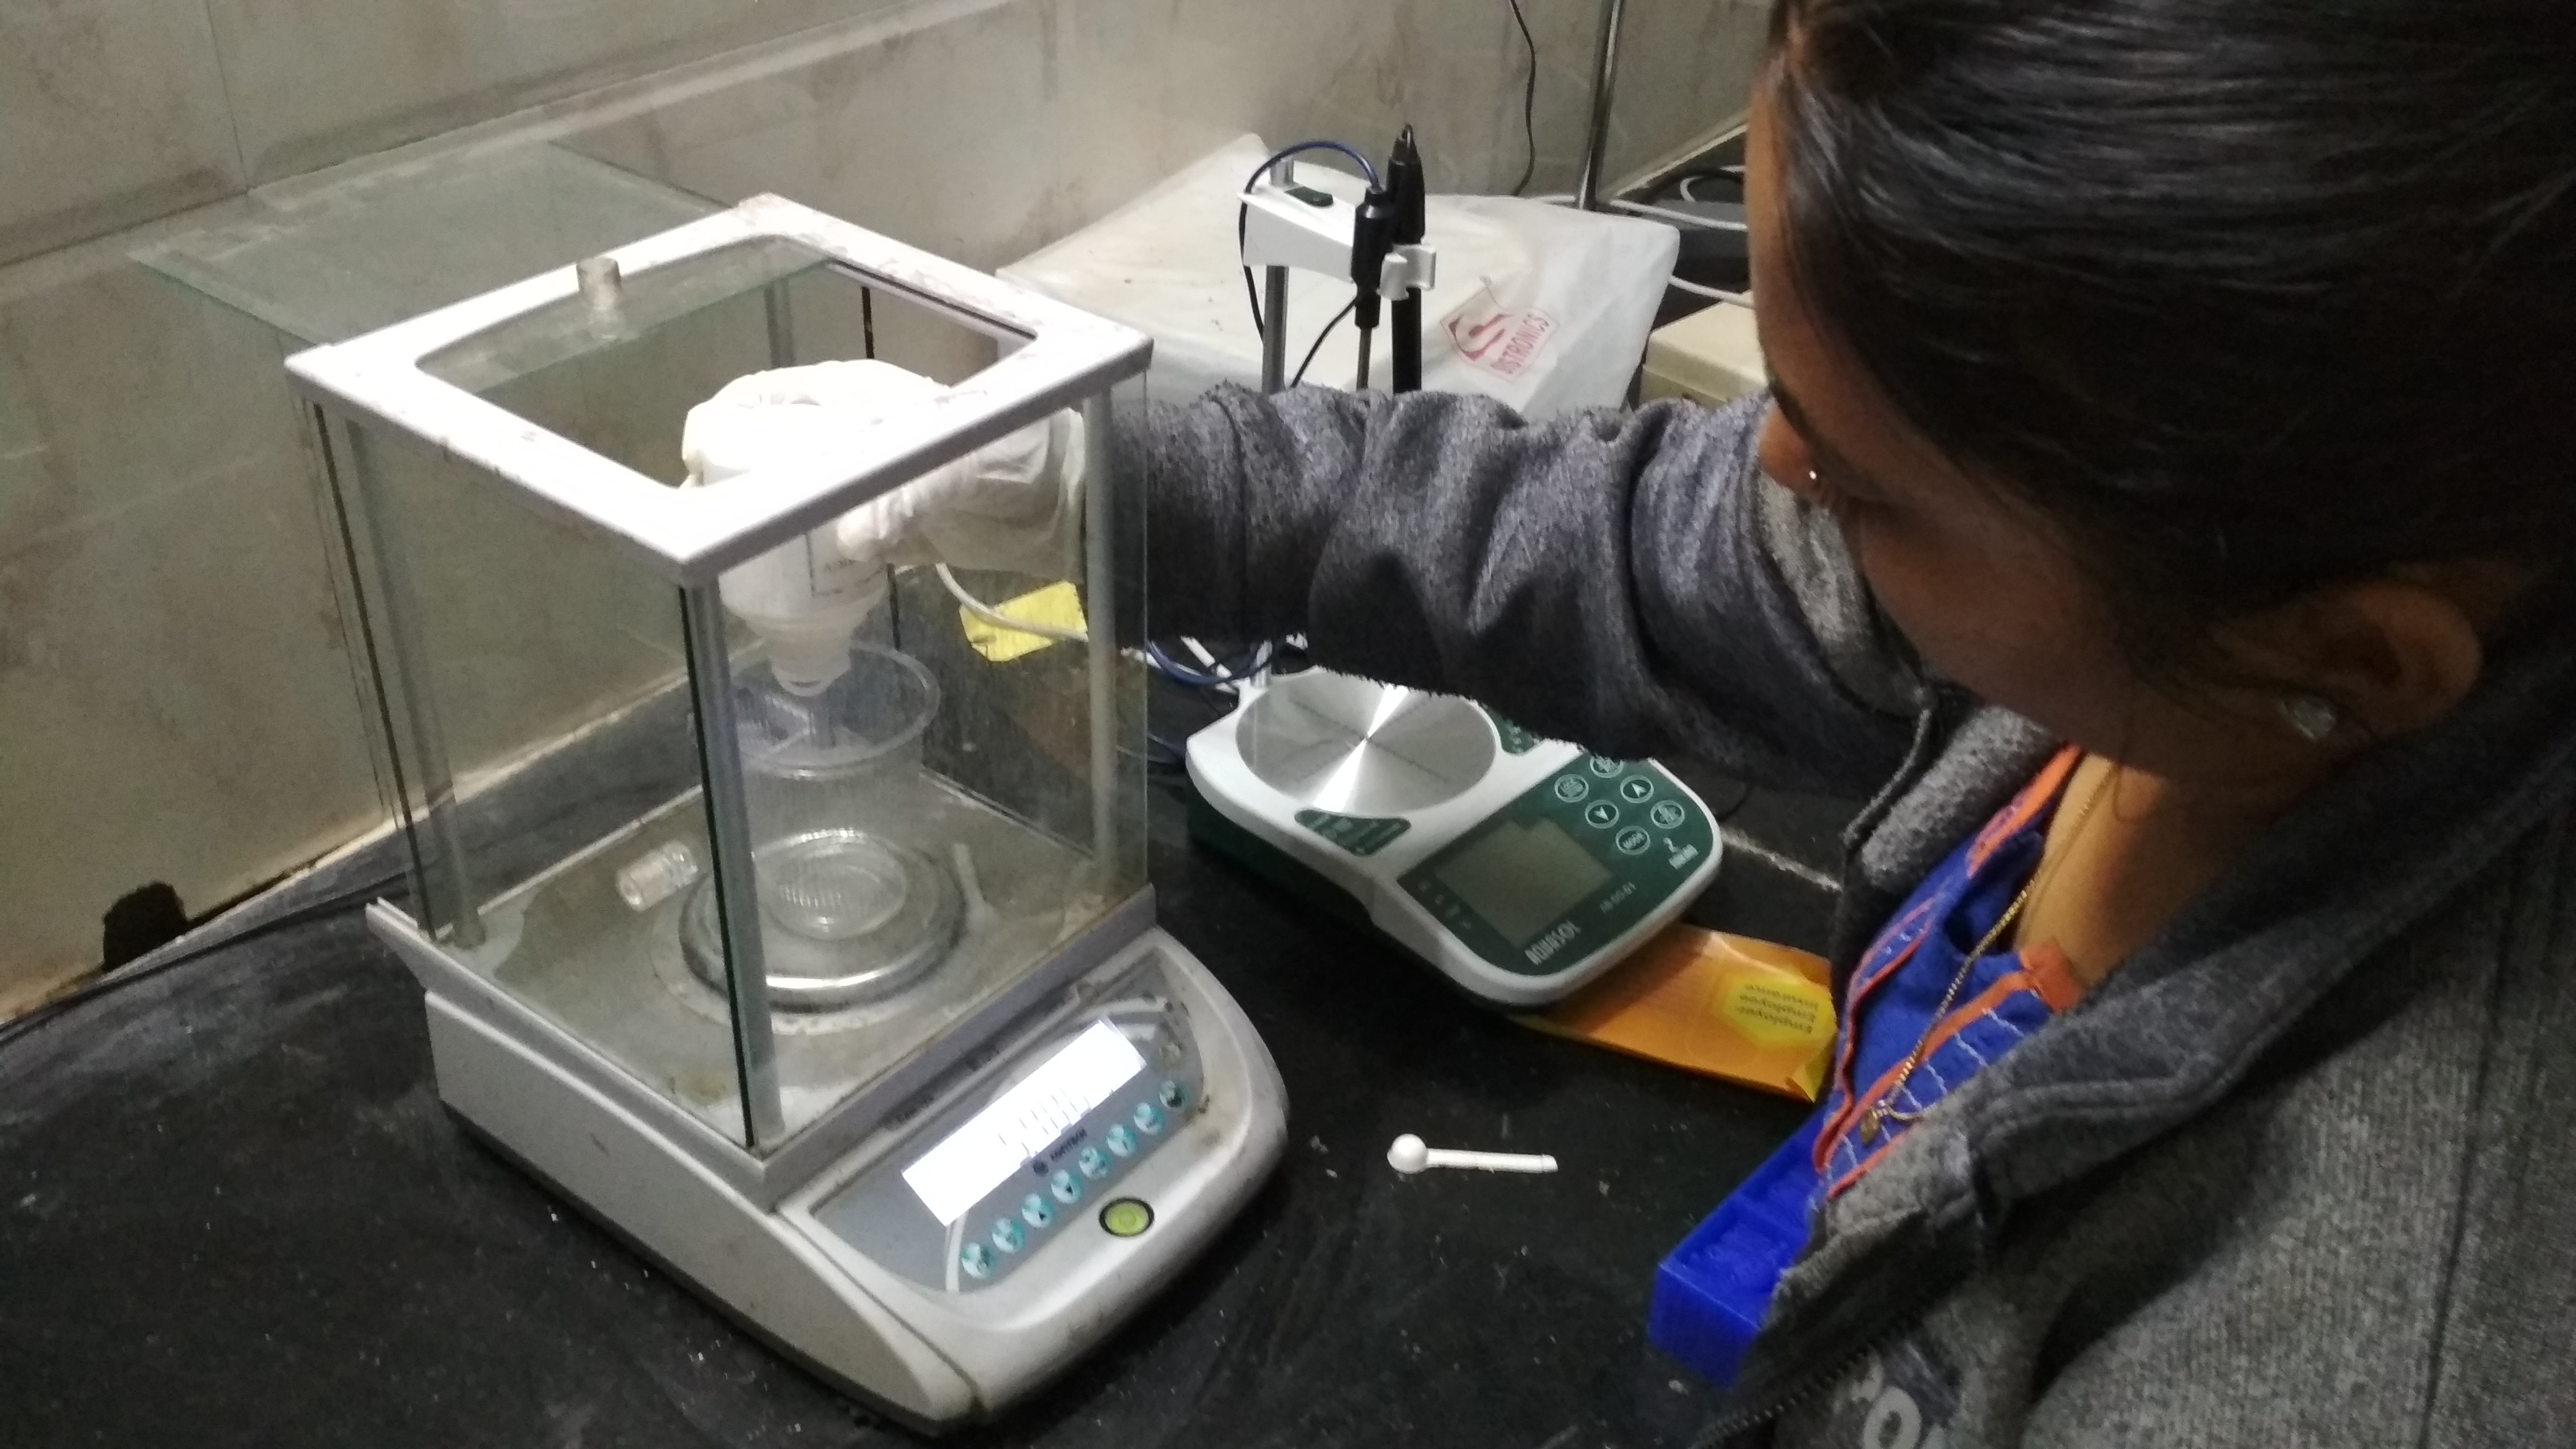
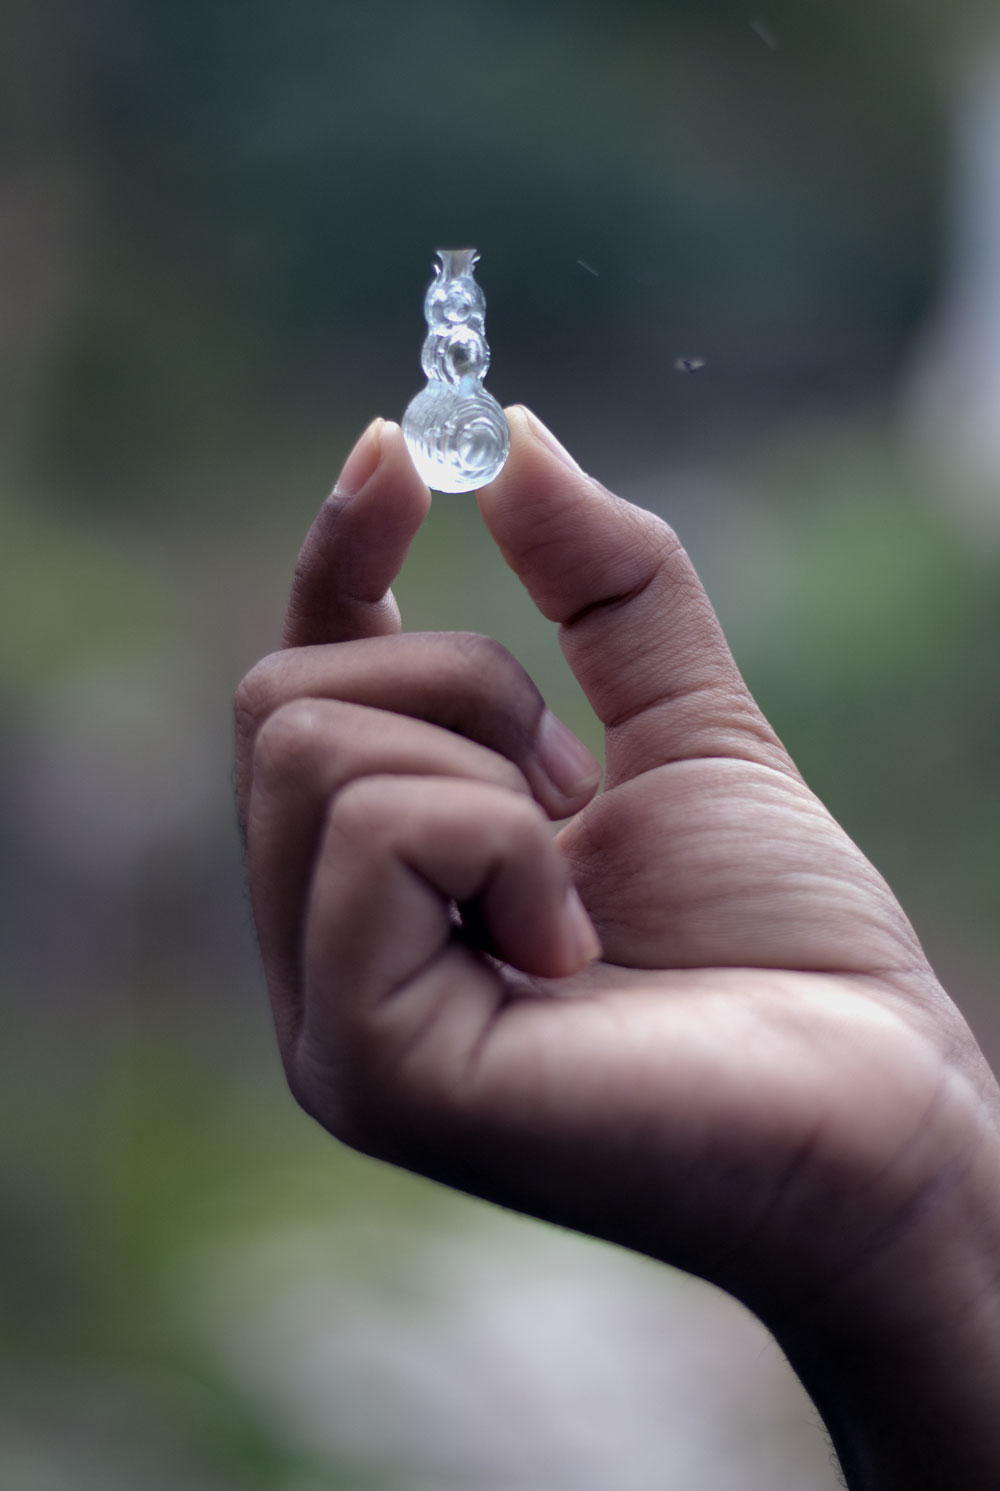
Then I moved towards casting. I took 20g epoxy resin, 10g hardener and mixed it.
WOW..!! It looks nice...
For this mold, you can download solidworks original file and .stl file from here.
Learning Outcomes-
I enjoyed this assignment because after a long time I do the lot of hands-on work. I studied properties of various materials and observe the behavior of the material. I learned about how to make negative and positive mold within the limitations of 3 axis machining. Traditional method of the molding and casting is good but it takes too much time.