Assignment 08 Make Something Big
In this weeks Assignment we had use our CNC-mill to make something "Big". For this task we had a new Test-CNC-Mill.
The Shaper Origin. This CNC-Mill is special because it is handheld Mill.
It determines its position via a special tape which ist placed onto the material. If you want to mill something
just upload the svg file on the machine and use the build in monitor to place ist where you want it to be milled (more later on).
Then the Shaper shows you the direction in which you have to move the mill, if you make minor mistakes while moving the mill
the mill will correct them using its build in motors.
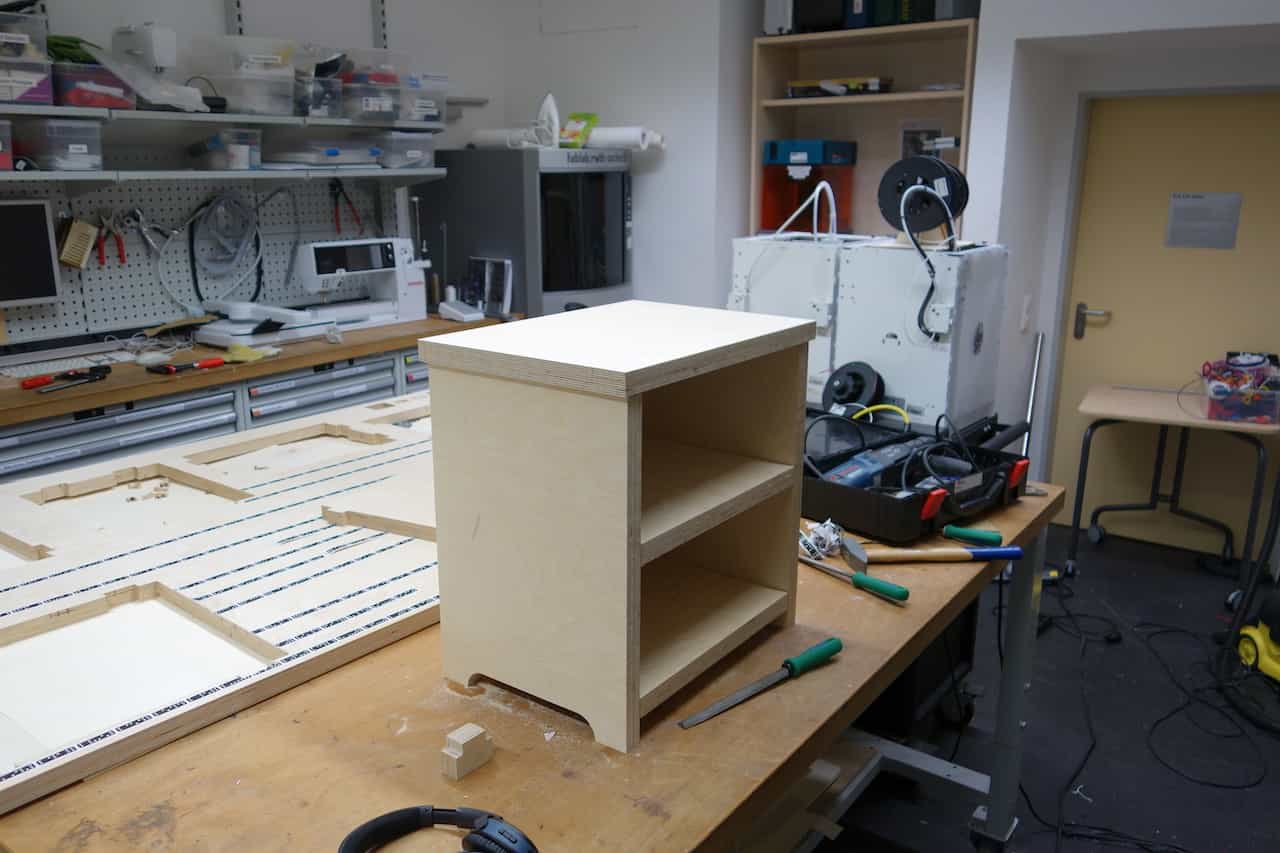
For the Assignment I chose to make a nightstand since I needed a new one.
For the Assignment I chose to make a nightstand since I needed a new one.
Tools used
- Shaper Origin
- Hammer
- 1/4 inch Drill
- 1/8 inch Drill
- Sandpaper
- Wood Files
Designing the Nightstand
It was a rather long process to design my new nightstand. I started off on paper, then I recreated the design with Openscad. After that I exported it into Fusion360. There I specified in which way the each face would be milled and added the dogbones for the joints. Finally I used the Shaper Utilities Addon to export it to stl-files.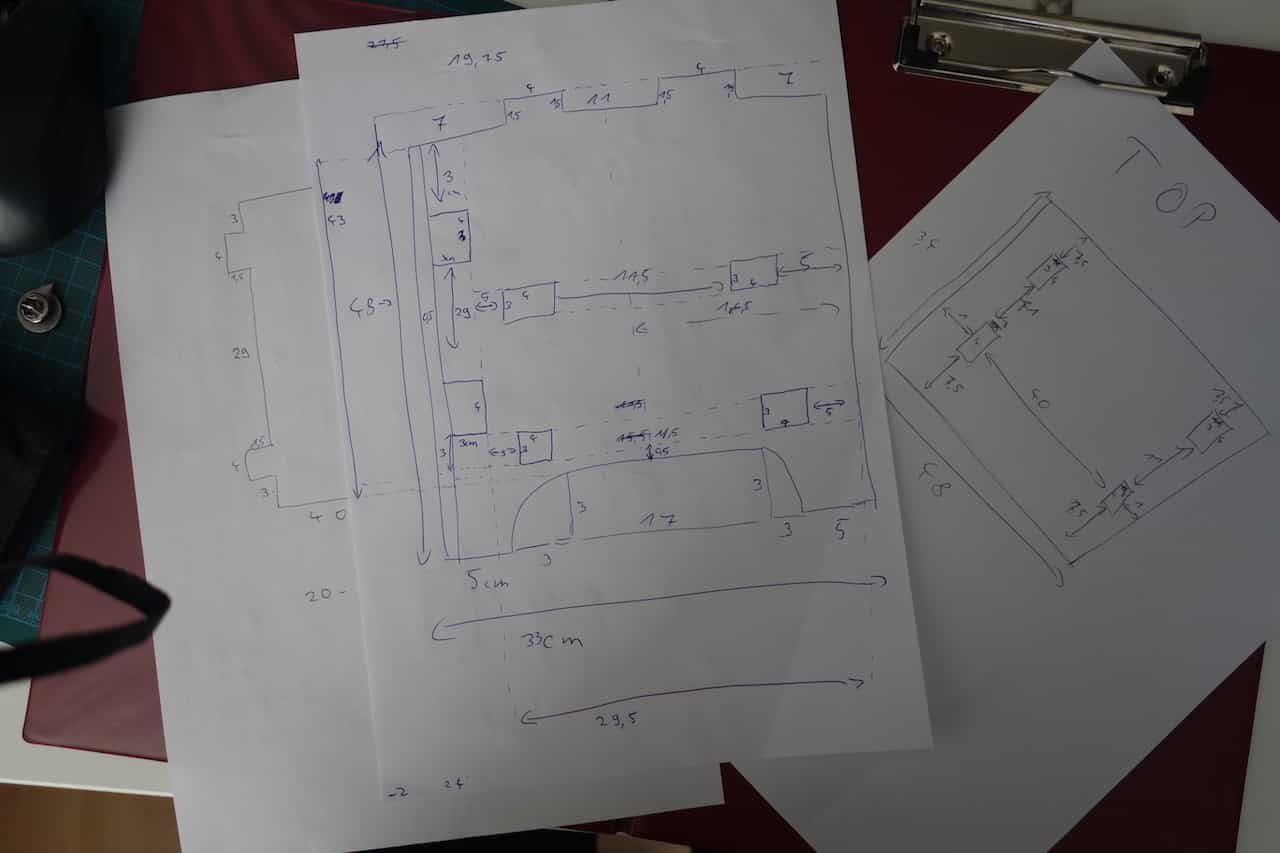
I decided that my nightstand should consist of two side-plates with two foots each, one back- and one top-plate and two inlay plates.
So the final nightstand will stand on four foots which will provide airflow under it, this will prevent mildew and moisture und the nightstand.
It will also have two separate compartments where I can store things.
I started with the measurements of another nightstand which where 48cm*46cm*33cm and derived all my other measurements from them. The back-plate and the inlays will have four "teeth" each so they can be connected to side-plates via a simple joint. The top-plate will be plugged on top using four similar joints.
For the depth of the joints I decided that half of the width of the material(1.5cm) would be enough.The pockets will be 1.7 cm deep and the teeth 1.5 cm, this ensures that the teeth will completely fit into the pockets without leaving gaps.
Calculating every measurement from scratch was quite difficult. I had to resize things multiple time to make everything fit together. Sometimes a made mistakes while calculating sometimes I just failed to read my own handwriting.
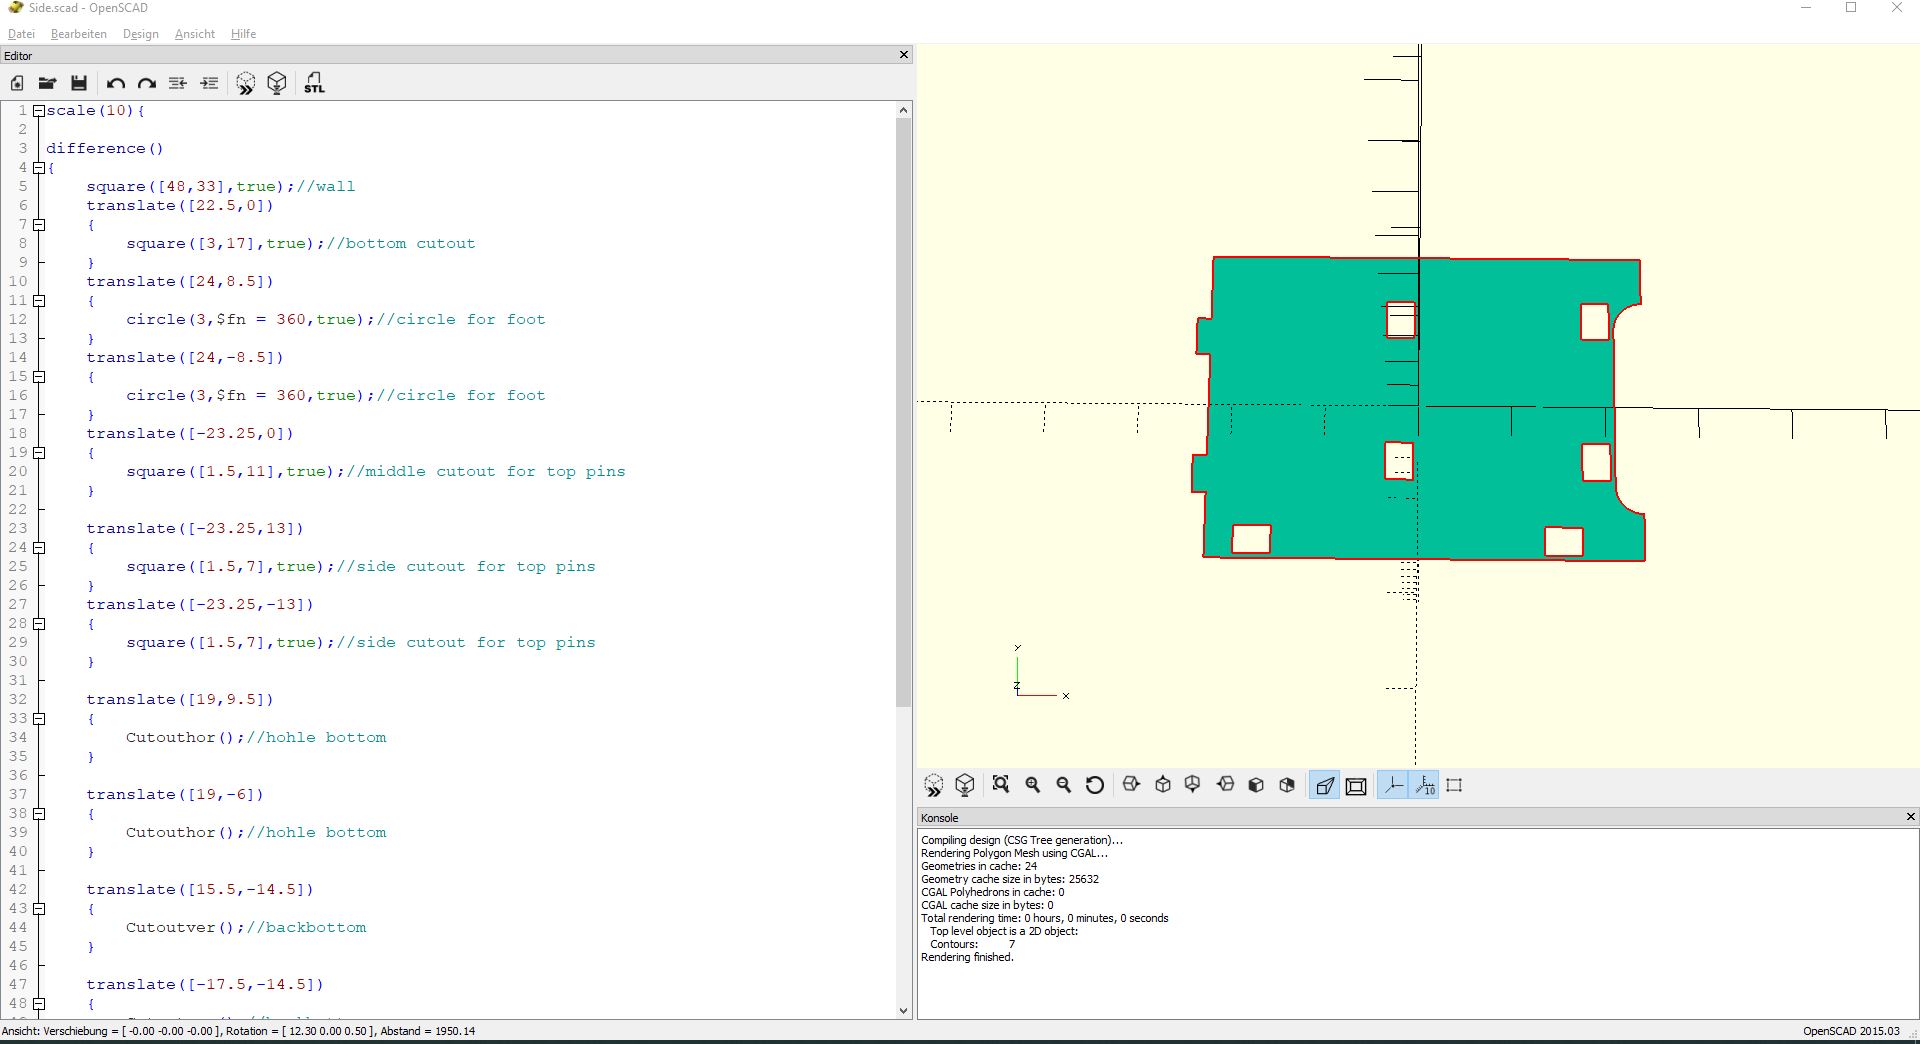
Now I designed every part in openscad this was easy since I already hat all the measurements.
I used cm as a unit for the design so I had to scale the whole object by 10, because the standard unit Openscad uses is mm.
I tried to export the files directly to svg and mill them, but this did not work. The Shaper needs connected lines to recognize shapes as pockets etc. But but the svg created only contains single lines, so I to do something about it. I decided to export the files to Fusion 360 since it had an add-on for the Shaper. I used the dfx format to export the files.
I tried to export the files directly to svg and mill them, but this did not work. The Shaper needs connected lines to recognize shapes as pockets etc. But but the svg created only contains single lines, so I to do something about it. I decided to export the files to Fusion 360 since it had an add-on for the Shaper. I used the dfx format to export the files.
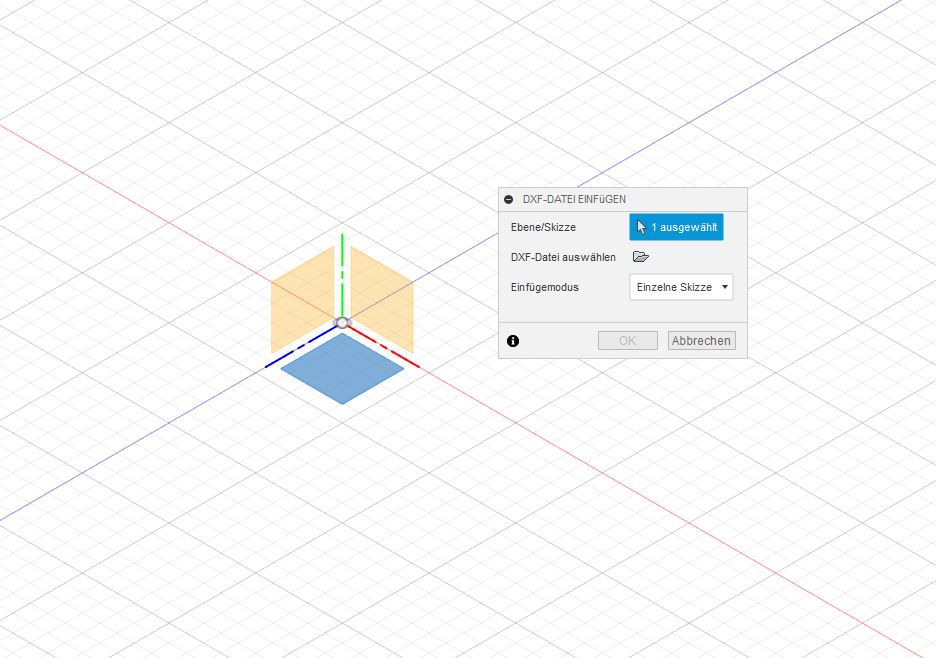
Via Insert->Insert DFX I opened this Dialog here you choose in which direction the dfx file will be orientated. I always choose the x-z-plane.
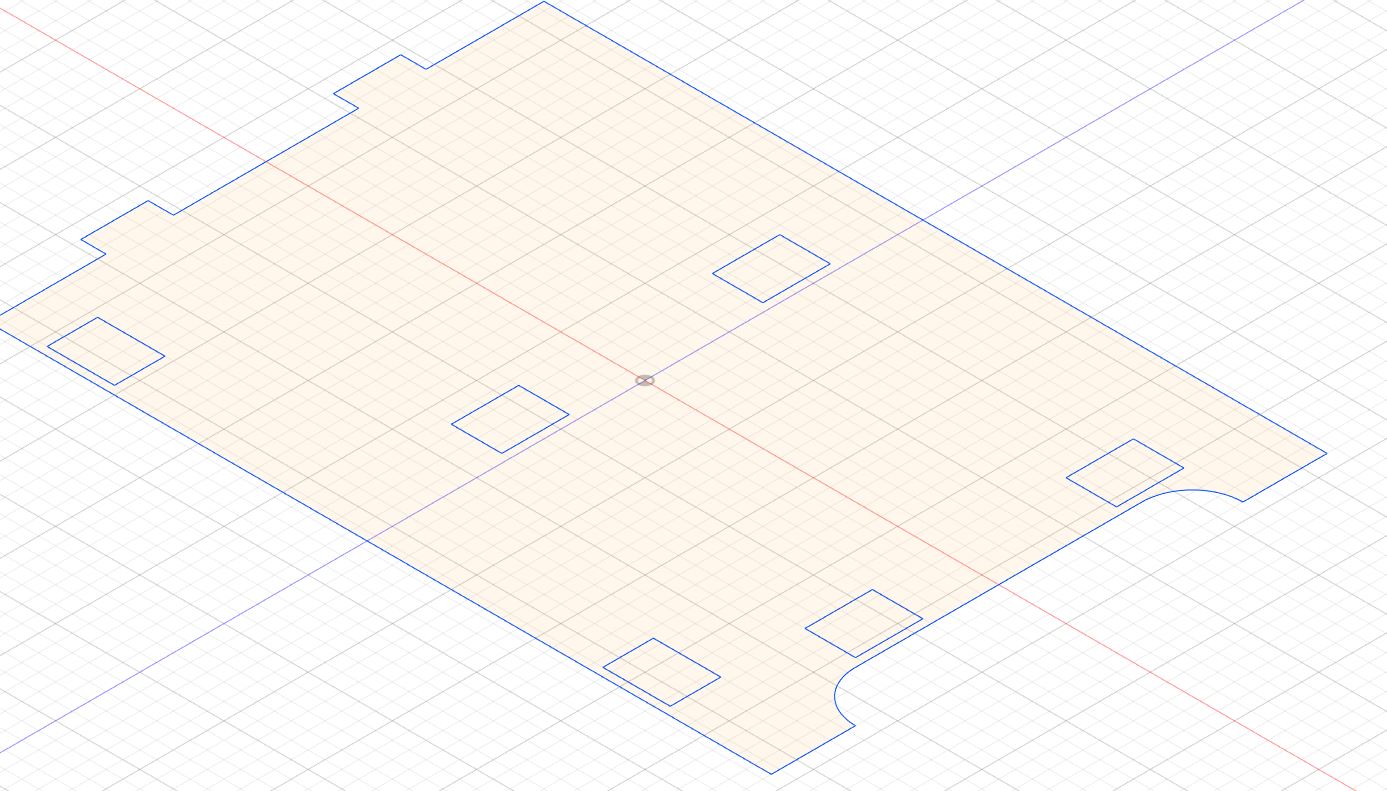
The imported file should now look like this.
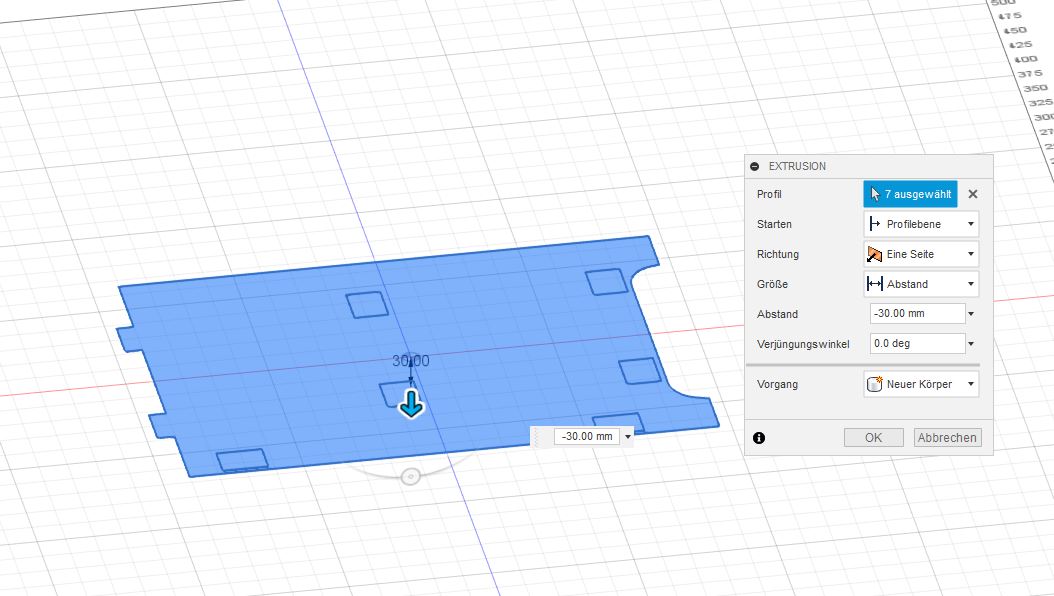
Next I extruded the whole body be selecting the whole object and then pressing E.
Since my material is 3 cm thick. I extruded -30mm. I chose to extrude into the plane so my drawing lies on top of the resulting solid.
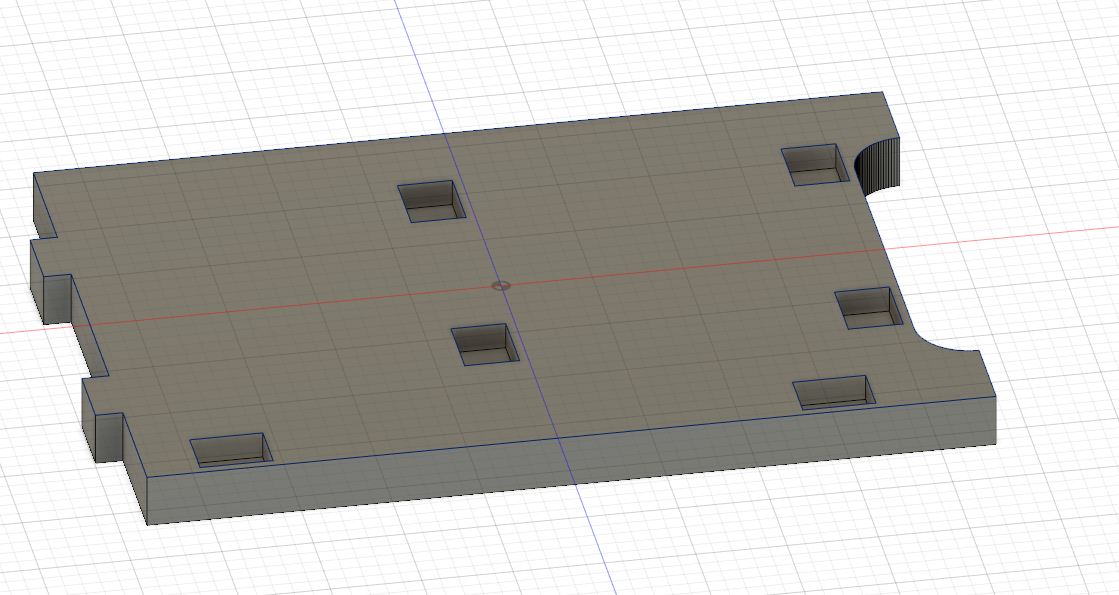
Lastly I extruded the pockets with a depth of -17mm.

To create dogbones i found a nifty tool just run it in Fusion360 and the dogbones will created automatically.
Dogbones are necessary because a CNC-mall cannot cut 90° angles. Since the drill is round and it has a set diameter the edge will always be a little bit round. When milling a pocket this results in a pocket that is a little bit smaller than intended. If you dont fix this in some way or another your joints wont fit anymore. By adding the dogbone the sharp angle will be substituted by a circle which makes the pocket slightly bigger.
Dogbones are necessary because a CNC-mall cannot cut 90° angles. Since the drill is round and it has a set diameter the edge will always be a little bit round. When milling a pocket this results in a pocket that is a little bit smaller than intended. If you dont fix this in some way or another your joints wont fit anymore. By adding the dogbone the sharp angle will be substituted by a circle which makes the pocket slightly bigger.
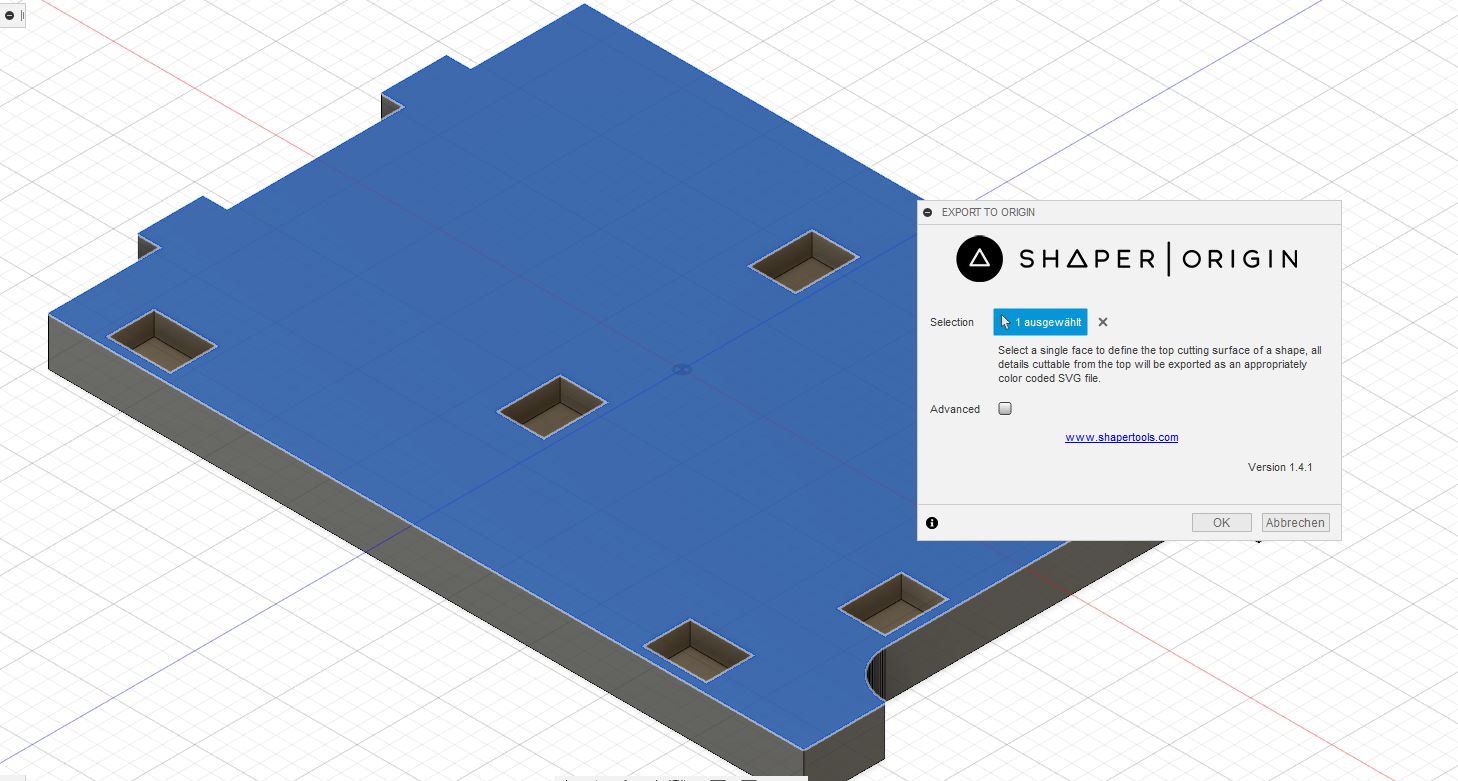
To finish off press the shaper button in the top toolbar select the face of the solid you want to be the top of the cutting surface and press Ok.
Now a svg will be exported which ist ready to be milled with the shaper.
Setup the Shaper
I will explain briefly how to use the Shaper Origin for more detailed information please refer to these tutorials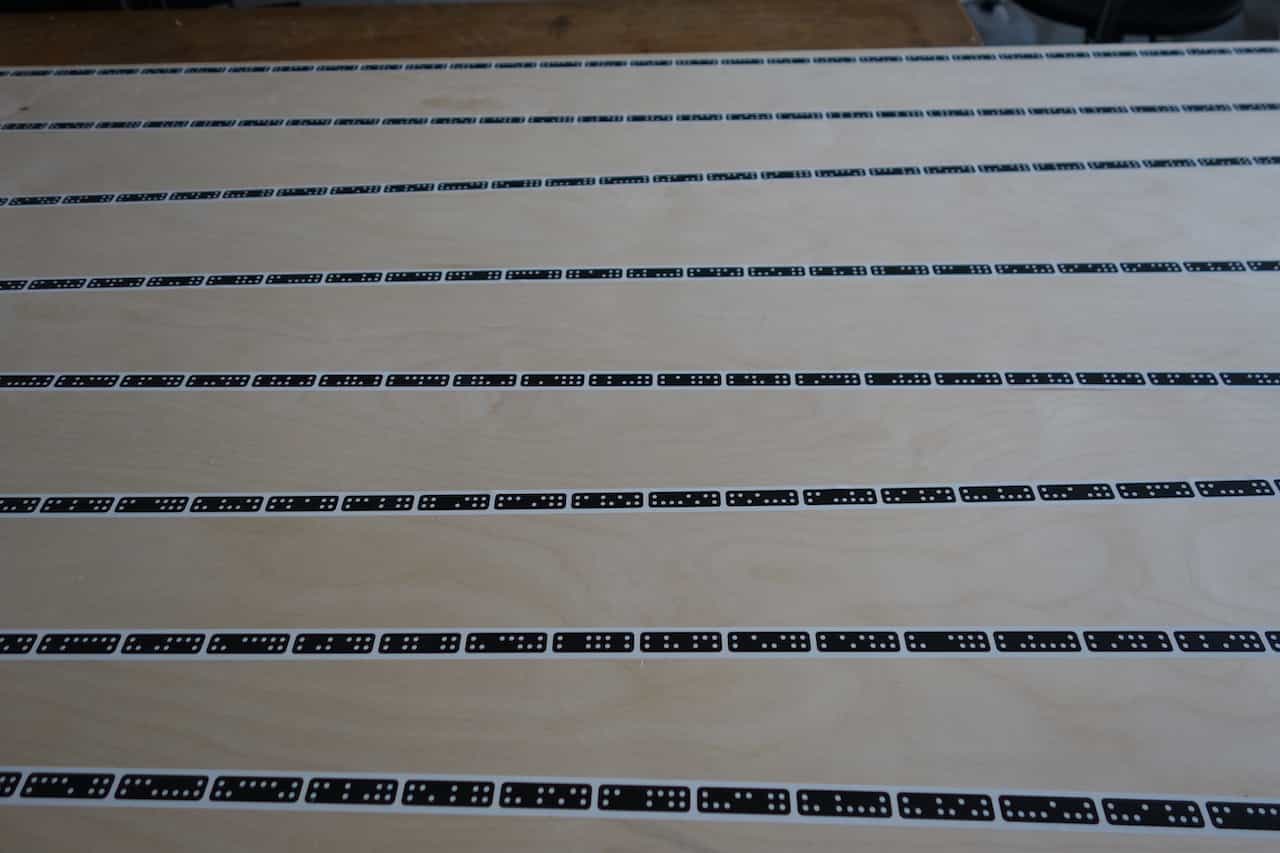
First place some shapertape onto your working-area/workpiece like this. The Shaper should "see" at least 3 tapes at any place of your working-area.
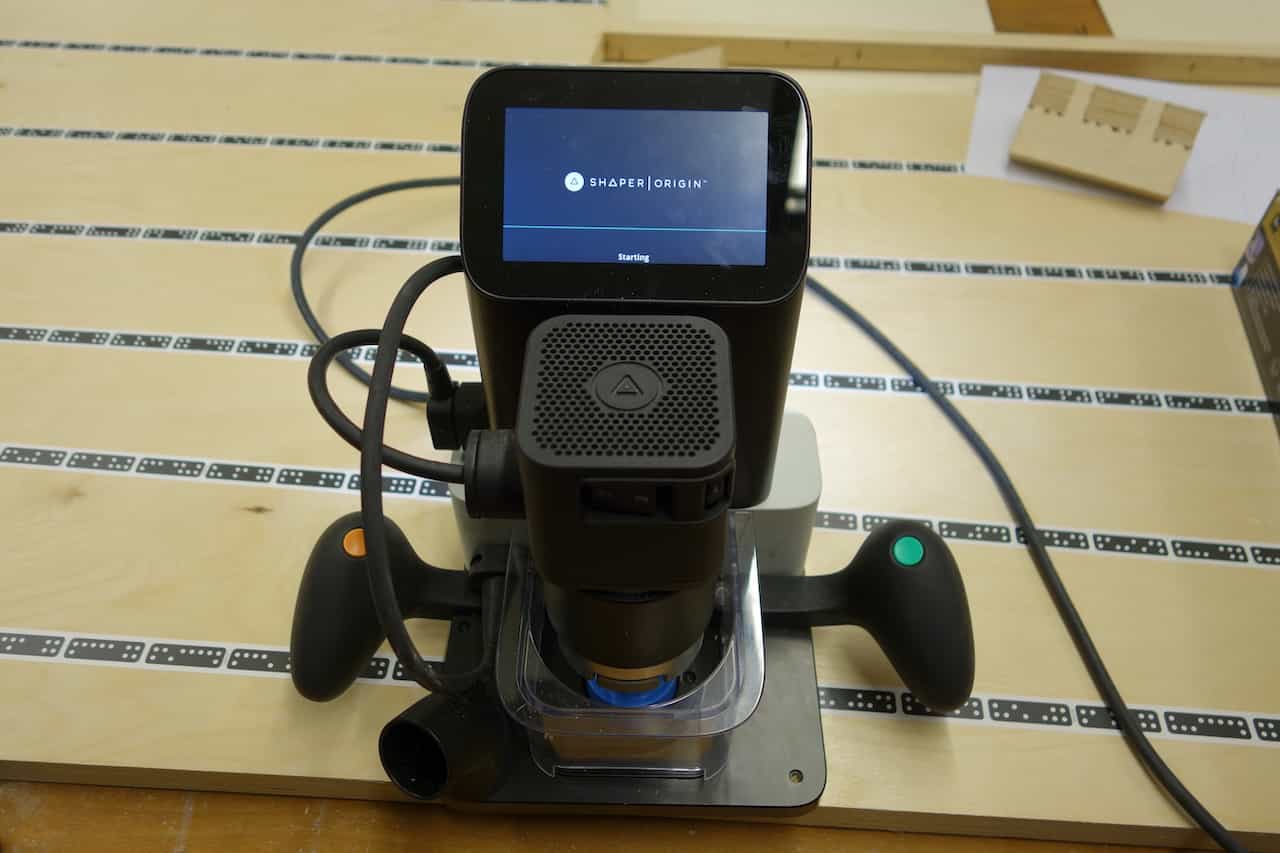
Now place the Shaper onto the workpiece and plug it in.
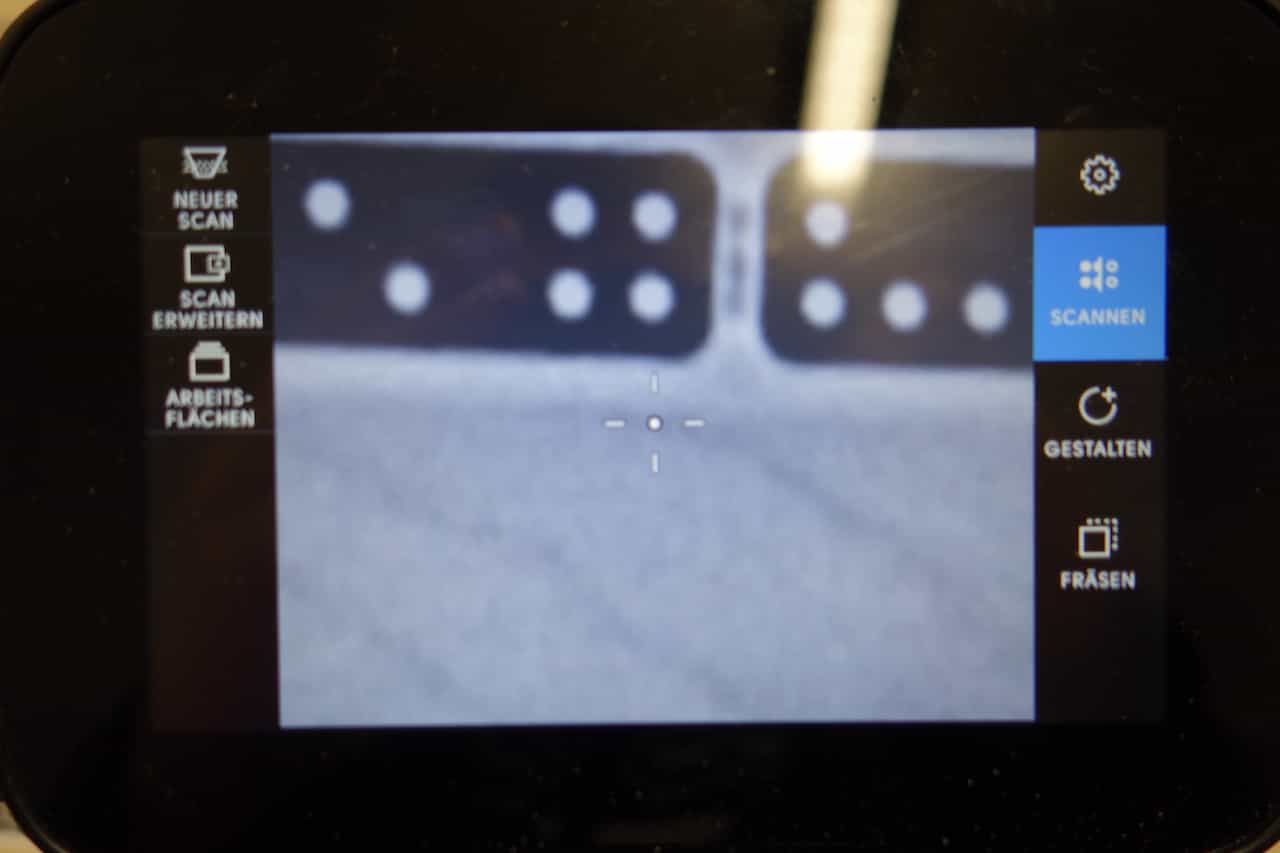
Now select Scan->new Scan and move the Shaper till all of your working area is covered. Then press "finish scan" or the green button on the handle.
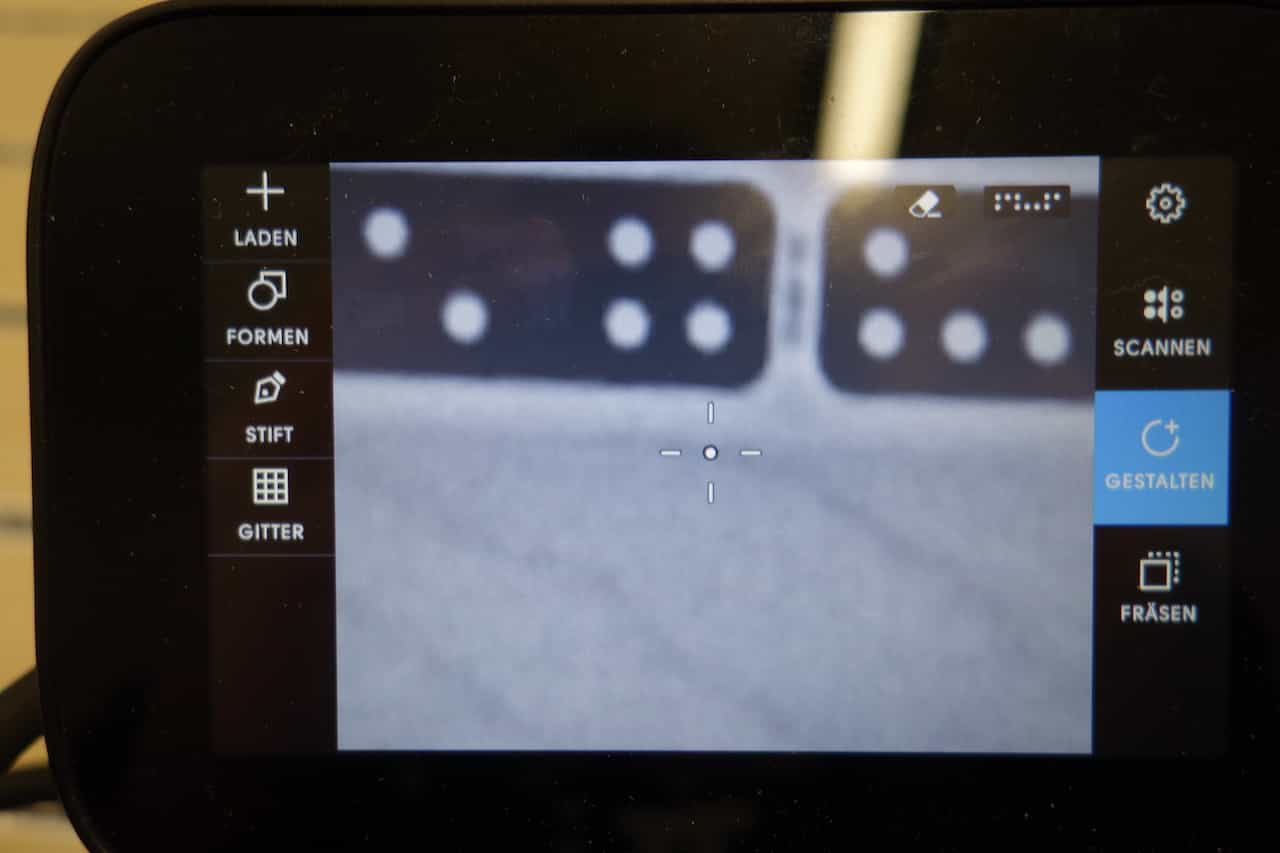
Now select Design->"+" to open the place menu.
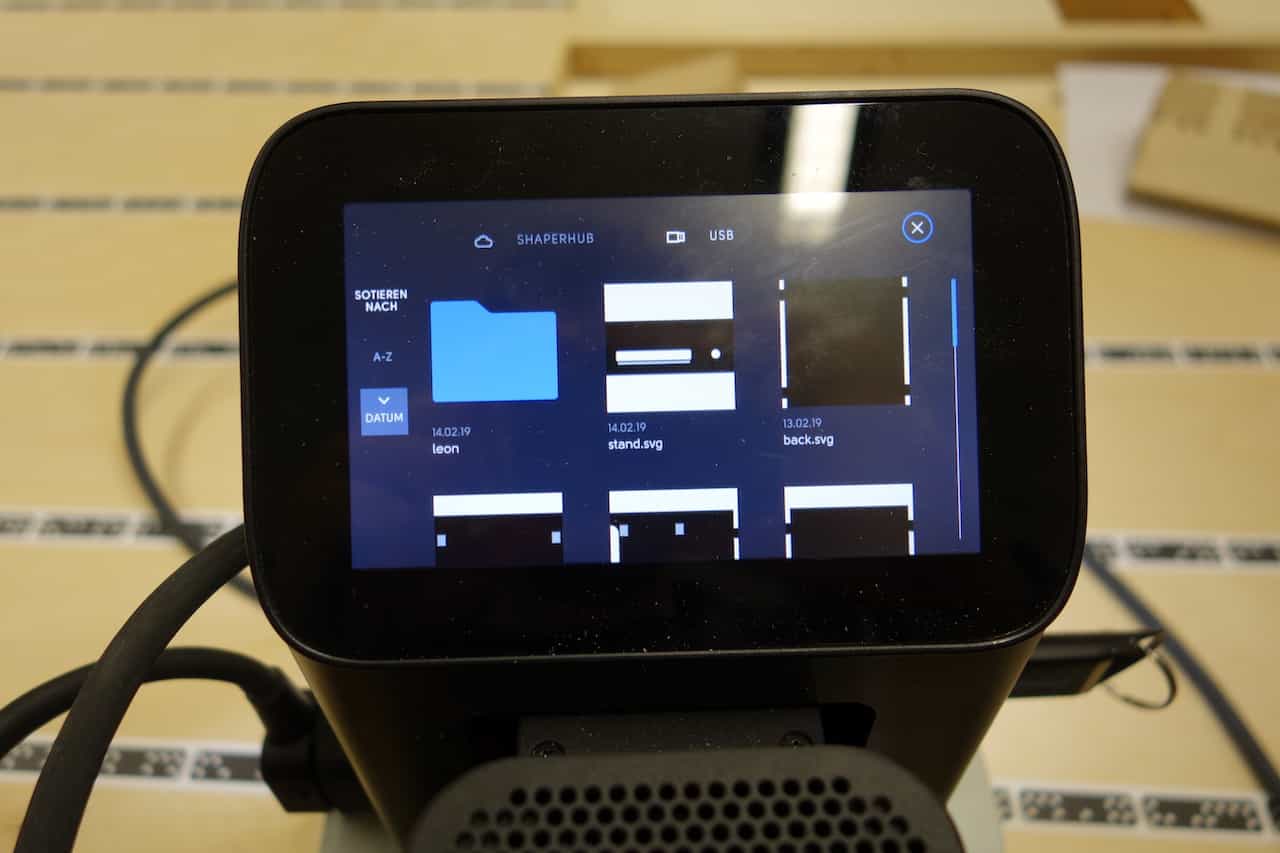
In this menu select the svg you want to mill.
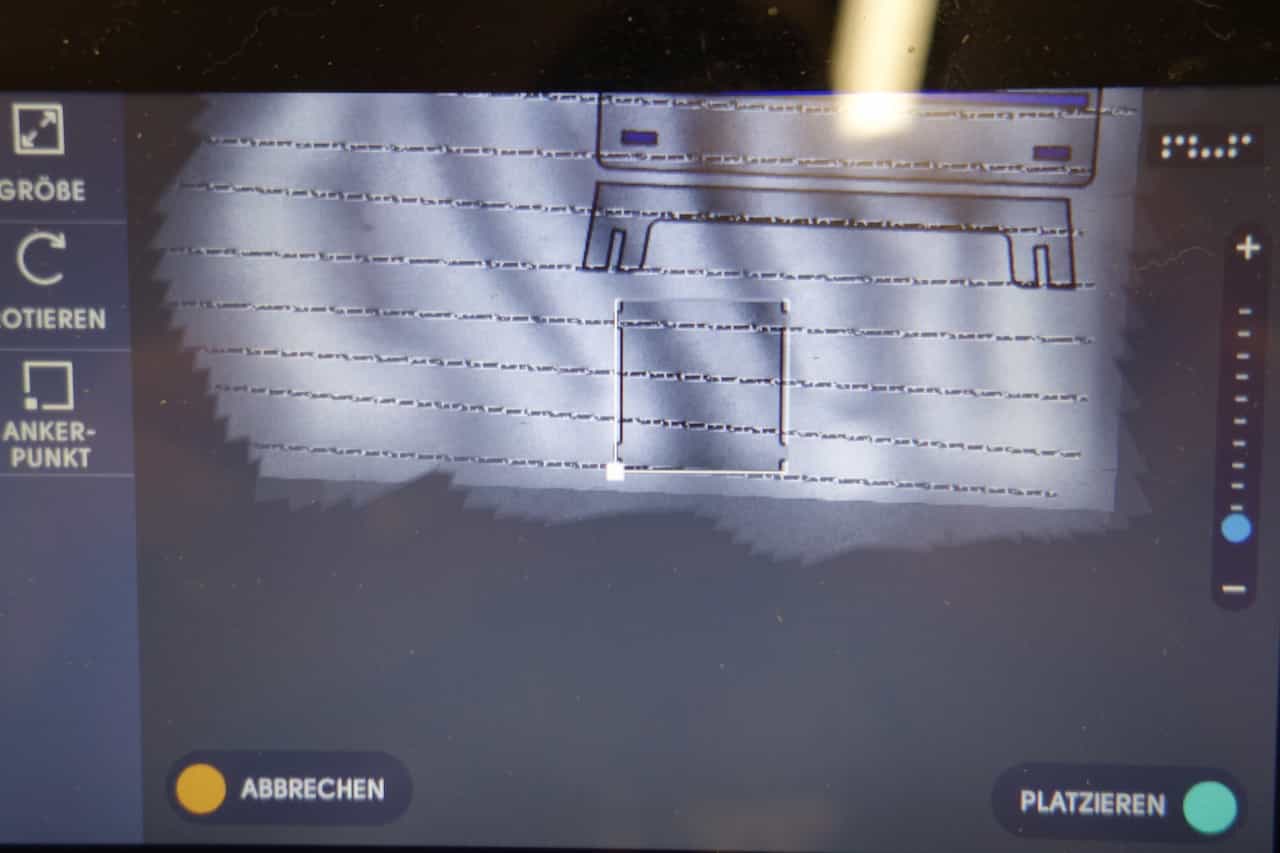
You can rotate and scale the svg using the buttons on the left. To place the svg press the green button.
Keep in mind that the location of the drill corresponds to the location of the white square on the outline of the svg.
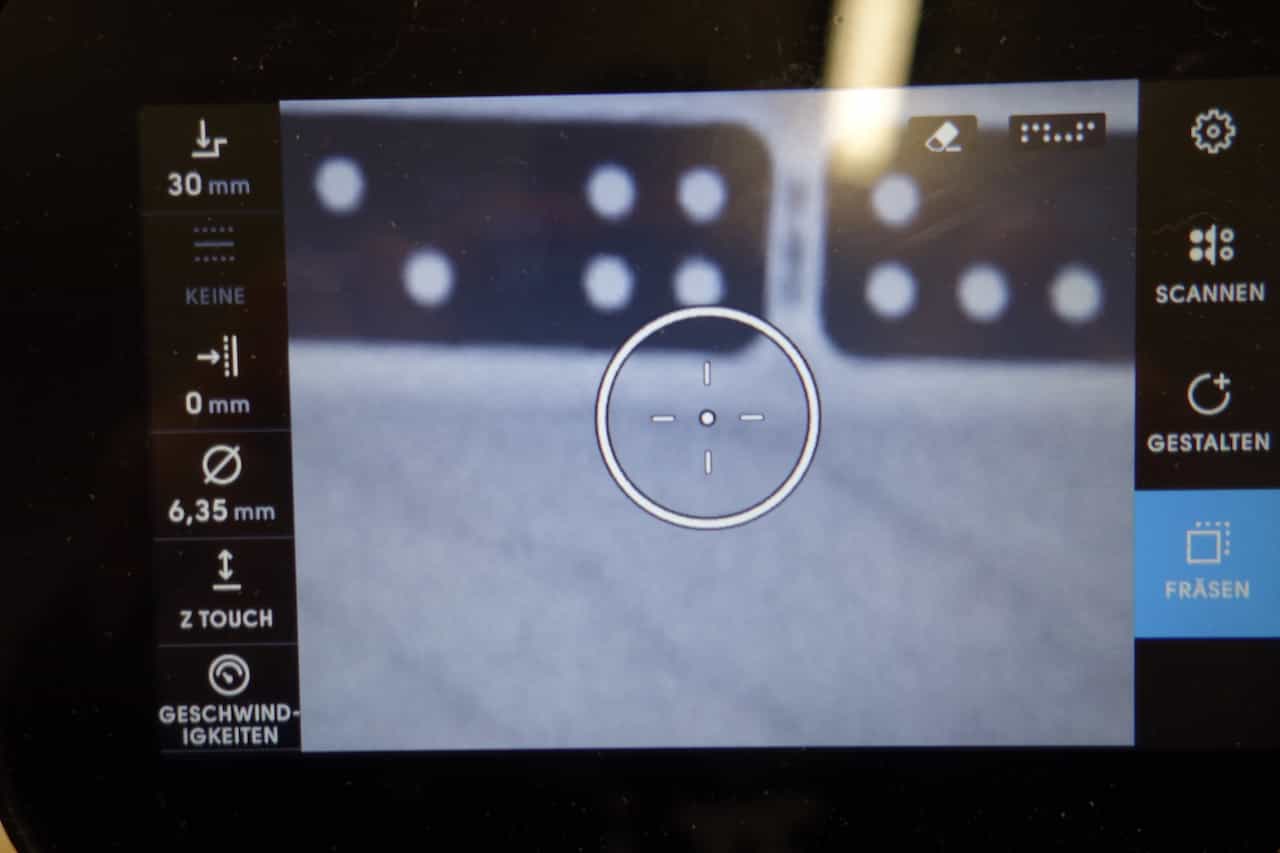
When you now press cut you can alter the depth of the cut, the style of the cut and the precision of
the cut with the buttons on the left side. When you change the drill make sure that you enter the
new diameter and perform a z-Touch. The corresponding buttons are also on the right.
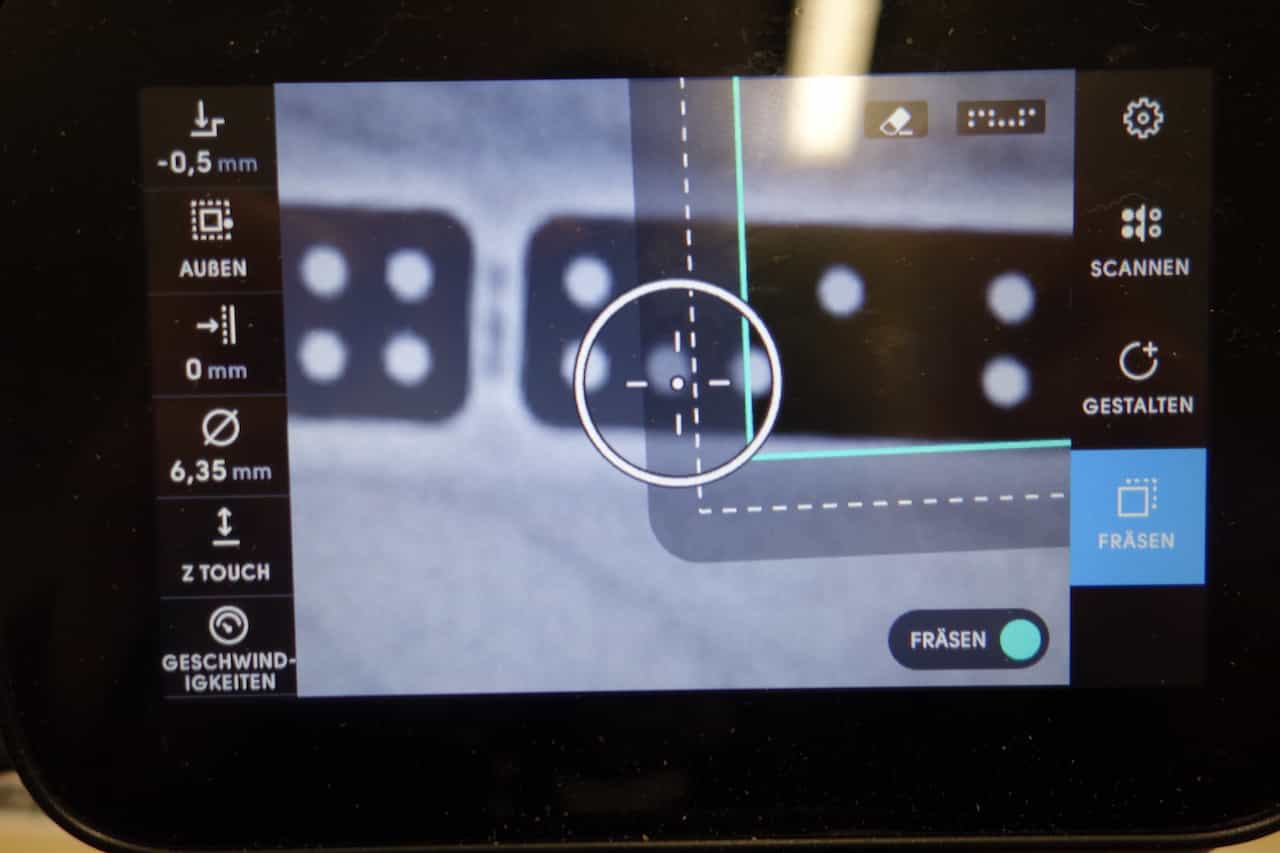
To mill something move the shaper to an outline of your svg and the milling path will be displayed.
If you now press the green button the drill will move down und you can start to cut.

The blue colouring indicates that this area is already cut and the arrow shows you the direction i which you have to move the Shaper.
The "Feedrate" is determined by the movement of the shaper (It works best when you move the shaper rather slow) the speed can be changed with a small wheel on the motor I used 3 (16,400 RPM). The other speed can be found here.
The "Feedrate" is determined by the movement of the shaper (It works best when you move the shaper rather slow) the speed can be changed with a small wheel on the motor I used 3 (16,400 RPM). The other speed can be found here.
Testing my Joints
Before I started milling the real project I decided to test my joints. I design a test-joint an milled it utilizing several techniques until I was satisfied with the result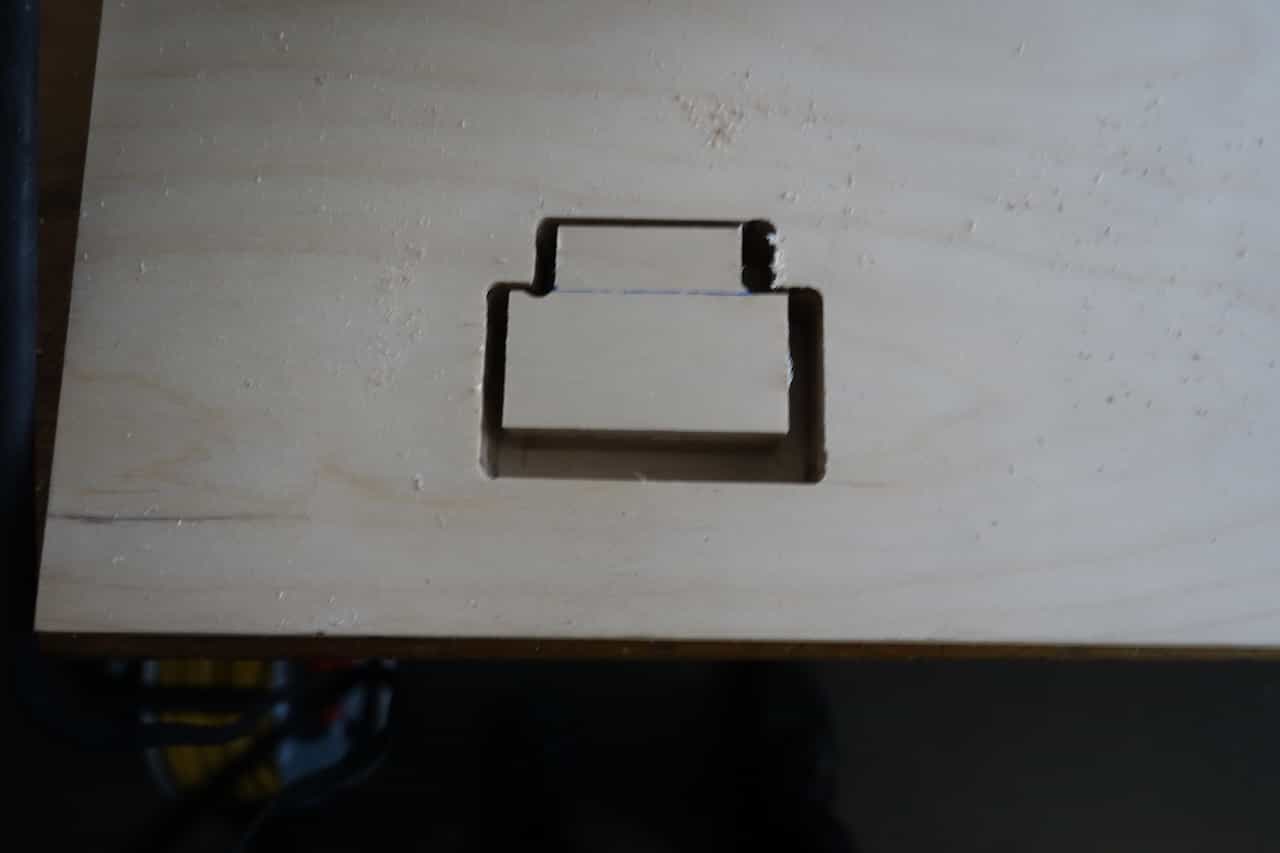
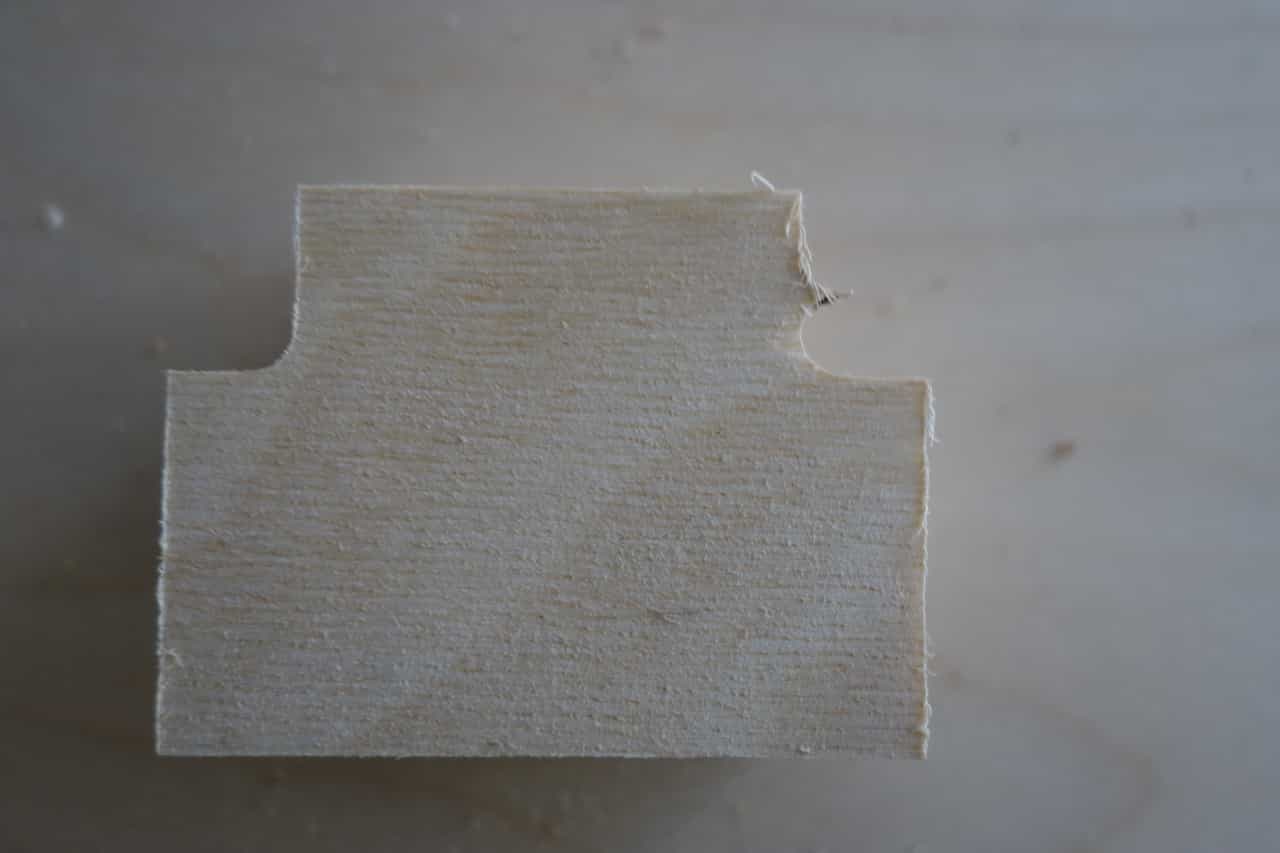
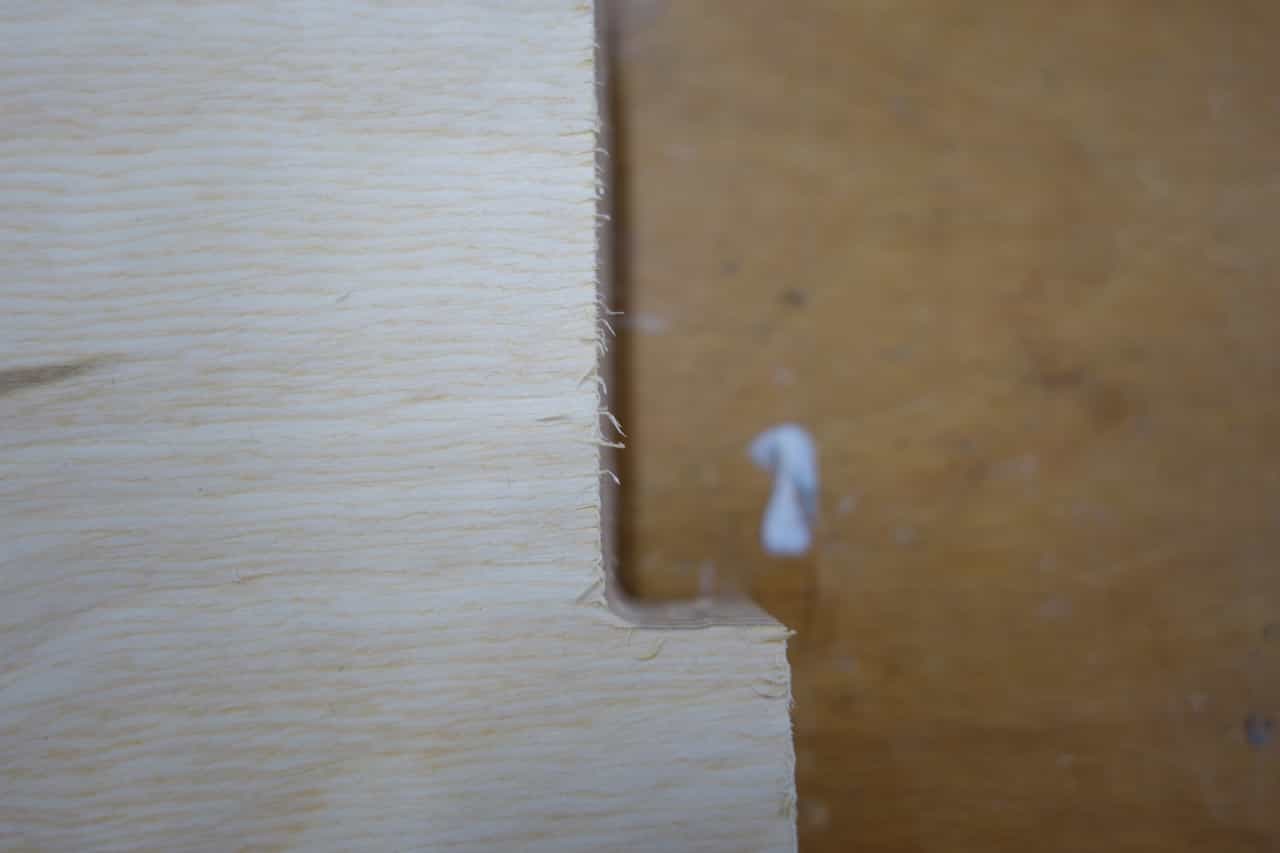
First I milled the male part of my test-joint everything went fine. I had to mill the same path 3 times (10mm 20mm 30mm)
since the 3cm birch-wood was to hard to be cut in a single run. As you can see there is an indent at one
of the top left corners, this was because I pulled the shaper down to hard at the last part of the cut.
Here you can see clearly where the start and the end of the cut connect (top-right edge). If this happens just remove it using some sandpaper.

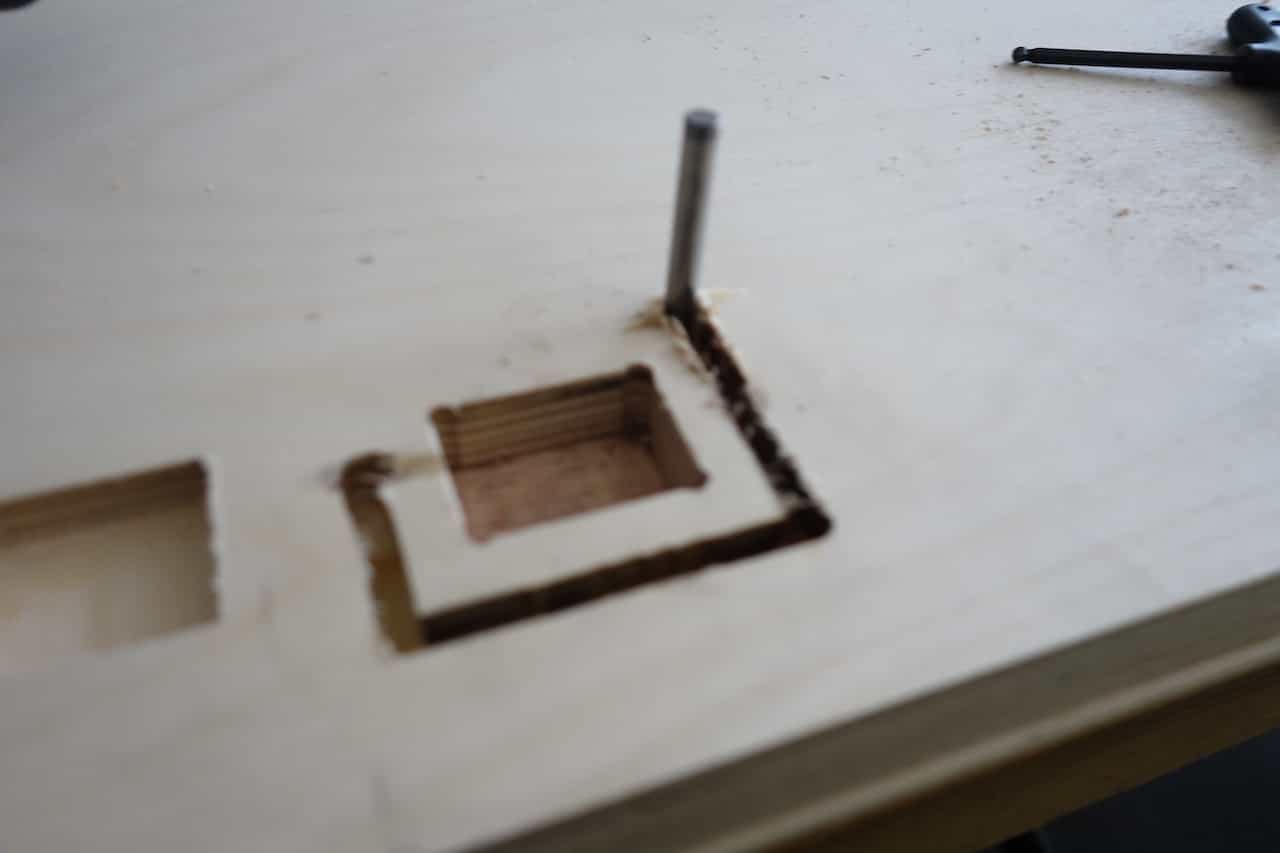
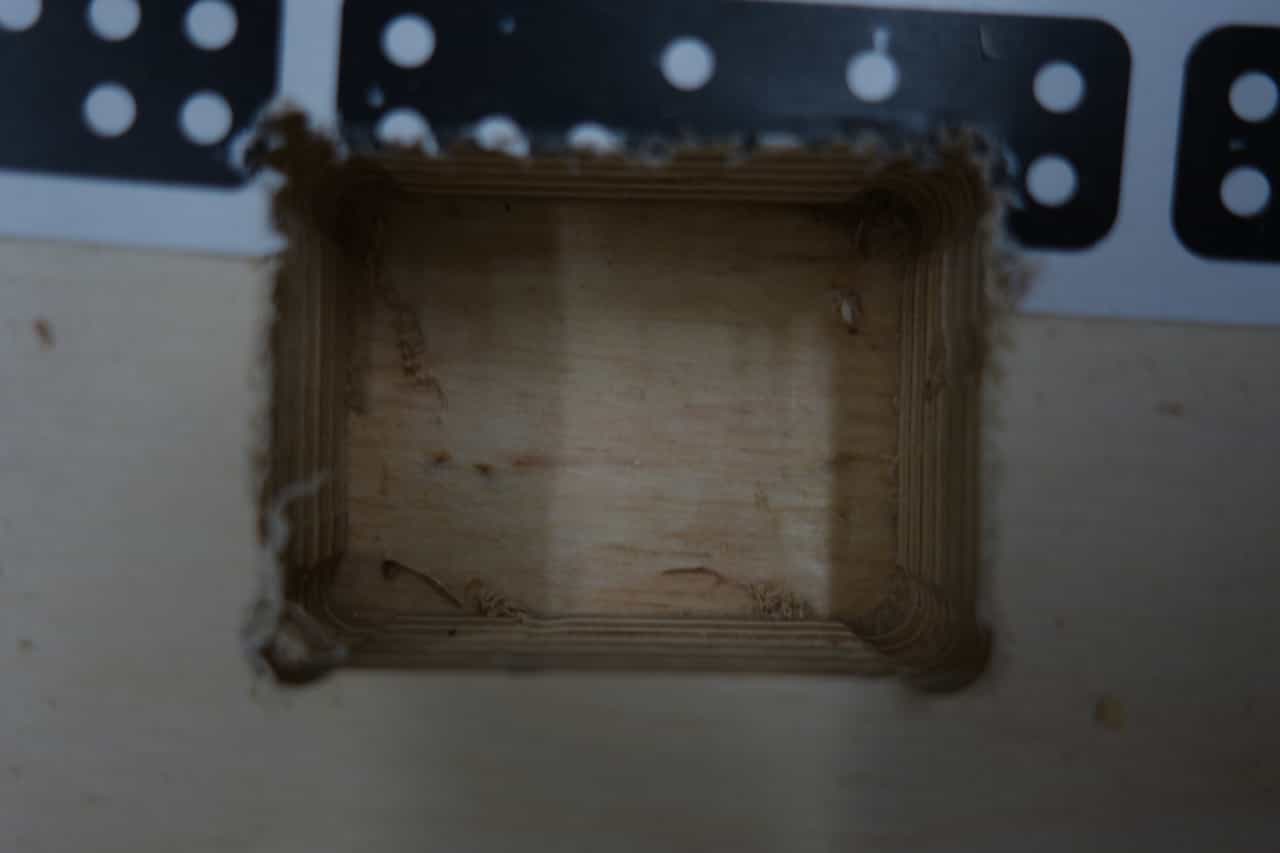
When I tried milling a pocket I tried to mill the whole 17mm depth at once. Here you can see that it was more burning than cutting the pocket.
The best fitting joints I produce using the following technique: First cut the pocket outline from inside using the 1/8" drill.
Then use the cut the pocket using the "cut pocket mode" and the 1/4" drill. This technique utilizes
the precision of the small drill and the diameter and therefor bigger cutting area in a single cut of the big drill.
Here you can see what happens if the drill is not screwed tight enough int the Shaper.
Luckily nothing happened except that the drill fell off and the wood got a little bit burned.
Luckily nothing happened except that the drill fell off and the wood got a little bit burned.
Cutting the Nightstand
After I tested everything with the smaller joints I began cutting the nightstand. I placed and cut one part after the other. For each part I first milled the pockets and then the outline. You have to use this order since when you cut the outlines first the piece comes lose and the pockets are not aligned in the right way anymore.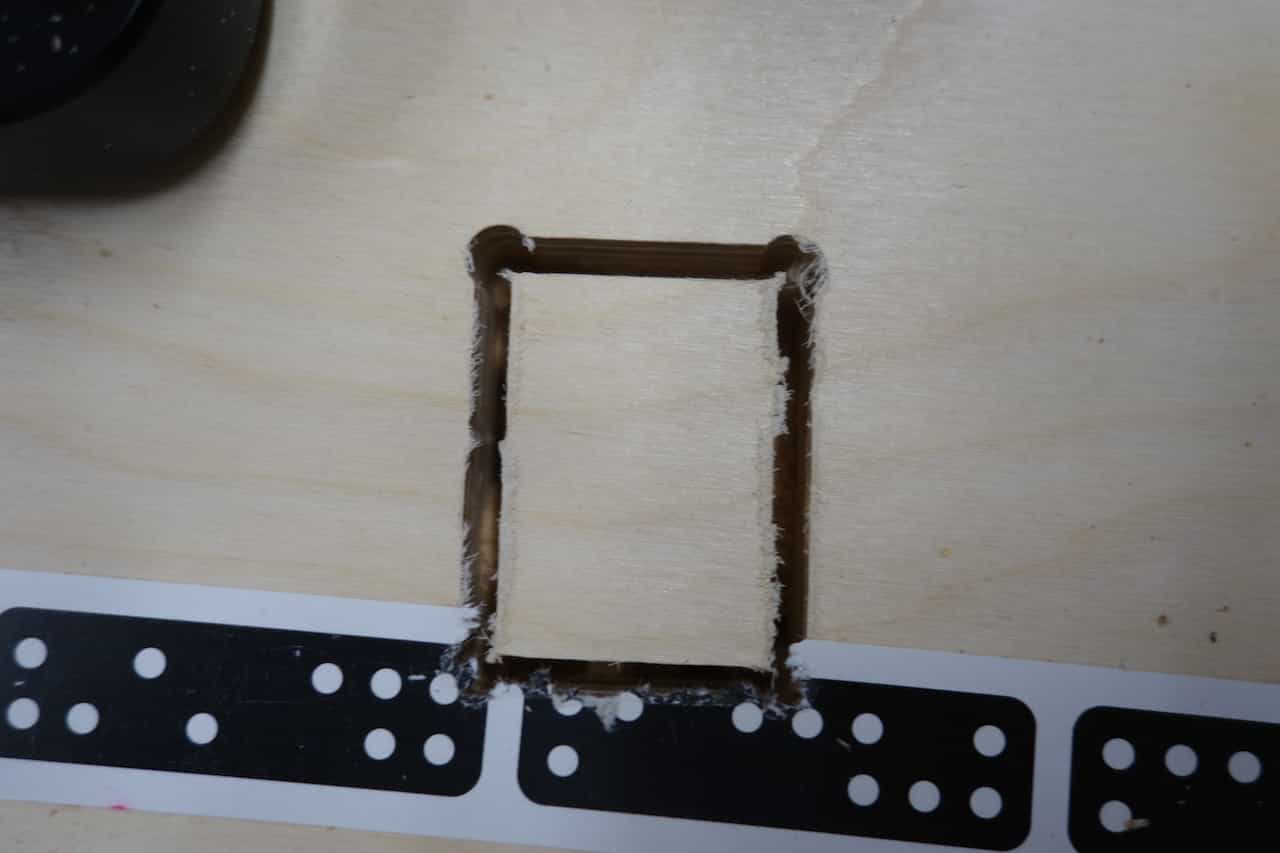
I started by cutting the outline of the pockets from the inside using the 1/8" drill.
Then I changed the drill to the 1/4" one an cut the pocket itself. Both steps have to be done twice one time for 10mm depth and another time for 17mm depth.
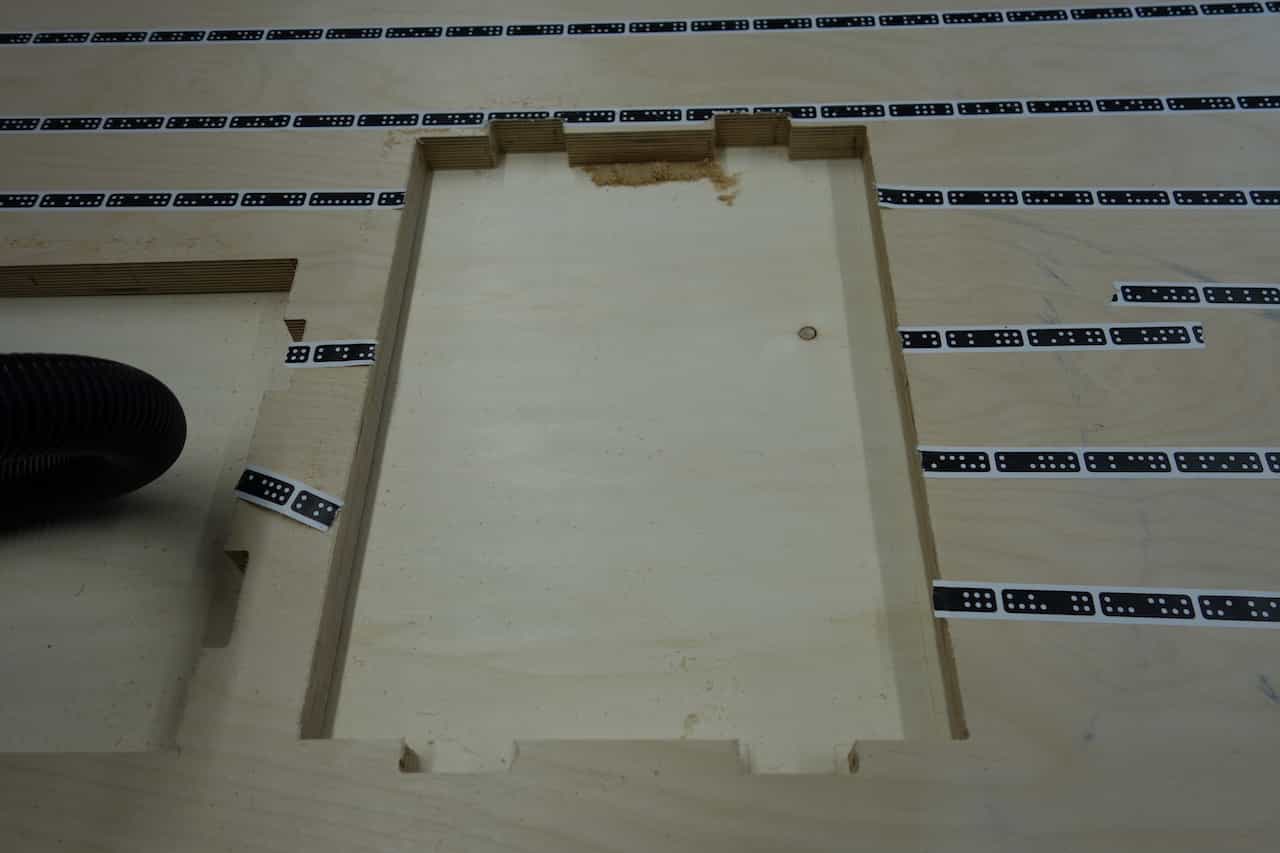
To finish of each part I cut its outline three times (10mm,20mm,30mm depth).
While cutting the six parts I had to extend the working area multiple times either by scanning or by putting down additional shapertape (and then scanning again).
Assembling the Nightstand
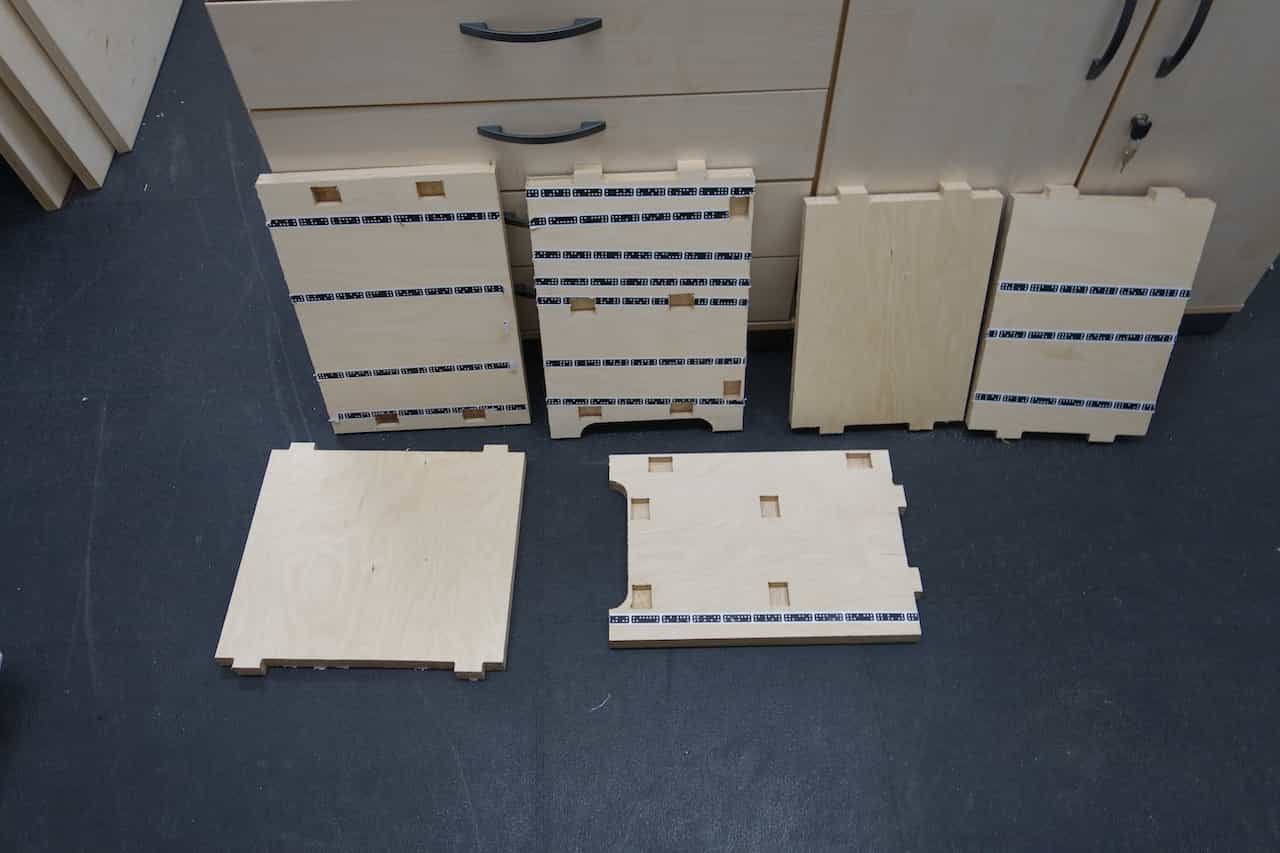
The last steps are sand and grind the parts so all edges are smooth and assembling the nightstand.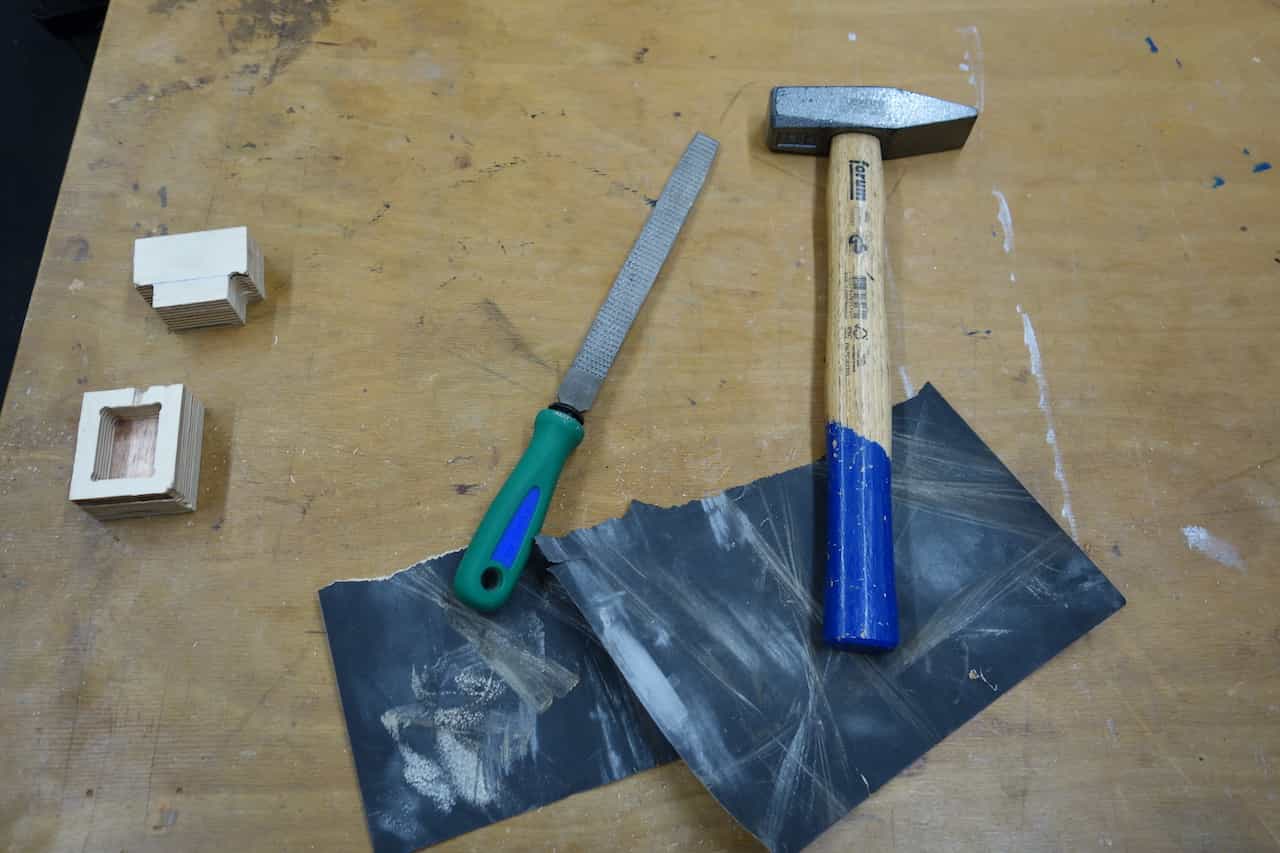
To finish my project I used a wood-file, some fine sandpaper and a relatively big hammer.
I smoothed the edges of all parts using the sandpaper. Additionally I filed away a little bit off the tip of the
joints so is easier to fit them together.
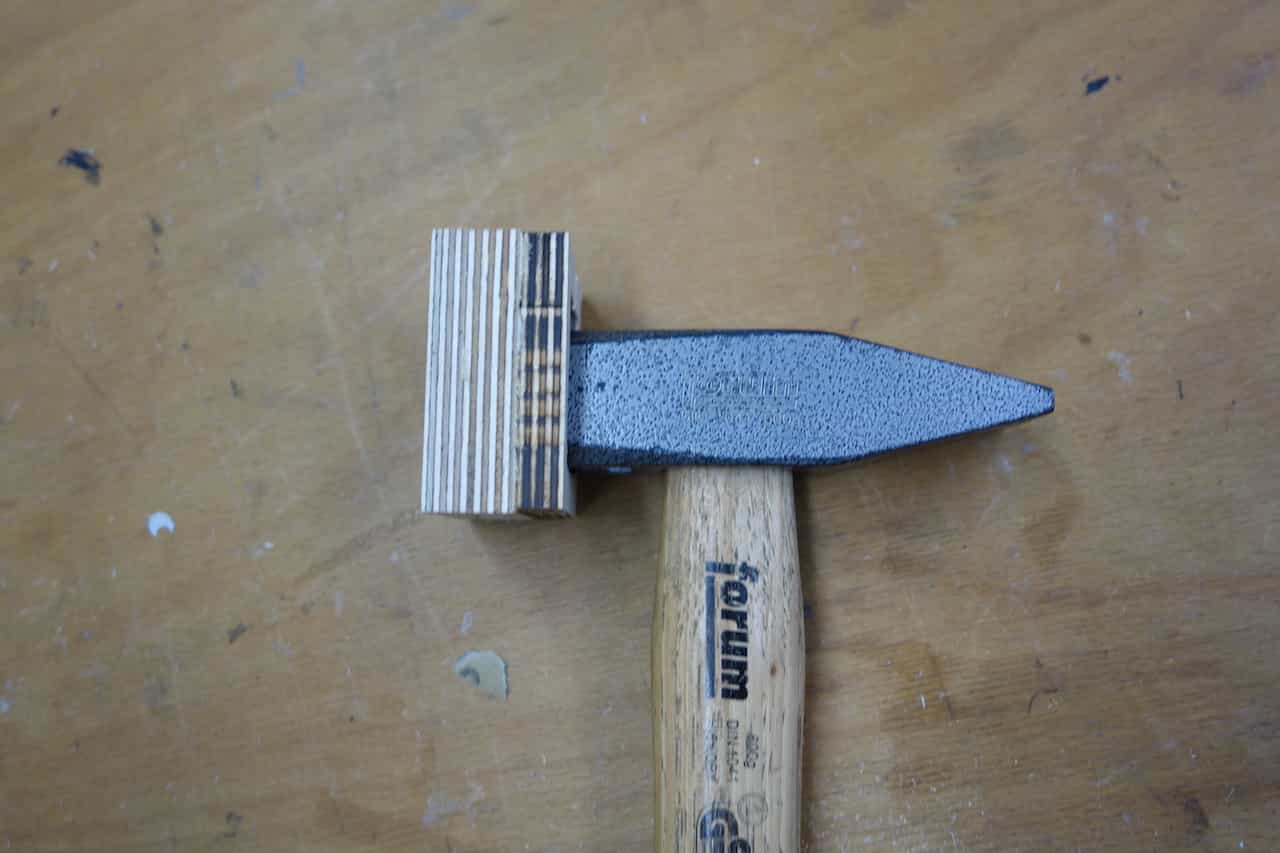
Because I did not want to damage the wood when hitting it with the hammer I tinkered a hammer-protection using one of my test-joints.
To provide a firm grip I first pushed the parts together with my hand then I switched to the hammer to make shure the joints went all the way in. Leaving no or the smallest possible gap.
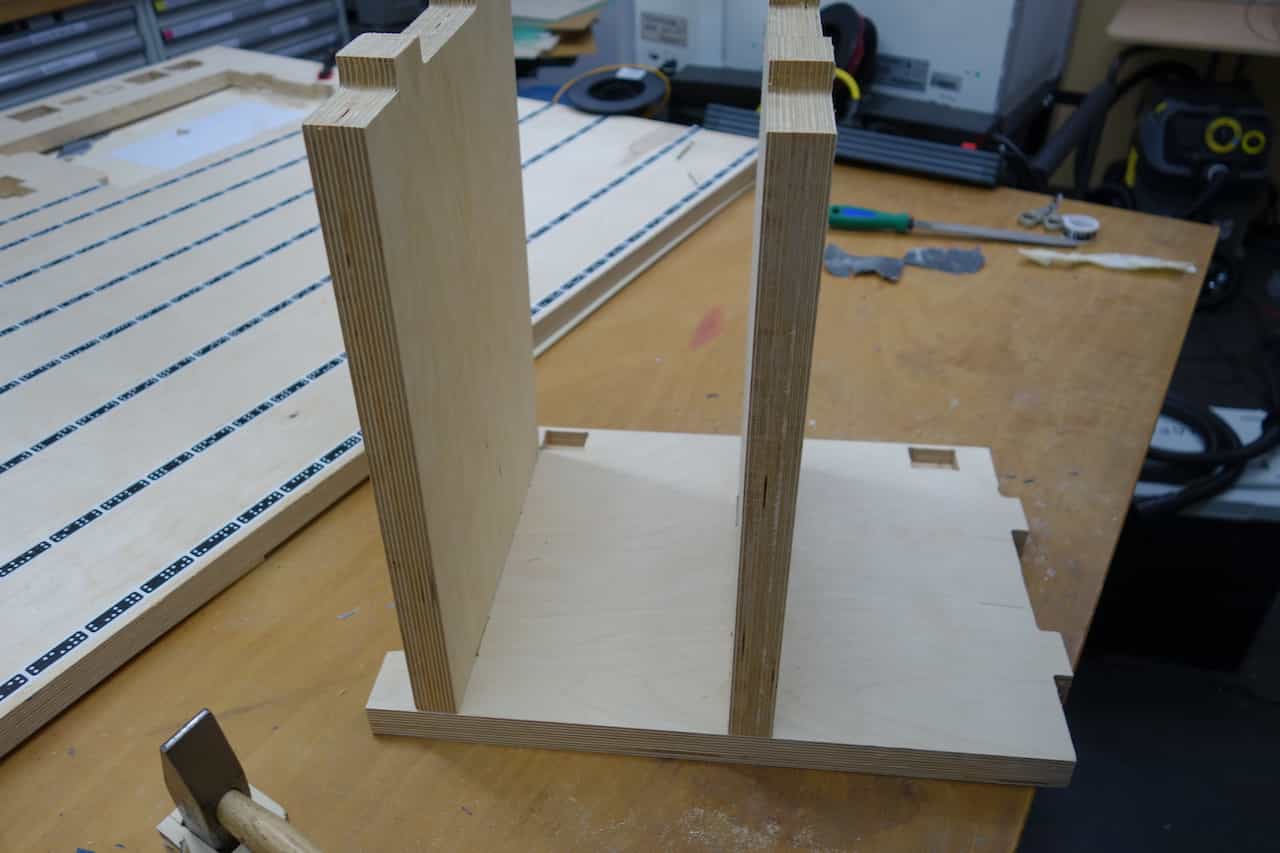
First I assembled the inlay-plates.

When I assembled the back-plate I recognized that it was to small. So I removed it and had to cut it again.
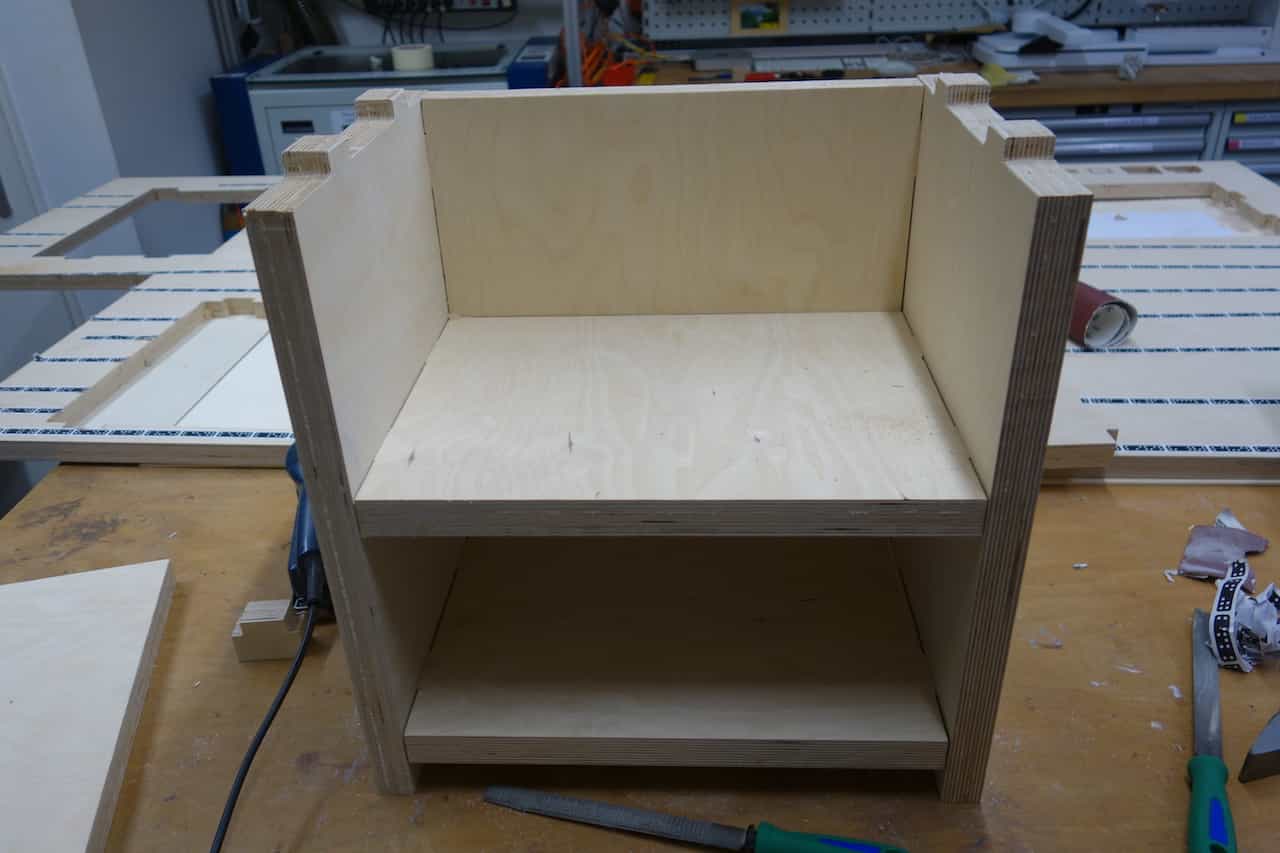
After recutting the back-plate and reassembling it alongside the other side-plate the nightstand looked like this.
To get the side-plate to fit I hat to file some of the joints so the fitted better together. After the side-plate was roughly aligned I used brute force (and the hammer) to force it into position.
To get the side-plate to fit I hat to file some of the joints so the fitted better together. After the side-plate was roughly aligned I used brute force (and the hammer) to force it into position.
Lastly I added the top-plate hammered it down. here the small back-plate came in handy (I laid it on top and use is as a protection so I wont damage the Nightstand while hammering).
Since every joint was forced together with a hammer the nightstand is very stable even without glue or screws.
Files
back.dxfback.scad
back.svg
middle.dxf
middle.scad
middle.svg
Side.dxf
Side.scad
Side.svg
Sidemirrored.dxf
Sidemirrored.scad
Sidemirrored.svg
top.dxf
top.scad
top.svg
testmale.dxf
testmale.scad
testmale.svg
testfemale.dxf
testfemale.scad
testfemale.svg
Favourite beverage of the Assignment

Tea to help me "think".