Wildcard week - Cooking and ... the Proofing Box
Assignments
Design and produce something with a digital fabrication process (incorporating computer-aided design and manufacturing) not covered in another assignment, documenting the requirements that your assignment meets, and including everything necessary to reproduce it. Possibilities include (but are not limited to) composites, textiles,biotechnology, robotics, and cooking. Demonstrate workflows used in the chosen process. Select and apply suitable materials and processes to create your project.
My plan for this week is...
- To complete the "Proofing Box" I started talking about a few weeks ago. Make a bread looks like an art but it is also a science and there are rules to follow. My plan is to experiment how temperature and humidity affect the "proofing" fabrication process and to use computer-aided manufacturing to control the process.
- IN PROGRESS : To experiment how I could use epoxy to get a nice finish for my capstone project
Learnings
Intro
My daughter is a pretty good pastry cook. She told me pastry is not a place where 'sort of ..' or 'just about..' works. It's all about getting the exact right amount of each ingredient in the right order and.. at the right temperature. So.. my topic for this week is .. COOKING !
Proofing (also called proving or more rarely blooming), as the term is used by bakers, is the final rise of shaped bread dough before baking. It refers to a specific rest period within the more generalized process known as fermentation.
We live in Quebec City, where temperature (and humidity) varies a lot between winter and summer time. My challenge for this week is to build a proofing box where temparature and humidity are controlled
#1 - All you need to know about dough temperature
Most of the information presented hereafter comes from this site.
Commercial regular active yeast contains the species S. cervisiae. The type C. milleri is very common in sourdough breads and it does work better at lower temps, but S. cervisiae actually peaks it’s activity at about 35°C (95°F). A few degrees difference in dough temperature can change the duration of the bulk fermentation or the final proofing a lot. When baking bread with regular active dried yeast, the optimum (for speed alone) temperature is just over 27ºC/80ºF.
Much hotter and the activity of the yeast declines. Above 35C/95F the yeast is effectively dormant or dead. The bacterial activity peaks at 34C/93F, so some bakers choose to ferment at 32C/90F to get a more sour bread. At 21C/70F the activity of the yeast has roughly halved, so the fermentation will take twice as long. The right temperature is the single most critical variable. The growth rate of for example the L. sanfranciscensis lactobacillus and C. milleri yeast is ln2 / generation-time, i.e. a growth rate of 0,7 is a generation (doubling time) of about 1 hour. If the generation time within your dough at 20ºC/68ºF is 1/2 of that at 30ºC/86ºF, the organism will also grow 1/2 as fast at 20ºC/68ºF compared to 30ºC/86ºF. So, it’s not the absolute numbers that matter, but the ratio of growth rate to growth rate at optimum temperature. To get consistent bulk fermentation and proofing times, we aim for a dough temperature around 24ºC/75ºF. This is a temperature which gives you a nice balance between speed and taste
According to this site, dough fermentation rooms require relative humidity levels of at least 75 percent. Proofers have relative humidity levels of at least 80 percent to prevent skins from forming on dough during the final proofing stages. In general, the lower humidity, the crustier bread becomes as it bakes. Climate control technologies incorporated into proofing areas maintain the temperature and humidity levels necessary for the respective baked goods. This is particularly advantageous on warm days, where proofers tend to retain more heat.
A dough proofer is an enclosure used in baking dough that boosts fermentation of the dough by yeast through hot temperatures and regulated humidity. The hot temperatures increase the action of the yeast, which results in an increased production of carbon dioxide gas as well as faster and higher rise of the dough. The dough is then allowed to rise inside the proofer before the process of baking starts.
So, it is simple, we have to provide a nice environment where temperature is at 24 degrees Celcius with a 80% humidity
#2 - All you need to know about ... rice cooker
Wait... where am I going with my rice cooker ? How is it related to dough proofing ? Here is my point: a rice cooker has a similar challenge, heating the rice and maintaining enough humidity in order to avoid to burn it. According to this article , a basic rice cooker has a main body (pot), an inner cooking container which the rice is in contact with, an electric heating element, and a thermostat. The bowl is filled with rice and water and heated at full power; the water reaches and stays at boiling point (100 °C, 212 °F).[1] When the water has all been absorbed, the temperature can rise above boiling point, which trips the thermostat. Some cookers switch to low-power "warming" mode, keeping the rice at a safe temperature of approximately 65 °C (150 °F); simpler models switch off; the rice has entered the resting phase.
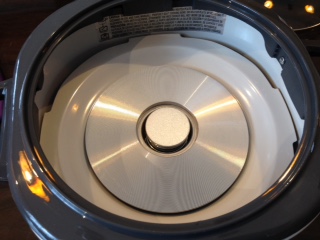
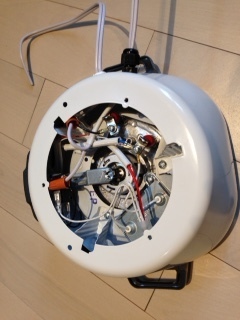
So... I bought one (at a bargain price of $18 at Canadian Tire and here is how it is designed.
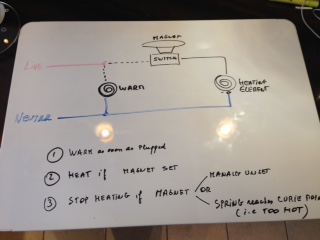
Here is a view from the top side, with the small bowl removed. At the center there is a magnet and under the magnet a coil. When that coil reaches its Curie point, the mechanism will pull back and the micro-switch will stop feeding the heater.
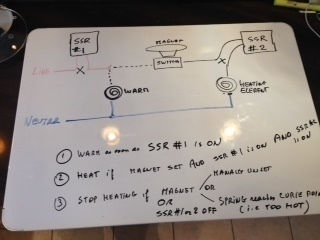
To summarize, we have a heat source and a way to generate steam and therefore humidity. Let's modify the circuit to add two solid state relays. The first one (on the left) controls the entire circuit. As soon as it is turned on the 'warming' will start. Even if there is water within the bowl, it will not be hot enough to make it boil. The second one controls the main heating element. When both SSR1 and SSR2 are On, the system will heat the water up to a point where steam will be generated. Note that the security mechanism is still in place and there is no risk to get a too high temperature when there is no more water. In this case, it will just stop, even if SSR2 is On.
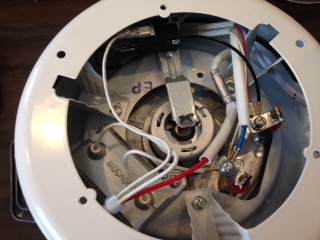
Here is the hacked version of the rice cooker. There is now a second cable, so we can control both Cook and Warm sequences. Note: I kept the safety mechanism (based on Curie point) ... well .. for safety reasons..
#3 - Building an enclosure
I want to design something as food-safe as I can. I have to protect the end user from any electricla shock and I have to protect the electronics against water.
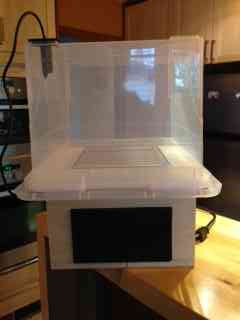
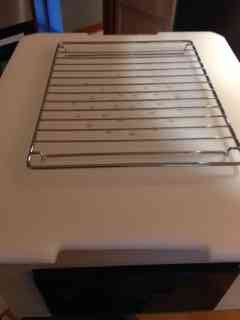
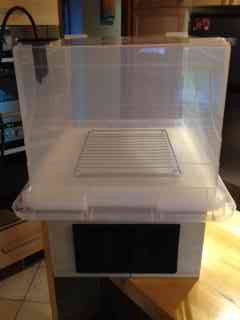
My starting point is a plastic box. The box is transparent (it helps to see how things are going from dough point of view) and easy to clean. It is big enough for any recipe I know.
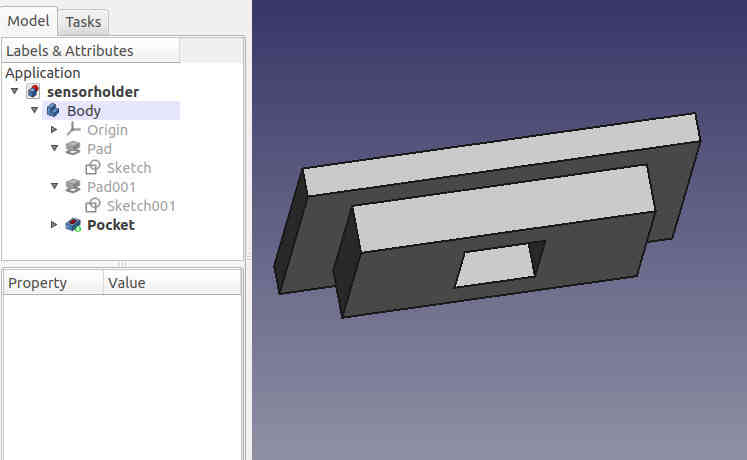
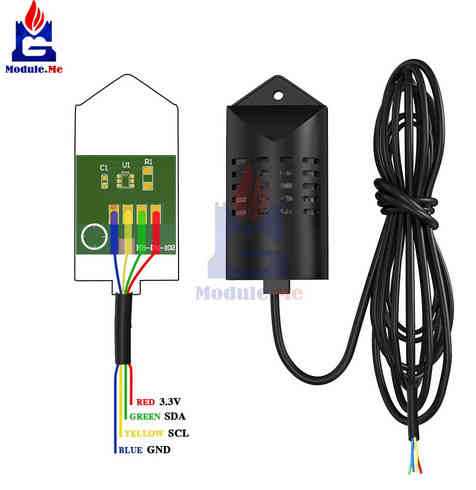
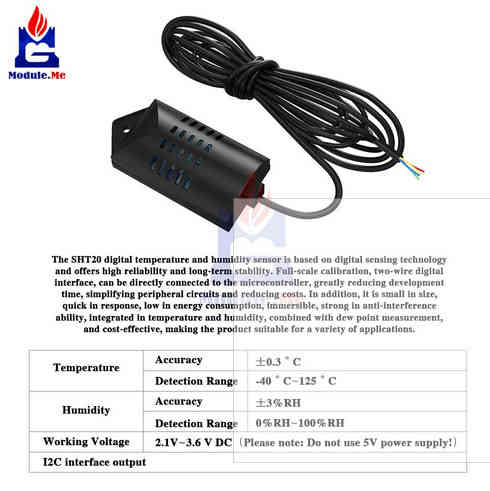
On the top, I installed a temperature and humidity sensor. I 3D printed a bracket so it could fit on the plastic box while remaining easily removable for cleanup.
The bottom part is a box made with plywood. You could laser cut it but I used just a bandsaw since I have one at home.
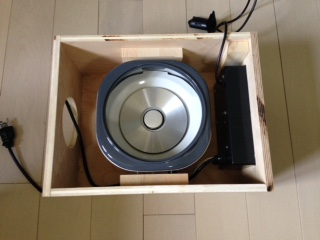
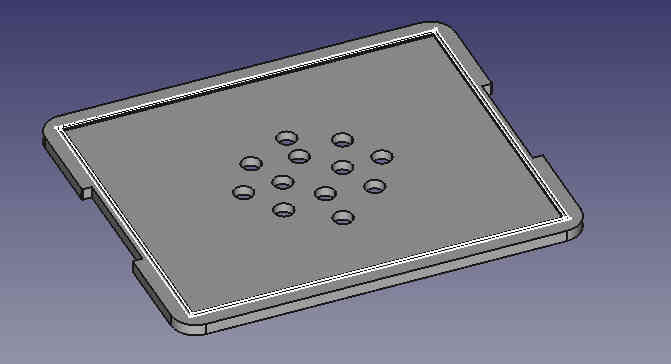
On the top of the box, I installed a HDPE board. This is food safe and also easy to clean. There are a few holes in the middle to help heat and humidity to spread in the box.
Here is the final prototype and the design files
#4 - Adding electronics
I just have a few hours to design it. I'm not that far from the design I will use for my capstone project and I will start from there. This is similar since it requires SPI and and some shit level circuitery to support a 3.3V sensor
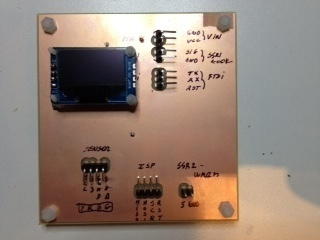
So.. here is the schematic, the PCB layout and the result
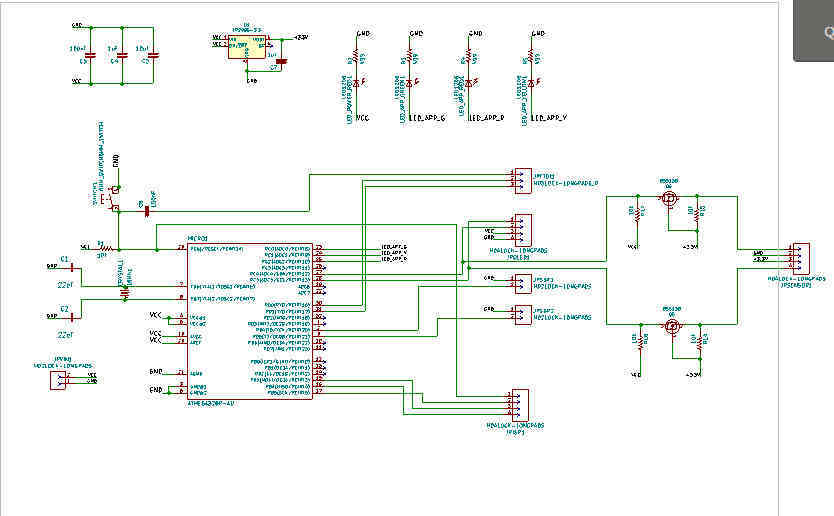
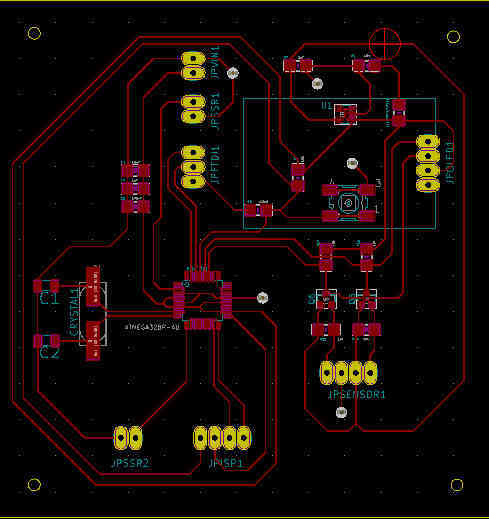
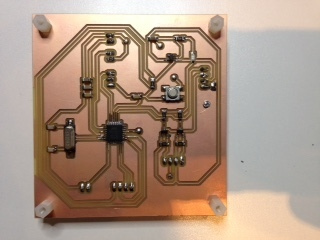
Note: all connections are on the front side, it is easier for installation and debugging. This is a double side pcb, with a ground plane on the front side.
#5 - Testing and measuring performance
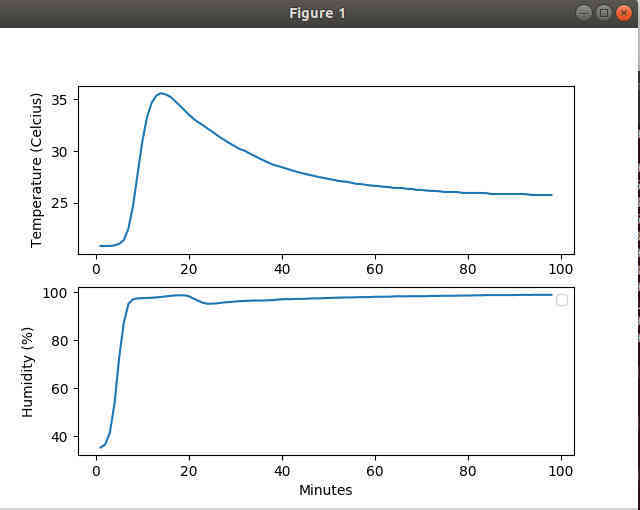
Based on experiment I run two week ago, I can figure out the possibilities offered by the (transformed) rice cooker. The first figure show what happens when the rice cooker "cook mode" is turned on and then turned off as soon as temperature reaches 24 C
The second one shows what happens when the "warm mode'" is used
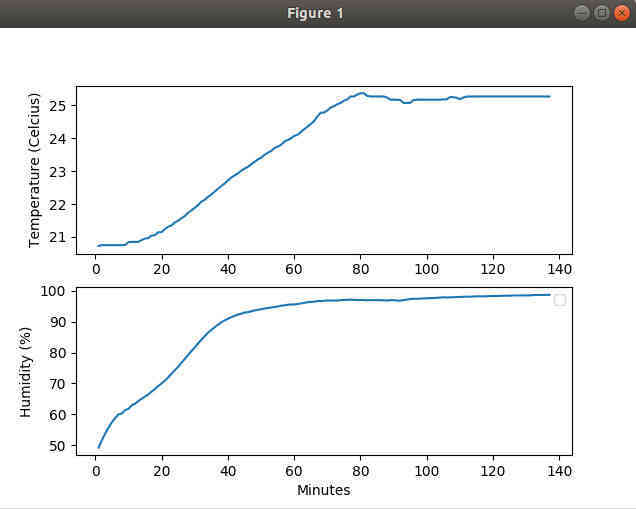
The ideal situation would be to turn the "cook mode" just for a few minutes and then to use "warm mode" to keep temperature at 24C
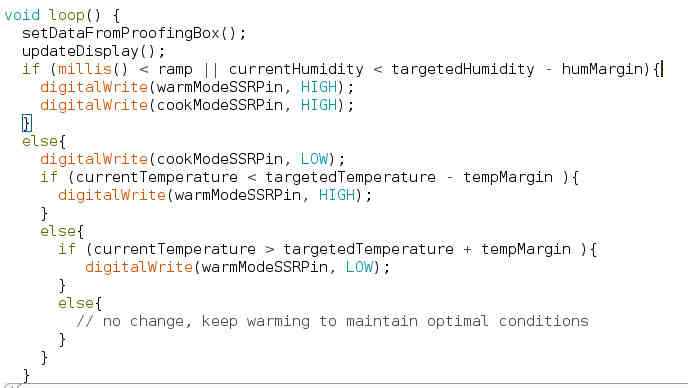
Here is the script and the part of the script where decisions are taken:
#6 - Field testing... The proof is in the .. bread
So... here is the machine setup. I designed it in away everything can be placed within the plastic box when the machine is not used.

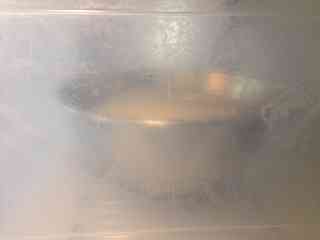
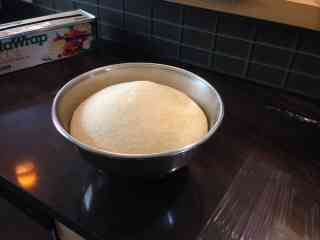
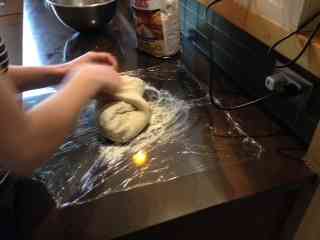
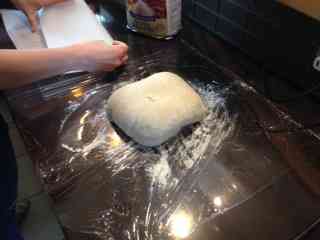
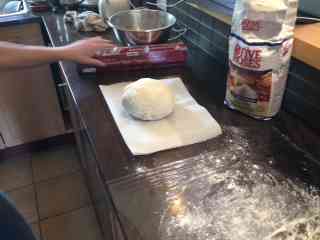
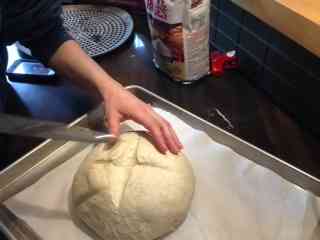
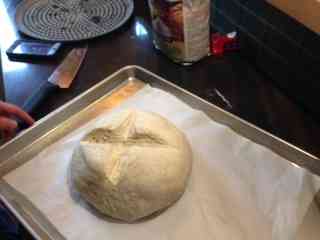
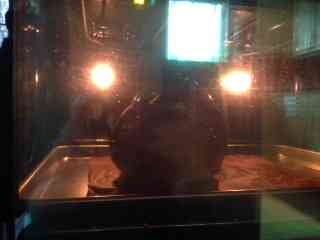
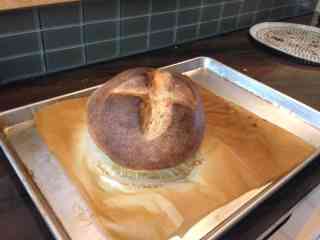
And the bread making process. The first picture is taken when the bread dough is rising in the box. Timing depends on weather conditions. The day we experiment was around 70% humidy and it went quite quick to rise (less than 1 hour) Do not rely on a timer, just wait until the volume has doubled. The machine is designed to handle all conditions. Then there is another step with manual work and a second rising period in the box. Then we cut the top with a knife and the bread dough goes into the oven...


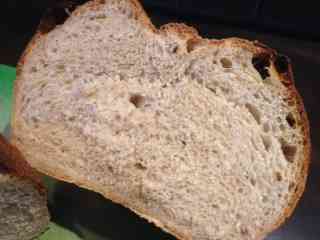
Note: our machine works perfectly well. Obvioulsy, it does not replace the talentuous pastry chef. And, as you probably noted, I did not explain all the details and the ingredients (rye and spelled are part of the secret...) . Feel free to contact me if you want more information.
Achievements
#1 - my "Proofing box" is up and running
Currently, I have hard coded the temperature and humidity targets. An improvement would be to let the user decide waht is the best combo, depending on the bread he wants to make. One approach could be to use RFID tags, each of them with different settings.