3D SCANNING AND PRINTING | WEEK 05
3D Printing
A0 Link to group assignment.
You can see the group assignment here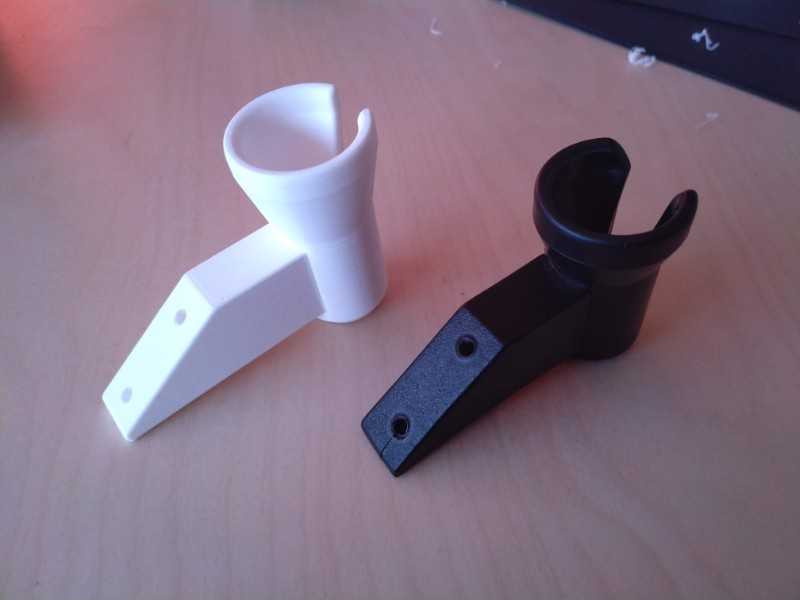
For this week assignment I've found a "client": My dentist has a broken piece of his torture machine that needs to replicate. It's a hanger for his milling machine. I thought that it could be a good opportunity to try the 3d scanning but, at the end I thought that it was easier and more precise to use a digital caliper and model the the piece from zero in rhino.
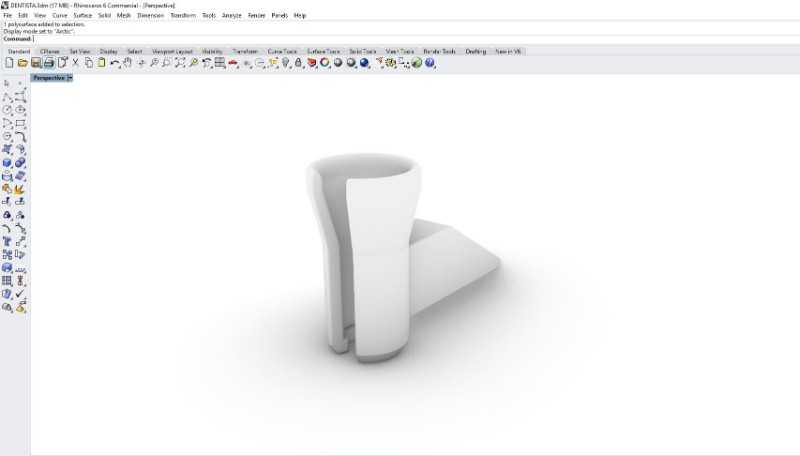
It was easy, and although it's a model that can't be do with a milling machine it won't be difficult to create something very similar without using a 3d printing machine. So I redesigned the model to create a new one related to the job of the client: a tooth.
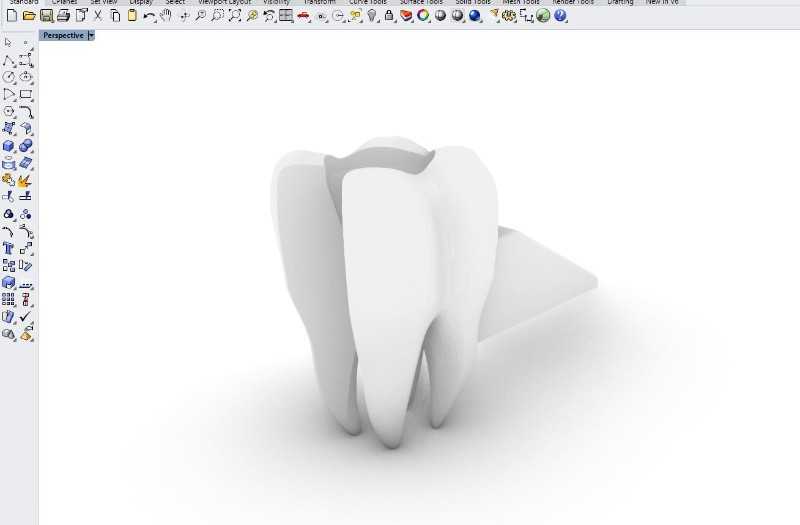
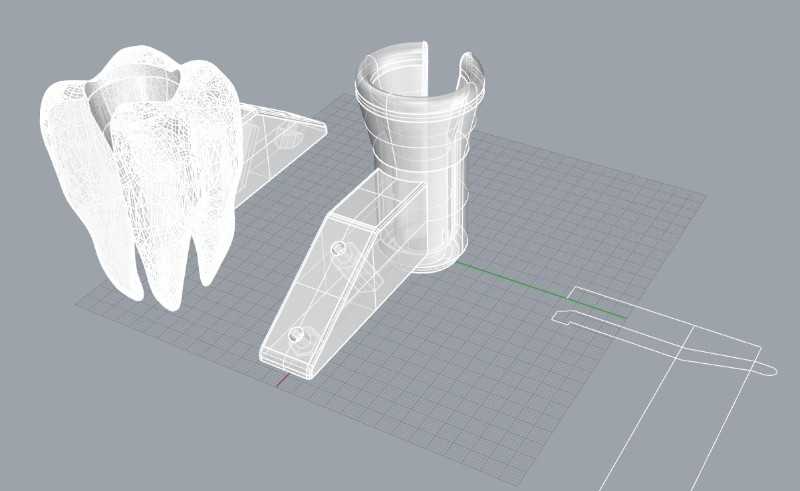
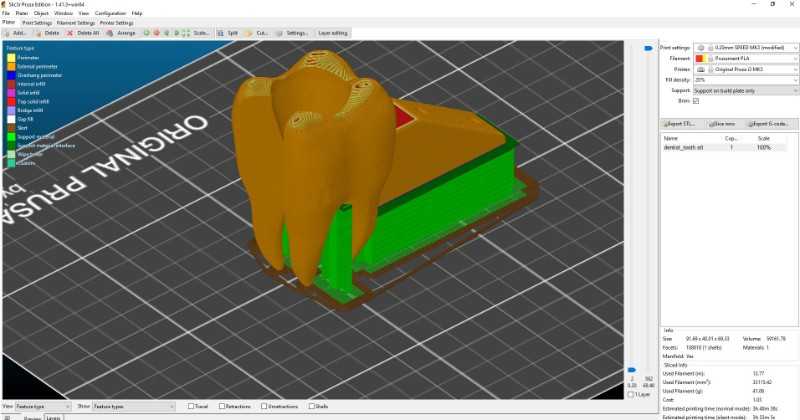
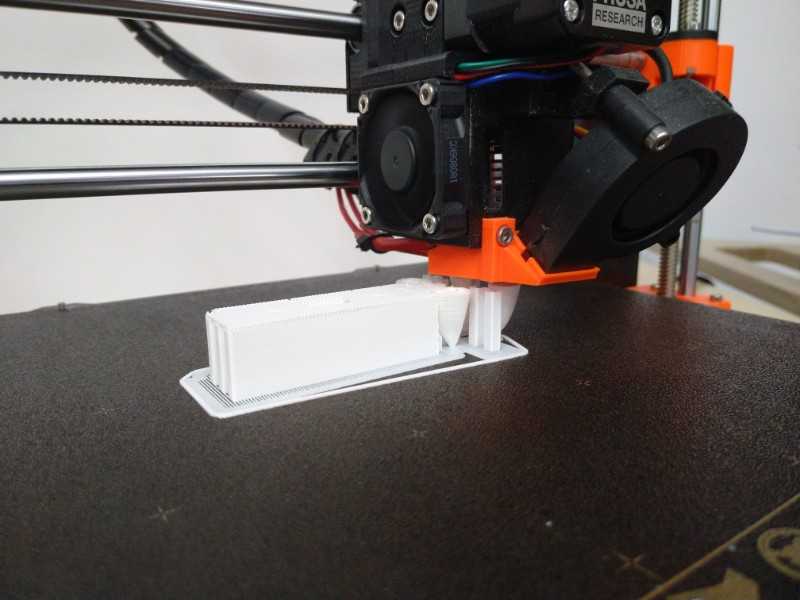
I export both models together as STL file with a precision of 0.001 as binary file. I used this format because is one of the most recommended for 3d printing. Then I openned with the Slid3r version for Prusa. I use this program because the print was going to be done in a Prusa Mk3.

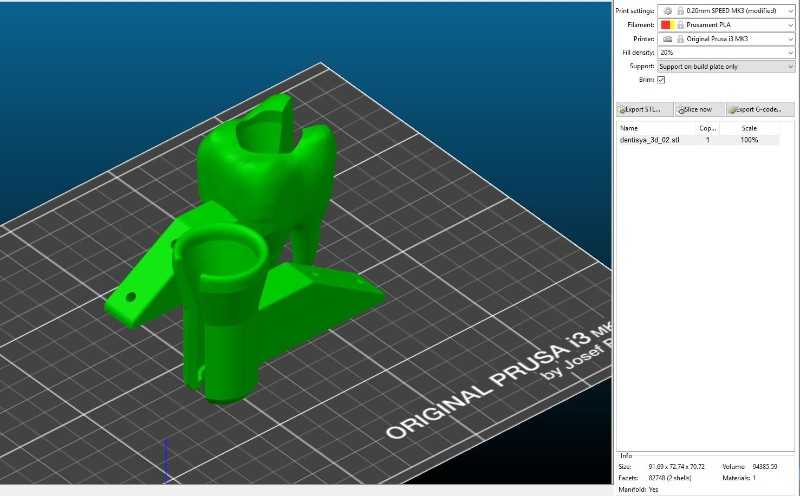
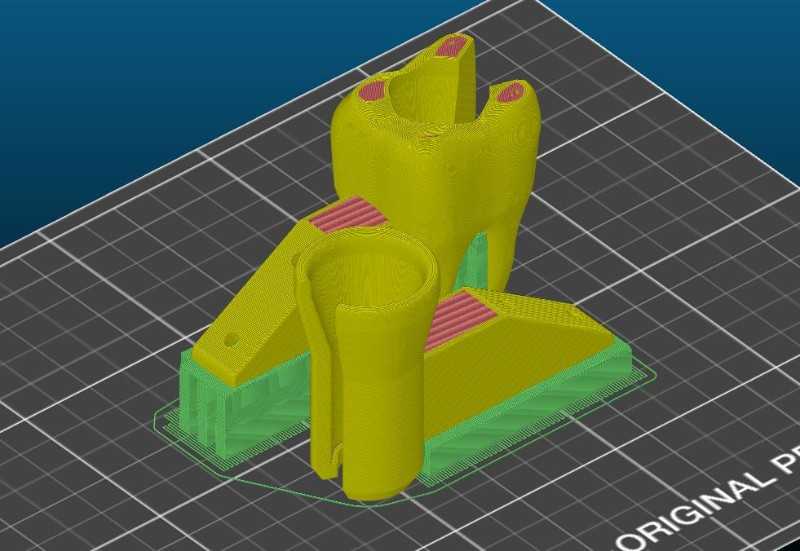
The program has predifined values that depends on the quality, I chosed the option "0.2 SPEED" and modified the exterior layer and the infill to make the printed piece stronger. Then I sliced the model and created a G-code to send to the machine. which I did it using a microsd. the result was bittersweet:
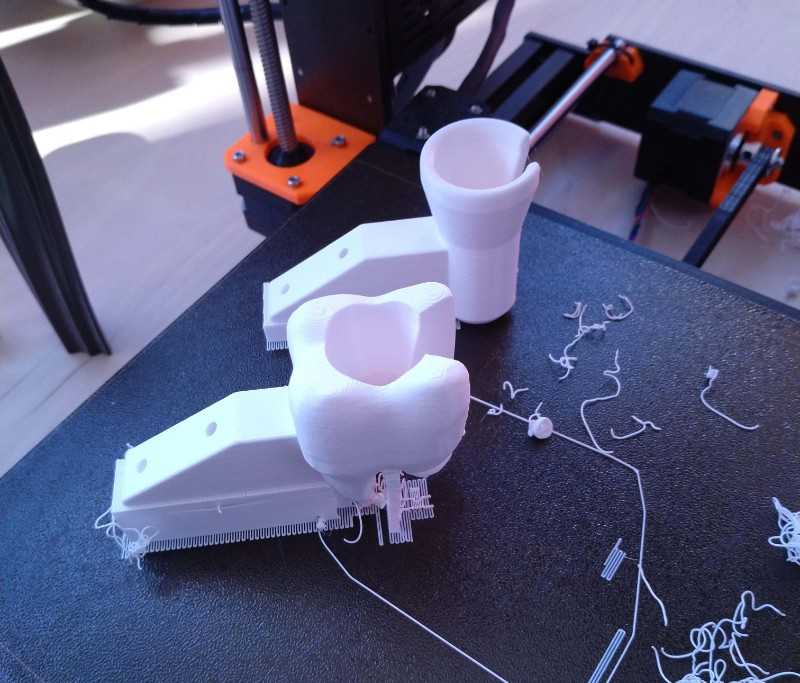
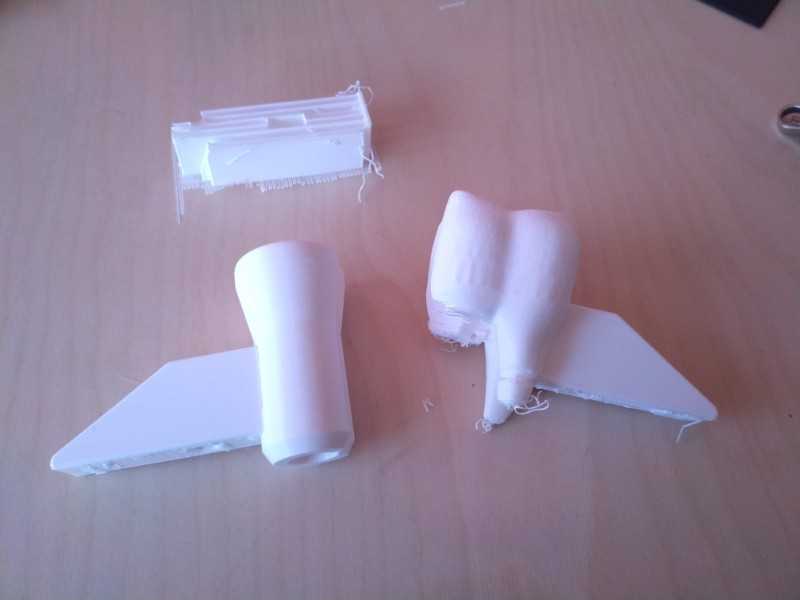
the tooth didn't work out. The reason is very simple: I was to confient and tried to print everything with out using a brim surface to attach the most delicate parts, the tooth root. In the other hand, the first piece printed perfectly and looks strong enough.
I recalculate the tooth hanger with a good brim (3 layers and close to the materia) to make sure that the next time the tooth will be perfect.
This time the piece was fine :)
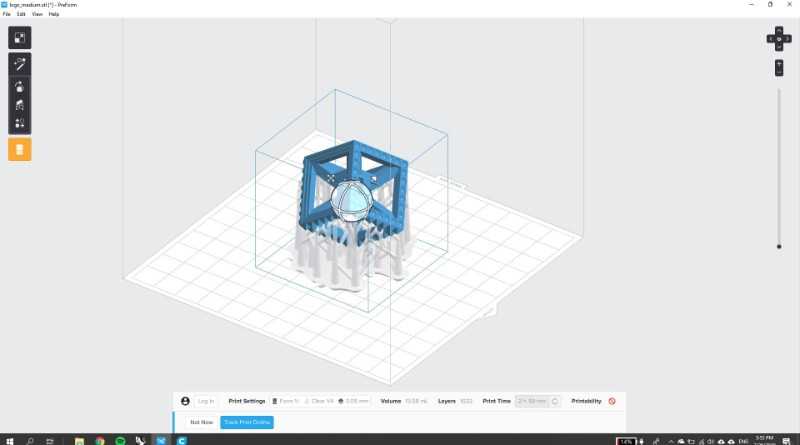
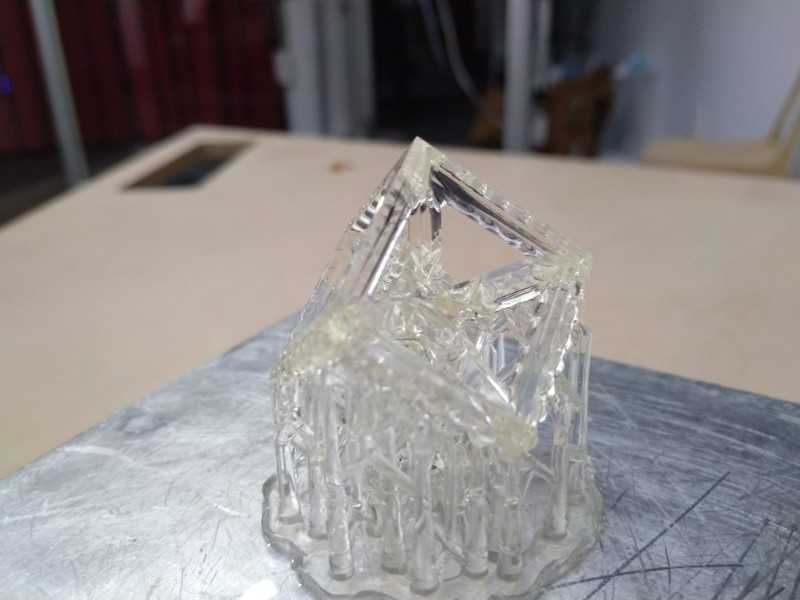
I was really excited about the SLA machine. I've never used or see one working and it was a new experience. I designed a very detailed object based on my brand (basically a rotate H o I in a square.
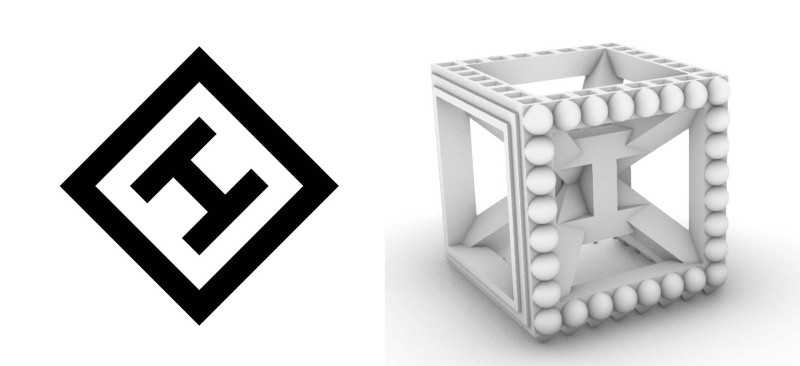
I tranformed into a cube with diferent textures and shapes to try the resolution of the SLA machine. The size os the cube is 30x30x30mm and each face has a different texture.
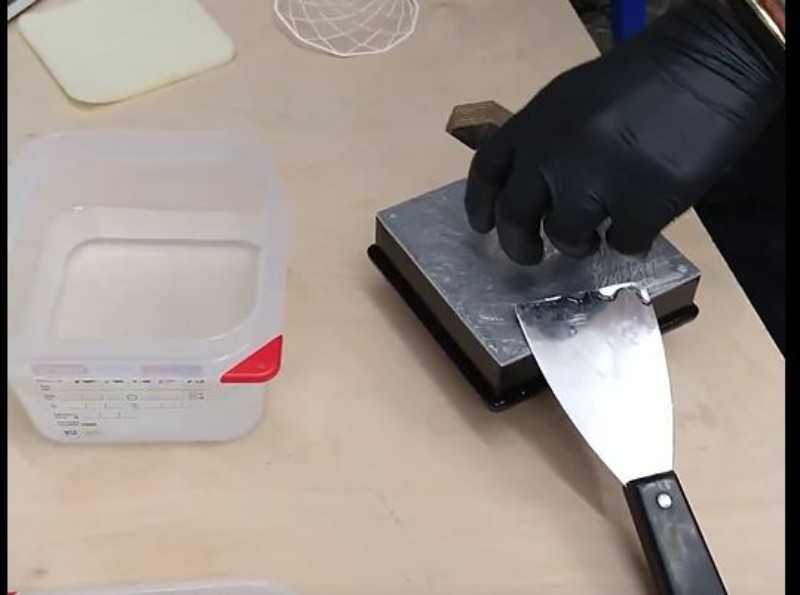
I exported to a SLT file and openned with Preform the software developed by formlabs to use their machines. The software is very good, It doesn't have many options but makes the process very very easy and there are not many parameters to change. It only necessary to orient the piece to optimice the printing and create supports.
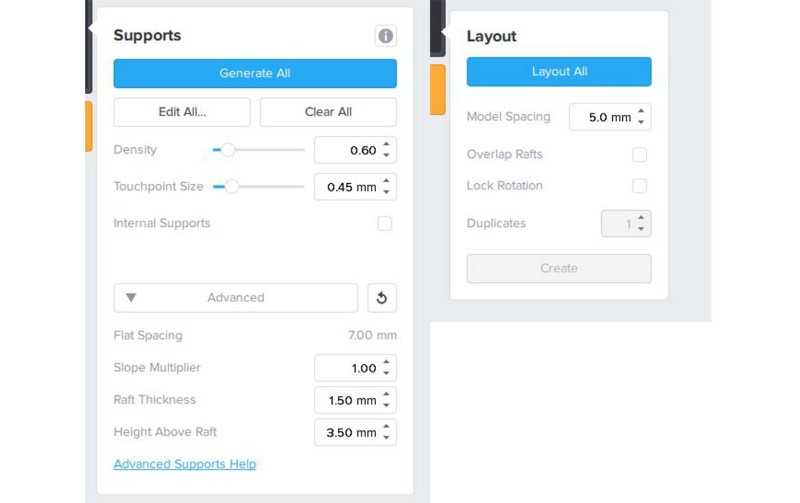
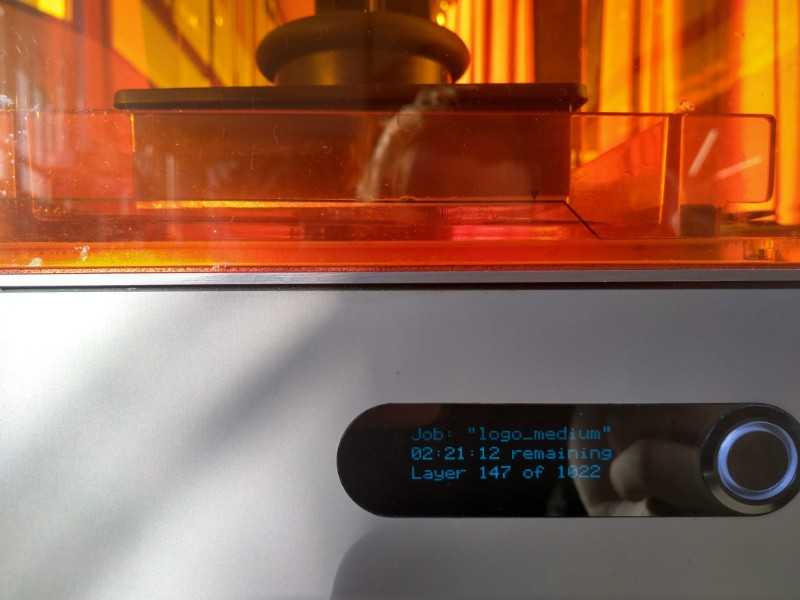
To prepare the machine is vary important to clean the contact surface with Isopanol and don't touch it after that; any dirty from your hands could create problems during the printing process. After download the file using a usb wire it's only necessary to press a button to start the print. For this piece I chose a precion of 0.05mm which makes necessary more than a thousand layers and 2:45 hours to finish the object.
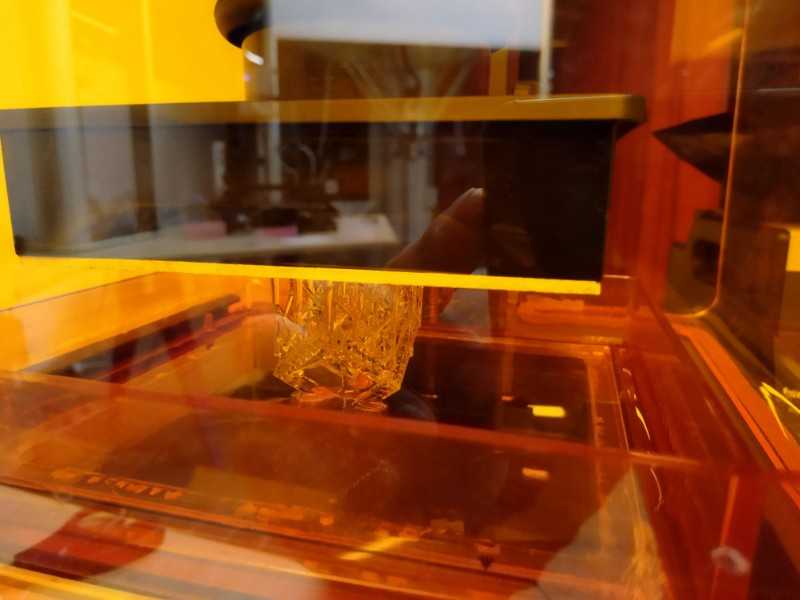
After two hours the piece is ready to take off the machine but it needs some postprocessing to be done. First it's necessary to eliminate the rest of resin by dipping the piece in isopanol and shake it, this process has to be done more than once time, I did it three times but it depends.
Second, the resin has to be curated with UV light, it can be from the sun or it can be done with special UV lights, I chose the sun. IMPORTANT: The light can't be direct.
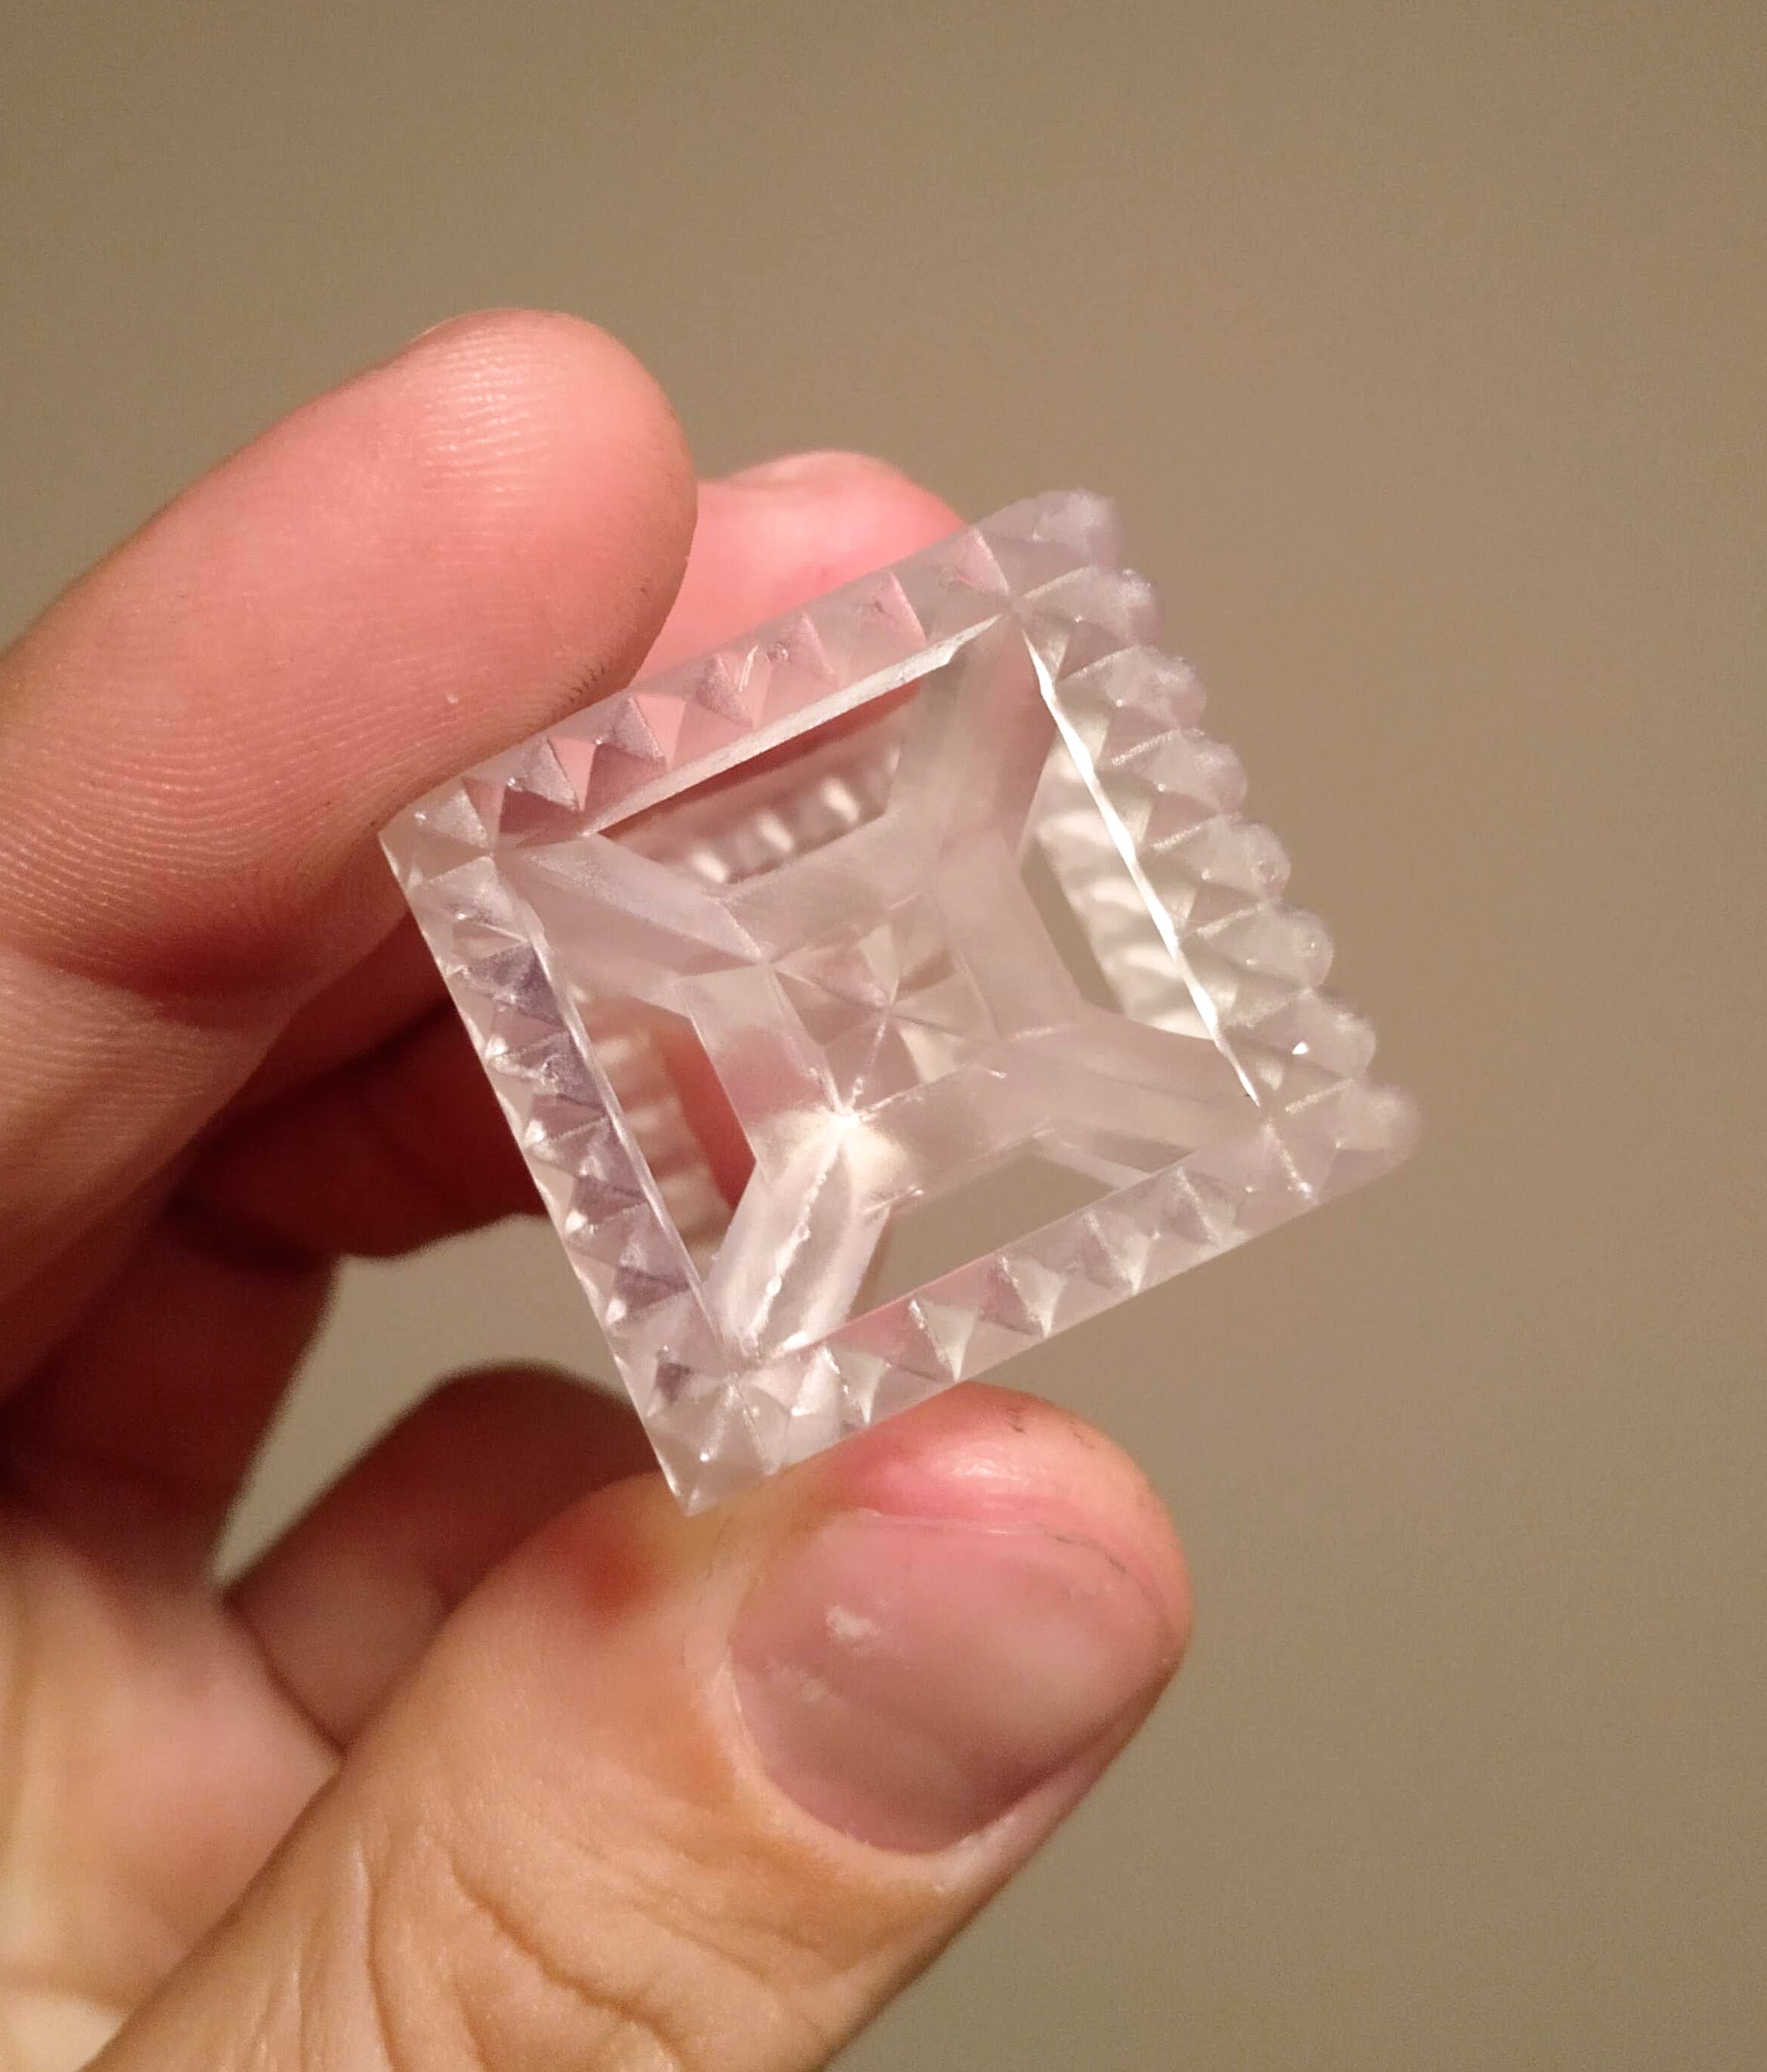
Here is my hero shot!
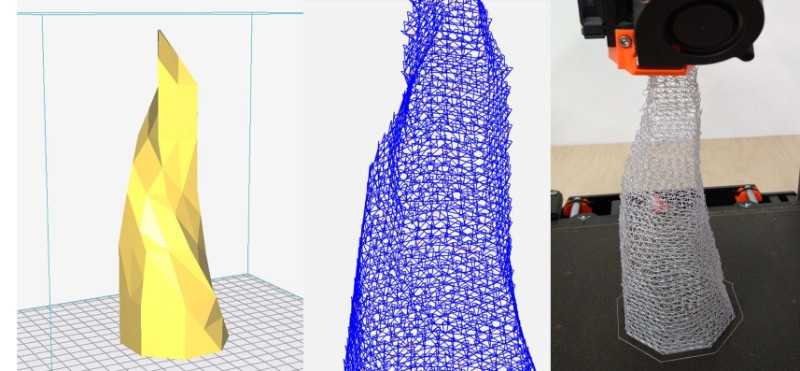
My last printing was made using Cura, I wanted to try a different way of print that wasn't based on layers. I have shown some videos of wire printing using a robot arm with a head that avoids the printed parts but one of our tutors, Ignacio told us that it could be done modifying the Gcode or with the experimental options of Cura. I've found this option very interesting and try to print something like that.

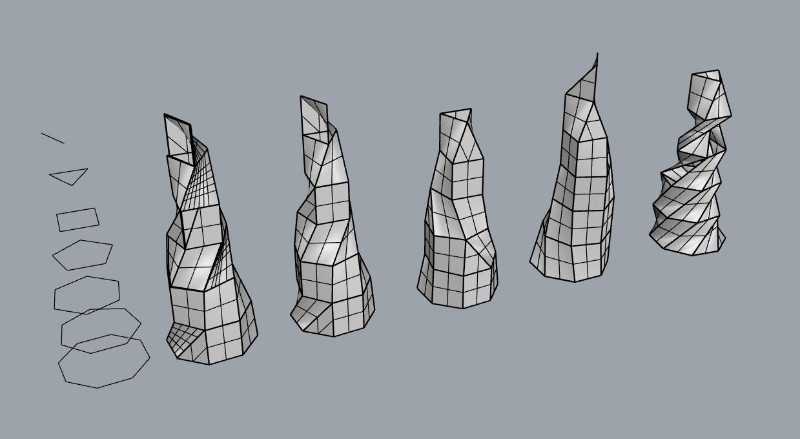
I created a tower based on the xpiral designed by Max Bill in 2d. i did it diferent options because it's hard to make the connection between polygons with less faces. I tried with automaticed options as "loft" or "sweep" but at the end I've found that the option with more control and best results was to create the whole tower face by face.
I've exported the solid to stl and openned in the last version of Cura. To use the wire frame it's necessary to open the experimental options, that are hide if you has the predifined parameters.
To find them go to custom/ expert / experimental/ wireprinting
Cura doesn't preview this file so I¡ve openned the g-code in a special viewer "NCviewer" which lets you see and touch the code. I feel too young to play with the code but the viewer helps me to choose the parameters and (spolier alert) see the changes to fix the printing after it failed.

The program that I need to use in this case was a different one and a little bit more complicated, but not much.
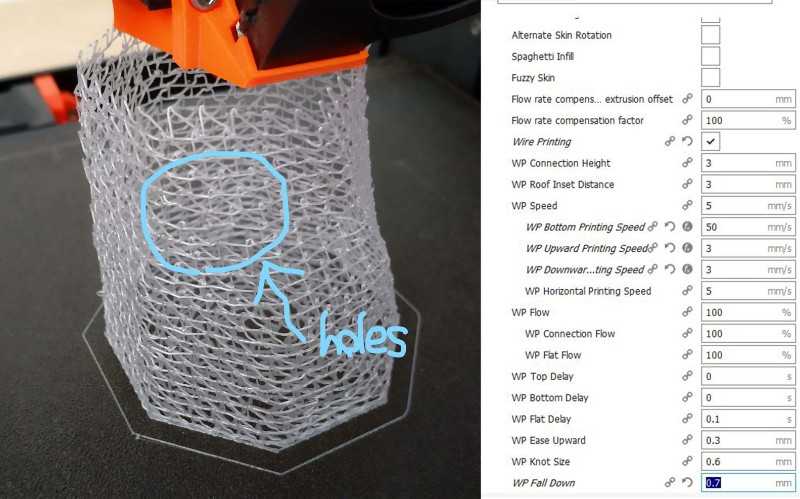
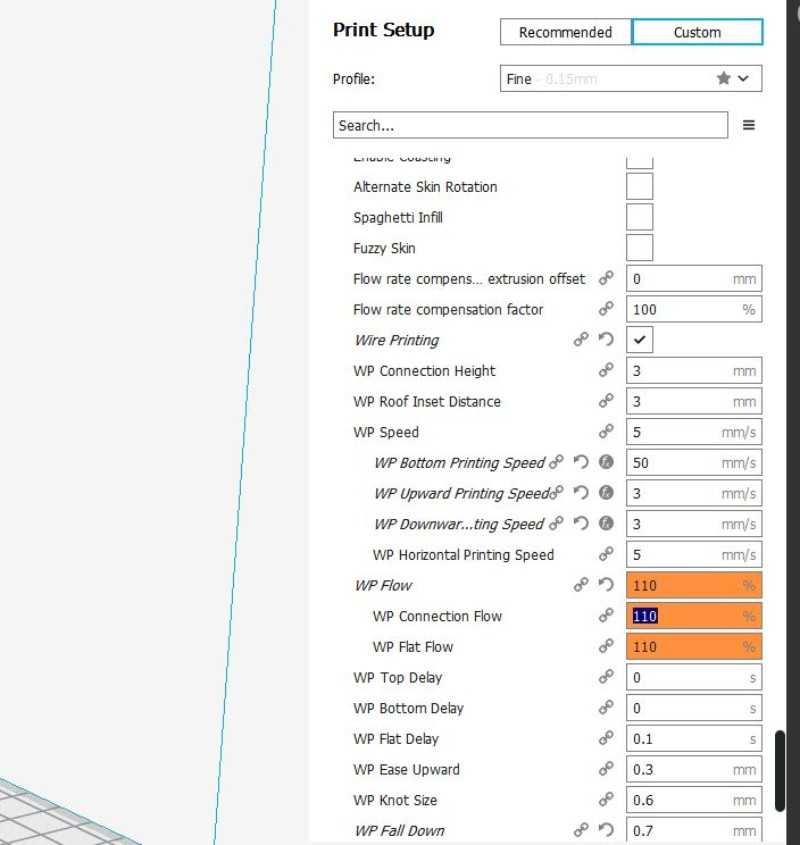
As result of the first try I've found holes in my the mesh and some broken parts. I changed the parameters to have a higher flow, make the printer slower and reduce the height of each layer (I discovered that a wire and the levelling detector were touching the mesh and breaking it). Here are the new values:
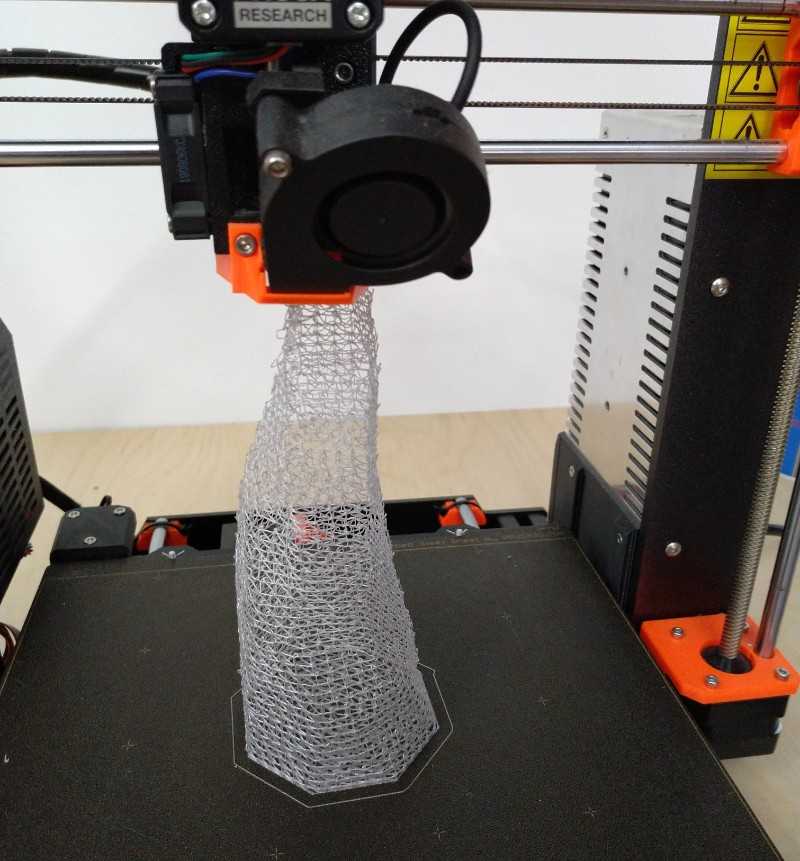
And this is the new result.
As conclusion I can say that this is a interesting path for research and it could be interesting to follow it with more time and knowñedge, maybe during the wild card week.
3D scanning
The promise land an app that will transform your mobile phone into a powerful 3d scann... It's going to be that not. I've tried 2 apss and the results wasn't as good as the ones in the advertisements.
We have three machines at the factory, the first two of them are the typical kind of laser cutting machines. The first one has an area of 1600mm x 1000mm and can cut material of 10mm of thickness, the second one can cut the same thickness but the area is bigger: 1500mmx2500m. The third machine is designed only for engraving, is very fast doing this process but not so powerful as the other ones. The maximum area is 110x110mm, it can be bigger if we use another lens but the quality of the engrave will be worse. All of them are CO2 machines and the most important difference between the two of them that can cut is that the biggest it's not closed which makes smoke produced by the laer a real problem that we've been months trying to fix.
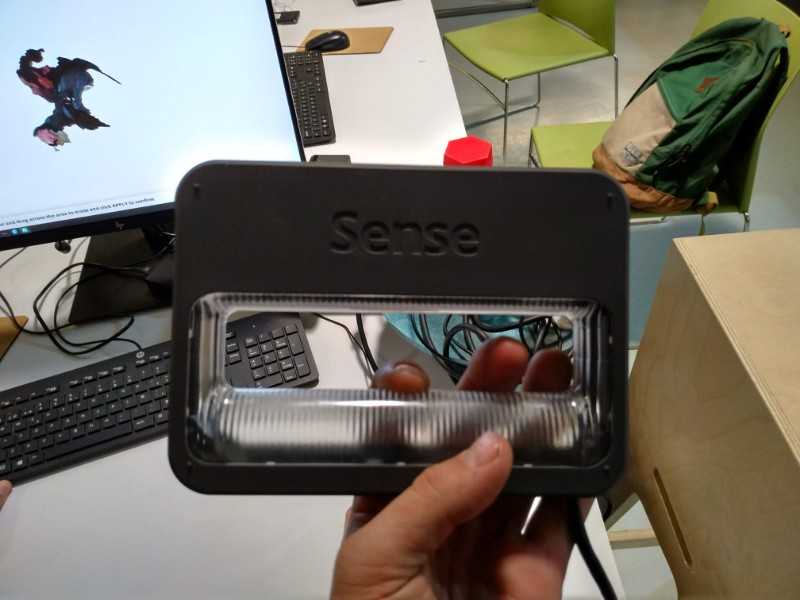
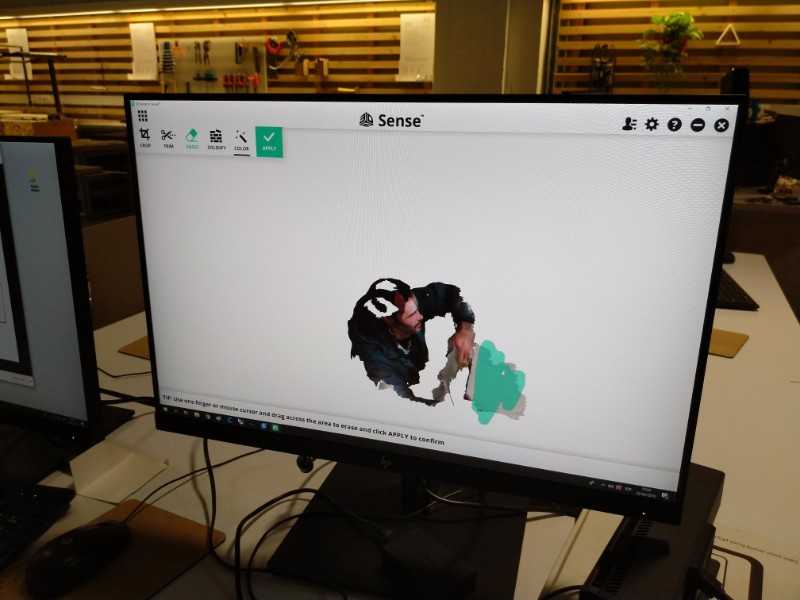
3D Sense
I have very little good things to say about 3dsense. The wire is very small for something that you have to move, the definition is not very good and it doesn't recognice black parts of the object which is very frustrating. I tried to scann one of my partners and it didn't work well. Shame...
Kinect
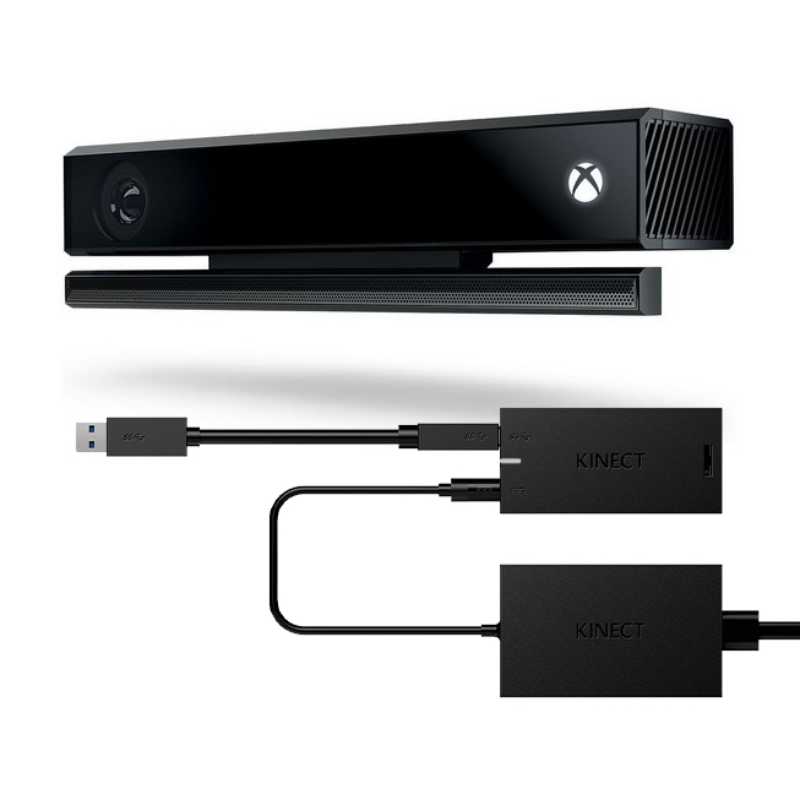
Kinnect on the other hand works pretty well. The infrared systems gaved me a better result, with more details and definition (i look good don't you think so?) But you can only take "3d pictures" to get a real and close 3d it would be necessary to join them later in a other program.
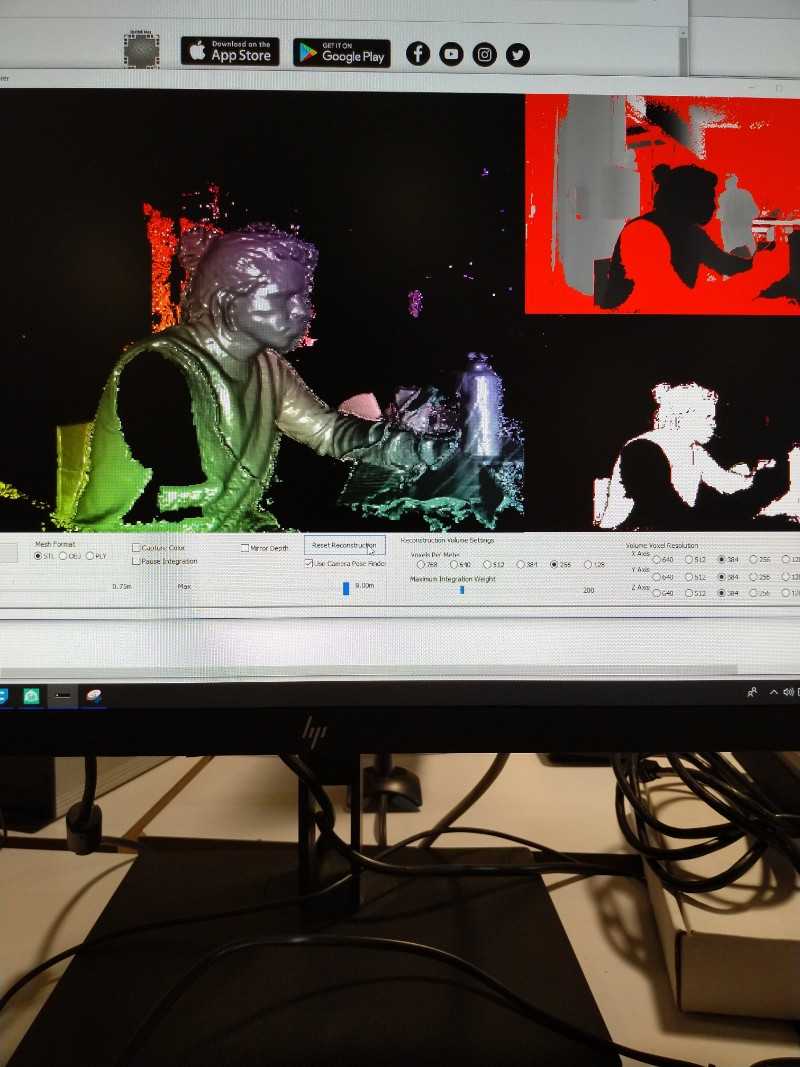
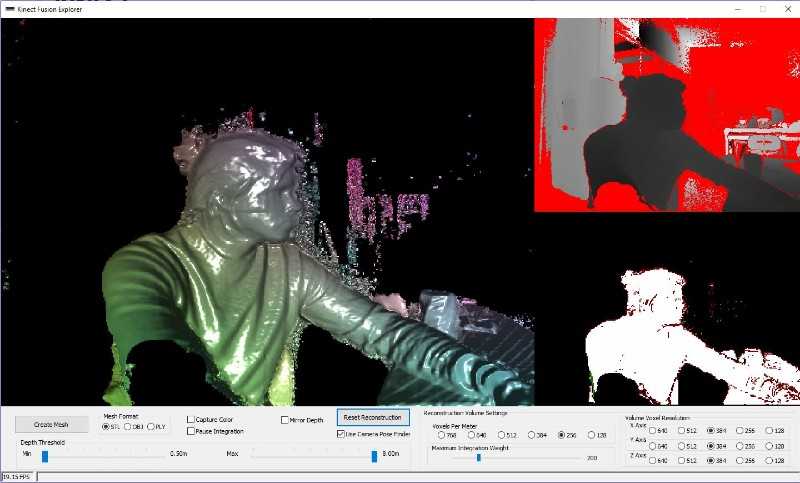
In concluison, Kinnect is a very good option but I think that I can get something better. Let's see...
For photogrametry I download and install a free version of Agisoft Photoscan. And I can say it loud: It's a very good program. Although my first scans weren't good at all.
first of all It's important to say that I have some troubles open the program for the first time, don't know why but it wasn't possible to see the picture that I was uploading to the program I founf the solution in a agisoft blog: open the program from the cmd bash. Theorically the error is related with windows something...
.jpg)
.jpg)
The first object that I tried to scann was a small tape mesure But I did something wrong, I use a rotary table, which I though it will gave more control to take the pictures, but I was wrong. The software put all the cameras in the same place with really but results...
.jpg)
.jpg)
.jpg)
You can see how bad was my first scann because after align the pictures the program calculates the "tie points"... try to find something there... horrible
.jpg)
.jpg)
SECOND TRY
My second try it was during a small party after the mesure tape thing. I wanted to revenge so I did a quick photo session with one of my friend and the scann works better this time. yes!
.jpg)
Here you can see the tie points after clean all the ones that I didn't wanted (parts of the room and mistakes of the program)
.jpg)
The next step is a dense cloud of points. With the curious result that you can admire here. It remembers to me a character of the avengers movie disappearing...
.jpg)
I built a mesh based on that points with a curious result. I tried to fixit reducing definition and using a smooth tool with better results.
.jpg)
.jpg)
Anyway the light wasn't very good and I still thinking that I can get something better than that capture...
THIRD TRY. THE GOOD ONE.
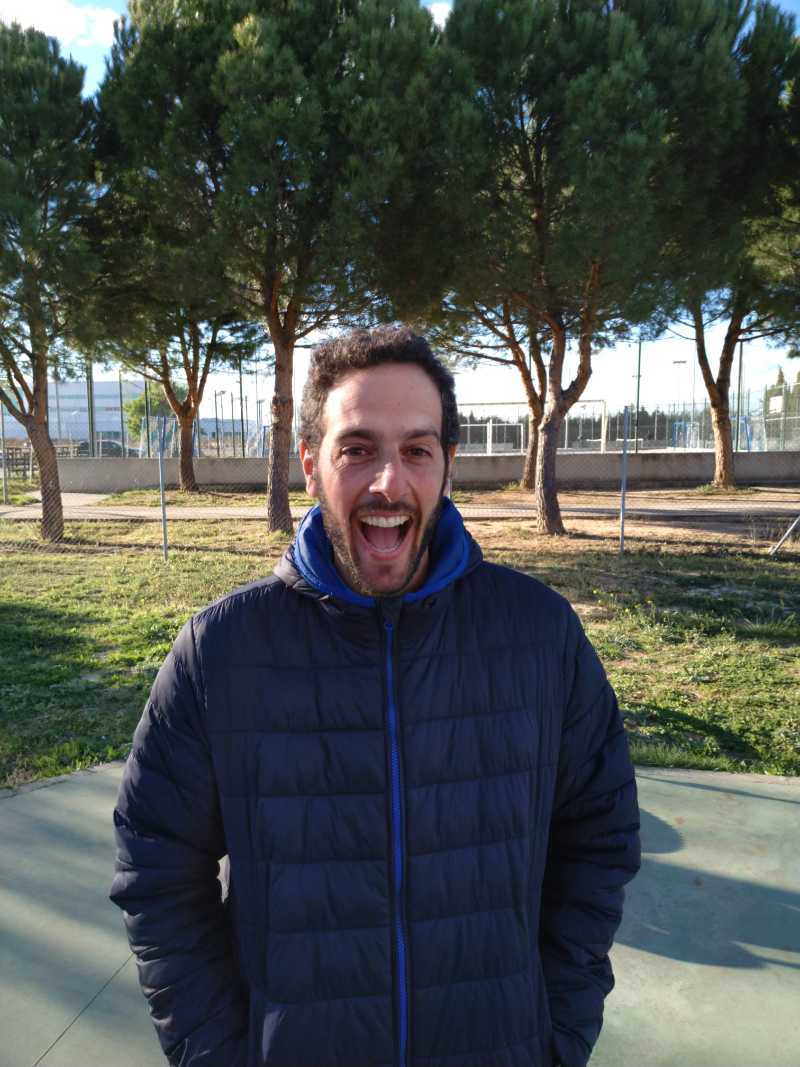
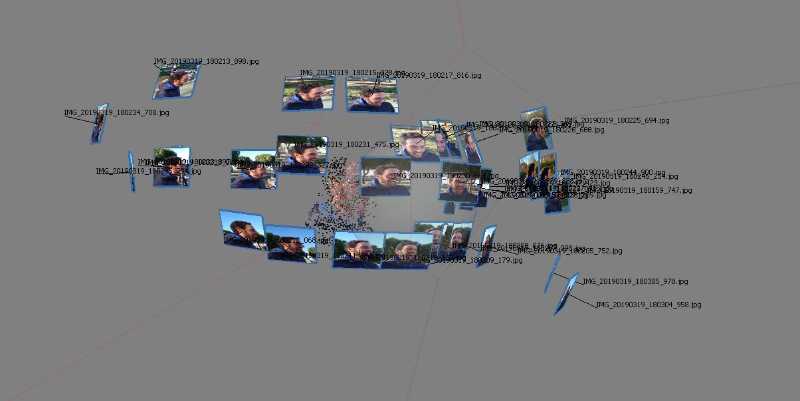
This time I picked a new model, my climbing teacher, and a better scenary, a sunny day outside, and ,well, the result speaks by itself. I did like 60 pictures but after some trys i got the best results with 30 of them. I think that it's importanto to be intelligent when you are doing the pictures and don't reapeat pictures from the same angle (it makes the program do rare things.
.jpg)
This is the first image after align the pictures, don't be scared, It's necessary to clean the rough information and you will see the light
.jpg)
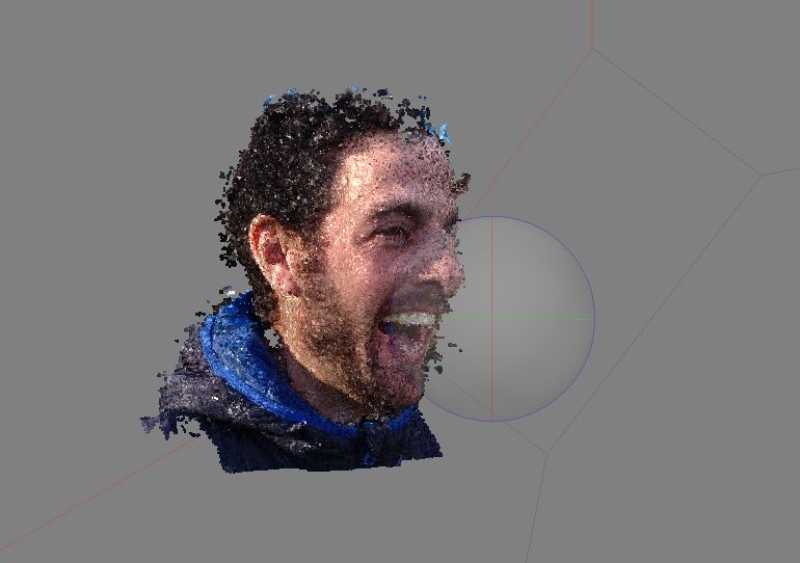
It looks much much better thn the last ones. There are more tie points where i want and even here you can see somethign similar to the first pictures. Now I have to do the a dense cloud of points. It took more time, almost an hour but the result was great.
.jpg)
As you see light is very important, the part of the face in the shadow is less clear and has more voids. I tried to fix this changing pictures and parameters but the base material is what it is so I pass to the next step and made a mesh based on the points that i have. Here is the result.
.jpg)
.jpg)
Ufff It's not as easy as I thought but I think that I can work with this... My next step is export an stl file and fixed the mesh with meshmixer and see what happens...
Repairing with MESHMIXER
Meshmixer is a free program from autodesk designed for 3d-printing but with many options to repair and touch meshes. You can even sculpt parts if you need to. The lazy me thought that using the command smooth everything will be fine... but it didnn't happen as you can see.
.jpg)
then I thought that the left part was actually really fine so I could use only that and mirror the model to get the whole face... But it looks like people it's not as symmetric as you can think and I ended with a good 3d model but it doesn't look like my model.
.jpg)
Finally I realized that the only way to finish with this and get a good result would be the real work, so I smooth some parts, sculpt the worst parts and finally it started to look better
.jpg)
the last step was to get a close model and create from zero the parts that I didn't get with photoscan, basically the hair, which I did using a primitive form (a sphere) that I deformed to look like the rest of the hair and then join it to create a whole and close piece.
.jpg)
.jpg)
My final step was to make a hole in the face, because I want to do a climbing hold in the week of moulding and casting, so don't be scare of my last pictures :)
.jpg)