MOULDING AND CASTING | WEEK 09
A0 Link to group assignment.
You can see the group assignment hereFor this week Assignment I designed redesigned a piece based on the same origami pattern that i've been using during the last week. At the beginning I tried with an anatomical heart but it turns out that it can be divided in to pieces that can be machinable with a 3d axes milling machine.
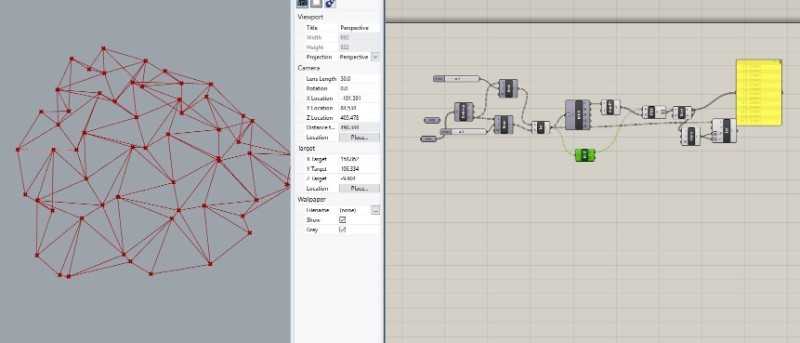
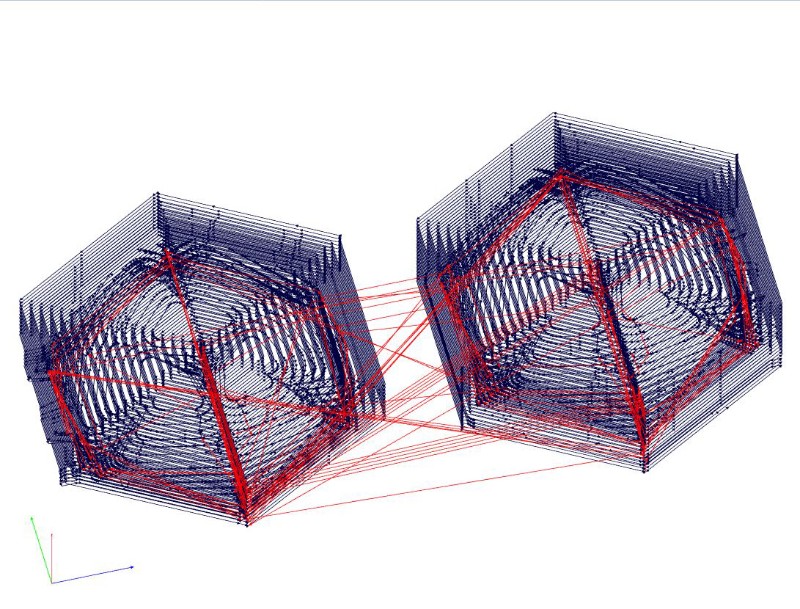
I had this design in grasshopper from the beginning of the course but it has to much detail for the exercise and for the time that we have for milling (we are six members and we can not count with the weekend) So I simplified the design to have only one module of the whole pattern. I didn't need grasshopper por this part and I modelled only using rhino.
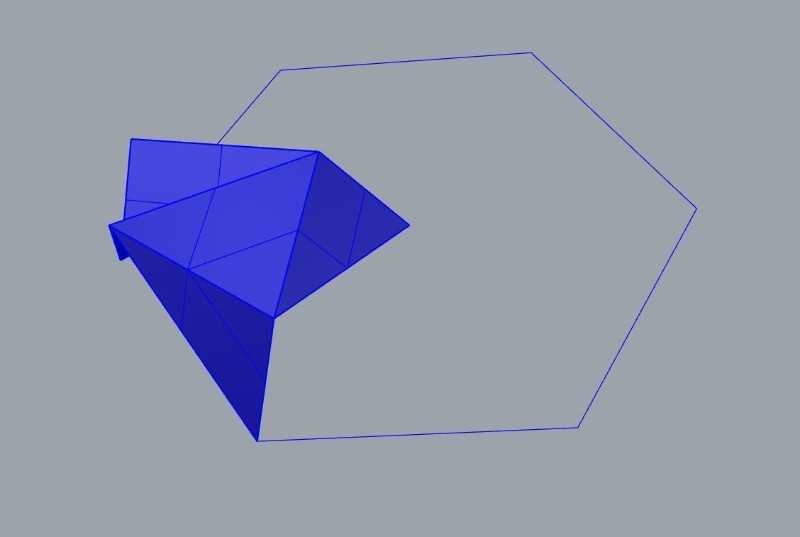
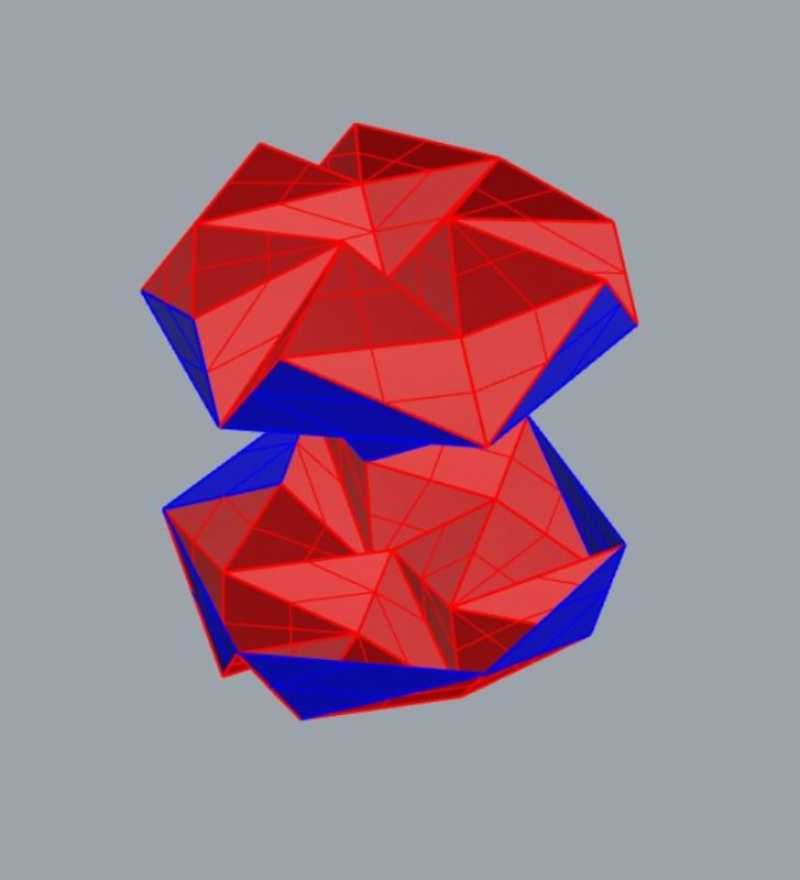
The basic modules is based on a triangle elevated, rotated scalated which cutting edges are connected to the vertex of the big triangle but another not equilateral triangles. These first unit is mirrored to have a simetrial one and then copied in a polar matrix of three components.
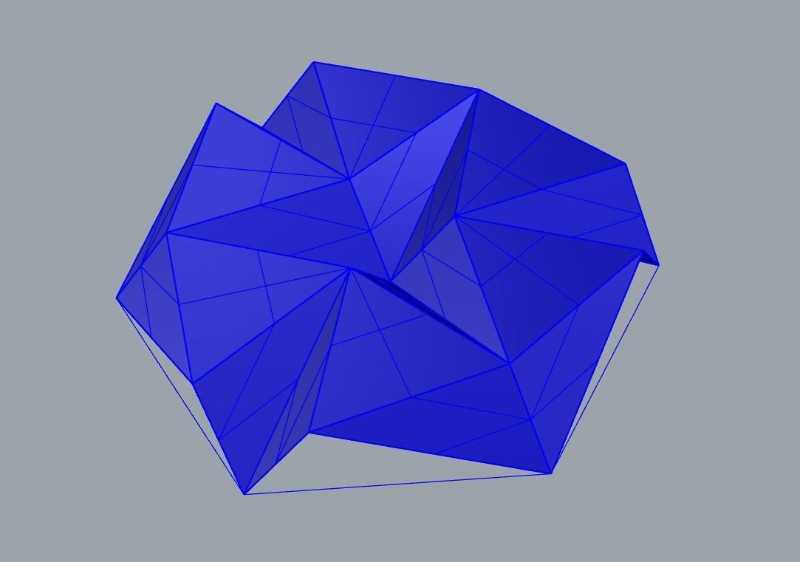
I mirrored one more time to have a close object that looks like a jewel.

Preparing the piece for the milling.
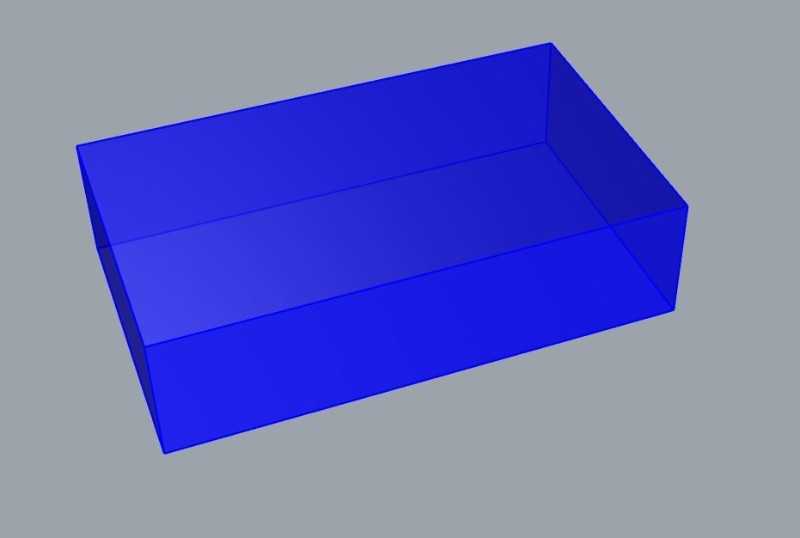
With this design I have the form that I want but now I need to create to mill the void fot the mold where I would cast this object. So I need to make some changes. I started by the wax brick. A piece of 148 x 88 x 38mm
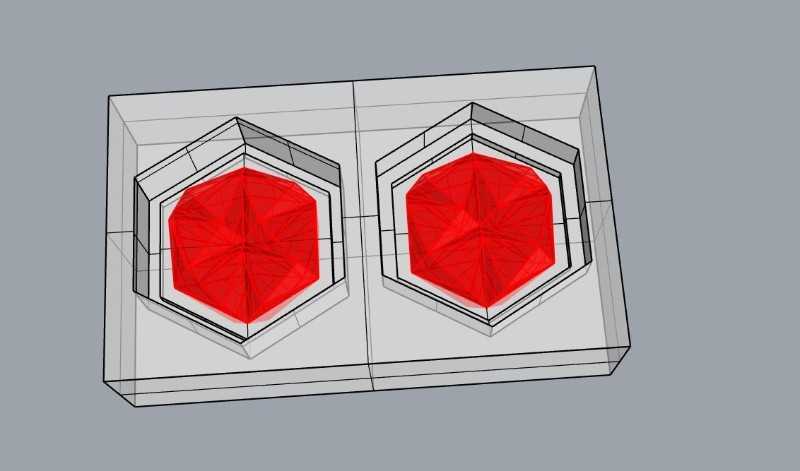
I make a hexagonal hole big enough for the piece and put it inside, I made the same with the other part but this time I modified the bottom to be symmetrical to the first piece whole. This is the result.
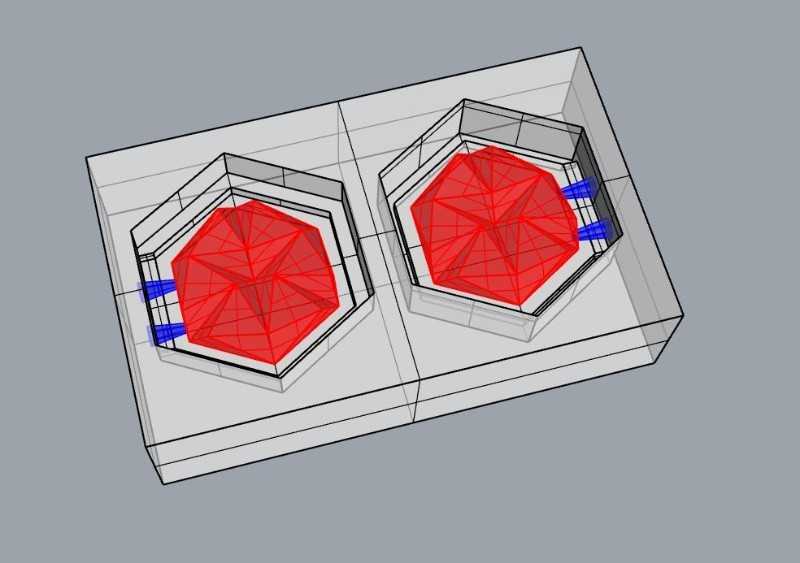
It's should be enough for the casting but... wait a minute How am i going to put the resin inside? I need chimneys of course!

I modelled two cones and put them symmetrical in my mold, it made me change some things in the border (now there were undercuts that a 3d axes machine could not mill)
Now is ready for prepare the milling files
I used Fabmodules because it was easy and the tutorial in fabacademy is very easy to follow. First step is export my model as stl and open fabmodules

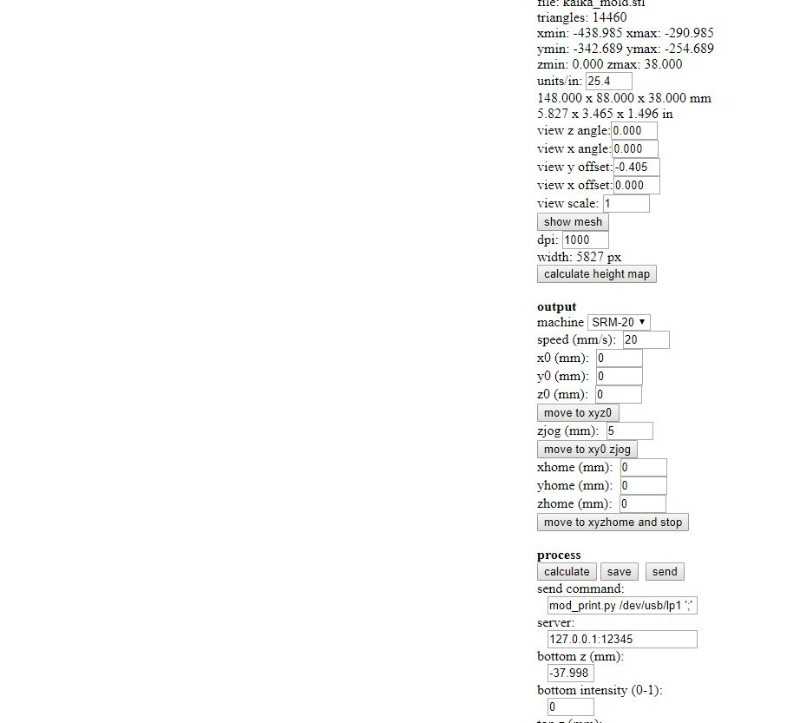
Then import your stl and IMPORTANT: Be careful with the units, the program understand units as inches scale the model if it needs to. Then show mesh and calculate height map.
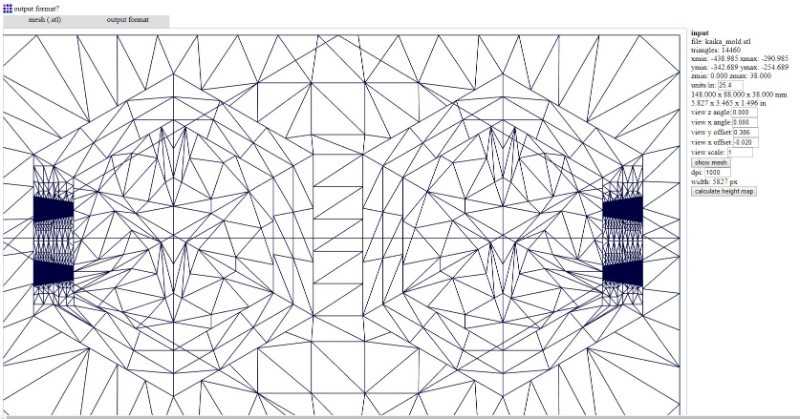
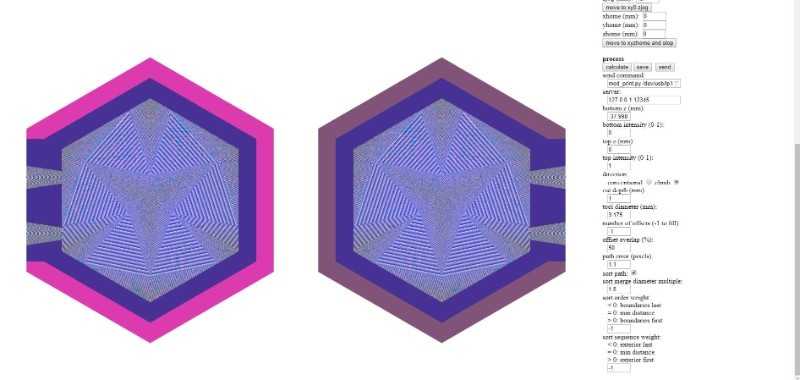
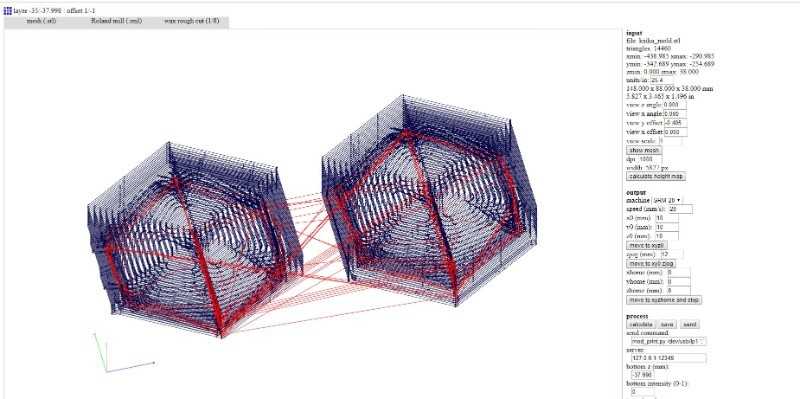
This step needs a few seconds to be ready and it's ready when you can see a colour drawing similar to your model. Now you can select output format (rolland mill) and process -first rough cut, then finest cut)
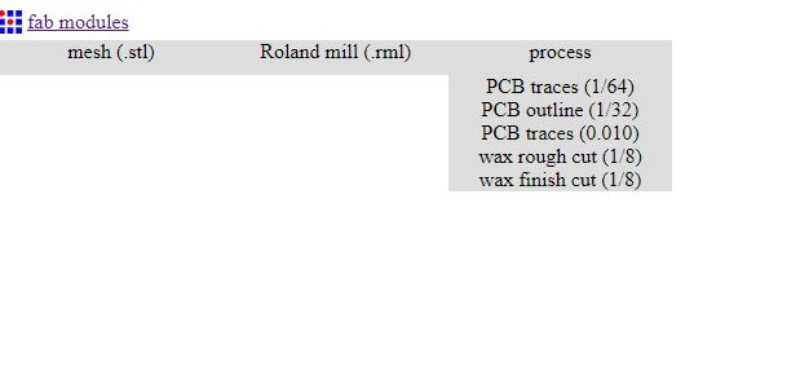
Now, you can define the values in the right, I did only change the origin, because I was going to define it in the machine and press calculate. IMPORTANT: When the process has start is better to don't touch anything, it can make the program stops (don't no why)
Here is the result of the rough mill when the program has finished
Here is the result of the finish mill when the program has finished
It's time to put some wax to mill!
The waiting is the hardest part.
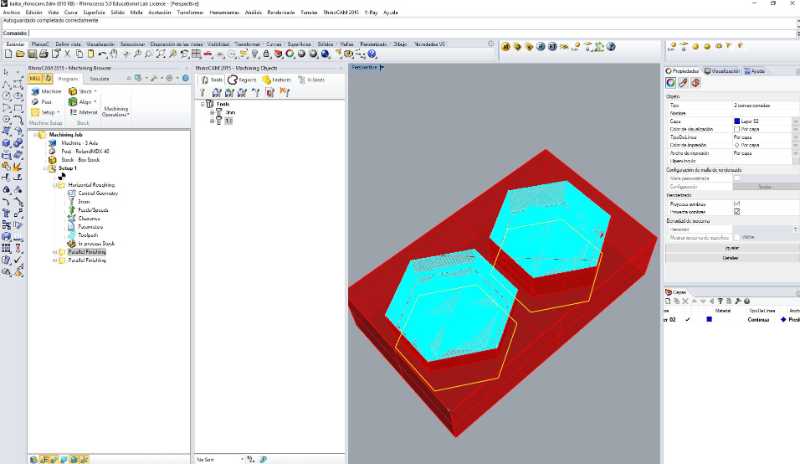
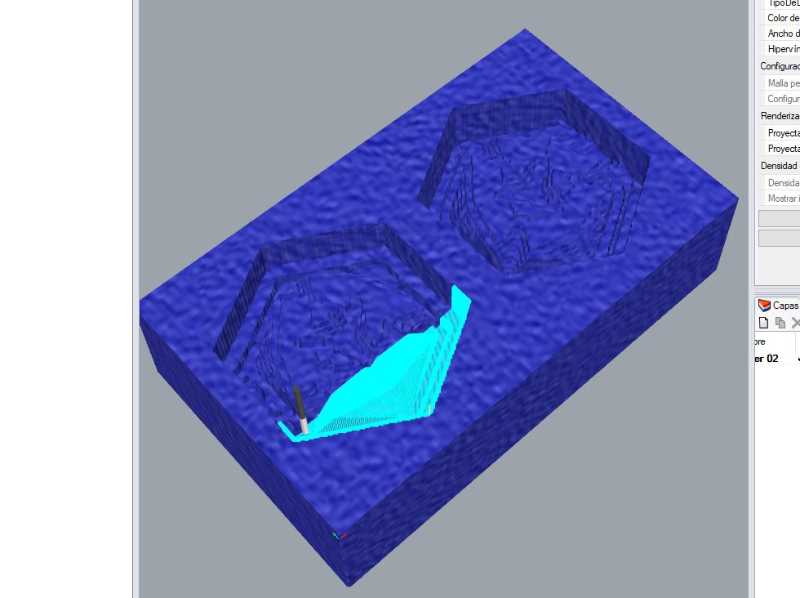
It's Tuesday and I'm still waiting for my time to mill the machinable wax so I've been learning how to mill wax "virtually" with RhinoCAM.
RhinoCam is more complex than FabModules but it looks more pro. I mean, you have more options and parameters to define and also you can see a precalculation of the time and the look of your final piece. It work in rhinoceros as a plugin so you can change the model with the presets for milling.
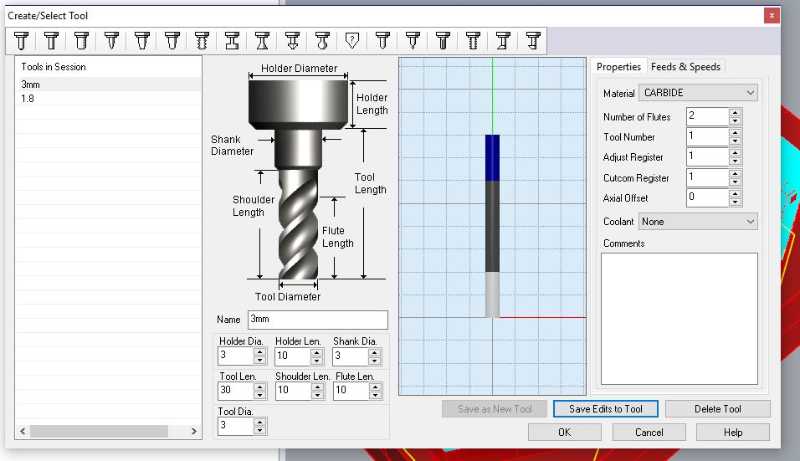
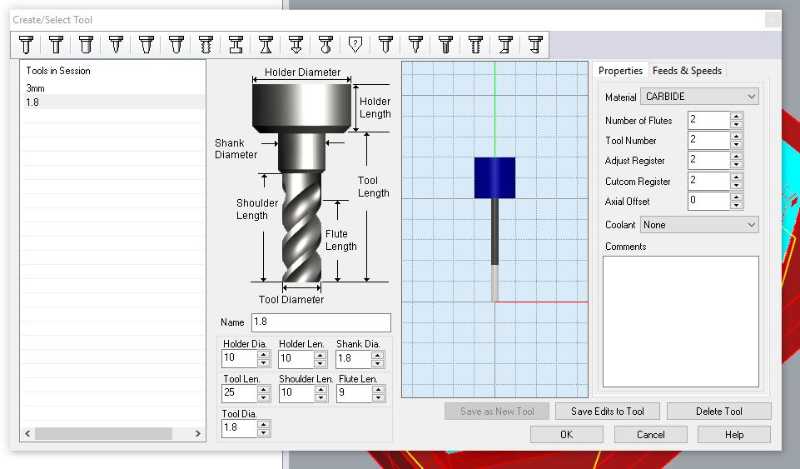
First thing to do is define the Mills that you're going to use. To do that basically you need to measure everything manually and put the parameters in rhino
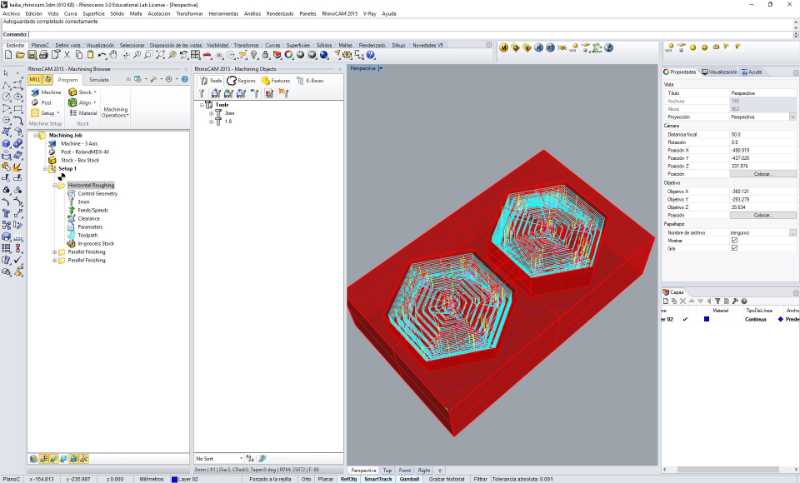
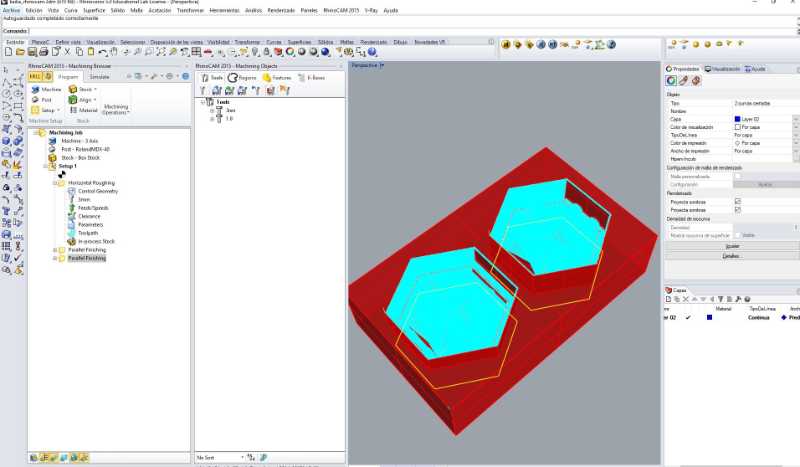
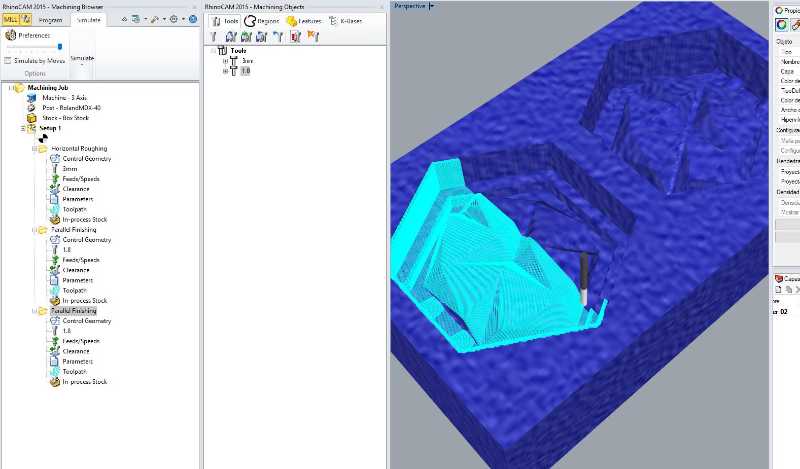
Then is time to define the block to cut and generate every milling separated.
the rough one
the finest one in x
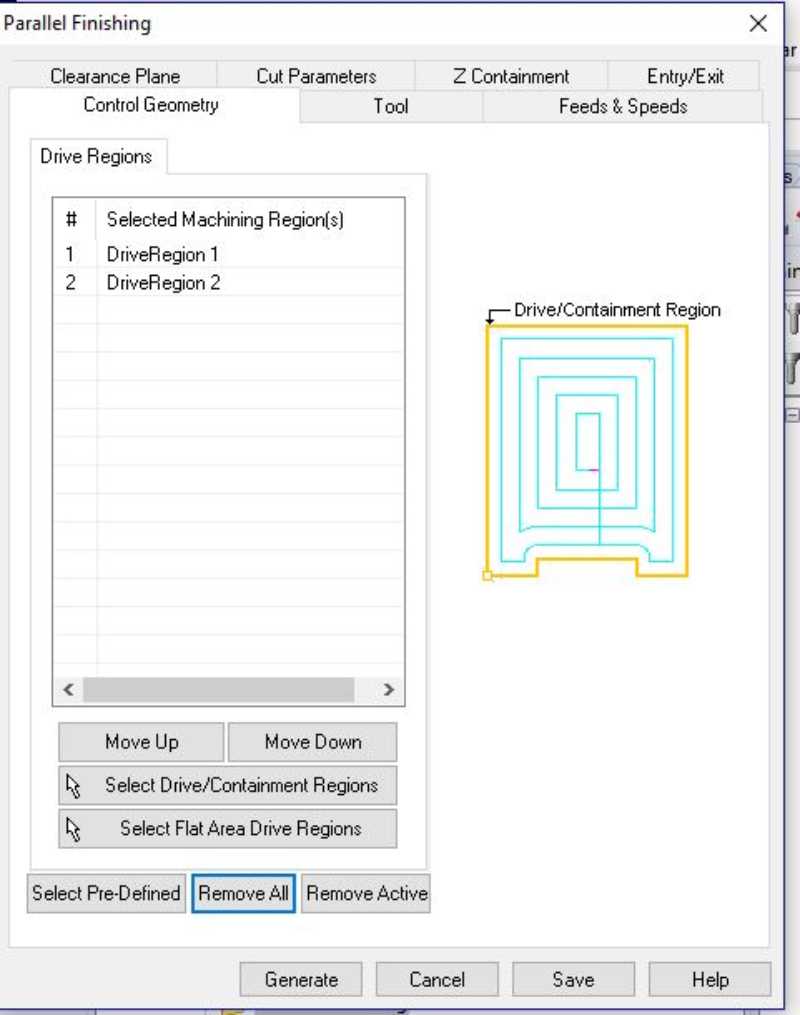
And another one in y for a more precise finish
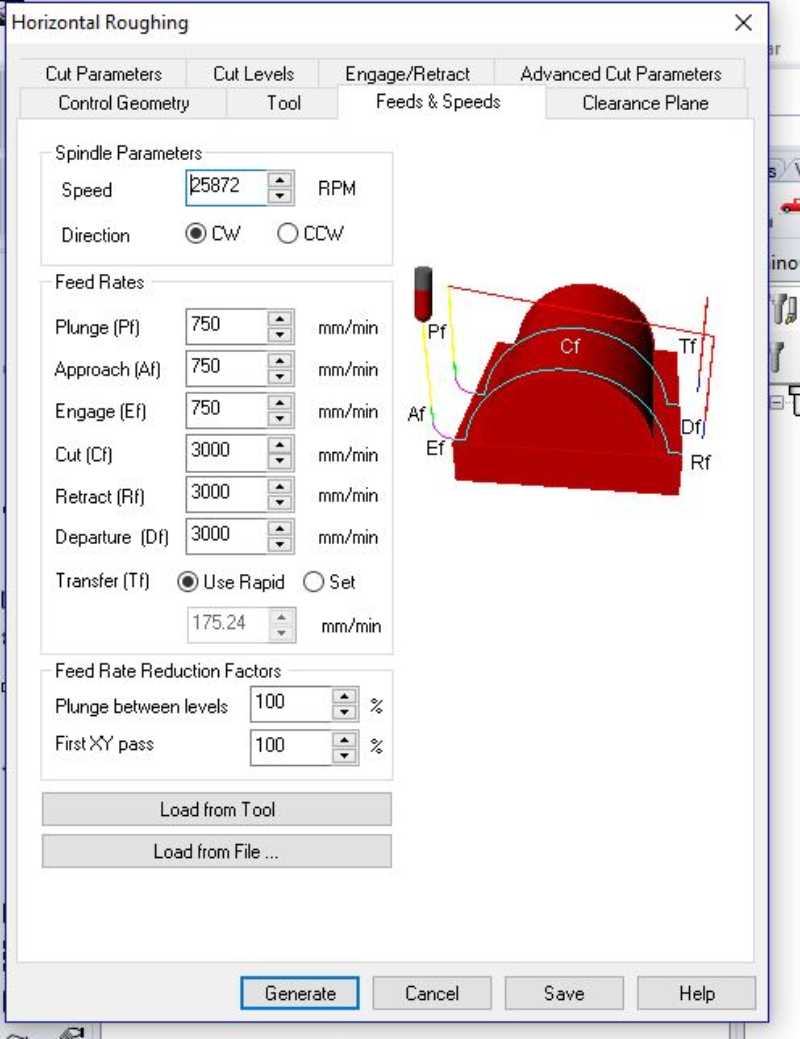
to define them is important to choose a correct speed (there are some predifined but i picked my own parameters.
Then you define the region for the mill. For the rough one the hole rectangle is ok but to save some time I only picked the inside hexagon in the other two of them.

Now you can play a simulation and see how the mill works.
Time for the Real Milling
.jpg)
Milling the wax was very Easy, I only had problems with the double glue tape but i could fix them and end the milling well. I Finally use three archives, each one for a different Mill. Probabbly after the first finish cut it would be ok for most of the models but I have fine interior edges and I wanted to get the closest finish to them.
.jpg)
Here you can see the finish cut (left) and the rough cut (right)
.jpg)
This is the finish one)
.jpg)
I used this milling during the process:
- 3mm for the rough cut
- 1.8 for the first finish
- 1/32 (0.4mm) for the last one.
.jpg)
Silicone
The datasheet of the silicone is very basic. There isn't any warnings and is more about characteristics and a way to use.
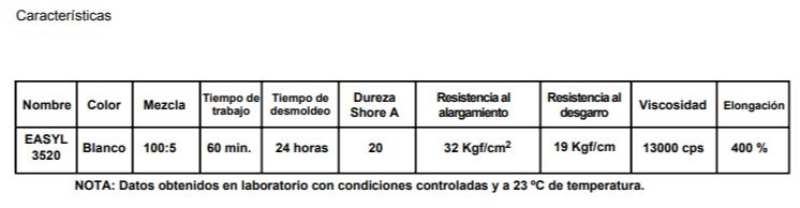
The most interesting part for me is where I can find the viscosity, the mixed, the color and the strengh
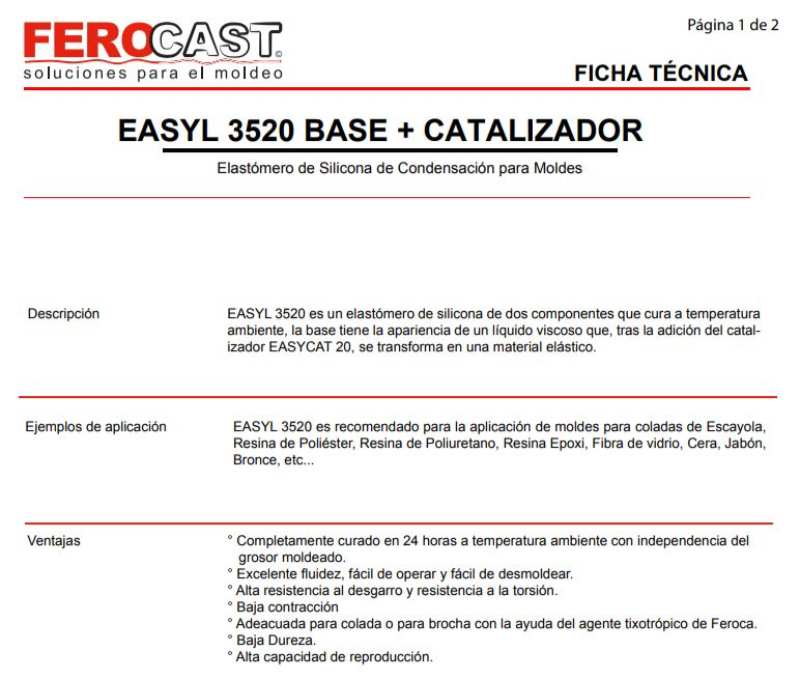
The datasheet can be read here or can be download from the right menu
For the last part of the assignment I used silicone for to create the mold. I mixed it following the instructions from the data sheet, which for this particular product where a a 5% of catalyzer for every 100% of silicone. Then the only thing to do is put the silicone in the wax mold, be careful with the bubbles and wait.
.jpg)
.jpg)
It's important to remove well to ensure a good mixation of both elements and to use a vacuum machine to take off the bubbles inside the silicone. Then you can put the silicone in the wax.
.jpg)
Final Piece
As material for the final piece I used Polyster Resin, the finish is very good and I wanted to get a transparence finish which the idea of using a modified piece during the output device week.
The datasheet of the polyester resin can be found in the right menu or here It's more complete and specific than the silicone one.
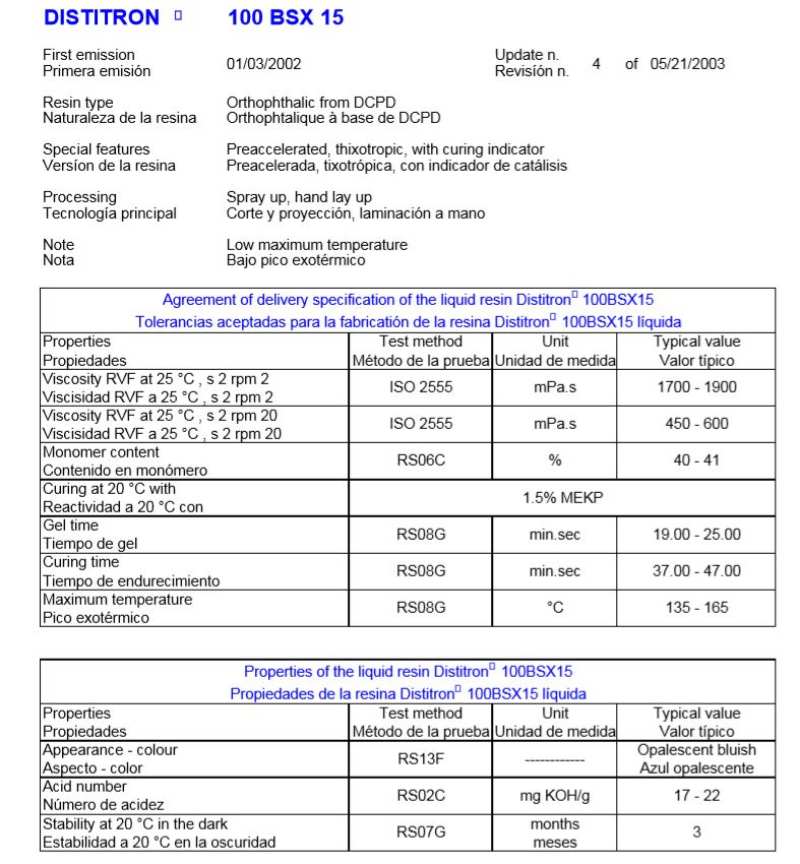
To curate the polyester resin is necessary to use two product and each of them has it's own datasheet. Here is the datasheet of the Ferpol 100BSX15, and here is the datasheet of the Catalizador F11. they contain specific details for many situations, like fires, contact with the eyes, and other precautions
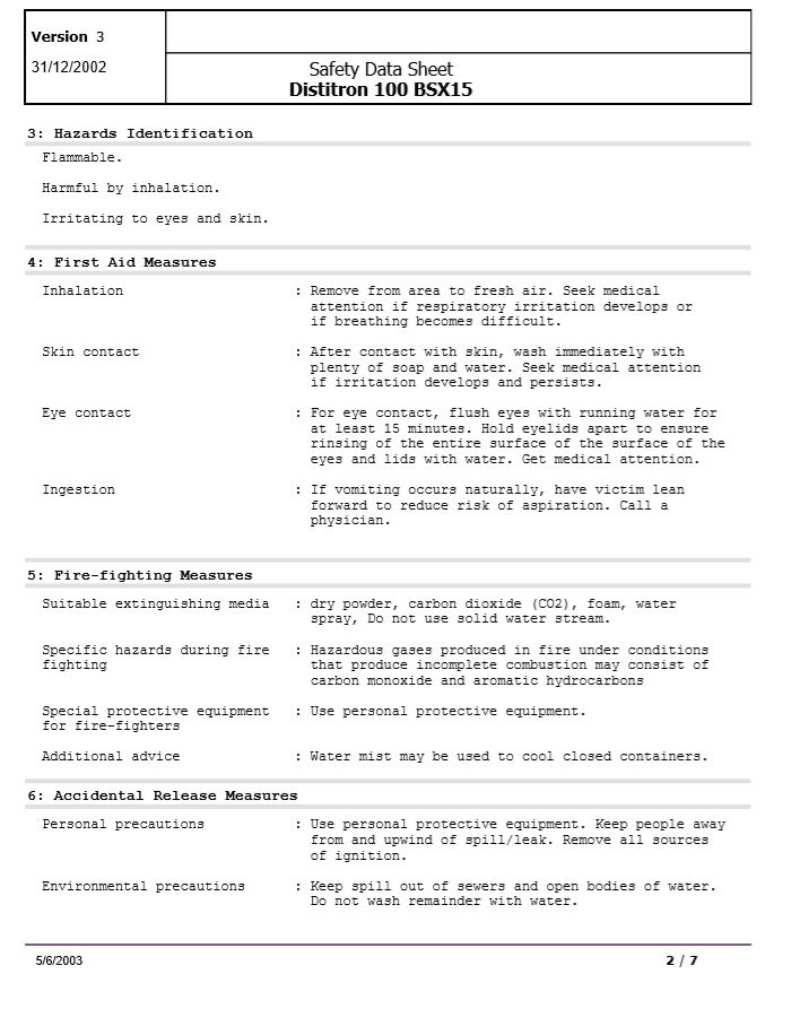
After read the datasheet carefully, I prepared the mold and myself for the process (poliester resin is very toxic and mask and gloves are mandatory, I also did everything under a extartor in a very ventilated room)
.jpg)
I have no pictures of the process, my hands where busy, but is very similar to the silicone; mix the components in the correct proportion, be careful with the bubles and wait. The result is this that you can see here.
.jpg)
Second casting. Prepare for my future weeks
After I finished with the first piece I created a second one with just the half of the silicone mold. My Idea is to cast 6 LEDs inside and connect them to a board in future weeks. I prepare a support for the Leds with the laser cutting machine so I have a precise position of them and cast them inside the polyster resin.
.jpg)
This time you can see pictures of the process. Me preparing the mixed
.jpg)
Me throughing the mix inside the mold...
.jpg)
the waiting (the hardest part)
.jpg)
And the result!! Looks like it's working!! So will see what happens in two weeks!
.jpg)
Milling machine was a bit busy this week (we are 6 anxious guys trying to finish our assingments) so I decided to do something without the wax while I was waiting for my turn to mill. The idea of create something to make more sweet the waiting looked perfect for a moment like this.
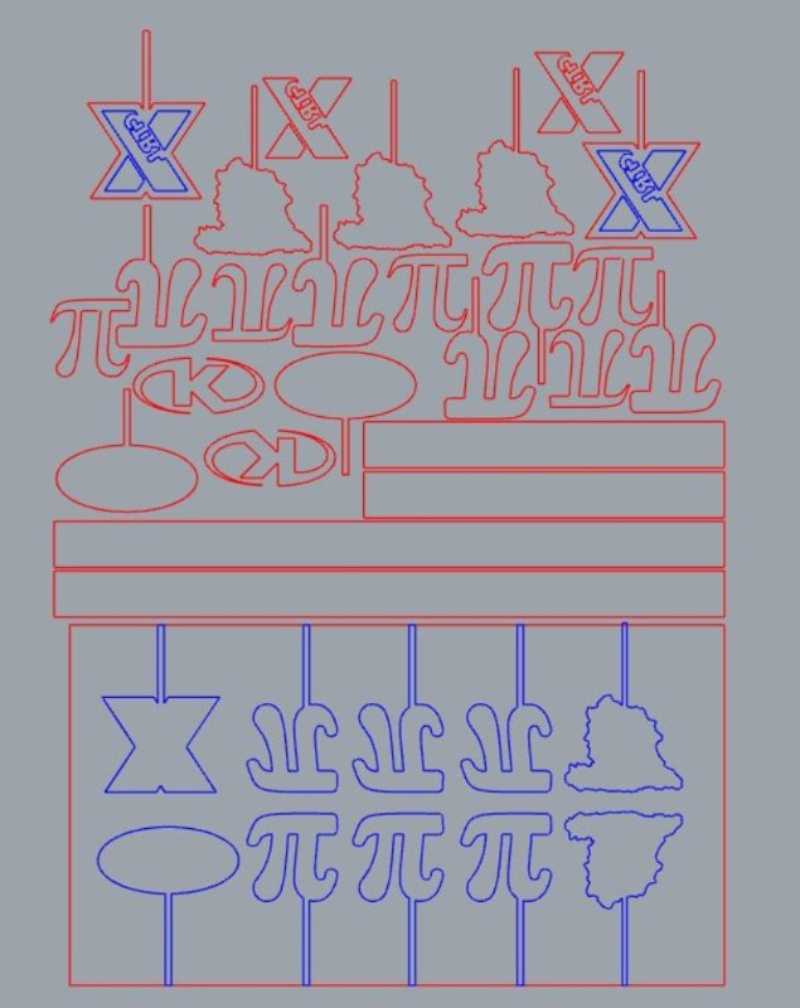
I've designed some lollypop with different forms, some of them were just a basic form cutted but others had two steps to give them more detail and see how this works with the silicone and (later) with the candy or the chocolate. There are some brands from friends, the shapen of Spain, my country, and the numbre PHI, a joke that only can be understand in spanish: Llolypop is said as "Piruleta" so a Phi lollypop it's something like a "PHIruleta".
.jpg)
I cut the pieces in an old piece of acrylate and paste them with clhoroform, then I let it dry and clean the pre-mold with soap and water. I finished puttimg some tape in the edges to avoid loses
.jpg)
I prepared the table and find all the tools and elements to make the mold.
- - a pre-mold
- - a gloves and a gown (it's not in the picture but believe, I put it on me)
- - a stick to mix the bicomponent silicone
- - a plastic glass
- - a digital scale
- - a food silicone and his catalizer
.jpg)
The datasheet can be found in the right menu or in this link (spanish) or this other link (english). We are in the European Union but the silicone is approved for alimentary use by de FDA, an american institution. It also says that needs to be clean with soap before use and the maximum temperature in the oven is 204ºC

In the bottle there are some important advices and the proportions to made the mix. In this case the proportion is 100 of silicone and 10 of catalyzer.
.jpg)
.jpg)
I mixed them during five long minutes to ensure a good curate and drop everything in the pre-mold. The trick here is doing it, slowly, without moving it to avoid bubbles, the mortal enemy of any casting process.
.jpg)
.jpg)
.jpg)
When I finished with the dumping of the silicone I tried to "vibrate the mixed to help the bubbles to get out. I spent a long time hitting the pre-mold with the table and, although you can not see it clearly in the pictures it helped a lot.
.jpg)
A DAY AFTER
I let the silicone curate during 24 hours and then I could take it off easily, it looks like I did the process ok because the mold looks great.
.jpg)
Now it's time to create sweets as willie wonka. the recipe for lollypops is really simple: Melt sugar mix it with food colour and flavouring, put them in your mold and let them get cold.
.jpg)
.jpg)
It's important to be careful with the temperature, too much hot can burnt your caramel and everybody nows: Nothing is worst than a bitter sweet.
Maybe I burnt the first round but I got a few good ones after that.
.jpg)
Here is my "hero shot". I've gotten some points for uncle of the year.
.jpg)
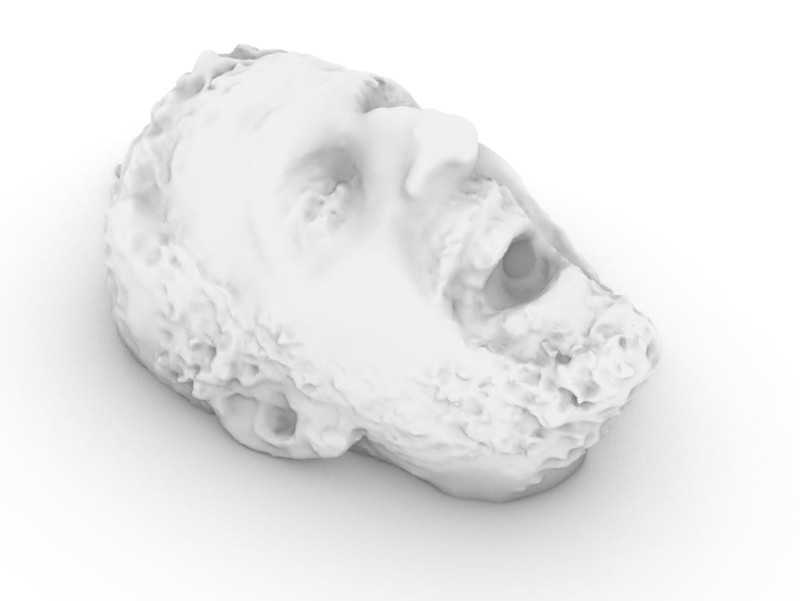
During week five (3d printing and scanning) I digitalized the head of my rock climbing teacher "Grana" with the idea of make him a present now. So I looked back for the files and change the model a little bit to create a face hold with his face. I make a hole in his forehead for the screw that he lost (i'm joking, it's to fix the hold in the wall) and create and stl to print.
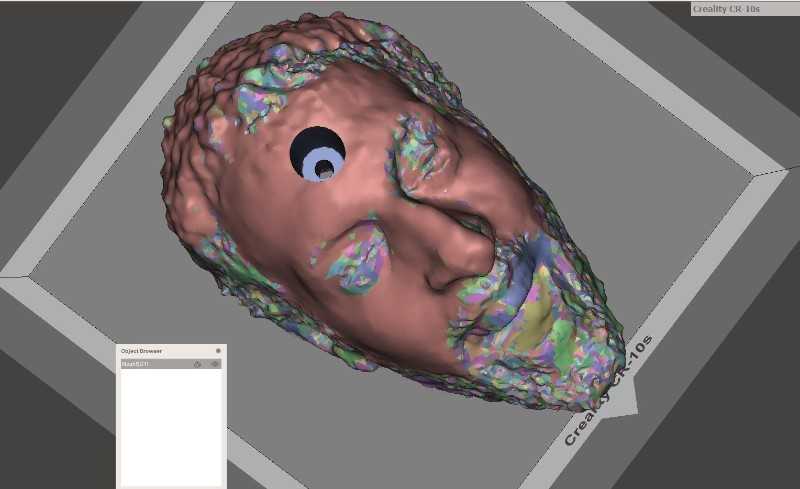
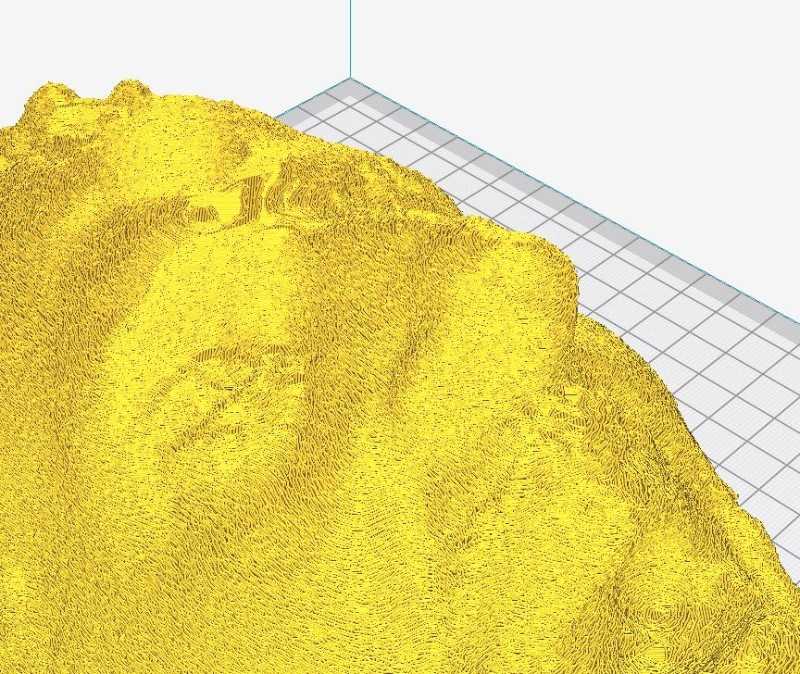
the thing is that silicone is very good with details and I don't want a smooth surface because it's bad for climb holds. So I've tried a experimental parameter from Cura "fluzzy skin". this parameter give a rough finish to the piece that you print. Here you can see the difference.
Preview without fluzzy skin
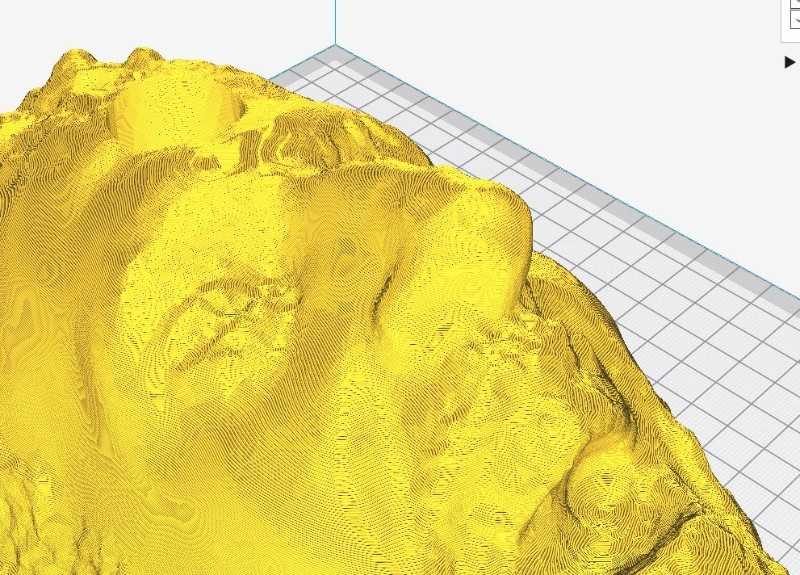
Preview with fluzzy skin
Then I printed with a definition of 0.3mm layers. It took 12 hours to finish but the result it's awesome
.jpg)
.jpg)
It really surprised me, as you see
.jpg)
Then I cutted a box with the laser cutting machine, but it was too big and I make a fast fixation with cardboard and a cutter to prepare the mold
.jpg)
Now it's time to put some silicone inside... It looks like it a really big mold so I make another little fixation with polystirene and tape... But it's working so i'm going to wait and see whats happen tomorrow...
.jpg)
As you can see is very important to vibrate the silicone there are many bubles hide inside.
24 hours after I mixed the silicone is dry and I could take off the base piece.
It was hard because The Hole for the screw and the fluzzy finish but finally I could see the result.
.jpg)
Poliuretane Resin
Now It's time to make the real climb hold. I used Poliuretane resin with two additives, glass fyber to improve the strengh of the hold and colorant to get somo color. Work with resin is easy and it curates very fast (8 minutes) but it's more toxic than other components so it's important to be careful and do the whole process with gloves, glasses and a mask. The resin has two part that you have mix in a percentage of 50%-50%. You know that it's reacting because of the hot.
The datasheet can be found in the right menu or can be read hereThis datasheet is more complete and specific than the silicone ones. Also, there are many warning in the products because they are more toxic and therefore they need to be manipulated with more care.
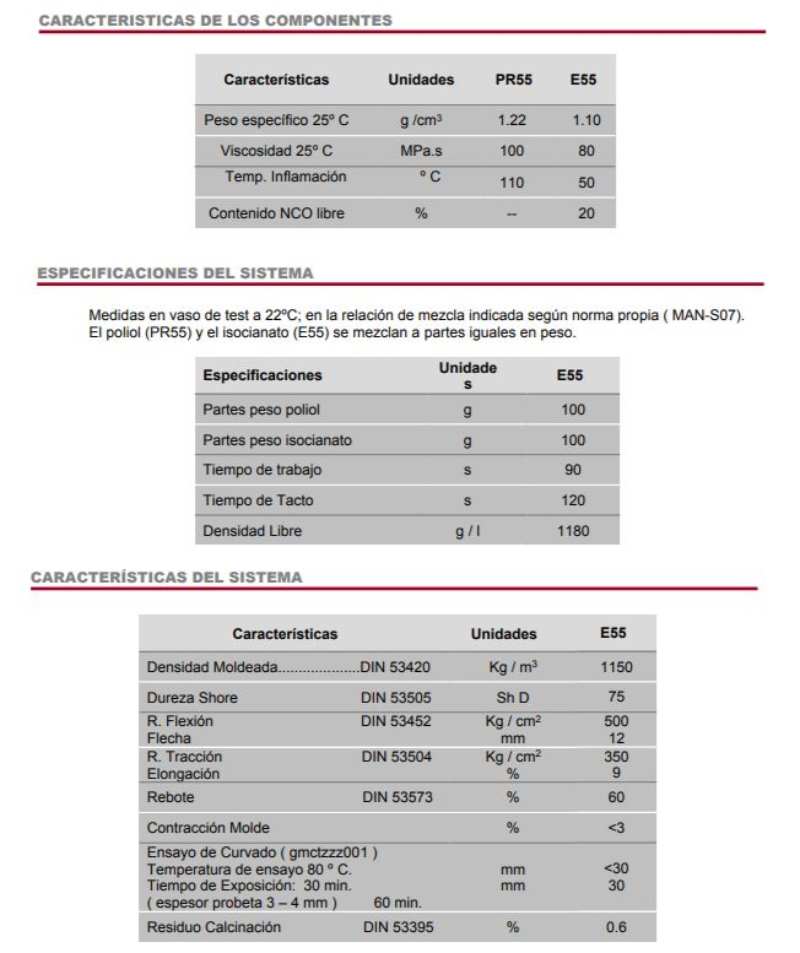
It's a bicomponent product so the security datasheet is divided in two: One is the Poliol PR55 and the other is the Isocianato E55
.jpg)
I wait one more day to let the piece get cold and take it off. It looked perfect :)
.jpg)
I did one more step and and sanded the back part to have a levelled finish
.jpg)
Now I just need to put it in a wall and see what happens!