Interface and Application Programming
In this week's assignment we had to write an application that interfaces a user with an input and/or output device that we made. To fulfil this assignment I used the microcontroller board from the Input Devices assignment. The aim was to create a graphical user interface that would display the score of the football table game.
Group Assignment
For this week's group assignment we had to compare as many tool options as possible. You can find the documentaion here.
Connecting Arduino to Processing
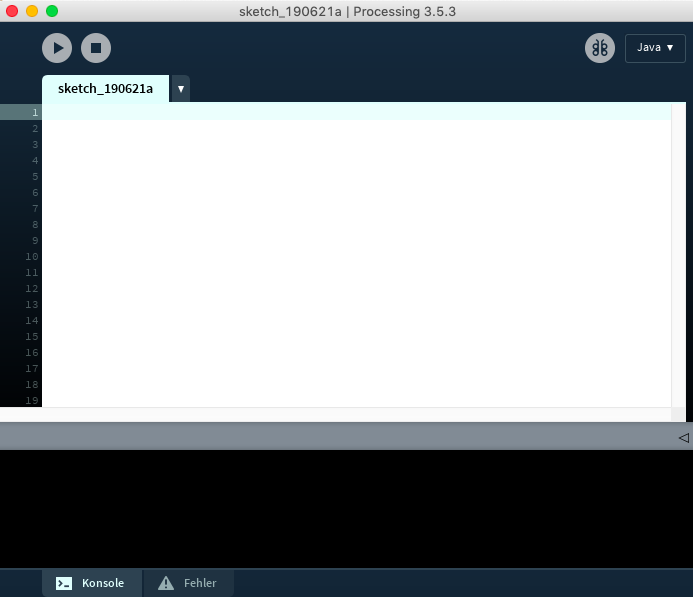
If you want to send data to the PC with the Arduino in order to visualize or store it there, then the programming language Processing is suitable. Processing is based on Java, but works with a simplified syntax. If you don't have a version of Processing, make sure you go to Processing.org and download the latest version for your operating system. Once Processing is installed, open it up. You should see something like this:
As you can see it looks a lot like the Arduino Software. The Arduino software was actually based in part of Processing. Once we have an open sketch, our first step is to import the Serial library. Go to Sketch->Import Library->Serial, as shown below:
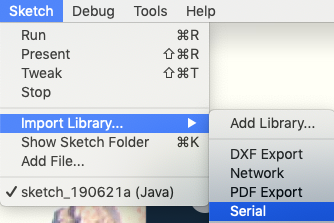
The following line should appear:

Just like Arduino has setup() and loop(), Processing has setup() and draw() (instead of loop). For our setup() method in Processing, we're going to find the serial port our Arduino is connected to and set up our Serial object to listen to that port.
Processing Sketch
I used the ControlIP5 library written by Andreas Schlegel to build a graphical user interface on top of my processing sketch. This interface basically creates a small window that displays the score. It contains two buttons that you have to press once you have scored a goal to resume the game. Processing receives data from the Arduino and sends data back to the Arduino.
// include Serial and GUI Library
import controlP5.*;
import processing.serial.*;

// Create object for monitoring a serial port
Serial myPort;

ControlP5 cp5; //create ControlP5 object
PFont font;

String score_blue;      // Data received from the serial port
String score_red;       // Data received from the serial port


// setup() is executed once at the beginning of the program
void setup() {
  size(500, 300); //window size, (width, height)
  // initialize myPort, set transfer rate as for Arduino Sketch
  myPort = new Serial(this, "/dev/cu.usbmodem14101", 9600);

  cp5 = new ControlP5(this);
  font = createFont("arial", 30); // custom fonts for buttons and title

  cp5.addButton("TeamBlue")     //"TeamBed" is the name of the left button
    .setPosition(70, 100)  //x and y coordinates of upper left corner of button
    .setSize(180, 70)      //(width, height)
    .setFont(font)
  ;

  cp5.addButton("TeamRed")     //"TeamRed" is the name of the right button
    .setPosition(270, 100)  //x and y coordinates of upper left corner of button
    .setSize(180, 70)      //(width, height)
    .setFont(font)
  ;

}

// Like loop() with Arduino, draw() is called again and again as long as the program is executed.
void draw() {
  background(150, 50 , 150); // background color of window (r, g, b) or (0 to 255)
  //lets give title to our window
  fill(0, 0, 0);     //text color (r, g, b)
  textFont(font);
  text("SCORE", 200, 50);  // ("text", x coordinate, y coordinat)
  if (myPort.available() > 0) {  // If data is available,
  score_blue = myPort.readString();         // read it and store it in score_blue
  score_red = myPort.readString();         // read it and store it in score_red
  }
  println(score_blue); //print it out in the console
  println(score_red); //print it out in the console
  delay(100);

  String blue = score_blue;
  String red = score_red;

  if (score_blue != null) {
  text(blue, 160, 200);  // ("text", x coordinate, y coordinat)
  }
  if (score_red != null) {
  text(red, 160, 200);  // ("text", x coordinate, y coordinat)
  }
}

//lets add some functions to our buttons
//so whe you press any button, it sends perticular char over serial port

  void TeamBlue(){
  myPort.write('1');
}
 void TeamRed(){
  myPort.write('1');
}
Arduino Code
This code must be uploaded to the microcontroller board.
// libraries included
#include <Wire.h>
#include <NewPing.h>


//decleares two digital Pins as Trig and Echo
#define trig 3
#define echo 4
#define max_distance 8
#define trigPin 9
#define echoPin 10

// NewPing setup of pins and maximum distance
NewPing sonar(trig, echo, max_distance);

// defines variables
long duration;
int distance;
int spacing;
boolean flag = true;
int red_score = 0;
int blue_score = 0;


void setup() {
pinMode(trigPin, OUTPUT); // Sets the trigPin as an Output
pinMode(echoPin, INPUT); // Sets the echoPin as an Input
Serial.begin(9600); // Starts the serial communication
}

void loop() {
  Sonar();
  Sonar_using_Lib();
  if(Serial.available()){  // id data is available to read
    int val = Serial.read();
    if(val == '1'){       // if 1 received
      // change flag to true
        flag = true;
      }
  }
}

void Sonar () {
  // Clears the trigPin
digitalWrite(trigPin, LOW);
delayMicroseconds(2);
// Sets the trigPin on HIGH state for 10 micro seconds
digitalWrite(trigPin, HIGH);
delayMicroseconds(10);
digitalWrite(trigPin, LOW);
// Reads the echoPin, returns the sound wave travel time in microseconds
duration = pulseIn(echoPin, HIGH);
// Calculating the distance
distance= duration*0.034/2;
// Prints the distance on the Serial Monitor only if the flag is true
if (flag == true ) {
/*Serial.print("Distance of Team Red: ");
Serial.print(distance);
Serial.println("cm");*/
// If the value is between 0 - 8 a Goal has been made
if (distance < 9 && distance > 0) {
  //counts the score
  red_score = red_score +1;
 // Serial.println(" GOAL !!! FOR TEAM RED");
 // Serial.println("Score: Team Blue | Team Red");
  Serial.println();
  Serial.print(blue_score);
  Serial.print("                     ");
  Serial.print(red_score);
  // stops the output on the serial to reset it (to restart the game) push the button
  flag = false;
    }
  }
}

void Sonar_using_Lib() {
delay(50);
spacing = sonar.ping_cm();
// Prints the distance on the Serial Monitor only if the flag is true
if (flag == true) {
/*Serial.print("Distance of Team Blue: " );
Serial.print(spacing);
Serial.println("cm");*/
// If the value is between 0 - 8 a Goal has been made
if (spacing <9 && spacing > 0) {
  //counts the score
  blue_score = blue_score +1;
  //Serial.println(" GOAL !!! FOR TEAM BLUE");
  //Serial.println("Score: Team Blue | Team Red");
  Serial.println();
  Serial.print(blue_score);
  Serial.print("                     ");
  Serial.print(red_score);
  // stops the output on the serial to reset it (to restart the game) push the button
  flag = false;
    }
  }
}
Programming
If you hit the run button (and your circuit board contains the code and is plugged in), a small window should appear and display the score.
Download Files
Code
Processing CodeArduino Code