4. Computer controlled cutting
This week I will do:
Laser Cutting
- Characterize your lasercutter, making lasercutter test part(s), making test part(s) that vary cutting settings and dimensions(group project)
- Cut something on the vinylcutter
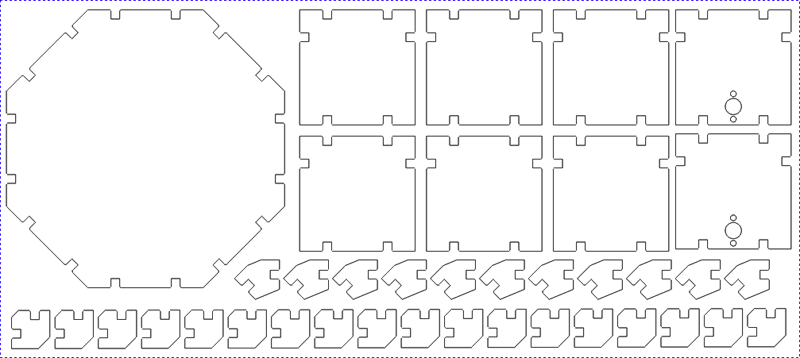
- Design, lasercut, and document a parametric press-fit construction kit, accounting for the lasercutter kerf, which can be assembled in multiple ways
Vinyl Cutting
I might make:
- stickers
- flexible circuit boards
- a textured surface/relief pattern
- screenprint resists/stencils
Research
Results
-
Description: Complete assignments and produce outcomes of Week 4 Computer controlled cutting.
-
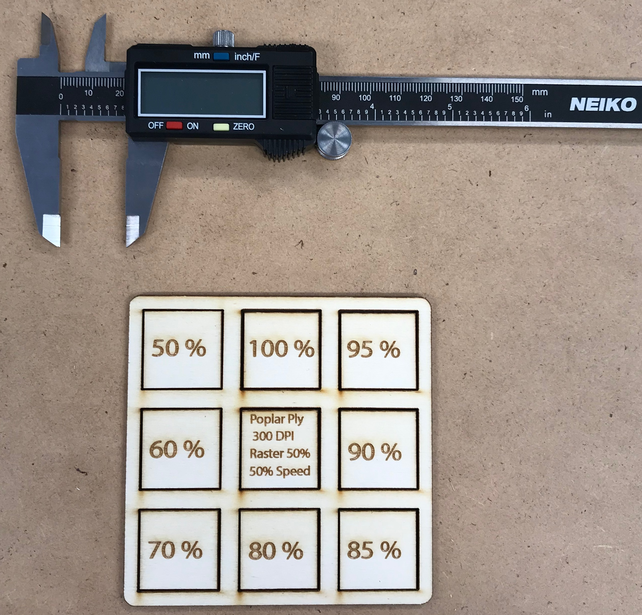
Planning: Using the research on the Kerf Gauge, I intend to reproduce the kerf guage in Adobe Illustrator and measure the kerf of the Epilog Helix 75w Laser Cutter.
-
Materials: Using current laptop, internet connection, and Epilog Helix 75w Laser Cutter. Used poplar 1/8” plywood to test the kerf gauge.
-
Problems: I made the kerf gauge, but line thickness did not make a difference.
-
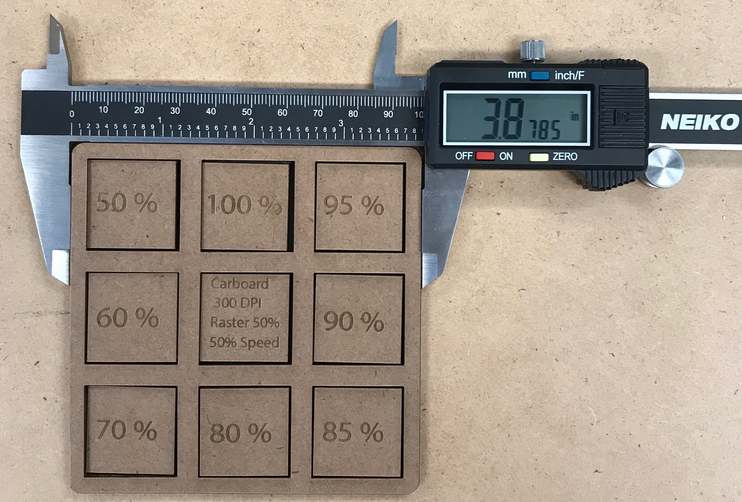
Corrections: I changed the power setting by 10% from 50% up to 100% and found a noticeable difference. I measured with a digital caliper and found a .030 difference from 50% to 100%
| Material | % Power | Measurement (inches) | Kerf (inches) |
|---|---|---|---|
| Poplar Ply | 50 | 0.9955 | 0.0045 |
| Poplar Ply | 60 | 0.9925 | 0.0075 |
| Poplar Ply | 70 | 0.9890 | 0.0110 |
| Poplar Ply | 80 | 0.9895 | 0.0105 |
| Poplar Ply | 90 | 0.9870 | 0.0130 |
| Poplar Ply | 95 | 0.9875 | 0.0125 |
| Poplar Ply | 100 | 0.9895 | 0.0105 |
| Cardboard | 50 | 0.9875 | 0.0125 |
| Cardboard | 60 | 0.9870 | 0.0130 |
| Cardboard | 70 | 0.9860 | 0.0140 |
| Cardboard | 80 | 0.9855 | 0.0145 |
| Cardboard | 85 | 0.9840 | 0.0160 |
| Cardboard | 90 | 0.9835 | 0.0165 |
| Cardboard | 95 | 0.9830 | 0.0170 |
| Cardboard | 100 | 0.9830 | 0.0170 |
-
Workflow: After experimenting with the kerf gauge, I downloaded and installed SolidWorks 2018 to learn about parametric modelling. My license had expired, but I was able to renew it becouase of the responsive Chris MORSE of the SOLIDWORKS Education/Research Team.
-
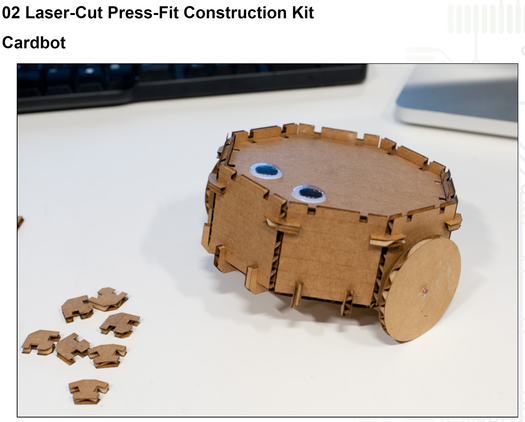
Success: SolidWorks is working and I found a parametric Cardbot model to learn with. Brian Mayton blazed the trail in his week 2 experience with Fab Academy. He provided a png file of the parts, so I will bring it into SolidWorks and see if I can reproduce it.
-
Learning: I immersed myself in SolidWorks by following a tutorial provided in the software. I have also cut the boat number for my Laser sailboat with the Roland CAMM-1 GS-24 Vinyl Cutter.
-
Using Roland CutStudio
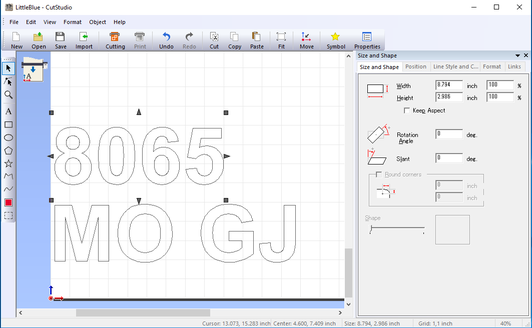
- The weeded boat number using purple because it was in the vinyl cutter. This was a test.
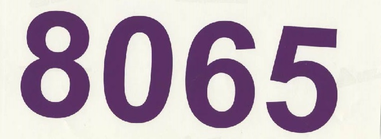
- These are the final results using blue vinyl to be applied to Little Blue after I gelcoat.


-
I always wanted to be able to make a cardboard surfboard. Thanks, Mike Sheldrake! Cardboard Surfboards I will use this as a prototype for my final project. I’ll cut a 5‘10” Fish when I get back to the GOCAT Fab Lab.
-
This is the surfboard with the stringers forward to aft and the first set of ribs (port to starboard) installed. I cut the parts from 4mm cardboard. There were 20 sheets of 610mm x 305mm cardboard; they were salvaged from the flood. I cut the rough edges off and made nice pieces to cut the parts from.
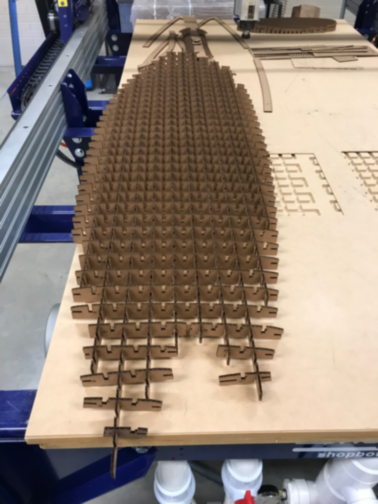
- This is the complete surfboard before fiberglassing. The second set of ribs are installed with the rails attached. Ready for glass!
