
Week 10. Molding and casting
20.03.19 Class
In this week's class Neil has explained everything related to the topic of molding and casting. The types of mold making that can be made from injection molding to part molding. Then we have explained above suppliers and manufacturers of silicones and other materials for the manufacture of molds.
After this has begun to explain all the materials that can be used both for the realization of the molds and for the manufacture of the final pieces. Metal fabrication has caught my attention a lot and that's why, although I've never done this kind of thing in my lab, I want to opt for making soft metals in my assignment and experiment with them.
He has also explained to us all the phenomena that occur during the performance of this assignment, such as the air bubbles that are created in the silicone molds or the working times depending on the type of silicone we are dealing with. Along with this, he has explained certain safety measures that we must take since we are working with chemical materials that in themselves are dangerous and that also undergo catalytic processes during which they can emit noxious gases.
Finally, he explained how to perform 3D milling and how we can do it more easily. He also explained the difference between using flat milling bits for roughing and round bits for finishing, depending on the quality we want to give the mold.
Week planification
As every week I have planned this so that I can perform all the tasks assigned to the assignment and even more in these types of jobs that I have not done before.
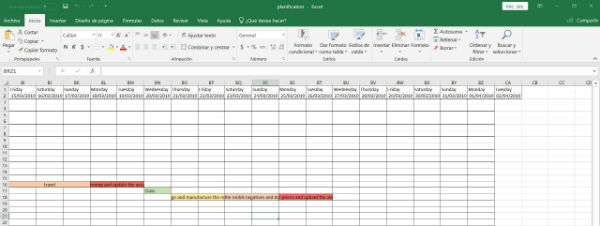
Thursday and Friday I want to make the designs of the molds, make them and leave them ready for Saturday, since I want to try to make two types of mold that I will explain later.
Saturday and Sunday I want to put the silicone in the molds because as I want to work with metals, this silicone takes 24 hours to cure and it requires a whole day. On Sunday I would like to unmold and carry out the first casting tests of the molten metal in the molds.
Monday and Tuesday I want to continue making pieces and finish the assignment to upload it to the web and leave it ready for Wednesday.
Group assignment
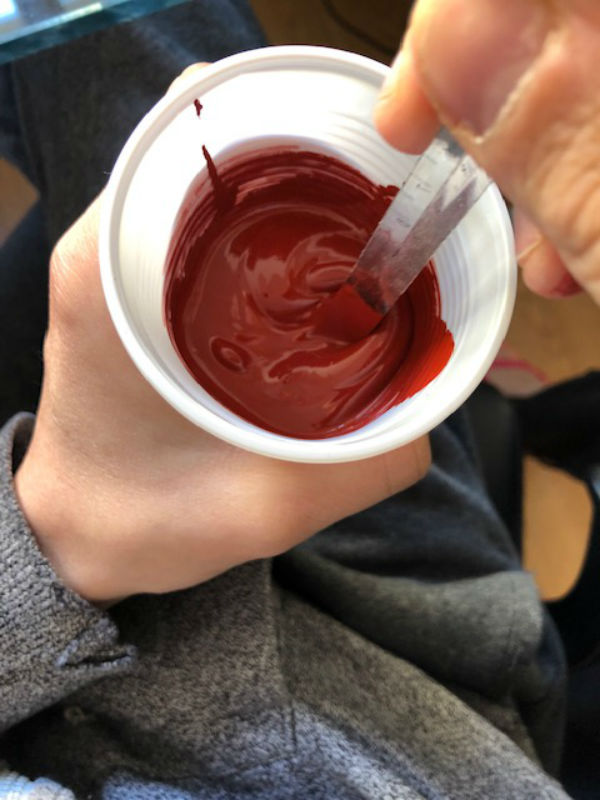
In order to carry out my assignment, I will use a special silicone for metal castings with low melting temperatures, such as tin or lead. This silicone is Tinsil 70-60, of Shore A hardness 60 and that is mixed at 5% catalyst by weight (5A:100B).
This silicone has a relatively low mixing viscosity and once cured it has no appreciable shrinkage. This silicone has a resistance to tear much higher than the rest of silicones for metals of low melting point.
This silicone is designed for molds that will hold up to 315 ° C.
Its characteristics are the following:
Mixture A:B: 5:100 by weight
Working time: 30 min.
Curing time: 24 h.
Shore hardness: A 60
Red color
Viscosity of the mixture: 17000cP.
Tear resistance: 63 pli
Specific weight: 1.5
In addition, this material has special features and safety. These are shown in the links that I show below:
FT TINSIL SERIES
HS TINSIL SERIES PART A
HS TINSIL SERIES PART B
As a student of the remote fabacademy I will do several tests as an individual assignment with the silicone that I bought for metals.
Individual assignment
For my individual assignment I want to do two different tests, both with silicones for castings of metal parts. On the one hand, I want to make a mold for a ring and on the other hand I want to make a mold to make fishing leads, since I am a big fan of carp fishing. I have not been able to make the piece I want for my final project, since I am looking to cover the led matrixes of the lights with resin, but as I still do not know how to make the LED matrix, I do not have it designed or designed, in the Week of inputs and outputs will clarify my doubts and I will be able to start working in a more multidisciplinary way.
I want to make the ring mold using a 3D print in PLA, because this material is easier to work the finish and get a mold with more quality.
I will make the mold of the fishing lead by machining wax and I will do it in two parts to later join them.
The two jobs I will perform in parallel and then show them:
To begin with the assignment, the first thing I have to do between Thursday and Friday are the designs of both pieces and then manufacture them using different techniques. I have made the designs as follows:
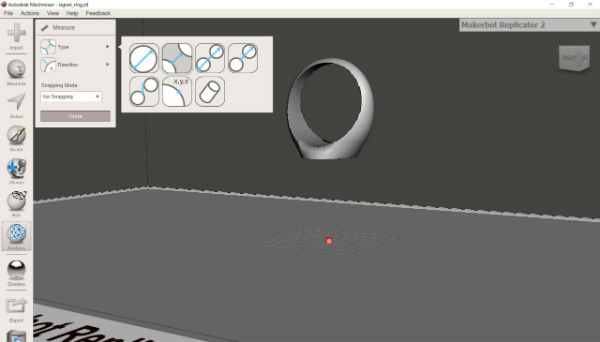
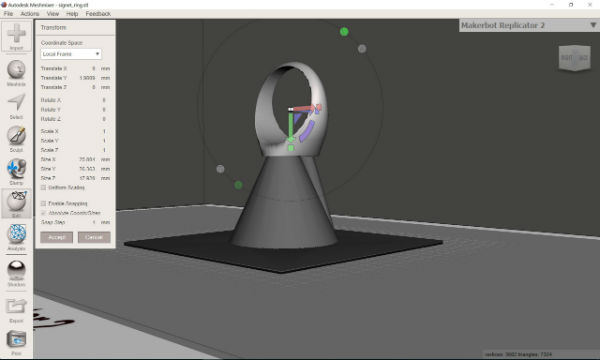
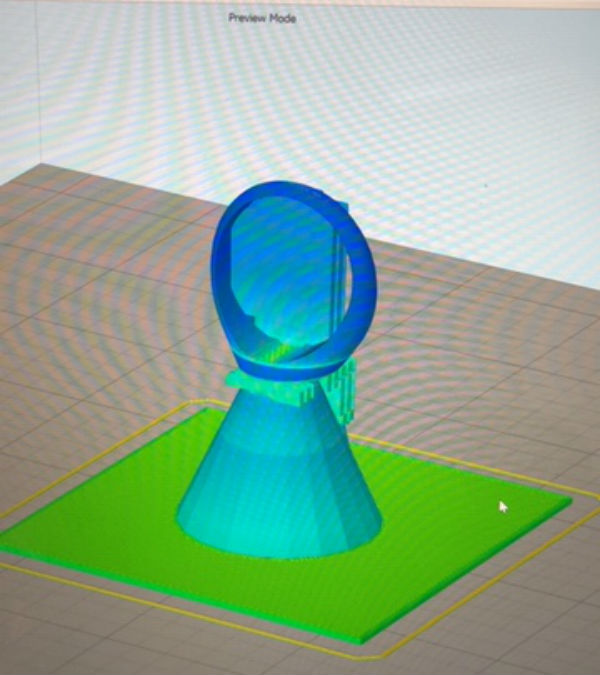
For the ring I took a piece that had previously designed and more I designed the sprue and the output of the air needed for the mold. Both designs I made with Catia, I exported them in stl and I joined them using the meshmixer program to be able to print everything at once also exporting the set in stl.
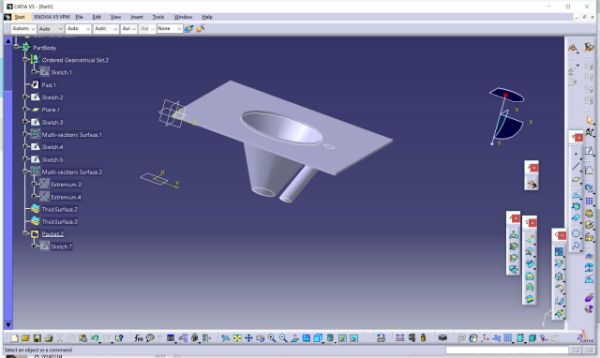
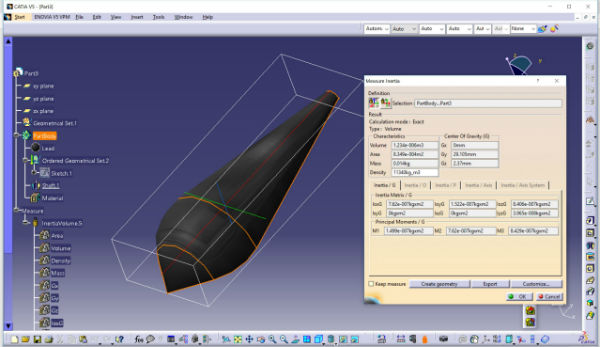
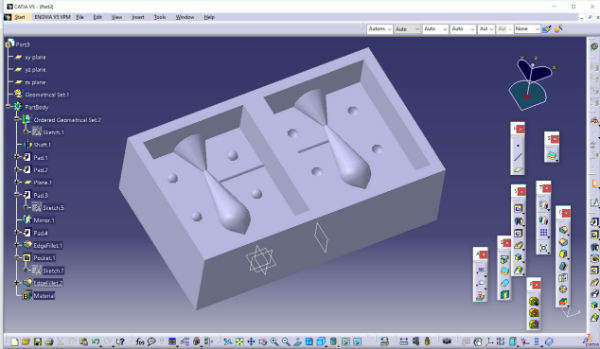
The design of the lead I have also done with Catia, I have done it in two parts. To the first half I gave the final form, I applied the material, lead, since in catia let it apply and with the density of it and its volume calculates the weight that more or less will have the final piece. This weight multiplied by two and this is the final weight of my lead. This is very important since I am looking for a lead of about 20-30 gr. The design will weigh about 28 gr. That with the internal emptying that must be done once manufactured will remain in about 24 gr. Perfect for the purpose that I want it. In this design I have also added, but already directly, the sprue and I have exported it in stl.
Once I have both designs I have to go to the manufacturing part of these countermolds.
For the ring I decided to print it in 3D with PLA and sand it well afterwards to get the best surface finish I can so that later the marks of the print do not remain in the silicone mold. For this I have processed the piece shown before with the simplify 3D program that I showed in the ·D scaning and printing assignmentand I have printed it on my Anet A8.
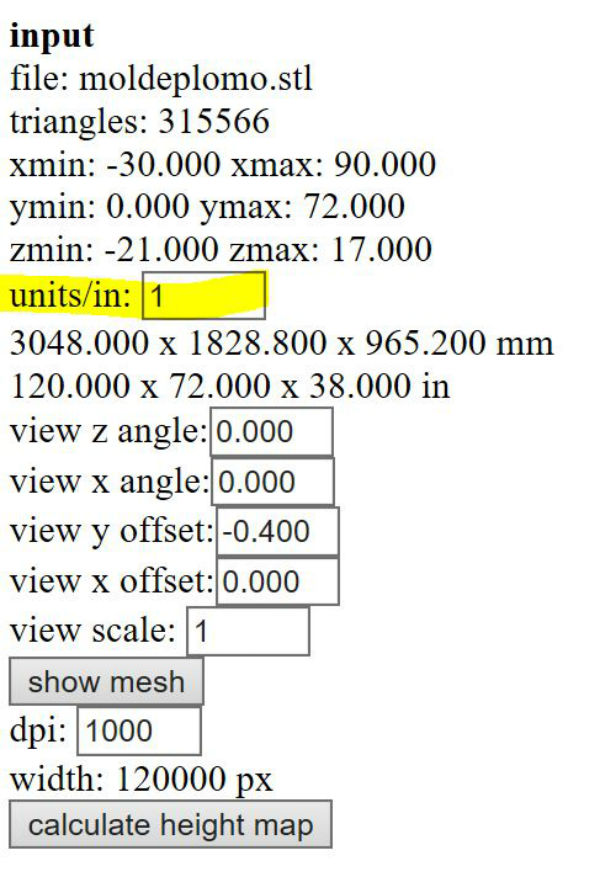
For the lead I had to use fabmodules to mill it on the roland, but I had a problem because at the beginning I did not calculate the height map directly and it was because I work in mm and the program is in inches, so I have had that put the conversion of 25.4 into units / in.
Now I calculate the height of the map, but when calculating the passes of the mill bit it takes an eternity. Like an hour in making a layer. Therefore, I have decided to change the program and perform the processing with VCarve pro, which is the program I learned in the assignment of controlled computer cutting.
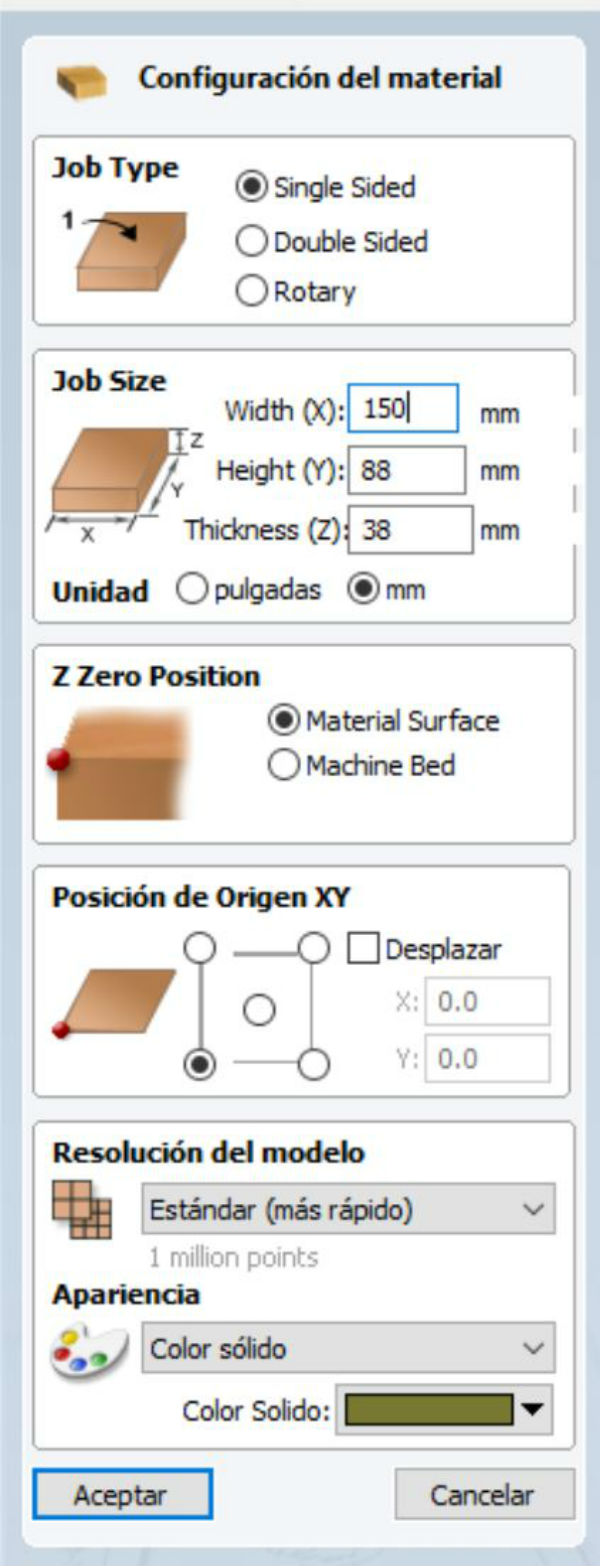
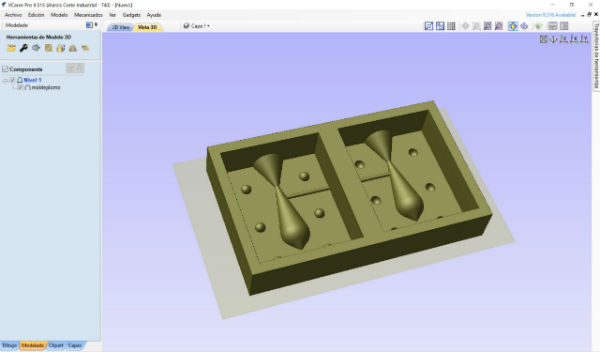
I introduce my stl in VCarve pro, this time I have imported it as a 3D object and not as vectors as in the assignment of controlled computer cutting. Before importing it I introduce the measurements of the wax block that I have.
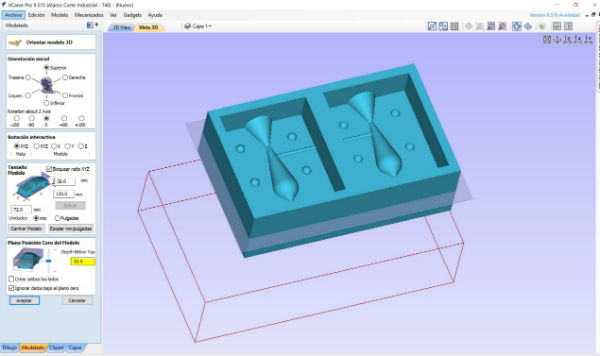
I accept and import the 3D model to the work table. In this window I have to put the maximum depth that I'm going to mill in the window that I indicated in yellow.
Once these steps are done, I accept and the program generates the block in another color, on which we will send the actions to be carried out.
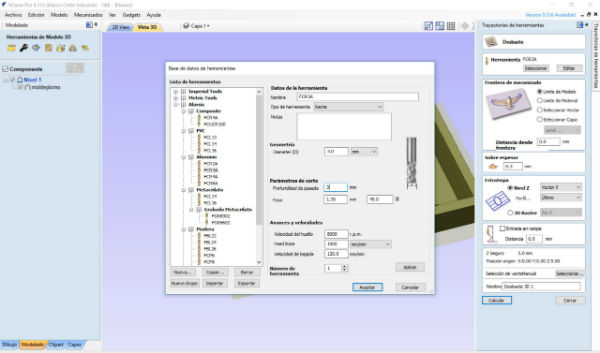
The first action that is going to be carried out is going to be the roughing of the piece, in this case the 3 mm flat mill bit is going to be used. With 2 lips, a depth of 3 mm. Per pass and a speed of 1000 mm / min. In addition, an oversize of 0.3 mm has been left to remove during the finishing operation.
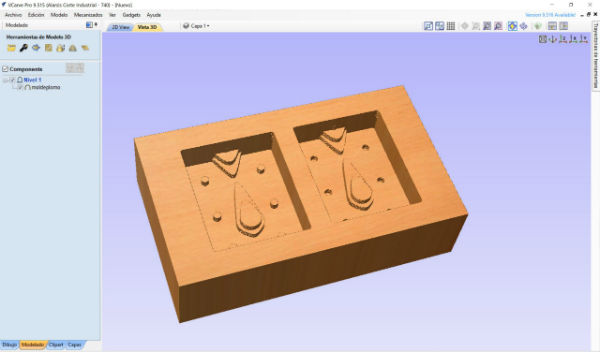
We calculate the process and observe the appearance of the piece after finishing.
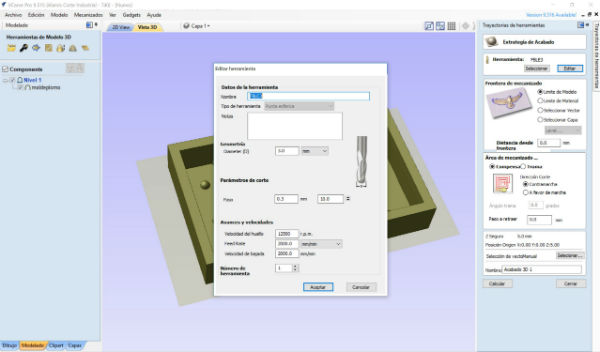
Then we go to select the finishing process, this I'm going to do with a 3 mm spherical end mill. also. In this case the speed will be of 2000 mm / min and the step of 0.3 mm as the over thickness that we have left in the roughing.
We calculate and we see the final aspect in which our piece will be and the time of both processes that add a total of: 1h. 36 min.
Once we have the two processes generated we will save them separately, because if we wanted to save them together the machine would have to have a tool change and ours does not have that extra and therefore we will have to change it between process and process.
To save the processes, the vcarve itself has several roland machines in its post-processing library, but not the one that we use, which is the SRM-20, and also these files that it exports are in extension .rol and not .rml as we need to machine. Therefore the most generic way to export it is in .gcode with the postprocessing: X-CARVE (mm) (* .gcode) and with this gcode we will introduce it in the machine through VPanel.

With the VPanel open, in the setup part, I change the type of file that I am going to introduce, instead of .rml I am going to introduce .nc, I make the zeros on the upper surface of the wax plate that I have stuck to the table of sacrifice of the bed and I am ready to launch the process of disvading.
I change the tool and place the finishing tool, I do zero again in Z and launch the finishing process. Here I had a problem because the light has gone out and the machine has lost the zeros and when resuming work it has been lost and the negative mold has been destroyed.
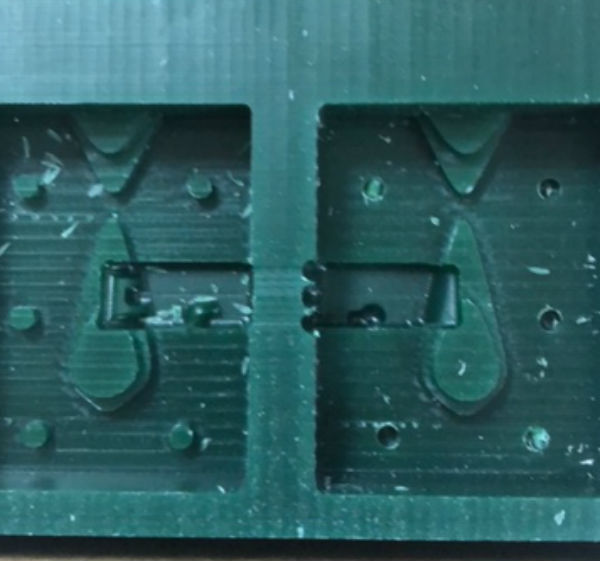
I put a new machinable wax plug and re-launch the two processes obtaining the final good result.
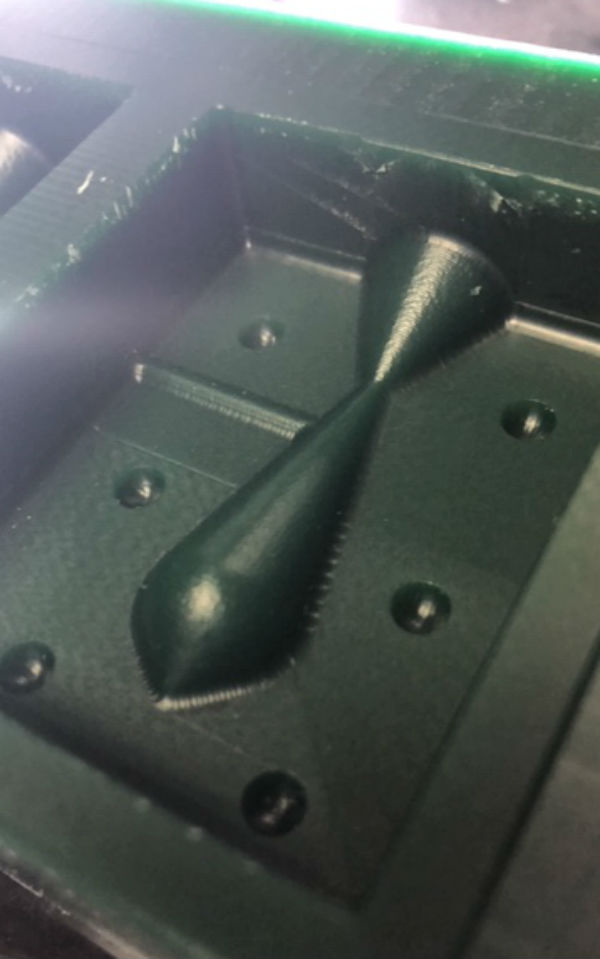
It's Friday night and I managed to have the negative mold to be able to fill it with silicone weekend and be able to do the tasks that I had proposed.
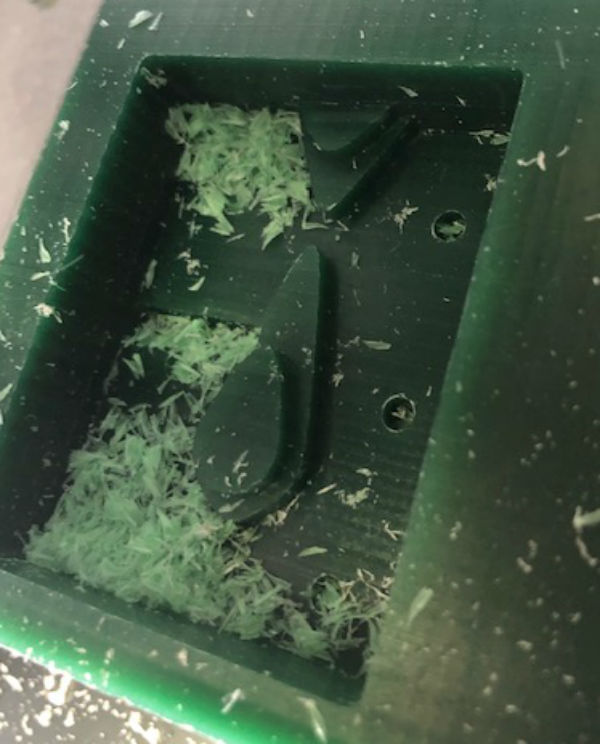
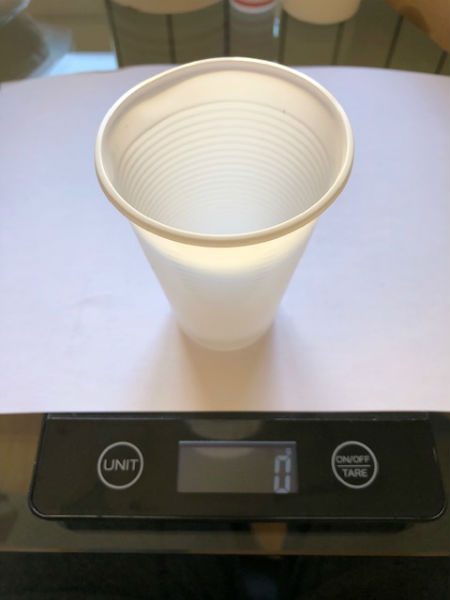
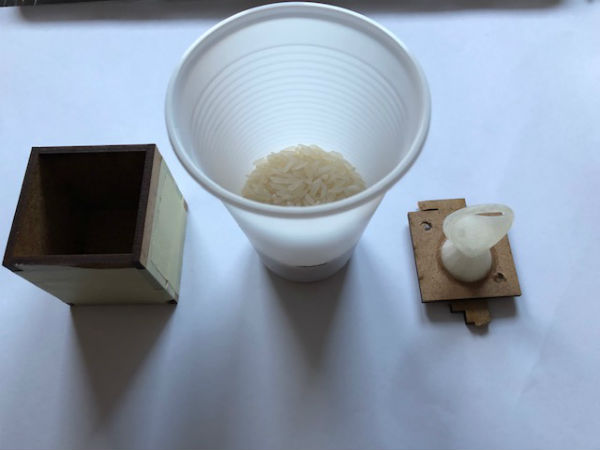
During Saturday morning I filled the negative molds with silicone for high temperatures. To know the volume I needed for my molds I followed the tip that my partner Elena gave me, which is based on filling the molds with rice, emptying this rice in a plastic cup and marking this volume and then filling it
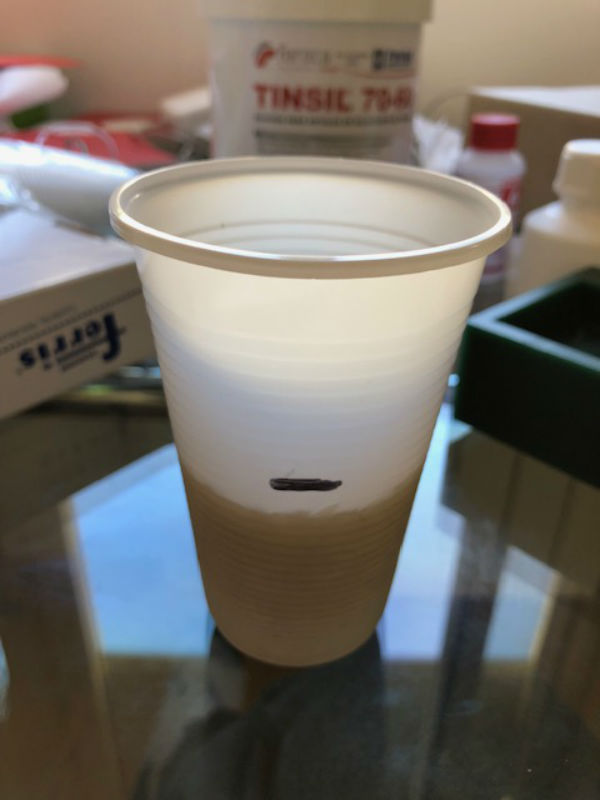
Then I put the glass in the weight machine, full of silicone almost to the mark and I look at the weight. This has been 130 gr. Therefore, since the mixture is 5: 100, I have to put a quantity of 6.5 g of catalyst for the silicone to cure.
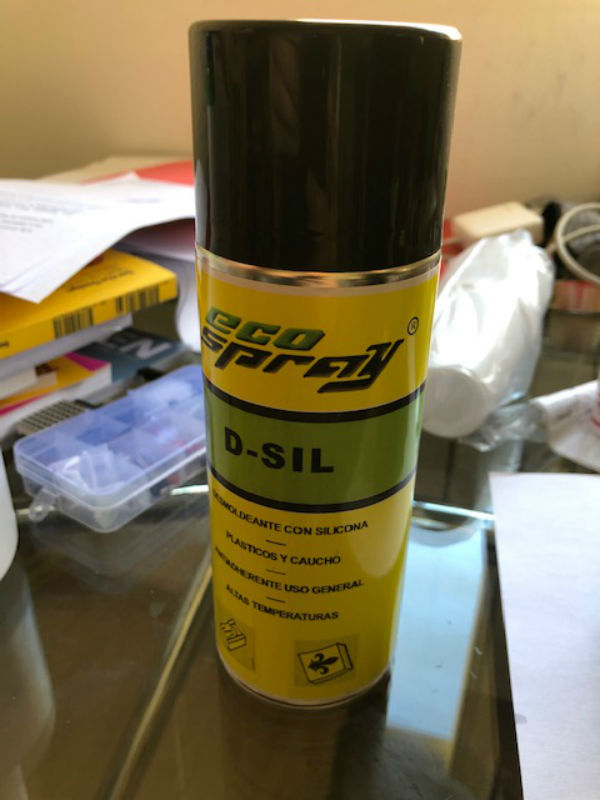
Once this is removed, I put a silicone release agent to get better the mold in the wax negative mold and pour the silicone in it until it is filled. Then I have to leave to cure 24h. until Sunday.
Sunday morning after 24 h. the silicone is already cured and I can extract the molds.
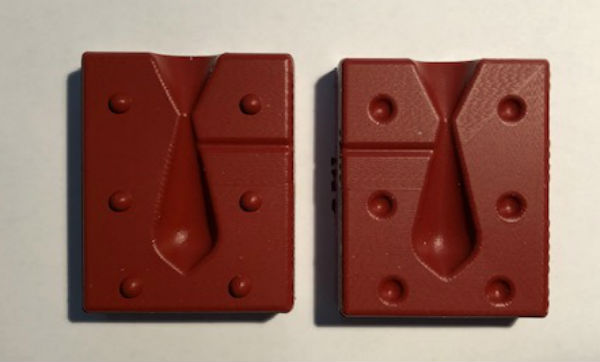
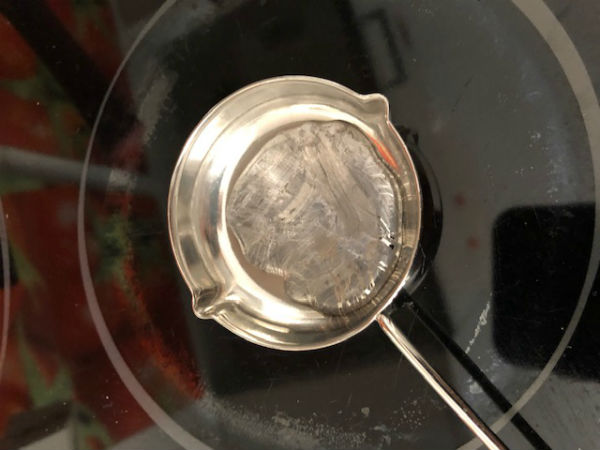
Therefore I can cut pieces of metal that I will use for the sprue, which is 50% lead-50% tin mixture, about 40 grams. More or less, to melt it and pour it into the mold. To melt it I heat it in the glass ceramic and to join the two parts of the mold I paste these with a bit of painter's tape.
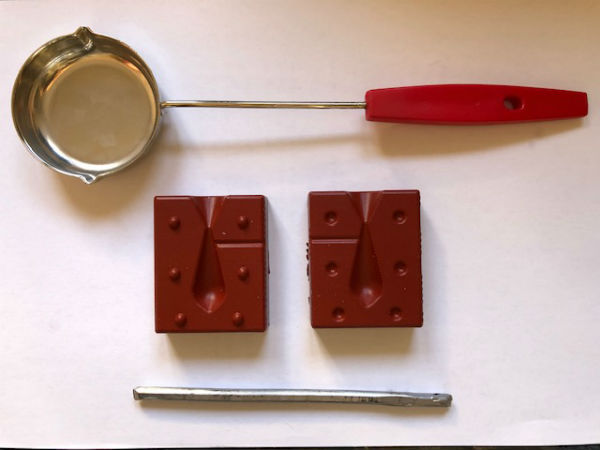
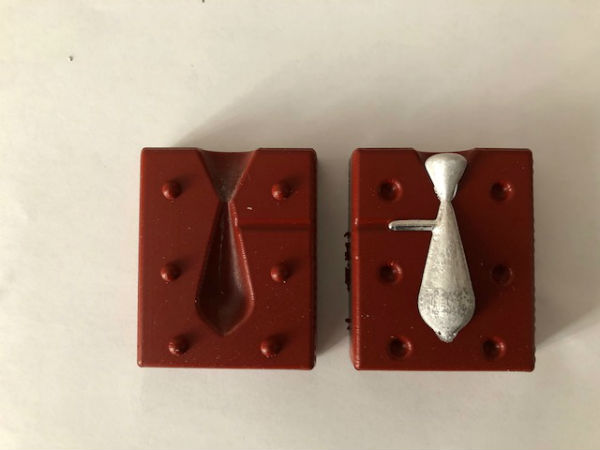
Once it is melted I pour it into the mold until it is filled and I wait for it to cool to see the result. I open the mold and there I have my lead to use for fishing.
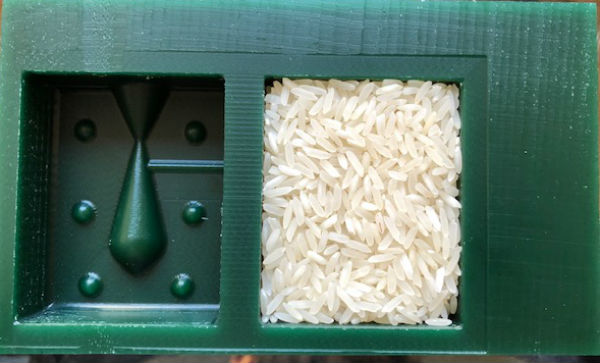
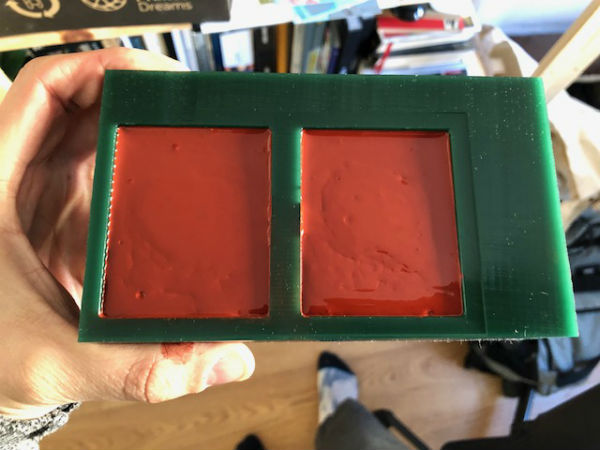
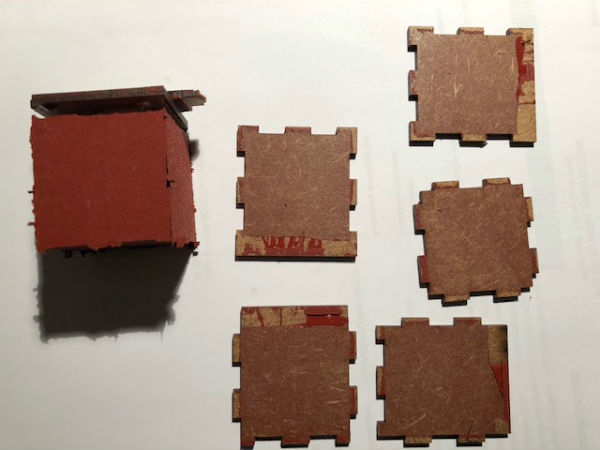
On the other hand, for the ring mold, I have created a DM box in which I insert the piece in 3D and silicone release mold. Once it is sprayed, I measure with rice, as before, the volume that I will need silicone and prepare the same mixture to pour it into the mold.
After 24h of curing, I extract the mold and to extract the internal part printed in PLA I have to cut it in 4 parts in such a way that later I will have to join the four parts to make the final piece.

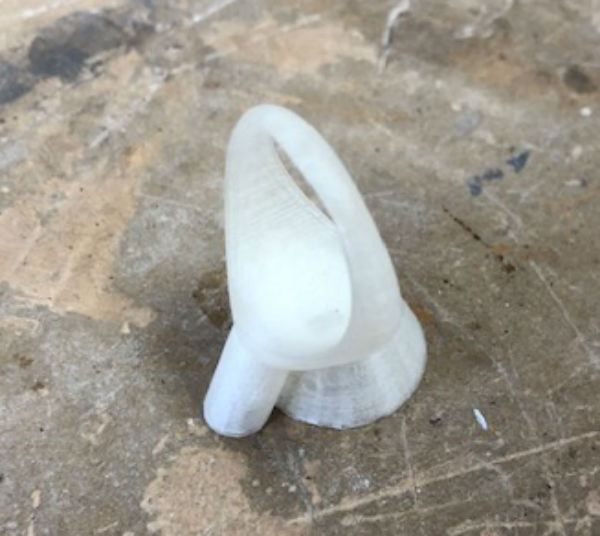
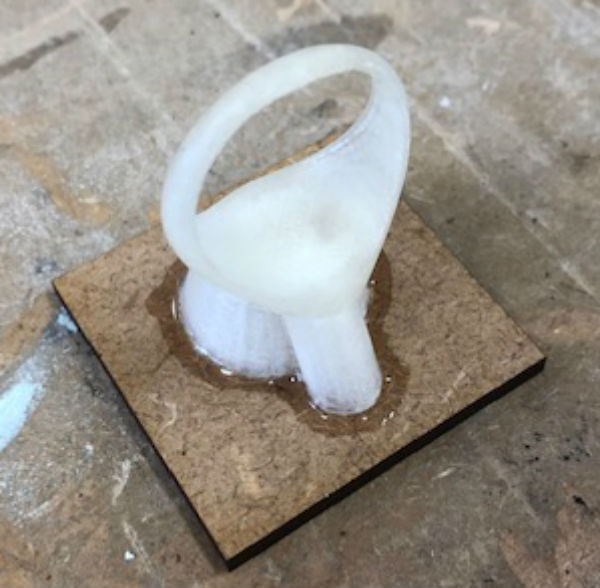
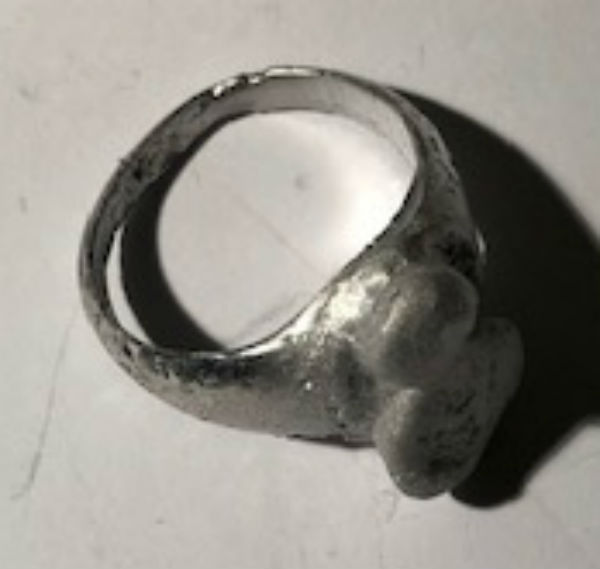
Once this is done, I put it back into the box and pour the molten metal inside to create the final piece that I show next. It is not a perfect piece but as I try it I will improve its quality.
My files
Conclusions
Another very tough week since it was the first time I did this type of work, but it has been very fun and I think I will continue working this technique a lot since I think I can get much out of it and I have many ideas to make with this technique . I will upload them as I do them in this assignment.