Week 16 and 18. Mechanical design and machine design
30.04.19 Class
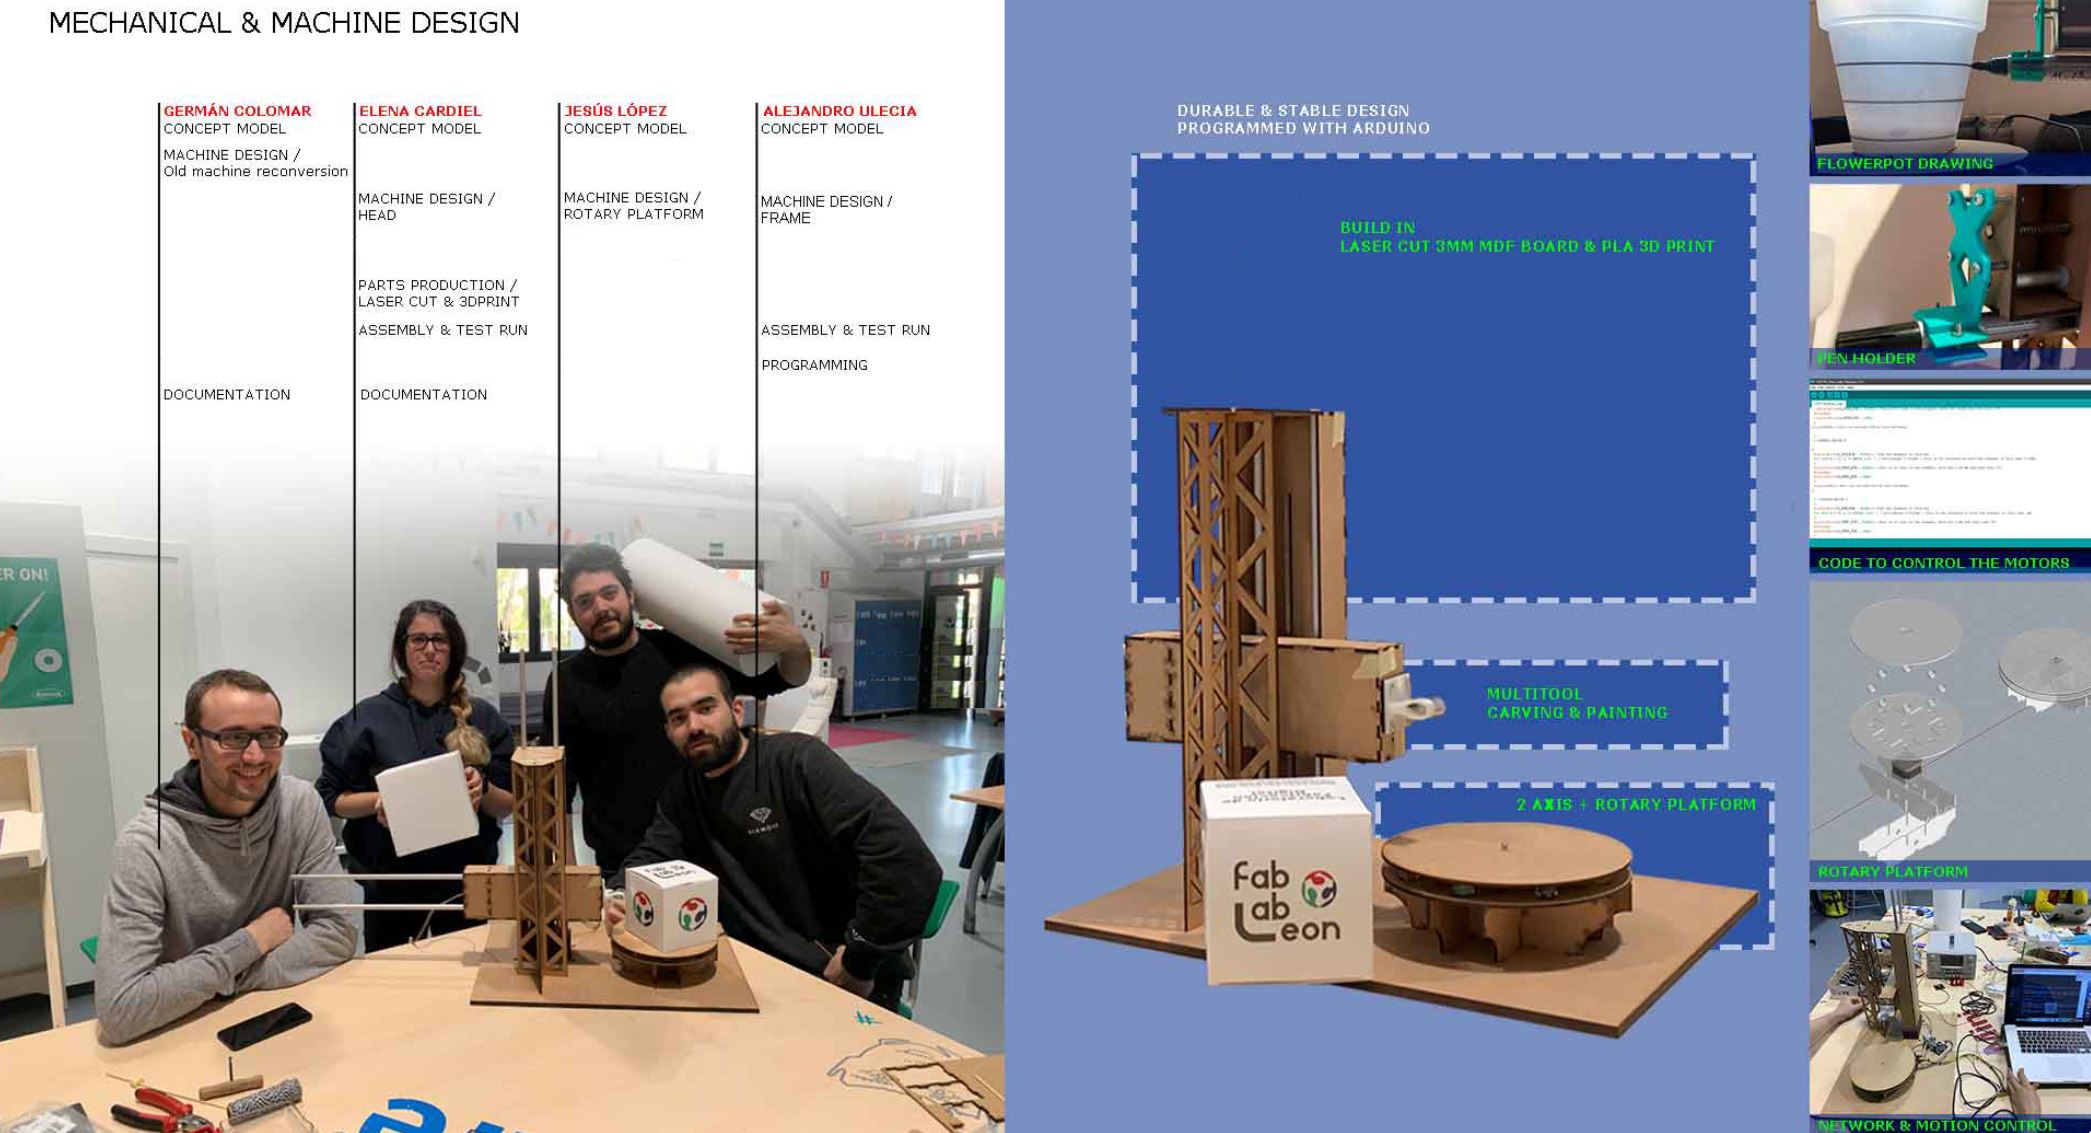
During this class we have been looking at the different types of machines and the functions they can take. The number of axes and motors that they can control, the programs and the different controllers that can be used for these and they have also explained to us how we have to organize ourselves to carry it out and document everything correctly.
Week planification
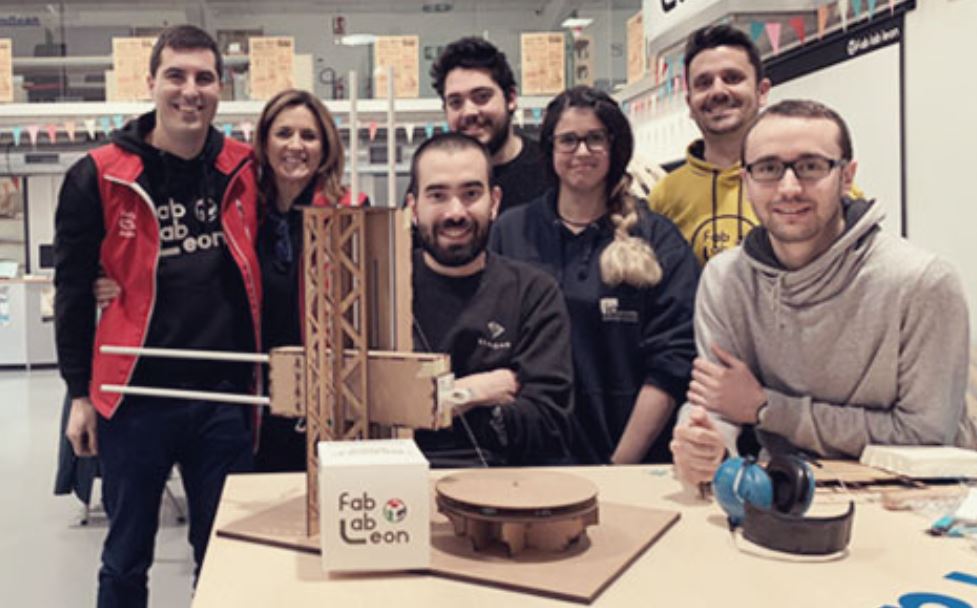
This task, to belong to the group of remote students of Leon, we have done by joining us all in the fablab de leon a weekend in which we have all been able.
To try that everything was fluid during the weekend as far as the work is concerned, we have organized and distributed the tasks to go making the machine separately and to take to the fablab of nuria all the pieces and this almost finished. there we only had to mount it and program it.
During the explanation of this assignment you will see the things that we have done each and the way of sharing the tasks to reach the common goal that has been the construction and programming of the machine.
Idea
Before starting thinking about our machine, we decided to do depth research on the machines that other students had done in previous years. The ones that we found out more interested were:Peeler,
Rotomolding,
Catapult,
Lights Drawing.
We finally decided to use Nadia’s modules and we agreed to make a vertical lathe, with two arms, a rotatory pedestal and various heads to generate different shapes, textures and designs.
This week's task is to answer the following questions that are proposed about the final project of the fabacademy:
Design. Structure design
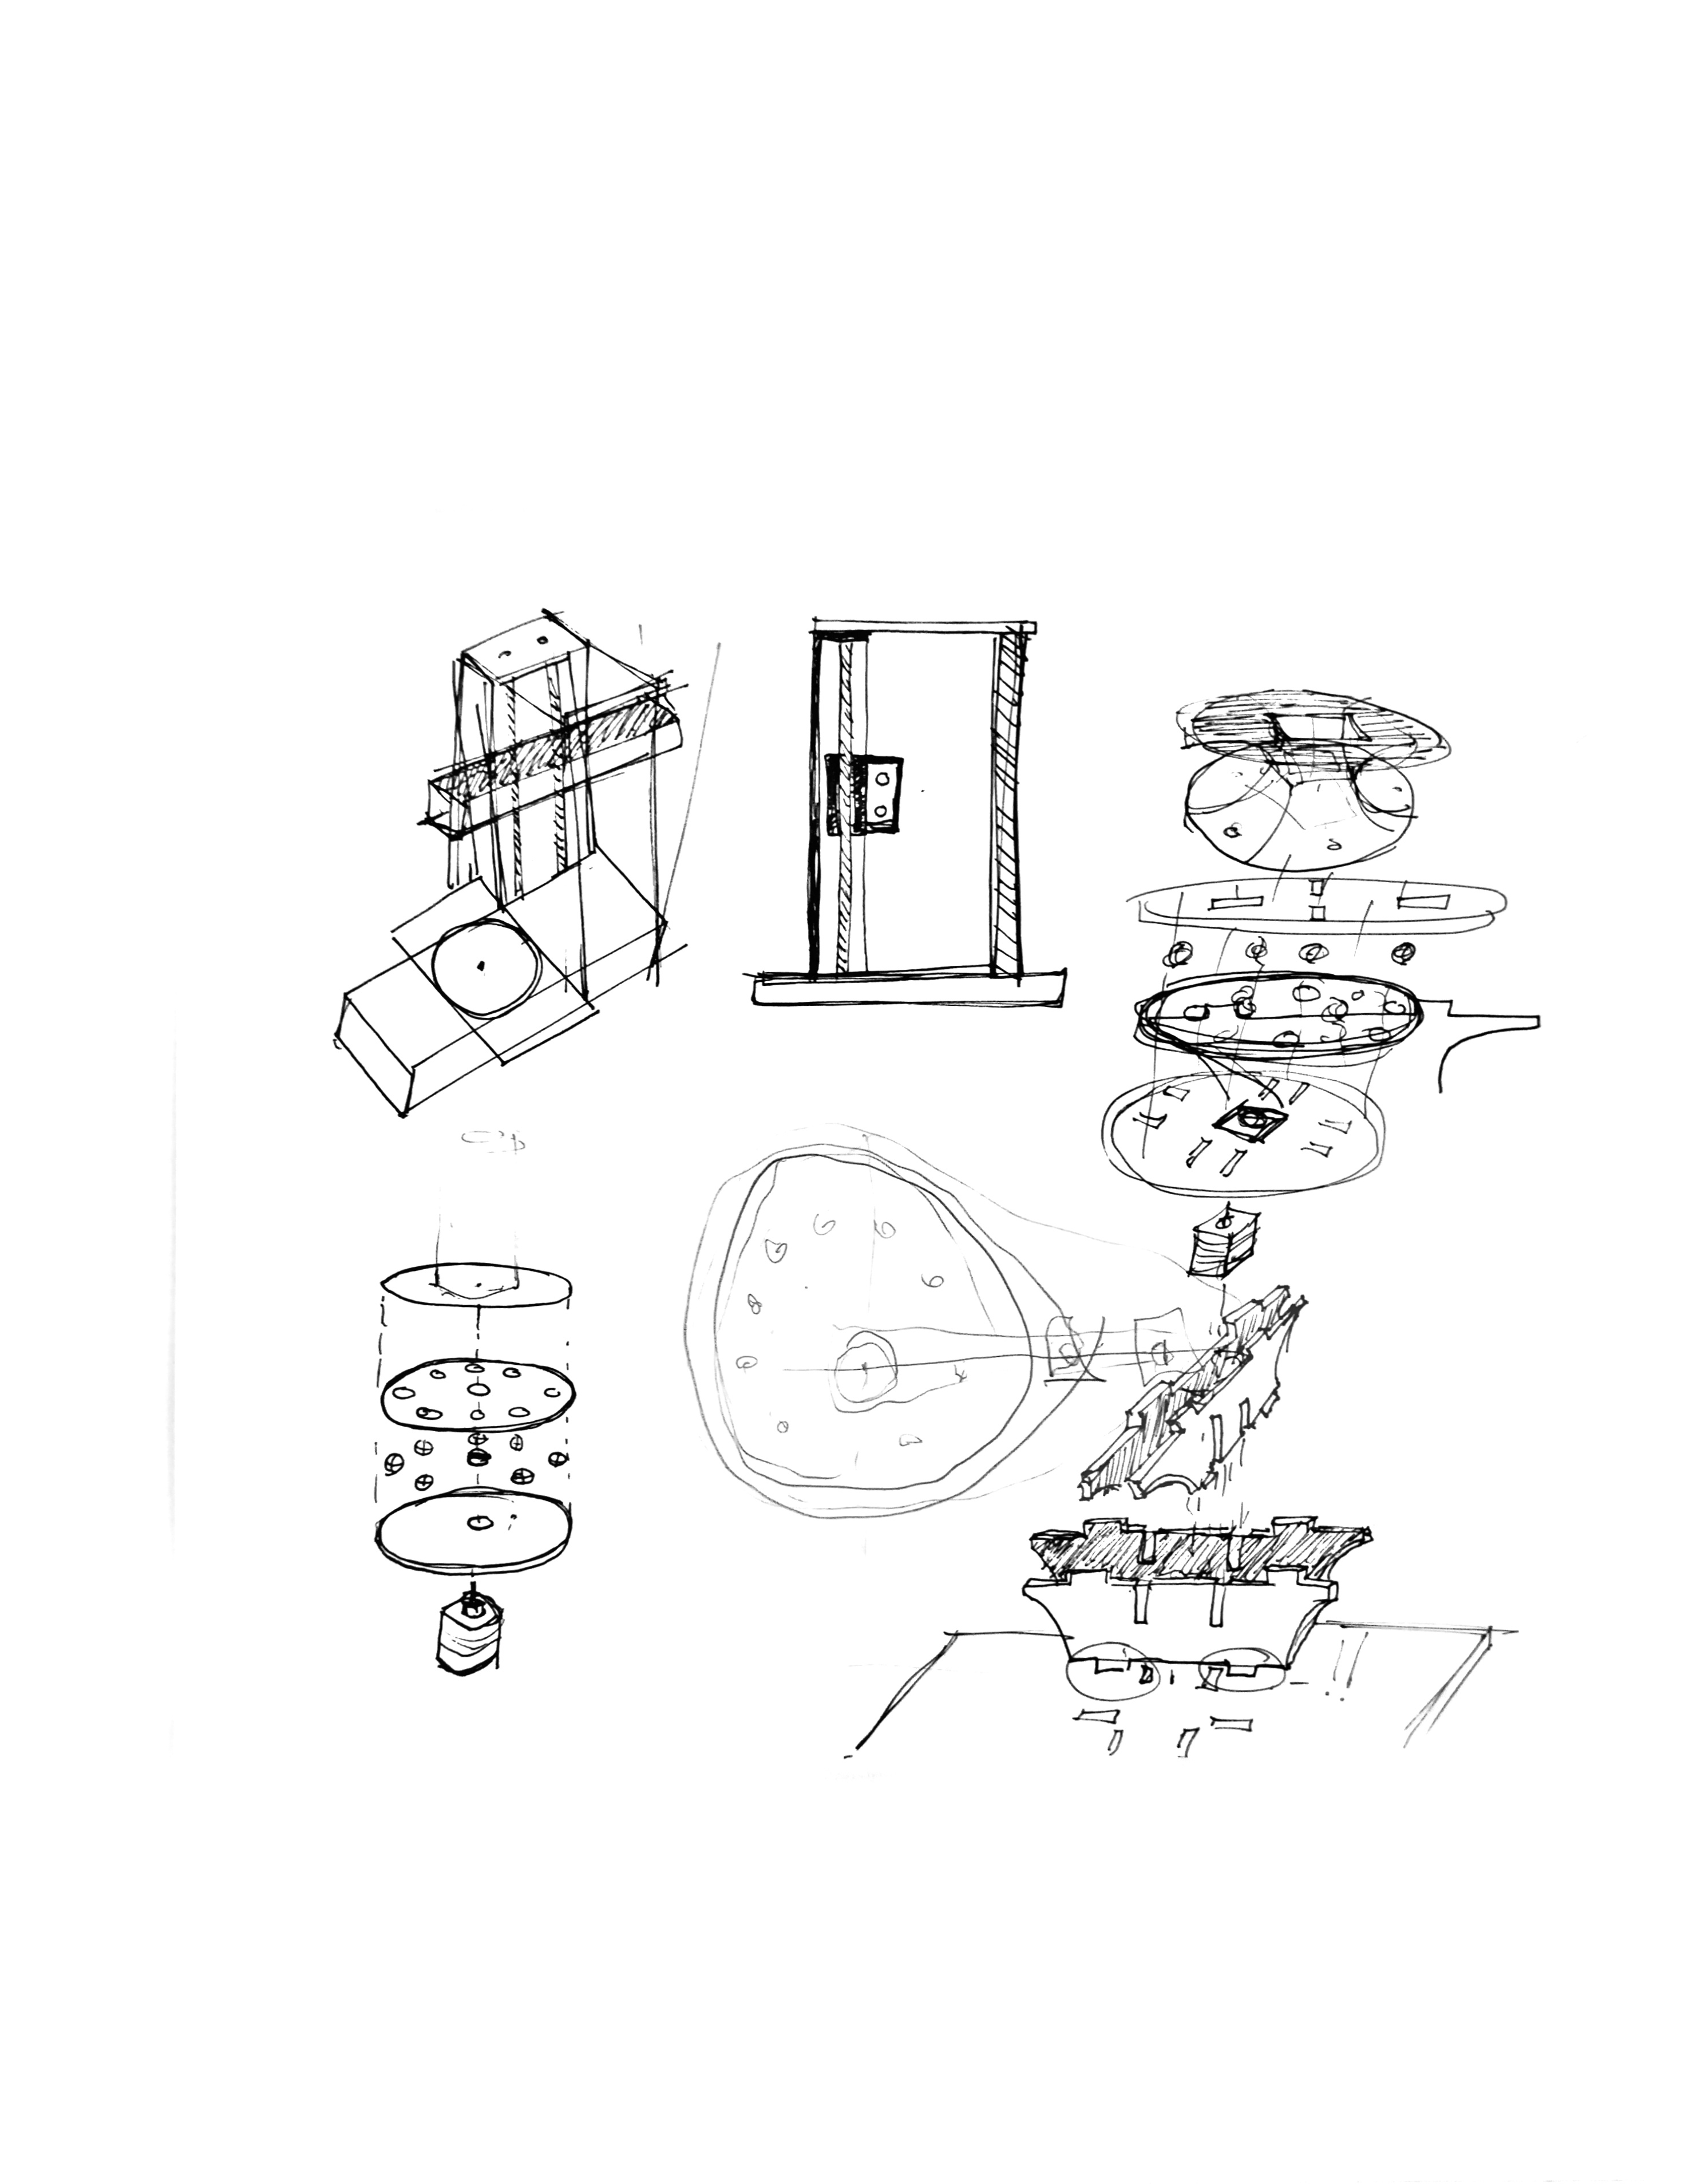
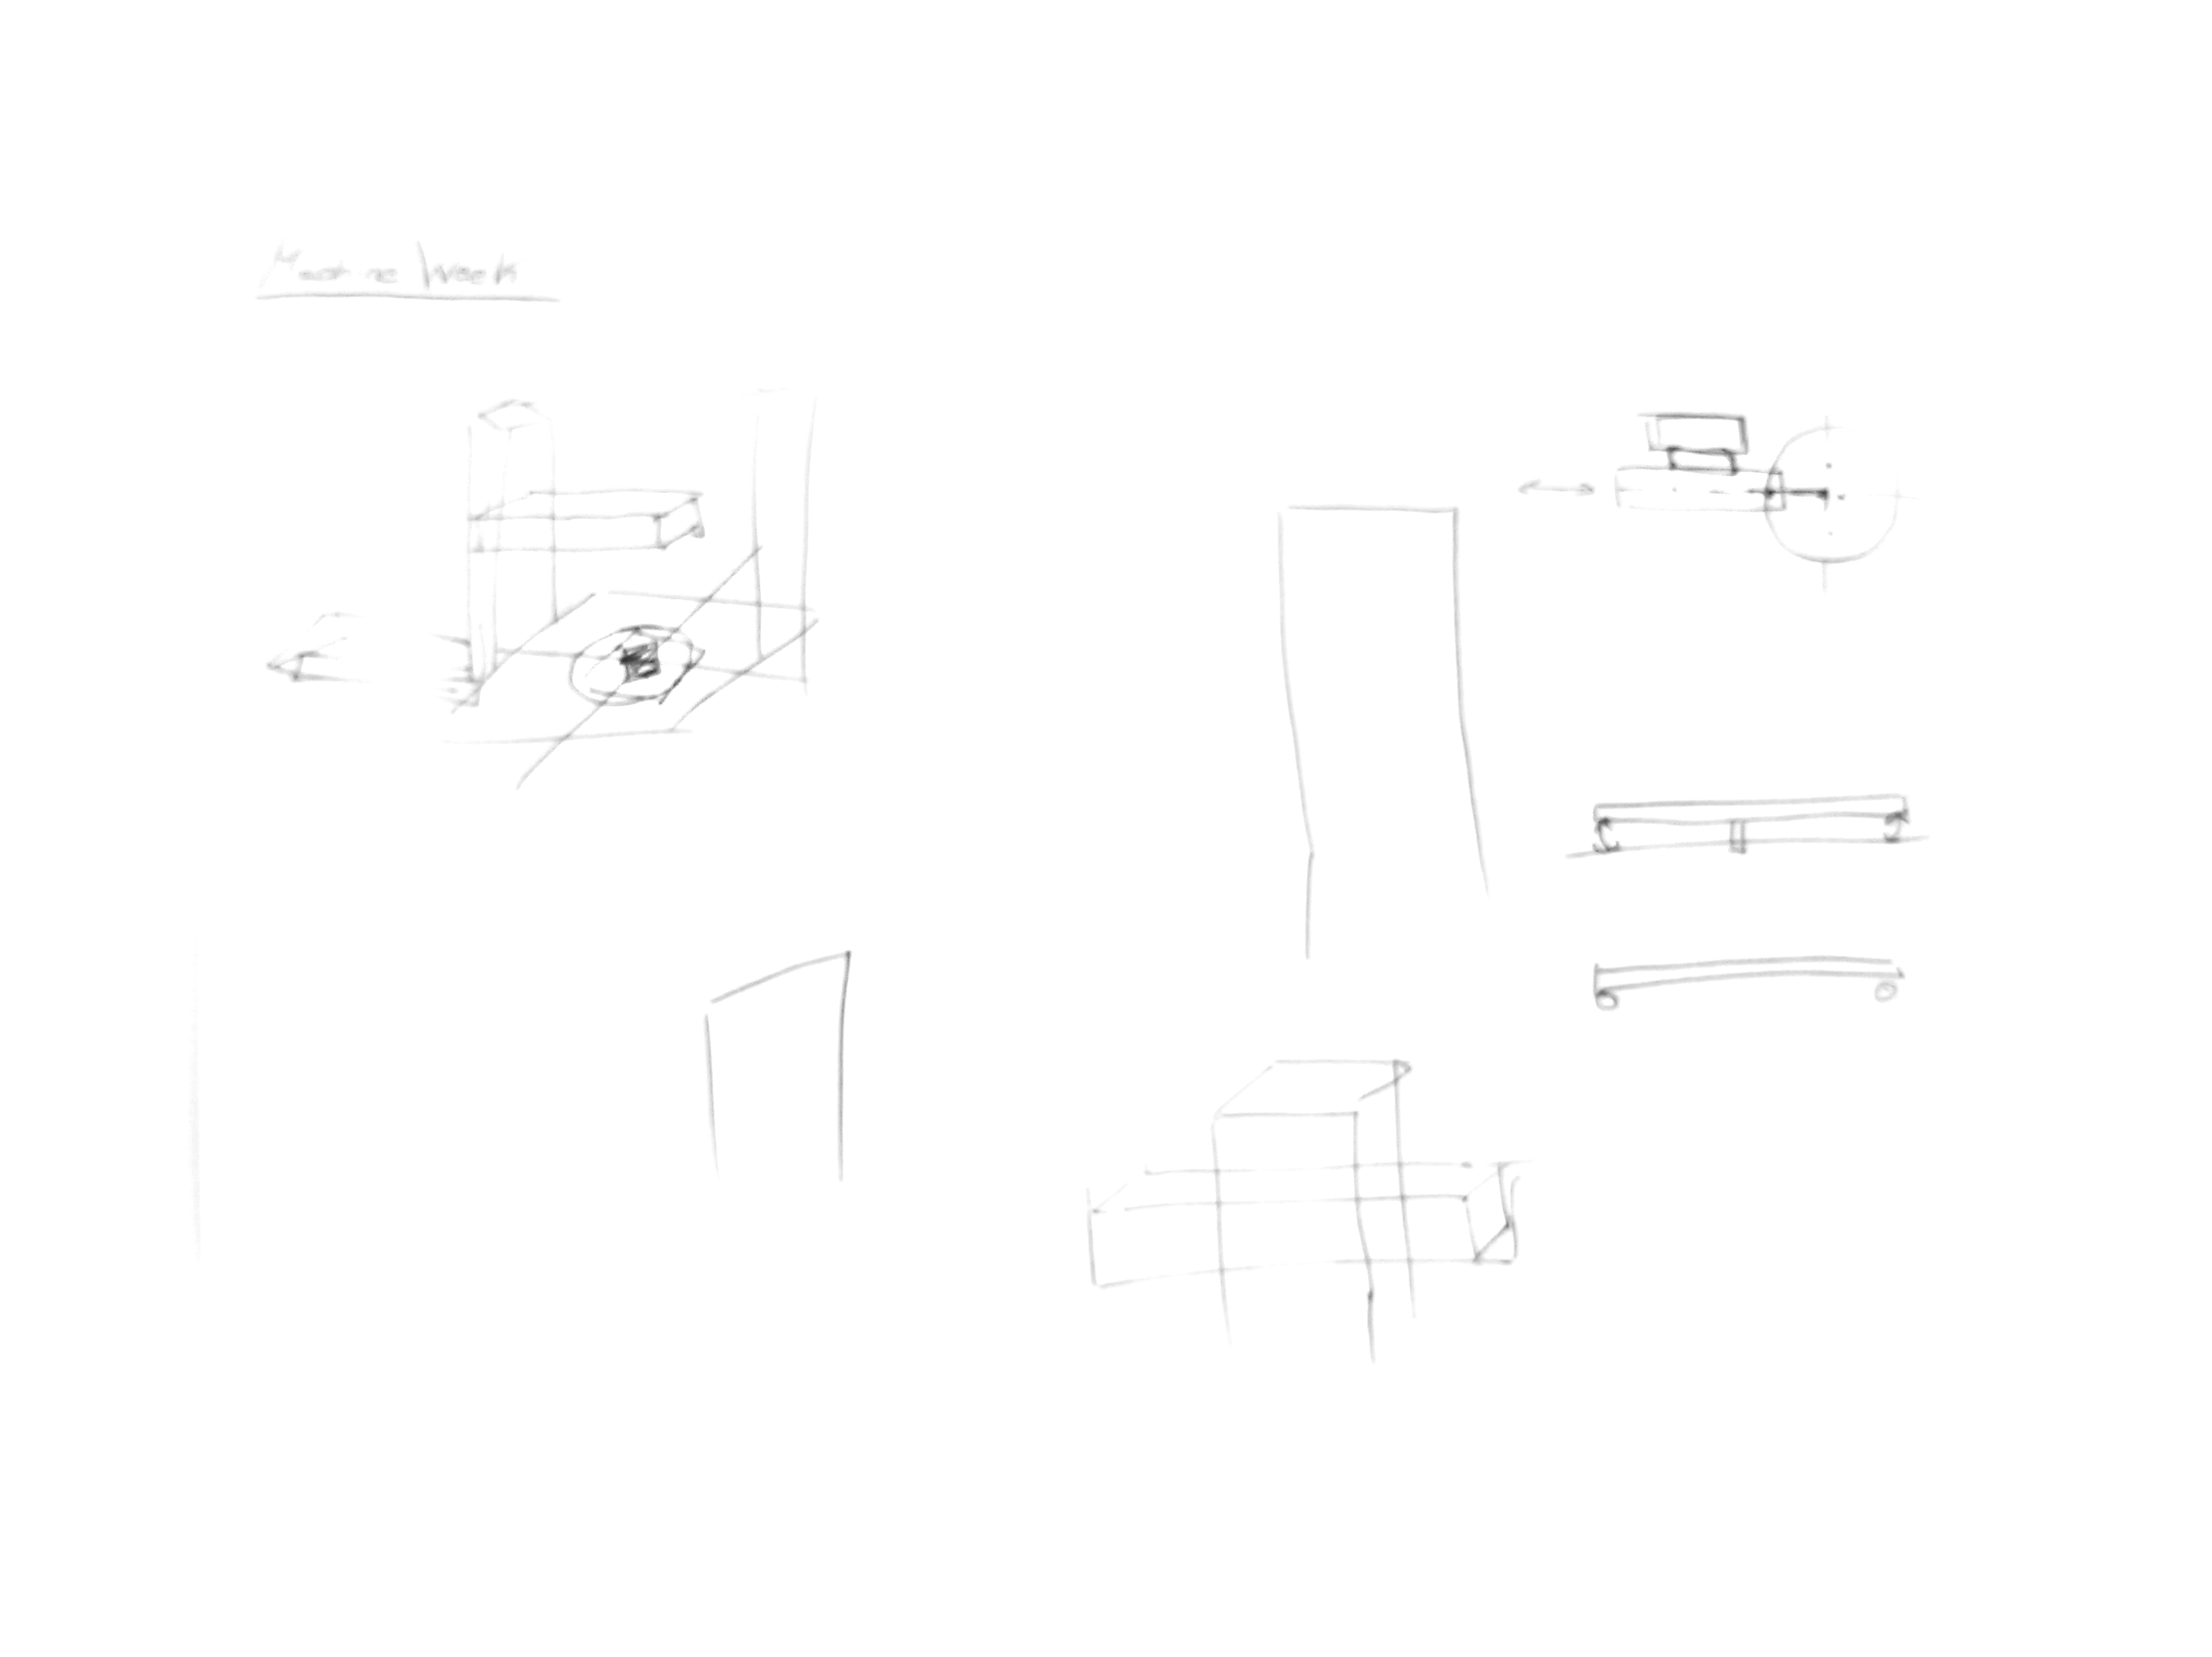
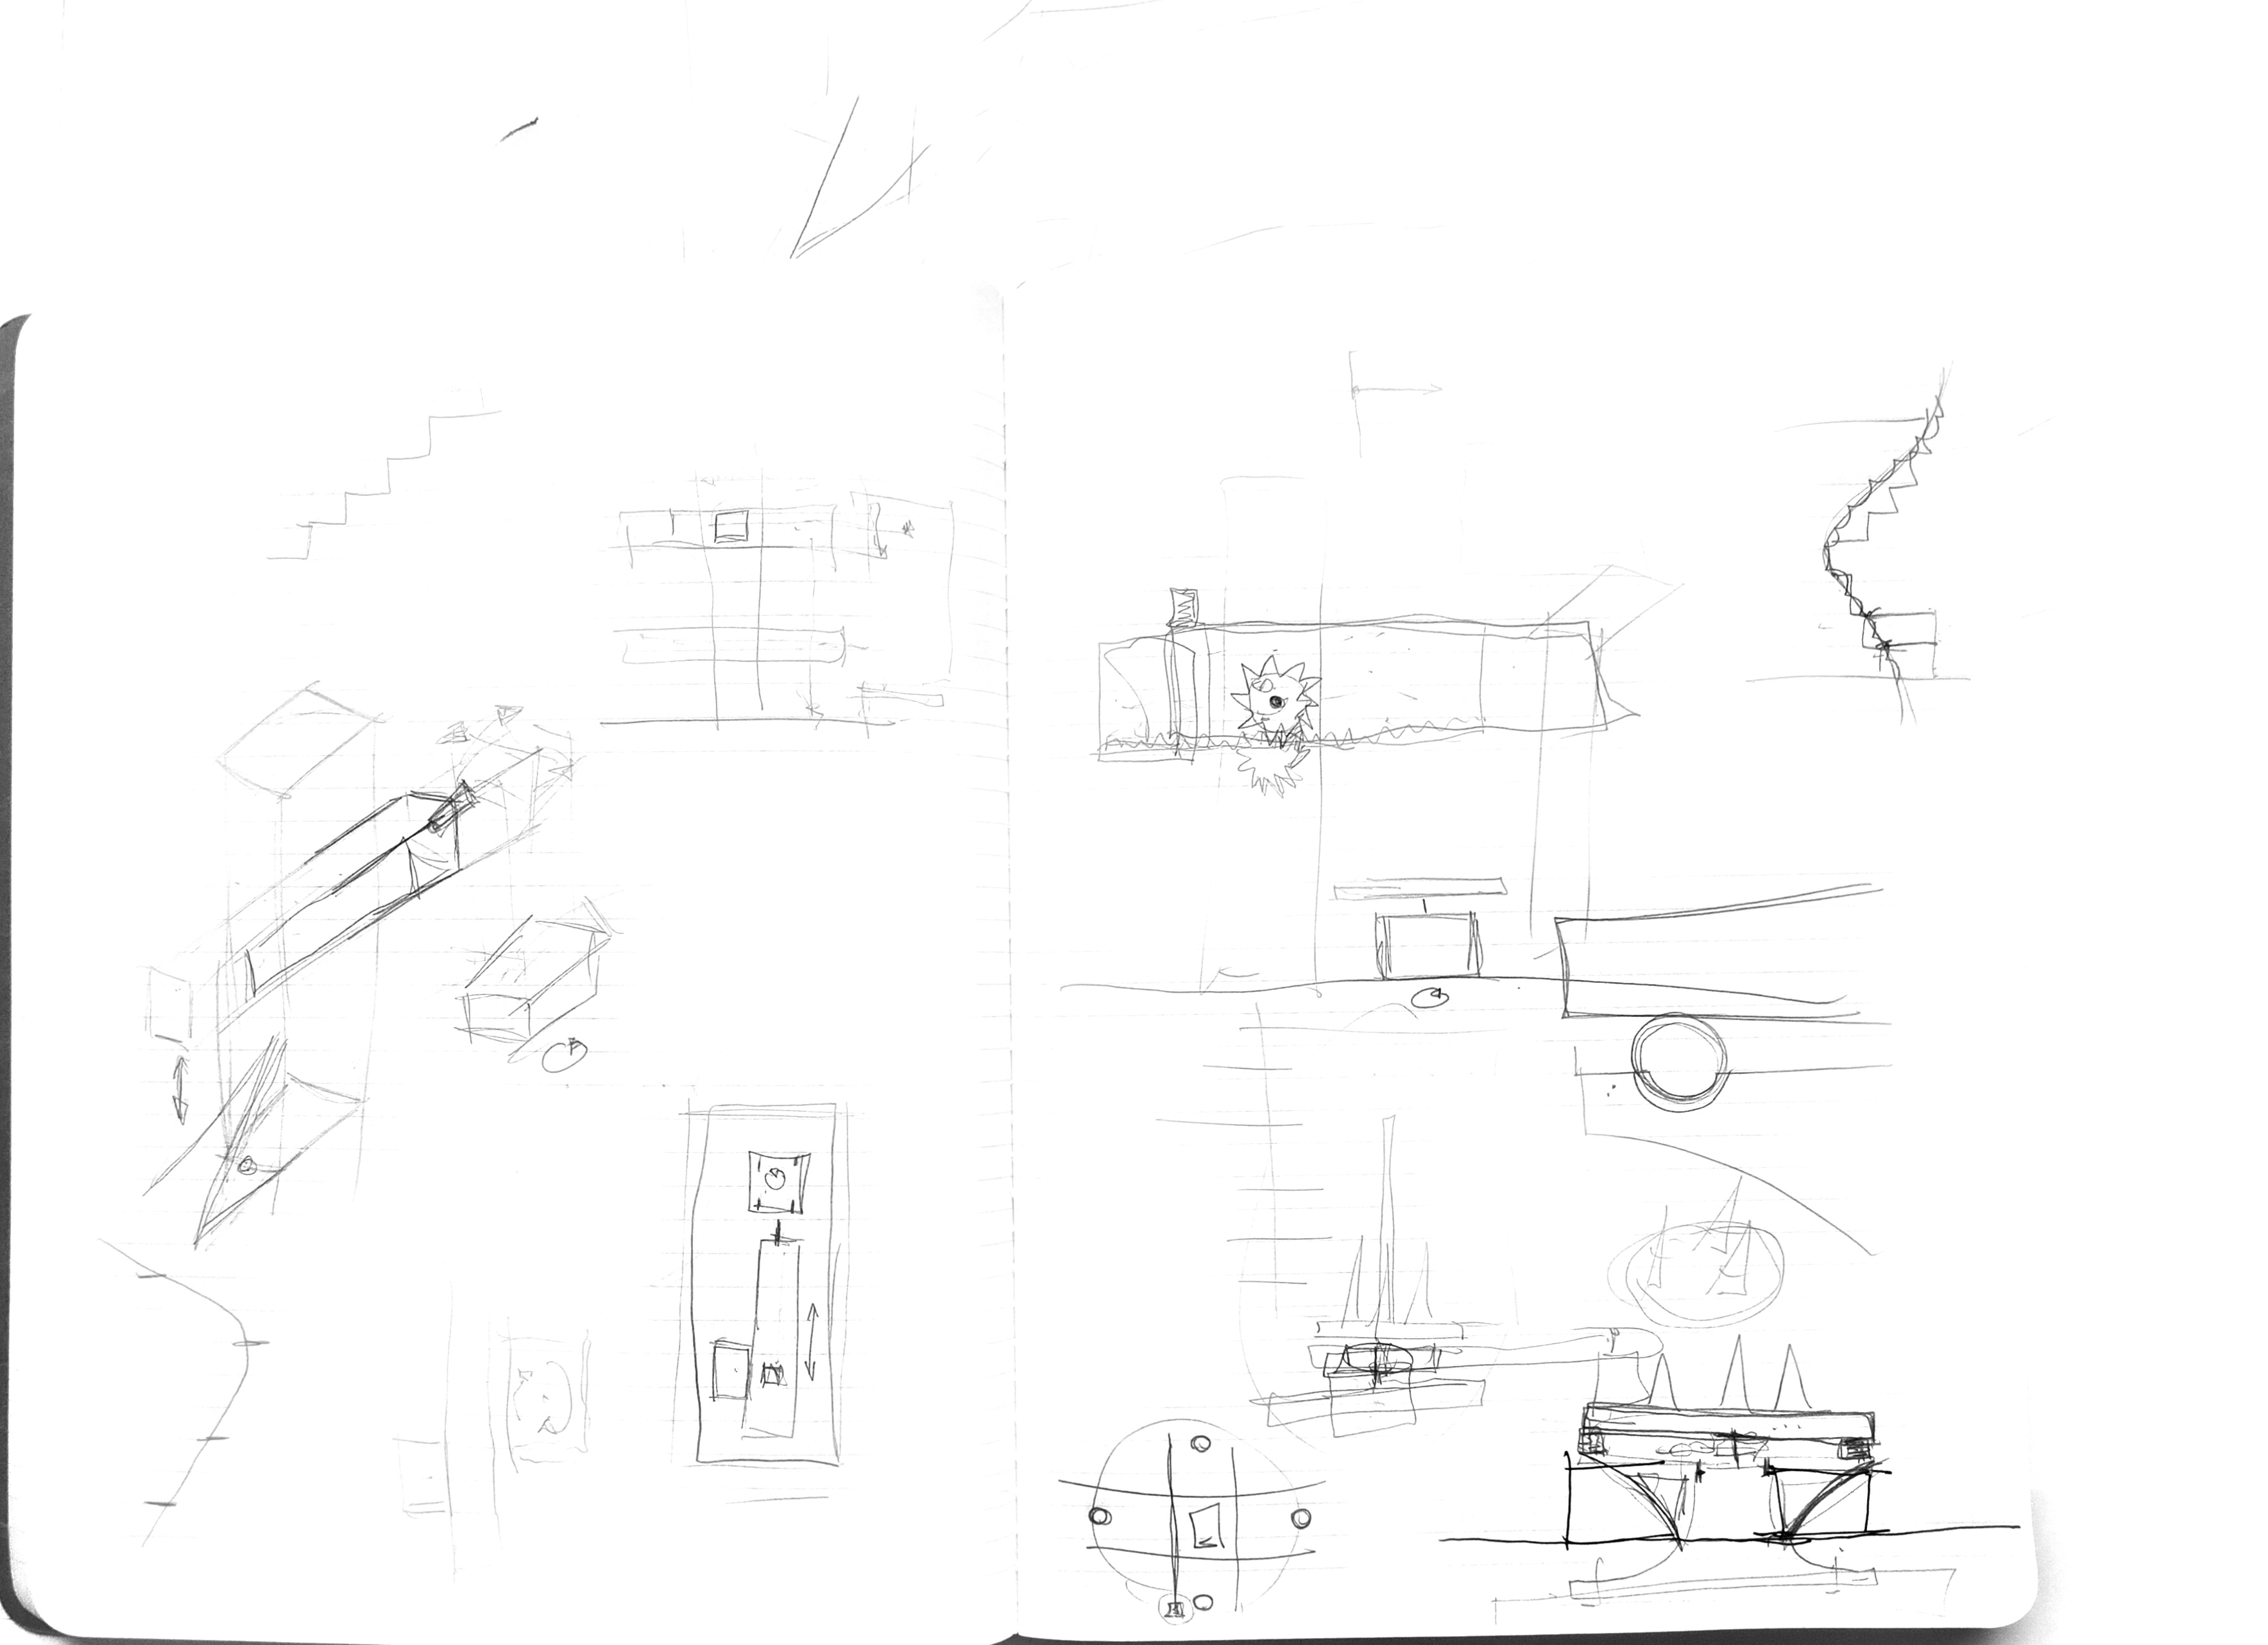
My part of the design was the design of the structure of the machine, we have based on Nadia's modules since in Leon we had all the electronic part to make them work. I have decided to make the modules from scratch because in our machine, the size of one of them will be smaller than a normal module.
The common measures that I have used I have obtained the file that the students who made the previous leon machine in 2016, downloading these and opening them with the Catia program, which is the one I use to model in 3D.
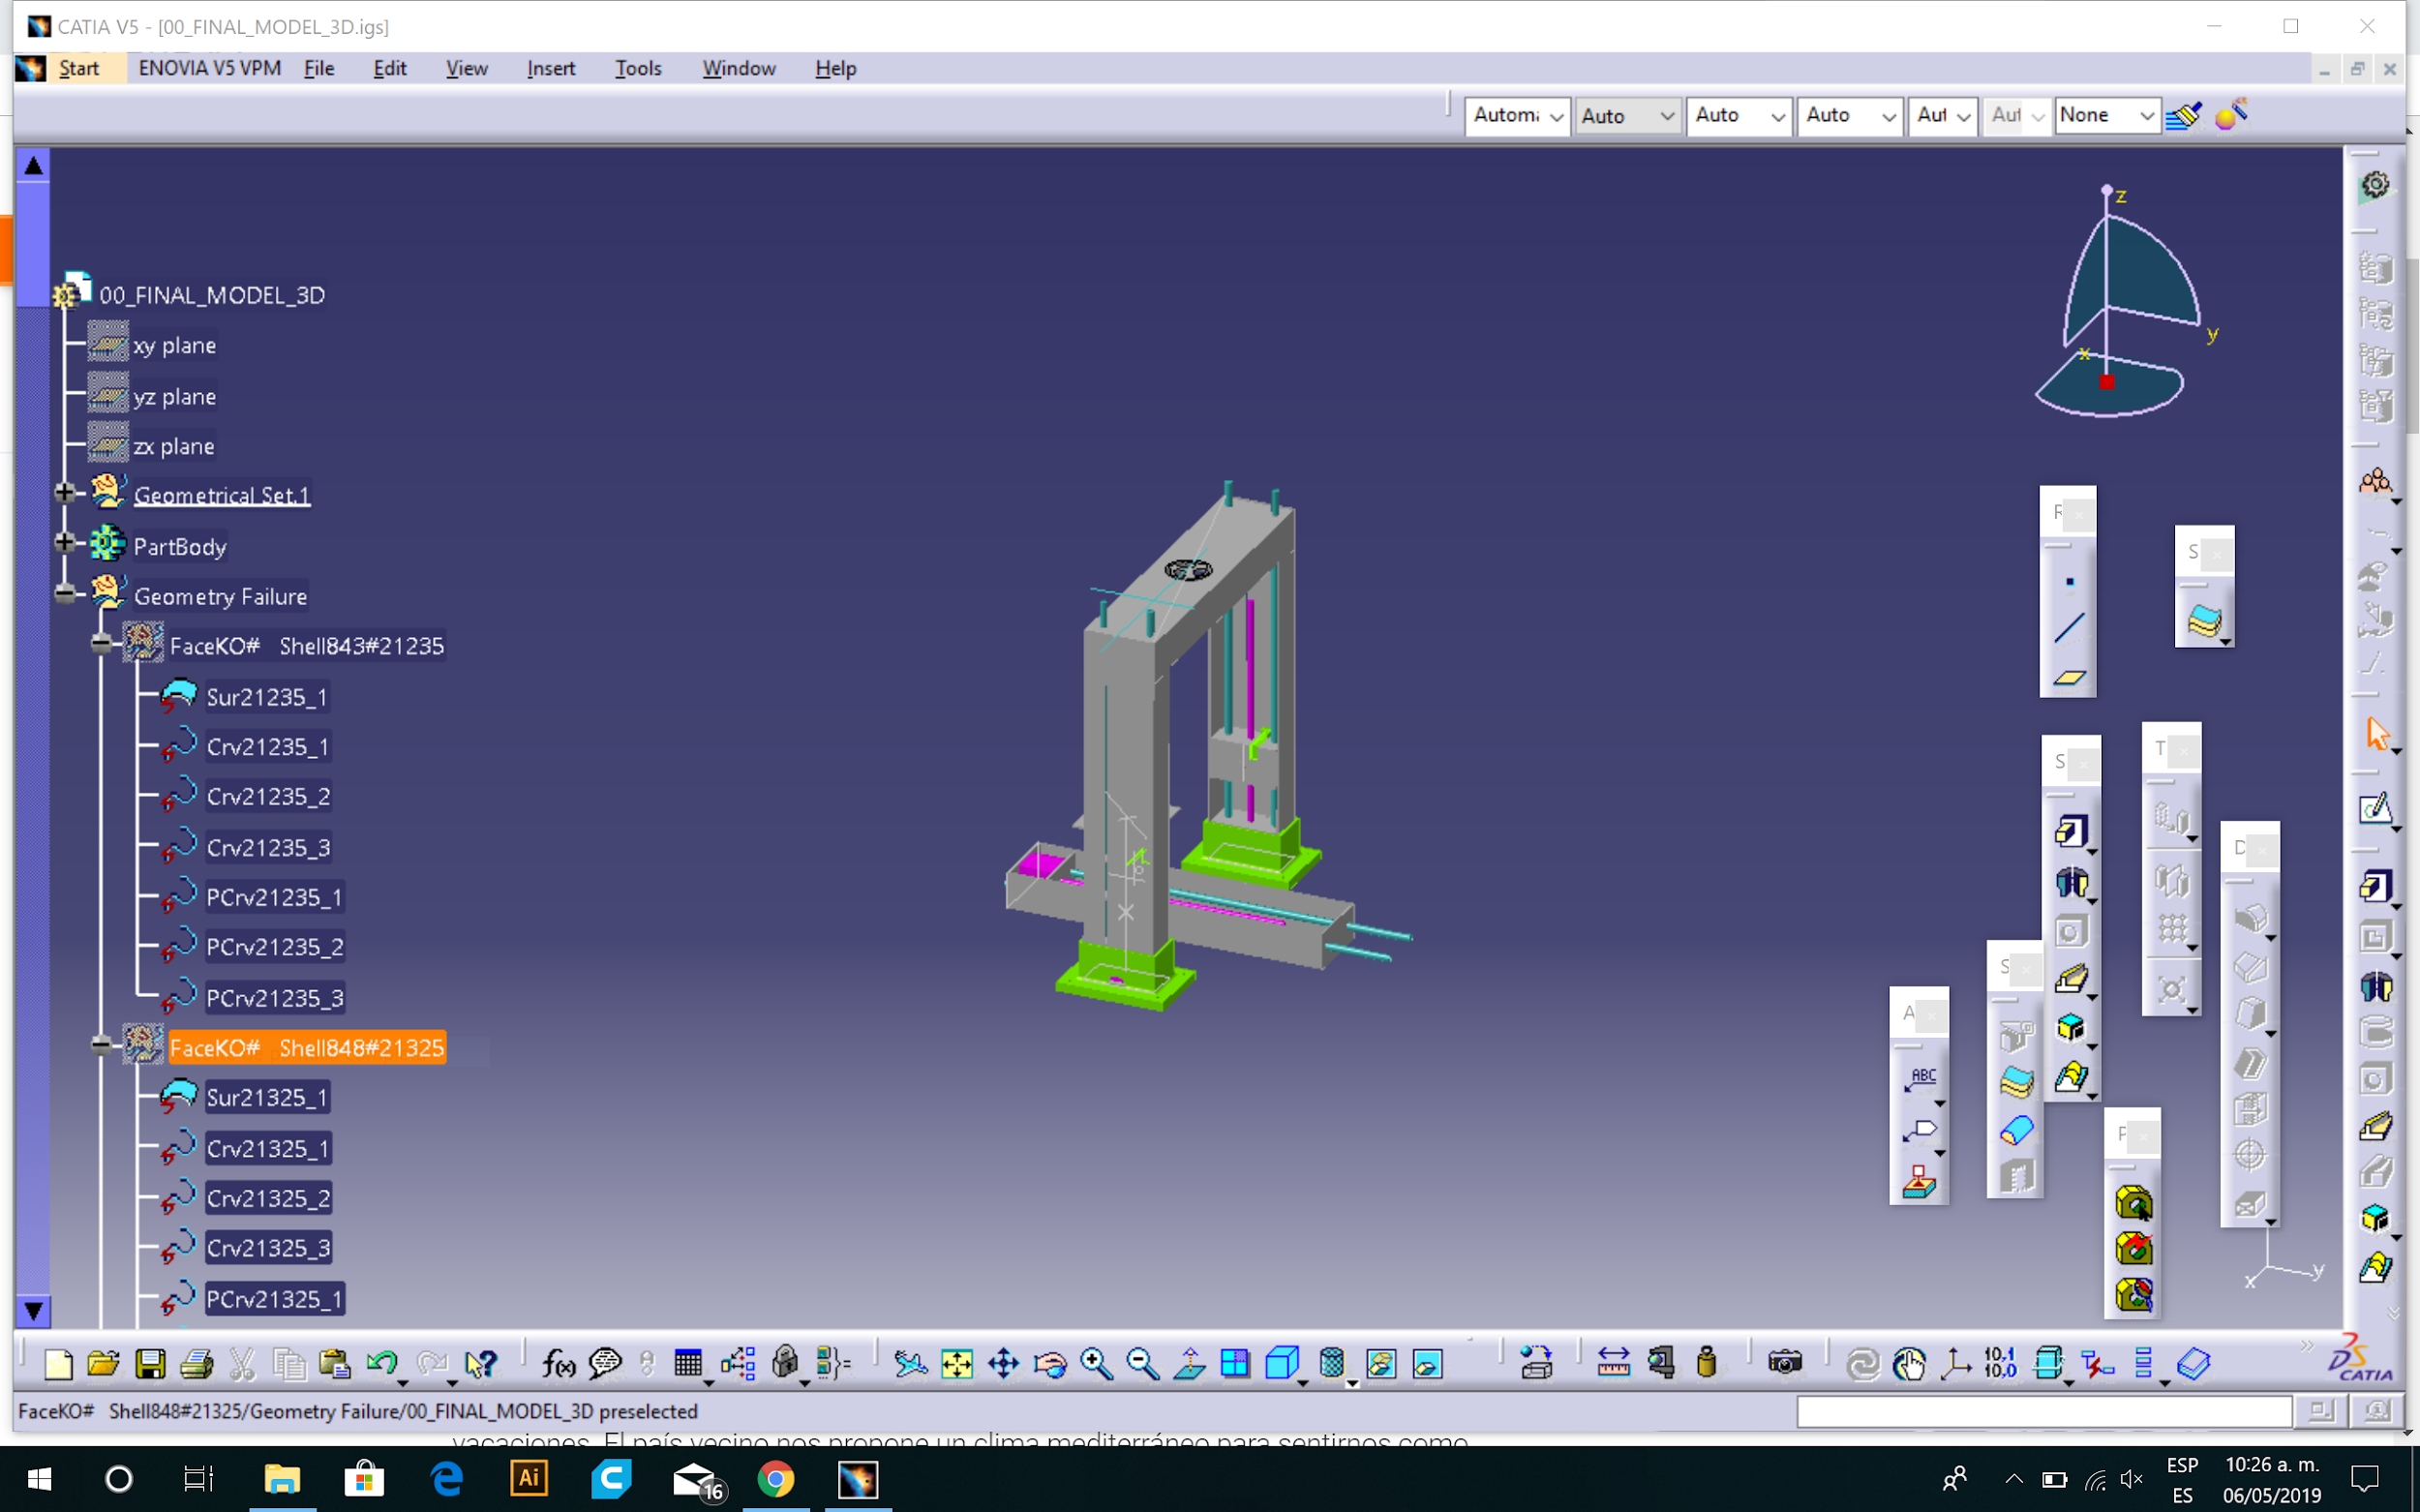 With the measurements taken from this model, I have started to make the three bases and the vertical arm, which has the same measures as this, the only thing that will change is the pedestal and the top cover to which I will add a reinforcement.
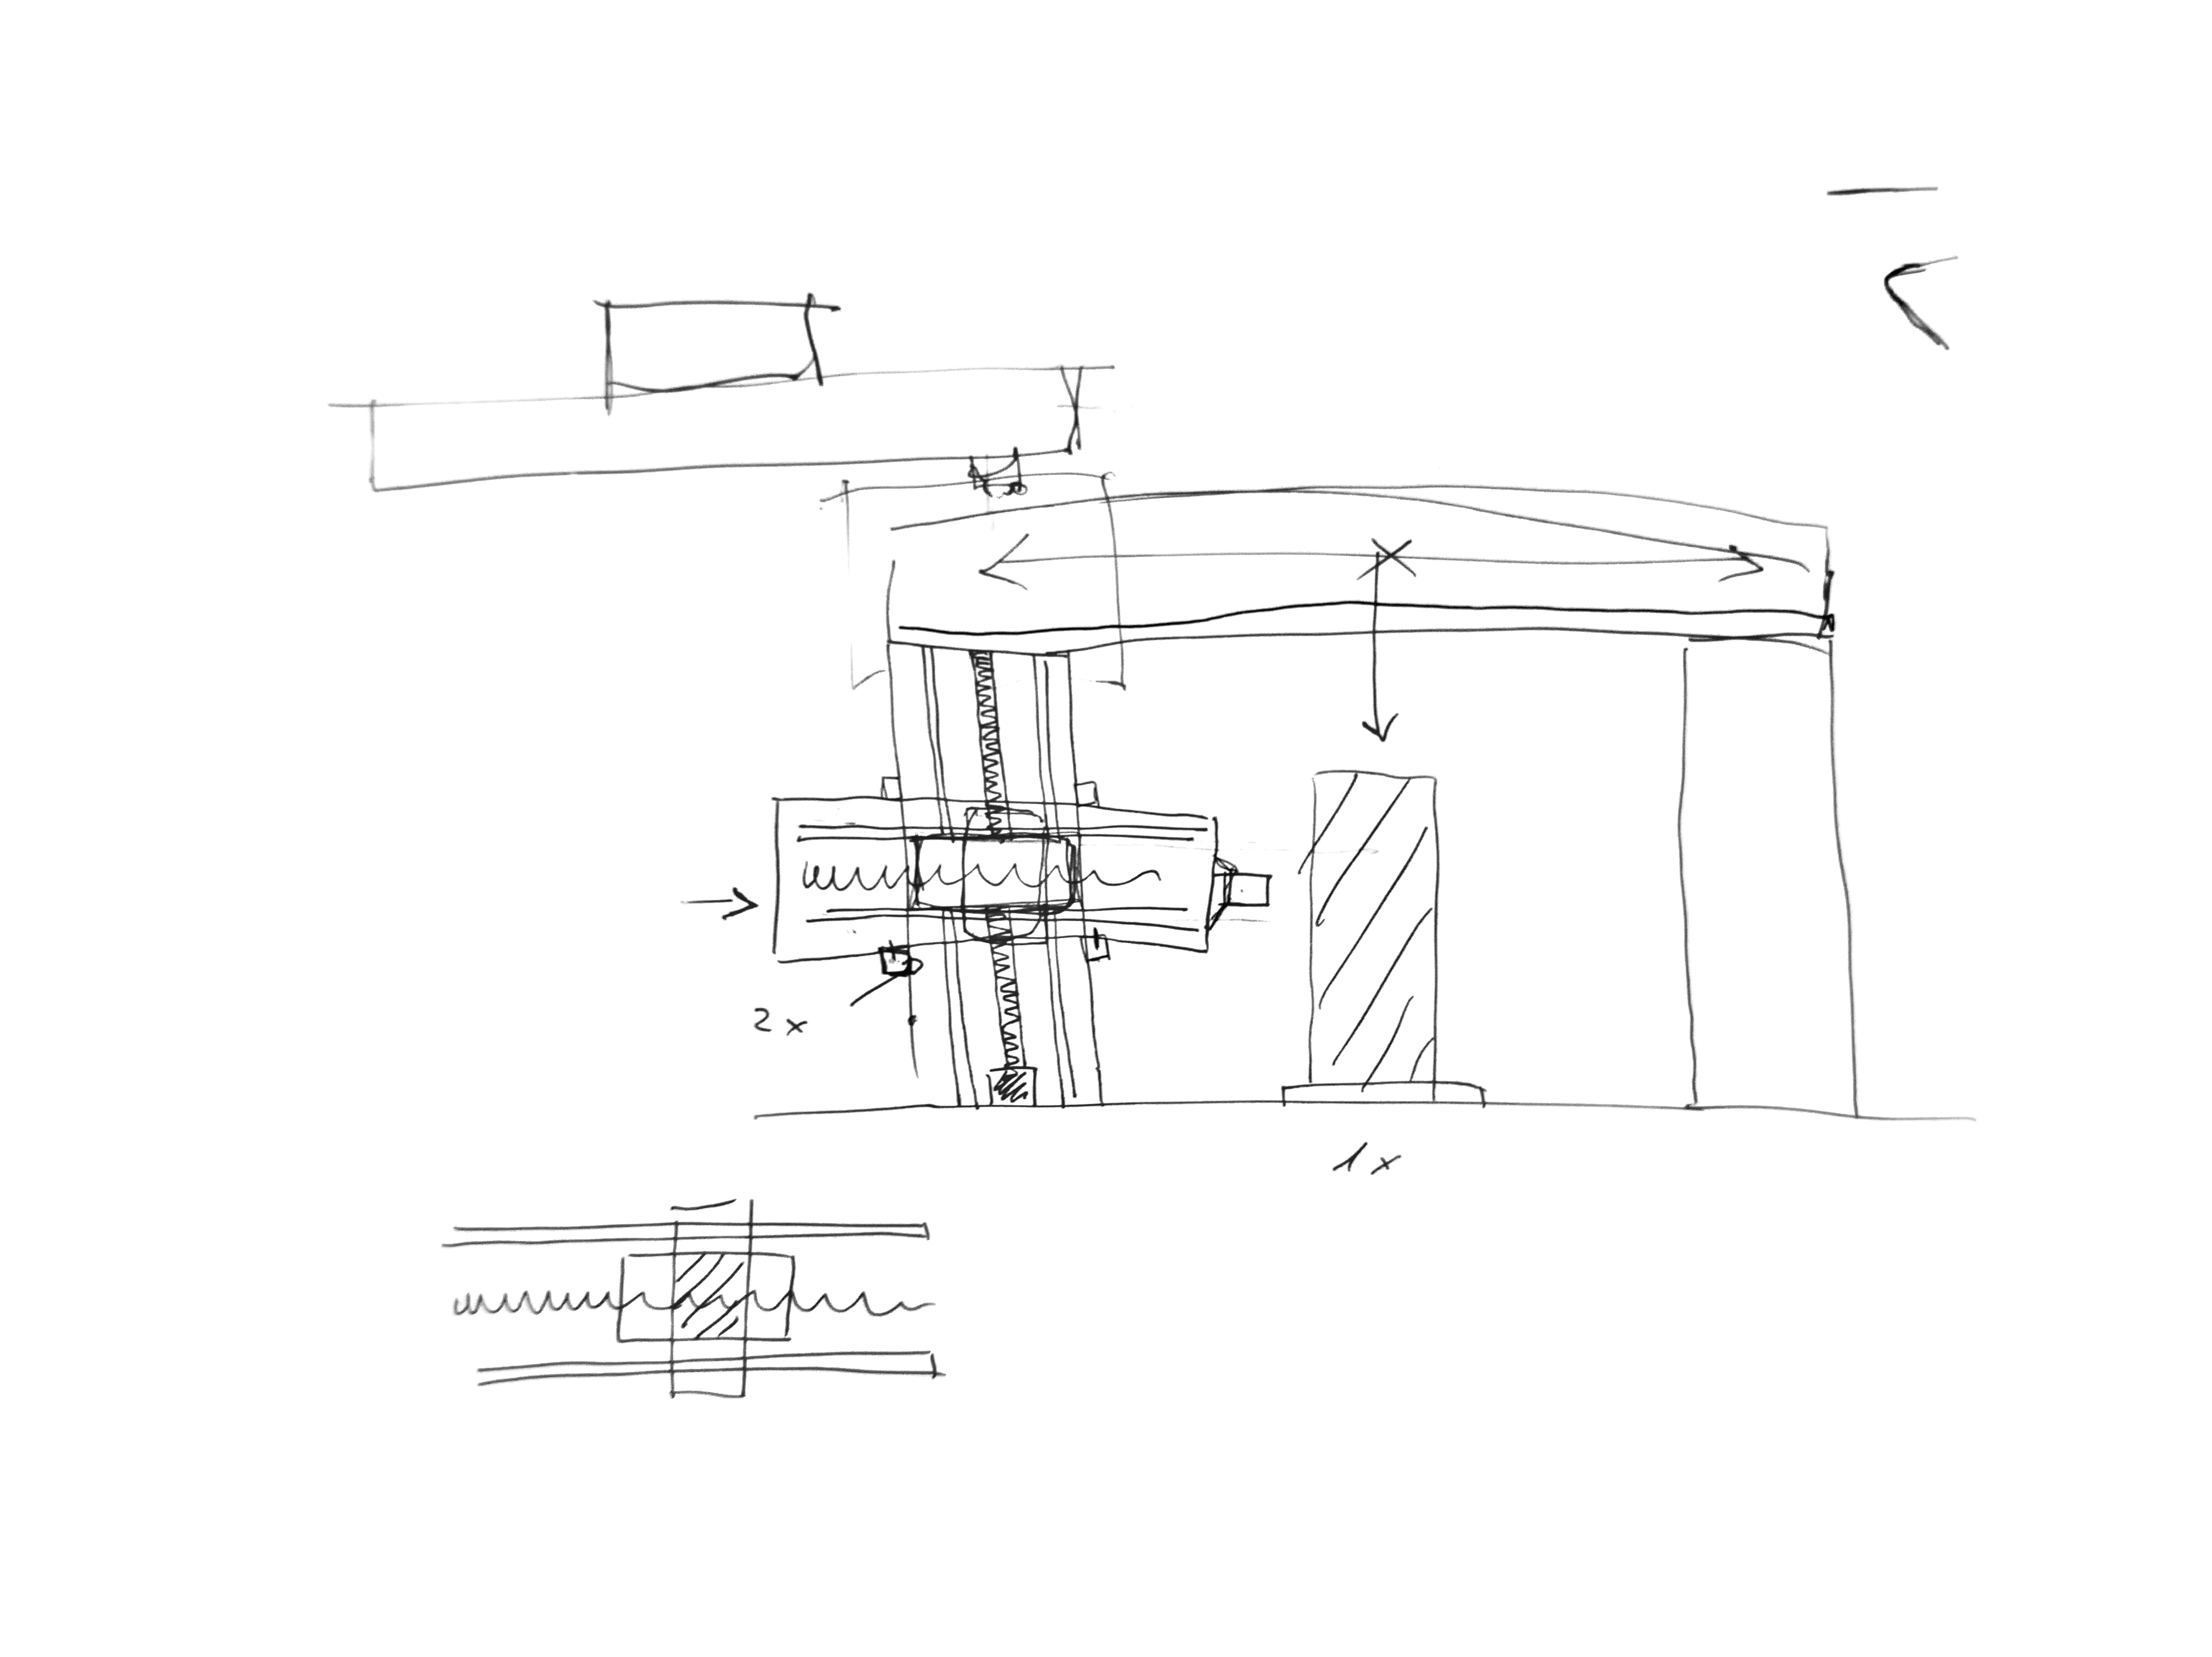
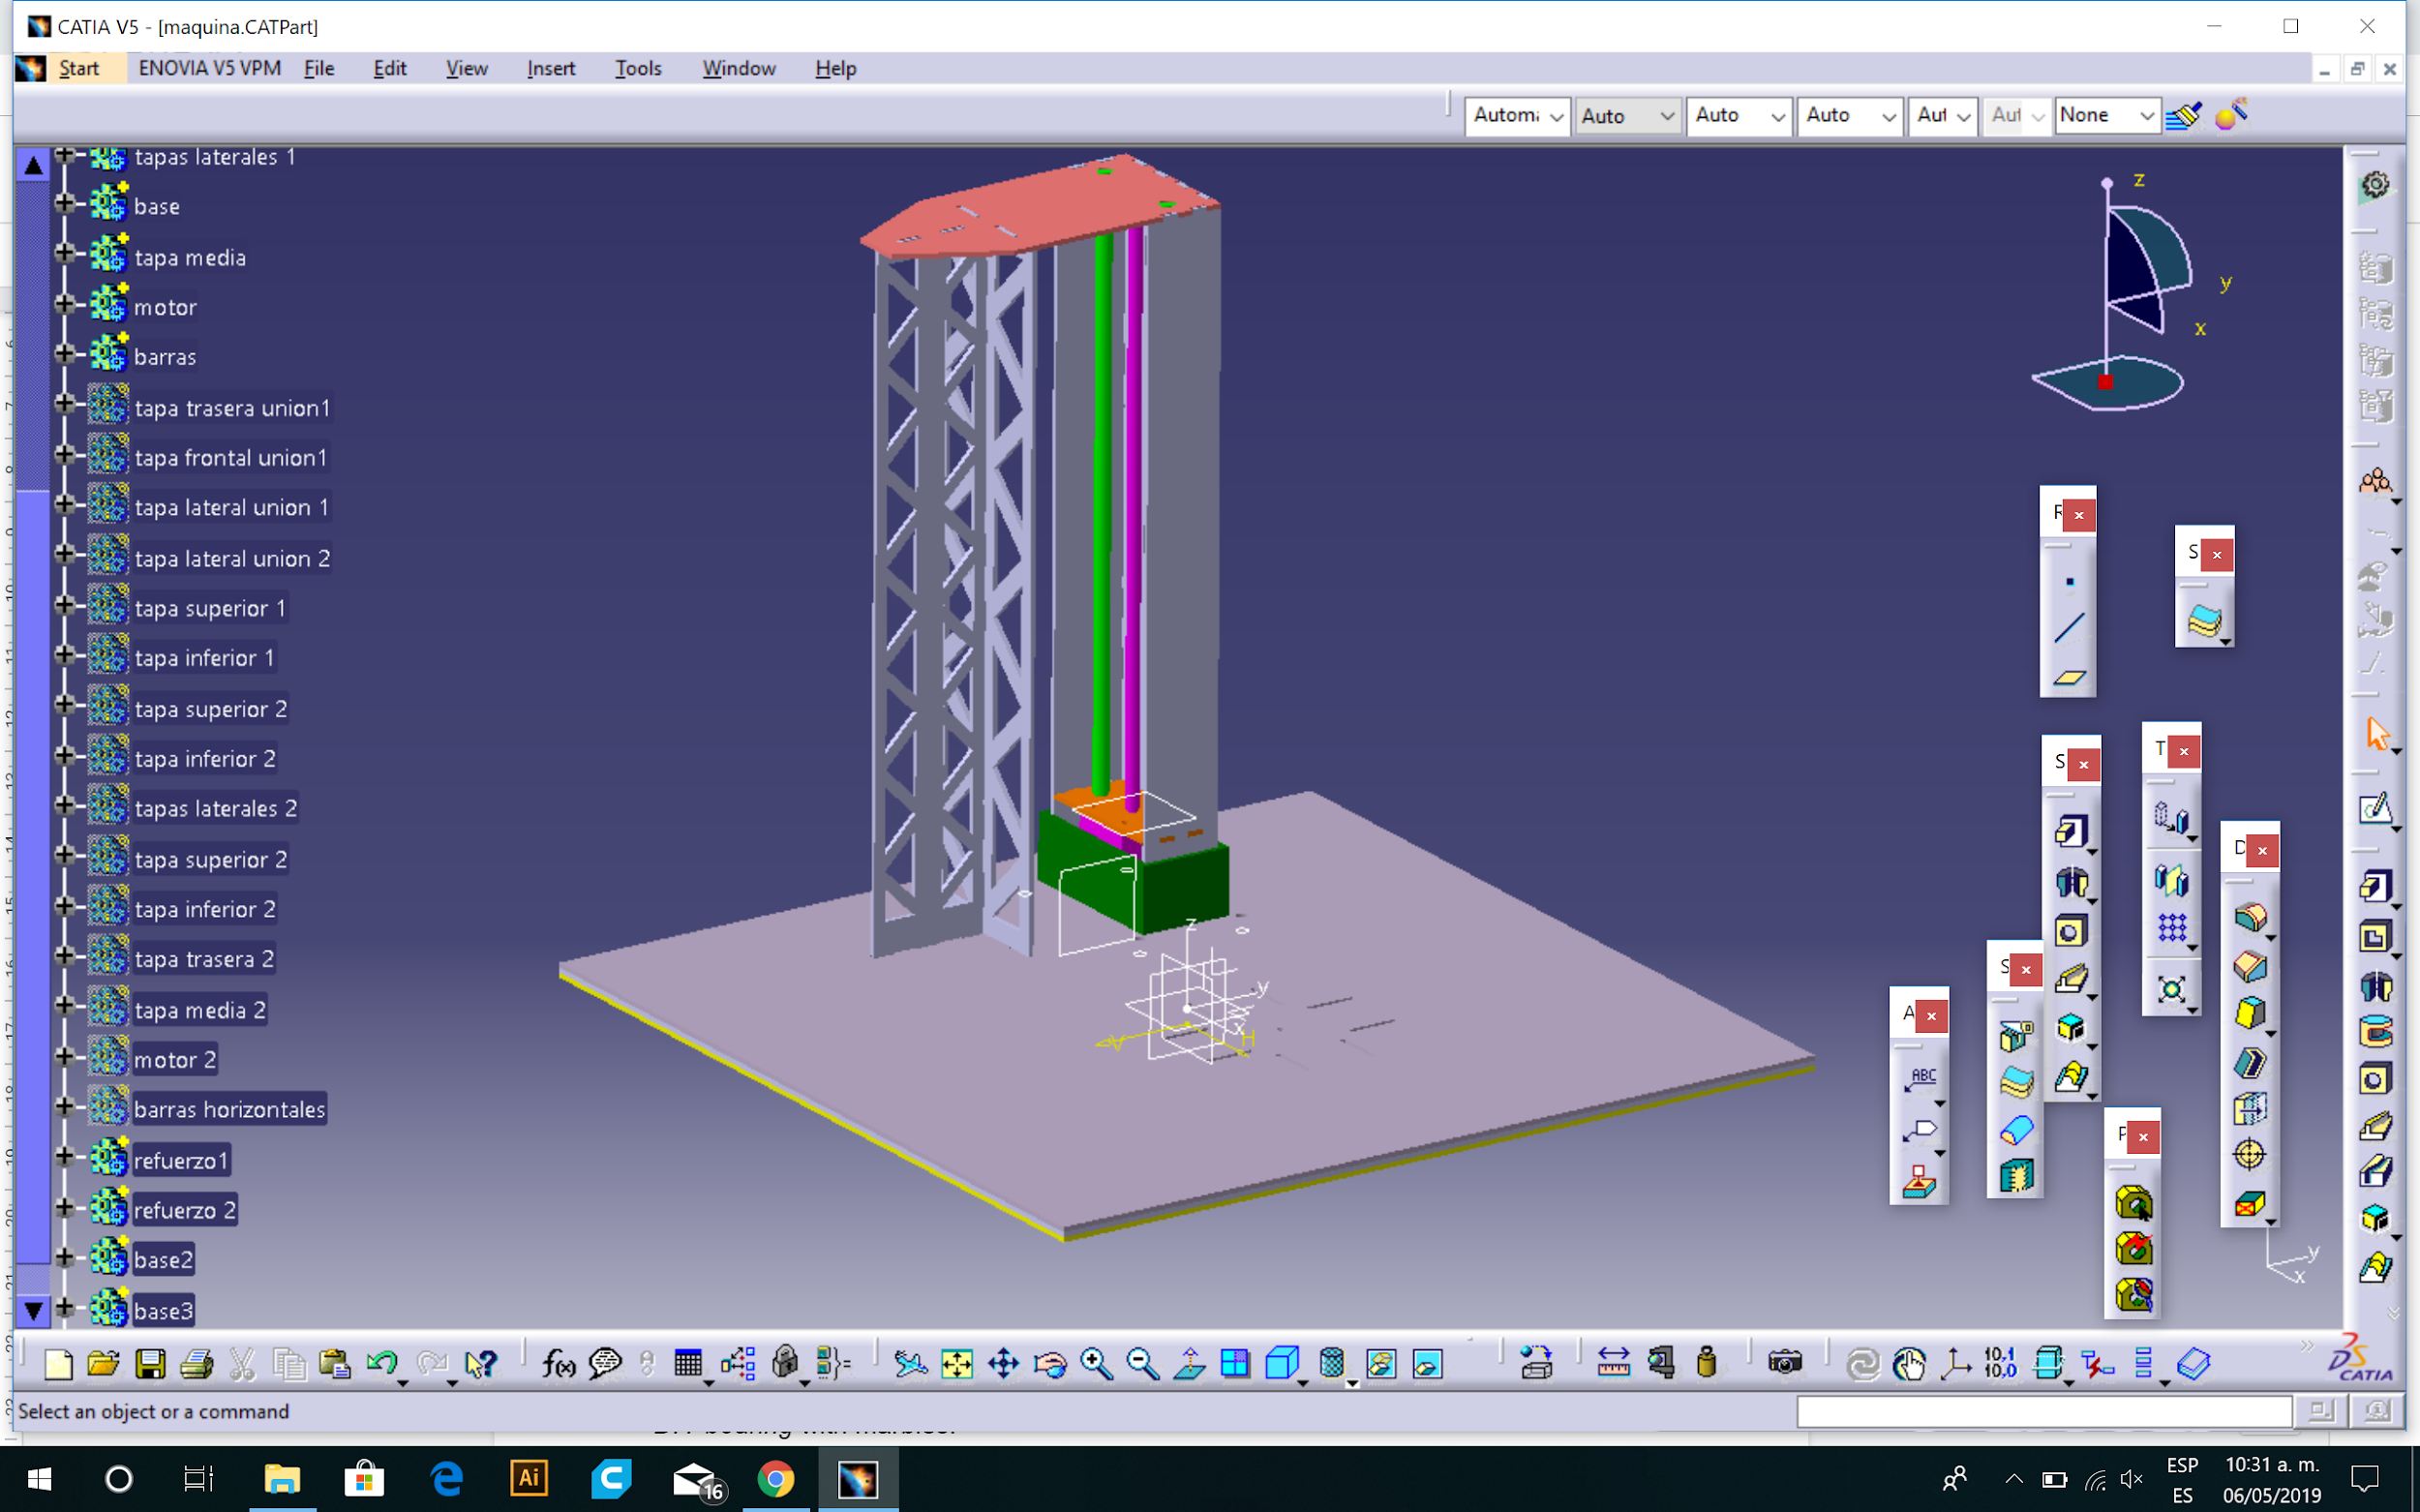 With the vertical module created, I proceeded to design the horizontal module, which is much shorter than the normal modules and which is also attached to the vertical module in half sharing the same piece.
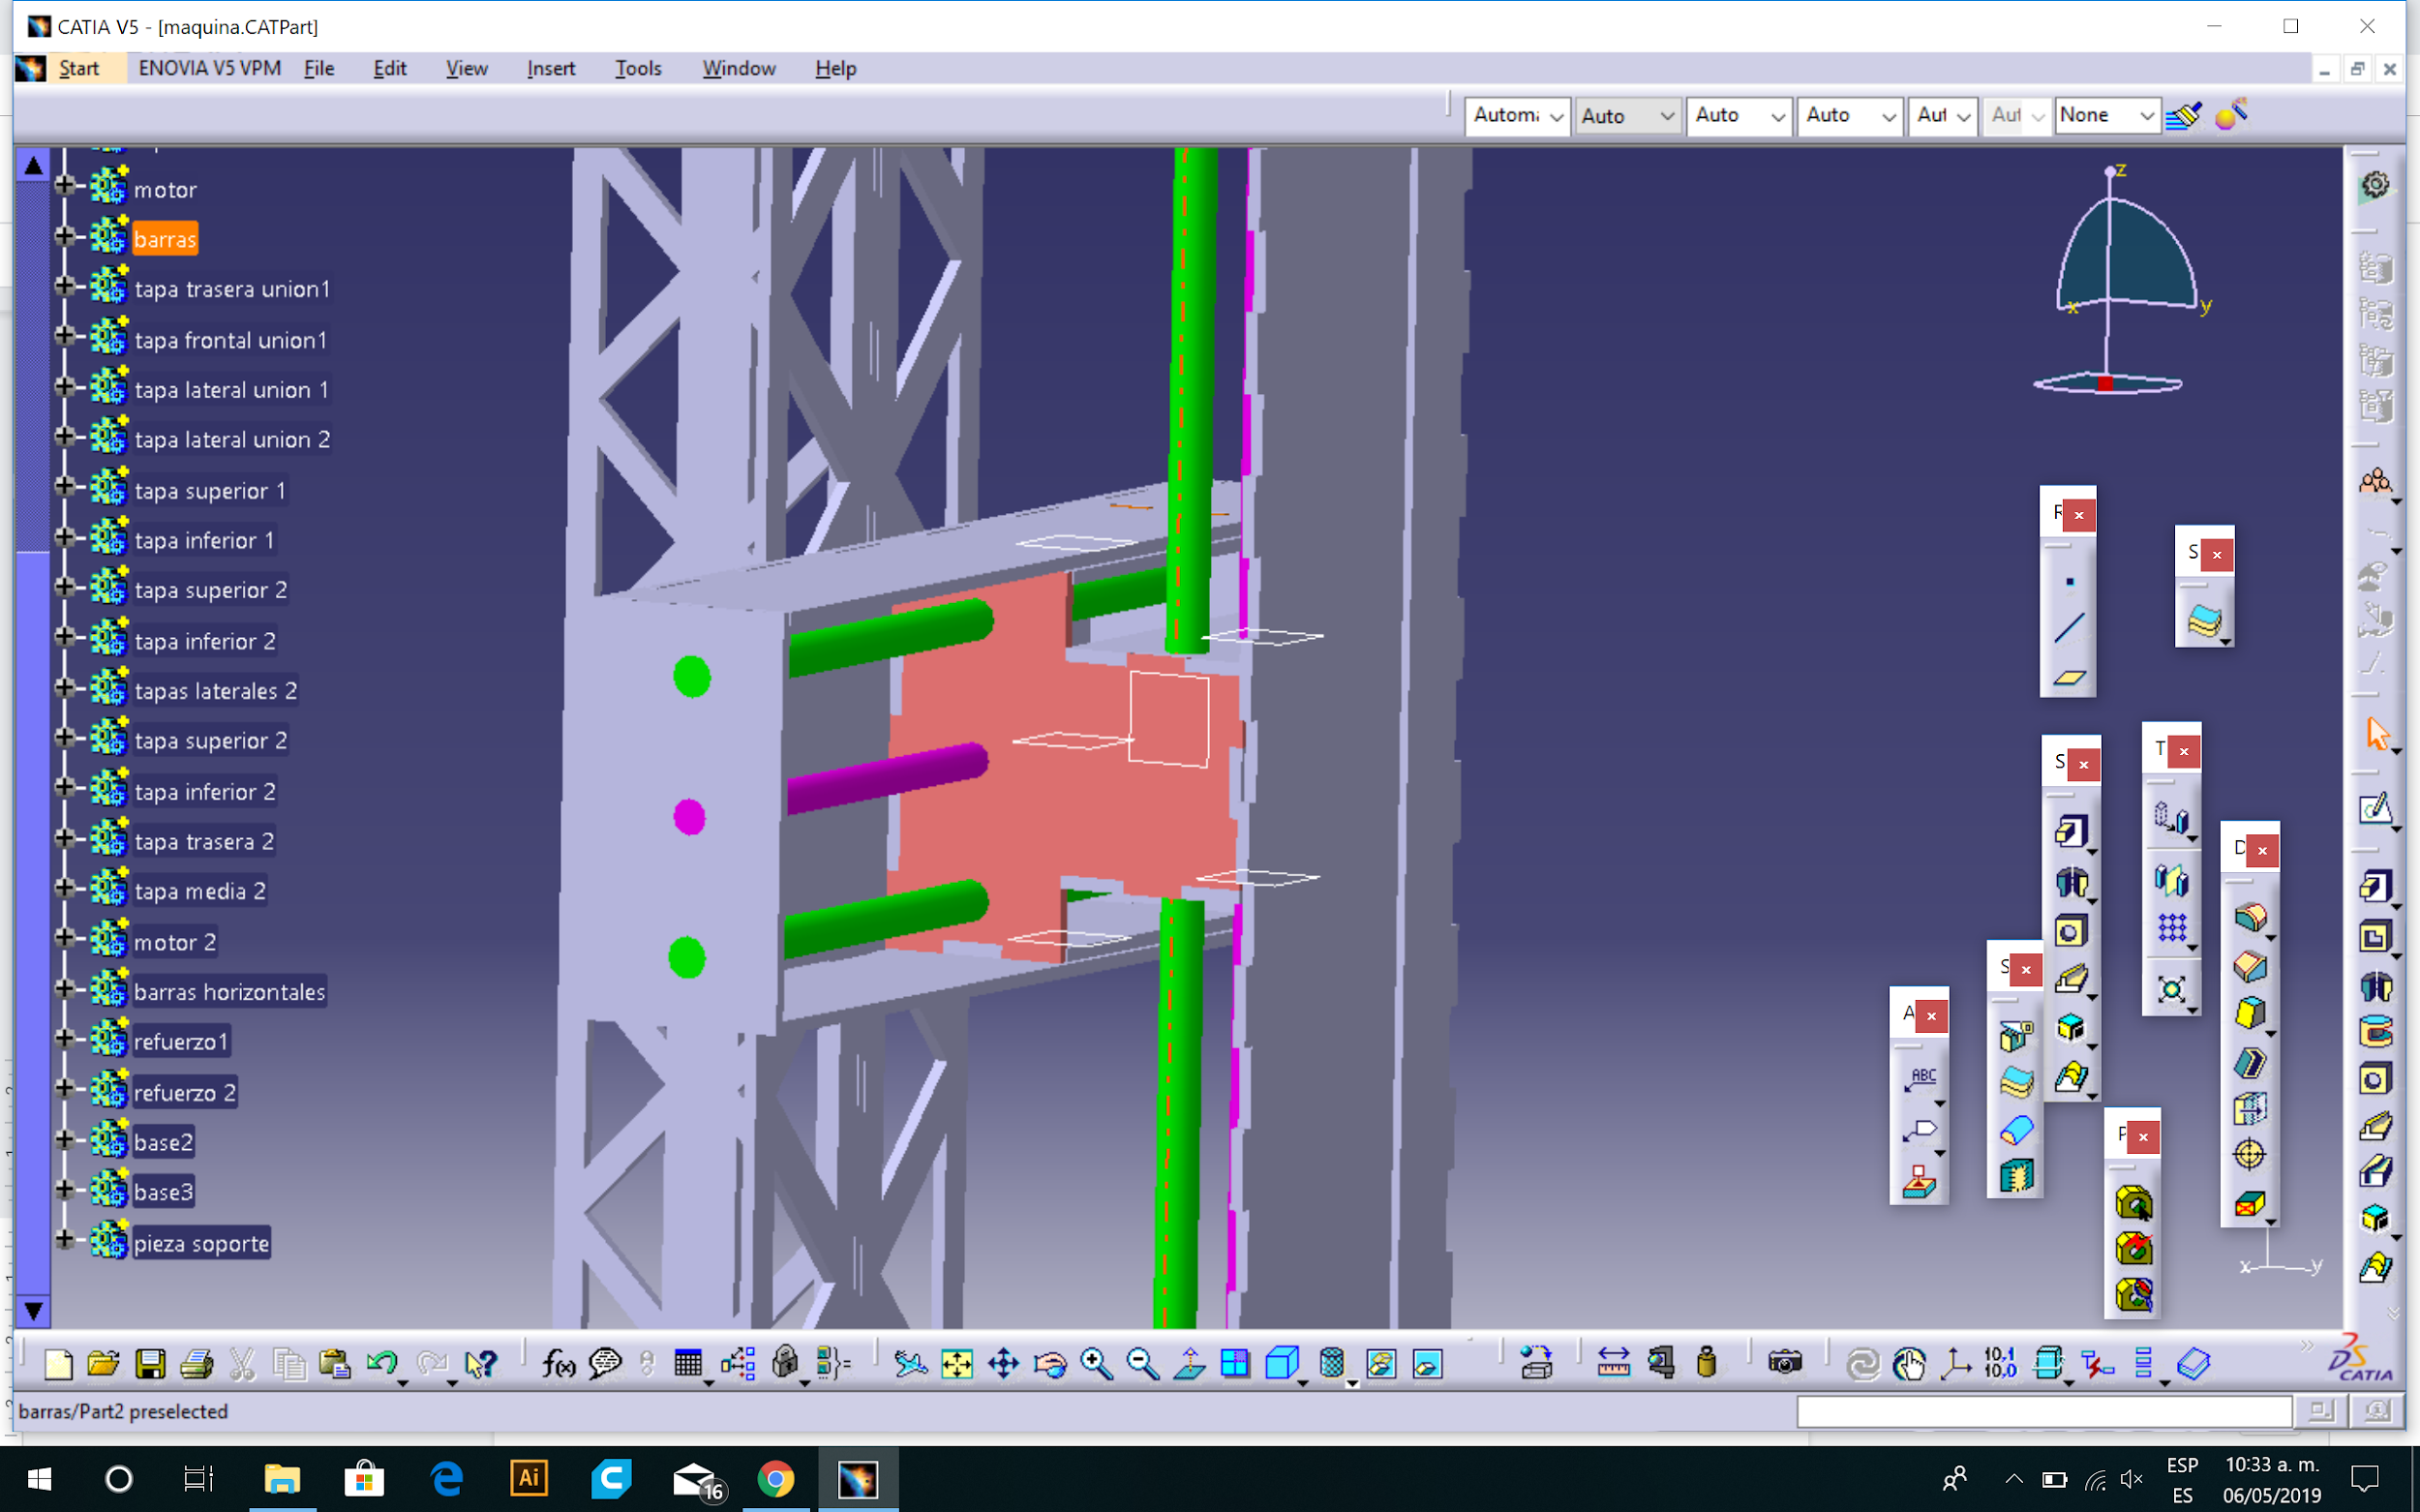 The calibrated bars, the motors and the rest of the pieces used in the design have been taken from the previous assembly as well since we are going to recycle them from the old machine.
The complete file of the structure of the machine can be downloaded here:
Structure design IGS
Structure design STL
Design. Pedestal design
To know more information about this part please visit the Jesus Lopez web page and our group page.
Design. Pedestal design
To know more information about this part please visit the Elena Cardiel web page and our group page.
Fabrication
To know more information about this part please visit the Elena Cardiel web page and our group page.
Assembly
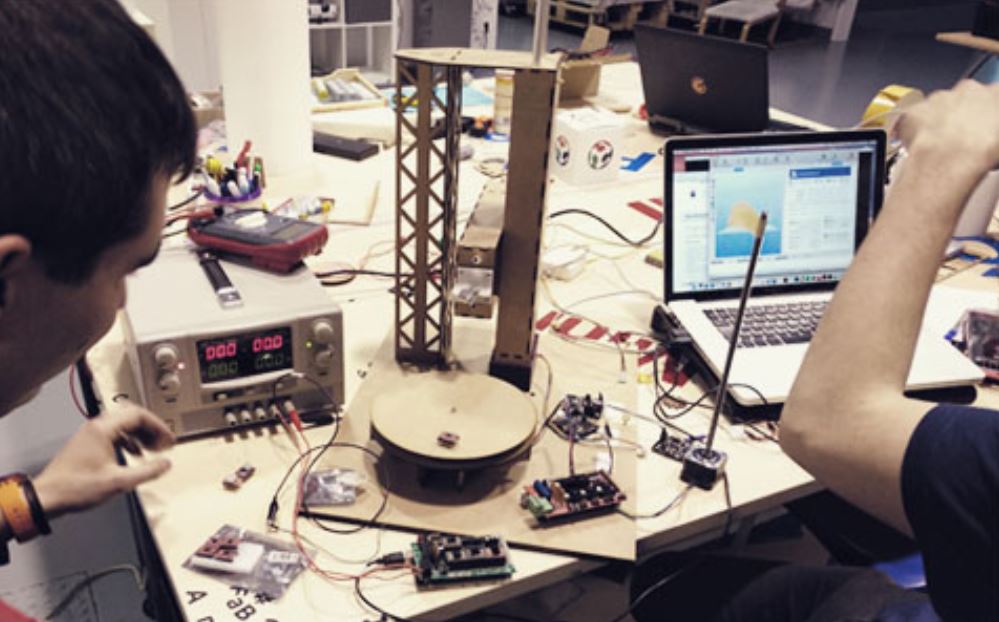
The assembly we made it already in the lion's fablab during the weekend that we were to assemble the machine. This task was carried out by Elena and me, while Jesus and German prepared the programming of the Nadia modules using Python. We took around 2 hours to assemble the machine. To reinforce the structure we glued the MDF pieces with hot and white glue. We also had to cut one of the endless screws, as our horizontal module is smaller than the original Nadia's modules. Here you can see a video of the process:
Electronics and programming with python and gestalt
To know more information about this part please visit the Jesus Lopez web page and our group page.
Programming with arduino
After trying it in python and having a lot of problems with Nadia's modules, we decided to connect our machine to an Arduino Mega 2560 with some ramps to be able to connect to them all the elements that we used in the machine.
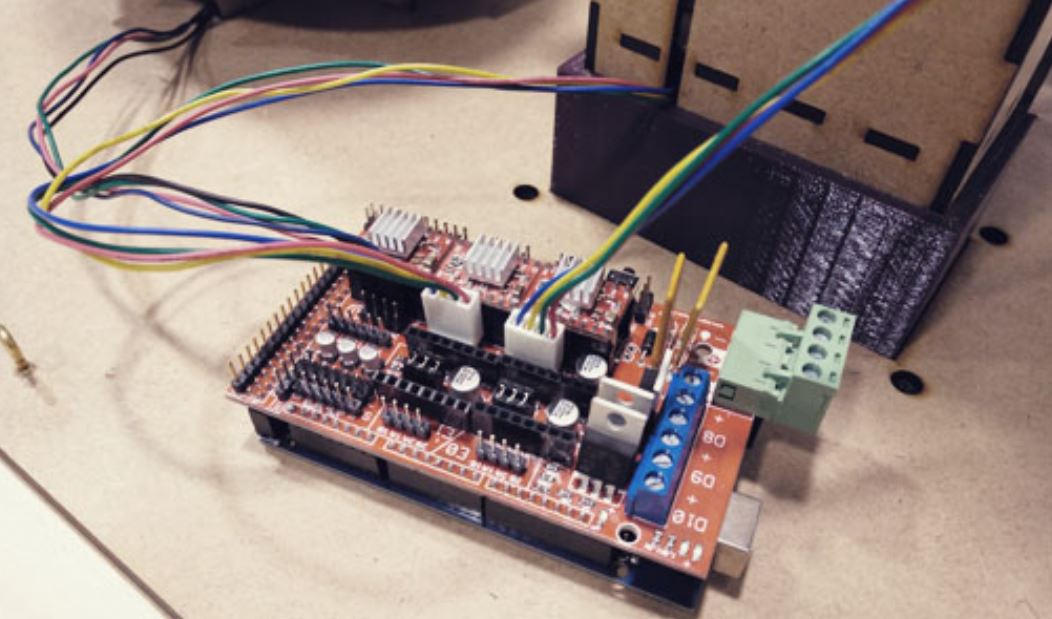 Each motor is connected in X Y Z and commanded by a pololu motor driver. These are regulated to a consumption of 0.3 A so that there are no overvoltages and the motors break. We controlled this consumption by regulating the screw that each pololus motor driver has and monitoring the consumption in the power supply that we have connected to the Arduino Mega.
Once we had all the pololus motor driver regulated, we checked by a small test that all the motors worked individually and then we connected all of them to the ramp plate. After this, we downloaded an example program to use with ramps for working with 3D printers. We cleaned everything that does not correspond with the motors leaving just the movements code. Before loading the code, we put the machine in a safe position so we have time to turn it off if something goes wrong.
Once the machine was placed in a safe position, we uploaded the program to the Arduino and observed how the motors began to move together.
After this, we programmed a series of movements for the functions that we wanted to do and we uploaded the code again. We tried with the first head that we did, and we could test that it doesn't work with foam, but it works with clay instead.
Then, we decided to try with a marker as we discovered that our machine worked better as a "cylindrical drawing machine" rather than as a "vertical lathe".
And this is the code that we used to make these initial movements:
CINTYA initial code
I continued working on the code and I did a second version in where we are able to control each axis independently. I controlled the movements of each axis depending on the number of micro-steps, which corresponds with a distance.
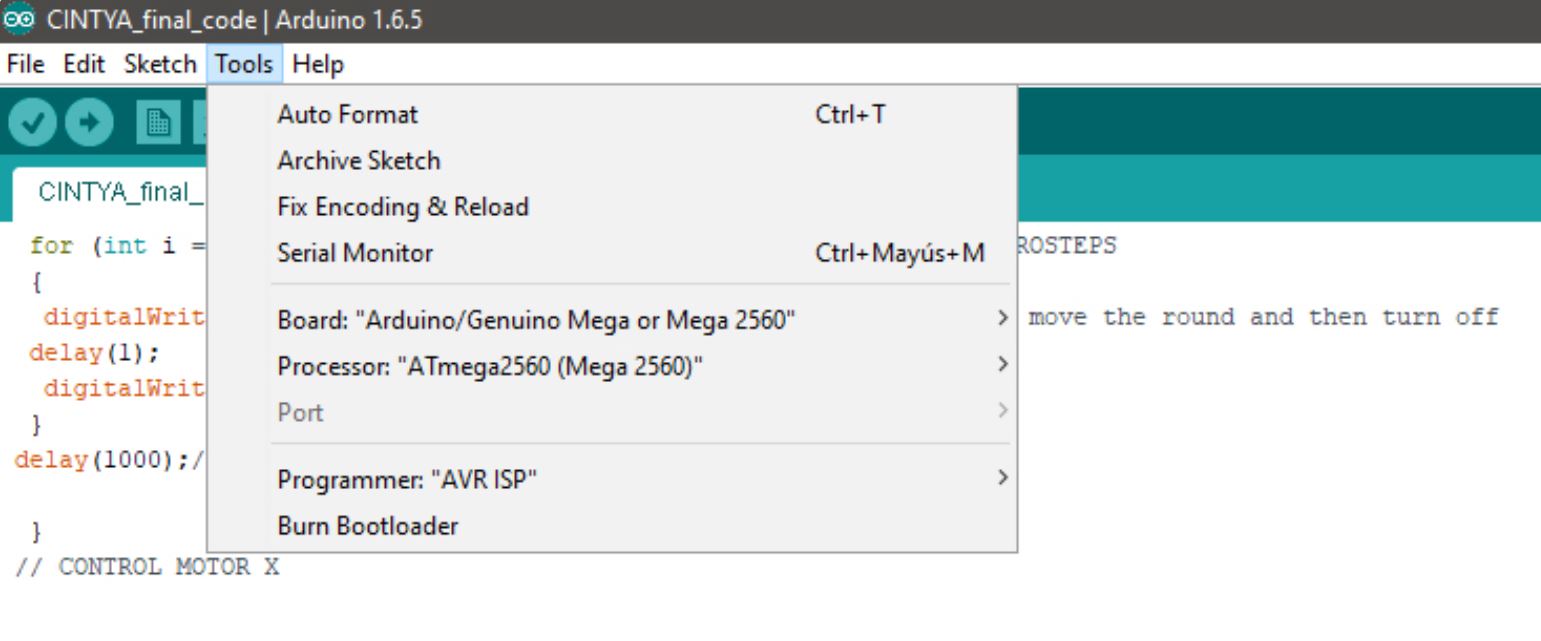
To send te code from Arduino IDE we used this settings:
 And here is the full code, that we explain below:
CINTYA final code
Arduino ramp's pins
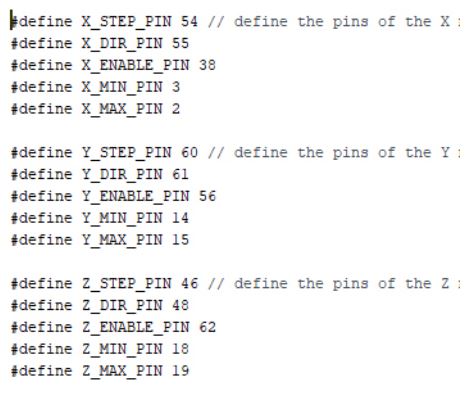 In this part of the code, we are setting the pin numbers of the ramps for Arduino.
Variables and initial position
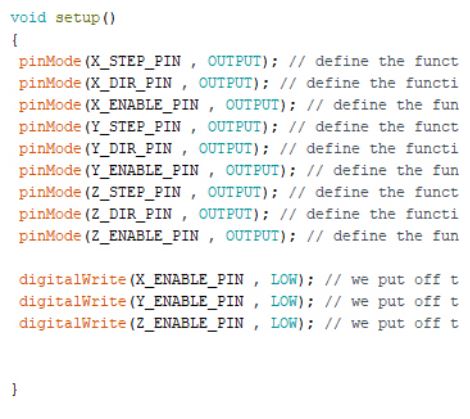 In this part of the code, first, we are telling Arduino that the motors are outputs. Each motor es defined by the number of micro-steps, the direction (hight=up, low=down) and if the motor is enabled (hight) or disabled (low). Then we set that at the beginning all motors are disabled (low).
Calculations
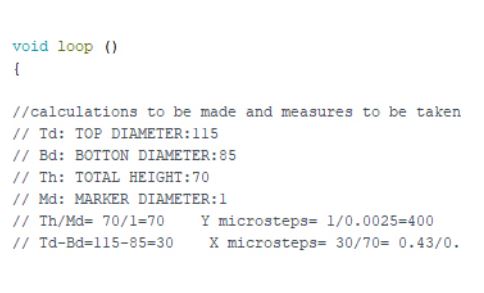 In this part of the code, we explain that we have calculated that 1 turn of the motor is 3200 micro-steeps that means 8mm. (so 1mm. = 400 micro-steps). Depending on the geometry that your cylindrical object has, you have to calculate how much the motor needs to move.
Axis's movements
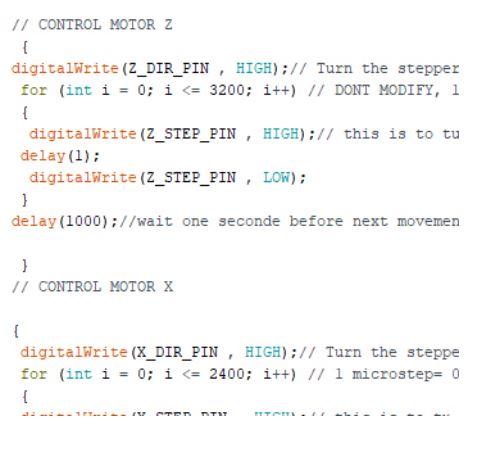 In this part of the code, we are configuring the movements of each axis, which you can control independently. And we control them based on the micro-steps that you want that the motor does.
And finally, here you can see the machine working customizing a plant pot:
Group website
To finish I want to show an image of the group, on the other hand the slide of the machine and recommend that you visit our group website and see our machine video.