Week 09: Casting and molding
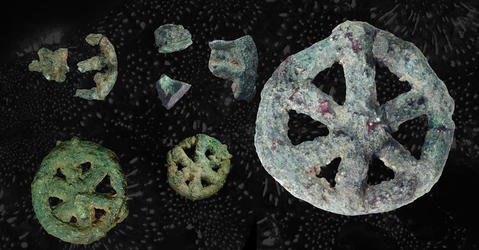
In the past few weeks, we have covered additive and subtractive manufacturing methods. Casting allows us to make an object(s) from the negative of the desired object(s). In comparison with the other digital manufacturing methods, casting and molding have a rich history. It can be dated all the way back to 6000 years ago with an amulet from the Neolithic village of Mehragarh made using the lost wax casting technique.
During college, I have done metal casting using the lost wax casting technique, polymer molding and casting with SmoothOn products. I always made my mold from a physical object. Knowing that we will be using the CNC machine to make a wax mold, as well as having the option to use the laser cutter for making vacuum forming components, I am really excited about embracing digital fabrication techniques into casting and molding.
Group Assignment
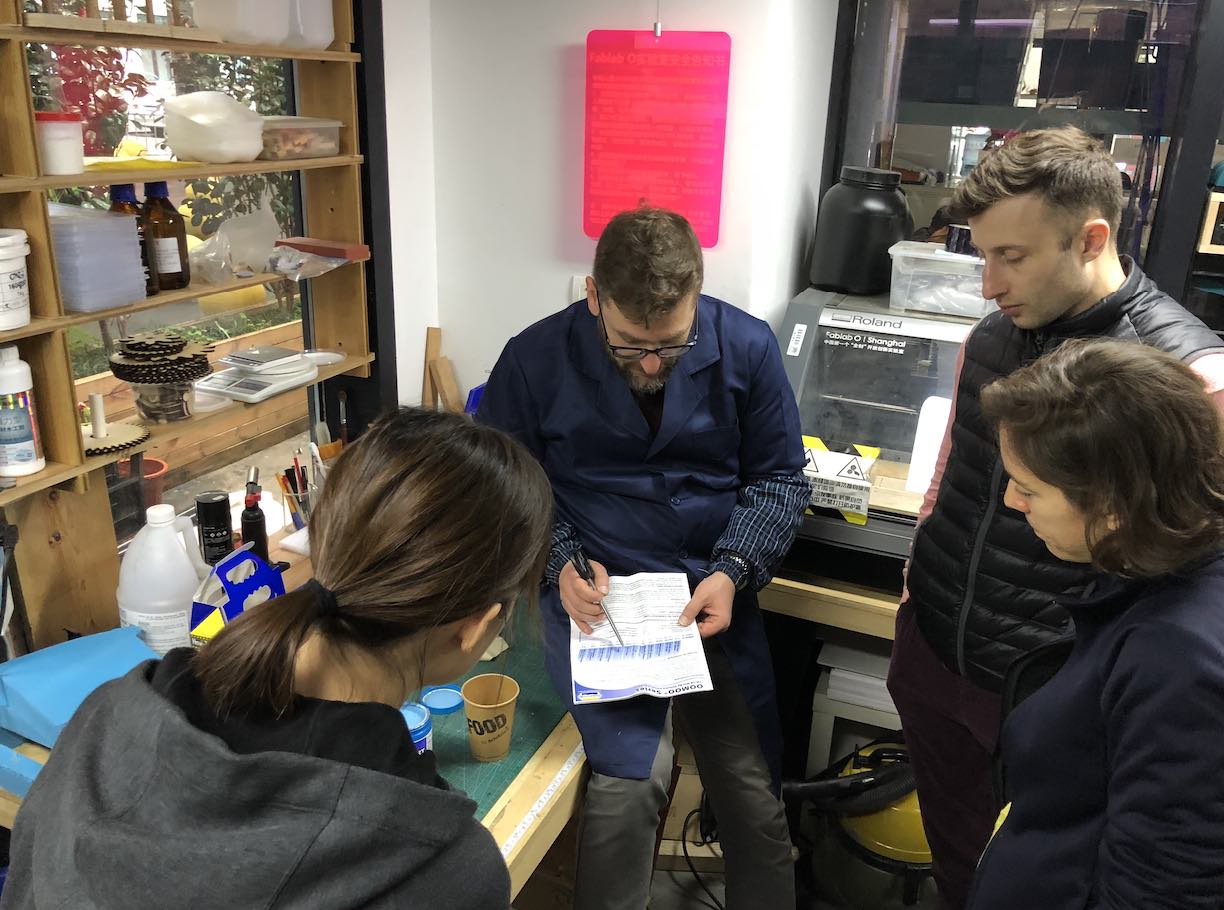
As a group, this week we reviewed the safety data sheets for different molding and casting materials, and then experimented with them. In the section below, I will be covering the experimentations we did in class and a summary of the datasheet for some of the materials we have used. My classmate Pamela also did a really comprehensive documentation on the experimentation.
Molding
Molding is the process of manufacturing by shaping liquid or pliable raw material using a rigid frame called a mold or matrix. This itself may have been made using a pattern or model of the final object.
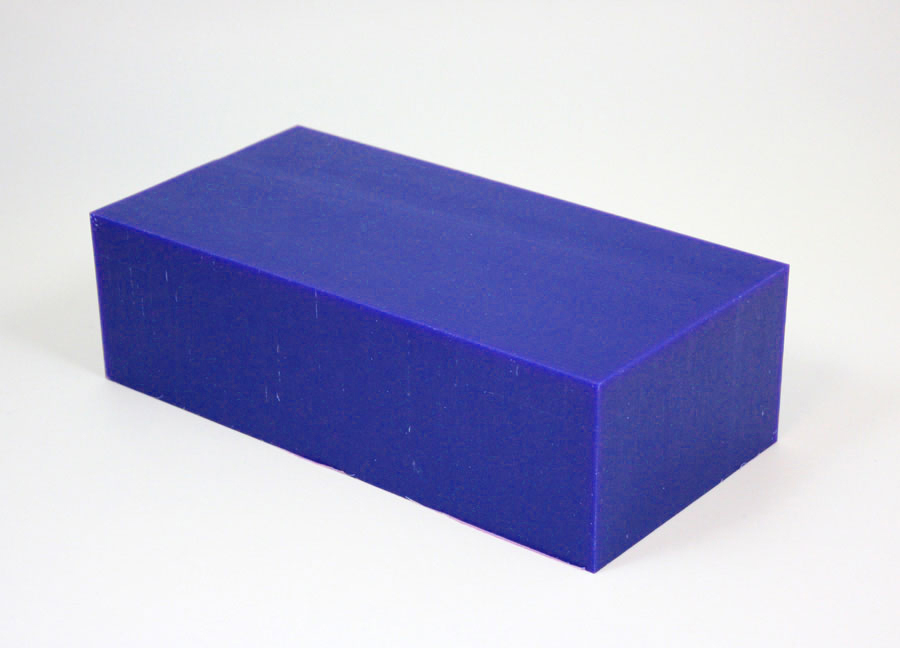
CNC-machined styrofoam
Since each of us would mill a mold for our individual assignments using wax, we used styrofoam to test the Roland Modela mdx40a CNC machine. The work flow for this CNC machine is the same as the Shopbot we have used a few weeks ago:
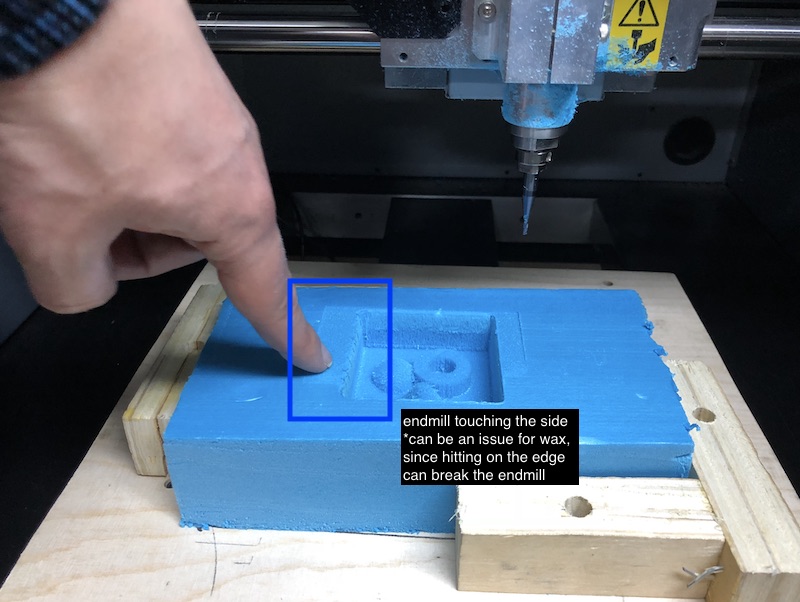
1. CAD: save the design as a mesh in .stl format. Make sure to leave a gap that is the size of the largest endmill (if your endmill is 6mm, leave at least 6.3mm) between the edge of the cut and the boarder.
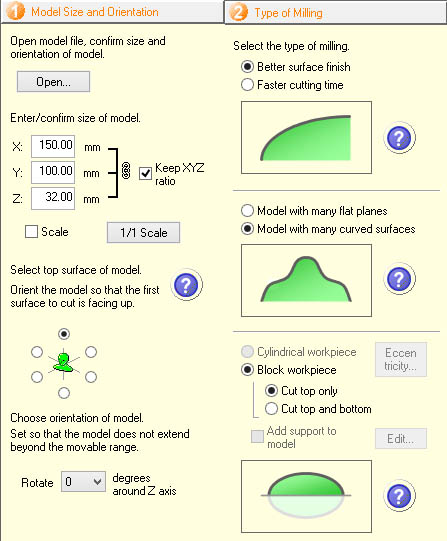
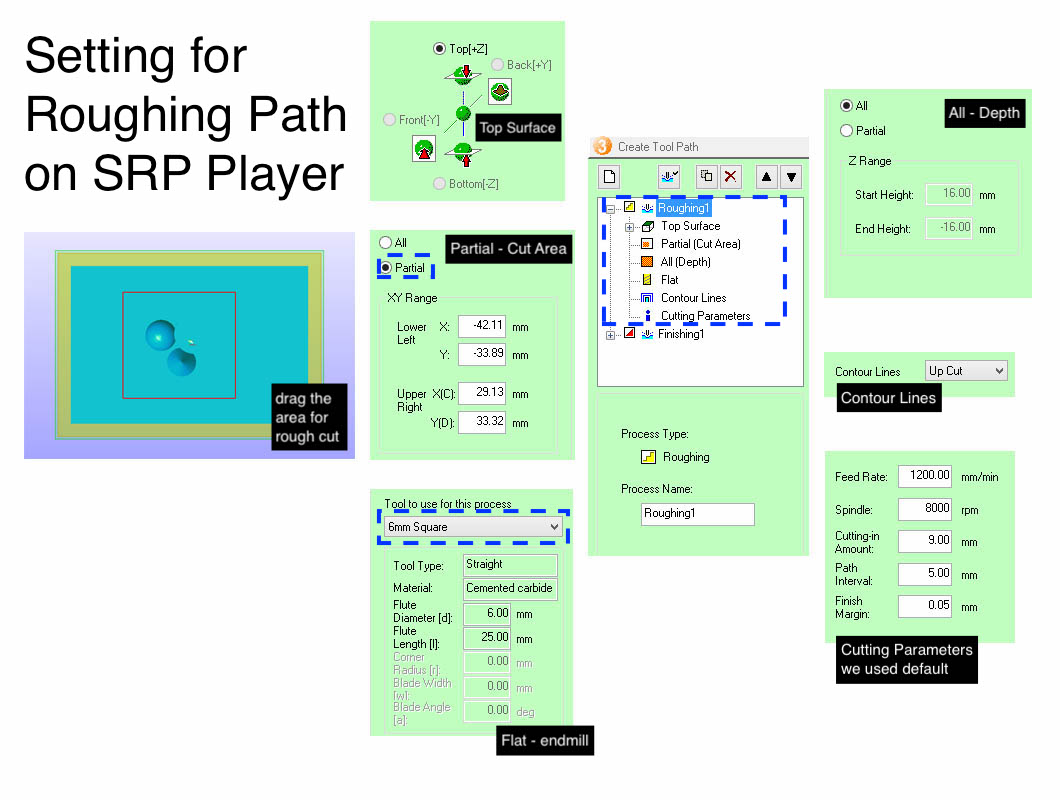
2. Converting mesh into path using SRP player: the path are divided into Roughing and Finishing. With a 6mm endmill, we would be making a roughing that sculpts into the material to remove large chunks. Then with a 3mm endmill, we would be making a finishing that gives a precise cut.
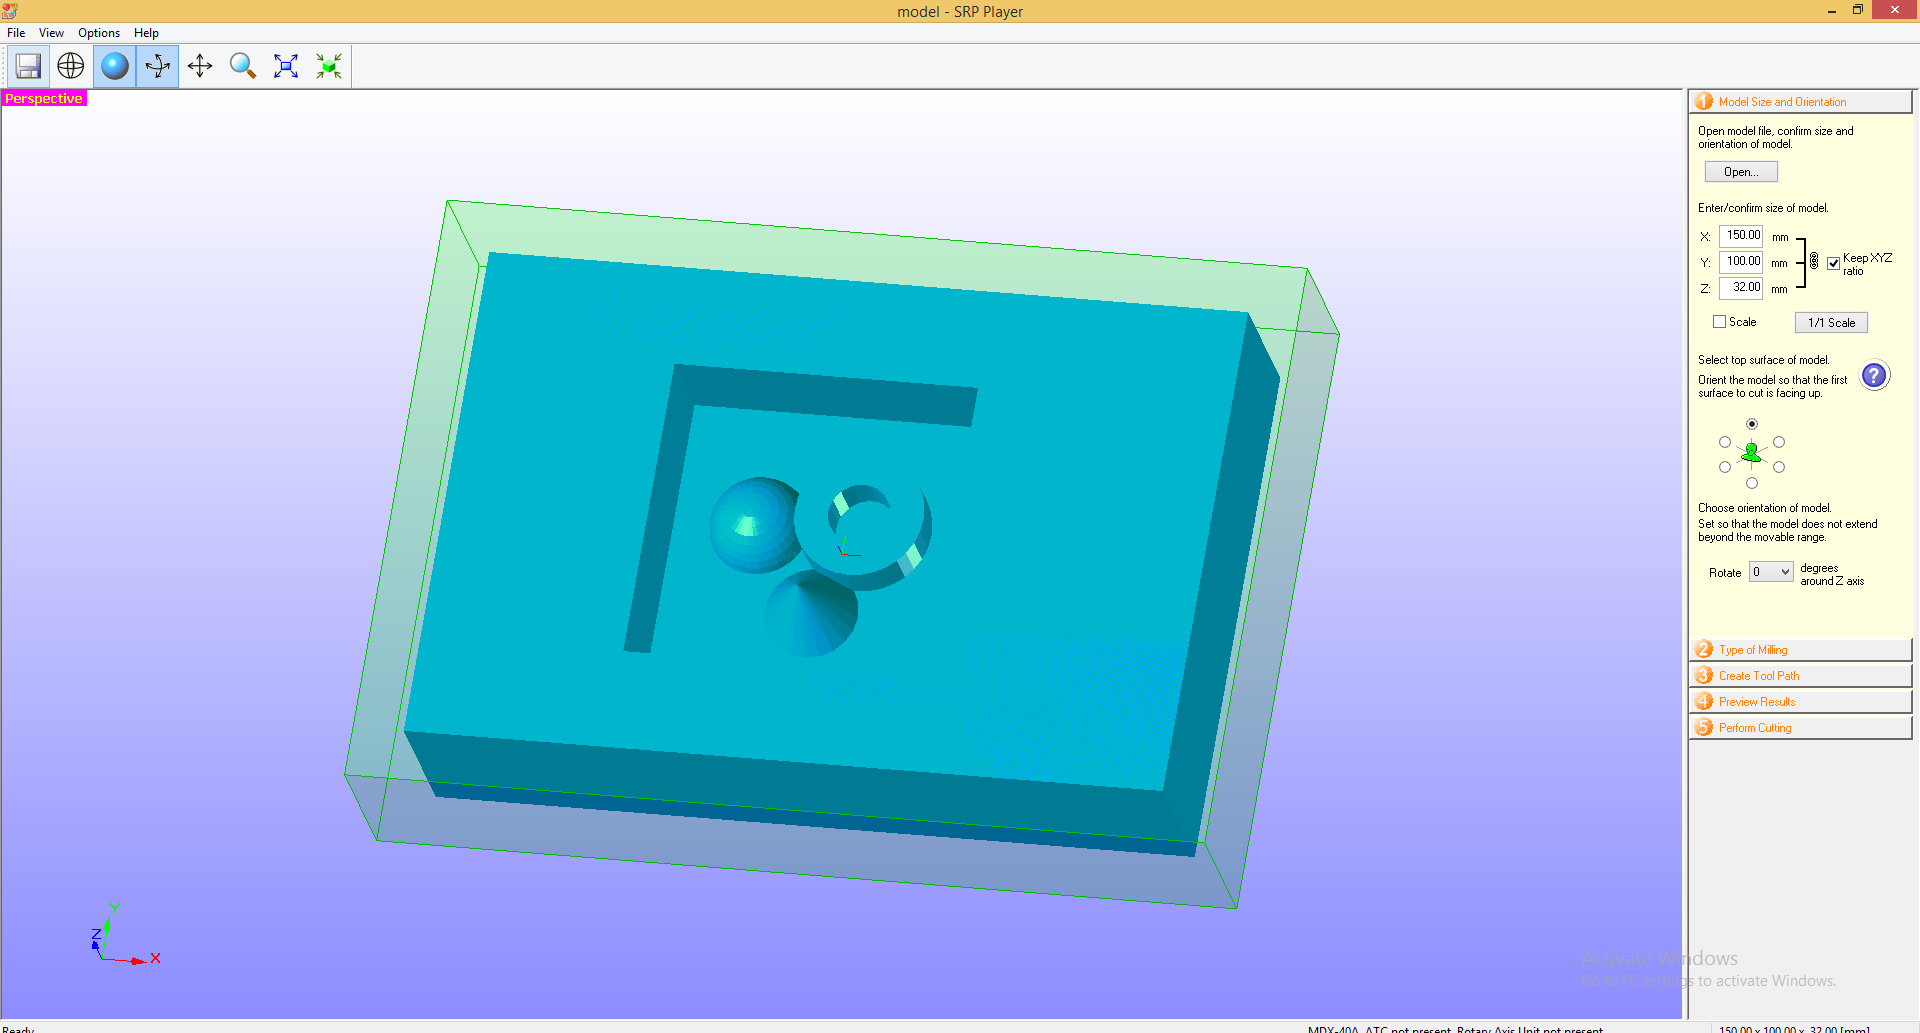
3. Setting up the CNC machine: we used VPanel to move the endmill and output the cutting files. Similar to the Shopbot, we took the z-origin with a metal plate placed underneath the endmill. Since the cut starts in the middle of the path file (SPR player default setting), we took the xy-origin at the center of the material.
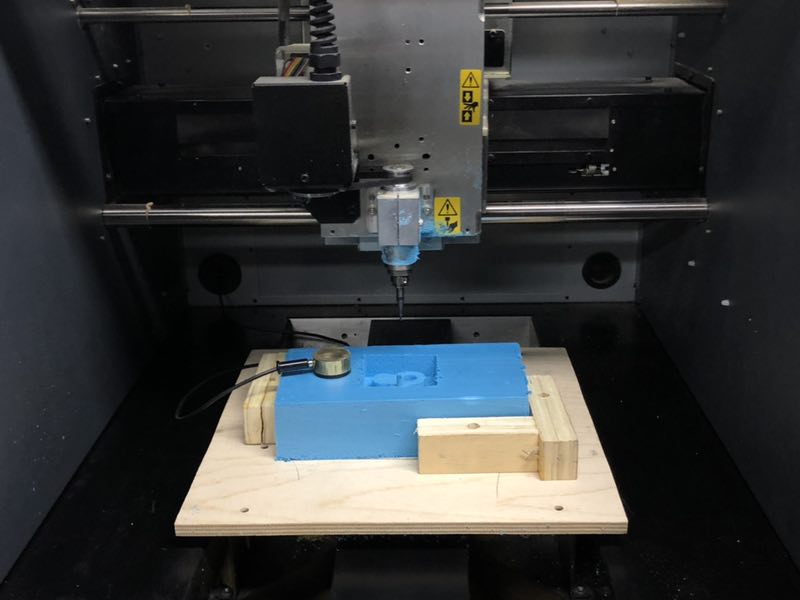
4. Cutting:
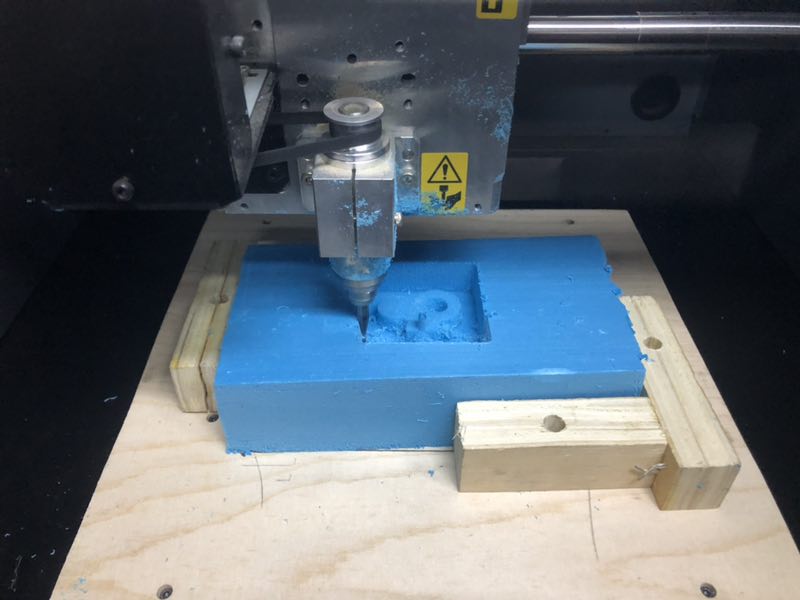
The cut took approximately 1.5 hour.
Rubber
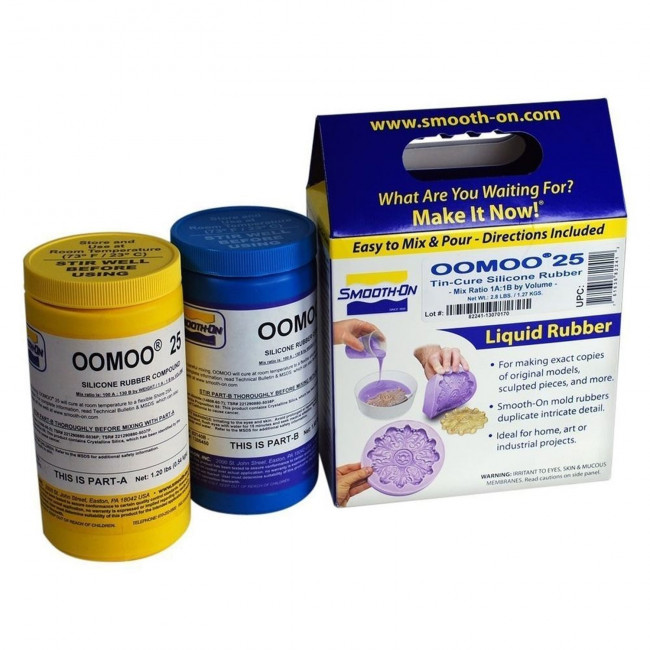
We poured SmoothOn OOMOO 5 into the Styrofoam mold. The material is activated by mixing two parts together (A1:B1 by volumn; A100%:B130% by weight). Stir the bottles before using.
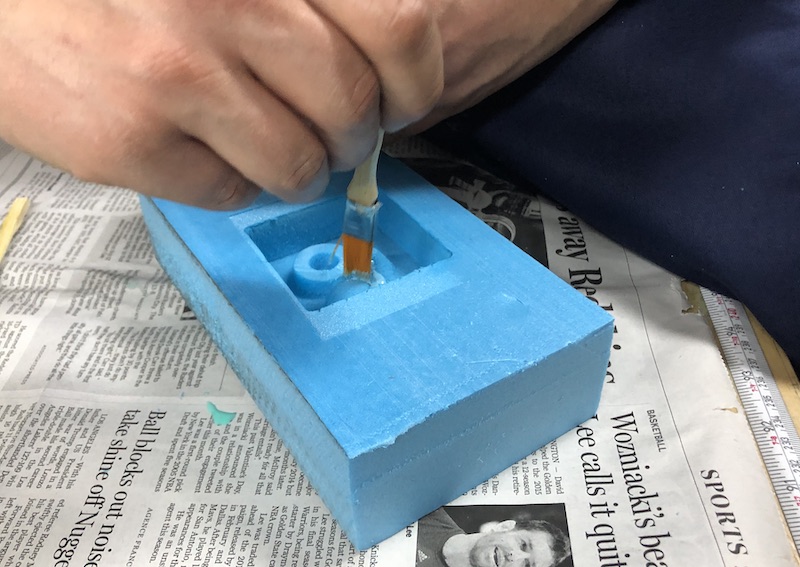
For best mold quality, do not stir in too much air while mixing, or else air bubbles get into the mold. Before pouring, we brushed the interior of the mold with a layer of rubber. While pouring, pour slowly and let the material floods the mold from the edge to the center.
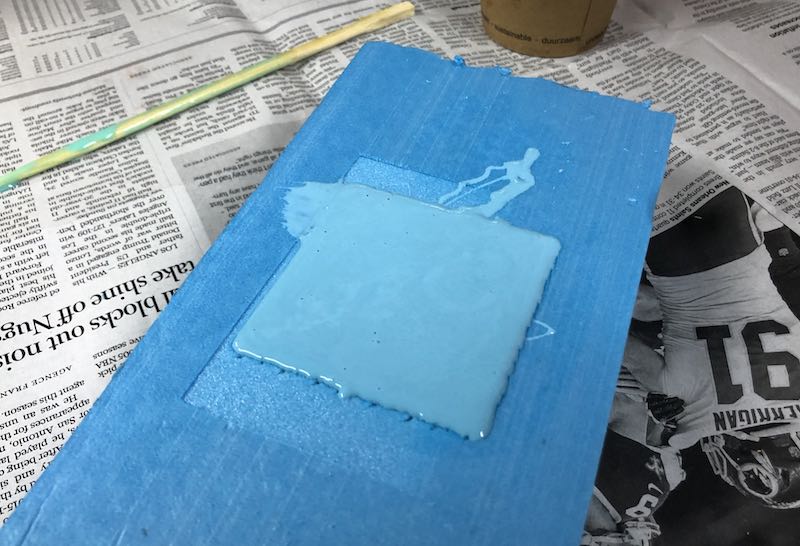
According to the datasheet, the curing time is 75 minutes. It took longer, since the material was still slightly tacky after the given curing time. Here is the result:
Vacuum-formed mold
Vacuum forming is a simple thermoforming method, in which a sheet of plastic is heated to a forming temperature, stretched onto a single-surface mold, and forced against the mold by a vacuum. Once the plastic cools down, the plastic becomes a permanent object. We have also experimented with mold making with a sheet of HDPE (High-density polyethylene) and a sheet of Styrene.
The vacuum forming machine we use at Fab Lab O is made by Saverio. It is made of a frame for fixing the plastic, a vacuum bed where the mold sits and a heating bed.
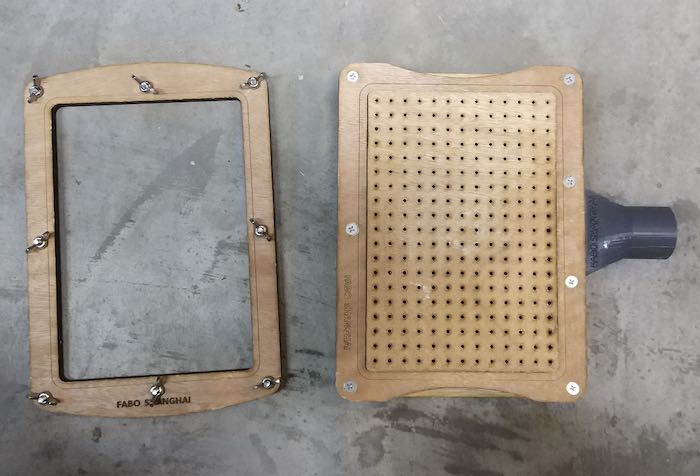
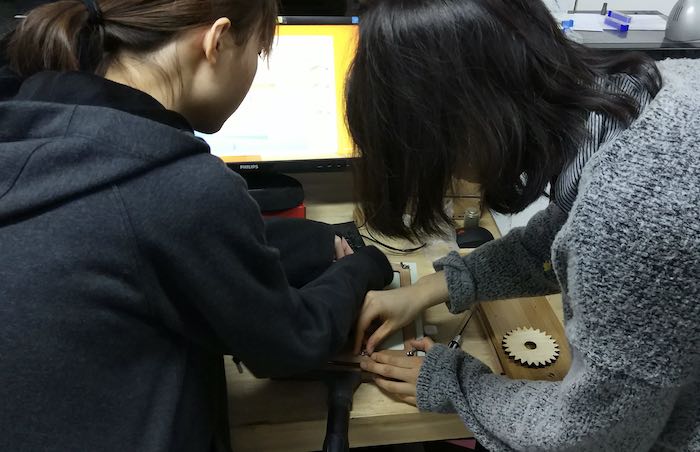
1. Fixing the plastic sheet into the frame: before fixing, make sure you have drilled holes on the plastic sheet at the position of the nuts and bolts
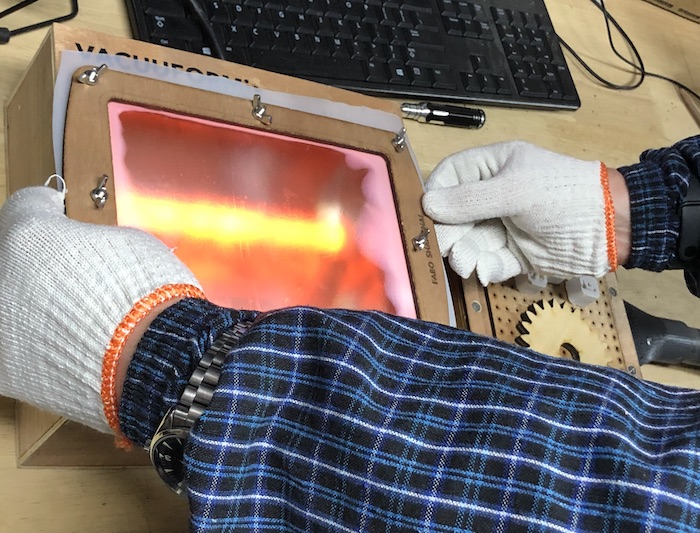
2. Heat up the plastic. With HDPE, it is ready to be vacuumed when all the areas are transparent. With Styrene, it is ready to be vacuumed when it sinks toward the center like an air-ballon.
3. Move the plastic onto the vacuum bed quickly. Once it is on the bed, turn on the vacuum. MAKE SURE YOU HAVE ANOTHER PERSON HELPING YOU TO TURN ON THE VACUUM MACHINE!
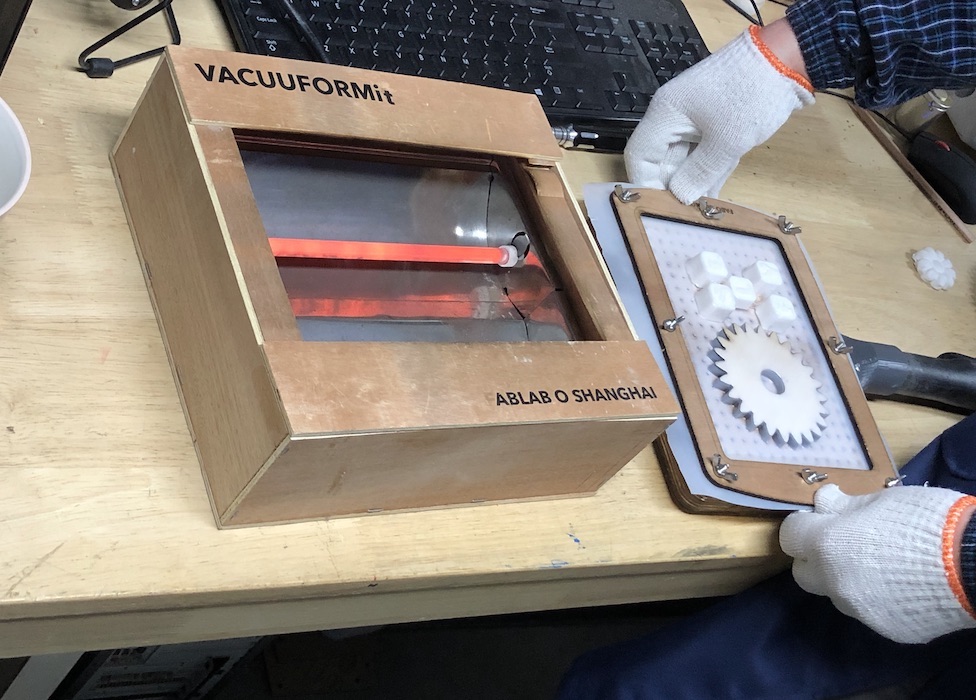
4. Once the plastic hardens, you can remove the mold away from the plastic.
Casting
Casting is a manufacturing process in which a liquid material is usually poured into a mold, which contains a hollow cavity of the desired shape, and then allowed to solidify.
Polyurethane Resin
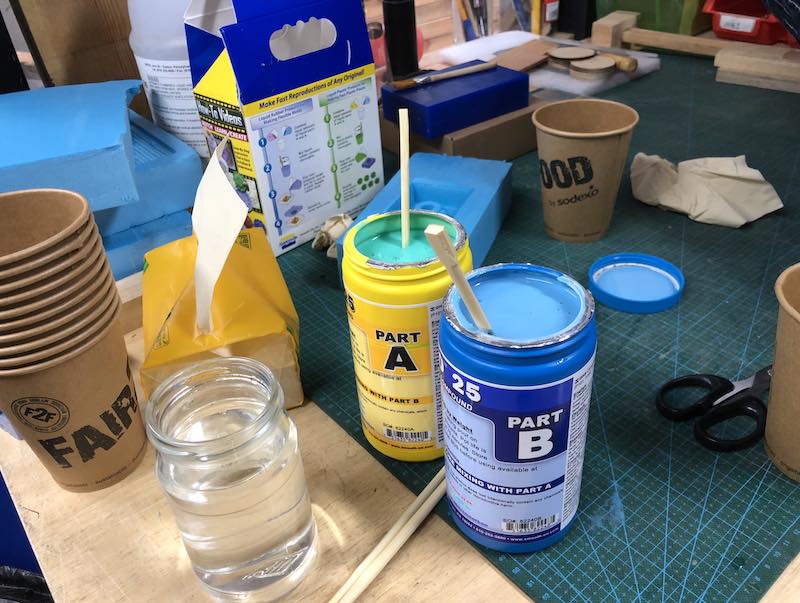
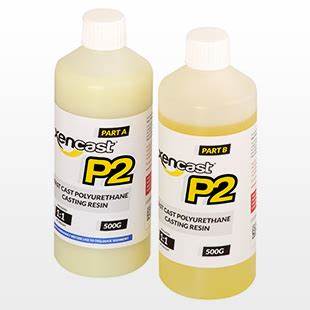
Resin is a highly viscous and solid substance of plant or synthetic origin. It is primarily used for small-scale productions such as prototypes or dentistry. It is also ideal for making toys, models, figures, jewelries. The resin we use at Fab Lab O is a P2 polyurethane resin from Xencast. The resin is activated by mixing Part A and Part B together in 1:1 weight ratio.
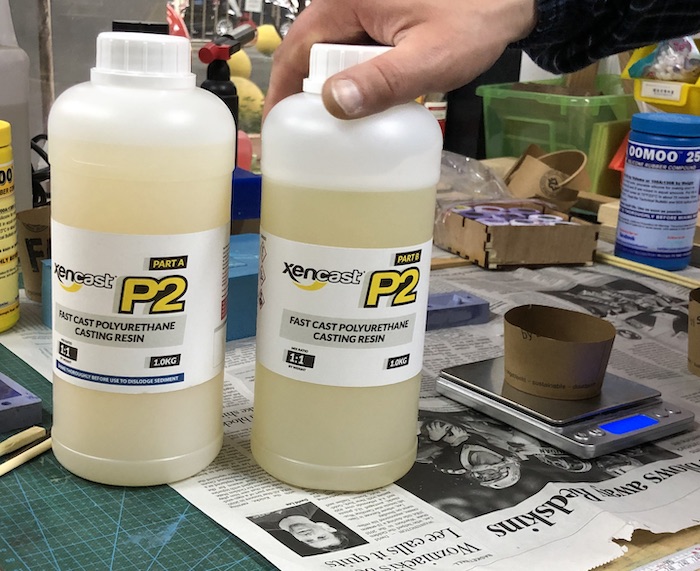
1. Measure the amount of material you need for Part A and Part B. Remember it is 1:1 by weight ratio.
2. Pour Part B into Part A and mix well.
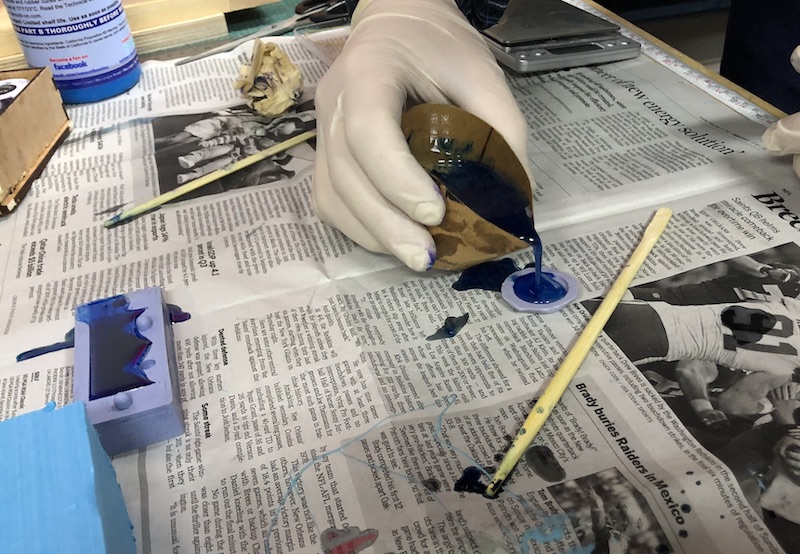
3. The resin is ready to use for pouring, Since the pot life for this fast-curing resin is only 2 minutes 15 seconds, work fast! You can also add color into the resin if needed, or let the resin dries white.
4. Curing takes about 20 minutes. However, for the casted object to stiffen, it is a good idea to leave it longer.
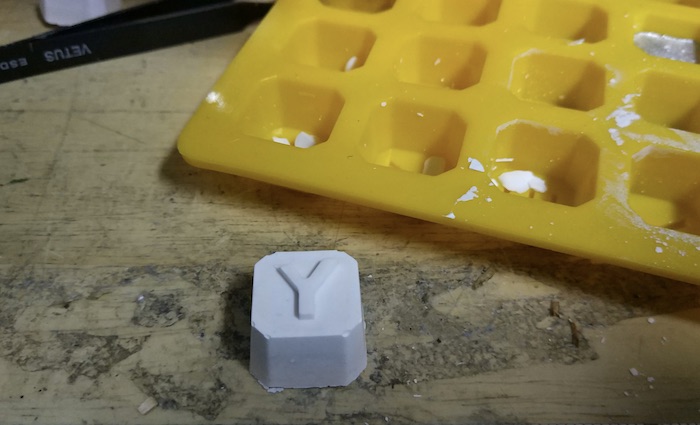
Drystone
Drystone comes in power, which is activated by adding water and mixed into a cream-like consistency (if it becomes to liquid-like, it does not solidify). Although according to the manufacture, the ratio for the powder and water is 100g (power) to 33.4g (water), Saverio suggested us to experiment with the ratio and mix it by experience.
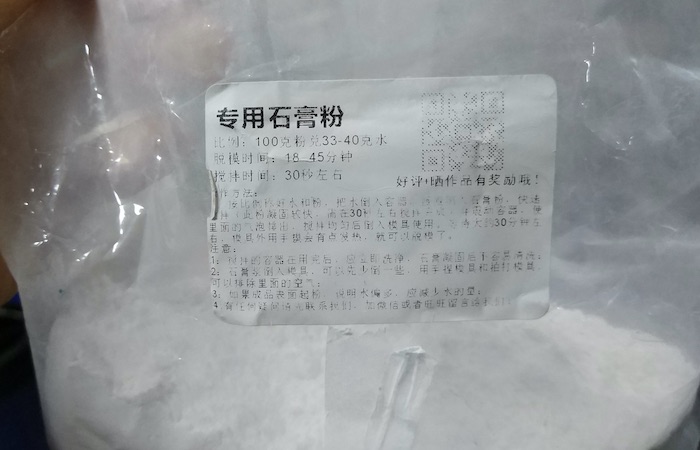
The mixture has a pot life of 30 seconds. It cures in about 40 minutes, and results in a smooth surface with many details.
Bismuth Tin Alloy
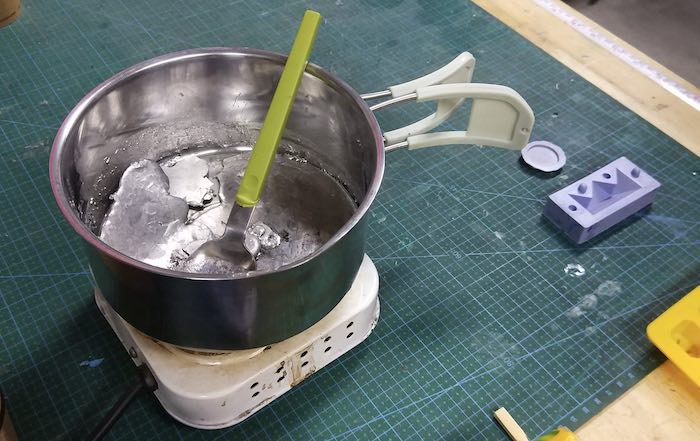
The alloy we have at Fab Lab O is a mixture between Bismuth and Tin (ratio unknown, it is a left-over material from a past student). It comes in lingot. The alloy melts at 100 degree celsius and solidifies in a few minutes, which allows us to do quick metal casting within the fab lab.
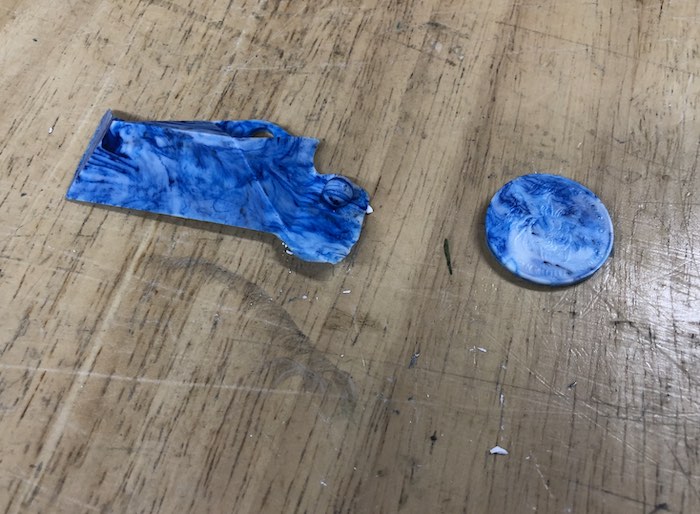
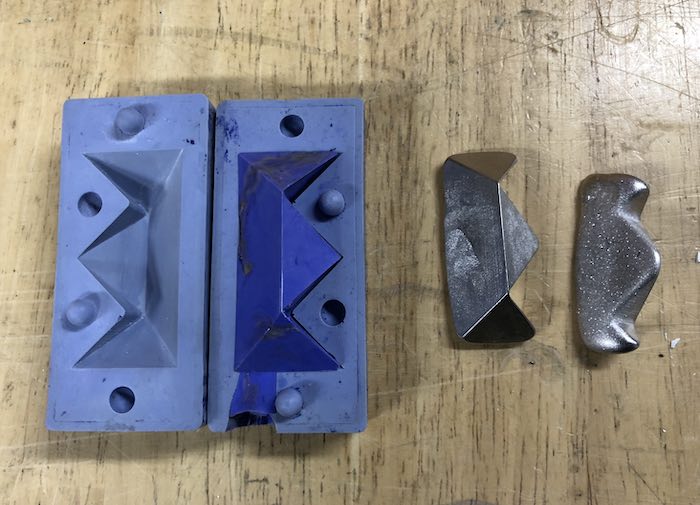
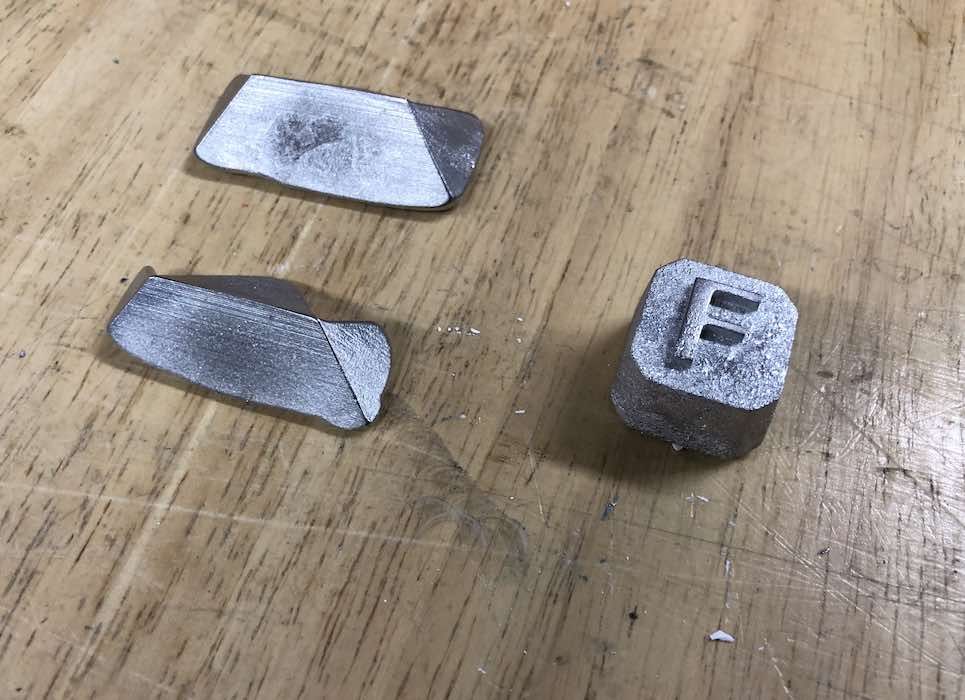
We did a few rounds of alloy casting. The surface of the casted alloy had some bubbles on the surface (bottom image - right). It became smoother when we applied baby powder to the rubber mold (bottom image - left).
Datasheet
To understand the material properties and the safety considerations for the materials we are using, we went through the datasheet that we can find of the materials we are using. Here are some of the important notes based on the datasheet.
Mix Ratio
●Mix ‘Part A’ and ‘Part B’ 1:1 by volumn.
●Mix ‘Part A’ 100 and ‘Part B’ 130 by weight.
Mixing
●Stir Part A and Part B thoroughly before dispensing. After dispensing equal amounts of Parts A and B into mixing container, mix thoroughly for 3 minutes making sure that you scrape the sides and bottom of the mixing container several times.
Safety Precautions
●Use in a properly ventilated area (“room size” ventilation). Wear safety glasses, long sleeves and rubber gloves to minimize contamination risk. Wear vinyl gloves only. Latex gloves will inhibit the cure of the rubber.
Cure Time/Demould
●75 minutes at room temperature (73°F/23°C) before demolding. Post curing the mold an additional 4 hours at 150°F (65°C) will eliminate any residual moisture and alcohol which is a by product of the condensation process and may inhibit some resins.
Using the mold
●No release agent is necessary when casting wax or gypsum. Applying a release agent prior to casting polyurethane, polyester and epoxy resins is recommended to prevent sticking and mold degradation.
Mix Ratio
●Mix ‘Part A’ and ‘Part B’ 1:1 by weight. Use digital scales.
Mixing
●Mix thoroughly by hand for at around 1 minute.
Safety Precautions
●Wear gloves and goggles and work in a well ventilated area. Always read the SDS before use.
Pot Life
●2 minutes 15 seconds. Be sure to pour your casting(s) before this time.
Cure Time/Demould
●Larger/thicker castings will heat up more and cure quicker (around 10-15 mins). Small castings or thin sections will take longer (around 20 mins).
Temperature
●Melt temperature : 240°F (115.5°C); Solidus temperature : 240°F (115.5°C)
Safety Precautious
●Use normal precautions when handling hot molten liquid solutions. Do not breathe fumes or vapor from heated material. Do not allow hot material to contact skin. Provide appropriate exhaust ventilation at places where dust is formed. Try to avoid creating dust.
●When handling product at elevated temperatures, use heat‐resistant gloves. With product at ambient temperatures, use disposable nitrile, neoprene or butyl rubber gloves with repeated or prolonged use. Prevent skin contact when handling heated material.
Individual Assignment
For my individual assignment, I want to make a double face mold. However, I also wanted to experiment with many mold making techniques. For this week, I decide to start with making simple molds to figure out mold making methods for different effects. On the side, I will be spending more time to make a design for a double face mold to cast in the next few weeks.
I made a drawing in Rhino, inspired by seasonal changes. Based on the drawing, I extracted some imageries and decided to cut these forms using the CNC machine.
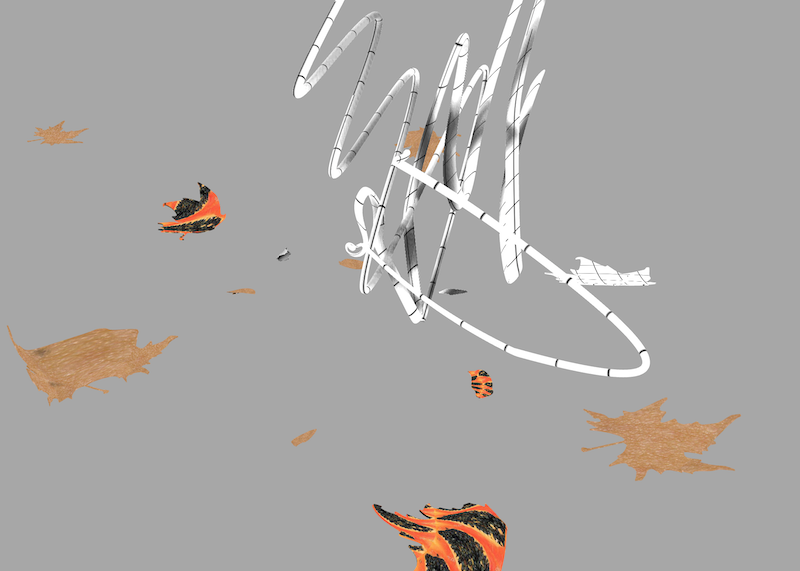
Here is the initial design of the mold in Rhino.
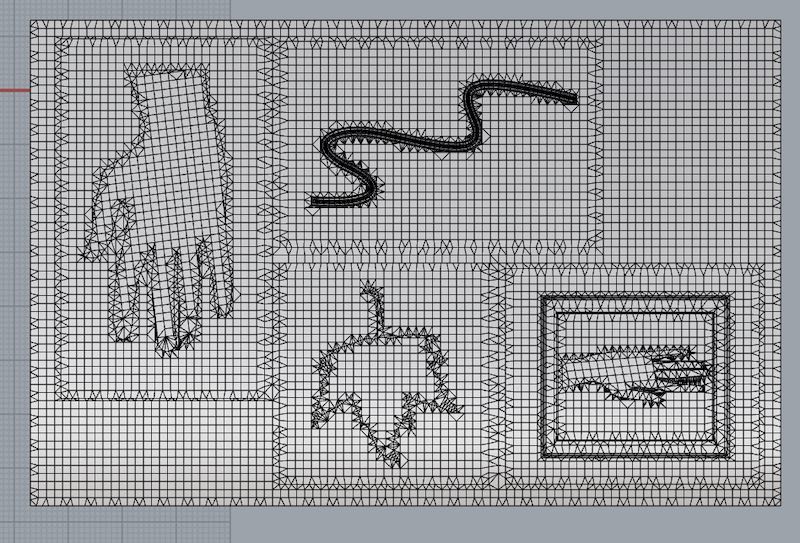
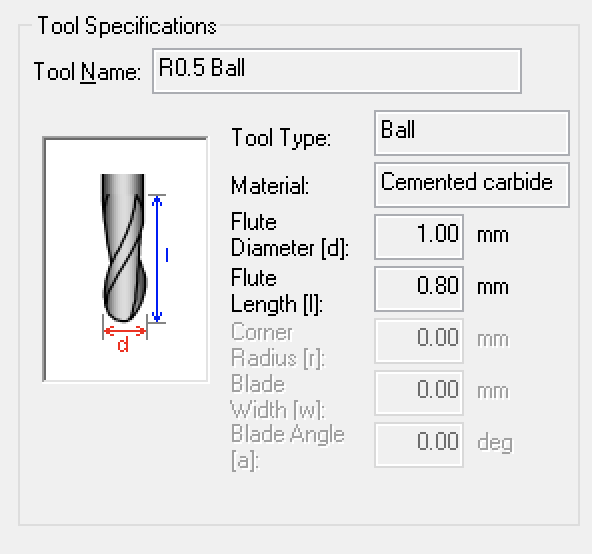
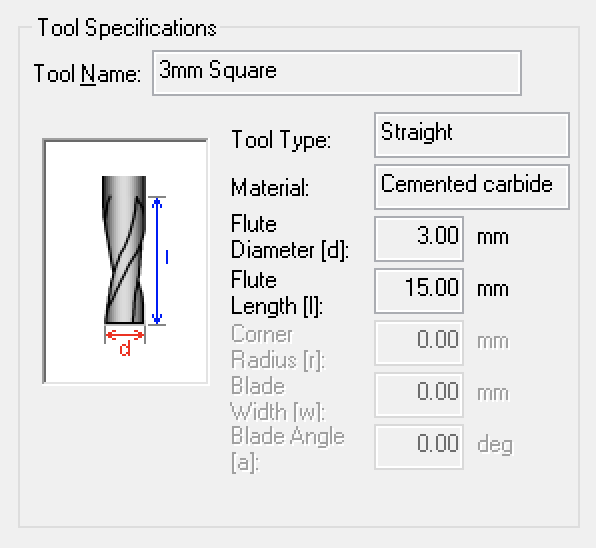
I saved the mold as a mesh file and made a path file in SRP player. I planned to use a 3mm endmill for my rough cut and a 1mm endmill for my finishing cut.
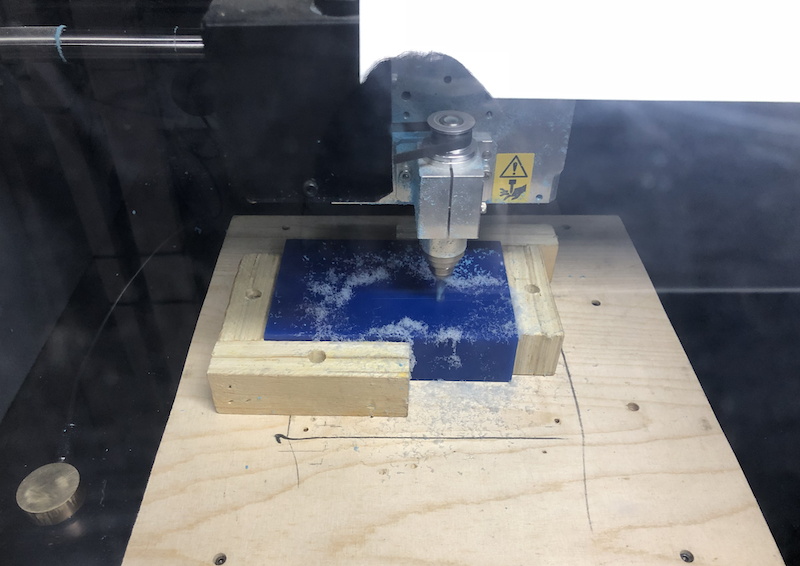
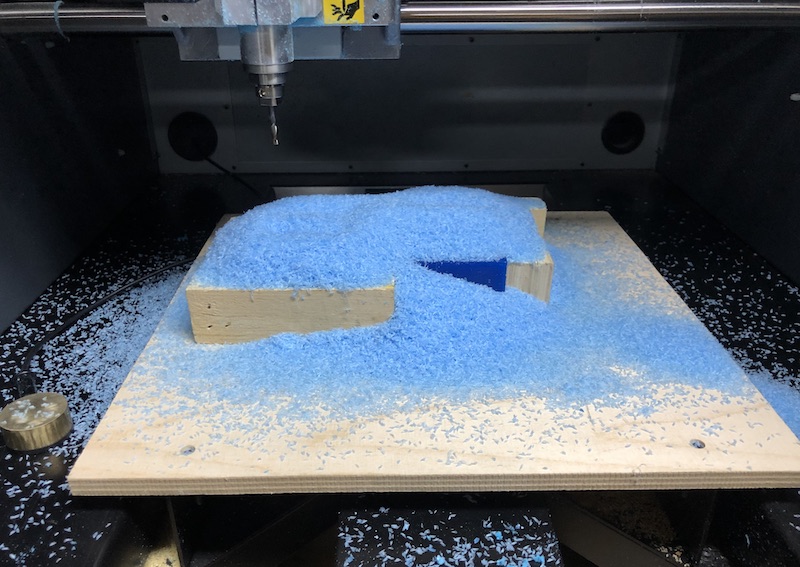
Then, I did a test rough cut on a piece of Styrofoam to find out whether the form cuts properly.
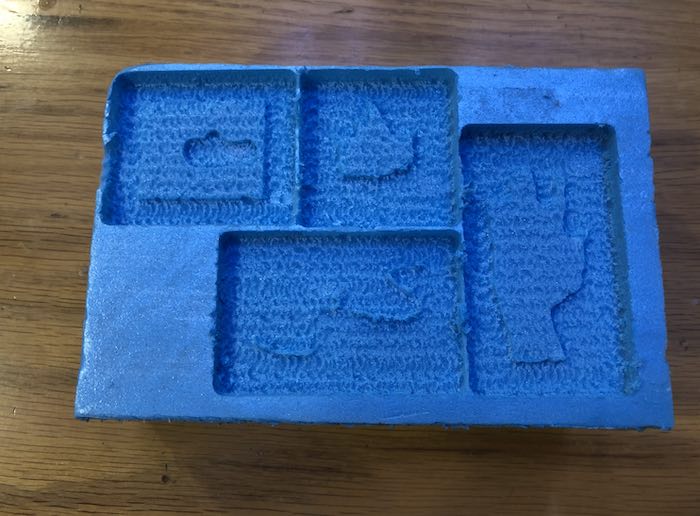
I realized the gaps between the molds are too thin. Some of the parts on the leaf and on the curve also didn’t cut. Although wax is more rigid than foam, I decide to increase the size of each form slightly, and removed one of the forms. Here is the modified design:

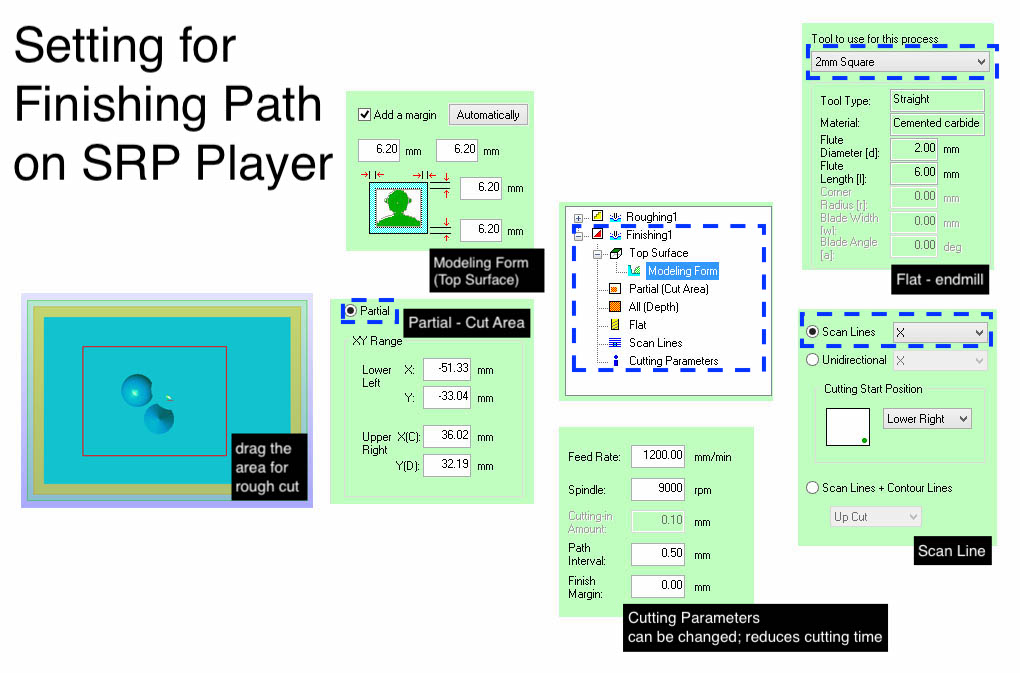
Initially, the estimated cutting time was more than ten hours. There are some important settings that I did in SRP player for speeding up my cutting:
1. Make sure to select "Patial" for all the cuts and use the red box to drag the area to be cut. Since there are three molds on the wax, I made separate finishing path files for each mold in order to give the endmill less jogging time and less cut on the not necessarily finishing cut areas like the edge of the mold.
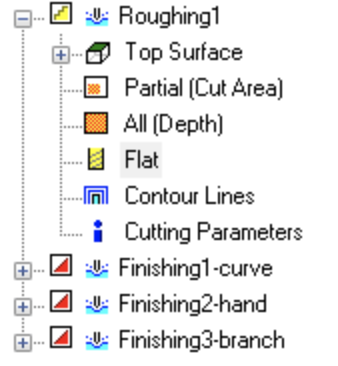

2. Under "Cutting Parameter" of the finishing cut path files, make sure the "Cutting-in Amount" and "Path Interval" is not too low. The default setting was "0.1mm", which was too fine for what I needed"
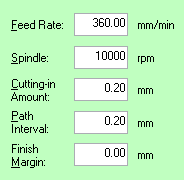
After I changed the settings, here is the estimated cutting time:
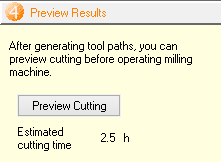
The file is ready to be sent to the CNC machine!
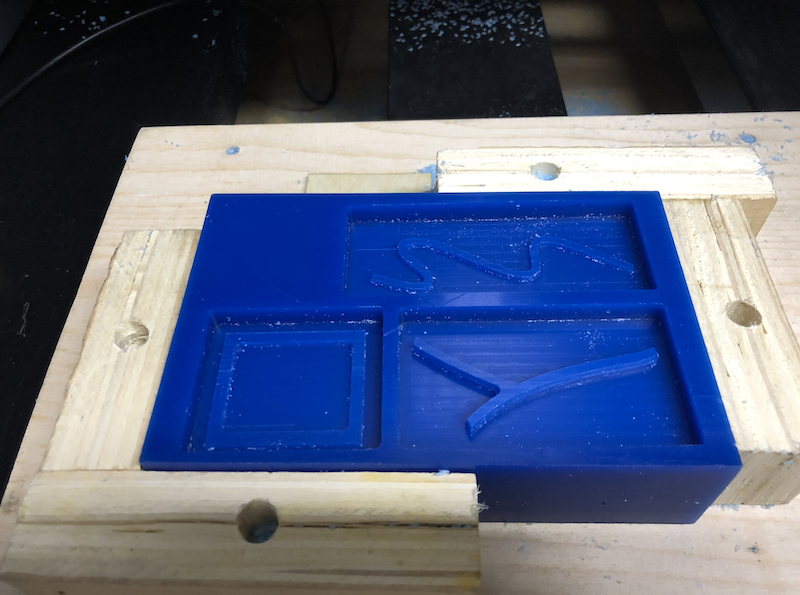
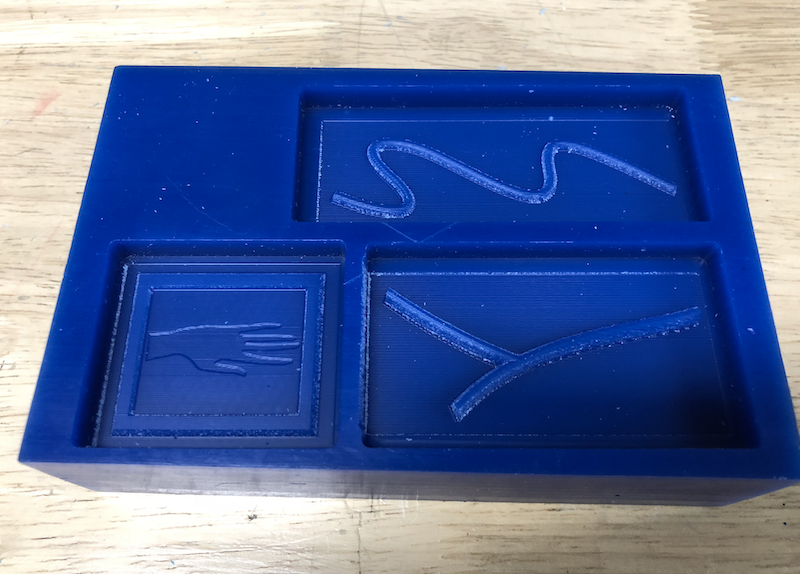
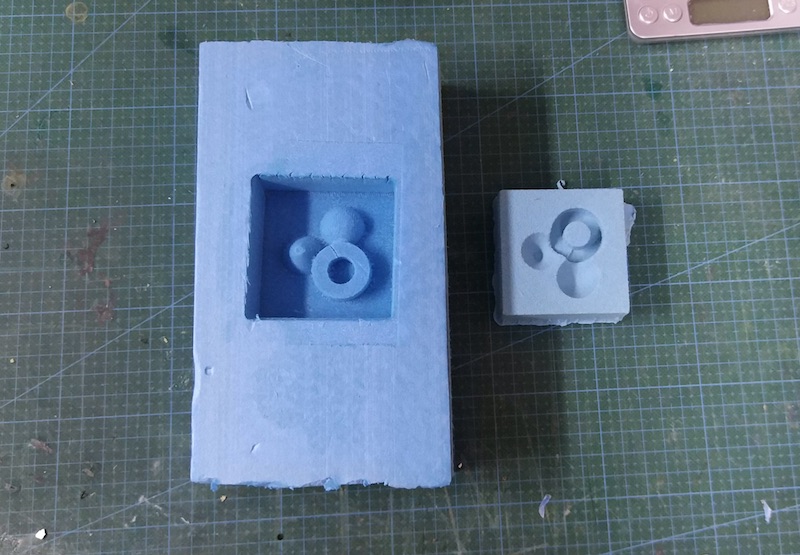
I was really surprised and satisfied by the amount of details the 1mm endmill gave to the finishing cut. I am looking forward to making more fine molds with the machinable wax!
Then, I used OOMOO 25 to make a rubber mold from the wax mold. By pouring sugar into the mold and taking the weight of the sugar, I could estimate the amount of material I will need for my mold. My classmate Pamela recommended me to use the SmoothOn online material calculator to find out the amount of material I will need for Part A and Part B:
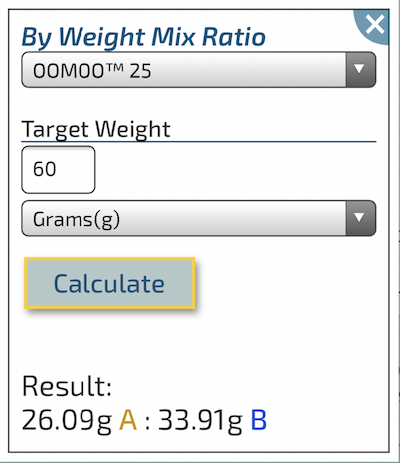
Then, I used OOMOO 25 to make a rubber mold from the wax mold. By pouring sugar into the mold and taking the weight of the sugar, I could estimate the amount of material I will need for my mold. My classmate Pamela recommended me to use the SmoothOn online material calculator to find out the amount of material I will need for Part A and Part B:
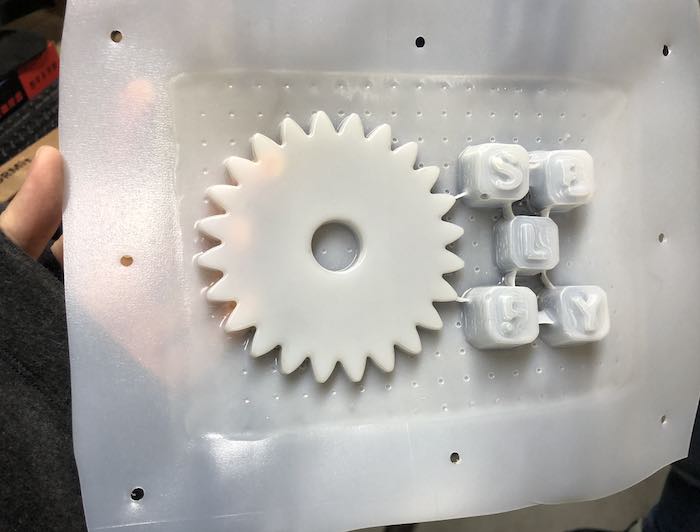
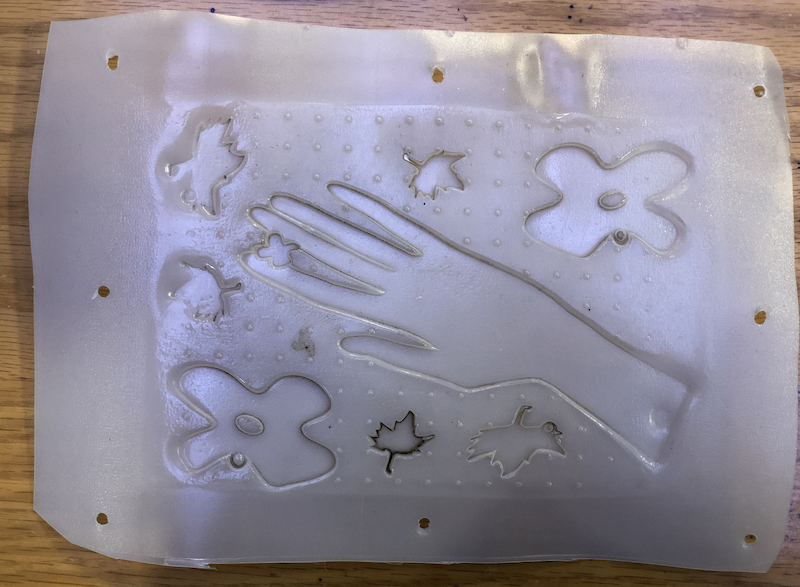
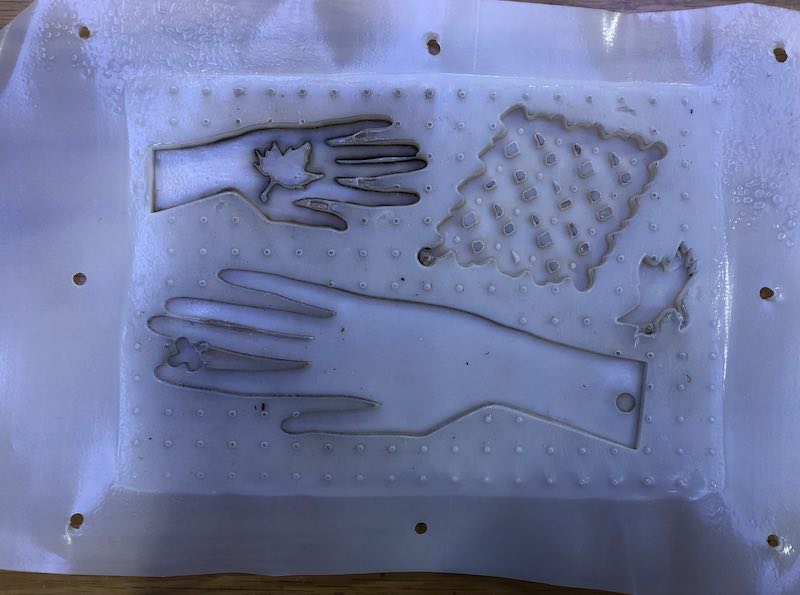
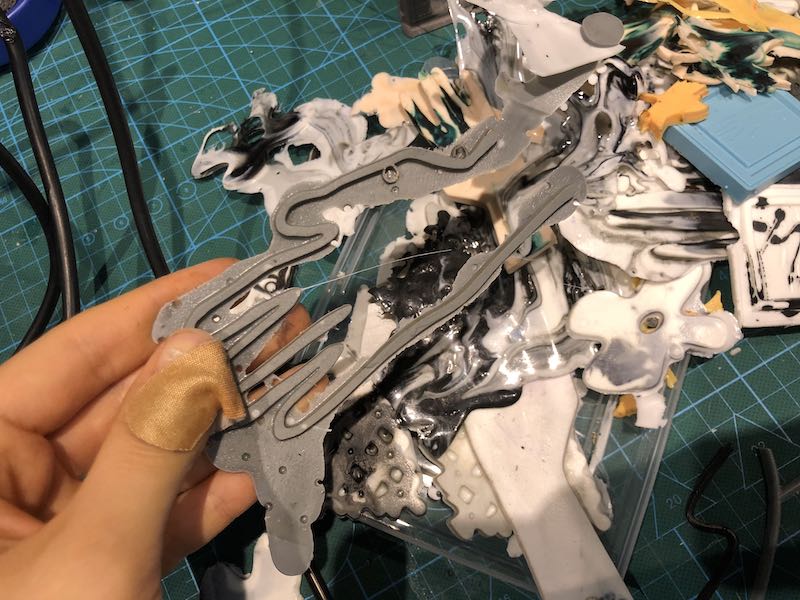
There are also some flat components that I want to cast. I decided to laser cut the pieces, and then do a vacuum forming.
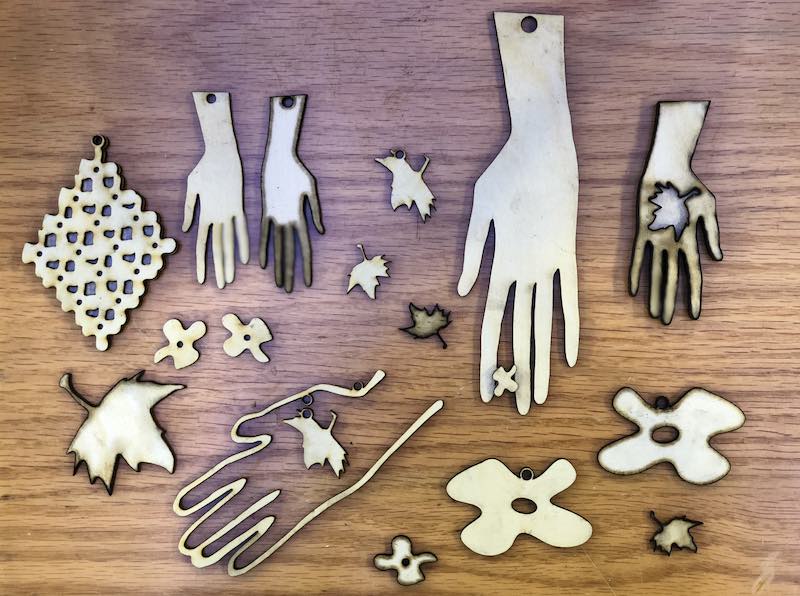

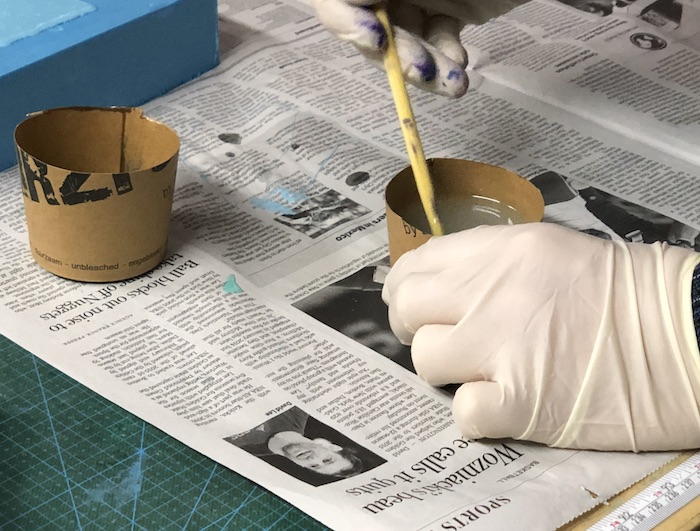
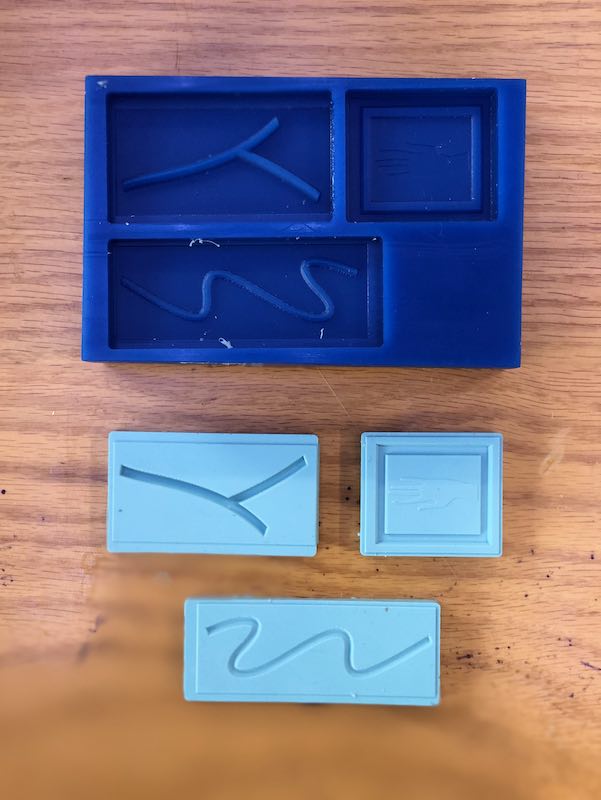
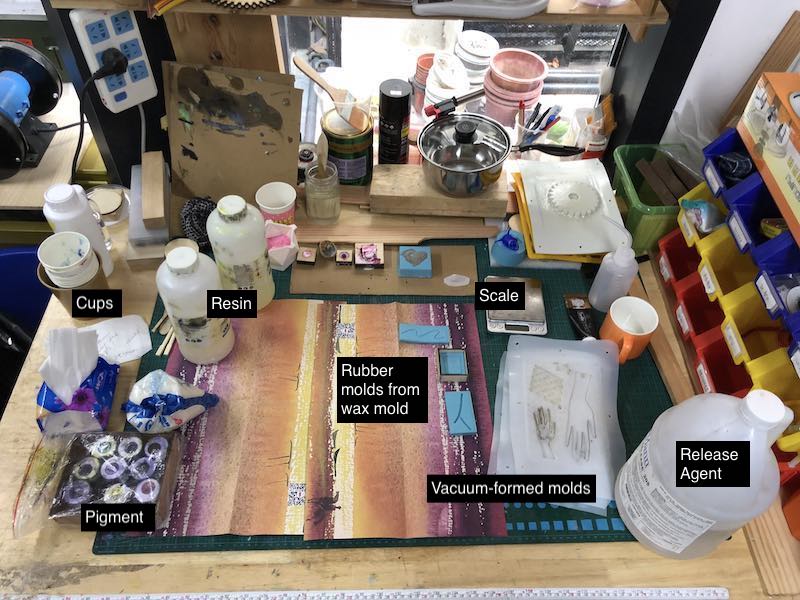
Then I casted the parts using resin. Here is my working station:
Here is how it turned out. However, I was not really happy with the result, since the vaccum formed mould is not the best option for making detailed parts. Many of the small edges broke when I tried to demould even after applying mould release. Also, I did not make my negatives thick enough, so the resin often come out of the mould when I did the pouring.
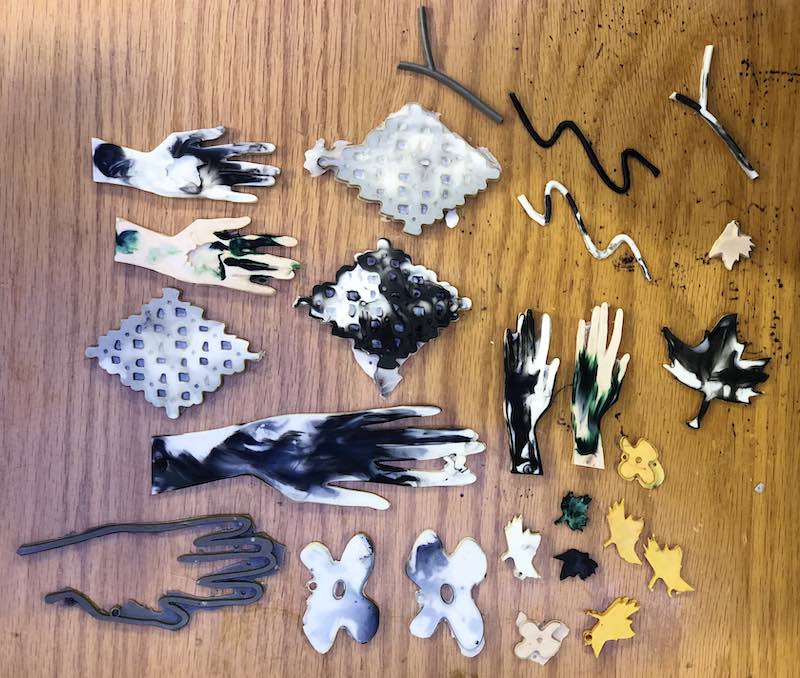
However, I did like the CNC wax mould since it takes details really well. If I have detailed components I want to make in the future, I will use this method instead of using a 3D printer. It also gives me more flexibility in material and color choice.