Sixth assignment
20 February 2019
Part I
Test the design rules for your 3D printer
Part II
Design and 3D print an object
3D scan an object
Part I
There are two parts for this week's assignment.
First part is the group assignment: - test the design rules for your 3D printer(s)
The individual assignment: - design and 3D print an object (small, few cm3, limited by printer time) that could not be made subtractively.
I will be showing first part below and second part in the next page.
3d print
What it is?
It is and additive manufacturing process that consists on layering down some thermoplastic material (most commonly used are PLA and ABS for FDM), using the information from a digital file. until a three-dimensional object is created.
The most commonly used 3D printing process is called Fused Deposition Modeling (FDM), this is the process used for this assignment and it consists on extruding material through a nozzle, diameter of the nozzle can vary but printers usually come with a 0.4 mm one.
Advantages
prototyping
3d printing is really suitable for prototyping. It is cost efficient compared to a traditional manufacturing process. It reduces time as it requires less steps, with traditional technologies, besides doing the cad files, you need to design and fabricate the molds. It is a long and very expensive process that doesn't worth it when you just need one piece. Also when prototyping you probably will want to make different variations to achieve the perfect product. The time and the money needed for that wouldn't be affordable or efficient.
complexity and design freedom
For different manufacturing process there are different restrictions in terms of form complexity. However, for 3D printing, design requirements such as draft angles, undercuts and tool access do not apply.
Customization
Since additive manufacturing technologies excel in building single (or limited quantity of parts) one at a time, they are perfectly suited for one-off production. This is an advantage that medical and dental industry has embraced for custom prosthetics implants and dental aids. Every body is different so each of this product should be made to fit each person individually.
Sustainability
Additive manufacturing methods generally only use the material needed to build a part in opposition to subtractive manufacturing methods, such as CNC milling or turning, remove a significant amount of material from an initial block, resulting in high volumes of waste material.
Limitations
Cad file required
This limitation is simple logic, no cad file not 3D print. If you don't have the knowledge to generate a 3d model in any software you have 3 options. The first one is to learn how to do it, which takes quite some time depending on your abilities. The second one is to hire someone but of course this will cost some money. And the last one is to download a file from Internet, but if you need or want something specific you may not find it.
Limited materials
While it is true that the range of materials is wider as time passes, it is true that it is mostly thermoplastics, and you have to restrict to them.
Cost
3D printing costs are really affordable now, nonetheless prices won't decrease per piece as the quantity of pieces increases as in other manufacturing processes. Mass production is not a good fit for 3D printing.
Post processing
There some 3D printers that have really good printing quality and usually you can see the layers, it can not be compared to a plastic injection molding process for example. So in order to get a really smooth finish, some post processing like sanding, painting or acetone treatment are required.
Test the design rules
3D printer
For this part we used a Zortrax M200. If you are new to this machine, it is very helpful to check the ZORTRAX 3D Printers User Guide for M Series.
This machine has a build volume of 200 x 200 x 180 mm, it uses a 1.75 mm diameter filament, in this case we are using ABS, so the machine maximum printing temperature of 290° C is enough.
Also it is important to consider the electrical specifications.
AC input:
110 V ~ 4 A 50/60 Hz
240 V ~ 1.7 A 50/60 Hz
Maximum power consumption:
200 W
This machine has a perforated plate that goes mounted on the heat bed. The holes help the material to adhere to the print bed but also make printing with raft mandatory. This means of course a little extra material each time you print something.
Setting parameters
Slicer
For this part we download a model from Thingiverse. It is a test model that allows to understand how the printer works and what are the limits when printing a model. You can check overhang, bridging, stringing, sharp-corners, tolerances, and wall thickness with it.
Z-suite is the slicer Zortrax works with, it was pretty easy to use and you can download it from here.
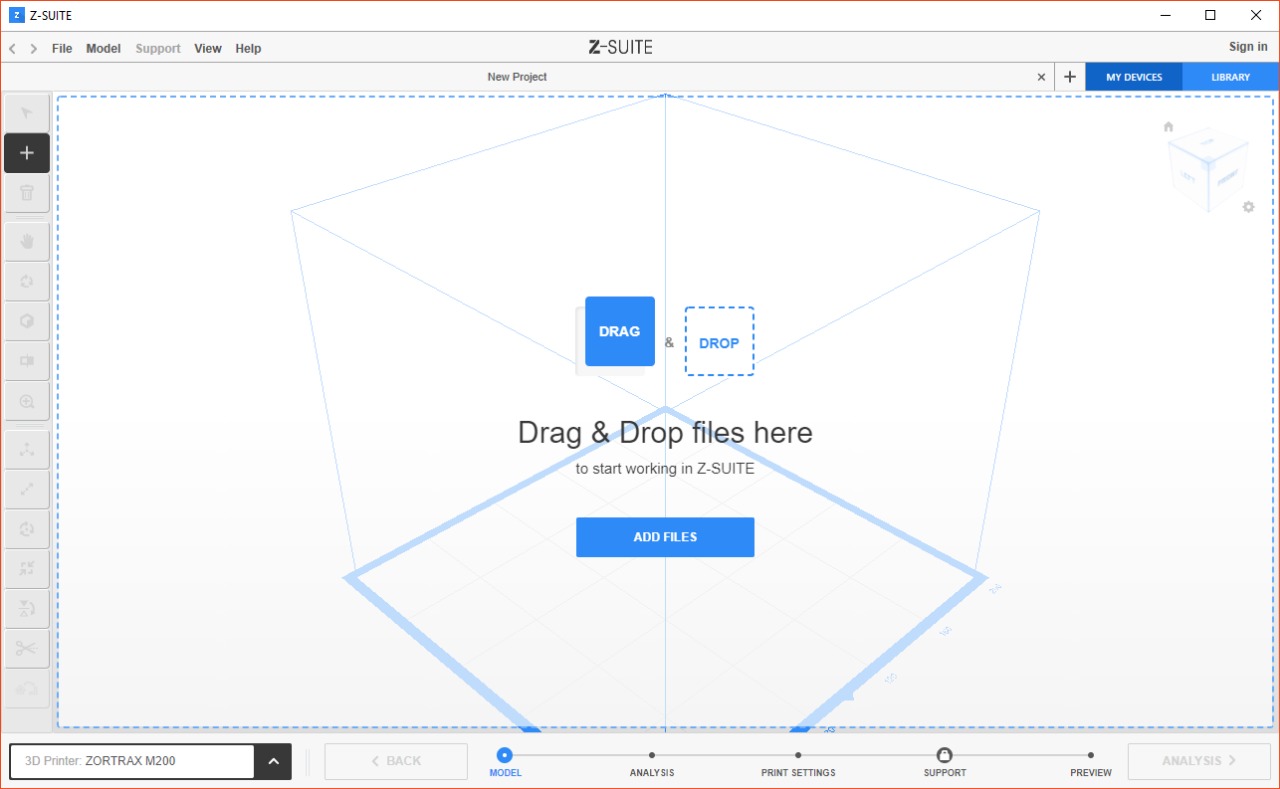
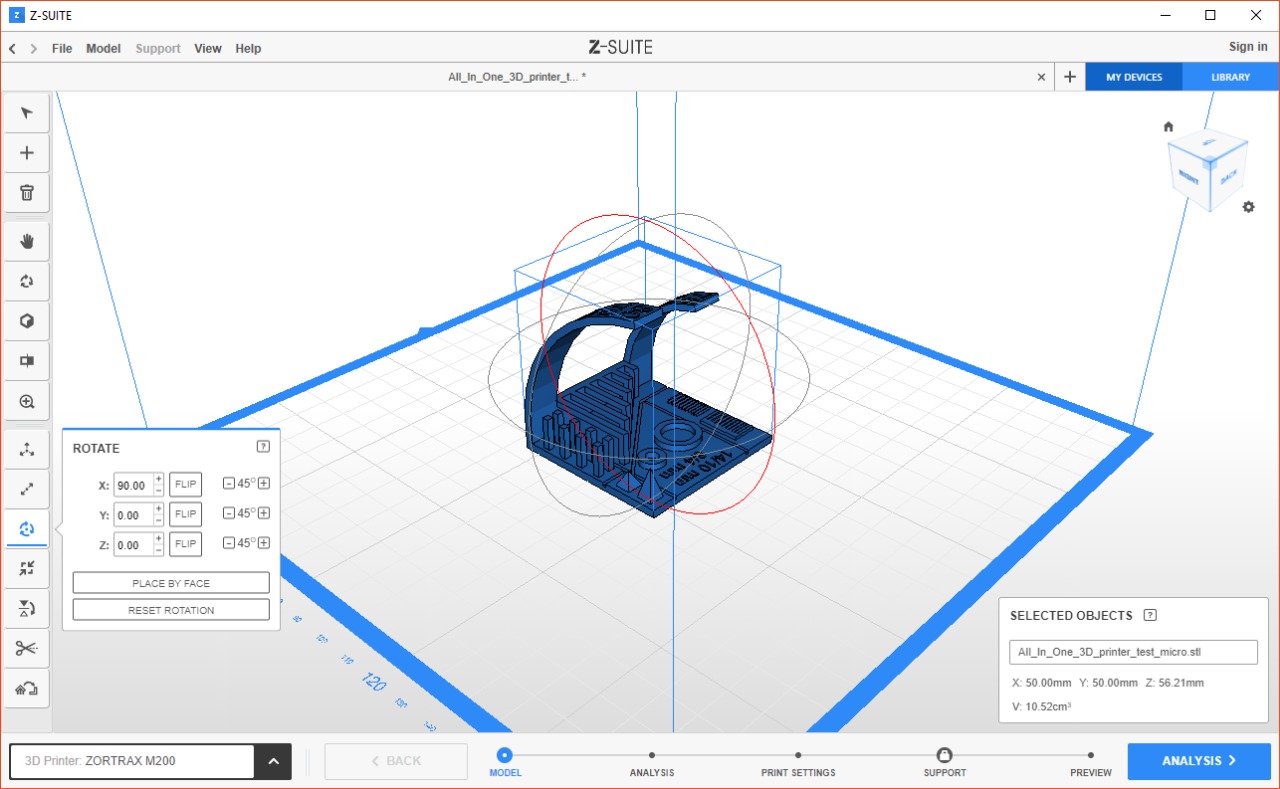
First thing we needed to do was open the file and decide the position, scale.
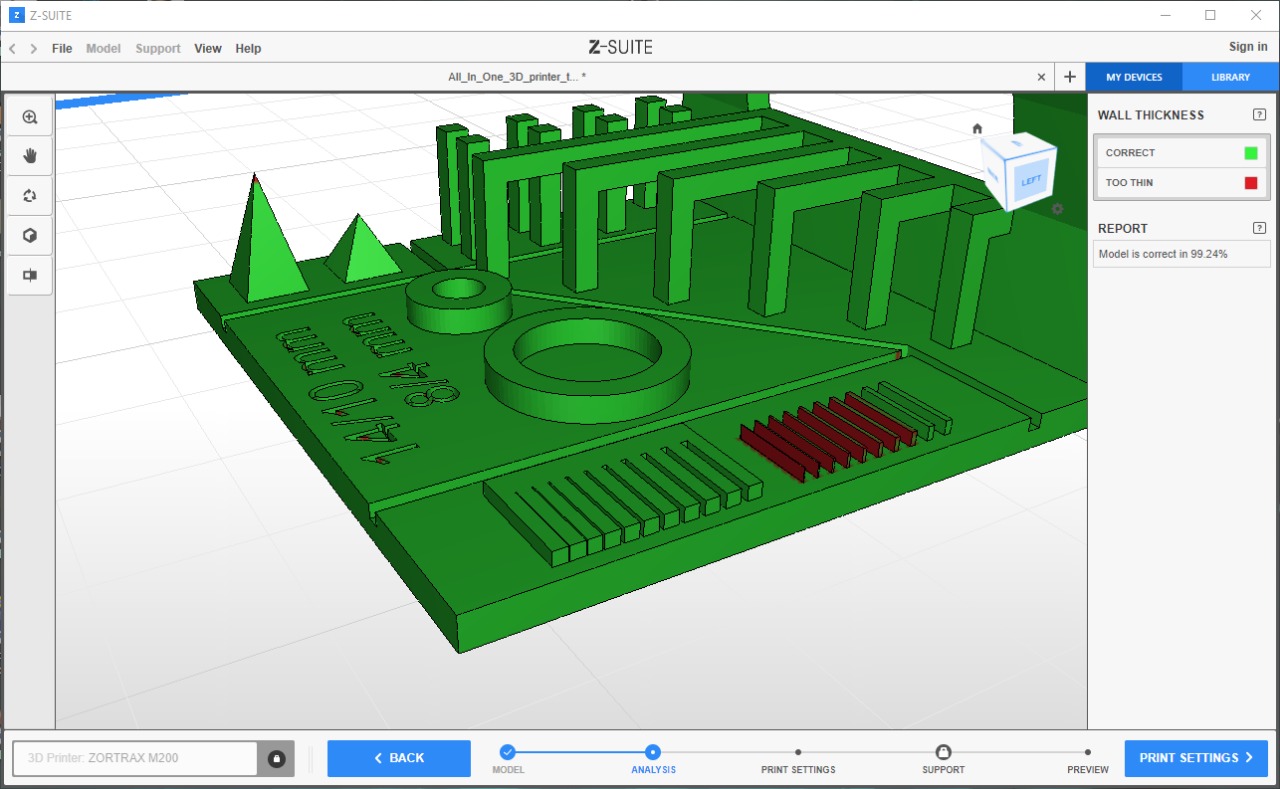
Next step was checking the walls thickness, as you can see in the next image the program shows the parts that are too thin to print. Of course this is according to the diameter of the nozzle which in this case is 0.4 mm.
Areas in red are going to print with difficulty or just won't even get recognized to be printed.
Z-suite has parameters for different materials, this time we used ABS, the temperature, printing speeds are set by default.
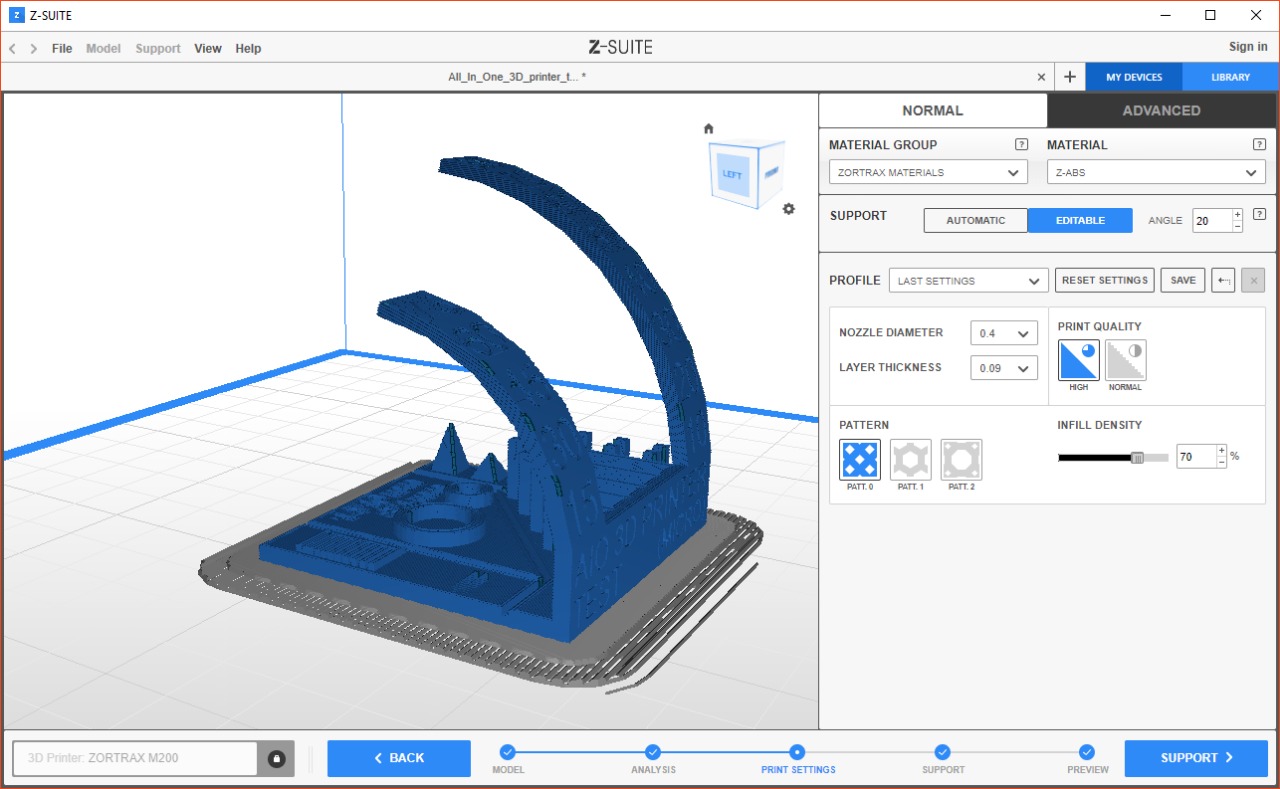
Next step would be generating the supports but, as we are testing overhang angles we omitted this part.
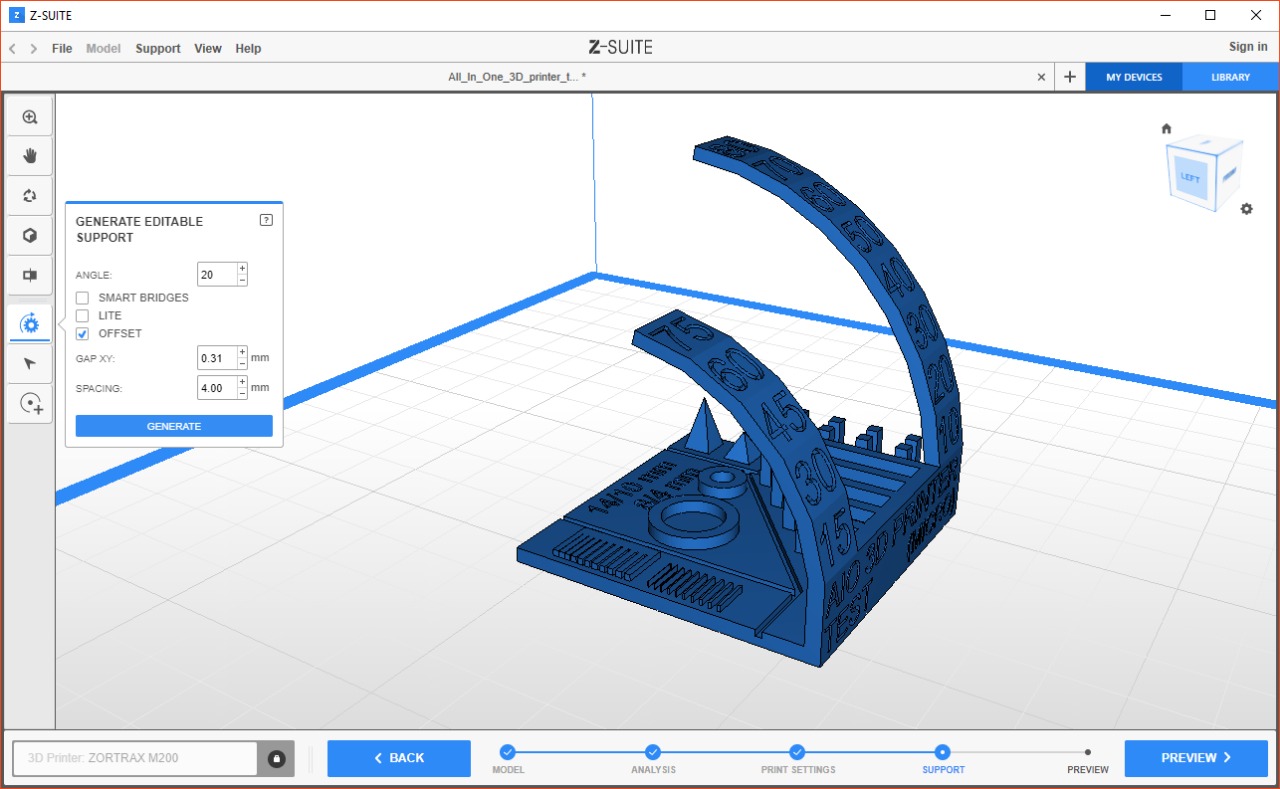
Clicking preview will start the slicing process and will show a summary of all the parameters we established before, the amount of material to be used and the print time.

After the Z-Suite has finished slicing, it is time to export file. We save the Z-code in the SD-Card (the zortrax printer have it's own SD included) and then insert it in the machine to send the print. The advantages to use an SD card instead of WIFI or a cable connected to the computer, is that information won't be interrupted if the Internet connection fails or if the computer powers off or freezes.
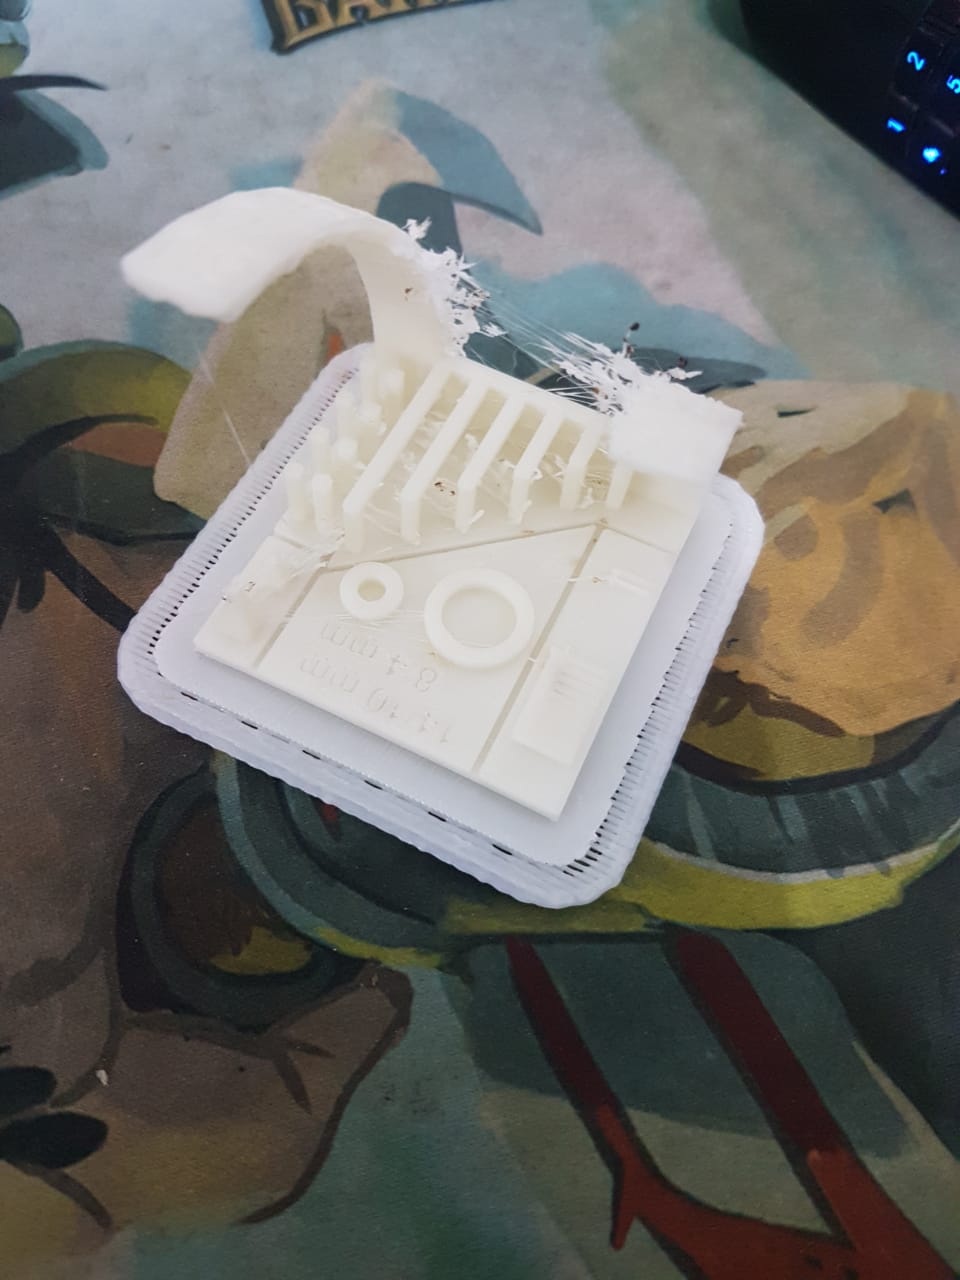
We send the print in white ABS and a little over three hours later, the result is this.
Part I
Test the design rules for your 3D printer
Part II
Design and 3D print an object
3D scan an object