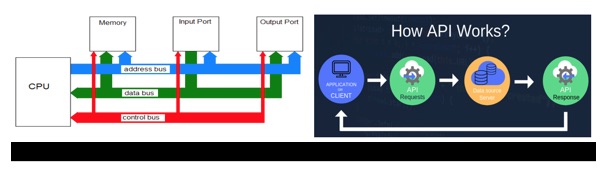
What is an API? (Application Programming Interface)
API is the acronym for Application Programming Interface, which is a software intermediary that allows two applications to talk to each other. Each time you use an app like Facebook, send an instant message, or check the weather on your phone, you’re using an API.
An application program interface (API) is a set of routines, protocols, and tools for building software applications. Basically, an API specifies how software components should interact. Additionally, APIs are used when programming graphical user interface (GUI) components.
An API can specify the interface between an application and the operating system. An API differs from an application binary interface (ABI) in that an API is source code based while an ABI is binary based. For instance, POSIX provides APIs while the Linux Standard Base provides an ABI.
It shows how software components should interact. Additionally, APIs are used when programming graphical user interface (GUI) components. A good API makes it easier to develop a program by providing all the building blocks. A programmer then puts the blocks together.
The key tool to tackling this challenge is the Application Programming Interface (API), which at its most basic acts as a door or window into a software program, allowing other programs to interact with it without the need for a developer to share its entire code.
The Design standards don't just help architects iterate on the API's design quickly, it also makes implementation faster. An important reason to design APIs is to ensure faster code.
Individual Assignment – I’ve used these applications for the Input and Output devices for my final project as shown below.
Software Program used by me – Arduino IDE – Serial Monitor.
In computer programming, an application programming interface (API) is a set of subroutine definitions, communication protocols, and tools for building software. In general terms, it is a set of clearly defined methods of communication among various components.
 Objective –
 Temperature Sensor LM35 Sensing.
Assignment 12 Output Device_files\input output devices.AVI
I have milled the same PCB design as Master and Slave which I have used during the Network and Communications Assignment for this assignment also to show the Interface and Communications.
 Design -
 Assignment 14 Network and Communications_files\new uno.brd
Video - https://youtu.be/o6eZDr7ly-0
There are a number of different approaches to develop a mobile application like stated below –
1. Native. The default way of developing on mobile is to write native code for each device – usually Java for Android and Swift for iOS.
2. Web Views.
3. React Native.
4. Flutter.
5. Progressive Web Apps.
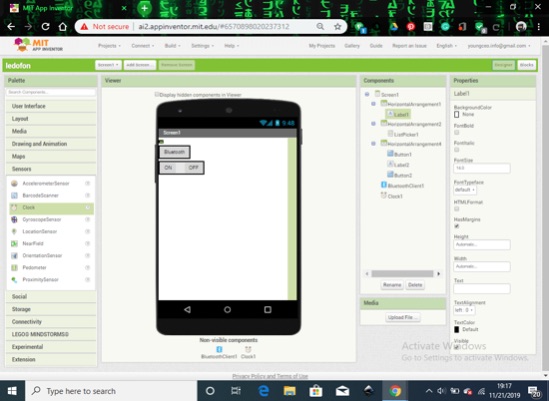
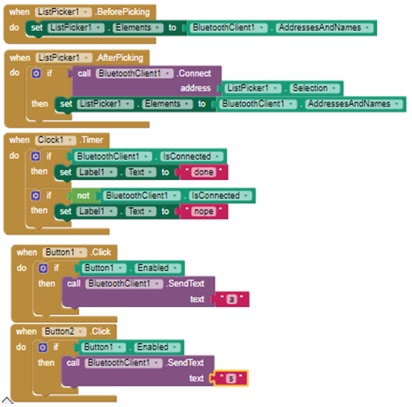
Integrate a Bluetooth Application - I have walked through the MIT App Inventor.
The Android platform includes support for the Bluetooth network stack, which allows a device to wirelessly exchange data with other Bluetooth devices. The application framework provides access to the Bluetooth functionality through the Android Bluetooth APIs.
Language – MIT App Inventor

MIT App Inventor is an intuitive, visual programming environment that allows everyone and even children to build fully functional apps for smartphones and tablets. The blocks-based tool facilitates the creation of complex, high-impact apps which helps the developer for using significantly less time than traditional programming environments. MIT App Inventor is a web application integrated development environment originally provided by Google, and now maintained by the Massachusetts Institute of Technology (MIT).
The App Inventor allows to develop applications for Android phones using a web browser and either a connected phone or emulator. The servers store your work and help you keep track your projects. You build apps by working with: The App Inventor Designer, where you can select the components for your app. Hour of Code with MIT App Inventor. App Inventor is a free, cloud-based service that allows you to make your own mobile apps using a blocks based programming language. You access App Inventor using a web browser (Chrome, Firefox, and Safari).
Introduction: Bluetooth established a very low power, short range communication link between two devices.
Go to the link ai2.appinventor.mit.edu
Designer Panel: Select the List Picker component from user interface.
Block Editor: The Blocks Editor is where you program the behavior of your app.
Step 3 of 4 of setup Instructions: Starting App Inventor
Before you begin, make sure you have access to the following things:
Internet - A Gmail account (this is how you will log in to App Inventor) | Get a free Gmail account.
Start the Designer and create a new project.
In the web browser, go to the App Inventor website at
http://beta.appinventor.mit.edu/
When the Setup is complete, you are now ready to build the app.
What I did - Blink LED On/Off Mobile Application
I wanted to show the temperature monitoring system on an Android smartphone. Temperature is sensed by a temperature sensor installed in the circuit and is sent over Bluetooth to the smartphone. An Android application is used in the smartphone to display temperature data. The system provides easy monitoring of process data on a smartphone.
Components Used -
Arduino UNO, Bluetooth module HC05, a few single stranded wires, One LED and a mobile phone.
Arduino Uno - On the transmitter side, interface LM35 temperature sensor with Arduino Uno. HC-05 Bluetooth module. HC-05 module is an easy-to-use Bluetooth Serial Port Protocol (SPP) module, designed for transparent wireless serial connection setup. Serial port Bluetooth module is a fully-qualified Bluetooth V2.0+EDR (enhanced data rate) 3Mbps modulation with complete 2.4GHz radio transceiver and baseband. It uses CSR Bluecore 04-external single-chip Bluetooth system with CMOS technology and adaptive frequency hopping feature. It can auto-connect to the last device on power by default. The default auto-pairing password is 1234.
Connections of Bluetooth Module HC05:-
1. VCC – to VCC of Arduino UNO.
2. GND – to GND of Arduino UNO.
3. RX – to digital pin 0(TX pin) of Arduino UNO.
4. TX – to digital pin 1(RX pin) of Arduino UNO.
5. Connect RX & TX pin after uploading the code.
 APK File –
Code for Bluetooth Sensor HC05 –
APK File –
Code for Bluetooth Sensor HC05 –
void setup() {
Serial.begin(9600);
pinMode(8, OUTPUT); // put your setup code here, to run once:
}
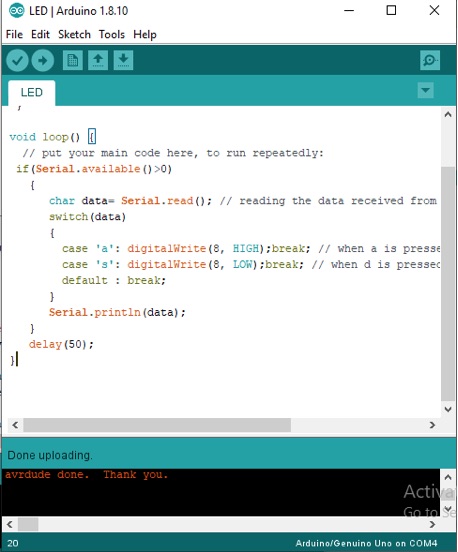
void loop() {
// put your main code here, to run repeatedly:
if(Serial.available()>0)
{
char data= Serial.read(); // reading the data received from the bluetooth module
switch(data)
{
case 'a': digitalWrite(8, HIGH);break; // when a is pressed on the app on your smart phone
case 'd': digitalWrite(8, LOW);break; // when d is pressed on the app on your smart phone
default : break;
}
Serial.println(data);
}
delay(50);
}
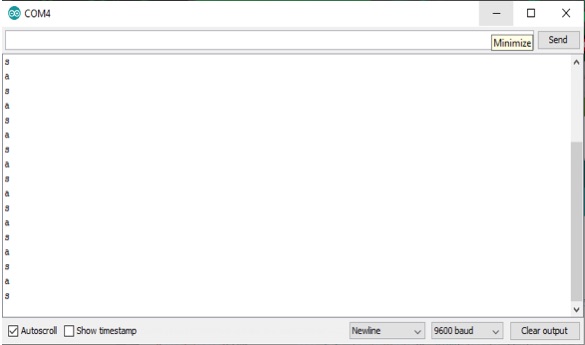
The Output value is being sent to the serial monitor.
Video - https://youtu.be/DdwDKnm41ZM
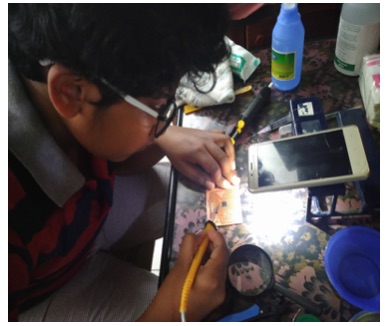
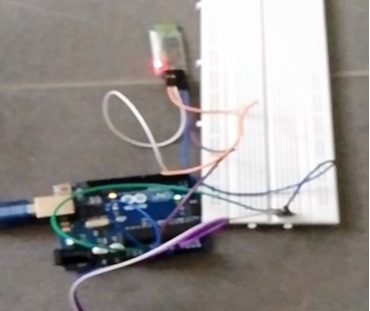
As shown in picture above, the RX and TX pins of Bluetooth module are connected to TX and RX pins of Arduino UNO, respectively. HC05 Bluetooth module sends temperature data wirelessly to the smartphone via Bluetooth. Android app receives this data and displays it.
To connect Bluetooth module with the smartphone, these two must be paired.
Software
Arduino IDE software is used to program Arduino Uno. The steps to program Arduino UNO are given below.
1. Open Arduino IDE software.
2. Select proper COM port and board from Tools menu in the IDE.
3. Compile and upload the code to the board.
Construction and testing –
1. Testing of the circuit is simple. Download and install .apk file on your smartphone.
2. After successful installation, turn on Bluetooth on your smartphone.
3. Power on the Arduino UNO.
4. Pair Bluetooth module with Android smartphone.
5. Default passkey for pairing is 1234.
6. After successful pairing, open the installed application on the smartphone.
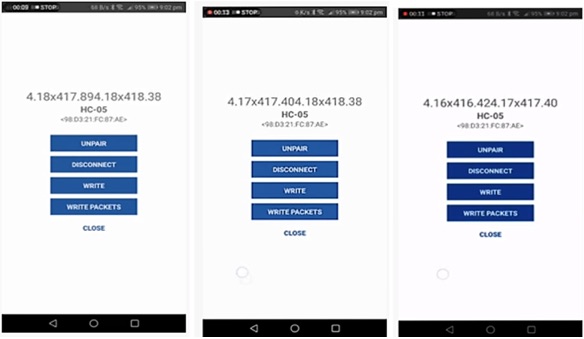
7. The paired devices list will appear.
8. Select the HC05 device from the list to connect the smartphone with HC05 Bluetooth module.
9. After successful connection, ‘connected’ message will be displayed on the main screen of the application.
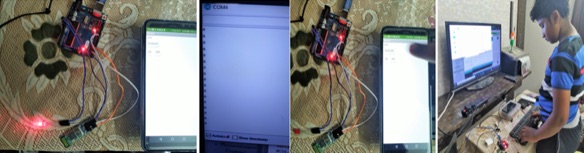
The Android app will turn the LED ON/OFF. A working screenshot as observed on the smartphone is shown in this picture.
Review – Though I have finished this assignment, I was not satisfied with my learning outcome, hence on second thoughts, I chose React Native to do this assignment - React is a declarative, efficient, and flexible JavaScript library for building user interfaces.
Project Requirement: Create a mobile application which shows the temperature reading sent by the Bluetooth module using Arduino, lm35 and hc05.
Tools:
Hardware - Arduino, HC05 Bluetooth module and LM35, temperature sensor and Custom made PCB’s for the task.
Software - React Native mobile application.
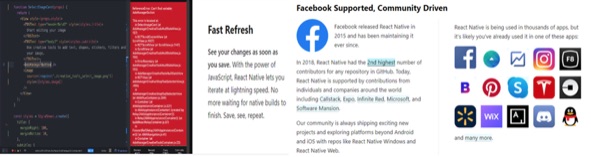
React Native is an open-source mobile application framework created by Facebook. It is maintained by Facebook and a community of
individual developers and companies. React can be used as a base in the development of single-page or mobile applications, as it is optimal for fetching rapidly changing data that needs to be recorded.
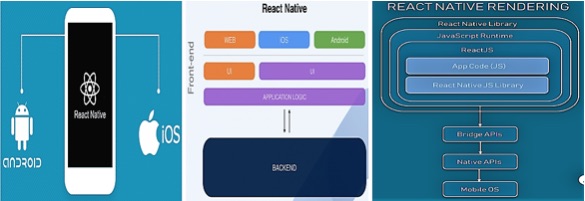 React native
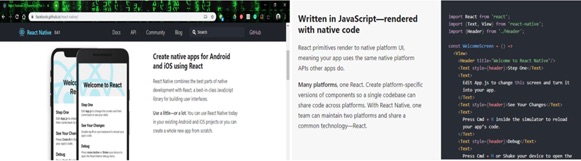
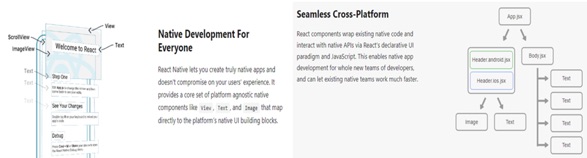
 is used to develop applications for android, iOS, Web and UWP by enabling developers to use react along with native platform capabilities. Furthermore, an incomplete port for Qt also exists. React Native combines the best parts of native development with React, a best-in-class JavaScript library for building user interfaces. Use a little—or a lot. You can use React Native today in your existing Android and iOS projects or you can create a whole new app from scratch.
It is Written in JavaScript and rendered with Native Code. React primitives render to Native Platform UI, meaning that the app uses the same Native Platform API’s as the other Apps do. Many Platforms, One React. Create a Platform-specific version of components so a single codebase can share a code across platforms. With React Native, one team can maintain two platforms and share a common technology – React. It goes like this –
Mobile app setup:
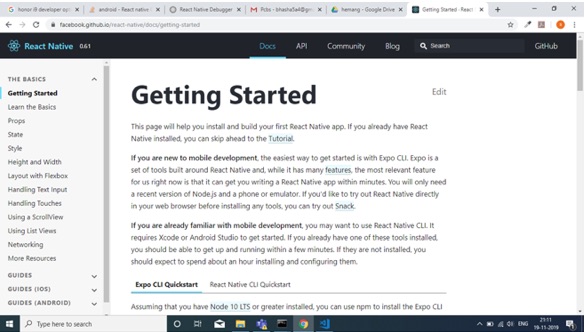
• Installed react- native app development setup following:
https://facebook.github.io/react-native/docs/getting-started
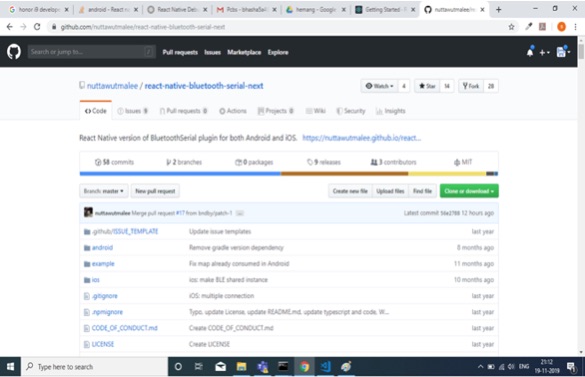
• Installed Bluetooth module example from here:
https://github.com/nuttawutmalee/react-native-bluetooth-serial-next
• Followed the documentation mentioned in the above links and did changes to the application.
• Modified UI and added my own pieces of code.
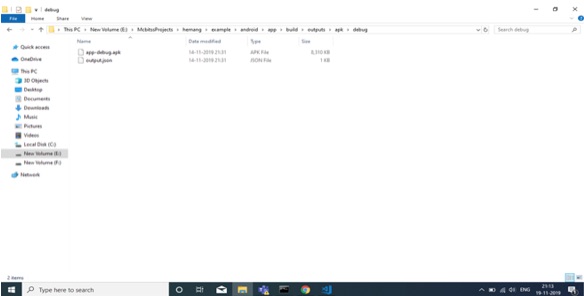
• Built the application in APK format.
 Procedure to be followed –
 How to build an App with React Native
Register for API key.
https://api.org/register
2. Follow the link to register for an API key.
3. Getting Started. Use the Create React Native App
$ npm install -g create-react-native-app
$ npm install -g expo-cli
or
$ yarn global add create-react-native-app
$ yarn global add expo-cli
4. If this is your first time creating a React Native app, make sure you have Node, npm or yarn installed.
5. Now that CRNA is installed, we can create a new project by running the command below:
$ create-react-native-app-rn-app
$ cd news-rn-app/
$ npm install
6. Install Dependencies.
$ yarn add redux react-redux redux-thunk
$ yarn add react-native-router-flux
$ yarn add react-native-elements
$ yarn add react-native-size-matters
$ yarn add axios
$ yarn add moment
Or
$ yarn add redux react-redux redux-thunk react-native-router-flux react-native-elements react-native-size-matters axios moment
7. Build React Native from CLI.
8. Essentially, react-native init AwesomeProject
9. Run the command below to test the app. This will start a development server for you, and print a QR code in your terminal.
If you are using the Expo app, you can scan the QR code.
$ expo start
10. Create Folder Structure, directory by feature/module. The project root creates an app folder, in that folder, we will create
6 additional folders, assets, config, components, modules, redux and styles.
Add a folder in the root called “app”
Move the App.js file into the root of app
Update the index.js import statement to import App from ./app/App.js
Create folders inside app
Assets — we have two folders in this directory, images & animations.
Components — this is where you’ll place all your shared components.
Config — we set up our app’s color scheme in a colors.js file to keep things consistent.
Screens — these are our main views.
Make sure you are in the project root
$ mkdir app && cd app
$ mkdir assets config components modules redux styles
Config
$ cd config && touch constants.js routes.js request.js && cd ..
Redux
$ cd redux && touch rootReducer.js store.js && cd ..
Styles
$ cd styles && touch theme.js && cd ..
Or
$ mkdir app && cd app && mkdir assets config components modules redux styles && cd config && touch constants.js routes.js request.js && cd .. && cd redux && touch rootReducer.js store.js && cd .. && cd styles && touch theme.js && cd ..
11. Screens
In our app, we have five main screens
Bookcase
Explore
Add Book
Lists
Profile
To get started, we’ll stub those out with placeholder text:
12. Config
Redux - We will configure the app for Redux. We will set up the Root Reducer and Store.
Reducer - The reducers are the in charge of updating the state of our app. In the redux folder, update the rootReducer.js file. In this file, we will import the reducers from our modules and use redux combine Reducers function to merge them together into a single state object that we will later use to create our redux store.
// Description: Root Reducer
import { combineReducers } from 'redux';
// Combine all the reducers
const rootReducer = combineReducers({ });
export default rootReducer;
13. Store - In the redux folder, create the store.js file. In this file we will create our redux store by importing our root reducer and injecting our store enhancers, i.e. Redux Thunk.
// Description: Redux Store Configuration
import { createStore, applyMiddleware, compose } from 'redux';
import thunk from 'redux-thunk';
import reducers from './rootReducer'; //Import the root reducer
const enhancer = compose(applyMiddleware(thunk));
export default createStore(reducers, enhancer);
14. Routes - In the app/config folder, update the routes.js file. In this file we will set up our Router and Scenes.
15. Entry Point - The App.js file is the entry point into our app. In this file, we import our routes and store. We then connect our provider to our store which will let our app scenes access our app’s state and then wrap our app’s Router with our Provider.
16. Theme - Last but not least, we will create the theme file, in this file we will declare our font sizes, colors, font family and more. In the styles folder, update the theme.js file.
17. Navigation - Once we have those five screens set up, we can get the first part of our navigation created — the tab navigation at the bottom of the screen. We’re going to be using the React Navigation library. We’ll add a router.js file to the root of our app folder and then install a couple of libraries:
npm install react-navigation --save
React Native Elements for icons & such. Follow the react-native-elements install instructions given on the website.
18. Bookcase
19. Adding Books
20. You can and should break everything possible into shareable components. React Native’s Flat List component. This is a really neat component that works out of the box to loop through and display data. The reason it’s so neat is because it has a ton of functionality built in, things like: scroll loading, pull to refresh, etc. Finally = bookcase.js file
21. We need to add another file, BookcaseItem.js which is what our _renderItem function is rendering.
22. Now we will have books. We need to add another file, BookcaseItem.js which is what our _renderItem function is rendering.
23. Add another feature to add an EditBook.js to our app/screens directory with some bare bones placeholder text and a back button. At this point, we’re just verifying its work.
24. In our router.js file we’re going to add a Stack Navigator. I visualize the Tab Navigator like five poker cards laying down on a table horizontally next to each other. When you add a Stack Navigator, you’re essentially laying cards on top of one of those five cards, adding depth.
25. Now we have a simple list of books, we’re able to click onto it, see the edit page, and go back to the list.
26. Run the command below to test the app. This will start a development server for you. Download the Expo app to test.
$ expo start
https://medium.com/mesan-digital/how-to-build-a-news-app-with-react-native-part-2-home-module-2308c9a6b6a1
Check out this link for more information.
How I made this Application –
1. Ideated the mobile application.
2. Listed out the mobile platforms and devices to be supported.
4. Chose the Approach to develop the app from Native, Web or Hybrid.
5. Designed the app.
6. Developed a Prototype.
7. Integrated the appropriate analytics tools.
8. Identified the beta testers and integrated the relevant ones.
9. Eliminated the bugs, released and deployed the app.
10. Captured the metrics.

 Working link - https://youtu.be/6RQUnbCw1Fs
APK File –
My Set Up -
Working link - https://youtu.be/6RQUnbCw1Fs
APK File –
My Set Up -
 My Comprehension –
 I have understood that with Create React Native App, there's no need to use X code or Android Studio, and you can develop for your iOS device using Linux or Windows. This is accomplished using the Expo app, which loads and runs CRNA projects written in pure JavaScript without compiling any native code. This is an important pattern to understand since it’s the same one I have used for Explore & Reading Lists areas. This is just the start, but I’ve got the beginnings of the app set up and ready to really start adding functionality. There are many advantages to using CRNA, one being that it allowed me to start a project without installing or configuring any tools to build native code — no Xcode or Android Studio installation is required and can install the Expo app on my iOS or Android phone for testing.
Group Assignment – Compare as many tools as possible. I have teamed up with Anand Kumar Verma and Jaideep Sarode for this assignment. We made a Comparison of different process of Interfacing about the serial communication of the Input board via FTDI cable - sending and receiving data by TX and RX pin of the FTDI. After that we visualized through our own design GUI platform via calling only the "COM PORT NAME". We repeated this exercise in Bluetooth communication where it maintained the serial communication.
Later we tried figuring out the tools as listed below which seemed most popular.
Slack –
MIT App Inventor
monday.com
Gmelius
Ryver
Zoho Cliq
Fleep
Slenke
Flock
Rocket Chat
Teamwork Chat
Scratch
Processing
Other Communication Software You Might Find Useful too-
Workplace
Microsoft Teams
Troop Messenger
Yeymo
Gridle
Highside
Mattermost
Moxtra
Blink
Azendoo
Jostle
Glip
Samepage
Stackfield
Comindwork
Pyrus
Chanty
Communication Tools Selection Criteria-
I found this link interesting for Time Tracking Tools, Communication Tools, Design Tools, Documentation Tools, File Sharing Tools, Project Management Tools and Software Tools.
https://biz30.timedoctor.com/online-collaboration-tools/#communication
The User interfaces are composed of one or more layers including a human-machine interface (HMI) interfaces machines with physical input hardware such a keyboards, mice, game pads and output hardware such as computer monitors, speakers, and printers. A device that implements a HMI is called a human interface device (HID). Other terms for human-machine interfaces are man–machine interface (MMI) and when the machine in question is a computer human–computer interface. Additional UI layers may interact with one or more human sense, including: tactile UI (touch), visual UI (sight), auditory UI (sound), olfactory UI (smell), equilibrial UI (balance), and gustatory UI (taste). Composite user interfaces (CUI) are UIs that interact with two or more senses. The most common CUI is a graphical user interface (GUI), which is composed of a tactile UI and a visual UI capable of displaying graphics.
Learning Outcome – I have understood that the merit in choice lies in selecting the Right Tool based upon the User Interface-UI, Usability, Features and Functionality, Messaging, Threading, Notifications, Video Calling, Screen Sharing, Integrations and should be Value for Money. I have realized that the communication software organizes conversations, provides content for discussions, and enables real time asynchronous working by minimizing the major errors by providing better engagement thereby boosting the engagement of the users. Now it is clear that the Interfaces are useful because they provide contracts that objects can use to work together without needing to know anything else about each other by providing total abstraction which is based upon the Command Language and Menus. I am glad that I have worked on MIT App Inventor and React Native approaches.
References – FAB Academy Modules and Internet
https://www.mulesoft.com/resources/api/what-is-an-api
https://thedigitalprojectmanager.com/best-communication-tools/
https://www.scoro.com/blog/best-project-management-software-list
https://electronicsforu.com/
https://noobieelectronic.blogspot.com/2019/05/temperature-monitoring-on-smartphone.html
https://appinventor.mit.edu/explore/ai-with-mit-app-inventor
https://facebook.github.io/react-native/