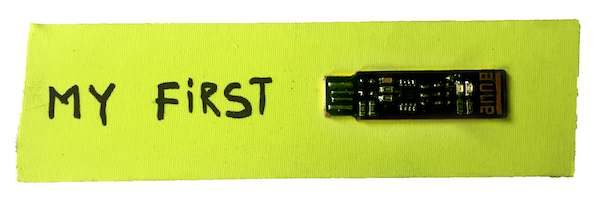
# Electronics production This week marks my first serious attempt at electronics production. In the past I helped some people do this on a lasercutter and larger milling machine. Both with moderate succes. After Henks class we kicked of with a group assigment: characterizing the design rules four our PCB production proces. And later this week I made my first in-circuit programmer - milled, soldered, debugged and flashed by yours truly. For my final project I also wanted to try my hand at dead-bug soldering but unfortunatly I failed this week to get this started. And if time allows I will also finally install mods for my Modela MDX20 at home.
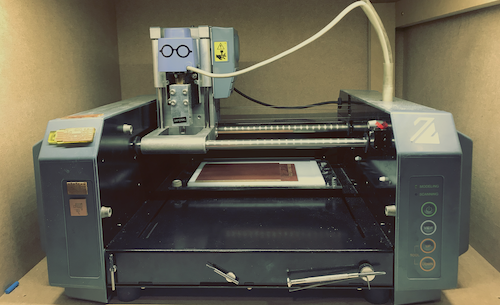
Modela
There are several ways to make PCBs (printed circuit boards). Common used methods for this include etching, milling and outsourcing. For the scale we will be producing at milling is the best fit, we work in low volumes and don't want to deal with potentially hazardous materials. The Modela MDX20 desktop cnc milling machine is a common machine in the lab - it's small, super percise and easy to use. At the Waag it can only be used for this purpose but the machine is also capable of milling and scanning in 2.5D in other materials.
Tools used for electronics production
Hardware
USB drive
Modela MDX20 - work area: 203 x 152 x 60 mm
Soldering iron - Weller WS 81 (SMD tip)
Software
FabModules
Illustrator
Tools
1/32 inch milling bit
1/64 inch milling bit
Scraper
Materials
FR-1 PCB blanks (1.8 mm thickness)
Double sided tape (good quality)
UV curable PCB mask
Rubbing alcohol
Operation and settings
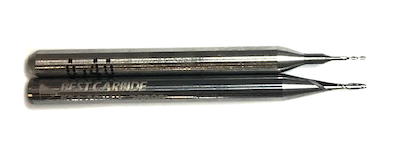
The Modela is a milling machine, it works by removing material using a milling bit. The machine can move in 3 directions and does this in a very funny way. The X axis is the bed of the machine that is moving and the Y axis is in a fixed position. On the Y axis is the Z axis that can move over the Y axis and move up and down. There is a very sophisticated dust extraction system that you can find next to the machine, a hand-held hover, this can only be used when the machine is not running. The material that we are using is a one sided PCB blank (FR-1) this is a hard, flat material, that consists of a thin layer of copper over a non conductive phenolic resin (or as some like to call it: paper base). By milling away the top layer traces of copper stay where electronic components can be soldered. The milling bits that we use are 1/32 inch and 1/64 inch with a 1/8 inch shank - both have 2 flutes and a 30 degrees spiral. The smaller one allows us to mill very narrow paths in the top layer, this keeps the finished product quite small but also alows us to use SMD components (these are also very small). The larger milling bit allows us to clear away more material and can cut out the board. Since it's double the diameter of the other one it is also less likely to break. Milling bits are quite brittle so handle them with care, don't let them fall! The material is fixed onto the bed of the machine, on top of the spoilboard. The spoilboard is milled true to the machine, this gives us more accuracy in our finished product.
Step by step guide
- Make your design ready for the milling machine. Safe your file as a .PNG file with a resolution of at least 1000 PPI (pixels per inch) in true size. The computer at the Waag only handles 1000 PPI. Whitspace will stay, black can ben milled - depending on the settings.
- Press View to move the bed to the viewing position. Unscrew the bed using the screw and take it out.
- Find a piece of material that will fit your design. Make sure the material is straight and clean. Put double sided tape on the back of the PCB, the papery side, be carefull not to overlap the tape. Cover as much surface as possible.
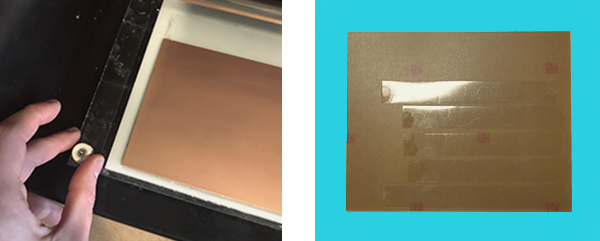
- Place the material on the bed in the bottom left corner (this is good practice). Carefully but firmly press it down, going from left to right. If you press the corners before the center there might be some tension building up in the center.
- Put the bed back in the machine and tighen the screws again, monkey tight - not gorilla tight. Press view to move the bed back into the machine.
- Open Fabmodules. There is a very good step by step guide on how to do this here.
- Right click > programs > open server program > scroll down and choose Roland MDX20 > PCB.

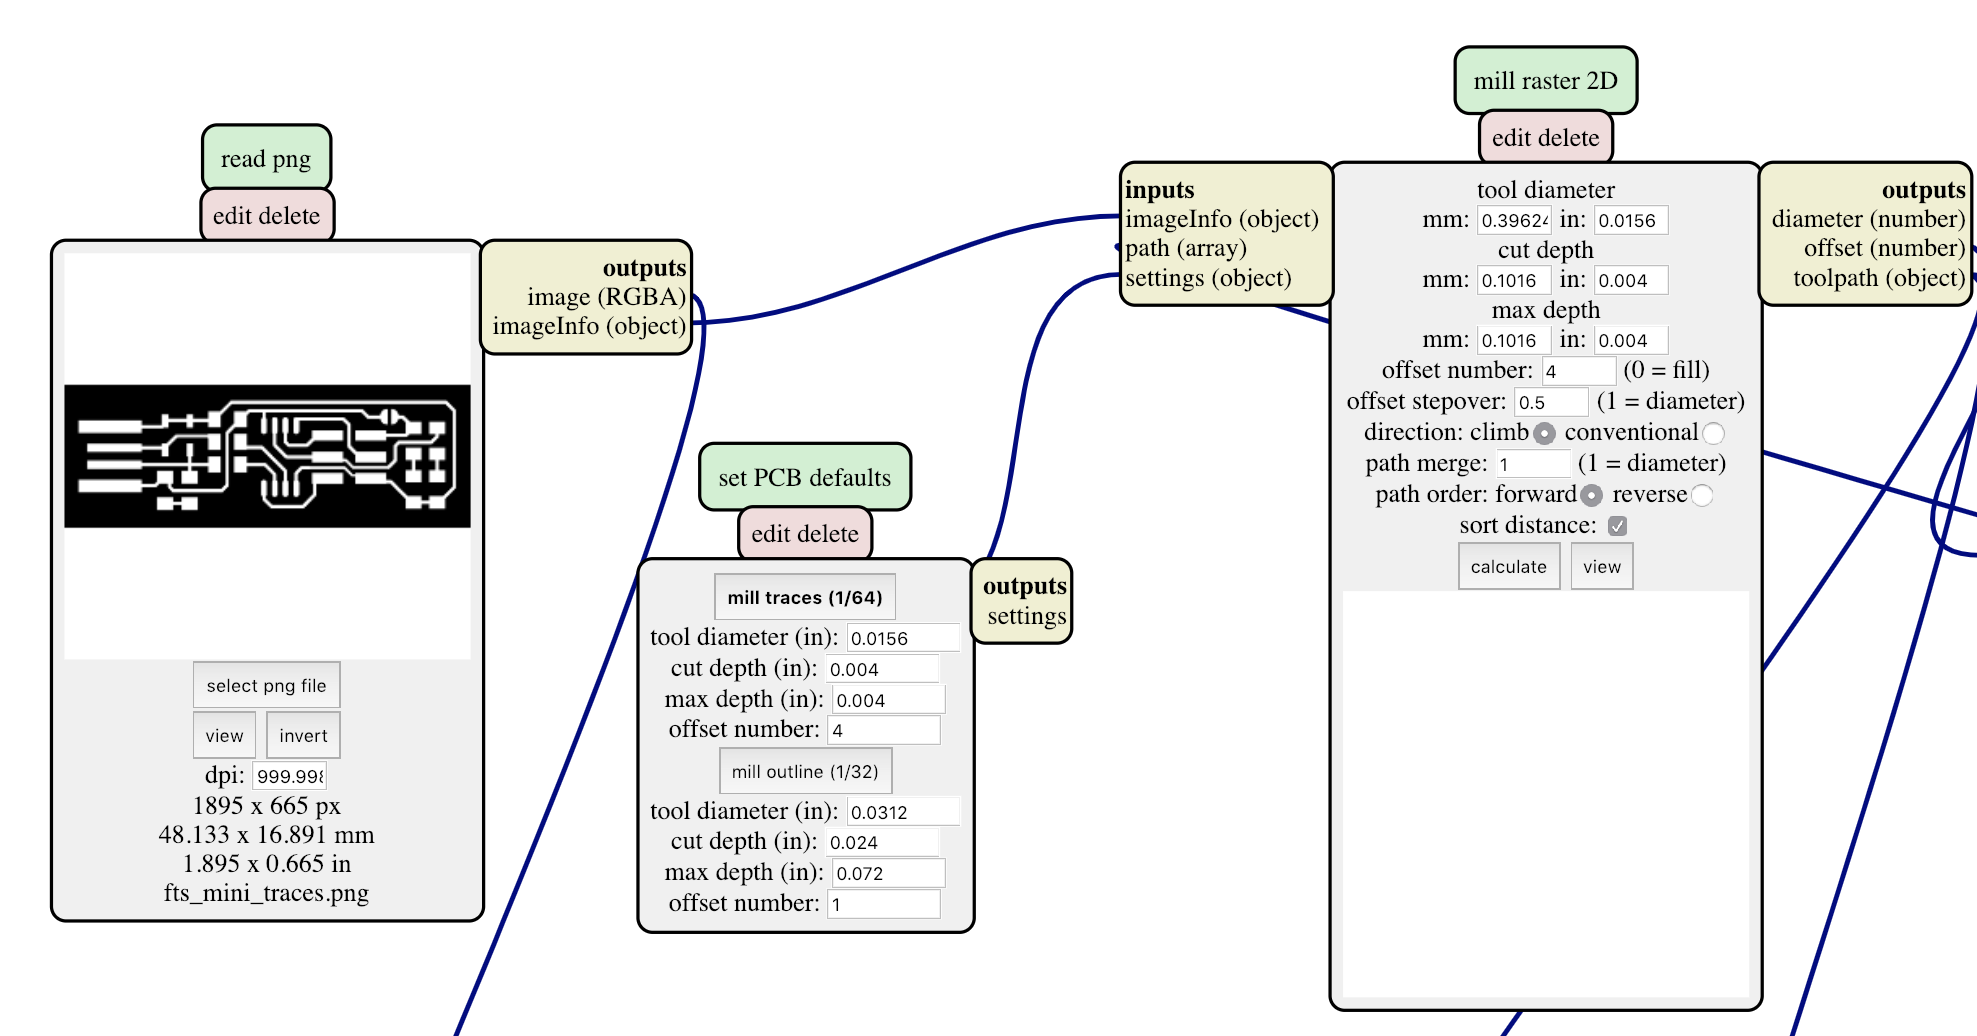
8. Go to the second mod and select if you want to mill traces or outline. Always start with traces before holes and finish with outlines. This will change the settings in the thirth window to a good startpoint.
9. In the 3th mod check your settings - if you use imperial you can skip the first calculations. The first four settings can be used as calculators to convert mm to inch. Tool diameter describes the diameter of your milling bit (the cutting part), this can be found on the box or sometimes on the shank. Cutting depth (vertical) tells us how deep we want to cut per 'pass' - this will automatically change to the right depth but if you are a advanced user and need to change this you can. Maximum depth (vertical) is how deep we want to cut in total, this number is reached by passing several times. The offset number (horizontal) is amount of times we want the milling bit to circle around our design. 4 lines is a good average - 0 will take a long time because this will remove all material. Offset step over (horizontal) tells us how much the cirkles will overlap. The standard for this is half the diameter size of the milling bit. Make sure the direction is set at climb and don't change anything else. The most likely thing you will change here is the offset number, other settings can stay the same.
11. Now the 4th mod can be used to set the traveling speed of the machine. Our milling bits don't have any coating and easily snap, the speed we use for the traces is 1 mm/s and for the outline 4 mm/s. In this mod we can also set a origin to start milling from - it will always start at the bottom left of your design. By changing the X & Y values and clicking 'move to origin' we travel as closely as possible to the origin.
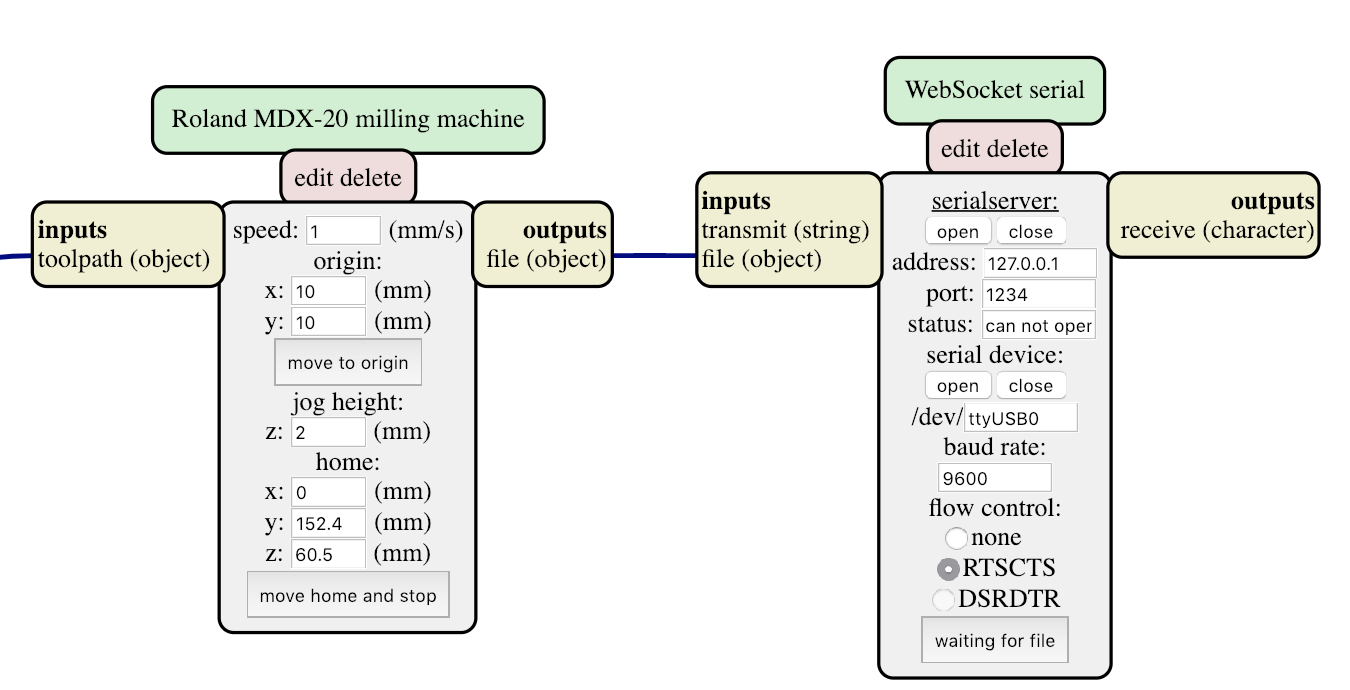
12. Get the milling bit you want to use (1/64 for traces and 1/32 for outlines). Rotate the spindle so that you can see the tightening bolt and unscrew it a bit, put in the milling bit and tighten it again. Make sure the full shank is inside and again - monkey tight.
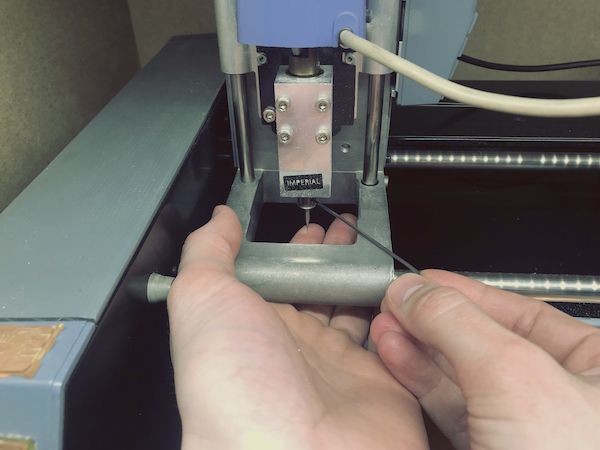
13. Lower the Z all the way down using the buttons on the machine. Make some last adjustments in the 4th mod for the perfect origin. Carefully losen the bolt again and lower the milling bit onto the material, make sure there is no dust underneath, and tighten it again with the milling bit resting on top of the material.
- In the 3th mod press calculate and check if everything looks as expected. If all is well press 'send to machine' and your job will start. If you made a mistake, change your settinggs and recalculate.
- Wait for the job to finish.
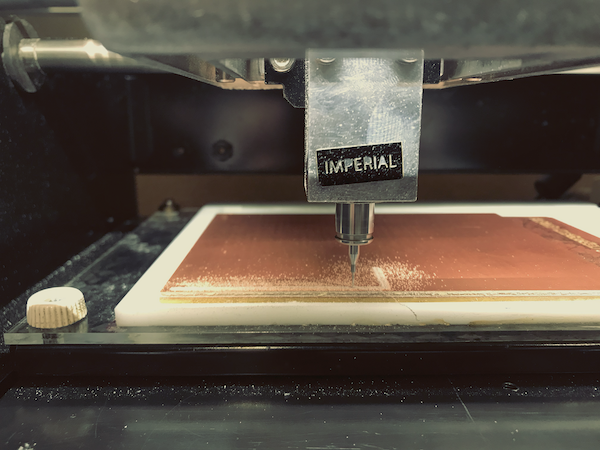
Group assignment
For the group assignment we worked together on a small test accuracy test. Henk showed us an example of the tests he did earlier and they looked very crisp. We used the standard file to test the accuracy. The white parts on the images are the parts we want to mill around. We used all standard settings except for the speed (changed to 2mm/s) and offset number (changed to 0). We used a 0.4 mm 2 flute milling bit without any coating. For the cutout we used all standard settings and used a 0.8 mm 2 flute milling bit.
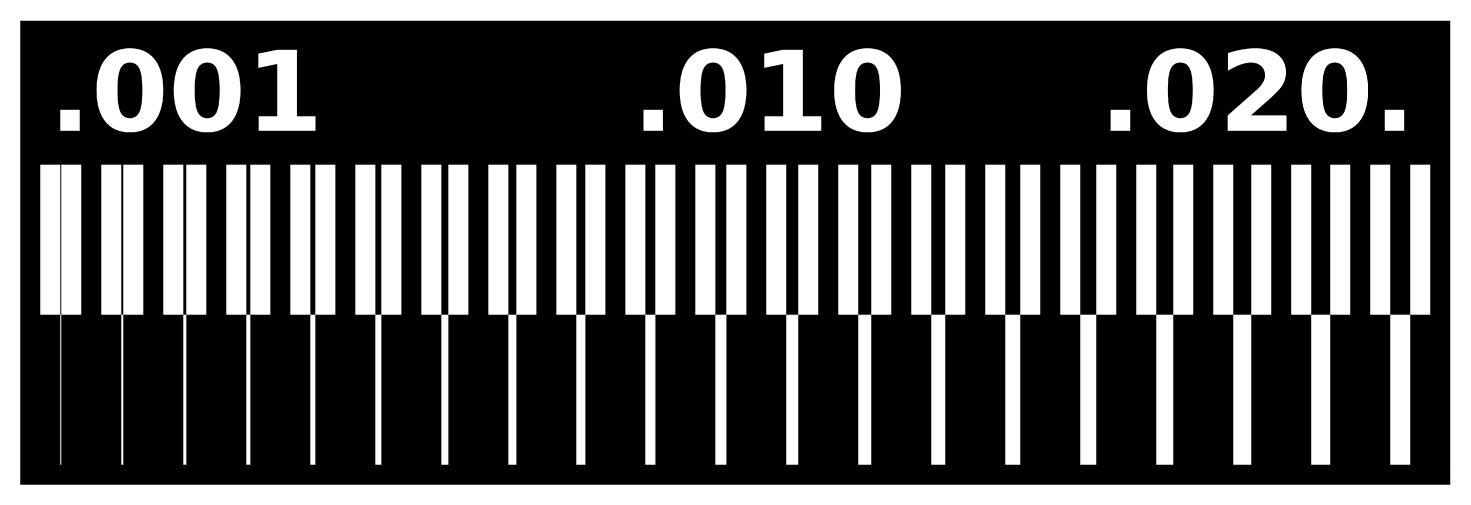
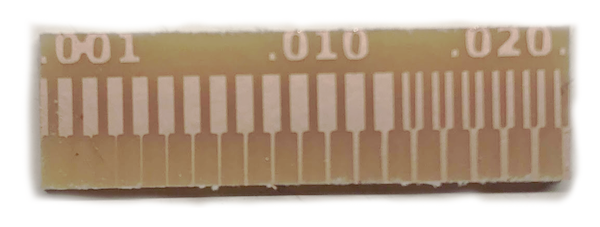
The results were a bit disapointing. In the top bar you can see three quarters of the inside lines didn't cut - this was to be expected since the milling bit doesn't fit in there. For the last few the results look quite well. It's important to keep in mind that there is a small radius of the milling bit here so the top and bottom bar are still attatched. The second bar is were things go south. The first 3 lines are completely ripped of the board and the 4th has gotton slightly deatached. I was a bit confused about this since Henks results with the same settings looked much better. I thought about slowing the speed down or playing with the offset but it turned out that Henk used a different milling bit (1 flute). This explains the difference, a 1 flute milling bit is a lot better at clearing away the material with its bigger chipload.
I quickly drew a outline file to cut out our test - I forgot to invert it so the outline was cut out on the wrong side of the border. This is a quick fix with the 'invert' button. Since the results were still clearly visible we decided not to redo the test.
My first ISP
Now let's get on to the good stuff. I started with a fresh PCB blank - the one that was on the bed was already pretty beaten up with some failed attempts from previous users. I heard the day before there were quite a few broken milling bits so the advised speed was changed to 1 mm/s. All standard settings were used. About 5 minutes into my job the milling bit snapped of and I had to restart my job.
To reset the machine I pressed both "up" and "down" on the modela unitil the lights blink. And I cancelled the job in mods as well. After this it was just a case of putting in a new milling bit - changing the origin to a fresh spot and putting the milling bit on the blank again (step 13). This time everything went fine.
I started the second job - the outline and used all standard settings. This was a really quick job and the PCB was completely loose in the first try.
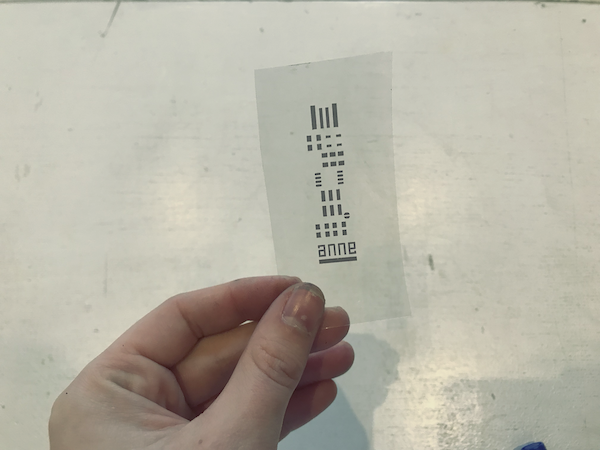
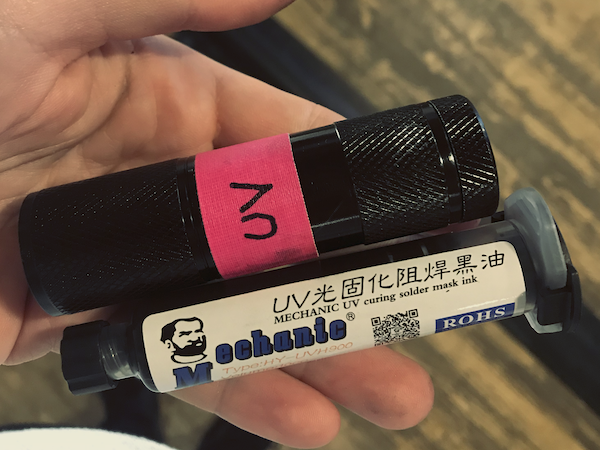
During both milling jobs I started to experiment with the curable PCB mask. I bought this material beforehand in three different colors, black, yellow and white. The white one unfortunalty had solidified inside the tube when it arrived. I had done some test at home based on the procedure used in several Youtube video's. Clean the PCB - smear some resin on top of it - even it out pressing down with a piece of acrylic - and curing it with a UV flashlight. And my initial results using the black resin were encouraging. I had no luck with the the yellow one - it just didn't want to cure.
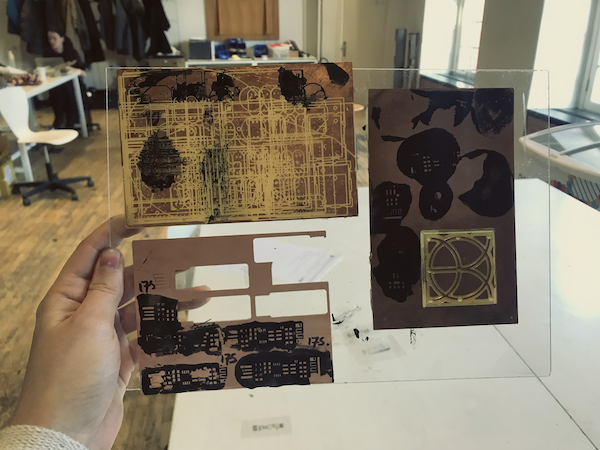
The blank on the right has some solid black blobs - these are the ones I made at home. The thicknesses vary but all together everything cured very well. Since I don't have acces to a printer at home I couldn't try the masking of the areas that I didn't want to cure. The parameters for this test were (1) layers of masks & transparant paper, (2) curing time, (3) resin thickness.
| test | seconds | masking layers | layers total | resin thickness | results |
|---|---|---|---|---|---|
| 1 | 10 | 2 | 3 | medium | not cured |
| 2 | 15 | 2 | 3 | medium | not cured |
| 3 | 20 | 2 | 3 | medium | not cured |
| 4 | 20 | 2 | 3 | thin | some parts cured |
| 5 | 25 | 2 | 3 | thin | too much cured |
| 6 | 25 | 3 | 3 | thin | some parts are really good |
With the results of my 6th attempt I got out another blank with some failed attempts from yesterday. The thickness seems to be very important, you want a layer so thin it almost becomes transparant. Since the resin is really black I was a bit worried about aliging the mask and PCB without the need of making a jig. I used a flashlight and from both the top and bottom but this was unsucsessful. Than I tried my proven method of eyeballing it using the most transparant parts
For the second blank (this blank was the same kind of blank but had a slightly different color) none of the tests would stick so I went on to the 3th blank. This blank had a rough past so not enough copper for the resin to stick on.
| test | seconds | masking layers | layers total | resin thickness | results |
|---|---|---|---|---|---|
| 1 | 25 | 3 | 3 | thin | too much cured |
| 2 | 20 | 3 | 3 | thin | some parts are really good |
| 3 | 20 | 3 | 3 | thin | some parts (traces) not cured |
| 4 | 20 | 3 | 3 | thin | some parts are really good |
The traces have a thicker layer of resin - this takes much longer to cure. If you wait much longer the thinner parts get to much light and this causes the areas we don't want to mask to cure. At 25 seconds it was nearly impossible to get the open areas clear again. In the meantime my PCB was done and I reached a point where I had some decent results.
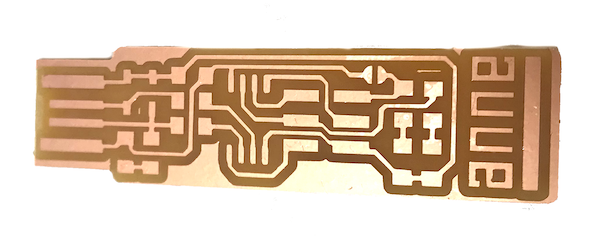
I cleaned my PCB with some rubbing alcohol and used some double sided tape as well to make sure there were no invisible copper fibers hiding. I scraped the board and tested 3 times for shorts. Having any kind of issue in the board is going to be really difficult to fix later on because of the masking covering the traces. I layered 3 fresh layers for the mask and put them aside.
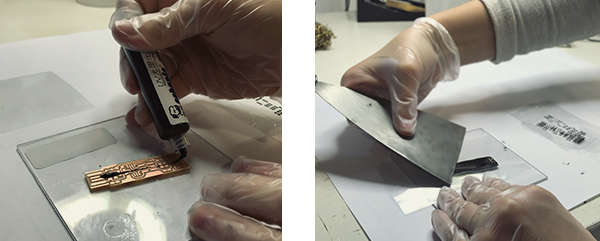
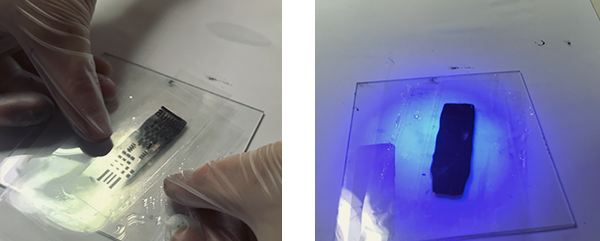
I carefully put some resin on the board and pressed it down using a piece of acrylic. It took me about a minute to get a good distribution and to align the masking layers on top of it. After the curing I took of the layers and was shocked to see nearly nothing had cured. With some rubbing alcohol, scraping and time I cleaned my board as good as possible and tried it again changing the duration to 25 seconds. Again - most parts hadn't cured.
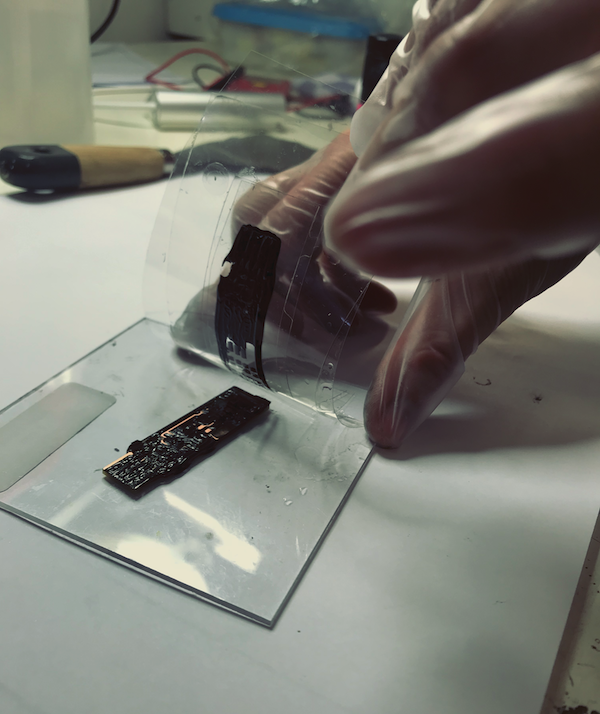
At this point I was worried I was damaging the board with the cleaning and that I was risking running out of time. So as a preventative measure I started milling a back up board. The thirth attempt was a bit more succesful - exposed the resin for 30 seconds and carefully cleaned of the uncured parts. A lot of the parts that I didn't intent to cure had cured but were easily removed with the tip of some tweezers. The traces were still a bit wet so I cured these after the cleaning with a flashlight for about a minute. Using a Sharpie I made my finishing touches and did a test to see if everyting still worked. This time around it was much more difficult to see since I was no longer able to see the traces. Everything was fine. For this part of the assignment I was now about 4 hrs in.
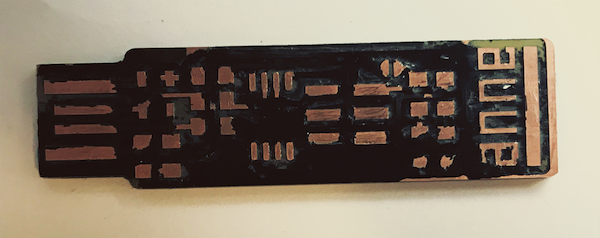
I went on to the soldering - this was quite easy and quickly done. I set the soldering iron at 70%. I started with the ATTINY and continued on to the USB side and than the other side. I don't have experience soldering SMD components but it felt like the masking made it a bit easier - because of the contrast I had good visibility for where the parts should go. I finished the soldering in about 30 minutes, triple checked it and went on to the flashing. The order order of soldering I used was:
Big things:
- 1x 2x3 pin header
- 1x ATtiny45 *
Right side parts - 1x resistor 499Ω
- 1x resistor 1kΩ
- 1x red led *
- 1x green led *
Left side parts - 1x 1kΩ resistors
- 1x 499Ω resistors
- 1x 49Ω resistors
- 1x 3.3v zener diodes *
1x 100nF capacitor
Orientation matters!
I finished with applying solder to the USB pads and gently sanding them flush.
I used Brians ISP design and used his documentation for the flashing. You can find it here.. I put in my ISP in the USB port of my battery pack for the smoke test, the red light went on and there was no smoke. My class mates warned me about using a USB3 port so I brought a USB hub to make sure this wasn't going to be an issue.
To flash the ISP there are a couple of things that need to be downloaded. Firstly Crosspack, a development eviroment. And secondly the firmware that we want to flash to our board. To program a ISP a working ISP is needed. This one is plugged into the computer and is connected to the new ISP using a ribbon cable.
I made AVR folder and put my firmware inside of this. From within the firmware folder I did the 'make' command to create a Make file. In this file the chip we use needs to be specified. Since I used a ATTiny45 nothing had to be changed here.
anne@Annes-MacBook-Pro-311:~/avr$ makeThe next command is make flash. This will erase the chip, and program its flash memory with the make file. Here I was supposed to see some progress bars.
anne@Annes-MacBook-Pro-311:~/avr$ make flashI got the following error. This was solved by plugging in the ISP directly into the computer.
avrdude: Error: Could not find USBtiny device (0x1781/0xc9f)Than I ran the command again and with succes. Now it's time to make fuses - this prepares the ISPs final step after this it can no longer be programmed. During this step the ISP lit up both red and green.
anne@Annes-MacBook-Pro-311:~/avr$ make fusesIf all went well the ISP can now be seen in the mac system report (USB). For the last and final step we change the reset pin into a GPIO pin using the following command.
anne@Annes-MacBook-Pro-311:~/avr/fts_firmware_bdm_v1$ make rstdisbl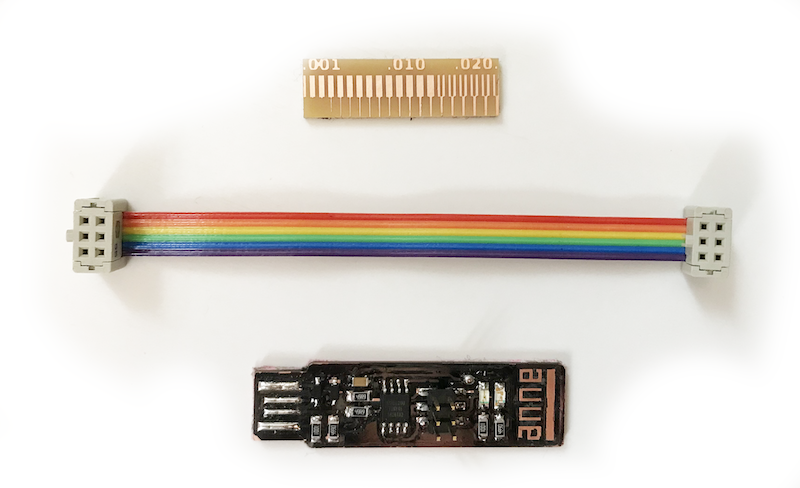

Files
Testfile accuracy - traces 1000ppi
Testfile accuracy - cutout 1000ppi
ISP - traces 1000ppi
ISP - cutout 1000ppi