Molding & Casting
MOLDING & CASTING
This is the content we had covered this week:
W11 - Molding & Casting
- Types
- Materials
- Additives
- Machining
- Safety
- Software
Assignment
-
Group assignment: review the safety data sheets for each of your molding and casting materials, then make and compare test casts with each of them.
-
Individual assignment: design a mold around the stock and tooling that you’ll be using, mill it (rough cut + (at least) three-axis finish cut), and use it to cast parts
This week we’ve taken a look to molding & casting with different techniques and materials.
HOW TO MOLD & CAST
This week was all new to me. Even though I attended a workshop a while ago on creating a mold, it was a completely different process as we were using an object to create the mold and not a 3d model. As usual, I made some drawings to understand the process better and serve as a visual reminder of the steps.
MOLDING 101

"Diagram showing the first steps to create a mold froma 3D model. "
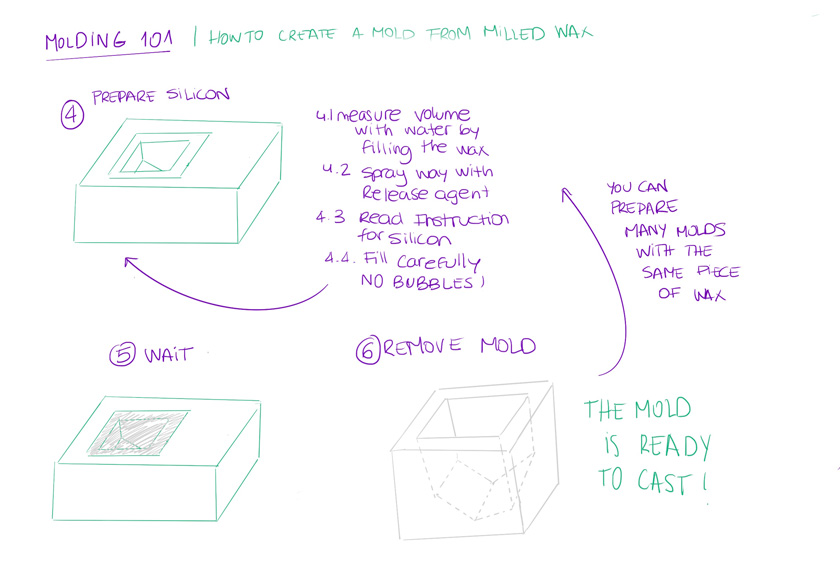
"Diagram showing the second part of steps to create a mold froma 3D model. "
CASTING 101
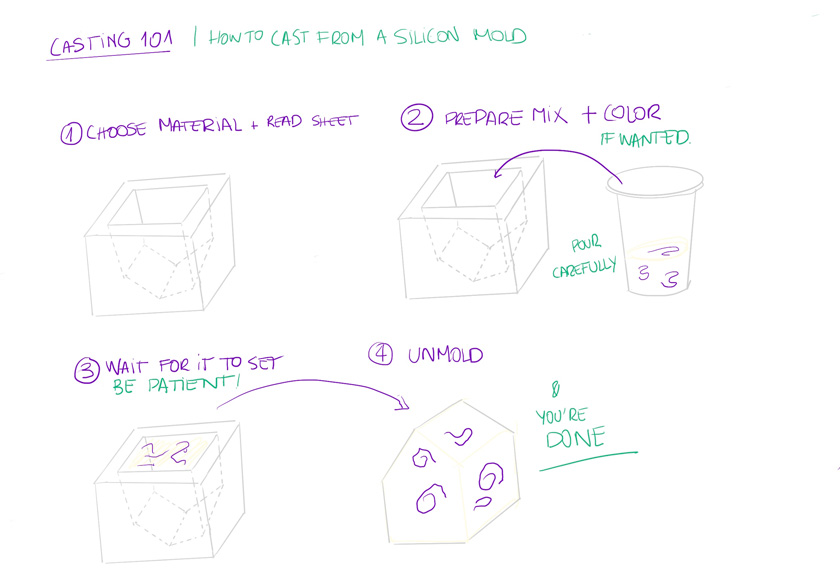
"Diagram showing the steps to cast from a silicon mold. "
GROUP ASSIGNMENT
This week we had extensive training that, to me was the starting point of the group assignment.
What did I check? To be honest, only the materials that I ended up using as we were exposed to many others, so I could choose the ones I like.
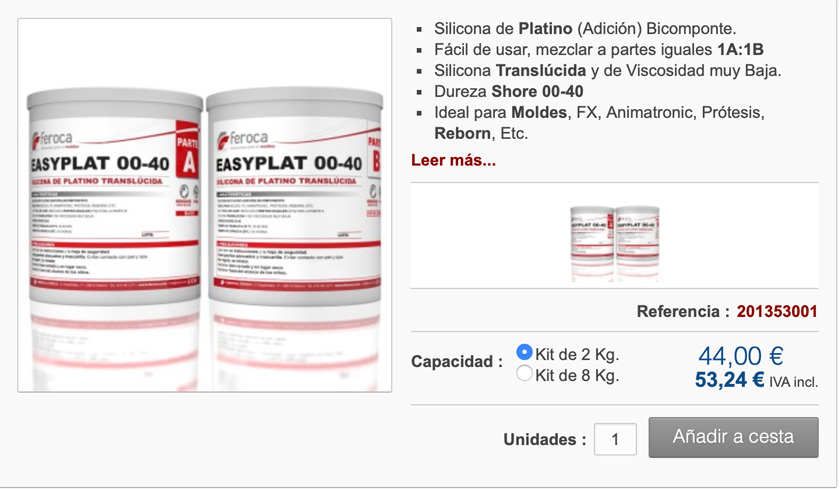
SILICON MOLD V1 | EASYPLAT 00-40
"Diagram showing the steps to cast from a silicon mold. "
Download EASYPLAT instructions
SILICON MOLD V2 | PLATSIL FS10-20
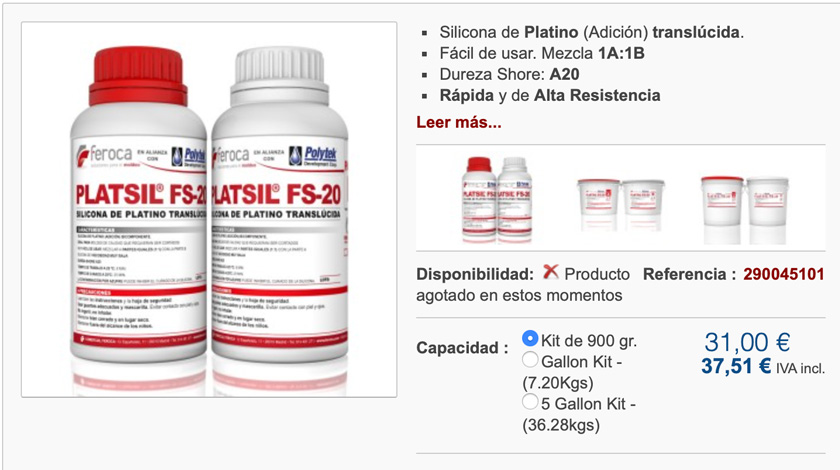
"Diagram showing the steps to cast from a silicon mold. "
Download PLATSIL instructions Download PLATSIL safety sheet
CASTING V1 | HYDROCAL WHITE
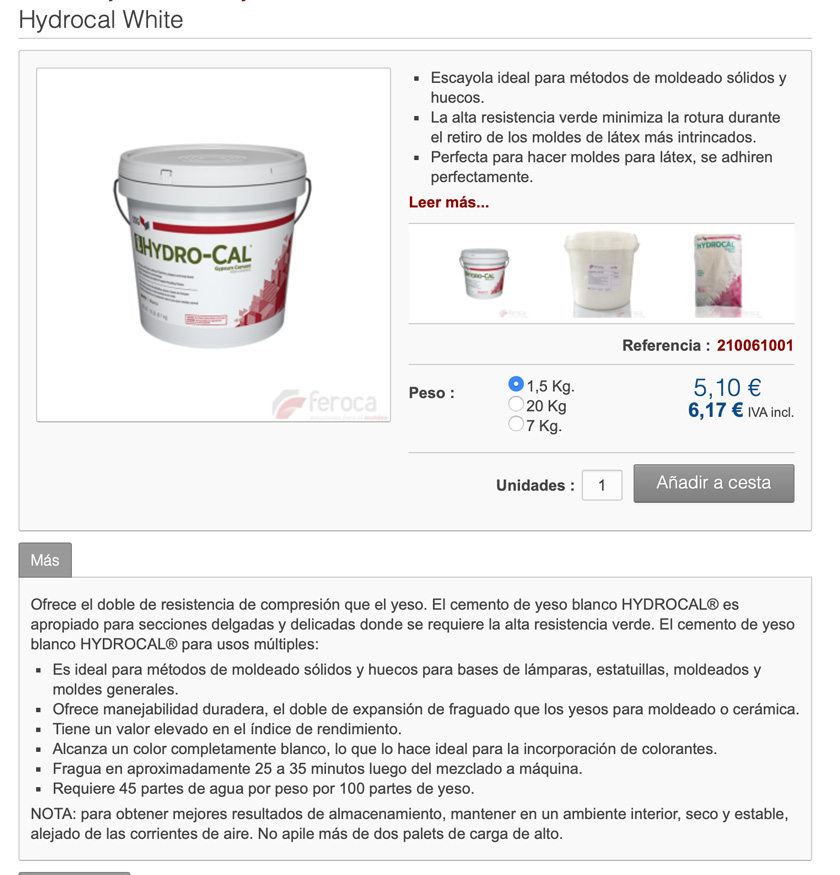
"Diagram showing the steps to cast from a silicon mold. "
WHAT WENT WELL
Very straightforward: It was quite easy to understand, read and follow the instructions.
WHAT COULD BE BETTER
Dull:Knowing that this process is necessary it can be very dull because you might not need to read everything all the time as the precautions are very similar.
INDIVIDUAL ASSIGNMENT
HOW CREATE SOMETHING USING MOLDING & CASTING
I wanted to take advantage of this week’s assignment to improve my 3d modeling skills. So this time, I went from designing something that I could see a use for, and at the same time, it could pose a challenge to learn more about Fusion 360.
CANDLE HOLDER
I choose an ordinary small candle to create a vase for it. It needed to fit inside the wax block so having all measurements right was a key to a successful outcome.

"LEFT: Measuring candle diameter with the caliper. RIGHT: Measuring candle's height with the caliper."
STEP 1: DESIGN 3D MODEL WITH FUSION 360
The object that could fit inside the wax block was very large so instead of having an intricate shape to fit the wax I decided to experiment just with the top of it.

"First Texture created with Fusion 360"
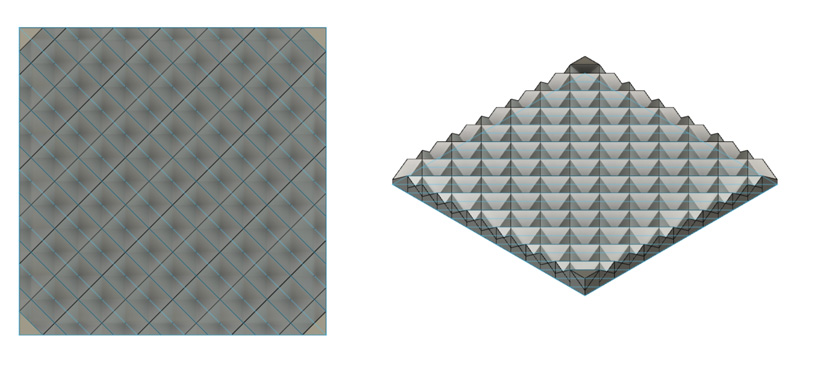
"Second Texture created with Fusion 360"
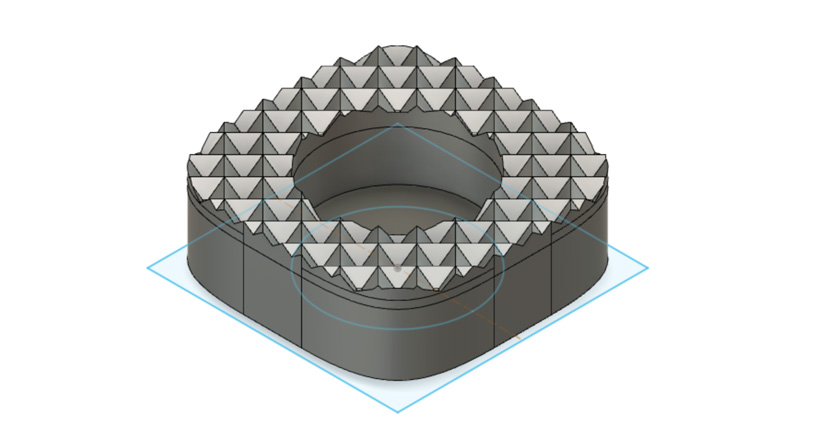
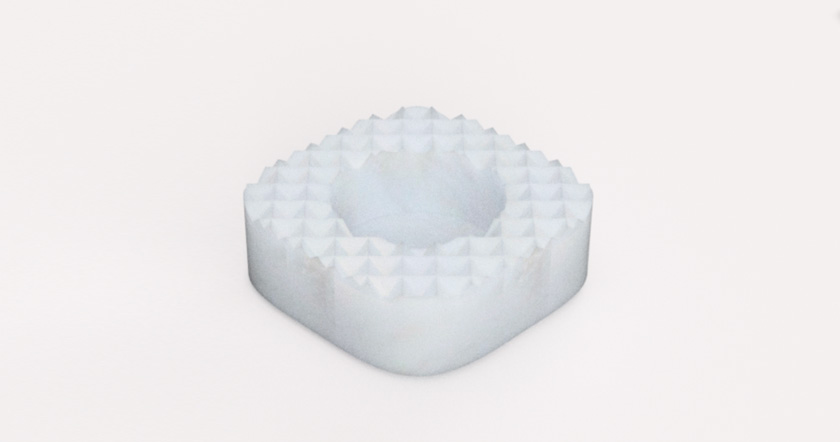
"3D model of my design of a candle holder"
STEP 2: 3D PRINT TO SEE IF THE CANDLE FITS
As I didn’t have as much room of an error to make the candle holder fit the wax piece, and the candle fit the vase I decided to 3D print the object to see how it looked. I was very pleased by it!
"3D printed candle holder."
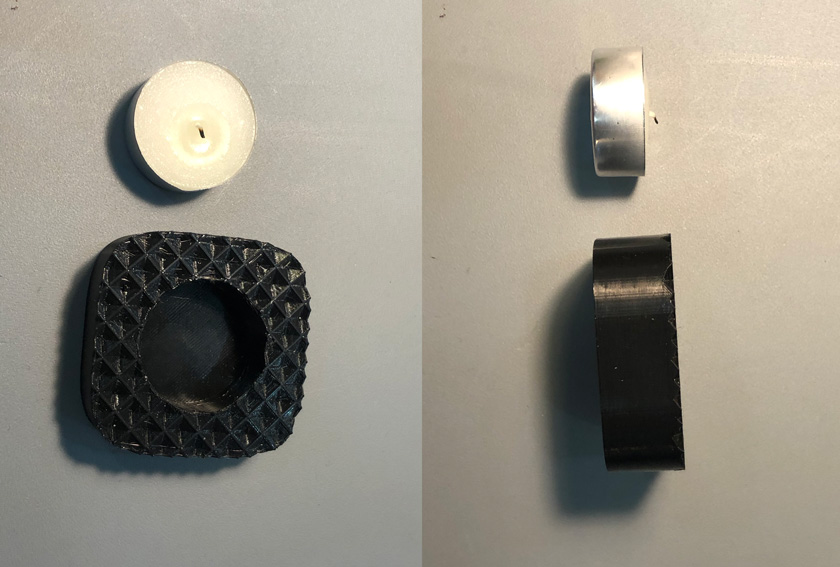
"LEFT: Candle holder + candle next to it from top view. RIGHT: Candle holder + candle next to it from side view."
"Fusion 360 3D rendering of the candle using a cangle material. "
Download Candle Holder STL file to 3D print
Download Fusion 360 Candle Holder 3D Model
STEP 3: FINISH 3D MODEL TO HAVE THE MOLD

"3D model of the wax cut to create the mold for the candle holder. "
Download Milled Wax Candle Holder STL file
Download Fusion 360 Candle Holder Mold
STEP 4: PREPARE FILES WITH MODELA 4
As I’ll be using the Roland SRM-20, I’m using modela 4 to prep the files for milling the wax piece.
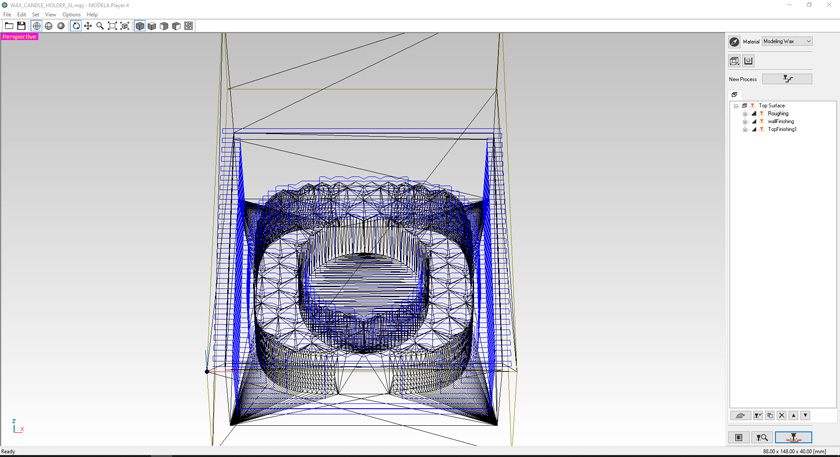
"Roughing file preview."
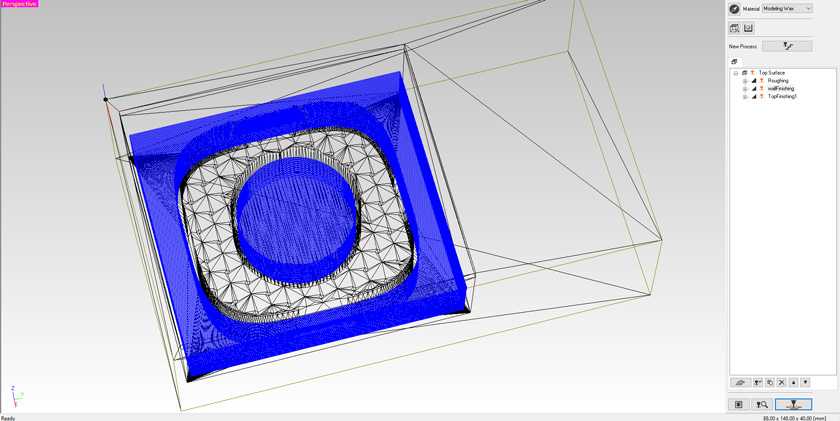
"Finishing file 1 (sides) preview."
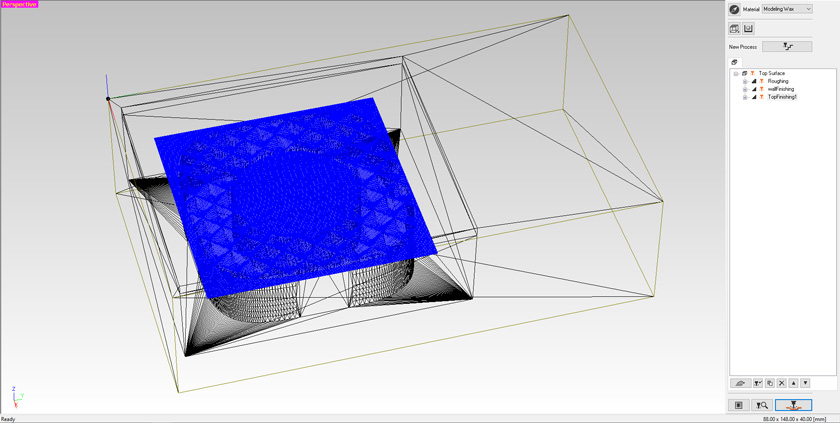
"Finishing file 2 (top) preview."
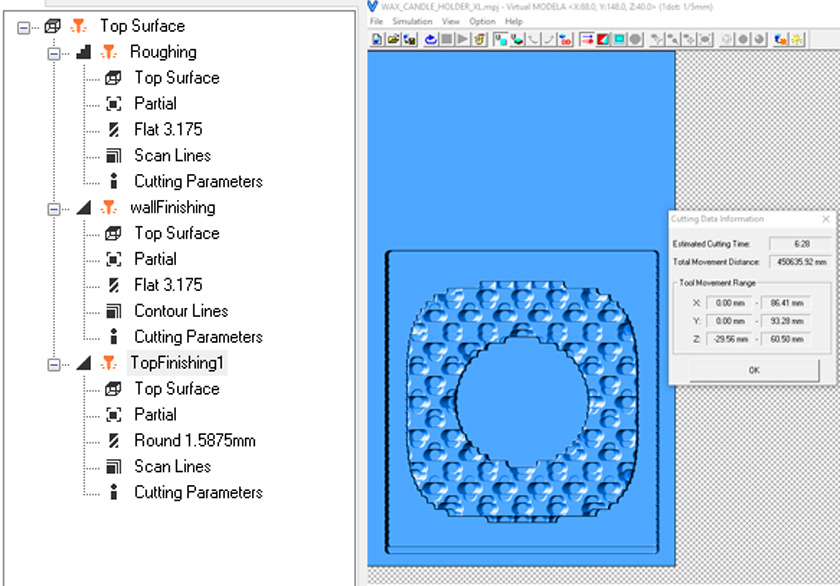
"LEFT: List of cutting layers + properties. RIGHT: Roughing time."
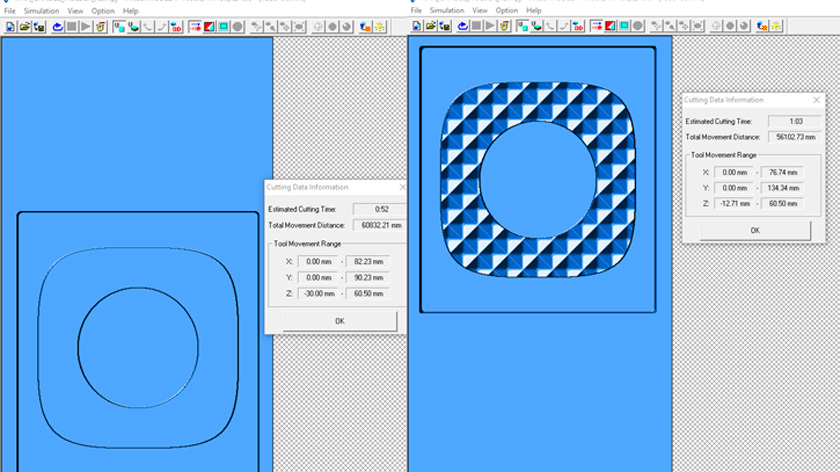
"LEFT: Finishing 1 Time. RIGHT: Finishing 2 time."
STEP 5: ROUGHING
Roughing is the first step to mill the wax piece. It will remove most of the material that needs to be removed. We’re using a larger milling bit than with finishing processes.
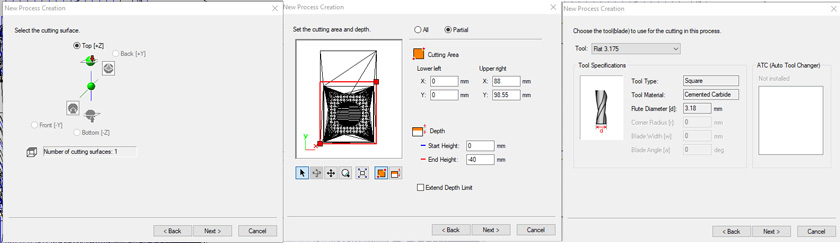
"LEFT: Selecting cutting surface using Modela 4. MIDDLE: Setting the cutting and the depth using Modela 4. RIGHT: Choosing the cutting tool using Modela 4."
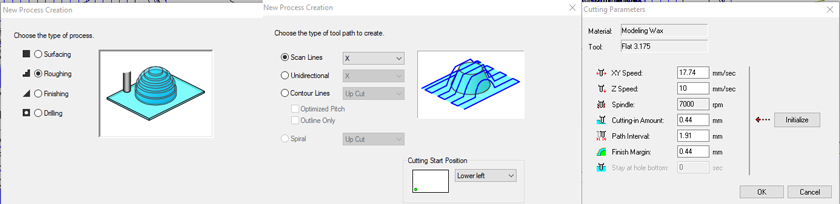
"LEFT: Select Roughing using Modela 4. MIDDLE: Select tool path using Modela 4. RIGHT: Define Parameters for cutting using Modela 4."
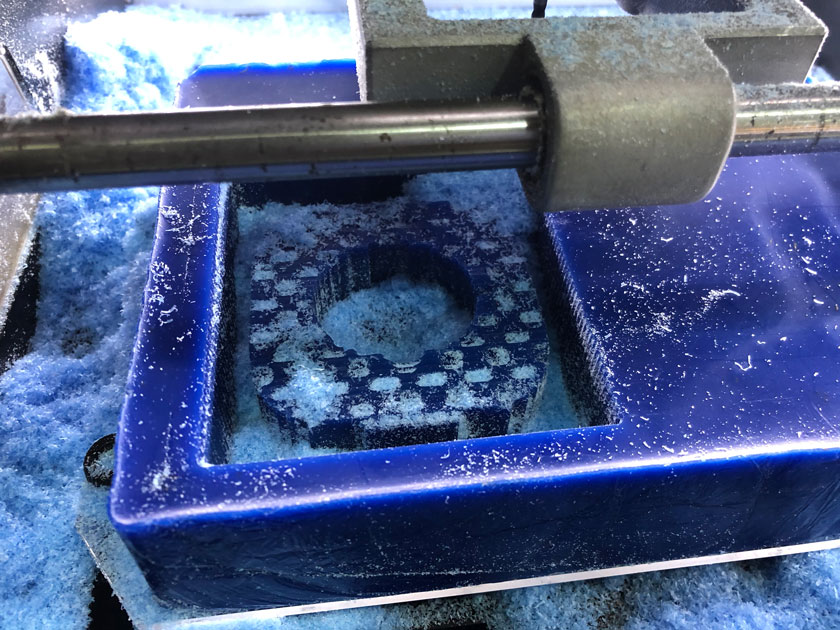
"Starting Roughing Cut."
After a while I realized that the wax block was moving a bit due to its bottom not being flat enough. Therefore, Josep suggested to use the big CNC machine to make sure the bottom was flat.
"Using Raptor XL CNC machine to flatten the wax block."
STEP 5 BIS: ROUGHING AGAIN
This time everything seemed to be ok.

"LEFT: Uneven top being milled again. RIGHT: Roughing after a while having already a pile of wax shavings."
"Roughing done. 6 hours and 30 minutes later."
OMG, I thought that it wasn’t going to ever finish.
STEP 6: FINISHING 1
Starting with the finishing part was exciting as I was truly willing to finish.
"LEFT: Select Finishing. RIGHT: Select tool."
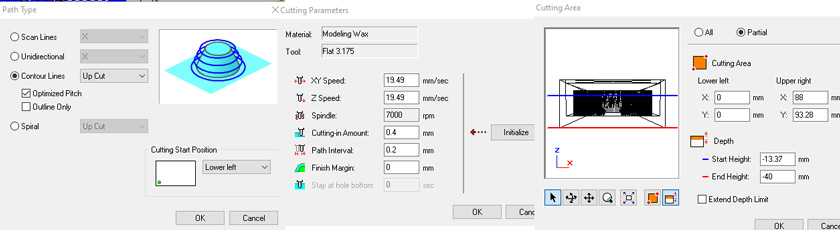
"LEFT: Select path Type. MIDDLE: Select cutting parameters. RIGHT: Select partcial cutting area."
The last part of selecting the partial cutting area was crucial to expedit a bit the process. That way I could use a rougher/larger tool for the sides and a more delicate one for the top finishes.
STEP 6: FINISHING 2
Oh mamma! This is taking forever! When it comes to change the bit I was already very tired. I had started early in the morning and I was the last person left in the lab besides my instructor.
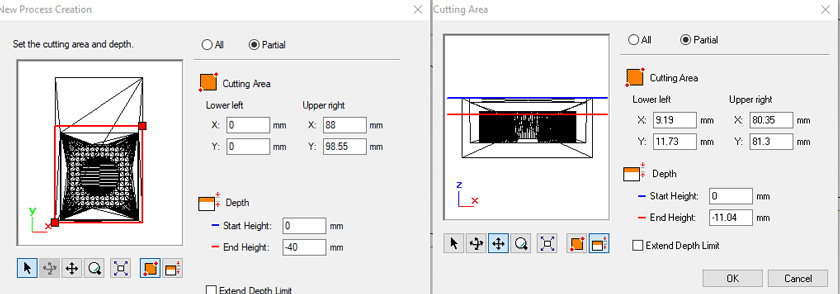
"LEFT: Set the cutting and depth. RIGHT: Select partial cutting area."
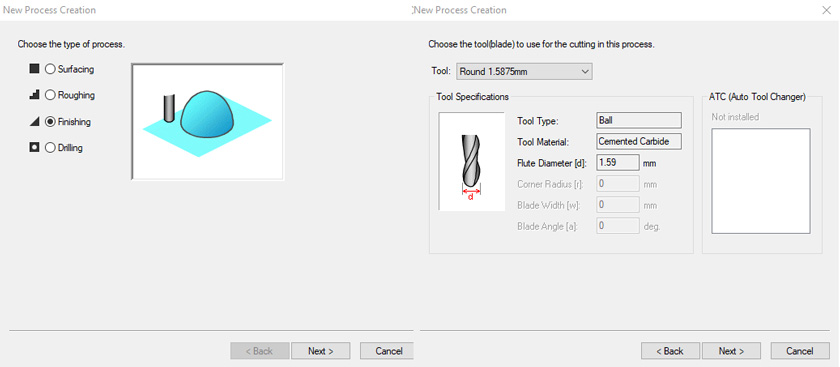
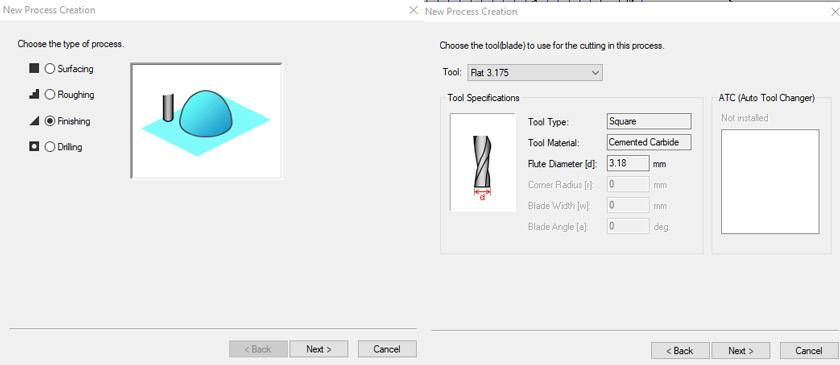
"LEFT: Select finishing. RIGHT: Select rounded tool."
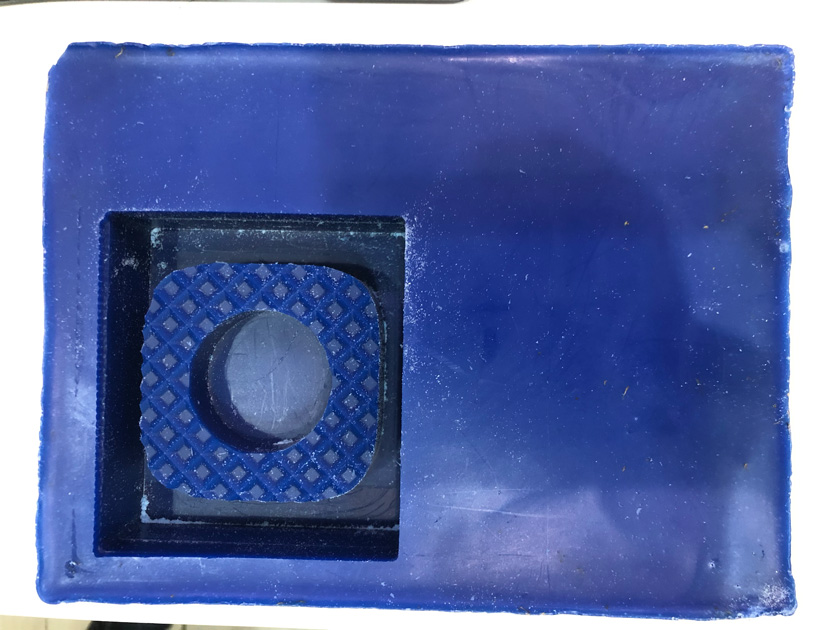
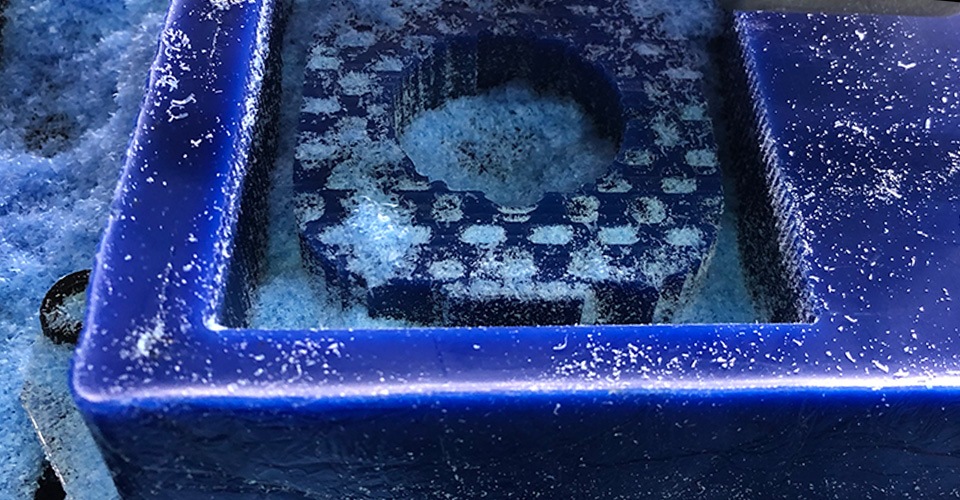
"Finishing done! Ready to create the silicon mold. "
STEP 7: CREATING SILICON MOLD
As my mold was going to be medium size I decided to use a silicon that allowed me a decent working time.
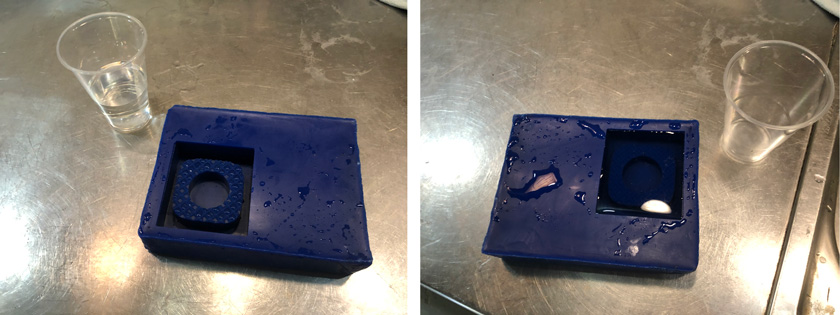
"Measuring the mold's volume using water.. "
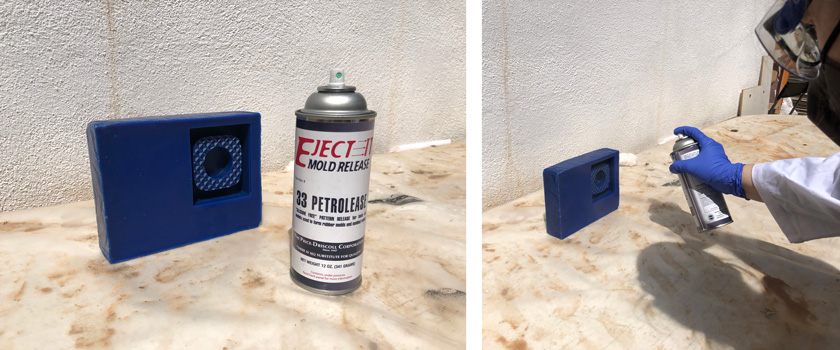
"Adding Release agent to the mold.. "
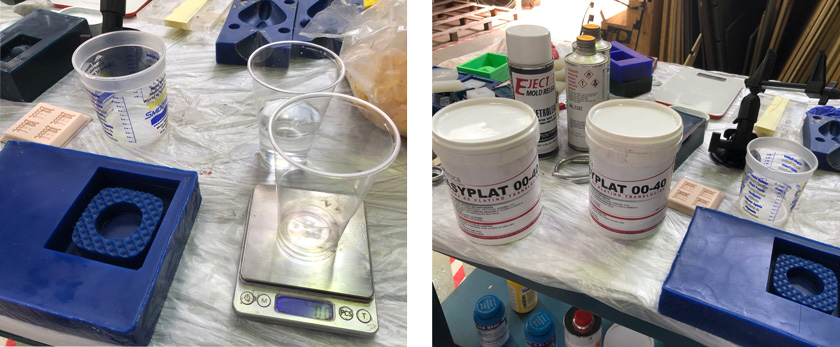
"Mixing the proper ratios of the silicon. Using EASYPLAT 00-40. "
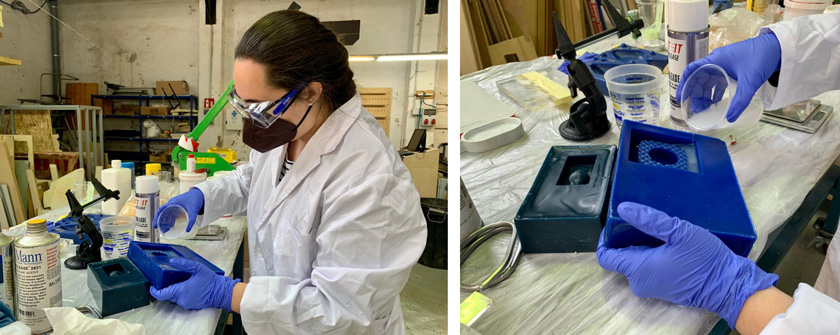
"Pouring the silicon carefully into the wax mold. "
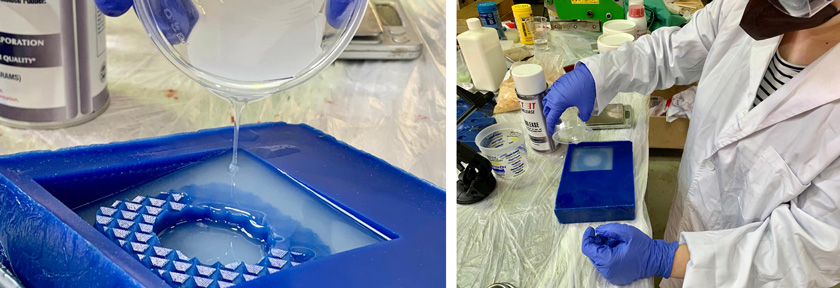
"Pouring the silicon carefully into the wax mold. "
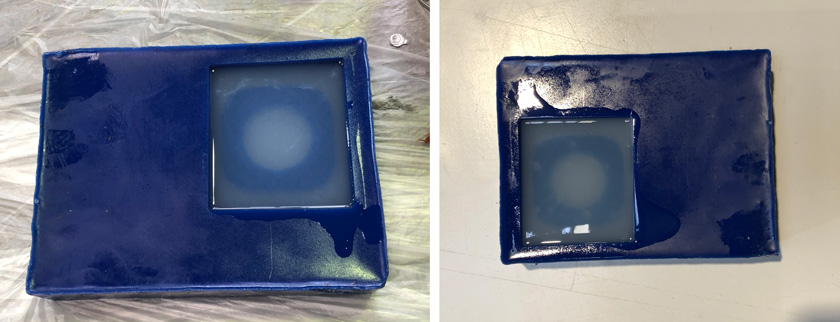
"LEFT: Silicon starting to cure. RIGHT: Silicon out of the oven. "
As I wanted to cast the same day, I decided to expedit the process by putting my mold into the pizza oven at around 100ºC. I would have used a lower temperature, around 80ºC, but some people were using it to dry Mycelium at the same time. It worked fine!
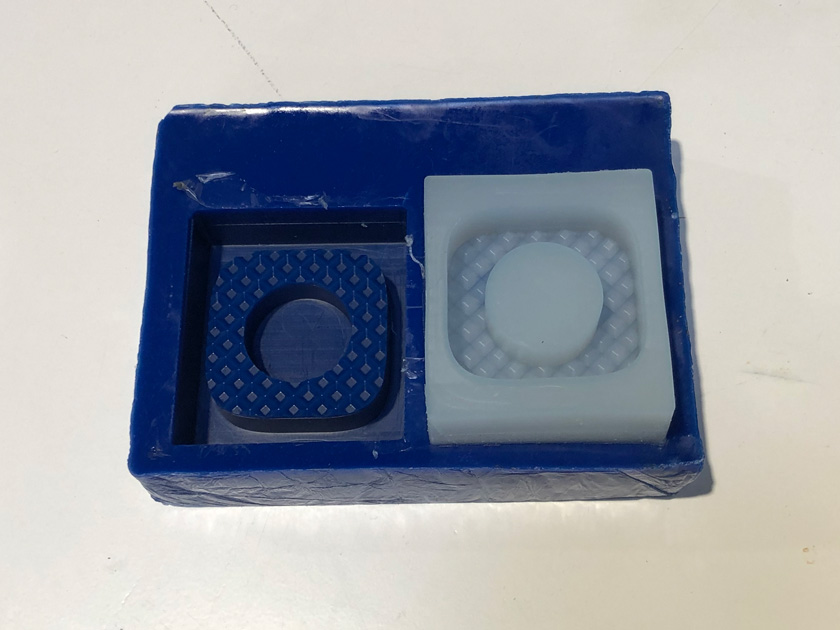
"Wax mold and successful silicon mold. "
STEP 8: CASTING CANDLE HOLDER
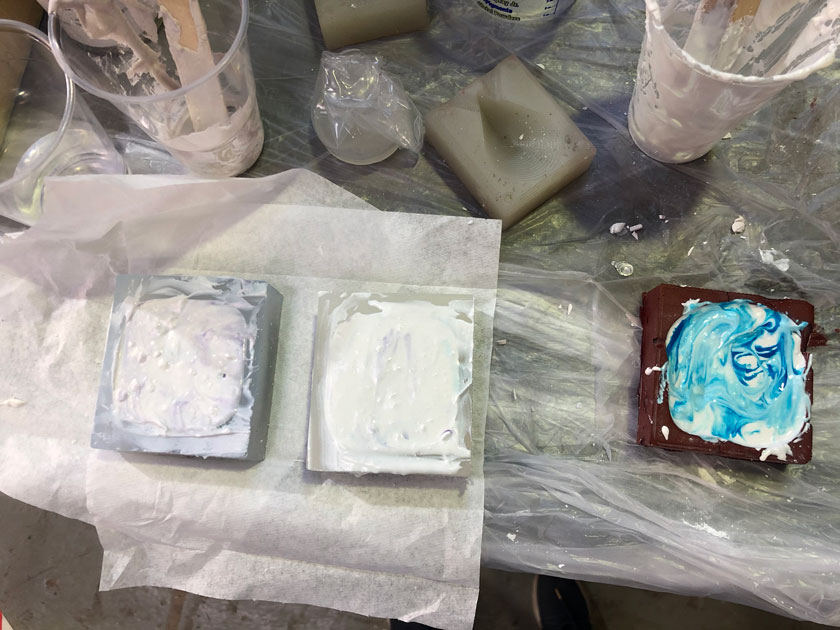
After getting my silicon mold, I got to choose the material. In my case I went for Hydrocal White and some purple dye marbling.
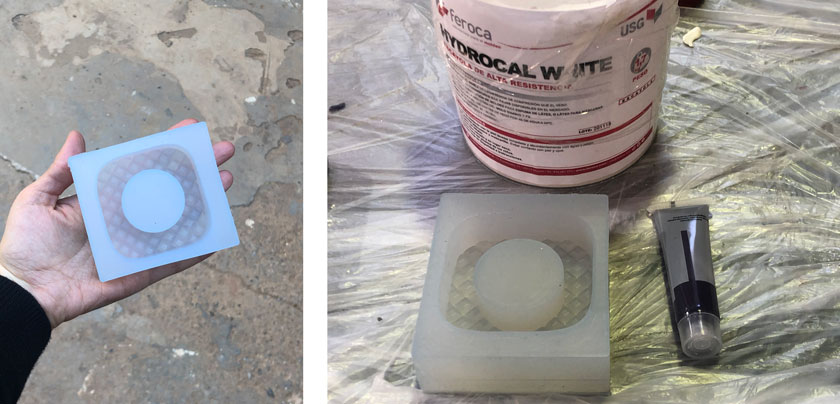
"LEFT: EASYPLAT 00-40 silicon mold. RIGHT: Hydrocal White + silicon mold + Purple dye. "
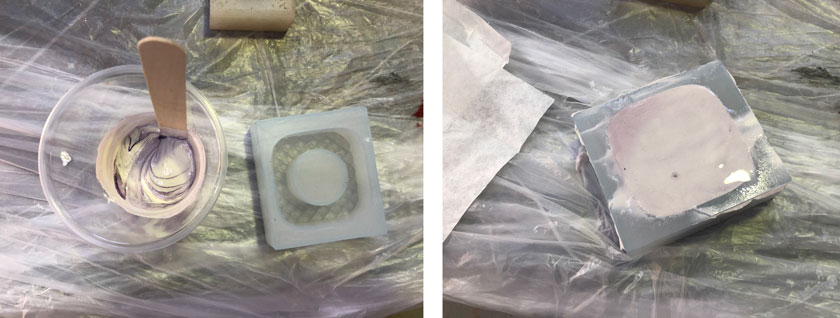
"LEFT:Hydrocal White 100 to 45 water mix + purple. RIGHT: Mix poured into the silicon molt. "
And after what felt like another eternity to let set (even if it was around an hour), I felt ready to unmold.
HERO SHOTS
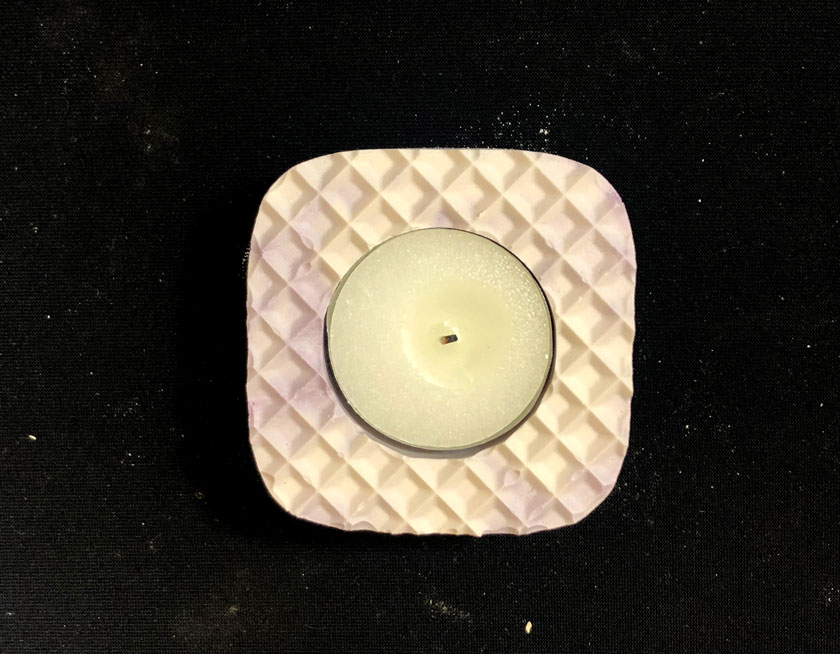
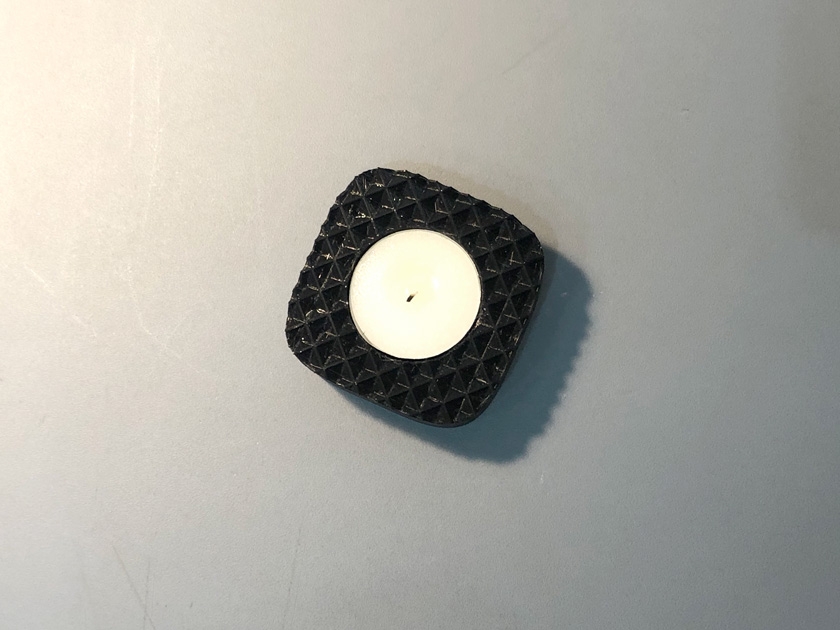
"Hero shot of the finished Hydrocal candle holder + candle. "
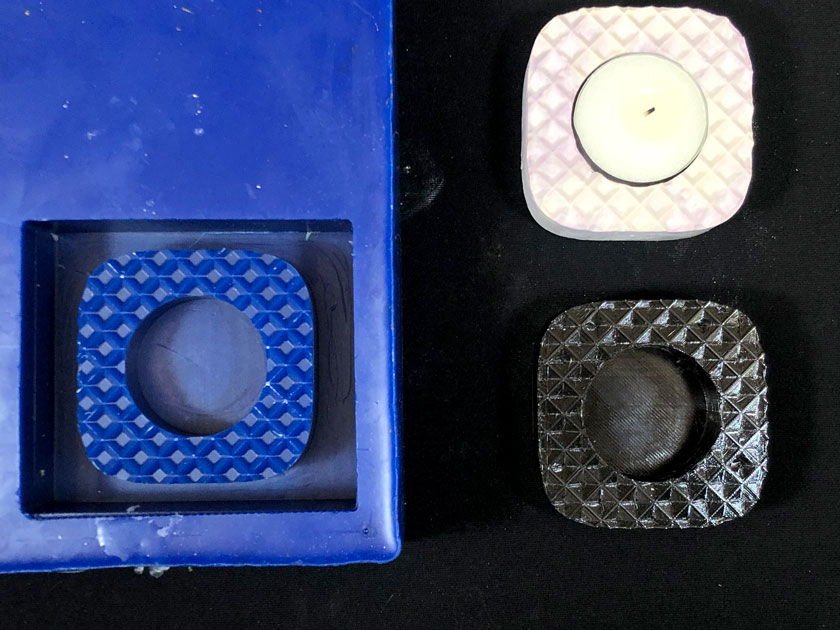
"Showing the process visually: wax mold, 3d print + finished candle wolder "
TAKE B: PLATSIL MOLD + ACRYLICAST CANDLE HOLDER + MORE COLORED SWIRLS
As I was waiting for the first candle holder to set I decided to make another mold using Platsil which only takes 30 minutes to dry to cast another material.
I wasn’t as thorough with documentation this time as I didn’t have anyone else to help me take the pictures, and my gloves were to messy to grab the phone. So here it goes what I have.
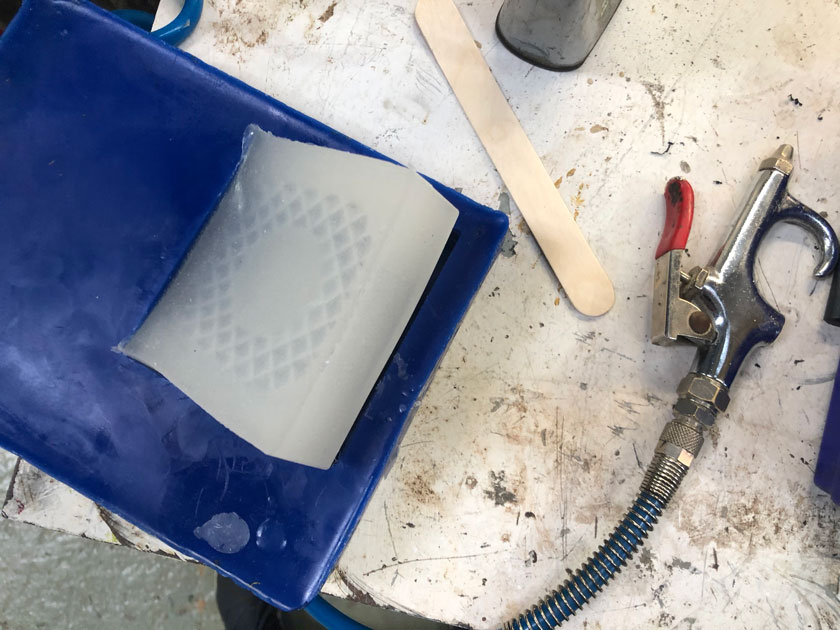
"The PLATSIL silicon was a lot more difficult to remove, so it needed compressed air to be pushed out. "
"Different combinations to get better swirls. "
The first candle holder turned out pretty well, but the colors were too pale and the swirls were almost invisible. We’ll see how this turns out.
HERO SHOT
This is the Hero shot for the two last candle holders that I casted. There are some evident defects because I added to much colorant and I didn’t mix well enough. For the future I’ll try a different ratio and maybe different dyes that are stronger or pure pigments.
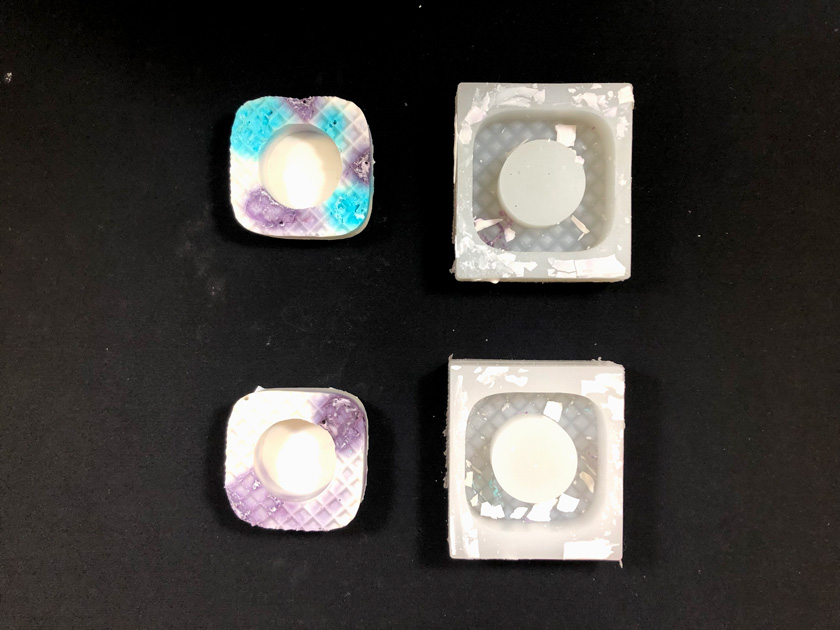
"New cast with an insame amount of colorant. "
WHAT WENT WELL
It worked: There were so many steps with so many waiting times that at some point I was skeptical that it would work. But it did, yay!
I learned a lot: There were many processed that I wasn’t familiar with that thanks to this assignment I know more about it.
WHAT COULD BE BETTER
Unrelatable to the final process: I had to create something simpler than what I would use for my final for the sake of time.
Machining time: Even I tried to simplify my design I ended up having a long cut. That difficulted some of my peers as I stayed a long time using the machine. We felt some times that we were more people than machines to fullfil this week’s assignment.