5. 3D Scanning and Printing
Group assignment: Test the design rules for your printer(s)
We tested a couple of 3D-printers: the Ultimaker2GO and the Prusa I3 using general PLA filament. Parts came out relatively fine and comparable on the 2 printers. We wanted to do a testprint on the EOS and the µPrint also, but they were both printing the last couple of days. We’ll try later.
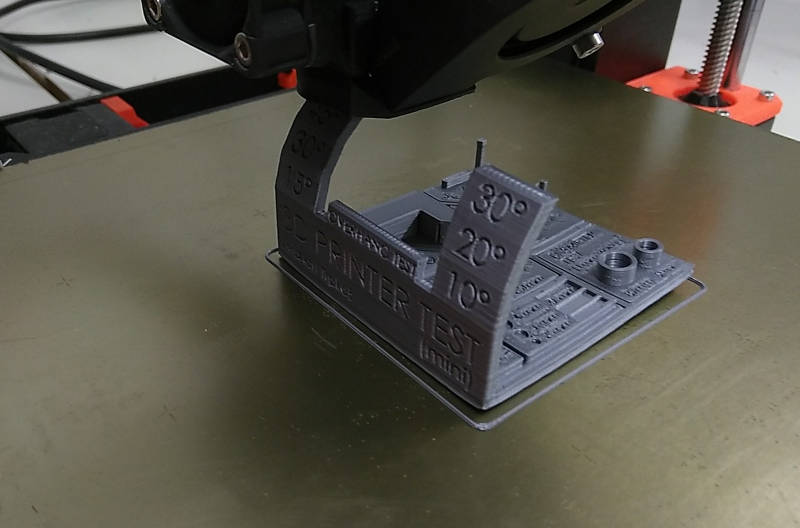
We downloaded a test file from thingiverse, the MINI All In One 3D printer test by majda107.
It was printed with 100% infill, no supports and 200µm layer height. As was recommended by the designer of the part.
During the print the part curled up in the corners. This could be due to the 100% infill used.

For the Prusa printer we used the Prusa slicer software and Cura for the Ultimaker.
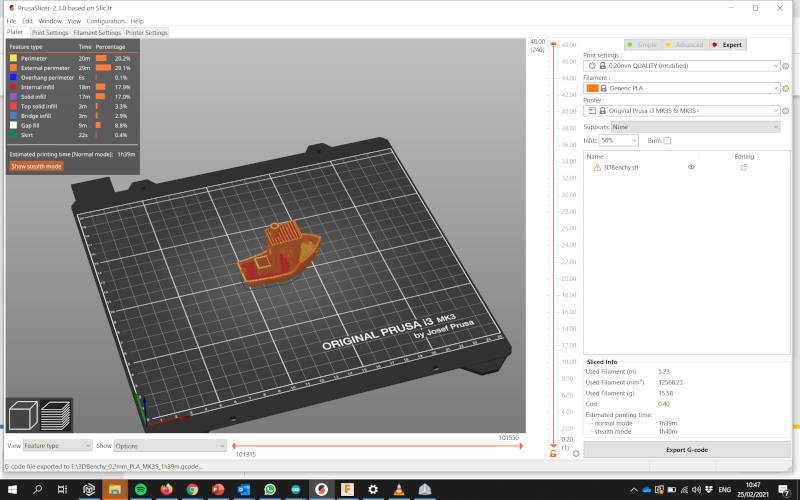 Both are advanced slicing softwares and support lots of different printers by now.
We used comparable settings in both software.
Both are advanced slicing softwares and support lots of different printers by now.
We used comparable settings in both software.
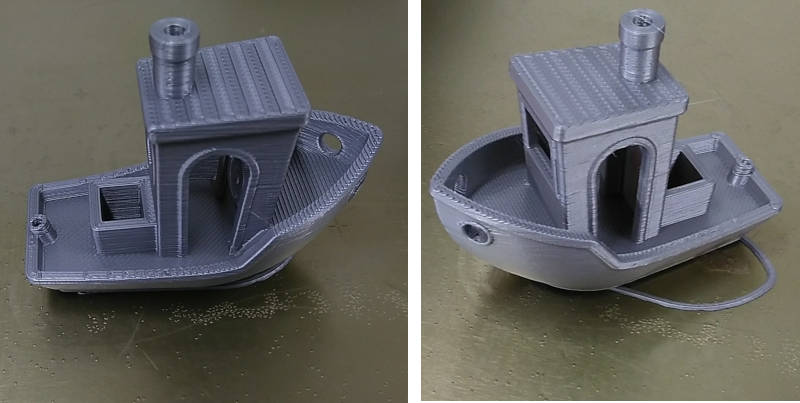
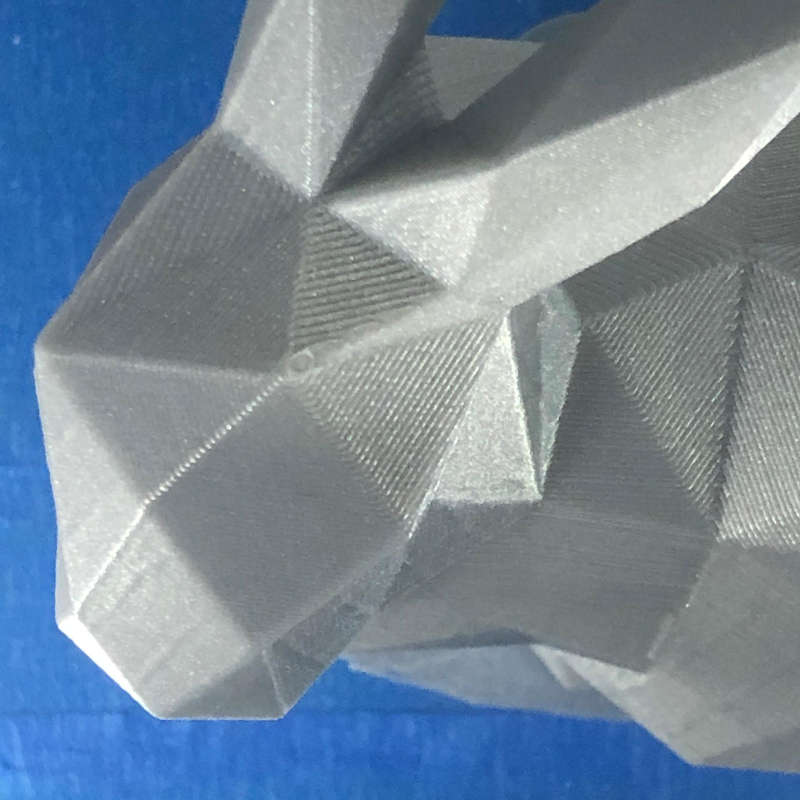
On the prusa we also did a 3D benchy test, this is a little boat designed so that it includes most of the difficulties you can encounter printing with an FDM print.
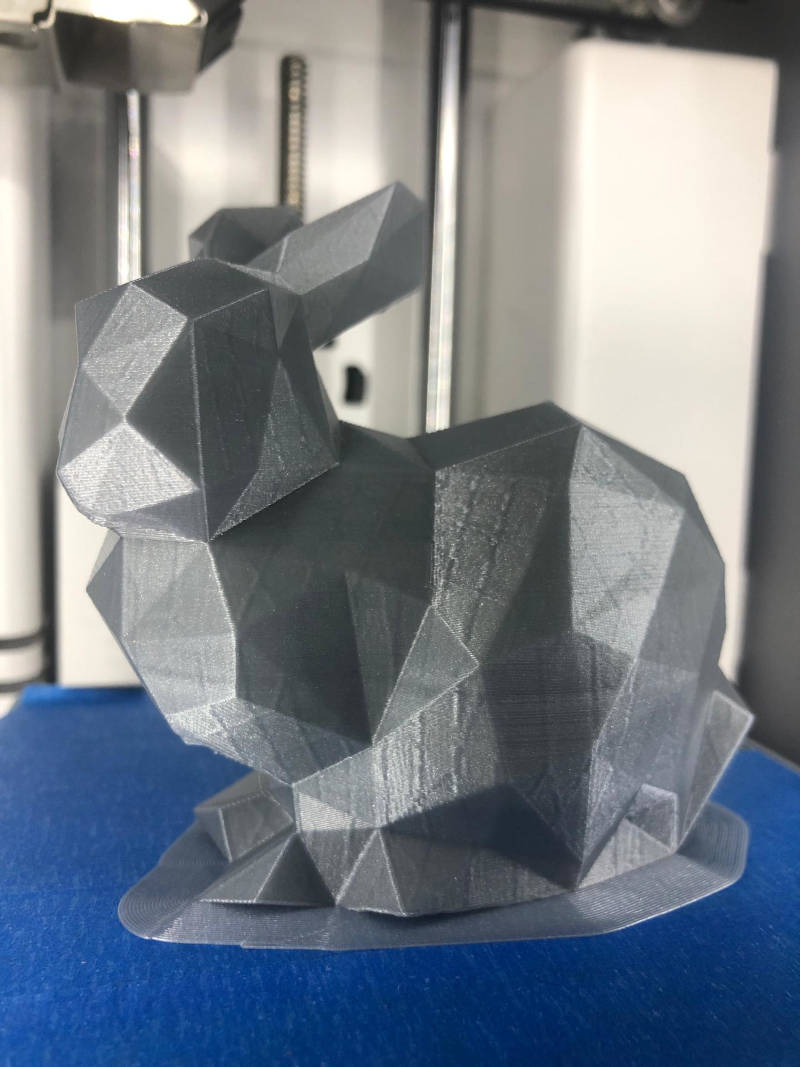
For the Ultimaker2Go we did a Stanford bunny print.
Results:
- overhang came out really well on both machines
- there was almost no stringing
- text was readable
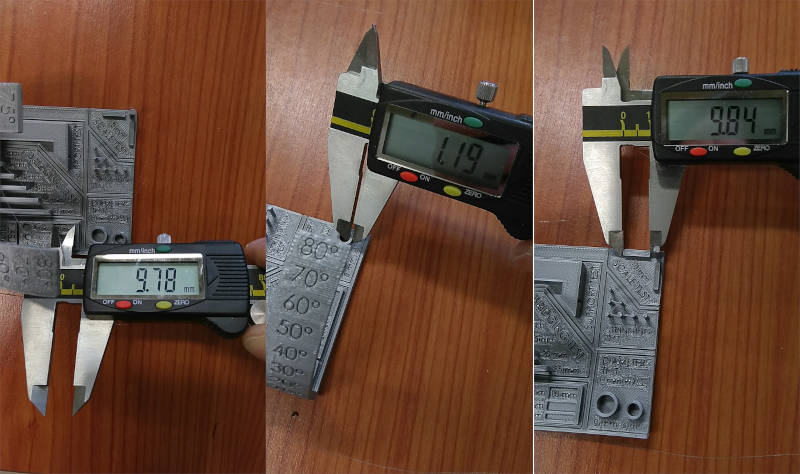
- dimensions: we have an average of about 0.2mm offset in both directions. So to make accurate parts we should compensate for 0.1mm in each direction.
Design and 3D print an object that could not be easily made subtractively
5. 3D scanning and printing
Design and 3D print an object that could not be easily made subtractively
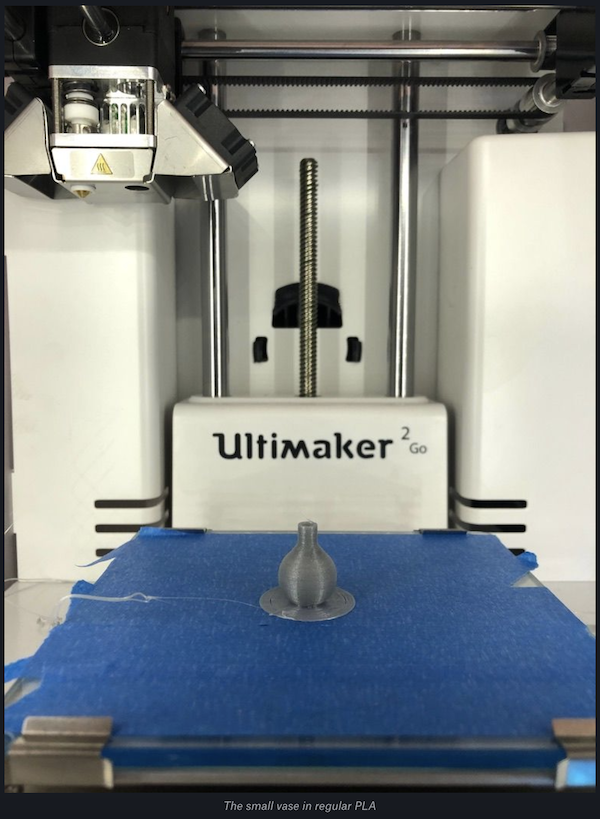
For this drawing assignment I wanted to make an Erlenmeyer vase that I would like to print in different sizes in wood filament.
I started off drawing a ball and added an empty cilinder on top. To make the vase hollow, the ball needed to have an extra empty sphere on the inside as well. In order to make the opening from the cilinder into the sphere, the empty cilinder needed to be longer than the outside cilinder. To calculate the right size, I needed to know the shell thickness of the outer sphere, as well as the length of the outer cilinder. It’s crucial to make the hollow cilinder at least the same length of these two values combined. Otherwise you wont be able to put something in your vase. That would be unfortunate and not very handy…

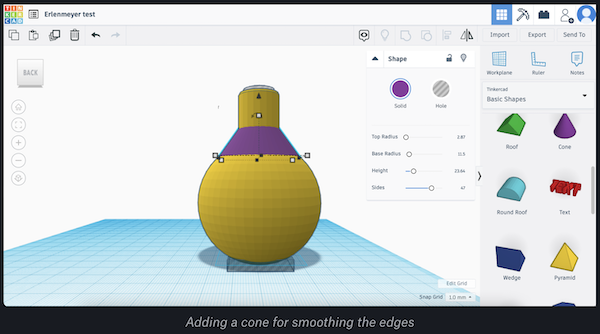
With the basic form in place, I wanted to create a more smooth edge going from the cilinder to the sphere. I did this using a cone. It took a while to get the parameters right, but I managed.
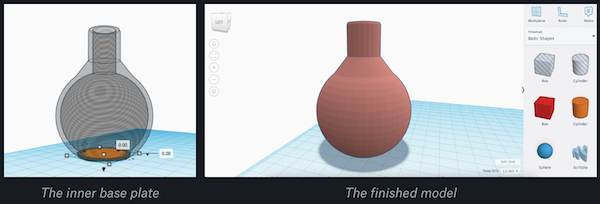
A final thing to take into account, is that a sphere wont stand on a table. So the vase needed to be flattened. I sliced the bottom off using an empty box. Afterwards I added a new base cilinder inside the vase.
The final step in the design process is to group all the parts so it becomes one model.
After designing, it still needed printing. I made a super small version and it’s adorable!
3D scan an object, try to prepare it for printing (and optionally print it)
I had to scan something. Obviously the first thing I did was try to scan Mysa, my dog. She did a good job of staying still, well… most of the time 😉.
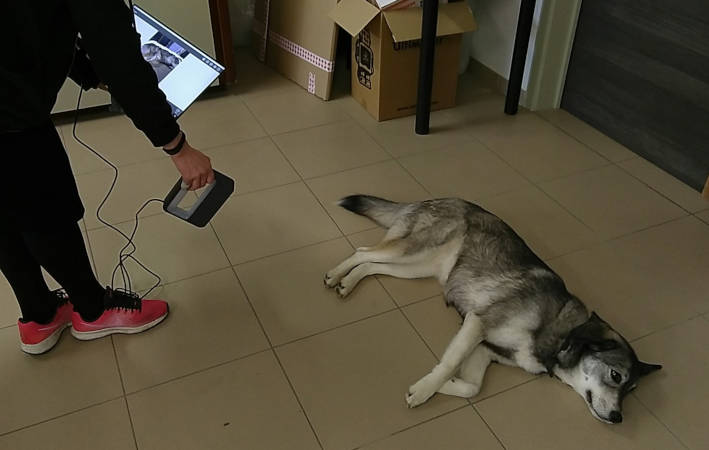
Although obsolete, we used the Cubify Sense scanner. Because that is what we have available in the lab. You can still activate the device and download the software to use it.
Scanning with the Sense is pretty straightforward. To start you choose what you want to scan based on the size. Then you aim at the object and slowly go around it with the scanner.
Make sure you keep the same distance and the object in the circle on the screen. When the software loses track, you can go back a bit and continue.
After the scanning the Sense software let you do basic cleaning and deleting parts you don’t want. After that it solidifies the scan and you can do basic touch-up before you save it.
Time to scrape the dog off the floor… (It’s a dog’s life…)
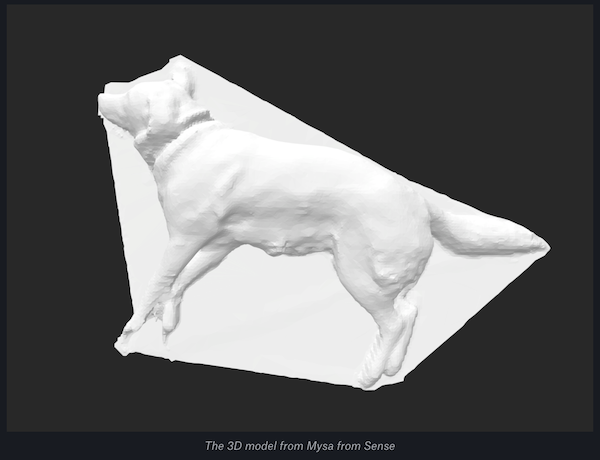
Mysa came out pretty okay after the touch-ups in the sense software. But you could clearly see she was lying on the floor while scanning as the floor was also part of the scan. Not the goal!

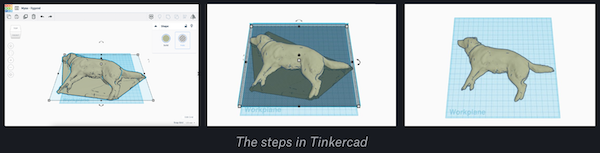
So to easily remove the floor, I used Tinkercad and did a couple of very easy steps.
1/ Import the OBJ model file 2/ Add an empty box of a few mm underneath your model 3/ Merge both and ta dah your dog is loose from the ground!
After exporting the file, I imported it to Cura for slicing and printing it on the Ultimaker2GO.
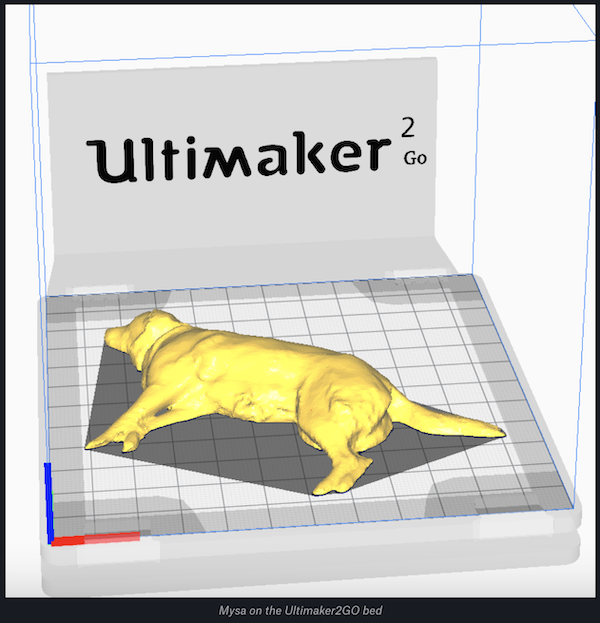
I used the wood filament to have the print in a similar color to her fur. It came out great! Now I can give a 3D-printed Mysa to all my colleagues who miss her during the COVID pandemic… Working from home is hard for an office dog.
I might also print her bigger and make her more heavy so I can use her as a door stop during summertime.
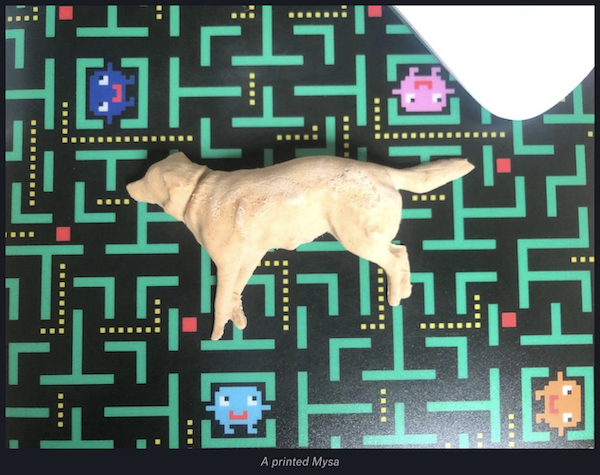
In love with my dog? Print your own Mysa!