Mechanical Design & Machine Design
Assignment - Computer-Aided Design
- design a machine that includes mechanism+actuation+automation
- build the mechanical parts and operate it manually
- document the group project and your individual contribution
- IDEA
-
To solve this week’s task, it was necessary to first decide what we were going to do. Since my colleague Matasović and I belong to the remote FABLAB Barcelona and work together, it was decided that the two of us would do this task together. After a few ideas, we decided to make a CNC Plotter Machine. In order to design and make this device, we first researched already existing projects and made CNC plotters. Since we are not in the FABLABA space itself, due to the current COVID situation, we had to adapt to the situation and make a CNC plotter from those parts that are available to us at home.
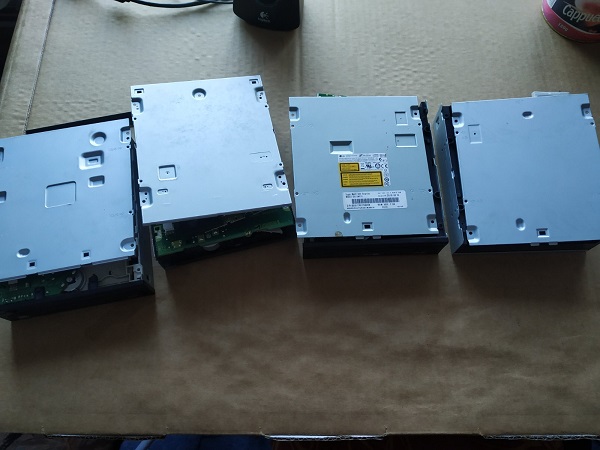
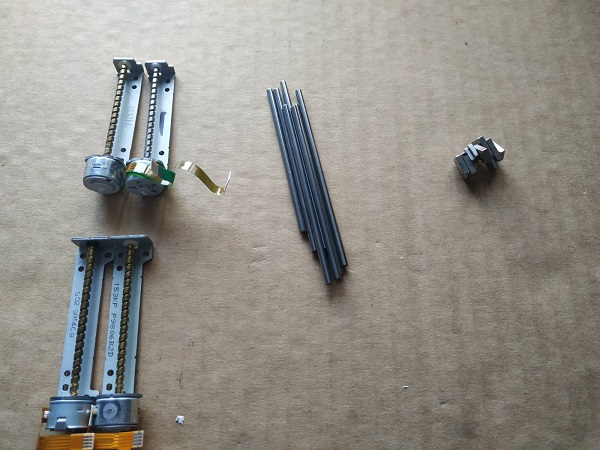 For the case, we chose an old CD & DVD burner that we disassembled to get the necessary parts.
After disassembly, we measured the required parts.
This was followed by the design of the necessary parts of the CNC mini plotter.
For the case, we chose an old CD & DVD burner that we disassembled to get the necessary parts.
After disassembly, we measured the required parts.
This was followed by the design of the necessary parts of the CNC mini plotter.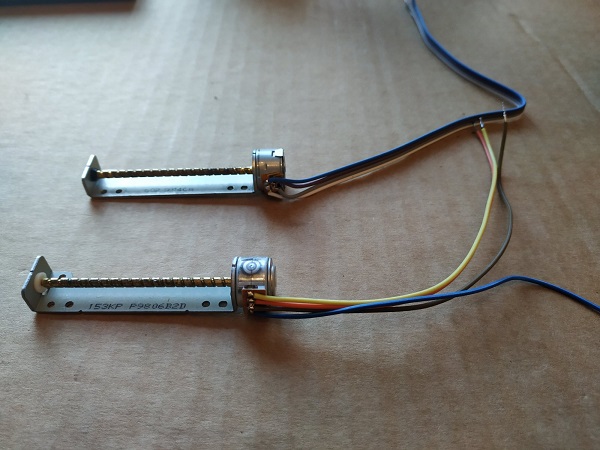
- 3D MODELING
-
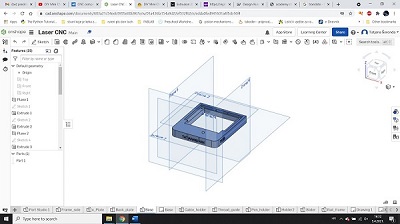
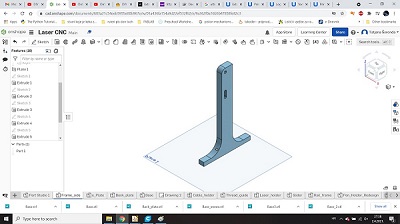
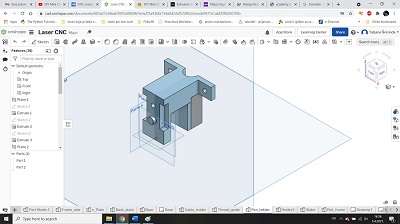
The housing is designed in the OnShape program and consists of the following parts:
- Base
- Frame_side
- Back_plate
- Pen_holder
- Holder2
- Plate
- Thread_guide
- Slider
- Rail
- Cable holder
- 3D PRINTING
-
I used The Ultimaker S3 to make the parts on the 3D printer and Ultimaker Cura for slicing.
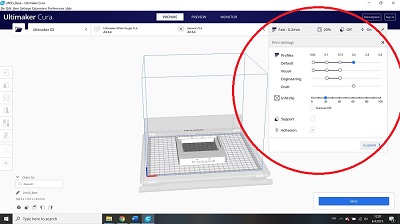 The same 3D printer settings are selected for all parts:
- layer thickness 0.2 mm
- infill 20%
- without suport
- with adhesion included
- ASSEMBLY
-
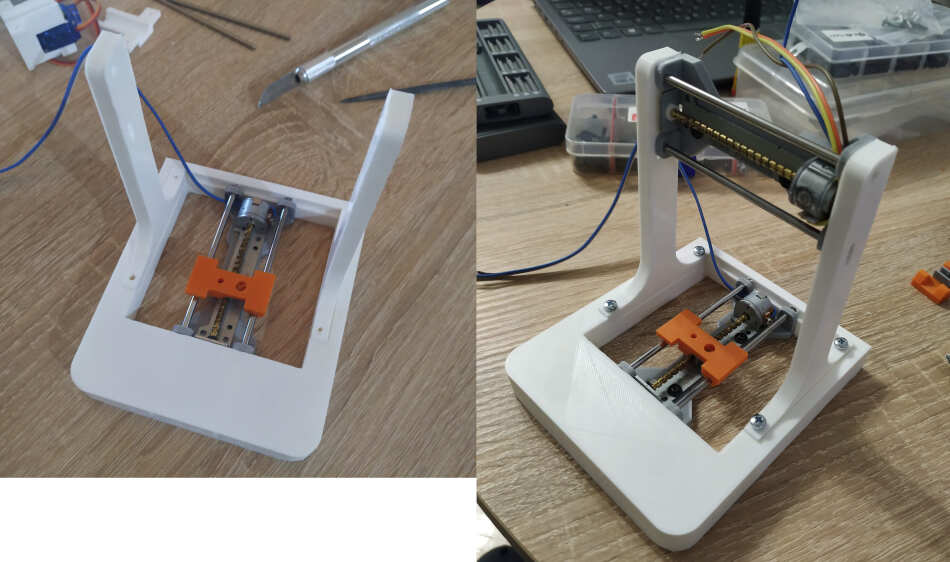
 My colleague Ivan Matasović was in charge of assembling the 3D parts and the parts we took out of the old Cd/DVD burner.
Then he programmed the CNC plotter using an Arduino Uno. On top of arduino uno goes motor shield.
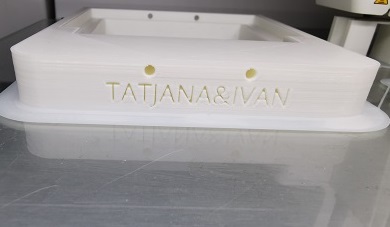
During the assembly, some parts broke, so they had to be reprinted 3D.
My colleague Ivan Matasović was in charge of assembling the 3D parts and the parts we took out of the old Cd/DVD burner.
Then he programmed the CNC plotter using an Arduino Uno. On top of arduino uno goes motor shield.
During the assembly, some parts broke, so they had to be reprinted 3D.
- PROGRAMING & TESTING
-
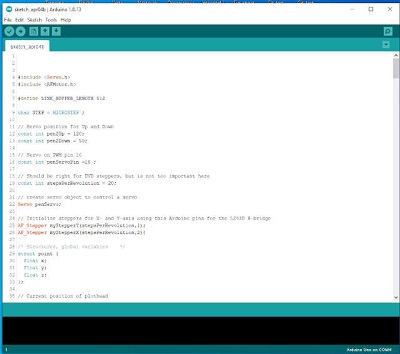
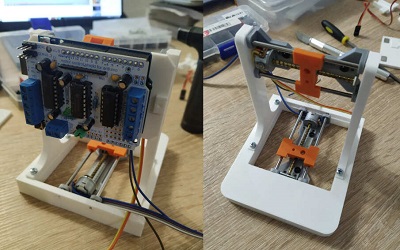
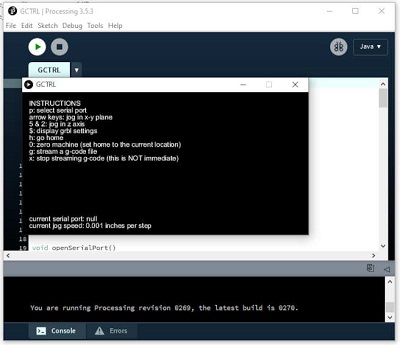 When he connected it all it was time to program Arduino so that he can communicate with the machine over Gcode.
He used sketch based on GBRL. It’s important to add a library from AdaFruit, AFMotor library in order to work.
In arduino sketch he changed steps per pervolution to 20 (from the datasheet above).
When he connected it all it was time to program Arduino so that he can communicate with the machine over Gcode.
He used sketch based on GBRL. It’s important to add a library from AdaFruit, AFMotor library in order to work.
In arduino sketch he changed steps per pervolution to 20 (from the datasheet above).
-
Link to group web page: MINI CNC plotter
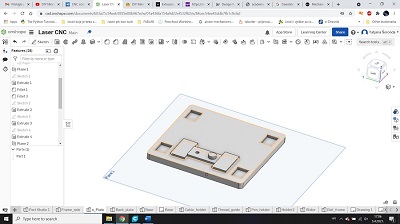
I started making the drawings by making the Base, which is followed by all the other parts.
Base
Frame side
Back

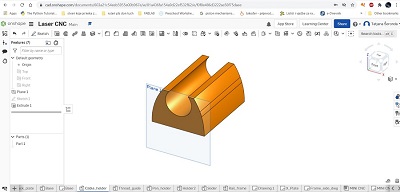
Pen holder
Pen holder2

Plate
Rail
Cable holder
Thread guide
 Once all the parts are drawn they are transferred to the dwg file and to the stl file.
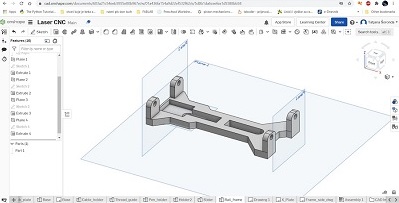
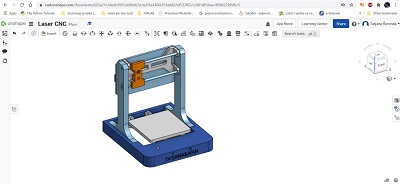
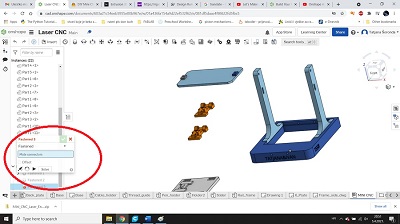
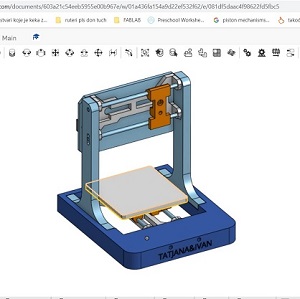
I made an assembly from ready-made 3D parts.
Once all the parts are drawn they are transferred to the dwg file and to the stl file.
I made an assembly from ready-made 3D parts.
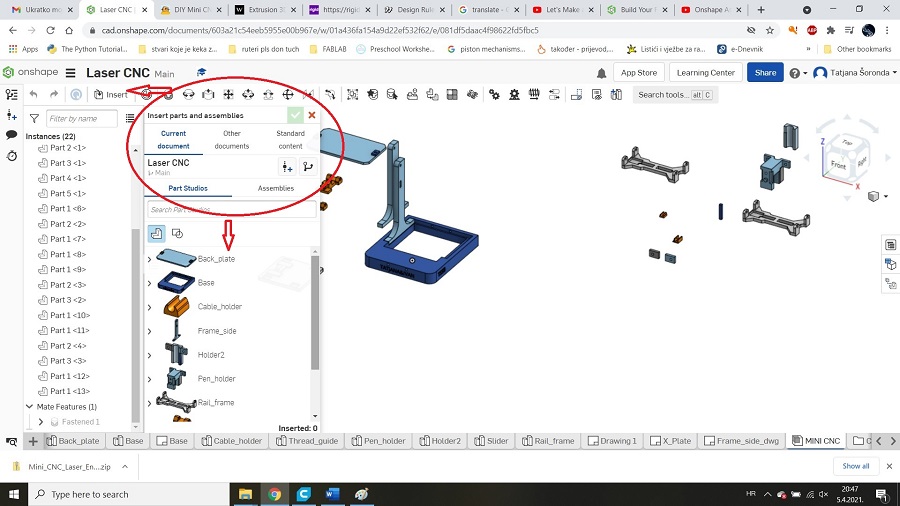
 I first inserted the necessary parts into the assembly part.
For the purpose of assembling the assembly, each part had to be rotated to the appropriate position.
I first inserted the necessary parts into the assembly part.
For the purpose of assembling the assembly, each part had to be rotated to the appropriate position.
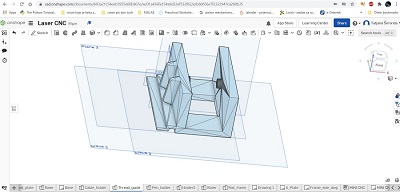
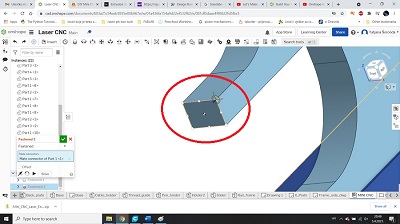
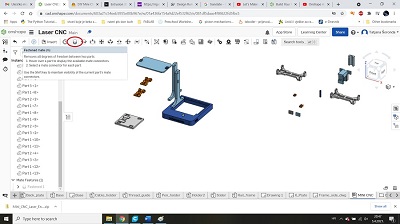 After that, I determined the connection points for each part separately – fastened mate - ,
with the base being a fixed part to which all other parts were added.
After that, I determined the connection points for each part separately – fastened mate - ,
with the base being a fixed part to which all other parts were added.
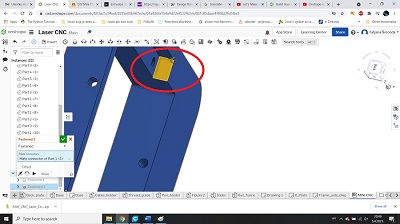
First fastened_mate connection point
Second fastened_mate connection point
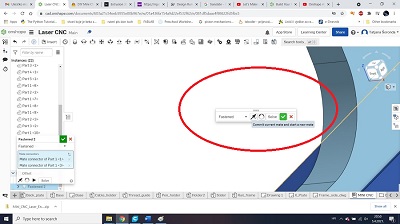
 After selecting the connection points, the selection must be confirmed.
 After I connected the fixed parts it was necessary to connect the moving
parts so that the connection point is selected again but this time using the slider_mate command.
After I connected the fixed parts it was necessary to connect the moving
parts so that the connection point is selected again but this time using the slider_mate command.
First slider_mate connection point

Second fastened_mate connection point
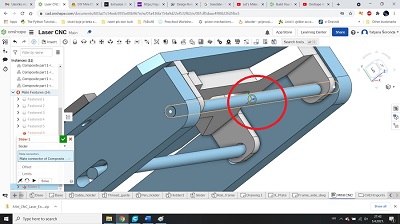
Confirm selection
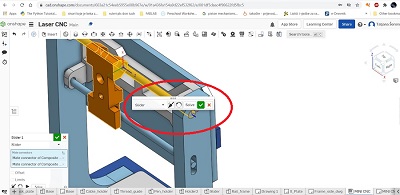
Rail on it's place
 After I connected the fixed parts it was necessary to connect the moving
parts so that the connection point is selected again but this time using the slider_mate command.
After I connected the fixed parts it was necessary to connect the moving
parts so that the connection point is selected again but this time using the slider_mate command.
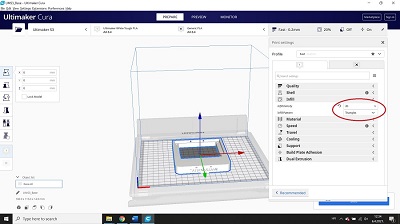
 For the in fill pattern I chose triangles.
Since this printer has the ability to work with two filaments, I turned off head no.2.
I chose white tough filament and 0.4mm nozzle size.
For the in fill pattern I chose triangles.
Since this printer has the ability to work with two filaments, I turned off head no.2.
I chose white tough filament and 0.4mm nozzle size.
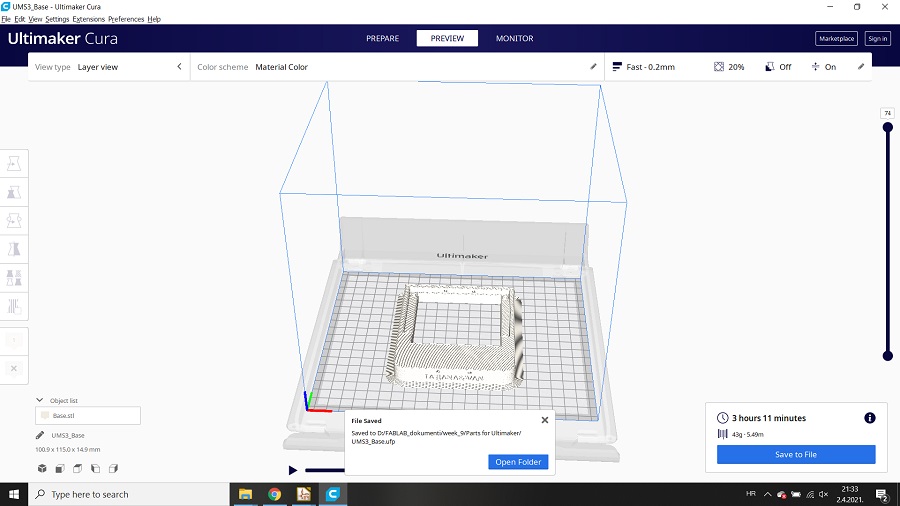
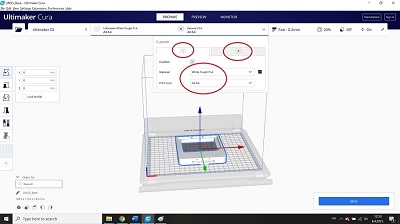
 After the selected settings, I made a slice for the part that needed to be printed in 3D.
It took 3 h11 min to print the base of the machine.
After the selected settings, I made a slice for the part that needed to be printed in 3D.
It took 3 h11 min to print the base of the machine.
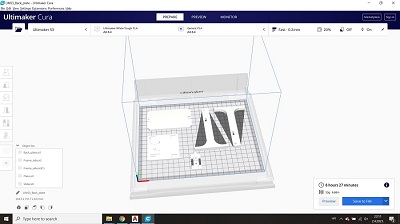
 Since some of the parts are smaller I put a few parts to print together. It took 6h 27min to print them.
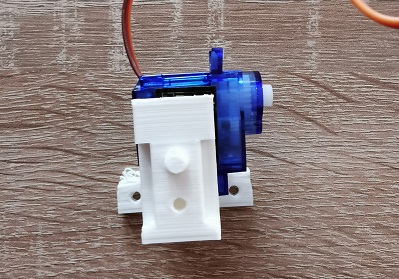
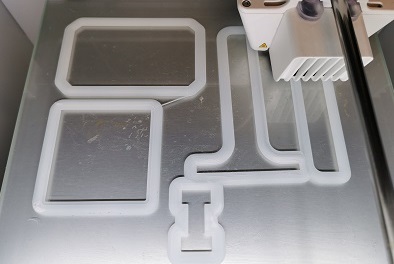
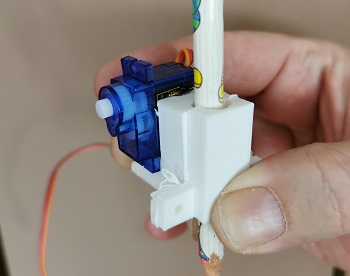 Pen and motor holder
Link to Ivan Matasović page: Ivan Matasović