2. Project management⚓︎
After having done Principles and Practices as a first contact, we are now on to the second assignment. For this first week we have to build a personal site and start using Git as the main tool to upload all the website content. Since I’ve been learning some C programming at 42 Academy, Git was a mandatory tool to work with, so I’ll get quicly with it even it’s a different enviroment. In the other side I haven’t made any contact with web development, si I’ll try to document my learning process and the difficulties that I encounter to meet the proposed objectives. My final goal is to have a working site with deep knowledge on how it works. If I get quickly to it, HTML can be the next step. Let’s get on with this. Here are the Assesment Criteria related to Project Management:
-
Individual assignment
- Build a personal site describing you and your final project.
- Upload it to the class archive.
- Work through a git tutorial.
-
Learning outcomes
- Explore and use website development tools.
- Identify and utilise version control protocols.
-
Have you?
- Made a website and described how you did it.
- Introduced yourself.
- Documented steps for uploading files to archive.
- Pushed to the class archive.
- Signed and uploaded Student Agreement.
GitLab Online⚓︎
The first thing you will face during FabAcademy is your online GitLab account and repository. As I entered in the repository, I noticed there where some existing documents in it, so I started reading the Readme.md as it suggests.
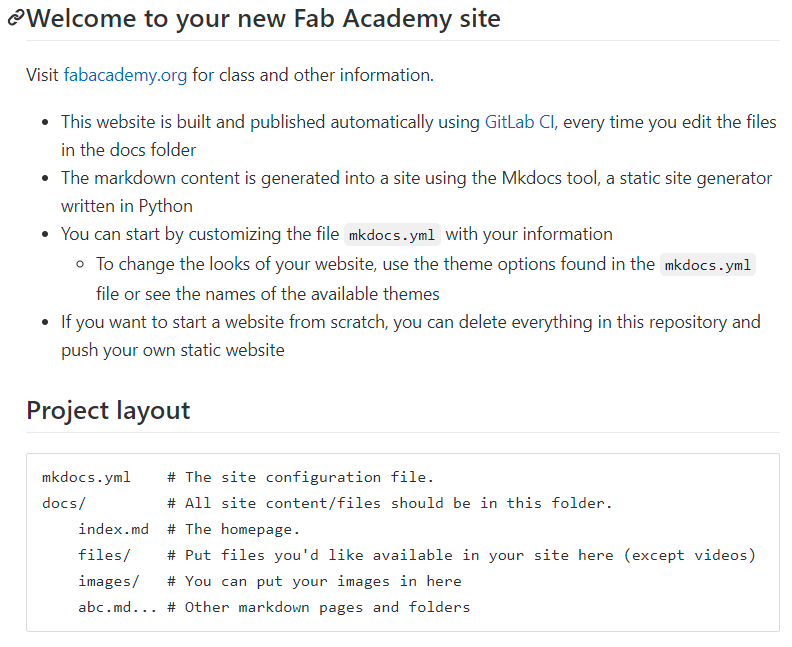
Reading through, I understood I had already a built Markdown website that I could configure to my taste. As it says in the Project Layout code lines, the site can be configured editing this documents online, so I started walking through the files.
Editing MarkDown through GitLab online⚓︎
To start editing any file on your repository, you first have to click on it and it will open in “readme” mode. As I wanted to make some first visual changes, I opened the mkdocs.yml file. Then you have 2 options.
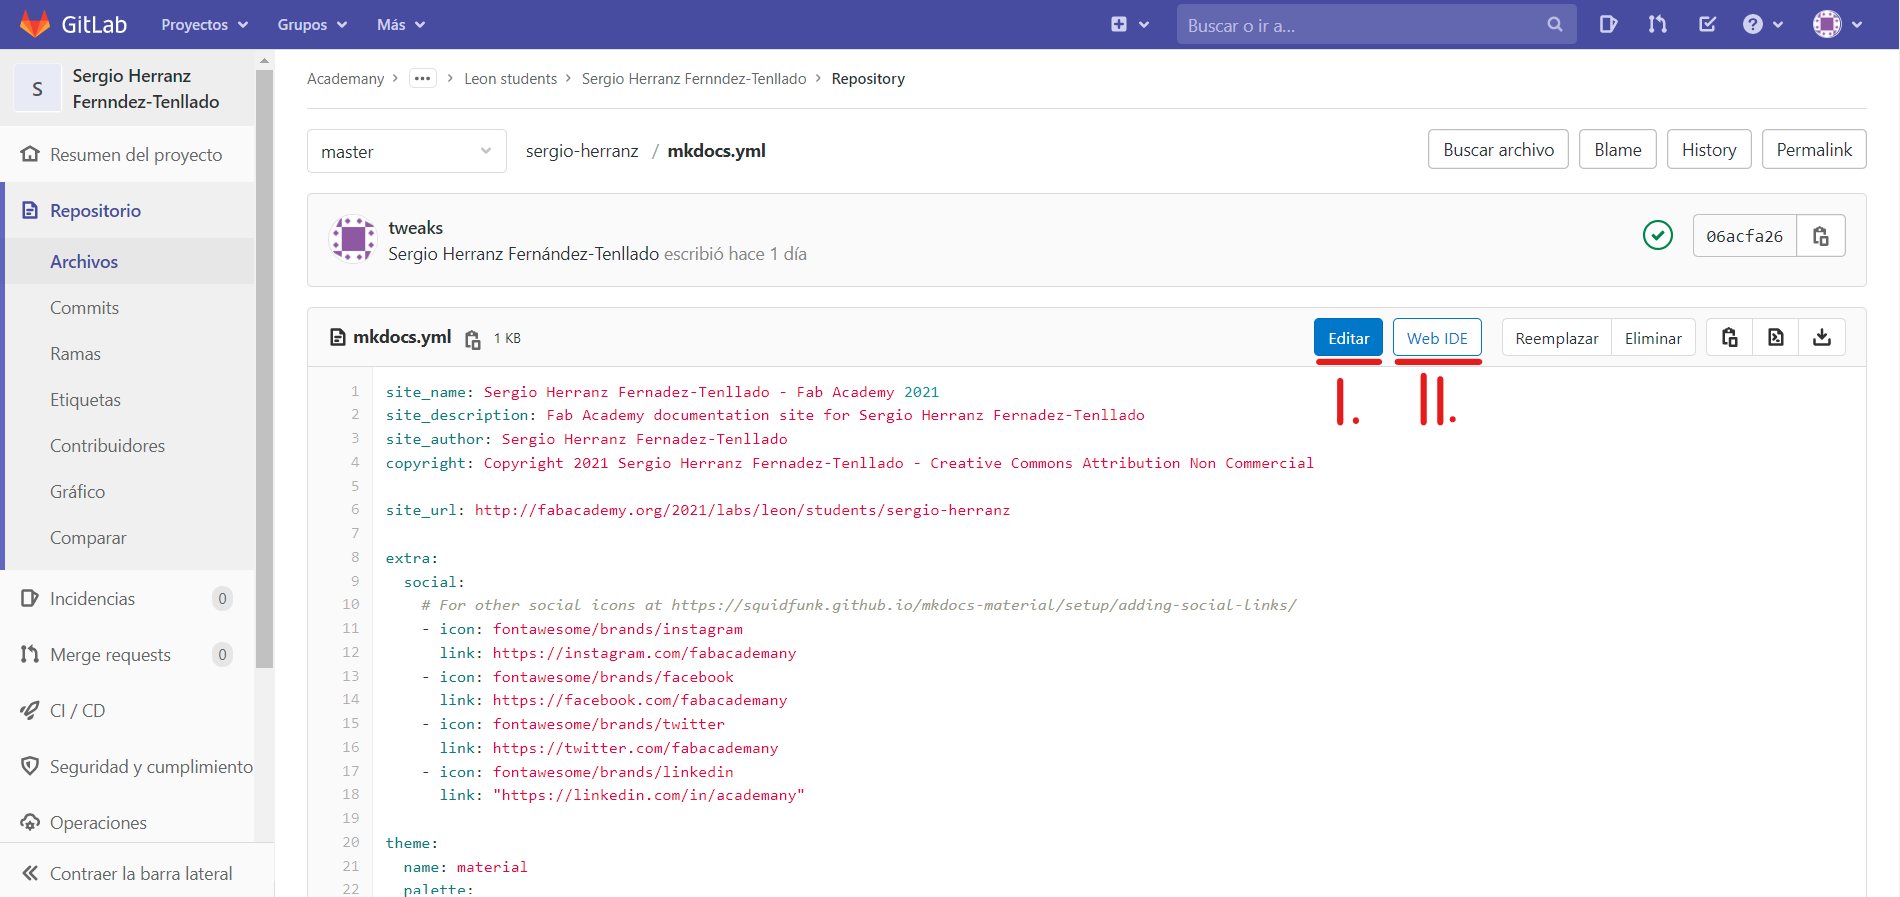
As shown in the image above, there are 2 bottons. Both can be used to edit the file, the difference lays on the interface you will be using.
- (I) The blue edit botton will open that file on an standard text editor with a commit option at the bottom, to save your changes.
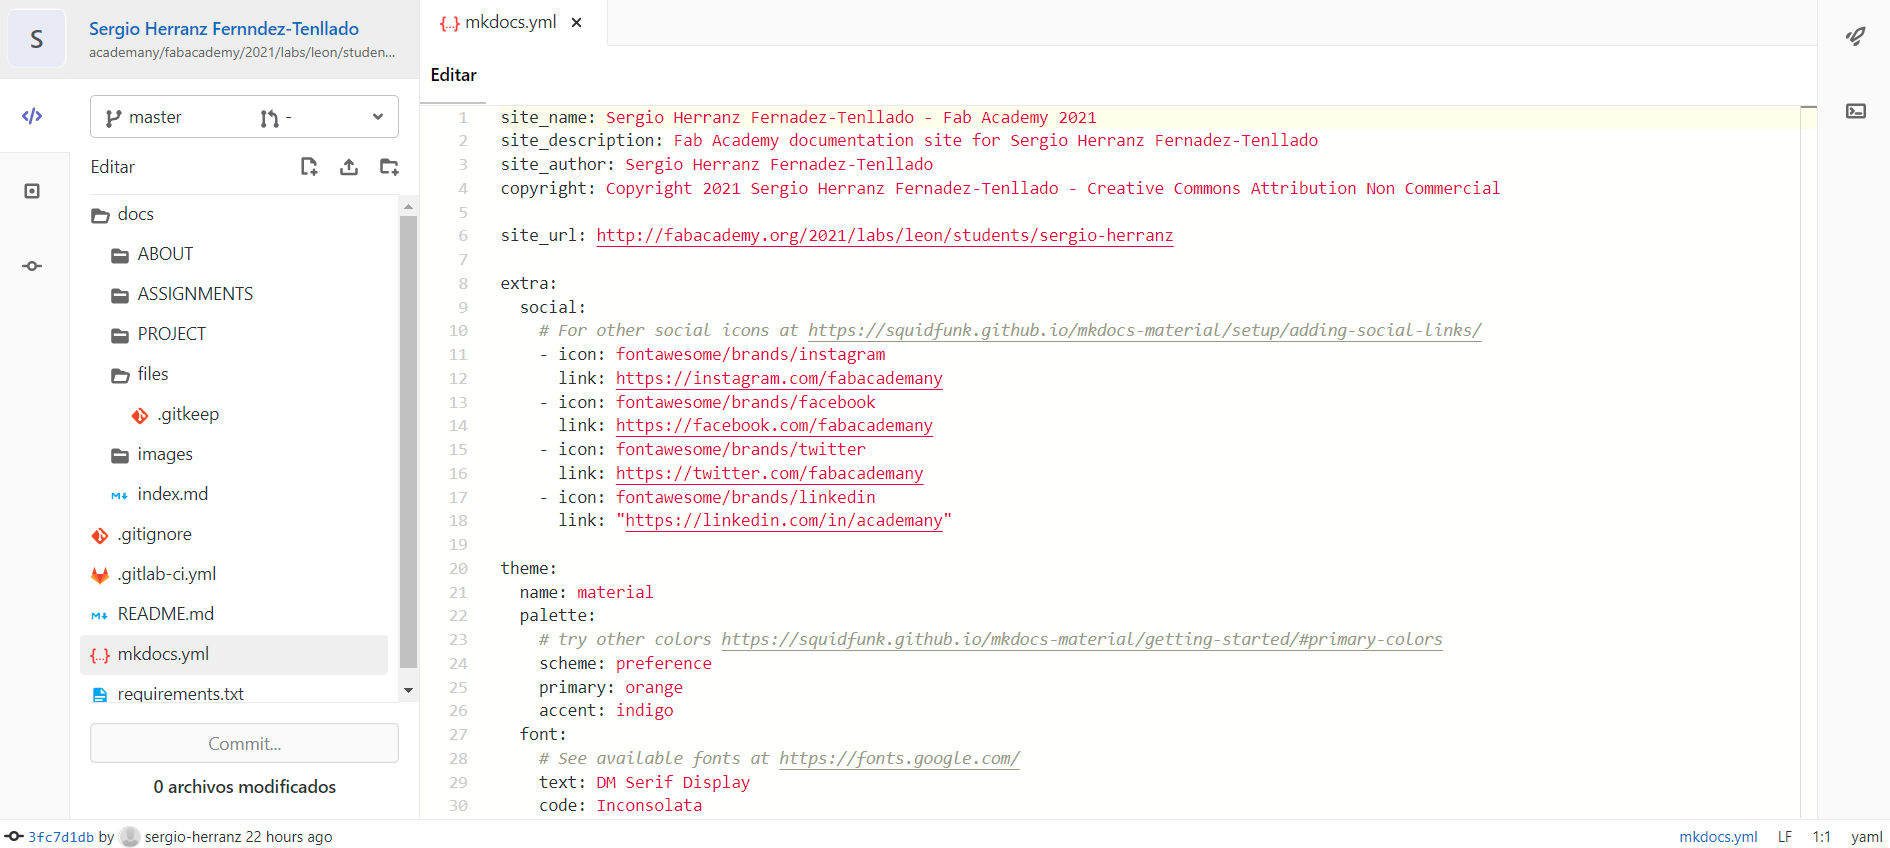
- (II) The web IDE botton stands for an Integrated Development Environment, which will allow you for a full “code editing software” like experience with all the files on your repository, so you can make multiple changes on different files to finally commit them at once with the commit botton below all the directories and files. You even have a terminal and a pipeline located in the rigth as two other bottons. This is what the web IDE looks like:
To undestand more what is going on in those code lines I visited the official MKDocs site. As it’s written in the Readme.md file shown at the beginning, looks like MkDocs uses themes to change the appearance of the web, which are defined in the mkdocs.yml file.
theme:
  name: material
  palette:
    primary: deep
    accent: indigo
  font:
    text: Ubuntu
    code: Ubuntu Mono
  icon:
    logo: material/school
By default our website is using a theme called material, which isn’t a built-in theme for MkDocs. Third party themes have their own documentation, so Material has its own GitHub repository and a MkDocs website as a demo for preview.
We can find more detailed info on how to change the color, font or logo in the setup tab on the Material MkDocs web with built in tools for previewing how the changes would look like. After some simple changes, it’s time to commit and refresh the page to see how it has changed!
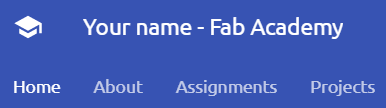
Much better! It’s time to move on and get Git configured locally.
Experience and impressions⚓︎
For somebody who isn’t familiarized with version control, code or a command line, Git can be a bit scary at the beginning, so an easier way to start aproaching this tool is working with the web interface. It is a fast and easy way to make changes to your repository without getting to know any commands, using a text editor or a terminal. Working with Git through the web IDE has been an easy and successful experience, but it has it’s limitations.
GitLab on local⚓︎
Since the objective was to get MkDocs working locally, I followed the intructions written in the Readme.md file. This is the order in which I found easier to follow the steps, as one led me to another.
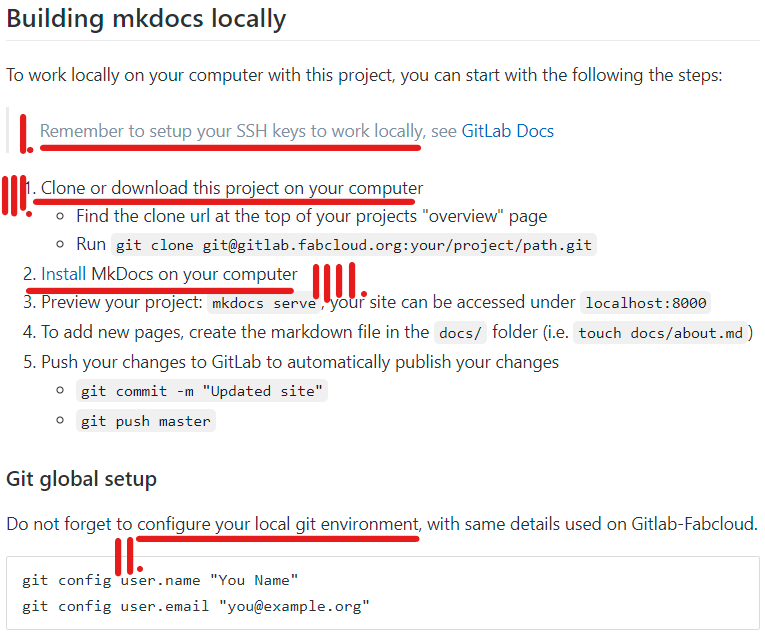
- (I) Before the first written step, there is an advert that you should configure your SSH key to work from local, and a link to the GitLab Docs page. By clicking there it will show up this:
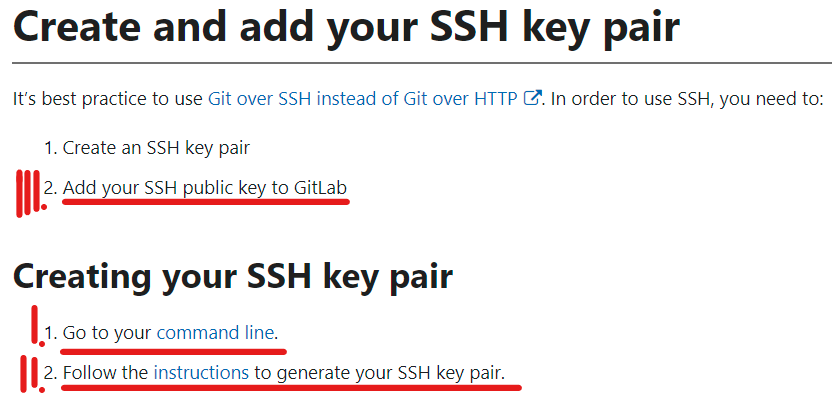
- (I.I) Apparently, the first thing we should do to get Git locally working, even before than having an SSK key, is having a command line. GitLab Docs has also a link to show us which are our command line possibilities.
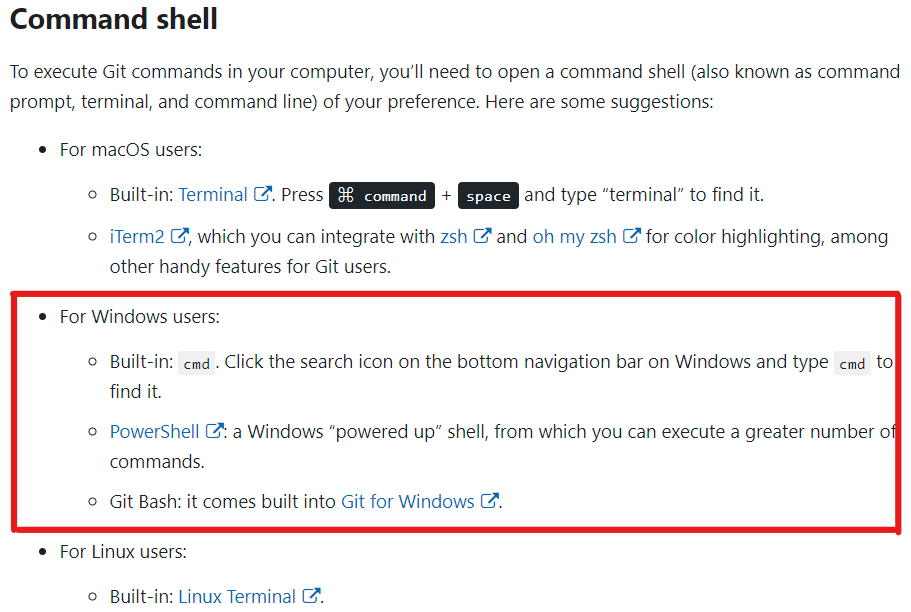
As a Windows user, it suggests 3 options. CMD which is the ancient terminal of Windows, PowerShell and Git for Windows. We can add to this list two more alternatives: Windows Subsystem for Linux and Windows Terminal which are both two recently released tools that provide a whole new world of possibilities.
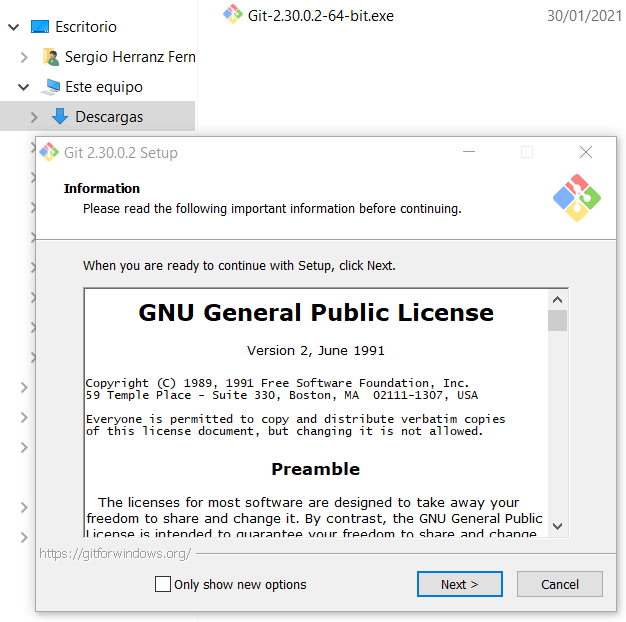
Command line for Git⚓︎
This terminal/shell world can be pretty tempting to investigate about, and I encourage you to do so, but for our purpose Git for Windows is the perfect choice, since it is a command line with bash and git installed in it. To get it working is as simple as going to the official page linked above, downloading the executable and installing it. I have left the default options in the instalation process.
Once it finishes, we are ready to get it working.
Generating the SSH-key⚓︎
- (I.II) This is how to generate the SSH-key. There are four types of SSH keys. RSA is the one we looking for. An RSA SSH key can be configured in lenght for more security. To generate one we have to type this command:
ssh-keygen -t rsa -b 2048 -C "email@example.com"
The -C flag, with a quoted comment such as an email address, is an optional way to label your SSH keys. After executing the command, we’ll see a similar response to:
Generating public/private rsa key pair
Enter file in which to save the key (/home/user/.ssh/id_rsa):
Finally we have to copy the key to the clipboard, to put it later on GitLab. To do so, we can execute this simple command:
cat ~/.ssh/id_rsa.pub | clip
Adding it to GitLab⚓︎
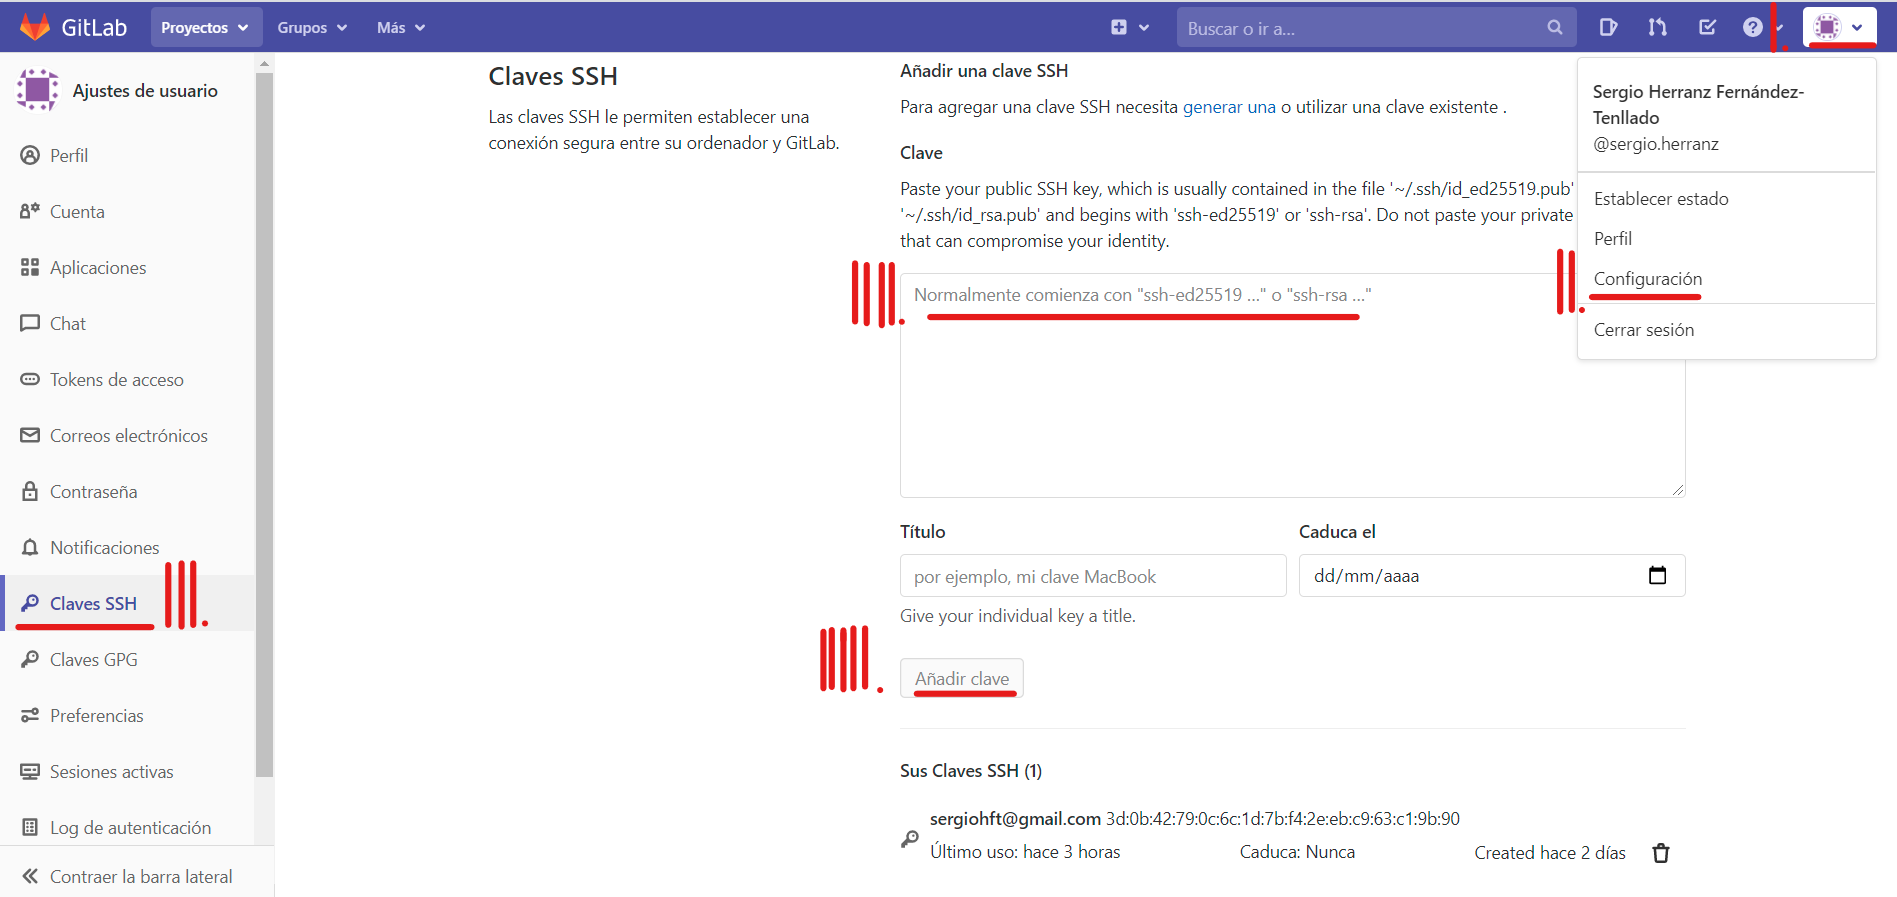
- (I.III) To add it to our GitLab account we have to be logged in. (I) Then we will click on our profile pic on the top right side. (II) Next we will click configuration in the drop down shown. (III) It will appear a panel on the left with a ssh key option. (IIII) Once we are there, we have to paste our hole length key in the big blank box. (IIIII) Finally we have to save the key by clicking add. There is no need to specify date or name, thats a personal choice.
Getting Git configured⚓︎
As I have used Git before, my learning process hasn’t been too tedious, but since I have used it in another platform (MacOS), all the tools to get it working were different. So here is where my journey starts.
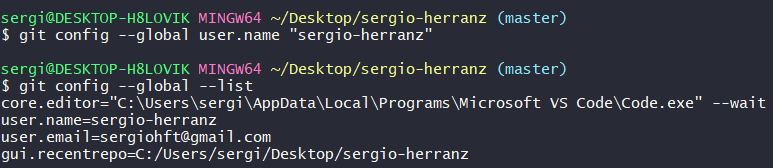
- (II) For now we just want to set up our credentials to let Git know who will make the changes on the repository. To do so, use these commands. Use the same name and email linked to your GitLab account.
git config --global user.name "your_username"
git config --global user.email "your_email_adress@example.com"
--global option tells Git to always use this information for anything you do on your system. If you omit --global or use --local, the configuration will be applied only to the current repository. If we want to check if we did it correctly, we can use git config --global --list.
Cloning from Git⚓︎
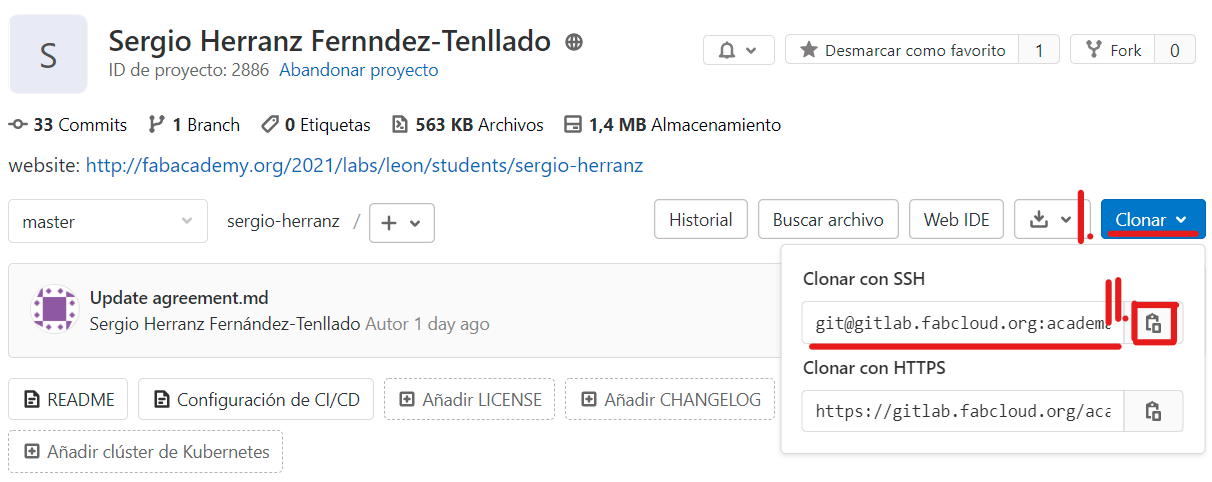
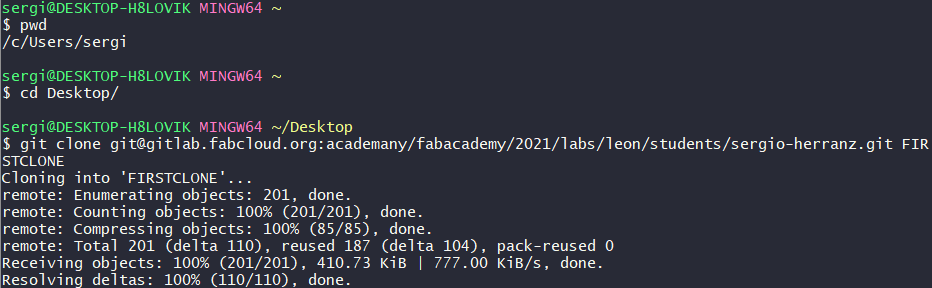
- (III) To make our first clone from Git, first we have to get to the local repository we want to clone our GitLab repo. We can do so navigating with the commands through the git bash terminal. Once there we just have to execute
git clonefollowed by the url of our repository which we can find here:
We can name our local repository as we want, especifying the name in the git clone command after the repo url, like this:
git clone GitRepositoryURL RepositoryNameExample
If we dont specify the name, it will create the folder with the name stablished on GitLab. I used “FIRSTCLONE” as a test run. We can make as many clones of our repository as we want.
Upload changes⚓︎
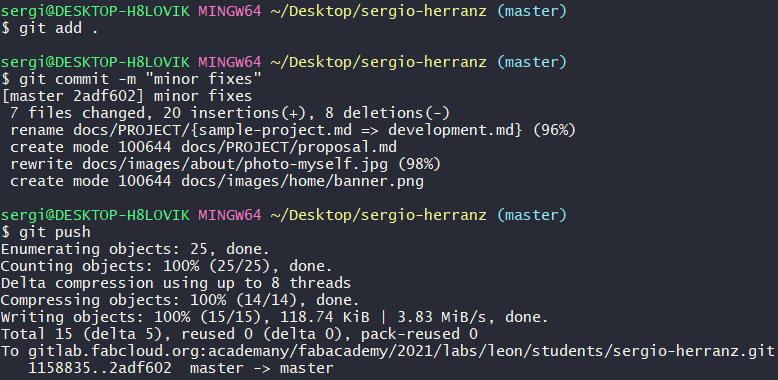
Now it’s about the mantra. Every time we are going to start working locally on our repo, It’s advisable to do a git pull to let any changes made online clone locally and not overwrite them later. Once we have finished working, its time to say to git with files we want to stage to upload. This is done with git add *examplefile1 examplefile5*. The we can commit them, which is recommended to do it with a comment defined with the flag -m, git commit -m "examplefile 1 and 5". Finally it’s time for git push to upload the files to the repo.
Experience and impressions⚓︎
Although working with Git through the web IDE has been an easy and successful experience, it has it’s limitations. Working locally provides you with all the tools that you are used to use or just wan’t to try out, to then use Git to upload the changes to your repository. The idea is to work in all your files in your favorite software and then merge all the work with the one online, regardless of the people who are working on those files at the same time. Since I had used Git before, it has been an easy tool to get working again.
Setting up MkDocs locally⚓︎
- (IIII) Now we have to install MkDocs on our computer to work fully local.
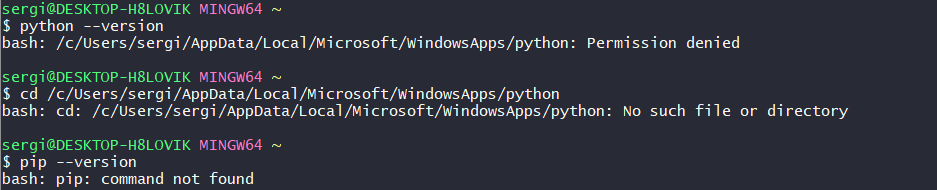
In order to manually install MkDocs we’ll need Python installed in our system, as well as the Python package manager, pip. You can check if you have these already installed from the command line:
python --version
pip --version
Installing Python⚓︎
Trying to check the Python version installed, looks like it is installed buts has no permissions to run it. Checking the file directory appears that it doesn’t exists, even running the git bash in admin mode. So we are just going for a fresh install.
Install Python by downloading an installer appropriate for your system from python.org and running it. Note: If you are installing Python on Windows, be sure to check the box to have Python added to your PATH if the installer offers such an option (it’s normally off by default).
If you’re using a recent version of Python, the Python package manager, pip, is most likely installed by default. However, you may need to upgrade pip to the latest version:
pip install --upgrade pip
The first try looks like it failed because of permissions so we will run it again. Doing so and checking the version reveals we have the latest version so we it worked beside the error message.

Mkdocs install and plugins⚓︎
Having done the Python install, I totally forgot about installing MkDocs, so I tried to run it like so and the result was obvious. At first I thought I wasn’t in the right directory but later I realised we have to install MkDocs.

We just have to run pip install mkdocs on the shell. When it finished I innocently believed that there weren’t anything more to install, but running mkdocs serve reveals I was being too optimistic.

-
Installing the theme:
pip install mkdocs-material. I found this solution through the MkDocs documentation and the Material theme GitHub page. -
Installing the plugin:
pip install mkdocs-git-revision-date-localized-plugin. For Plugin documentation and the git revision date localized plugin we are looking for.
Running MkDocs locally⚓︎
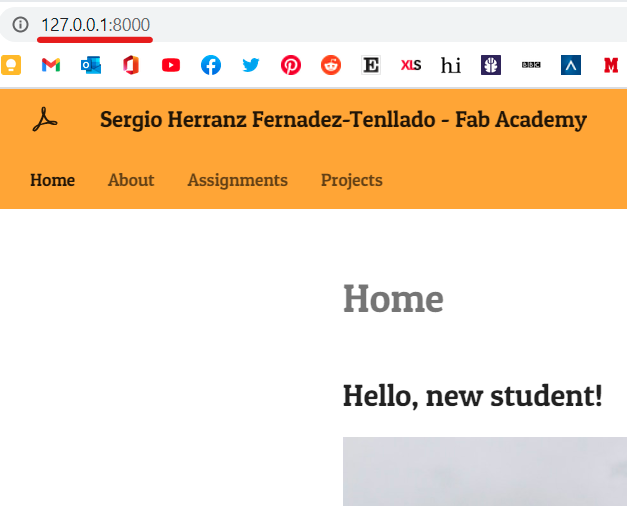
We just have to make the final step. In the directory of our git repository, we can run mkdocs serve.

This will launch a local web with the url http://127.0.0.1:8000/ that we have to enter in our web browser. We have limited time, so if the mkdocs serve process doesn’t detect a connection, it will shut down the process, so I recomend typing first the url in the browser and then executing the command.
Building my FabAcademy website⚓︎
There is a pretty usefull MkDocs cheatsheet with usefull information about how to write the documentation the way you want. How to comment, tag, insert images and write code line.
Resizing images⚓︎
I have struggled a lot with image sizing and frameing because MarkDown is pretty limited on that, but it looks like there are some flavoured MkDocs iterations and plugins which can solve you some problems. You can even write html code directly and Markdown will get it working with that, but sometimes you will need to implements some CSS info too adn that’s too tedious for me, so I found another alternatives.
Some usefull links and commands here:
- How to style images with markdown
- Framing images like a table content
- Rounding image corners
- CSS options for centering
- Resizing with %:
{ width=50% } - Resizing with px:
{ width=150 height=100 } - Framing with text:
{ style="float:right; padding:10px" } - Rounding all corners:
{ style="border-radius:10%" } - Rounding specific corners:
{ style="border-radius: 0 10px 10px 0" }
Extras⚓︎
I will continue developing my site as I get through the course so I will try to update this documentation along the way. This are some of the things I want to improve:
- Changing the favicon and logo
- Centering text in a table
- Making checkboxes
- Changing logo and favicon
- Lists inside lists and change the dot type
- Dark theme
- Landing page
- Aditional stylesheets
UPDATE: Although FabAcademy has ended, I want to keep upgrading my site and document the new visual features, so I’ll keep updating this “Extras” post
Conclusions⚓︎
I trully have to improve my documenting skills, and working faster. Document as you go have to be an essential for me. Chaos can be beatifull but I even haven’t managed to achieve beauty in this mess! I’ll try getting a prestructure before starting to type and flow through the “to do’s“.
Also I have to say Markdown has pleasantly surprised me, for the amount of functionality it includes, the customization it allows and the ease to include new content. I may postpone the jump to HTML to the future and who knows if it will not be for after finishing the course! On to the next assignment!