13. Molding and casting⚓︎
-
- Review the safety data sheets for each of your molding and casting materials.
- Make and compare test casts with each of them.
-
Individual assignment
- Design a 3D mould around the stock and tooling that you’ll be using, mill it (rough cut + (at least) three-axis finish cut), and use it to cast parts.
-
Learning outcomes
- Design appropriate objects within the limitations of 3 axis machining.
- Demonstrate workflows used in mould design, construction and casting.
-
Have you?
- Linked to the group assignment page.
- Reviewed the safety data sheets for each of your molding and casting materials, then made and compared test casts with each of them.
- Documented how you designed your 3D mould and created your rough and finish toolpaths for machining, including machine settings.
- Shown how you made your mould and cast the parts.
- Described problems and how you fixed them.
- Included your design files and ‘hero shot’ of the mould and the final object.
Design⚓︎
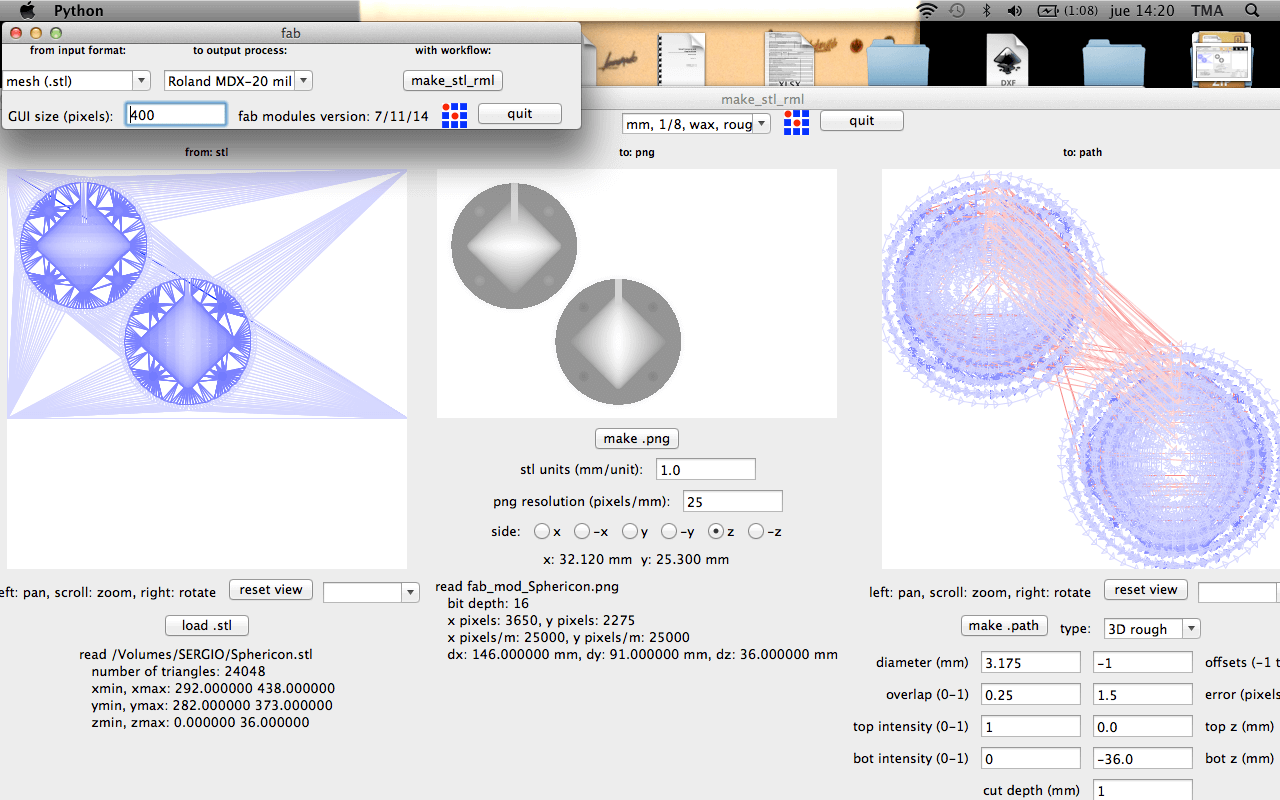
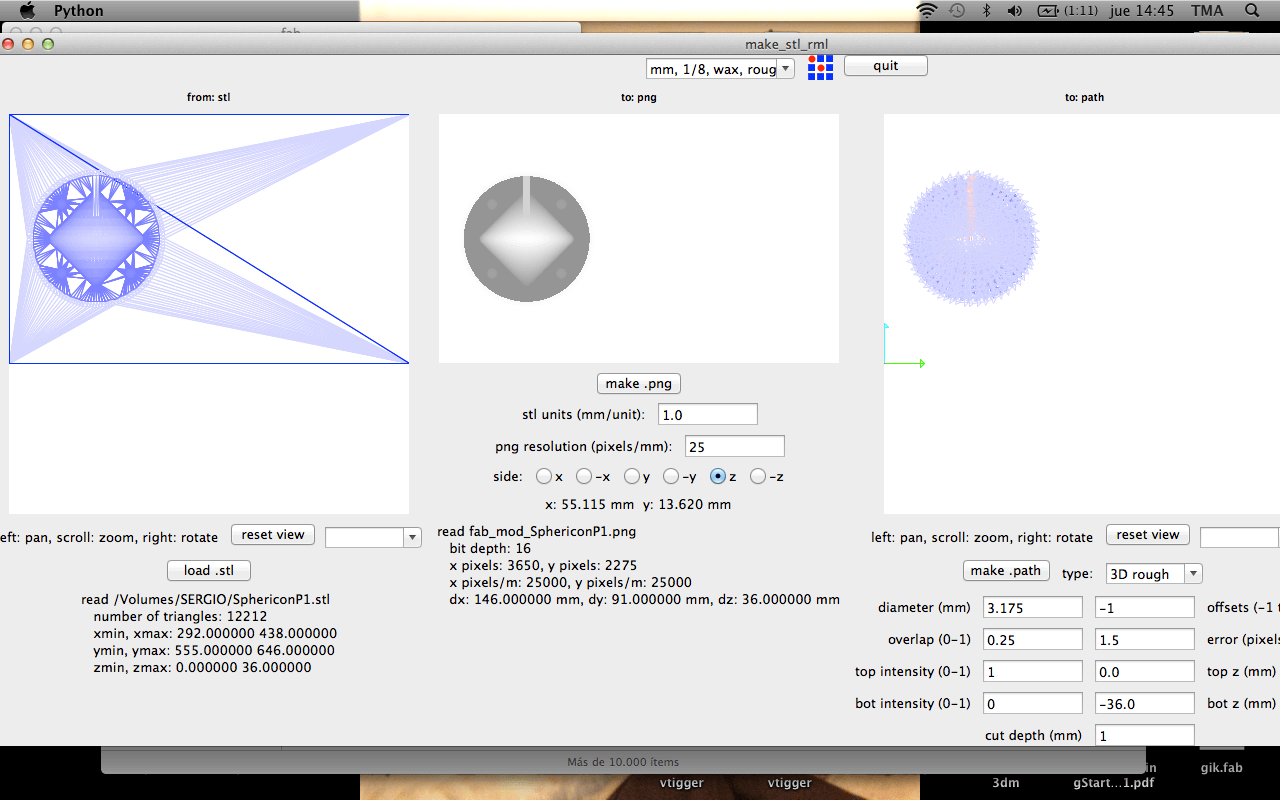
For this assignment I didn’t have any specific idea about what to make, so I was talking to my course mates Mauro and Alberto. A very recurrent theme is that of chess figures, since it fits very well with moulding and casting, and Mauro proposed us to make some pieces each to complete a collection, taking as a reference Josef Hartwig’s iconic design for Bauhaus. In the end it was going to be a bit difficult to coordinate the aesthetics of the common design and in my case I needed to mill the wax mould as soon as possible so as not to be short of time during the week, as my instructors had told me that the milling and curing processes of some resins could be very slow, so we each came up with our own design.

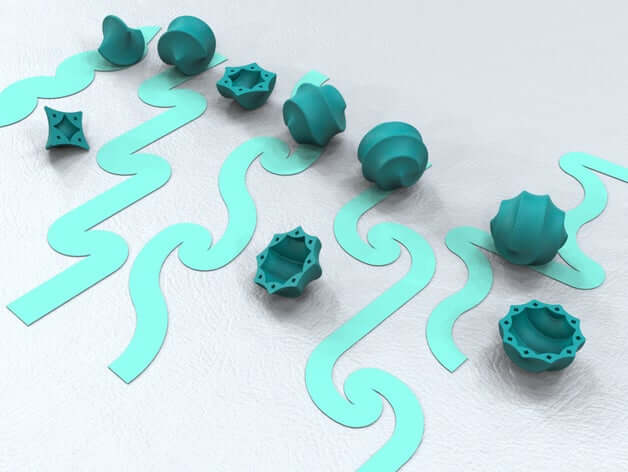
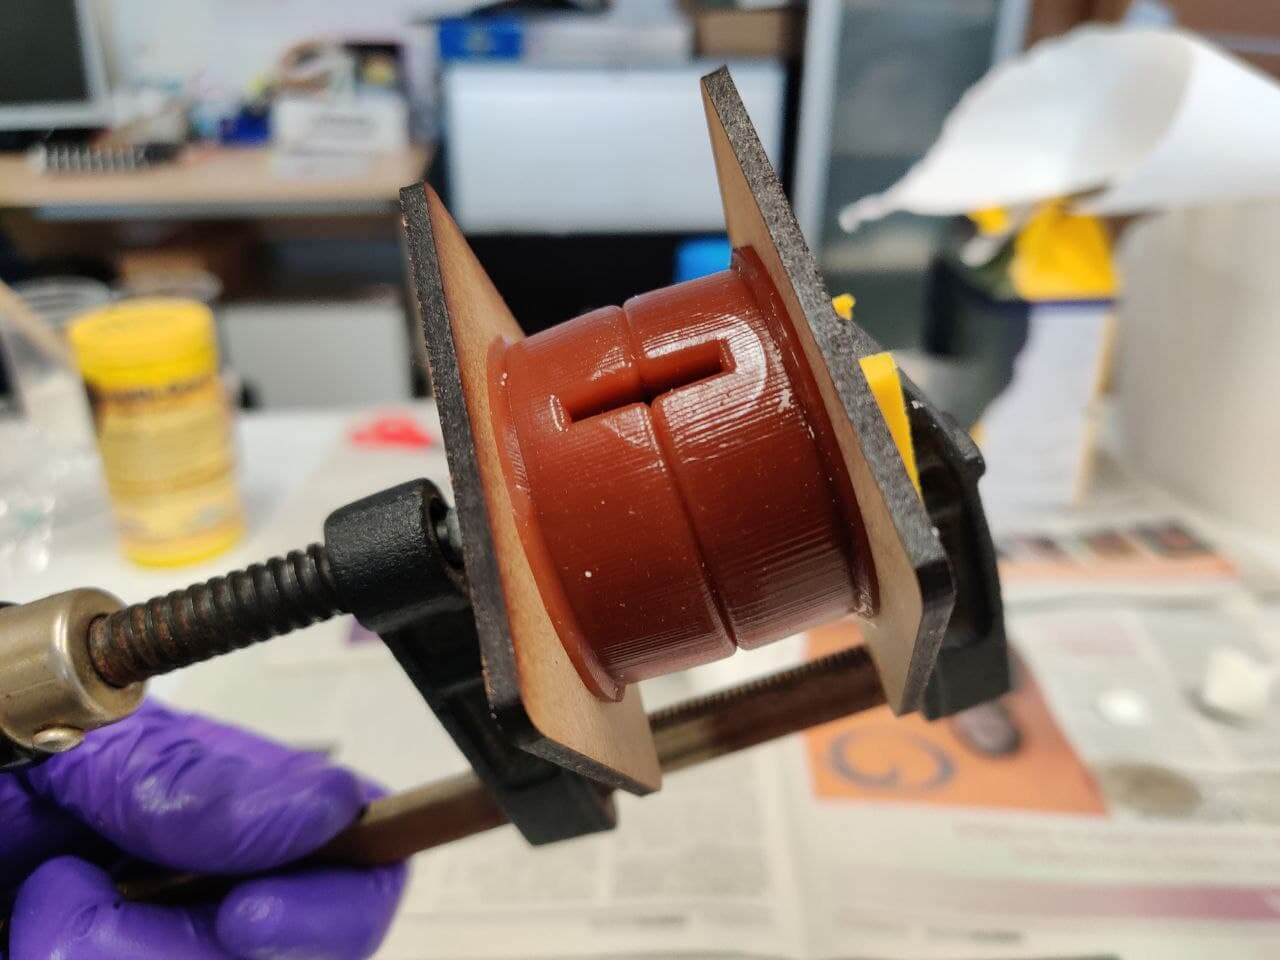
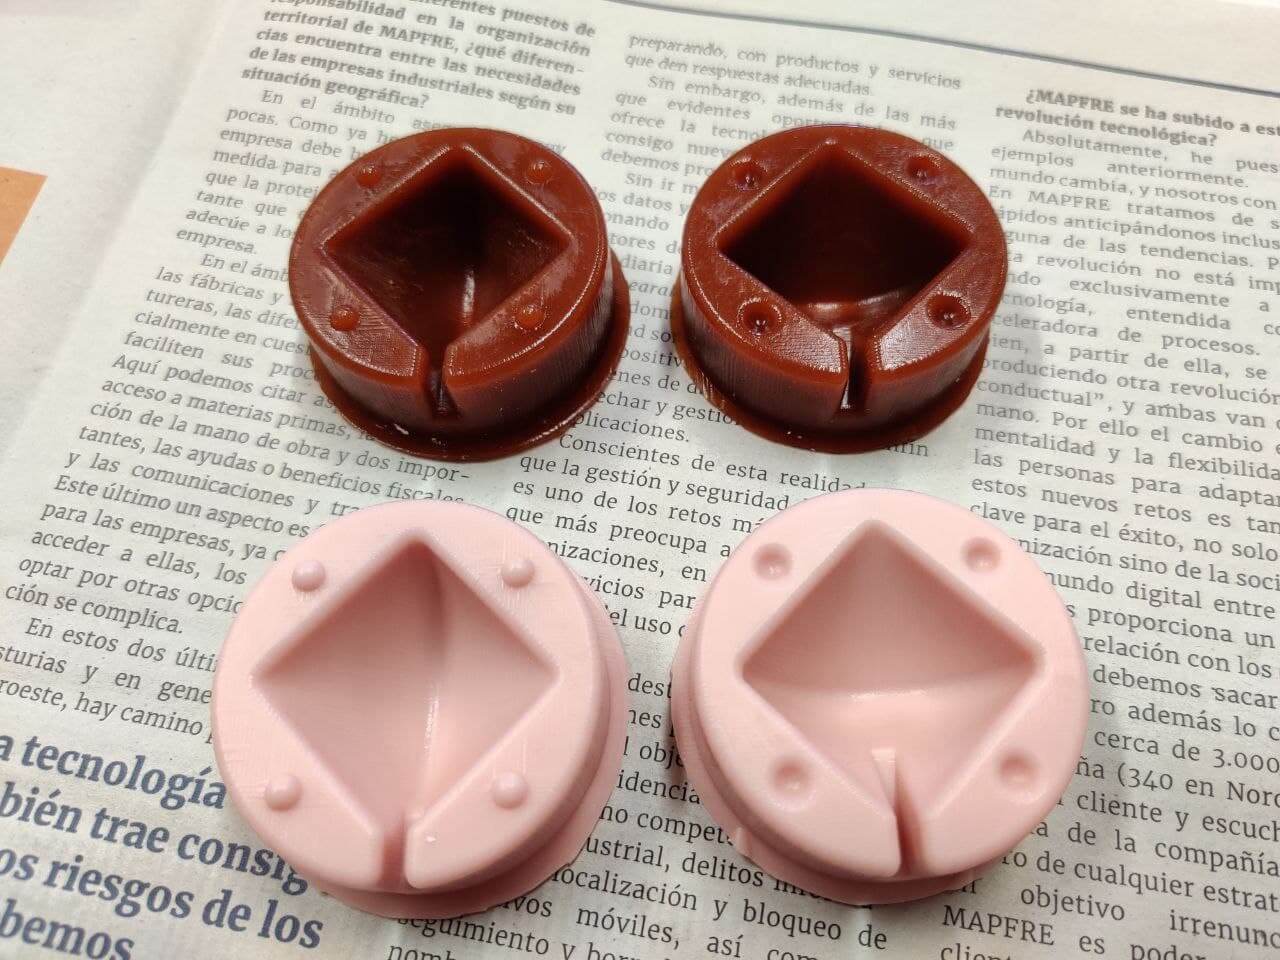
Finally I went for the sphericon design because I was looking forward to it during the 3D Printing week, and I believe that the use of moulding and casting can generate a better finished and therefore more functional figure. The sphericon is a solid that has a continuous developable surface with two congruent semi circular edges, and four vertices that define a square. The first difficulties were finding a geometric description from which to build the solid, so it was more a process of trial and error through design and trying to understand the behaviour of the part.
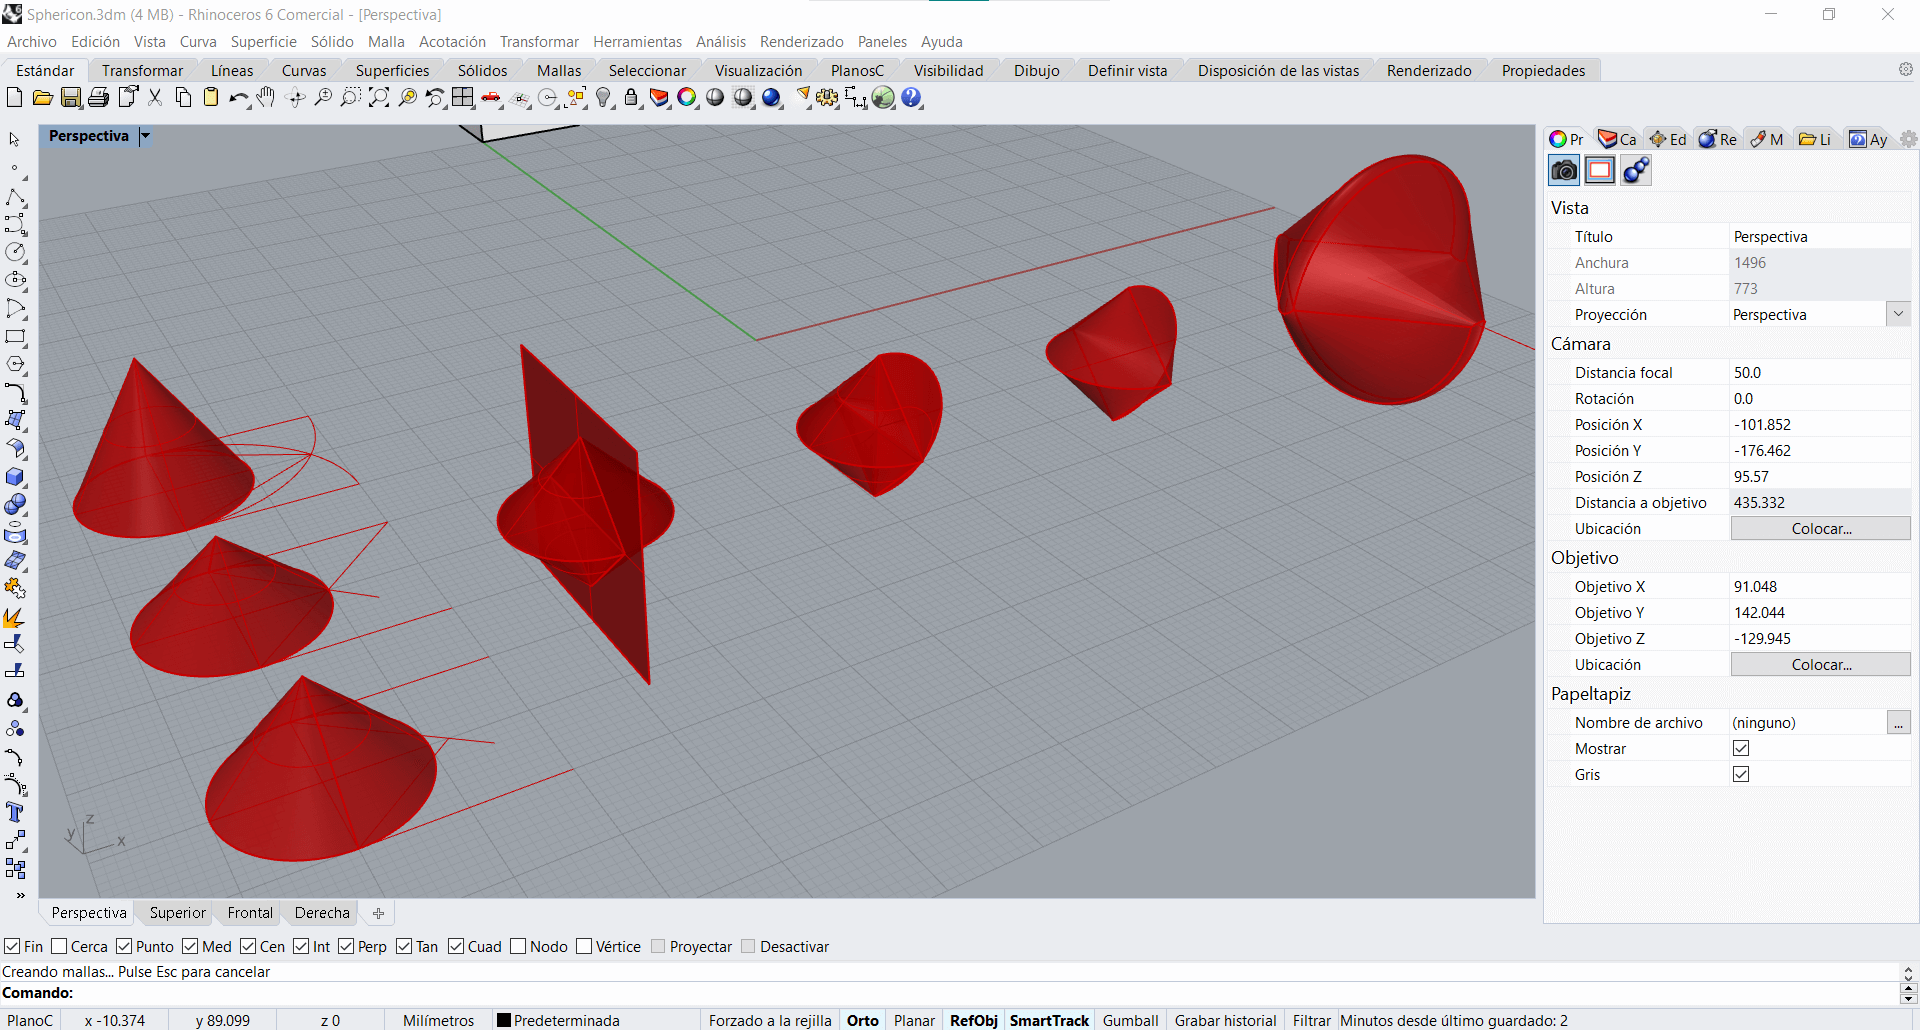
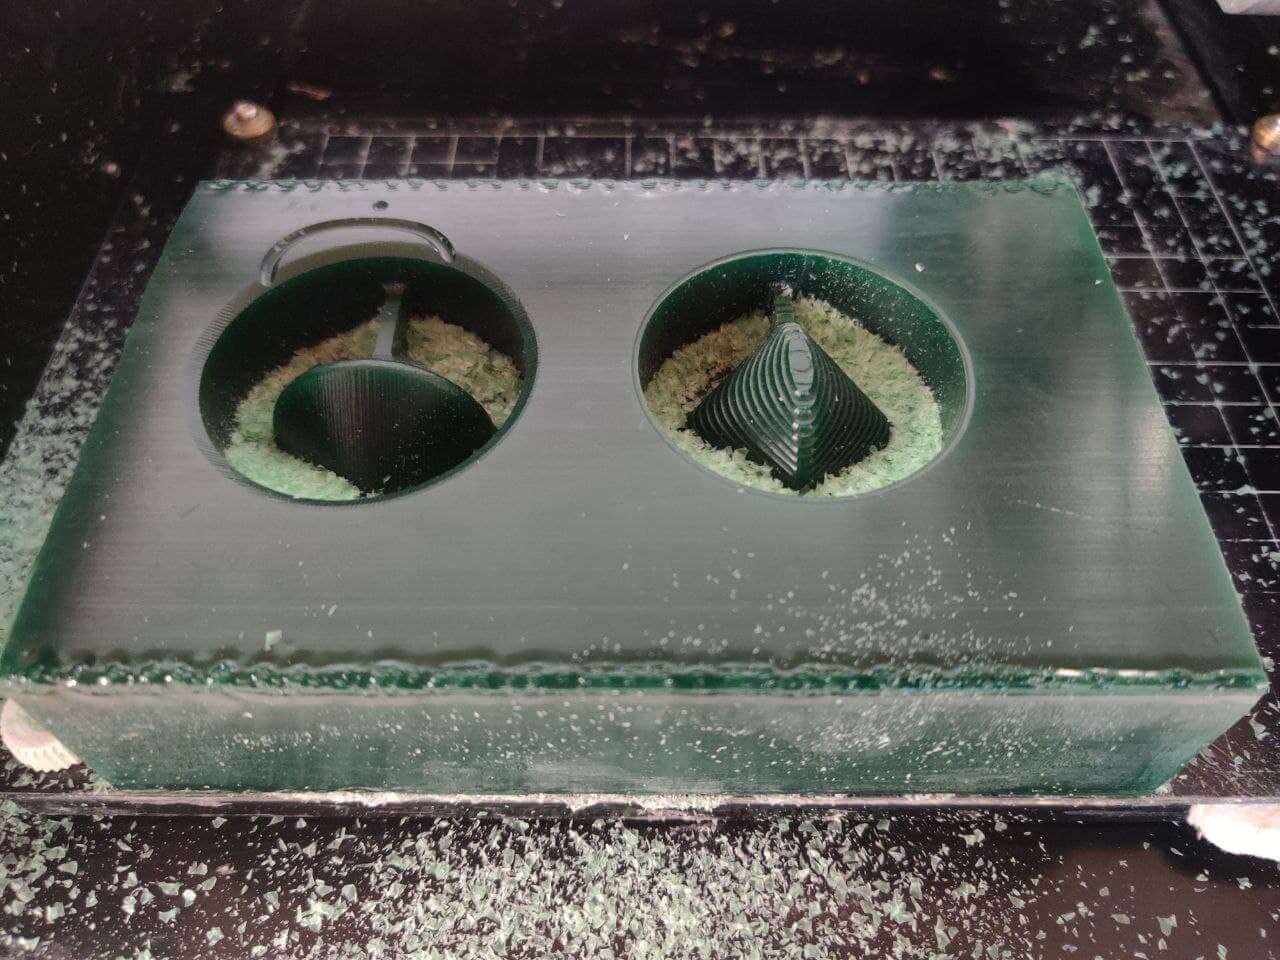
The second problem was that as I needed a two-part mould, I needed to understand the concept of the mould in the mould and how to design these parts so that when moulded, the moulds would form the shape I wanted to make with the casting. Finally and after several attempts and adjustments I managed to square the piece in the wax mould. It is important to take into account to put some demoulding angle or a small lip around the block to be able to extract the mould well once it has cured. Also define the spaces that will be necessary to fill the mould with the resins, leaving a hole for filling and another one for the air to come out. My problem is that the geometry of the piece allows me little margin, so I finally made a single wider channel.
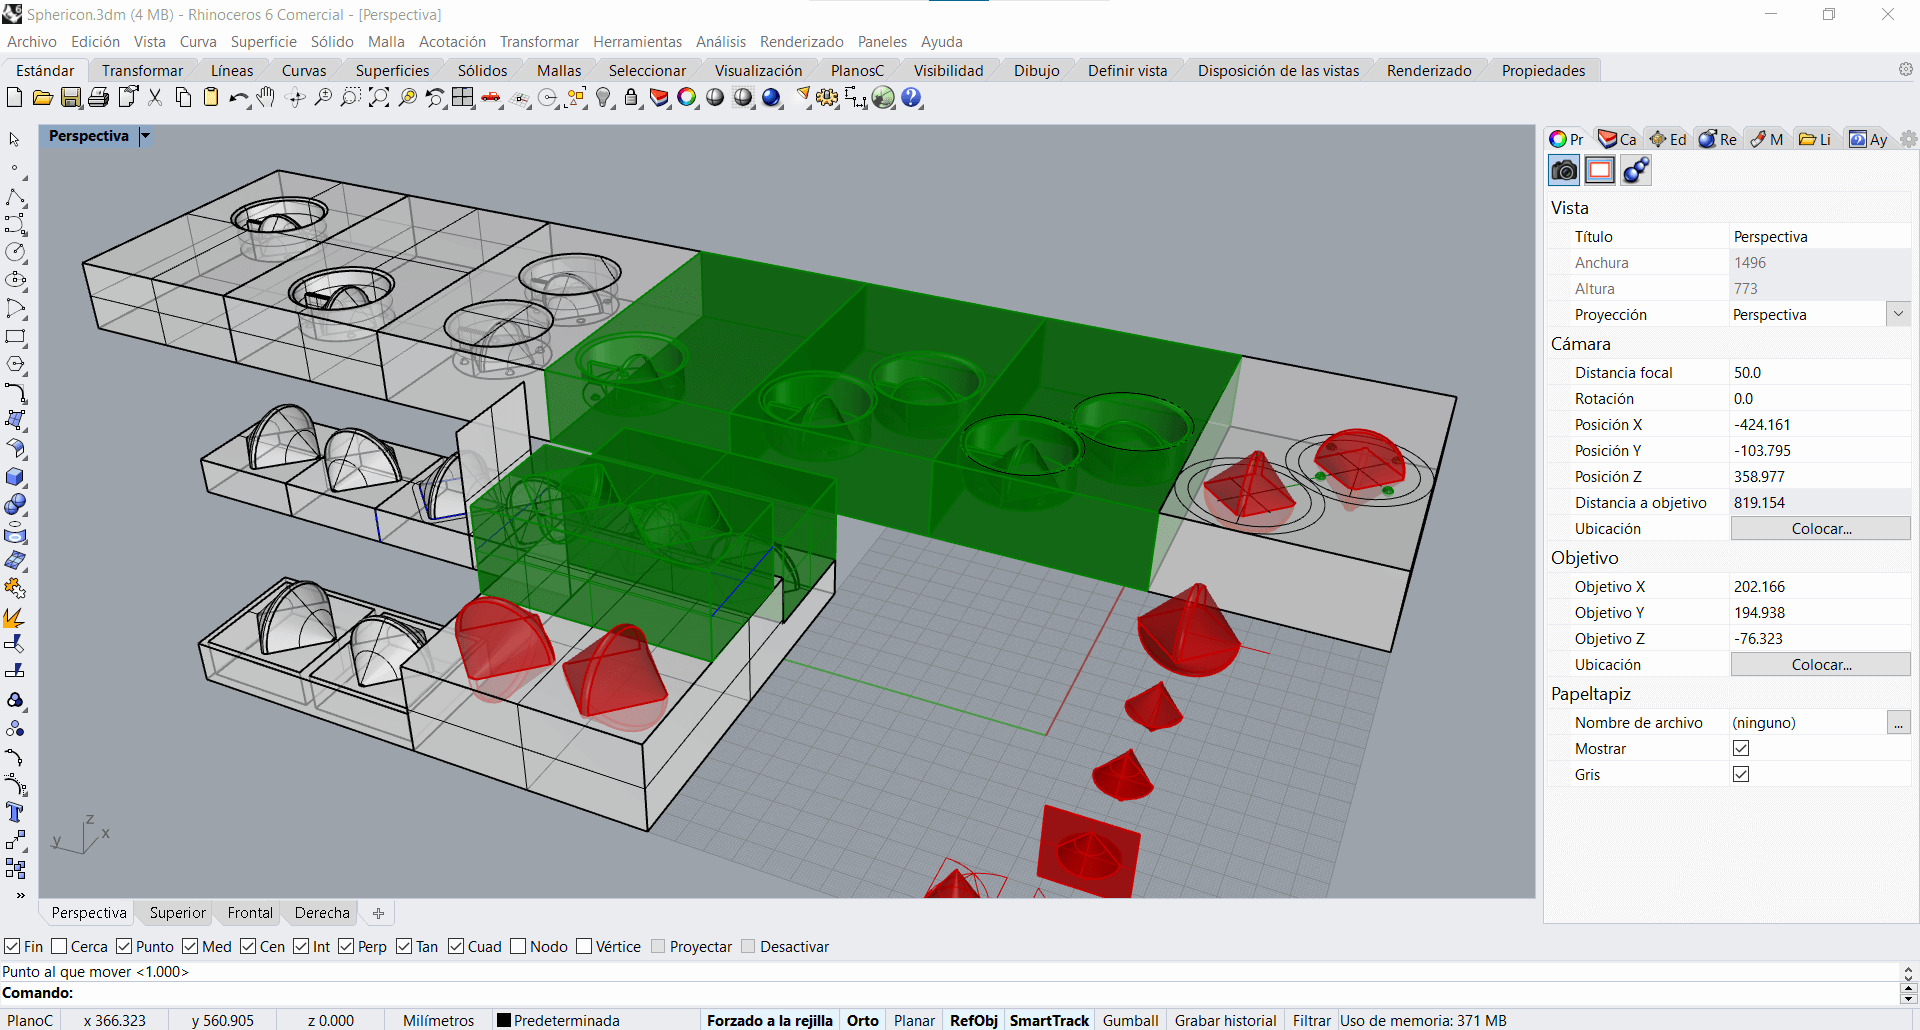
This is a timelapse of the design process of the piece.
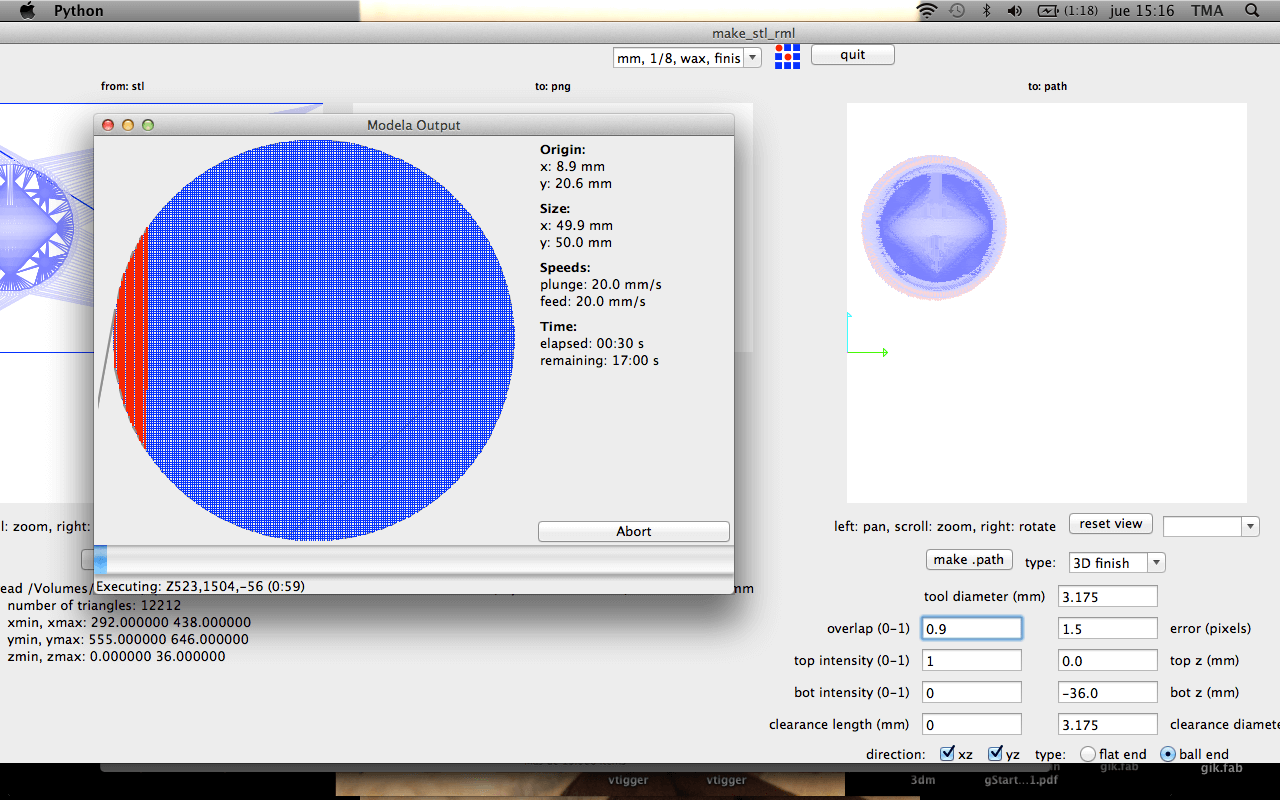
Milling⚓︎
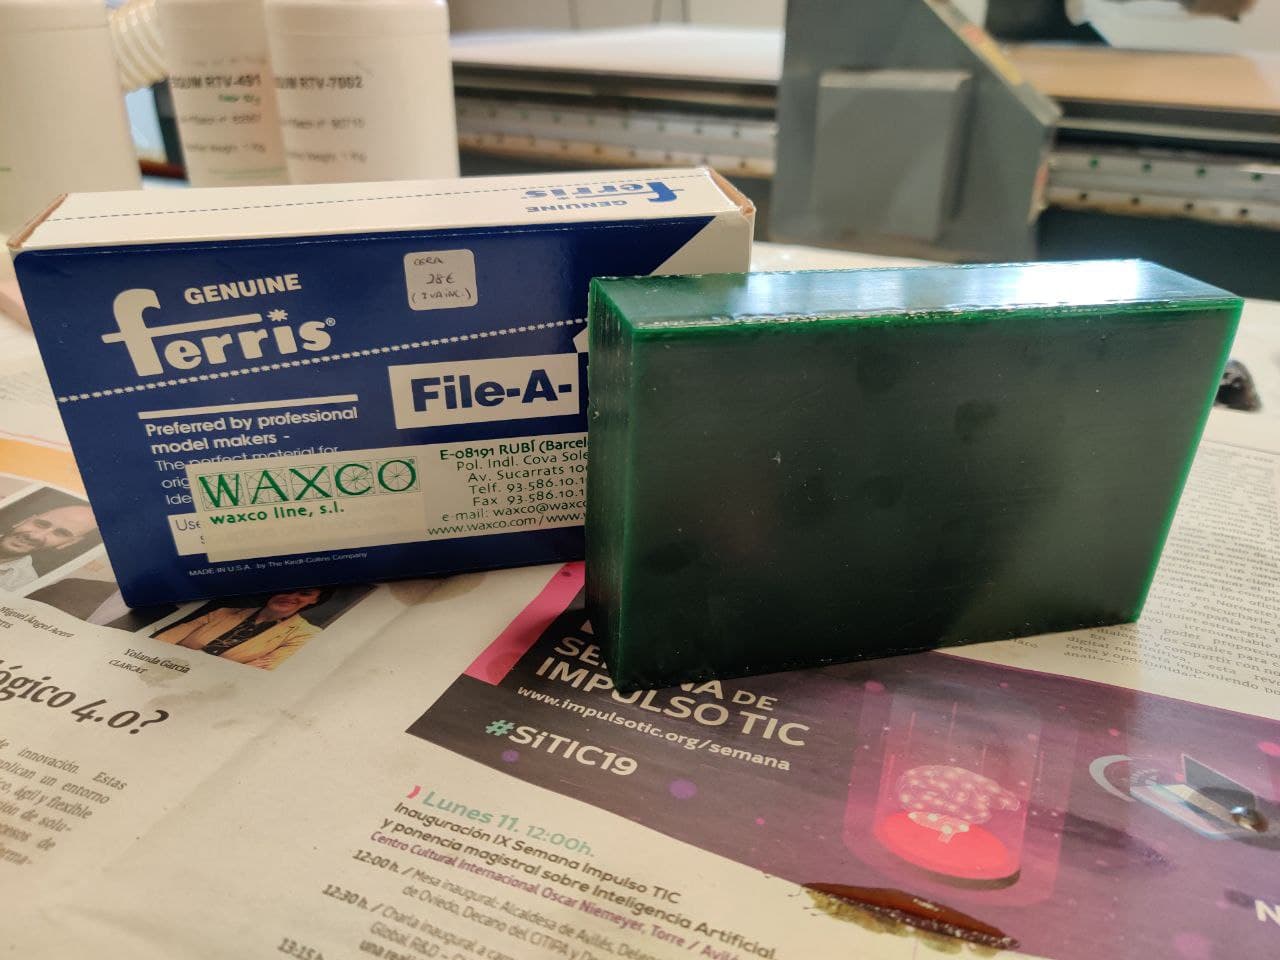
- Material: Polyethylene hardened wax block.
- Dimensions: x=14‘6cm y=9‘1cm z=3‘6cm.
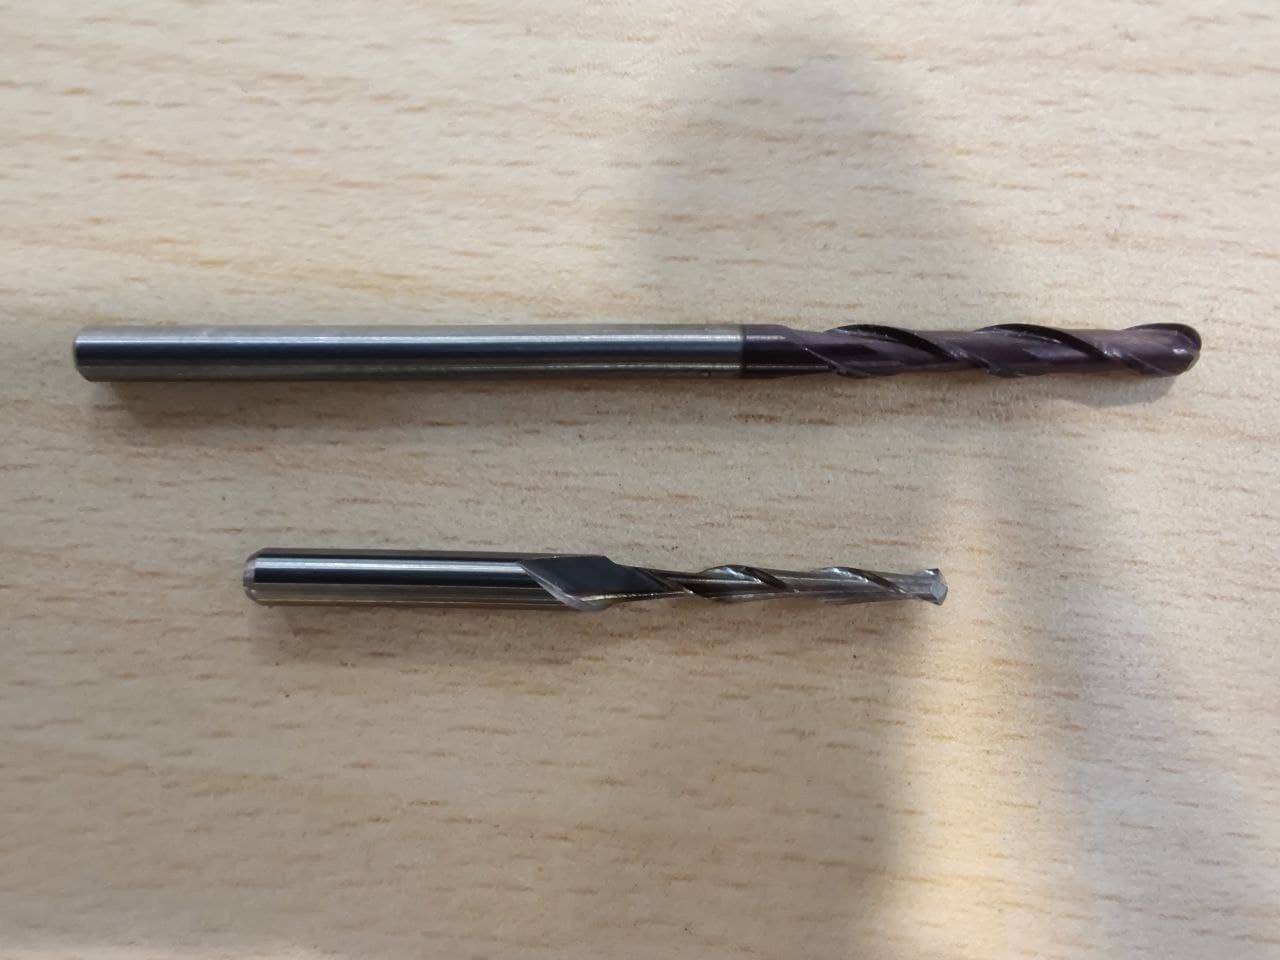
- Milling bit: 3mm milling bit with rounded tip.
I have tried to compact the design pieces as much as possible to leave most of the block reusable but the fit of the piece and the dimensions in the model with the wax block have given me many problems. Settings and time of each process:
- Roughing. Overlap 0.25. Time: 13 mins each piece
- Finish. Overlap 0.9. Time: 17 mins each piece
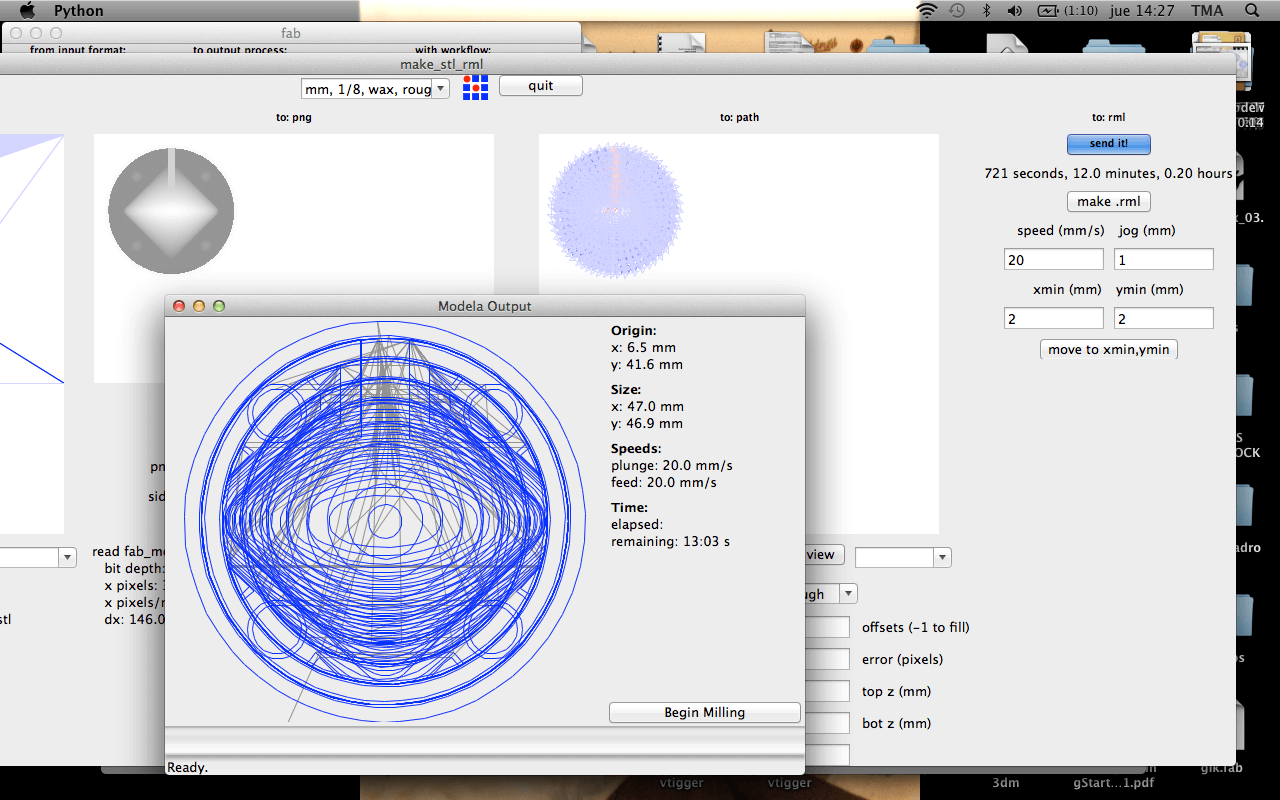
During the milling process a lot of the wax is turned into debris. Here at the lab the have recommended me to put a plastig bag below the Modela to be able to collect it. This debris can be turned into a wax block again.
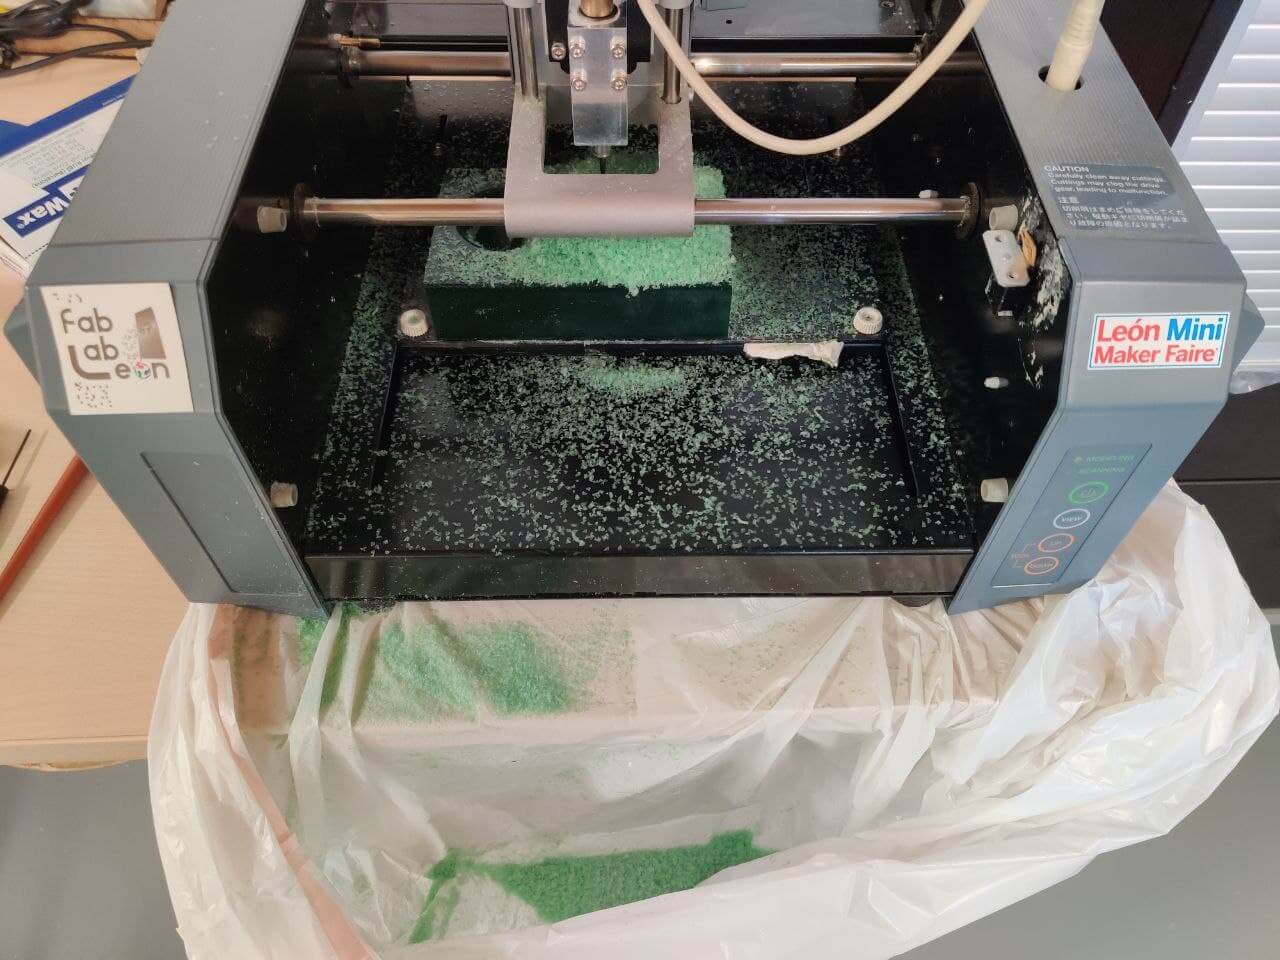
Timelapse of the process:
Group assignment⚓︎
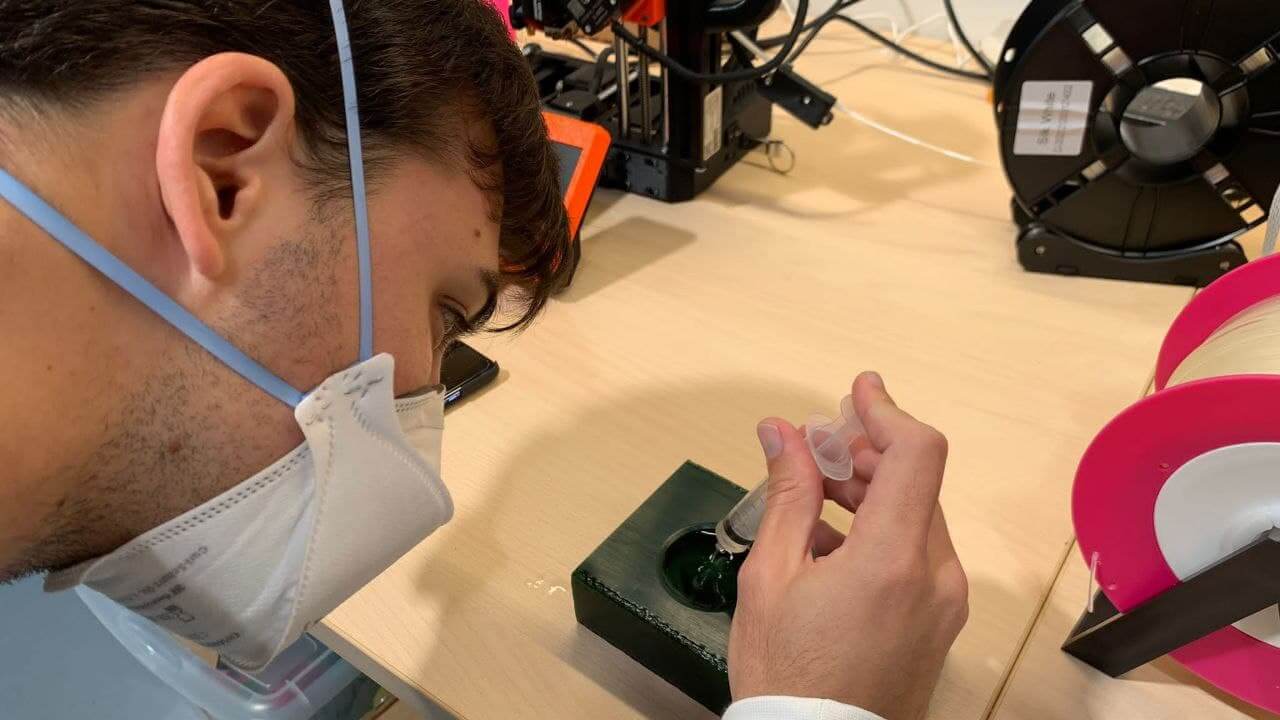
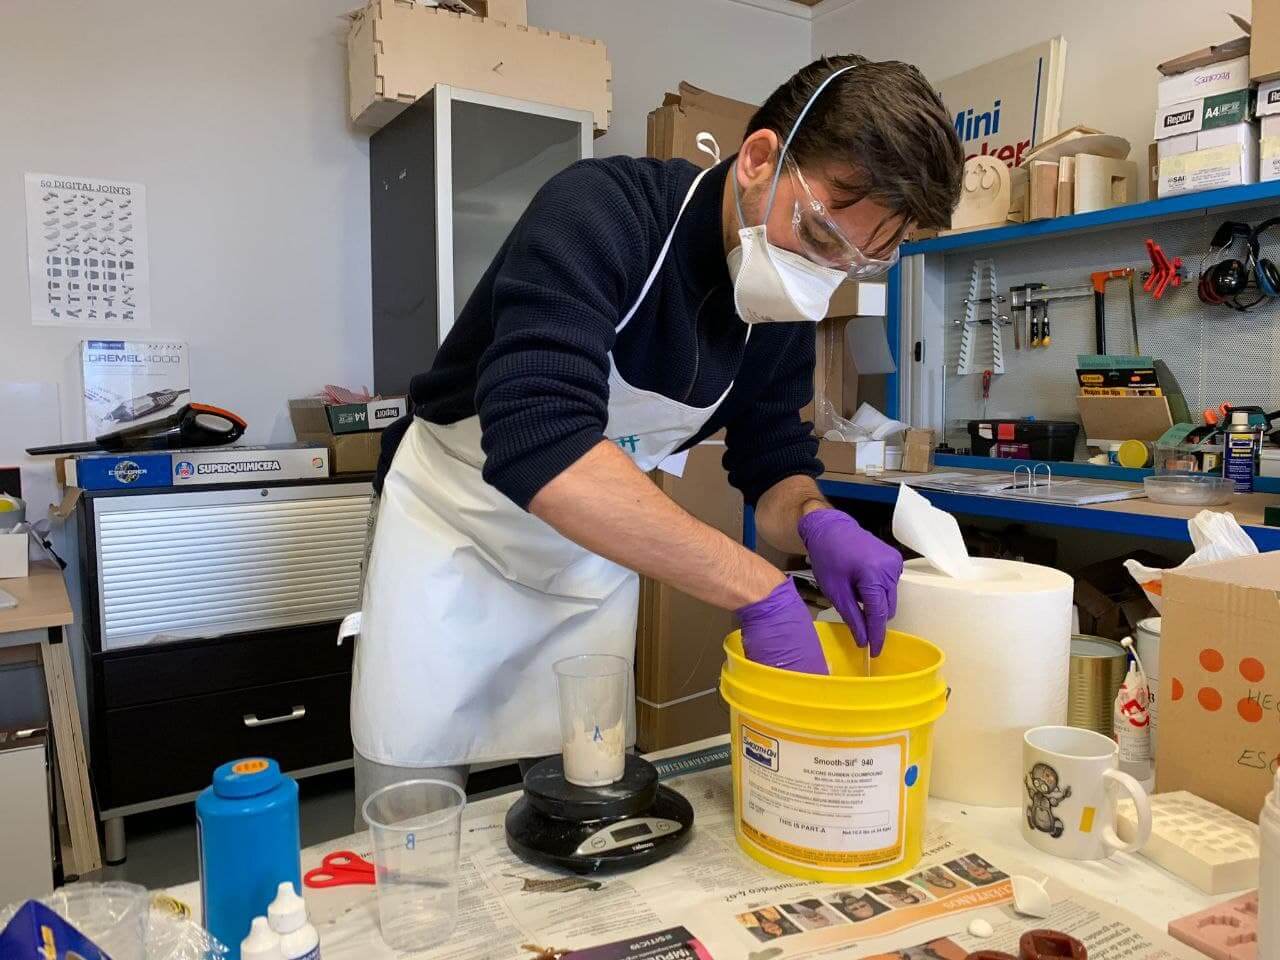
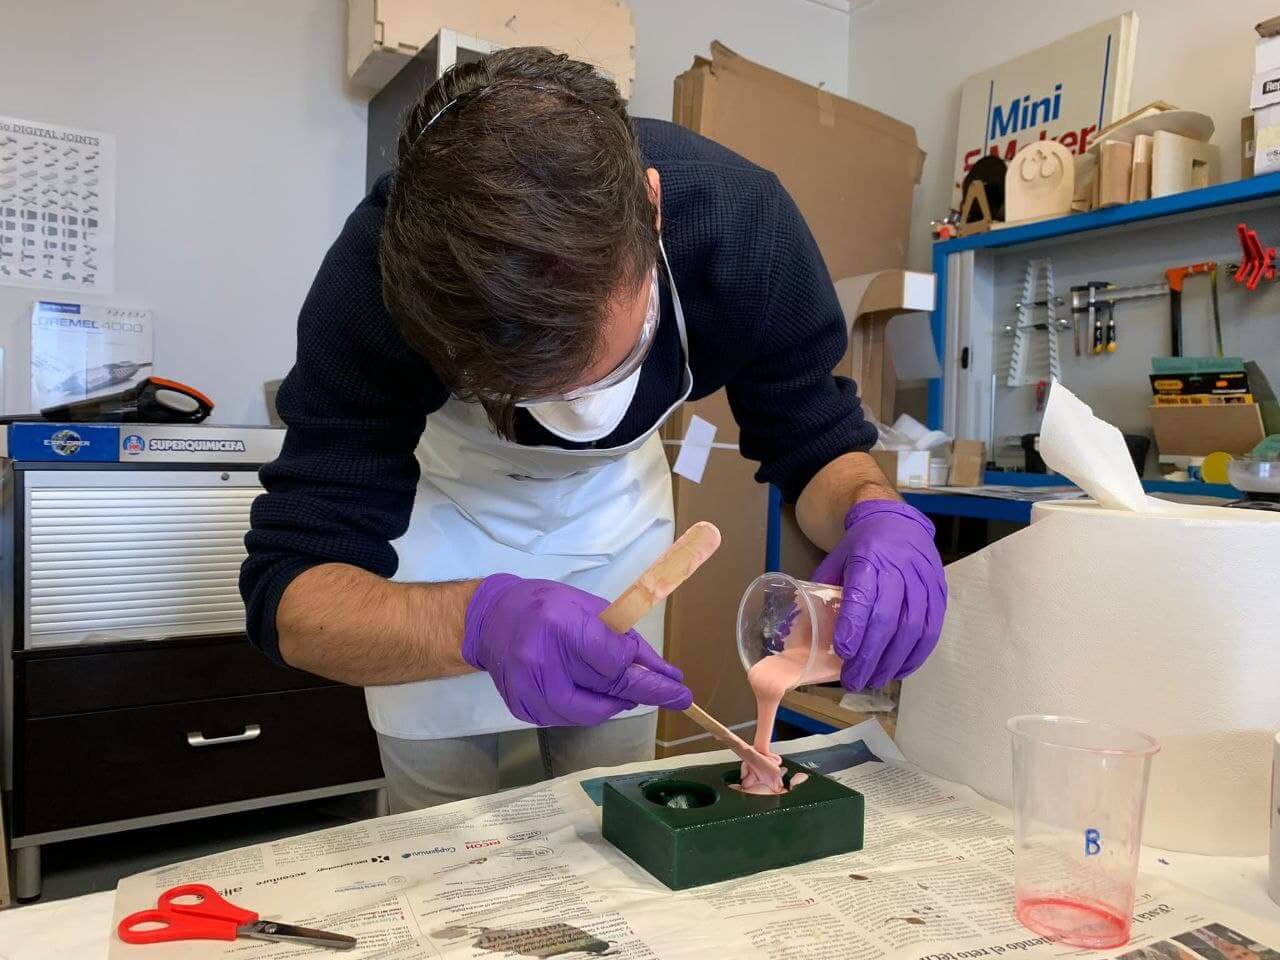
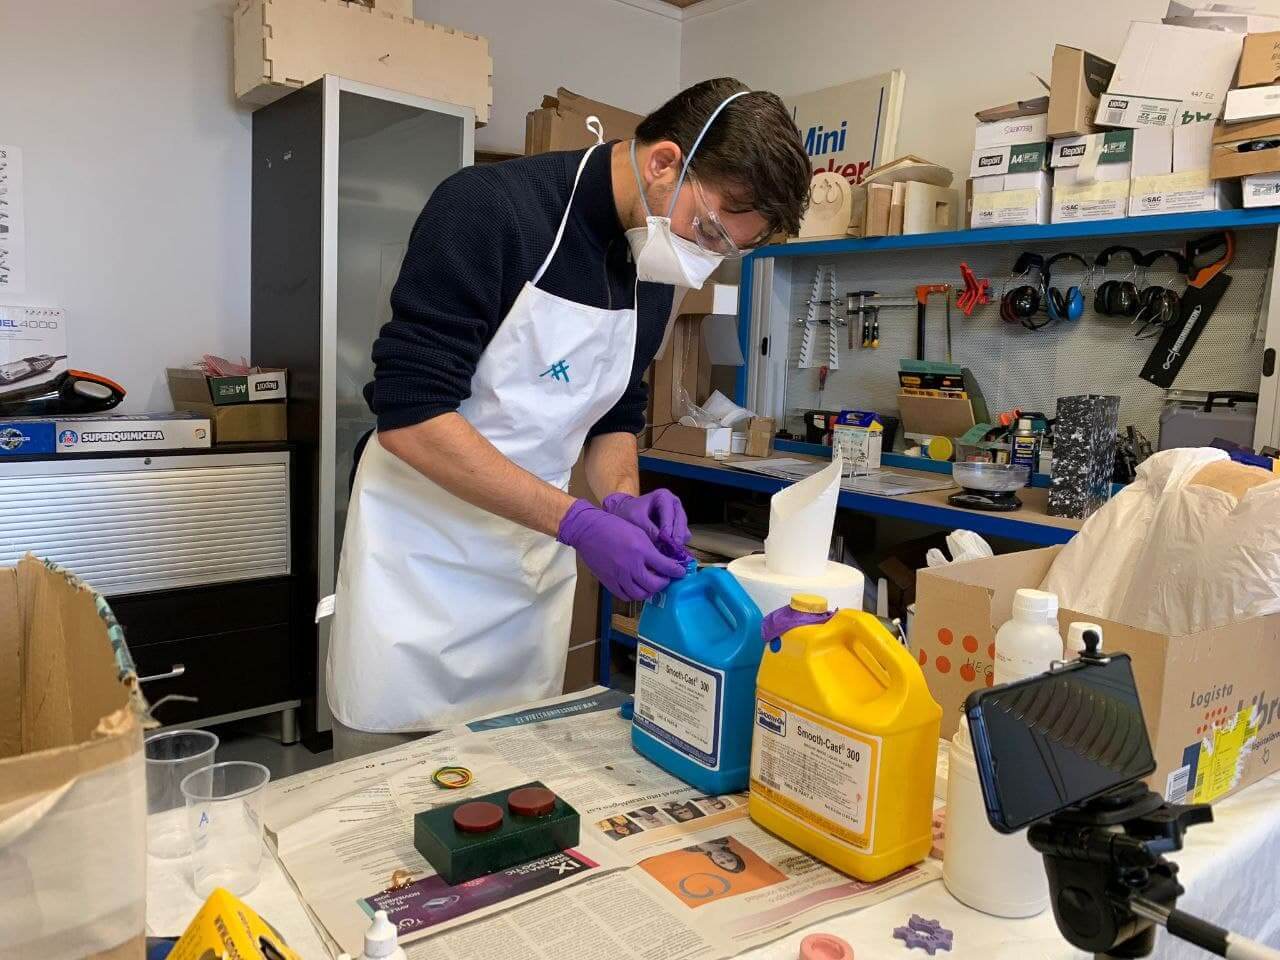
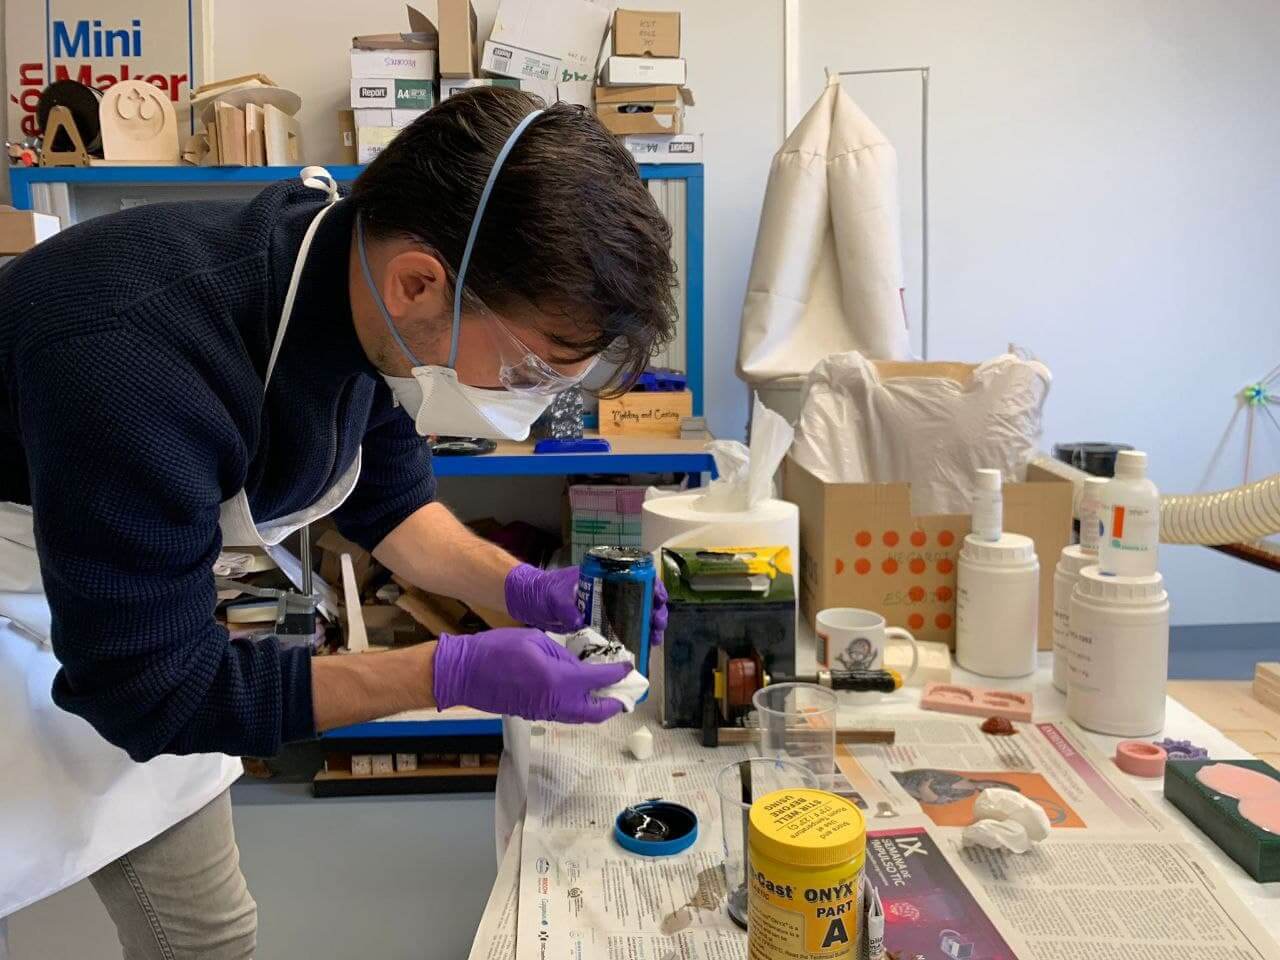
As the main point of this group assignment is safety, having to read all the safety data sheets of the resins and silicones we are going to use, I have also added some of the elements we use in the FabLab for safety. In addition to the ones you can see in the picture, I have also used an apron, protective plastics for the surfaces, ensured good ventilation and always have one of my instructors nearby for any circumstance (they take good care of me).
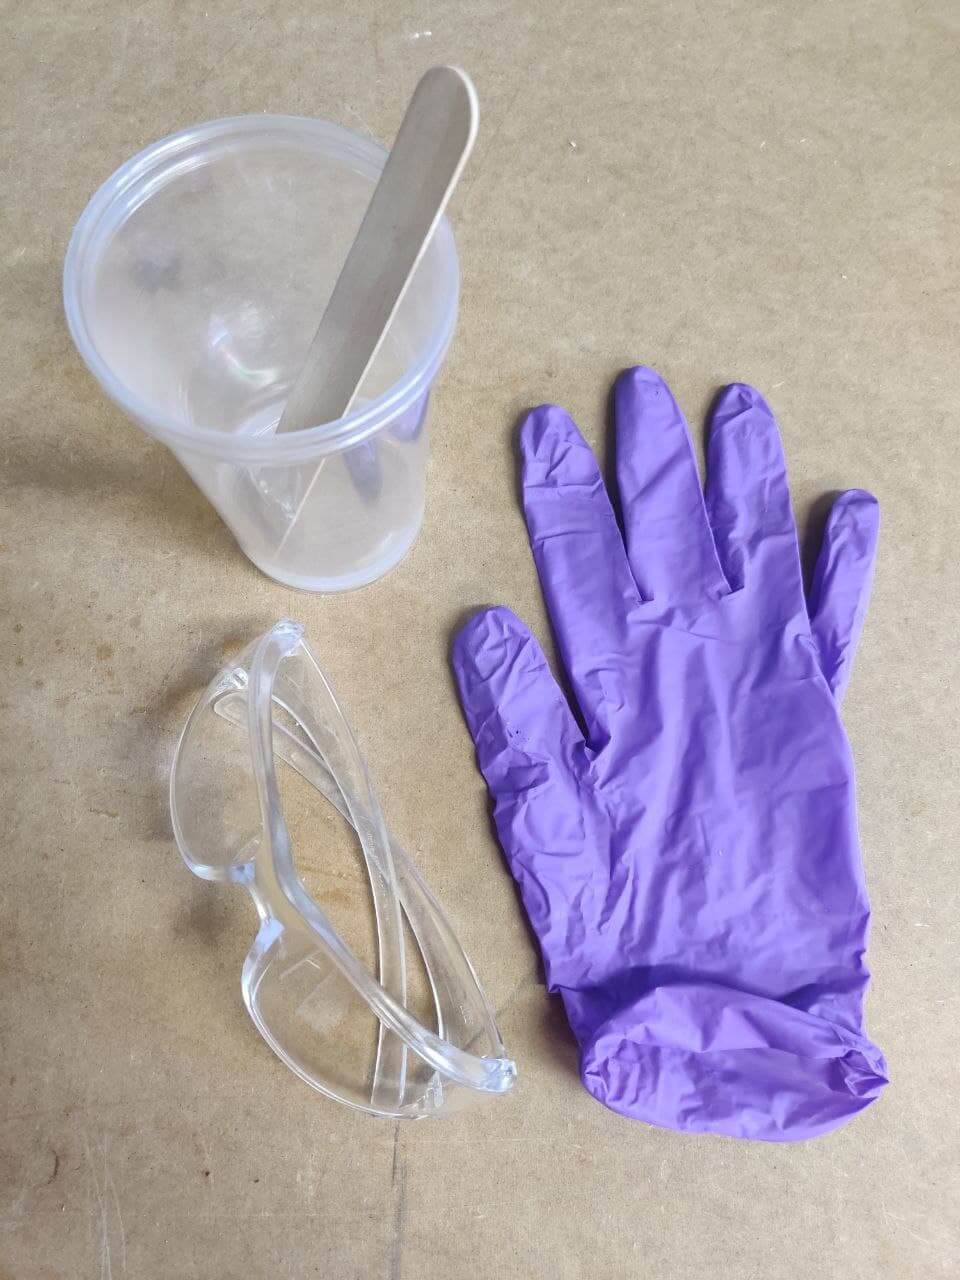
The photo below shows the set-up I have set up to carry out this week’s assignment. It has brought back memories of when we did chemistry lab practicals at school, and of Walter White in Breaking Bad. 
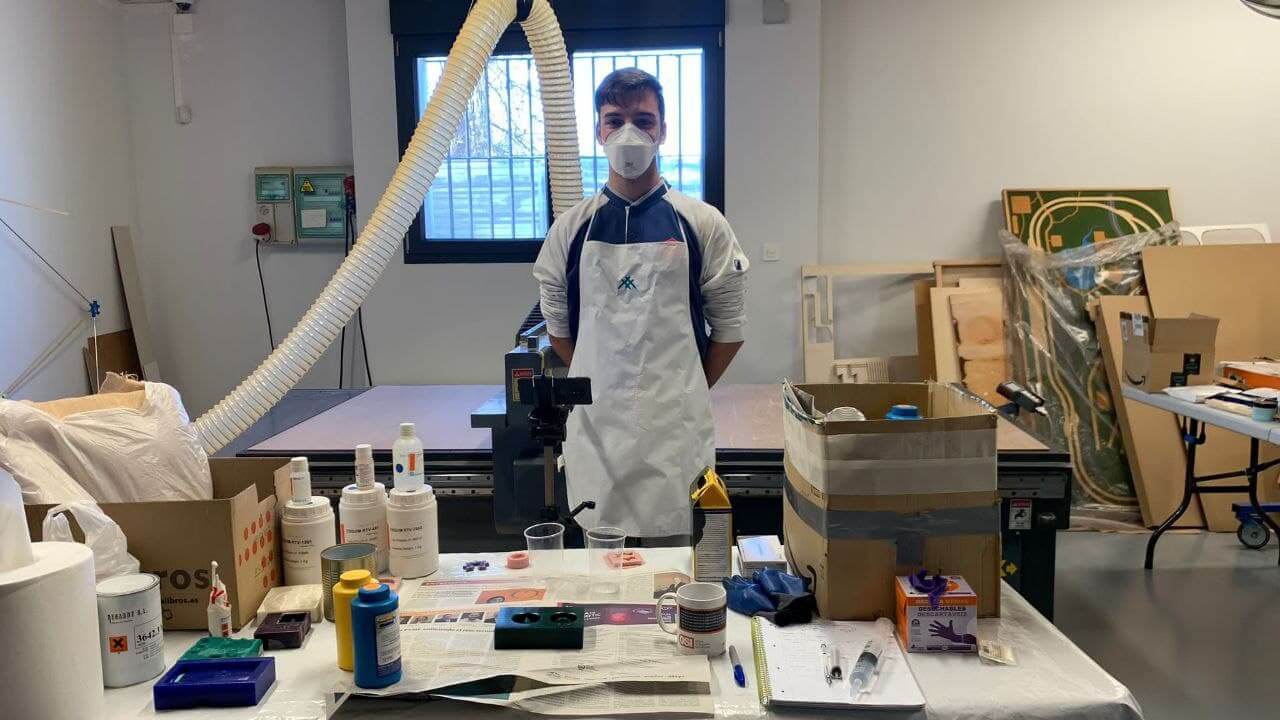
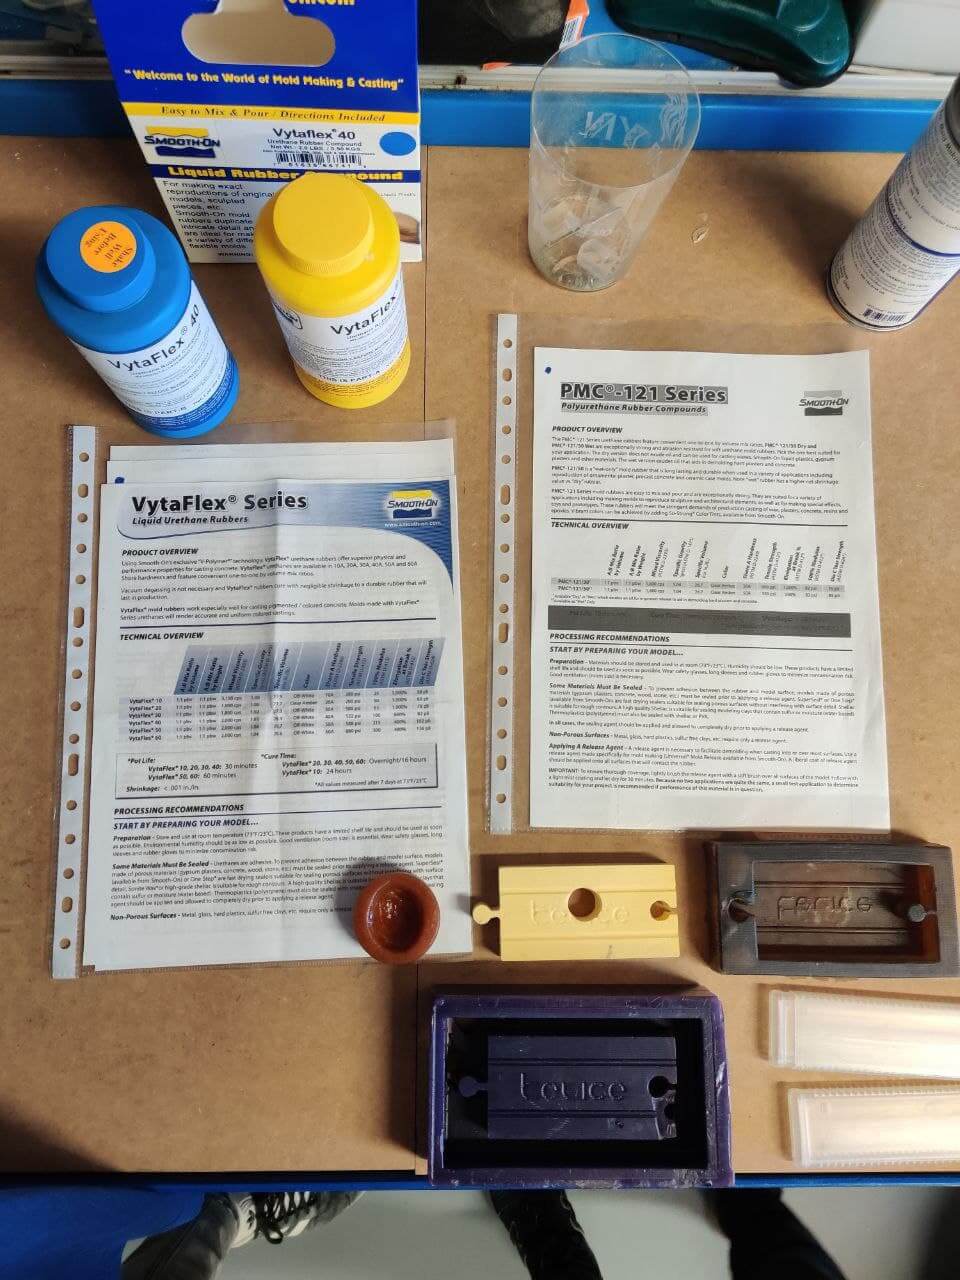
The next step is to read all the safety datasheets for each of the materials we are going to use for molding and casting. Here at the lab, most of the products we have are from Smooth-On and there is a folder in which you can find all the documentaton printed and stored. I will detail the important things of each on the following lists.
VYTAFLEX® 40⚓︎
SILICONE
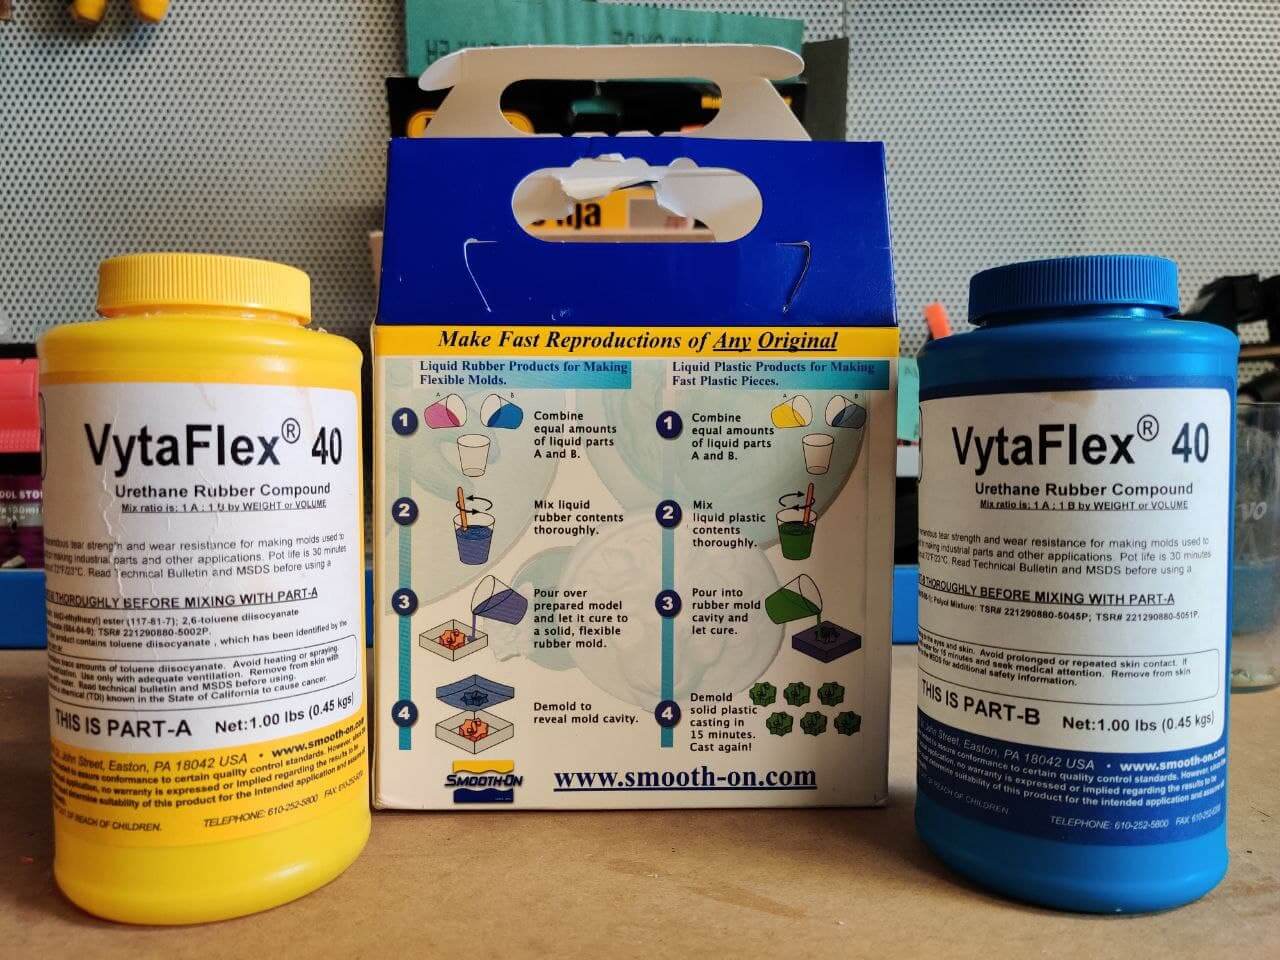
- It is a liquid urethane silicone.
- It has a pot life of 30 minutes and a cure of 16 hours.
- It is recommended to use a release agent.
- Security: good ventilation is recommended, wearing safety glasses, rubber gloves and long sleeves. Mask should be used
- Pre mix the Part B before using. After dispensing equal amounts of Parts A and B into mixing container, mix thoroughly for at least 3 minutes making sure that you scrape the sides and bottom of the mixing container several times.
- Mix ratio is: 1 Part A : 1 Part B by volume.
- Curing: allow rubber to cure a minimum of 16 – 24 hours at room temperature 23°C before demolding.
- Post curing (optional): Following an overnight cure, heating the rubber to 65°C for 4 to 8 hours will increase physical properties and performance.
- Safety indications: gloves, glasses, and an apron or long sleeve are mandatory. Causes skin irritation, causes serious eye irritation, may cause respiratory irritation.
SMOOTH-SIL® 940⚓︎
SILICONE
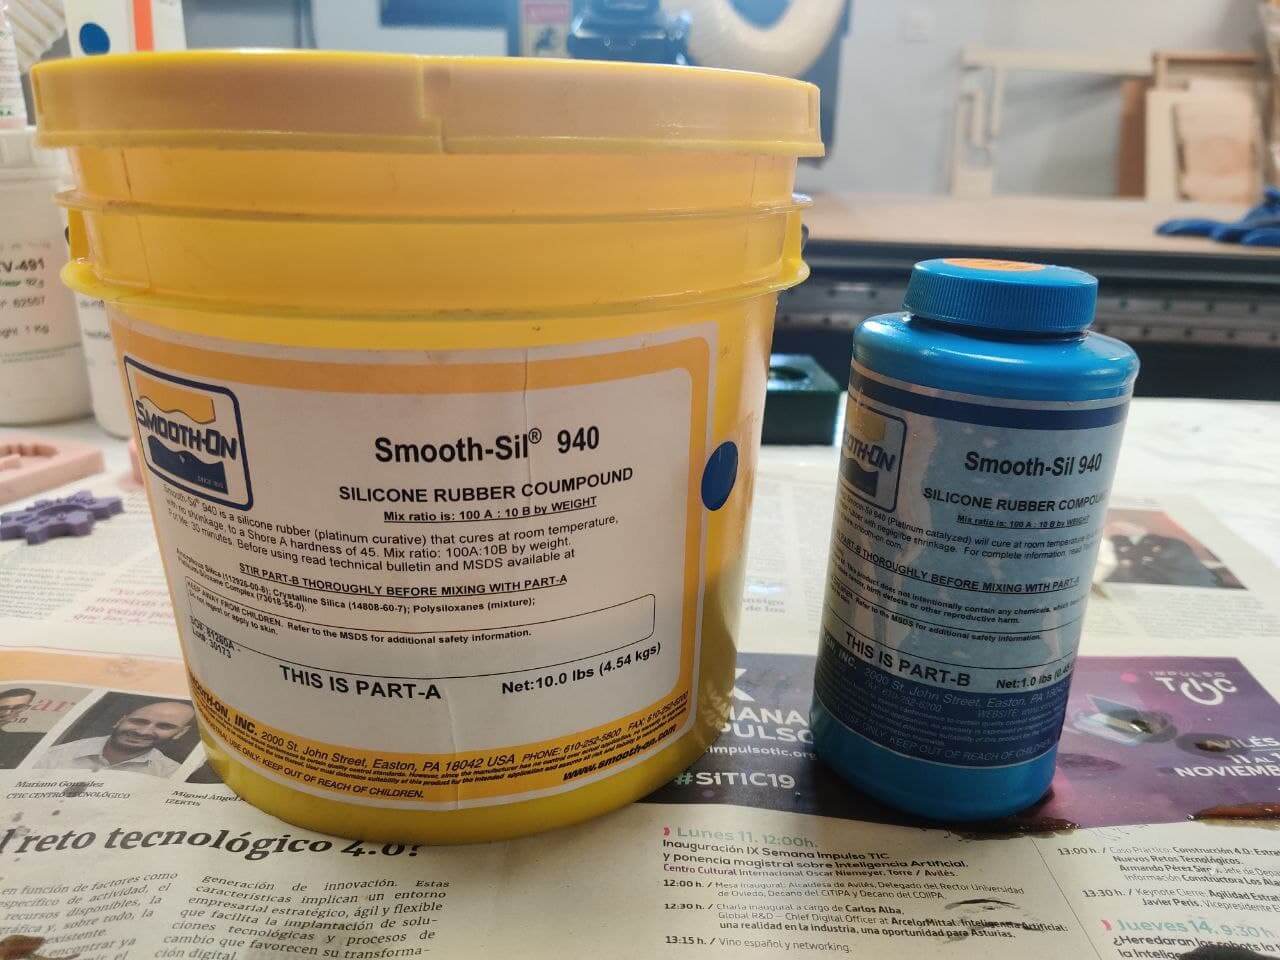
- It is a Platinum Silicone Rubber. For Food Related Applications
- It has a pot life of 30 minutes and a cure of 24 hours.
- Security: good ventilation is recommended, wearing safety glasses, vynil gloves and long sleeves. Wear vinyl gloves only. Latex gloves will inhibit the cure of the rubber. Mask should be used.
- Mix ratio is: 100 Part A : 10 Part B by weight.
- Curing: allow rubber to cure a minimum of 24 hours at room temperature 23°C before demolding.
- Post Curing (optional): post curing the mold will aid in quickly attaining maximum physical and performance properties. After curing at room temperature, expose the rubber to 100°C for four hours.
- Let cool and wash mold cavity thoroughly with dishwashing detergent/water solution. Rinse thoroughly and allow drying before using.
- Safety indications: Gloves, glasses, and an apron or long sleeve are mandatory.
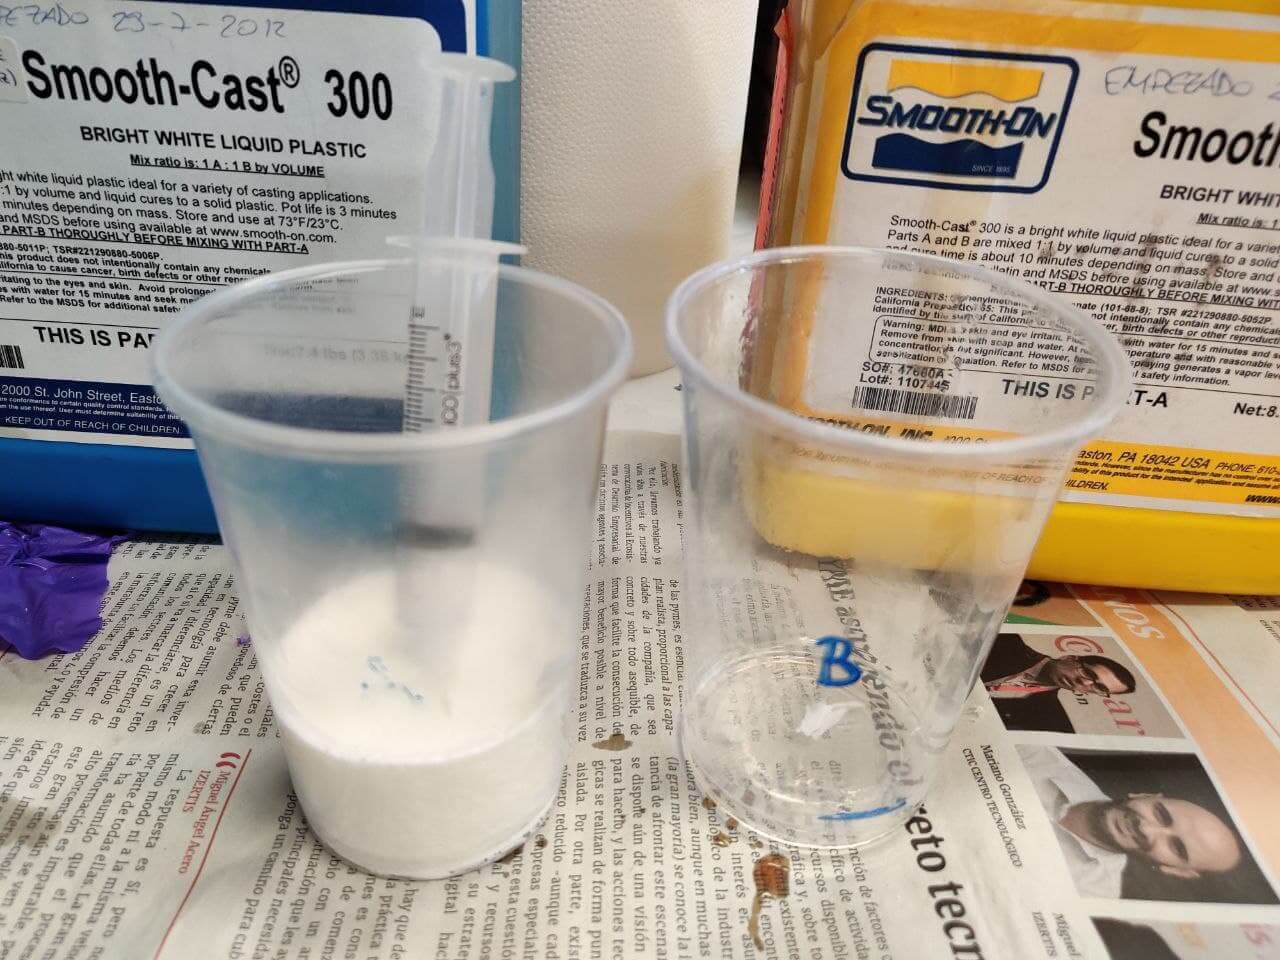
SMOOTH-CAST® 300⚓︎
RESIN
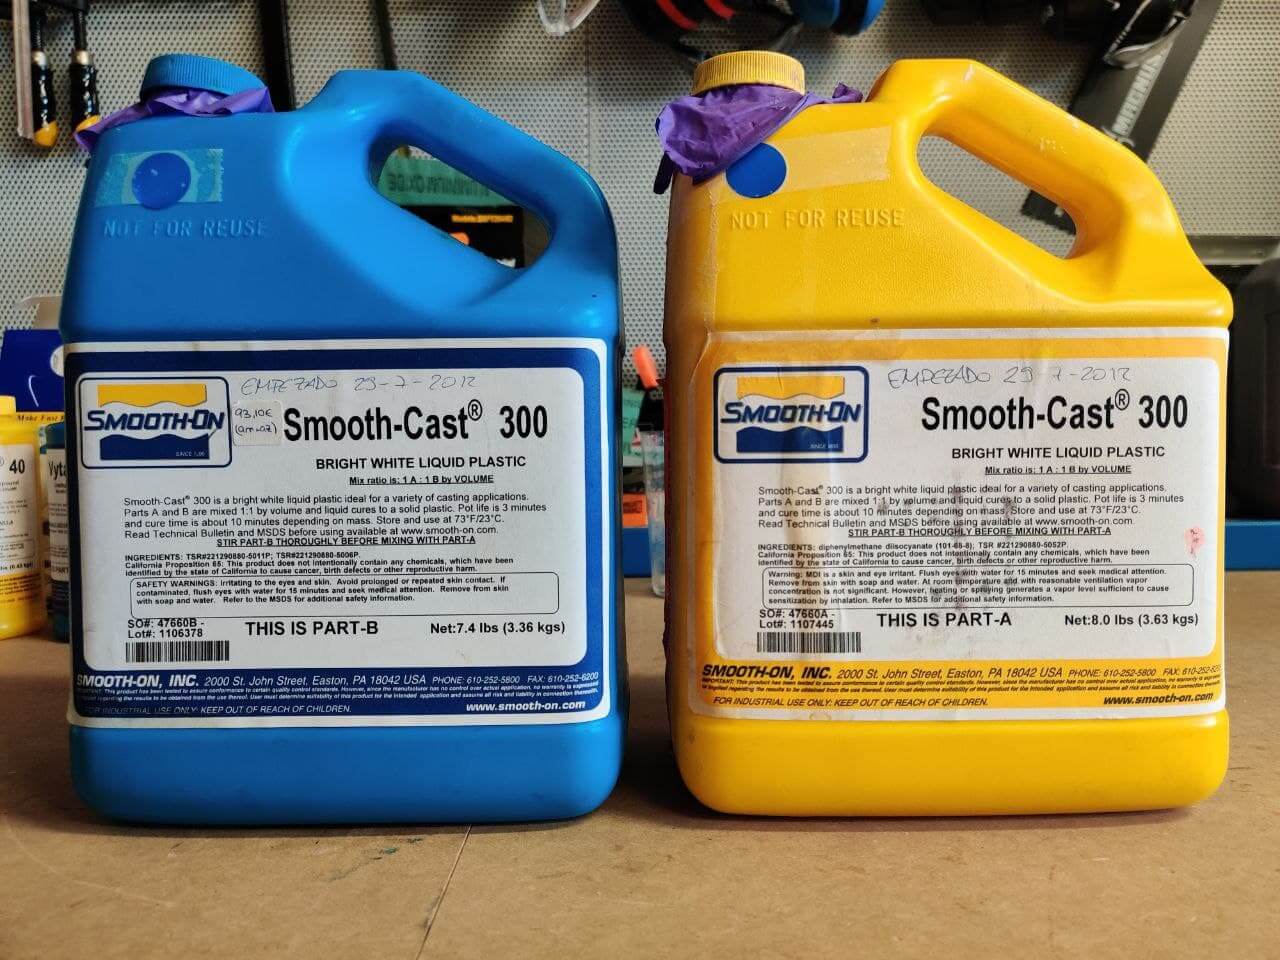
- Low viscosity polyurethane resin, which produces bright white pieces. Dyes can be used.
- It has a pot life of 3 minutes and a cure of 10 minutes.
- Security: good ventilation is recommended, wearing safety glasses, rubber gloves and long sleeves. Beware of possible burns, since the mixture of the two parts generates an exothermic reaction. Mask should be used.
- Pre Mix both parts before using. After dispensing equal amounts of Parts A and B into mixing container, mix thoroughly for at least 1 minutes making sure that you scrape the sides and bottom of the mixing container several times.
- Mix ratio is: 1 Part A : 1 Part B by volume.
- Safety indications: gloves, glasses, and an apron or long sleeve are mandatory. Causes skin irritation, causes serious eye irritation, may cause respiratory irritation.
SMOOTH-CAST® ONYX™ FAST⚓︎
RESIN
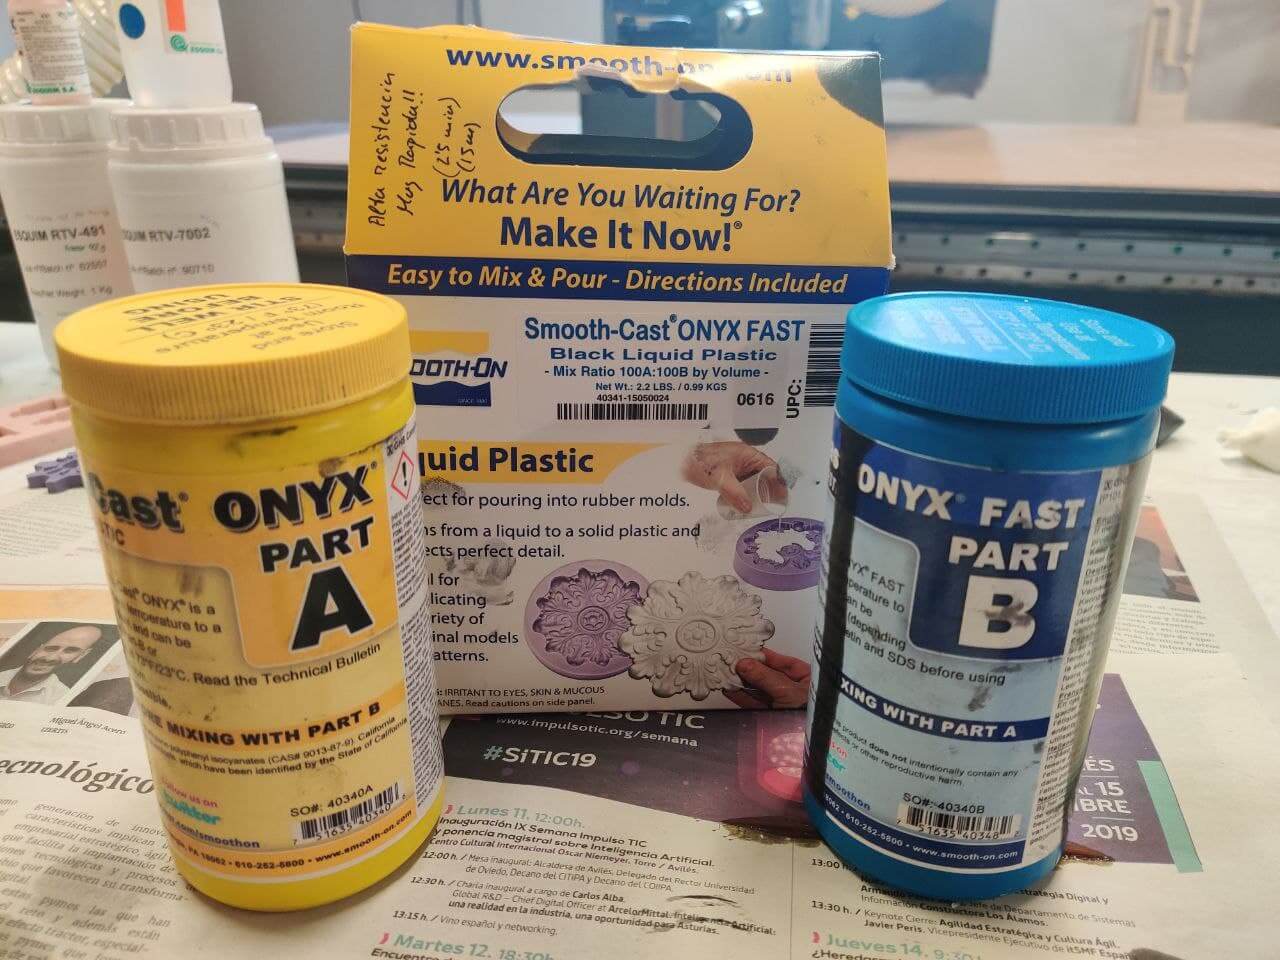
- Mercury-free urethane resin, which produces deep black pieces.
- It has a pot life of 2.5 minutes and a cure of 10-15 minutes.
- Security: good ventilation is recommended, wearing safety glasses, rubber gloves and long sleeves. Beware of possible burns, since the mixture of the two parts generates an exothermic reaction. Mask should be used.
- Pre Mix both parts before using. After dispensing equal amounts of Parts A and B into mixing container, mix thoroughly for at least 1 minutes making sure that you scrape the sides and bottom of the mixing container several times.
- Mix ratio is: 1 Part A : 1 Part B by volume.
- Safety indications: Gloves, glasses, and an apron or long sleeve are mandatory. Causes skin irritation, causes serious eye irritation, may cause respiratory irritation.
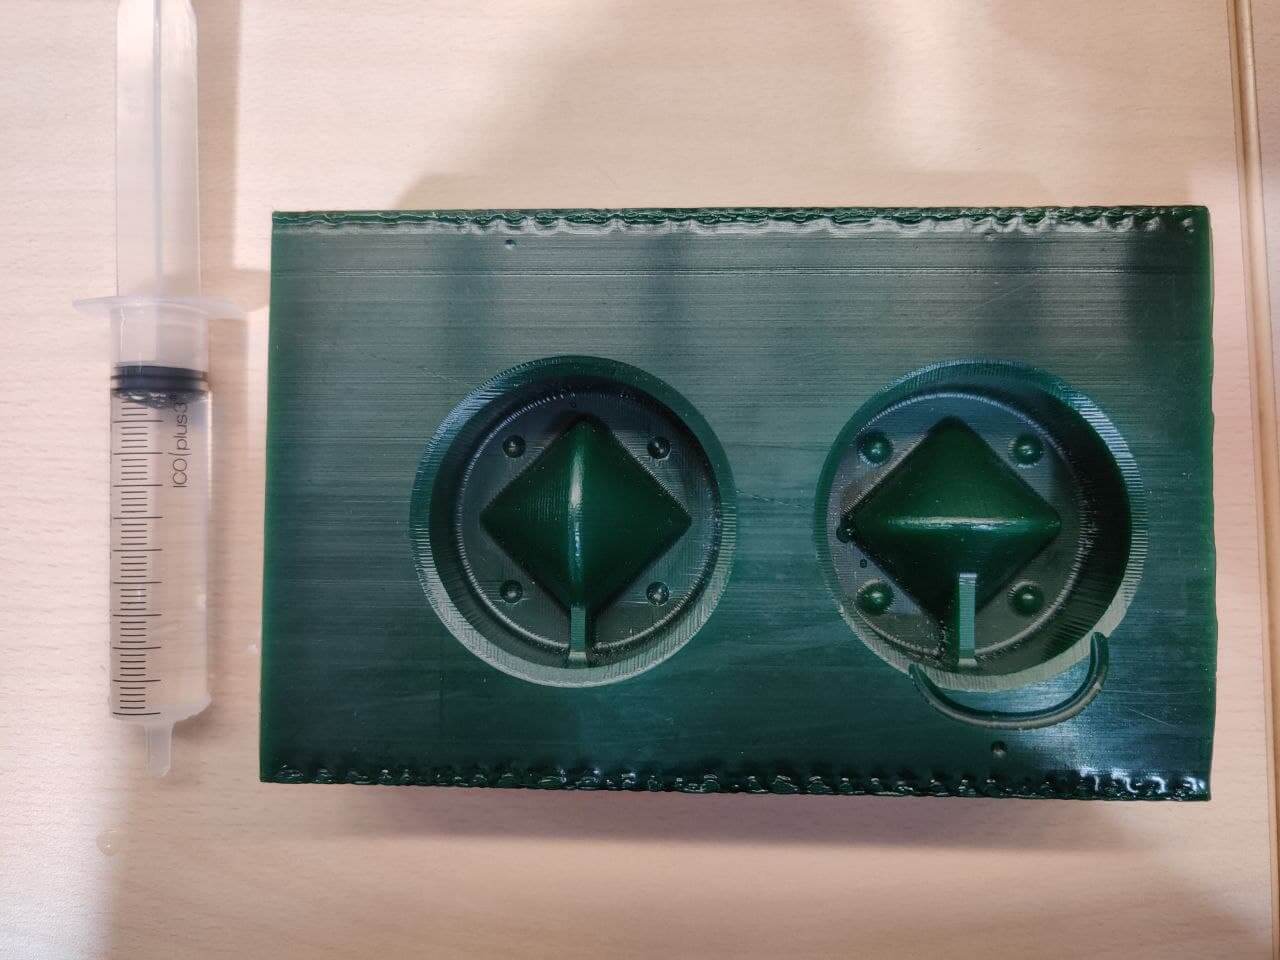
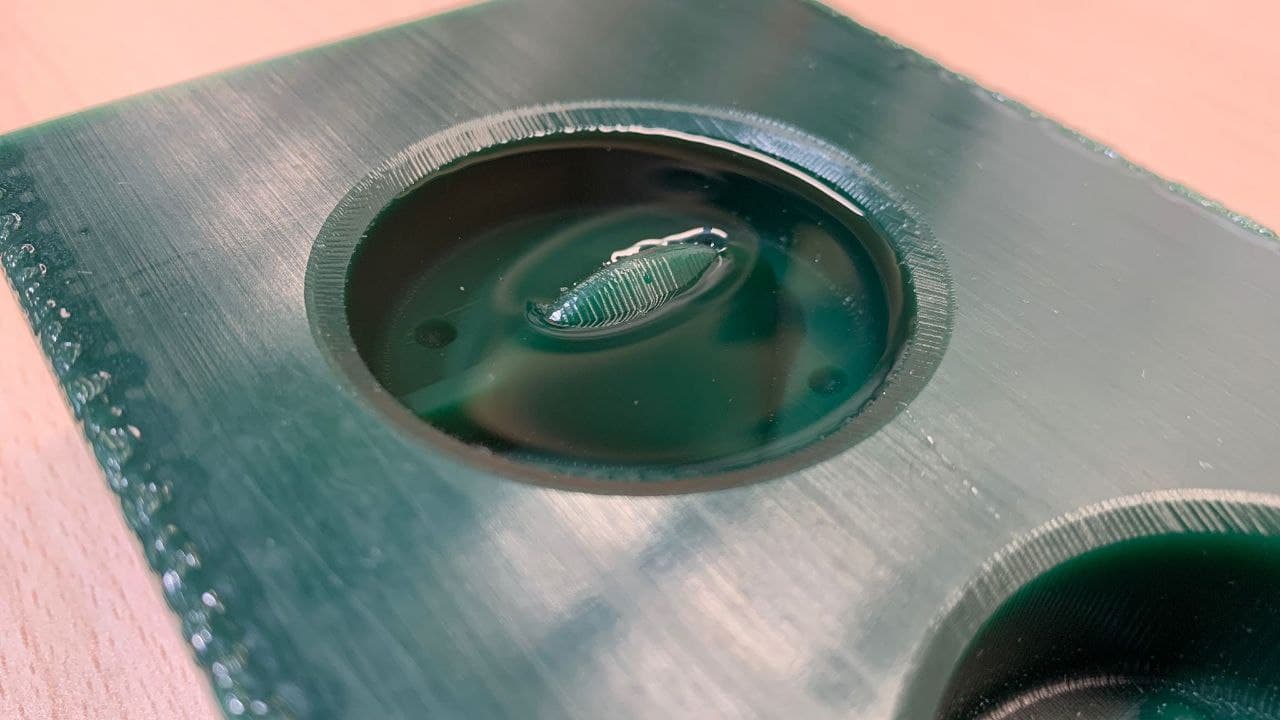
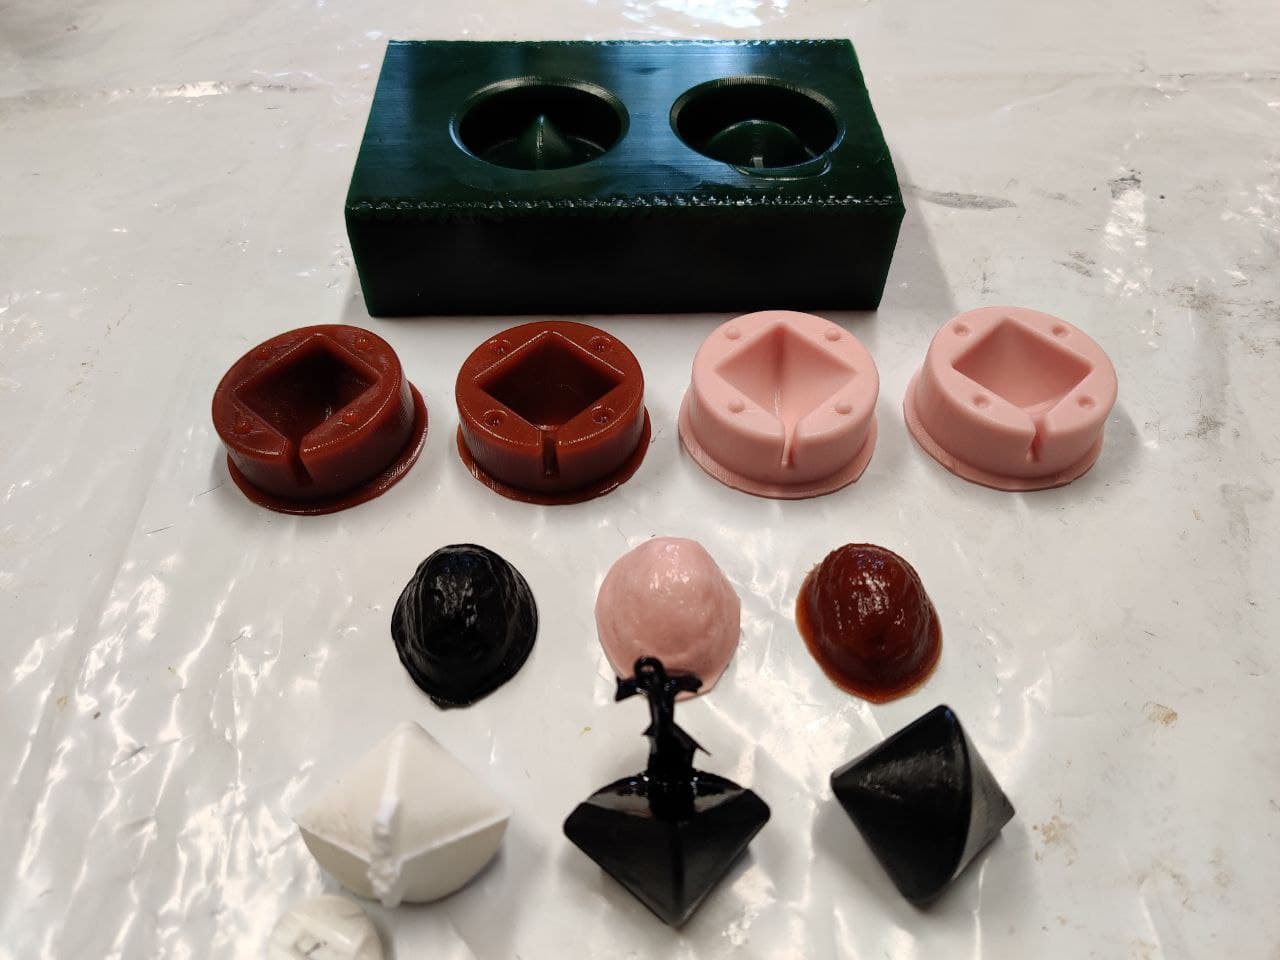
Molding⚓︎
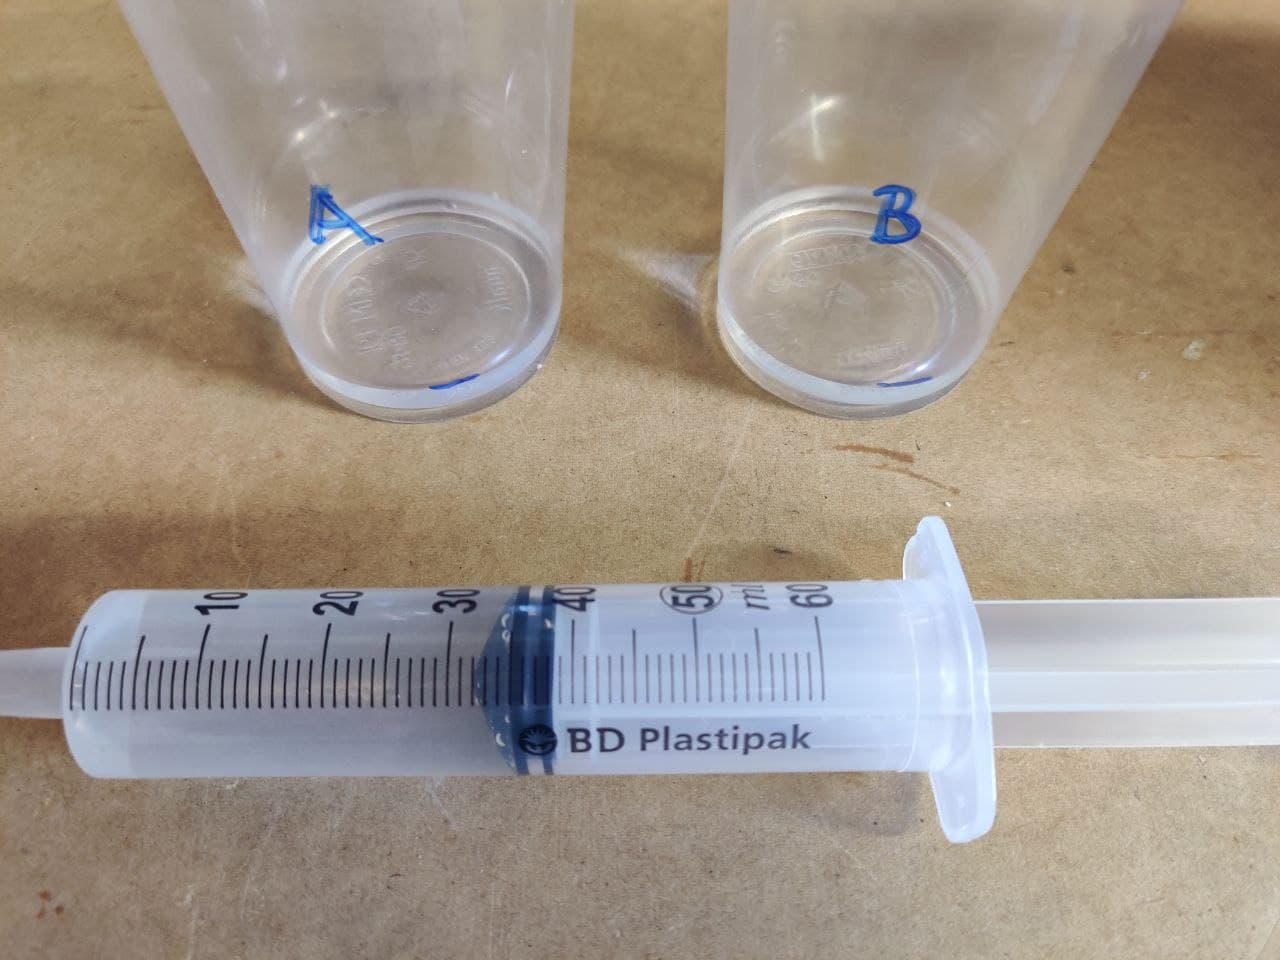
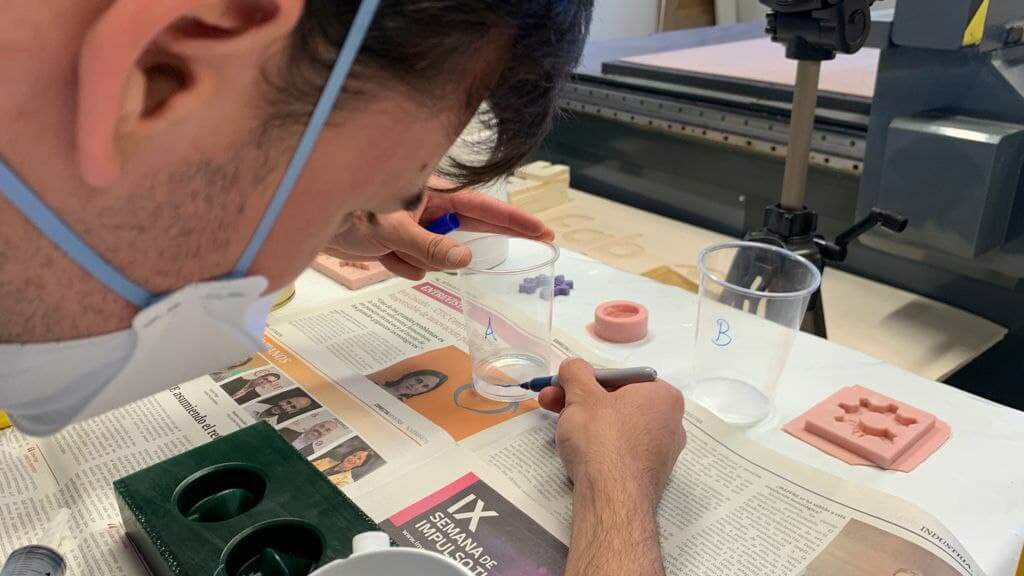
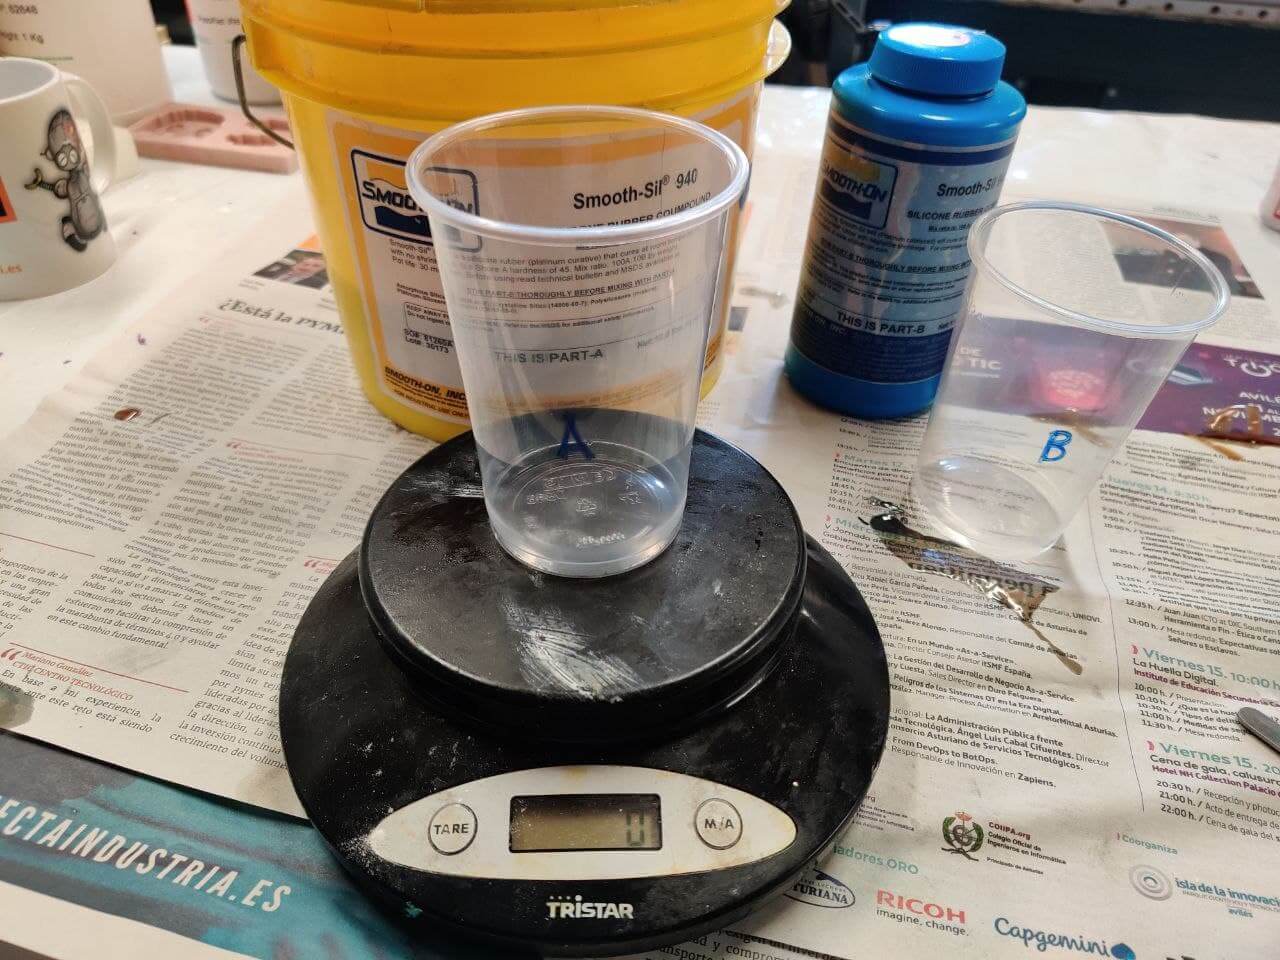
To calculate the amounts of resin needed in each mix, we first need to know the volume of our mold. For this we can use a syringe with water and measure the difference deposited in the block until it is filled.
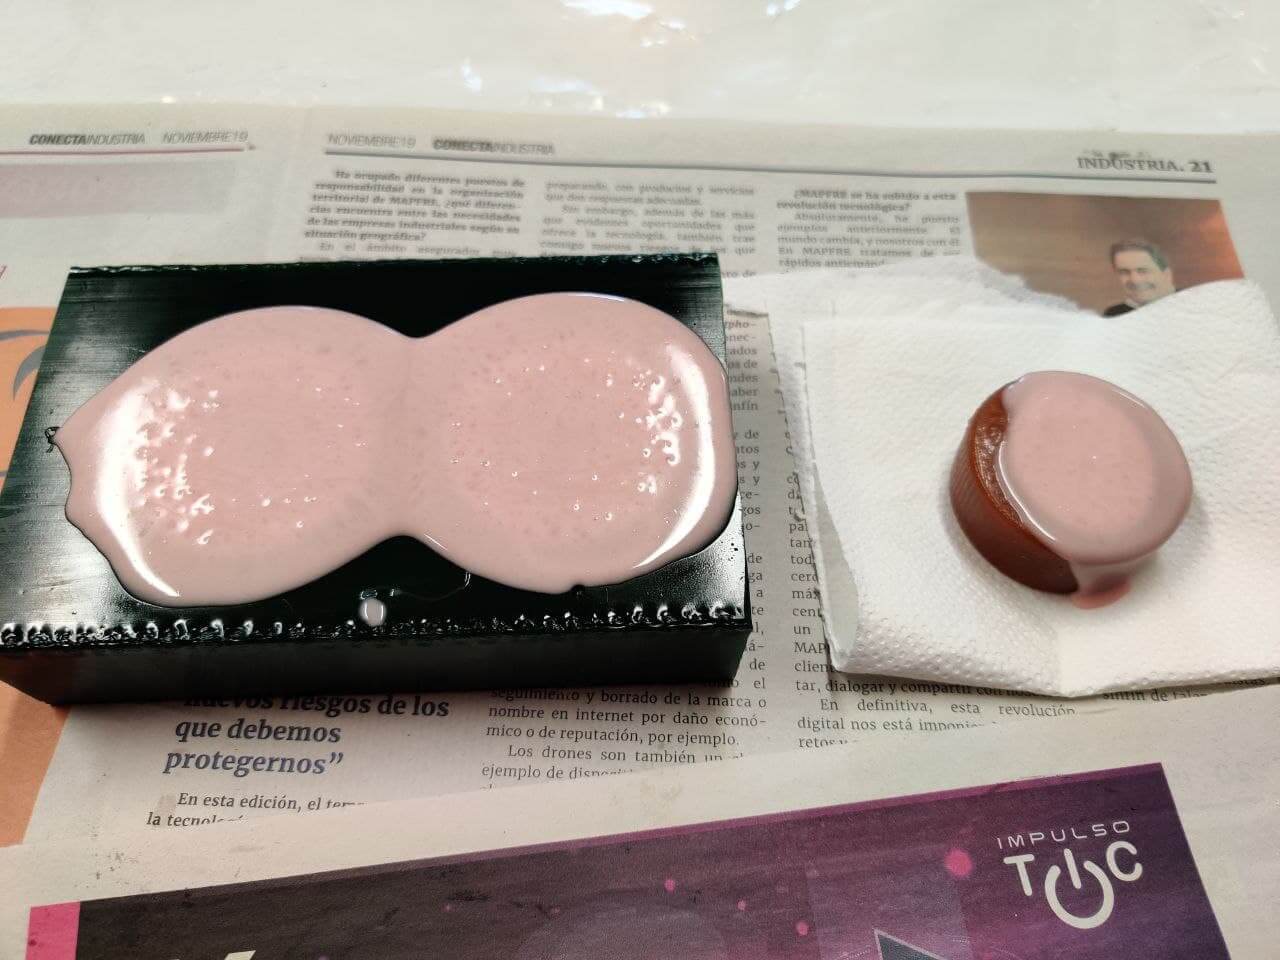
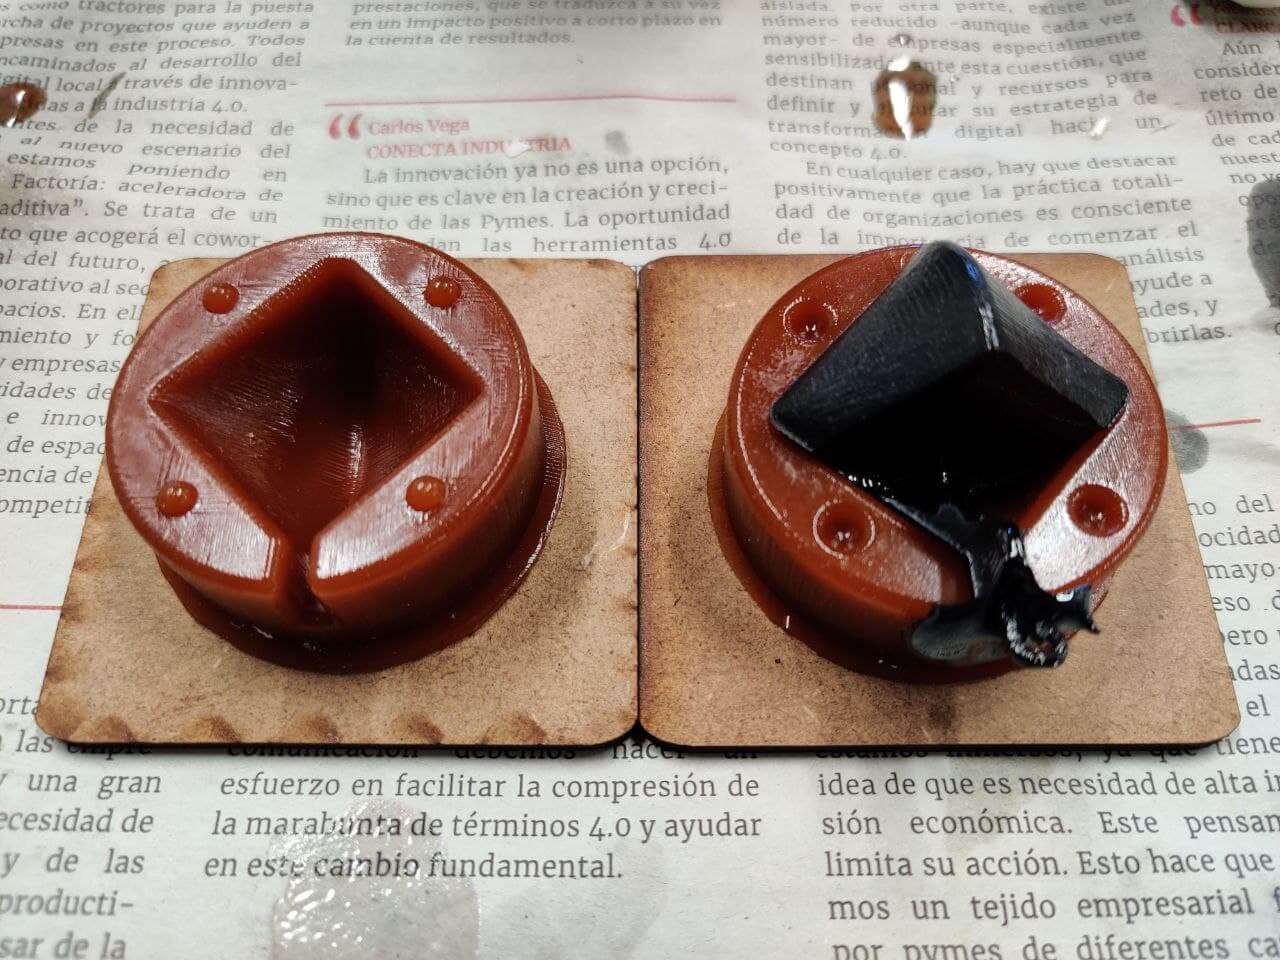
In my case, as you can see in the photo, I have not taken into account the necessary space of the mold that must remain on the model. This will cause the molds to have a very fine area at the tip of the model and may break.

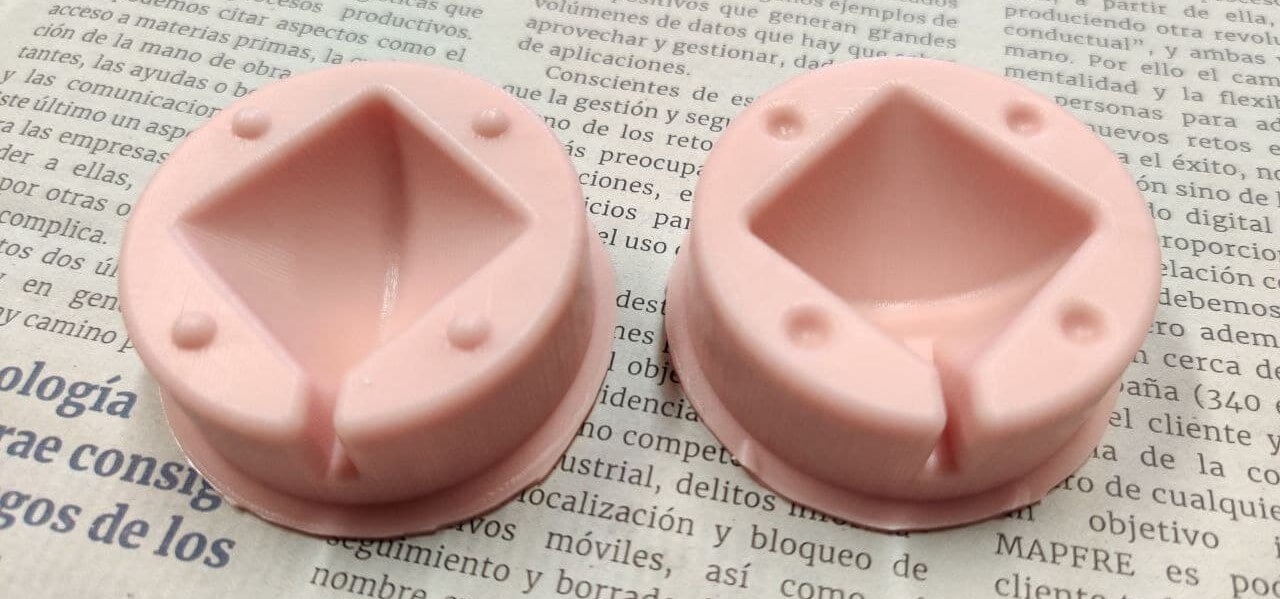
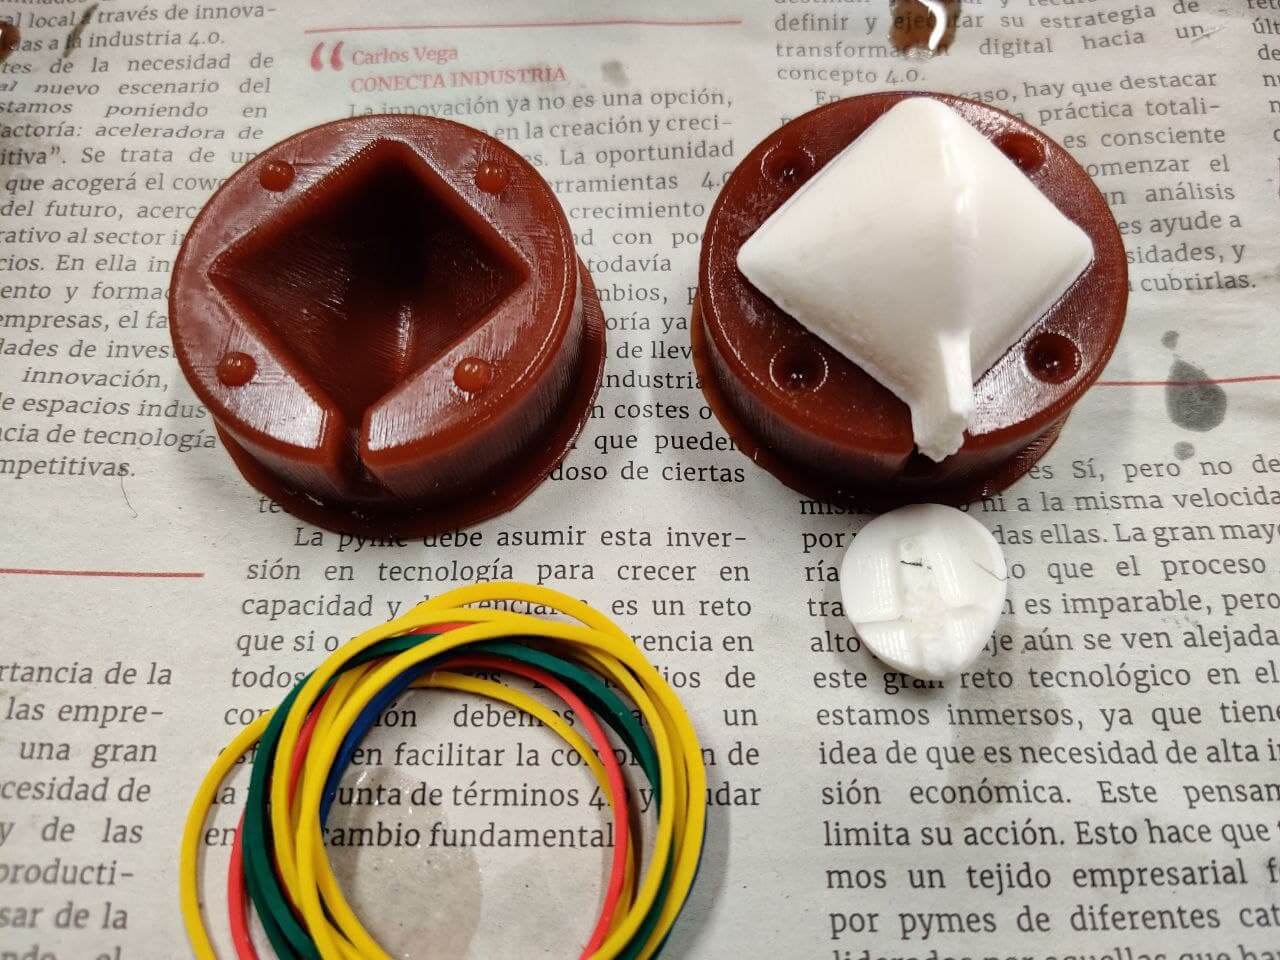
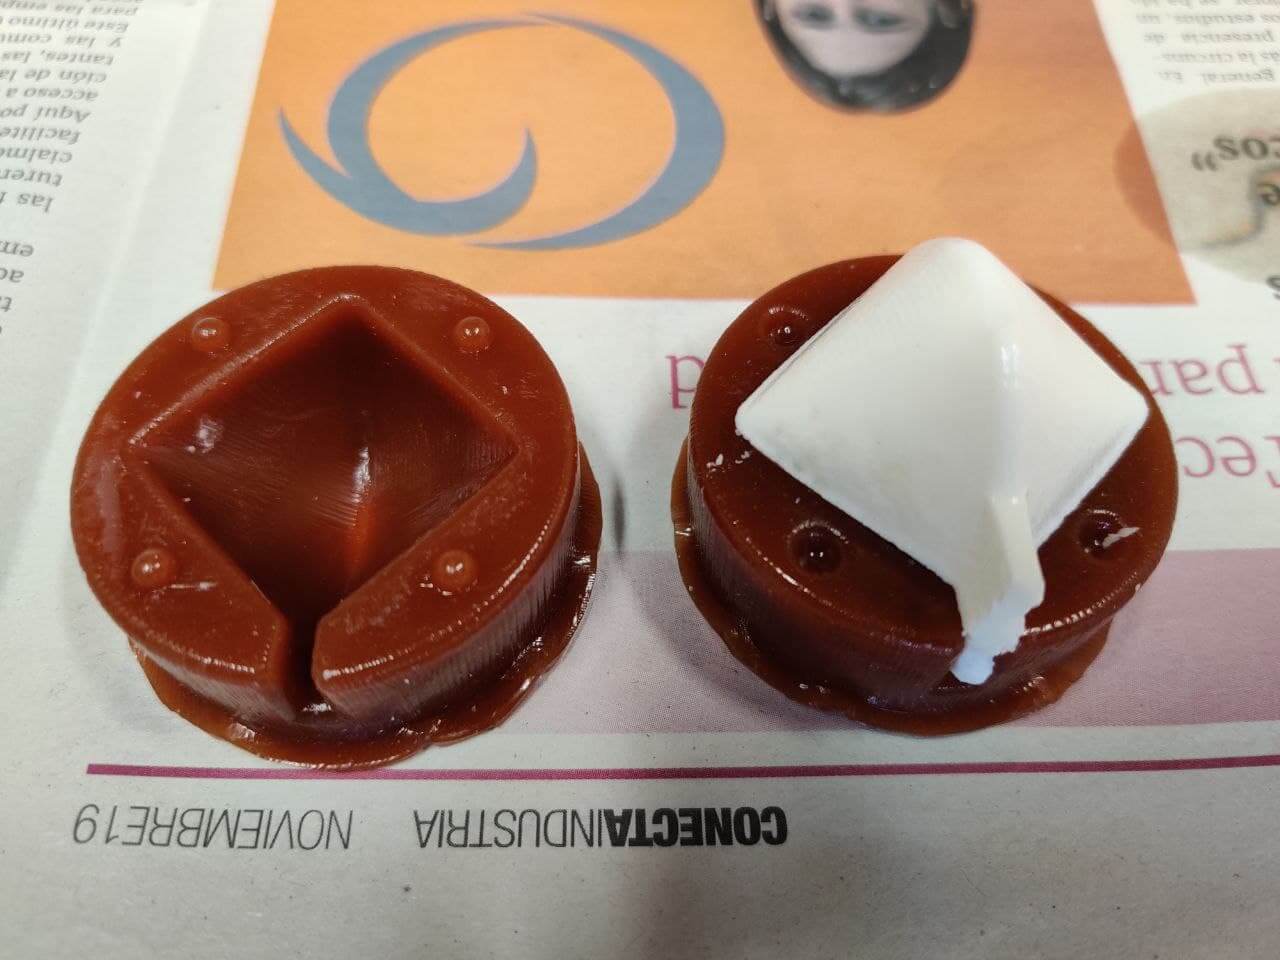
Mould silicone⚓︎
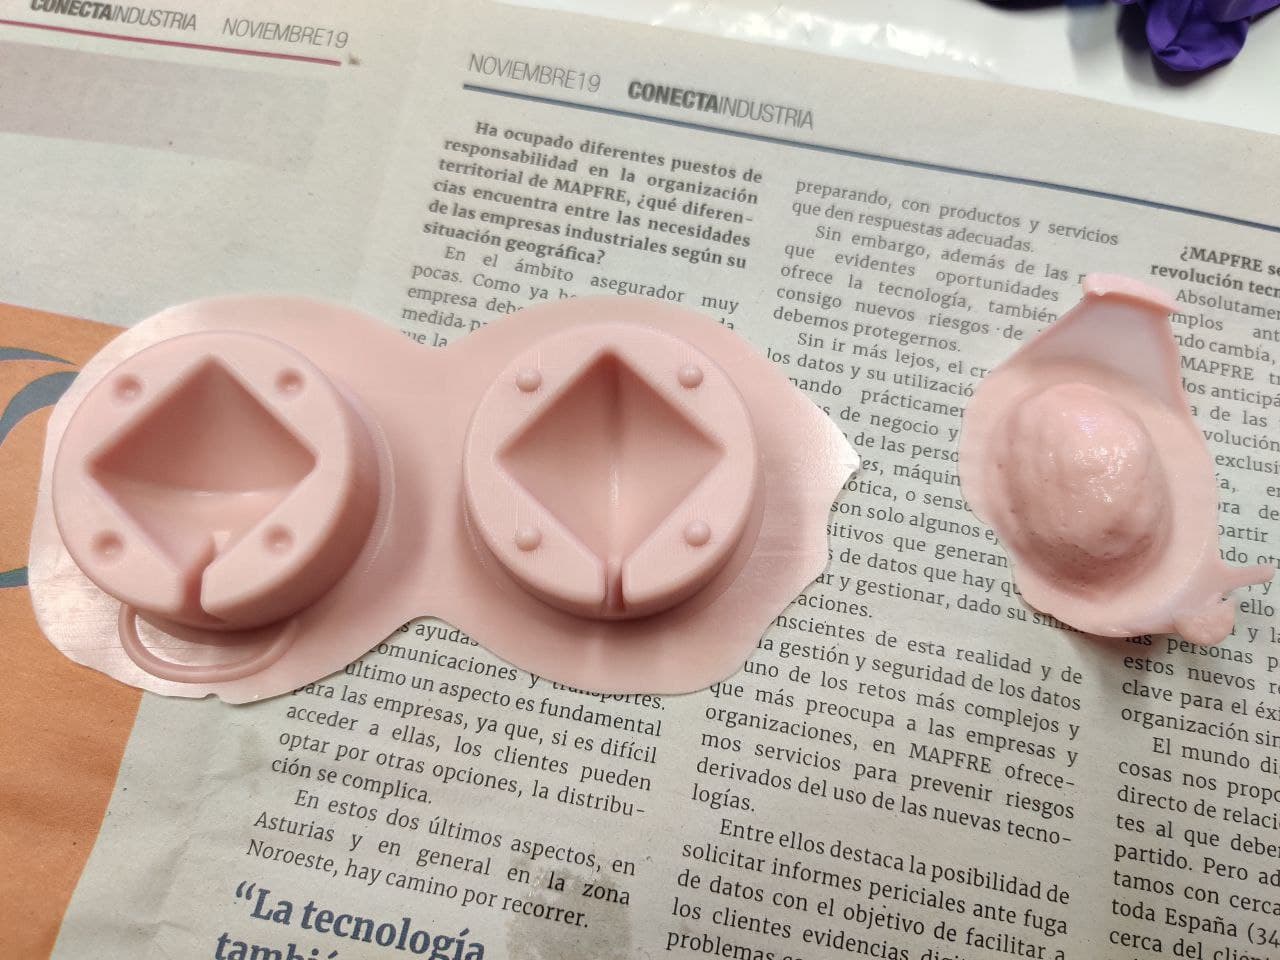
Vitaflex 40. I’ve followed the instructions and the process described in the group assignment corresponding to this resin.
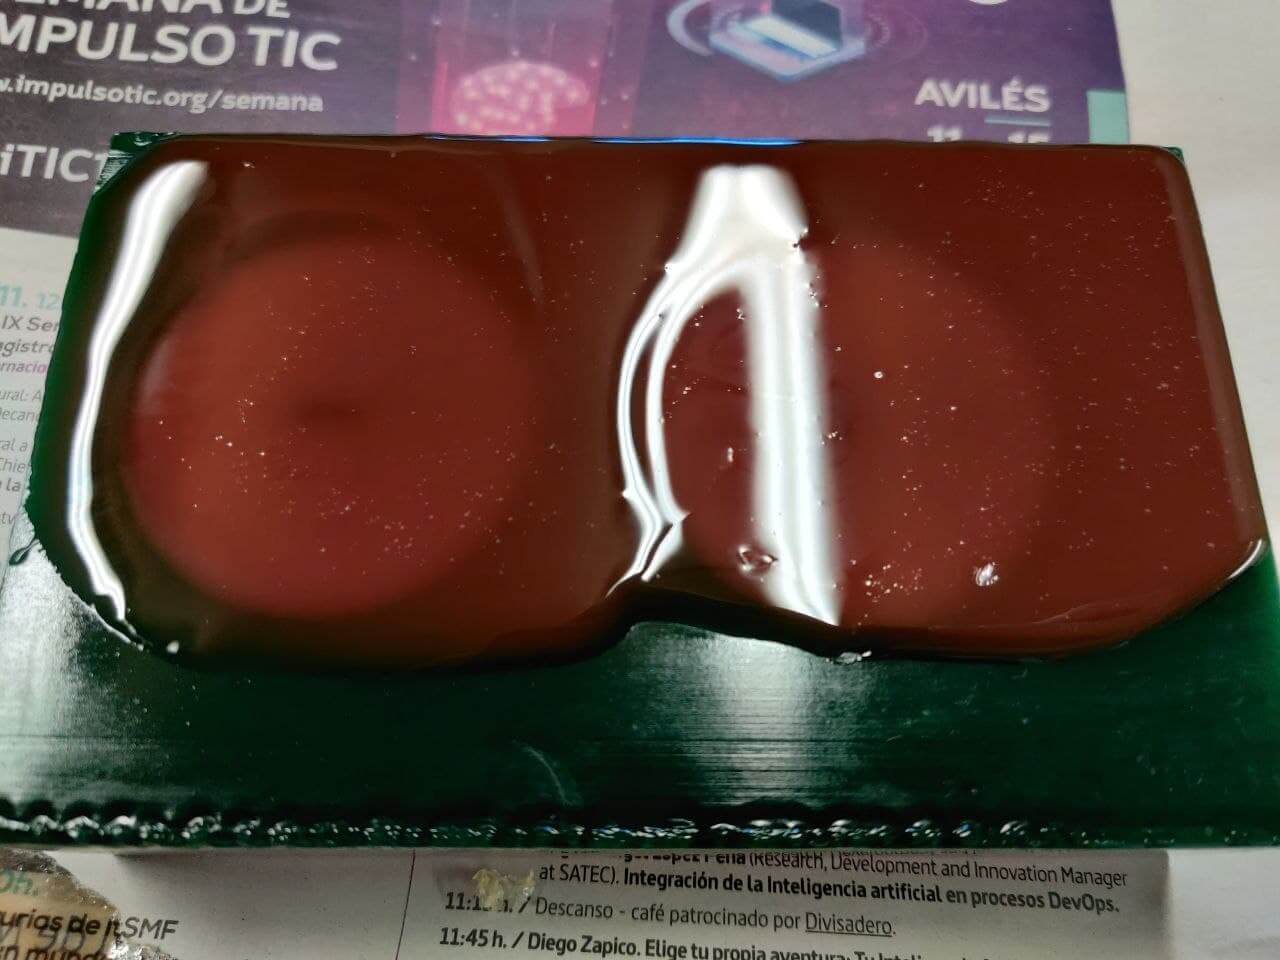
Final result after curing for 24 hours:
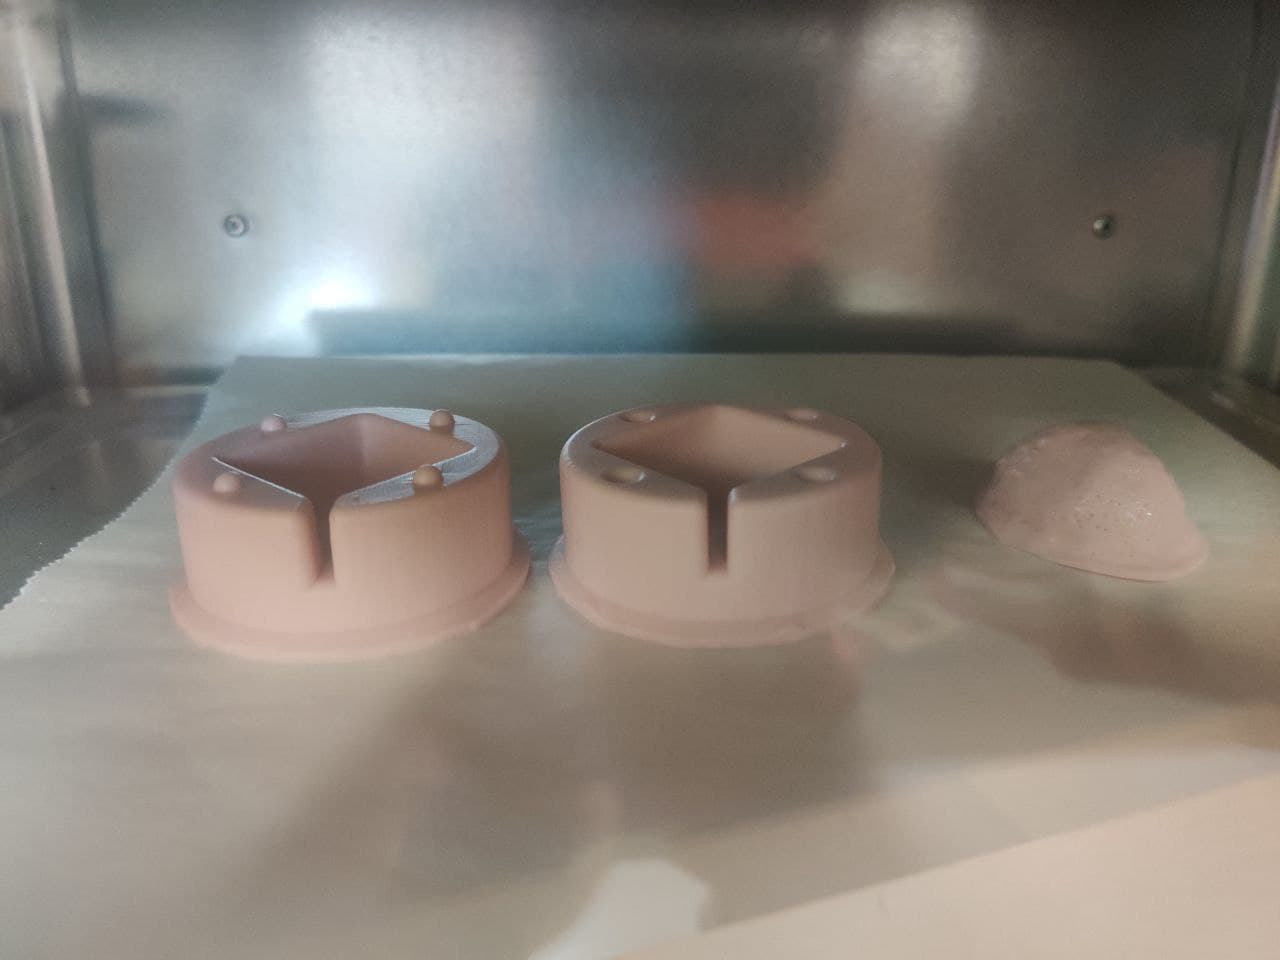
Food mould silicone⚓︎
Smooth-sil 940. I’ve followed the instructions and the process described in the group assignment corresponding to this resin.

Timelapse of the whole process:
Curing process for food silicone it’s more complex as explained before. After the 24 hours we have to expose the silicone to a constant heat in the oven.

Casting⚓︎
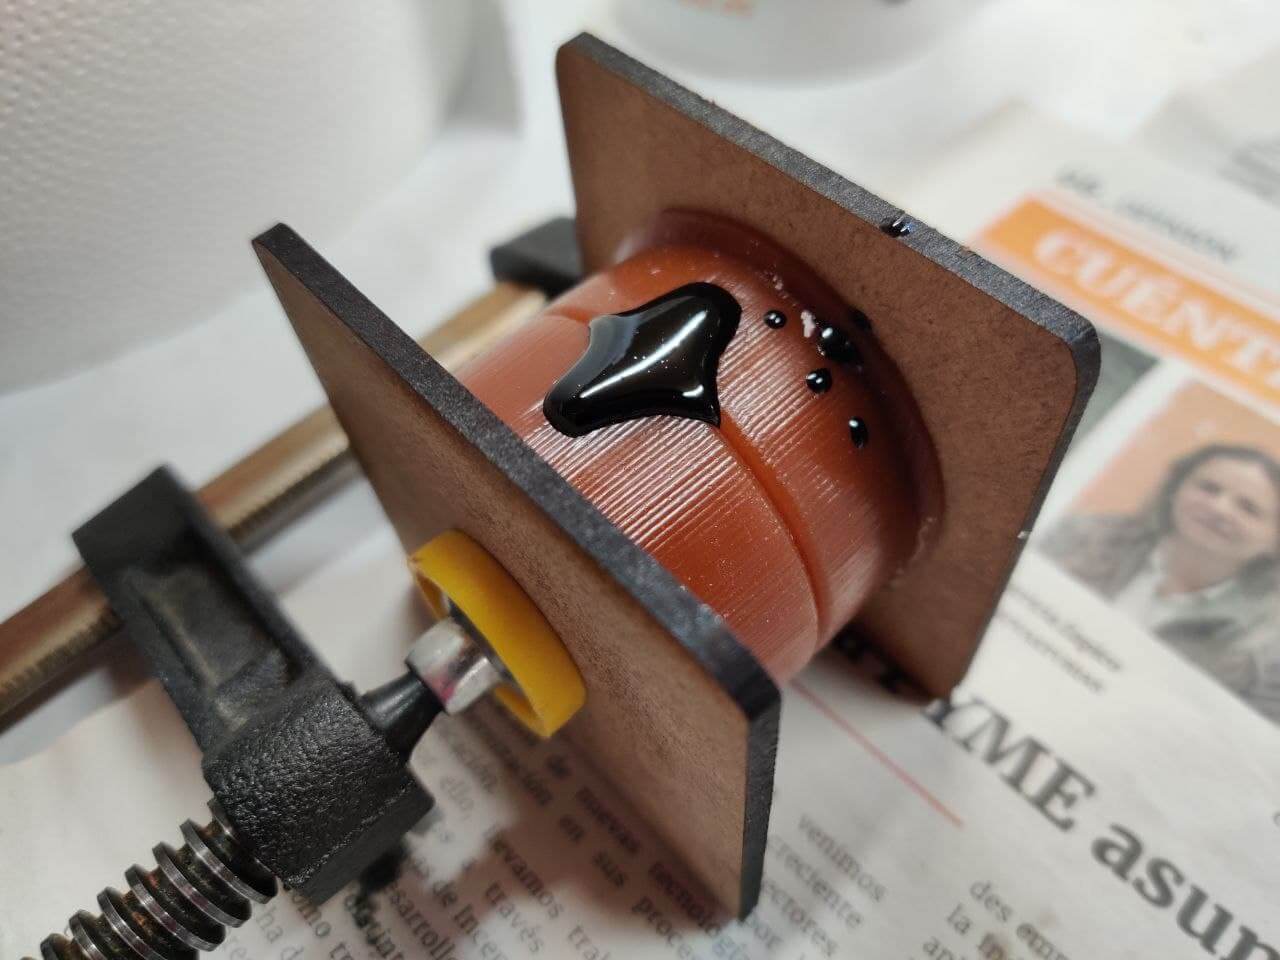
First casting⚓︎
Smooth-cast 300. I’ve followed the instructions and the process described in the group assignment corresponding to this resin.
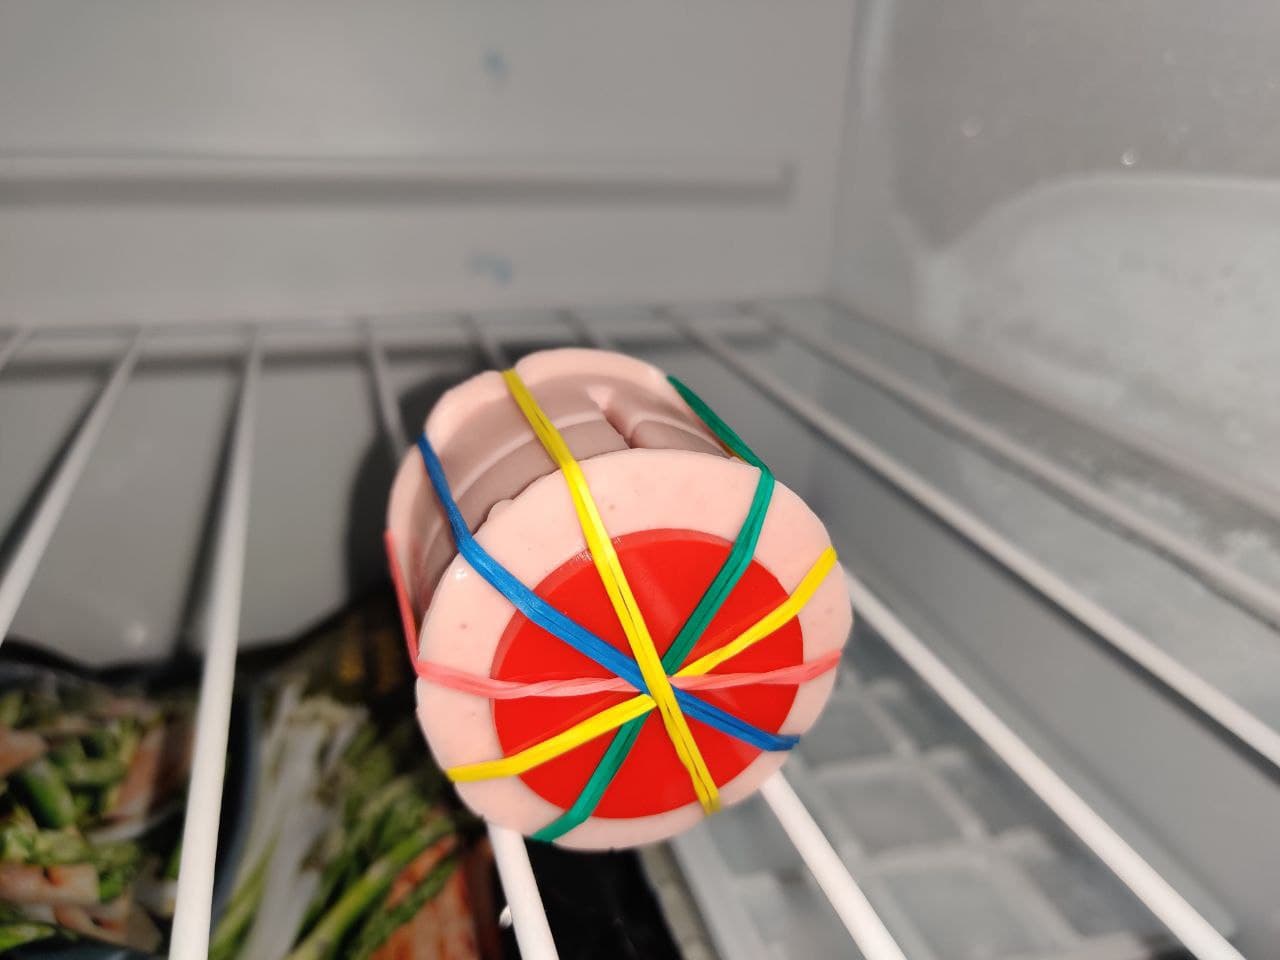
I am using rubber bands to keep the mold together
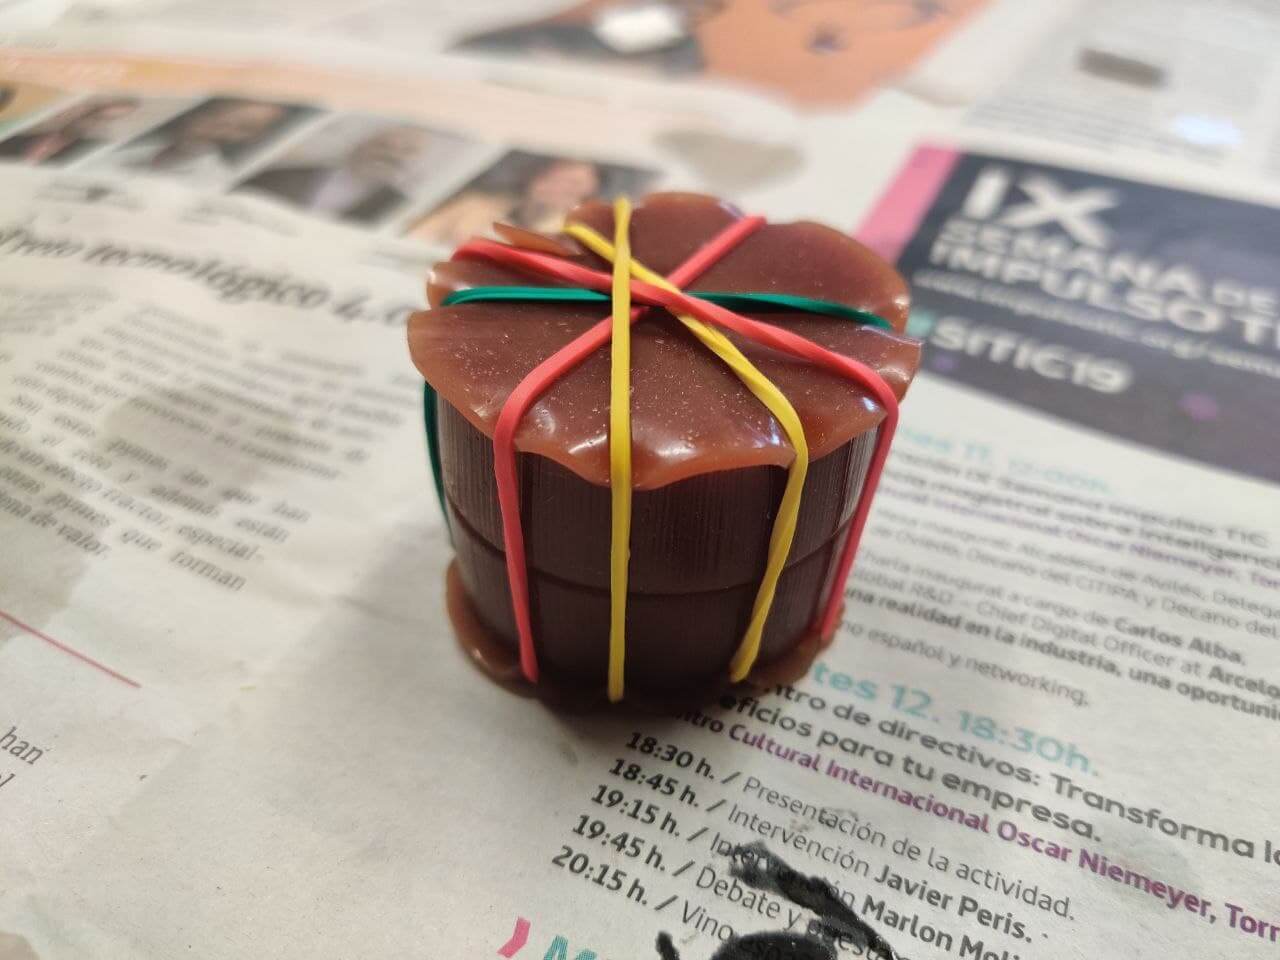
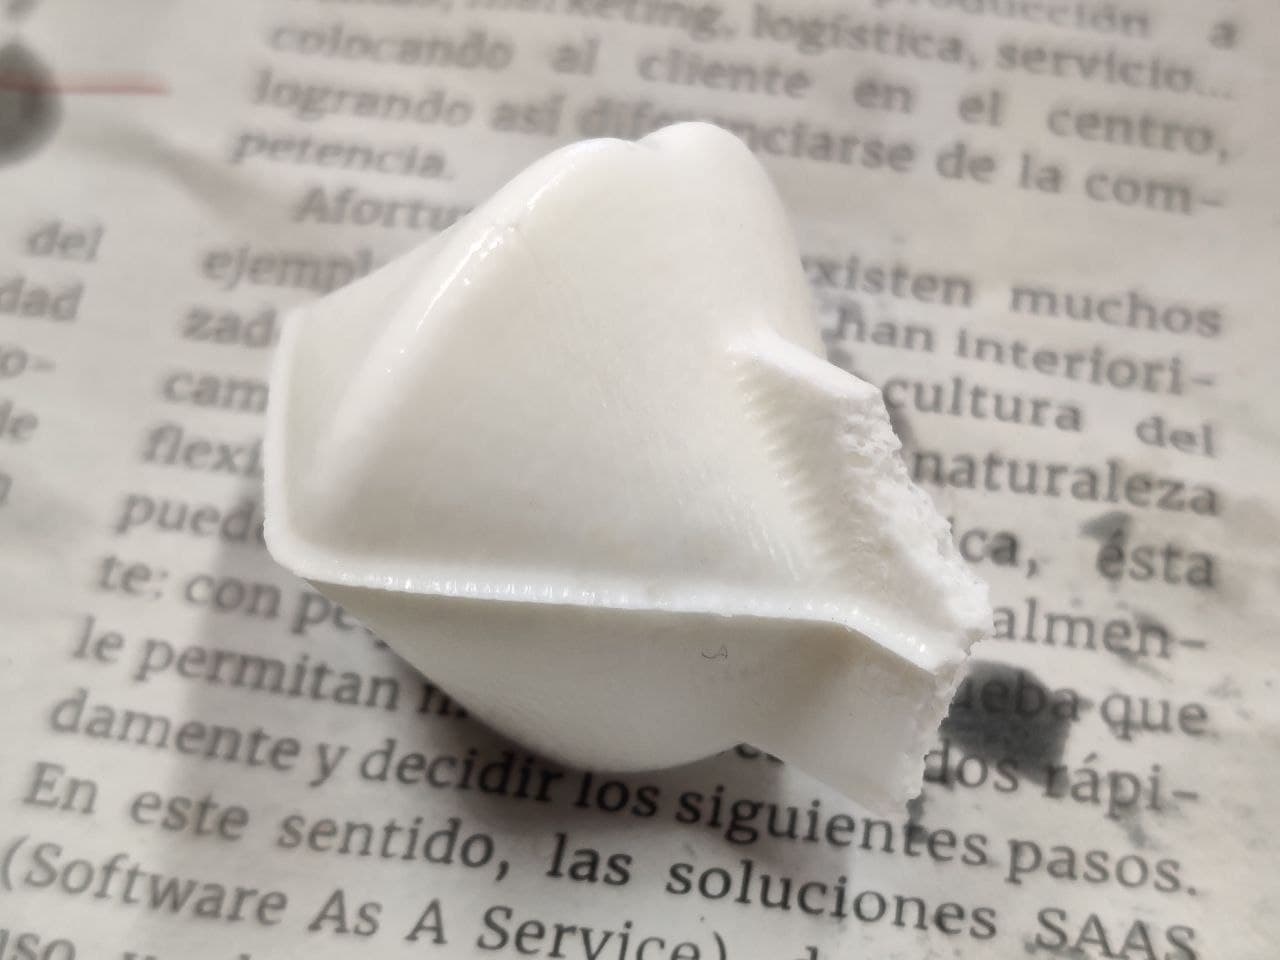
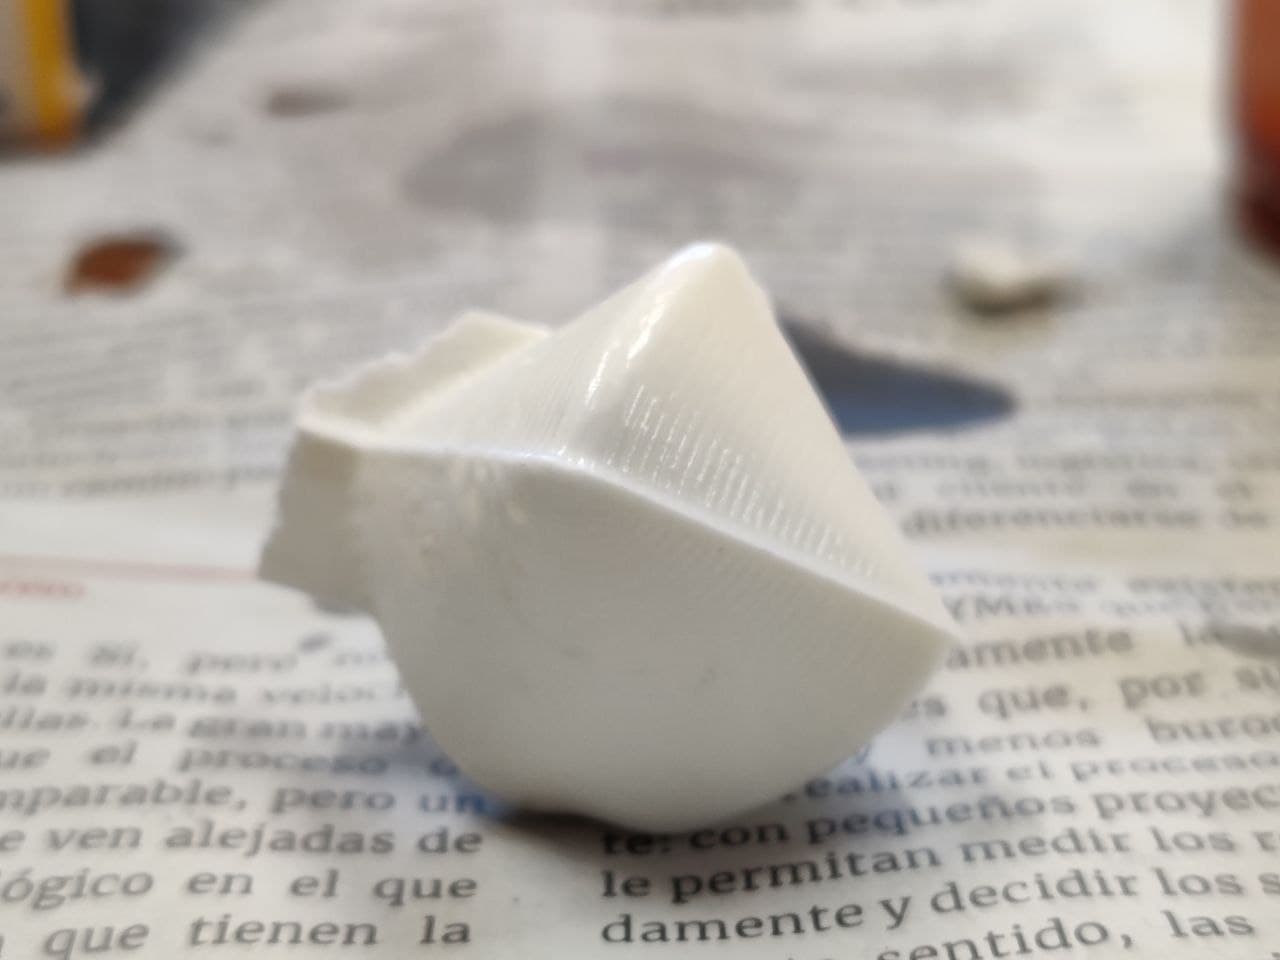
The rubber bands made too much preassure, and due to the thin layer at the top the figure has ended up with a notch. This is a timelapse of the whole process:
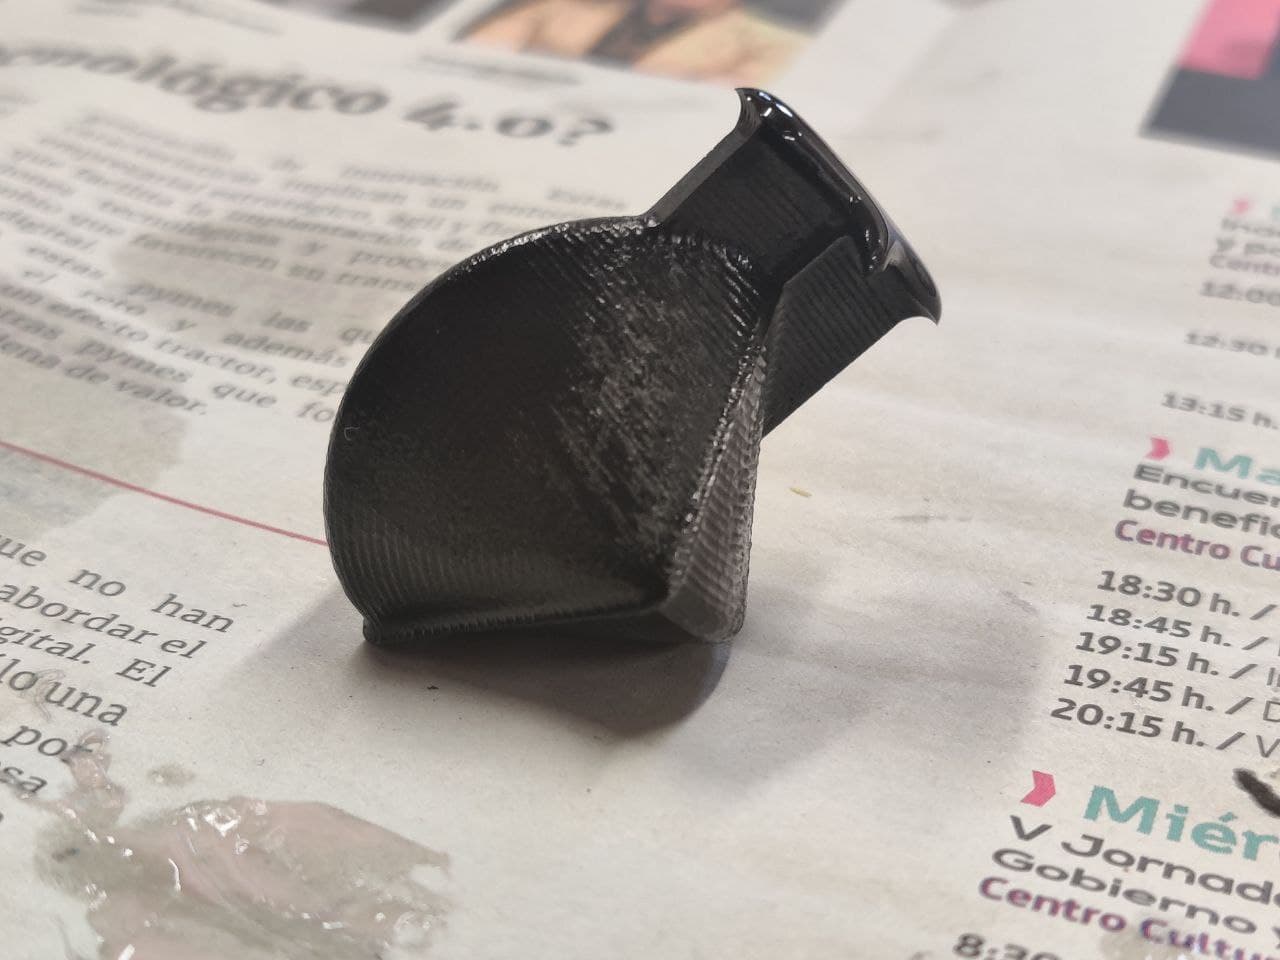
Second casting⚓︎
Smooth-cast Onyx Fast. I’ve followed the instructions and the process described in the group assignment corresponding to this resin.

First attempt. As the pot life is really short the mix started solidifying before it could fill the mold. I have to be faster.
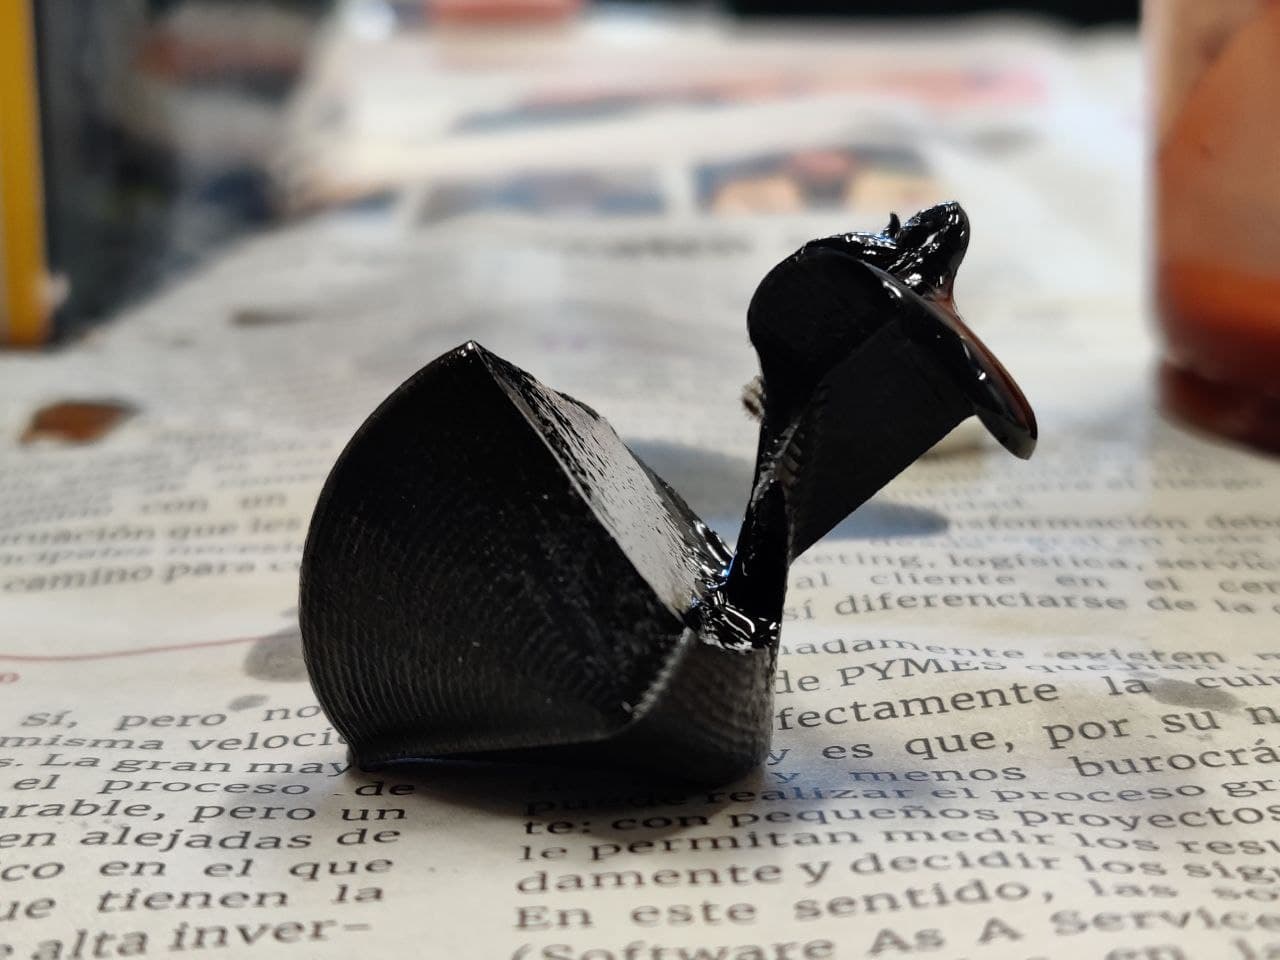
Second attempt
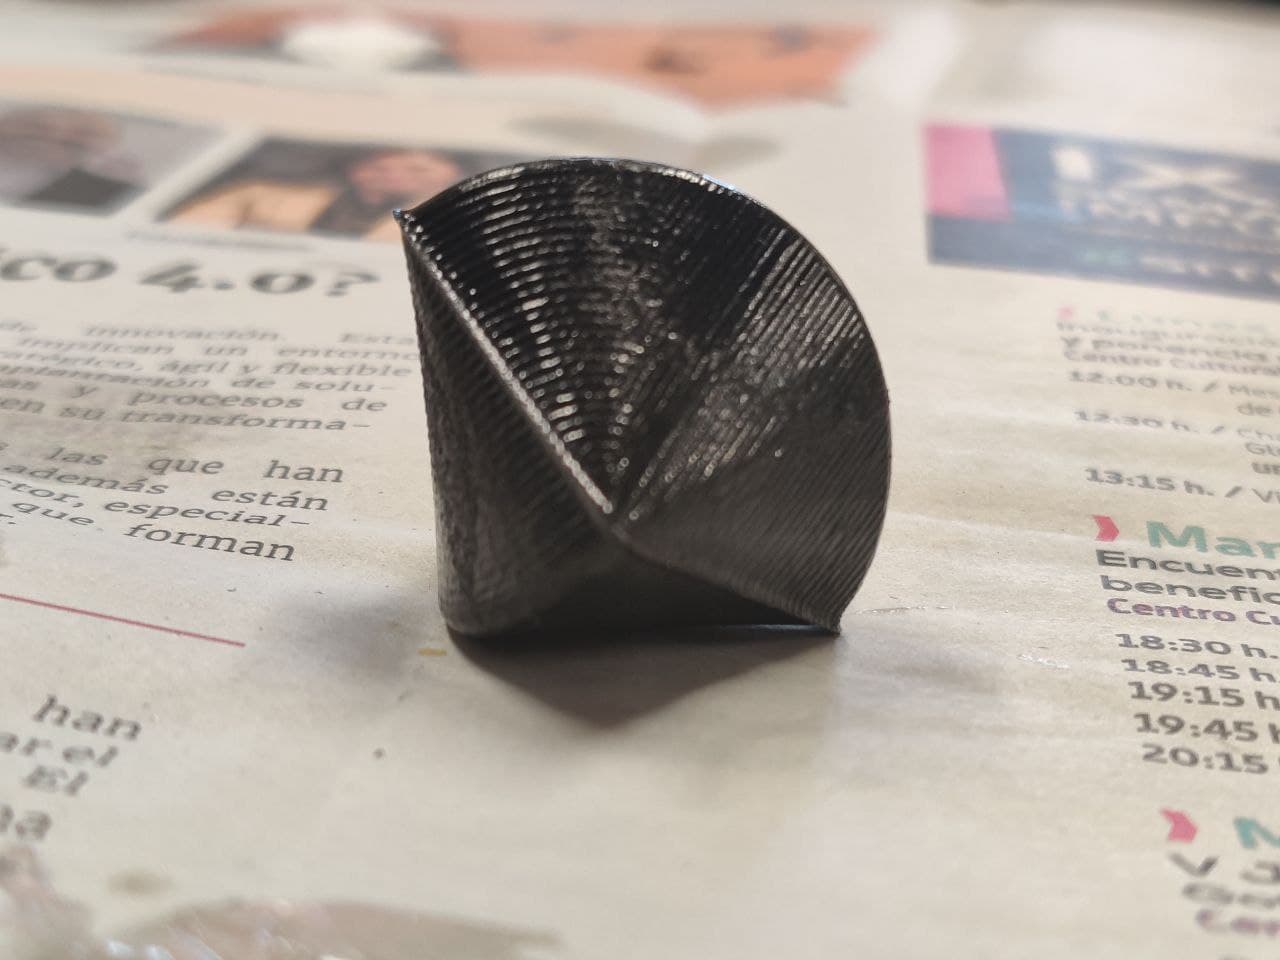
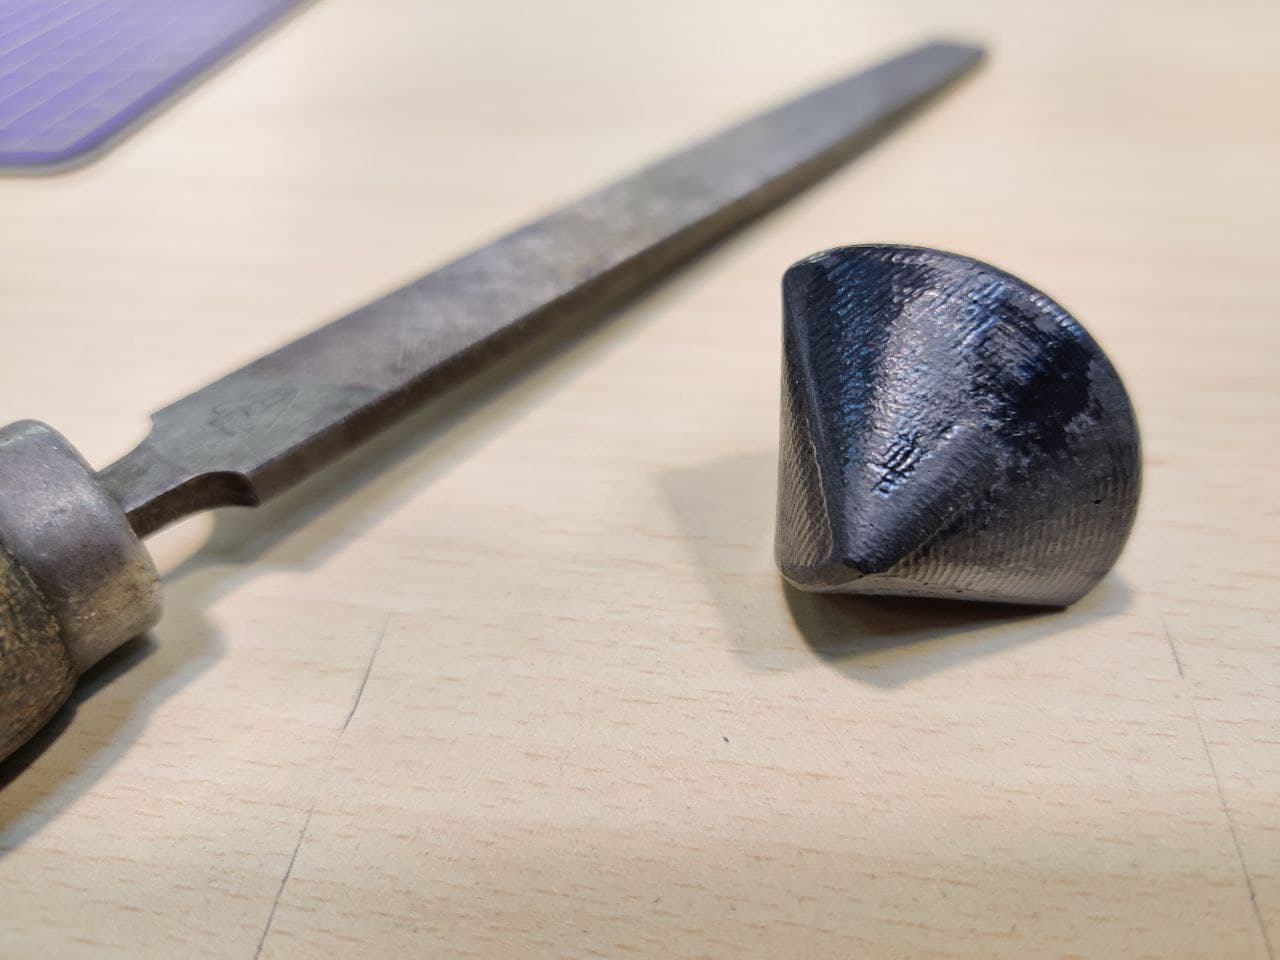
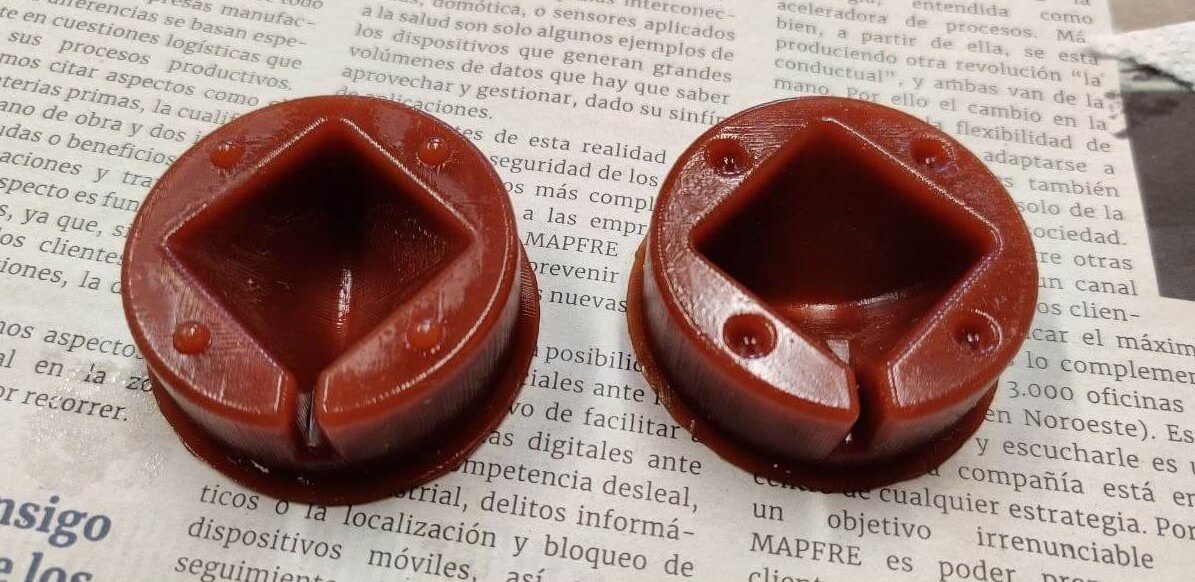
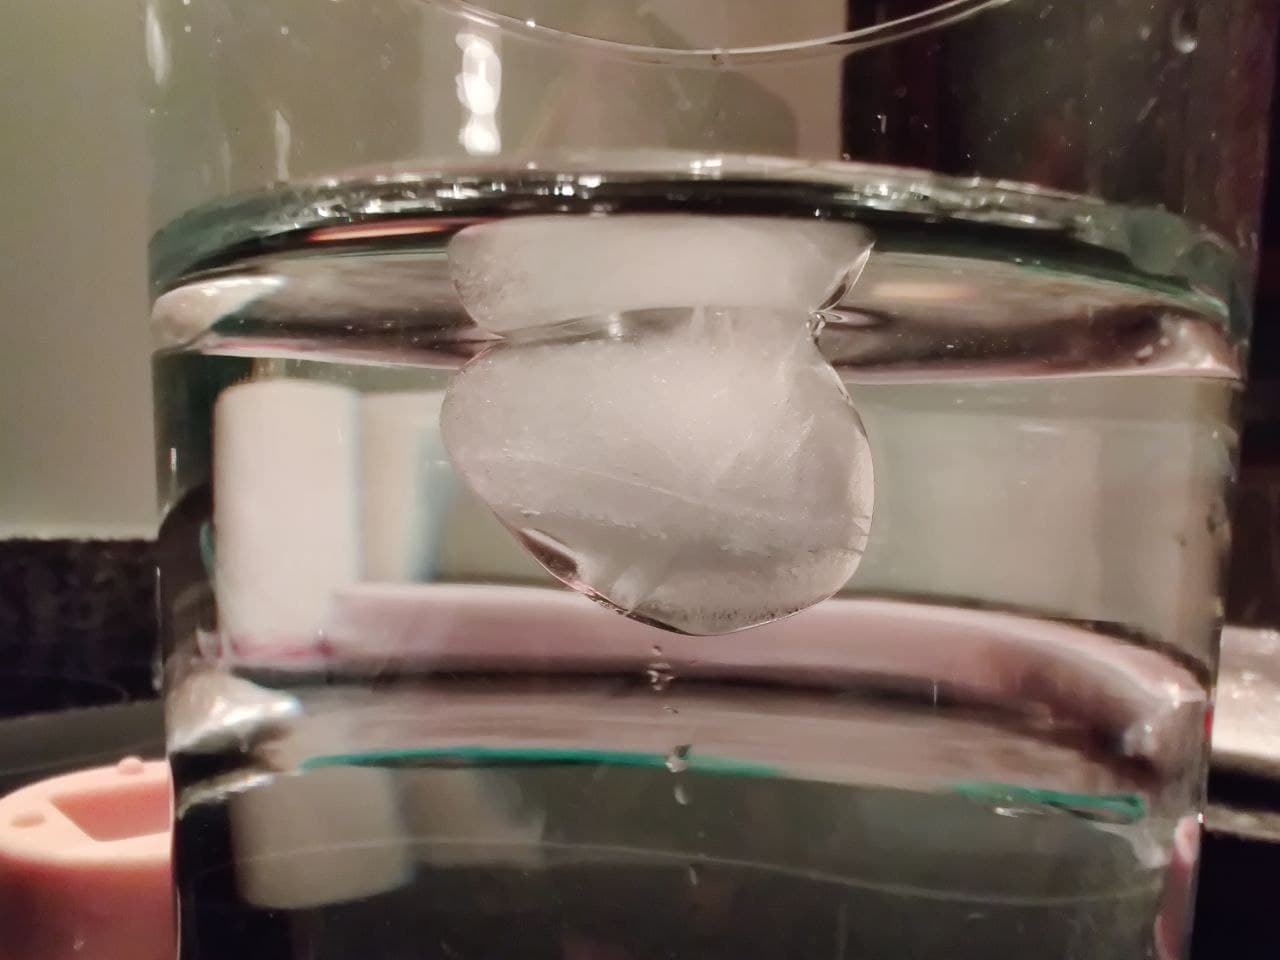
It rolls! The sphericon it’s not a myth! 
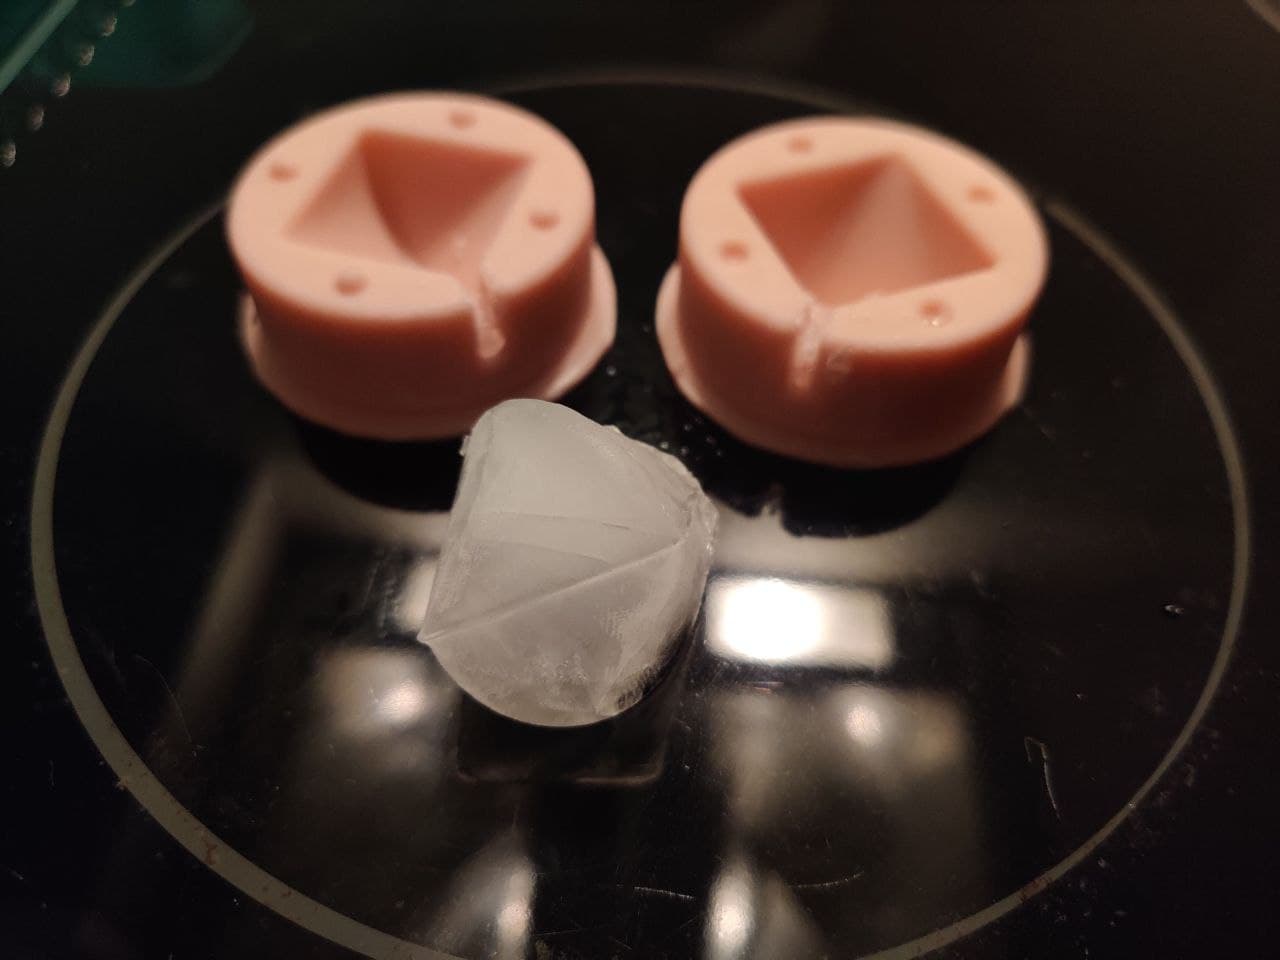
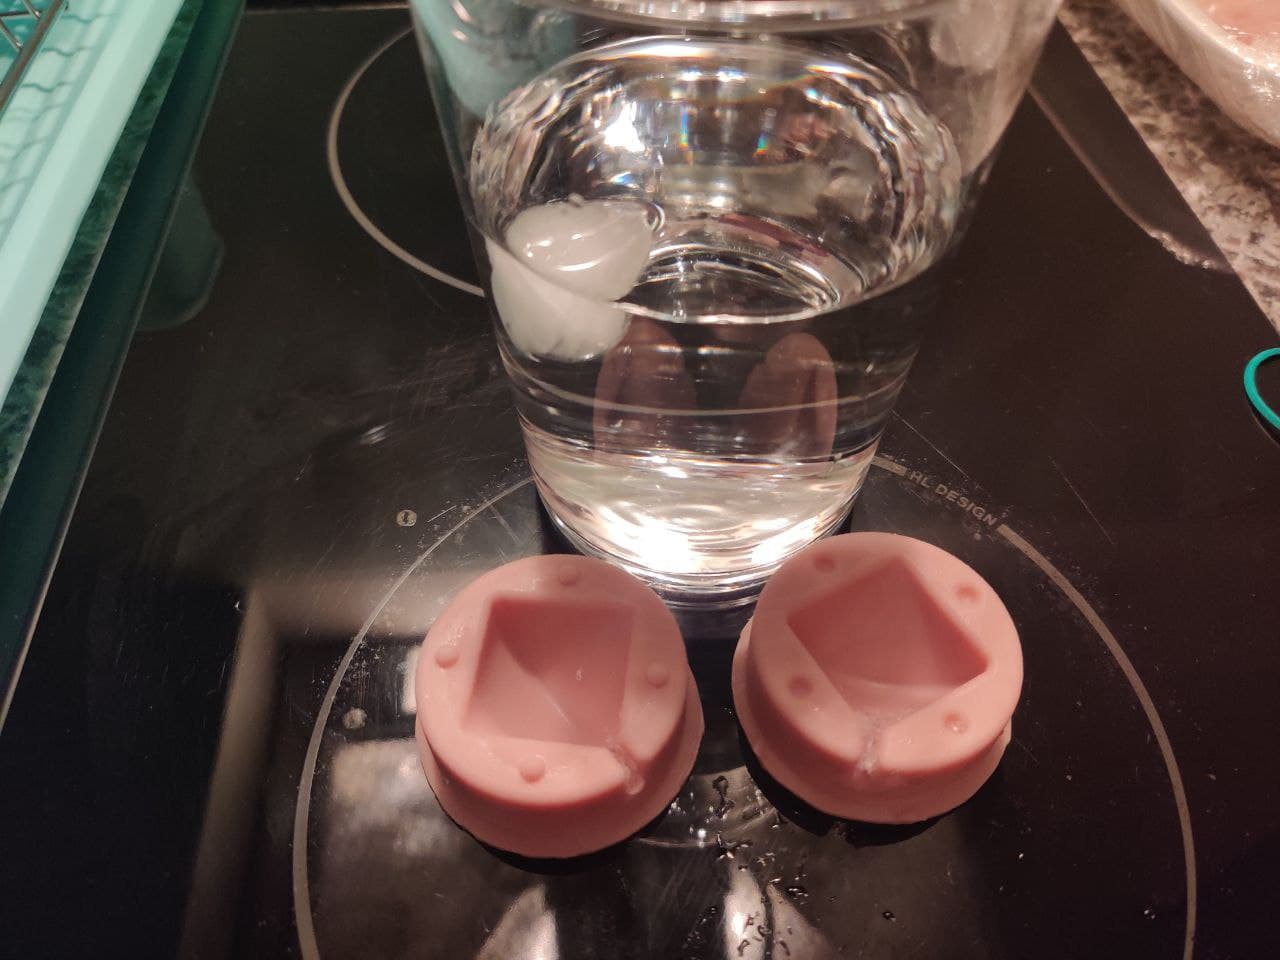
Extra⚓︎
I used the food silicone mold to make some sphericon ice cubes! It’s not very efficient as a process but the result is very cool. I don’t think there are many sphercion-shaped ice cubes in the world! 
Summary⚓︎
Although I have enjoyed this week, there is one thing that has struck me about these processes and materials. The amount of waste that is generated to produce a relatively small object is high. Also the time it takes for making, processing and curing the mixes is enormous, making the process quite inefficient. This is probably because I have chosen an object that can be manufactured using other techniques in a much faster and less expensive way. Also the enviromental and safety concerns involved in the process are another big cons.

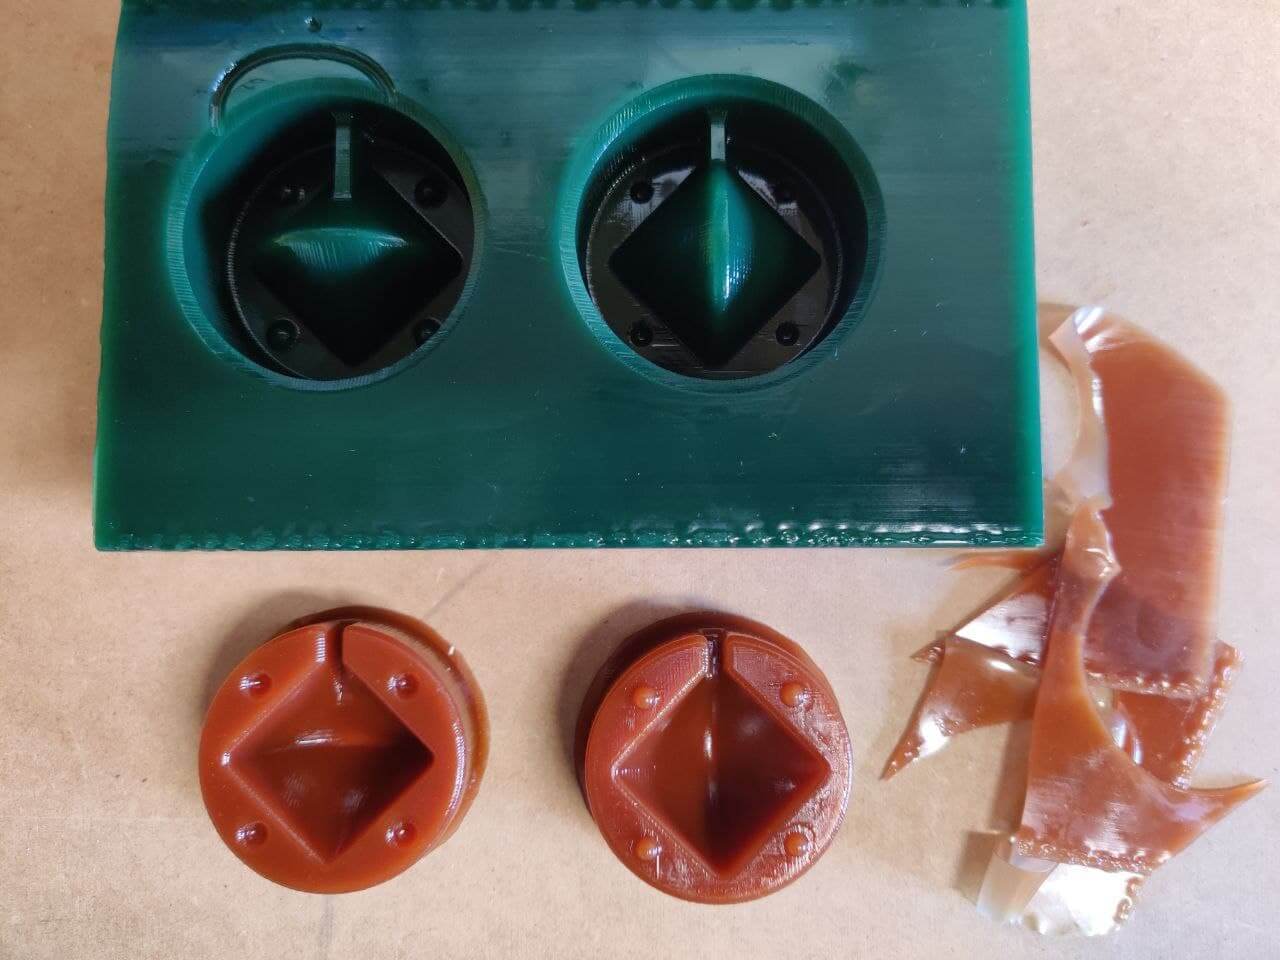
Hero shot⚓︎
All what I have done this week!
Files⚓︎
- Packed sphericon counter mold in half wax block (
.stl): file - Half part of the sphericon counter mold in the left half wax block (
.stl): file - Half part of the sphericon counter mold in the right half wax block (
.stl): file - Sphericon design in Rhino (
.3dm): file