16. Wildcard week: Vacuum Forming
This week I got familiar with vacuum forming. Having no previous experience on it, there was a lot to learn, so I chose really simple design, which is also reusable on my final project.
I was about to choose programmable logic at first, which I know some basics about, but then I realized vacuum forming could be used as casing for my final project.
Due to varying topics each student chooses, there is no group work for this week.
Vacuum forming
Ari was the instructor for vacuum forming topic.
Designing for vacuum forming
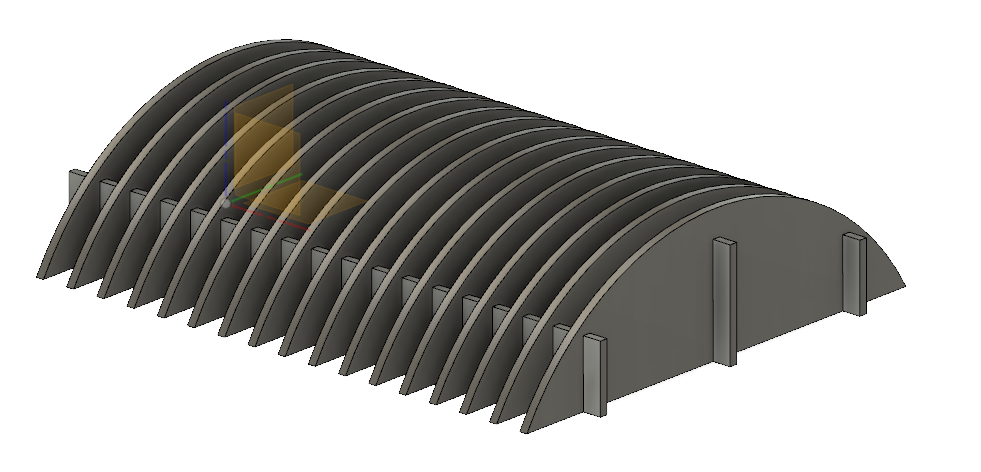
I aim to make transparent cylindrical shape of my final project out of transparent polystyrene or acrylic. I modeled a third of cylindrical wall (120 degrees) in Fusion360 and created a fixture with matching outline. Fixture will force vacuumed plastic to take intended form.
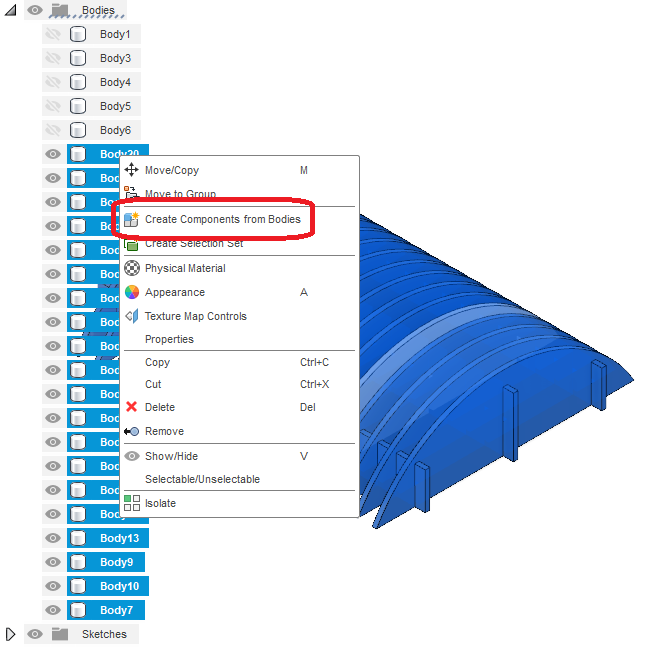
For arrange tool to work, bodies must be converted to components. Arrange tool is explained with more detail in CNC week.
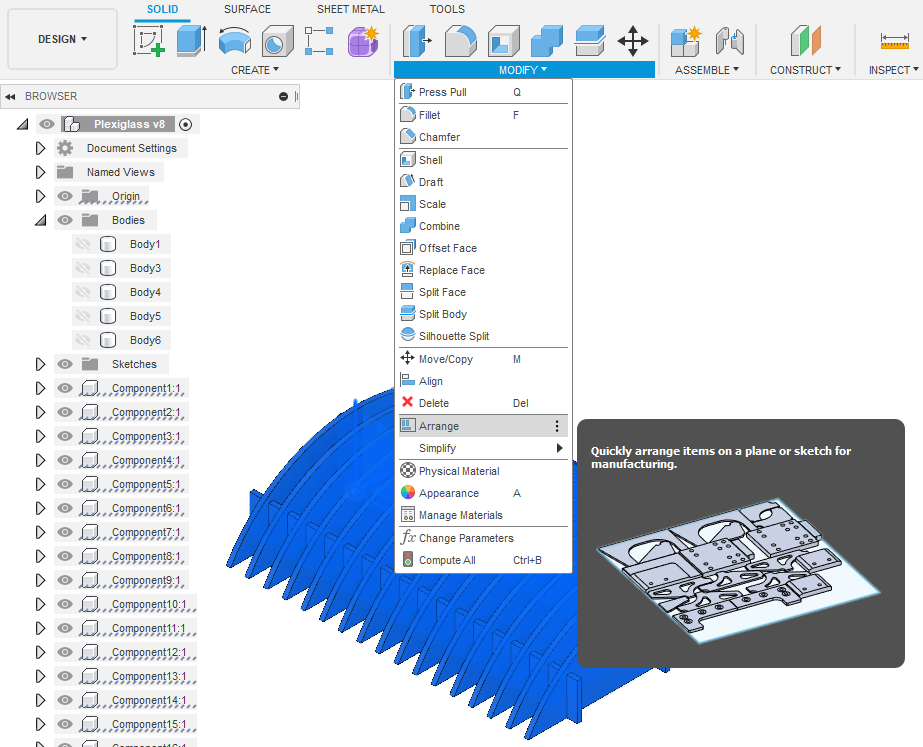
Arrange tool can be found under Modify ribbon. (may need to be enabled from preferences, check CNC week for more) I set stock size to A2 sheet (594 x 420 mm) and all pieces could fit there.
Once arranging was done, it was time to create .pdf file for laser-cutting. In Fusion360, this is done by creating a drawing. Select suitable drawing size, in my case A2 (594 x 420 mm).
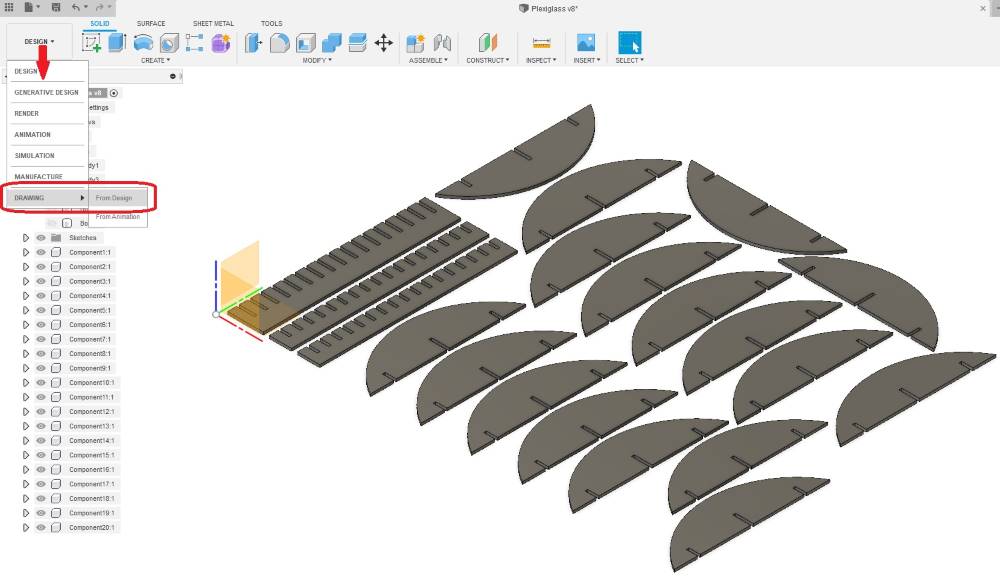
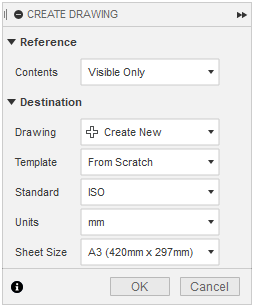
Hide sheet border and title block (don’t want to laser-cut it). After checking the drawing, I clicked pdf export and unchecked Lineweights before clicking OK.

Preparing support structure
I laser-cut the support structure and assembled it. For structure top I cut a suitable piece of thin plywood with bandsaw.
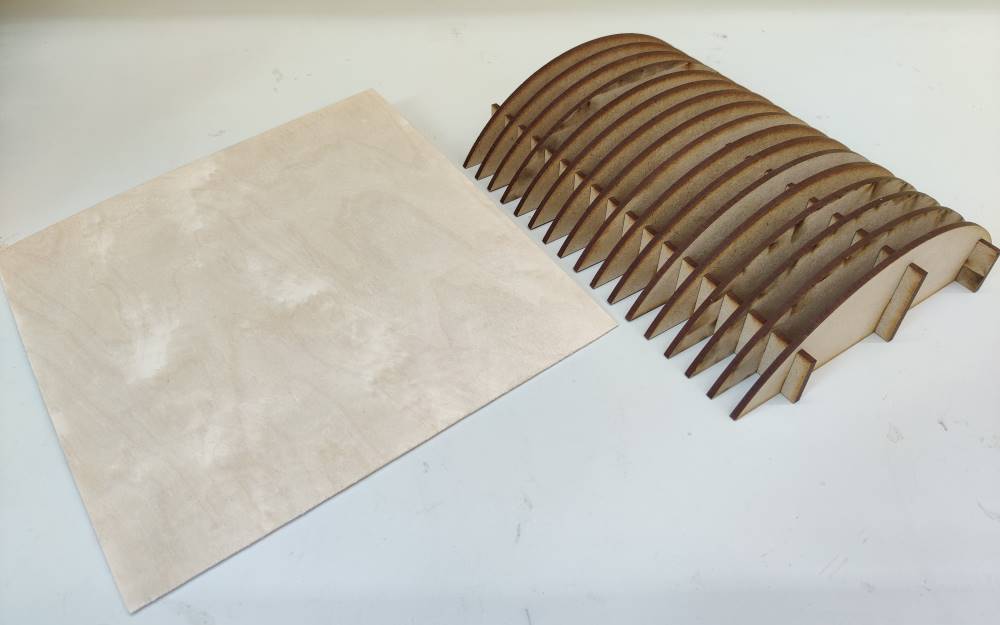
I spread polyurethane glue on plywood sheet, aligned structure to it and taped those together with wide painters tape.
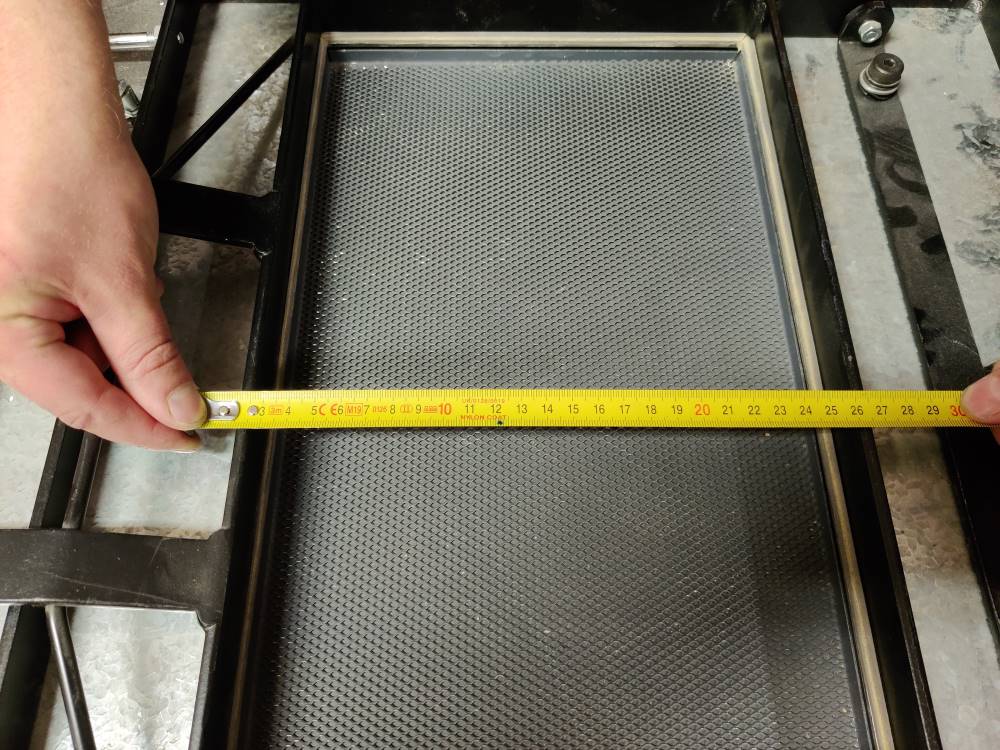
Meanwhile glued structure was curing, I prepared vacuum machine by selecting suitable frame size, attaching it and measured it’s area and also the size of polystyrene sheet I’ll use.
Measuring sheet size. Bottom area is the gray area with holes, dimensions of that are also needed. Sheet size should be a bit larger than the black locking frame that holds the sheet. About 2 cm on each side. Bottom area size is needed for bottom board which is used to guide vacuum to model.
Polystyrene sheet was cut with circular saw. Also OSB board that was used for bottom board was cut with circular saw.
After polyurethane glue was cured, I removed painters tape and noticed small roughness on areas painters tape was used. I smoothed out the roughness with fine sanding piece.
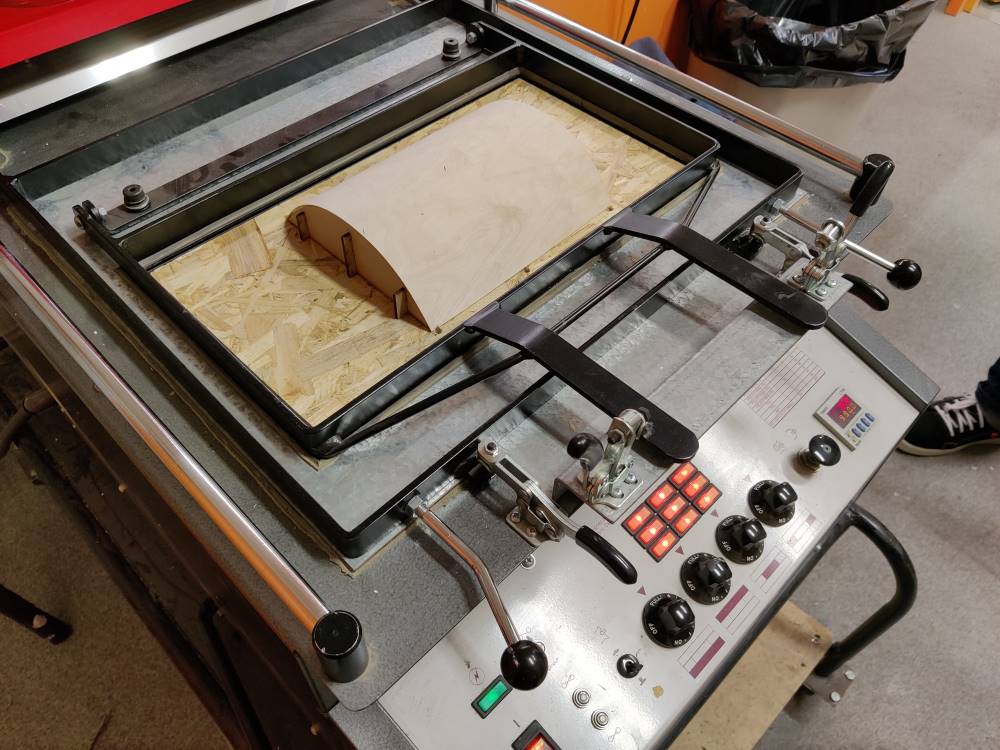
I glued structure to OSB board, this time with wood glue since it cures faster than polyurethane glue. I also turned on the heater on vacuum machine. Once glueing to OSB board was ready, I drilled holes on OSB board, along the long edges of structure, 3 holes on each edge.
Vacuum forming
I tried vacuum forming three times, since after the machine has heated up, the forming itself is quite fast. (no time to take many pictures…)
First attempt
After vacuum forming machine started to smell like sauna (warm, moist smell), it was ready, or possibly hotter than ready since it had been on full heating (versus thermostat-controlled). Heater element was pushed back (for the whole heating time!), vacuum bed was raised up, support structure was placed on vacuum bed, vacuum bed was lowered down and polystyrene sheet was placed under thick, black metal frame. Now everything was ready for forming.
Heater was pulled to front position, covering polystyrene sheet. Pulling heater to front position launched also the timer of machine. I checked the sheet few times and when about 130 seconds was passed PS sheet looked quite soft, so I and Ari decided that it was time to for first try. I pushed heater to back position, turned on vacuum and lifted the vacuum bed. Ari tried to poke PS sheet to align better with support structure, but I think it didn’t have much effect. PS sheet cooled pretty fast, so I lowered the vacuum bed and heard the support detaching from PS sheet. Carefully, avoiding to touch that thick black metal frame which was really hot, we opened latches holding metal frame down and were able to remove PS sheet.
Due to really hot vacuum machine, PS sheet had aliased a bit. Vacuum seemed quite weak, so I drilled two more holes for each side to guide more vacuum to structure edges. More comparison of the attempts after second and third attempt.
Second attempt
Vacuum machine heater was set to position 3 because the heater was so hot.
- My three tries
- 1st overheated a bit
- about 130 s under really hot machine
- new vacuum holes added
- 2nd underheated
- about 250 s, machine less hot
- vacuum holes had no effect
-
3rd heatwise right, but poor vacuum
- about 150 s, full heat but not really hot
-
Lessons learnt
- When heating, try setting heaters to 4, and when forming, set heaters to full
- Maybe OSB too porous, try MDF
- Laser-cut MDF to exactly right size next time
- Make model overheight: leave like 1 cm of extra height
- For materials other than PS, try laser-rastering something before vacuum forming
- Try acrylic? and lasering?
- Try to make logo out of SmoothSil of or something like that
Post-processing
Not done yet.