Week 1
Sooo I've started with installation of Homebrew cause I'm using macOS.
- Copied the link from the website and pasted into terminal
- Pressed return to continue
- Installation completed
- To prevent anatytics from being sent via Homebrew I run the command: brew analytics off
Then I installed GitKraken from the official website.
In order to better understand what Git is about and what it does I just typed on Google “a simple tutorial GIT” and it proved to be simple (Find link below).
First of all, it gave me the idea of what the Version Control is, that is a system that permits to record in a repository (a collection of source code) all the changes that are made on a file or a group of them with a possibility to revert back to a previous state of them. That is what also Git does, so we able to:
• keep track of all changes on a file or a set of them
• revert the project to a previous state
• see exactly who/when modified the file/s
• synchronise code between different people
Every user has a copy of files on their computer whereas the clone of them is stored on a server.
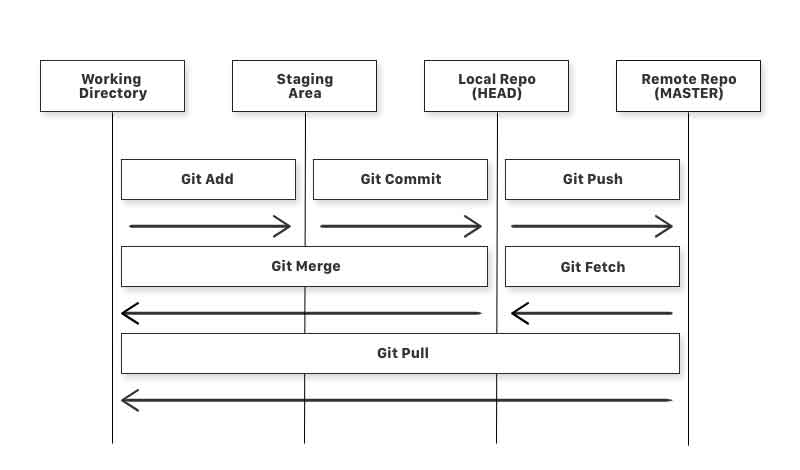
In this image is shown the workflow. As we can see there are 3 main steps in the first line and other 3 following:
- Specifically:
- - git add command adds files from the working directory to the staging area, the files with changes are not yet stored in the repository of hard drive
- - git commit command adds files that are staged to the local repository
- - git push this command adds all files from the local repository to the remote one. At this point, anyone who has access to the central server’s repository can see the files
- - git fetch is the reverse process of getting the files from the remote repo to the local repo, but not into the working directory
- - git merge completes the process adding the files from the local repo into the working directory
- - git pull is a sum of two previous commands, it permit to get the files from the server’r repo directly into the working directoty Once opened Git, I identified myself to Git giving the name, e-mail and checking up the data inserted
git config --global user.name "Veaceslav Grecov"
git config --global user.email "veaceslav.grecov@student.unisi.it"
git config --global --list
• user.email=grecovslava@hotmail.com
• user.name=Veaceslav Grecov
Then I tried to create a repository on my computer, I created a text file “Documentation”. Through commands such as > pwd I identified my position, > ls showed me the content of the location where I was situated, > cd permitted me to enter into the folder where I wanted to create a repository. Finally, I started the process of creation
> get init - command that creates a repository
> git add “Documentation” added the file to the staging area
> git commit -m “Initial commit” -command for initial commit that permits also to leave a comment
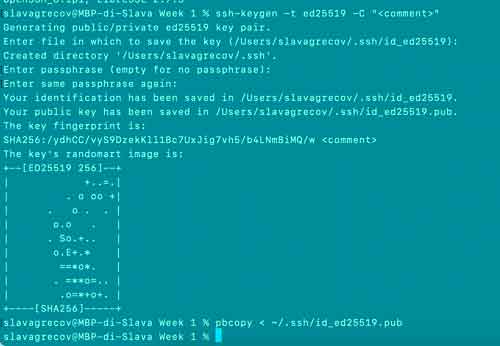
Afterwards, I realised that on Gitlab we have already had a remote repository, so we could simply transfer it to the computer. So as to do that, first and foremost, I needed to create a SSH key that enables server and the local repository to connect with each other.
On https://gitlab.fabcloud.org I went onto my profile, > settings > SSH keys and on the link that proposed to generate a key
Then I just followed the instructions and created a public key that allows the others to see my files on the remote server without a possibility to modify them and a private one for me. This is my code:
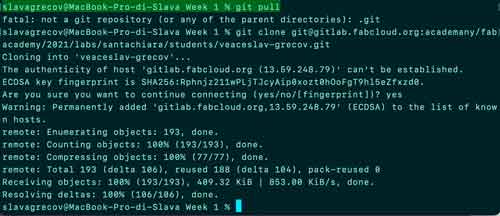
The next step was to pull on terminal and > git pull surprisingly did not work. In this way, I discovered that I actually had to clone with SSH from my profile page on GitLab and to insert that code on terminal. And so I did!
Building these pages
The first day and a half I spent trying to refresh my memory, because two years ago I had some experience with HTML and CSS. My struggles made me create the home page, then I realised that I needed to switch to something else. I decided to try Bootstrap. Anyway it took me a whole day to understand the syntax, but thanks to it I managed to mark up all the other pages and this one too. Special thanks to my colleague Adria Julia Necula who gave me a hand with cards of Assignments' page! :)
Home page
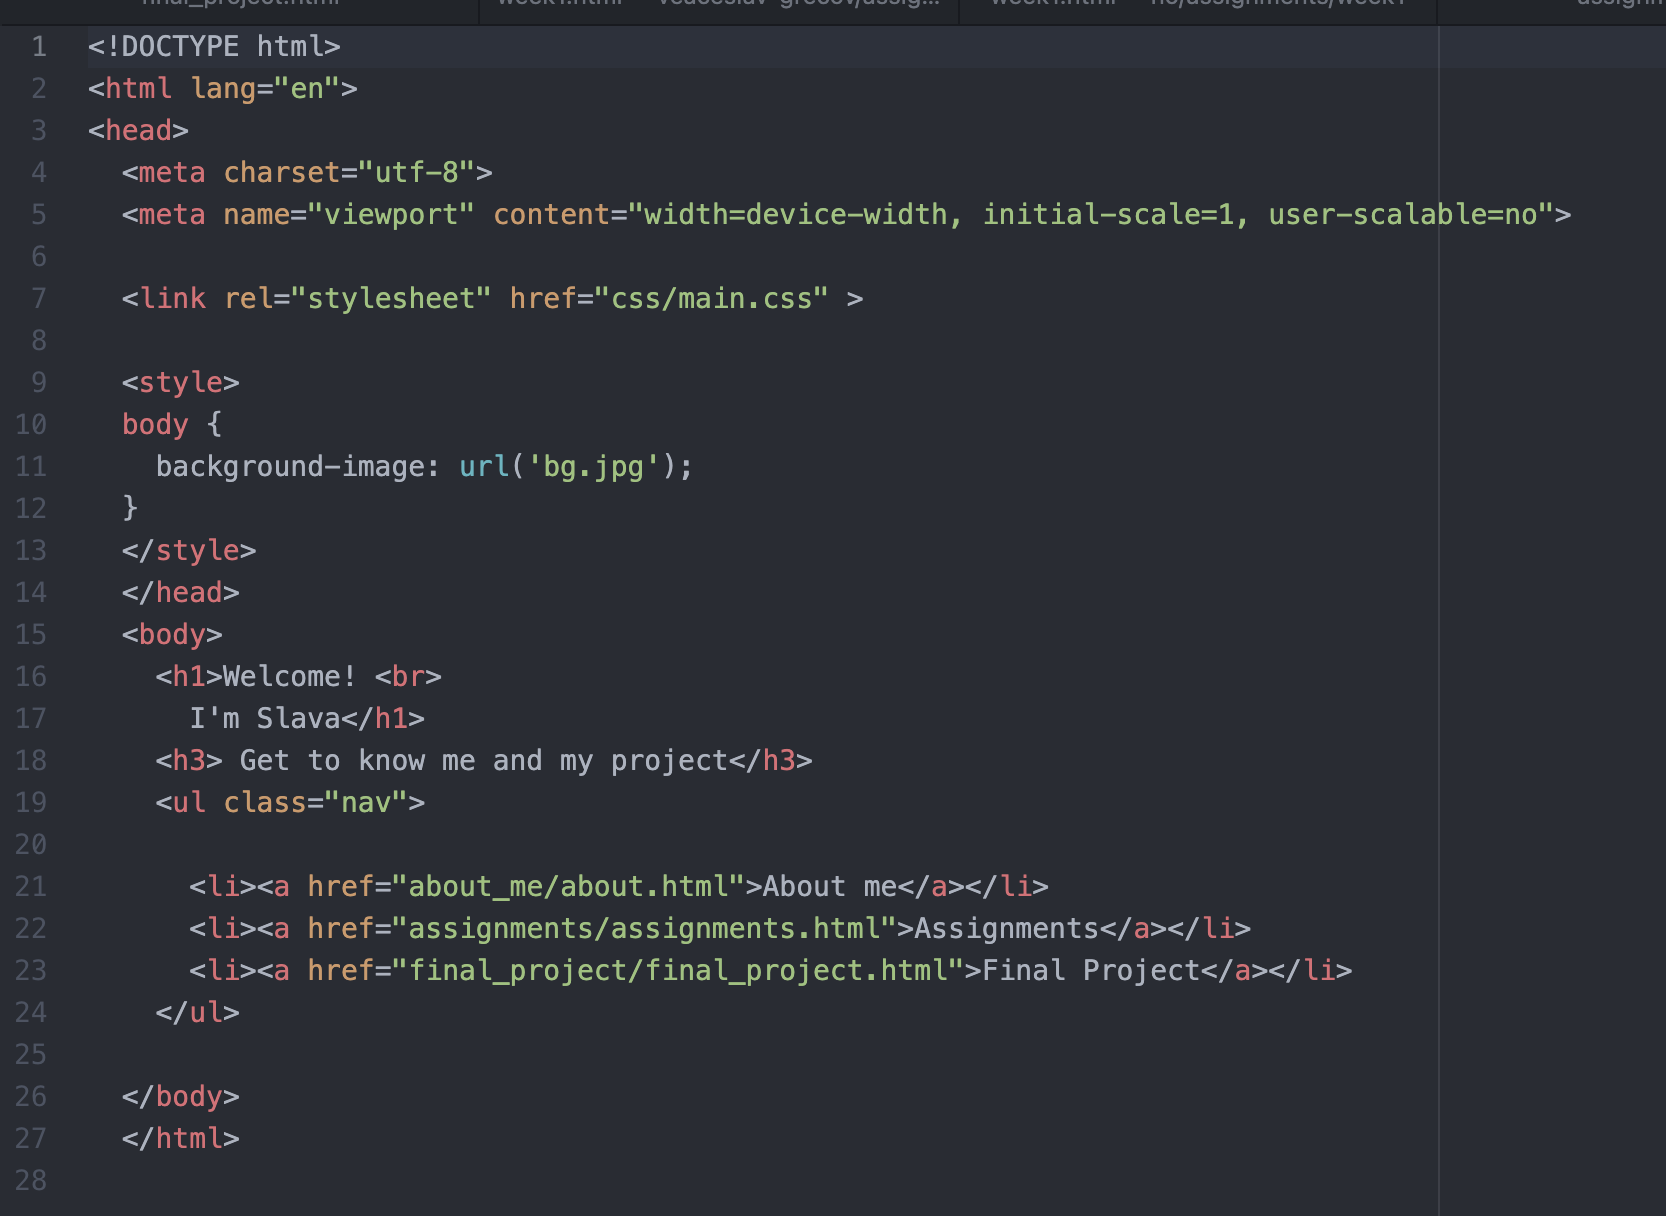
My idea was to build a simple home page where with a menu containing sections "About me", "Assignments" and "Final project". I also wanted to have as background a picture that would remind my project, so I decided to use one I took in Milan during an exhibition dedicated to Canova. So I wrote a html code making it responsive through "width=device-width, initial-scale" line. I wrote my text using different types of headlines: h1 for "Welcome! I am Slava!" and h3 for "Get to know me and my final project". Then I used navigation bar to create three sections, but the main job was done in css. In fact, I created a stylesheet main.css that I linked in html code. There I was able to determine font-family, I fixed my background image. Then I positioned and colored the welcoming headlines and navigation bar. I also added hover through a:hover, a:active { background-color: #2F4F4F; color: white; }
Bootstrap
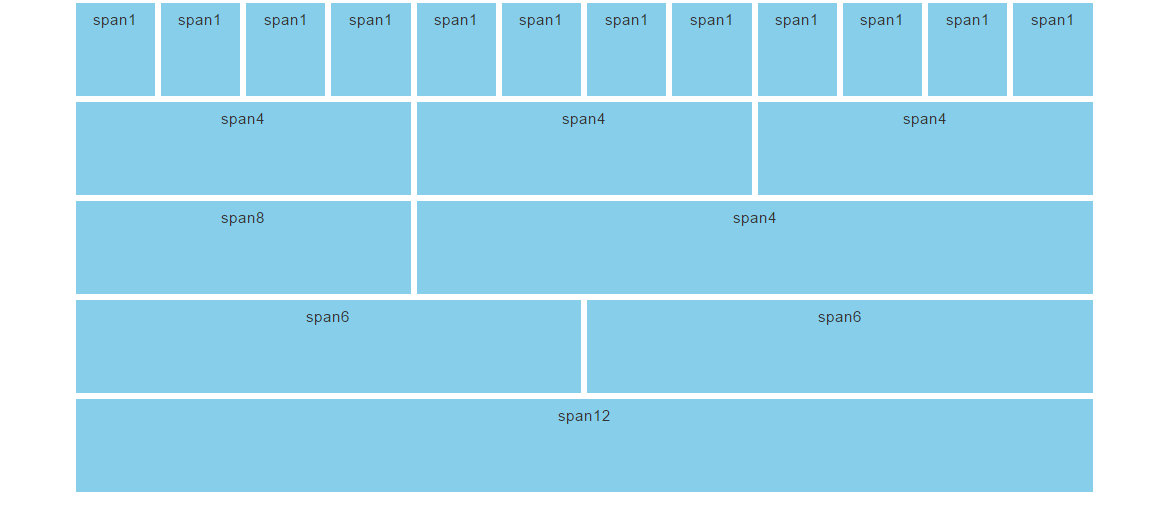
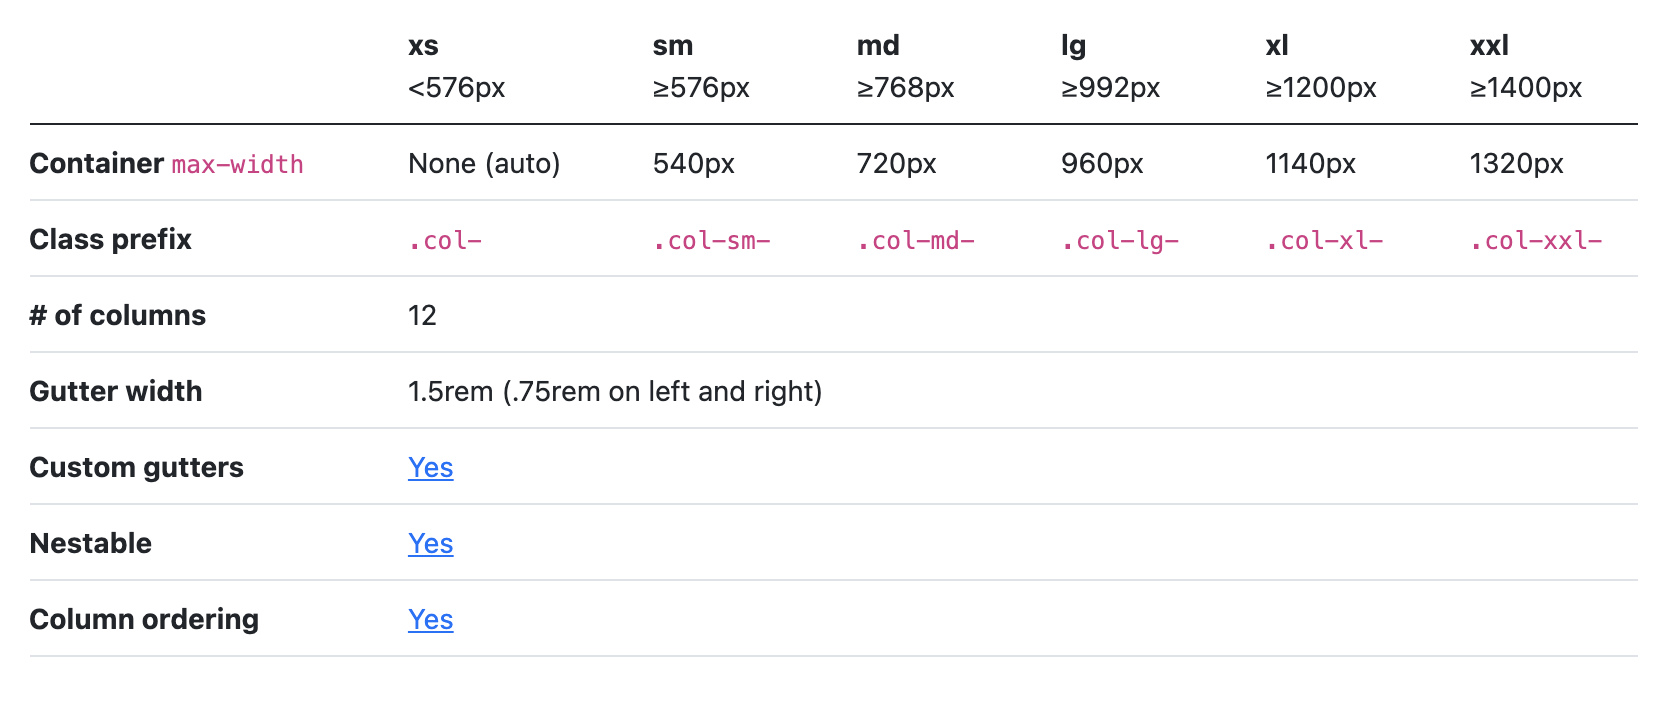
My time was out, so I wanted to try something new and to switch to a faster/more practical solution. Following the advice of one of my colleagues I gave a try to Bootstrap that is a free front-end framework for fast web development. From official website I followed the instruction and pasted into head the link for CSS and then in the footer the one for Javascript. Bootstrap offers a series of pre-written codes that permits to insert components, modify the layout and improve overall visual presentation of a web page. Bootstrap has a particular grid system that is showed below, so when creating a container it must be done in function of what bootstrap permits to do. It supports six responsive breakpoints, this is why the size of the column is specified via sm, md, lg, xl. Column classes indicate the number of template columns to span. Similarly to CSS Bootstrap uses h1 - h6 heading system, but has also its own colors, as for example, blue is "primary", red is "danger".
For assignments page I used a card template from bootstrap website that permits to create a grid of cards with equal distance between them, but also to insert an image inside, that must be 500x300 px size.
I had problems to push my website, because on GitLab the file .yml is structured for MKdocs, so I deleted it from my local repo and genereted a template for HTML on GitLab.