Week 3
Group projectCharacterize your lasercutter’s focus, power, speed, rate, kerf, and joint clearance document your work (individually or in group) You can find our project here
Individual assignment
- Design, lasercut, and document a parametric press-fit construction kit, which can be assembled in multiple ways.
- Account for the lasercutter kerf.
- Cut something on the vinylcutter.
Vinyl cutter
I tried to print this portrait that I found here, but on the contrary it got too complicated to cut out.
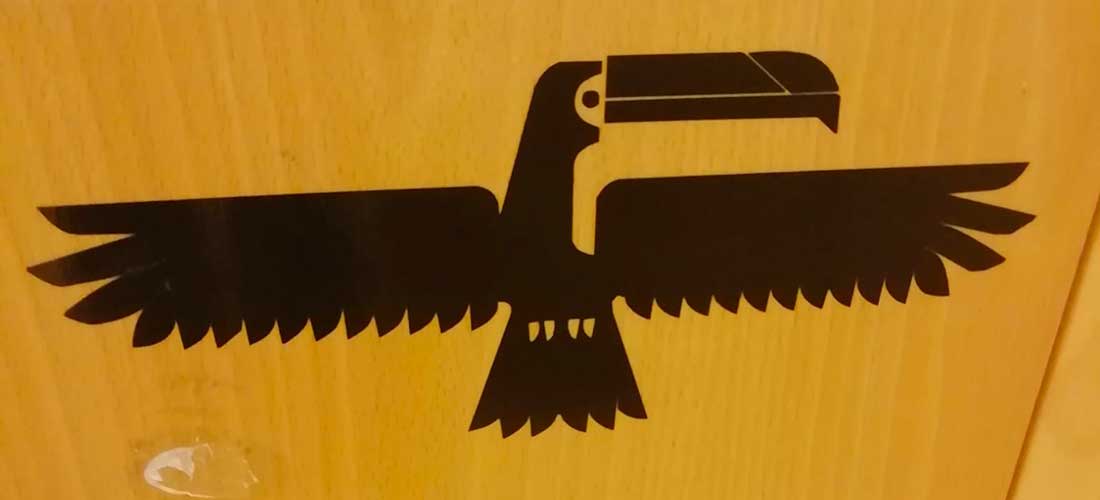
Finally, I found this bird on dribble and it worked out!
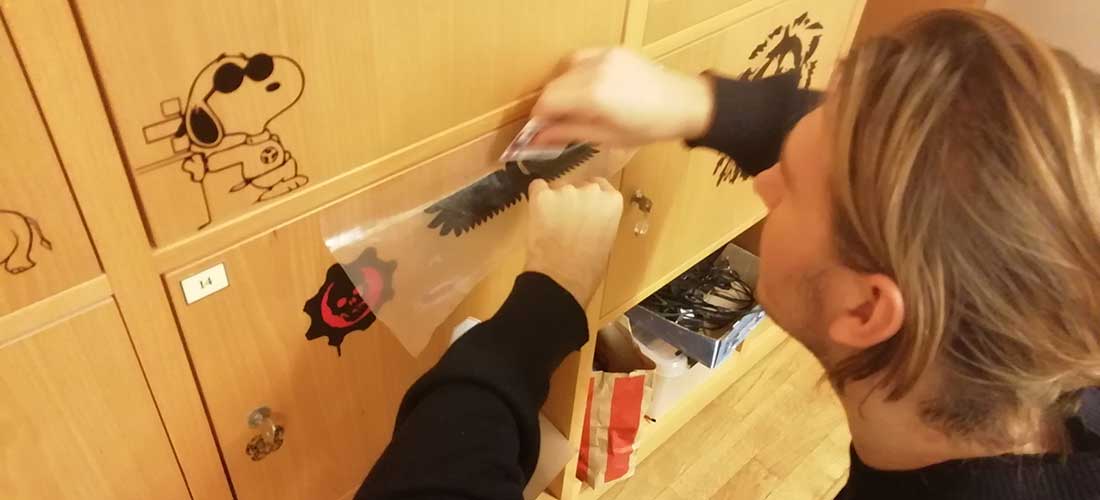
I followed these steps: once found a proper image, I opened it with Inskape software in order to get a bitmap of it, then saved it in png extension. In our lab we use Cutstudio to process the images for vinyl cutter, so it is necessary to trace the outline of the image and delete the original png that will be beneath. Aftewards, I cut out a piece of vinyl paper: it is important to have its surface as plane as possible.
Then I pulled the lever of the vinyl cutter machine and places the piece of paper at the beginning of left side where the white lines indicate the format and then pulled down the lever aligning wheels with cutting lines. I set up that I am working with a piece of paper and not with a roll/edge and enter. When the machine finishes measurements of paper, I pressed the origin button and start off the cut from the computer.
When the cut is done and machine is off, I took out the vinyl paper and start removing the pieces that I did not need. After, I prepared a transfer sheet, peeled the vinyl paper and sticked it on my locker very slowly, because otherwise bubbles appear on the sticker. Then I carefully ironed it by hand many many times and it was ready.

Laser cutter
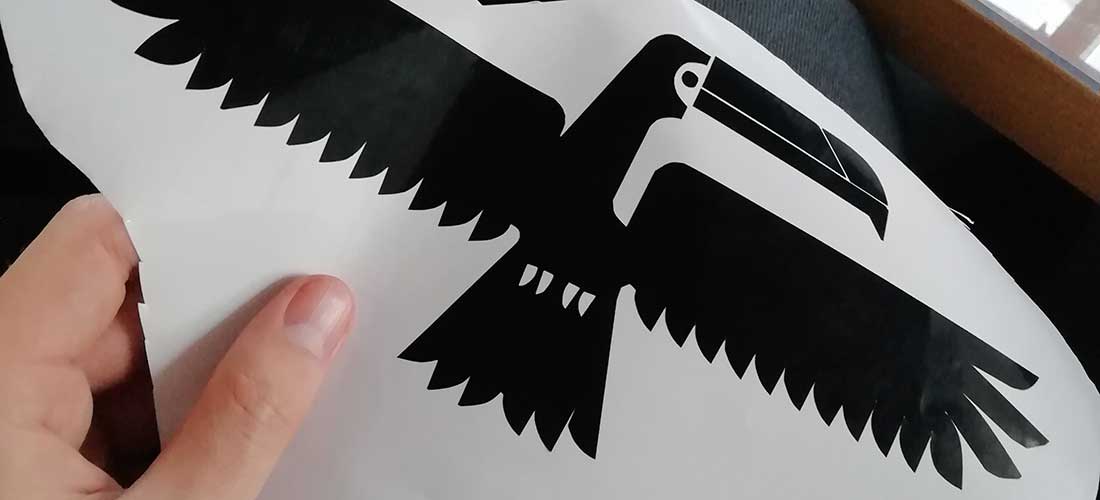
This is the result. Below you can see the process of how I got it
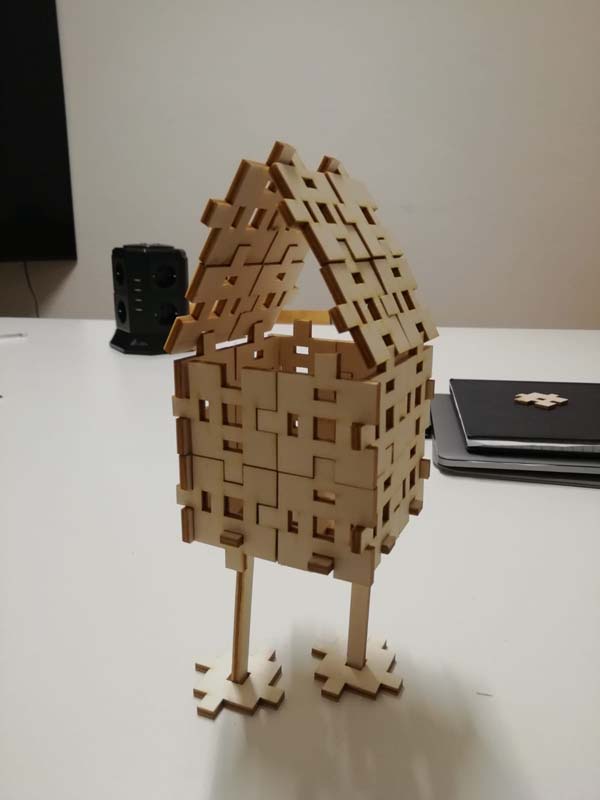
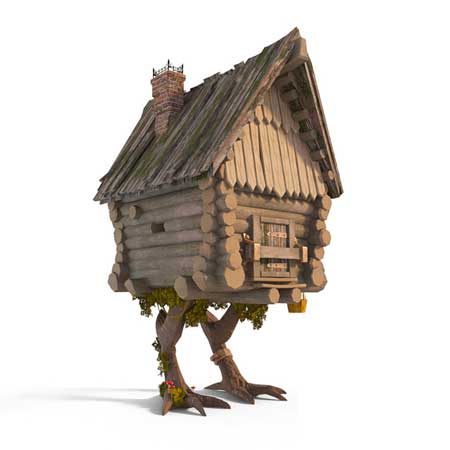
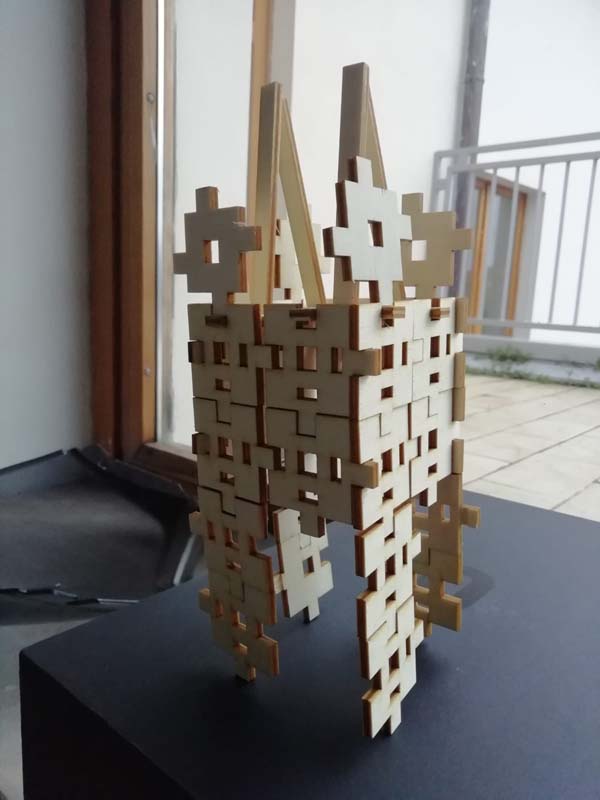
Thinking about the many things I could construct, at first, I was more keen to cut pieces to build a geometric object, but finally I got inspired by russian fairy-tales and started to model a избушка на курьих ножках. Sorry, I actually have no clue how to translate it, it's easier to show in an image. It's the house where the russian witch lives basically :)
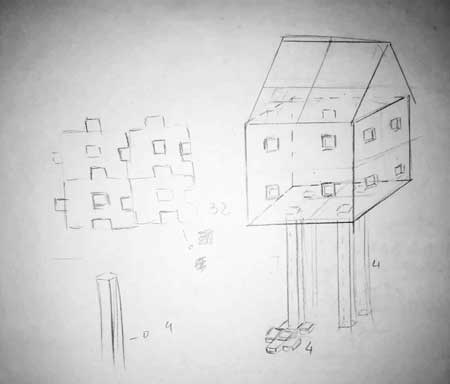
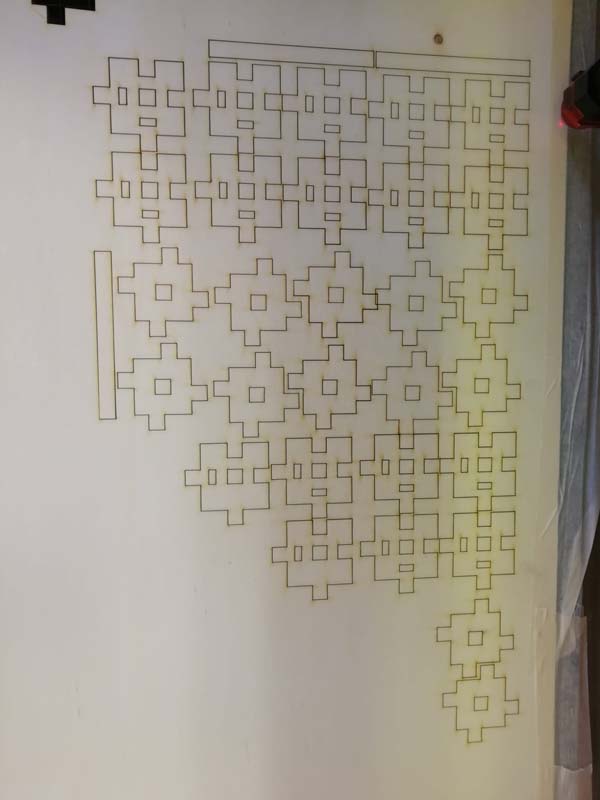
In order to undestand how to proceed, I skethced the model on paper and calculated the pieces that I will need. I thought it would be enough to have just two types of "puzzles", 4 long ones for colomns and 32 for the rest. Then I realised that I would become a really bad architect, while drawing this thought crossed my mind as well.
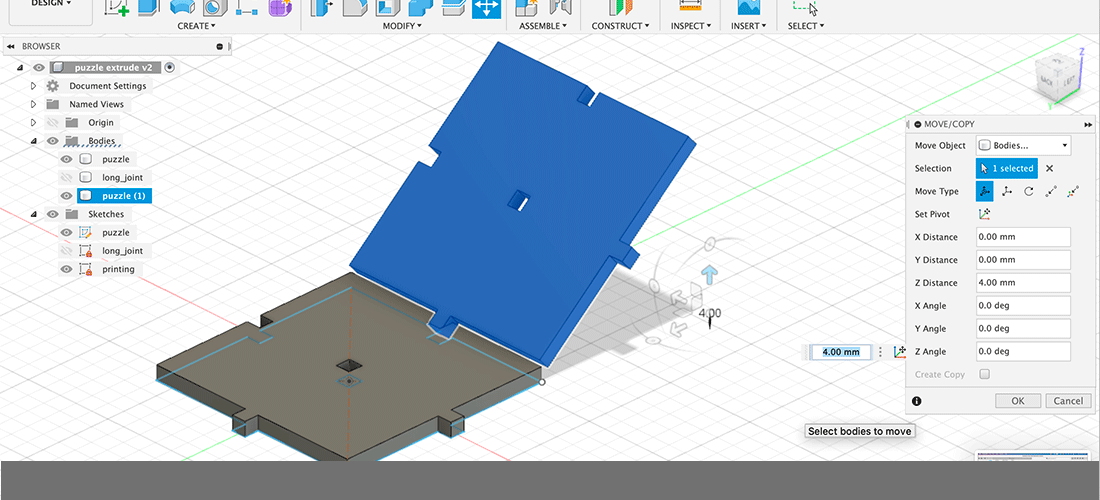
Here you can see Fusion360 models, detecting errors and re-modelling again the same thing.
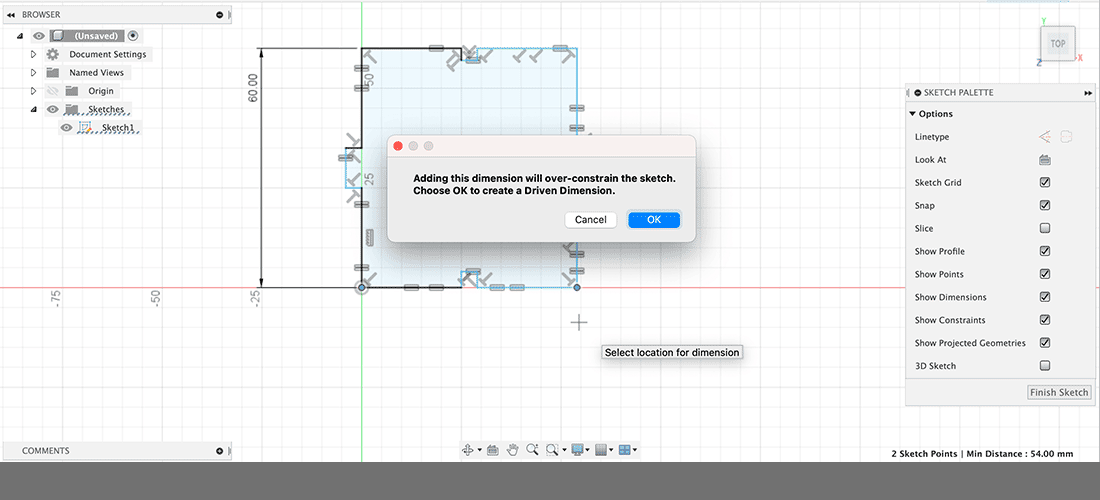
I tried to insert all the constraints first, but since I'm still a newbie in Fusion360, everytime it was over-constrained.
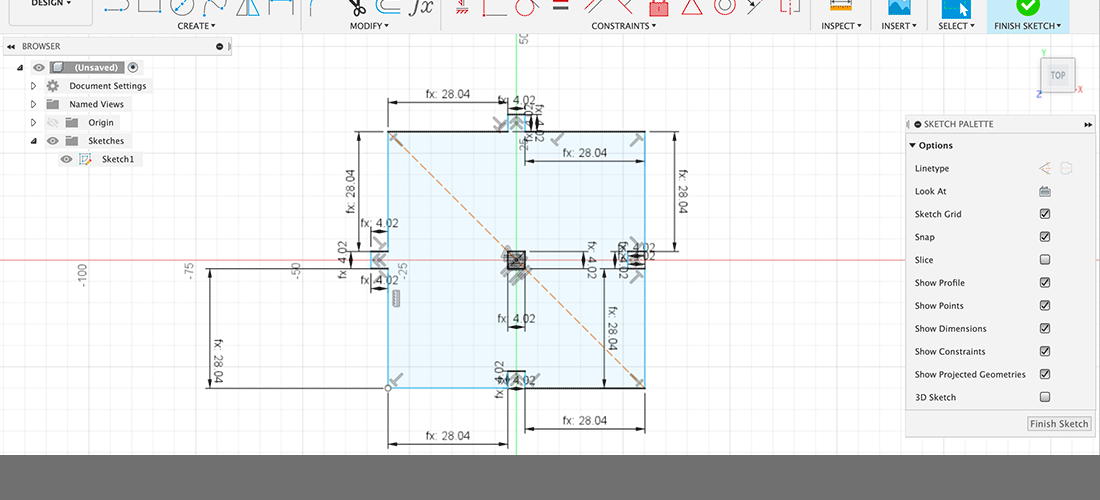
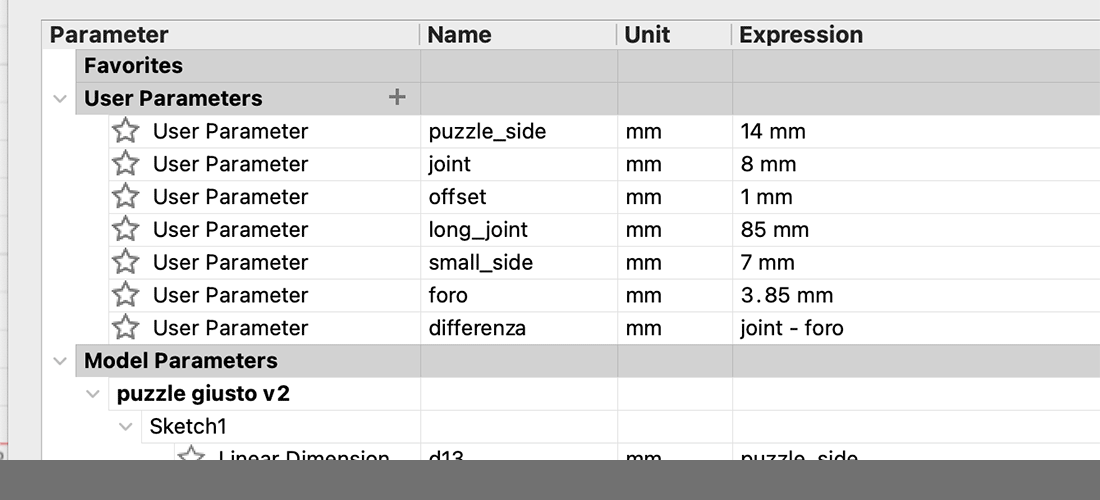
That's why I created a parametric model, this one is the last version of it. In order to apply kerf, I used an outline on the whole object that is the half value of the kerf: first I finished the sketch, extruded the object, created a new sketch on the extruded surface and applied the outline there, because otherwise it wasn't possible to select the whole piece at once to outline it. I also included it into the parametric model.
It was very interesting and very hard to find kerf, because first it was not easy to understand the concept: laser cuts exactly on the line that is set and in this way burns out a certain amount of material. For this reason, if our intention, as in this case, to intersect tightly wooden pieces without using glue we need to calculate the amount of material that is being cut out. It is also not a permanent number as it varies basing on on the wood, width and on the season! The wood's width changes in summer and in winter, so it is never the same value.
Despite the fact our kerf was 0,14, so the outline had to be 0,07 after some tries for the long piece (=column) I used 0.09 and for the rest 0,06. In this way the intersection of joints was stable.
Me and my colleagues took our time to find right values of power and speed as well. We prepared two tables where these values varied significantly: power from 50 to 90 and speed 0,90; 0,60; 0.30. After findings, we narrowed our gap: power from 40 to 60 and speed from 0,90 to 0,70. This is how we found that our laser cutter cuts wood panels with 50 power at 0,90 speed, since the lower power values still work if pieces are smaller, but 50 power turns out to be more effective.
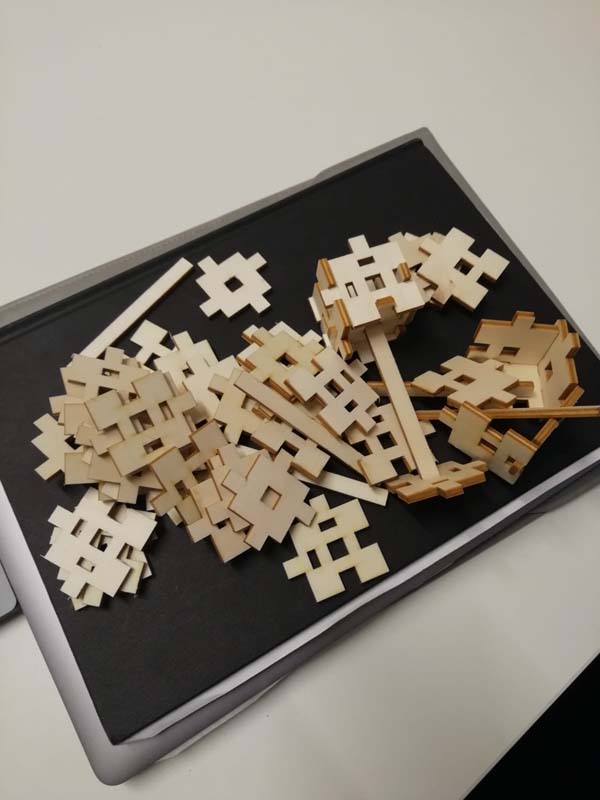
When I first asssembled a couple of pieces building a cube, I noticed that there was a problem. That's why I modelled another piece with some extra holes in it.
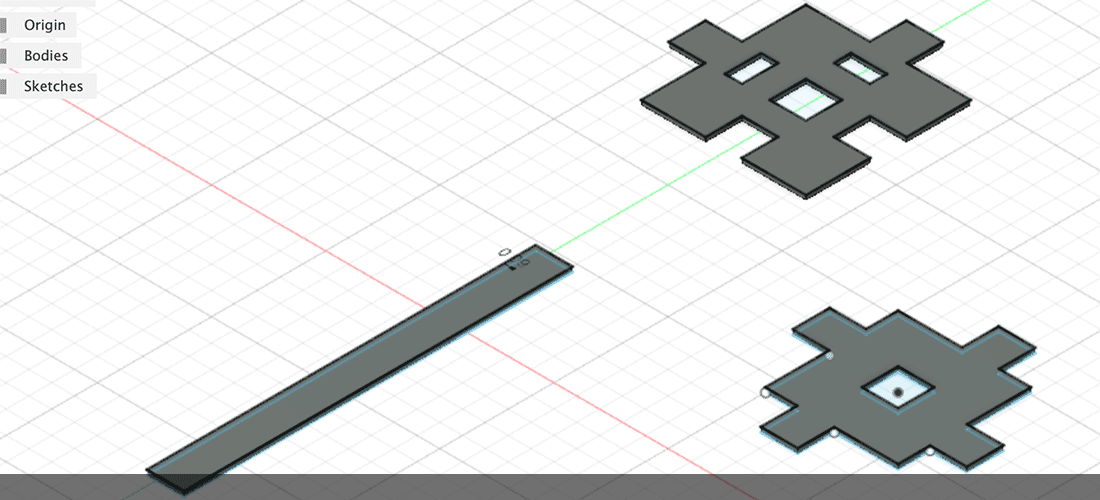
Not everything was perfect at once. I assembled some pieces to create a cube and noticed a problem with top and bottom sides, for this reason I created a third type of piece and added holes to the main one, even though in the end of the day, they were actually useless. I thought I would need them to connect bottom joint with side joint. I built a small tower to see if my general idea worked and then compared new pieces with old ones.

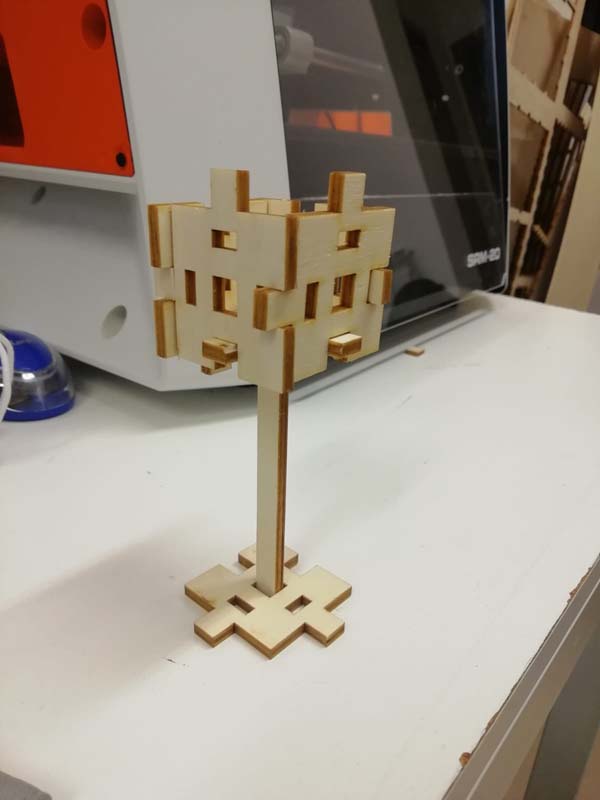
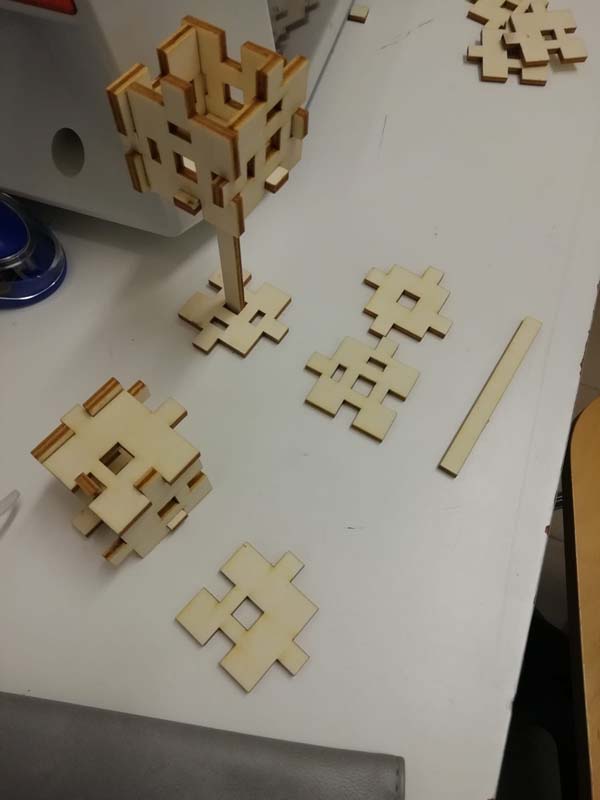
Anywaaay, as you can see it is possible to assemble also other things with this construction kit, for ex: a strange tower. There was created also a croos that looks almost as something religious, that is a patter I hadn't had in mind, but it looked pretty :D
