Moulding and Casting
Description
This week we are making a wax mold, to make a mold so we can cast. The thing you want to cast is the positive of the negative of the mold and that mold is the negative of the positive of the mold you make out of wax. Any questions?
Instructor notes on materials:
- Make a 3 way mold: 2 way mold is to easy
- you need to make the opening large enough; the liquid has low viscosity
- we are going to use the shopbot and how to set up the material. Most of this has already been covered in Make Something Big Week.
- make sure to read the datasheet: to understand the material
- even more important is to read the safety datasheet: you need to understand how the substance might harm you.
- when boxes are already open, sometimes documentation are missing: you can download them from the website
- when you let the mold dry: out it in the acrylic housing in the main area at waag and turn on the fume extractor.
- most materials we are going to use exists of two parts we mix.
- mix them very gentle: to make sure no bubbles remain in the liquid
- there is a vaccum chamber to use to get the last bubbles out.
- there is moldrelease in a spraycan: some silicons tend to connect to other silicons. So you need a release agent to prevent them from sticking together.
- we mix the material in plastic or paper cups (depending on the material)
- we mix them in small amount: you can first pour water in your mold ot measure how much you need.
- divide the amount you need by two as there are two parts of the mix and you need halve of both. (I assume)
- make sure to check the potlife to make sure you have time to mix and degas.
Notes on operating the shopbot for creating a mold out of machinable wax:
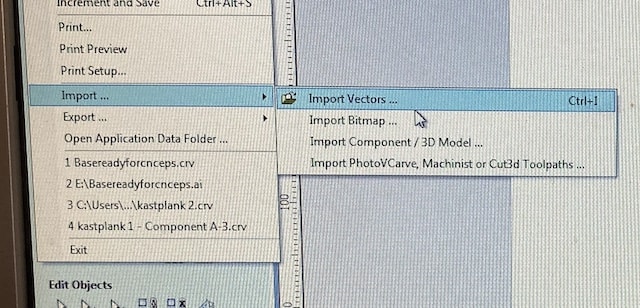
Software: We use Vcarve Pro to prepare the paths that the mill bit has to follow later on.
Here are the basic step you need to follow:
- Open new job in VCarve Pro.
- Measure and enter the dimensions of wax
- Make sure the 3D model's outer box size is a little bigger than the material size that you put into VCarve Pro in the x and y direction (the "red box" needs to be smaller than the "blue" box of the 3D model)
- Import your model: This can be a STL 3D model that you exported from Fusion360 (Note: It is smart to already use the block dimensions when designing in fusion )
- Center the model.
- In Vcrave there is a red line. This indicates material boundaries. This needs to be inside the material apart from the top; there the red line needs to be visible.
- When loading the 3D model, make sure to uncheck "Discard data below zero plane" in the "Zero Plan Position Model"! (and position the blue box (3D model) just a little under the red box
- When you press the modeling tab you can see the end result
- Set the "Model Position in Material" to "Gap above model" = 0mm
Roughing
Then you use the 3D roughing tool path button
Here are some tips on settings: but most of it is pretty clear from the UI itself.
- The roughing is done with 5mm bit at 6000speed and federate at 20mm/s. (This is much lower then with wood.)
- Also set machine, material boundaries and such.
- Safe Z: 6mm: layer thickness; how much it cuts away in one go.
- The roughing strategy can be used to pick the longest passes; that is faster
Then you name the tool path and calculate it.
Finishing
- Then finishing tool path button
- We do this with the same millingbit
-
Most things here are very self-explanatory.
-
Material boundaries
- Area machine strategy
- Stepover needs to be small; 0.5mm
- Then you name that one as well and calculate it to safe it.
In this part the bit follows the path and “knows” that most material from roughing is gone. You can check if all is well with the animation option.
Material and machine: here or some tips for the physical space
- Be sure to make the distance between the outer wall of the wax block and where you'll mill not smaller than ±8-10mm, you'll never zero-align the mill perfectly
- If you want have the smallest hole possible, make it a little bigger than 5mm, it will discard holes of exactly 5mm (I made mine 6mm afterwards, which did work)
- The settings: Spindle = 6000, feed = 50, plunge = 20. Make sure to check the milling bit used for both the roughing and finishing, because you need to set the stepover of the roughing toolpath to 3mm, and of the finishing tool path to 0.5mm (VCarve will not set these for you).
- Make sure to check that the distance from the tip of the milling bit to the collet is larger than the maximum depth that you'll mill
-
Even though you set the spindle speed in VCarve to 6000, the Shopbot will not know this, you need to manually set the spindle speed of the ShopBot to 6.0 with the little V7-4X box at the bottom-front.
-
To put the wax on the table, we use scrap wood and woodies to put it in place.
- You don’t need to suck away the material... as we want to collect the parts to make new wax blocks.
- The wax melts at a higher temperature then normal wax; otherwise it would melt under the bit.
Group assignement
I did the group assignement with Paula. I did the work while she took pictures and wrote documentation on her page
So I would like to ask you to but read there for all the details.
Assignment 1 - reading datasheets.
The datasheets of the materials consists of two parts: the technical and the safety part.
In the technical part you'll find stuff related to the proper usage of the material. Important words to look out for are:
- viscosity: how fluid is the material when pouring
- pot life: how long can you use the material after mixing the two components together
- cure time: how long do you have to wait before your thing is ready
In the safety part these are the signal words:
- Hazard identification: how hazardous is this product and to what?
- Make sure to also check if the material has some interaction with other materials so you pick the right gloves and measurement cups.
Assignment 2 - Make something
For my assignment I decided to make a ring for a finger. Or better still to make two of them, and connect them. The rings are made in one mold, but, hopefully by two materials. Or at least two different colors of the same material. I make two holes in my mold so I can pour in the material from both sides at the same time. The fluids, coming from both sides, will then connect in the middle in an unpredictable manner. Hopefully creating a nice pattern of some sorts. The ring should then be broken from each other. The unique break line as well as the unique color pattern of the rings should prove without doubt that these two rings belong together.
We are aiming for a significant marketshare in the age range of between 12 and 17.
I made my desing in Fusion360.
First I made a design of my desired end result

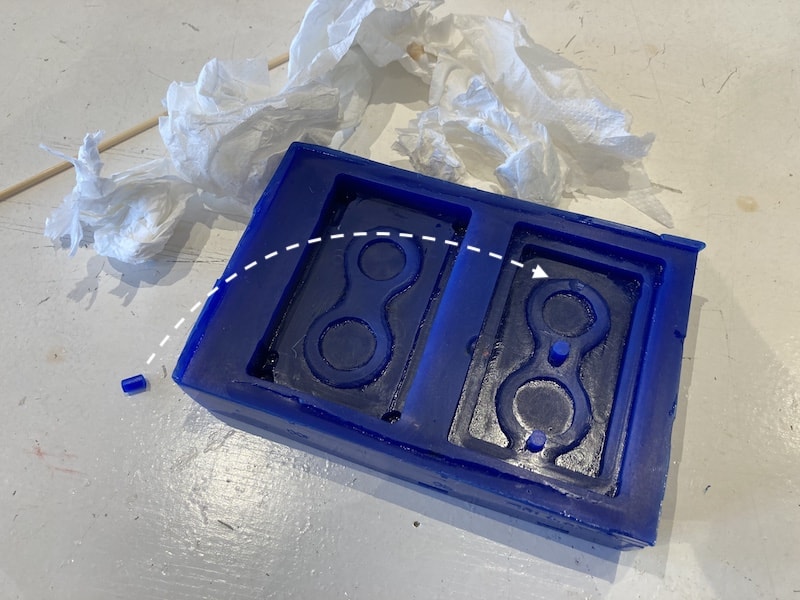
I then substracted this design from, what I thought, would be a good box to make my mold from. There are of course two parts: one will be the top and one the bottom. The top part has three holes in it: two for pouring in the casting liquid, one for letter the air vent out.
Also note the edge of both boxes: one will fit like a lid into the other.
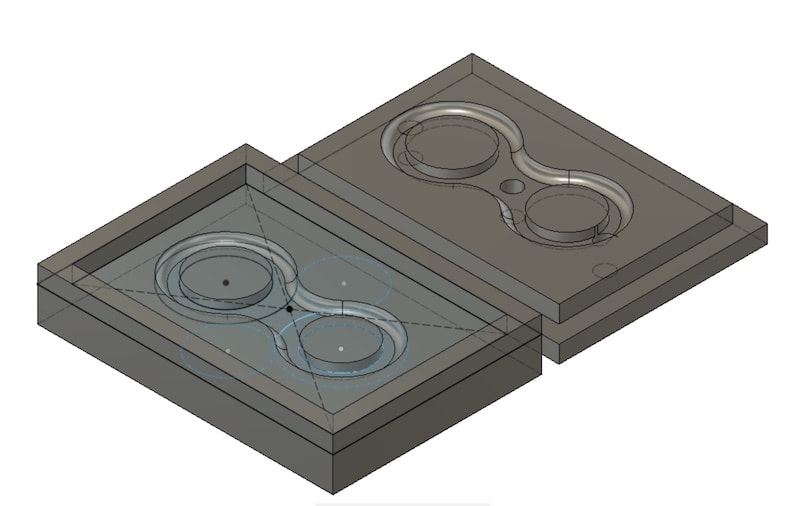
This box I then substraced from a box of virtual wax. The virtual wax box has the same dimensions as the real wax block.
As you can see this is the design for the mold I am going to make on the shopbot.
Going from virtual to Physical
I got one of these to put under the shopbot:

after I made the design I exported the file from Fusion360 as an STL, put this on a USB and copied the STL file to the shopbot computer. In this computer I opened VCarve and created a new file. In the new file I could choose to import a file, and I chose the forementioned STL file.
I then followed the instructions I already outlined above to create both a roughing and a smoothing path. Both path were then exported to one file as you only need to make two files in case you want the shopbot to stop halfway so you can change tooling, like a different bit or so.
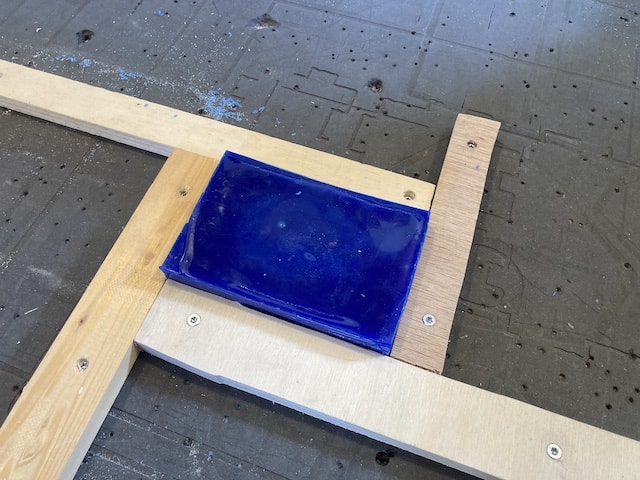
Using scrap wood I fixated the piece of millable wax to the sacrificial layer. (that won't be hurt this time, as, if all goes well, am not going to cut through the wax)
I had some issues Z-ing the shopbot as this error kept popping up and I assumed stuff was bad and I had to try again:
Z-Contact did not clear for some reason. Exiting.

As it turns out the problem is the wax: the material is not truly firm and strong. So what happens is this: the shopbot lowers the millbit until contact is made and then, very precisesly measures where it is. Then it tries, very softly a couple of more times to lower itself to make sure it truly is in the lowest position. But evertime it does so, it depresses the wax a little and ends up with an ever so slightly different measurement. This confuses the shopbot and causes it to give up without a clear reason.
So, my best guess is that you can safely ignore this error and proceed. And so I did.
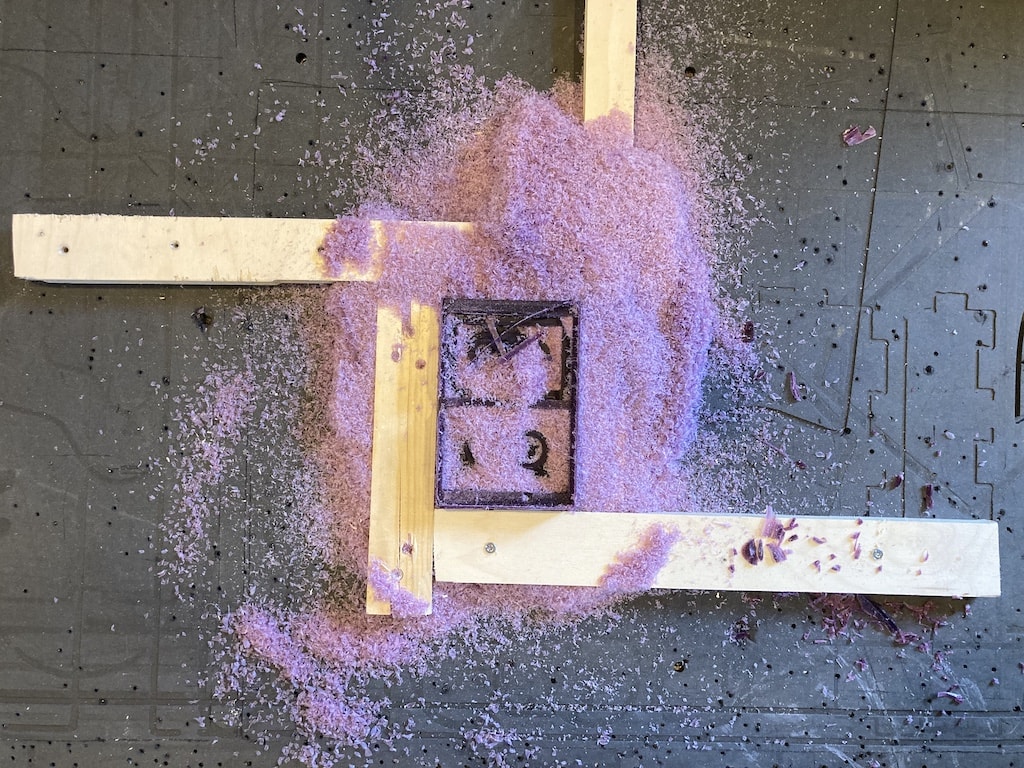
After approximately 40 minutes the shopbot was ready.

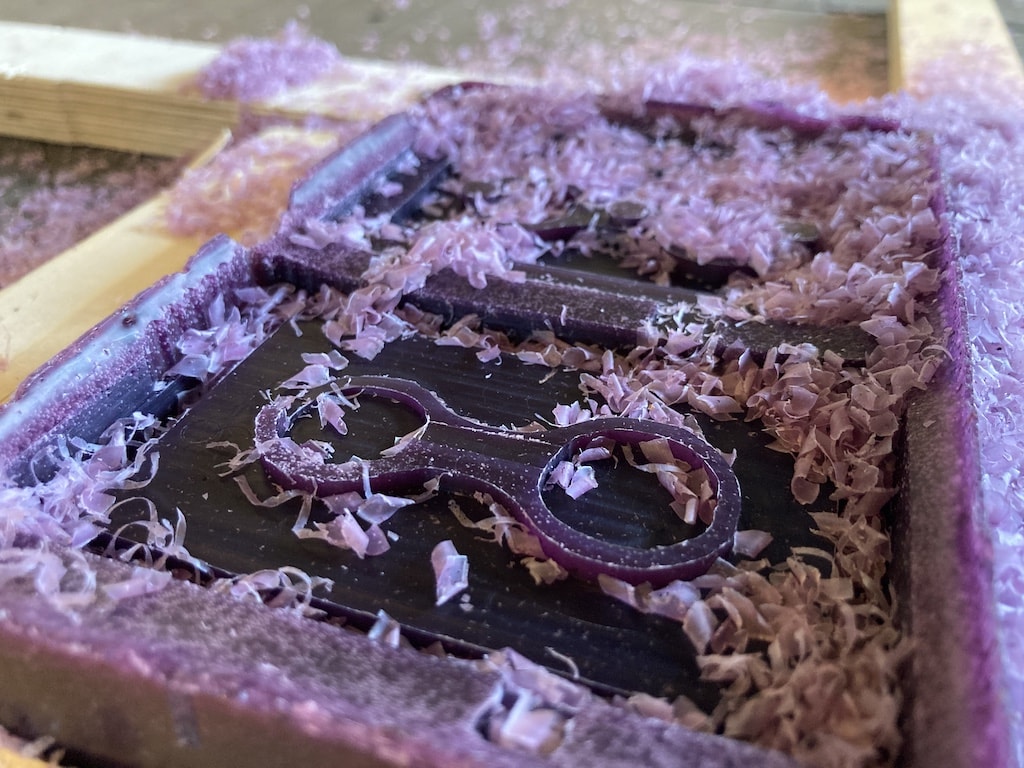
Pro-Tip As said before: you are not supposed to vacuum the wax chips: you need to collect them. So they can be reused. So I carefully removed all the wood so I'd have space to gently brush all the chips into a little container. One tip: when you are about to loosen the last screw of the last piece of scrap wood; hold the wood with one hand. Otherwise you will have happen to you what happened to me: the piece of wood started spinning wiping almost all wax-chips with force from the table and all over the place....
The chips were one the floor, machine and everywhere: so I vacuum them up: they were too much polluted by all kinds of other dust and pieces...
After the milling action I could clean and inspect what I had actually made and had some weird artifacts
There are depressions in the corners where I did not expect, nor draw them. I am not entirely sure what has caused them...
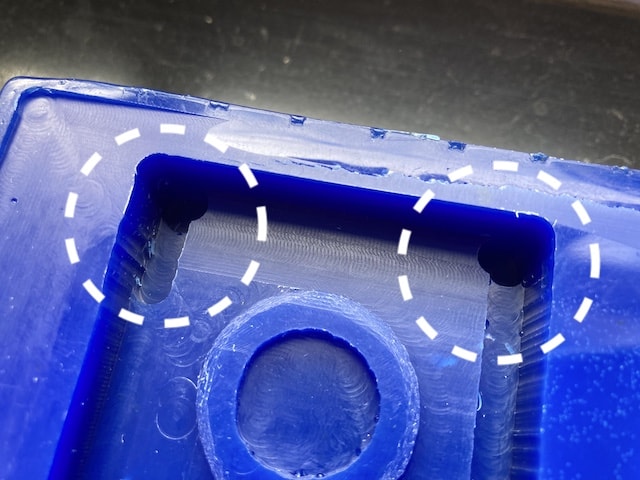
Also there is some extra wax removed in one corner in an also somewhat arbitrary way: I did not draw these bumbps, not did I intend them to be there

The actual molding
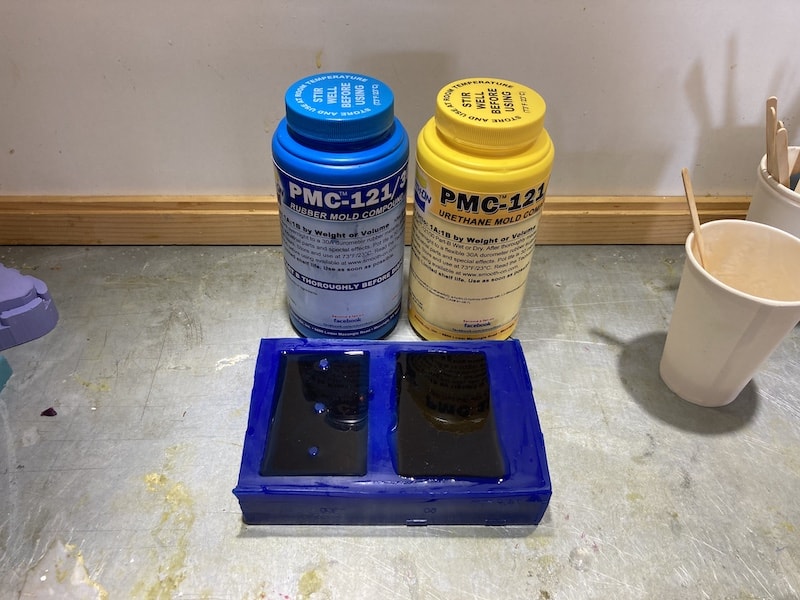
For the actual mold-making I felt I had the choice between two materials:
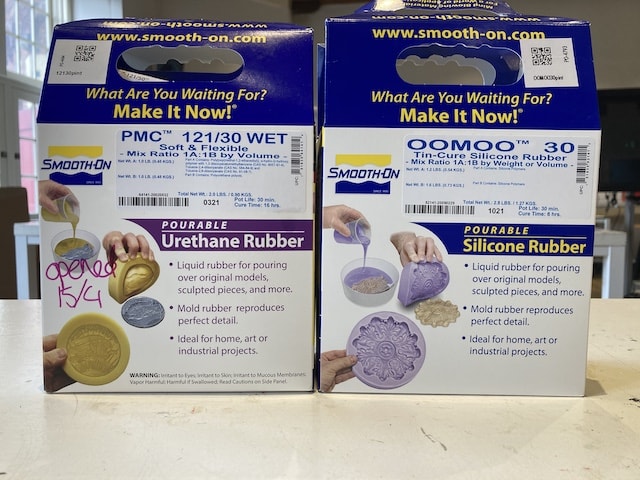
Apart from some color differences and other structural properties, the main reason to doubt which ne to take was curing time. But in the end it turned out that both would only be ready by the time I had already returned home, so I picked one that I had not sen be used by another student: the urethane.
In order to know how much material you need, you can pour some water in your mold and measure the weight. You then divide that by two as you will make your casting material from two base materials and you need halve from each.

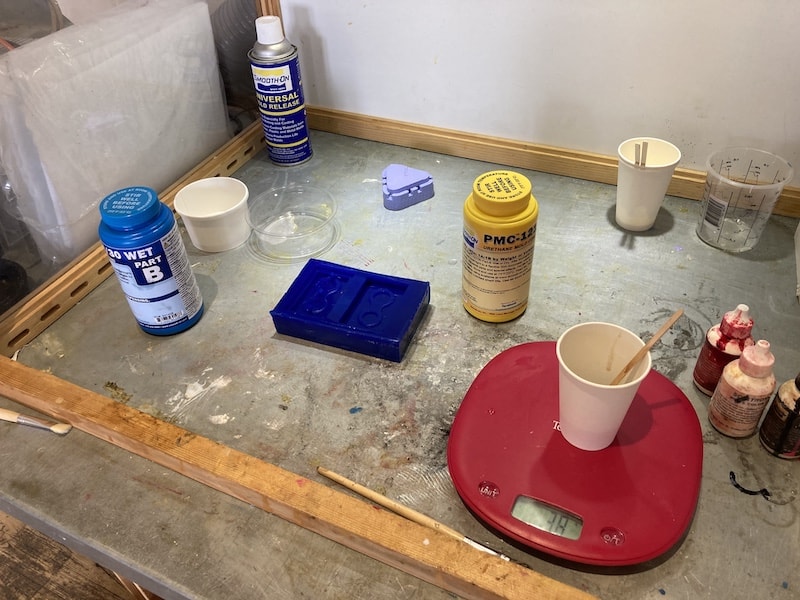
As you don't want to have any air in your casting material, you need to stir it in such a way that no air gets trapped in the liquid. You us only a horizontal movement; very different from any previous kitchen related stirrung your have done all your life.
After that you can put your material in the degassing chamber. Here the air is removed until almost 1Bar underpressure. Any air bubbles in the casting material therefor grow and rise to the surface. It is funny to see and I degassed for a few minutes as their seemed to be only very few bubbles in my casting material. I am a stirring master of course.
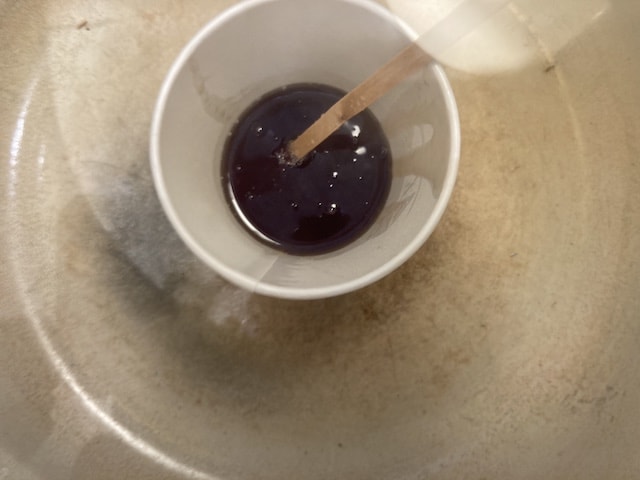
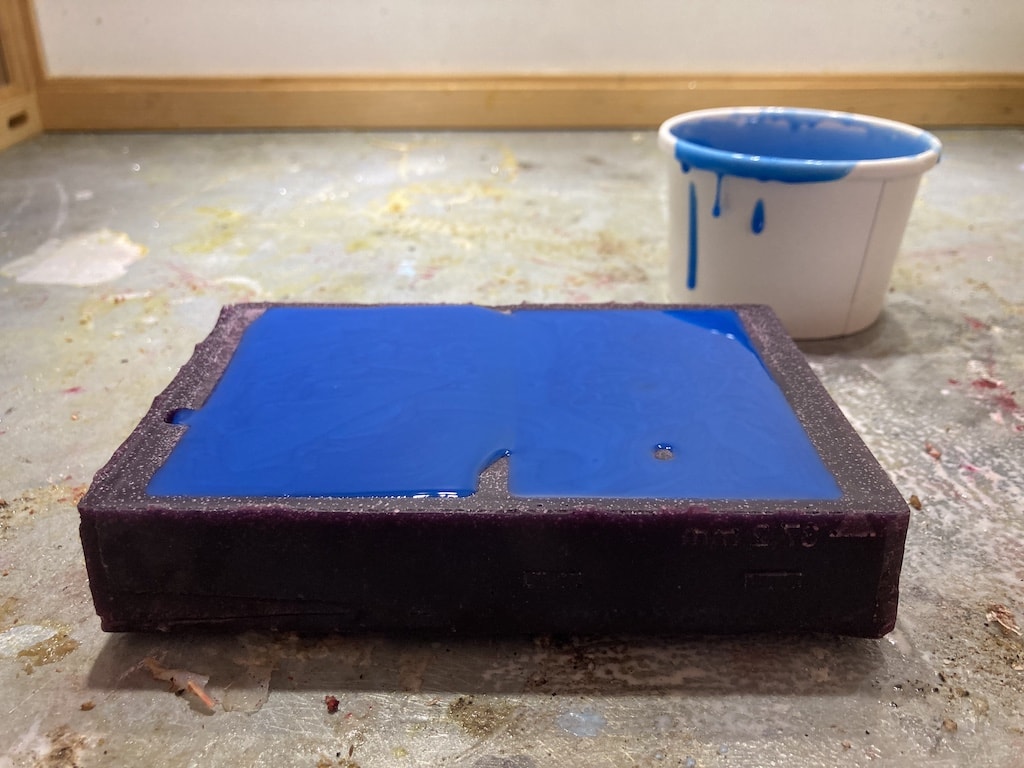
After that I carefully poured the well-stirred and degassed urethane into my mold and found out along the way that the table we use is not level.
The table (that is not flat) has a little suction chamber in which we can store our mold as they cure. Any hazardous gasses are sucked from the chamber and put somewhere else. Outside probably... My mold would need at least 16 hours to cure, so I cycled home for a nice rest of the day as the mold and the casting would now have to attend to itself; it was out of my hands, there was nothing left to do, the stone had been cast.
Next day
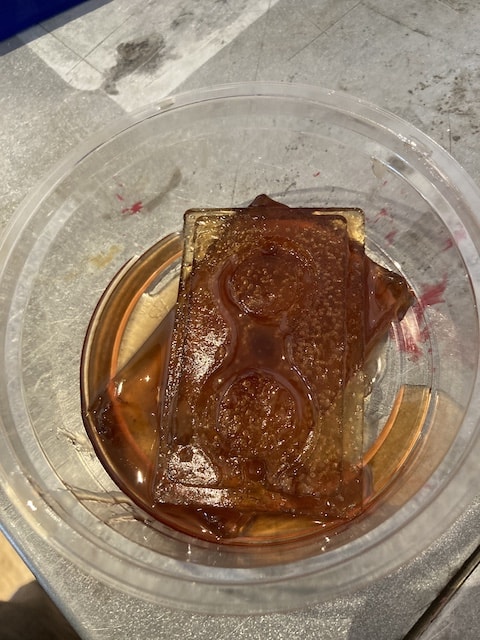
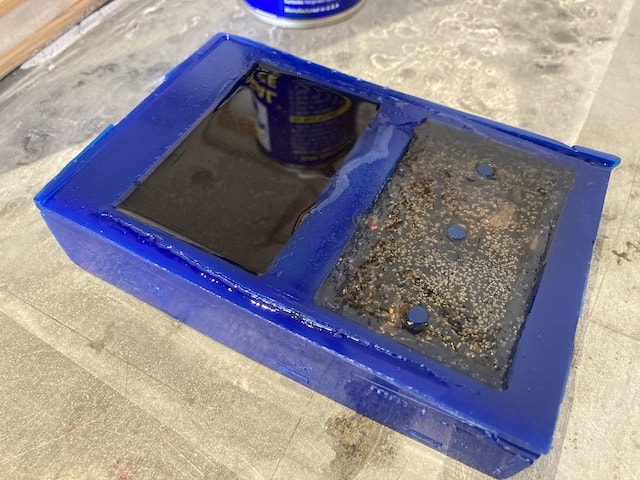
The next day I rose early and arrived at Waag before the sun had come up in order to marvel at my amazing cast and celebrate the next step: making the actual ring. I felt that the top of the material was still somewhat wet, but this material is known for always staying wet. So I gladly removed the thing from its suction chamber where it had been curing all night. And spats of urethane spilled on the floor... the material had not cured entirely and was still partly fluid.
Also, you can see that especially on the right part there are many many many bubbles trapped inside the material. Was the temperature too low in the room? Did I not stir well enough? Was there not enough degassing done? So many different options and variables to test...
In the end I had to chuck out what I had and start anew...
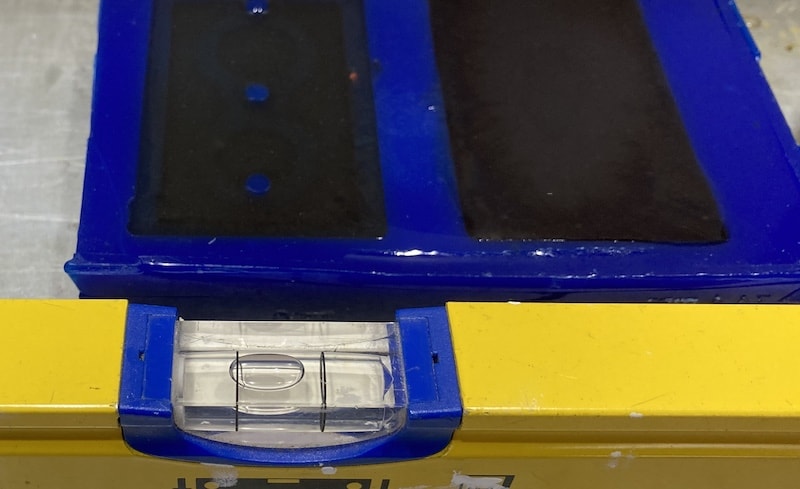
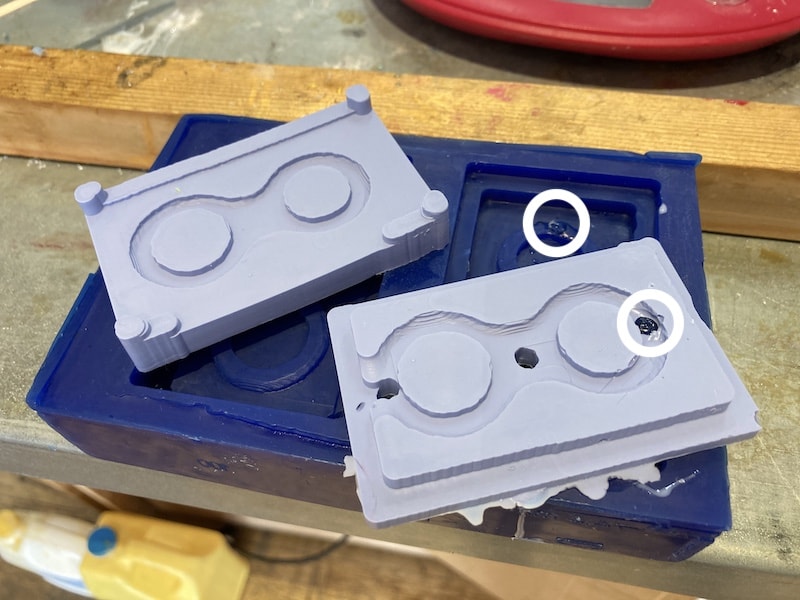
I had to clean my mold thouroughly as I thought that now I wanted to try another material. But this proved to be very hard. The urethane got stuck in all the little corners and even applying multiple pieces of paper and using sticks did not help. In the process I even broke part of the mold... Luckily I could use a lighter a and meld it back in place.
Here you can see the broken piece and the place where it came from. Also you see the shiny parts on the mold that are still wet from the urethane.
I removed the remaining urethane as best as I could, but as some remained, I figured that I might as well use urathene also in my second attempt. This way I don't run the risk of unexpected chemical reactions. Of course I stirred much better the second time and also degassed much longer. And boy.. where there many bubbles still inside...
I took over ten minutes to degass, and probably I could have degassed some more, but there is also this thing called potlife, which is 30 minutes in this case, and I did not want to run the risk that it would start to harden in the cup.
A new casted mold now sits in the same place as yesterday and I am at home hoping for it to cure hard and strong.
Next next day
Close but no cigar productions has delivered. Again. Also, they cooperate with Random Shit inc. this time as, weirdly enough, the left part of the urethane in the mold was still fluid, while the right part was solidish...
I cleaned the lot, this time with a brush and soaps (brush was disposed off) and filled the mold with Oomoo. Urethane will probably stay an unhappy once in a lifetime experience.
Now I have to wait another six hours before the oomoo is cured.

Next next next day
So the mold has been cast. Or the cast has been mold. Depending on your viewpoint. The material has cured and feels nice and gummy.
Sadly the design for my wax mold was not correct and clearly it shows now that I won't be able to use this mold. I maybe have to make a new wax mold some day. I think that is maybe the best. I guess, I will always need two or three attempts at something before it works...
Also note that the part of the wax that came loose earlier and that I 'fixed' came off again with the oomoo stuff.
I did not have time to make a new mold and will have to finish this later.
A new dawn a new mold.
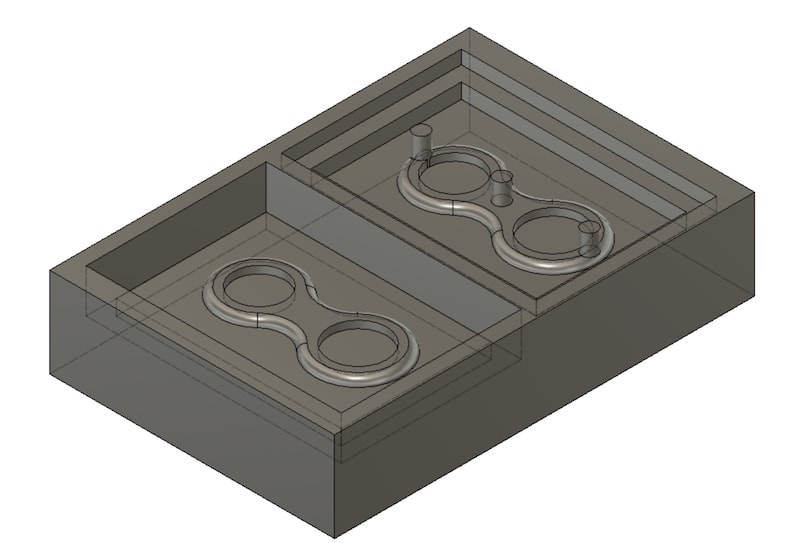
Weeks later, even after the final presentation, I get the time to make a new mold. I will build upon the design I already made. and keep in mind the issues I had earlier;
- No holes smaller then 5mm.
- redesign the way the two halves fit together to that they actually fit.
Adjusting the design.
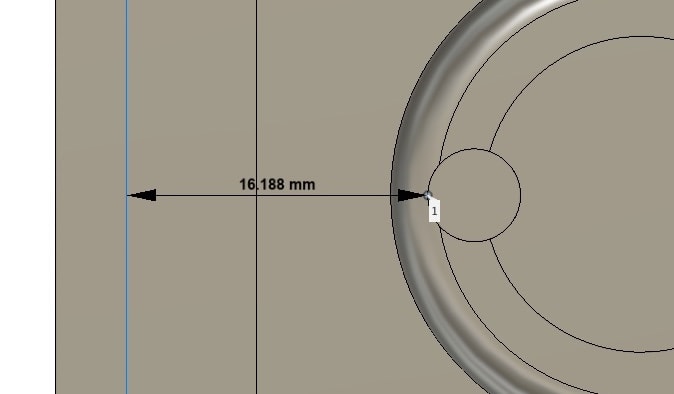
I made a few adjustments to the original design. The new file can be found here. Most notably, I made sure that there are no longer any places where the 5mm millingbit can't come.
Also, I made sure I measured the new (and last, boy was I lucky) piece of wax that
Milling on the shopbot.
Take yer time. The golden rule on the shopbot. And so I did. And then still you can mess up x and y.
Directly after starting the shopbot I noticed this first milling stripe was not in the right direction. Now you can go back and reverse everything in VCarvePro, but you can also just unscrew and rescrew the wood to the bed and turn your stock 90 degrees.
Of course most of the things and how you should do them have already explained. above. But there is always room for new learnings and mistakes when you are using the shopbot. So above you can see the first; make sure that the x and y in your drawing correspont to the one of the machine.
Another interesting learning is that you can also add numerical values in the shopbot software to move the drillbit. This makes zero-ing a lot more precise.

First I do the rough cut:
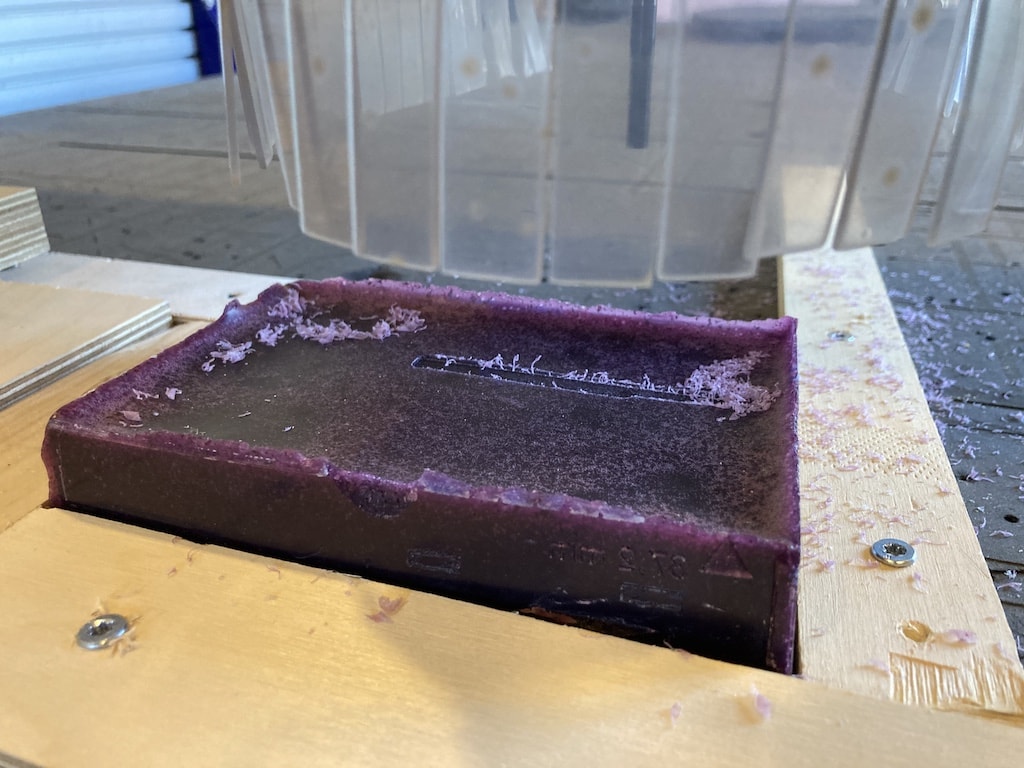
Then we do the rest and we end up with a nice pile of wax chips that we carefully collect and save with the other wax for future students.
With a screwdriver and sanding paper I remove any loose chips or excess parts that might get stuck in my casting material.
Then I carefully combine parts A and B of moldstar30
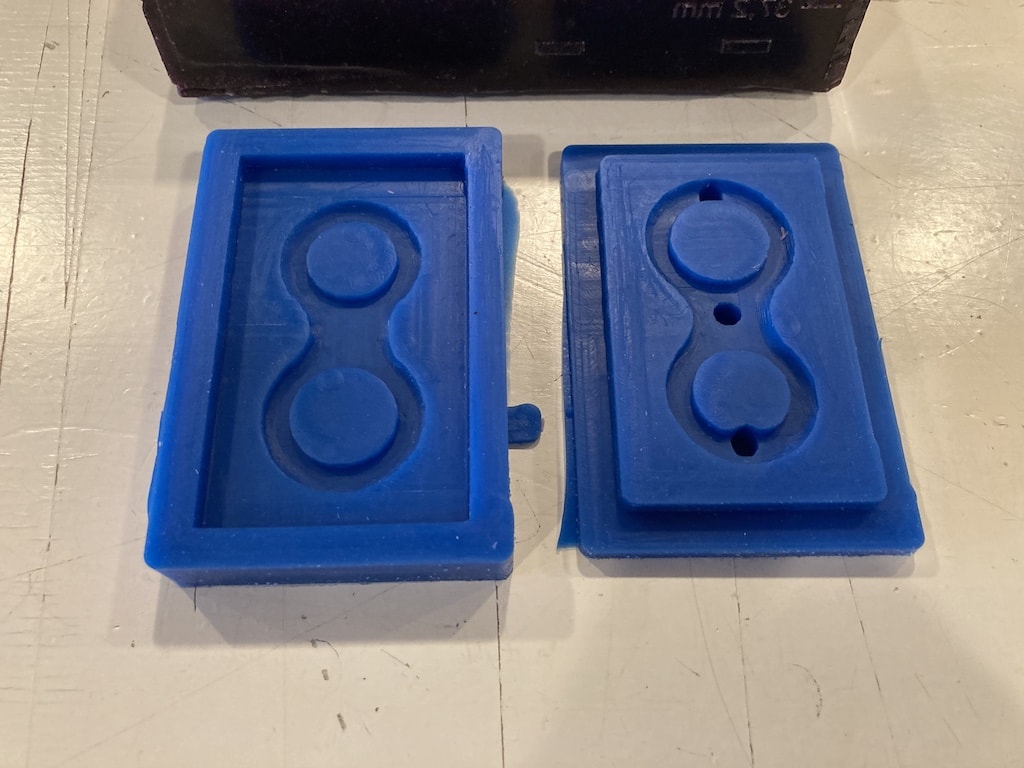
Making the mold.
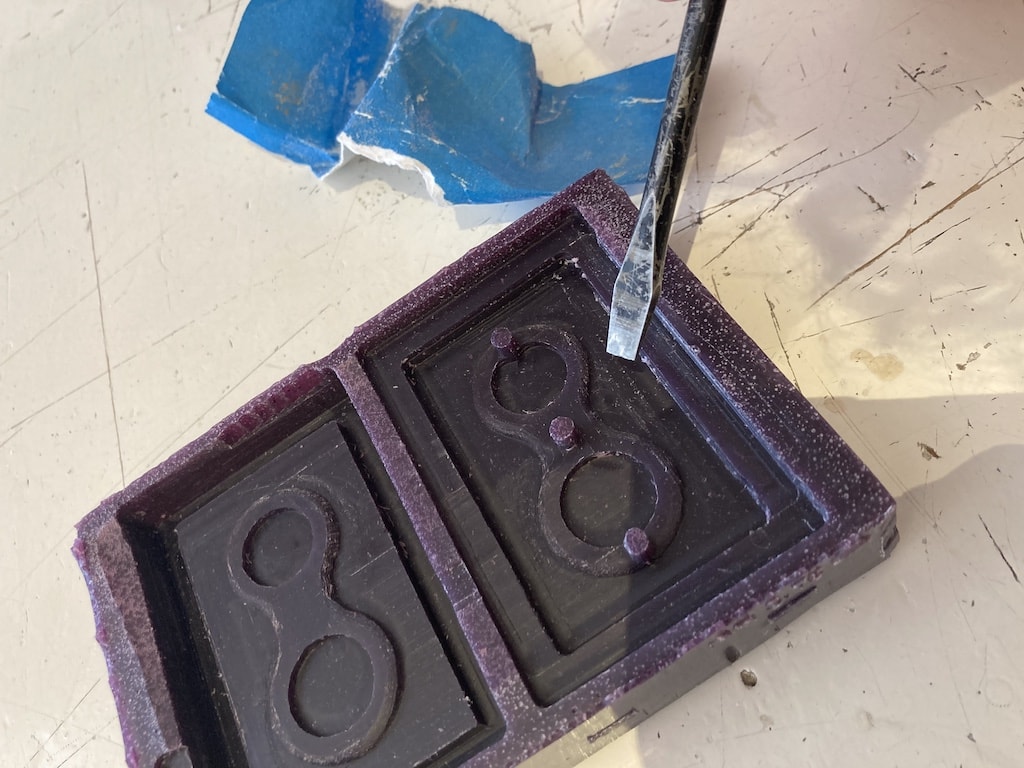
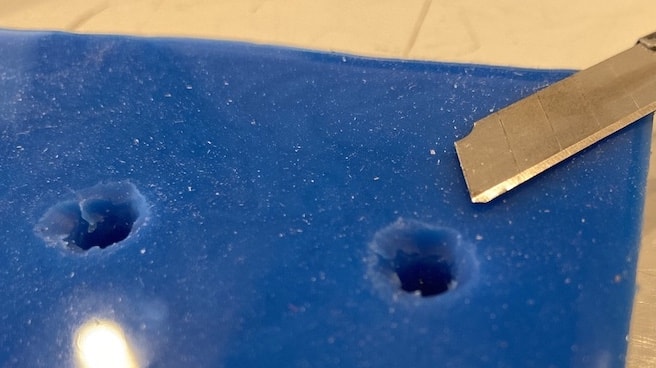
Using Mold Star 30 I pour a nice thick amount of material in the mold. The parts that should make hole dissapear as I slightly overpour, but I think this is fine; I can cut them out again later.
And indeed, when I come back the next day, I need to cut open the holes. I use the occasion to even make them slightly bigger on the top: creating a little funnel so I can later pour in the casting material even easier.
The end result is the ready for the actual casting of the rings.
Casting
The wish-for-effect my cast will have is two colors that meet in the middle. Hard to picture? Let me explain. My mold has two pouring holes on each side and one hole in the middle as an air vent. In both pouring holes the same material should be poured, but with different pigments/colors. When poured at the same speed and volume, the two liquids should meet in the middle and there unite and mix a little in an unpredictable manner.
I order to achieve this, I decided to use Smooth-Cast 325 EU by Smoothon. I watched a few youtube videos by the maker. There is namely one thing that makes me nervous about this material: the potlife is 2.5 minutes. That means that I have 150 seconds to stir it well and pour the material.
Luckily I learned in forementioned videos that you can already add the pigment or colouring to one of the two parts before mixing. Still, a challenge will remain to prepare two identical, but different coloured, mixtures at virtually the same time and pour them at somewhat identical speed into a 5mm pouring hole...
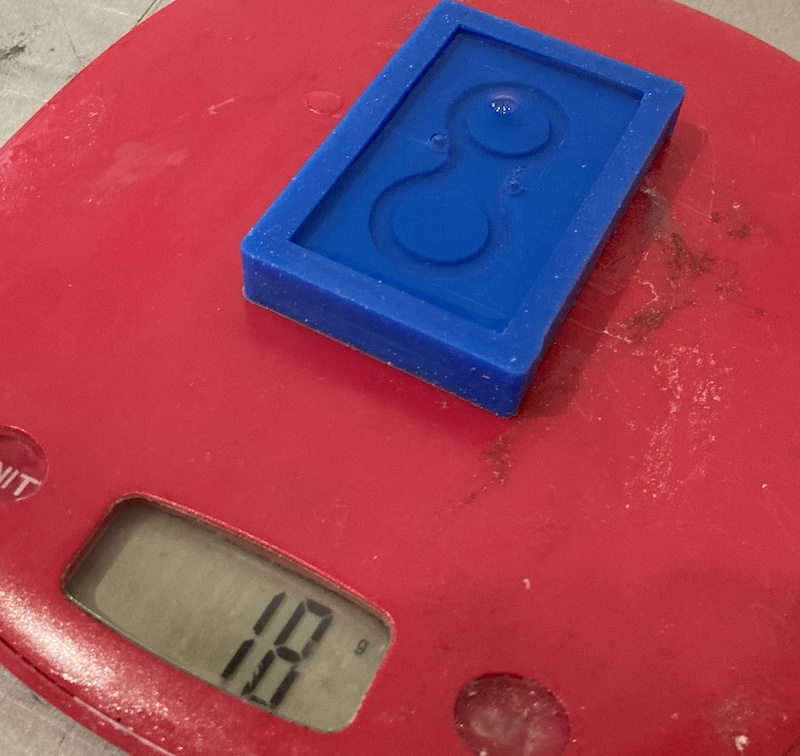
The total amount of liquid that goes into the mold is 18 grams. Notice how I measured here the total mold. Totally neglecting that I only want the inner part. Suffice to say that I stayed with more then enough material afterwards. Still, this is not a bad thing, as I will later explain.
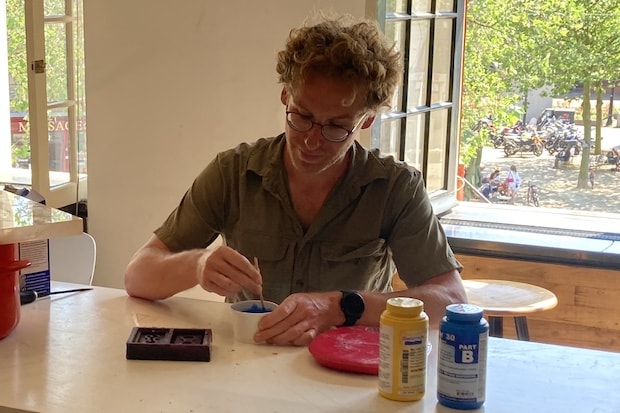
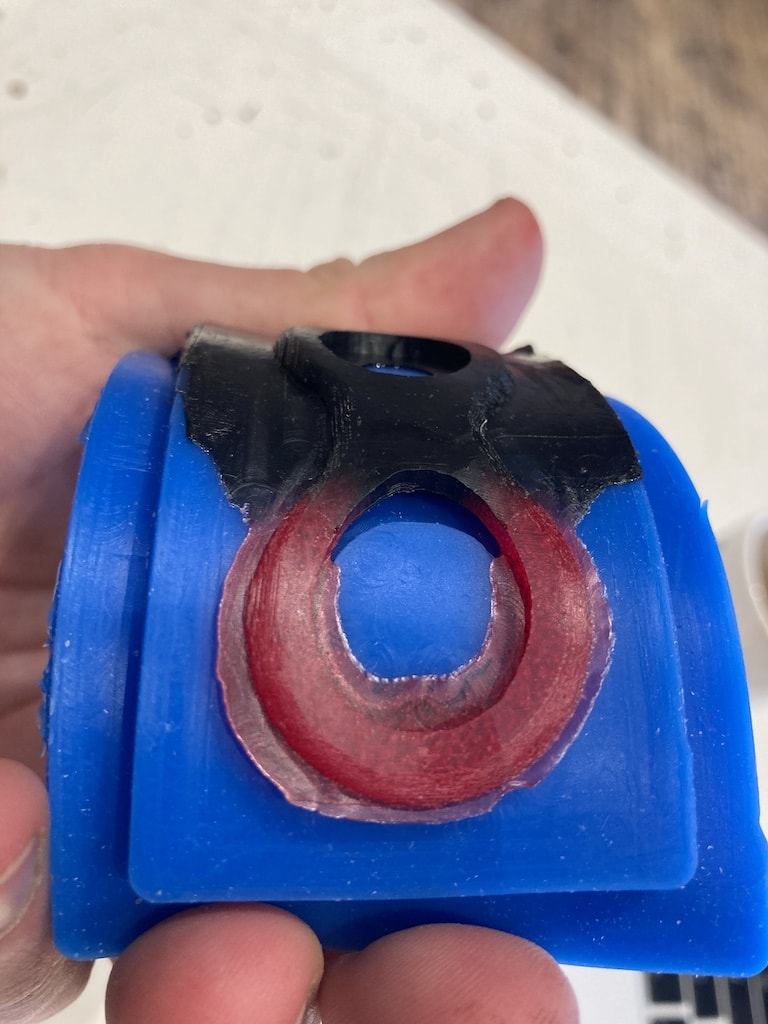
As noted before, I needed to move fast due to (very) limited pot life. So I prepared two little cups with part A and added the pigment to them. Then I made two bigger cups with part B in them. I quickly put part A and B together in the first container, stirred quickly (never mind the bubbles!) and then did the same with the second container. I then tried to pour them in equal speeds into the holes. But as the substance of the first container had already somewhat started to harden, this was difficult.
Notice how the black pigmented part has gone in much easier, while with the red part a blob stayed on top.
In the end result you can also see that the black part was much quicker to the other side. If I want to do this again, I might need an extra pair of hands.
Also, the end material was much softer then expected. I think that it is almost impossible to get the right ratio of part A and B when using such small amounts. In the final attempt, not using any pigment, the material was the strongest. My guess is also that in such small amounts the amount of pigment can really change the chemical balance needed to harden out properly.
Here are some end result pictures:
The end result being much too flexible...
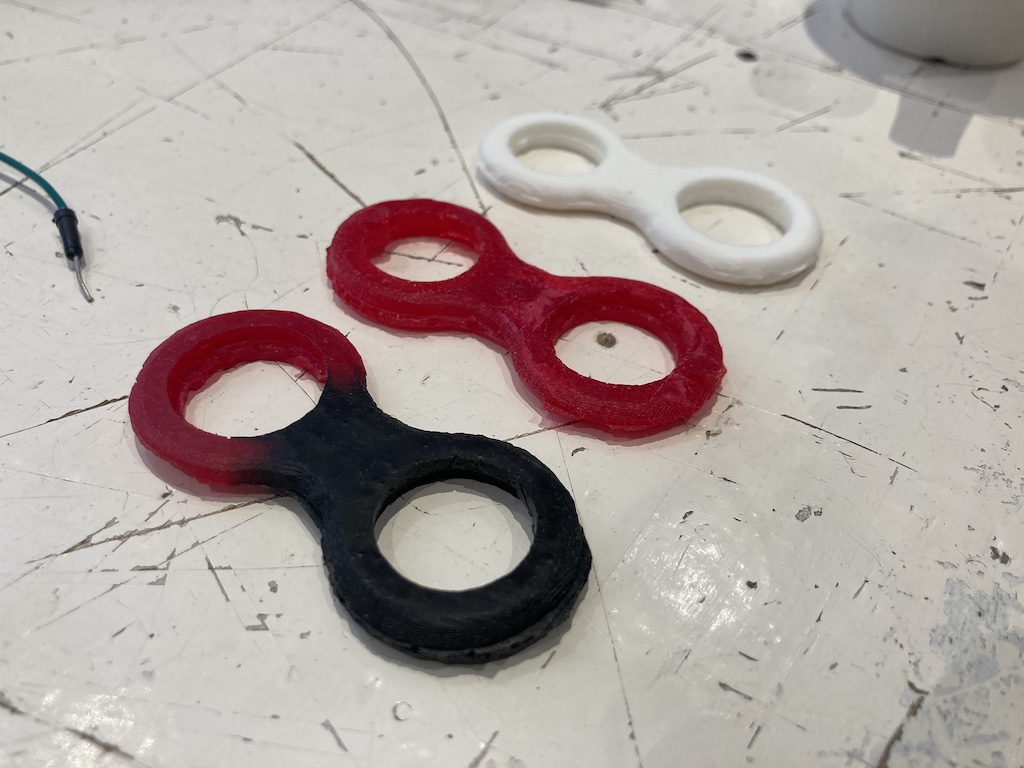
Everyone I showed the end result (n=3) thought I made some kind of candy...
What I have learned
- Casting is not my favorite material. It is sticky, unpredictable and messy. Also that it creates plastic particles annoys me. I did start appreciating the shopbot more and I look forward to make some 3D cuttings in wood someday.
- I have only dipped a toe in the ocean of possibilities of moulding and casting. Maybe there will be a day when I take the full dive. But that will only happen when I have a true and proper need for it. Which I currently can't think of...
You can download an stl copy of my mold here. You can also get the Fusion360 files here