How to use git
This page is here to show how you can use GIT. It is a version control protocol that we will use during all this course to upload the files related to the Fab Academy.
The Git flow
The main principle of Git is based on 3 silos:
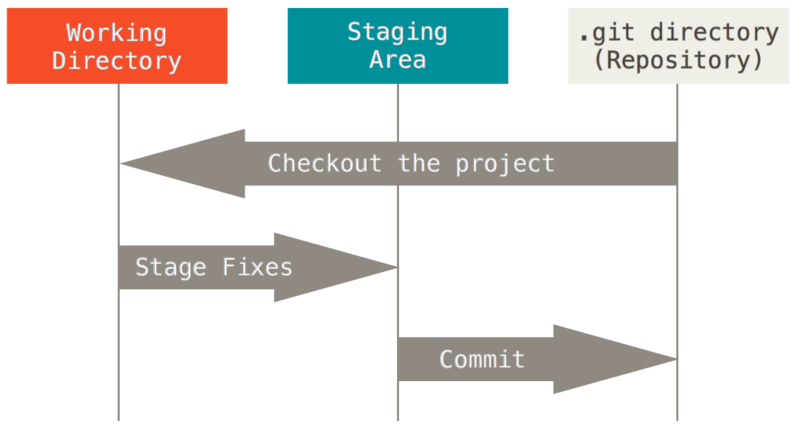
Source: Fiore Basile’s presentation DVCS slide 13
- Based on what we learned about distributed version control systems (DVCS) in the **What is Git?** Chapter we know that the files are located on our own machine also. So, one of the first step will be to clone the repository on our computer (see further Clone your working directory). That’s all the artifacts we will handle: source code, builds, images, photos, drawings, etc. That will be called the
working directory - In the same time when you clone your working directory, you will get a
.gitfolder (it will be called Repository). This one is not shown because of the dot in front of the folder name. Simply reveal hidden files in your actual repository to show them. His job is to communicate with the network, if something changed (commited) from the staging area need to be pushed via the DVCS on other machines. - The
staging area: is like a buffer, or like a draft of your next mail. You first need to select the files you really want to send, we called this Stage Fixes. Then after selecting the files you will need to give them an operation name, which summarizes the work done. Only after that you will be able to push your files via the DVCS.
Interactive tutorial
Git flow is something important to understand and is a kind of trial and error. I personally learned a lot with the interactive tutorial from Github https://try.github.io/levels/1/challenges/1. A so called bullet-proof simulator :-D
After your firsts pushes you will quickly need to structurized the job to something looking more like that:
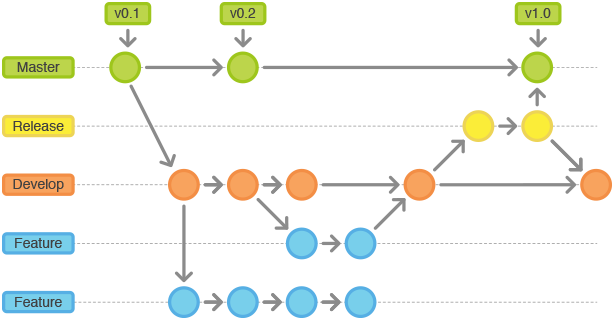
Source: Fiore Basile’s presentation DVCS slide 42
Why? The answer is to seperate your big black boxes of tasks into smaller snippets, functions, features, bug fixes, and so on, to work in a more efficient way with your squad. More on how to do this, below.
At this point, it could be easier for team developers to follow the releases by tags. For instance this strategy could help: (Source: https://fr.wikipedia.org/wiki/Utilisateur:Romainhk)
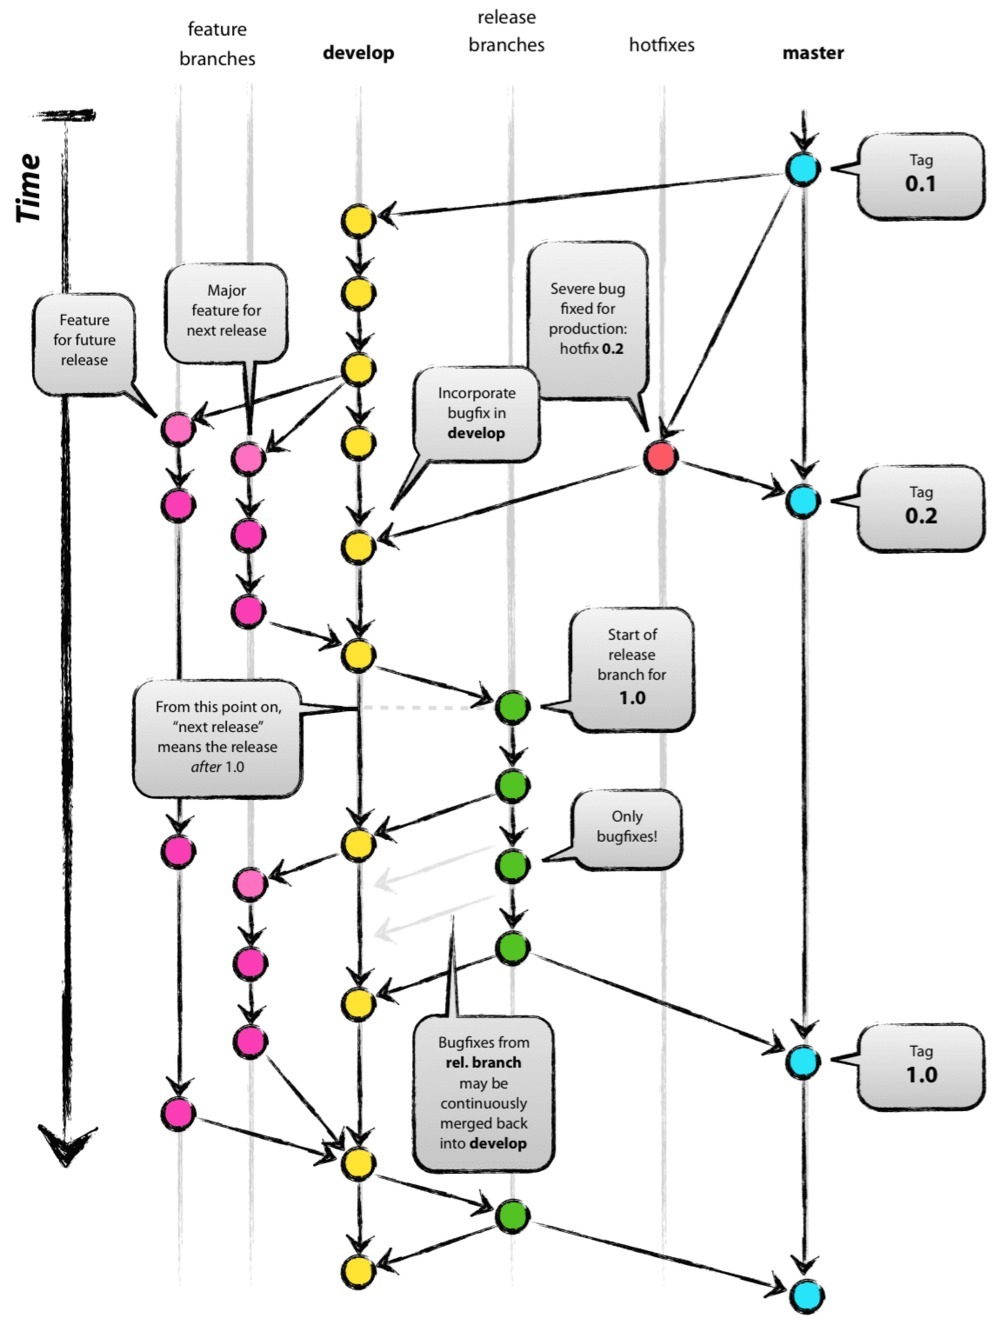
I will not go deeper there, but encourage you to visit this site if you want more information explained very well http://nvie.com/posts/a-successful-git-branching-model/
For tagging as well follow the instructions on the Git Basics Documentation here: https://git-scm.com/book/en/v2/Git-Basics-Tagging
Install Git Kraken
For more comfort and visibility I personally prefer to use a version control tool, and my preference goes to Git Kraken for many reason. The first one, it’s a cross platform Git GUI Client, meaning it works for Windows Mac and Linux. Another very good solution is GitHub Desktop. The principle should remain the same but in a different GUI.

Source: https://www.gitkraken.com/
You have to have an account (free for non-commerical use) and install it. Go to https://www.gitkraken.com/ and follow the steps there.
After the guide tour provided by Git Kraken, you will have to let Git Kraken use your SSH Key created above. For doing this go to file/preferences/authentication/ and remove the tick on “Use local SSH agent” like the video below :
Source: www.youtube.com/embed/nNzeGittVXw
You are now ready to clone your first repository.
Clone in your working directory
To pull your project return on your lab home page in Gitlab, and from there copy the “Git specific URL” :
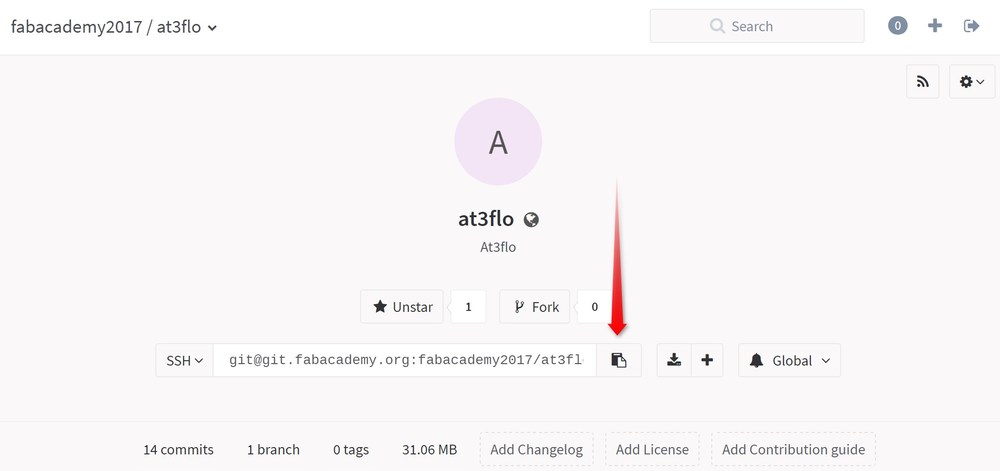
Go to Git Kraken again and go to file/clone repo (CTRL+N). In this place you first have to select the location on your computer where you want to locally copy the remote repository. As a good practice I invite you to create a so called “dev” folder or “git” for instance, which will remain as your preferred folder to clone other future awesome projects. For the URL just paste the previous copied one :
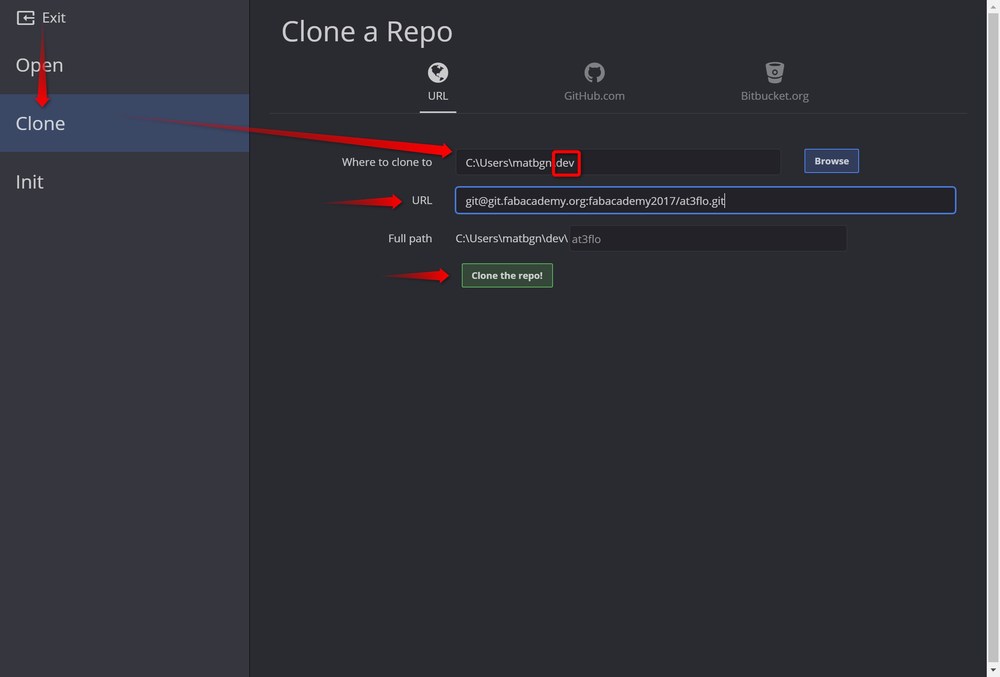
You can now work locally (in your dedicated “dev” folder) and do all the stuff you want in it.
Push your local modifications
When you are happy with your modifications, return on Git Kraken, you will see something like that :
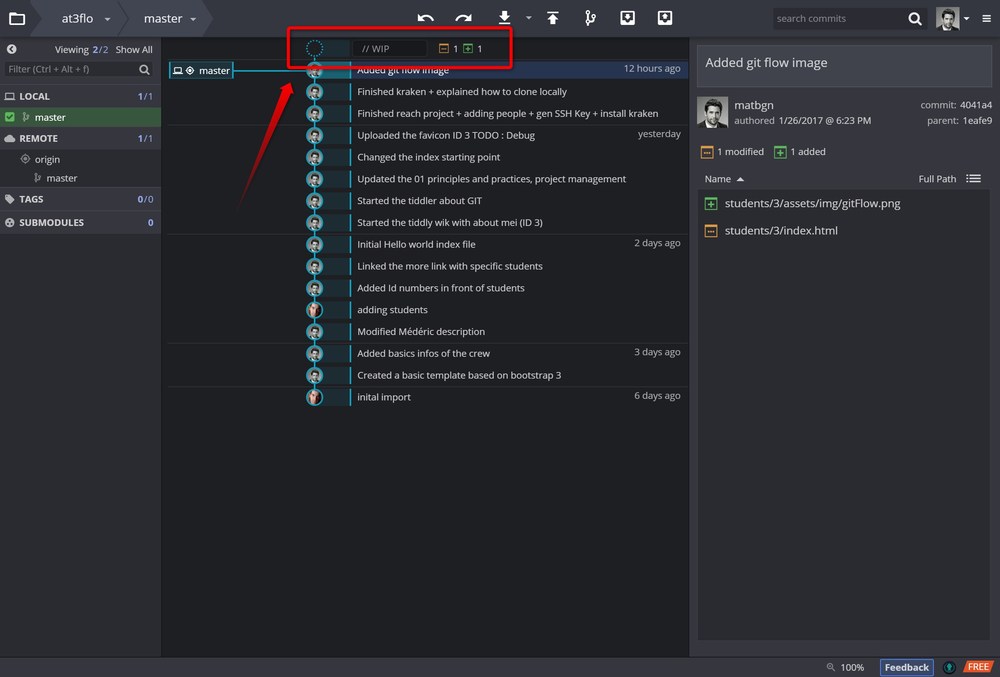
Which means that you have a Work In Progress on your local machine. You have now to explain what you did with small comment and select the modified files that are concerned. This operation is called “commit”. See the small video below :
Source: www.youtube.com/embed/nNzeGittVXw
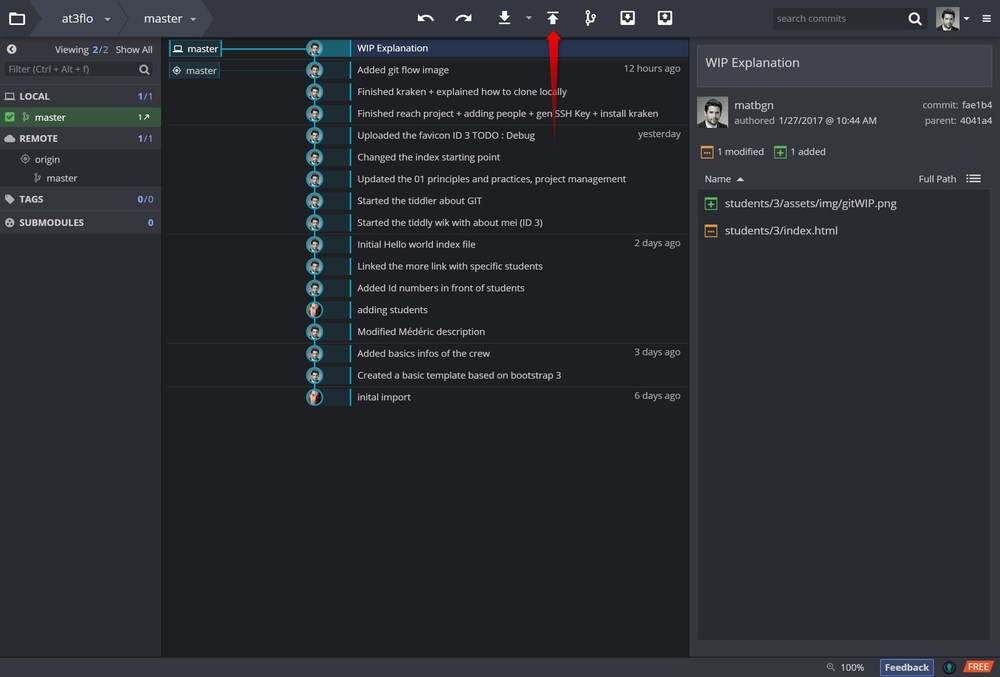
After doing this you will see that your desktop will move ahead from the remote repository. In other words, the changes you did are not yet in the remote repo.
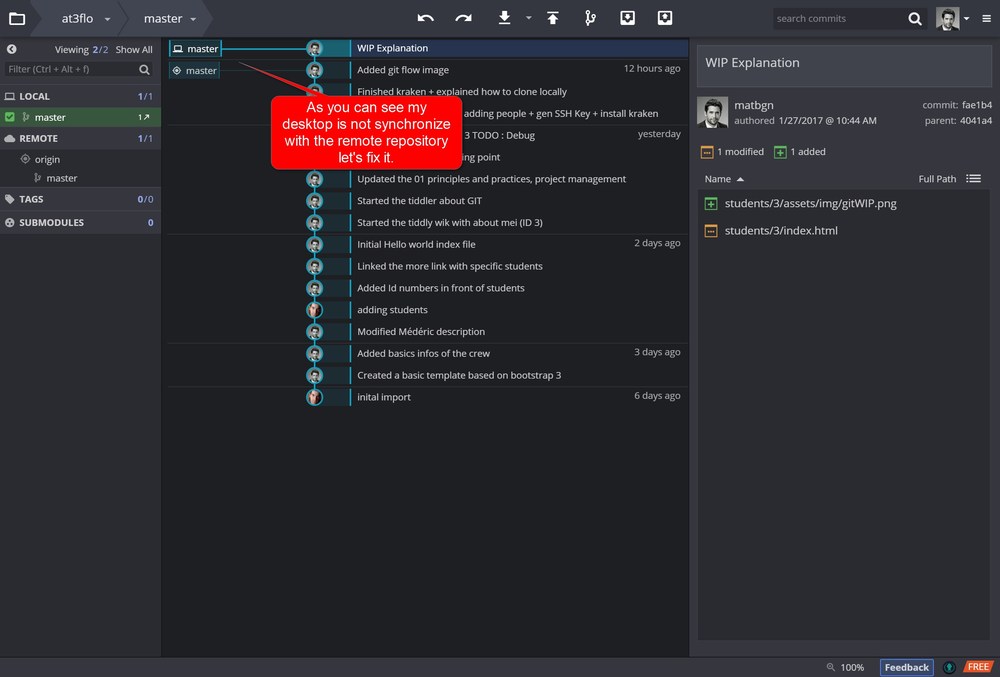
So the last thing you have to do is to push your modifications in the cloud.
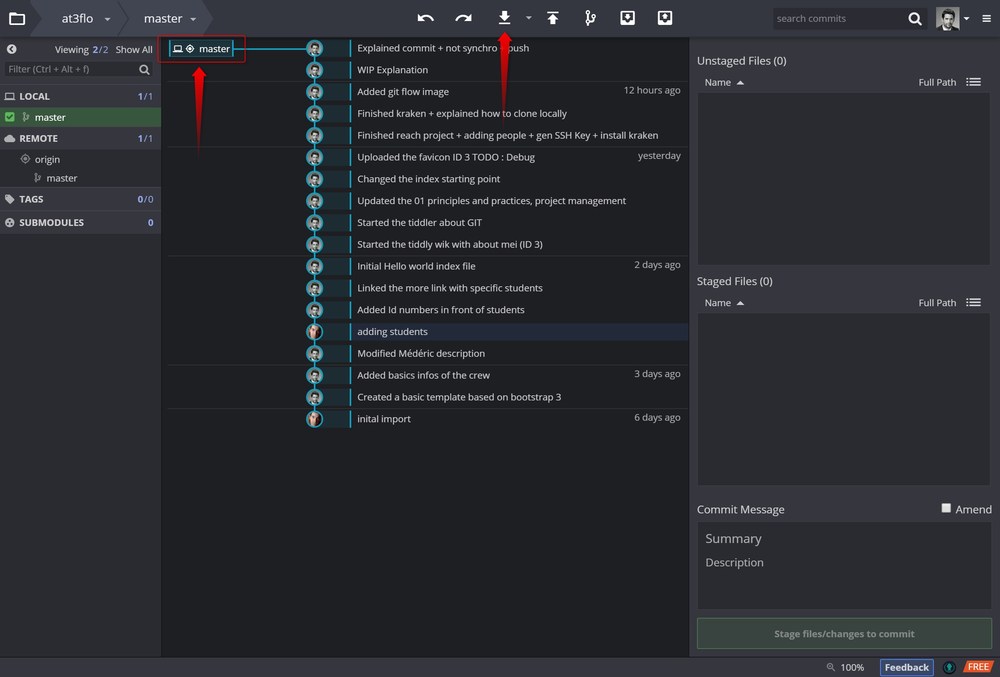
IMPORTANT : note that every time you wanna start to work on a repo you will have to “Pull” again this repo to make sure that you are both synchronize. Like this :
Here an example of flow inside GItKraken:
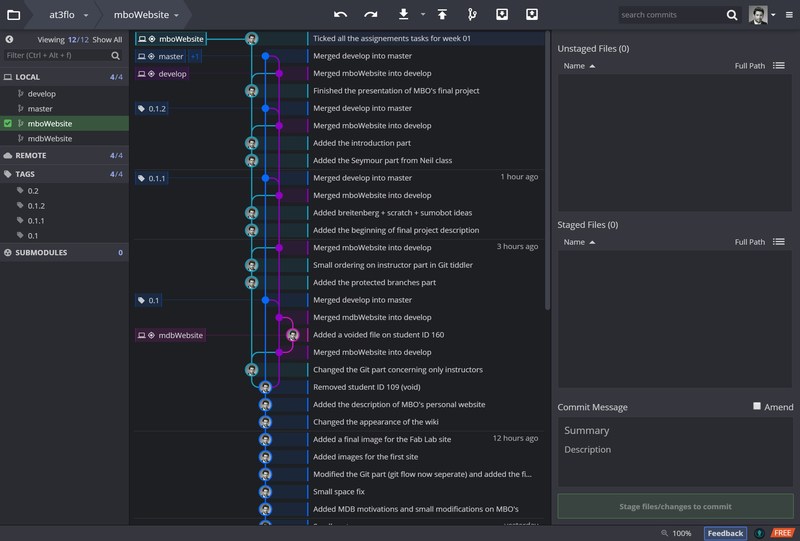
And here, as an exemple, how to merge one branche, into develop for instance, and then push them:
GUI Problems with GitKraken and Git Bash workaround
If you encounter some problem to merge with GitKraken (for instance GUI not working properly) you can do it at anytime by the terminal we used just before.
First of all, be sure you are working in the proper development place by using the command cd like this :

After that you will have to repeat a sequence of commands and mostly it will stay the same trough all your basic projects.
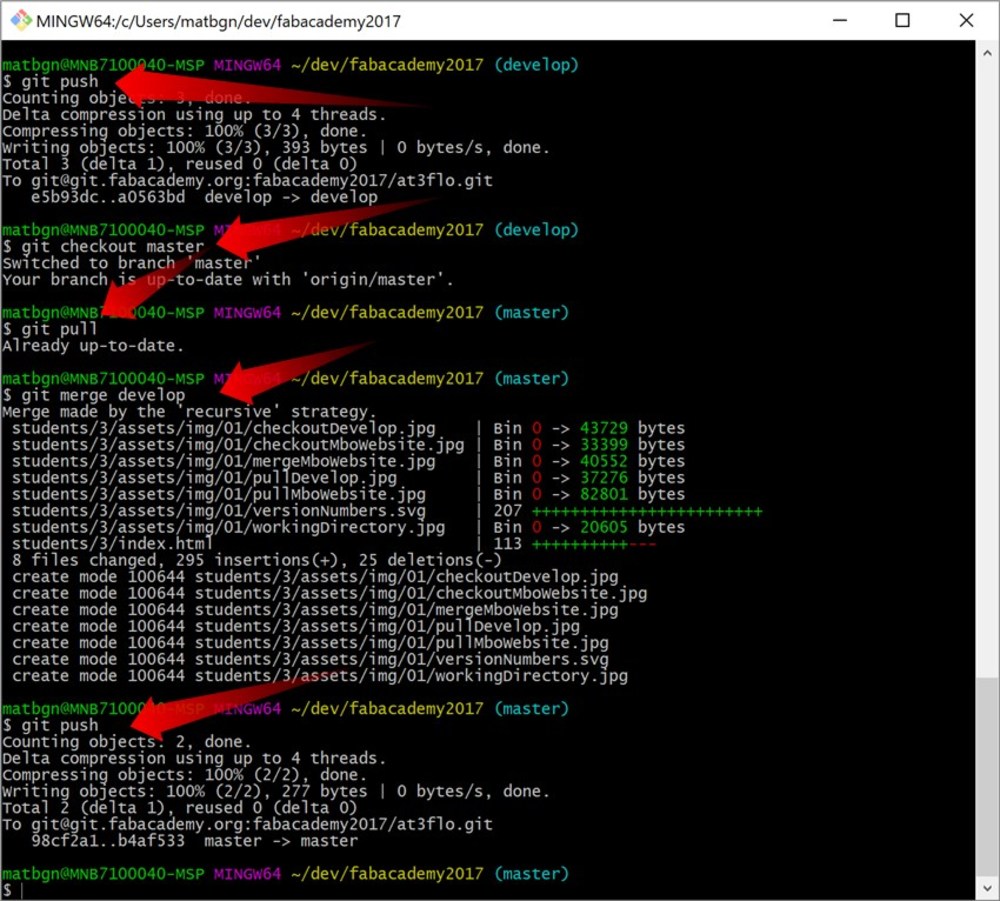
First of all make a checkout of your working branch (in my case mboWebsite):

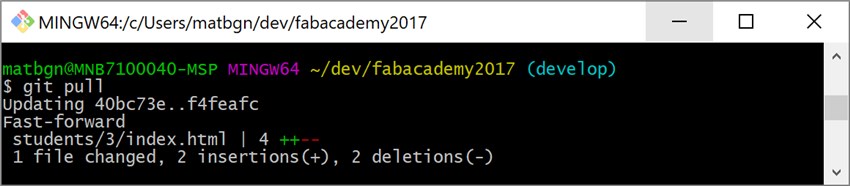
After that you absolutely need to do a pull, so you can grab all remote changes on the “cloud”:

Then you can go on the upper branch and again do a checkout:

Then repeat again, do a pull:
Now you’re coming to the merge part we will git merge mboWebsite on the actuall selected branch here develop:
At this stage you will be invited to enter some comments about this merge like this:
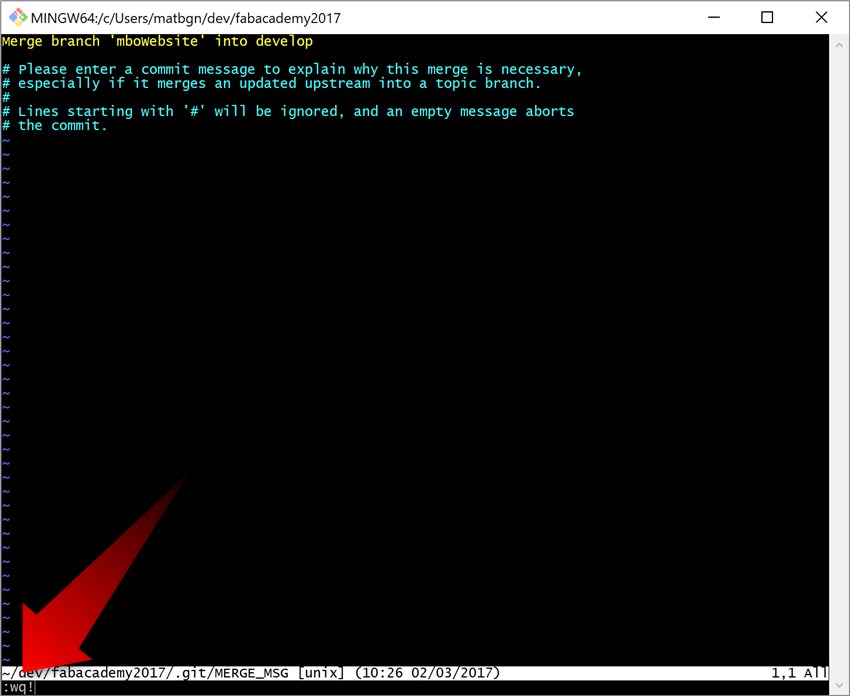
If you don’t want to add specific content, you will then type exactly this commande :wq! and then enter. If you want to add some more useful comments to this merge please see first the vi Language Introduction in the chapter below.
The merge result can be seen here:

From now you can repeate this sequence any time it’s needed. As a small résumé and if there is no other conflicts, we can summarize like this because it is really circular:
- Checkout to the feature branch [OK]
- Pull the latest job from repository [OK]
- Checkout to the develop branch [OK]
- Pull the latest job from repository [OK]
- Merge the feature branch [OK]
- Push the merging results
- Checkout to the master branch
- Pull the latest job from repository
- Merge the develop branch
- Push the merging results
If you need to go any further, follow this excellent presentation for using Git via a Terminal Tutorial Fiore Basile Git
Protected branches (for instructors)
For advanced : If you have some fears, you can protect a specific branch and assign it to the developers squad, firstly create the branches.
Then go to the Gitlab dashboard under Settings / Protected Branches, select the specific branch, choose if they can directly push or not, and protect it.
You are done with this small intro, good luck padawan!
Push Large Files on GitLab
Simply follow this straight forward tutorial : https://git-lfs.github.com/
- Download the git-lfs-linux-amd64-2.X.X.tar.gz
- Extract it with
tar -zxvf file.tar.gzWhere,- -z : Work on gzip compression automatically when reading archives.
- -x : Extract archives.
- -v : Produce verbose output i.e. display progress and extracted file list on screen.
- -f : Read the archive from the archive to the specified file. In this example, read backups.tar.gz archive.
- -t : List the files in the archive.
- Make it executable by
chmod +x install.sh - Execute it
sudo bash install.shYou only have to set up Git LFS once. - Go now on your repository and type:
git lfs installgit lfs track "*.mp4"git add .gitattributesMake sure .gitattributes is tracked
- Work as normal then:
git add file.mp4
git commit -m "Add design file"
git push origin master`
Clone partial repository (Sparse Checkout)
What we are trying to do is called a sparse checkout, and that feature was added in git 1.7.0 (Feb. 2012). The steps to do a sparse clone are as follows:
mkdir <repo>
cd <repo>
git init
git remote add origin <url>
This creates an empty repository with your remote, and fetches all objects but doesn’t check them out. Then do:
git config core.sparseCheckout true
Now you need to define which files/folders you want to actually check out. This is done by listing them in .git/info/sparse-checkout, eg:
echo "some/dir/" >> .git/info/sparse-checkout
echo "another/sub/tree" >> .git/info/sparse-checkout
Last but not least, update your empty repo with the state from the remote:
git pull origin master
You will now have files “checked out” for some/dir and another/sub/tree on your file system (with those paths still), and no other paths present.
IMPORTANT: Note that this will still download the whole repository from the server – only the checkout is reduced in size. At the moment it is not possible to clone only a single directory. But if you don’t need the history of the repository, you can at least save on bandwidth by creating a shallow clone. See below for information on how to combine shallow clone and sparse checkout.
You can combine the sparse checkout and the shallow clone features. The shallow clone cuts off the history and the sparse checkout only pulls the files matching your patterns.
git init <repo>
cd <repo>
git remote add origin <url>
git config core.sparsecheckout true
echo "some/dir/*" >> .git/info/sparse-checkout
git pull --depth=1 origin master
You’ll need minimum git 1.9 for this to work. Tested it myself only with 2.2.0 and 2.2.2.
This way you’ll be still able to push, which is not possible with git archive.
Source: https://stackoverflow.com/questions/600079/how-do-i-clone-a-subdirectory-only-of-a-git-repository