Exercise 13 - Networking and Communications
Weekly Assignment
Group Project:
Send a message between two projects
Individual Assignment:
Design and build a wired &/or wireless network connecting at least two processors
Group Assignment
All three of us worked together on making our individual projects work, since only Will had more than one Satshakit board. However, we felt that we needed to do more, so we got together again to try to communicate between the two boards. We wired up the two boards for I2C communication according to the following tutorial and picture.
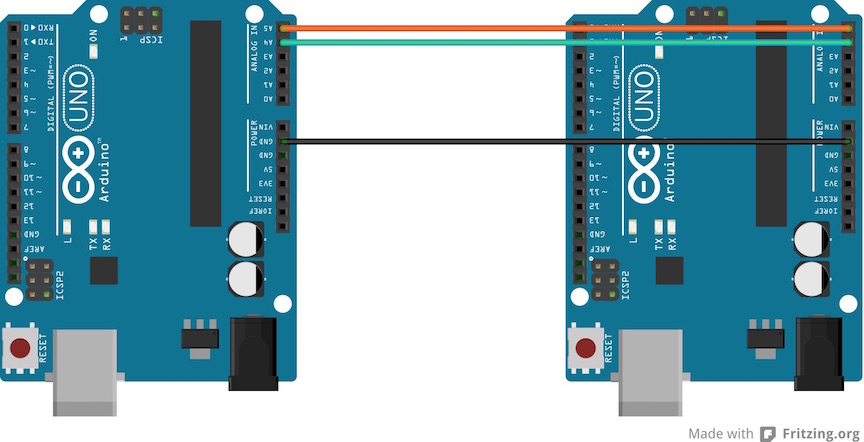
The diagram for wiring two arduino together, but we used our Satshakit boards
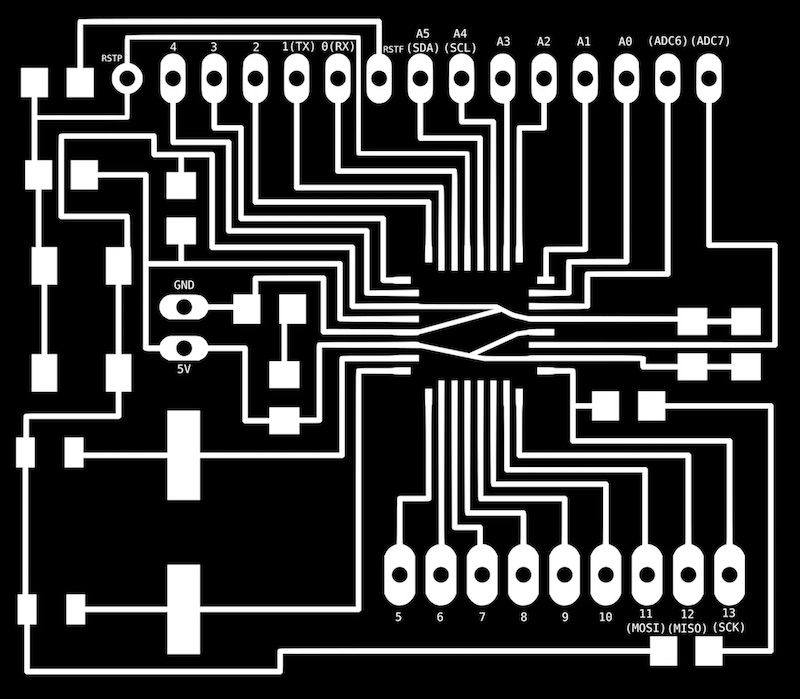
The Arduino pin mapping for the Satshakit board
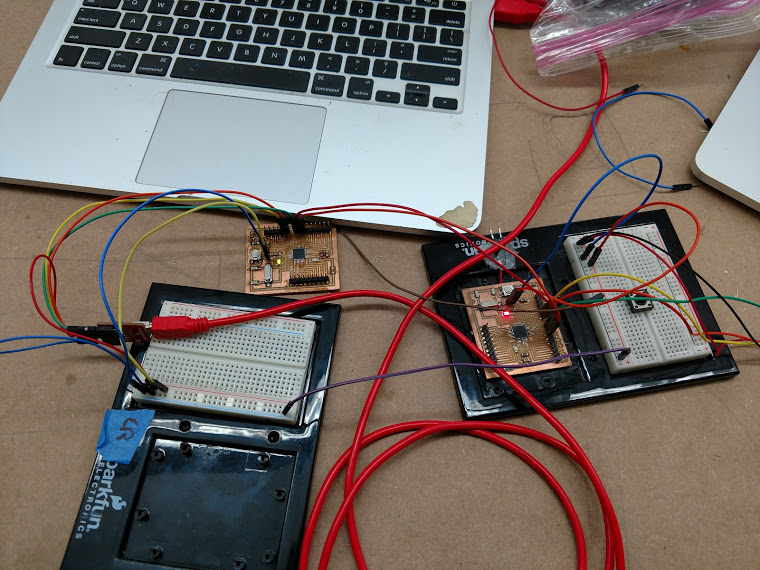
Our Satshakit boards wired together
After wiring them together, we uploaded the master and slave code that would allow us to type on the master serial monitor and have text appear on the slave serial monitor. If the letter "H" was typed on the master, the words "Yo, what's up?" would show up on the slave serial monitor. If the letter "L" were typed, the words "cool, cool" would show up on the slave serial monitor. The code can be found below.
The sketch for the Group Master board
The sketch for the Group Slave board
A video of it working!
Individual Assignment
I feel like I am starting every week with a statement about how little I knew about the topic and how hard it was for me. I guess that is because we have been on an electronics stretch and I had little to NO experience with electronics starting out. I have learned a LOT in these weeks, but they have been hard. As always, I started this week looking for some definitions and some tutorials to help me figure out what I was doing. I had at least heard of serial communications (hello, inputs week!) but I had never heard of the other types. I also had heard the terms master and slave in relation to computing, so I had a vague notion of what that meant. I tried to read the Wikipedia page on I2C but I found it more confusing than helpful. This led me to the Sparkfun I2C tutorial, which was more readable and more easily understood. Feeling like I had a slight grip on how things worked, I decided to give it a try.
Master -> Slave communication
I knew I wanted to use two of our Satshakit boards that we made in Exercise 10, so I borrowed one that Will had made so that I could wire them together and begin. I found a great Arduino Tutorial called Master Writer/Slave Receiver. I understood this to mean the master board would write (send) some information to the slave board, which would then display it on the serial monitor. I followed the instructions for wiring the two boards together. It was, for once, a fairly simple wiring diagram that I could follow easily! Was it just easy or am I getting better finally?
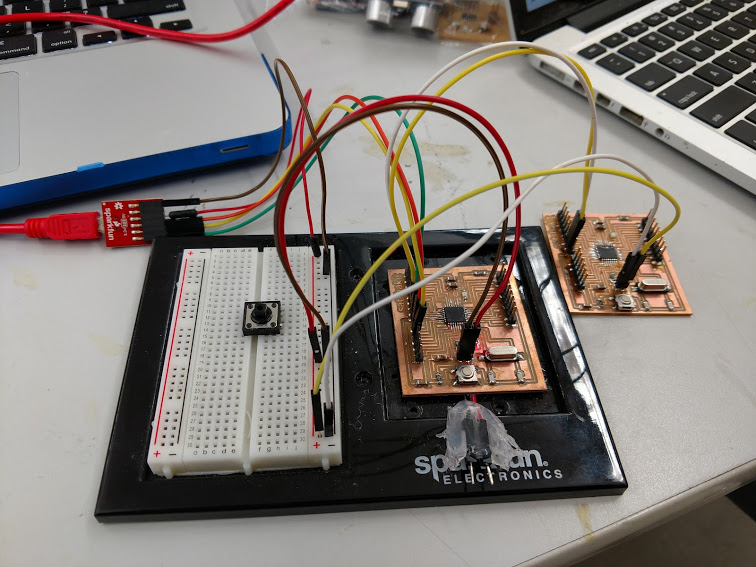
The two boards wired up together (the little black button was just left on the breadboard accidentally and means nothing)
I soon realized that I had to hook each board up to the computer separately so that I could send them different instructions. I hooked up the master board to the computer and sent it the following sketch.
Master Writer sketch, original version
I then hooked up the slave board to the computer and sent it the following sketch.
The code for the slave to receive the information from the master and print it to the serial monitor
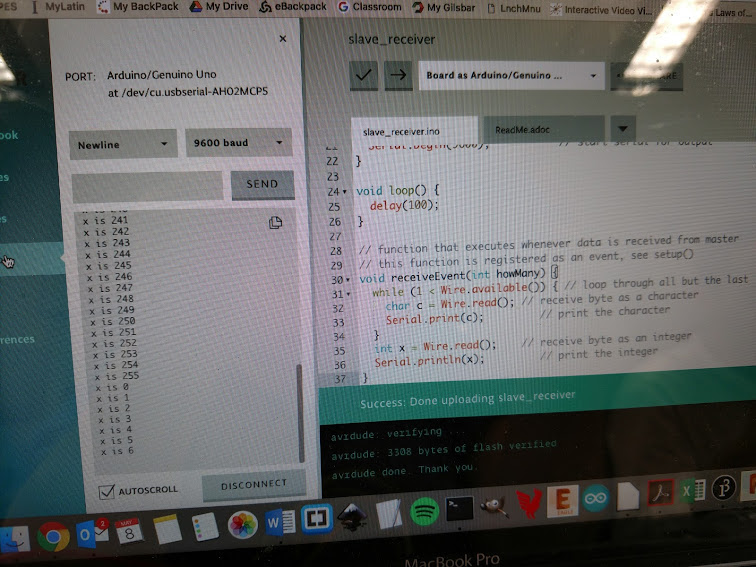
The serial monitor displaying the code. It worked!
So, that one worked. I decided to try getting a little fancy and change the text that the slave displayed on the serial monitor. I kept the same master code, but changed the slave code. The new code and results are below.
Modified slave code for receiving text
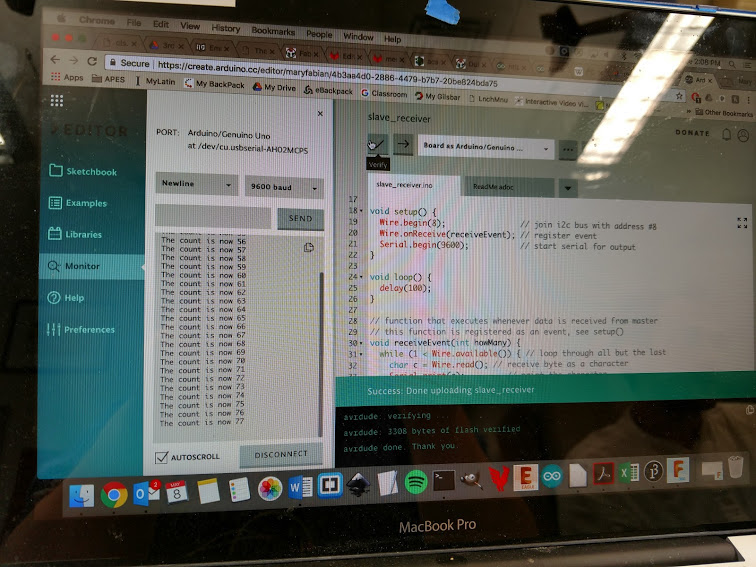
The modified code, which also works!
I then decided to try to do it the other way, which would be to have the slave send information to the master, which would then print that information on the serial monitor. I found this tutorial to be incredibly helpful and as easy to follow as the last one. The code and results are below.
The code for the master to receive information from the slave and display it on the serial monitor
The code for the slave to send information to the master
Video of it working! The slave is sending information to the master, which is displaying the word "Hello" over and over on the serial monitor
All in all, I felt like this was a pretty successful week. I felt like I understood what I was doing and will be able to modify what I learned for future projects.