Week 12
Interface and Application Programming
This week's theme was "Interface and Application Programming," research into this topic helped me interpret and implement design and programming protocols to create a graphical user interface.
The objective of this assignment were:
The objective of this assignment were:
- Write an application that interfaces with an input &/or output device that you made.
For the development of this assignment I decided to use the ultrasound sensor that I made in "Input Devices" .
My Workplan
My workplan was as follows:
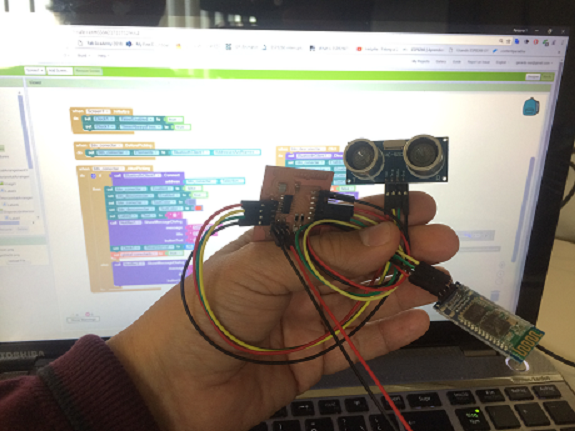
1. Connect all the components.
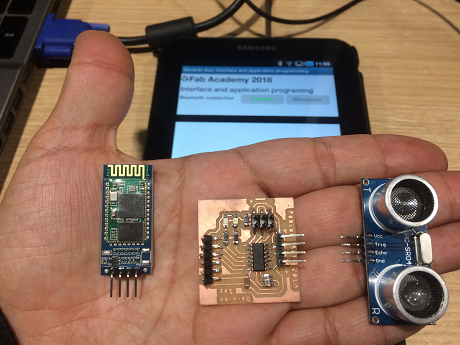
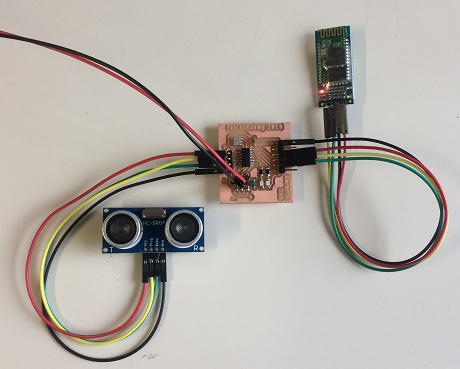
I made another PCB for the ultrasound sensor, the quality of my welding has increased, but it can still be improved. For this assignment I will use a Bluetooth 2.0 EDR module HC-06 (ZG-B23090W) that will be connected to my PCB and a tablet with a program that will receive the sensor data.
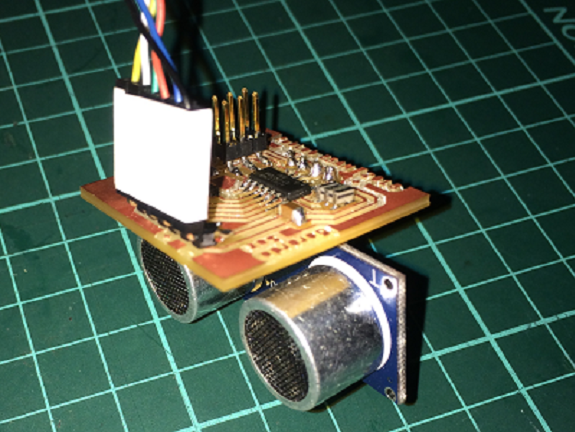
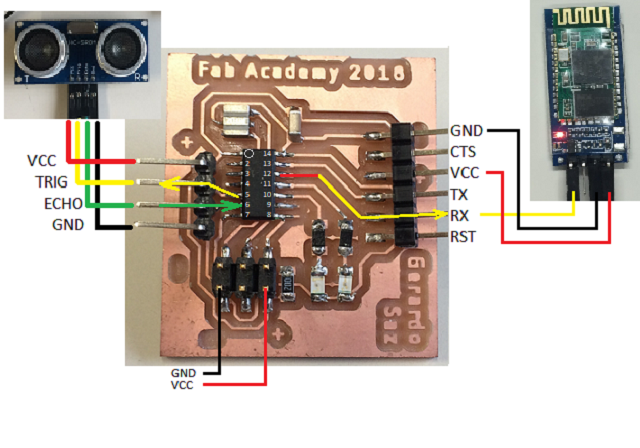
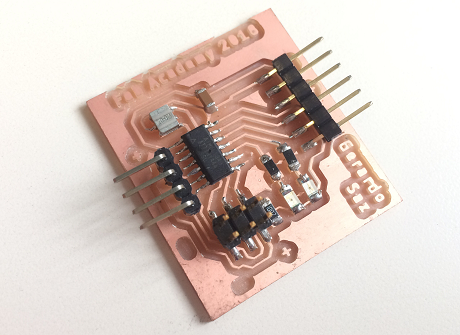 PCB with ATtiny44 microcontroller for ultrasound sensor
I already have the components connected.
I have respected the convention: red wire 5V, GND: black wire.
The ATtiny44 microcontroller will trigger a signal to the sensor and receive a response, with this information it calculates the distance. This value is sent to the serial port, where the Bluetooth module receives it.
I have respected the convention: red wire 5V, GND: black wire.
The ATtiny44 microcontroller will trigger a signal to the sensor and receive a response, with this information it calculates the distance. This value is sent to the serial port, where the Bluetooth module receives it.
2. Reprogram the PCB.
To program and to work correctly, I made sure to have identified the ATtiny44 pins.
I prepared this summary table with the necessary information.
I prepared this summary table with the necessary information.
| Function | #pin | #Arduino |
|---|---|---|
| Trigger | 5 (PB2) | 8 |
| Echo | 6 (PA7) | 7 |
| Led1 | 10 (PA3) | 3 |
| Led2 | 11 (PA2) | 2 |
| Rx | 12 (PA1) | 1 |
| Tx | 13 (PA0) | 0 |
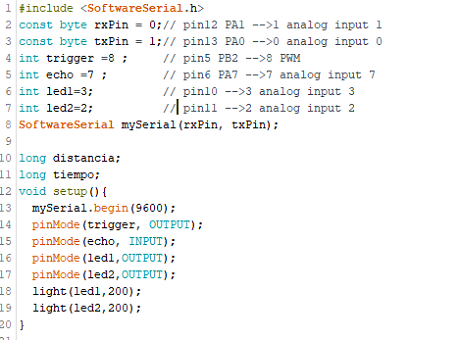
For programming, I used Arduino IDE. These are the definitions of the pins and the Setup.
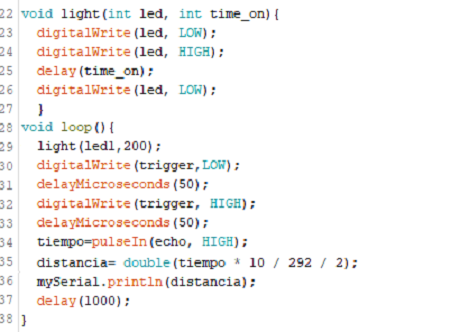
I did a function to turn on a led every time you send data through the serial port to the Bluetooth module.
The value sent is a number that represents the distance in centimeters.
The value sent is a number that represents the distance in centimeters.
Files to download
 Ultrasonic Sensor for Bluetooth
Ultrasonic Sensor for Bluetooth
3. Make user interface for sensor data reception.
I already had a sensor that only sent distances, the next thing was to make a program that receives the information and shows it.
To program the interface, I used MIT App Inventor, this is an application developed by MIT, very intuitive and in graphic environment.
Programming is done by dragging blocks that are ready to connect to others only if the syntax is correct.

The first step is to create the graphic part of the application, the necessary objects are on the left side, they must be dragged and dropped on the central screen, which has the shape of a mobile device. On the right side is the property area, there you can change the attributes of the object that is selected in the central part.
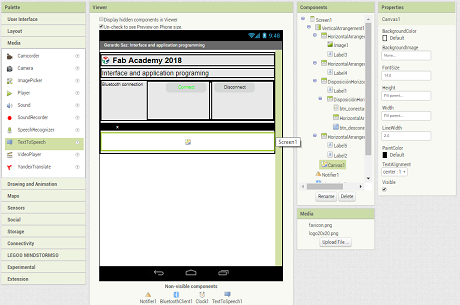
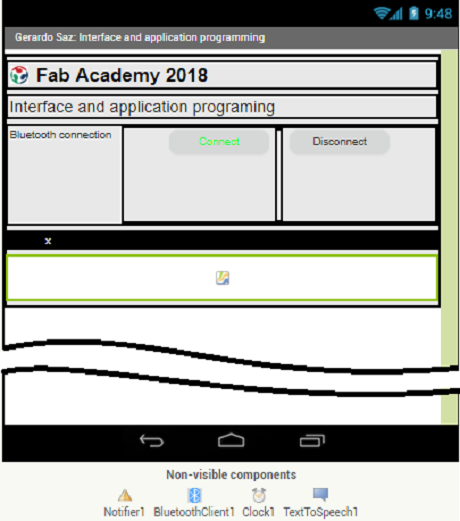
This is a view of my screen design. There are a couple of buttons, the first is to connect to the Bluetooth module and the second is to disconnect.
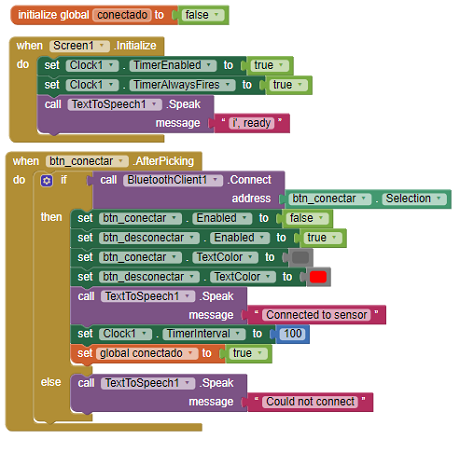
The first block is initialization, there I turn on the relog.
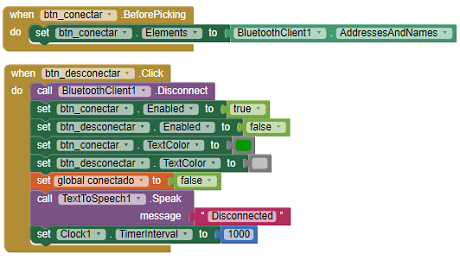
In the second, I defined that pressing the "Connect" button will display a list of Bluetooth devices that are available.
In the third block, I defined what happens when it connects.
In the second, I defined that pressing the "Connect" button will display a list of Bluetooth devices that are available.
In the third block, I defined what happens when it connects.
In this block, I defined what happens when it is disconnected.
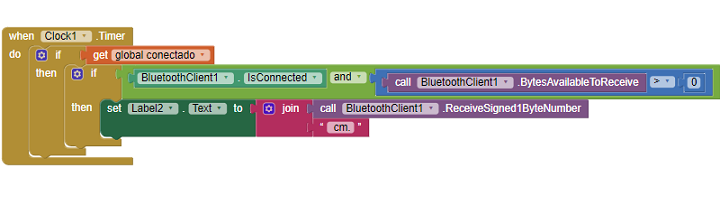
In this block I defined that every time the time of the relog is fulfilled, the data received by the Bluetooth will be shown.
4. Funcionality test.
In this video you can see how the application works and how it receives information from the sensor via Bluetooth.
File to download
Application Interface (MIT App Inventor)
Application Interface (MIT App Inventor)