This week we have learned how we could 'talk' with an Arduino board trough laptop's USB port. There are many languages and softwares to use this week and I confused with which should I start!. Processing was my first decision.
Processing ![]() is a software which we could design a Graphical User Interface GUI application and connect them to control Arduino and other MCU throw serial.
is a software which we could design a Graphical User Interface GUI application and connect them to control Arduino and other MCU throw serial.
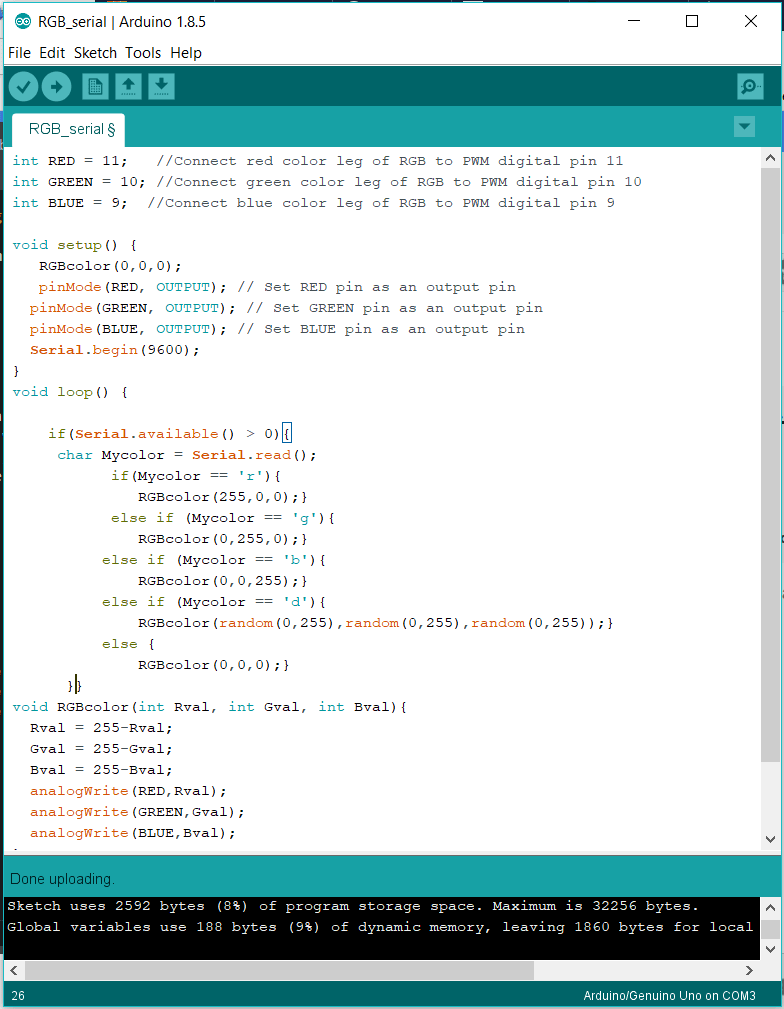
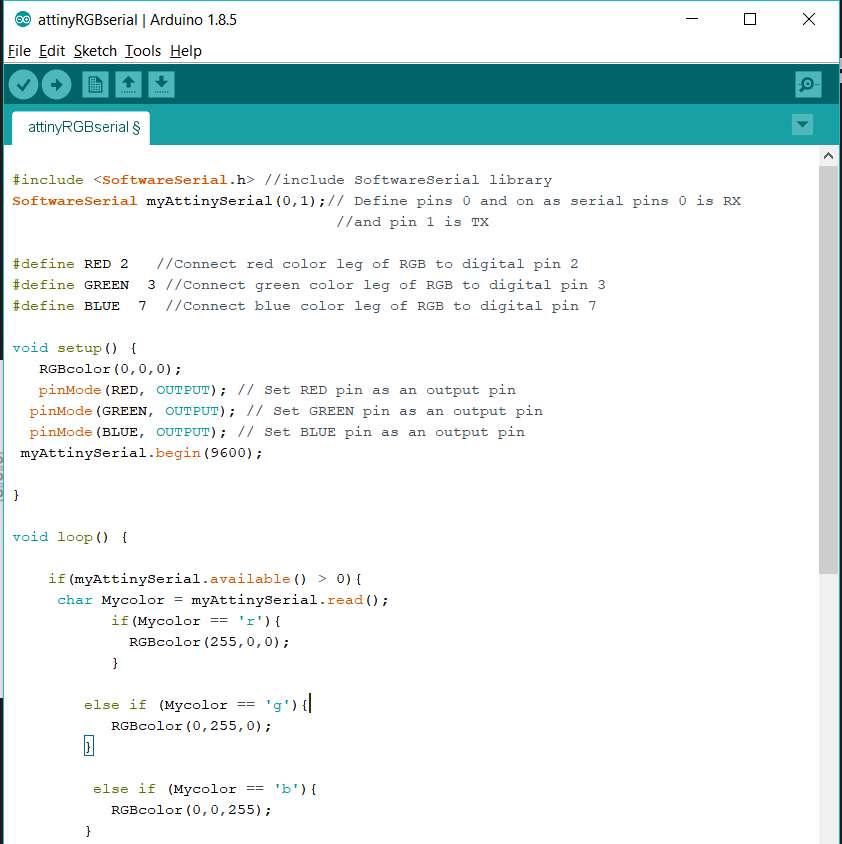
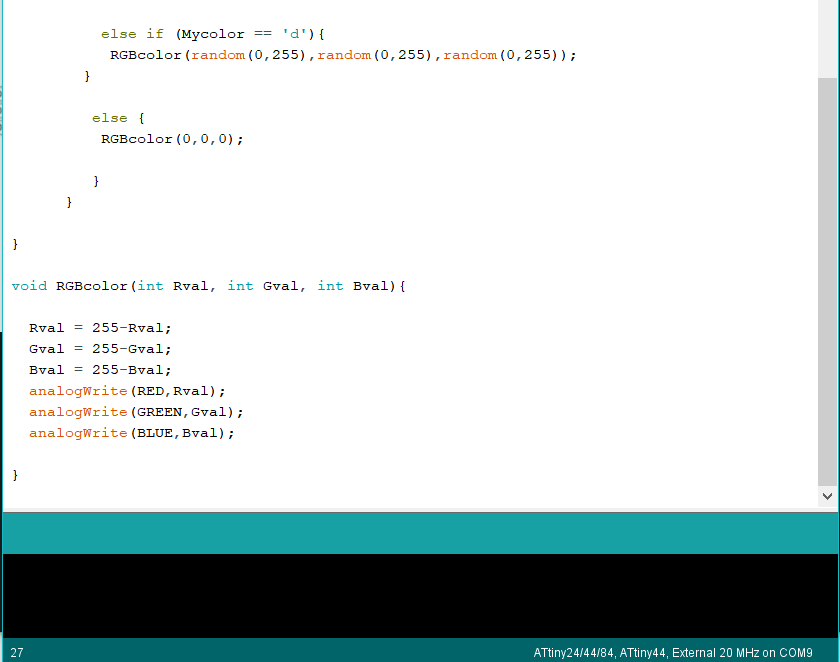
Acctully before starting with Processing I should have an Arduino code deals with serial monitor successfuly. I used RGB LED in OUTPUT week so I have a good idea how every thing works so I just wrote a could which lights in red color when I just type 'r' in serial monitor window and send it to the Arduino also will lights in green, blue and in random colors.
This is my code
The previous code in exactly the same code I controlled using Processing software. At the beginning, it was somehow hard for me to deal with this software. Firstly I added the Serial library to be able to take with Arduino through serial port.
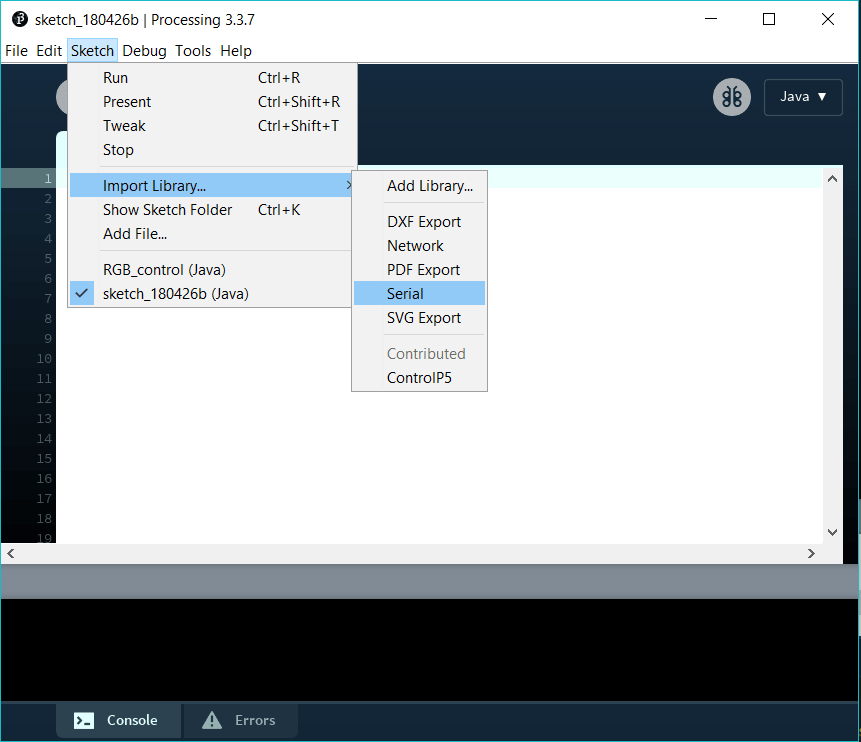
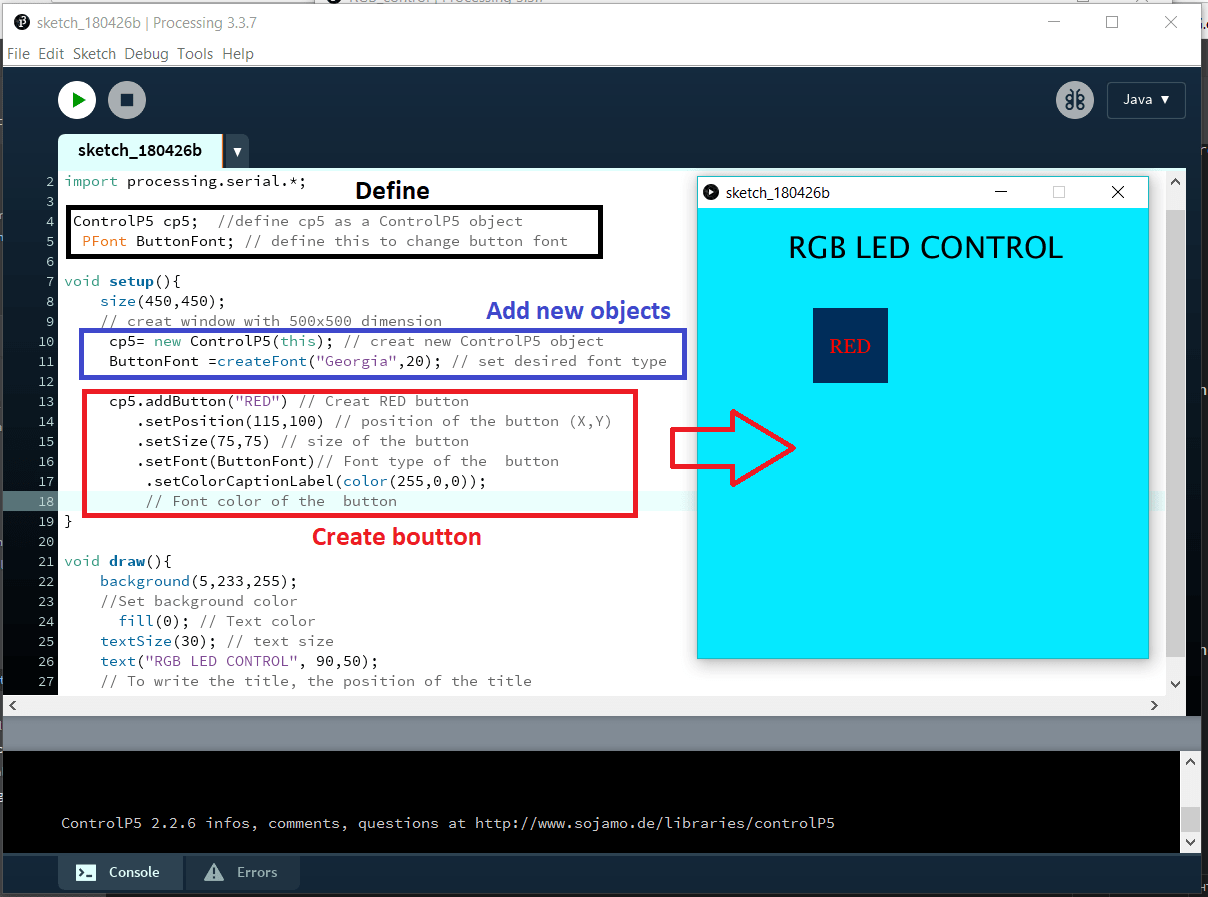
I decided to use buttons in my interfacing screen so after a little search I found that I should add a library called controlP5. I downloaded it from HERE> After that I unzipped it, then move the folder to libraries folder in processing download location. Then the library will appear in the list shown:
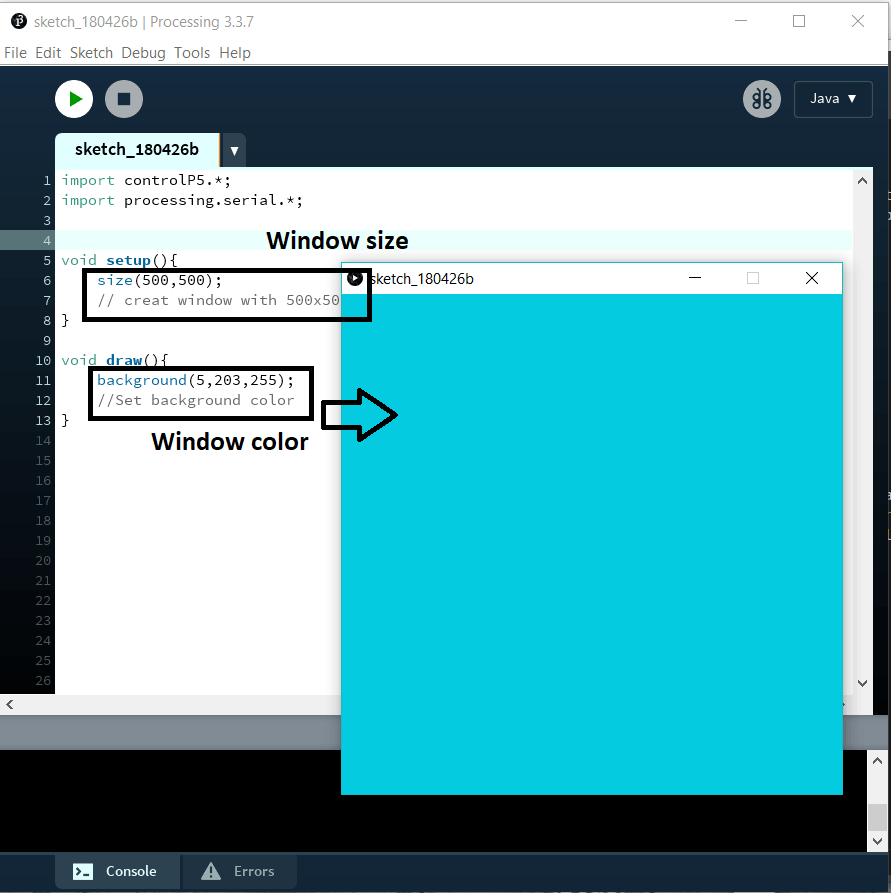
After adding libraries I start playing with simple instructions and see the effect of them such as shown:
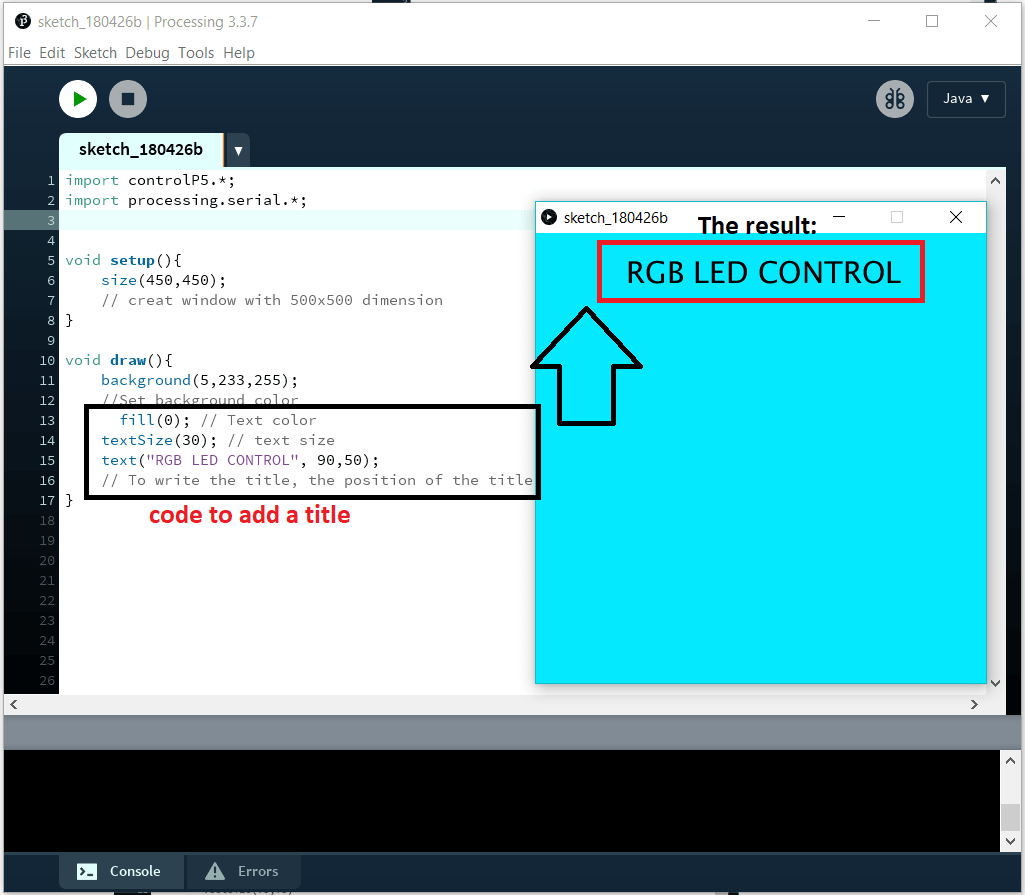
Finaly, I founded my favorite color then I added a title and control its font, color and size as shown:
Now add a first button as shown:
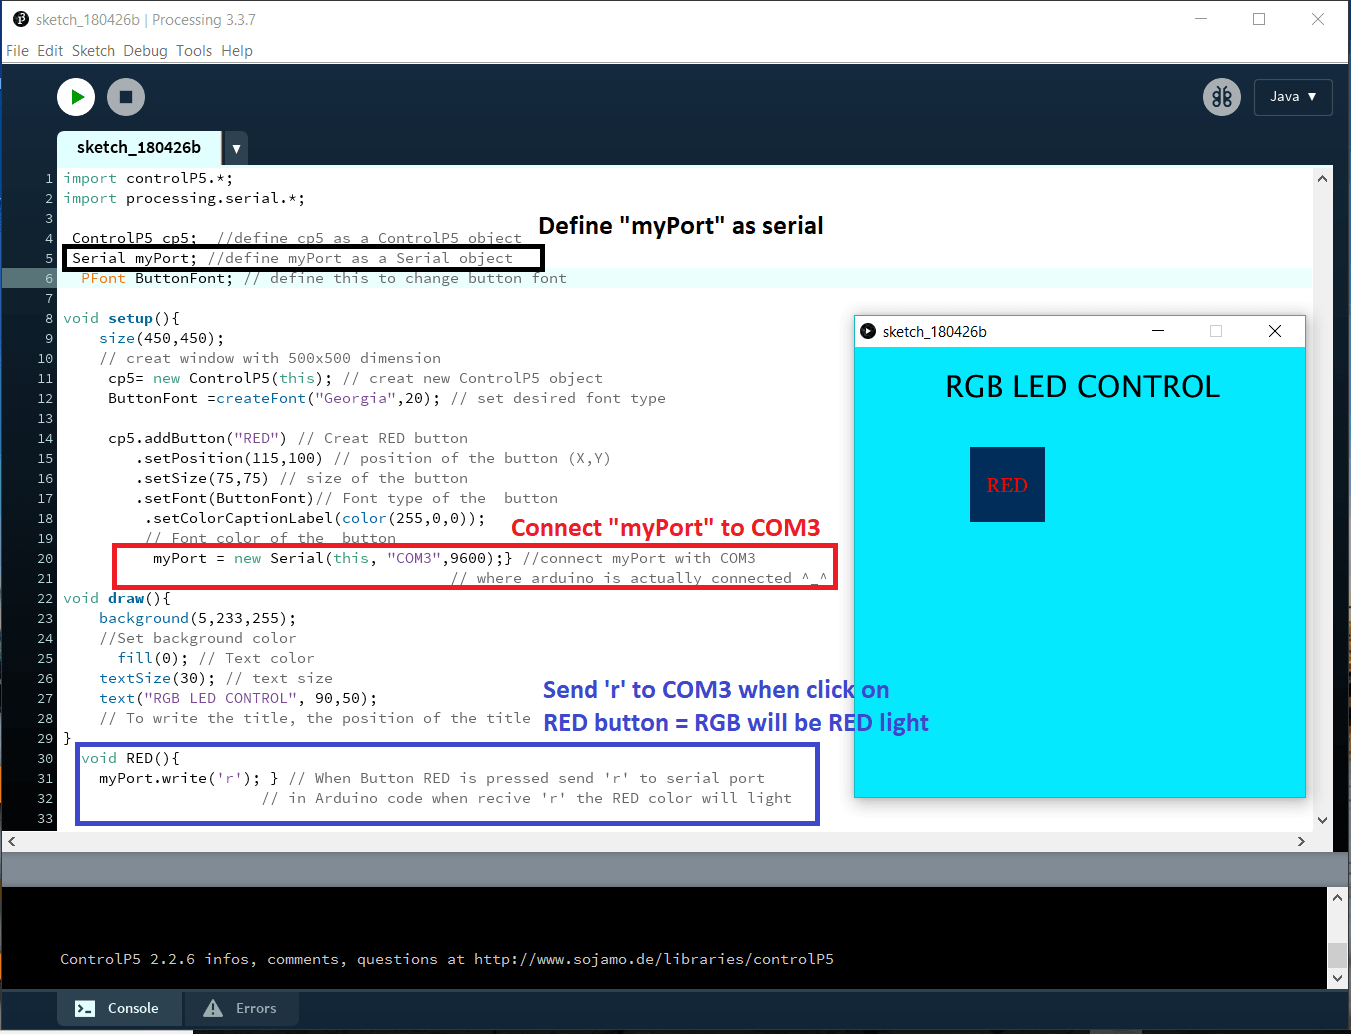
Now write code to connect the RED button with COM3 after connecting the Arduino to the laptop and uploading the previous mentioned code to it.
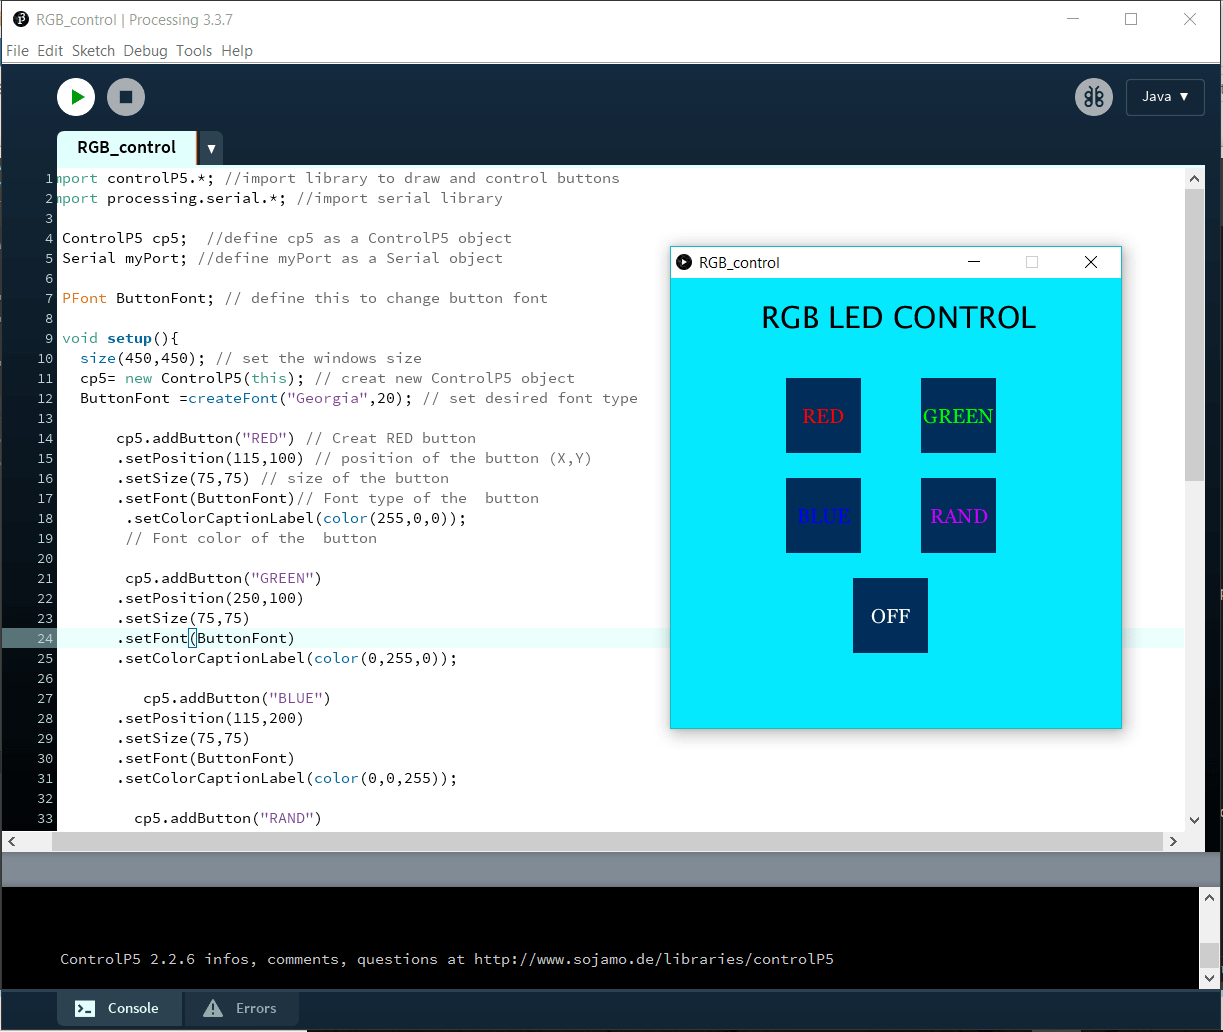
I repeated the same instructions for the rest buttons. This how my final GUI window and code looks like
Thanks to GOD everything is working perfectly. Watch the video
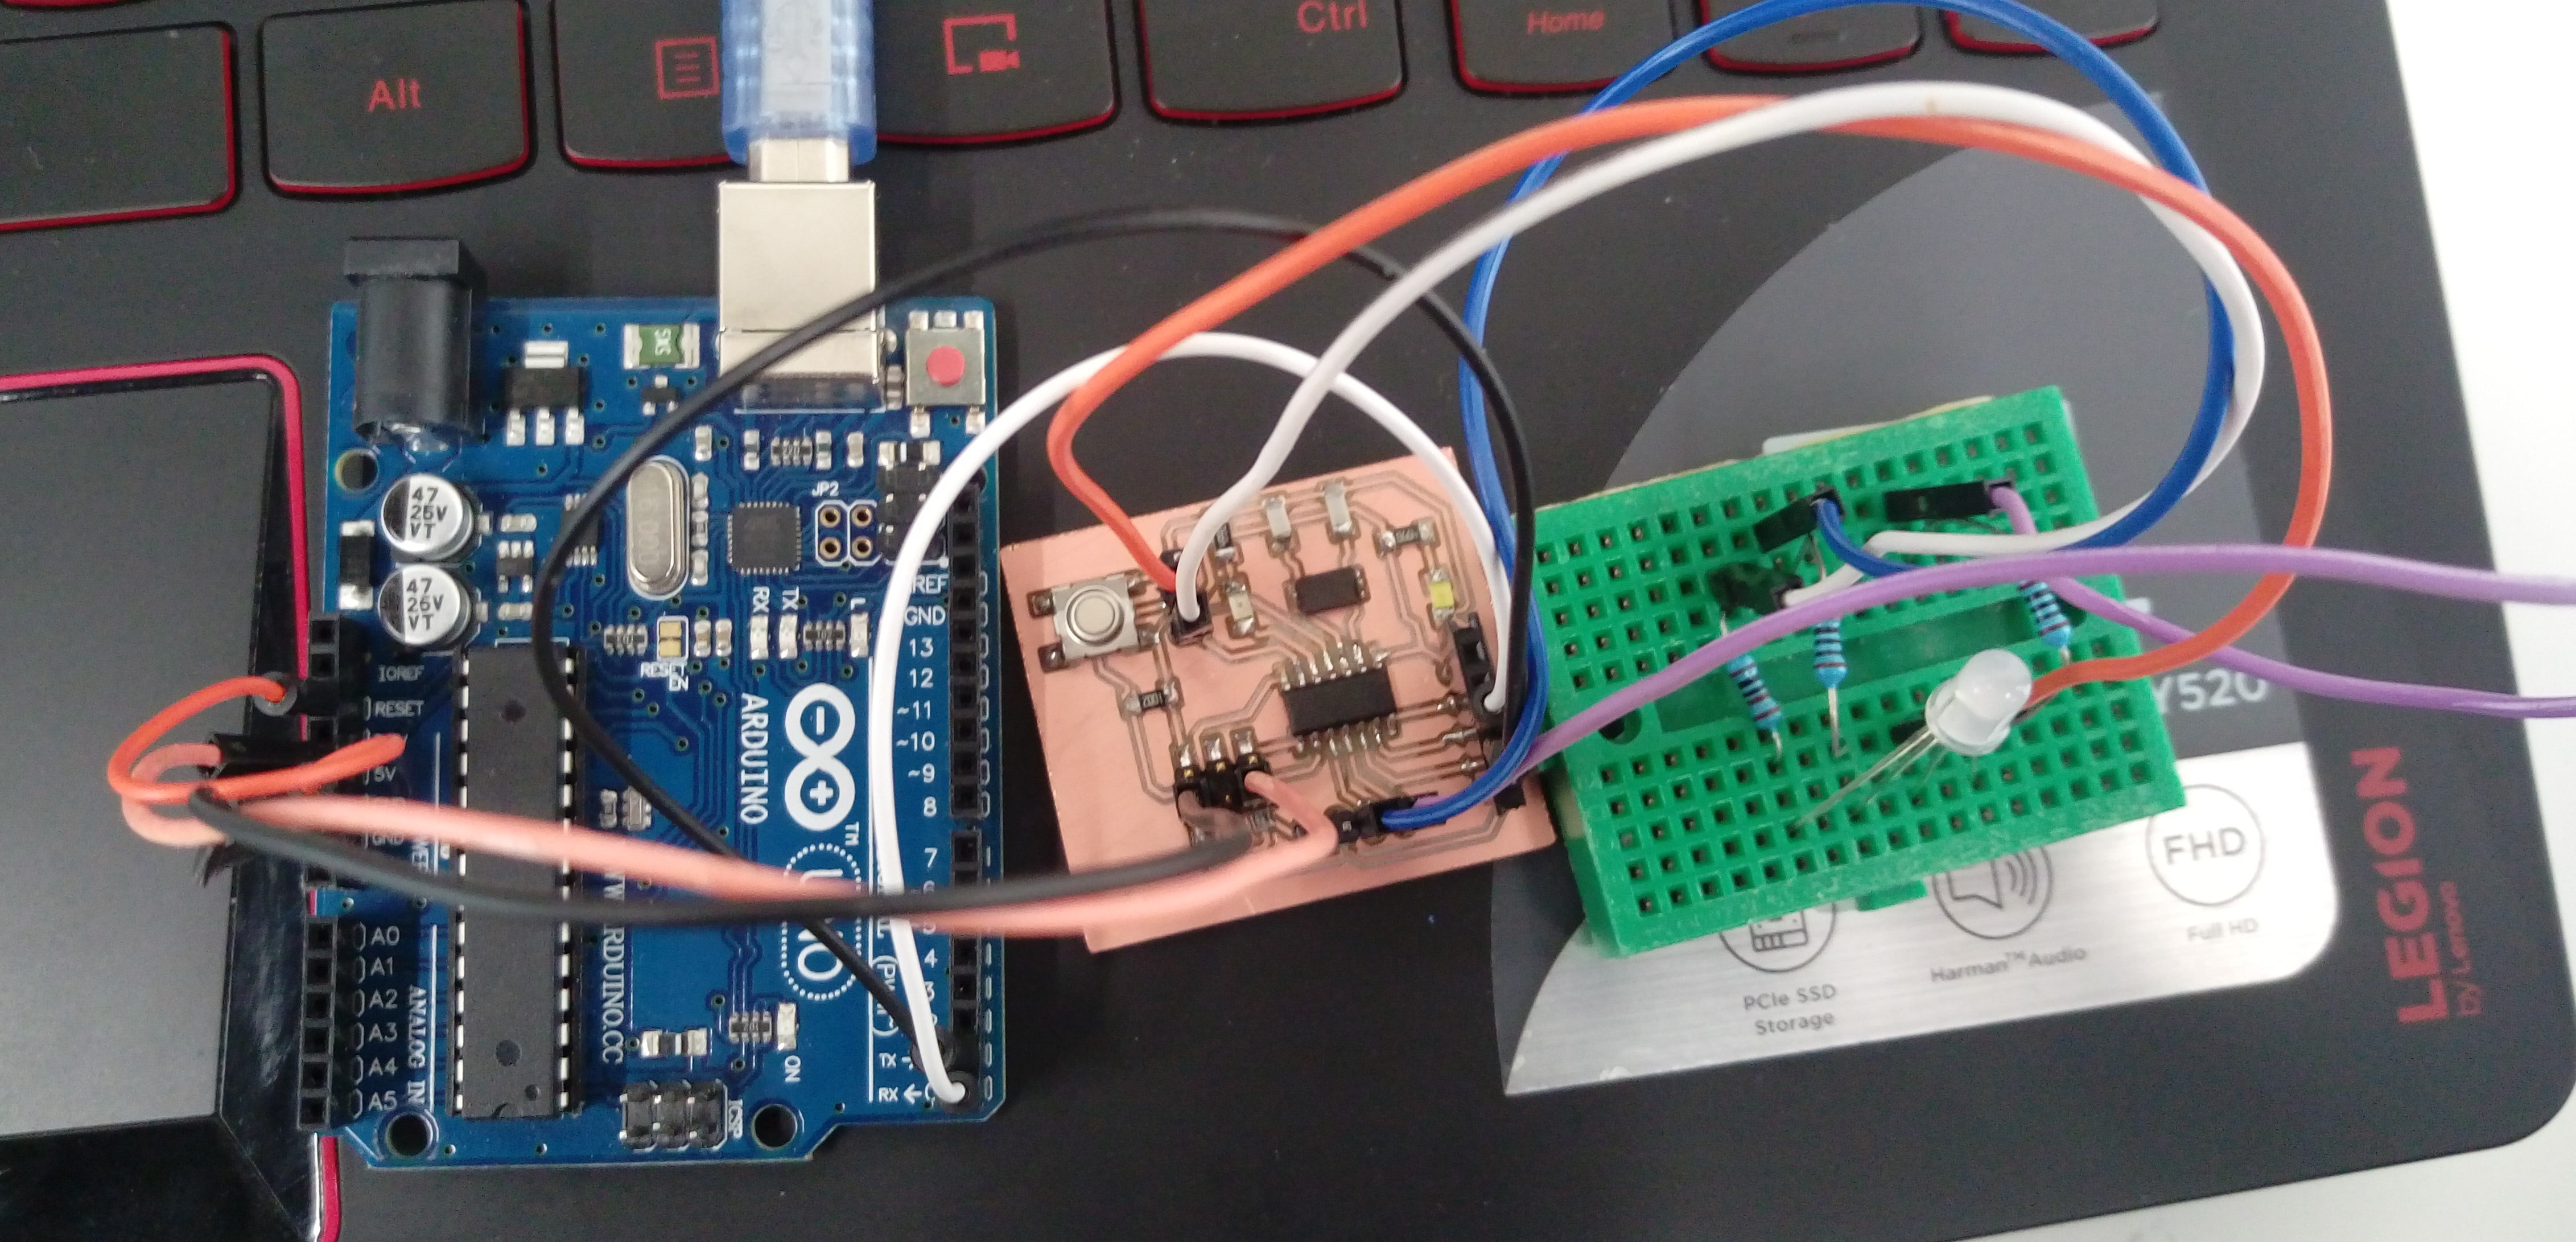
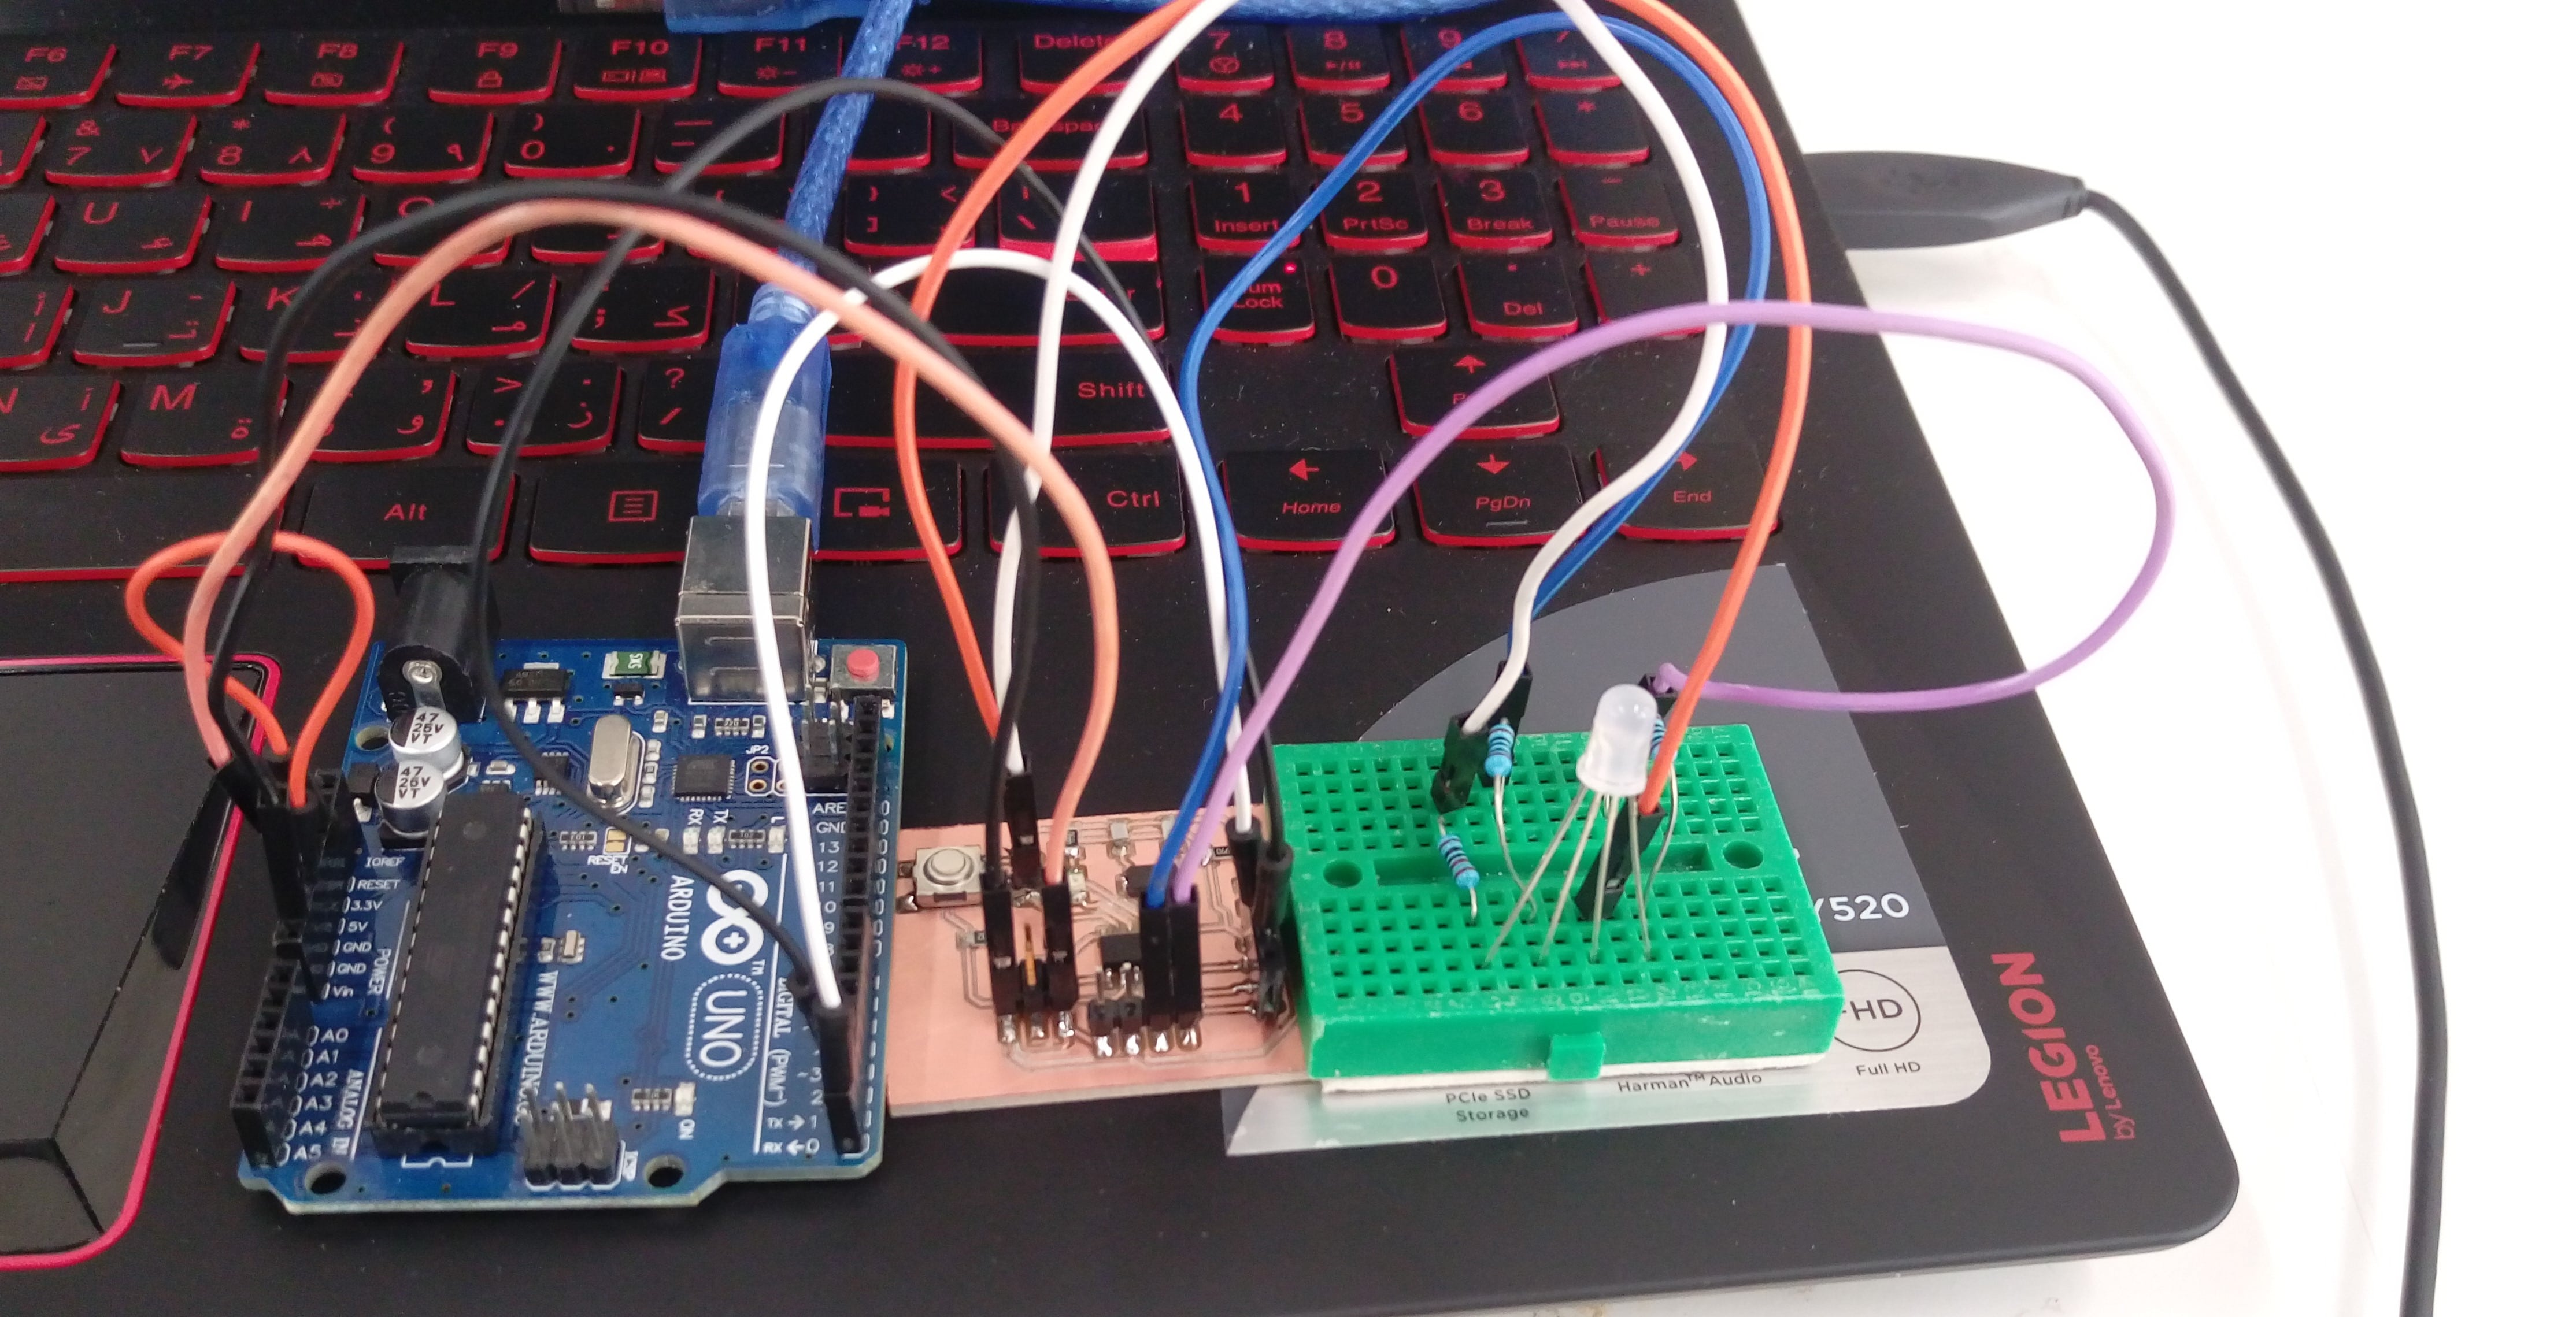
After I make sure everything was working with the commercial Arduino board, Now I should work with the board I designed in Input devices Week. This board had ATtiny44 microcntroller. Fortunately, No need for any change in Processing code, but with Arduino code when I tried to use it, I discovered that ATtiny didn't have any hardware serial pin on it!! so it gives an error while compiling the code. To solve that problem I used a software serial library and defined pin 0 , pin 1 as RX and TX pins. To connect RGB LED to my board I used the digital pin I designed for servo and Ultrasonic sensor. This is the connection :
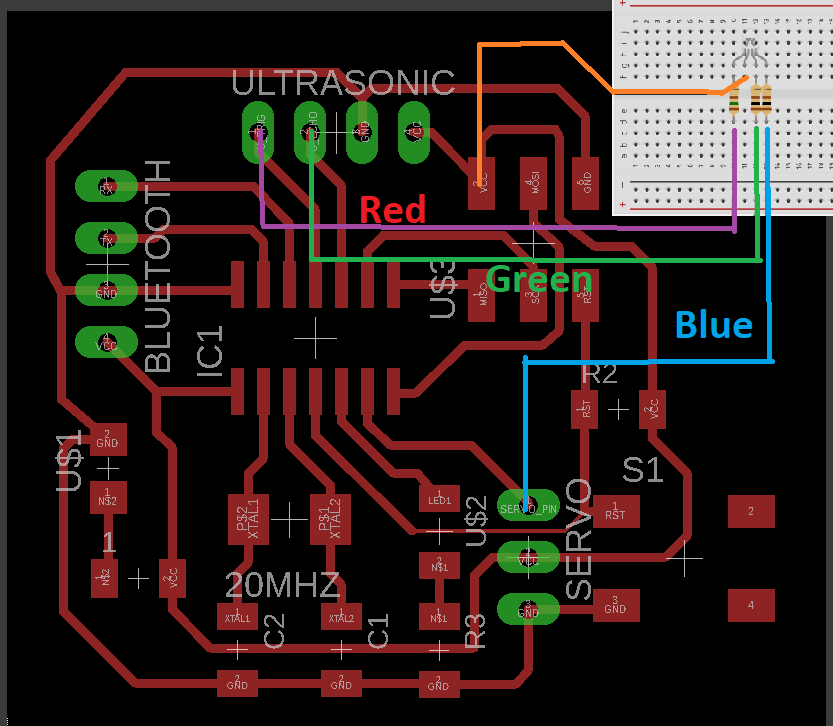
But also I had another problem how to connect my board to the computer USB COM to send data to the board?. I solved that problem by using Arduino UNO board as USB to TTL convertor through this connection :
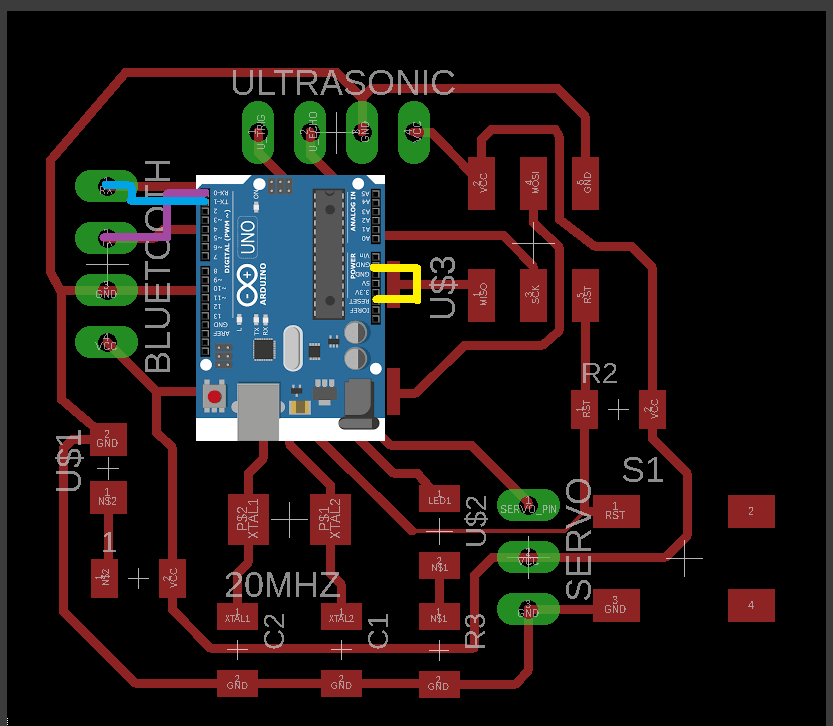
This how overall wireing connction looks like:
This is the modified code after adding software serial instead of serial and changing pin numbers:
The results in this video:
I was in my room and I haven't any wireless module (WIFI or BLUETOOTH) to connect it to Arduino in order to be able to control it with my phone. So I searched for an application let me use USB serial port. Hopefully I found Blynk
![]() which is a very useful and cute Android application through it, I could control Arduino and many other MCU using my smart phone WITH and WITHOUT using wireless modules.
which is a very useful and cute Android application through it, I could control Arduino and many other MCU using my smart phone WITH and WITHOUT using wireless modules.
Firstly I carefully followed this video to connect my Arduino with my phone with USB Without any extra shields. I started by downloading the App freely from Play Store.
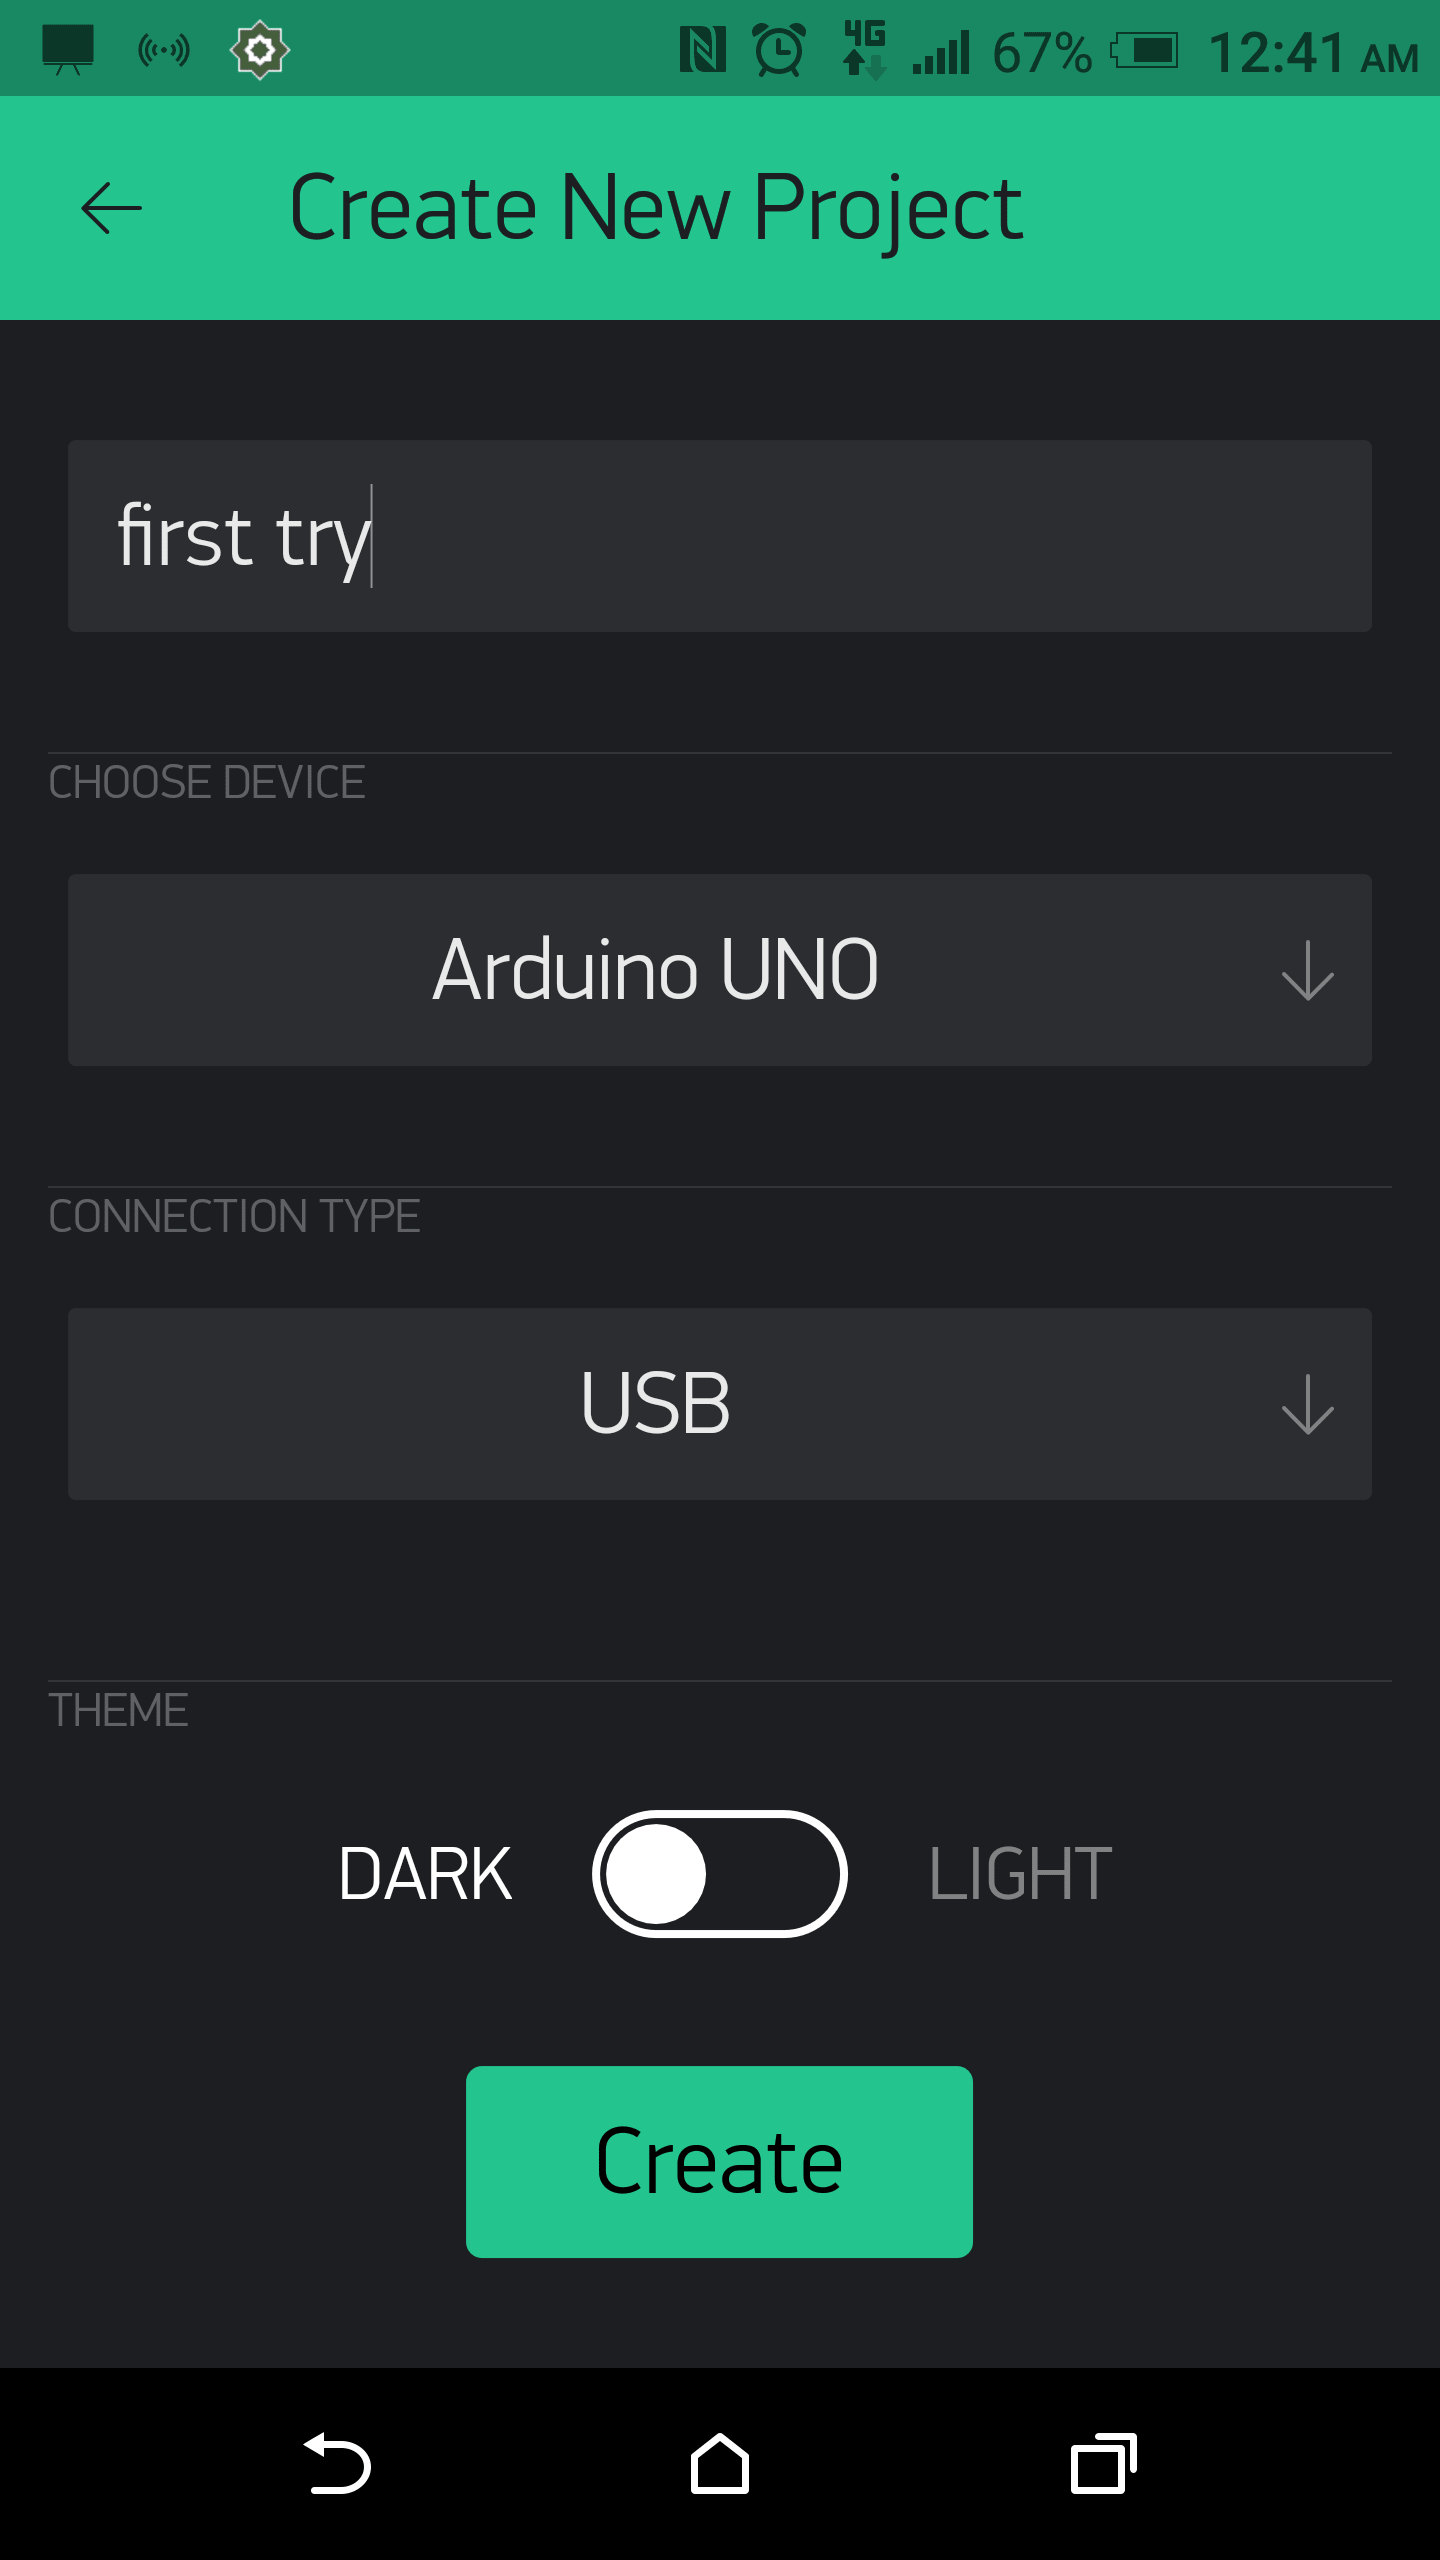
To add a new project I asked to choose my board and the connection type I selected them as shown:
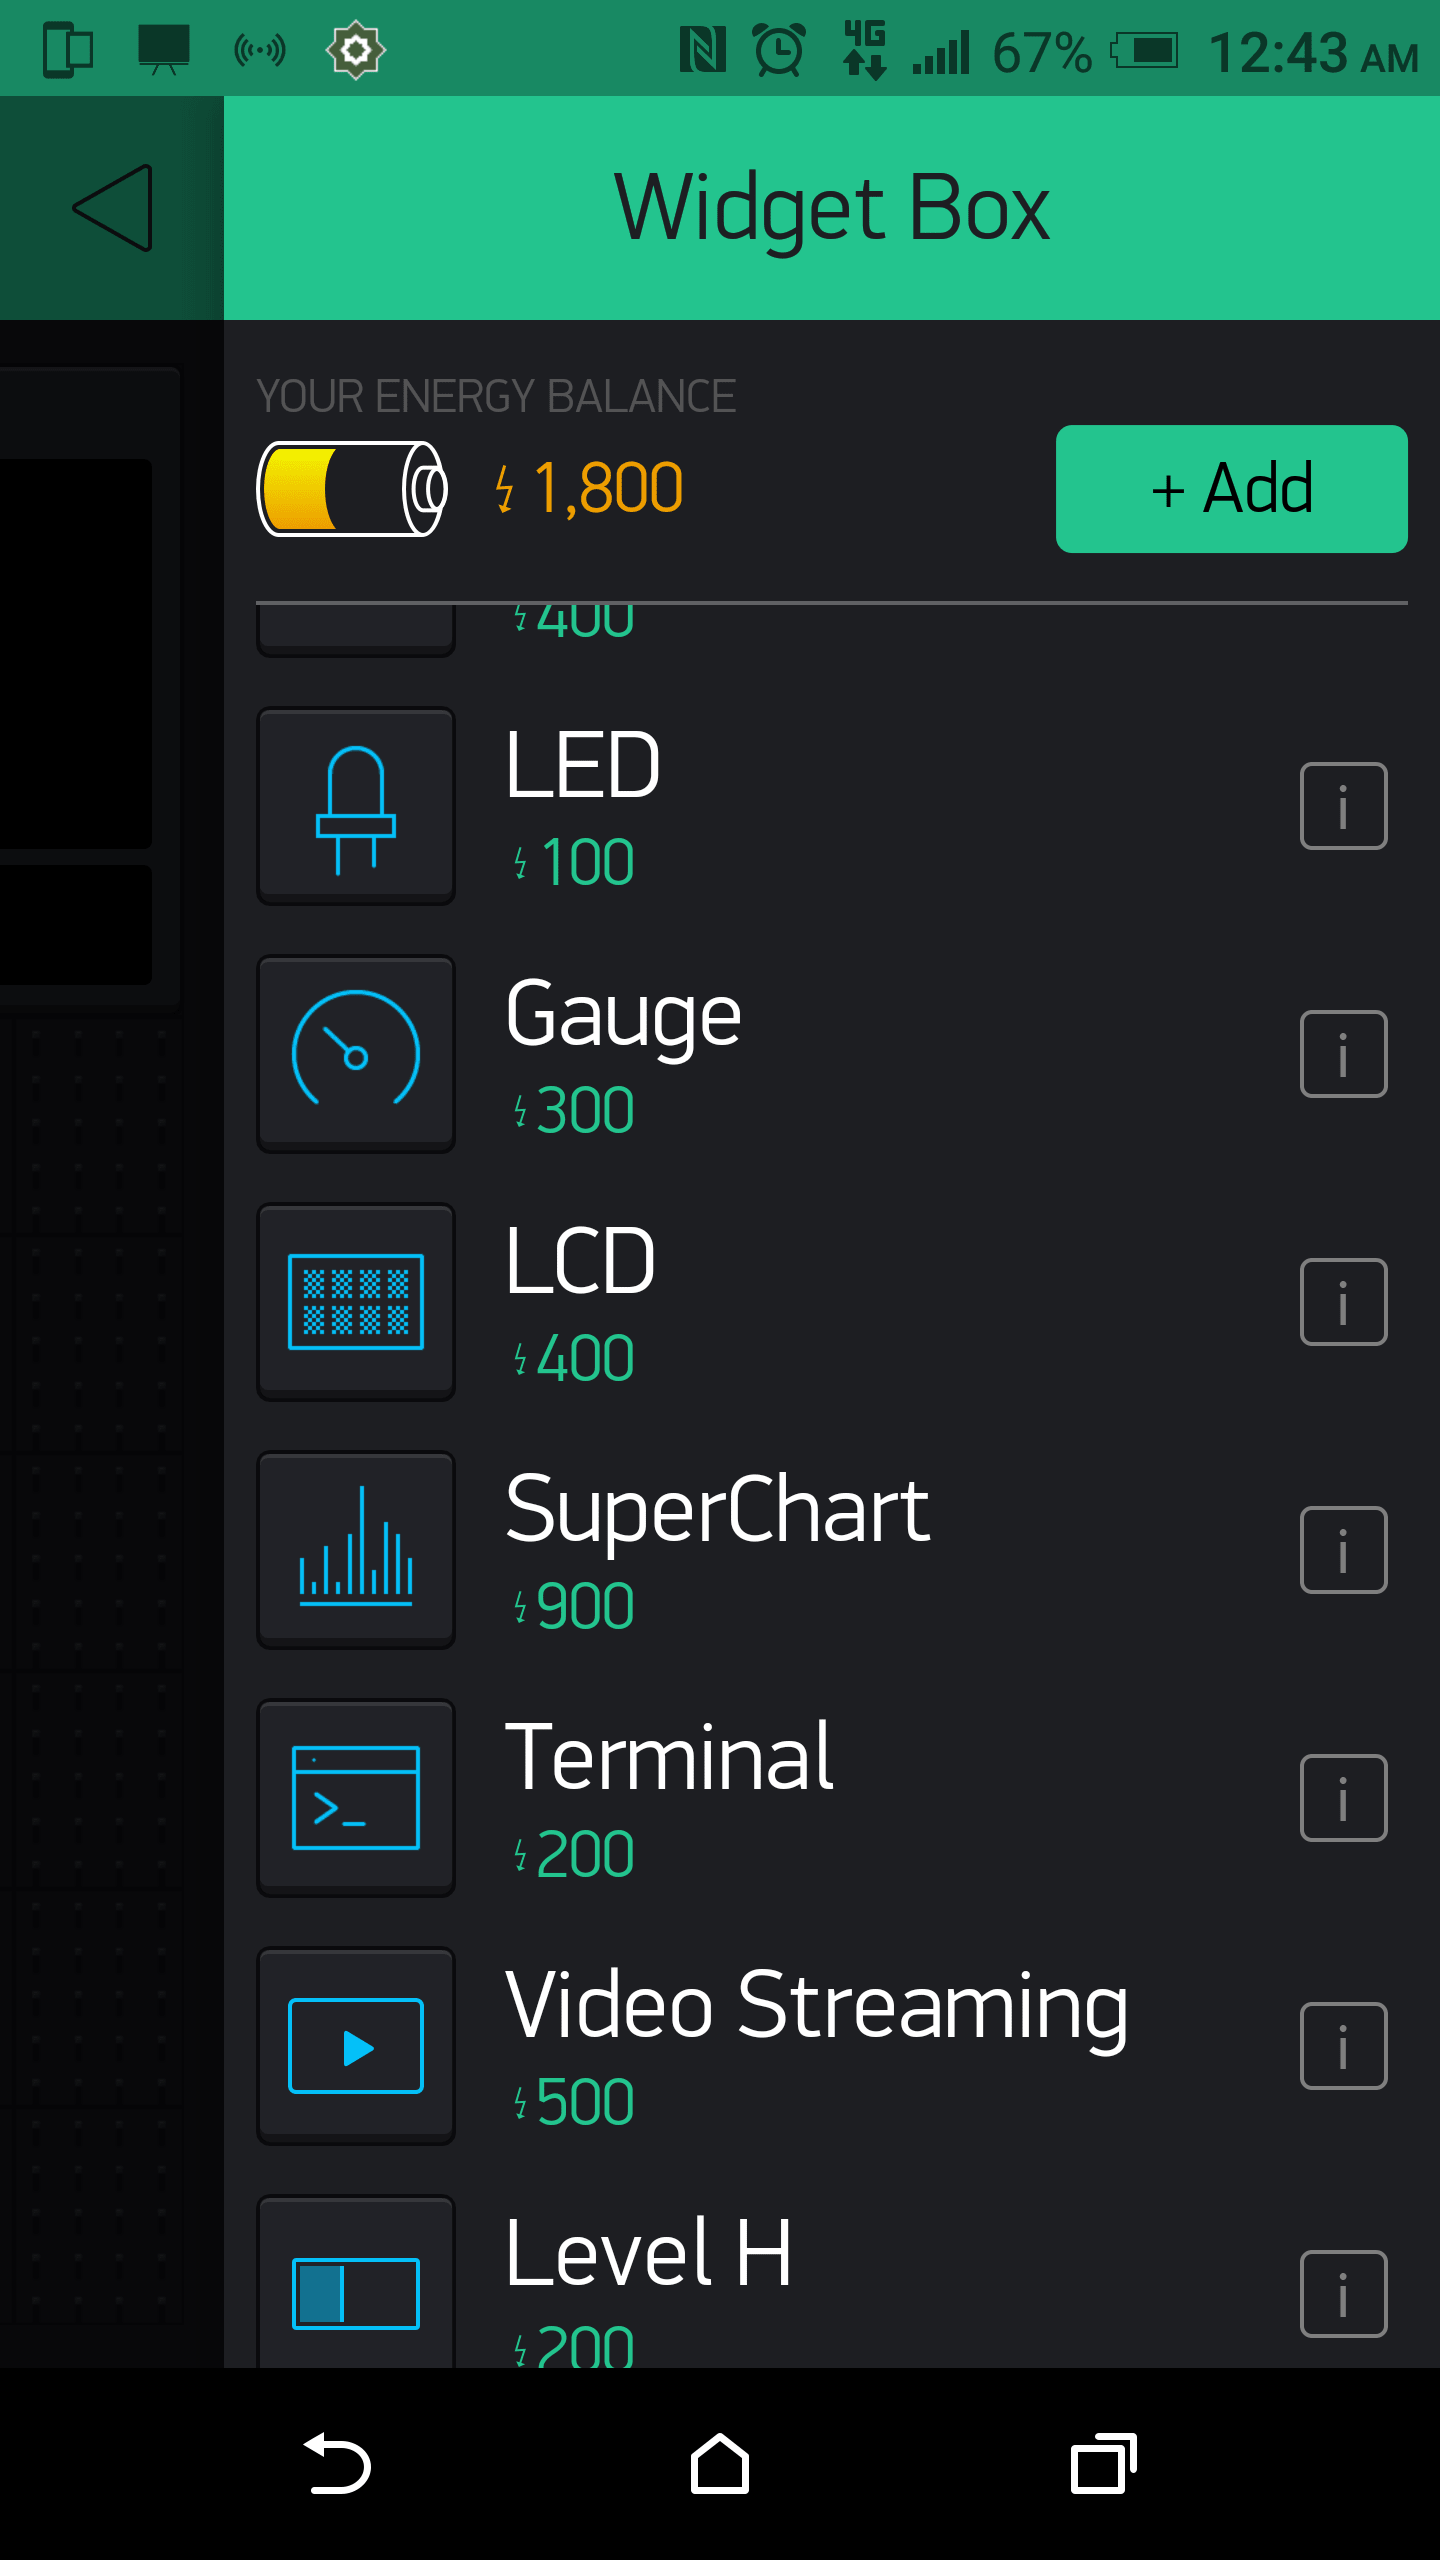
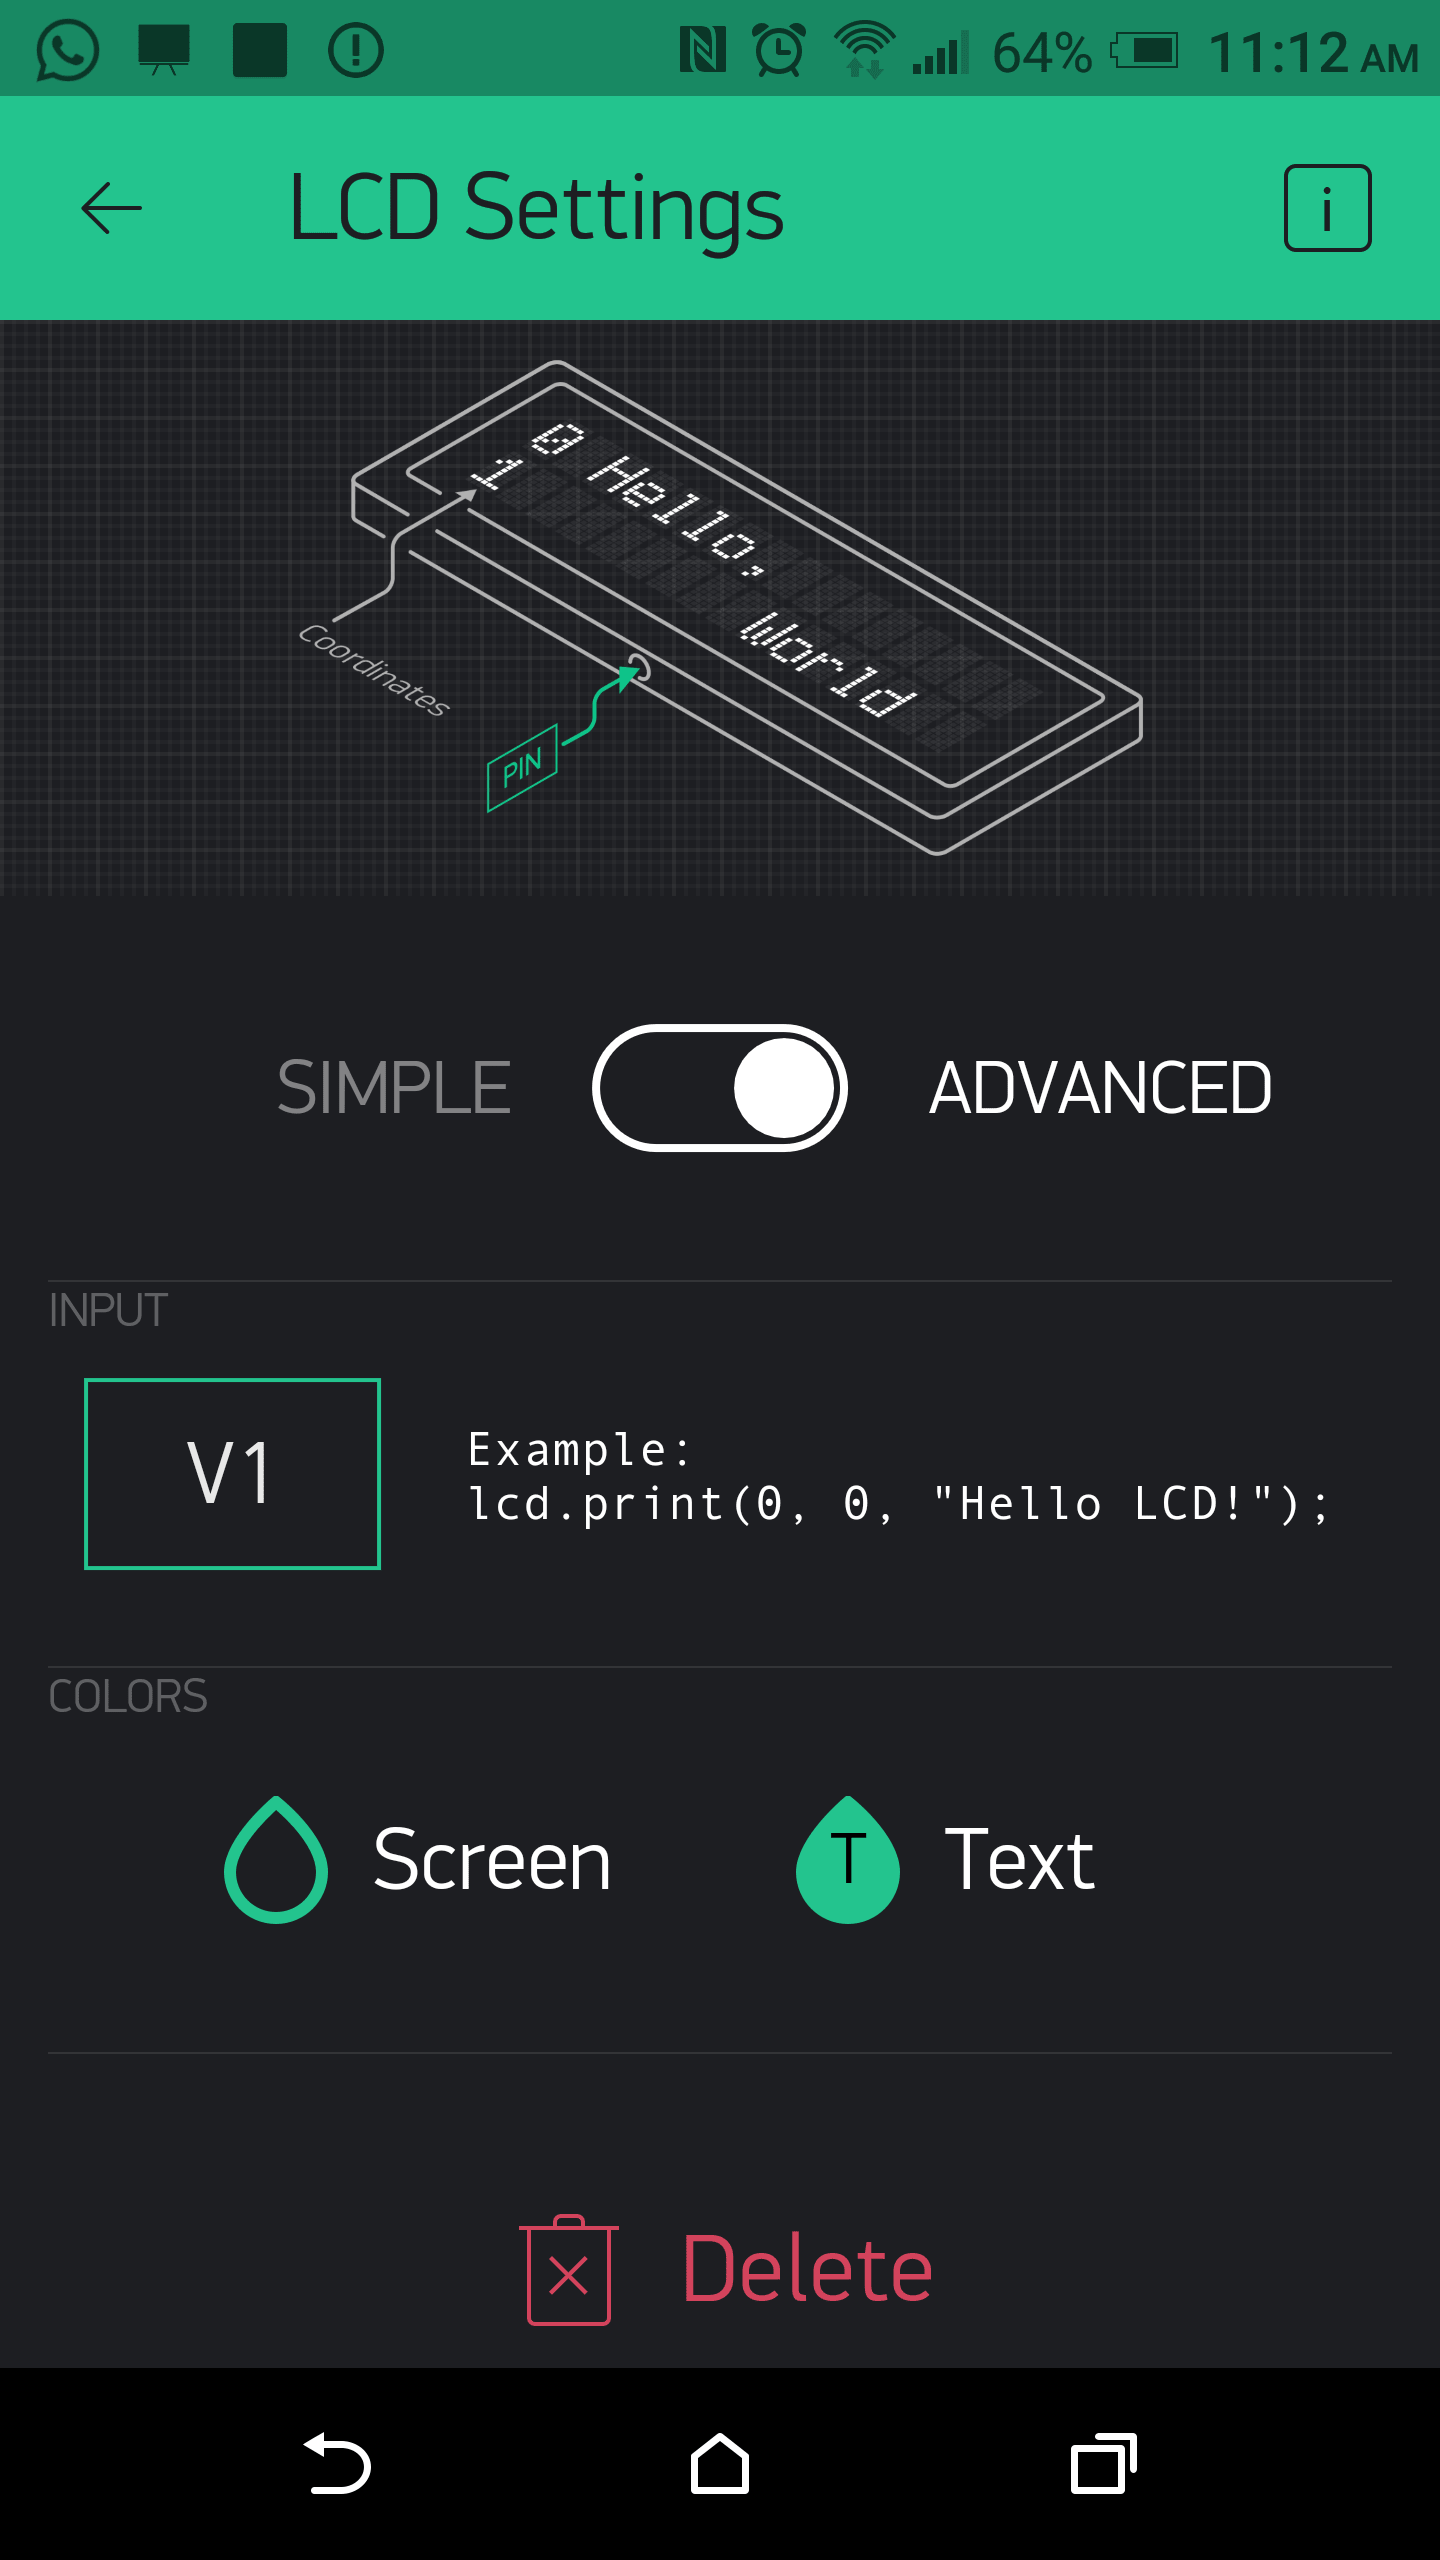
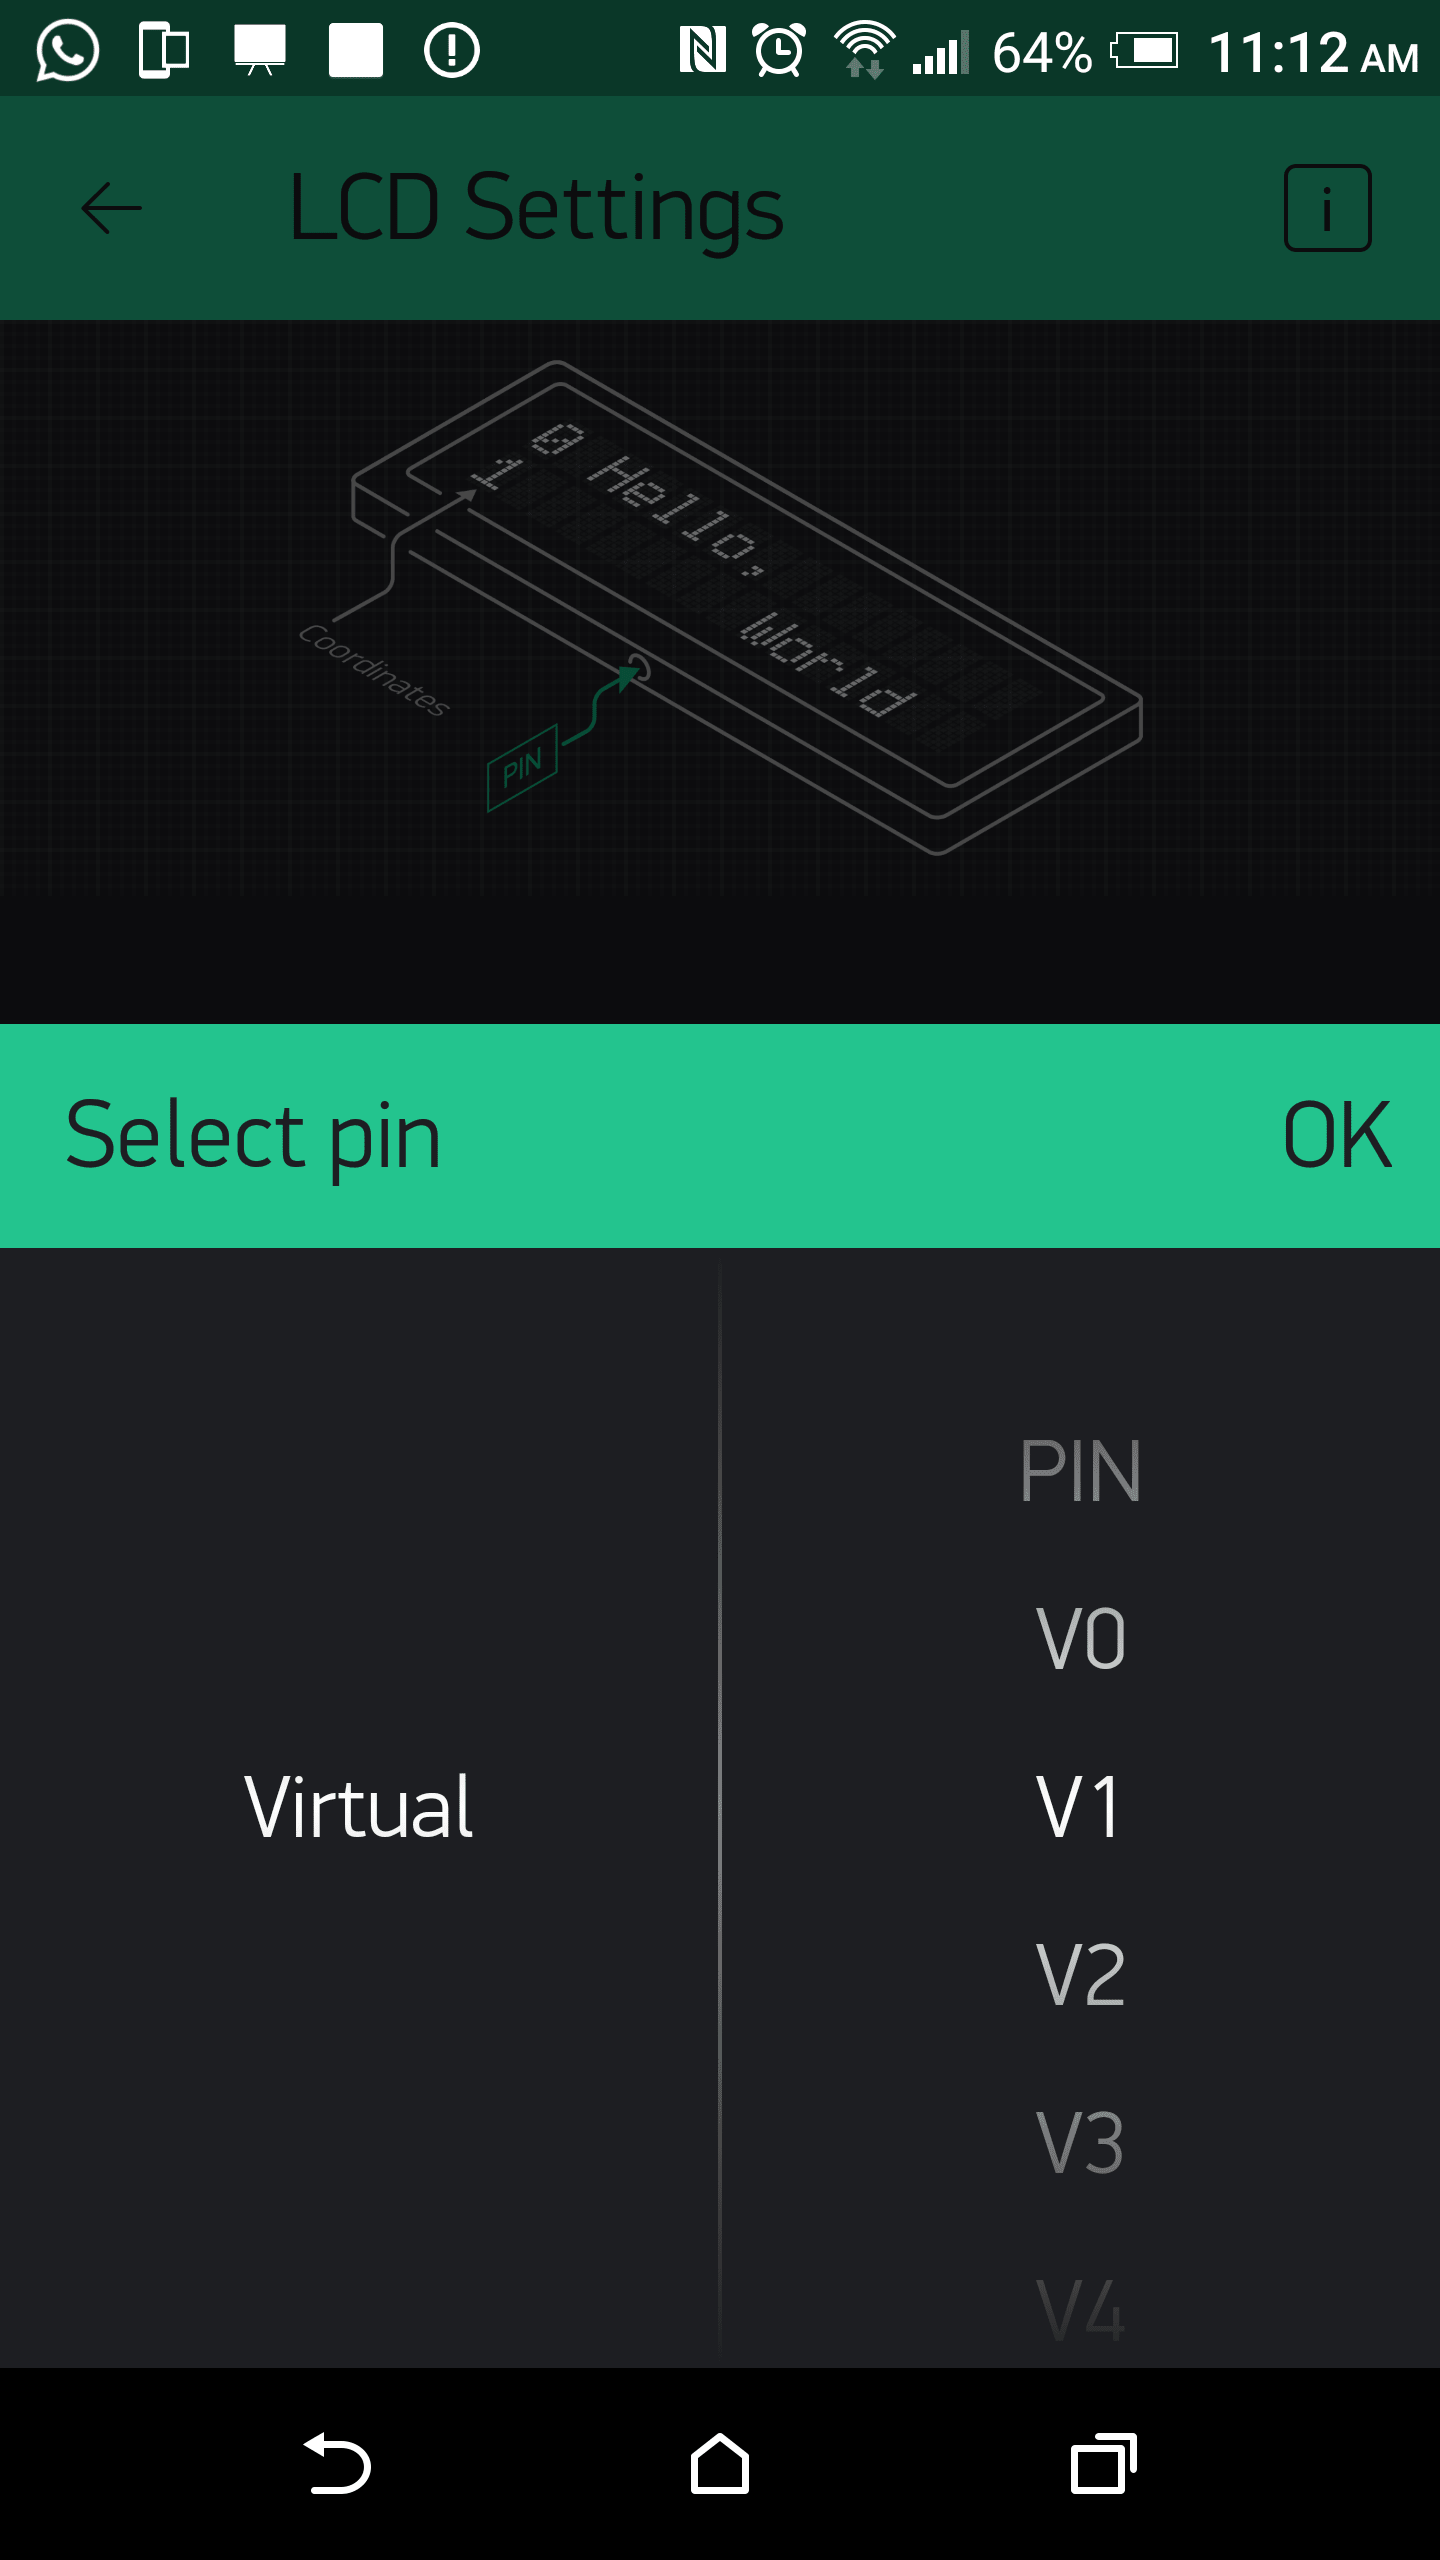
Then I have a list of components. Firstly I tried with a LED and connected it successfully and controlled it with my phone. To not repeat the procedure I will just document my work with Ultrasonic sensor. I chose the LCD to display the distance measurement. Then I selected the mode to control it and also the pin connect it (it is a virtual pin I will use it in the code to send data to serial port). This is the whole LCD settings
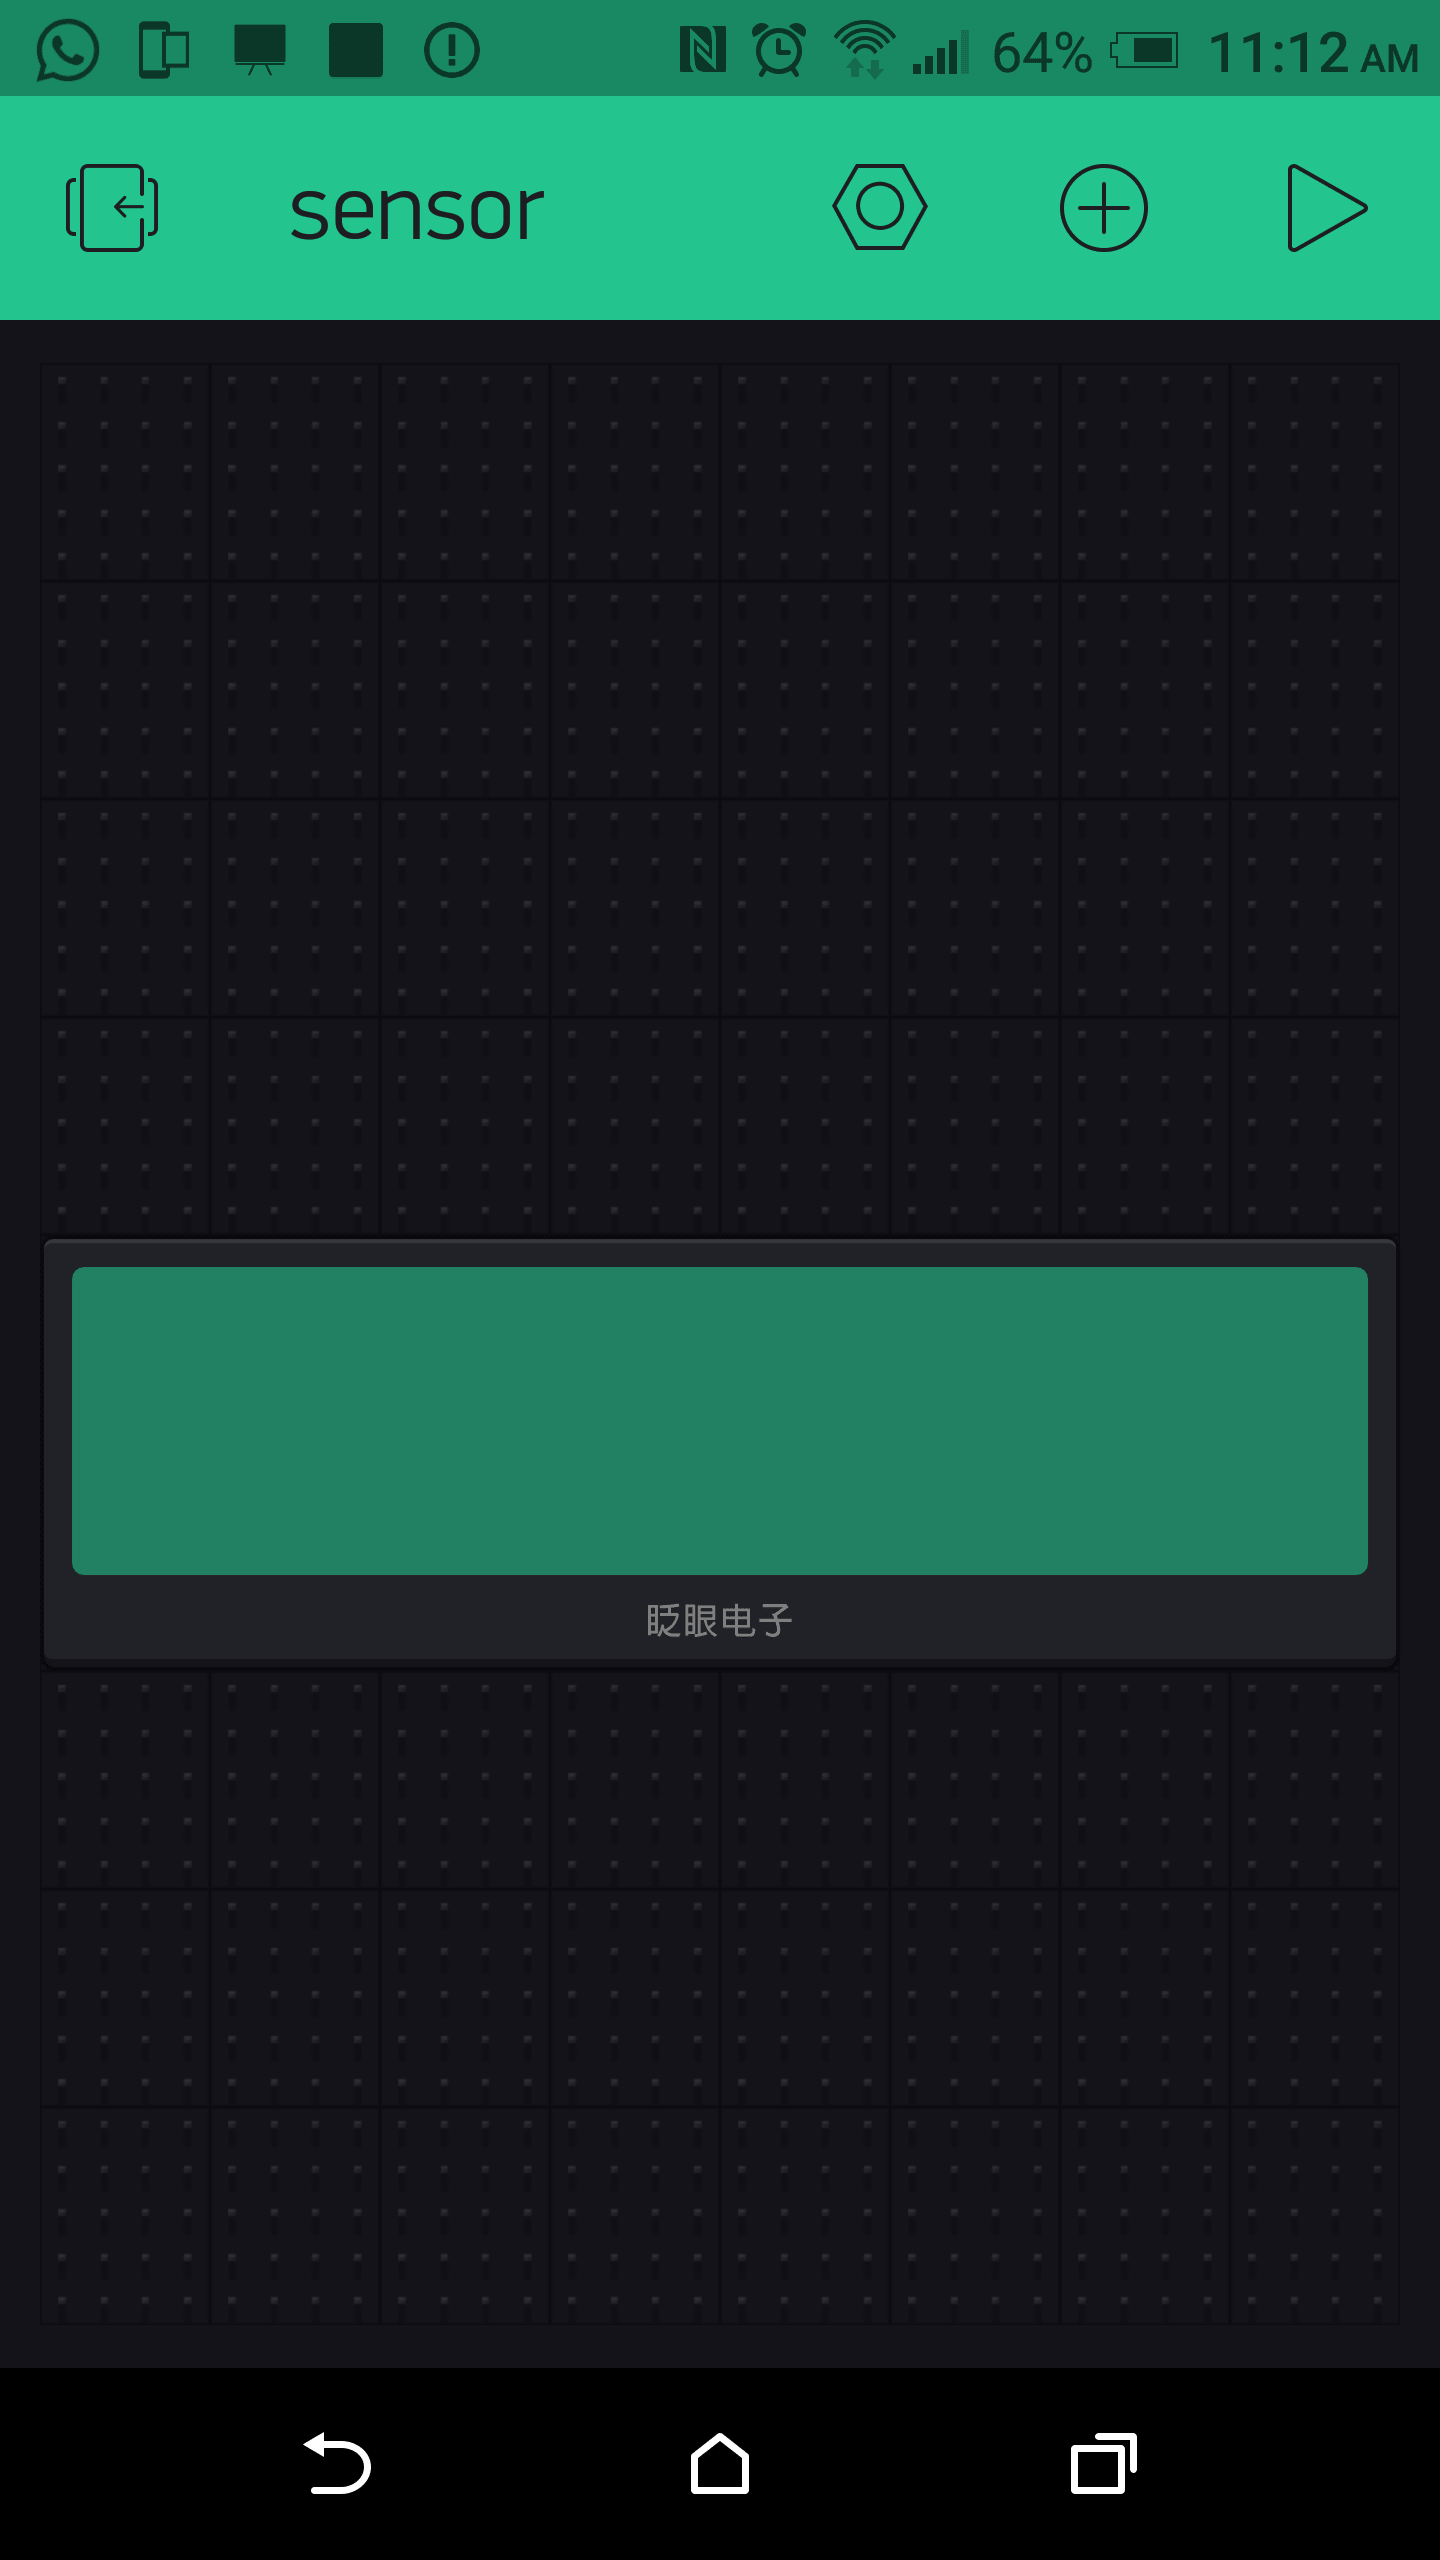
The is the final result after finishing at my phone!. Nothing alive ! Nothing happens !!.
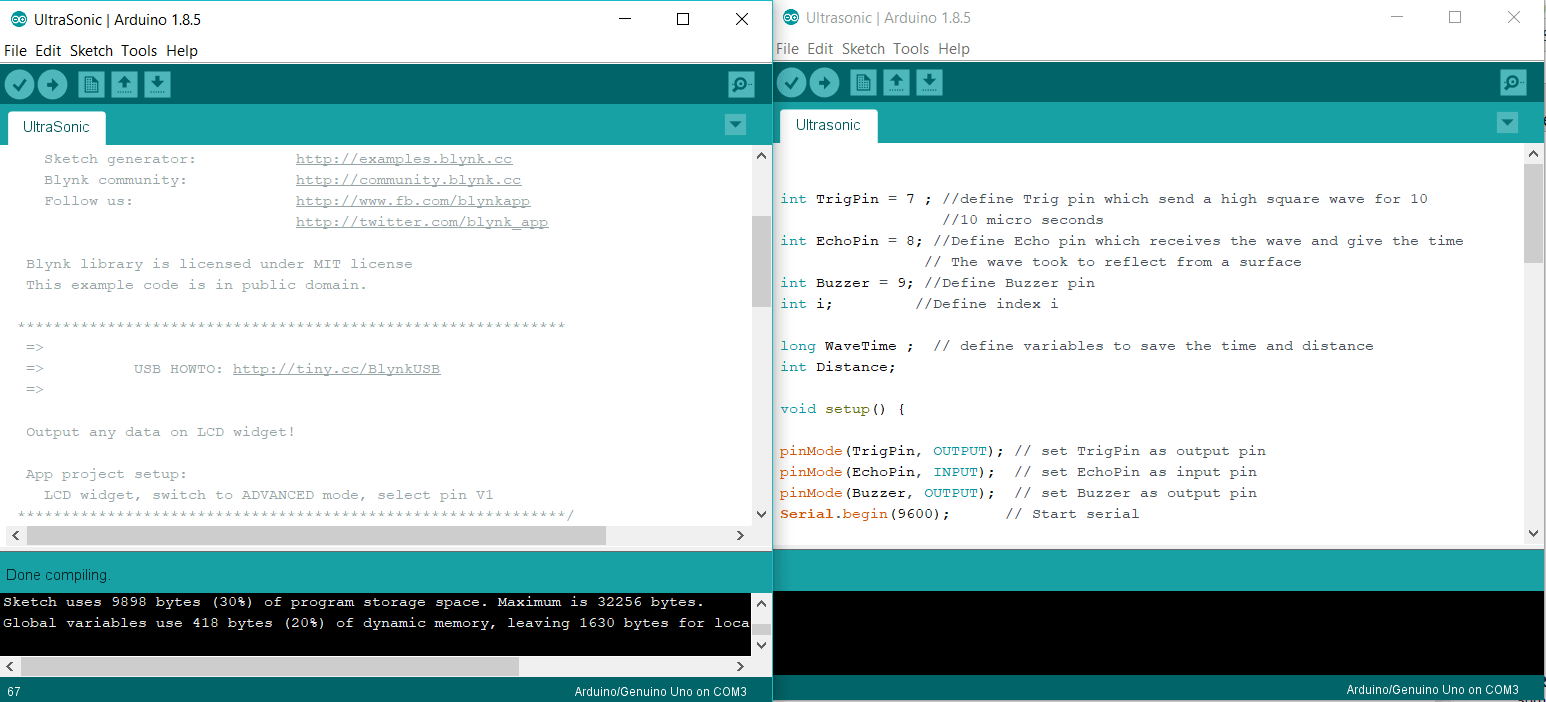
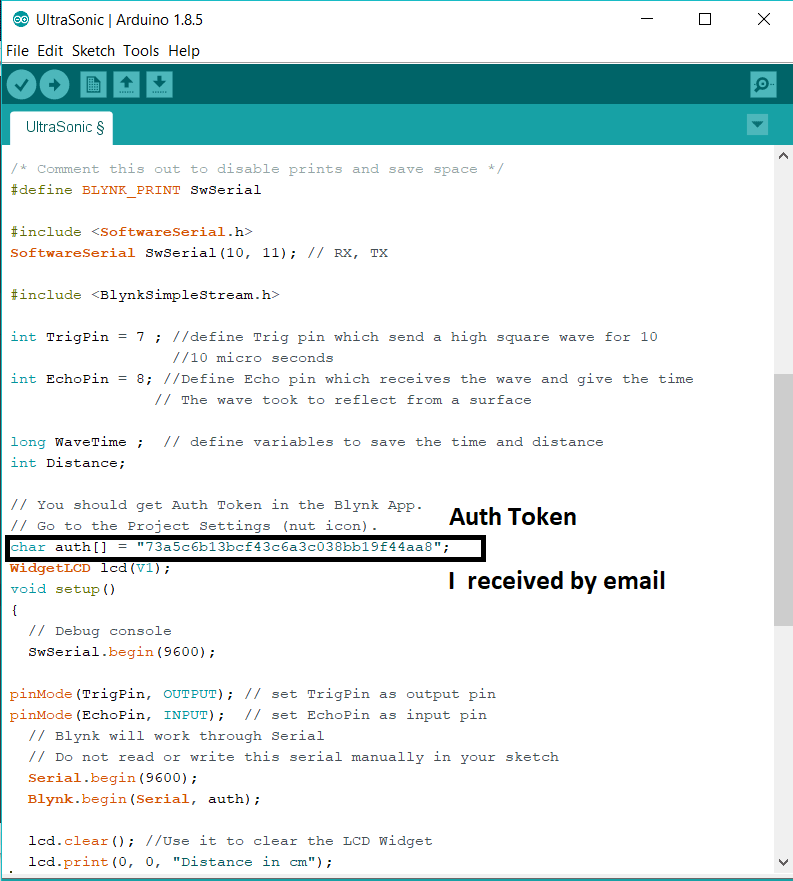
After creating my new project I received an email with a code called Auth Token I will use it later. Now I should move to Arduino settings. First, I downloaded Blynk library from HERE unzipped the folder and added it to Arduino libraries folder. After that I visit This site to find the example code which will control the project on my phone. This is the code from the website.
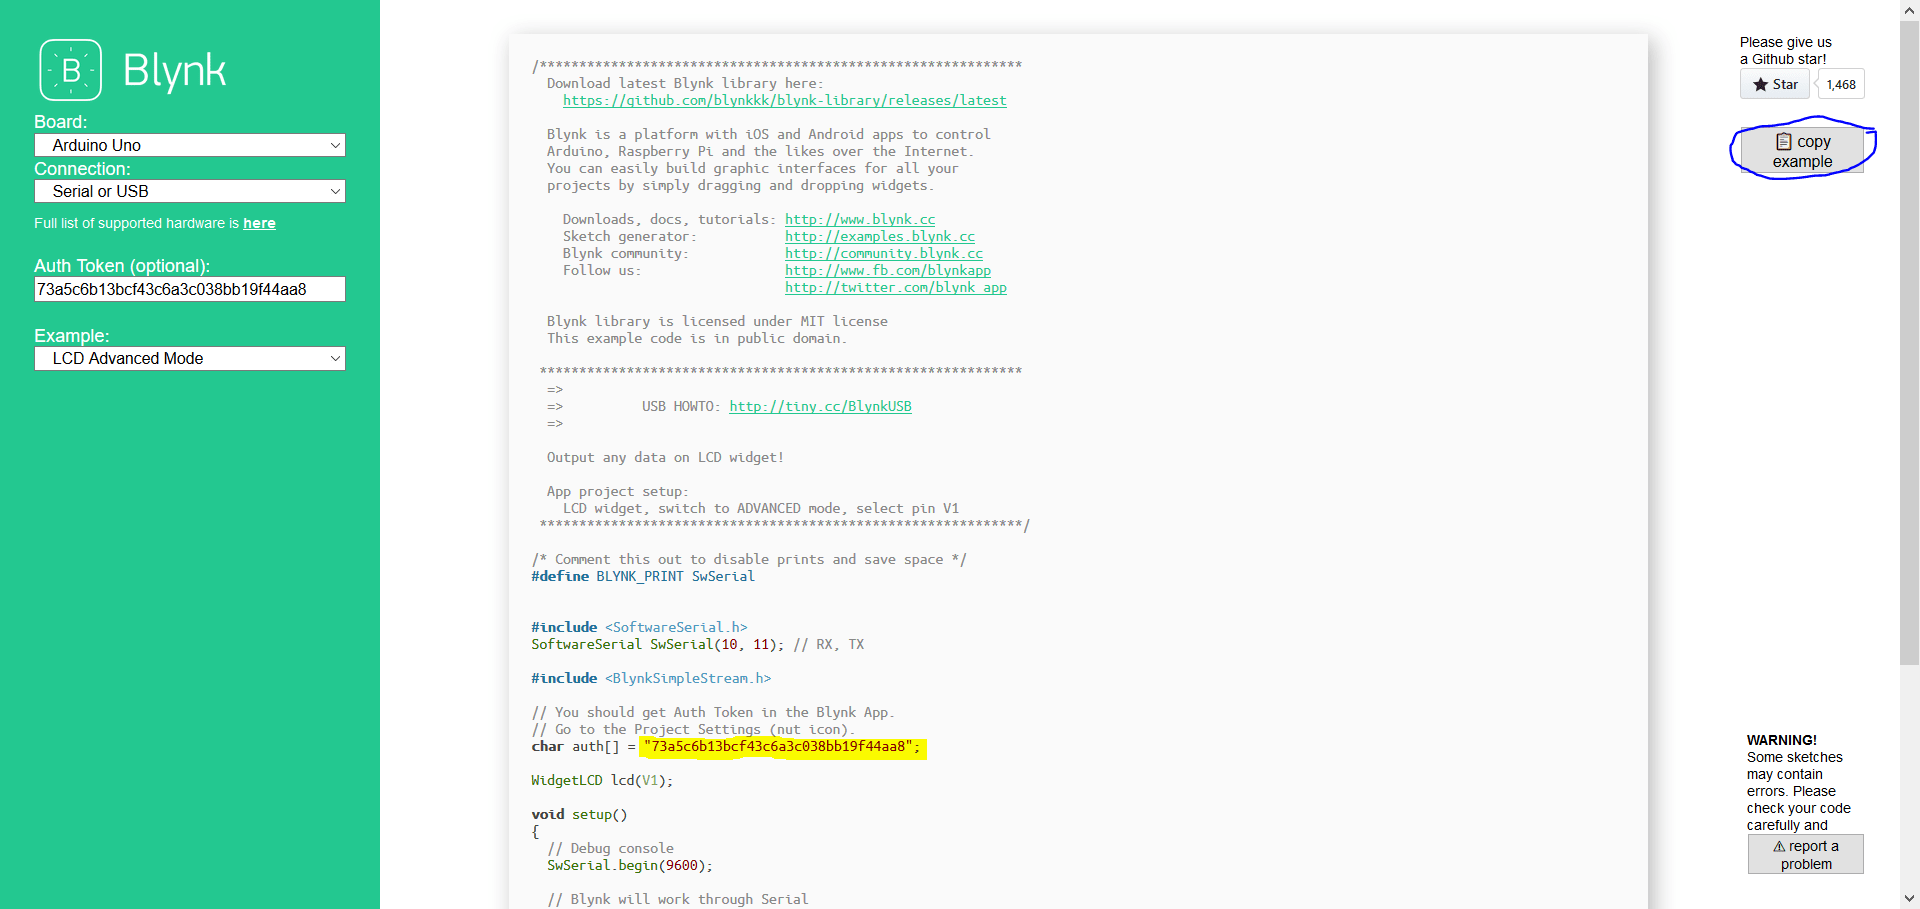
After copying the example to Arduino IDE I added Auth Token to it, then I have these two codes one which I made during Input week and the example I just copied from the website:
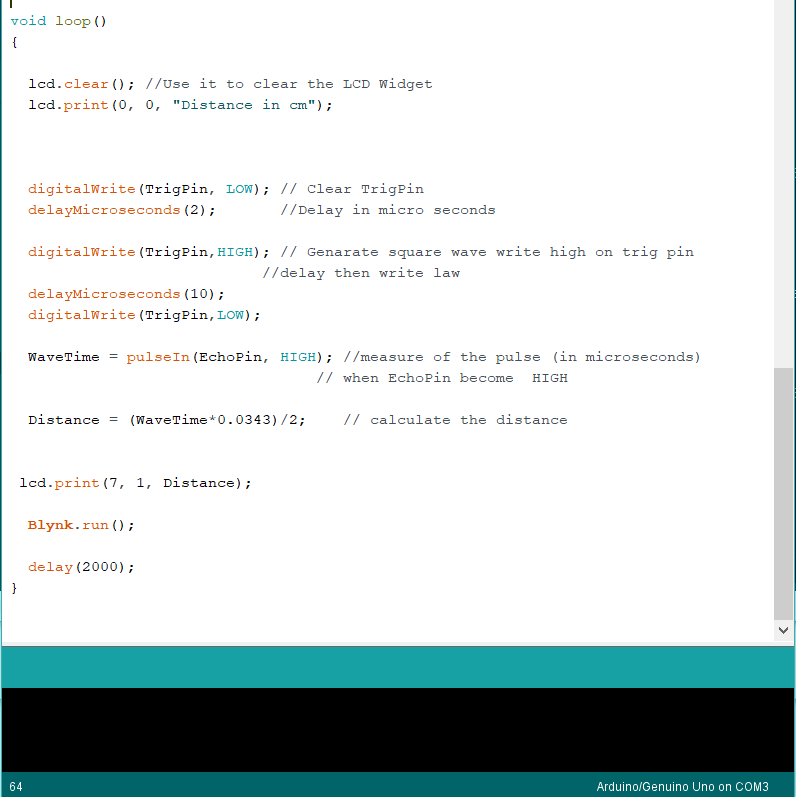
Now I combined the two codes to have this final one, compiled it successfully which I uploaded it to my Arduino board
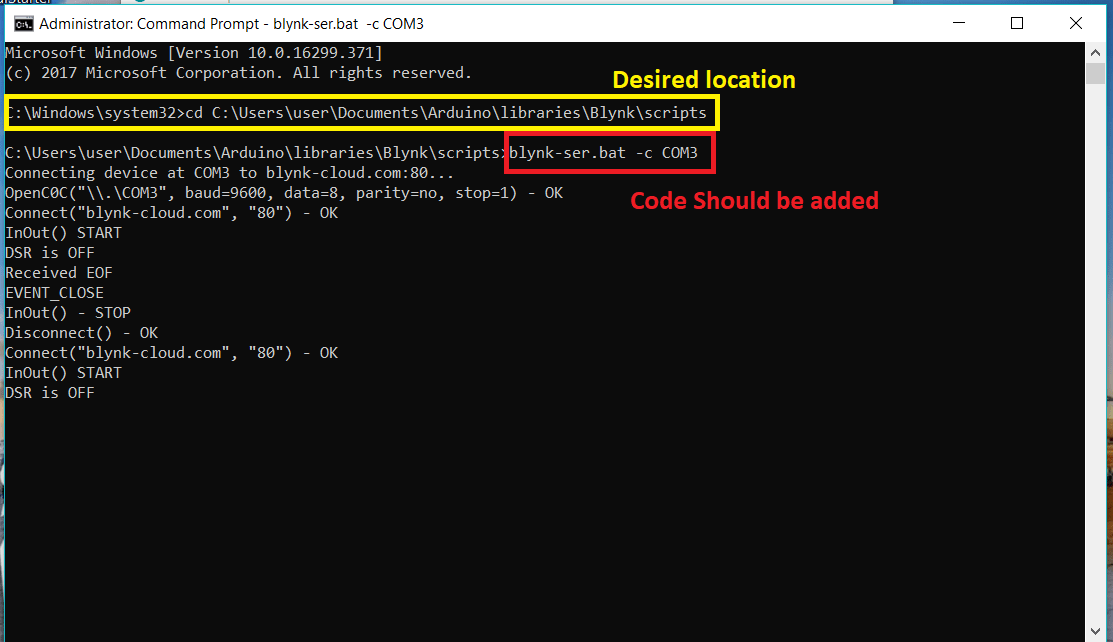
Now move to terminal to connect Arduino on COM3 to internet , go to Blynk library location and write this command blynk-ser.bat -c COM3 and see the results in terminal:
Finally, I moved to my phone see some text on LCD. Then I moved my hand in front of the ultrasonic sensor and the distance was changed correctly!! Every thing works :) I was soooooo hapy.
You can watch the video.
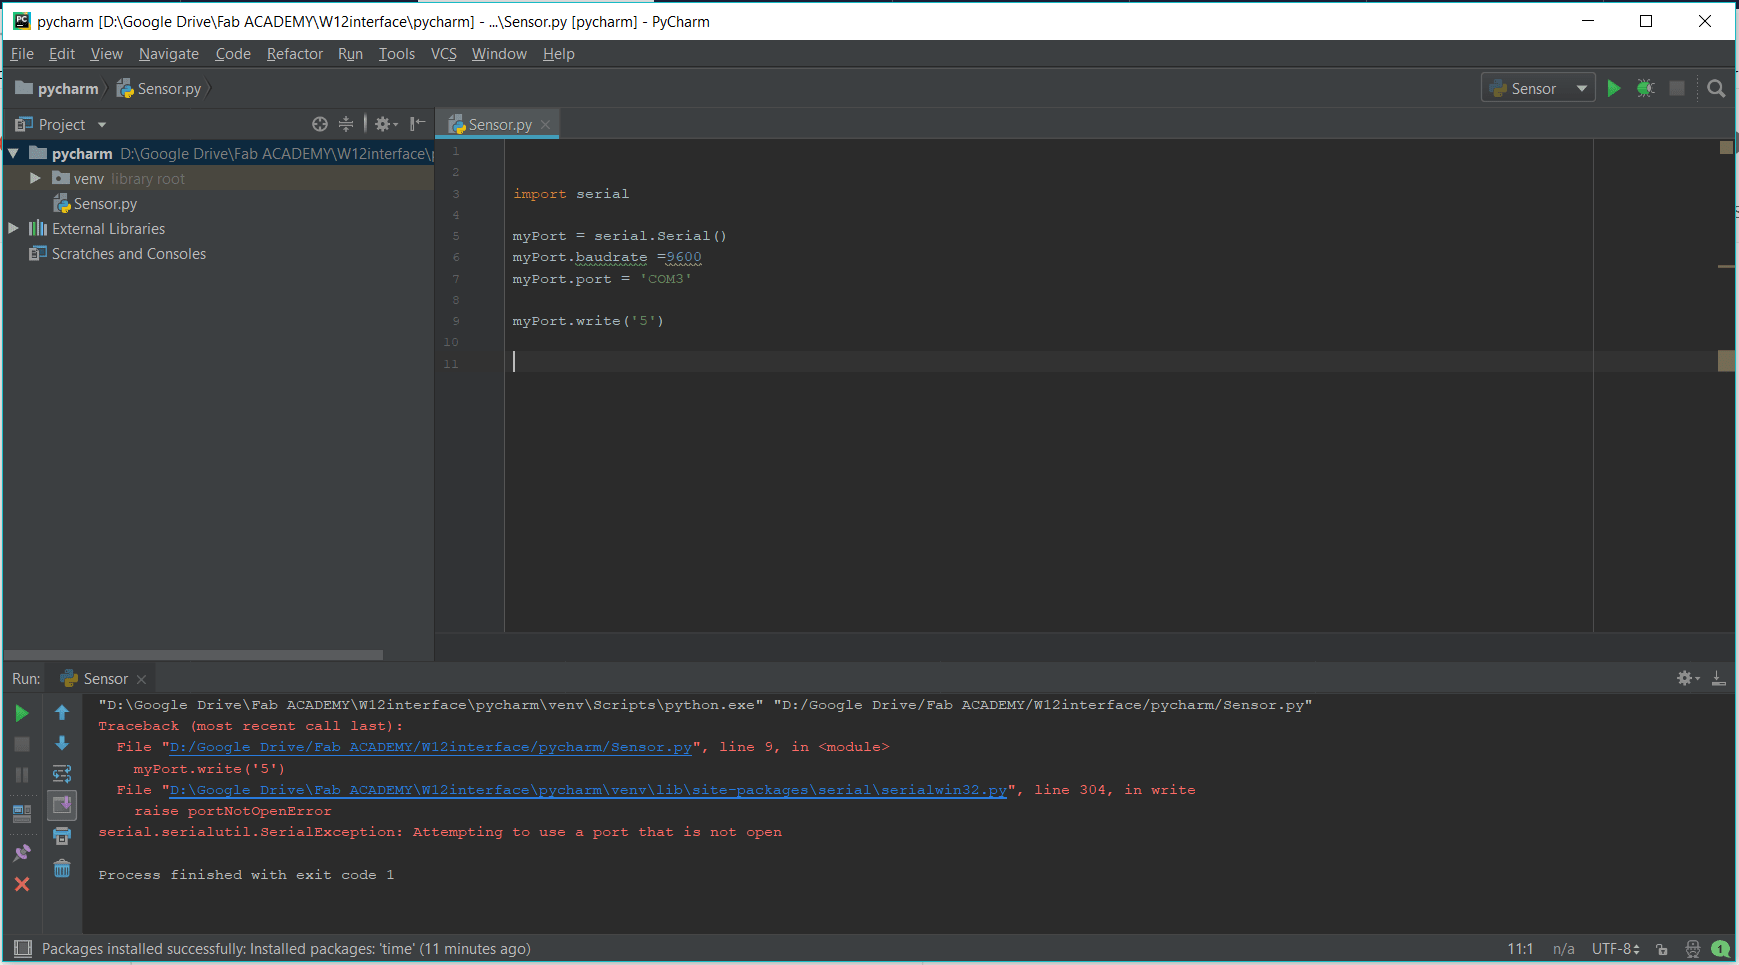
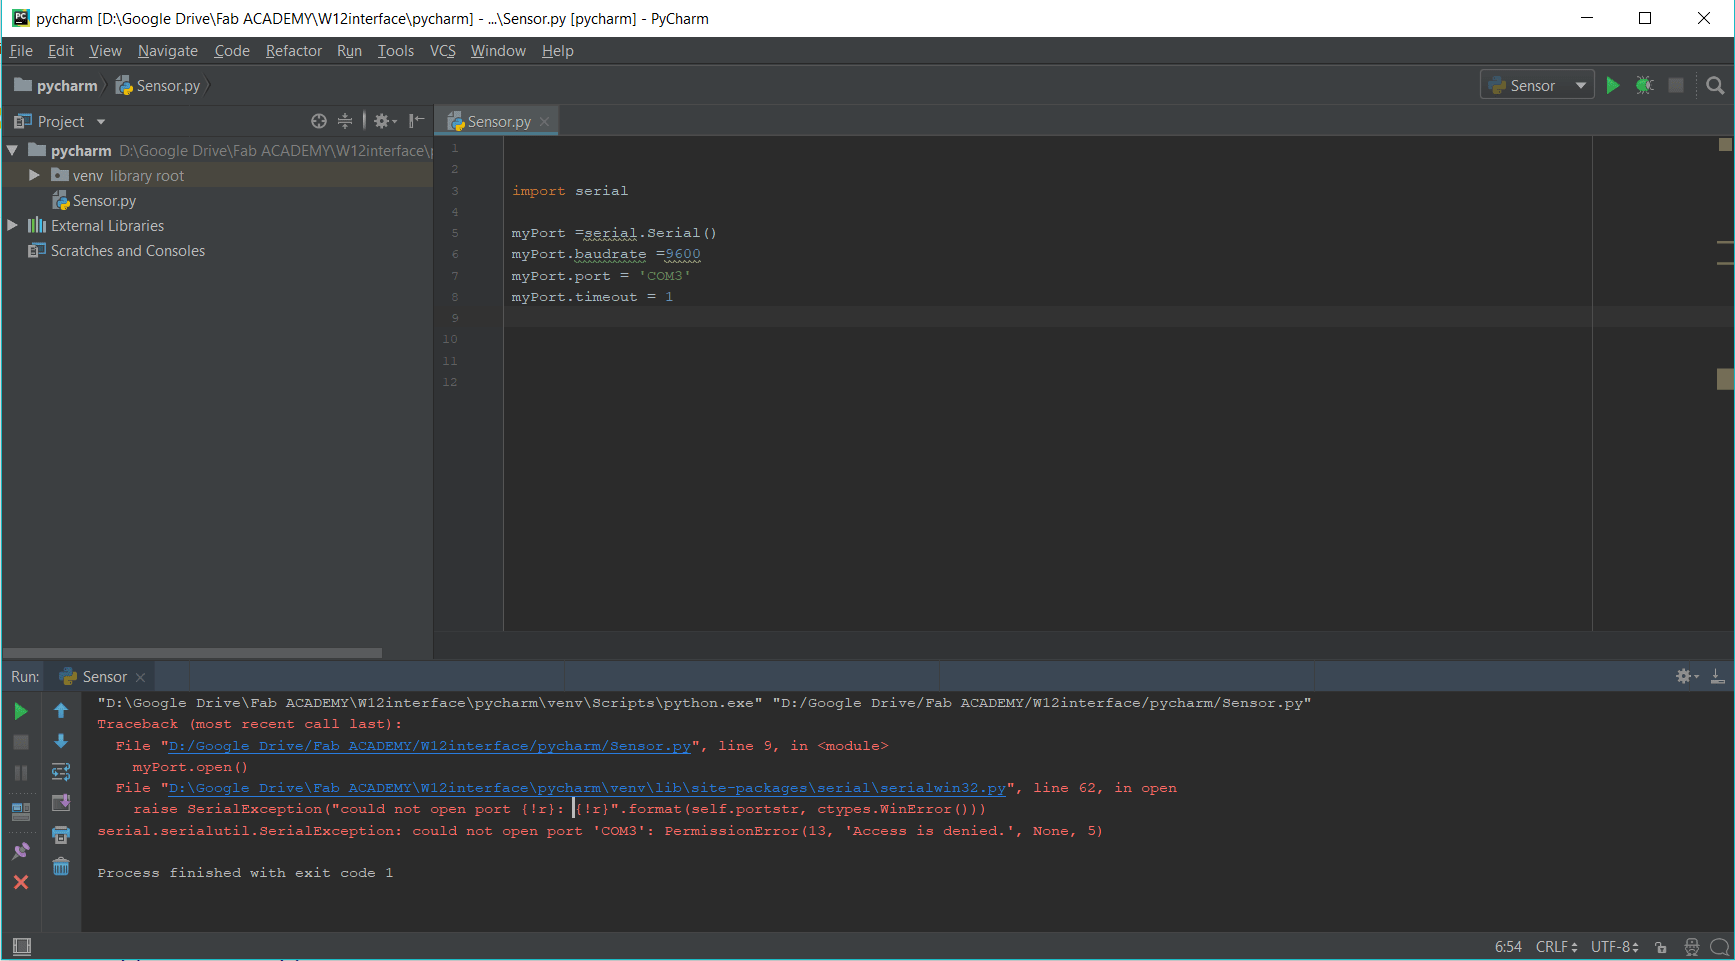
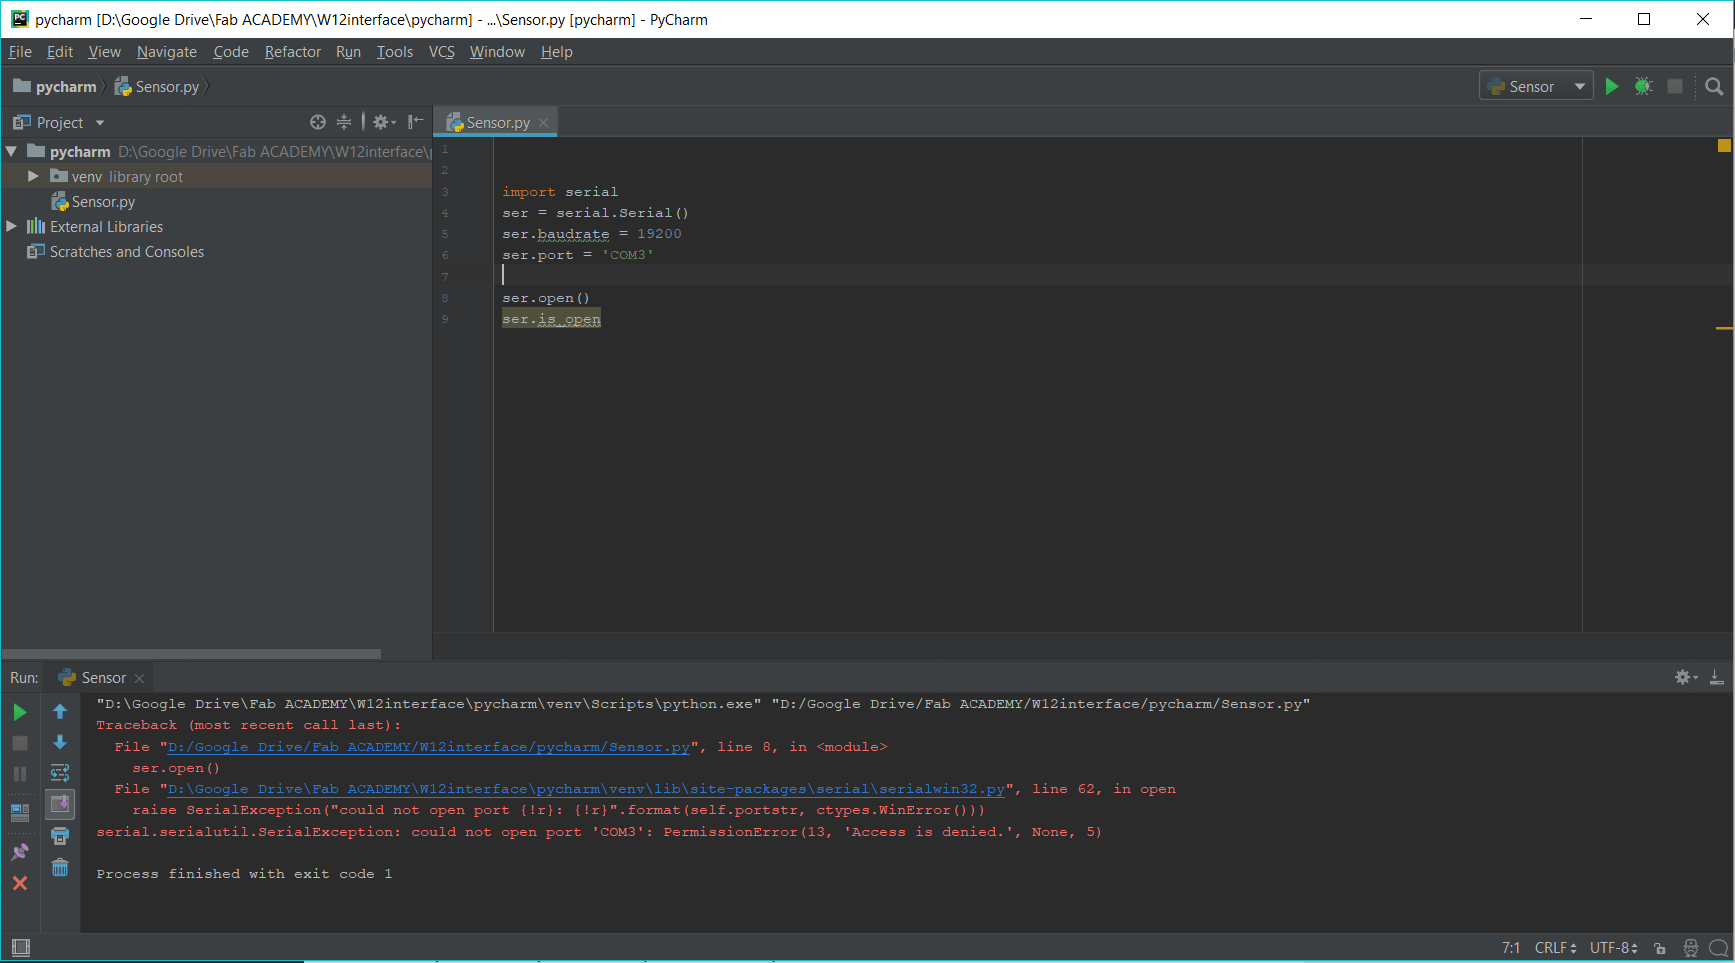
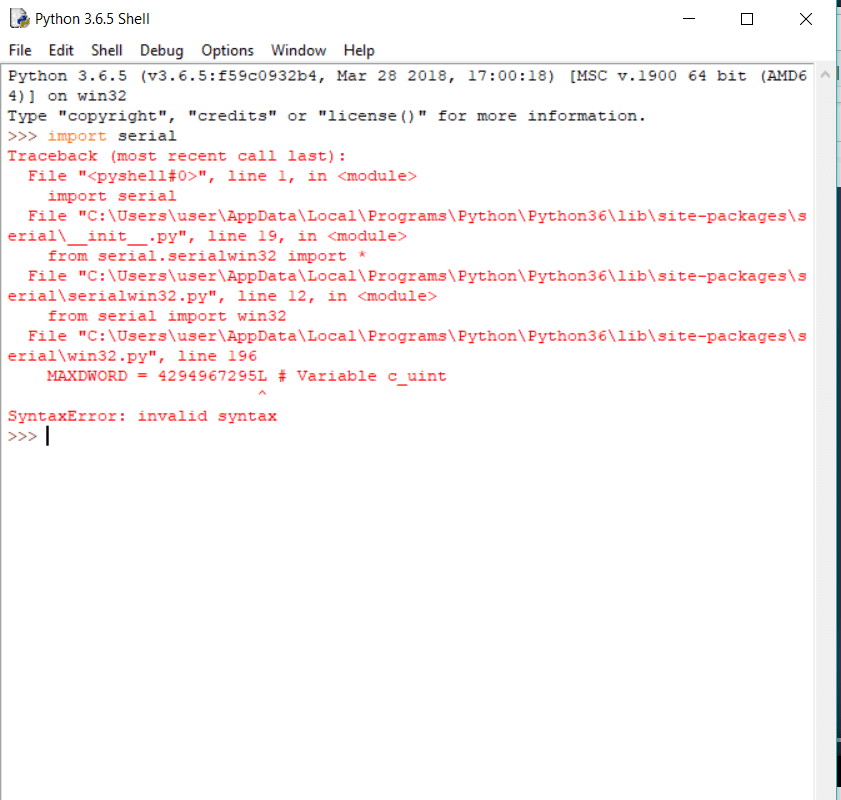
Try a lot to install Pyserial library but there are many erorrs