3D Scanning and Printing
3D Scanning and Printing
Tasks:
- Group assignment:
Test the design rules for your 3D printer(s)
- Individual assignment:
Design and 3D print an object (small, few cm)
3D scan an object (and optionally print it)
Lampshade
I used FUSION 360 software to design a lampshade!
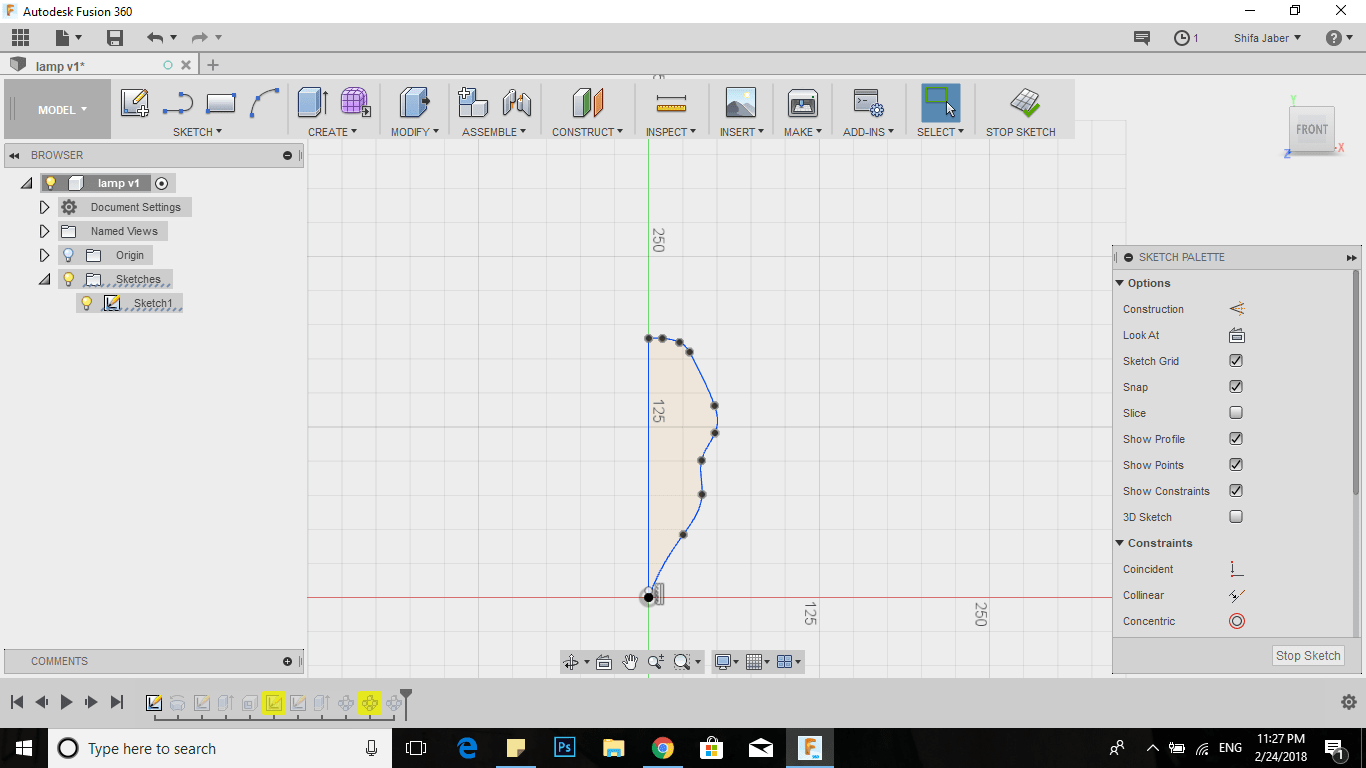
I started my design by drawing a sketch from sketch menu, using straight line and spline tool, to have a close profile.
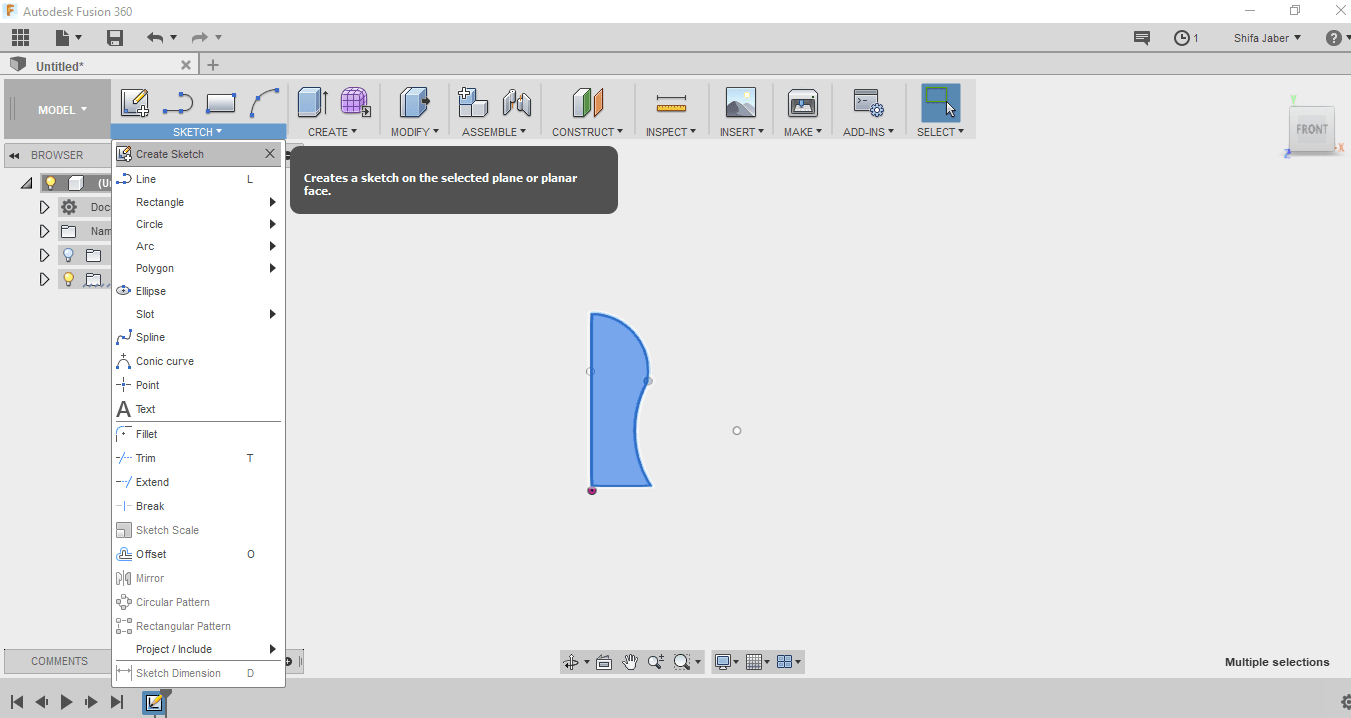
Next I revolve the sketch, from create menu, I chose to revolve the profile,
then I selected the object and picked the vertical axis to revolve it around.
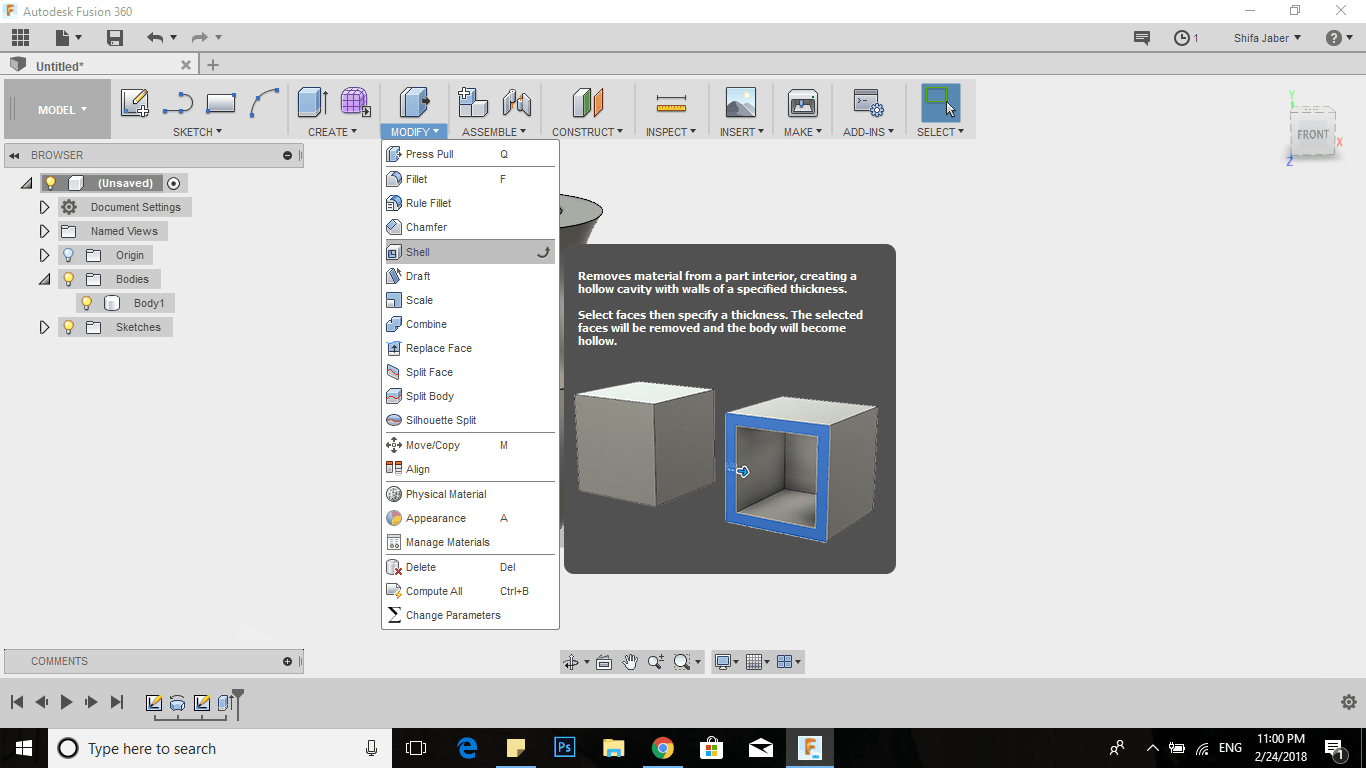
now I have the main body, to uniform the wall thickness I chose shell from modify menu.
I entered 1.6 mmfor the wall thickness.
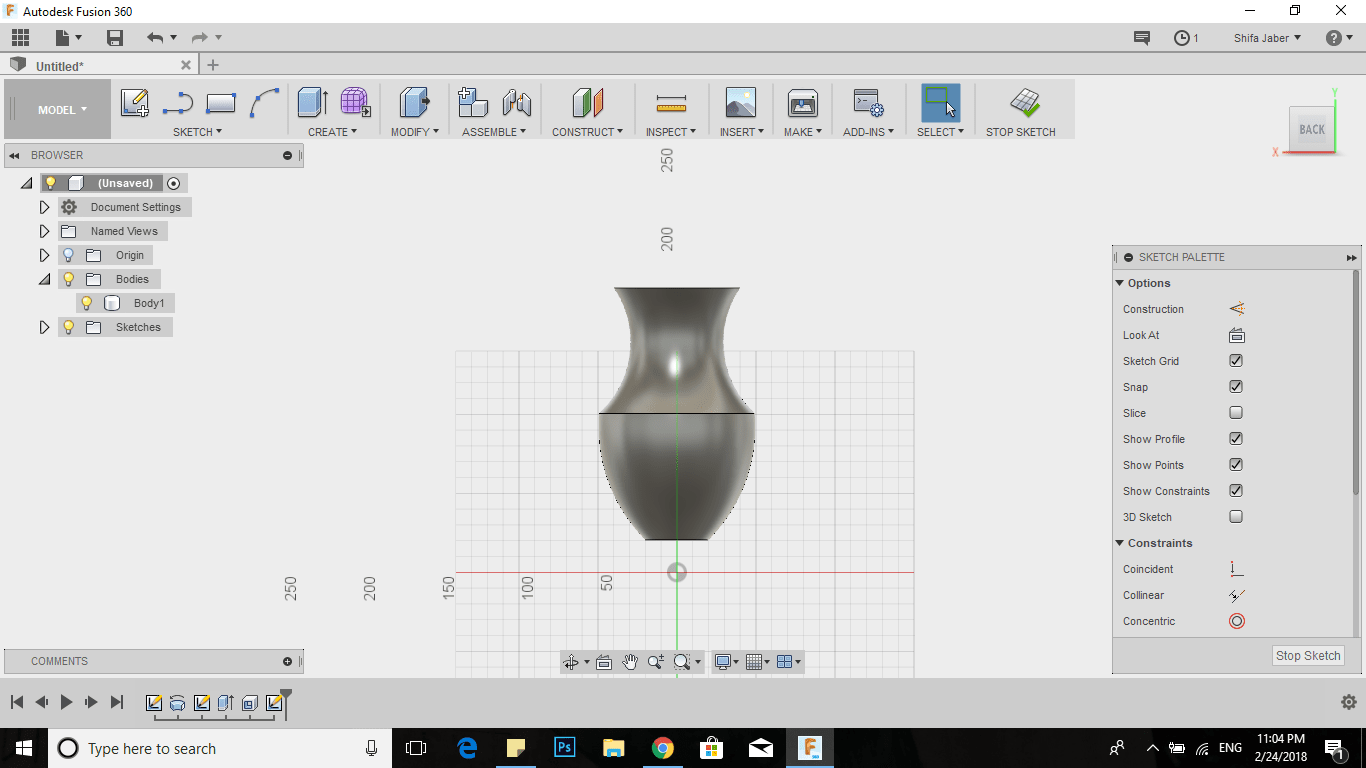
I I drew a line from sketch menu, then I draw one more line to make it parallel to the first one, I chose parallel constraint.
Next I chose extrude, selected the profile that I sketched then extruded it through the object, for that I chose the symmetric side.

So I have two symmetric strips, I chose pattern the circular pattern,
I selected just one body and Specified the quantity about 10.
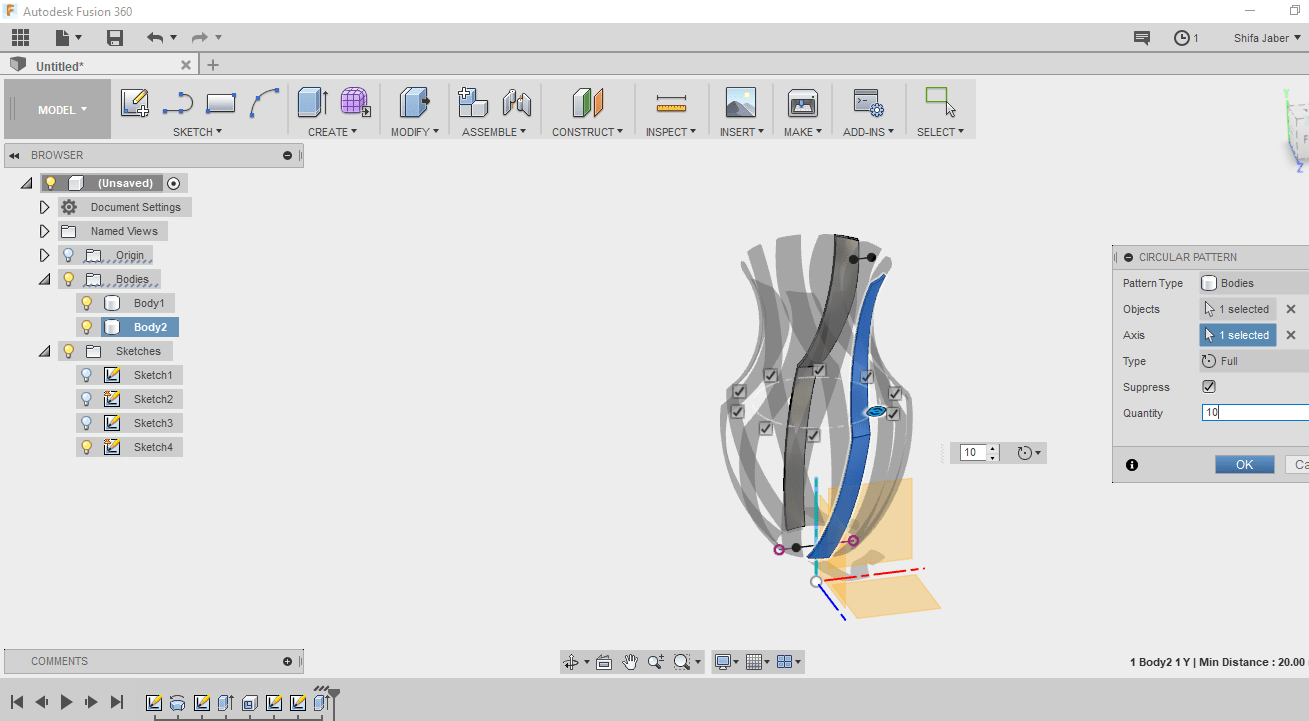
I noticed that there`s a mirrored feature all the way around
I decided to make another pattern with other direction.
So I chose a circular pattern and put the same quantity.
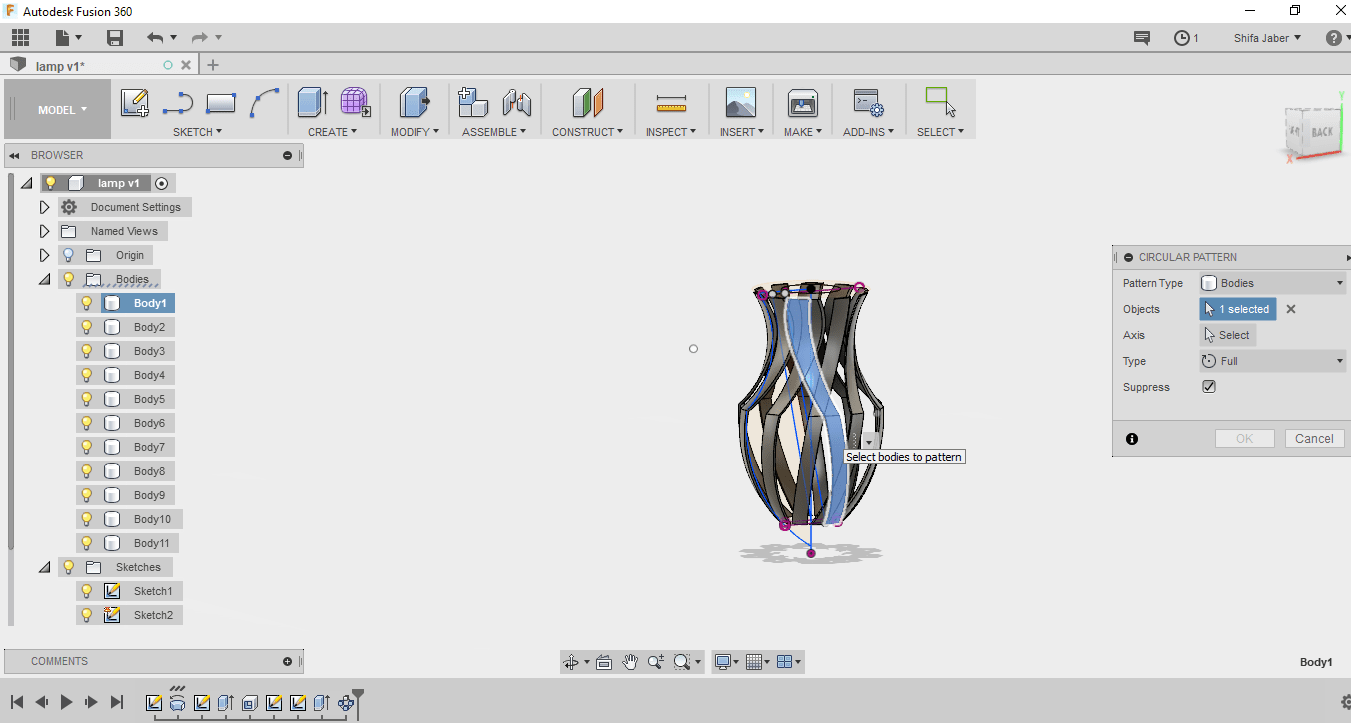
Because Fuison is parametric software
In order to enhance the lamp functionality, the profile has been changed and the quantity of the pattern has been increased to 17 .
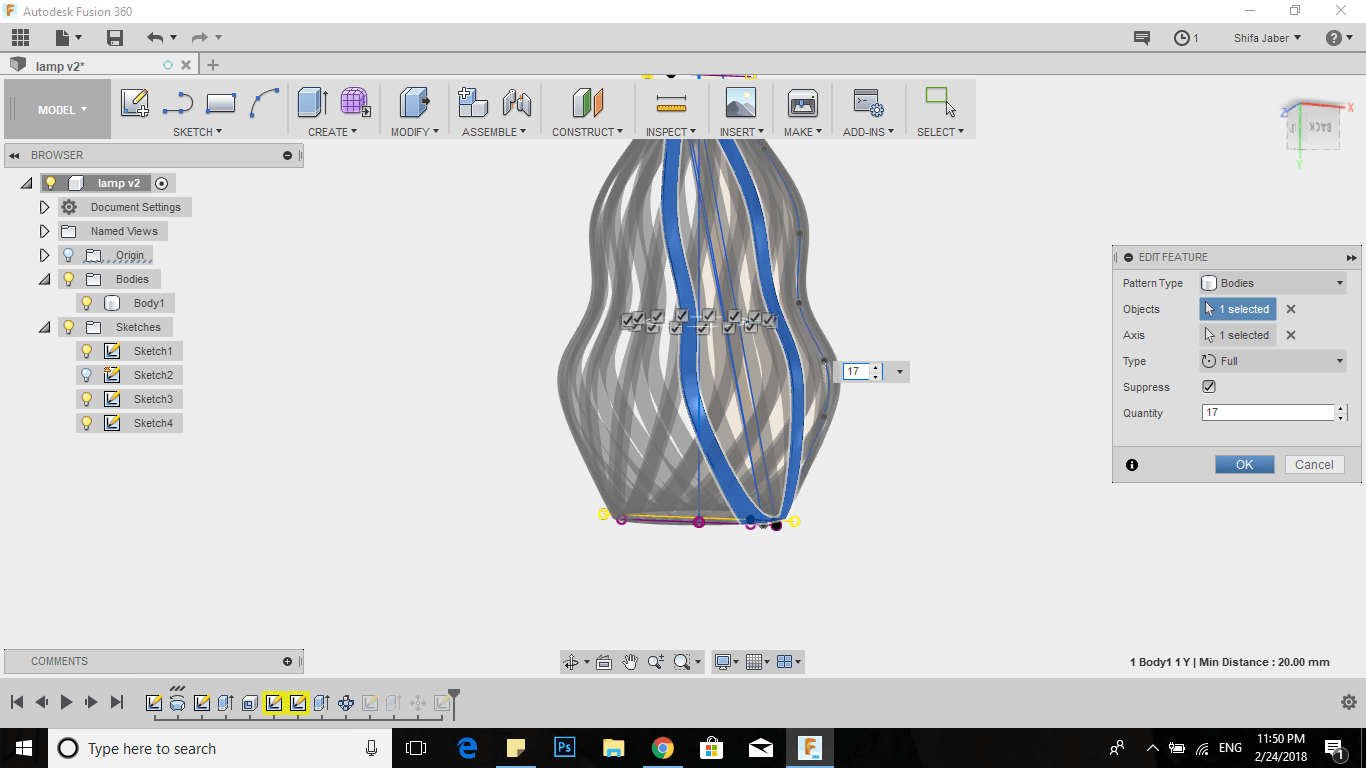
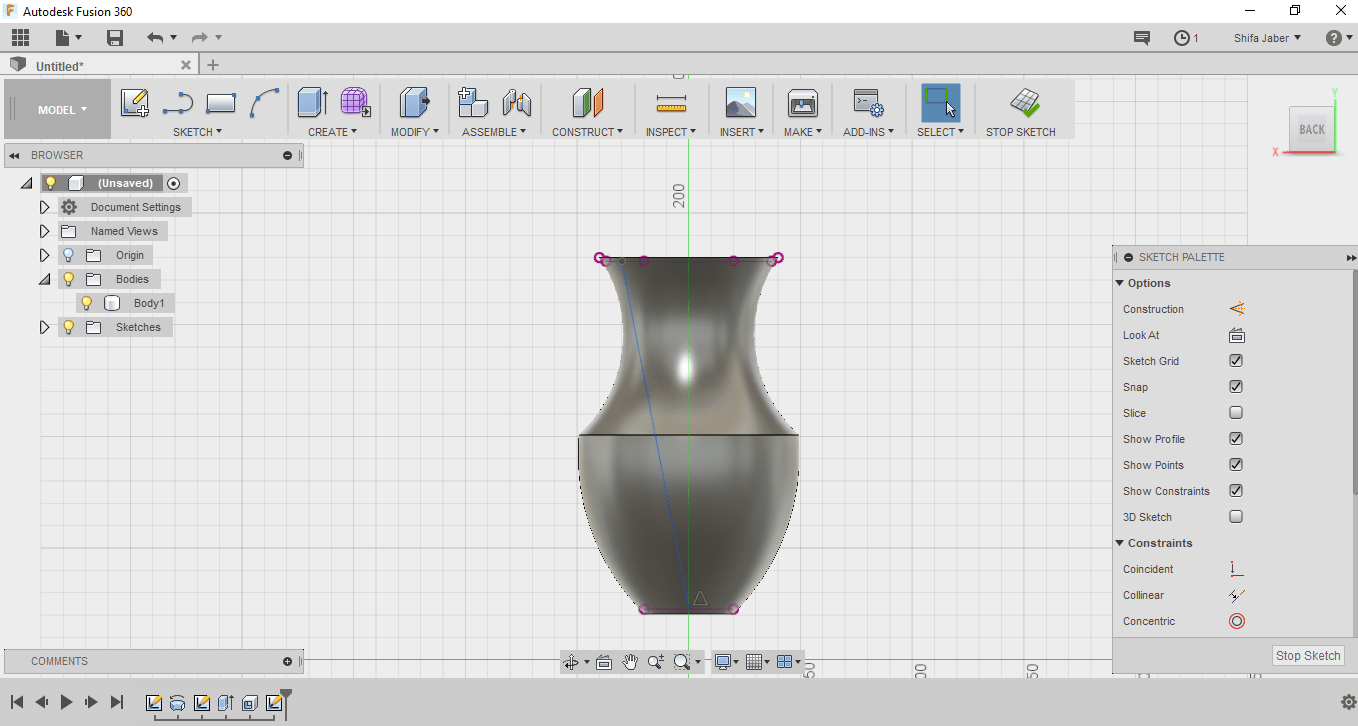
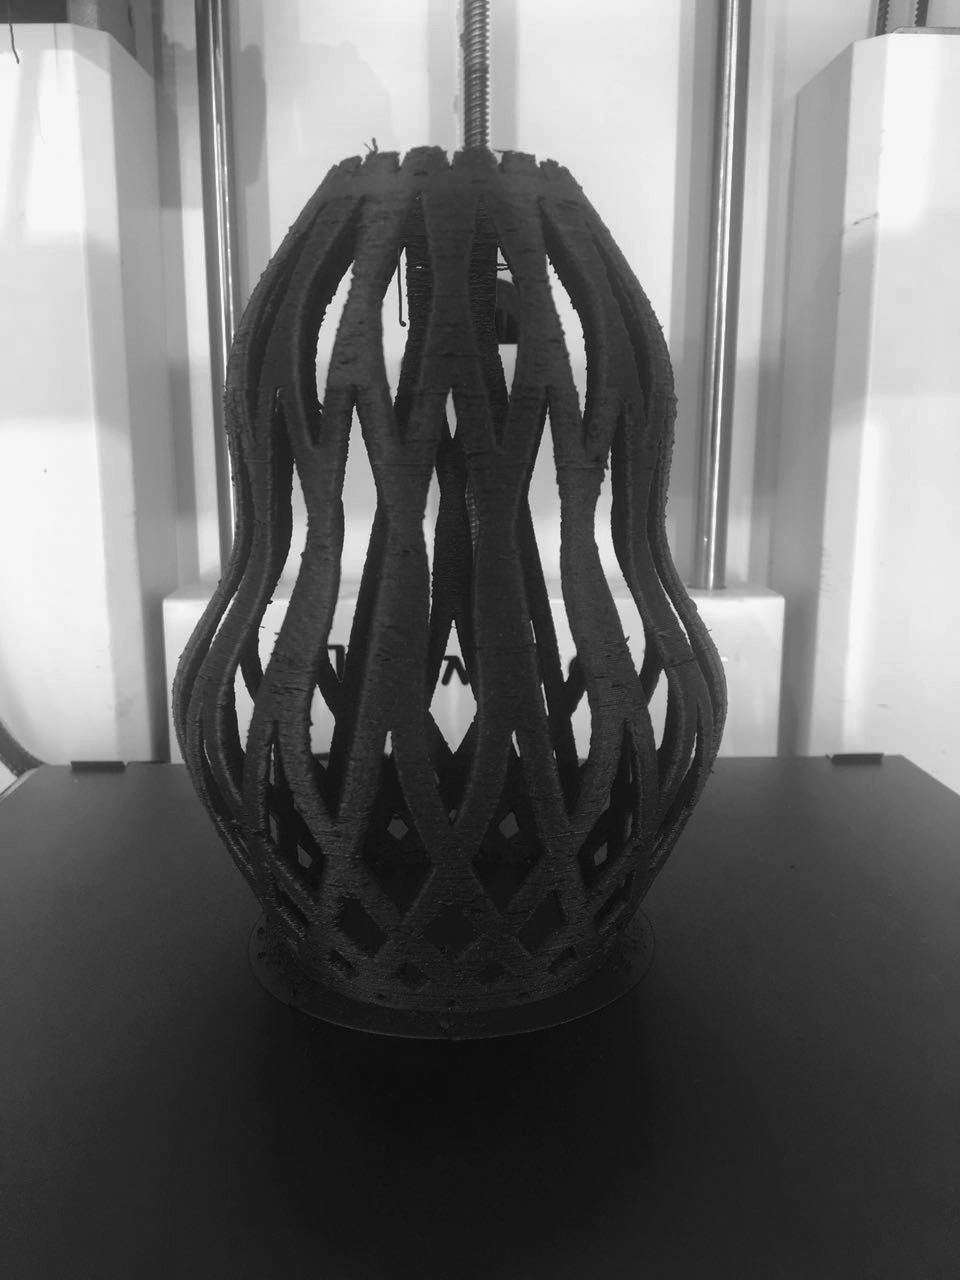
This is how my final design looks like.
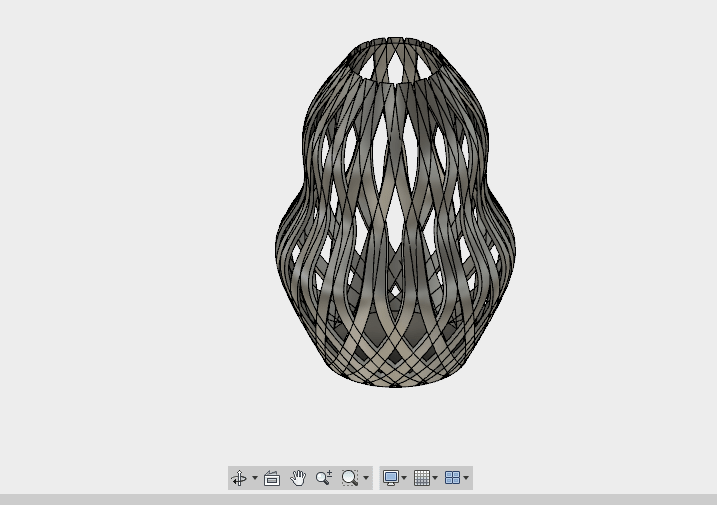
The Lampshade cannot be done subtractively becuase it is curved from all sides.
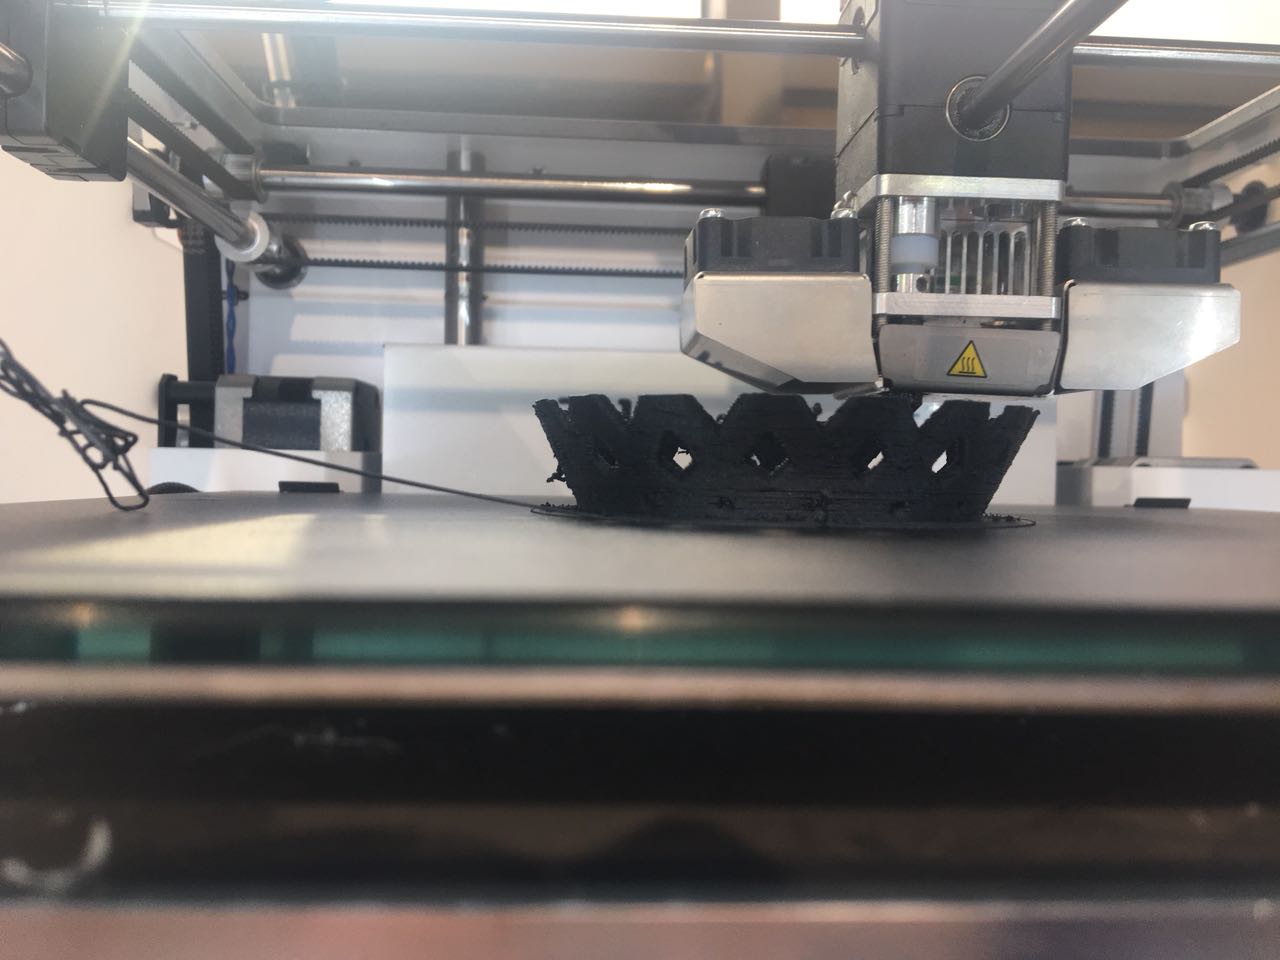
Now Let's Print It!
I decided to use Ultimaker +2
I need to read about this printer, to know how it works!
I start to learn the Hardware components Ultimaker +2 :
.jpg)
The Build volume diminsions in this printer is 223 x 223 x 205 mm
Ultimaker +2 allows one filament and I don`t need to use support element because my design is self-supported.
To send the 3D model to Ultimaker +2, I used the recommended Cura Software which provides both easy to use print settings
and the possibility of tweaking a number of advanced options.
First of all I saved my file as STL file and open it by cura software.
I checked the scale it was correct, then I rotated the model using rotation tool which allows to rotate in 3-axis.
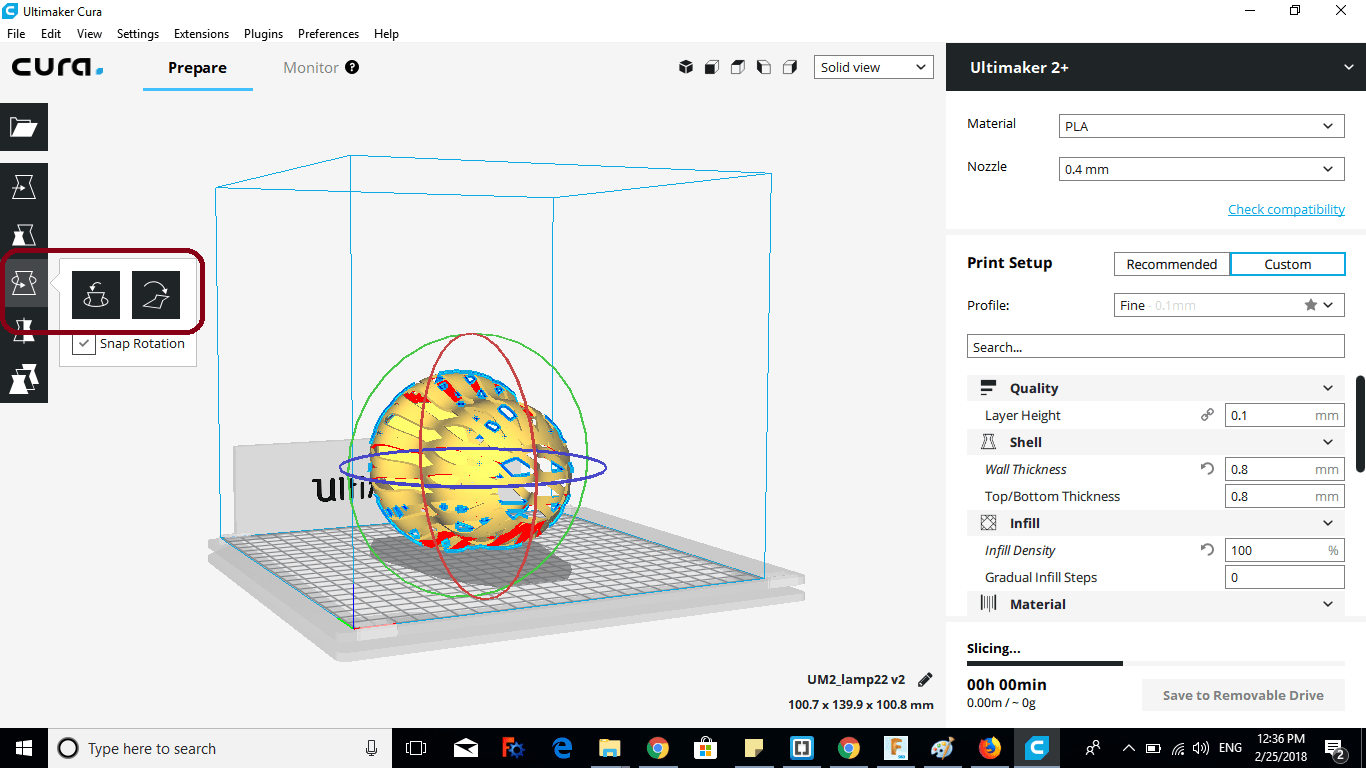
Unfortunately, the Carbon fibers filament which I need to use I couldnot find it in the library material of Cura
So I chose (PLA material) and manage the setting of it.
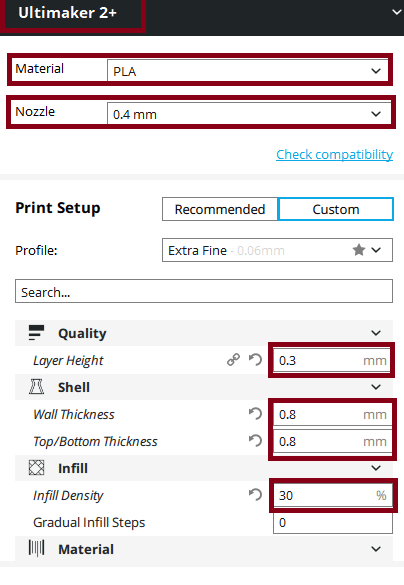
to fix the problem of Carbon fibre material, these are the settings which I used :
Layer height : 0.3
Wall thickness : 0.8
Infill density : 20%
After setting the settings, I went to layer view to see if everything is printing correctly.
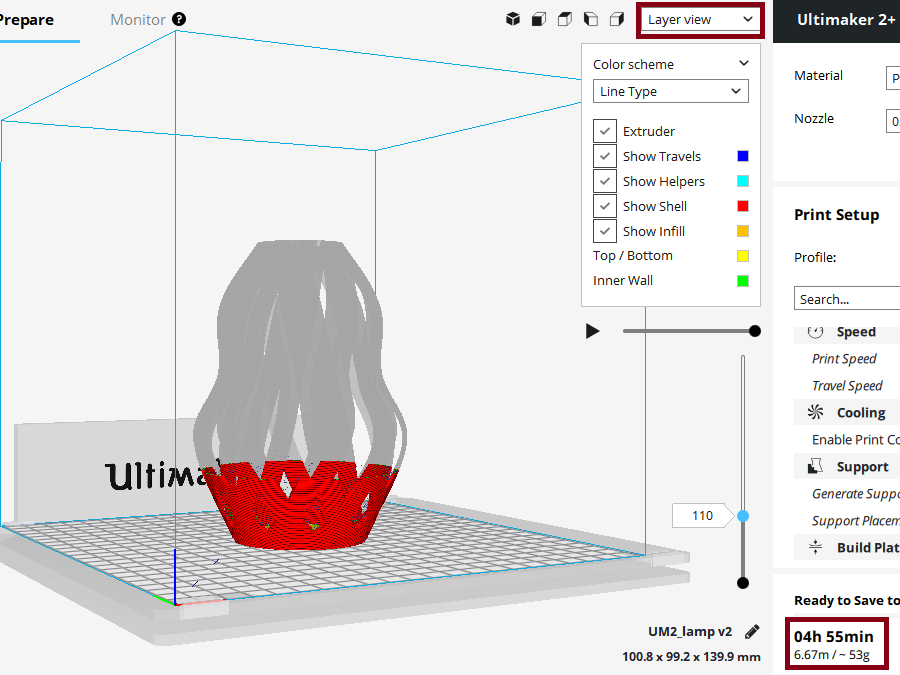
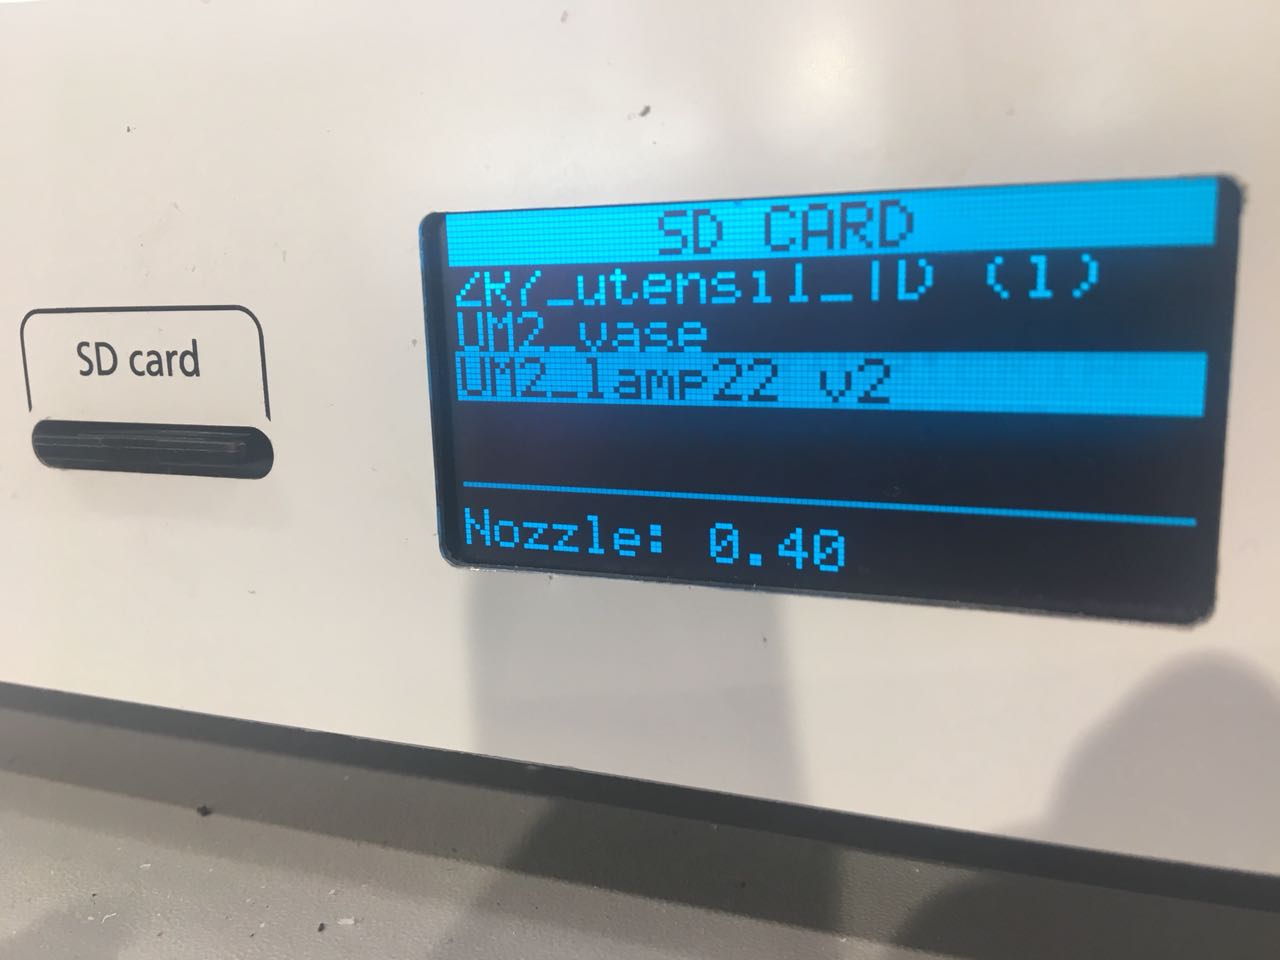
I saved the file in SD card and put it in the Ultimaker +2 printer.
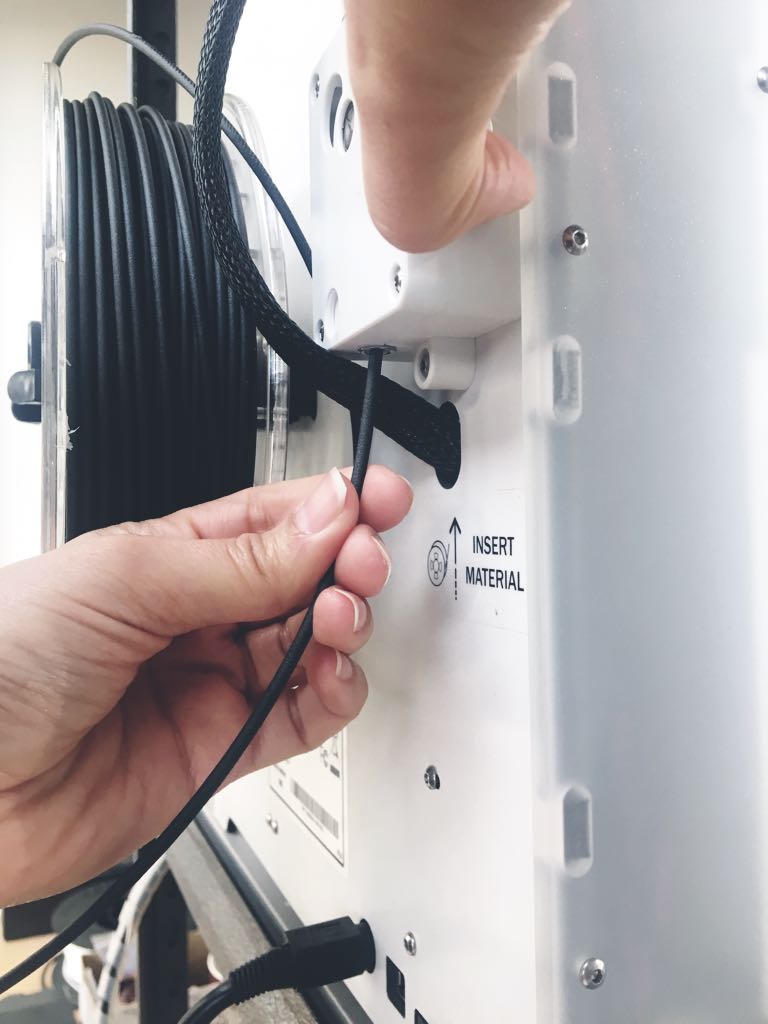
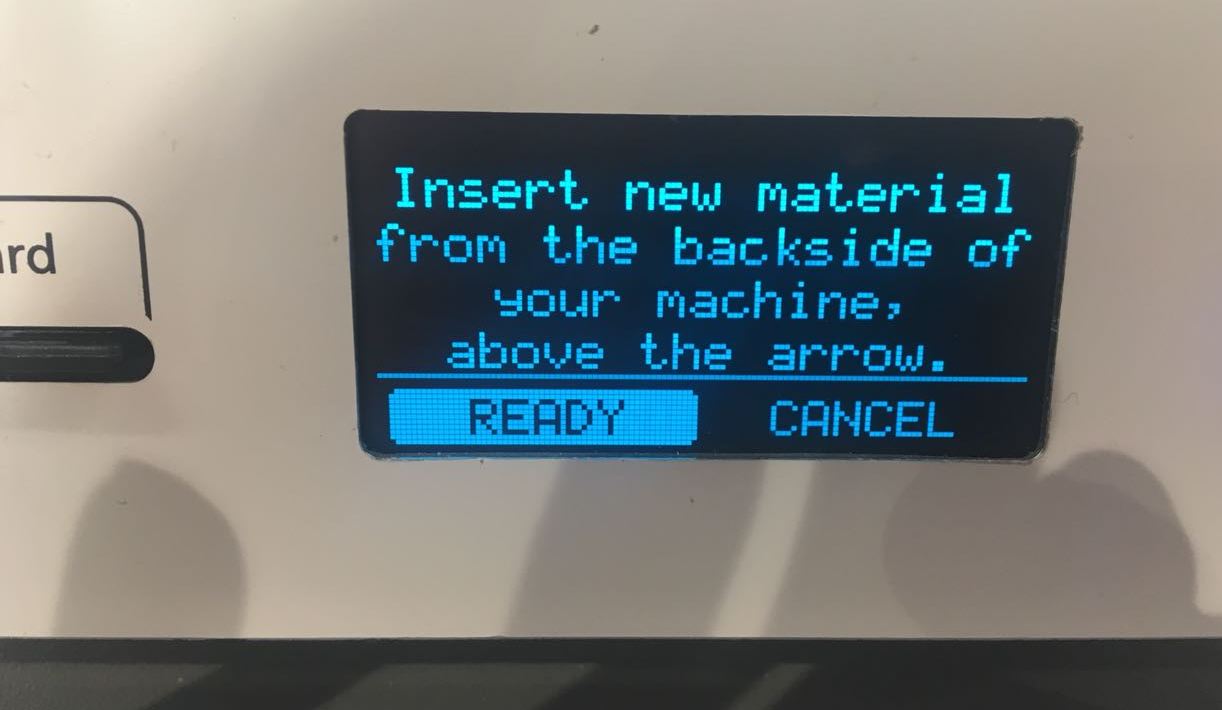
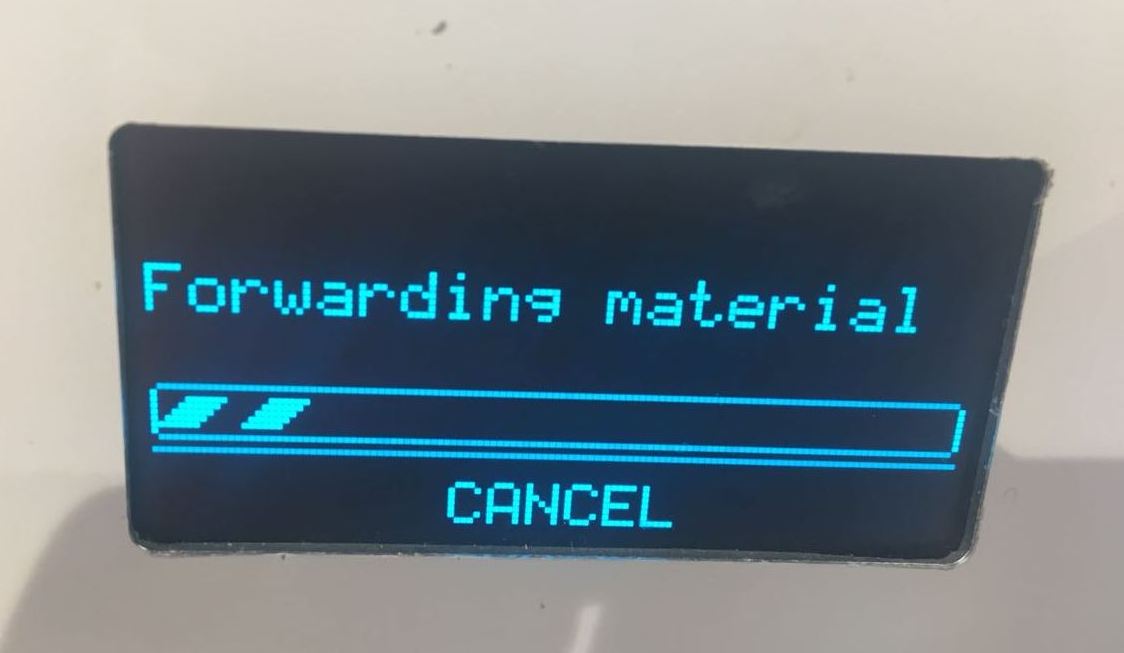
Now I have to change the material, I chose Material from the display of the printer
then I chose remove material put the Carbon fiber filament.
Back to the menu of - Ultimaker +2- and pressed print.
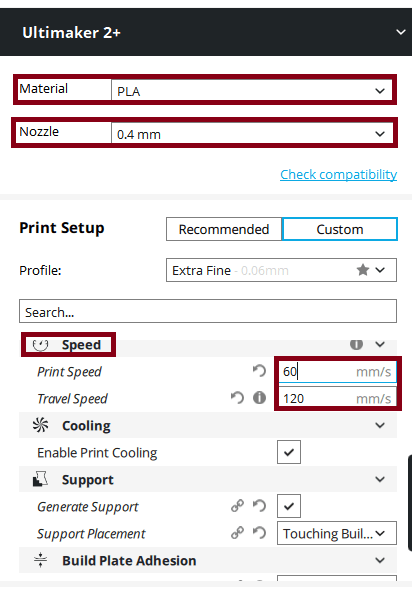
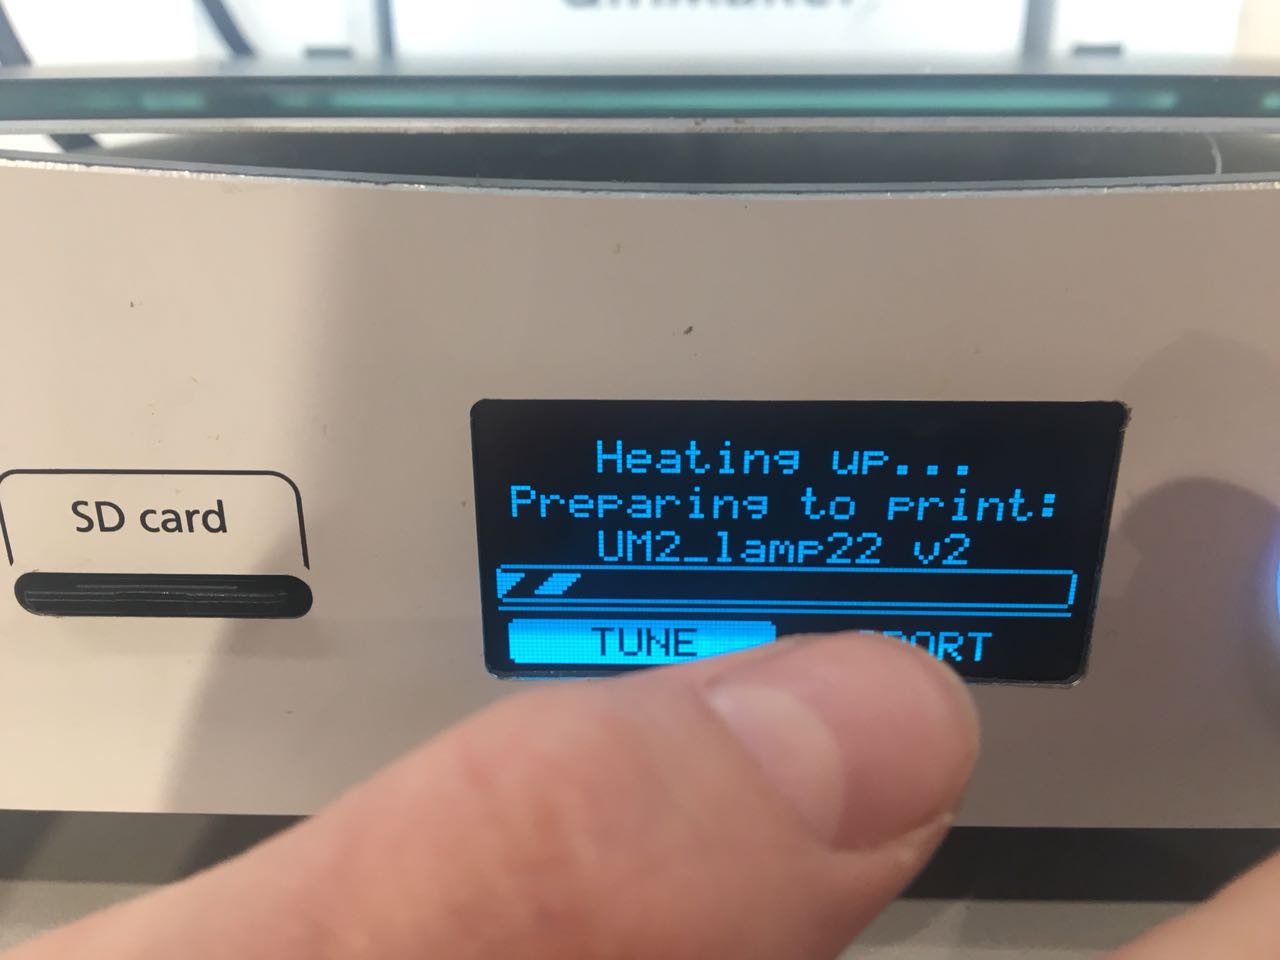
While it`s preparing to print I chose (Tune --- temperature)
Increased the nozzle temperature to 240 C
Heated bed 70 C
Decrease the print speed.
I got the settings from
colorfab official website
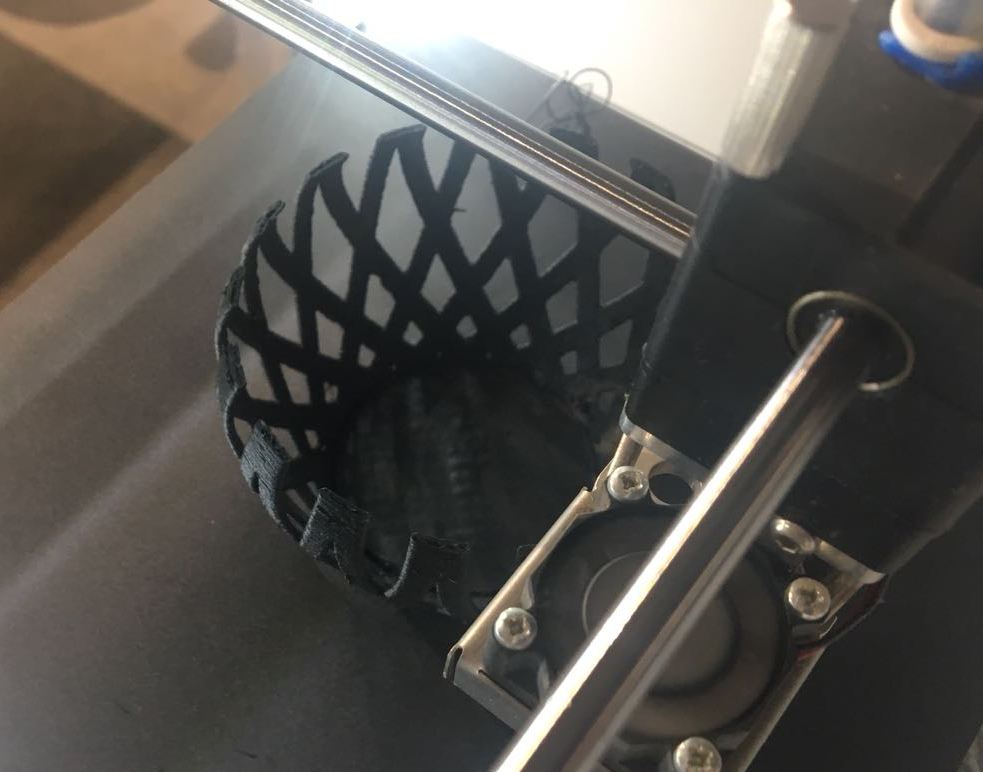
And this is the Final Result:
Download Files:
Lampshade Design
3D scan
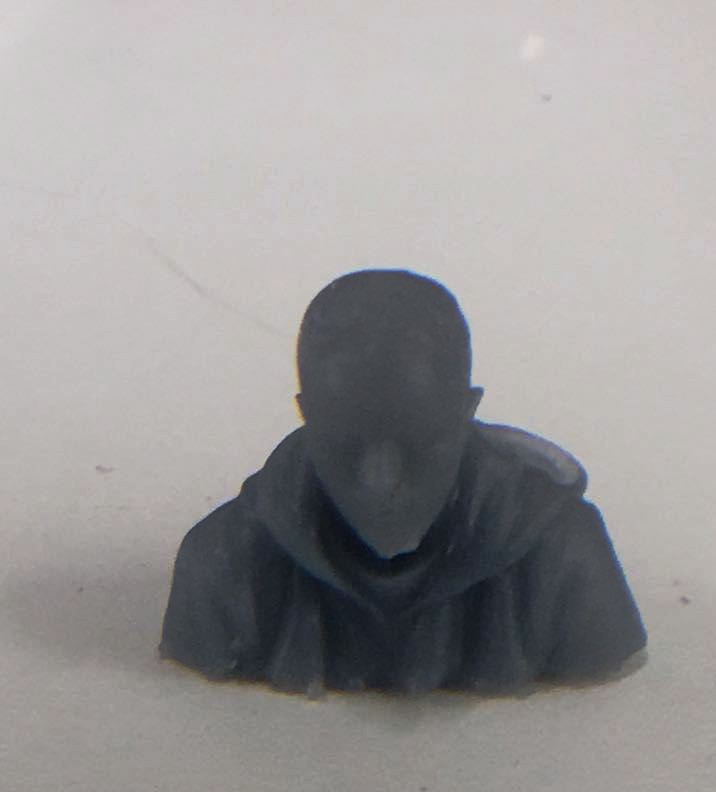
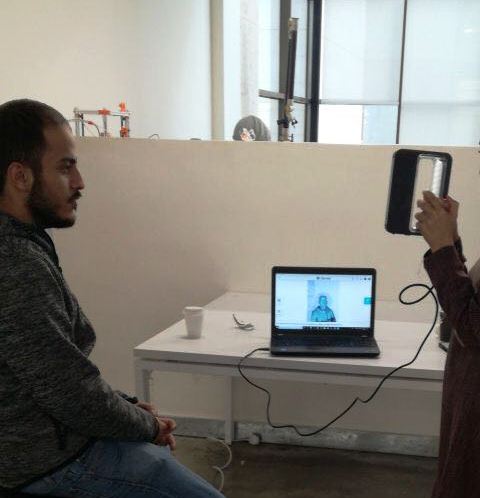
The object I decided to 3D scan and print it is my colleague Suhaib, this assignment was really fun!
I tried to scan him several times and it was my first time using this technology
For scanning I use Sense 3D scanner which is available in our FabLab.
The Sense contains two cameras, projector and on the back side it has the out port of the USB cable so
I can connect it to my computer
while I`m scanning the object.
Souhaib sat in rotating chair and slowly was rotating, I keep the distance between the sense and Sohaib constant distance.

Then I export my file as stl format.
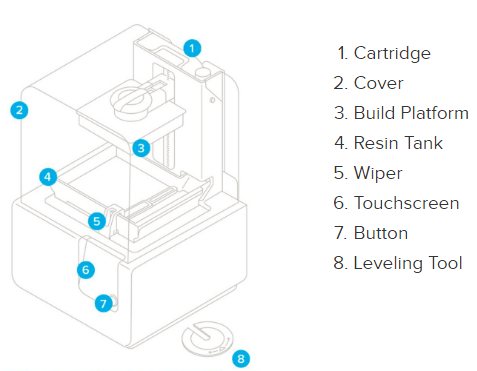
For this file I chose Form labs printer which is also available in our fablab, It is SLA 3D printer
Printer Components
This printer using a light source UV laser or projector to cure liquid resin into hardened plastic. .
I used Preform software to print my object.
I changed the scale of the object because it was big! And I also rotate the object then put the support.
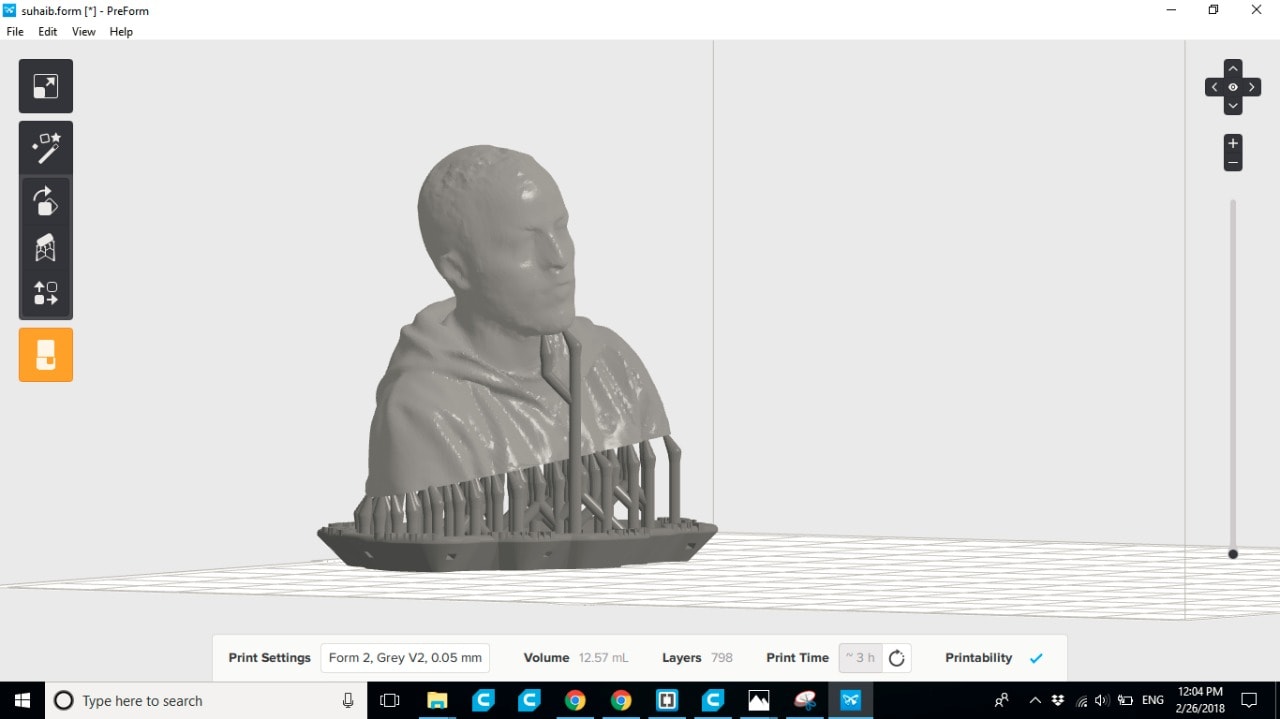
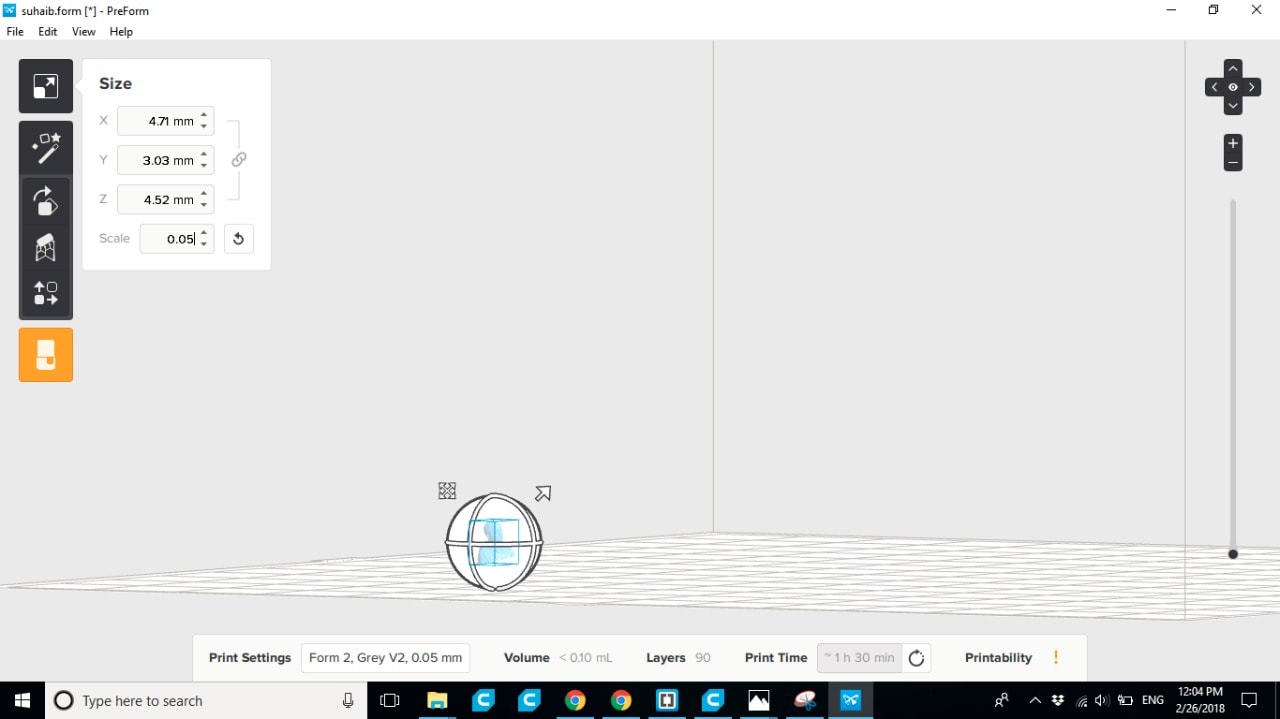
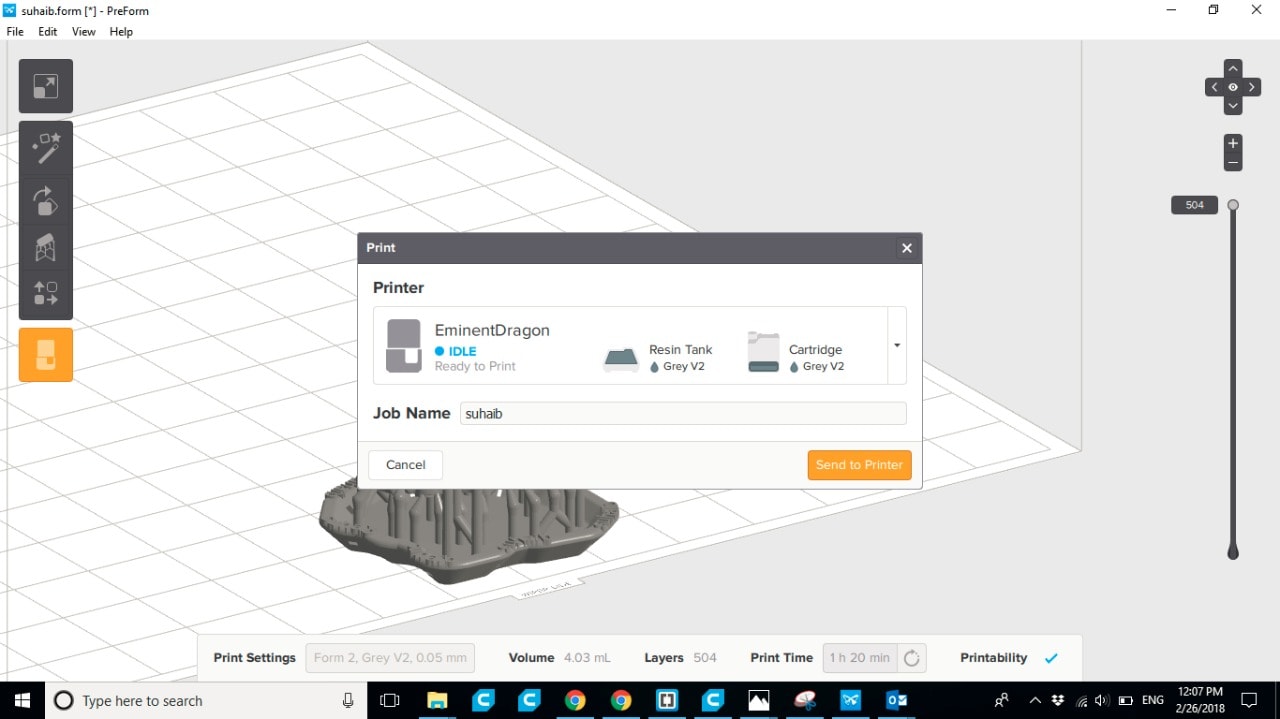
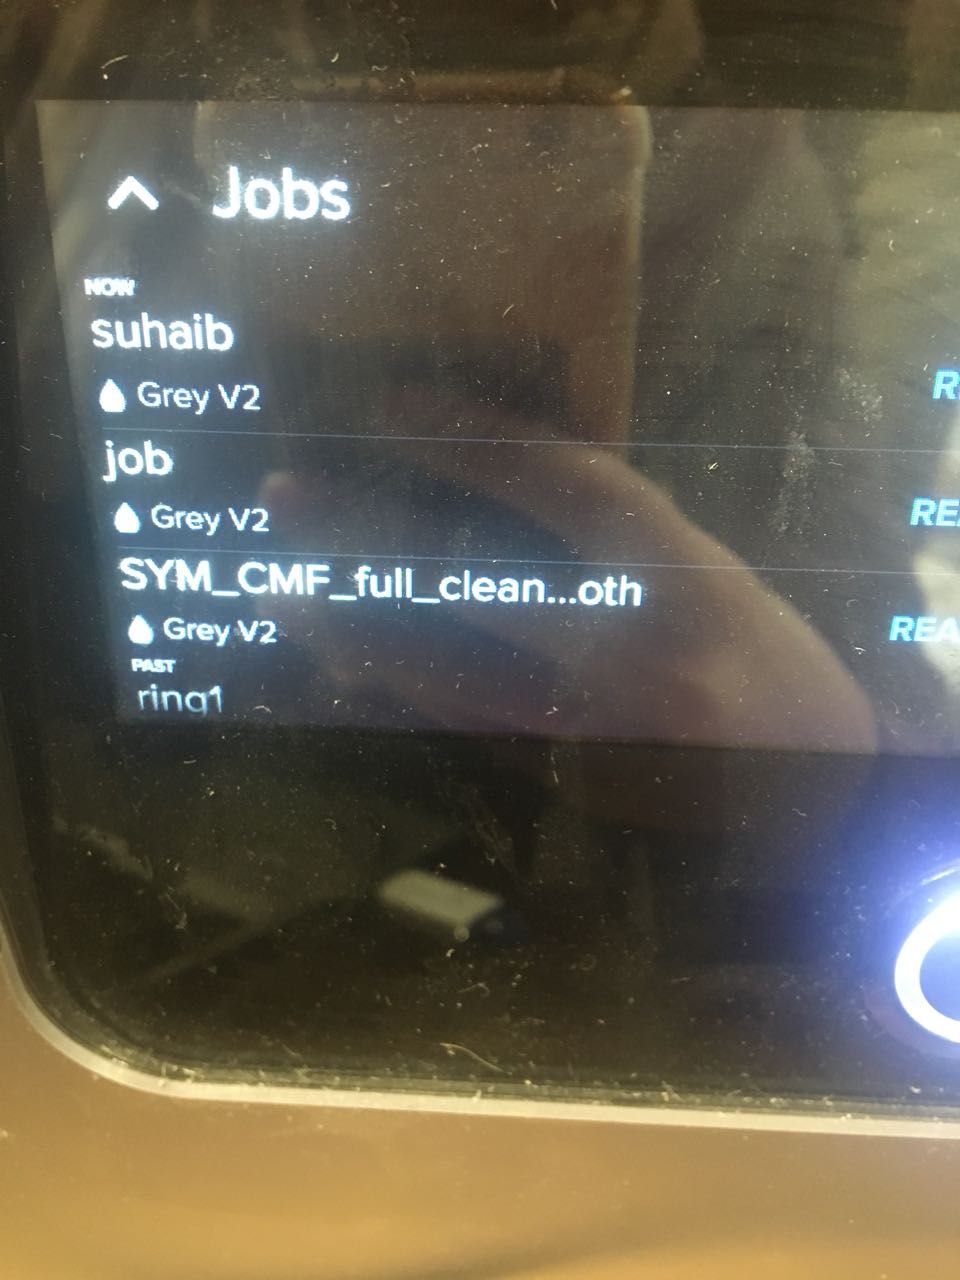
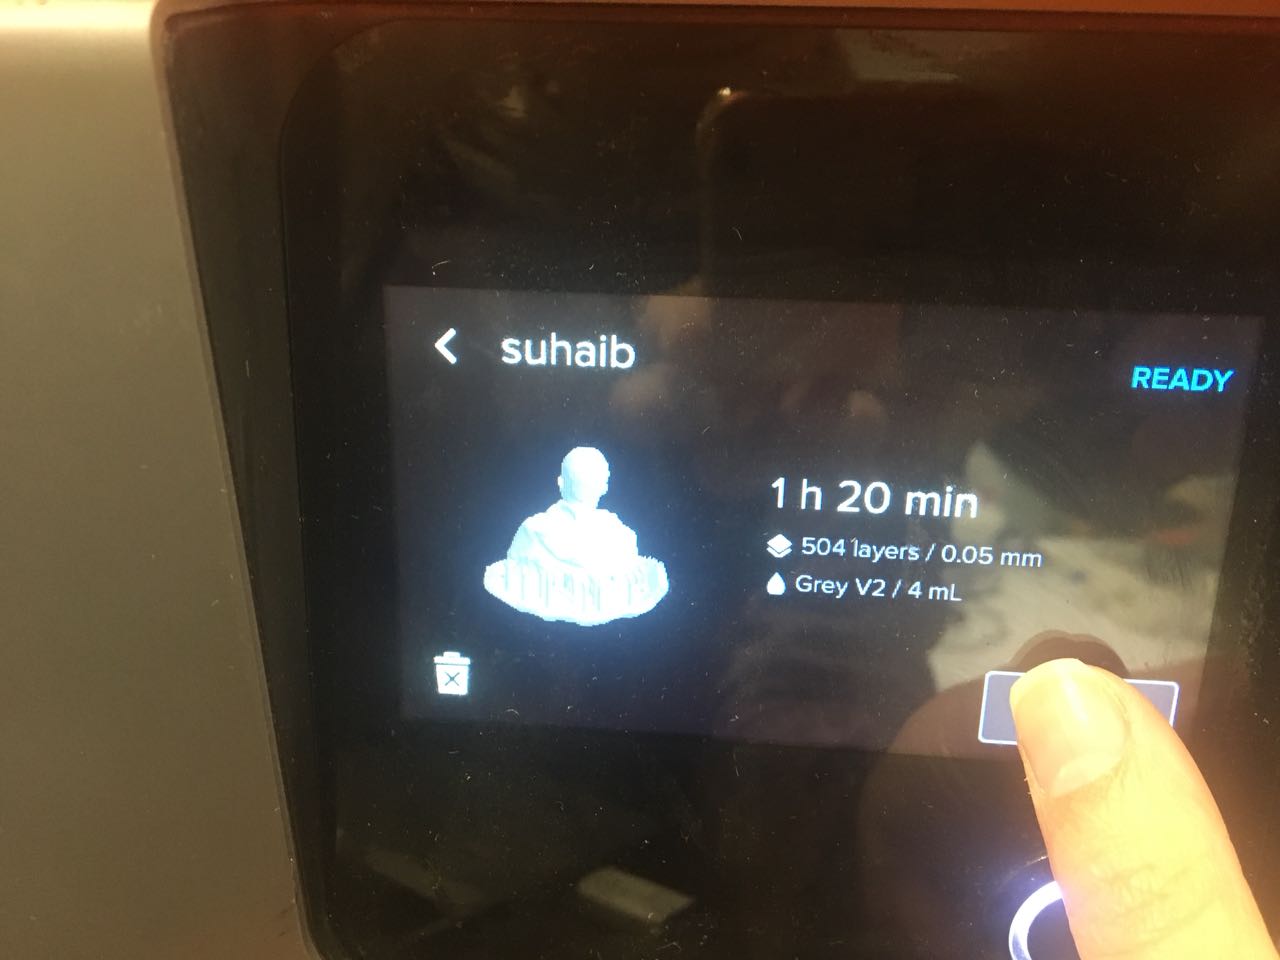
I connected the printer with the (USB) cable to upload my file, we can upload it also using (Wi-Fi) connection.
Now I can see my file on the display of the printer .
Download Files:
3D Scan
What I learnt in this week is:
SLA produces higher resolution objects and is more accurate than FDM as the resolution is primarily determined from the optical spot size
which is very small.
Also, much less force is applied in SLA than in FDM during layer formation and so the surface finish is much smoother and objects
printed using SLA look much more professional than FDM printed objects.
.jpg)