TASK
This week assignment is to make something big with CNC machine
I decided to make a Stool "it is one of the earliest forms of seat furniture. It bears many similarities to a chair. It consists of a single seat, for one person, without back or armrests".
The design tool that I will be using for this assignment is .FUSION 360 I really like this software.
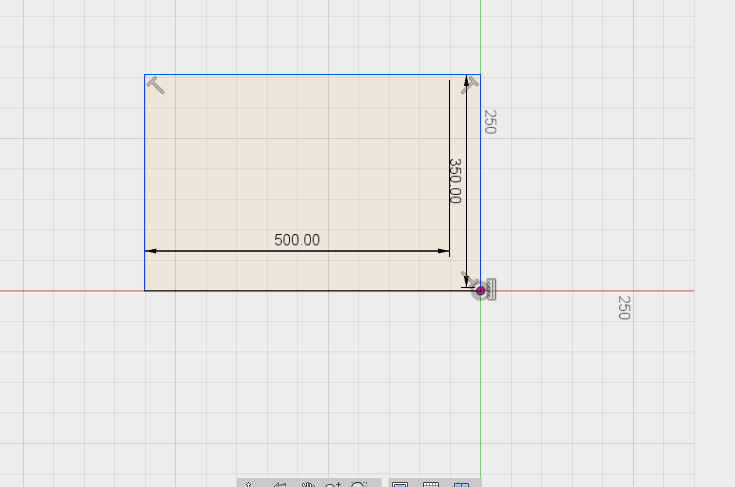
I started by drawing a rectangle (500*350 mm) dimension. This rectangle will be the reference of my design.
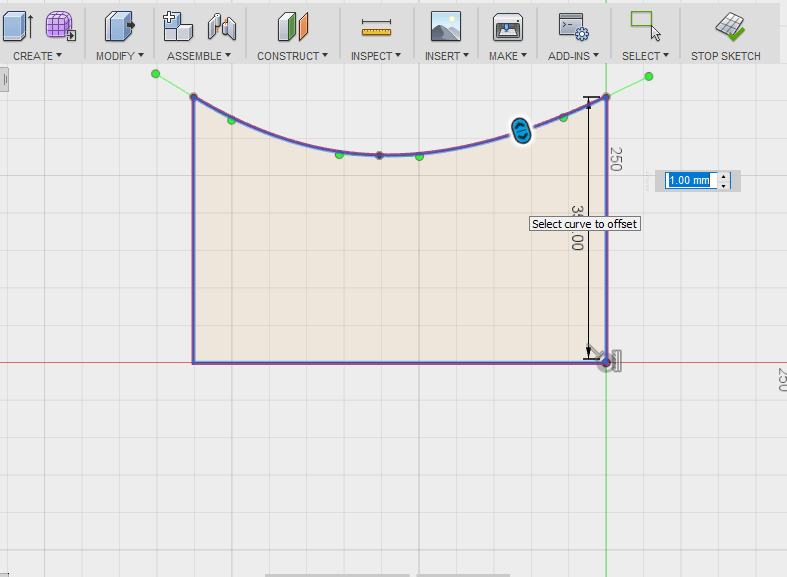
I draw a sketch using (line and spin line), then I chose (offset 50mm) to have a frame.
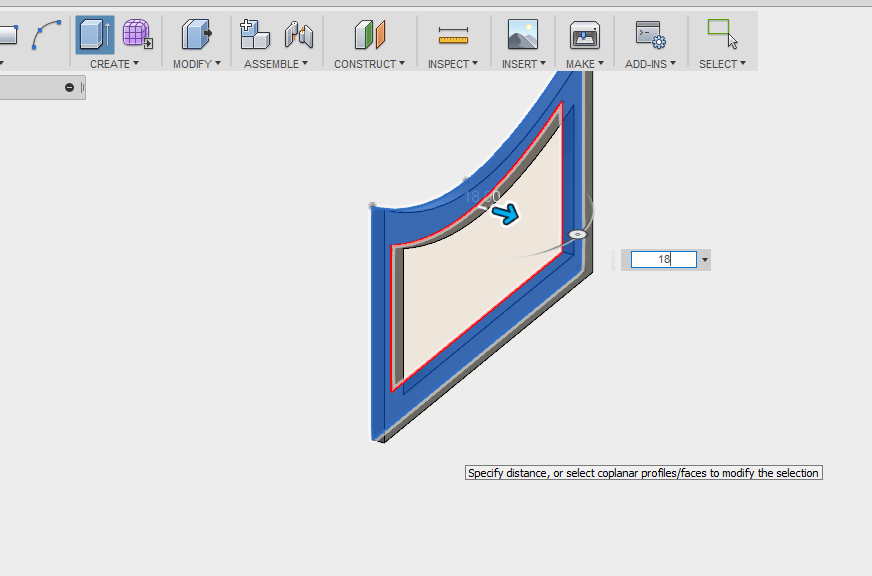
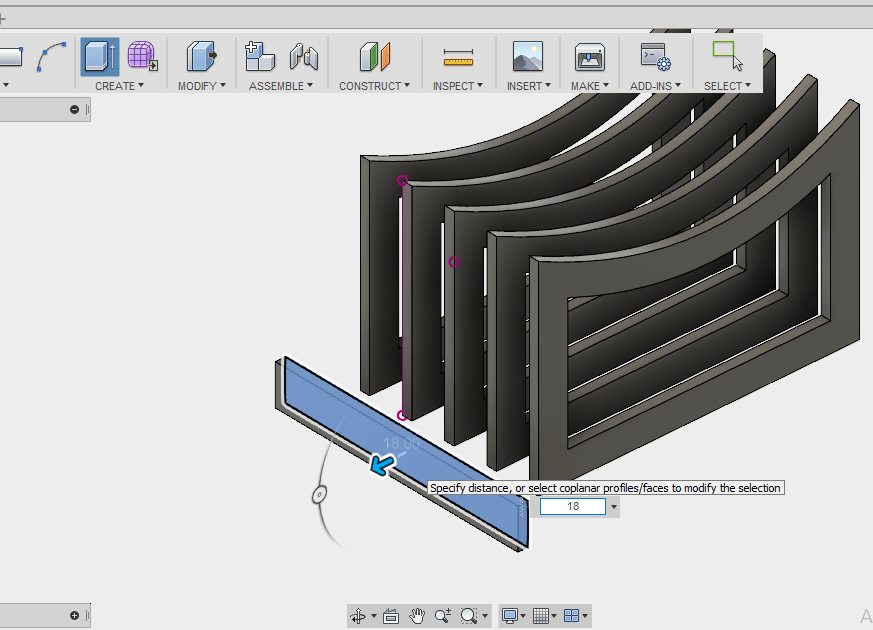
Now I have the frame, which will be the main object in my design, I chose extrude from create menu and extrude the frame (18 mm).
18 mm is the thickness of the wood which I will use for my design.
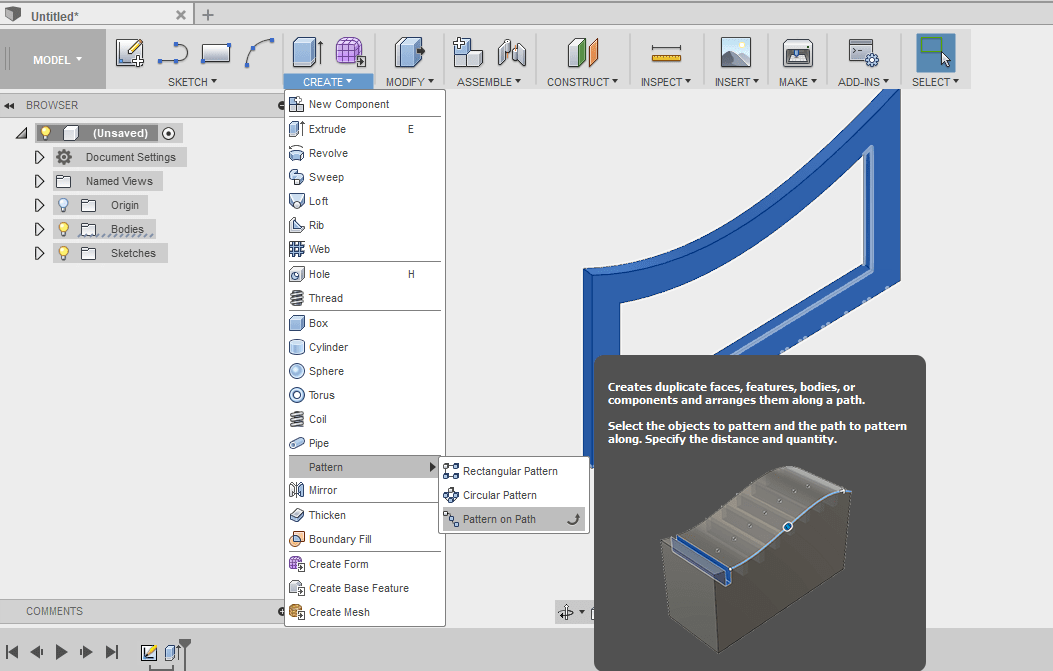
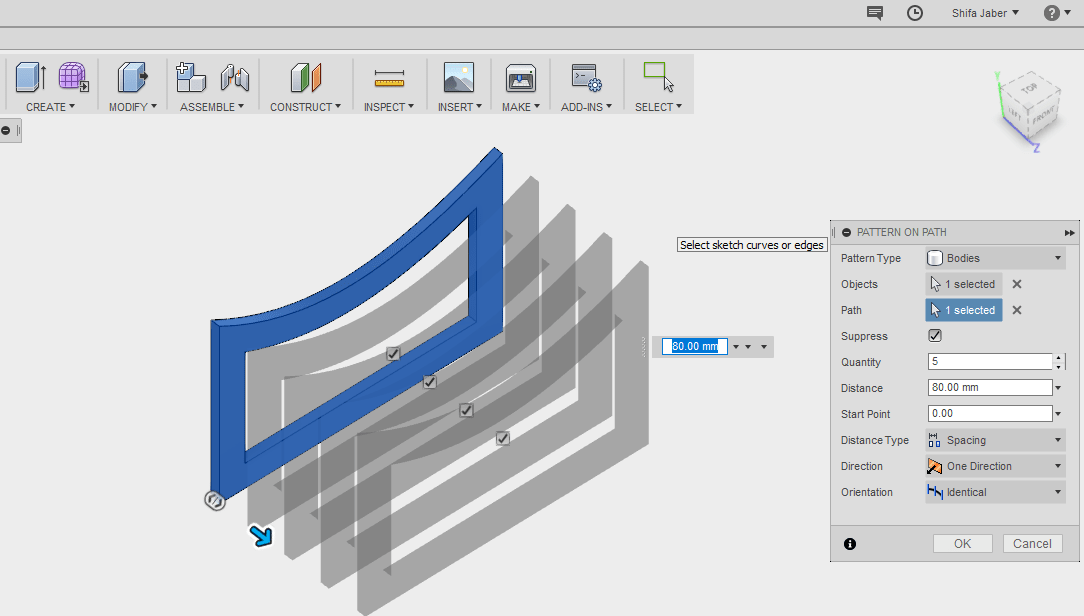
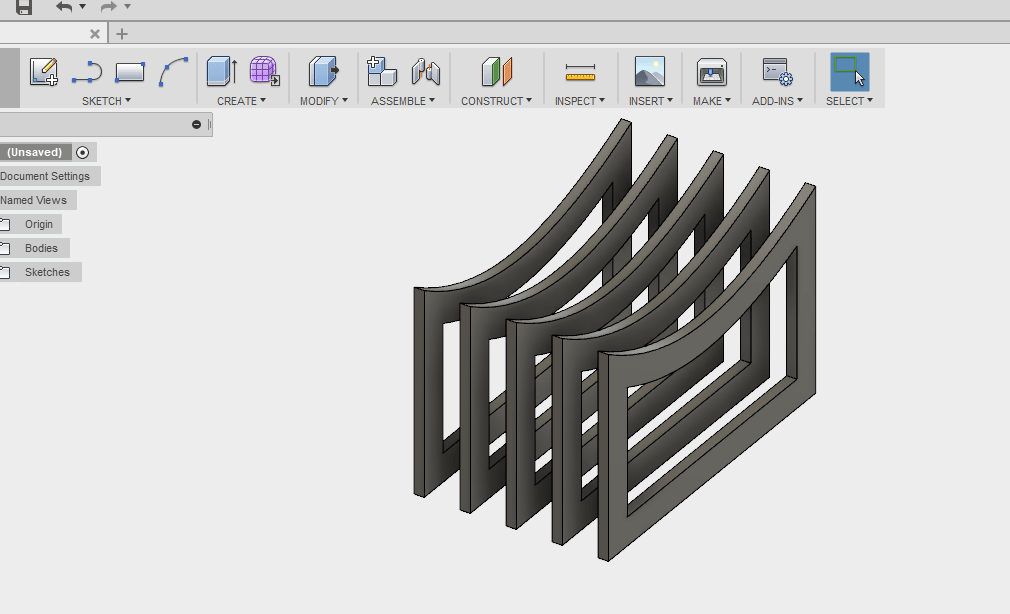
From create menu I chose Pattern on path, then I change the number of quantity and distance Quantity : 5, 80 mm distance
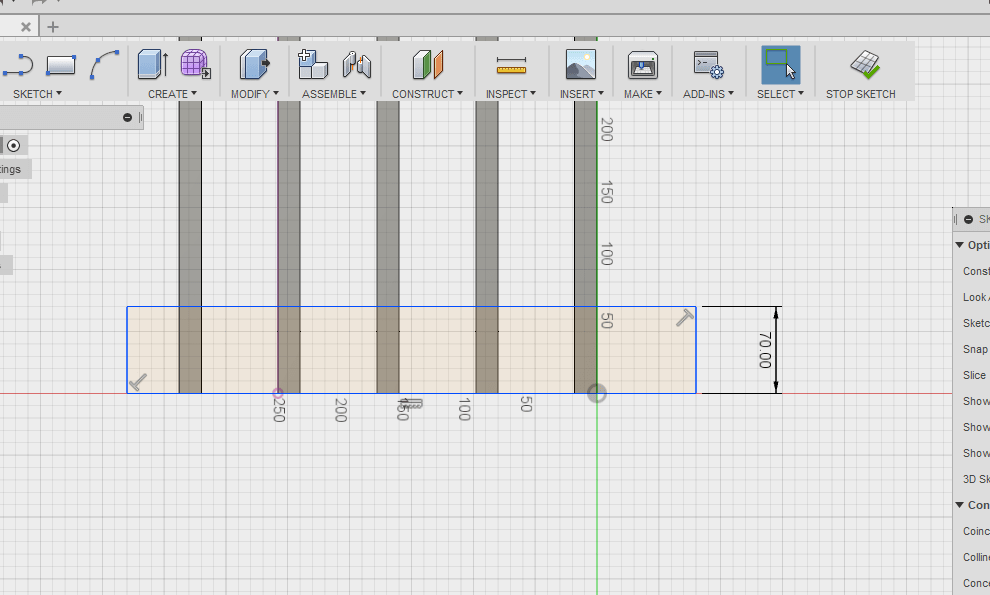
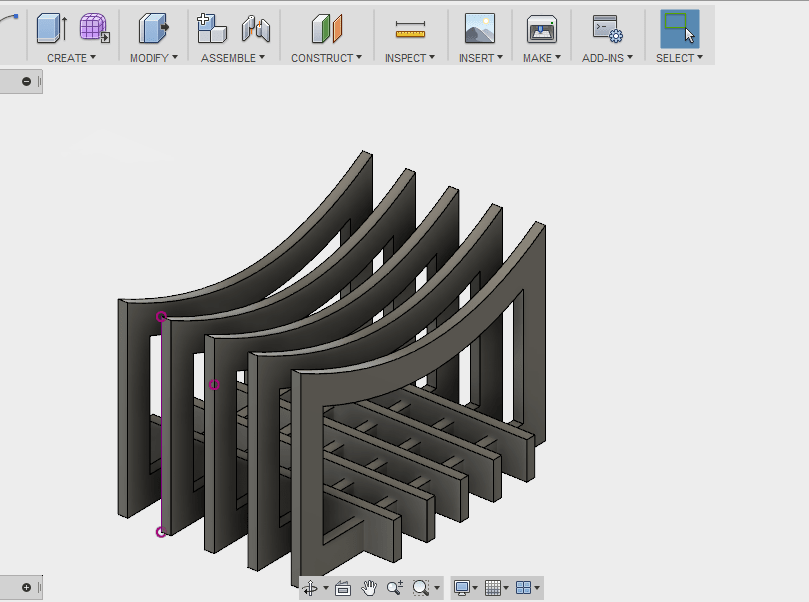
Then I draw a rectangle on the base to hold the frames, the width of the rectangle will be bigger than the width of the frame because when I will make the joint I will subtract the rectangle from the frame.
Extrude the rectangle (18mm)
Make it pattern (Quantity : 5, 70 mm distance) .
On the top of my design I draw an arch using spin line and line, then extrude it (18 mm).
Make a pattern with the same quantity and distance of the rectangle.
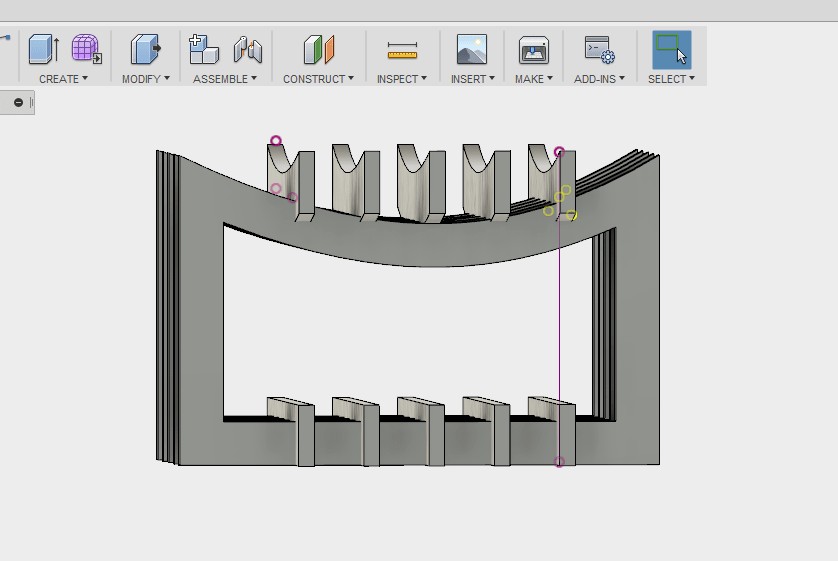
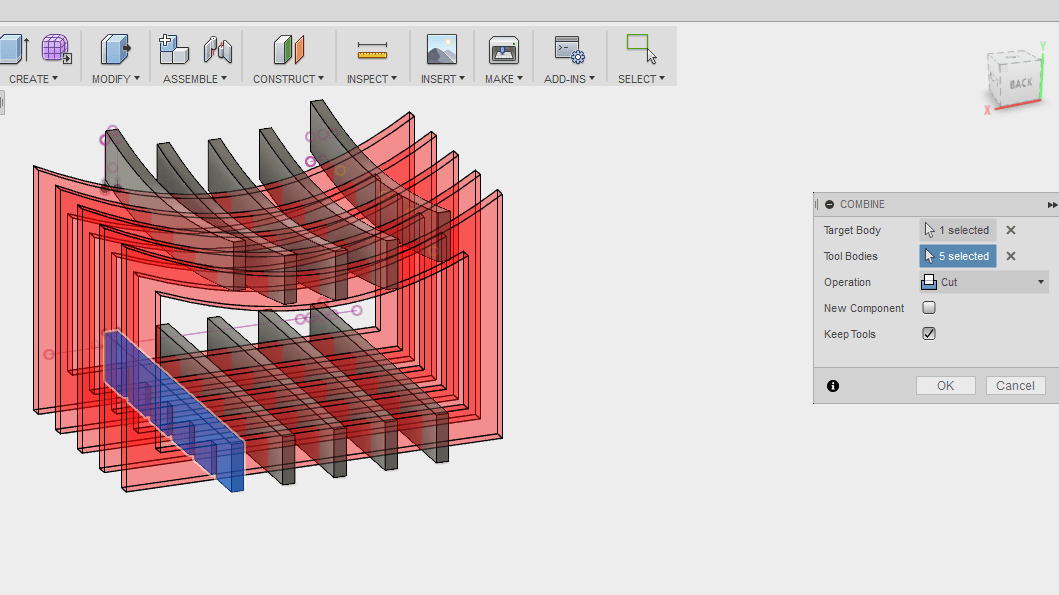
Now I will subtract the rectangle and the Arch from the frame to have a joint. I chose assemble menu - combine, I chose cut operation and click on (Keep tools)
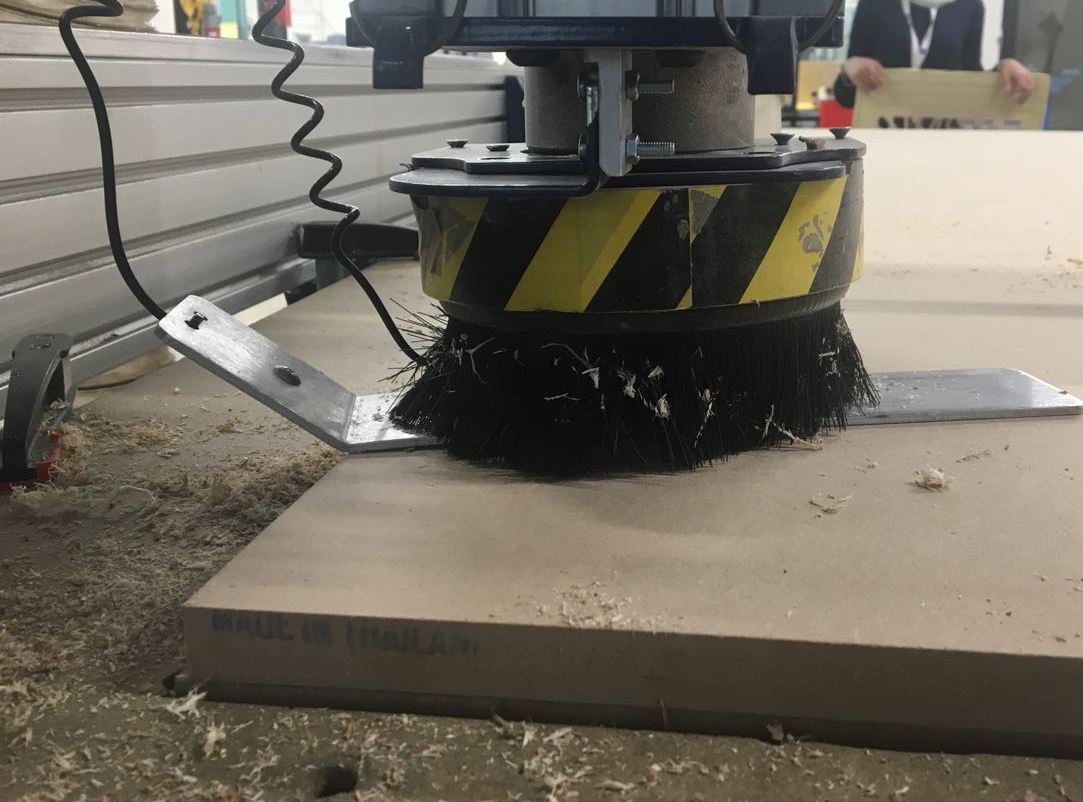
Now it's the time for the real thing, using the Shopbot to cut the real backless chair
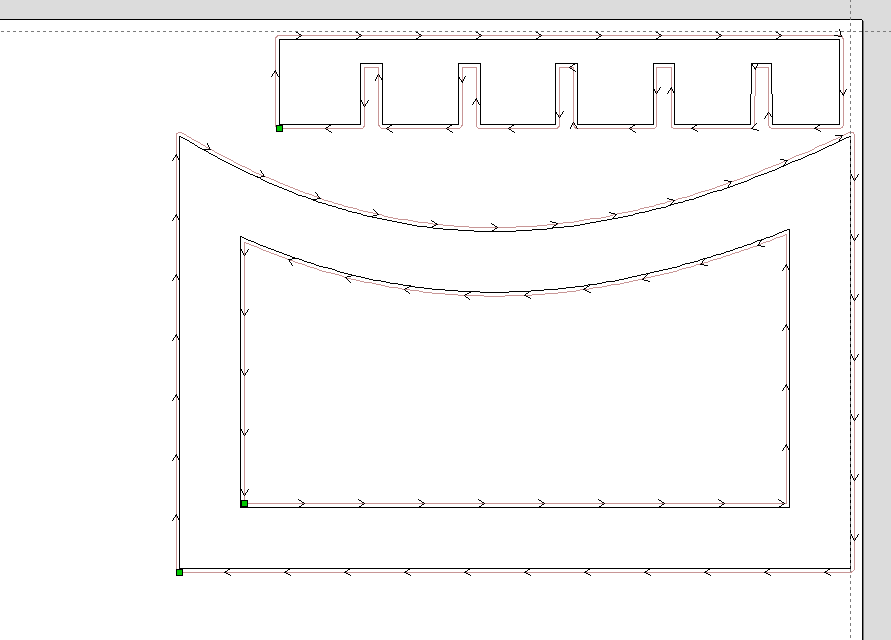
so the first thing was to take the dxf file and uploading it to VCarve in order to get the profile toolpath and the pocket toolpath to start milling.
I upload the .dxf file from file menu then press on import - import vectors
I edit the job size to (2440,1220mm) the dimension of the mdf borad
I chose 18 mm thickness and click on the right Z-zero.
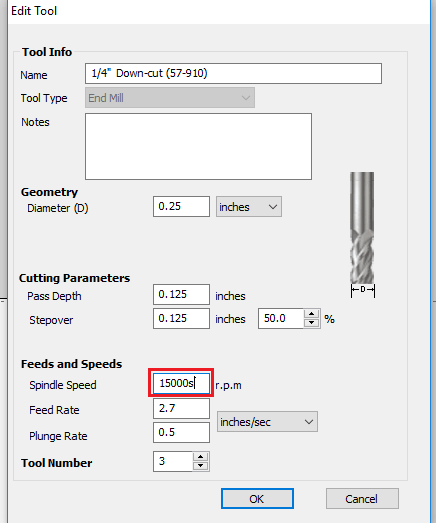
I decide to use 1/4inch end mil
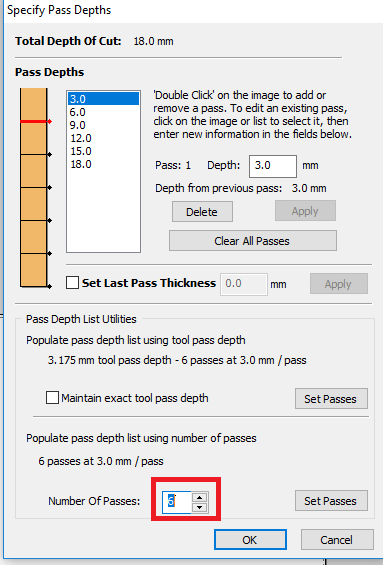
I set the cutting depth (C) to 3mm with 6 passes .
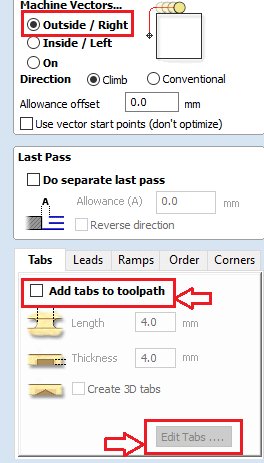
Click on outside cut then press on add tabs to tool path then I edit the path by removing the tabs on the corners.
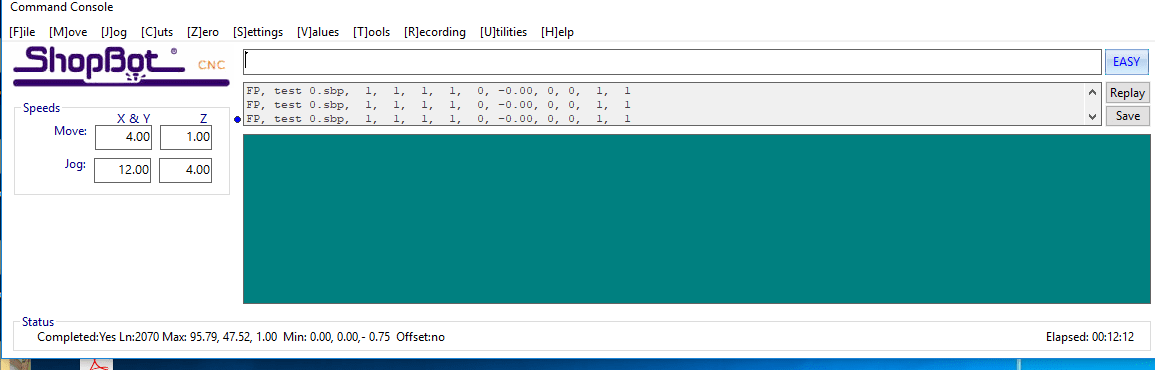
I change the spindle speed to 16000 "rmp" and keep the default settings Then I save toolpaths file using the shopbot to mm converter, and created the sbp file.
Milling with the SHOPBOT:
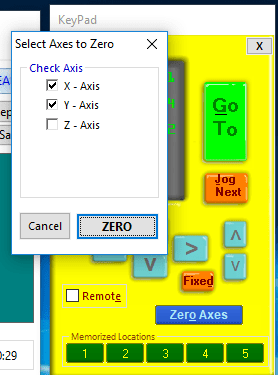
Now the file is ready to be cut. For machine we have to set X,Y,Z.
We manually moved the head to the very bottom left of the wood piece and zeroed the X and Y axis
For Z axis we use probing plate to set the machine zero of the Z axis
To fix the plank to the machine bed we applied the screws.
Now the machine is ready to cut, I chose file menu from shopbot software and chose Part file load.
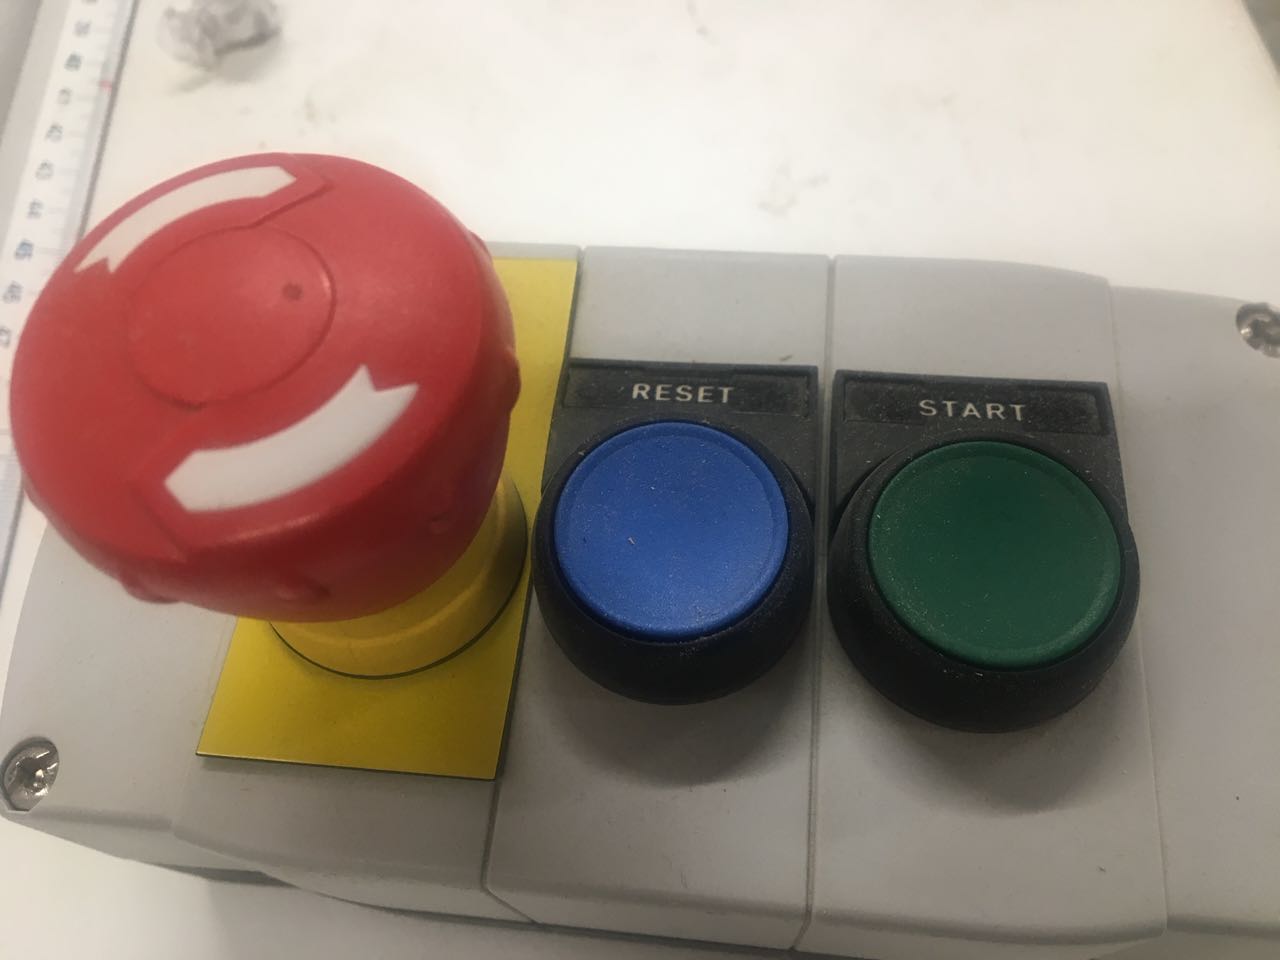
Then press start on on the remote control
Here we have a Problem !!
Unfortunately!! I could not remove the parts from the board so I go back to VCarve and change the Number of passes to 7
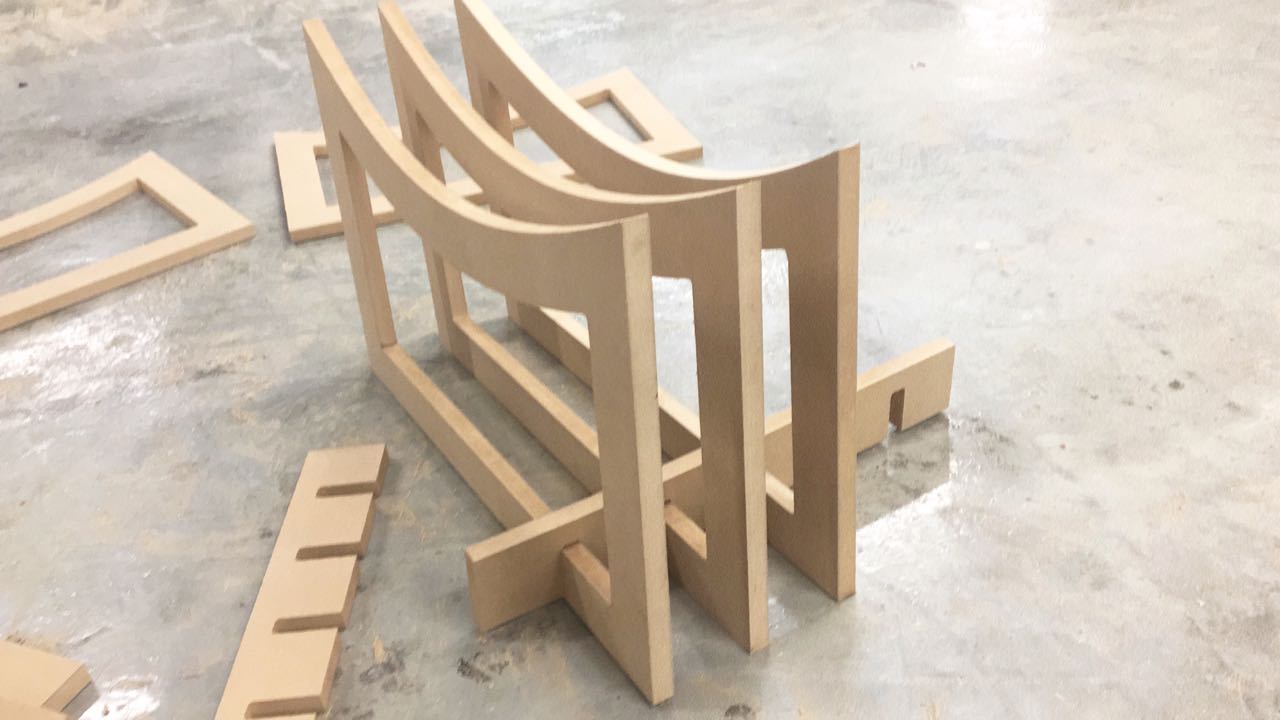
Assembly:
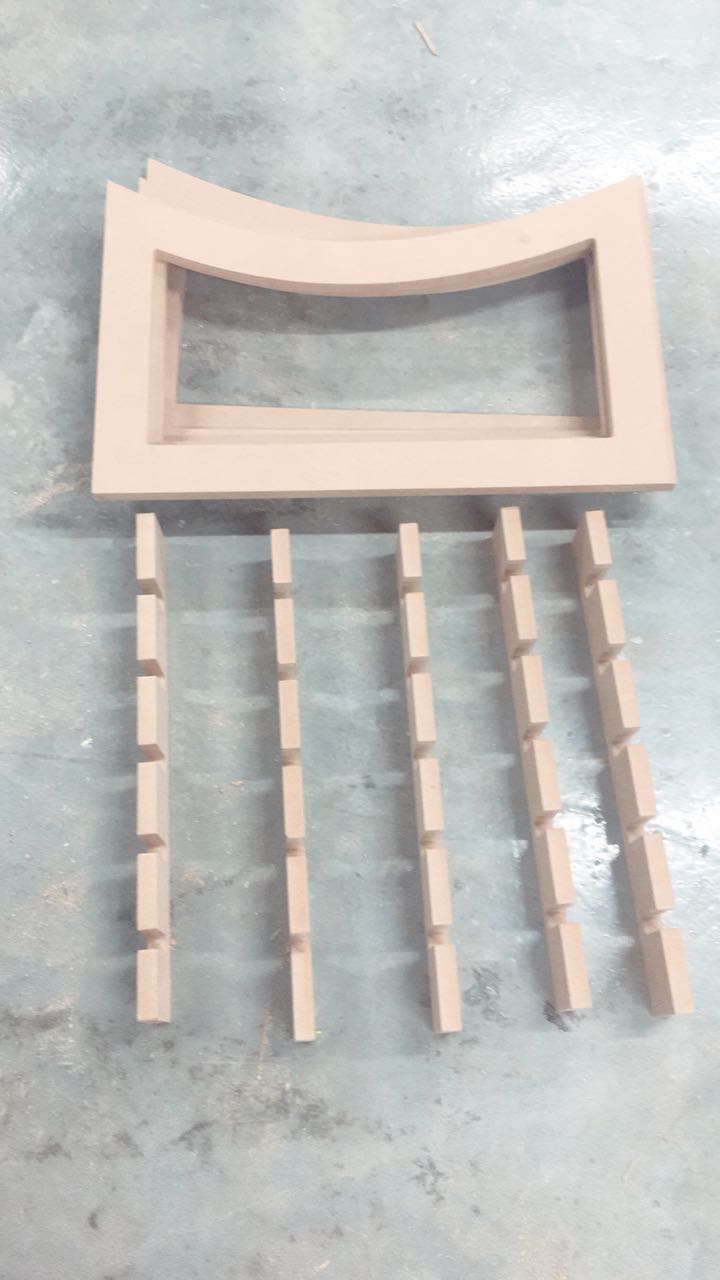
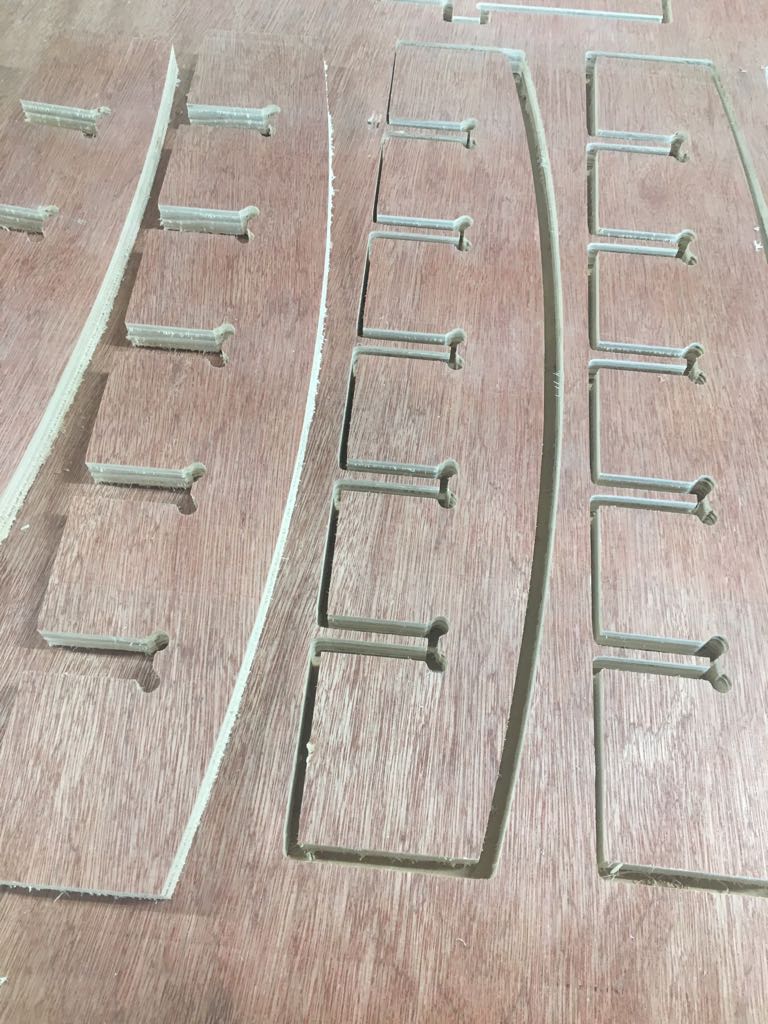
After the machine finished milling I took the parts and started sanding them to get a nice finish.
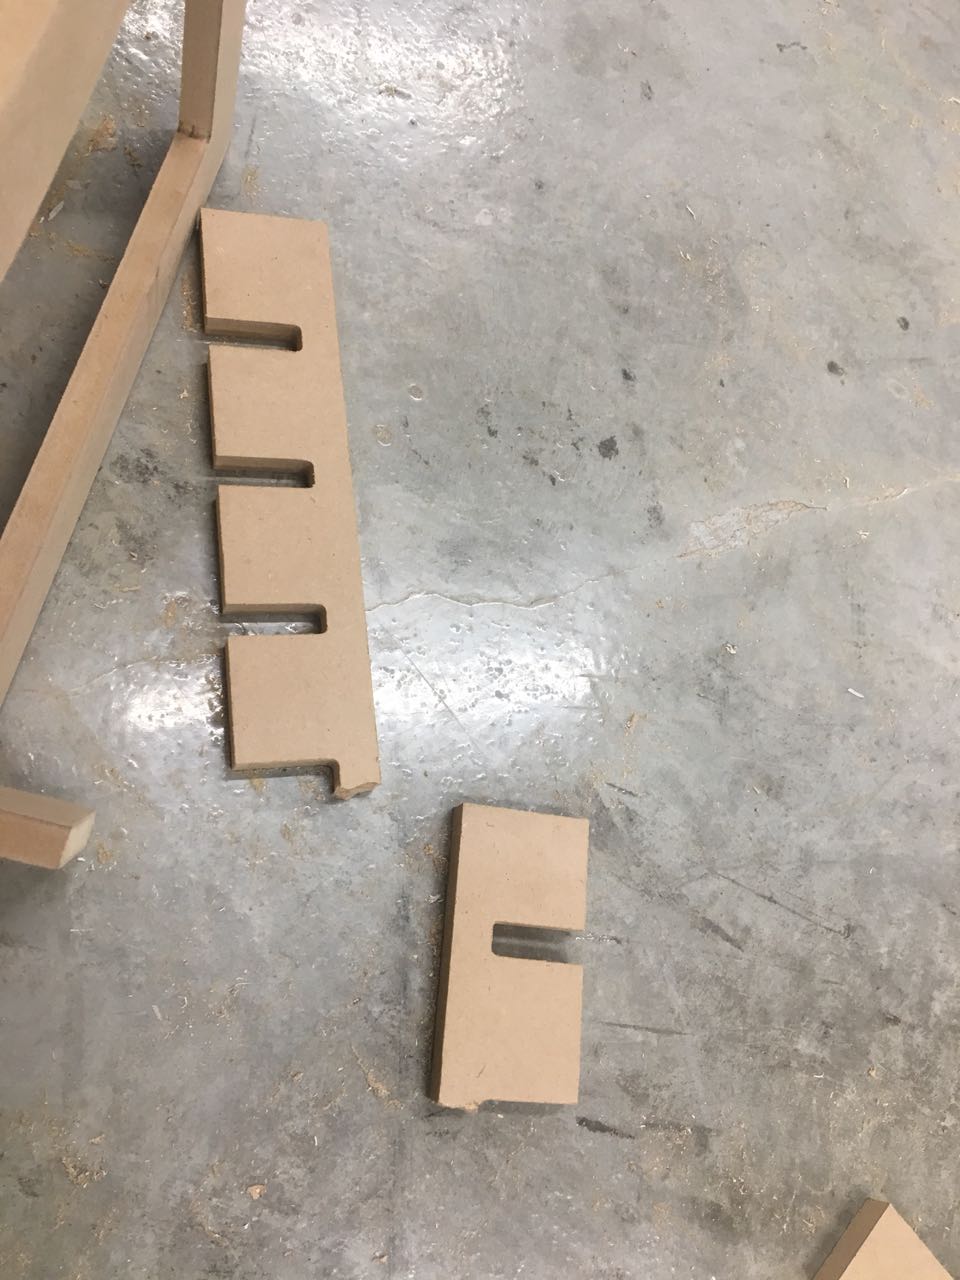
Here I have a problem : while doing the assembly one of the pieces was broken because it didn`t fit enough.
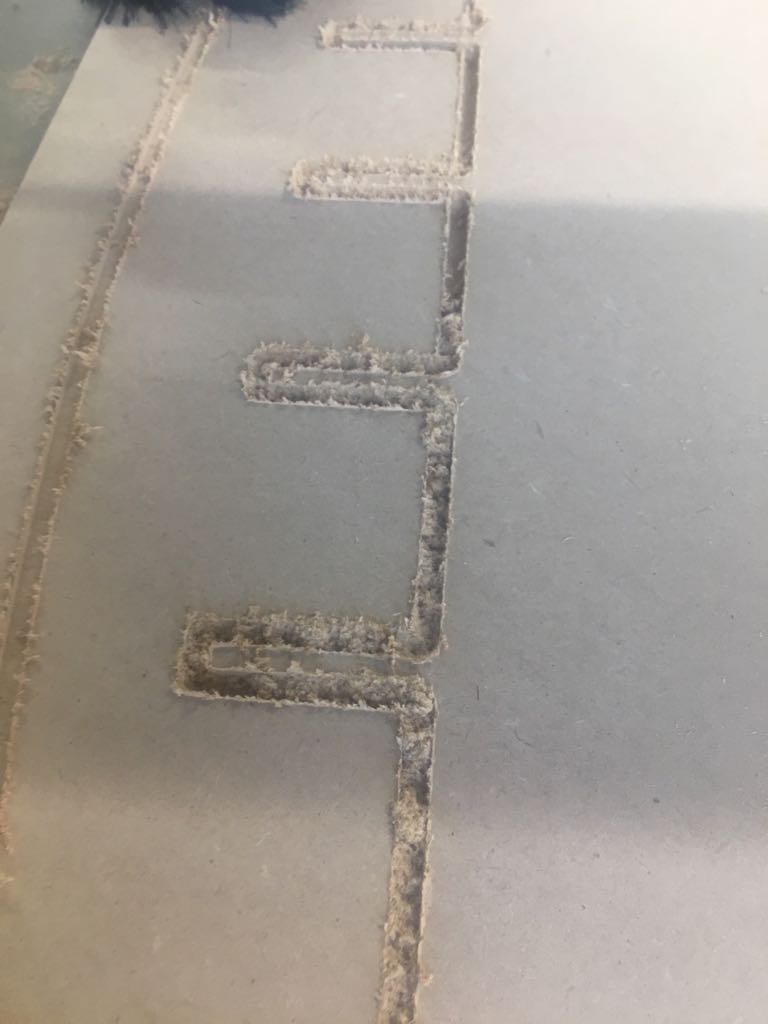
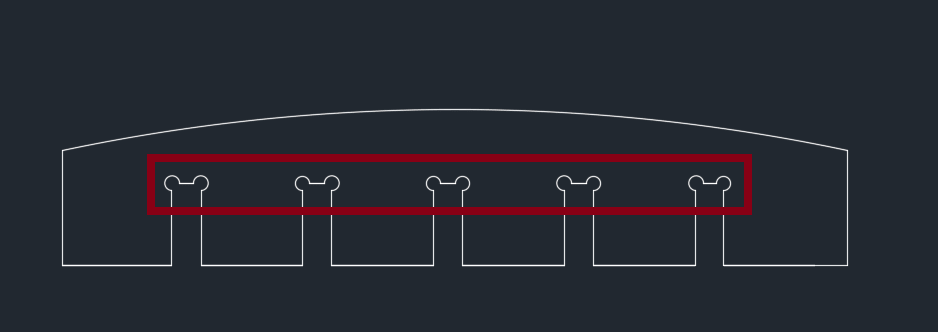
To fix the problem I will make fillet for the parts. The type of this fillet is called dog bone
This image shows how to make dog bone fillet
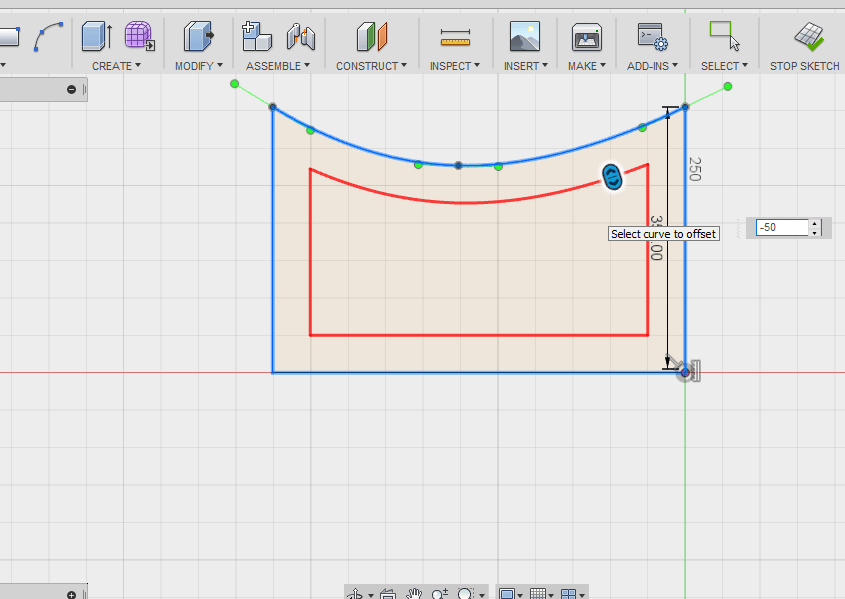
I also want to re-design the base to have a rocking stool. I draw a curve on the base:
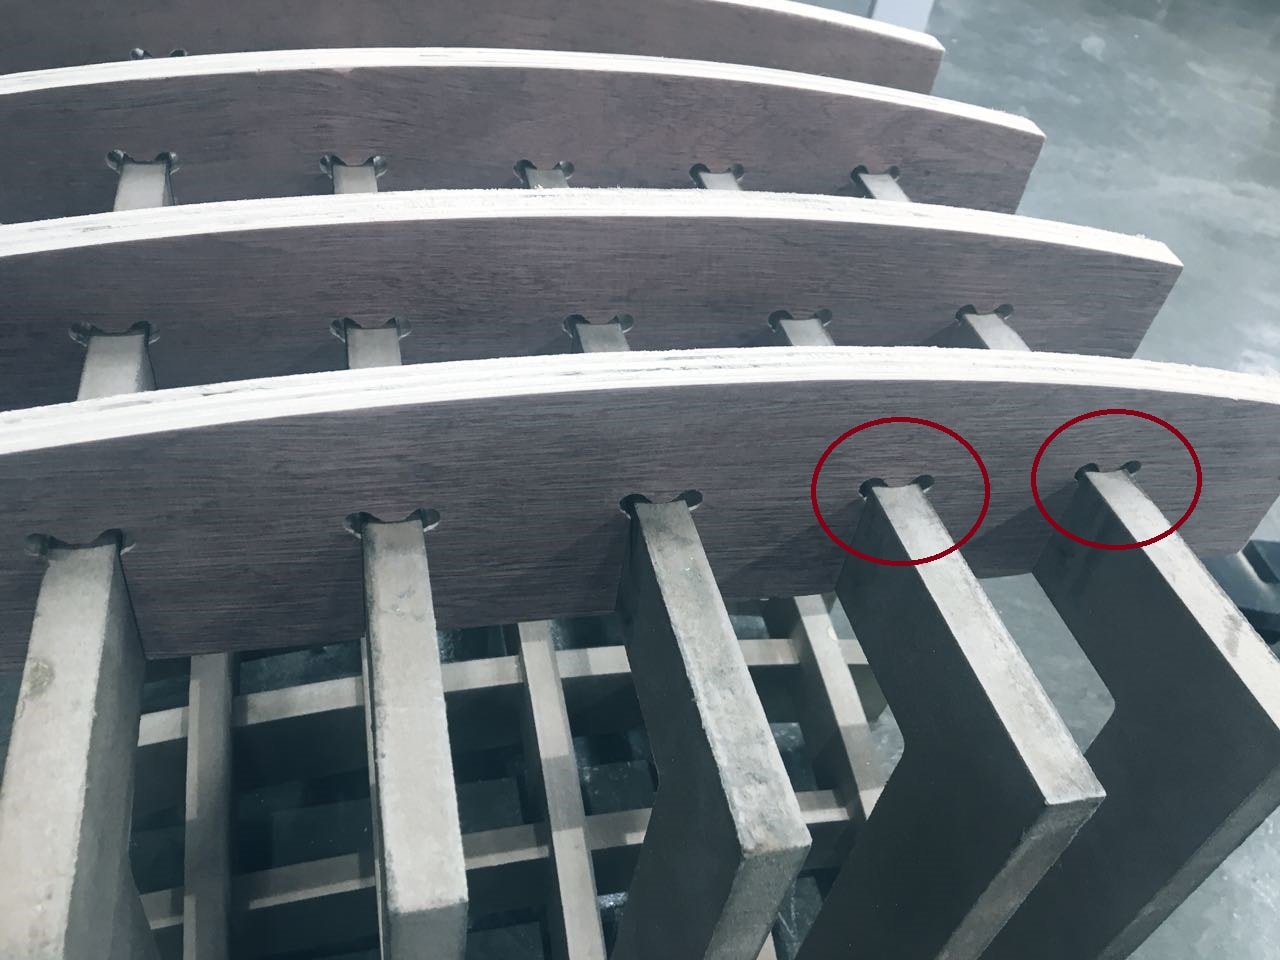
This is what I get:
Now I have a better joint.
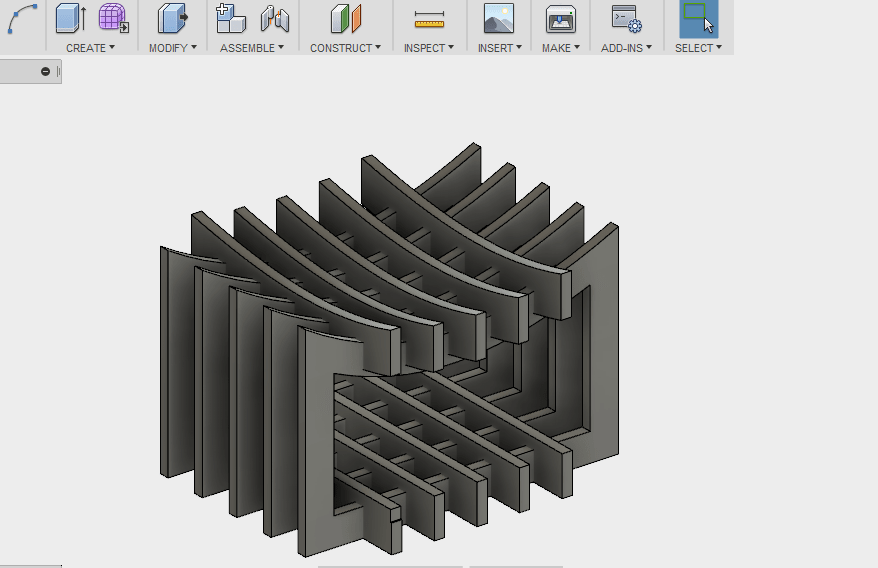
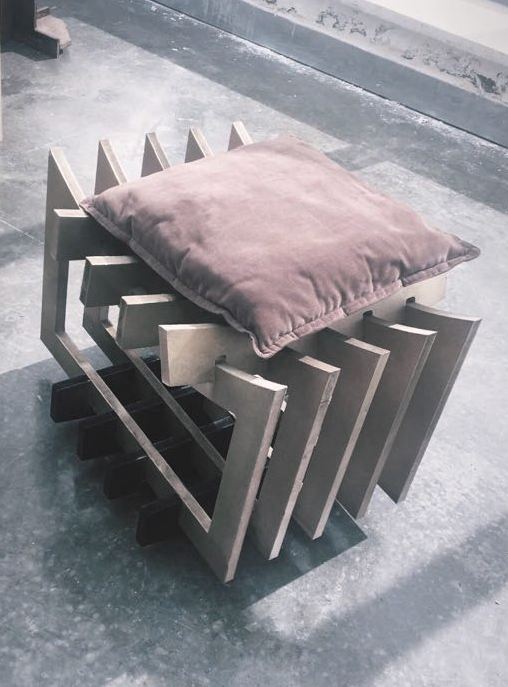
My Final Design:
And the happiness is to see your teacher Albot Dima trying your design =)
It was one of the most amazing weeks! yes, I made something big.