Contact Final Project Assignments My Lab About Me

Week 11

Input Devices

Assignment 11

Group Assignment:

1. Measuring Analog Levels of Phototransistor:

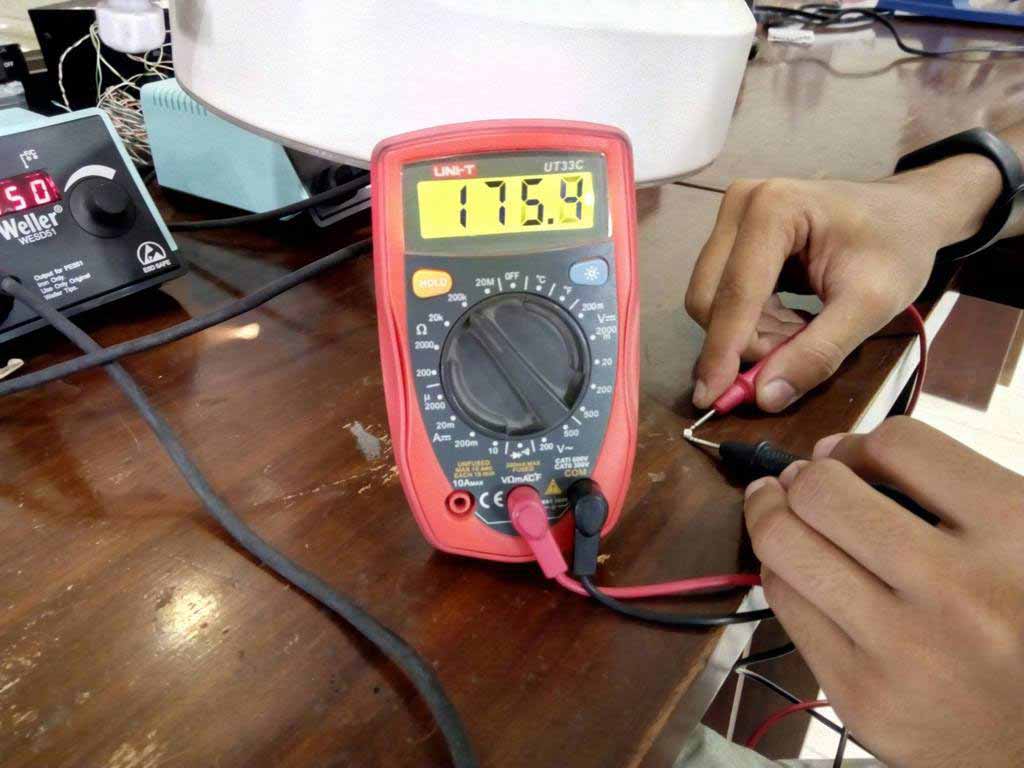
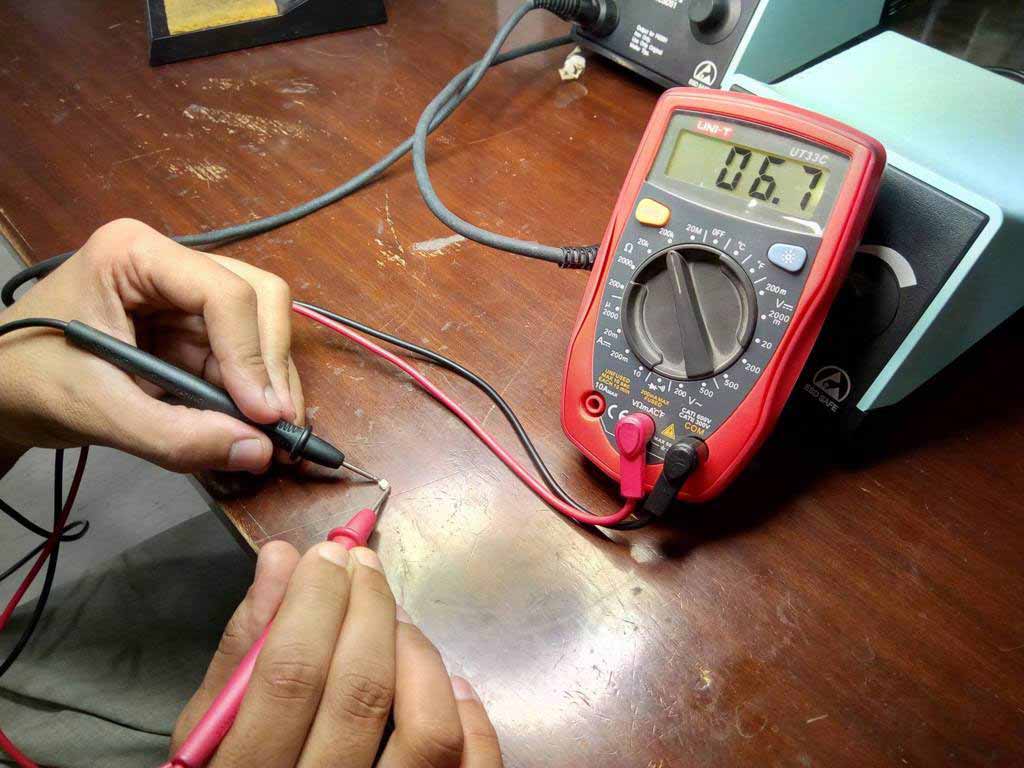
SFH 320 Silicon NPN Phototransistor is used by one of our group member in individual task in which the circuit is detecting light and displays result of light intensity on bar using python. So as the group assignment we measured the resistance of this component which is changed when we increase or decrease the intensity of lights on it. The resistance is measured by Digital Multimeter. We observe that at one instance when we increase the intensity of light resistance decreases and when we decrease intensity of light resistance increases.

Measuring resistance with low intensity of light

Measuring resistance with high intensity of light

2. Detecting Digital Signals in UltraSonic Sensor

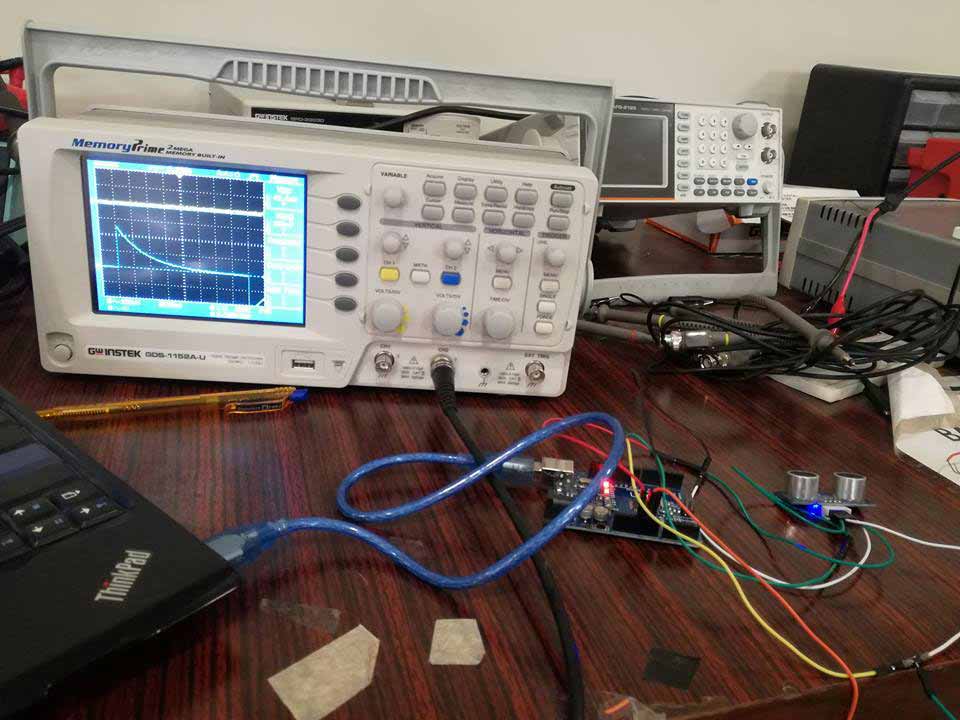
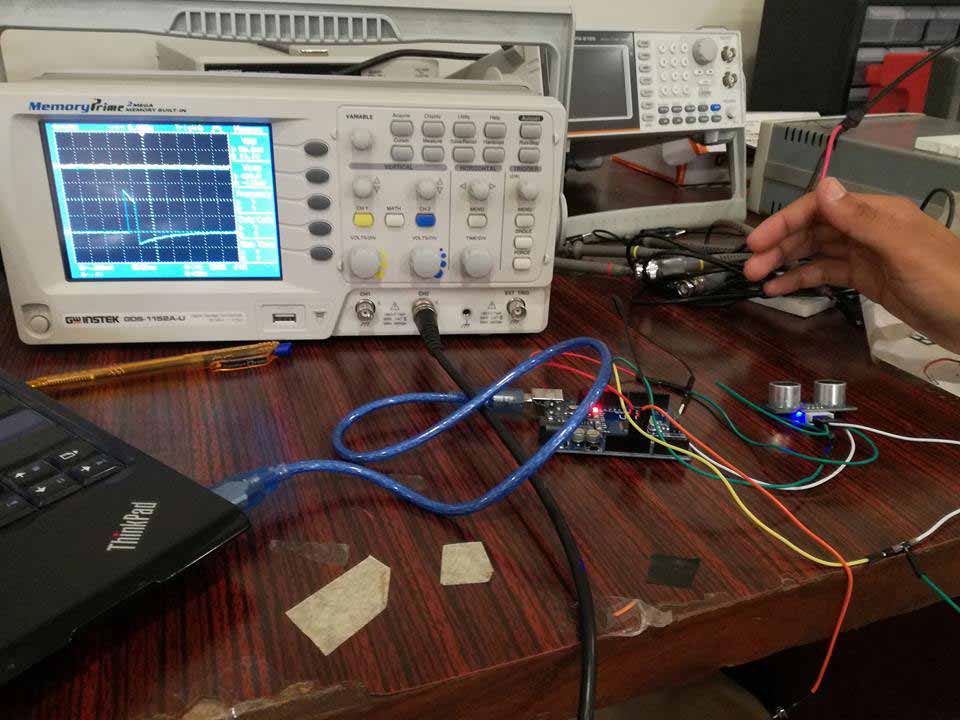
HC SR-04 Ultrasonic sensor is used by one of our group member in his individual task of this week. We detect the change in digital signal in Oscilloscope using arduino UNO. A sensor is connected with arduino and the pin of Echo is connected with Oscilloscope. Arduino is program to detect obstacle in front of Ultrasonic sensor (a code is attached with files), when an obstacle is present in front of Ultrasonic sensor we found change in wave in oscilloscope

A digital signal without obstacle

A digital signal with obstacle


Individual Assignment:

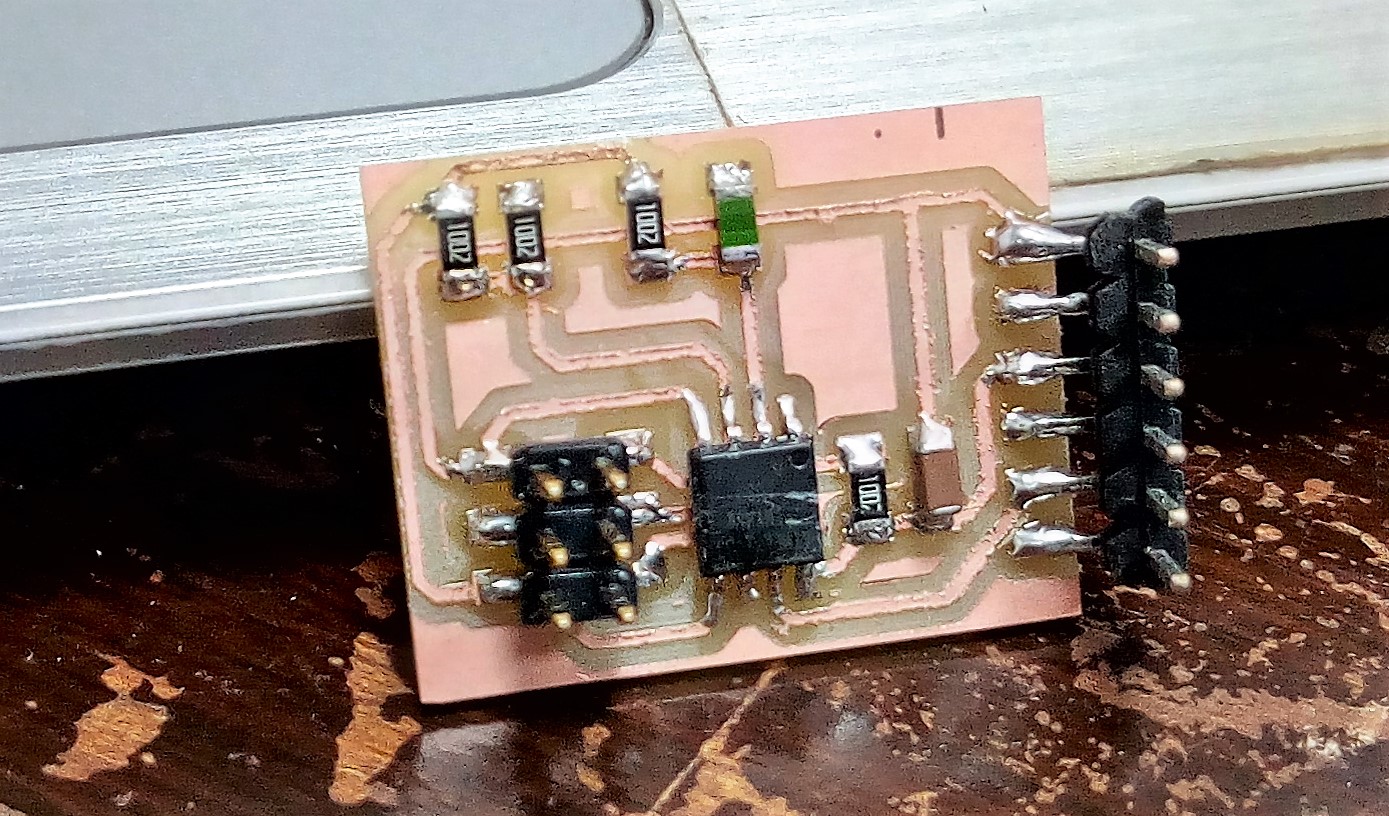
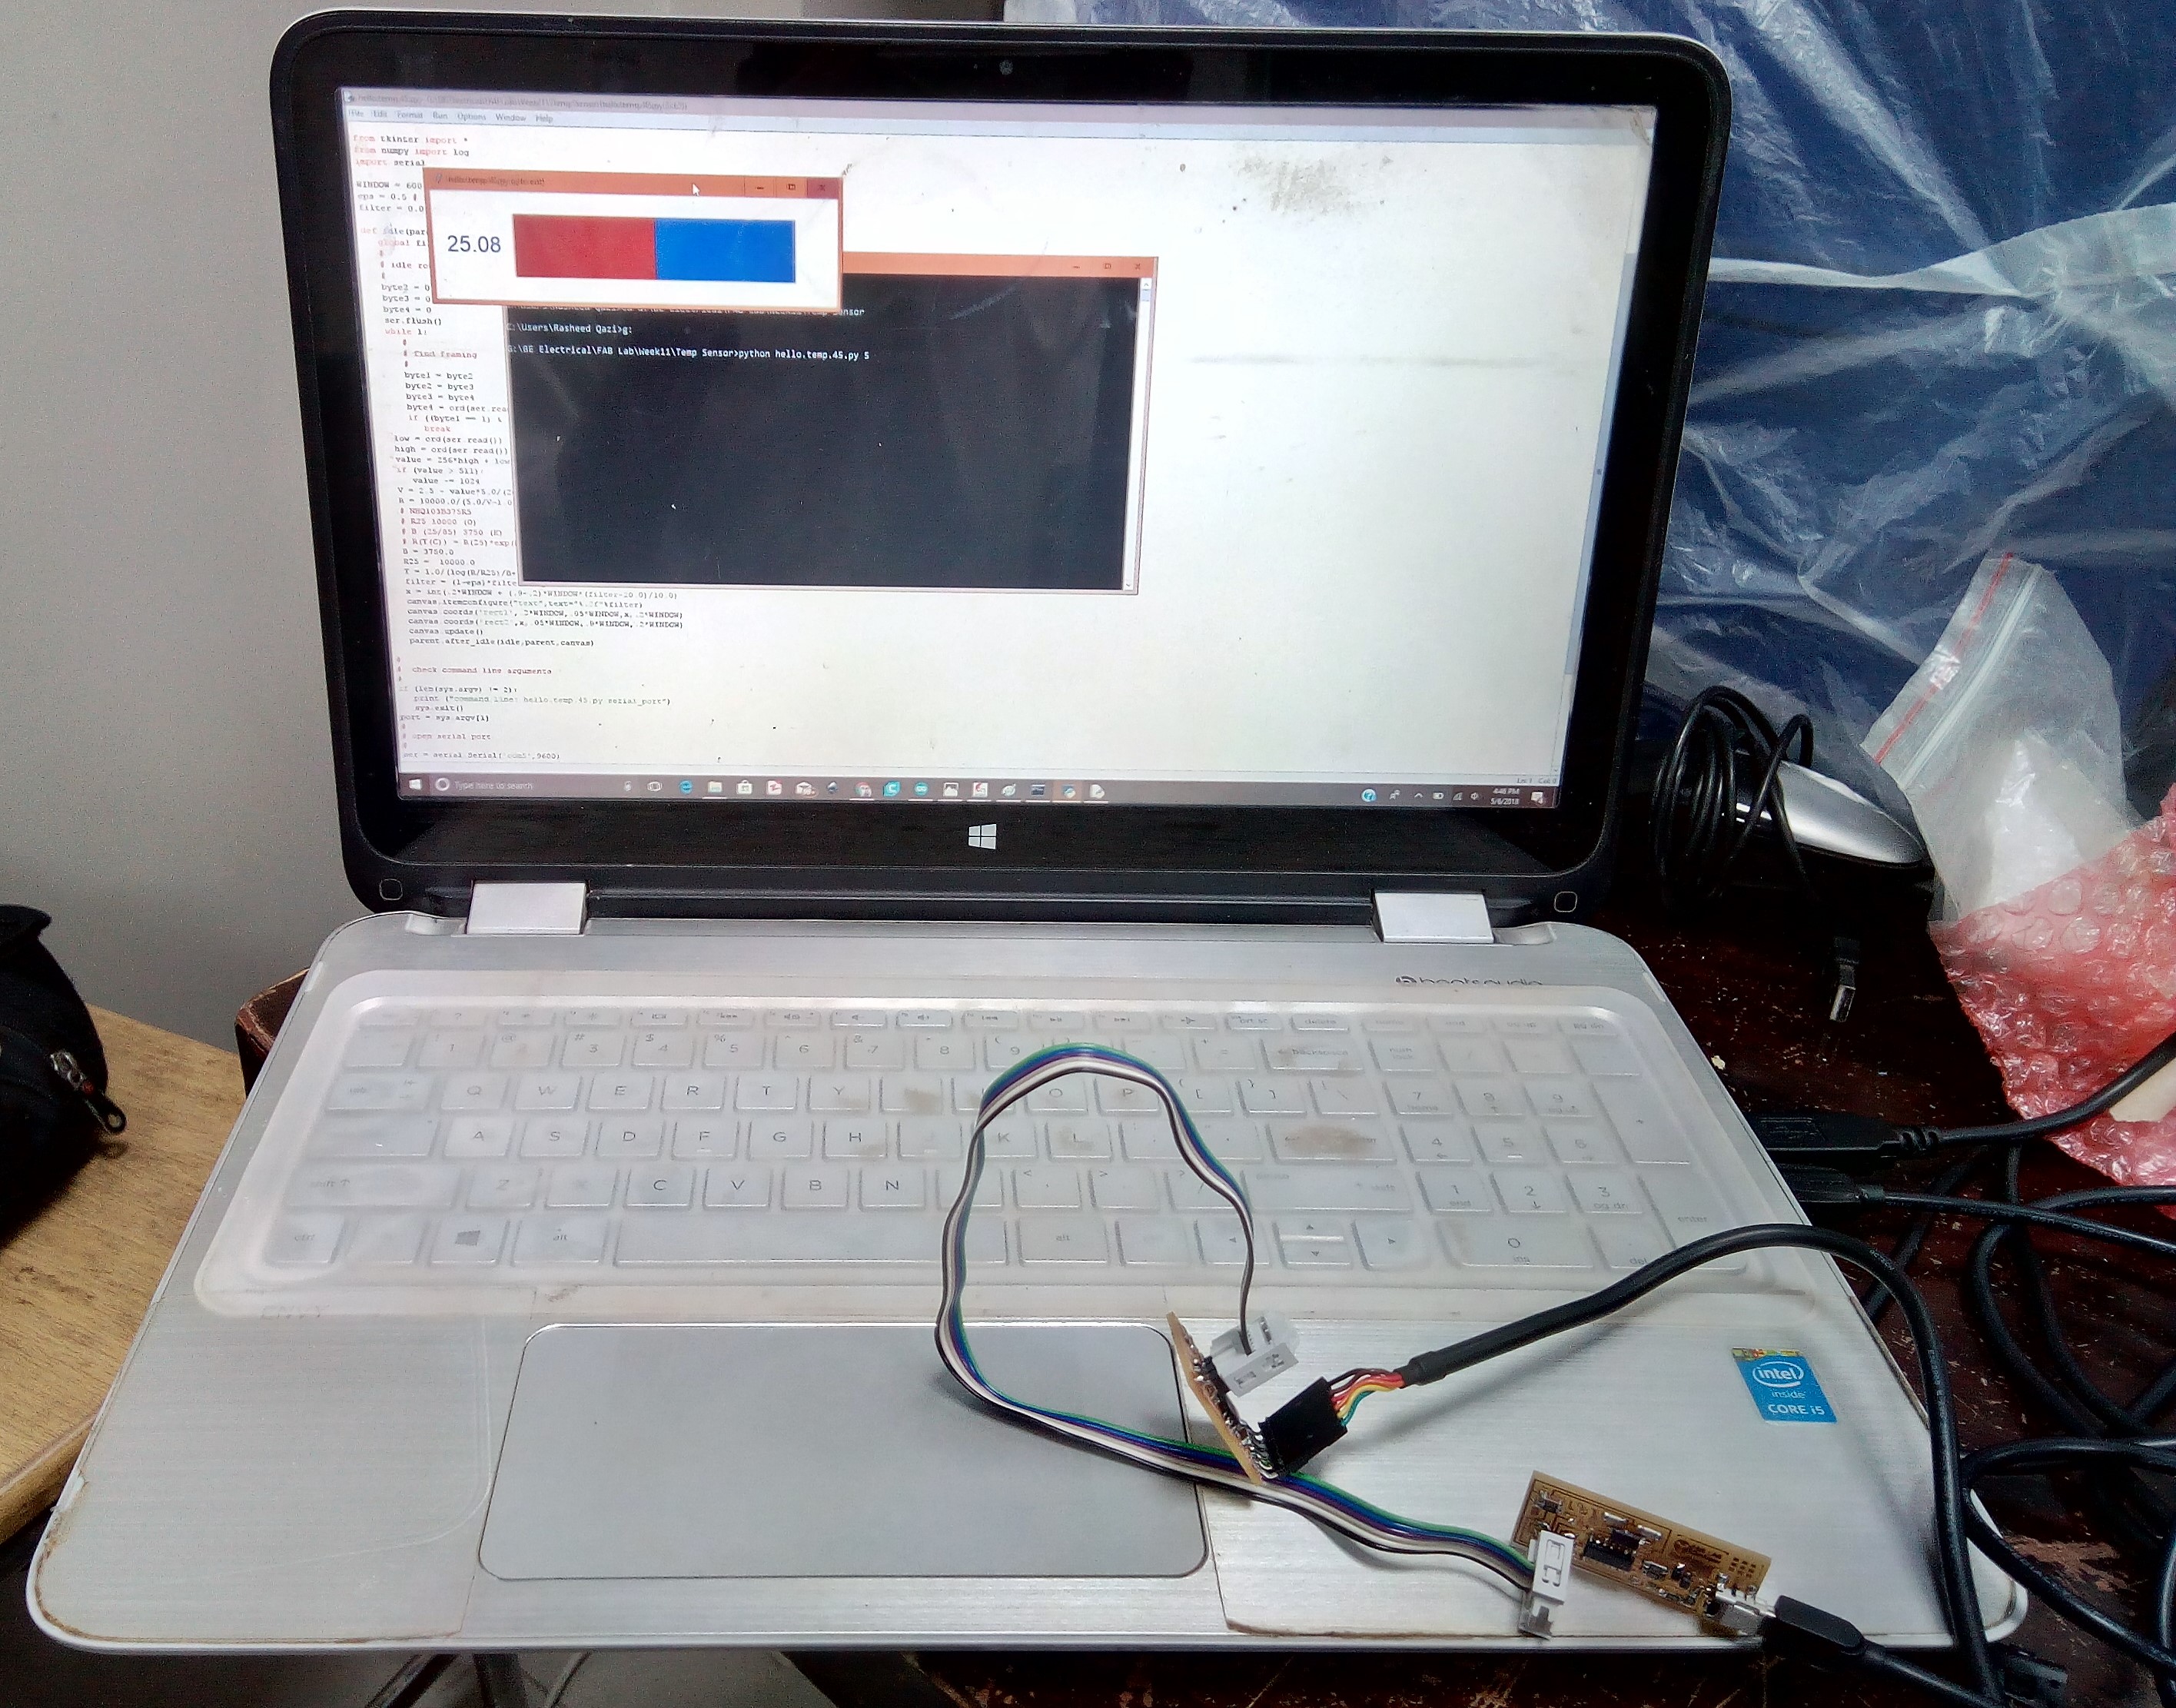
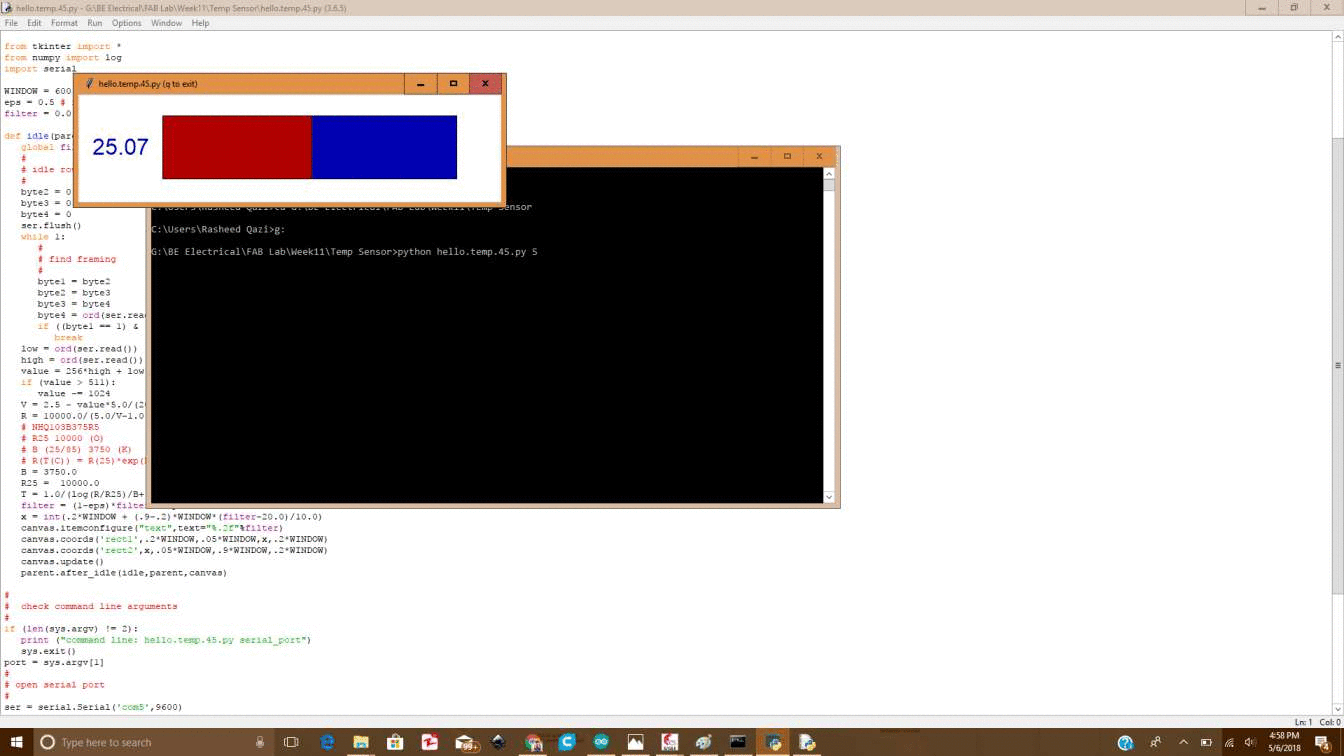
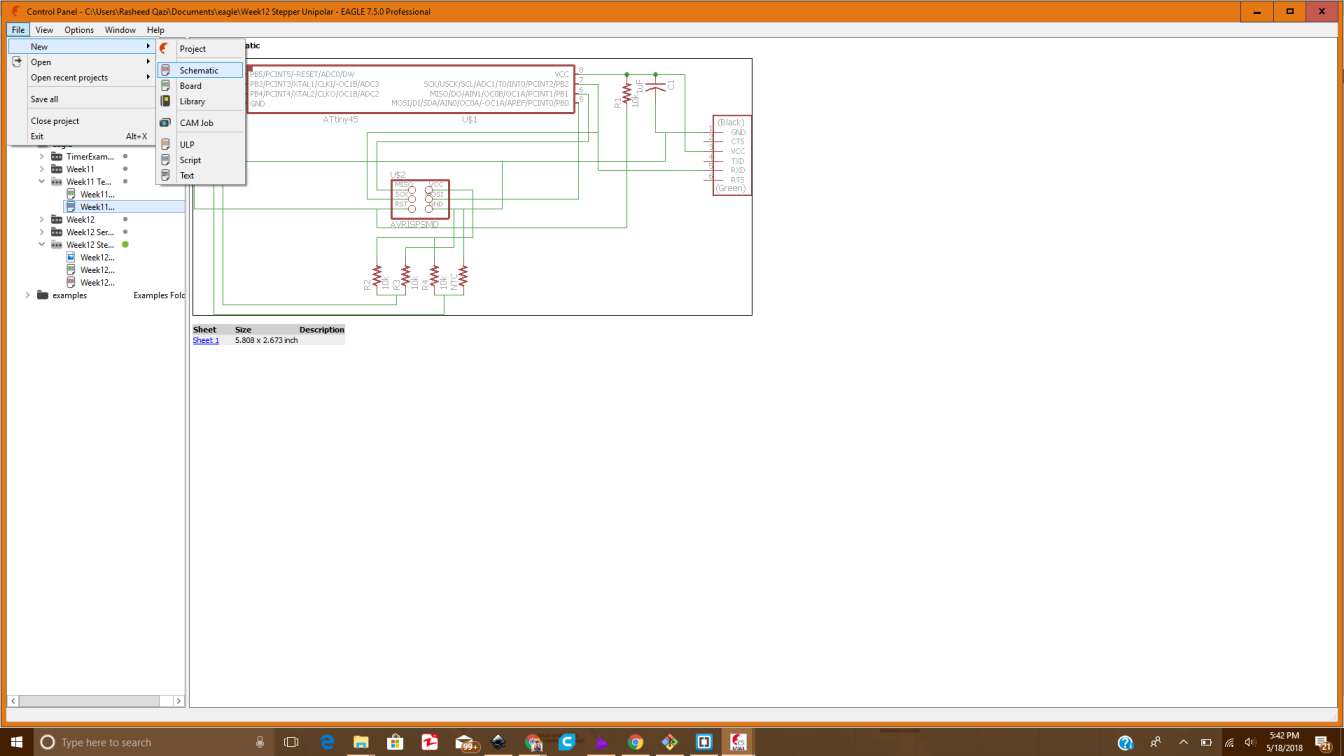
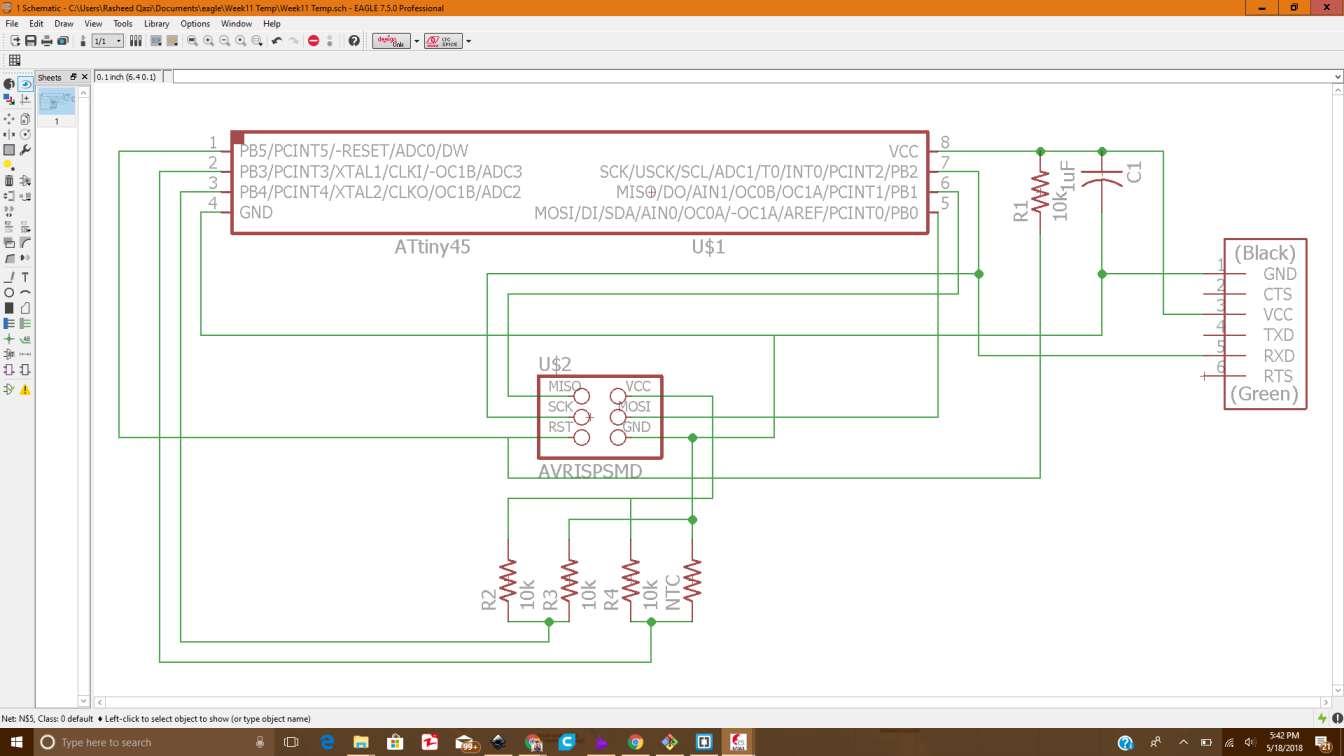
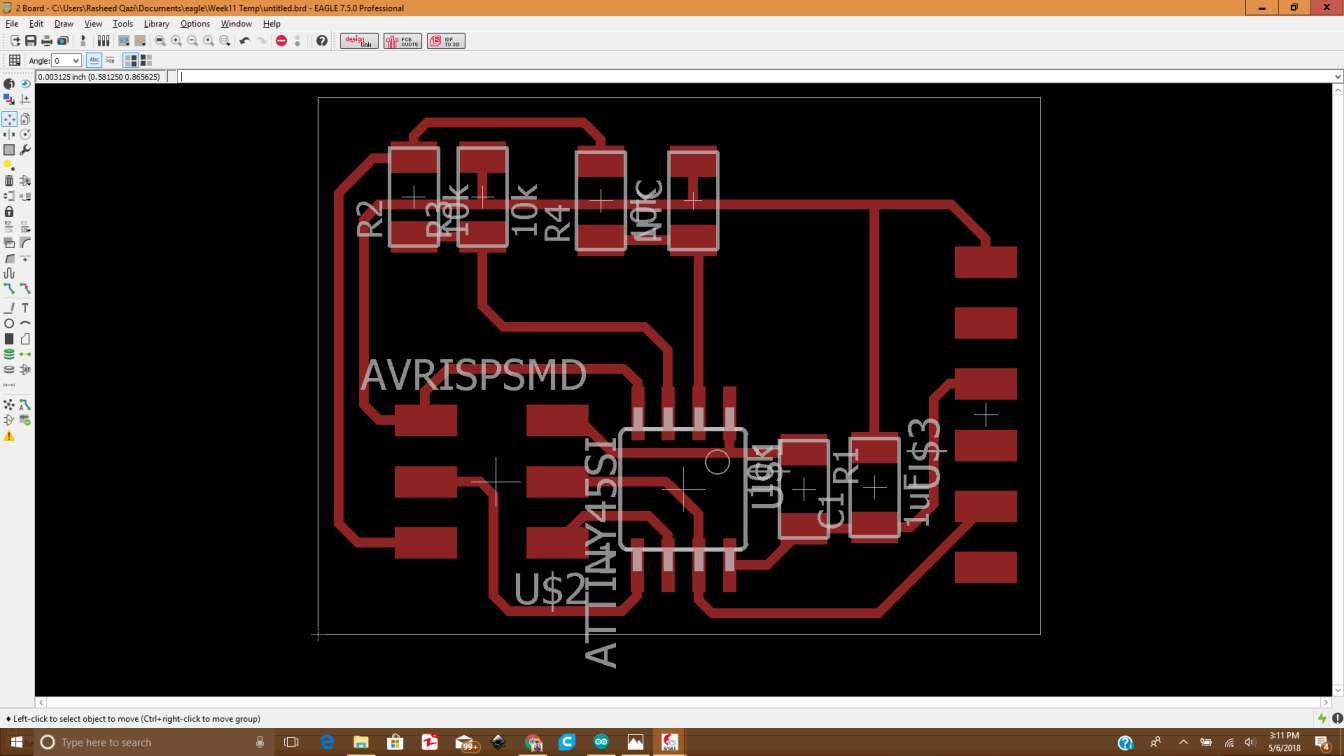
For completing the assignment of this week, I chose the circuit of Temperature Sensor. This circuit is using a NTC(Negative Temperature Coefficient) resistor placed in a formation of wheatstone bridge. We had the option to use the circuit traces availble in class schedule, but it was better to make it by myself and I did it accordingly.

1.Re-designing the Circuit

For designing the circuit I used Eagle software.

  • First I created the schematic by using the components from Fab library of Eagle.
  • Making new Schematic

  • After placing and connecting the components, the schematic was ready which can be seen below:
  • Complete Schematic design

  • Now I switched to the board and started making the PCB.
  • PCB Layout in Eagle

  • Then I exported the circuit as a .png file, and made the Traces and outline files so that I can generate the .rml files
    Traces of the Circuit

    Toolpath for the Traces of circuit

    Toolpath for the Outline of Circuit

    2. Milling and Soldering

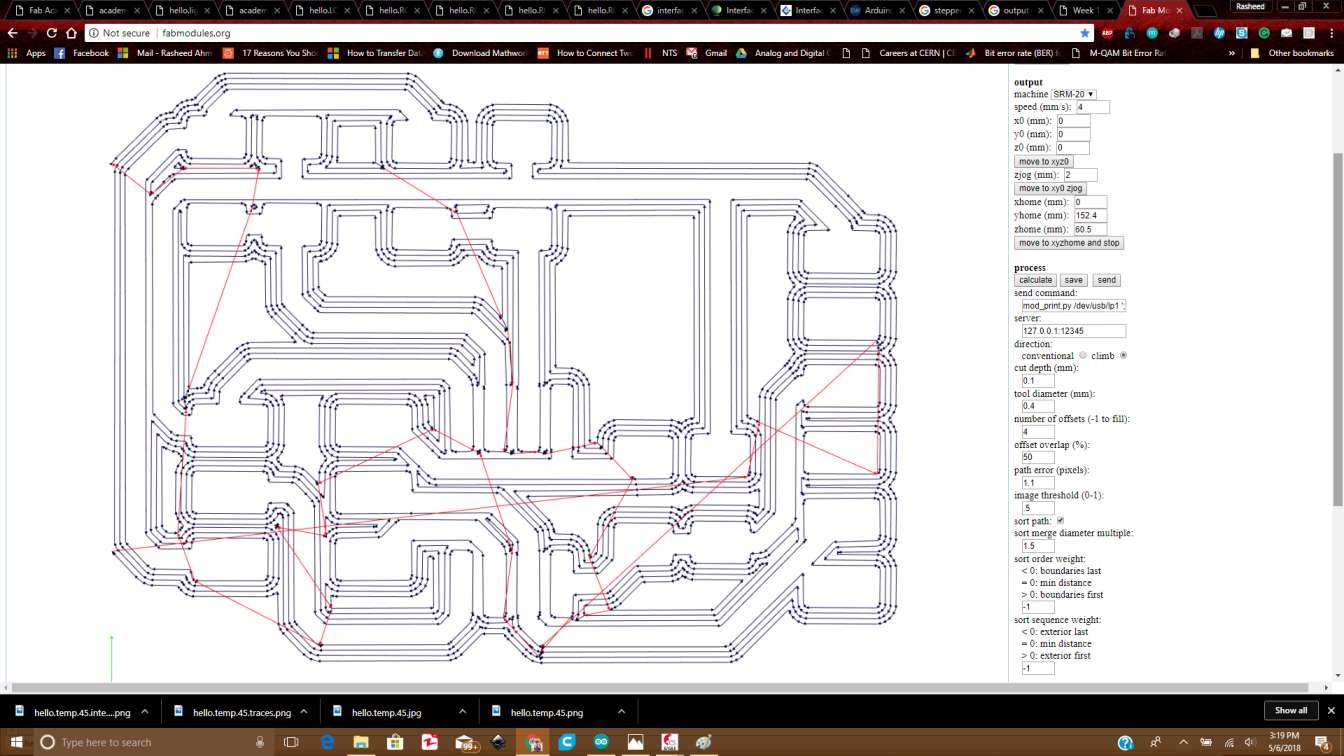
    After making the .rml files, I milled the circuit using SRM-20 machine and the images of that are attached below:

    Circuit after milling and soldering

    Till now everything seems quite similiar as I have already done in previous weeks. now was the time to proceed to programming.

    3. Programming the board


    I started programming the board using My Fab ISP. After uploading the c code then comes the time to open the Python program. Here I faced a little difficulty since it was the first time I was working on this programming Language. I came to know from my Instructors that we need to make certain changes in the code because the Python code was actually for Python Version 2.7 and we are having Version 3.6. The Changes that I made are mentioned in the picture below:
    Changes made to the original python code

    After making these changes, when I executed the code there was nothing at the output and I got the response shown below:
    Python results after executing the code

    Then I keep trying to make it work and after several attempts I was able to load the code. but for that I needed to go to Command prompt, then to the directory where the python file code file was placed and then to write a short command that is "python filename Port_Number_On_Which_Board_Connected". Further you can see from the below picture:
    Python execution using CMD

    Finally I was able to get the values of Temperature on Python Interface :)
    While Working on the Circuit

    The results are shown below:
    Results on Python Interface

    Video showing the working

    That's all for week11..
  • All the Files of Week 11 can be downloaded from Here.


  • Creative Commons License
    This work is licensed under a Creative Commons Attribution-NonCommercial 4.0 International License.