Design and build a wired &/or wireless network connecting at least two processors
In this week, I have used an ESP 12E board, and I communicated through my computer to control an LED and a Servo motor connected with it.
1.Circuit
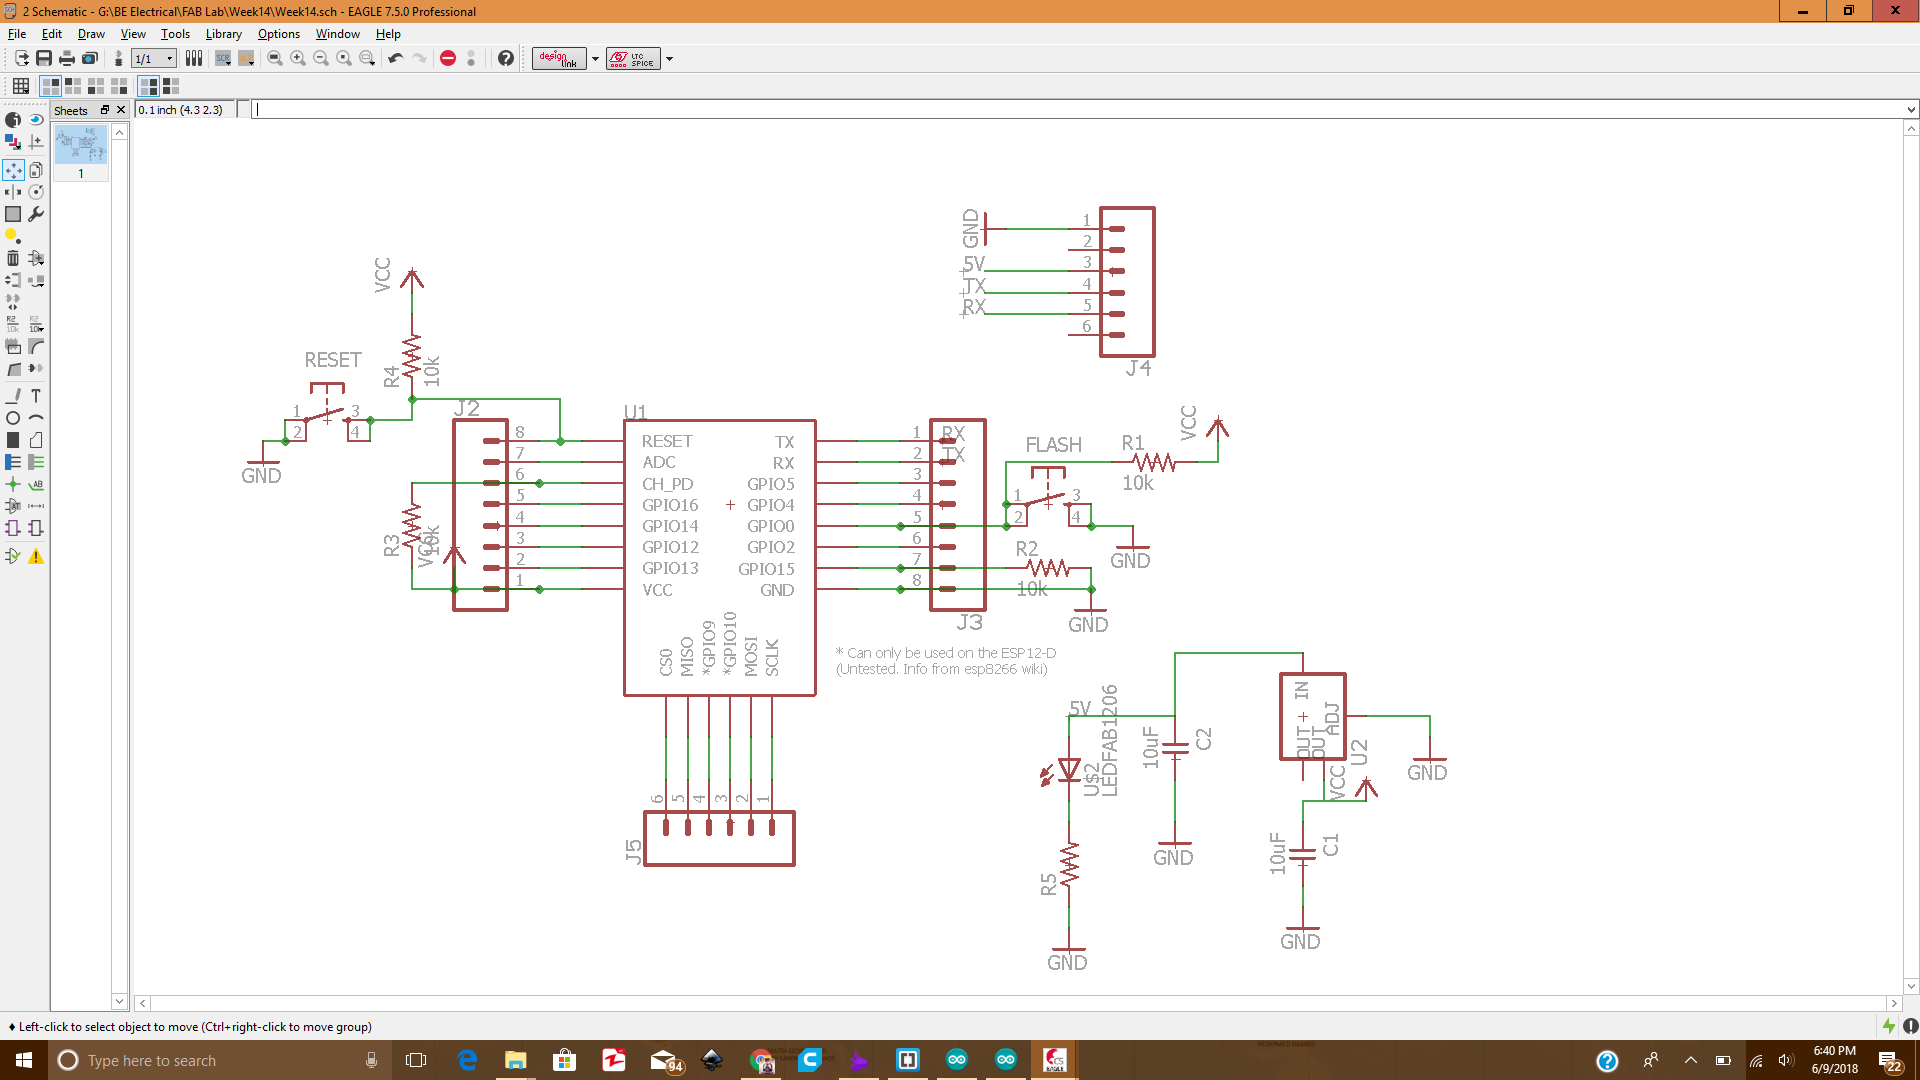
I designed the circuit using eagle software, the schematic of circuit after designing can be seen below:
Schematic
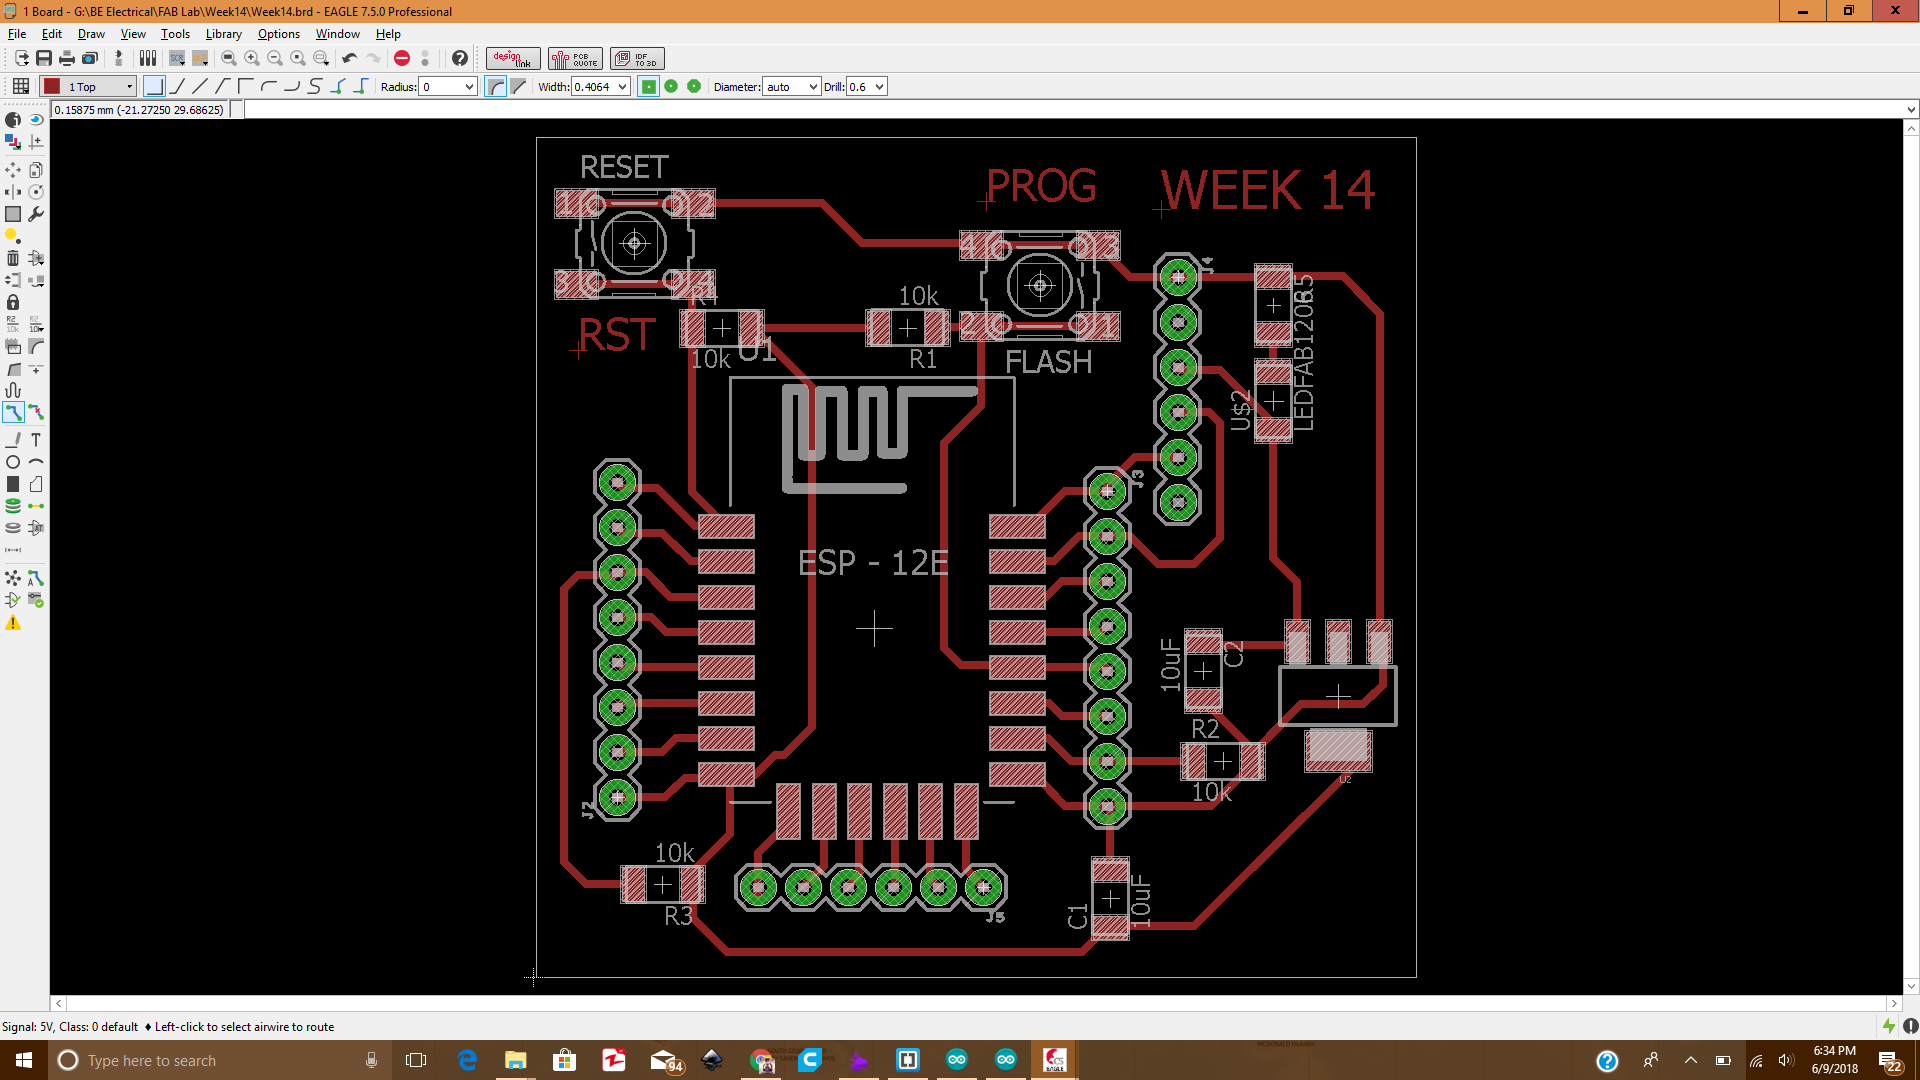
After completing to route the connections the board was looking like:
Board
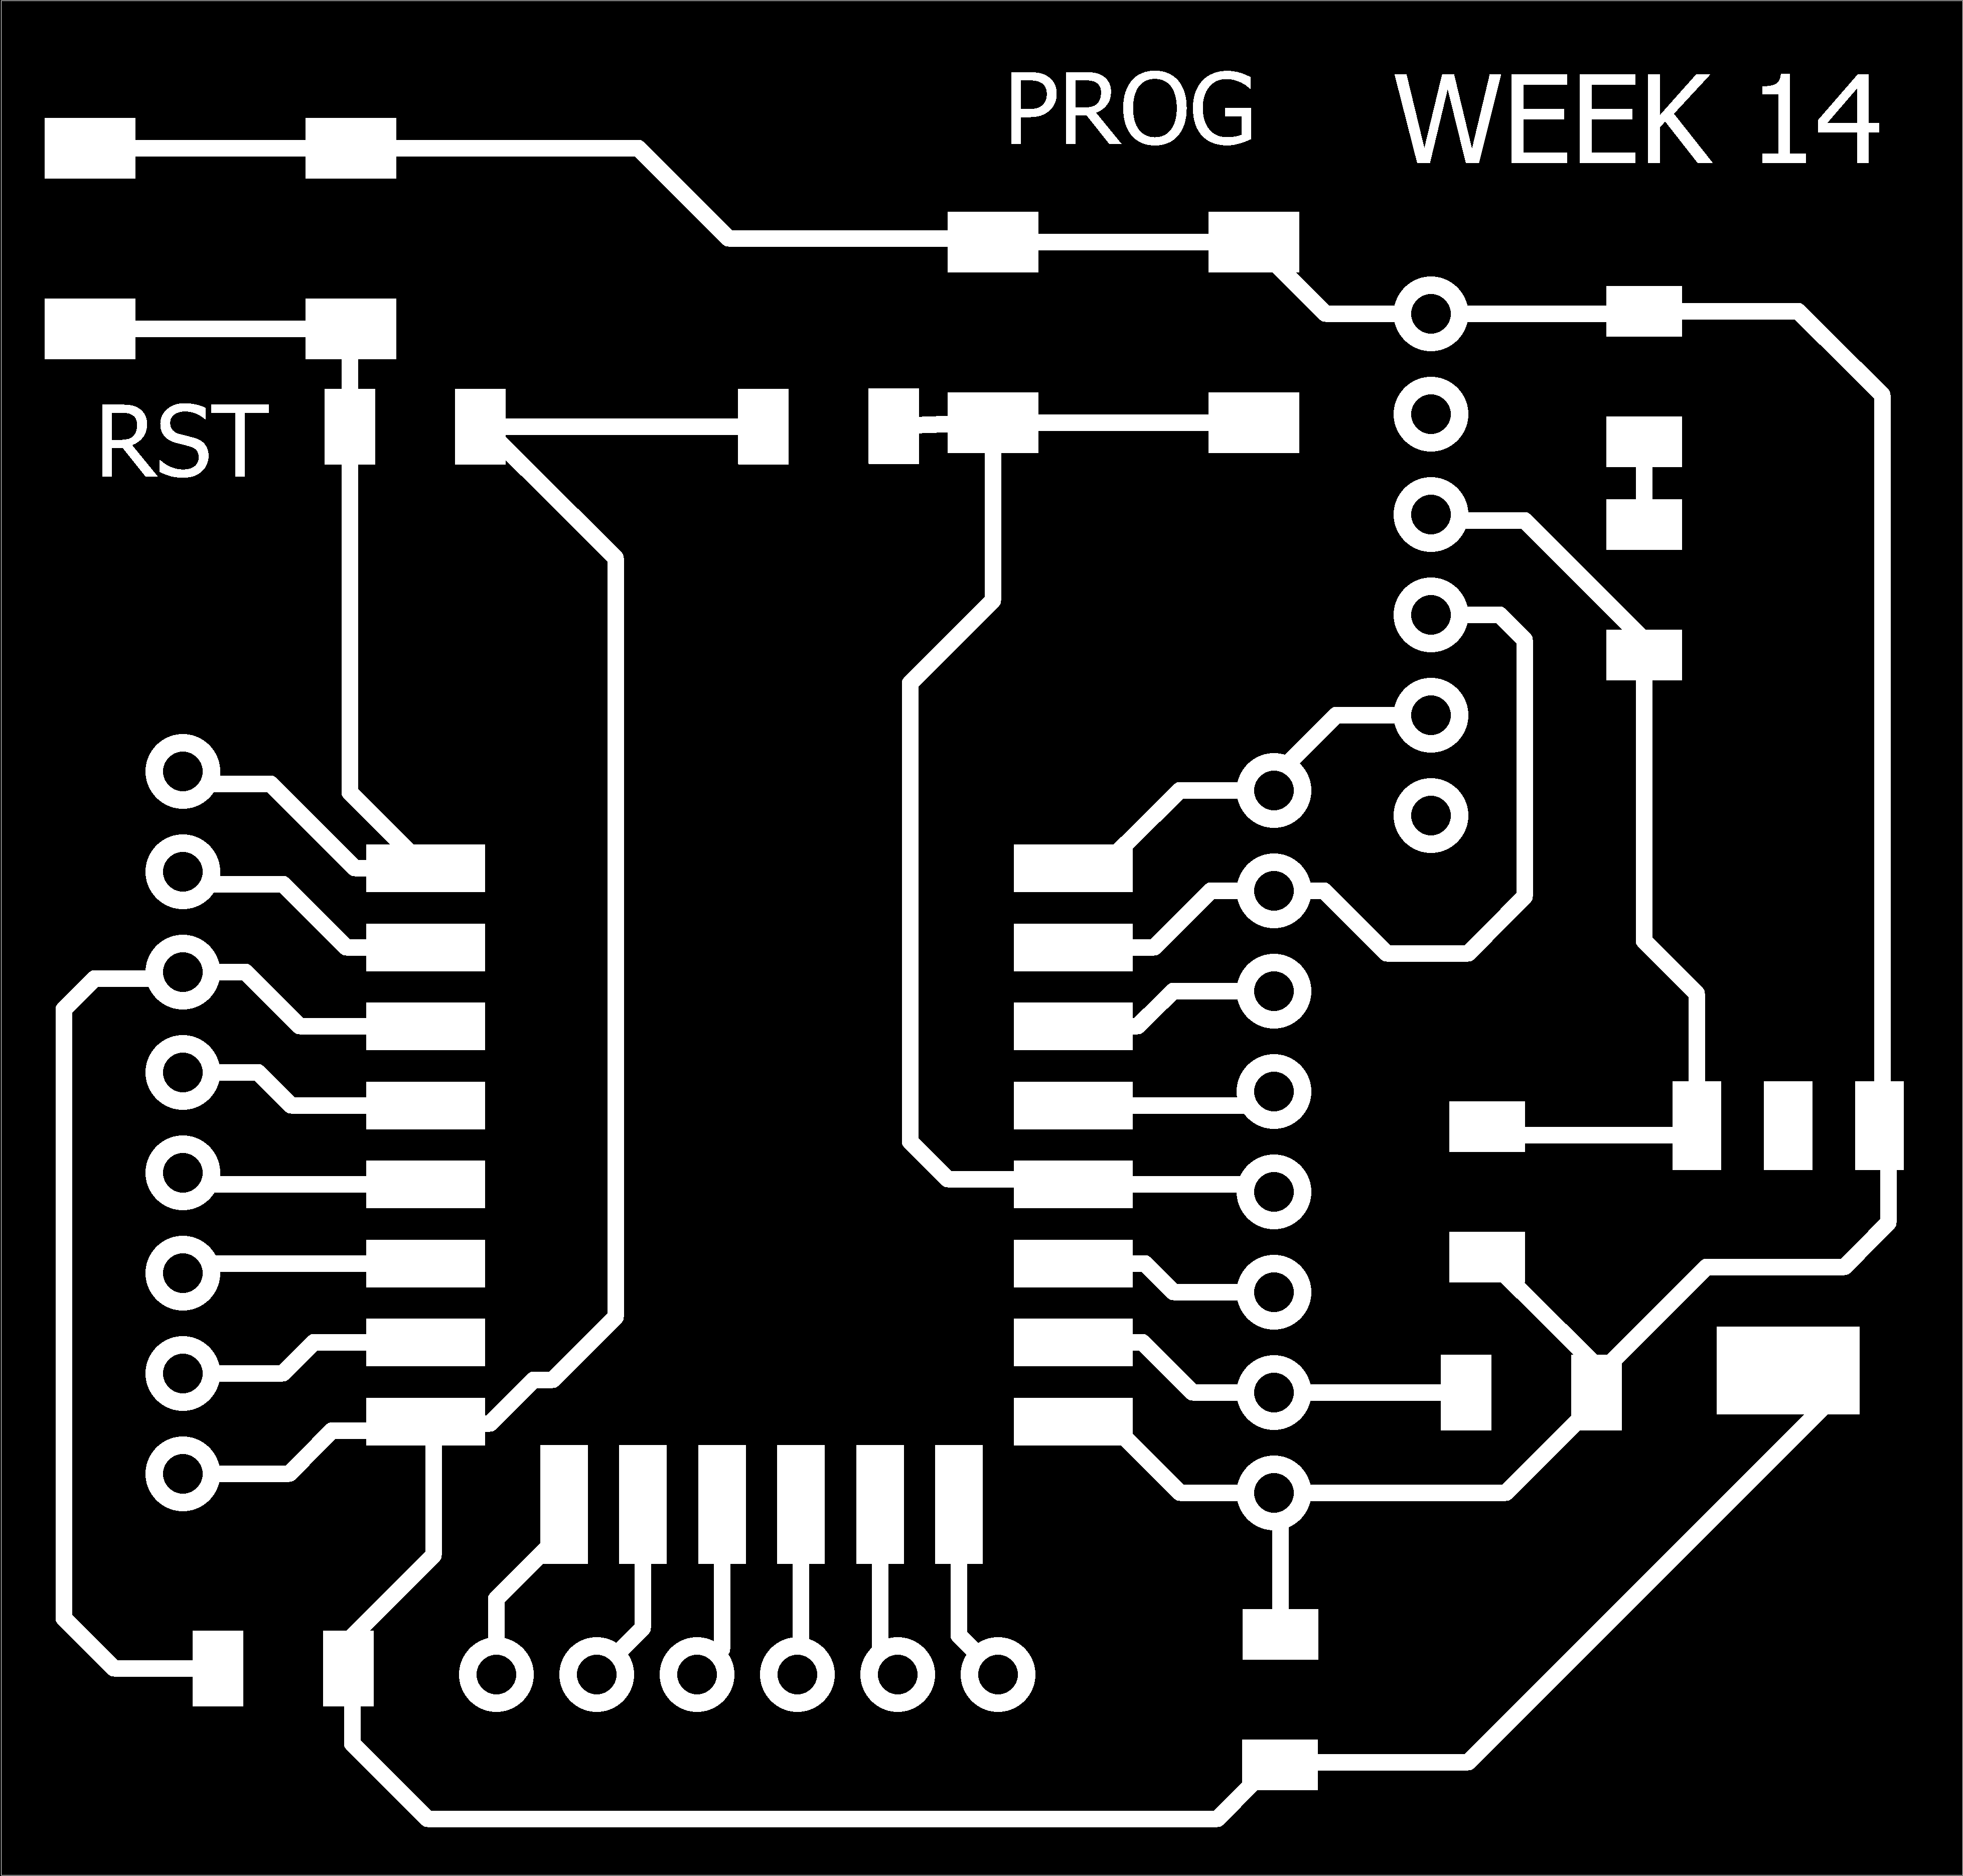
Then I created the Monochrome image of Traces so that I can make generate the RML files
Circuit Monochrome Image for Traces
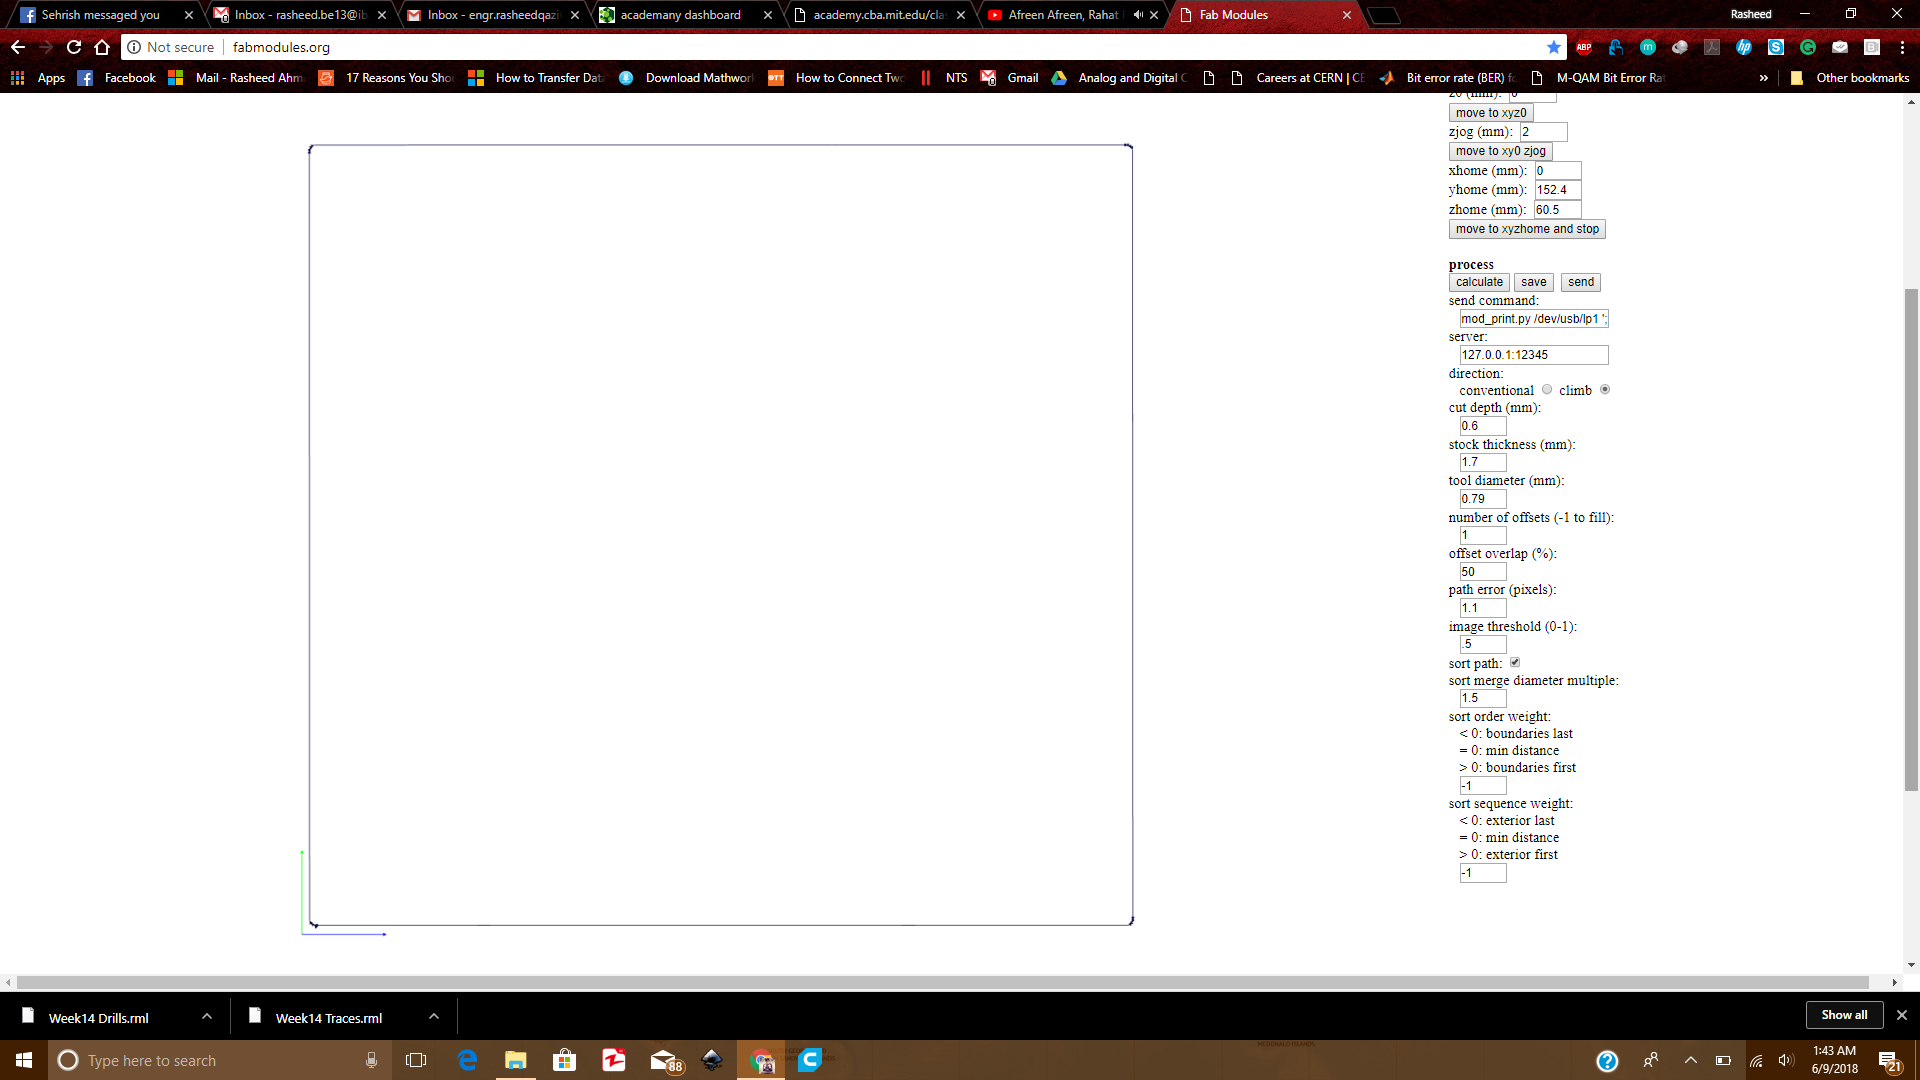
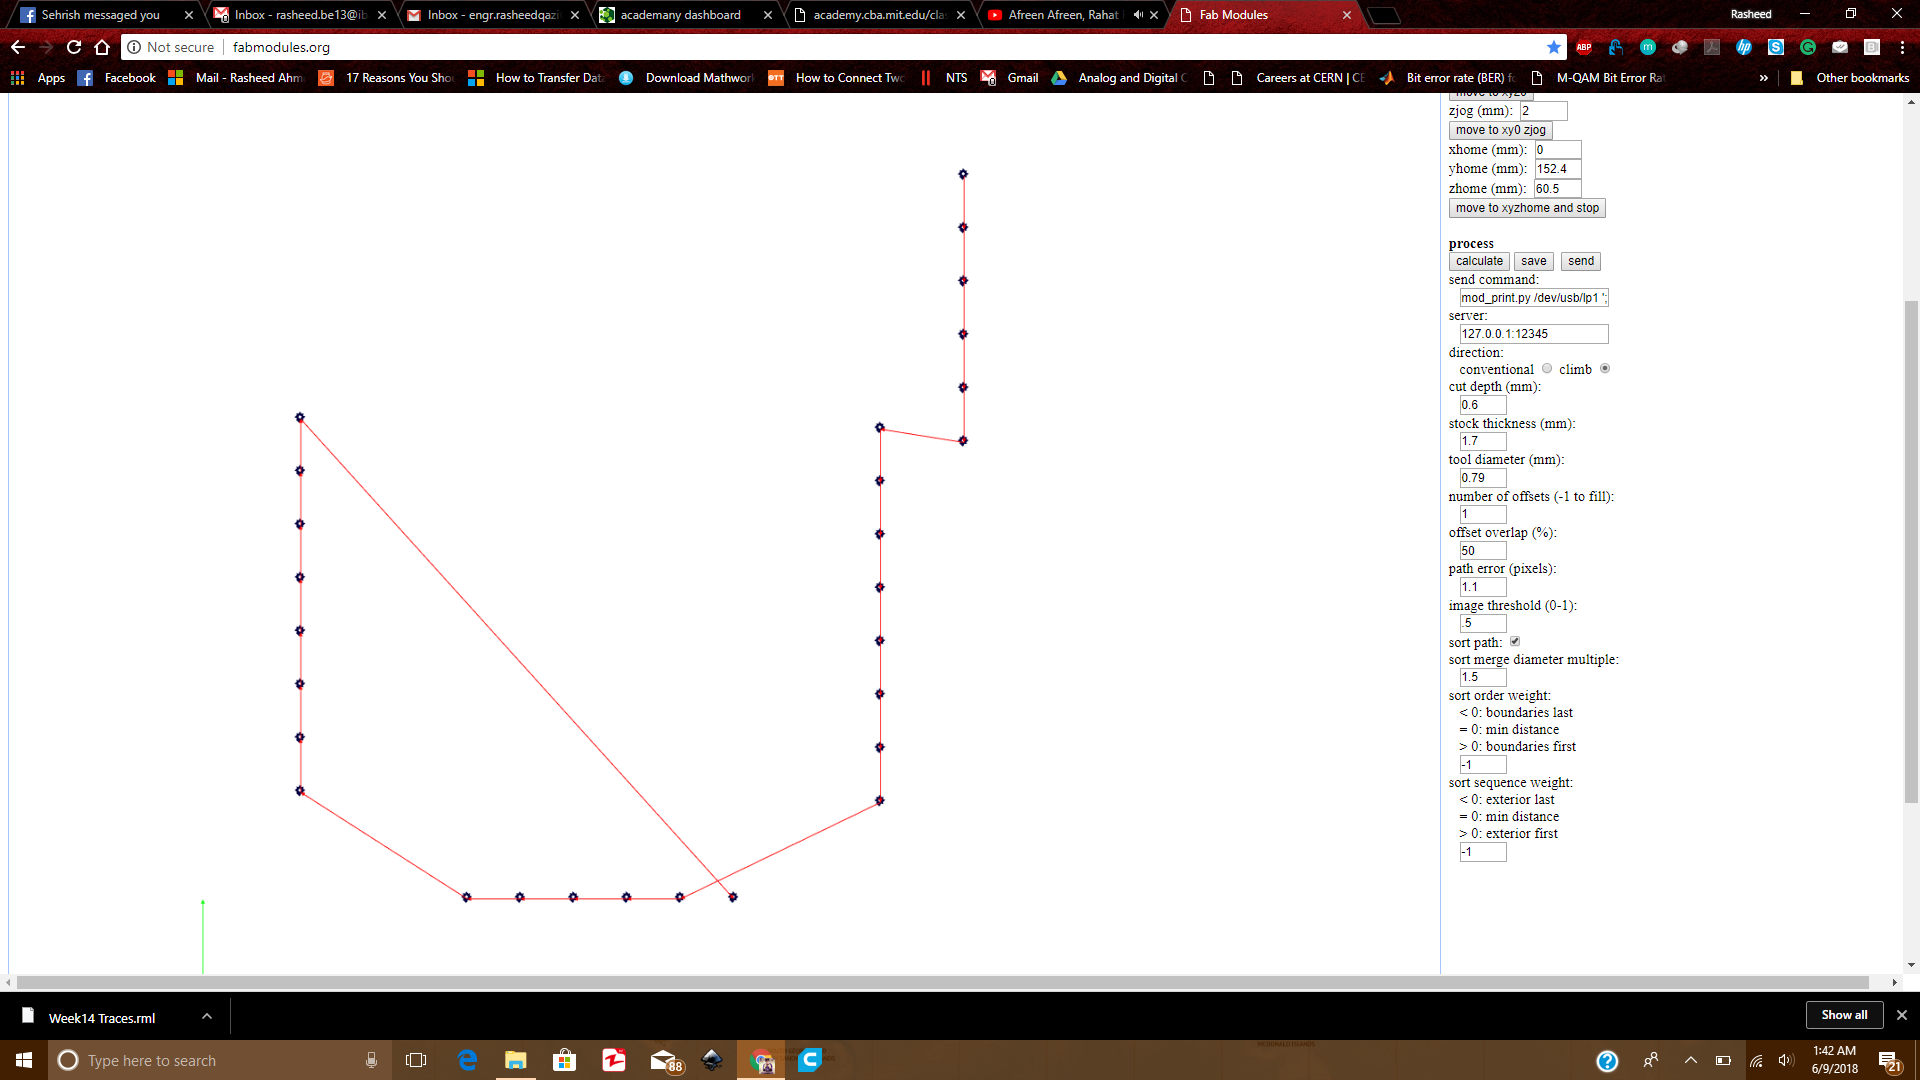
Circuit Outline
Circuit Drills
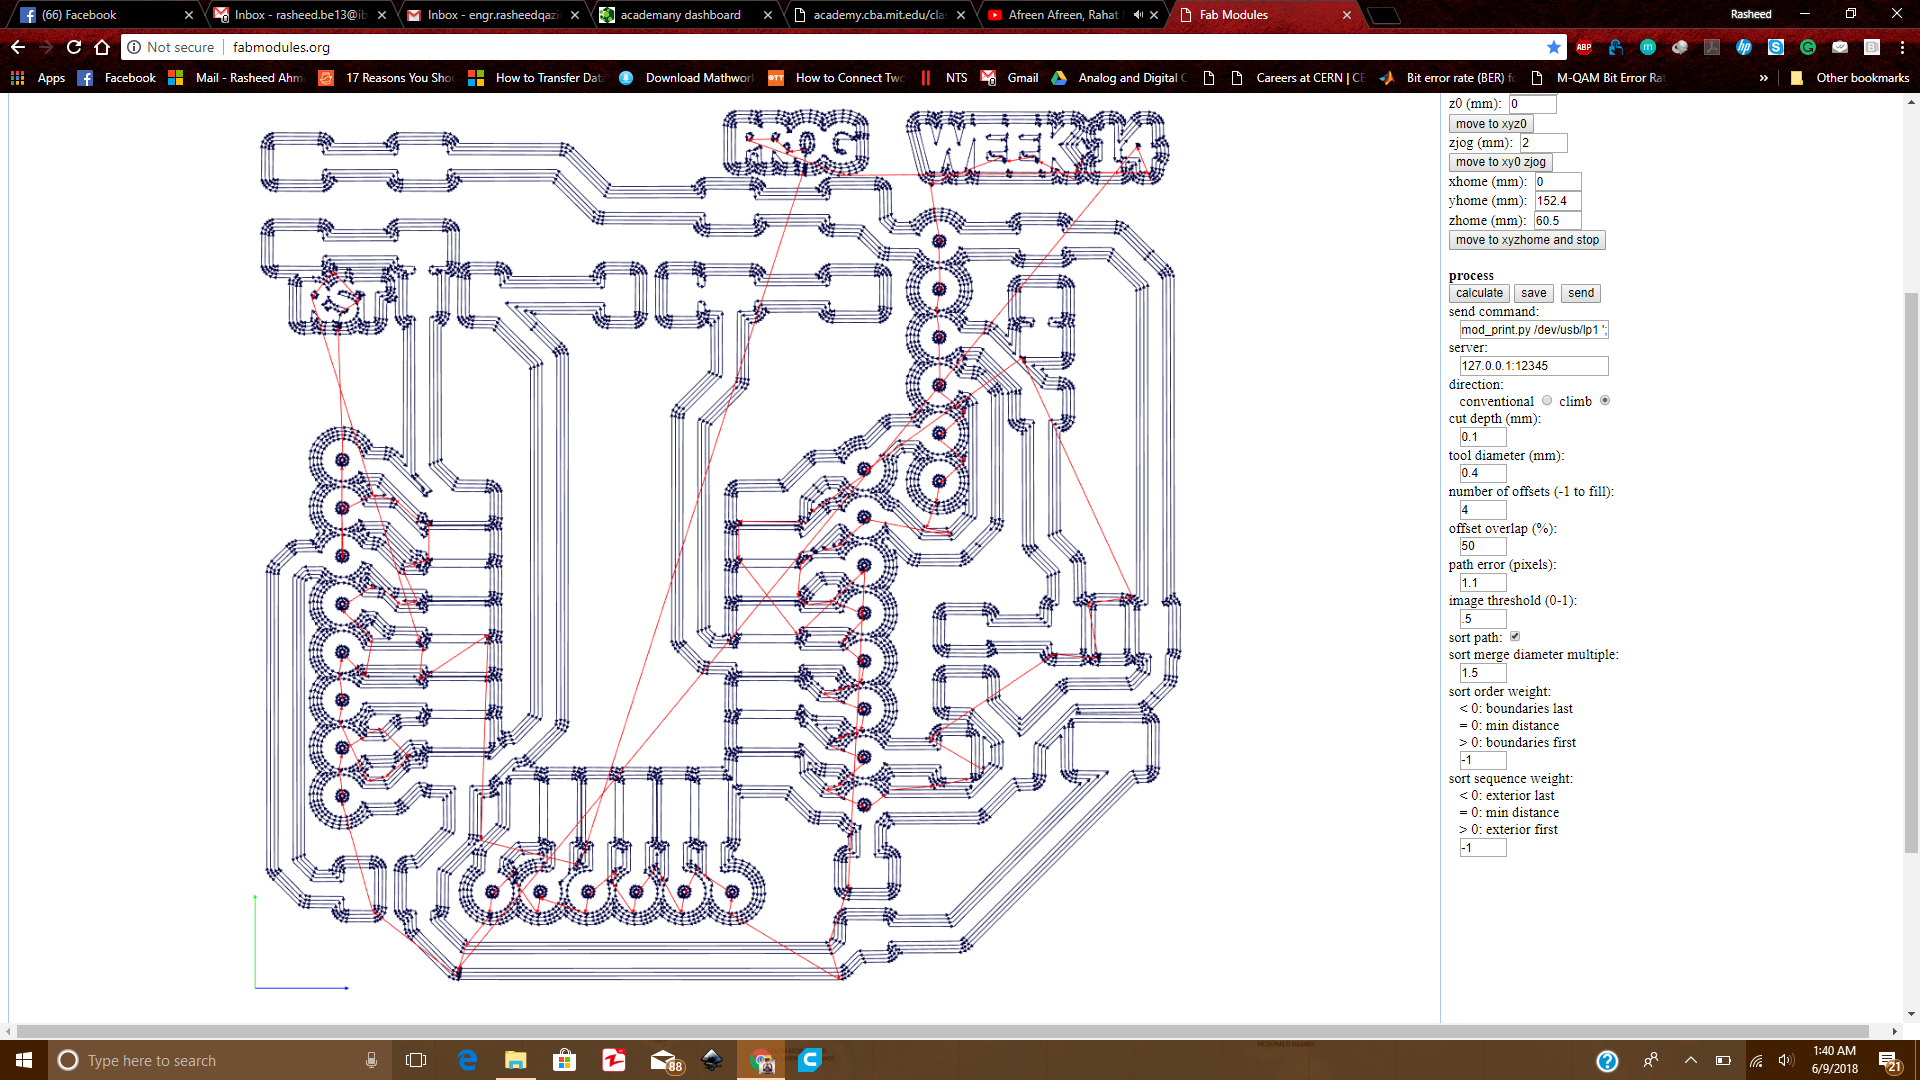
Now I generated the RML files using the Monochrome pictures shown above
Traces rml
Outline rml
Drills rml
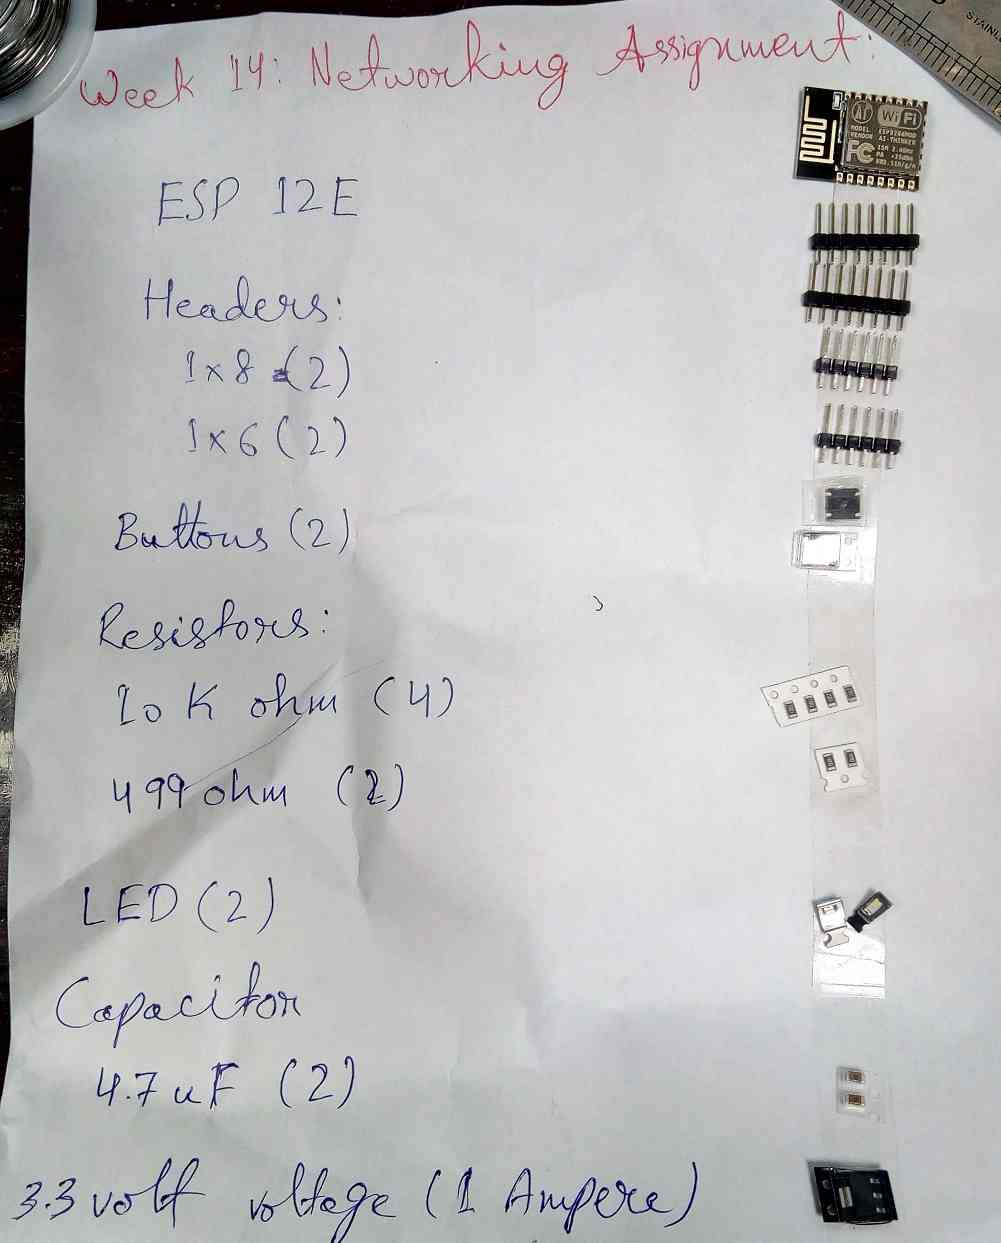
Using these files, I started milling the circuit. While the circuit was being milled, at that time I took a paper and gathered all the components required
List of Components
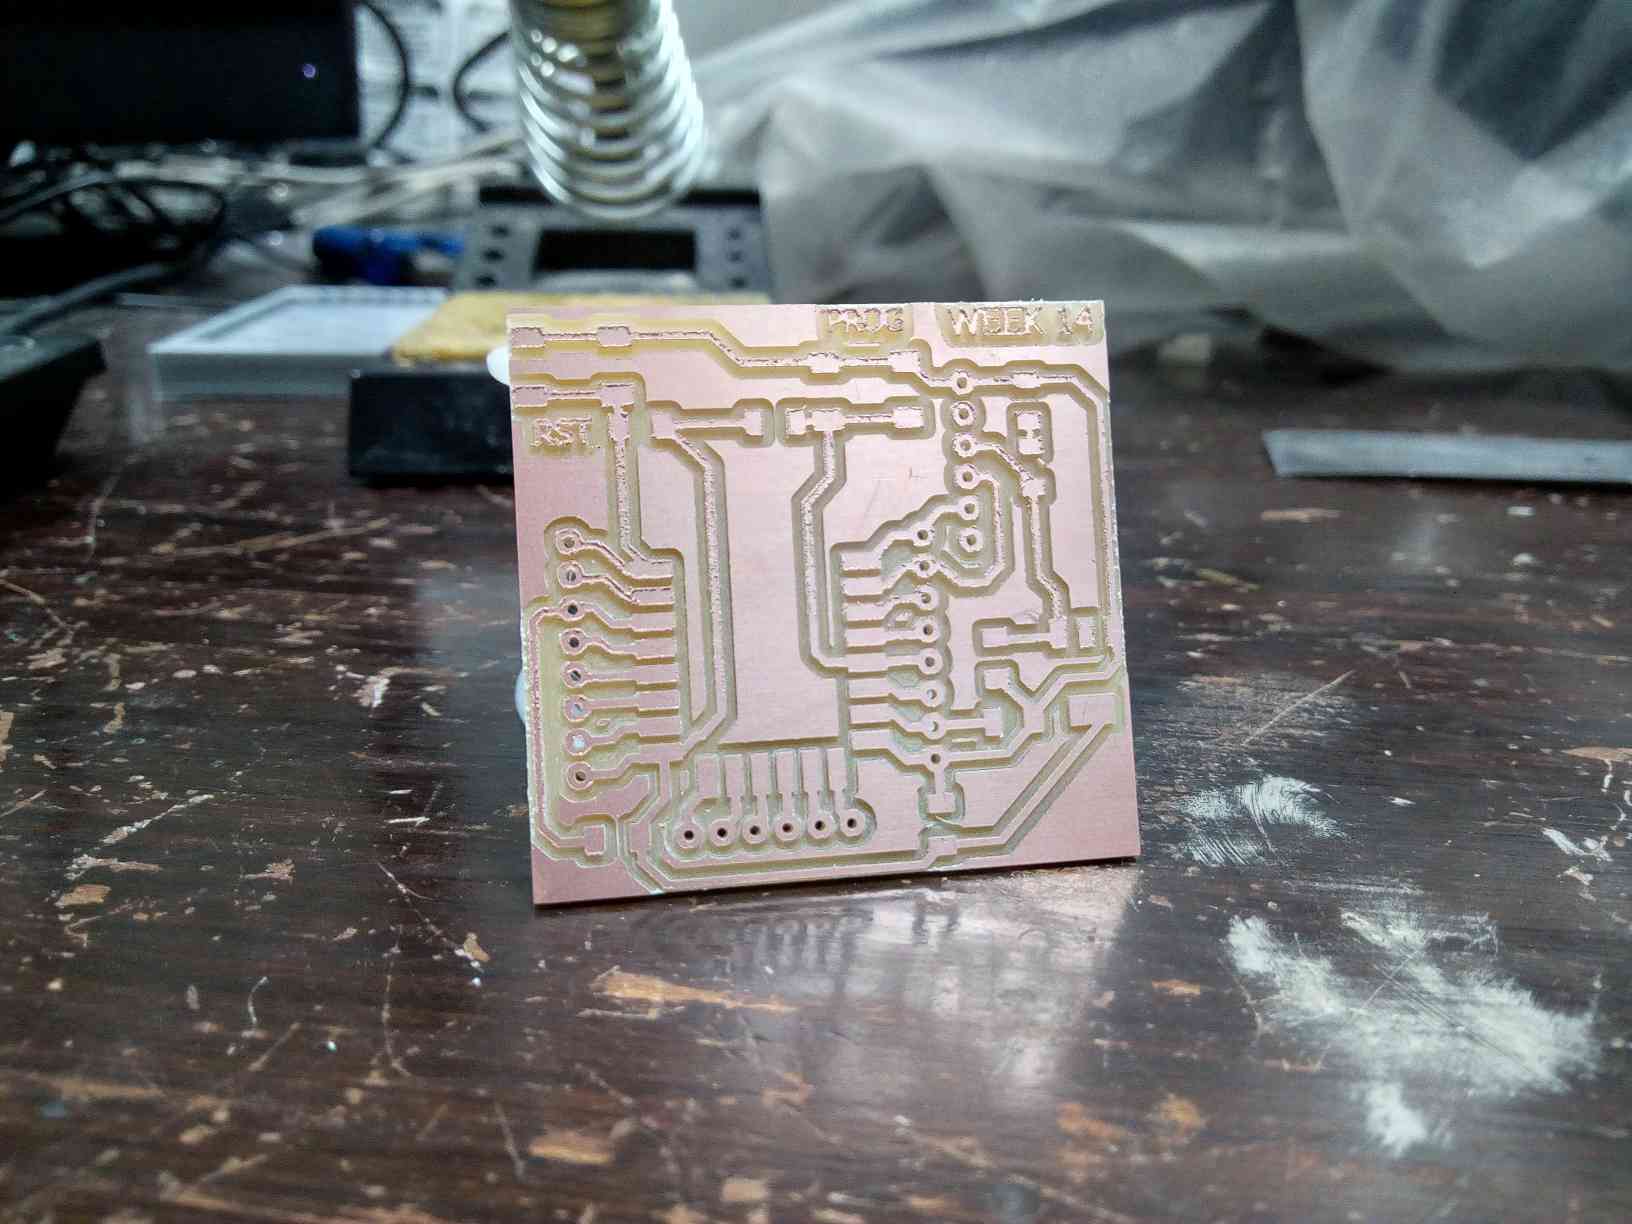
Board after Milling
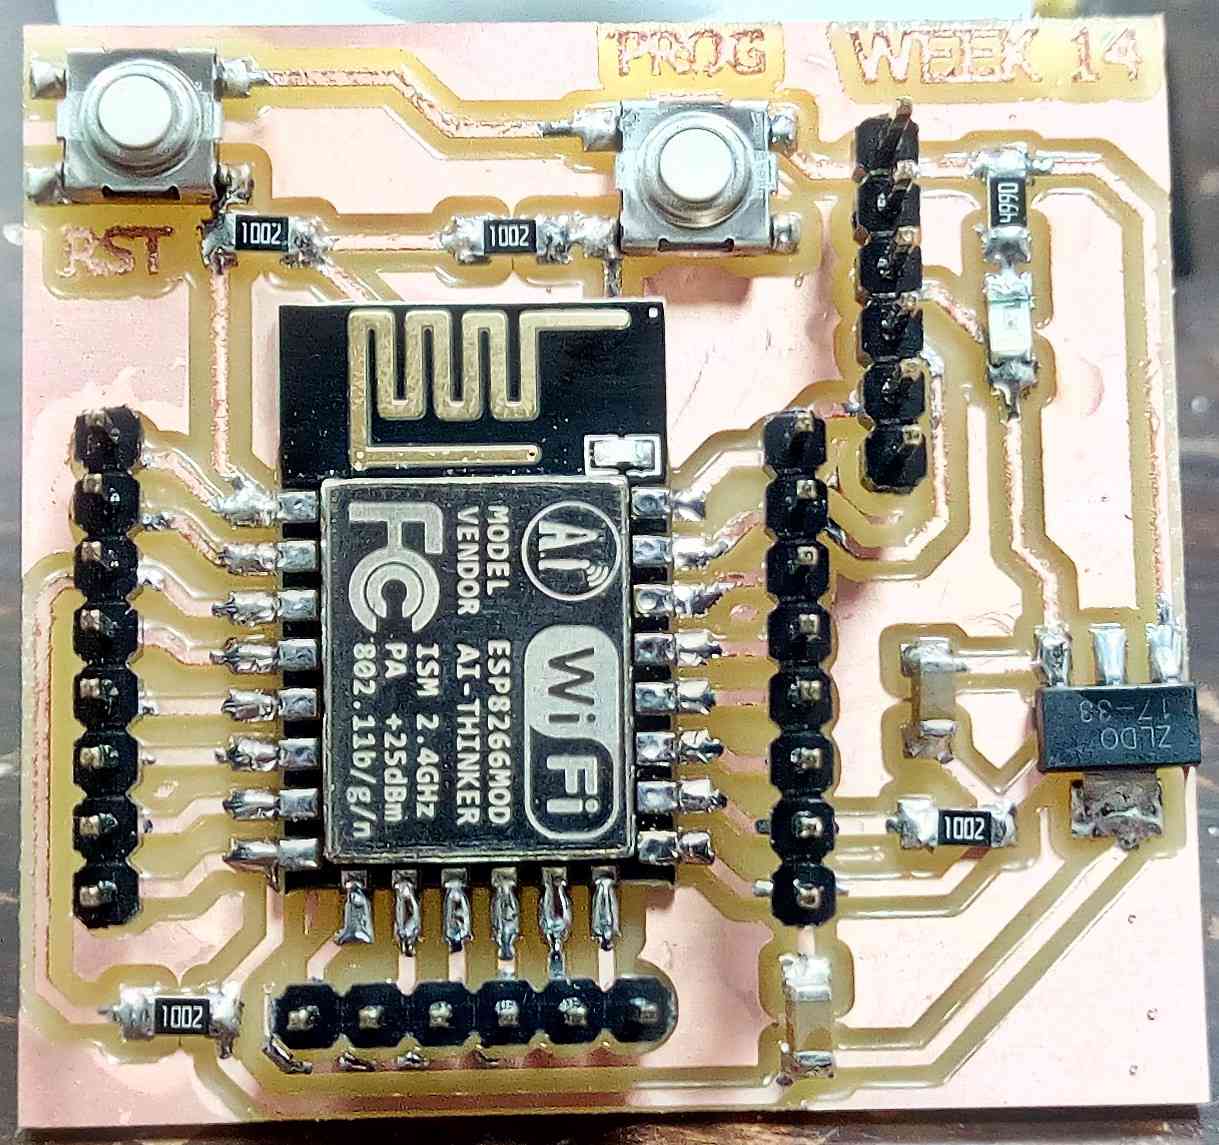
Then I soldered the components on their respective places and completed the hardware part.
Circuit after Soldering
2. Programming
For programming the board, I followed a short tutorial given Here. It tells about making a webserver on ESP8266.
Here I am going to mention the steps that I followed, inorder to program my ESP-12 using the Arduino IDE.
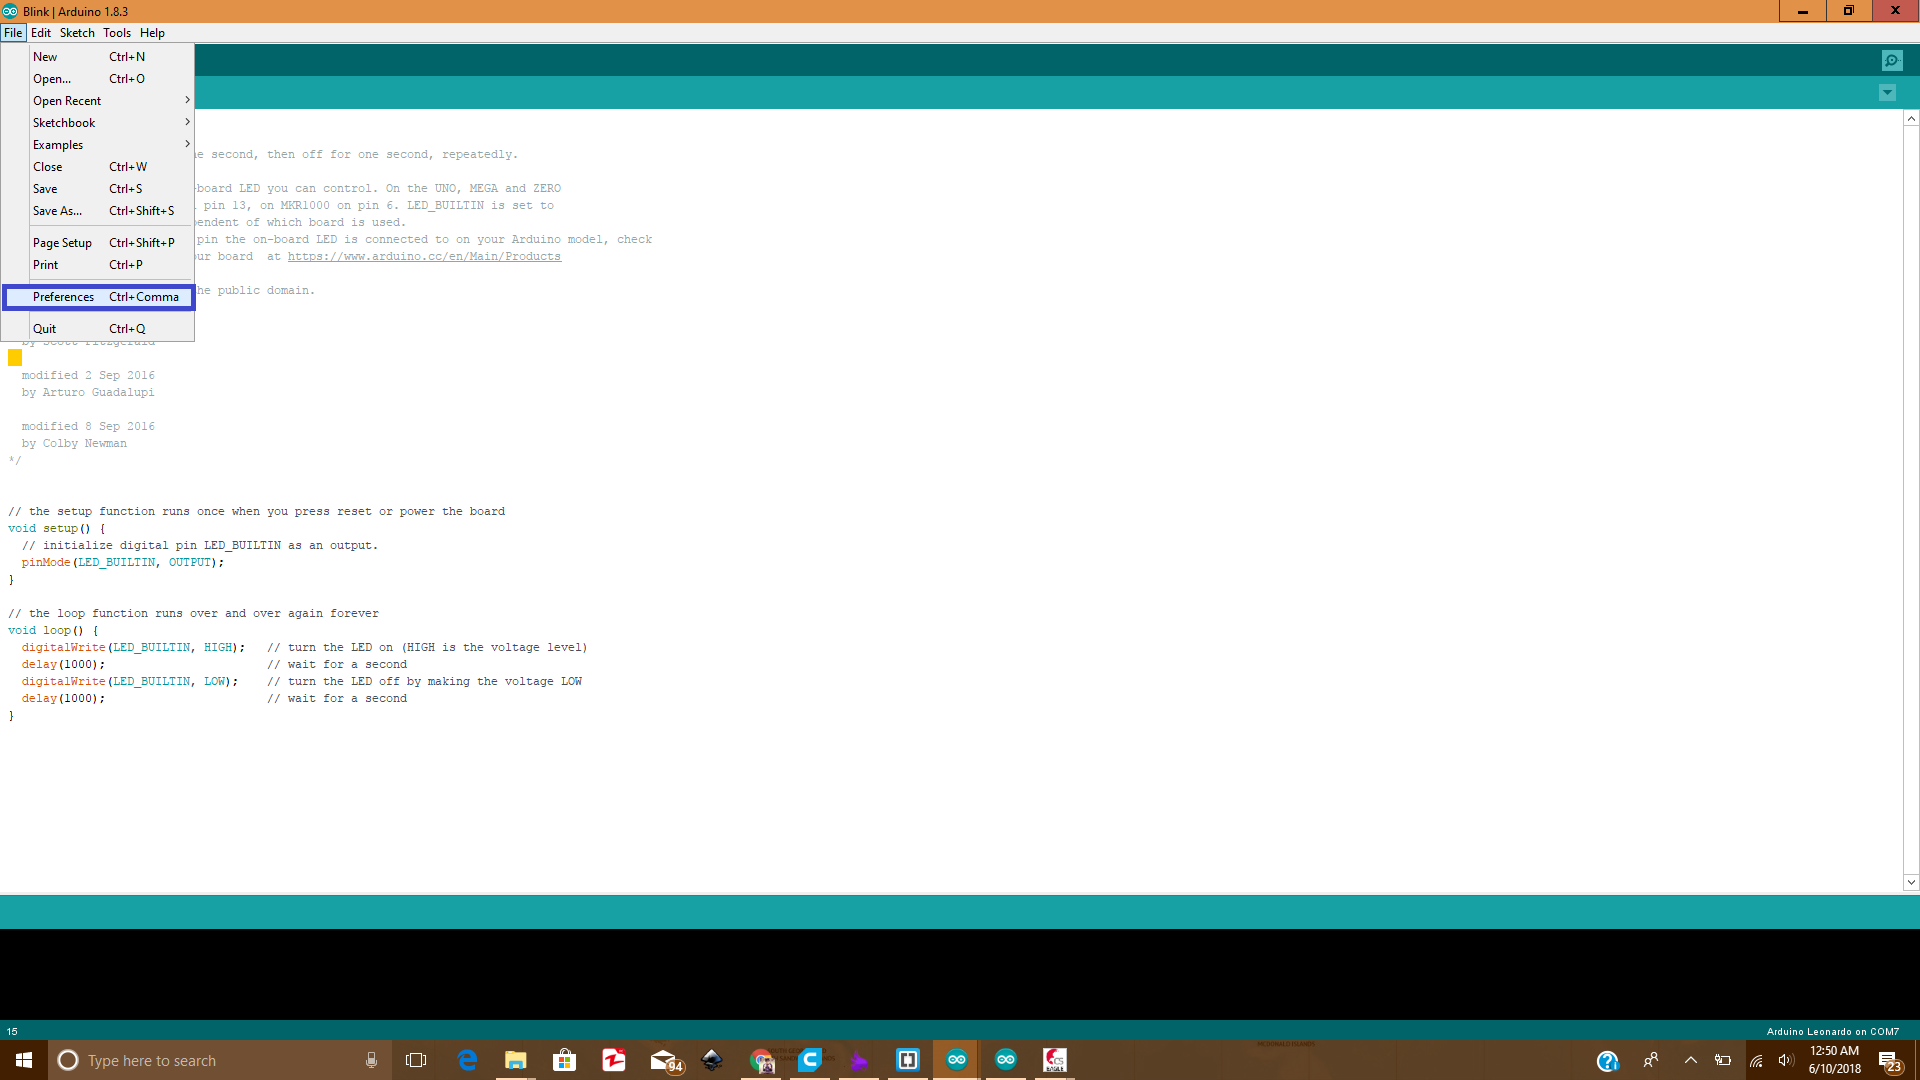
First, open the Arduino IDE, Go to File>Prefrences
Prefrences
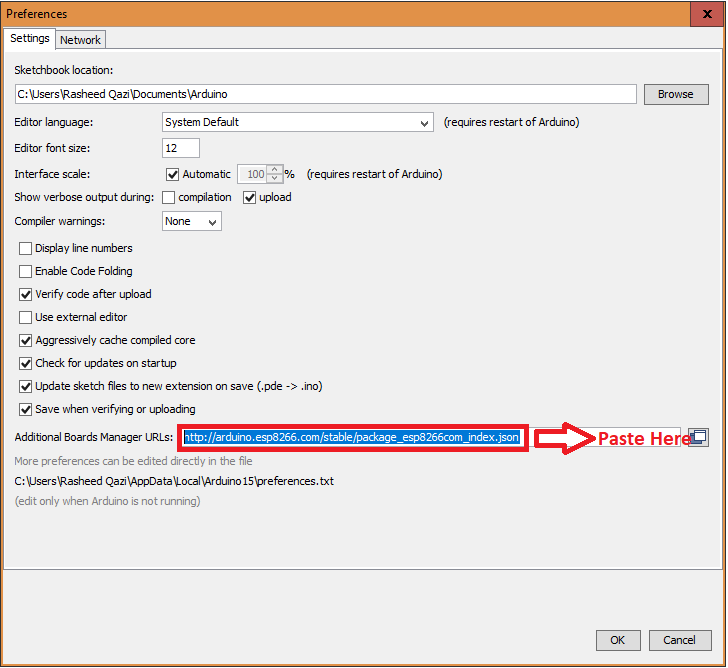
Then paste the URL "http://arduino.esp8266.com/stable/package_esp8266com_index.json", in the field named as Additional Board Manager URLs and press "Ok"
Prefrences Link
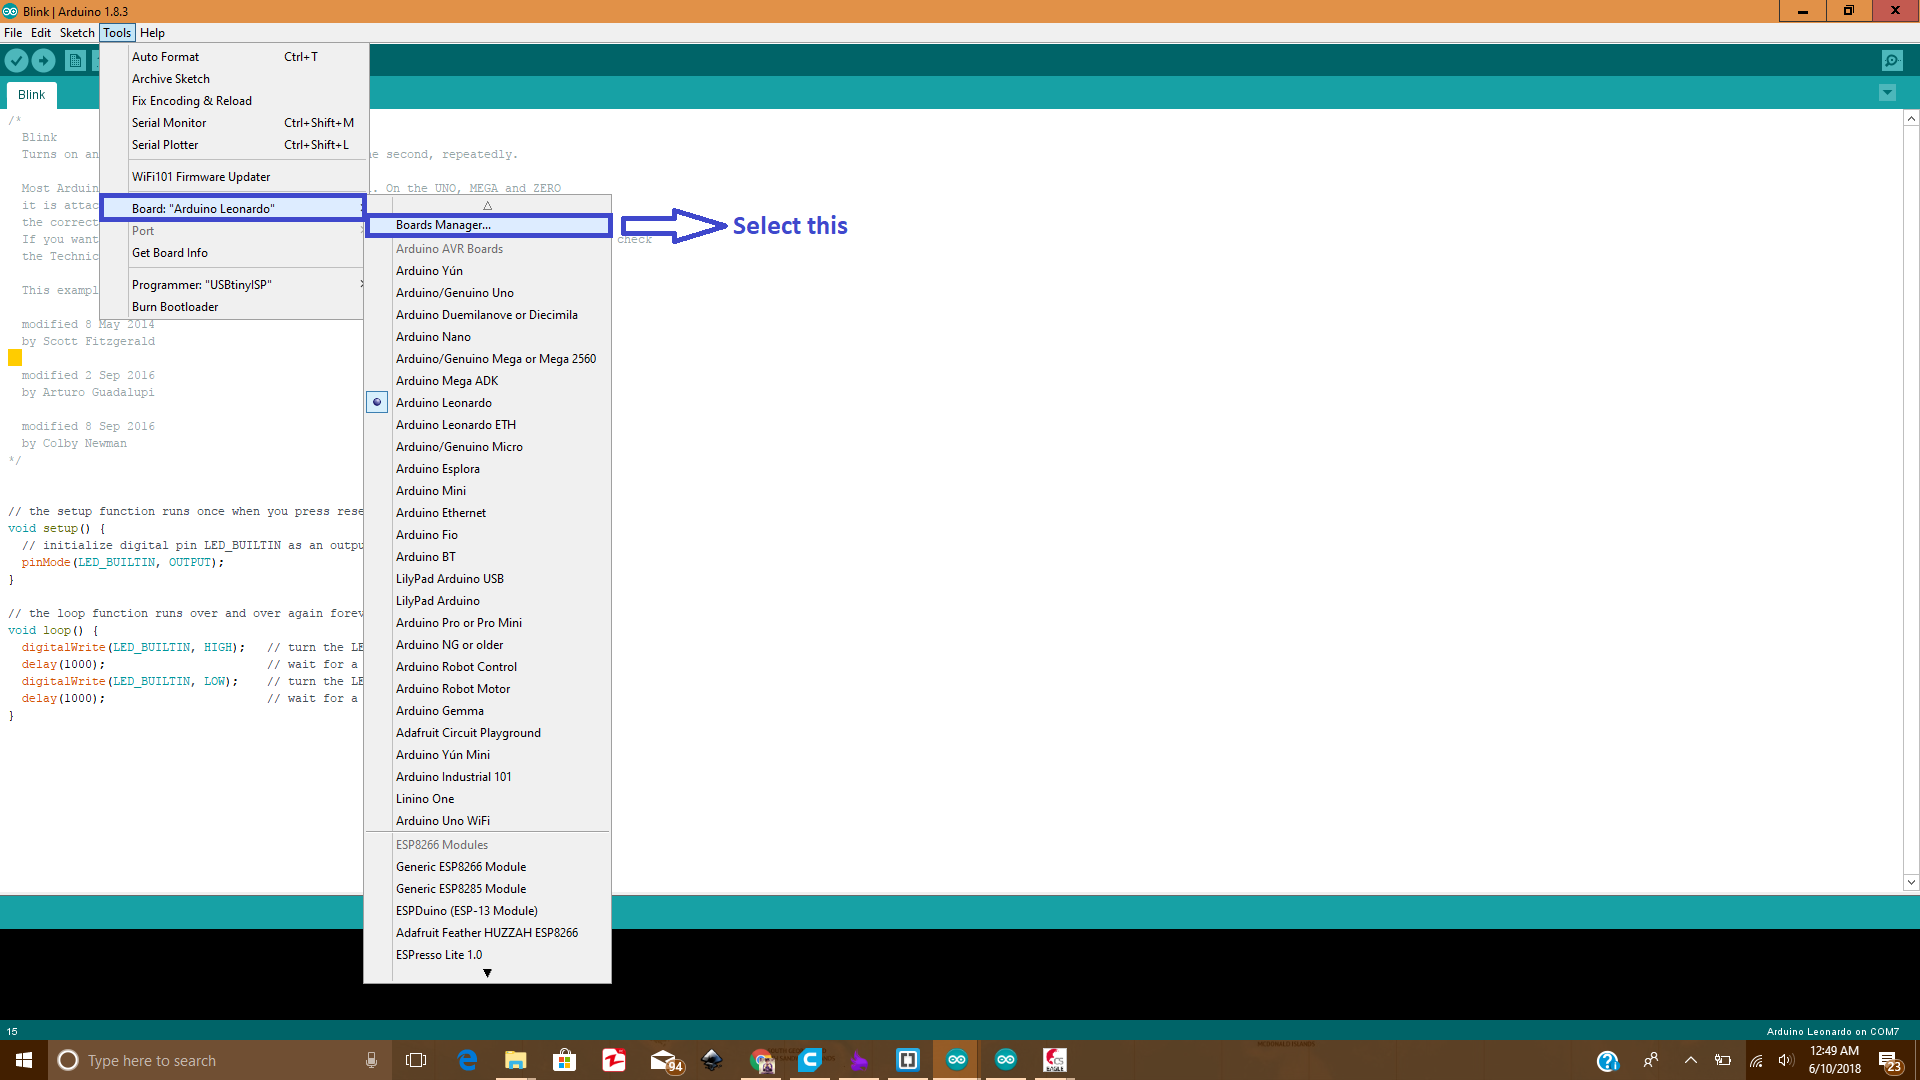
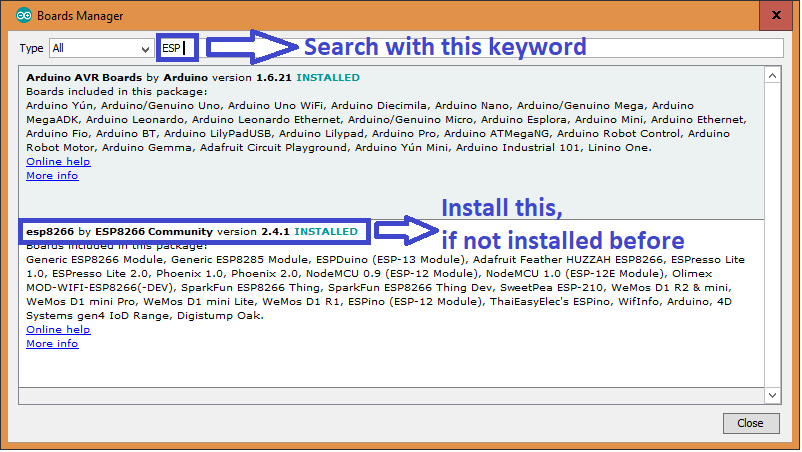
Now go to Tools>Boards>Boards Manager. A new window will appear
Boards Manager
Go to the search bar of this window and write "ESP8266" to search that board, and install the board shown below:
Installing the required board
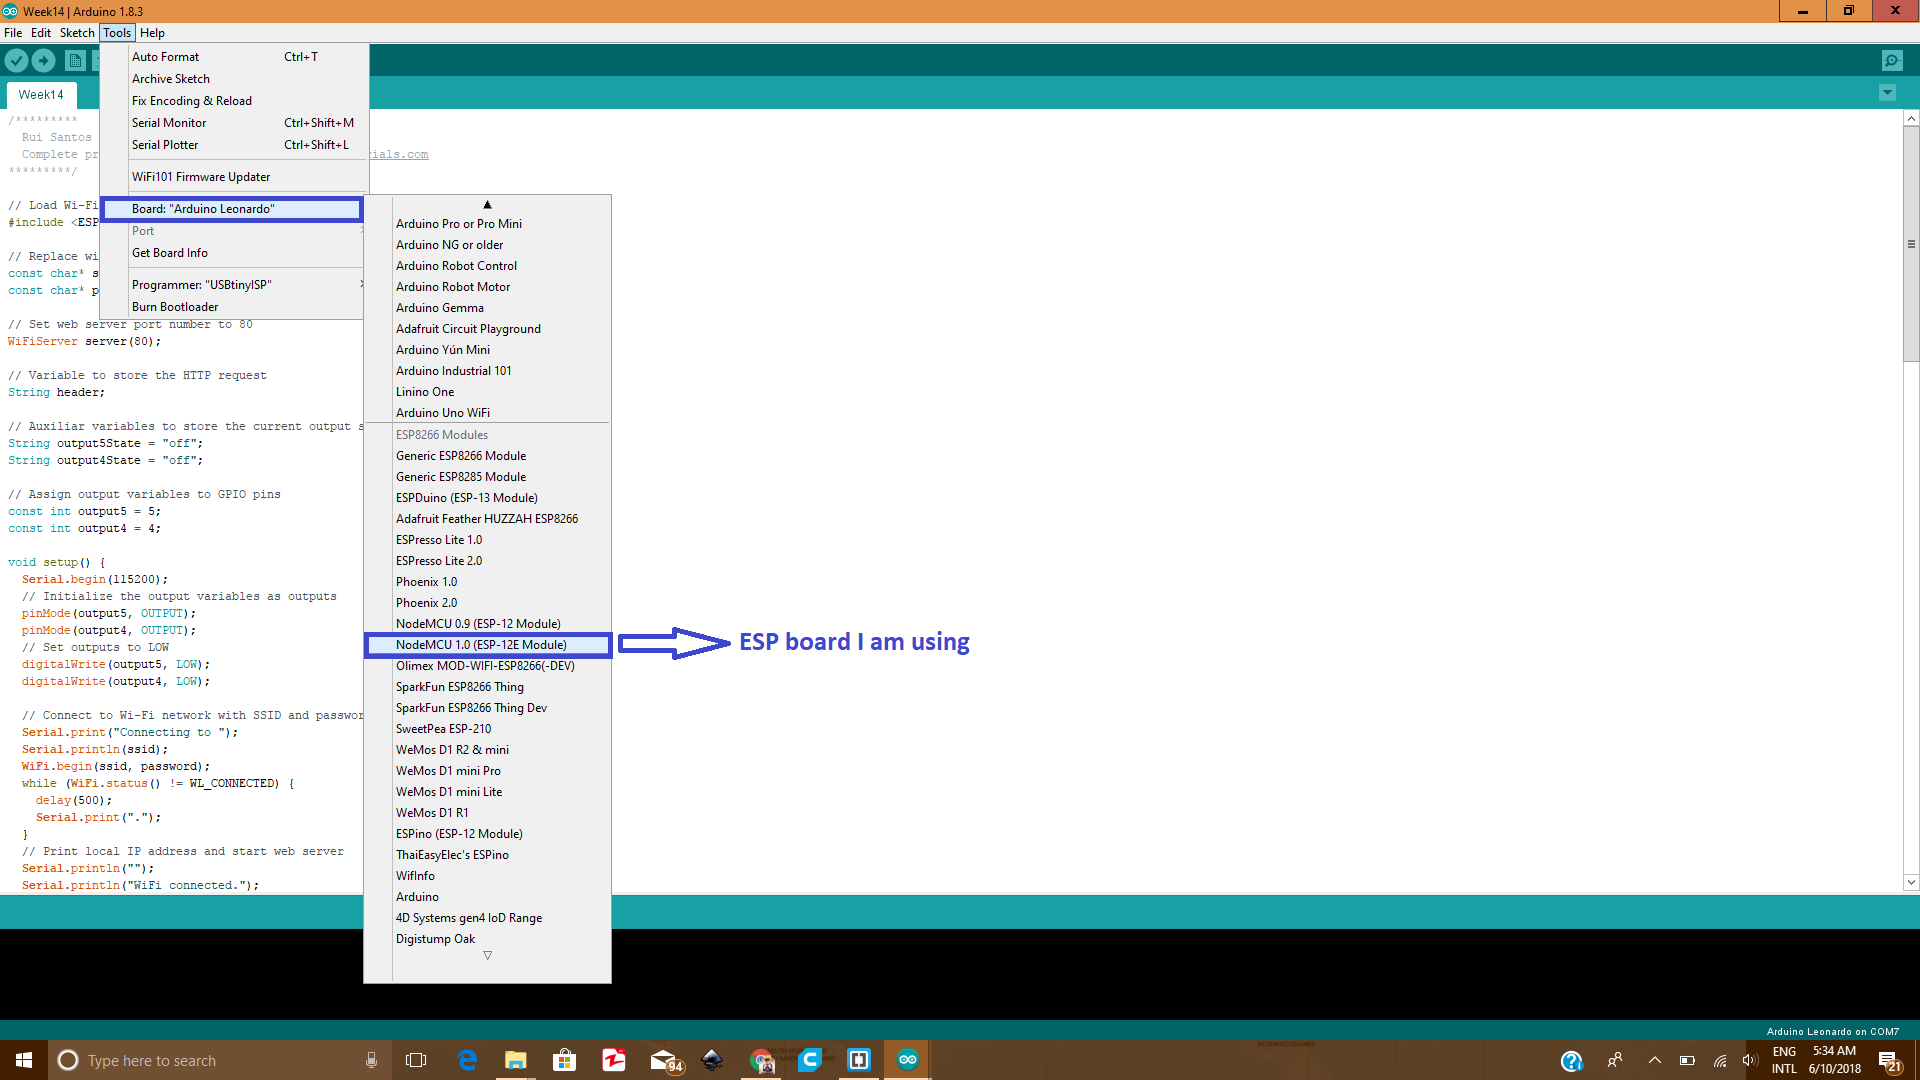
After Installing the board, select the respective board you are using from the same menu Tools>Boards
Selecting the board
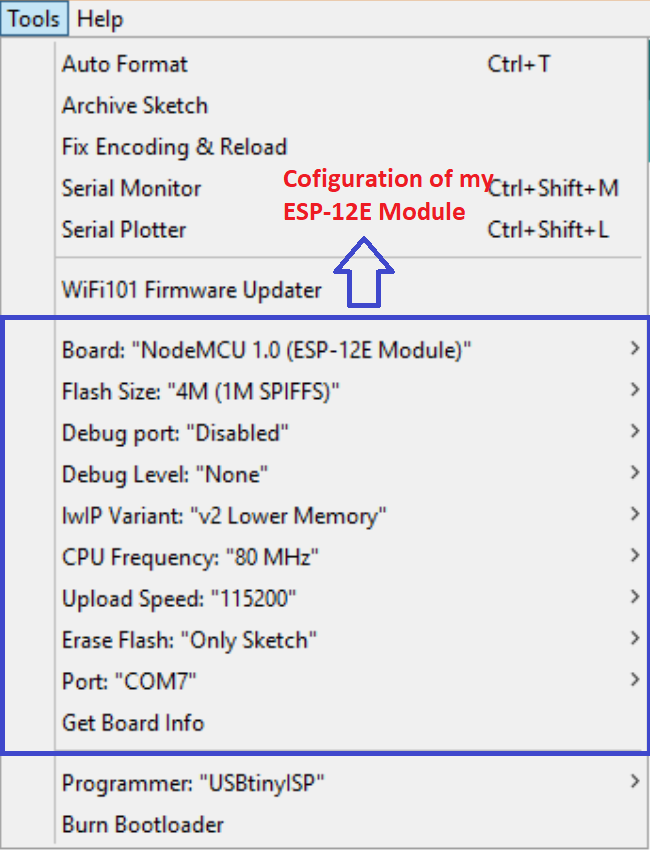
Once you have selected the board, then you can see the following configurations in the Tools menu. Make sure that these configurations are same if you are also using ESP-12E Module
Configurations of the board
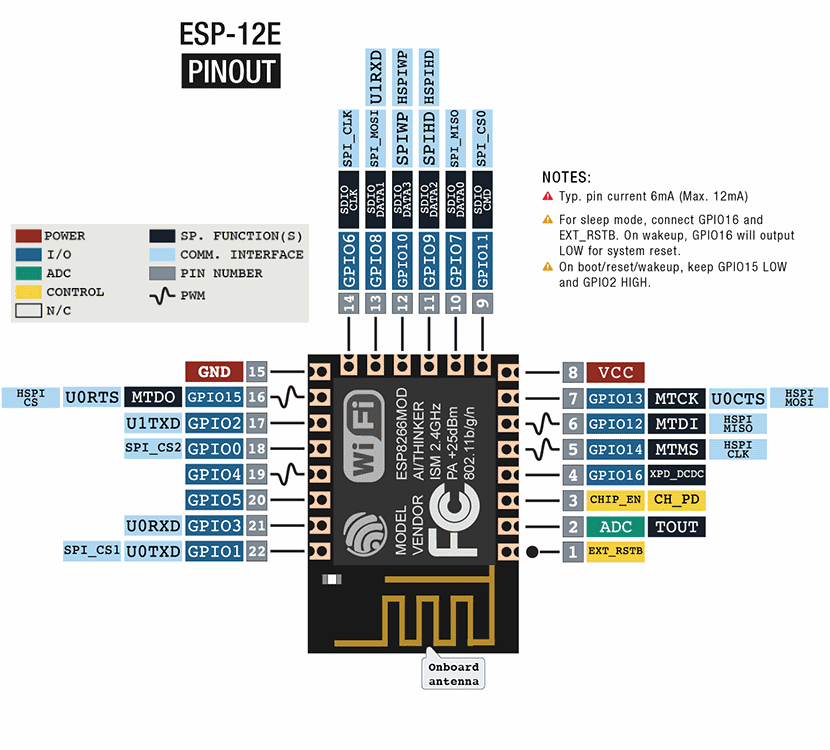
Now I was ready to upload the code to my ESP board, But inorder for the code to work properly, I must have assigned the correct I/O pin to the respective part of code as they are on my ESP device. In this regard, the pin configuration of ESP-12E can be very helpful. One picture like this which I found online is attached below:
ESP pinout
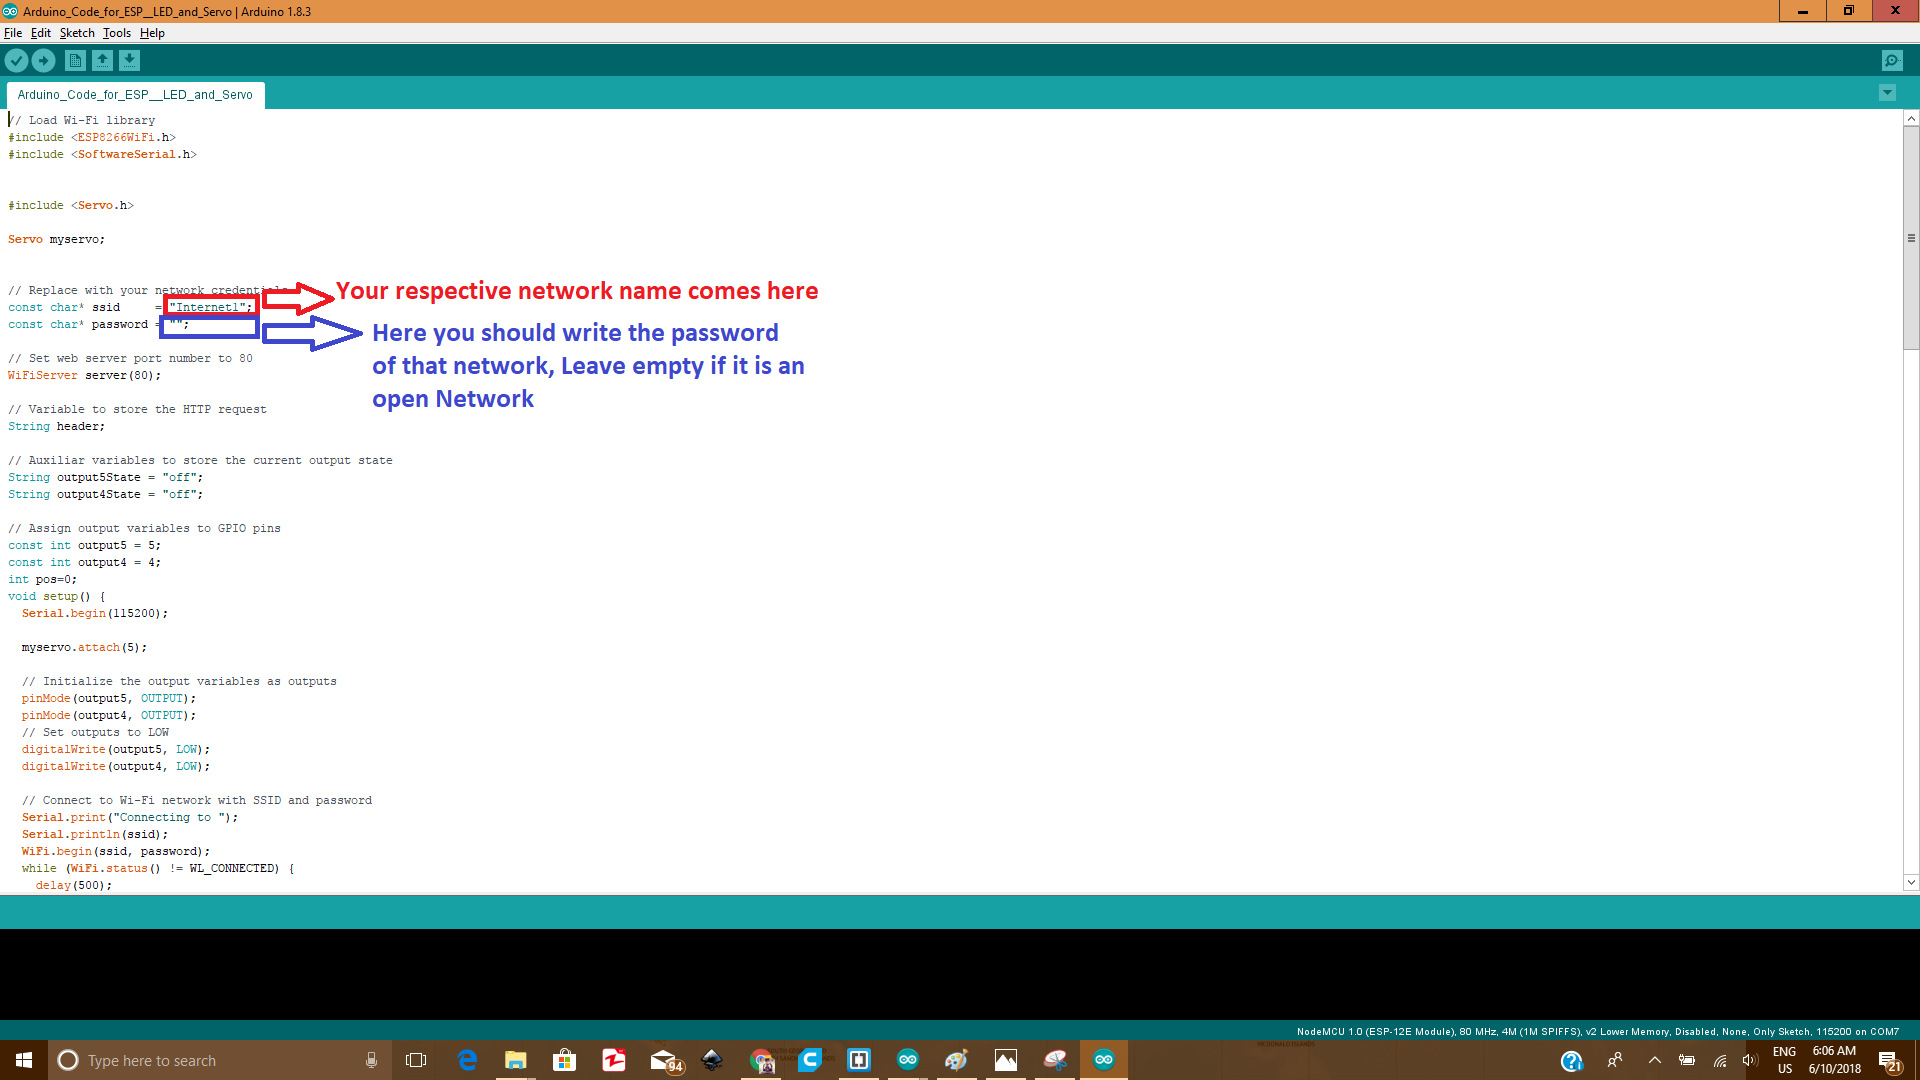
As I assigned the pins, now there was a little changing to be made in a code of making an ESP as a web server. This changing was to be done in the SSID & Password fields. We need to replace them with the respective network name and Password of the Wifi connection with which the respective devices (Mobiles/PCs) are connected. The fields in the code are shown below:
SSID and Password changes
Then I uploaded the program to the board. If you are making this board then make sure to take care of these two points
While the sketch is uploading, Make sure to press the PROG button on the board until the uploading is done.
Once you see the word "Uploading" in the bar at the bottom of IDE, at that moment press and release the RST button on the board
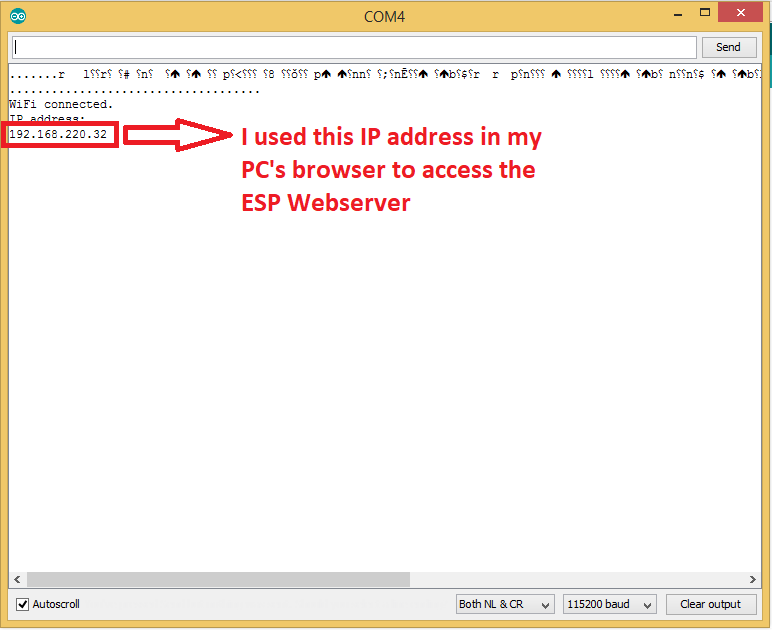
After the code is successfully uploaded, Open the Serial Monitor in the Arduino IDE. Press the RST button on the board and there will be a message at the serial monitor which shows the IP address through which you can access the Webserver created on the board.
IP on the Serial Monitor
3. Results
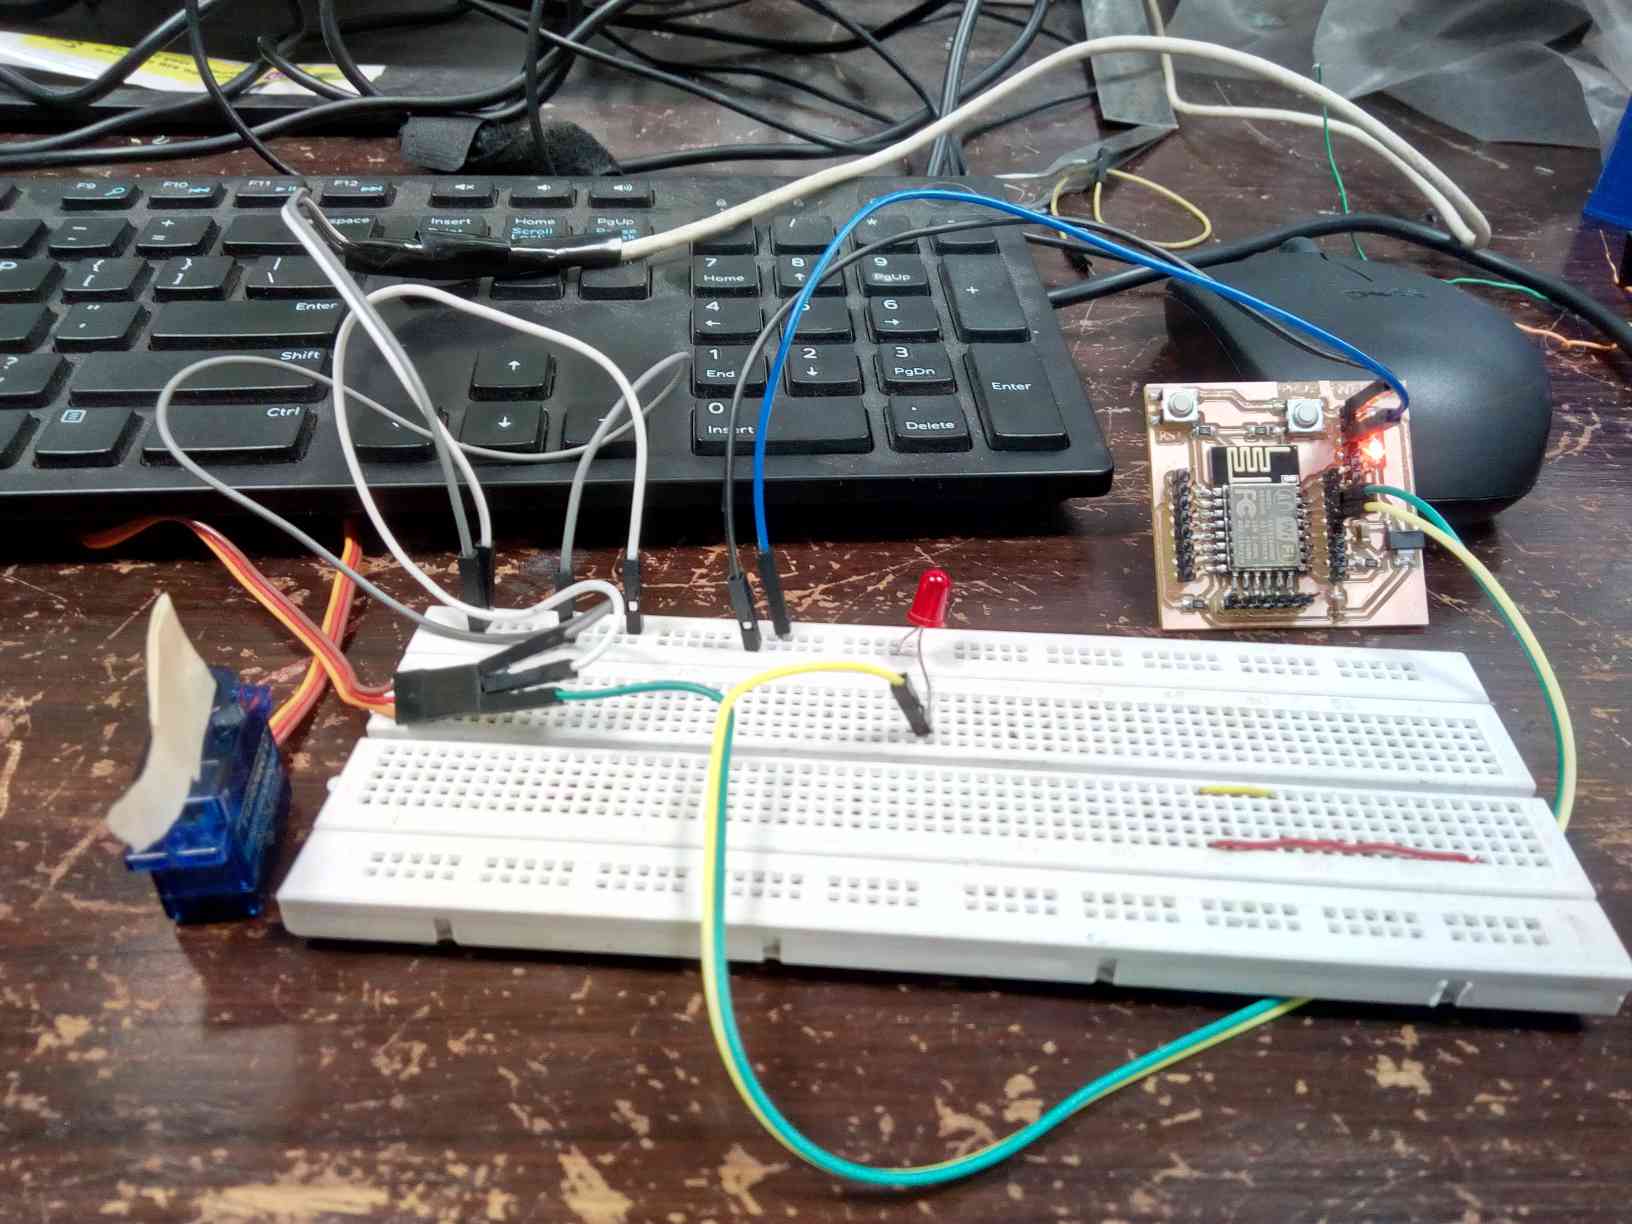
The Devices connected with the board can be seen in the picture attached below:
Output Devices connected with the ESP board
After getting the IP address one the Serial Monitor of Aduino IDE, to access the ESP device through WIFI, I disconnected my ESP board from the PC which was connected through the FTDI cable. Then I powered the circuit using external power supply and connected an LED and a Servo to the respective Pins. The results can be seen in the video attached below:
Video showing the working
That's all for week14..
All the Files of Week 14 can be downloaded from Here.