

Success is a journey, not a destination
Individual Assignment:
- individual assignment: design and build a wired and/or wireless network connecting at least two processors group assignment:
Group Assignment:
- send a message between two projects
Individual Task:
As part of this week's assignment, I need to make a network either wired or wireless by connecting atleast two microprocessors together.I have decided to use the boards I had designed in Week11: Input Devices and Week12: Output Devices.
I decided to make a wireless network using I2C Serial communication. Before impplementing the network it was better to revise my basic of I2C.
I2C Communication:
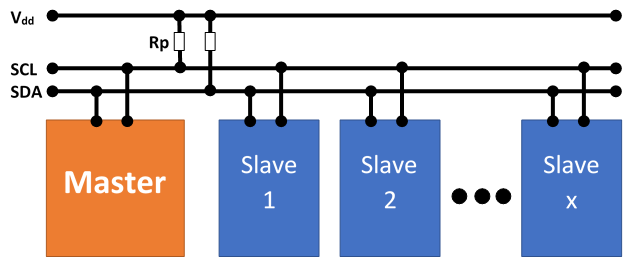
Inter-integreted Circuits abbreviated as I2C is One of peripheral modules in microcontrollers used for serial communication. Other protocols are USART, SPI, I2C, and USB.We know that serial communication is of two types: Synchronours(Transmitter and reciever share a common clock) and asynchronous(There isn't any common clock).I2C is a synchronous serial communication protocol which is intended to allow multiple slave digital ICs to communicate with one or more master circuits. I2C is the best choice for communication at short distance within a single device.Each I2C has a data line and a cock line, at which multiple slaves can be connected and addressed. I2C can be implemented by microcontrollers, EEPROMs, A/D and D/A converters, I/O interfaces and other similar peripherals in embedded systems.By using only two wires (SDA and SCL ) I2C can connect upto 1008 slave devices.It also supports multi-master system.
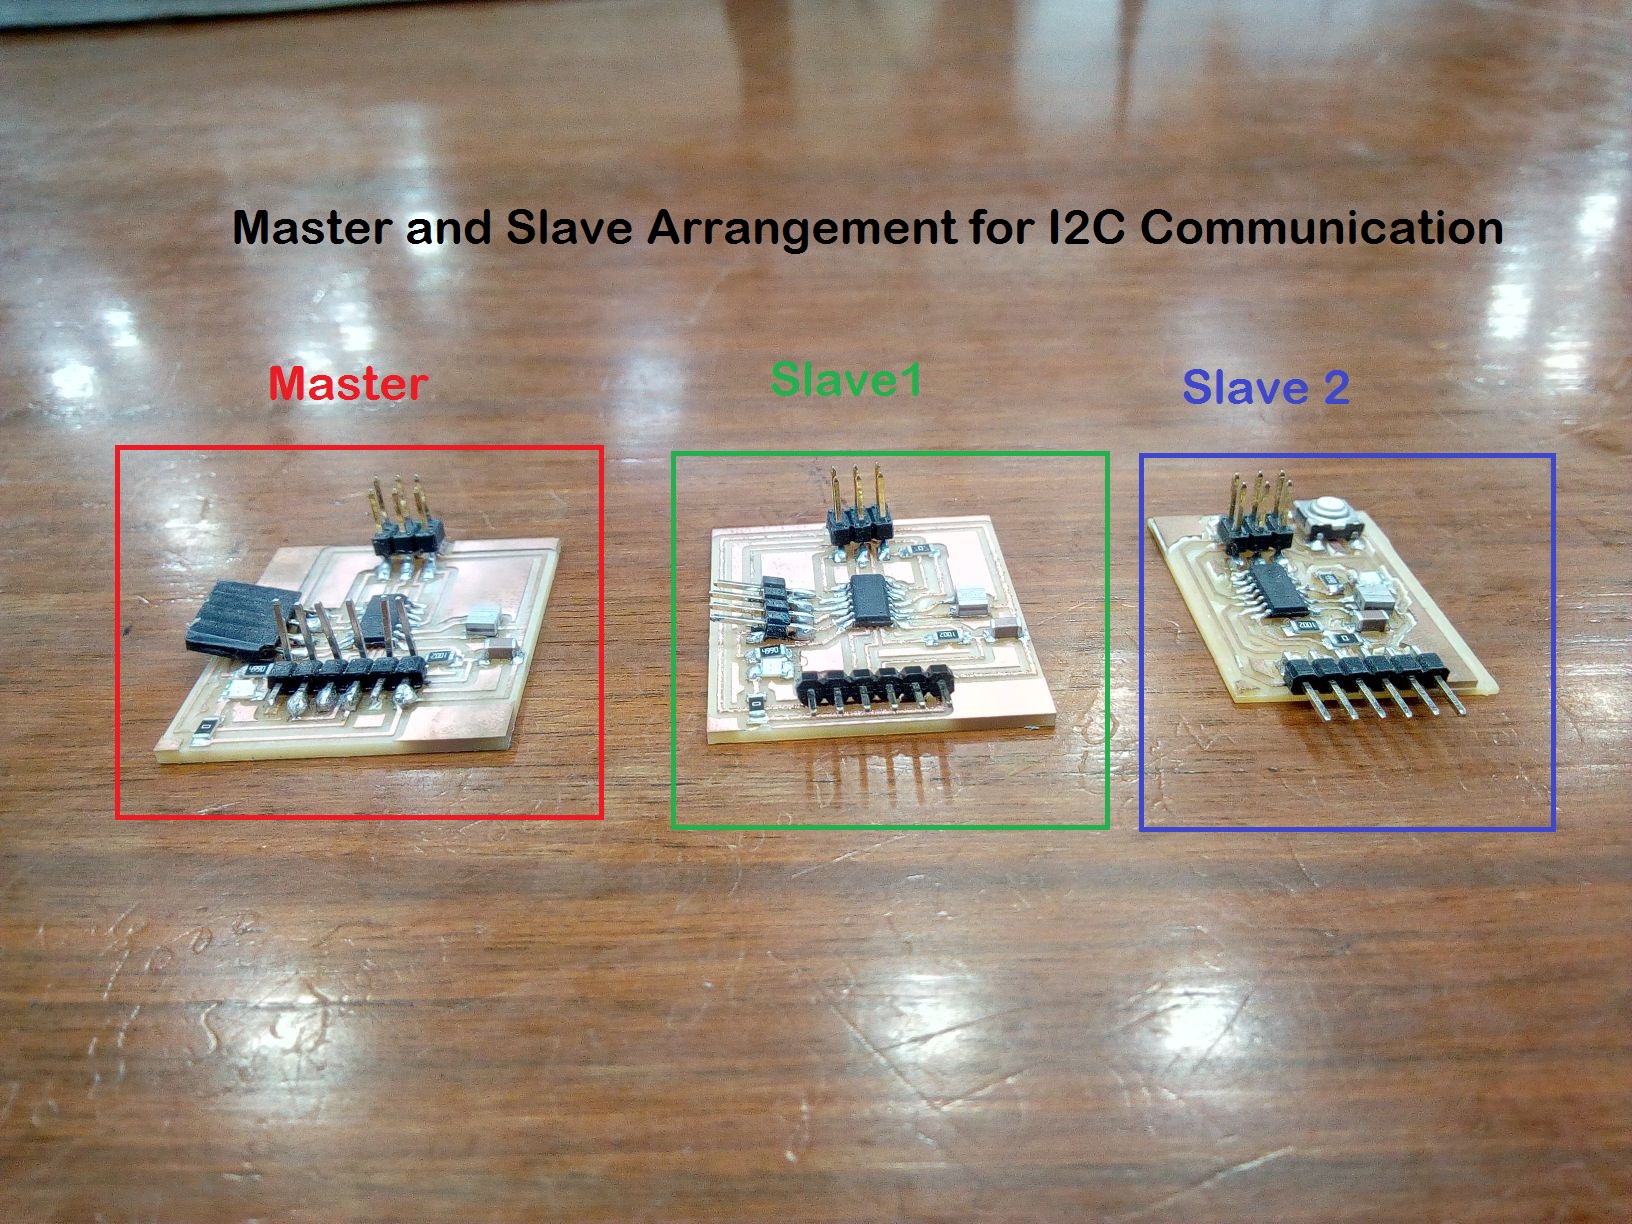
For this Assignment , I am using the board I designed in week 11 and week 7 . I am intending to make an I2C network between one master and 2 slaves . For my master board, I designed the week11 Ultrasonic board again with ATtiny44 IC and added an LED at pin 13 . For the slave1 I used the same board, but with slight changing in it , that this board has no free pins and for Slave 2 I used the board designed in week 7 having an led and a push button. The master and slaves are shown below:
Programming for I2C communication:
This is the first time I am working on I2C communication, so for programming the boards for I2C, I followed and studied some pages of students of fab academy who had already worked on this. I needed to write two types of codes ; one for the master and one for the slaves. Following are the steps I followed for programming the boards:
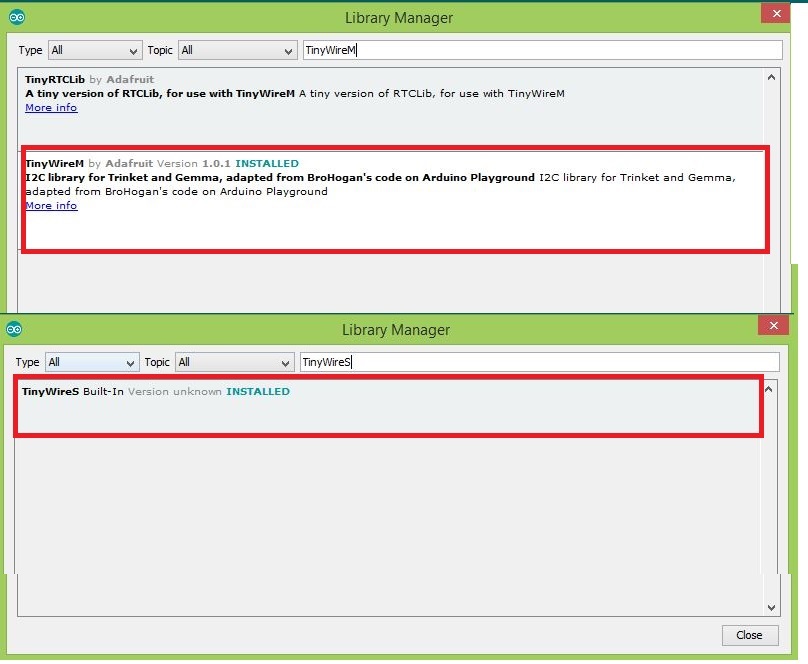
- Downloading the TinyWireM (Library for Master which is compatible with ATTiny44) and TinyWireS((Library for Slaves which is compatible with ATTiny44). The libraries were easily available in the manage libraries in the Arduino IDE. To program the Master following sequence was to be followed:
- Include the Master and slave Libraries as shown below:
- To set the the I2C communication bus , the following function is used
TinyWireM.begin(); - To start the communication from master, the following function is used
TinyWireM.beginTransmission(addressofSlave); - To send the data from master, the following function is used
TinyWireM.write(one byte); - To end the communication with a slave
TinyWireM.endTransmission();
Functions required for master:
Functions required for Slave:
- Include the TinyWireS library for slave
- Define the address of Slave
- Define the output pin (Here an LED in my case)
- initialize I2C lib and setup slave address ,
TinyWireS.begin(I2C_SLAVE_ADDR); - check if the TinyWisreS is available and read the data coming to the slave, then compare the recieved data and make the led on.
if (TinyWireS.available()){
digitalWrite(LED1_PIN, HIGH);
delay(100);
byteRcvd = TinyWireS.receive();
if (byteRcvd == 0){
digitalWrite(LED1_PIN, !digitalRead(LED1_PIN));
delay(200);
}
The master and slave codes are attached at the end of documentation.
All the Files of Week- 14 are attached below!
Week 14 Files!

This work is licensed under a Creative Commons Attribution-NonCommercial 4.0 International License.