Assignment 6: 3D Scanning and Printing

Assignment:
Group assignment:
- Test the design rules for your 3D printer(s)
Individual assignment:
- Design and 3D print an object (small, few cm) that could not be made subtractively
- 3D scan an object (and optionally print it)

3D Scanning
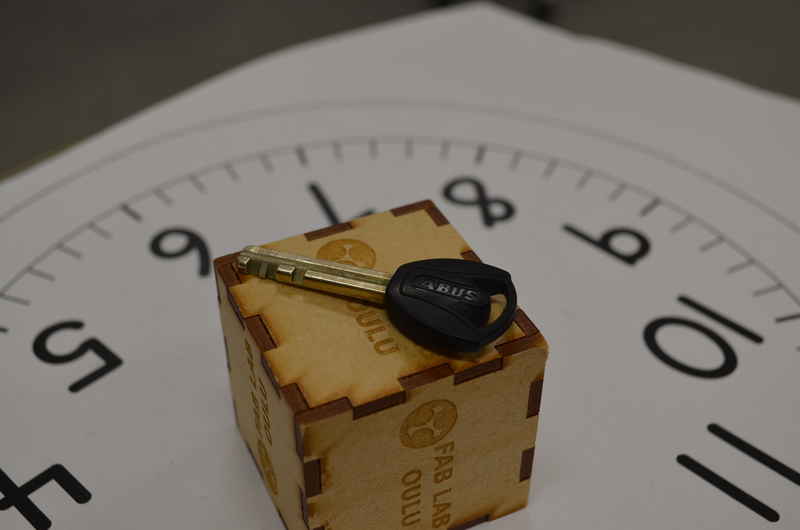
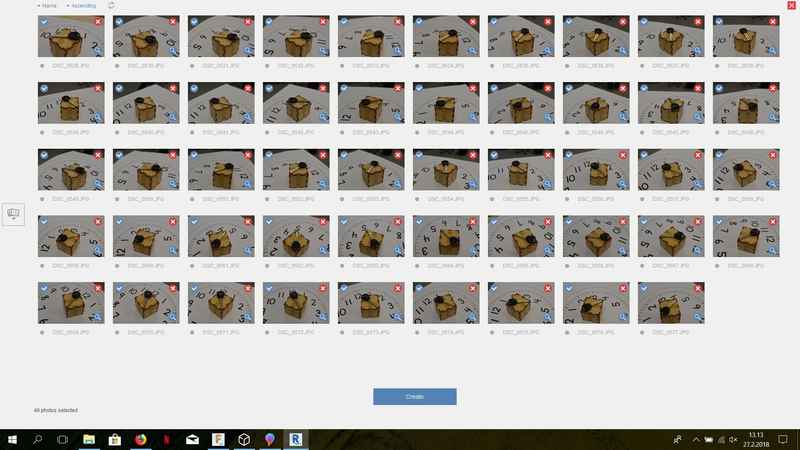
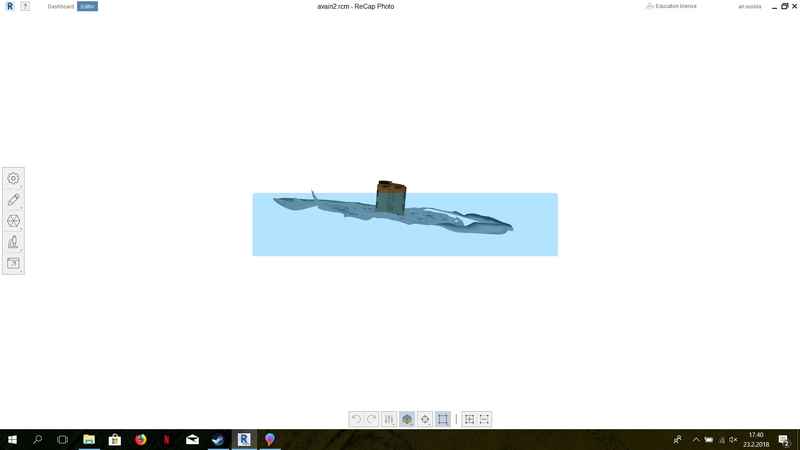
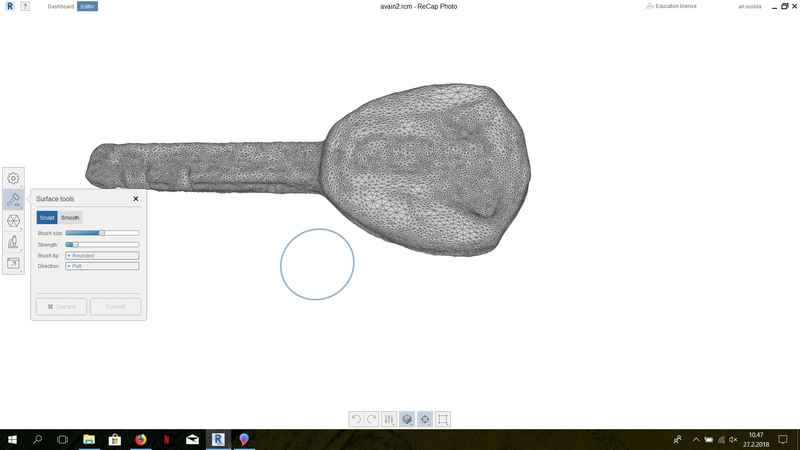
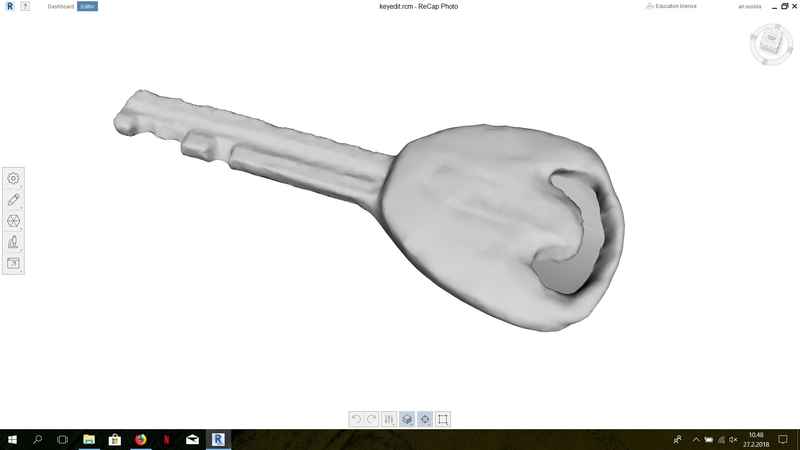
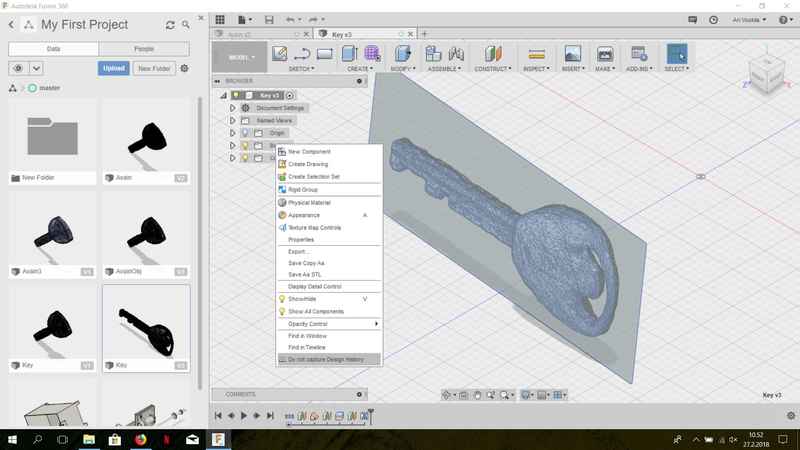
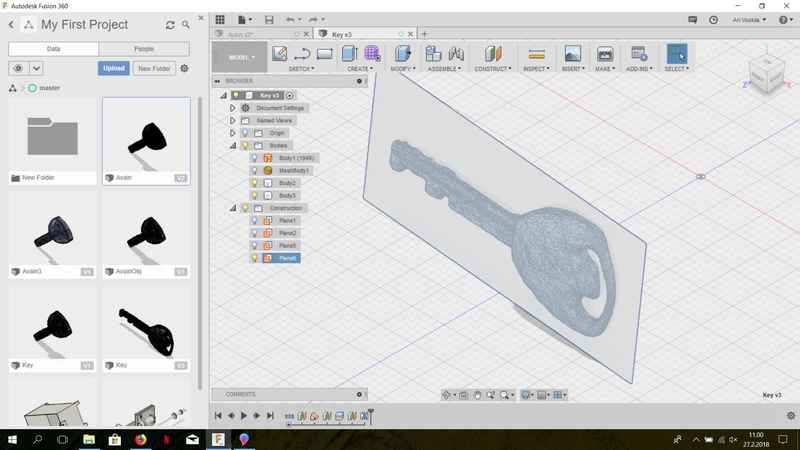
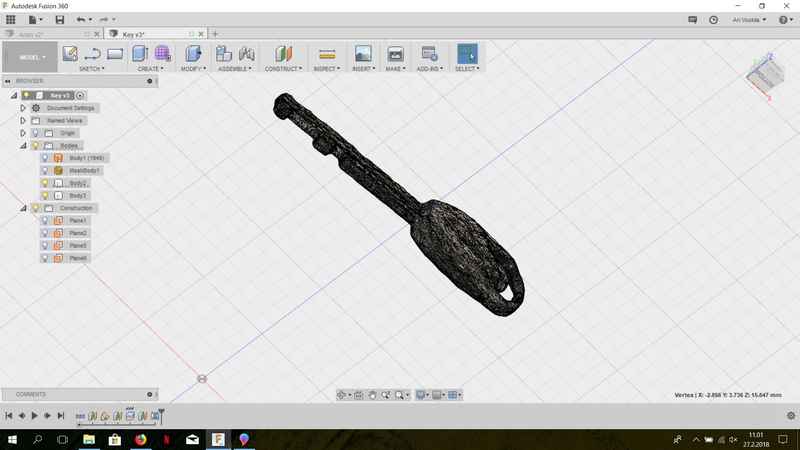
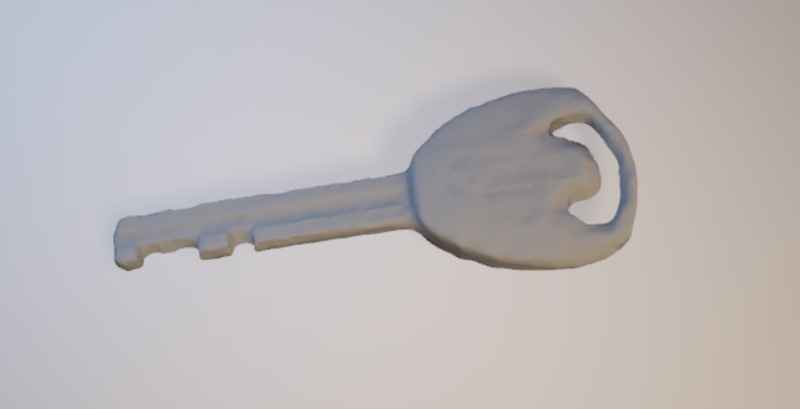
We started to practice using the 3D printers and 3D scanning with our whole group at 10 am at 22.2.2018. We went through a guide of which program to use for the scaninng and how. I chose a key for the scanning. There was a clock face below the key and a box under it to lift it up from the table.

PhotoForScanning
I started to do my 3D scanning on a rotating table with my Nikon D5100 camera. I took 49 photos with small step and from two different heights. I opened the photos in Autodesk Recap Photo (Create 3D object, click anywhere on the screen, select photos, press create, select auto-crop and start) and uploaded them in the Autodesk cloud for the 3D scan.

createObjectProject
It took about 15 minutes when I received a message that my project is ready for download. I opened the file in Recap Photo and it looked very nice from all the angles.

Key
I used selection tools and delete key to remove all the extra parts and then, I used transform model tool to make the object rotate in a better position.

SelectCutExtra
After that, I used Surface tools (push and pull) to make hole in the key better.

SurfaceTools
To make the edge of the key sharp and to fill it, I used Slice & Fill tool.

SliceandFill
I opened the sliced and filled key in Autodesk Fusion 360 and selected the Do not capture Design History from the component's menu, to make the change from mesh to brep possible.

HistoryOff
Then I selected the mesh with right key and mesh to brep to make it modifiable.

meshToBrep
Then I applied the capture design history once again and started to work with the key. I created a construction plane the cut the back of the key smooth and then used this plane to mirror the key to create whole object.

MirrorPlane
KeyReady
Then I saved the key in the stl format to be ready for printing. The file format can be modified only in the Autodesk cloud server.

CloudAccount
STL
keySTL
3D Printing
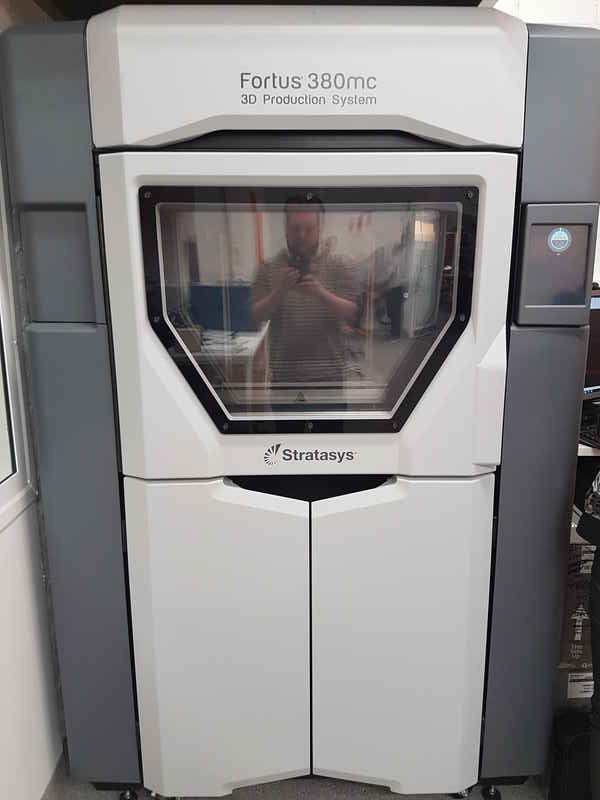
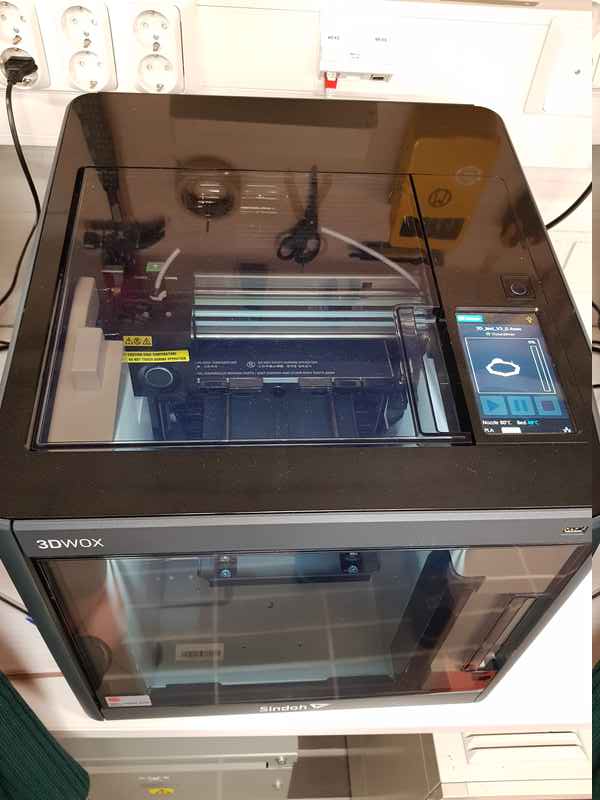
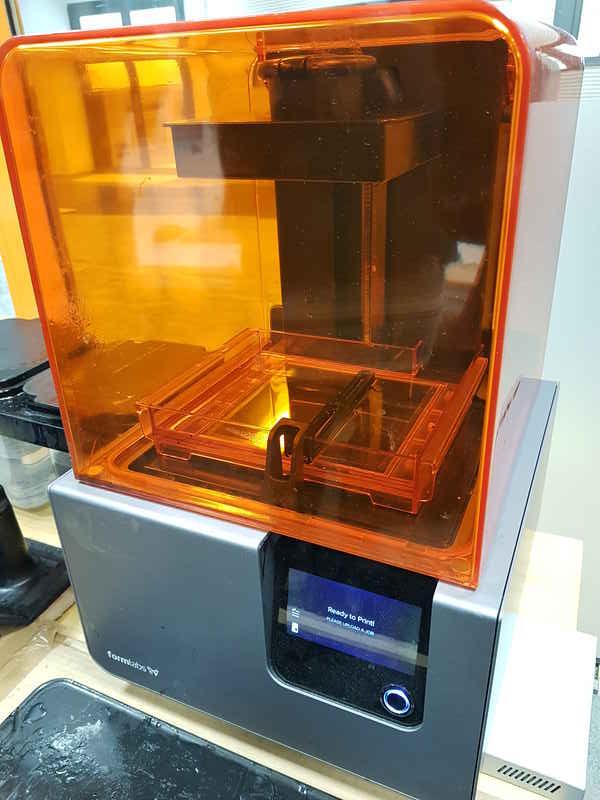
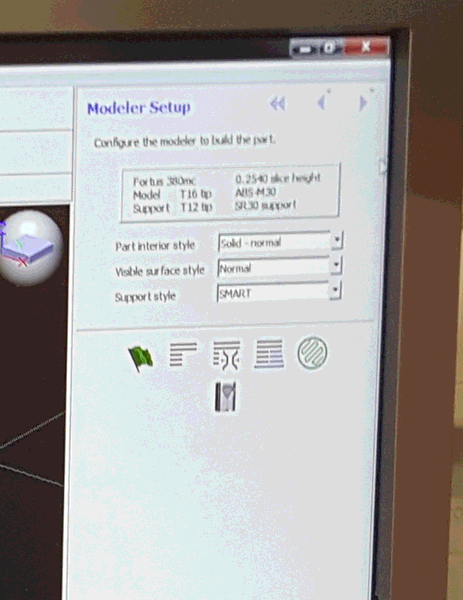
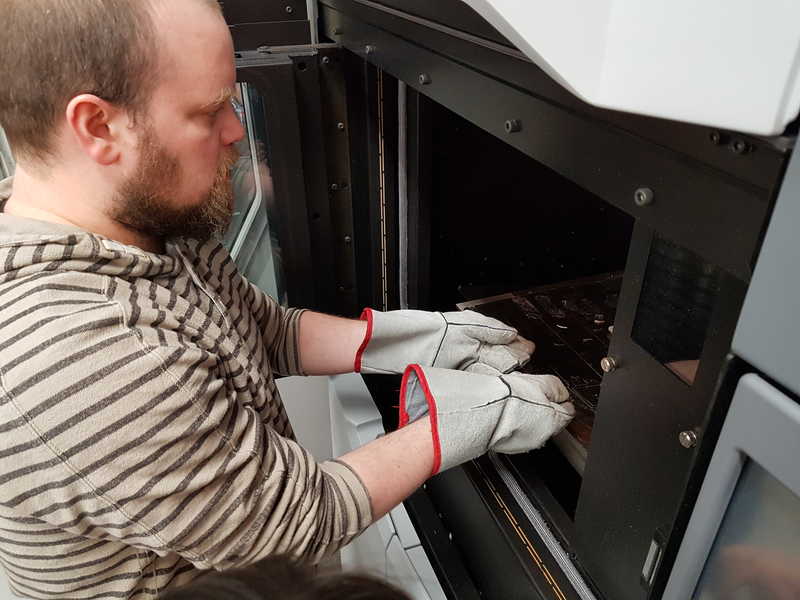
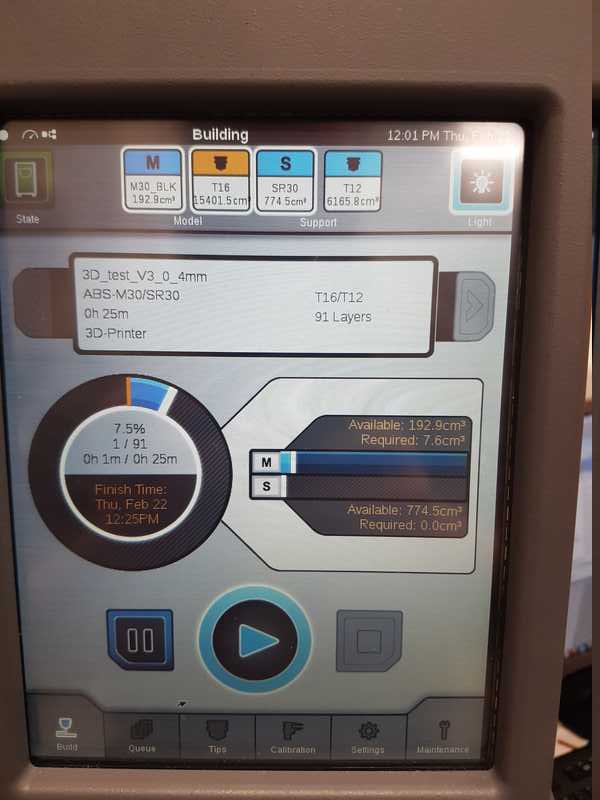
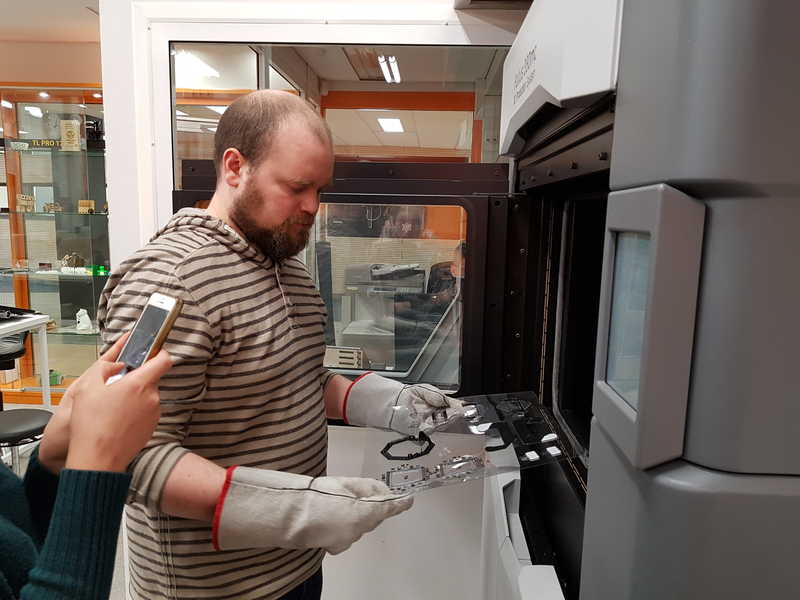
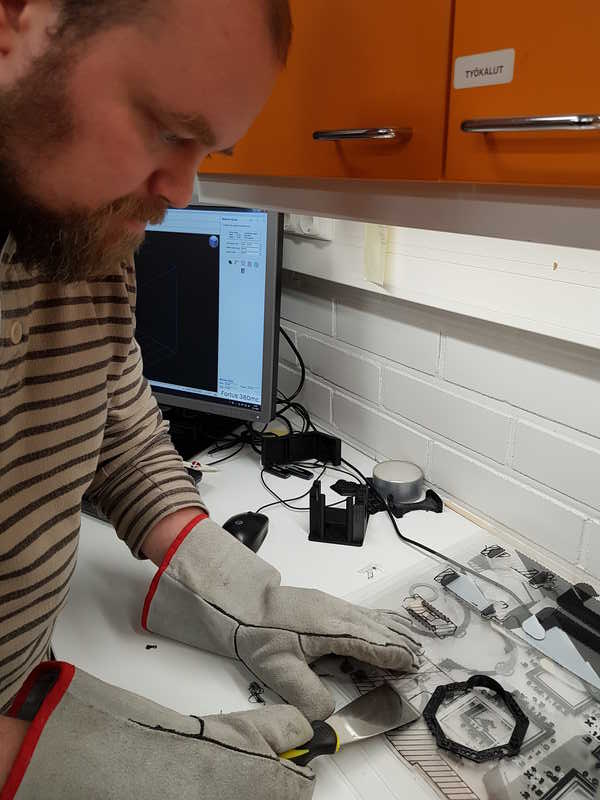
We have three 3D printers in our Fablab, which we used in this weeks assignments, Stratasys Fortus 380 mc, Sindon 3DWOX and Formlabs Form 2. I did my 3D print with Stratasys printer.

Stratasys
3DWOX
Formlabs
For the 3D printing project, I created inner part of the peristaltic pump (Autodesk Inventor professional 2018). The part is simply a wheel with rotating wheels attached to it. The part is impossible to make without 3D printer and fills the requirements for the assignment. It cannot be made subtractively, because there are axles between wheels, which are supposed to rotate against peristaltic pump tubing. These cannot be made subtractively, because the inner part of the peristaltic pump is made of one part where subtractive tools cannot be fit between bottom and top layers and the rotating wheels.

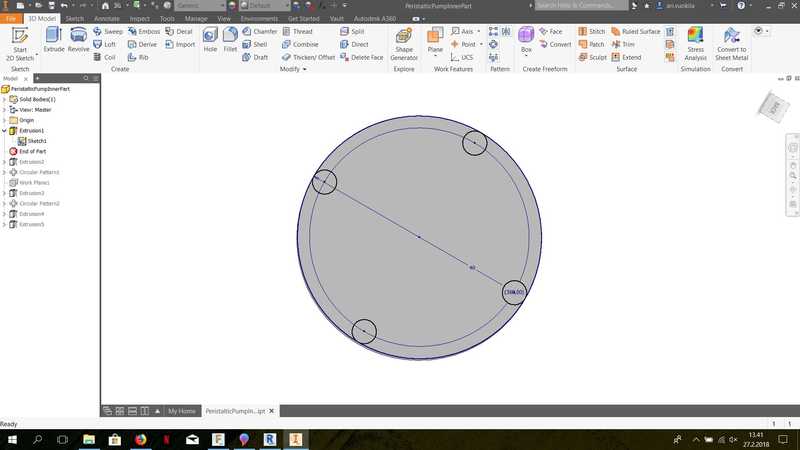
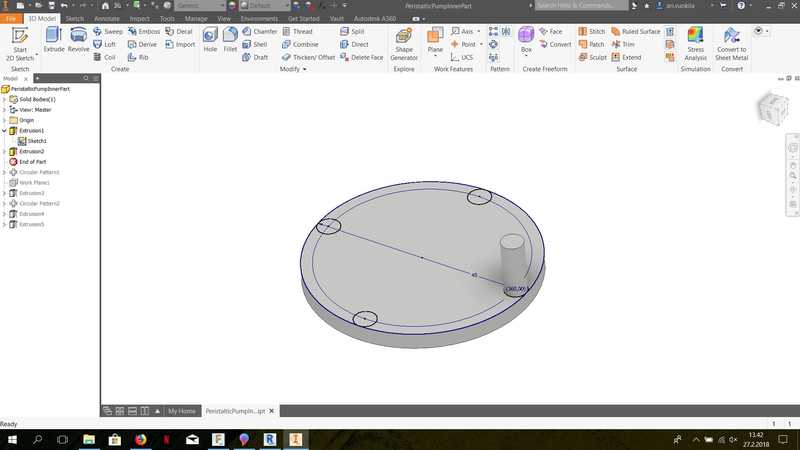
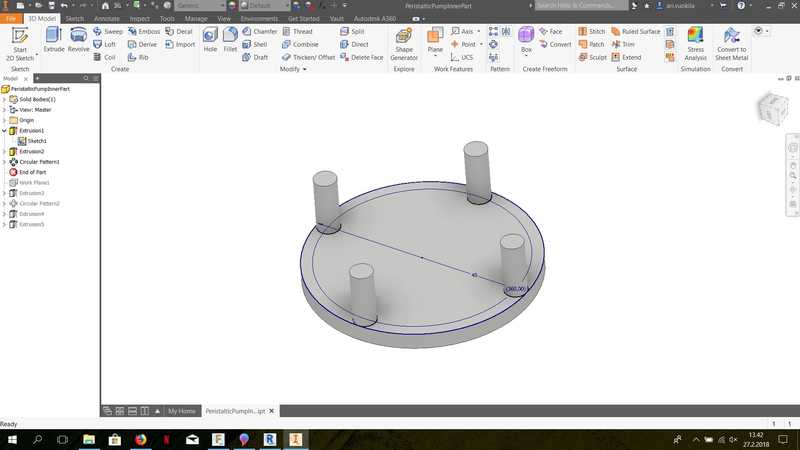
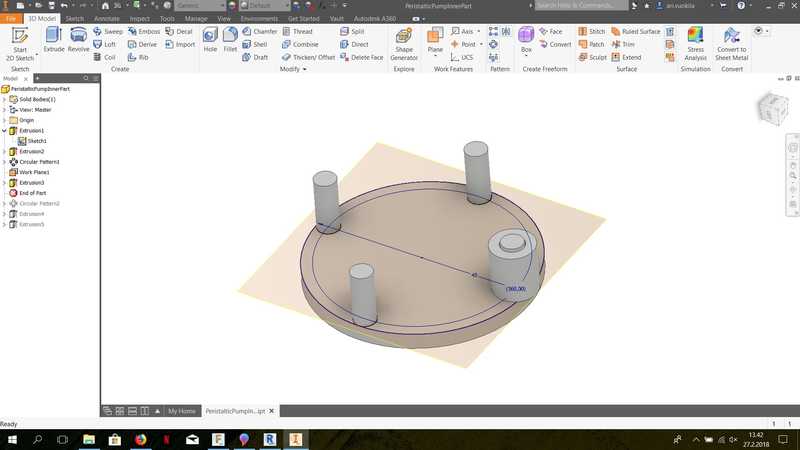
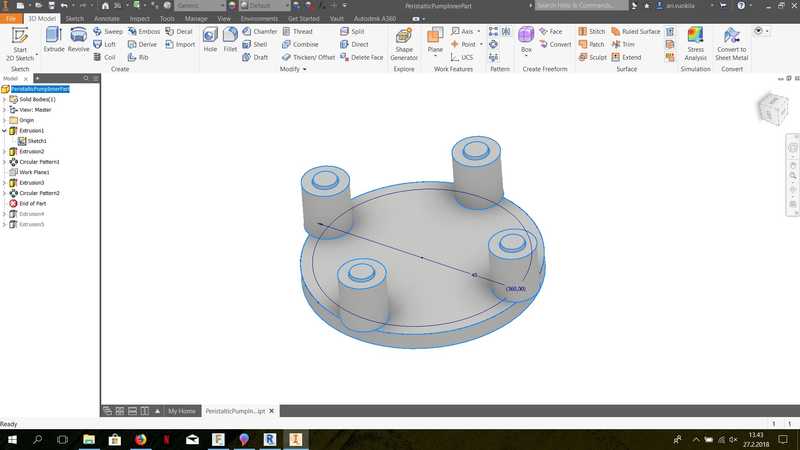
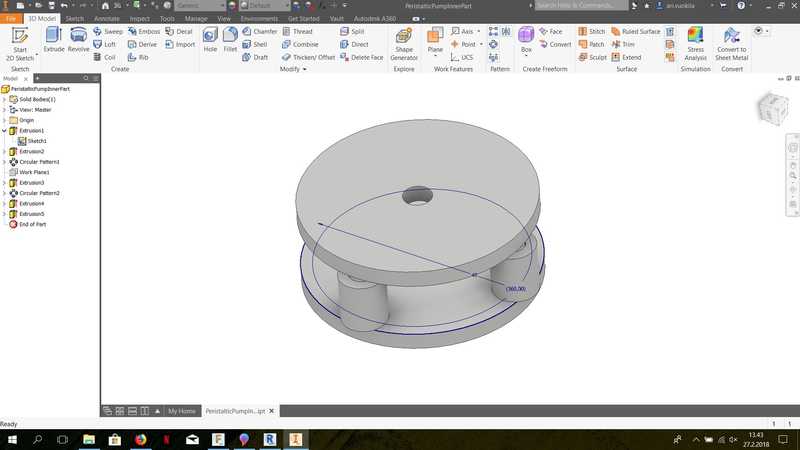
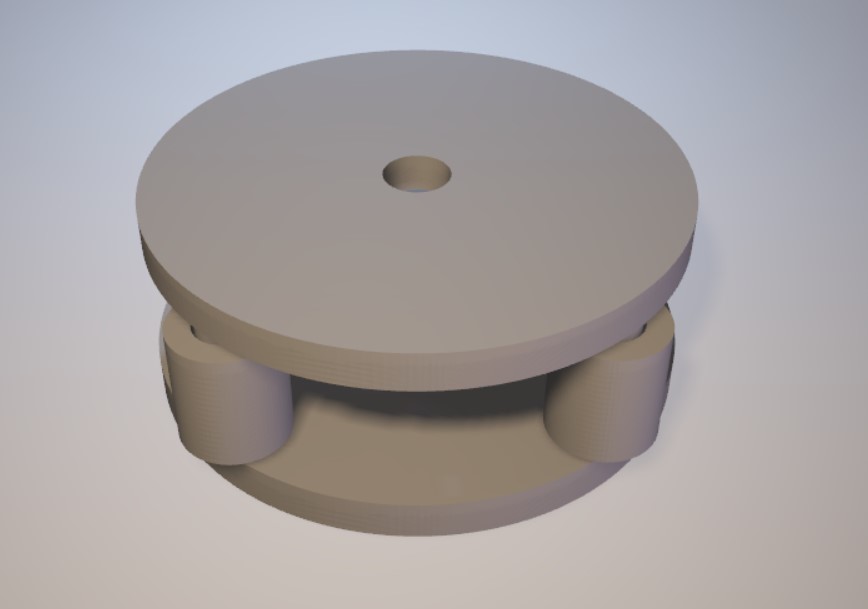
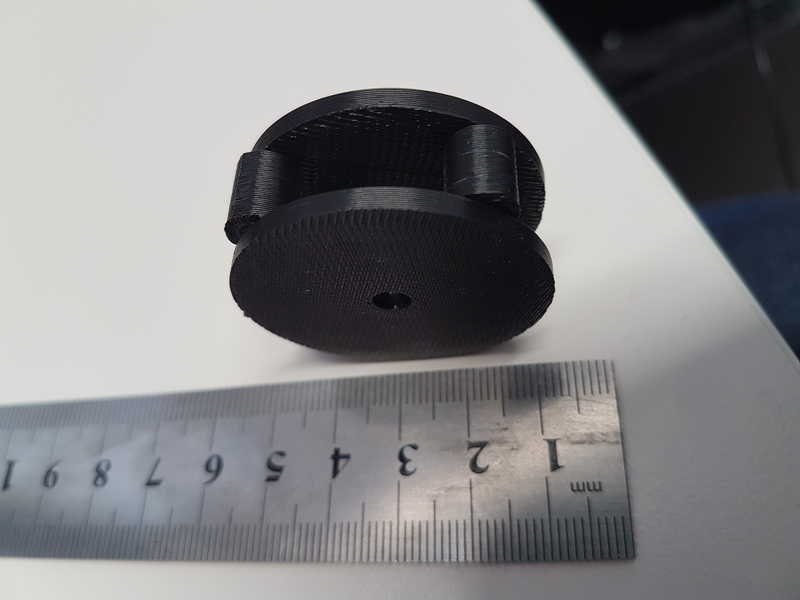
At first, I created a sketch of the wheel (diameter 4 cm) and extruded it (3 mm thickness). On the surface, I created another sketch for the axle holding the smaller wheel (diameter 4 mm).

3Dprint-0
The axel was extruded and rotated along the z-axis to create 4 similar axels.

3Dprint-0
3Dprint-0
Then I created an offset plane 0.5 mm of the surface and it was for the side of the wheels (inner diameter 4.5 mm and outer diameter 8 mm). One of the wheels were created and rotated along the z-axis to create 4 of the wheels.

3Dprint-0
3Dprint-0
After that, I created a plane for the other side of the part and extruded it and created a hole through the part for the stepper motor axel.

3Dprint-0
3Dprint-0
I exported part (Export-> CAD file-> stl file-> options -> resolution high, change the units to mm and save) as a stl file with high resolution to make it smooth on the surface, because the wheels has to be able to roll.

3DPrint8
Insight pre-processor for Stratasys 3D printer is the automatic choise when opening the STL files. Therefore you can double click the STL file and Insight opens with your file open.

3DPrinter
If you don't need to do any special settings for your part, you can select Part interior style, Visible surface style and Support style in the Modeler setup, which opens automatically.

ModelerSetup
I chose interior style as solid, visible surface style as enchanced and support style SMART and pressed green flag, which automatically slices the part and creates toolpath for the print. After that you only have to press build and it opens control center for the print.

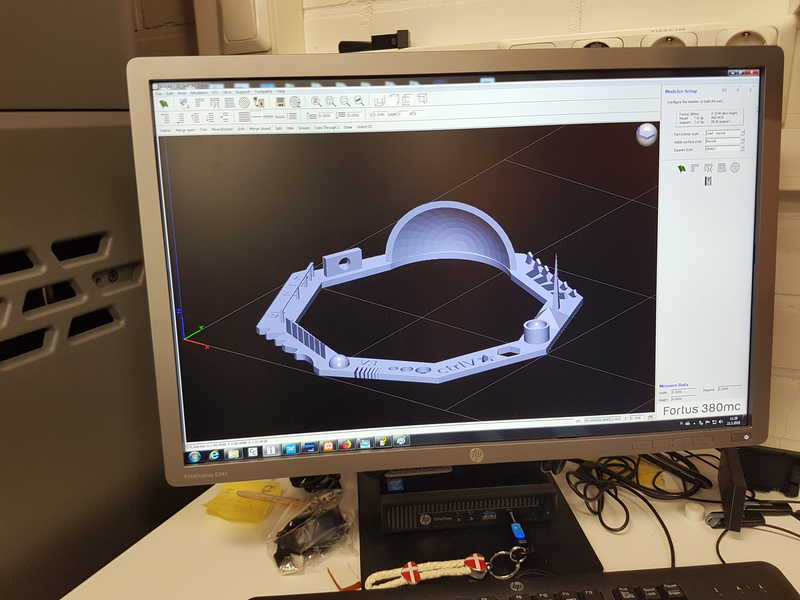
You can position your part there and press Build job when you are ready to print. This sends the file to printer.

Control
You have to place a printing surface in the printer (remember to wear gloves, it is hot in there!) and wait for it to soften, move it to its position (pins in the upper corners) and smooth it to create vacuum.

ModelerSetup
When the vacuum is ready you can press play button and it starts to print the object.

ModelerSetup
Remove the printing surface from the printer and remove your part from it.

ModelerSetup
ModelerSetup
Strip the bottom layer off your print and if you have used support, place the print in the NaOH bath for several hours (it melts the support plastic, Remember to wear gloves ) and wash the print and it is ready for use. In the case where support is not needed, NaOH bath is not needed.

ModelerSetup
ModelerSetup
3D printed part seemed to work as intended, because all the 4 wheels rotated smoothly. Still it is needed to be tested on the peristaltic pump tube surface with the whole pump put together.

InnerPart

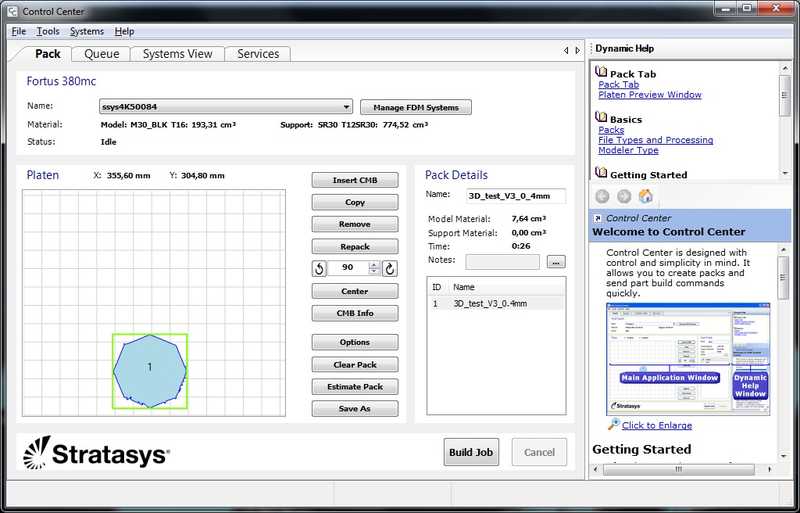
Reflection on this weeks assignment

This weeks assignment has been really interesting and I learnt a lot about the possibilities of 3D scanning and 3D printing. Advantages in 3D scanning are that you can use camera or 3D scanner to reproduce an object and move it to a 3D modeling software for post processing and you have possibility to replicate an object. It seems that it is used a lot in statue replication and also to create 3D room views. In the 3D scanning the limitations are that it is time consuming (good images from high number of angles, processing images to 3D scanning) and you don't see the results until the images are made in the 3D scanning and even if the results seem ok, you have to make a lot of post processing. In many cases, it would be faster to use 3D modeling software and a measurement tool to reproduce the object. 3D scanning of a full object from each side is extremely hard. As a conclusion, I would say that 3D scanning of simple geometries is not efficient and the 3D scanning of complex objects is hard and very time consuming.

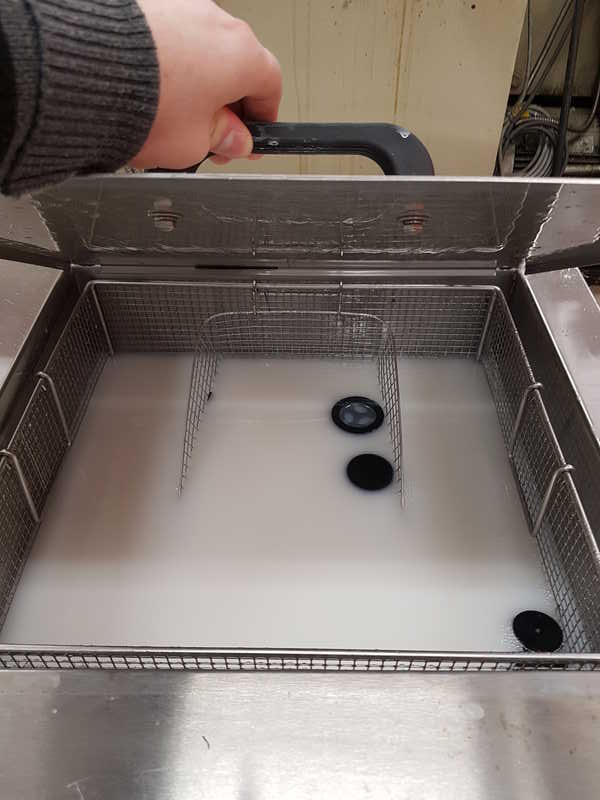
3D printing is a very versatile method and can be used quickly to produce prototypes of different kinds of objects or a part/spare part for some kind of machine. Even though many things can be made with 3D printing, it has several limitations as well. When you are considering to make bigger parts or several copies of a same part it is time consuming and in some printers the material costs are very high. In Stratasys printer, the material costs are around 300 €/l for the filament (ABS) and 450 €/l for the support material (soluble release material). Bigger pieces might cost above 1000 € and even the smaller ones cost surprisingly much. The materials for the basic 3D printers include ABS, acrylic and PLA, which are soluble in organic solvents and you have to be careful in 3D print purpose and also, if you are planning to paint them the paint should be acrylic paint. Typical printers cannot be used to print fine features, sharp angles, thin walls or walls very close to each other. The 3D printer nozzle diameter, material, 3D printing method and the fact that the filament is in molten state limits the accuracy of the print. The files used in the assignment are shared below:
3DprintingFiles.zip Files for the 3D printer.

3DScanningFiles.zip Files from the 3D scanning.

Group work file from Thingverse File from the group work.
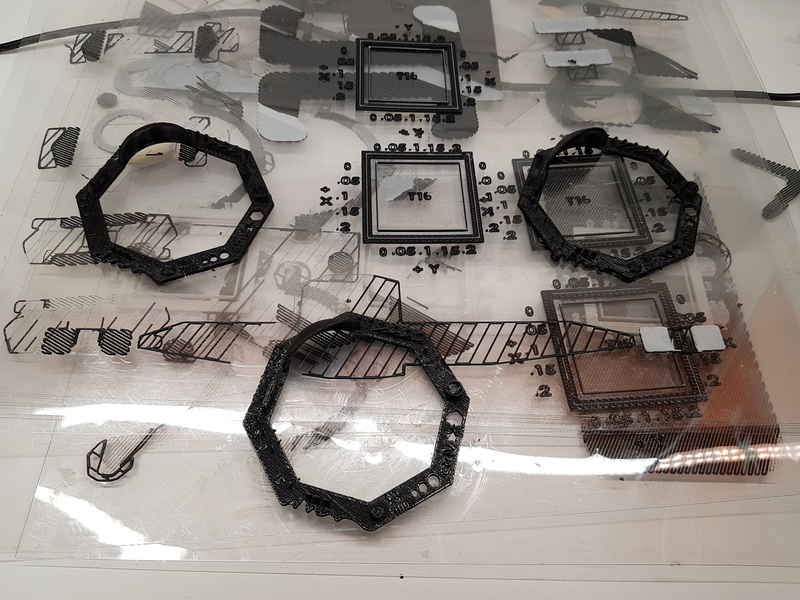
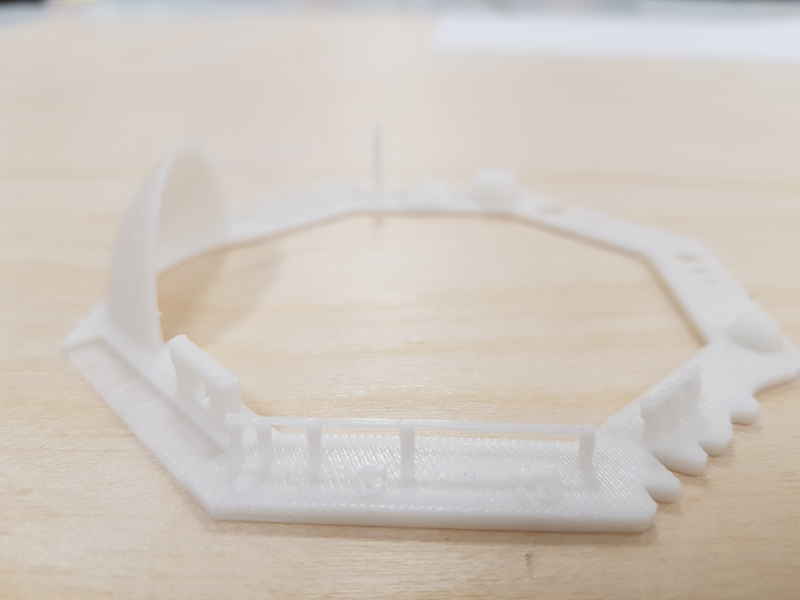
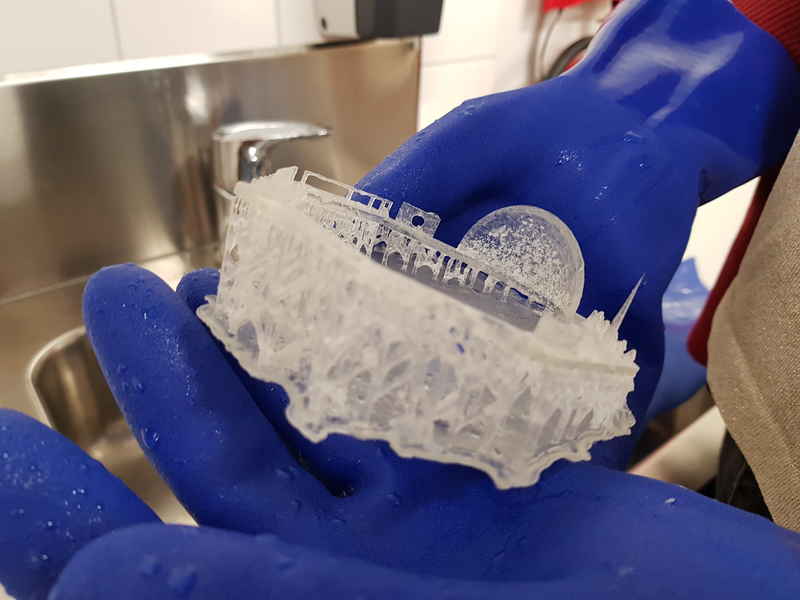
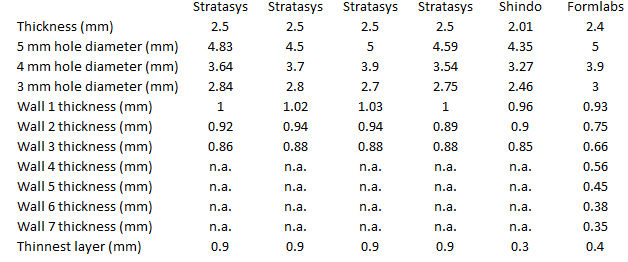
Group assignment

The group work consisted of testing the design rules for our 3D printers. 3D printing group page. I had never used a 3D printer before and I was exited to try it out and got the honors to work with the machine. Everyone else in our group had worked with them before, so they did not need the practice as much. We used a test piece, which we found from thingverse. We printed it with 3 different printers and compared the results with each other. Formlabs printer made the best quality printing, but it took almost 11 hours to print the part. We had plenty of problems working with Shindo 3DWOX, because it created filament errors four times, before we got it to print more than a single line. It might have something to do with wear of the printing surface. At least we got it to work, when we moved the hardest part to an area with smoothest surface. More on the group work can be found in our group page.

GroupResults
GroupResults
GroupResults
GroupResults