Week 13: Interface and Application Programming
This week's tasks:
- Group assignment:
- Comparing as many tool options as possible
- Link to the Group Assignment Page
- Individual assignment:
- Writing an application that interfaces with an input and/or output device that I made
Challenges:
- Defining the coordinates of petals was a bit challenging. To arrange them neat in a flower shape.
- For each functionality I spend considerable amount of time to sketch the logic and to think how to implement it and to search what are the related concepts that I could utilize for implementing what I had in mind.
Considerations:
Technology used:
- Processing
- Arduino
A word about my plan for this week's task
My project includes controling the LEDs on a physical device (a bracelet or a board) through a mobile app. Therefore, the output devices and application writing is so related to what I need. So I wish to try out writing an application that interfaces with a bracelet or a board (the physical devide is not ready yet but I am trying to make the core componenets such as circuit board utilizing individual neopixels wired in the shape of flower and a circuit board for controling the flower boards). As I have previously explained the potential idea for the final project, the kids rate each other through the mobile application and see the results in the physical device. For example when a kid rate another kid's positive behaviour through the app, if the rating reached a certain level, which is 3 or more than three out of five, the flower for positive behaviour on the physical device lights up. Therefore, it should work in a way that when the rating status is >= 3 (out of 5), the LED on the physical device would be lightened up. Meanwhile, I am trying to catch up with the previous week's task (output devices, which is partially done) for the sake of contributing a good amount of task to my final project. Since it is a lot of work, in case that I am out of time, I would interface with the input device (light sensor) that I have made. But anyways, I am happy that I am planning these week's task to complete partially my final project.
Getting ready for this week's task
Our instructor, Ivan, provided us with lots of handy related documents and tutorials such as Serial Communication, Arduino and Serial Software, Using Processing, Connecting using serial port, MIT App inventor, Using Python and Tkinter and Using Javascript. He also lectured about each of these concepts. Besides, he kindly guided each of us for figuring out what is the best to do for this week's task considering our final project and we also discussed which program could fit better considering our purposes and goals.
After the local lecture and going through different programming languages, I decided to utilize processing. It is a complete new and promising software to me compared to for example javascript and apparently makes life much easier, therefore I would like to try it out.
Flower Interface
Processing is a java-based but simple programming environment, which is free to download and use. It is a suitable software for creating applications with emphasis on visuals and animation. Processing is an open source program, which is comprised of a processing development environment (PDE) and a collection of functions.
Adopting processing, one is able to do almost anything that could be done in Inkscape but through functions/commands/methods.
- I started by downloading processing software (3.3.7).
- I went through the intro tutorial, examples and references.
- setup() is a function that runs once, when the program begins. There is only one setup() function for each program and ususally initial environment properties are defined here. I defined the size of the document, the basis for the color of the objects and the initial size of the objects in the setup() function. I also created the new objects from the button class, inside the setup() function.
- draw() is a function that is called after setup() function. All the lines of codes that are in draw() funtion, are executed continiously. I defined background color, texts, color and size of the texts in here. Here in draw() function, I also called the other functions that I have defined inside the button class.
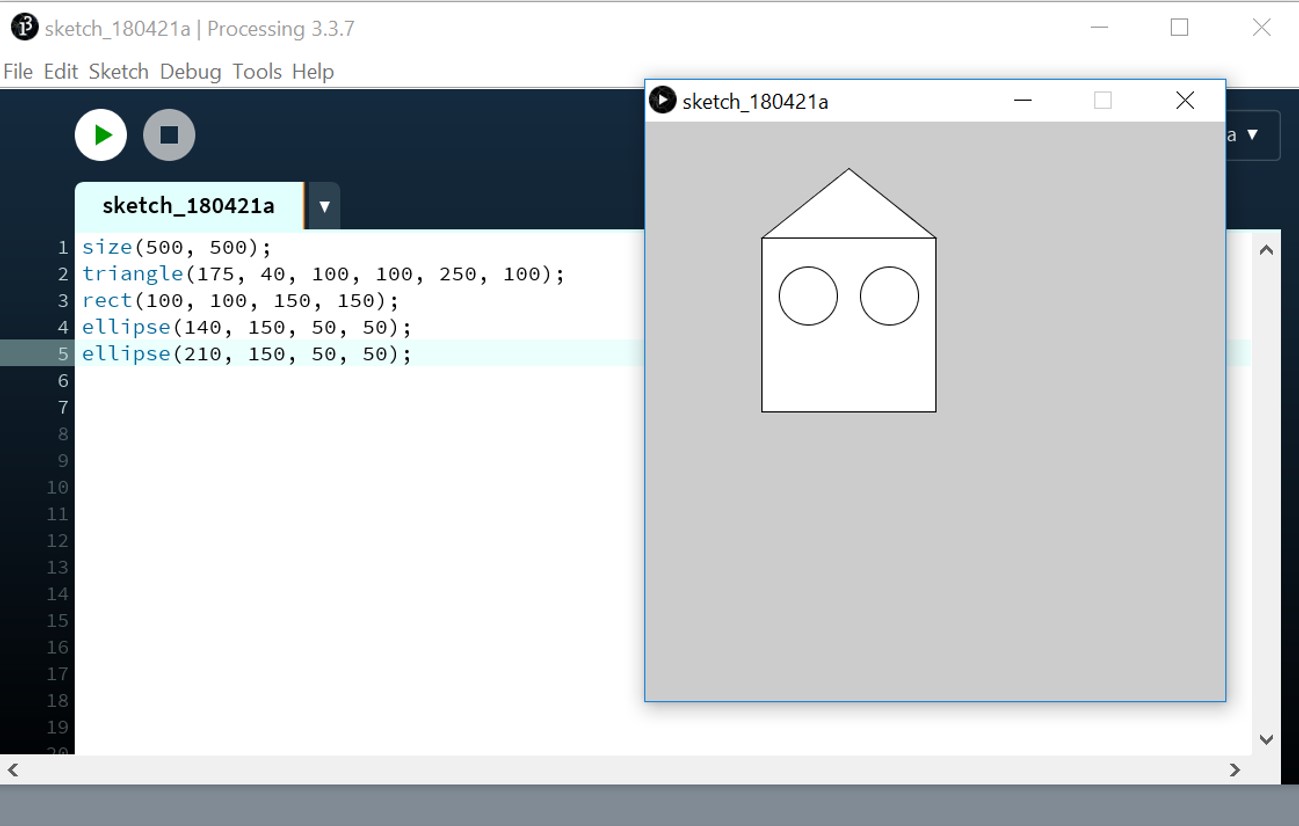
- Warming up with some basic features:
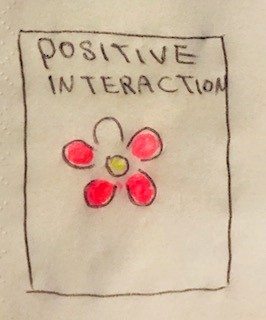
- Here is the sketch of what I have in mind to design:
- Coordinate System and Shapes: "Each pixel of the screen is a coordinate - two numbers, an "x" (horizontal) and a "y" (vertical) - that determines the location of a point in space. And it is our job to specify what shapes and colors should appear at these pixel coordinates."
- This tutorial was inspiring for creating the visual for flower.
- First I define the size for display setting with size() function:
size(375,667)
The size unit is in pixel and I set it to iphone 7 screen size. - I set the background color to white by background() function:
background(#ffffff); - It is suggested to draw all geometry with smooth() function in order to have smooth edges and also for improving the quality of resized images:
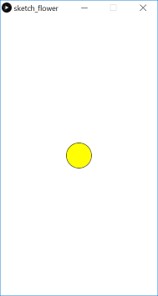
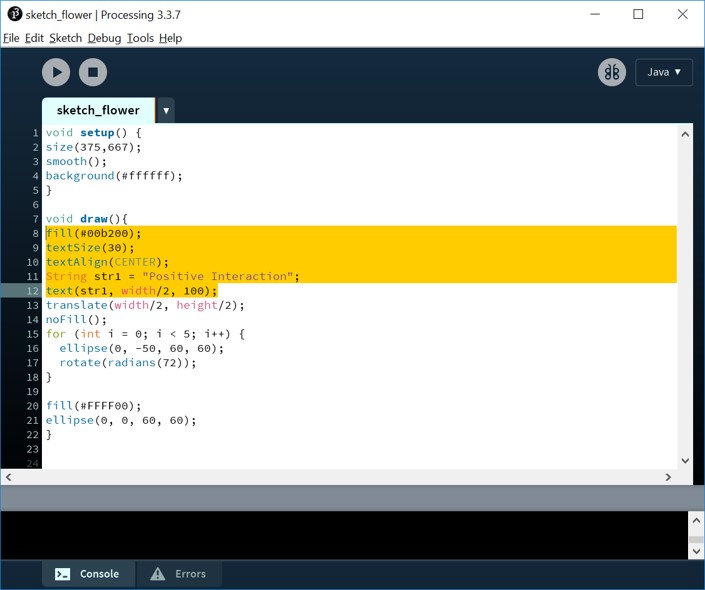
smooth(); - I start by drawing the center circle of the flower. Translate() function specifies an amount to displace objects within the display window. So I set the center point to 0,0 by passing half of the width and half of the height of the screen size to the translating function:
translate(width/2, height/2); - Then I draw the circle using circle() function:
ellipse(0, 0, 60, 60); - I colored it with yellow by the function fill():
fill(#FFFF00); - I draw the first petal exactly above the center:
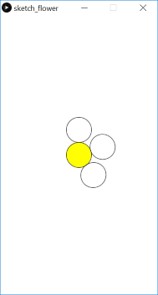
ellipse(0, -60, 60, 60); - It automatically get affected with the previous colored defined in fill() function. So for now I want no color for the petals so I use noFill() function:
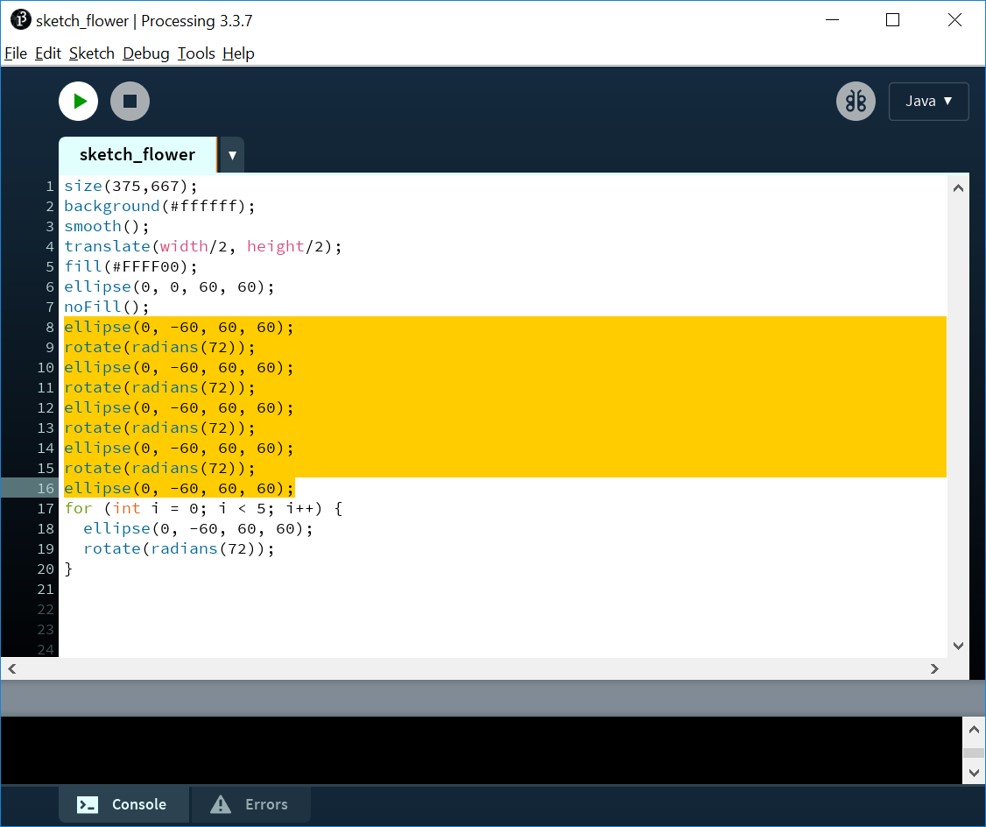
noFill(); - I used rotate() function for drawing the other petals and radius function for converting degrees to radius. Since I have 5 petals, I did a simple calculation of 360/5 = 72 and rotated each petal for 72 degree.
rotate(radians(72));
ellipse(0, -60, 60, 60);
I wrote the same 2 lines of codes 4 times for the 4 petals that need to be rotated. - This part of code is repeated for 4 times so in order to remove this repetition, I used a for loop, which controls a sequence of repetitions: So as you see in the picture, instead of highlited parts I used the following lines with for loop:
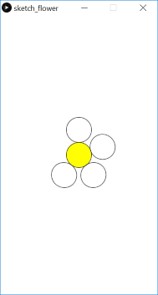
- Now I would like to manipulate it a bit to get the petals closer to each other. So I change the value of y coordinate, which is -60 now to for example -50 and I run it to see the affect:
ellipse(0, -50, 60, 60); - In order to fix the overlapping problem as you see in the previous picture, I simply rearranged the code and let the code lines related to center circle stay after the codes for petals:
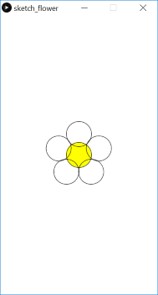
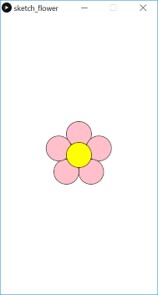
- Now I filled the petals by colorjust to ensure the visual would be find later on when it is filled with color.
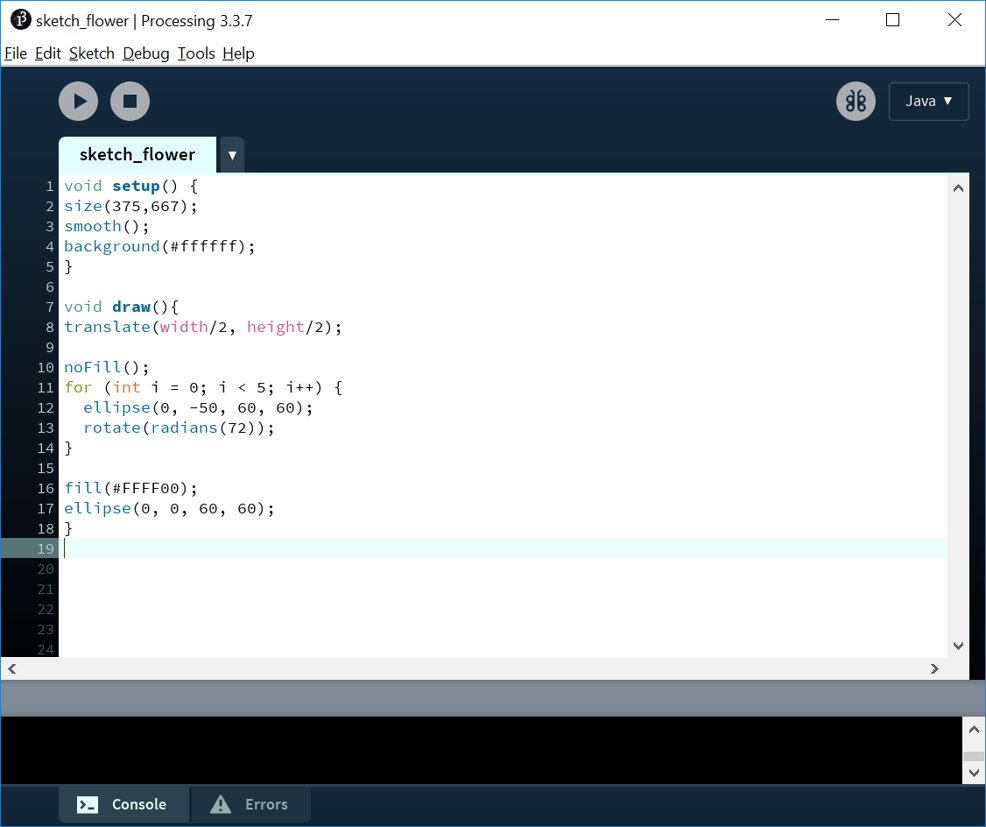
- I used setup() function to include those parts of the code, which need to run just once when the program starts. Good to keep in mind that "variables declared within setup() are not accessible within other functions, including draw()."
- I also used draw() function to place the rest of the code inside it. "Called directly after setup(), the draw() function continuously executes the lines of code contained inside its block until the program is stopped or noLoop() is called."
- I wrote a few lines of codes for text using textAlign(CENTER) for setting the allignment of the text in center and I also considered the coordinates of the text in top center(dividing the width of the screen by 2):


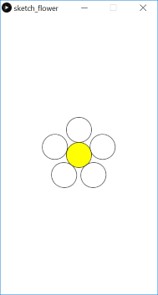
 I beleive the petals are close enough now.
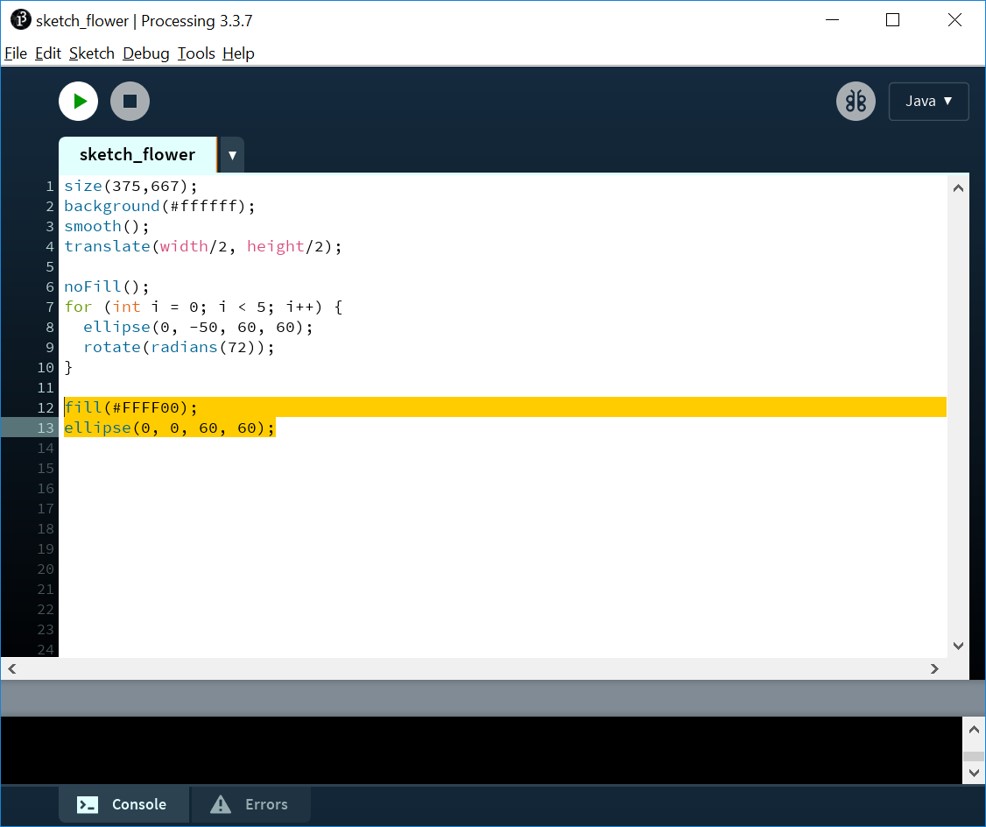
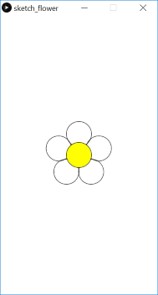
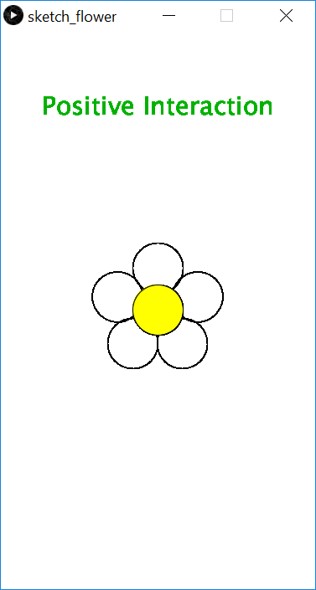
 It is OK and I am happy with the flower visual :-)
Changing the Color of Flower Petals by Mouse Click
- To see how mouseClicked() works, I added the following part of code, which means if the mouse is pressed on the elipse, fill its color with pink, otherwise fill it with white.
- Based on my knowledge about some programming concepts (basics of array, class and object) I could somehow guess that using arrays, objects and classes would be the solution.
- In improving the UI section, I explain the final solution that I came up with, for changing the color of each petal individually.

Now when I click anywhere on the screen, the color of petals changes to pink. It is not my solution, since I want to change the color of each petal seperately when it is clicked and I want to keep the color changed. So I need to firstly separate each petal and find a solution to keep the petal's color still by clicking on it.
Connecting Using Serial Port
- Initialization:
- "The Serial library reads and writes data to and from external devices one byte at a time. It allows two computers to send and receive data." (Source)
- "Communicating with custom microcontroller devices."
- "Using custom microcontroller devices as the input or output to Processing programs."
- "The serial port is a nine pin I/O port that exists on many PCs and can be emulated through USB."
- In my case, the computer is going to send data to my board, which means my computer writes data but not reads it.
- Finding the serial port name and number and assigning it to PORT:
private static final String PORT = "COM5"; - Declaration: stating to the program that there will be an object named myPort from Serial Class. This line should be added in the beginning of the document.
Serial myPort; - Instantiates and initializes the memory and initializes the variable 'myPort'. Adding the following code in setup():
myPort = new Serial(this, PORT, 9600);
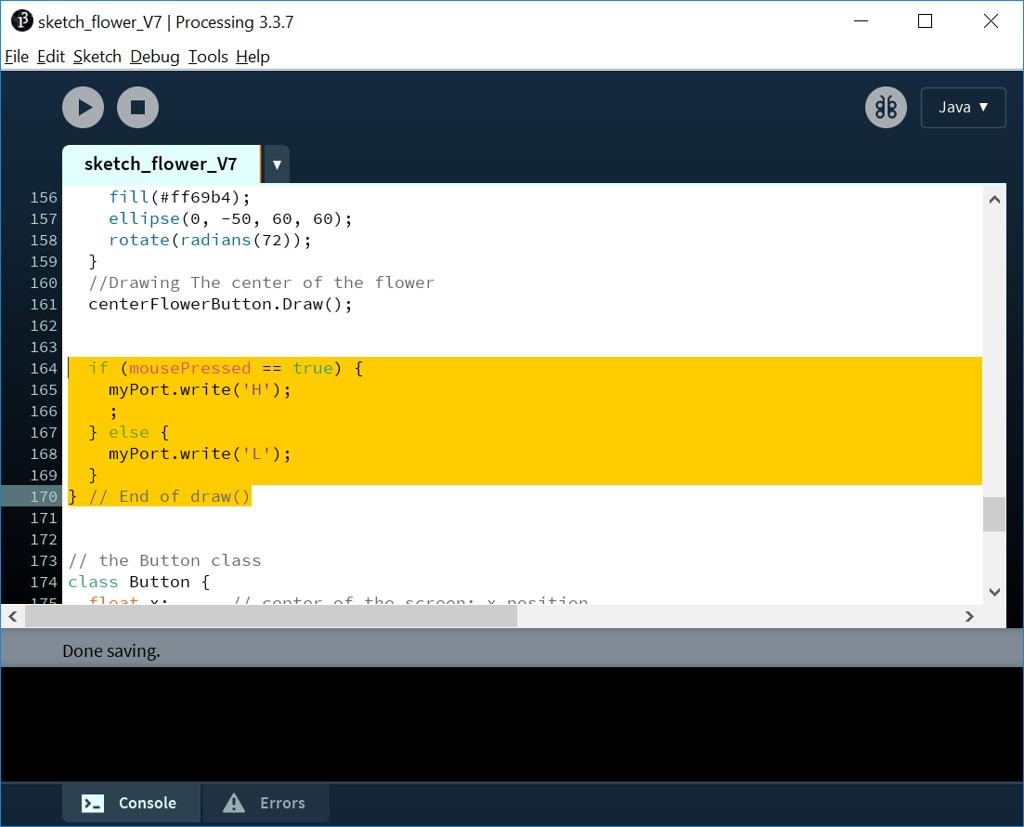
- If mouse is pressed
if (mousePressed == true); - Write H
myPort.write('H'); - Otherwise, write L
myPort.write('L');


The Result
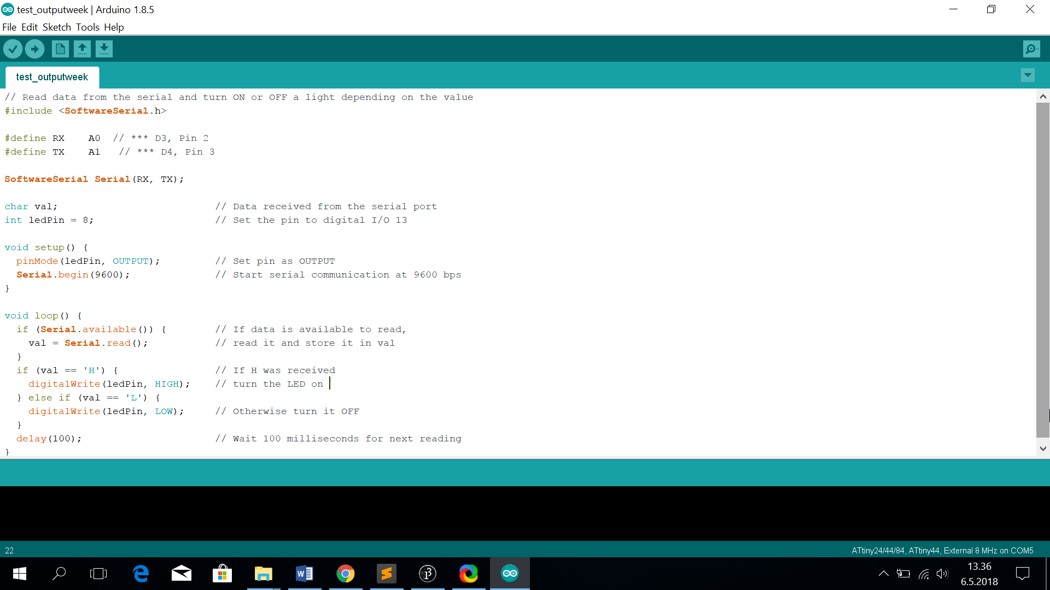
For communication, I connected my board with ATtiny44 microcontroller designed on Week 7 . When I click on the screen, the LED would e lightened up on the board. And on click release, the LED would turn off.- ATtiny44 does not have a UART (Universal asynchronous receiver/transmitter) implementation in hardware, but instead it includes a Universal Serial Interface, USI. (ATtiny44 Datasheet). Therefore, one cannot send data using the default Arduino serial library.
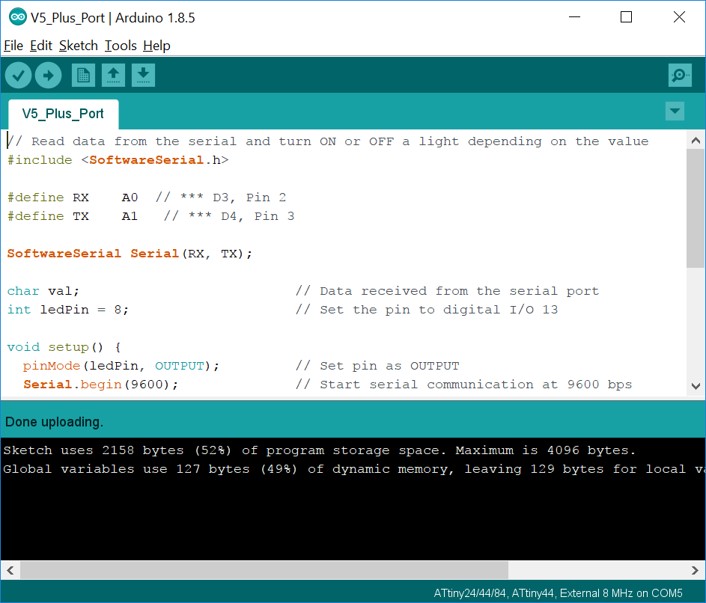
The Arduino core for ATtiny includes a Software Serial library that implements a serial UART interface. - RX: A0: Pin 2
- TX: A1: Pin 3
- ledPin: 8: Setting the pin that is connected to LED
- pinMode(ledPin, OUTPUT): Setting the pin as output
- Serial.begin(9600): Start serial communication at 9600 bps
- if (Serial.available(): If data is available to read
- val = Serial.read(): Read it and store it in val
- if (val == 'H'): If H is received
- digitalWrite(ledPin, HIGH): Turn the LED on
- else if (val == 'L'): Otherwise if L is received
- digitalWrite(ledPin, LOW): Turn the LED off
Now when I click anywhere on the screen, the LED on the board turns on. So the communication is established.
Improving the UI (Based on my Final Project Needs) and its Connection to the External Device
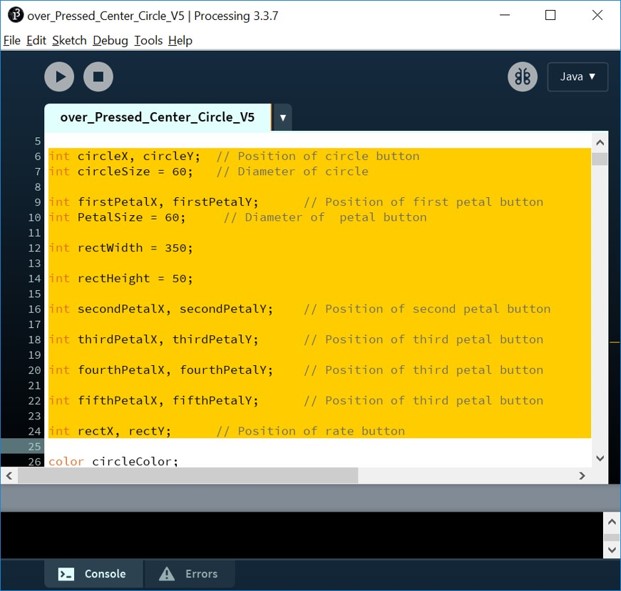
Since my Java programming knowledge is basic, I decided to rewrite the code in a more simple way so that I would be able to find ways to control each individual object that I have. it led to more lines of codes, but more understandable for me.- The first thing that I changed was the way of drawing the flower. Previously I used rotate() and translate(). But this time I decided to manually define the coordinates of each petal by calculation. Defining the coordinates of each object (center of the flower, five petals and rate button):
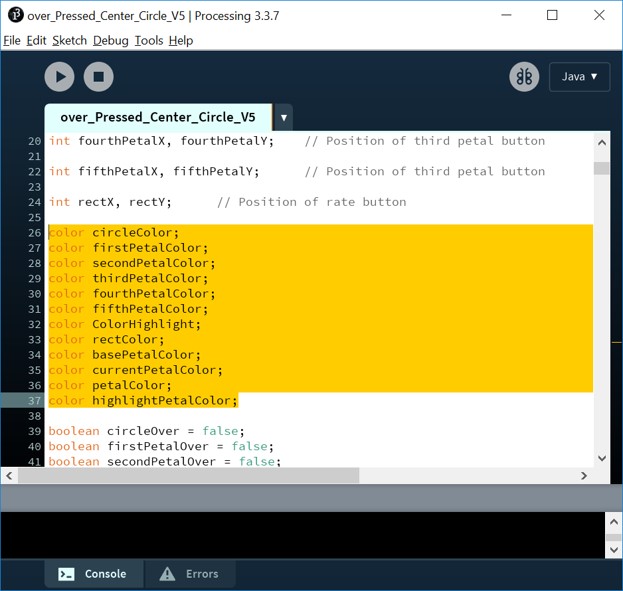
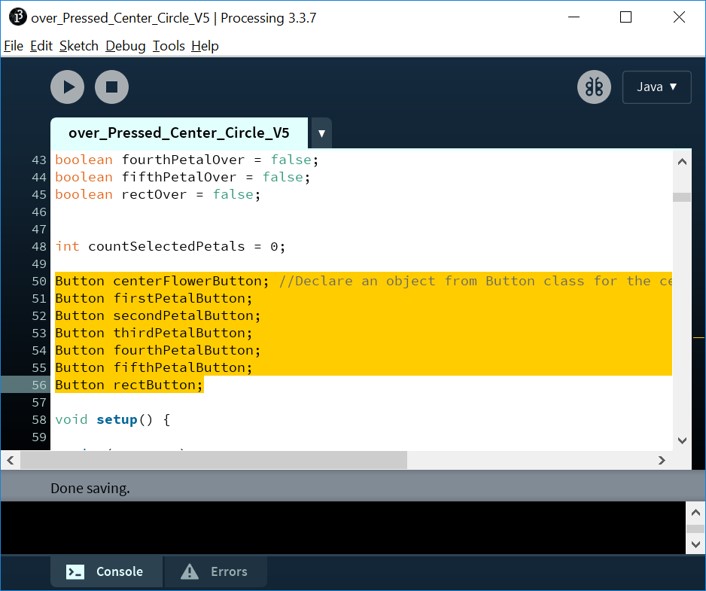
- Defining the variables for the color of each object.
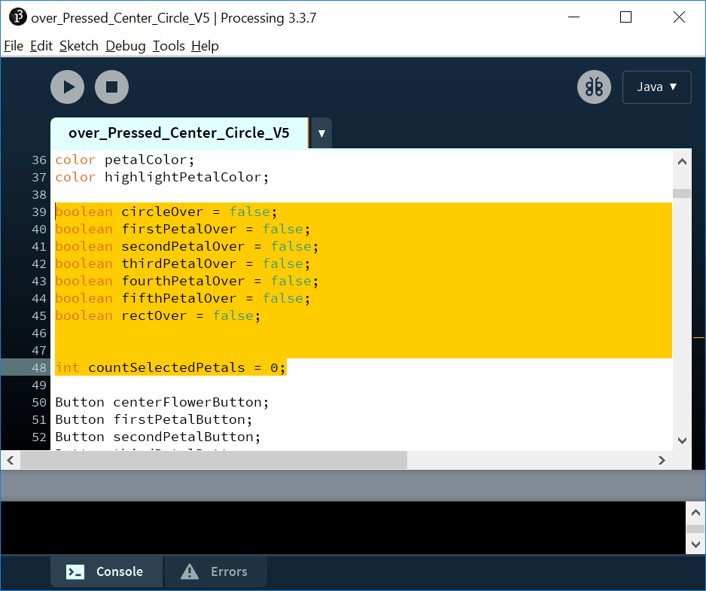
- Defining boolean variables for detecting when mouse is over each object. And also an integer variable named countSelectedPetals for counting the selected petals and setting its initial value to 0.
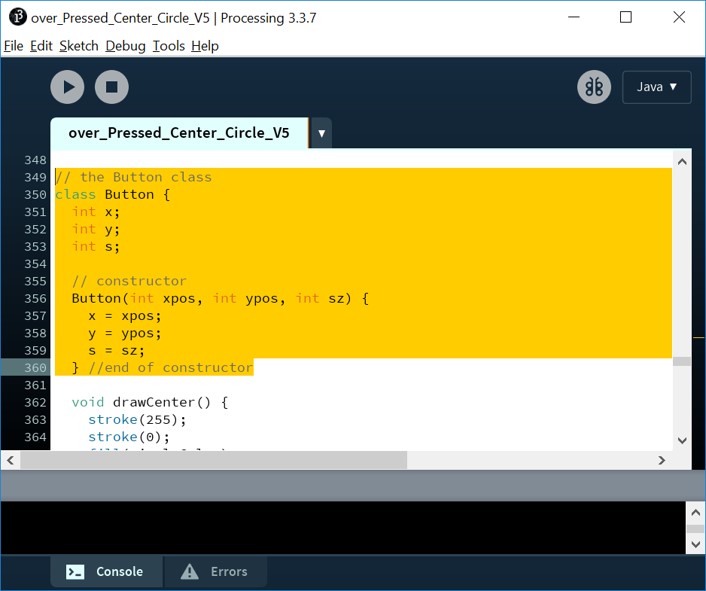
- Defining a class named Button for circles with three integer variables for xPosition, yPosition and the size. And also defining a constructor for it.
- Declaring different objects from Button class. An object for center of the flower, five objects for the five petals and one object for the rating button.
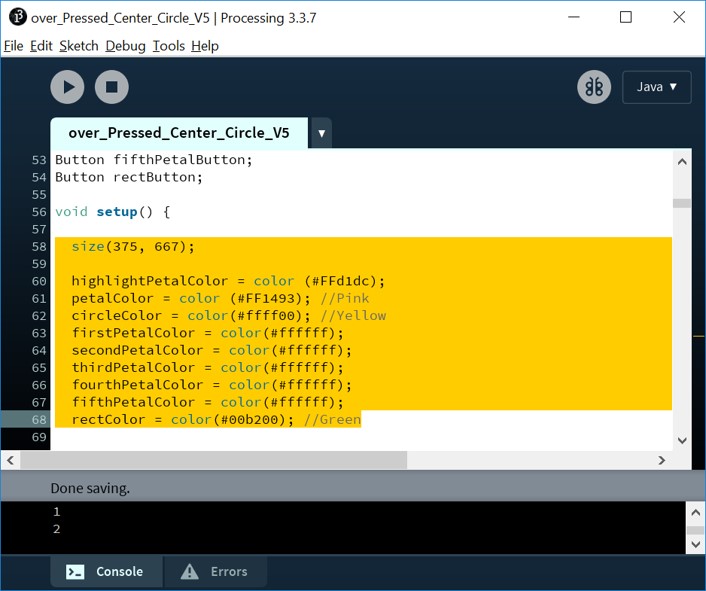
- Defining the dimension of the display window in units of pixels: width 375 and height 667.
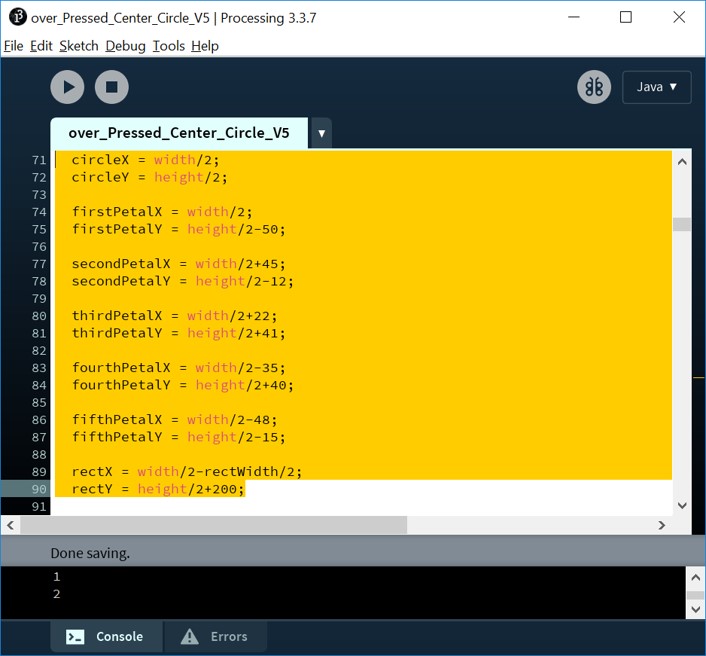
And defining the initial color for each object. - Defining X and Y position for each object. I first placed the center of the flower in the middle of the screen. Then I constantly changed the valused to figure out the best coordinate for each petal.
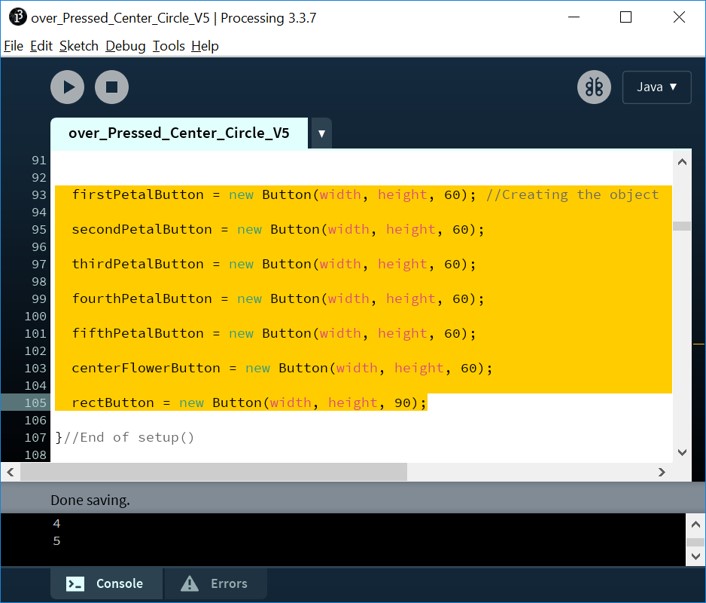
- Creating each object:
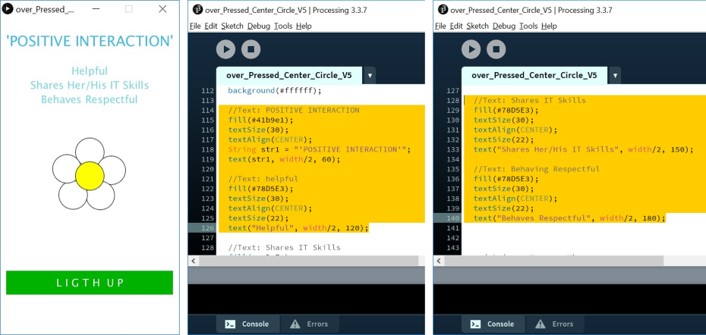
E.g. firstPetalButton = new Button(width, height, 60); - Defining the coordinates, size, color and align of each title:
E.g.Text: POSITIVE INTERACTION
fill(#41b9e1);
textSize(30);
textAlign(CENTER);
String str1 = "'POSITIVE INTERACTION'";
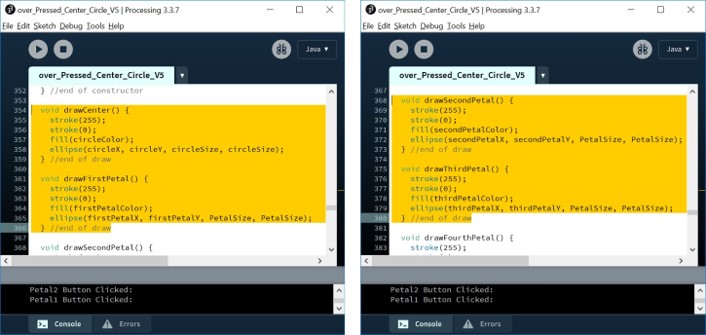
text(str1, width/2, 60); - Defining drawFunction() for each object inside the Button Class:
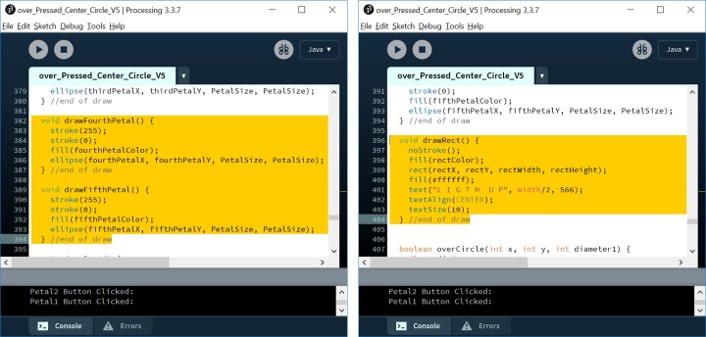
E.g. Drawing the fifthPetal:
void drawFifthPetal(){
stroke(0);
fill(fifthPetalColor);
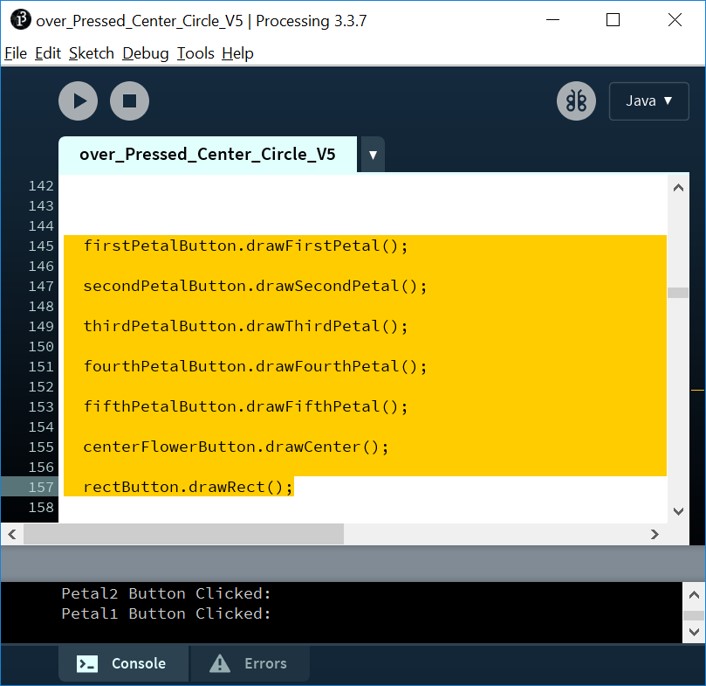
ellipse(fifthPetalX, fifthPetalY, PetalSize, PetalSize);} - Drawing each object in main draw() by calling the draw function for each object:
E.g. fifthPetalButton.drawFifthPetal();
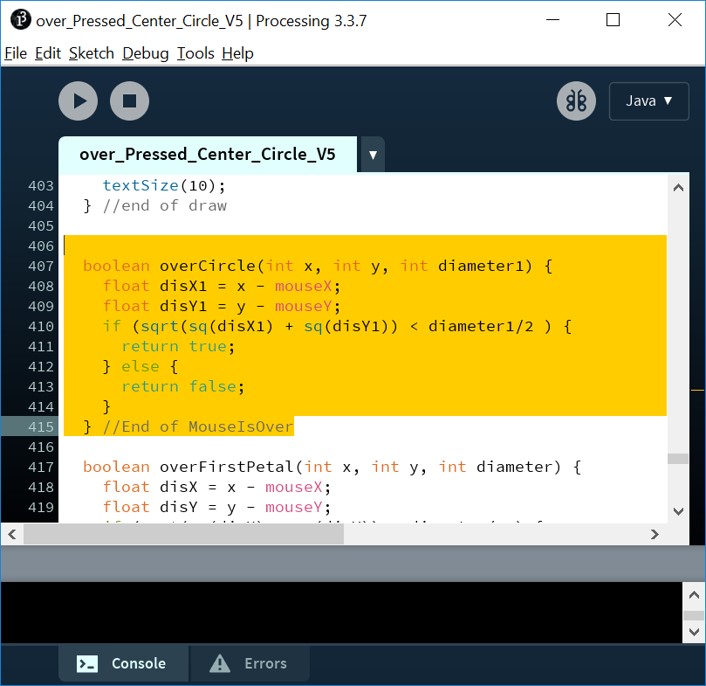
In order to have the center on top of the petals, I called the draw function for the center of the flower, after calling the petals. - Writing functions for detecting if the mouse is over the specific object. for ellipse objects it would be as following:
It gets the X and Y position of the object and also the size of the object. And it returns a boolean value as the result. it calculates the distance of X and Y of the object.
sq(disX): squares the value of Xdistance.
sqrt(sq(disX): calculates the square root of the value of sq(disX).
if (sqrt(sq(disX) + sq(disY)) < diameter/2 ) it returns true, which means the mouse is over the object. Otherwise it returns false.
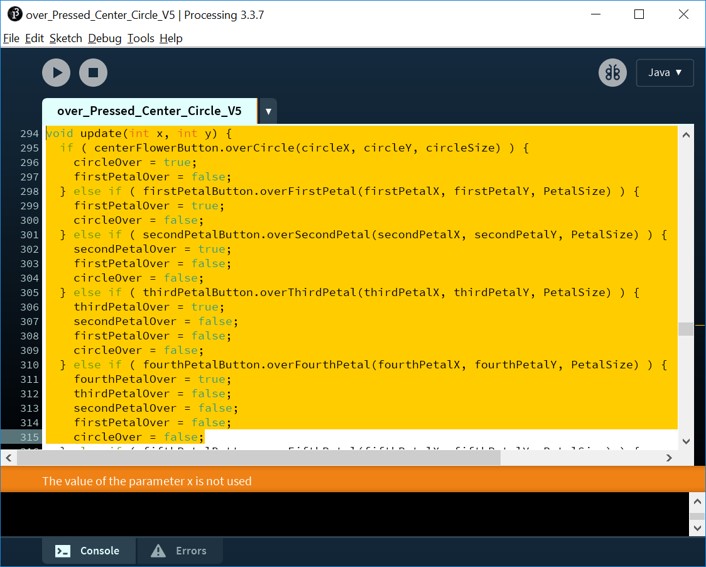
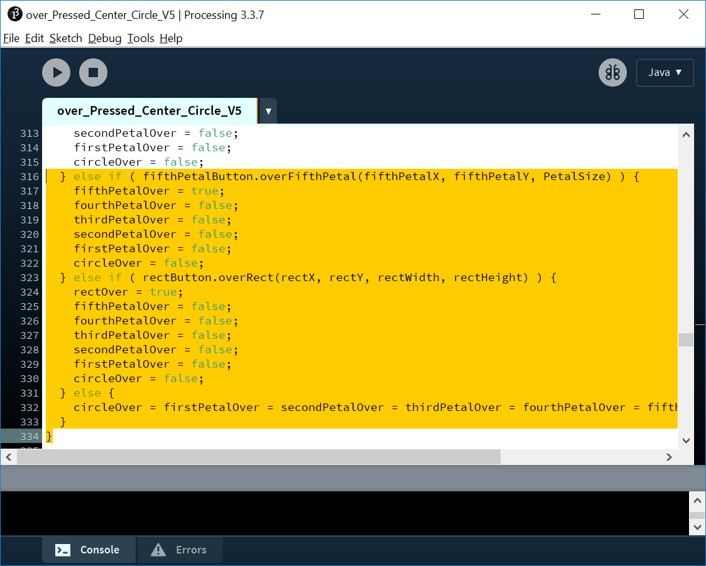
For each object I wrote a function with the same logic. - I wrote another function named update(), for updating the status of the mouse over. It works in a way that it checks that the mouse is over a specific object. If it was there, it returns true, otherwise it returns false.
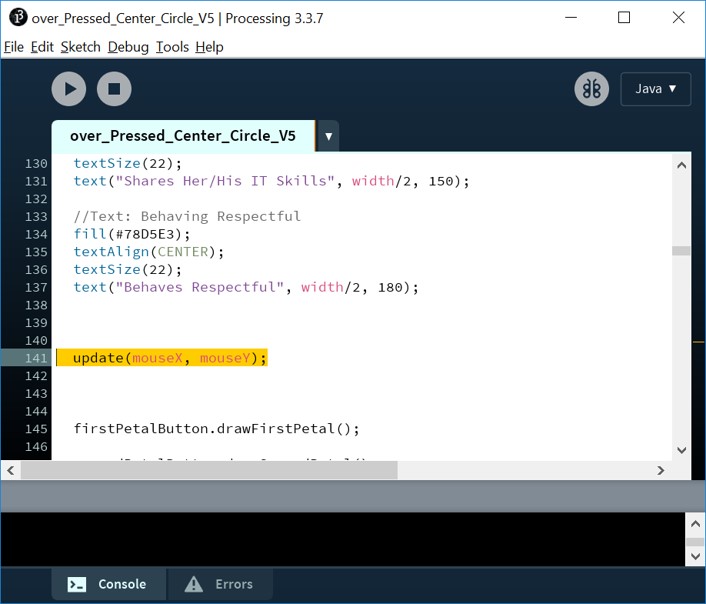
- And update() should be called in the main draw(). Because update() as I explained in the above line, is a function that checks the status of the mouse over different objects. So in order to execute this function to specify the coordinate of the mouse over an object, we need to call it in the main draw() function.
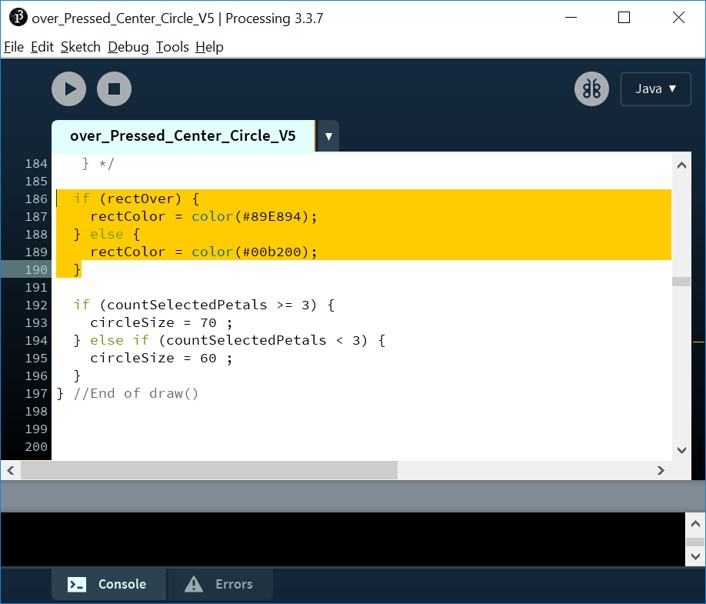
- I wanted to make the rate button highlighted when the mouse is over it so I wrote a condition for it, in which I checked if mouse is over the rate button set the color to a light green otherwise set the color to the original green.
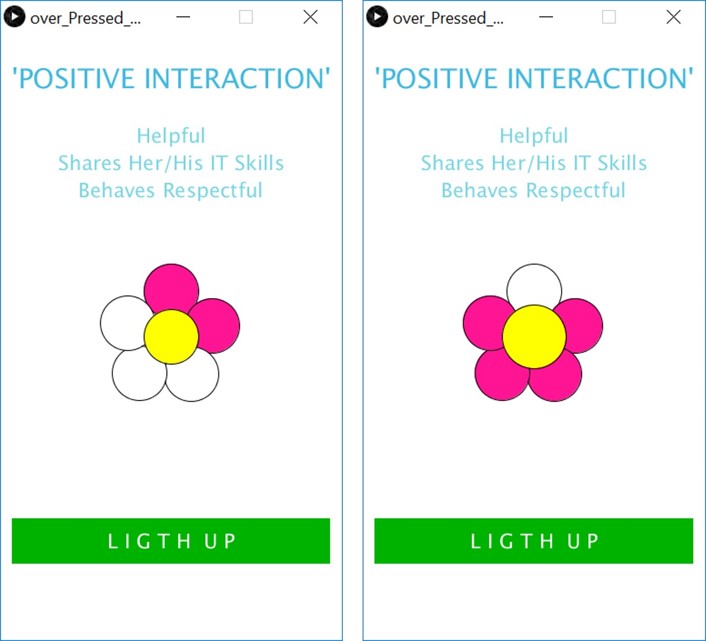
- Now it is time to write a function for pressing mouse. I want to switch between white and pink colors by clicking on each petal. For example, if petal is white, when I click on it I want it to turn to pink and vice versa. So inside the mousePressed() function, I check if mouse is over the object, if true then I give it another condition and check the color of the object. For petals, if it is white I fill it with pink and if it is pink I fill it with white.
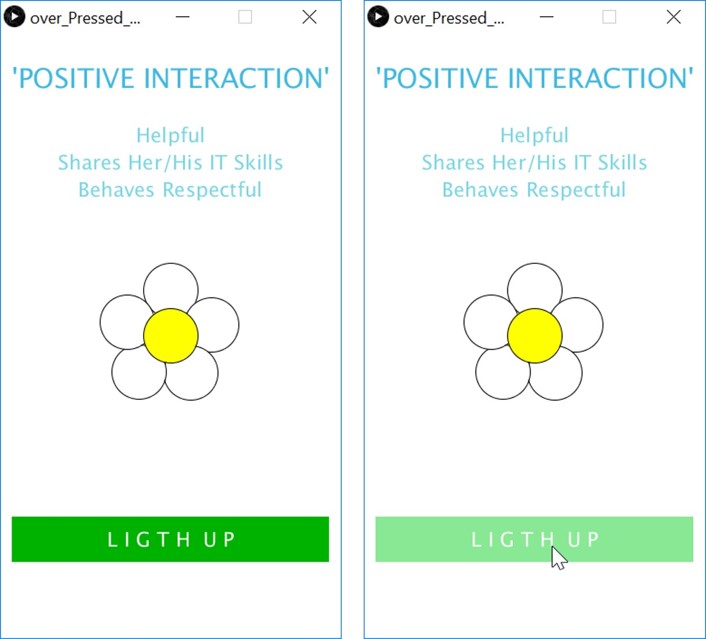
- I also want to turn LEDs on if more three or more than three of petals is selected. So when I fill the petal when pink color, I add 1 to countSelectedPetals variable, which I set its value to zero:
countSelectedPetals ++;
And when I fill the flower with white I reduce 1 from countSelectedPetals variable:
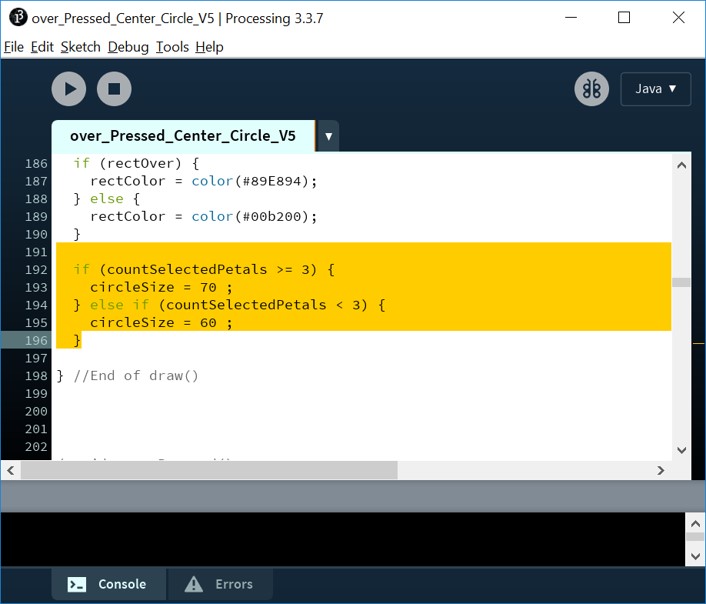
countSelectedPetals --; - In this way, through an if condition I check if the value of countSelectedPetals variable is equal or more than three. If true, I make the center bigger otherwise the center has the same size as before.
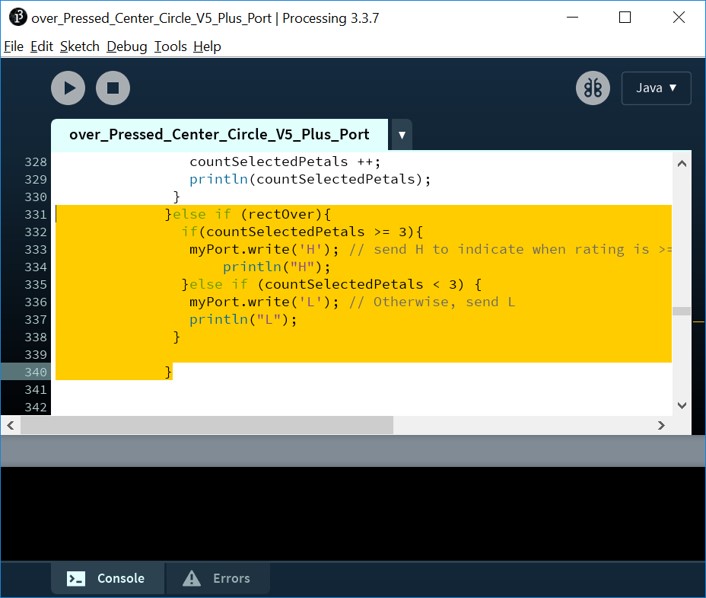
- After writing necessary codes for serial port (as I explained above in the first section), I wrote another condition in mousePressed(). I checked if the mouse is over the rate button. If yes, I checked if countSelectedPetals is >=3. And if yes, send H to indicate when rating is >=3 and the mouse is over the rate button and pressed:
myPort.write('H');
And else if (countSelectedPetals < 3) THEN myPort.write('L'); - Now since my mainboard should be connected to neopixels and I do not have neopixels yet, I test the application with the same board that I designed in week7(Electronic design).
- I used the same code that I used for testing the previous UI with the board (as I explained above)
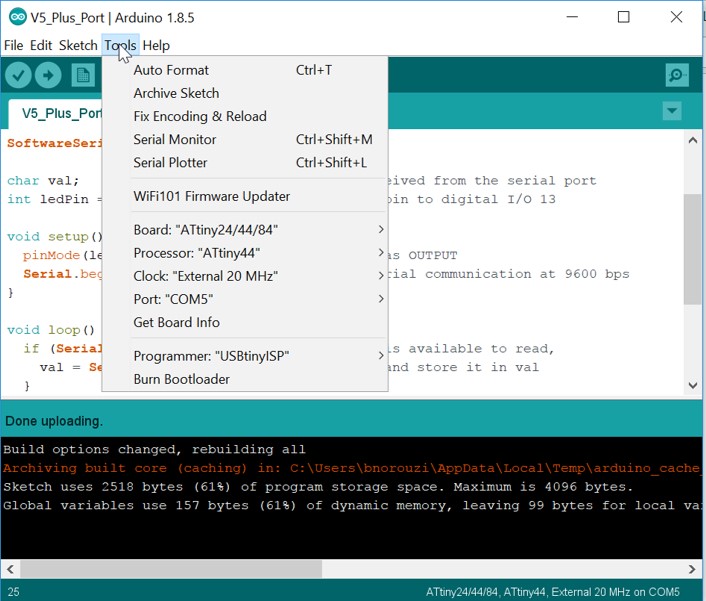
- Tools > Board: ATtiny44
Processor: ATtiny44
Clock: External 20 MHz
Port: Check the port (COM5) for me.
Programmer: USBtinyISP - Tools > Burn Bootloader
- Sketch > Upload using programmer


RESULT
When 3 or more petal is selected and the rate button is pressed, the LED would be lightened up. Otherwise it would be turned off.Overcoming the Challenges that I Faced
At the beginning of this week's task, when I found a tutorial for drawing flower in processing, I was so excited and I followed the tutorial since it exactly looked like what I wanted. The methods used in tutorial was a bit advanced, so it was possible to acheive the goal of drawing a flower with few lines of code. So I drew the flower neatly following the tutorial. But later on when I wanted to start considering each petal of the flower as an individual object with specific functionality, I faced some problem modifying those codes that I already had because of the drawing method that I followed. One example of those challenges is using translate for setting the center of the screen to (0,0) and using rotate() for rotating each petal around the center. In this way, I did not have the exact coordinates of each petal in numbers so it was somehow impossible for me (based on my knowledge level in processing programming) to calculate mouseover each petal without knowing the exact numbers for X and Y. So firstly, I drew the flower in my own method by calculating the coordinate of each petal. Changing the way of drawing the flower was positive for me because from then I was able to use tutorials, exmples and references in processing to reach my goal. Hence, I started to browse processing website to get familiar more with existing examples that partially could be what I want to implement. For example this button example was quite helpful for me and I adopted its logic to implement my own code. So I started adopting different examples, understanding them, reading and understanding the methods used in them. In this way, I could write the code for the center of the flower and the first petal. And I was successful to select and de-select them and change their color. Therefore, using the same technique, I expanded the code and added parts for other petals. Good to mention that writing down on the paper what I want to do, drawing different diagrams to make sense of what variables and functionalities I need and sketching helped me a lot to come up with a solution. As long as I was keeping everything just in my mind, it did not work! But as soon as I wrote my thoughts in the form of text and drawing, it helped a lot :-) It was also very good to have out instructor, Ivan, who was always ready to guide me in case of any difficulty in understanding some concepts. So the result is lots of code but simple to understand for a person, who is new in processing programming. In improving the UI section, I have described in detail what I have done. Understanding using serial and interfacing with a physical device was also a bit challenging. But having a very good presentation and instructions of Ivan in our local lecture and following his documentation was quite handy.
Original Design Files
Java Code in Processing (.pde)Arduino Code (.ino)