1
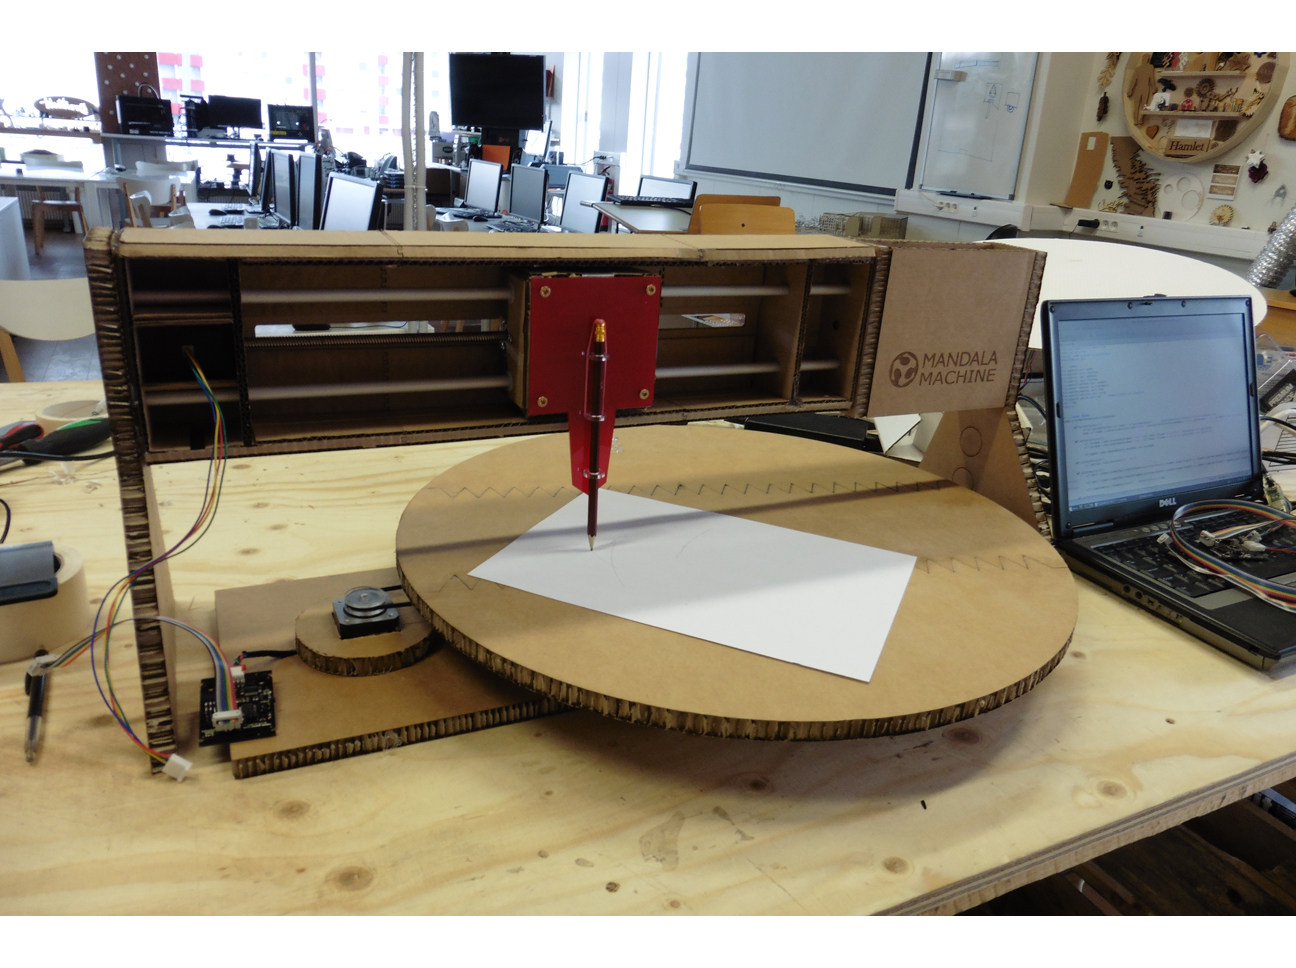
This week together with all other Fab Academy Reykjavik students and one Fab Academy Höfn student we have built a Mandala machine. The machine consists of two parts, one part taking care of the movement of a pen along a horizontal axis, a second part taking care of spinning a disk in a horizontal plane (see picture). Hence our Mandala machine basically is a (r, theta)-plotter. The building process and what we have learned from it is documented in detail on our group's Machine Building website.
2
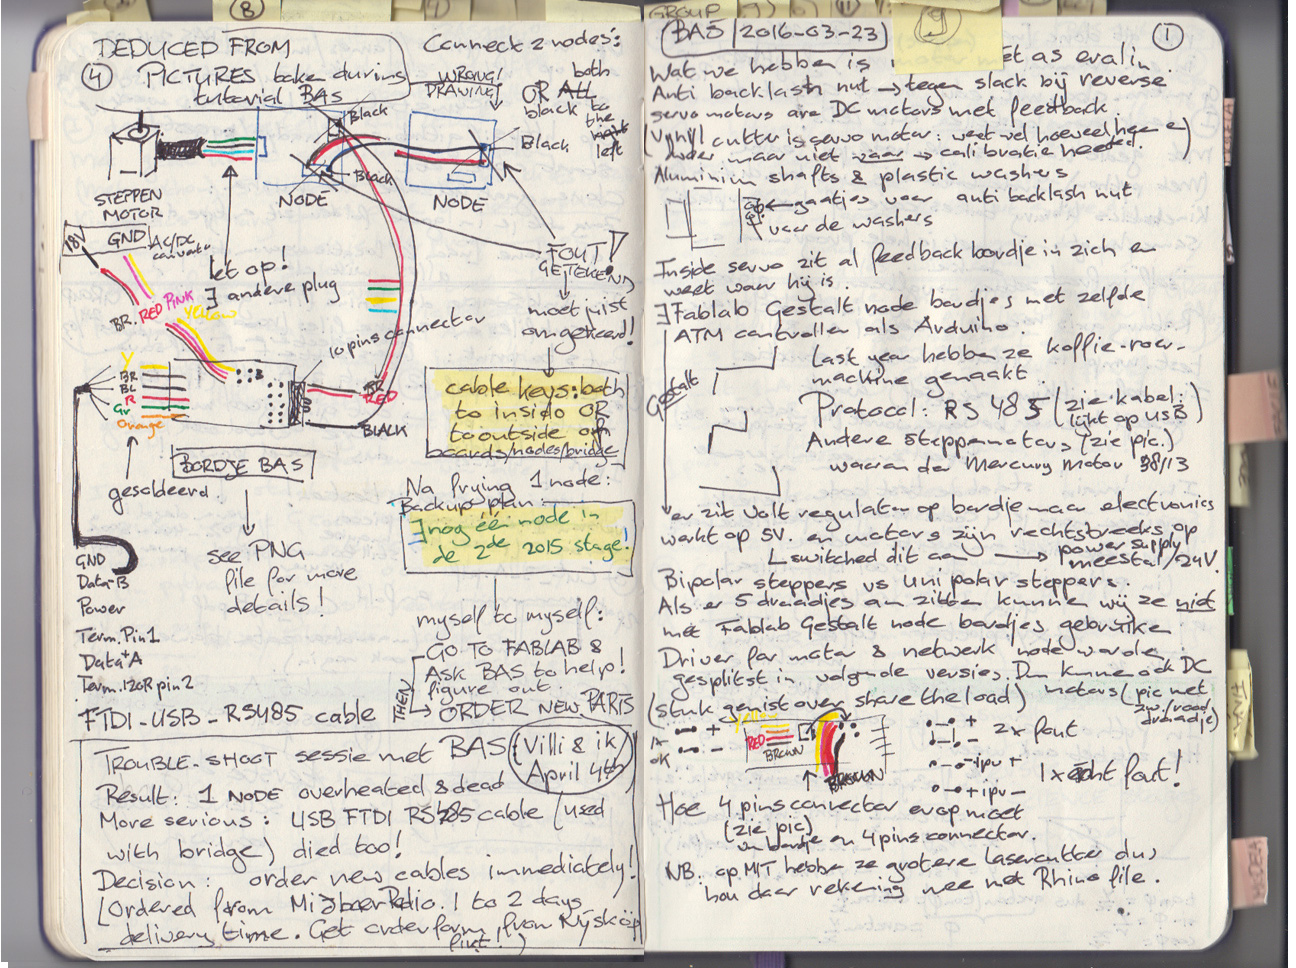
Our group process started with an extensive tutorial given by our local instructor Bas. I took lots of notes - like I always do - which came in very handy later on when we encountered all kinds of problems Bas already talked about.
3
Next day we started working as a group. As documented on our group's page it took a lot of time to decide what kind of machine we were going to build. Once the decision was taken, we split up the work and I joined the SCIENCE stages group.
4
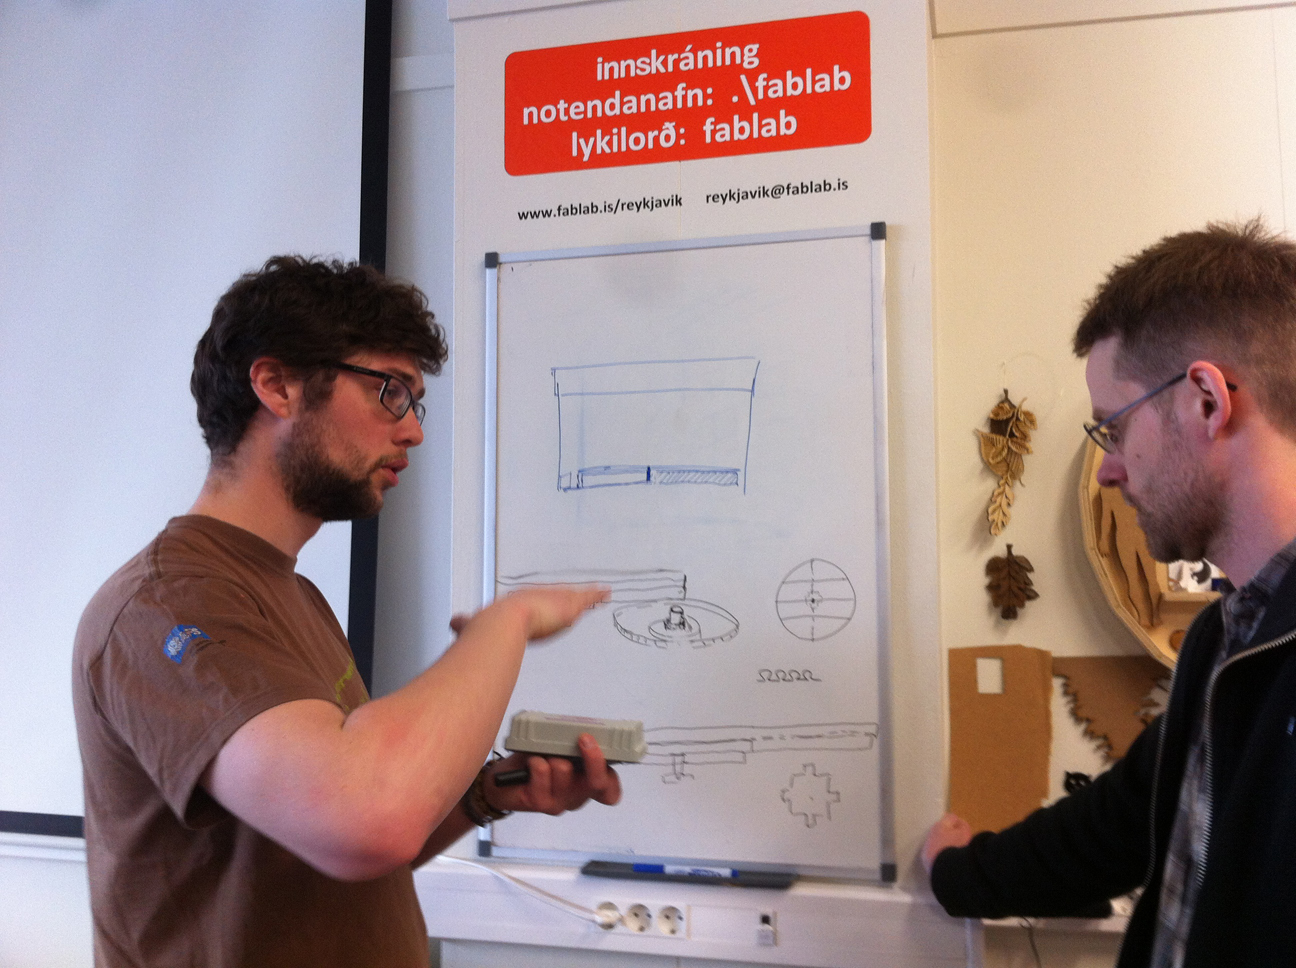
Apart from assisting people at specific tasks, I took a lot of pictures to document what we were doing. I took pictures of people in front of the white board discussing how to proceed (very handy as a reference when later people started arguing about earlier decisions that were earlier) ...
5
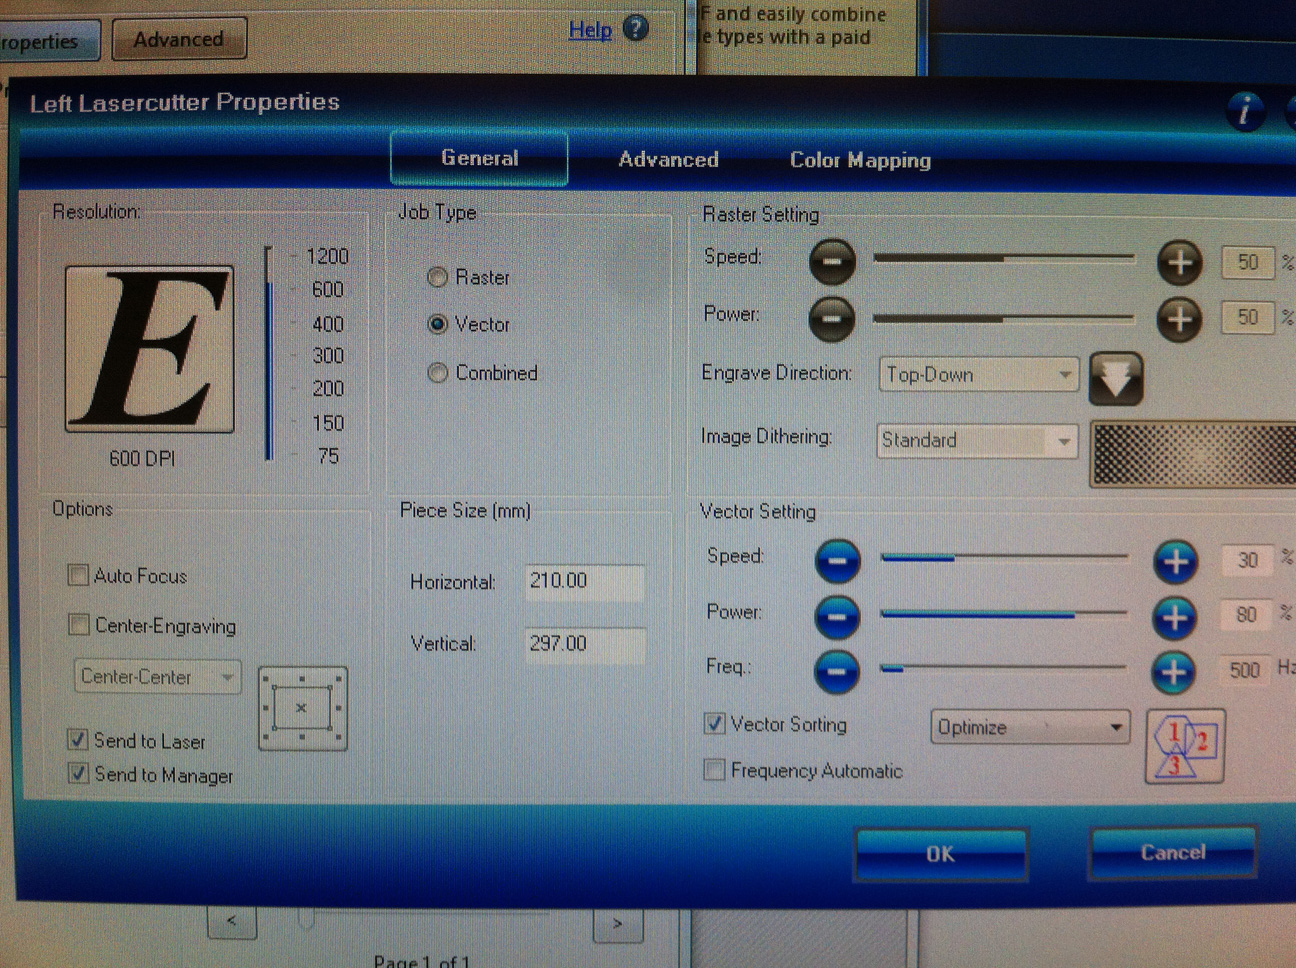
... pictures of lasercutter settings (very practical as a reference when adjustments have to be made because a large piece of cardboard is cut in tiny piece due to too much power and yes, we should have tested this in a small corner!) ...
6
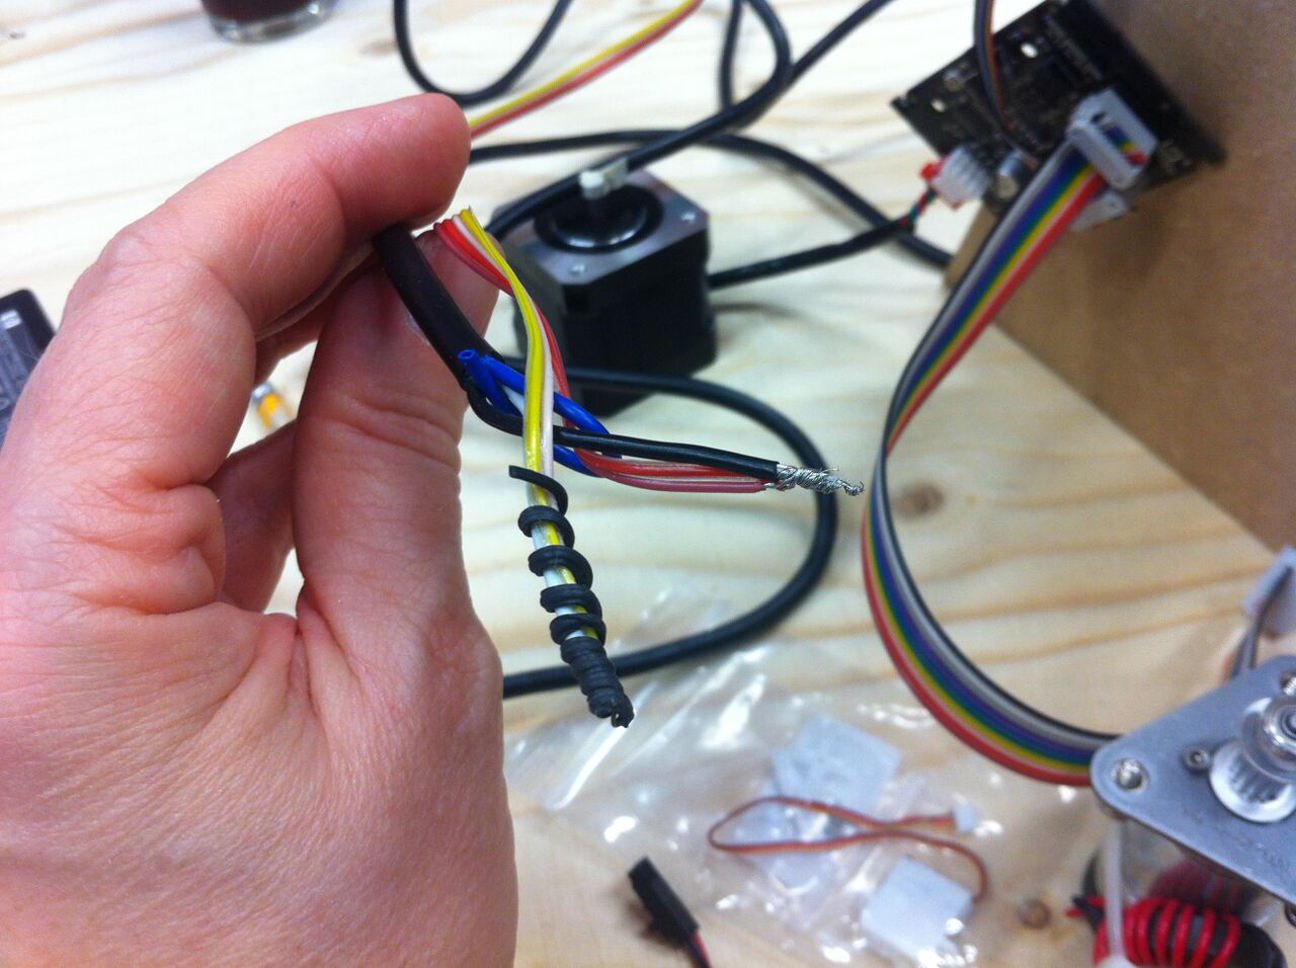
.... pictures of details of wires and weird connections (very practical as a reference when later nobody knows anymore what went wrong) and lots of other pictures for reference while working and for documentation on our group's webpage.
7
I also contributed to the group by applying some of my other skills, amongst which ideation. This is one of the ideas I presented to the group: a puffin cooky cutter machine. Unfortunately the other members of the group rejected the proposal, which is really a pity since everything that has the shape of a puffin sells like crazy in Iceland to the millions of tourist flooding into the country each year.

8
Another skill that came in handy is that I have a good sense for numbers and what their practical relevance is. For instance: when the group was considering to make a circulair sandbox (circle I should say) Zen machine, I calculated the sand for a 30 cm radius and 2 cm heigh circle would weight 8.5 kg. The cardboard would bend under that weight, sand would get into the construction, motors would get damaged: bad idea and the group quickly was convinced not to go this route.
9
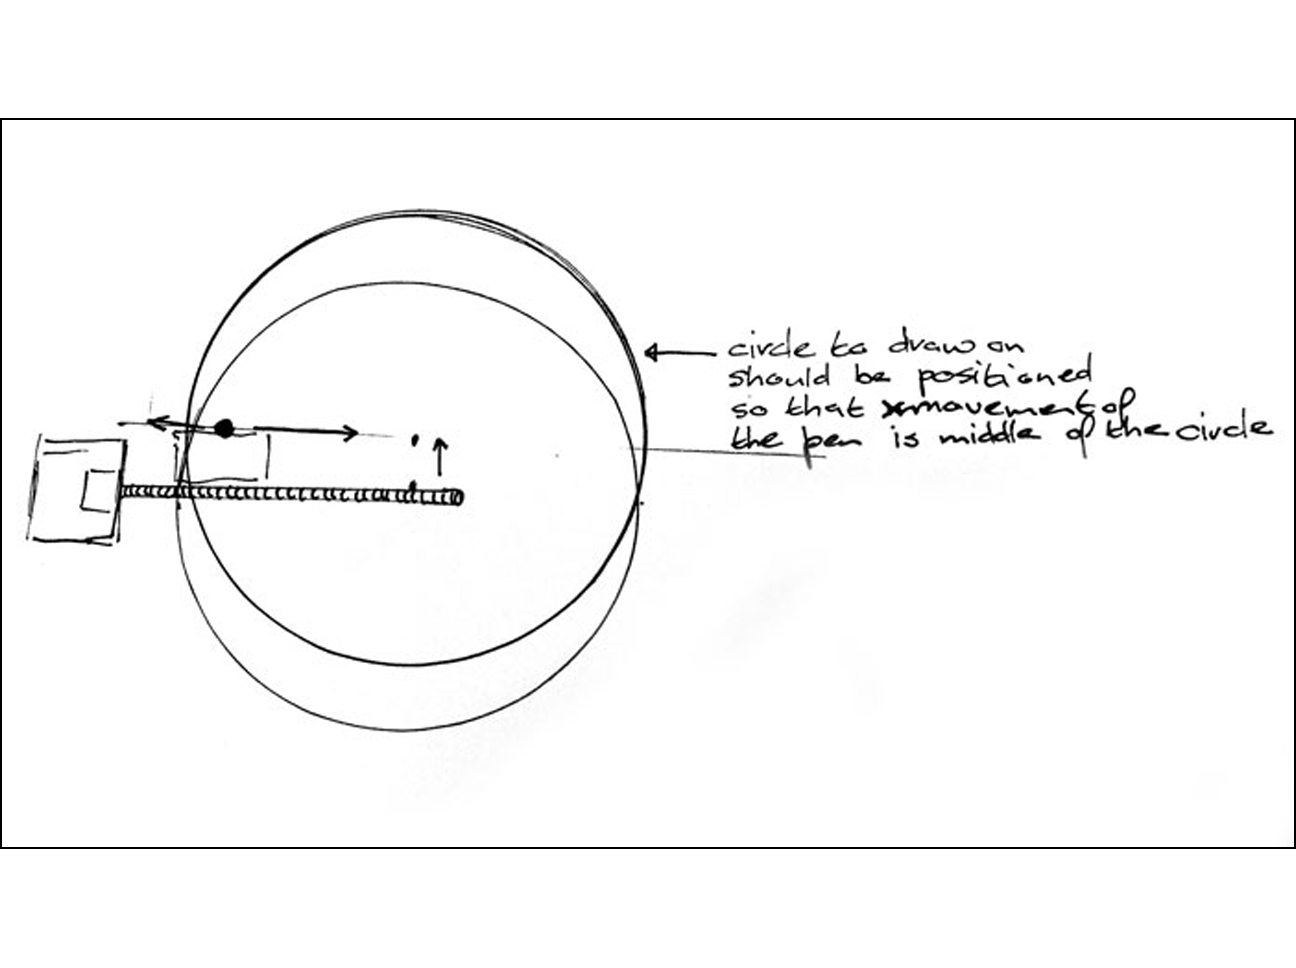
I also helped the group's work by making drawings to point out what could go wrong and should be taken care of, for instance this drawing to remind us to position the pen of our Mandela drawing machine out of the centre of the circulair drawing board.

10
Trouble shooting: during the build of the machine I made myself usefull trouble shooting and solving various problems that arose. For instance: we needed a rubber band to drive the cardboard circle. My old Canon printer doesn't have one anymore.
11
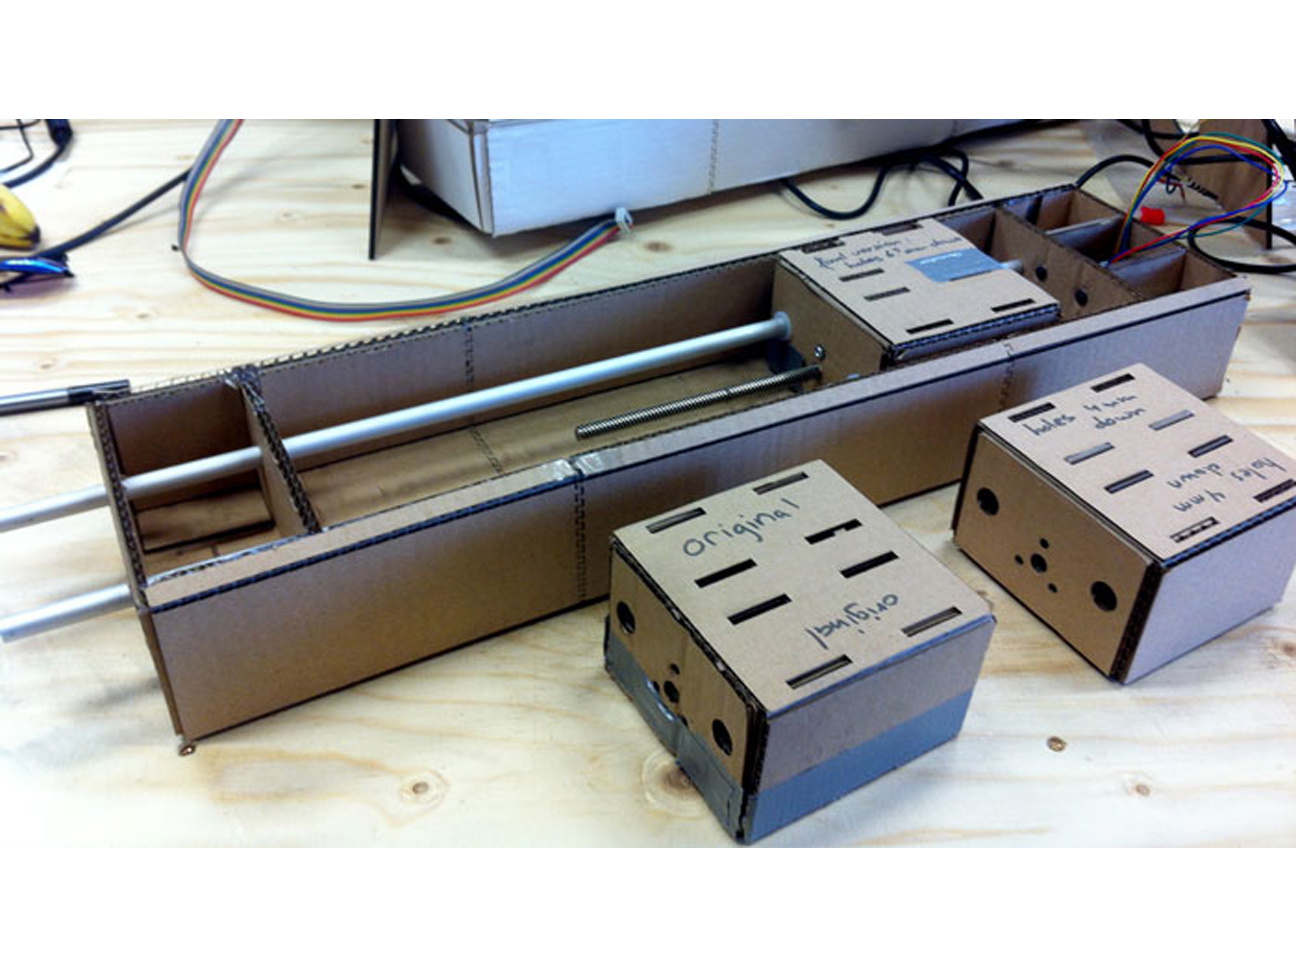
More troubleshooting: in the stage group a problem arose because we only could get cardboard that was thicker than the one the original design was made for. That was not good for accuracy and gave problems later in the process: the holes in the inside box (stage part) that runs on the aluminum slide bars were to low and the motor could not move it freely inside the frame. I helped measuring and recalculating how this could be corrected and according to this information new drawings were made to fix this.

12
And then there was my big roll of gaffer tape! As already can be seen in the previous picture, always having gaffer tape at hand is a must in Iceland to solve material problems that otherwise would have to wait till the next boat with stuff arrives. "Tape together what needs to stay together and is not glued or screwed together" could have been the motto of our group.

13
Having to wait for that next boat to arrive: Icelanders don't like that and solve problems in their own way. Foreigners like me are often very impressed by the ingenuity of their "quick and dirty" solutions, as can be seen in the middle of this construction ...
14
... resulting in one allen wrench set missing a wrench now, but the construction itself works fine!
15
The same for this rubber band combined with a pencil's eraser: great solution to get just enough downwards pressure on the pencil!

16
A special issue in Iceland is planning, which is an art not very much practised. I tried my best in making overall To Do lists and To Do list per day ....
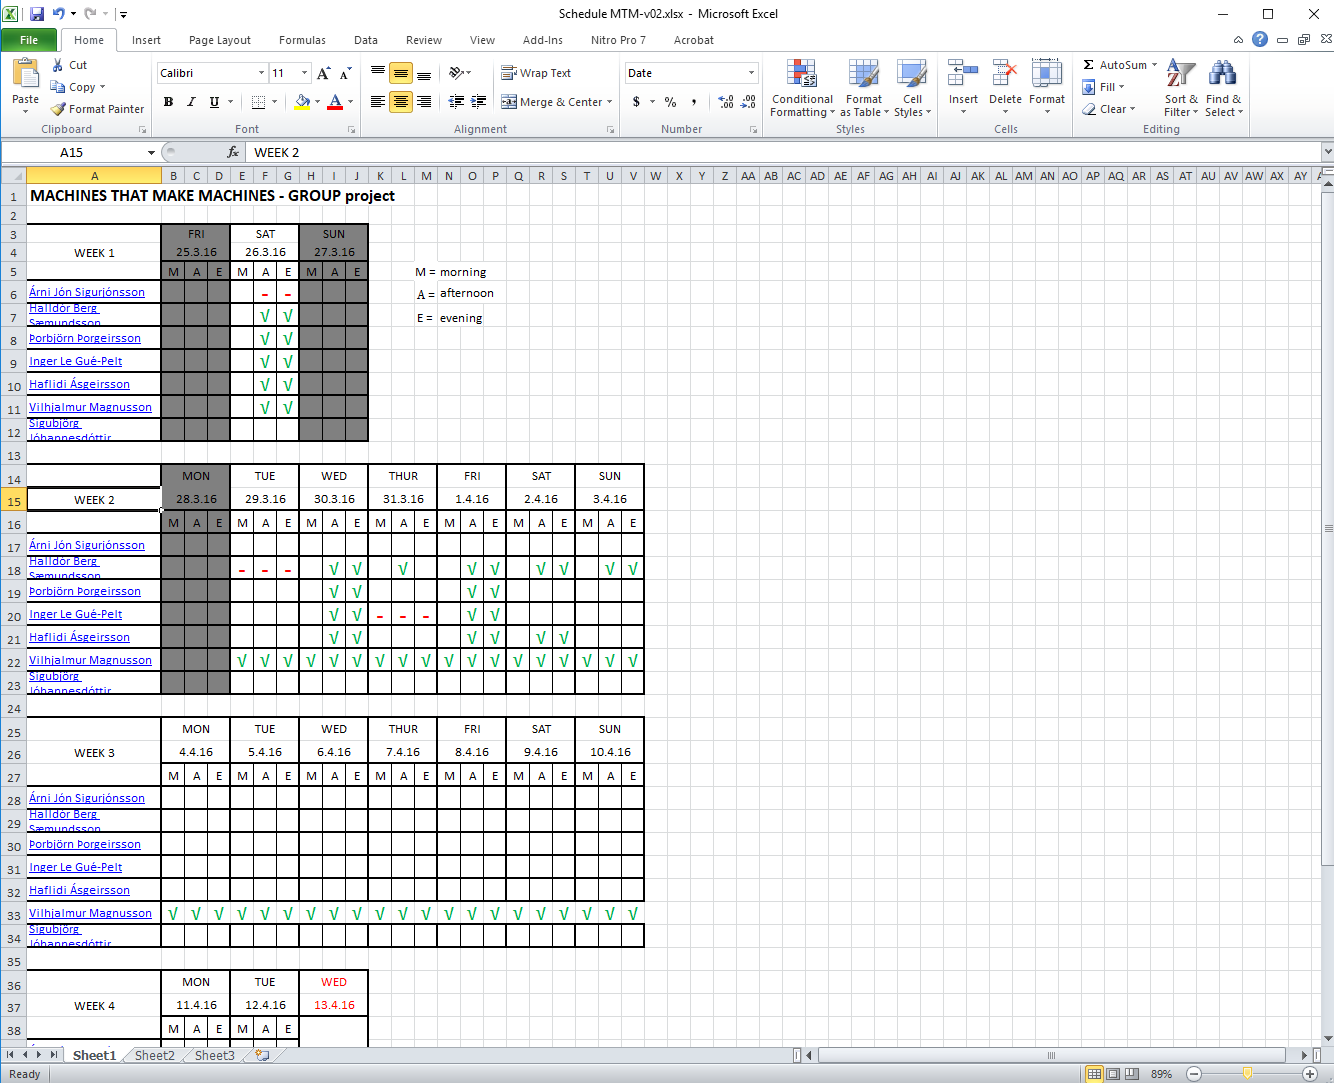
17
... I tried making time schedules so that people would be at the Fab Lab at the same time, which in general is a huge benefit when working together on a project ...
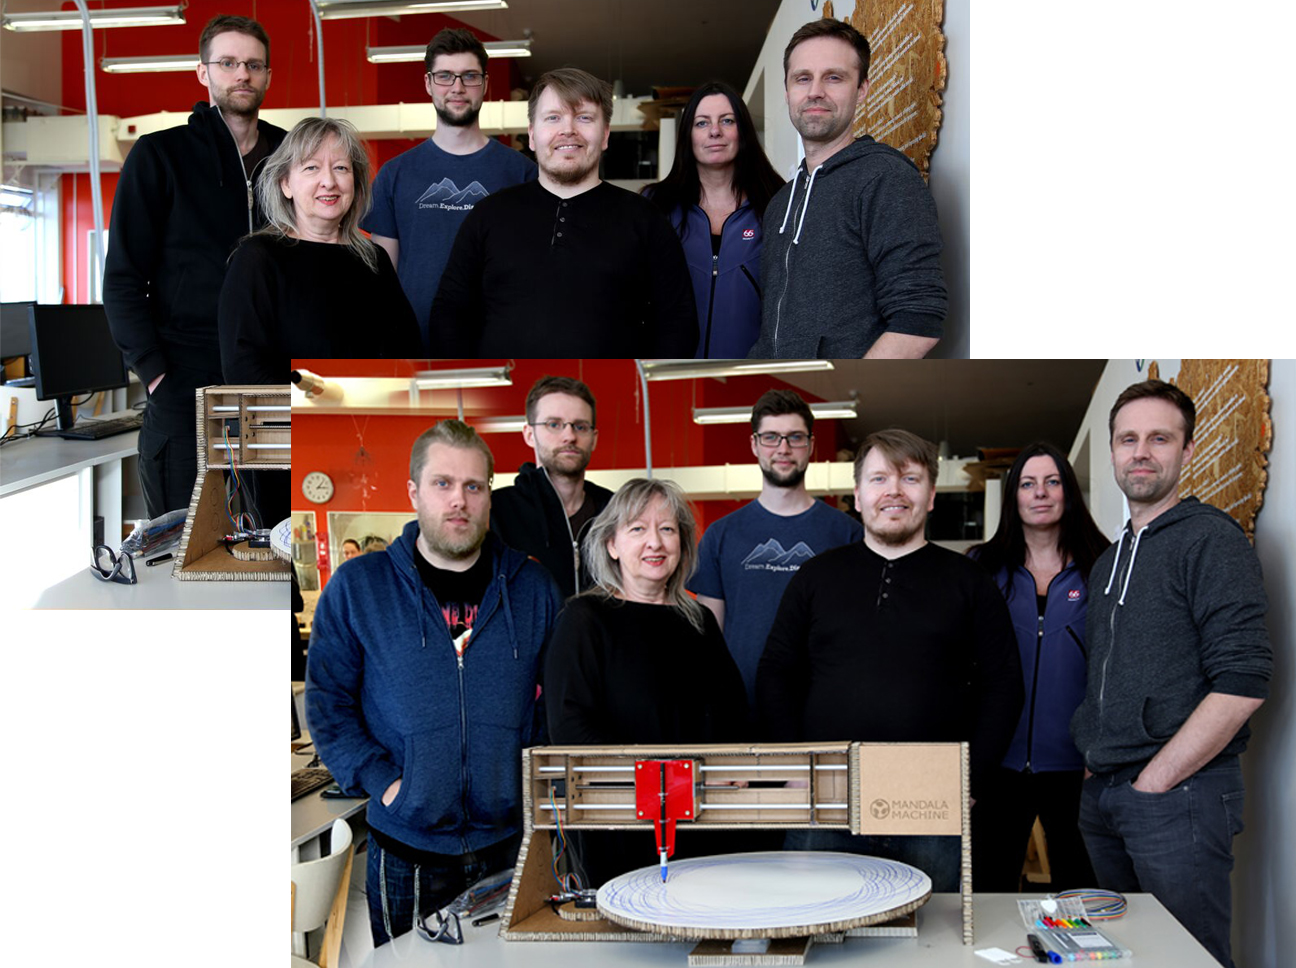
18
... but reality in Iceland is: nothing goes according to a fixed plan, people come and go in an organic rather than scheduled way, but at the end all is well. This was even true for this picture where all group members are standing proudly behind our working Mandela machine: it took my Photoshop skills to make it happen!
